This content has been archived. It may no longer be relevant
Please see the article replacing it here, under section 1.7
In this article we go over the steps to install Ubuntu with a bonded NIC, create the LVM on the boot drive, and then initialise an XFS formatted volume on the bulk storage provided by the server
Then we add this to Veeam as a Hardened Linux Repository with Immutable backups and then secure the Ubuntu server down so it cant be remotely accessed easily to protect your backups
Important – By continuing you are agreeing to the disclaimer here
Setting Up The RAID Array
For this section we will go through creating the RAID array, this will vary depending on the server and I will try to add methods for each model as they crop up, for now this will show you on a Dell system using iDRAC 9
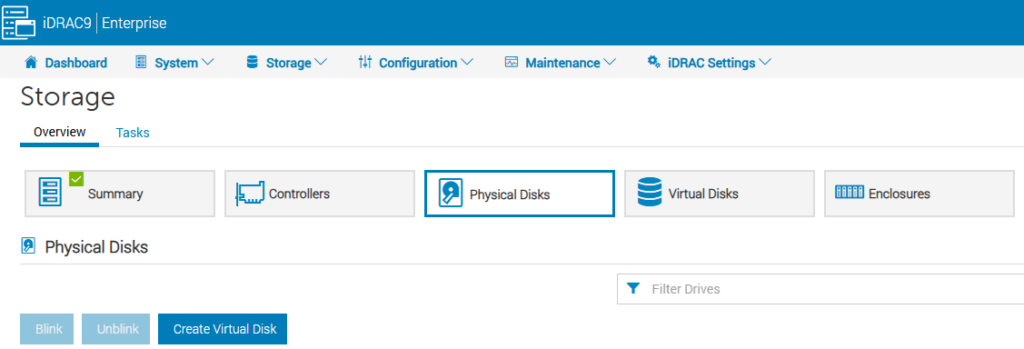
Log into the iDRAC and head to Storage/Overview/Physical disks and click Create Virtual Disk
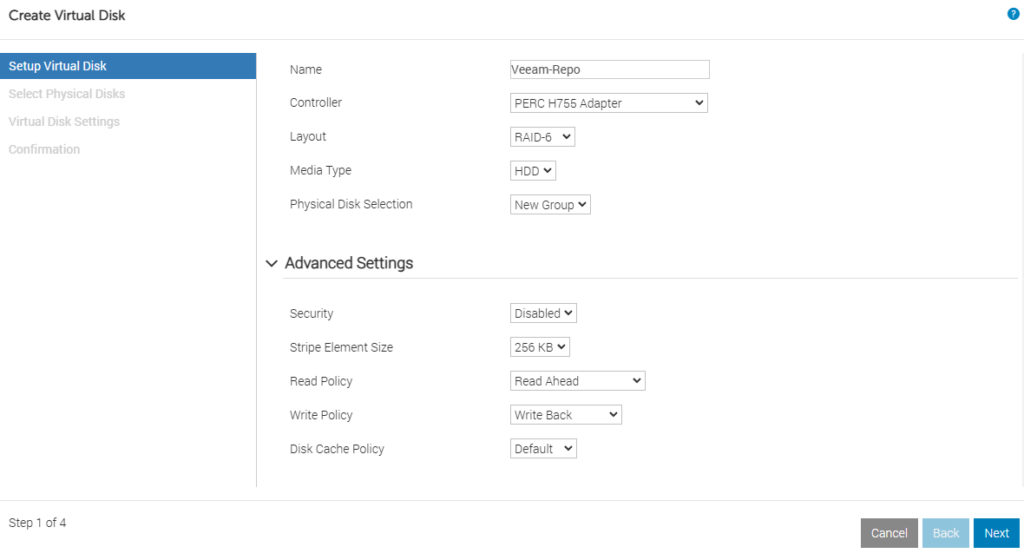
Give a name to the disk and select the layout, I want RAID 6 as this is backup server so resiliency is important
For advanced settings, make sure Read Ahead is selected for the read policy for a backup server this gives extra performance, and write policy should be write back only if your controller has a battery backup onboard so you dont loose data in the event of a power outage, the Dell H700 series have one by default, and write through if you dont
Then click Next
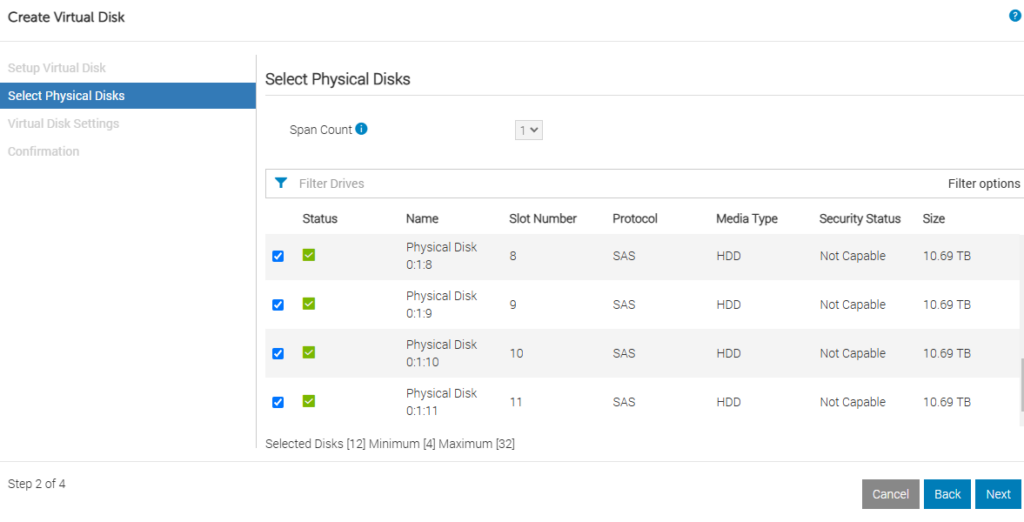
Select all the disks you want in this RAID pool and click Next
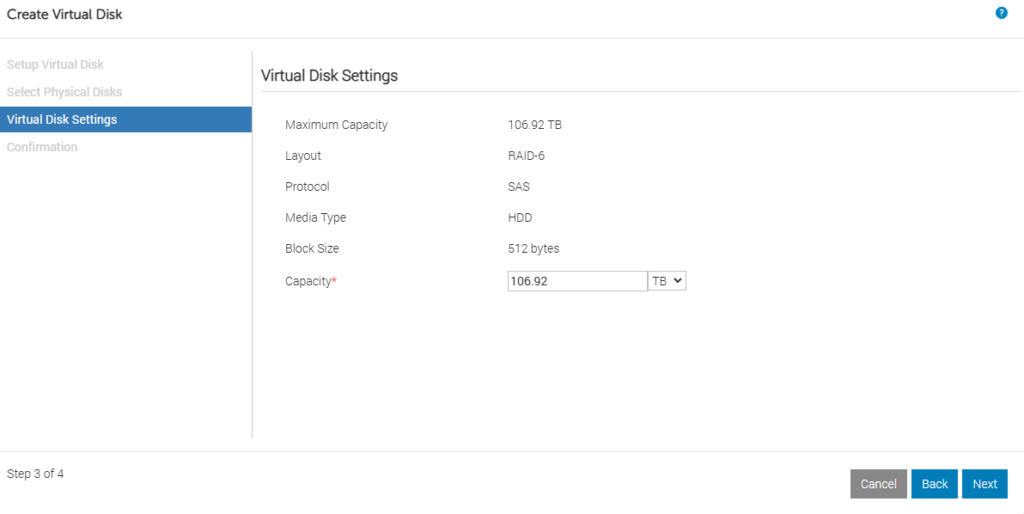
Click Next here
Click Add To Pending when you are happy
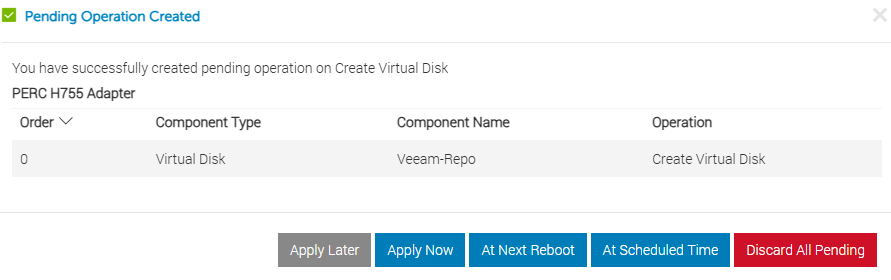
Once thats applied you will likely need to reboot for the OS to pick it up
Ubuntu Install
To start, you’ll need an Ubuntu Server ISO, the latest LTS version is ideal
Boot into the iso on the server you want to have as your repository
Navigate through the installer selecting your keyboard language
When the installer loads for networking we need to create a bond for the NICs we want to use
For this server there is only 2 connected NICs
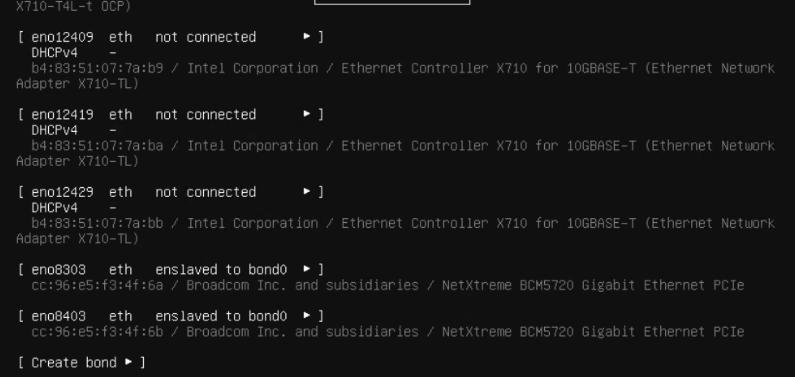
Click create bond with the mode balance-alb, this is a simple load balanced setting that doesnt need any particular switch config
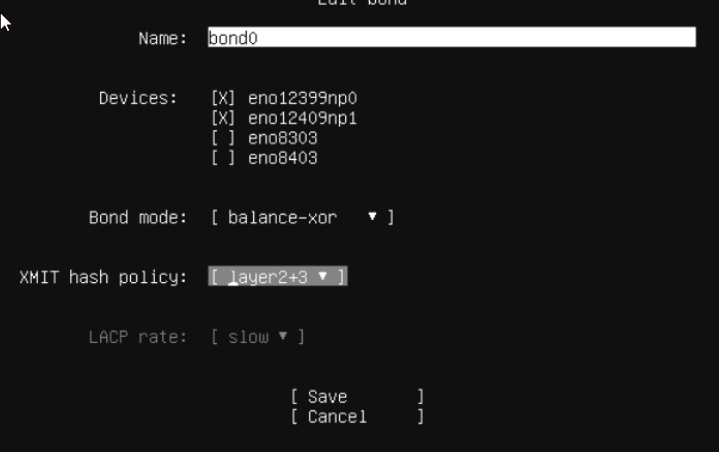
If your systems use LACP you can select 802.3ad and an XMIT Hash of Layer2+3
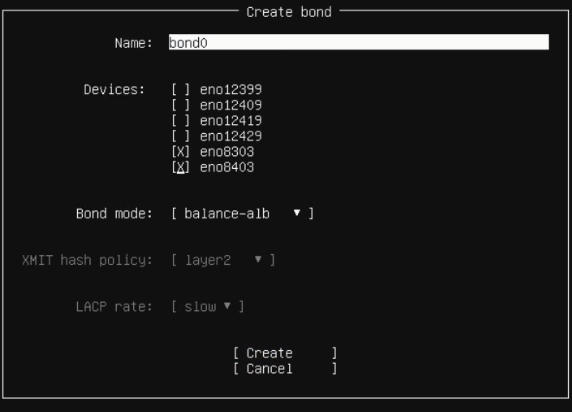
If the connection switches are a Dell VLT stack, like your cores may be, using a port channel not in LACP, active mode, the above will likely not work, however this should
Once thats created we need to edit the bond and set a static IP on it, this works similarly to a VIP in VMware systems
How you set the static IP on the bond will depend on your networking, but you this is the same as setting a static IP on any NIC on Ubuntu
Then fill in the proxy server if you have one, if not skip over it, then continue with the mirror check
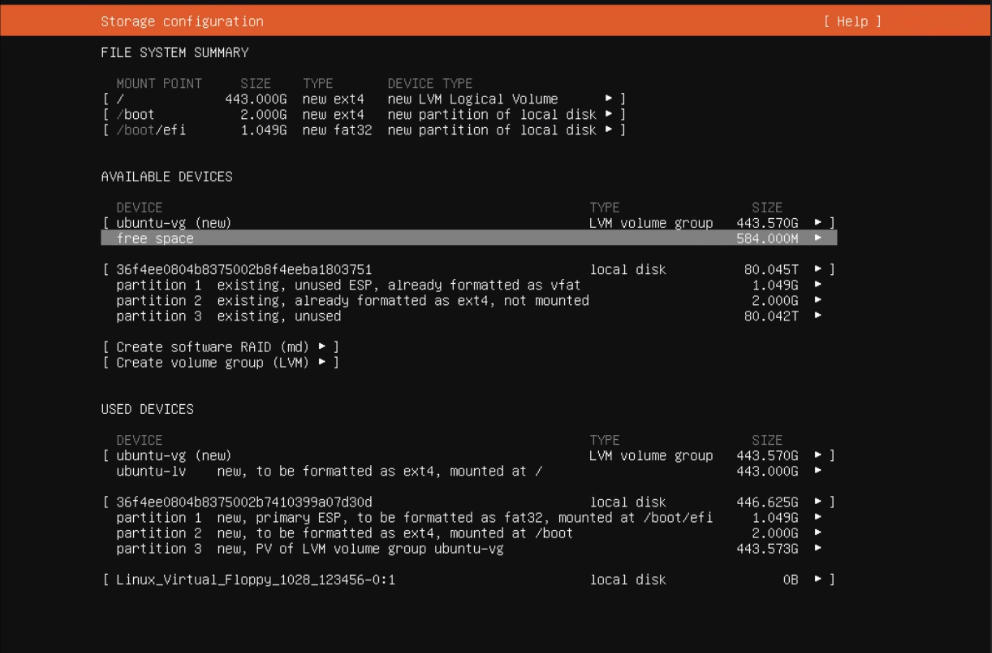
Then setup the main disk for use, this wants to be the main boot drive, like a BOSS card for Dell servers, this will be 512GB max, do not use the main large disk pool as this is needed for the repository and cant have the OS installed to it

Then confirm and continue
And configure the LVM to use the full disk, as this is just the boot volume, making sure the 80TB disk is not in a Logical Volume, if it is, delete it
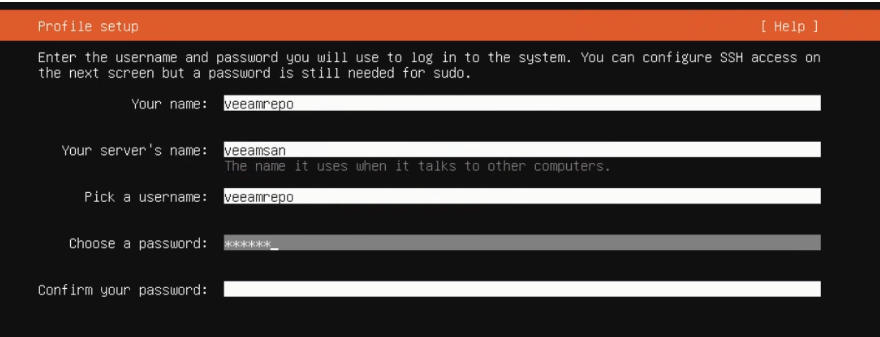
Now we need to setup an the default account, this has sudo privileges
Skip over Ubuntu Pro
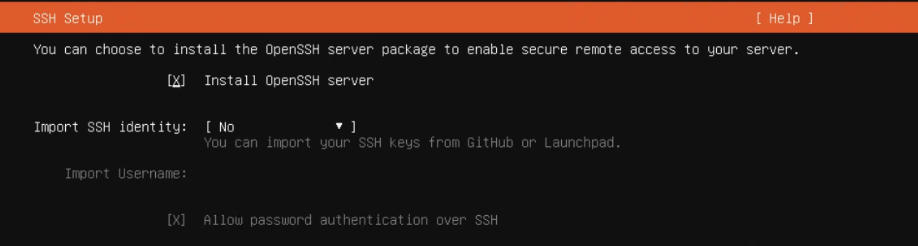
Install SSH – this will be disabled later
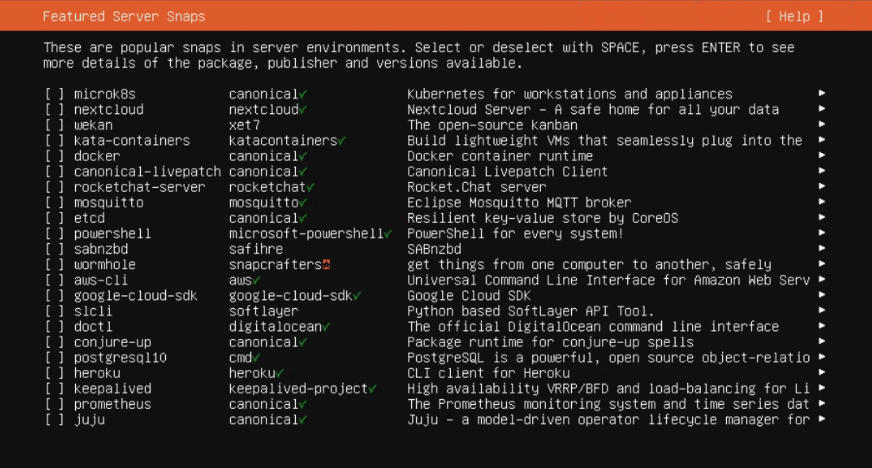
We need nothing from here, so skip over it and wait for the OS to install
Initialising Disks
This will wipe the disks you are initialising
Now those OS is installed lets get the disks initialised, run the following to check you have the right disks
sudo fdisk -lThis will then show everything
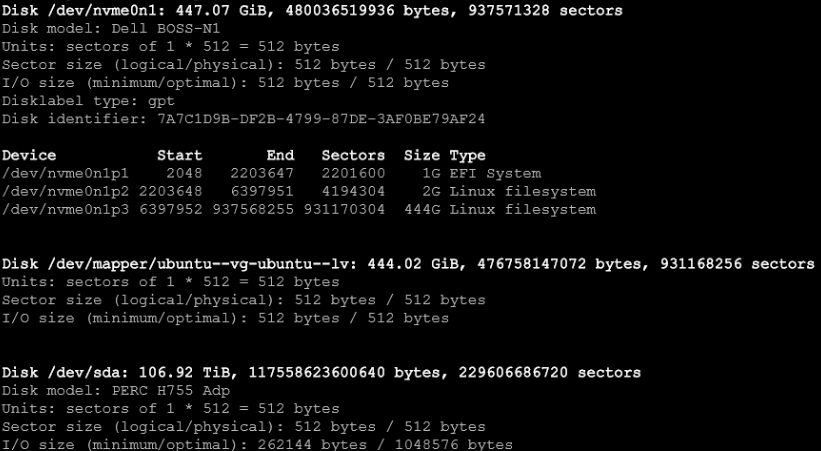
This shows the root partition and the system files are on sdb, perfect
We want to initialize the 107TB disk for use in the Veeam backup repository, in my case it is sda3, typically on servers using virtual RAID volumes its sda or sdb, so make sure you substitute the right device in here
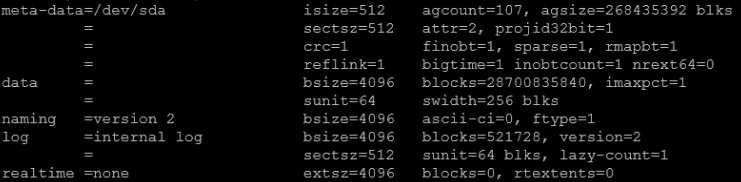
sudo mkfs.xfs -b size=4096 -m reflink=1,crc=1 /dev/sdaYou may need to add -f to force this, but the system will tell you
You then get this
Now lets create a mount point
sudo mkdir /mnt/veeam-repoNow we need an fstab entry to mount this on book, note the UUID of the drive, sda3 in our example, with
sudo blkid
Then run
echo 'UUID="Disk UUID" /mnt/veeam-repo xfs nosuid,nodev,nofail,x-gvfs-show 0 0' | sudo tee -a /etc/fstabAnd run the following to check its in there
sudo cat /etc/fstabNow we need to reload the daemon
sudo systemctl daemon-reloadThen run the following to mount drives under fstab
sudo mount -aAnd we can confirm its mounted with
sudo mountAt the bottom we have

Add Veeamsvc Account
Now we need the veeamsvc service account adding
sudo useradd -d /home/veeamsvc -m veeamsvc -s /bin/bashThen set the password with
sudo passwd veeamsvcThen add the veeamsvc account to the sudoers group
sudo usermod -a -G sudo veeamsvcTake ownership of the repository with this account
sudo chown -R veeamsvc:veeamsvc /mnt/veeam-repoAnd run
sudo chmod 700 /mnt/veeam-repoFurther hardening tasks can be done post Veeam install
Adding The Hardened Repository
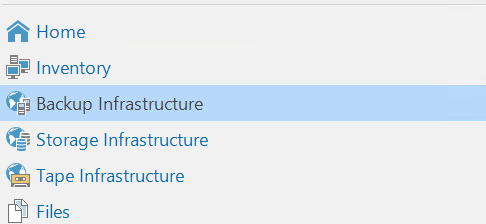
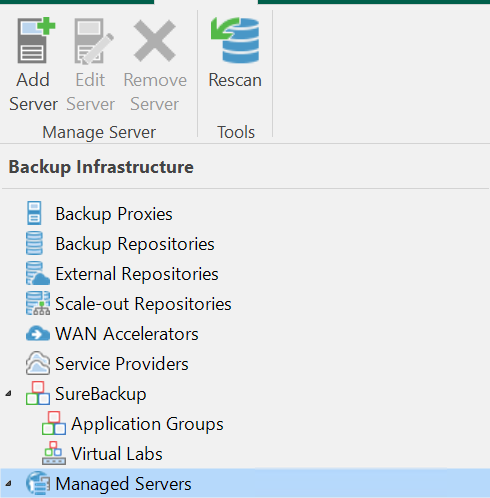
Head to Backup Infrastructure
Then from managed Servers click Add Server
Select Linux
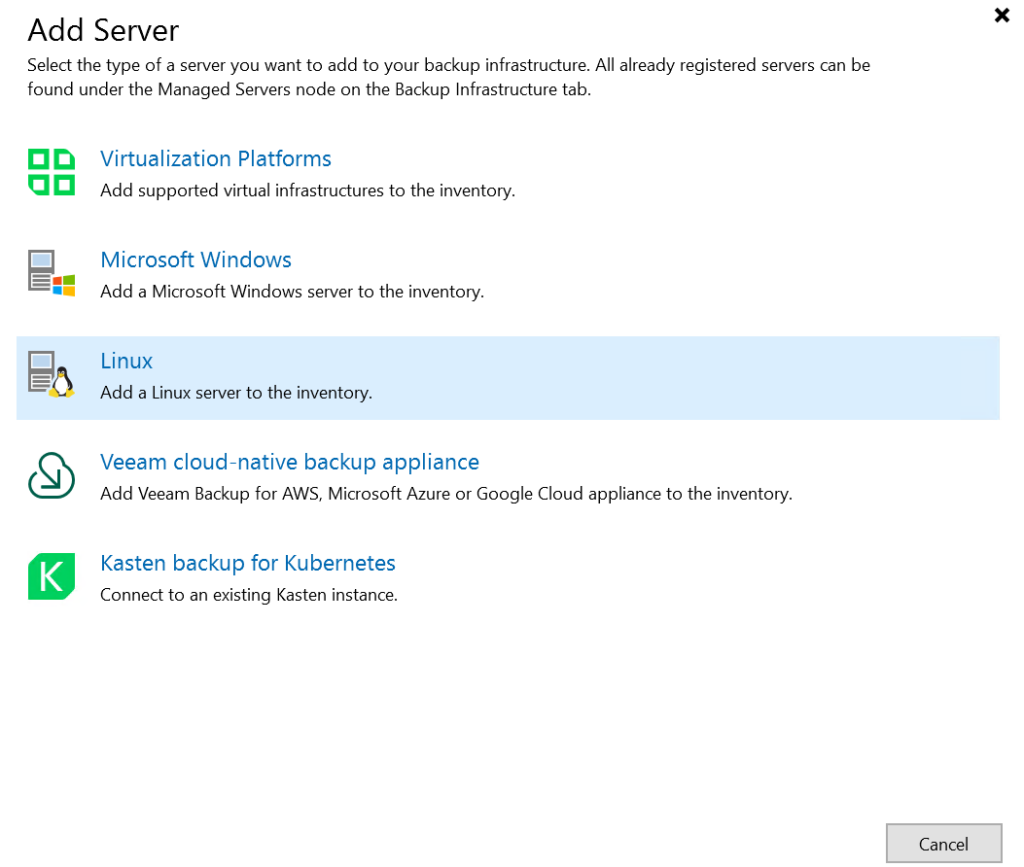
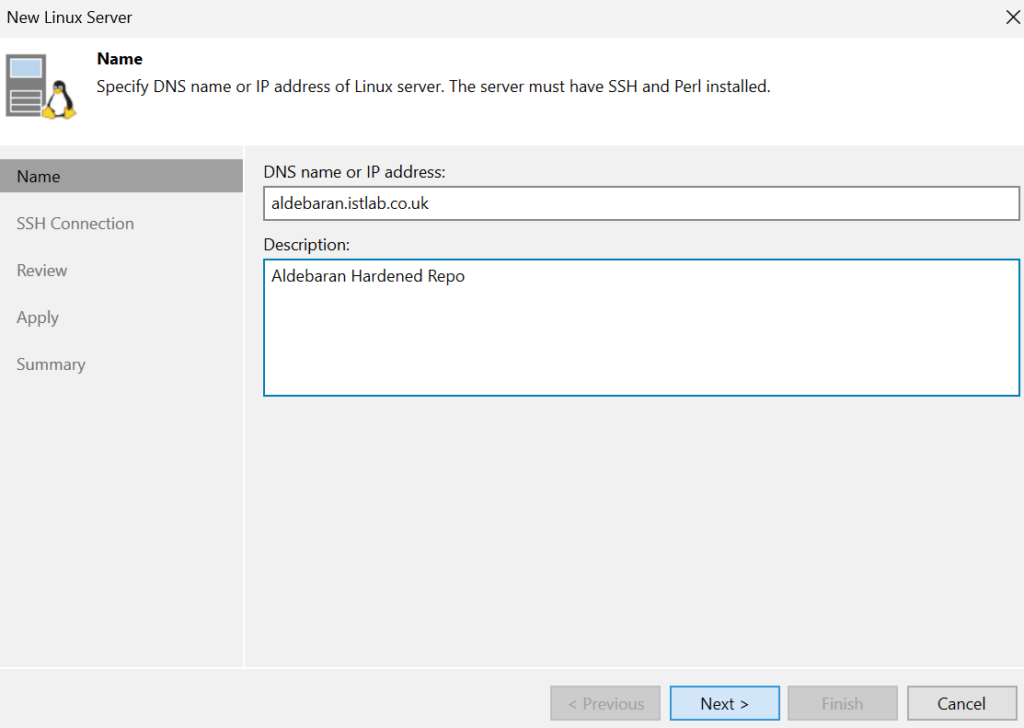
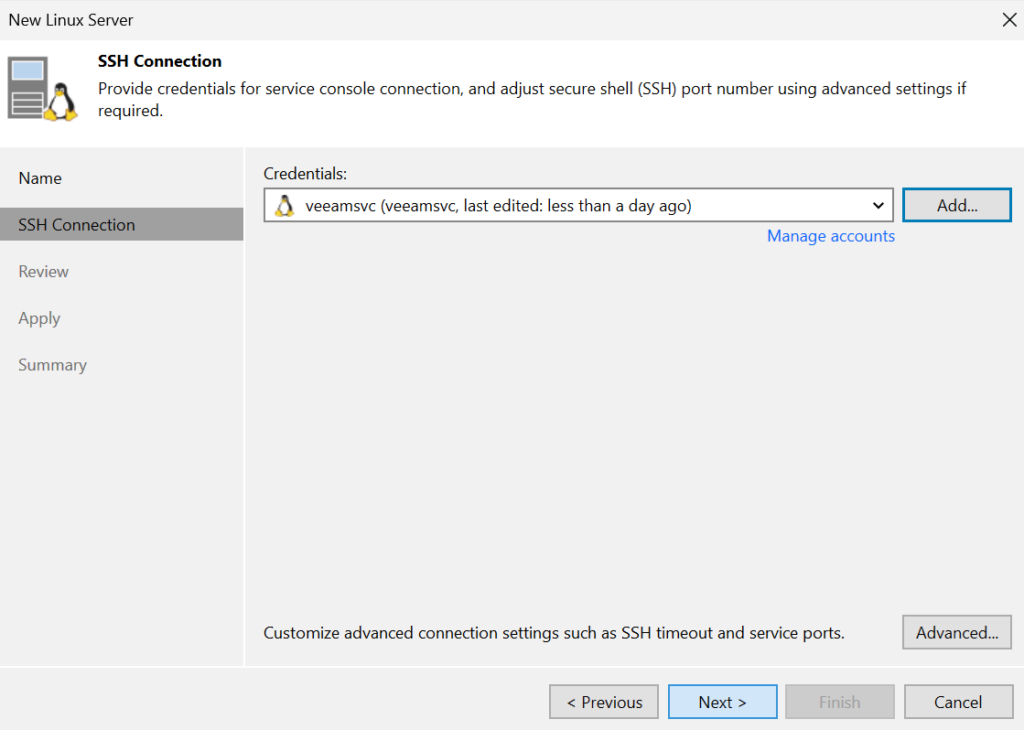
Add the host name and description
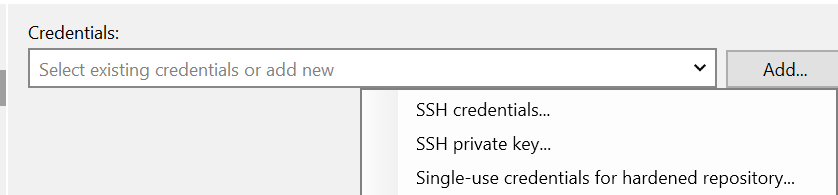
Add a new single use credential for the veeamsvc account
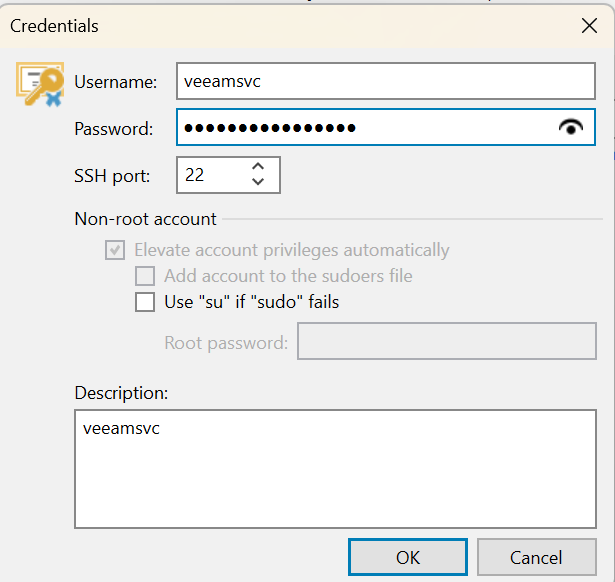
Add the credentials and click ok
Then click Next
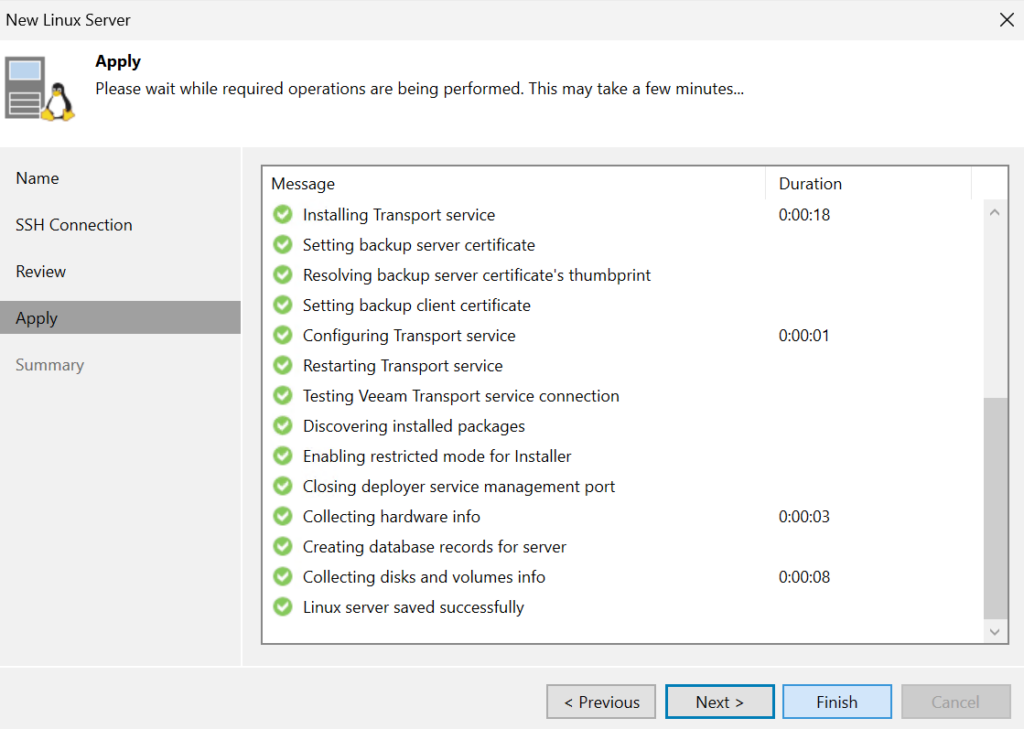
Click Yes on the SSH fingerprint warning

Click apply

Then Finish once its been added
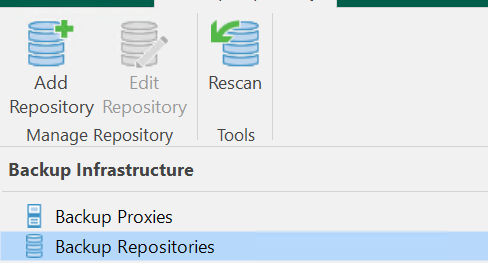
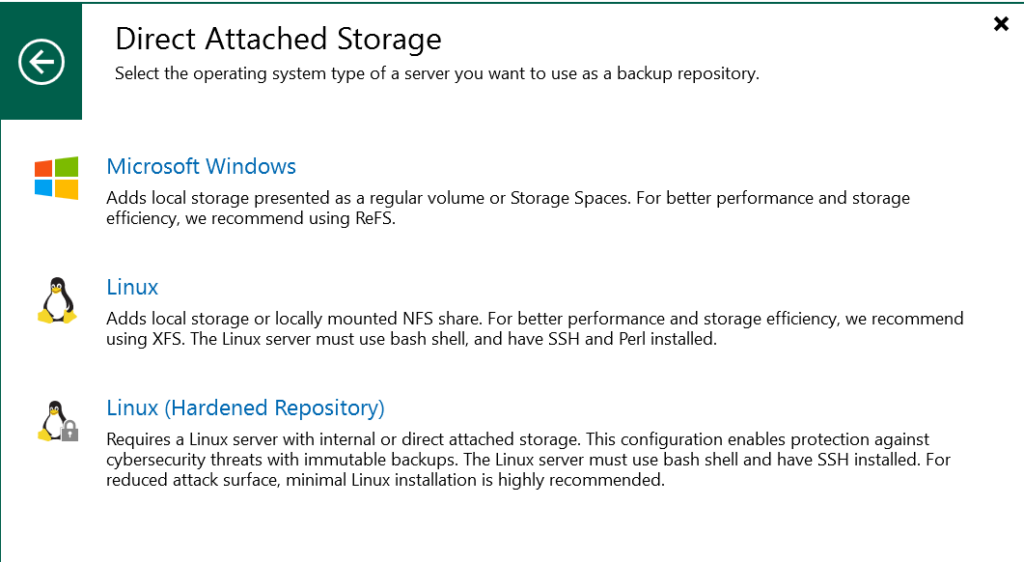
Now lets add a repository, click Backup Repositories and Add Repository
Select Direct Attached Storage
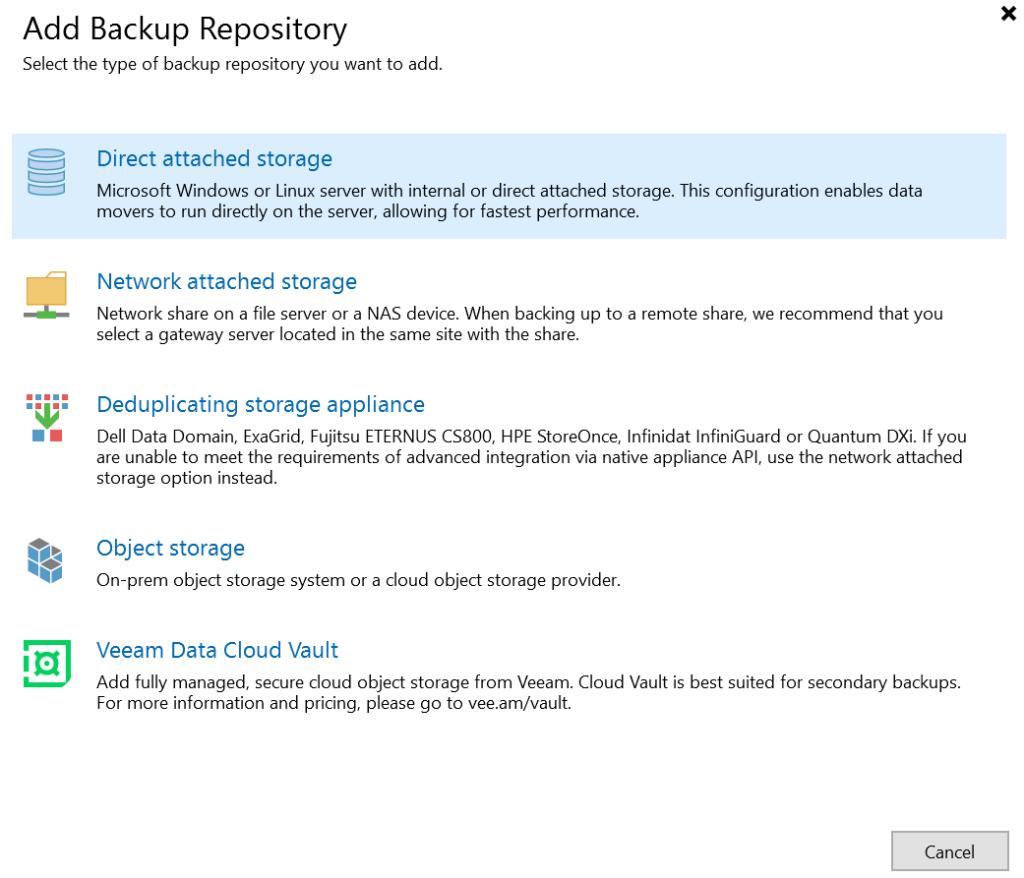
Then a Linux Hardened Repository at the bottom
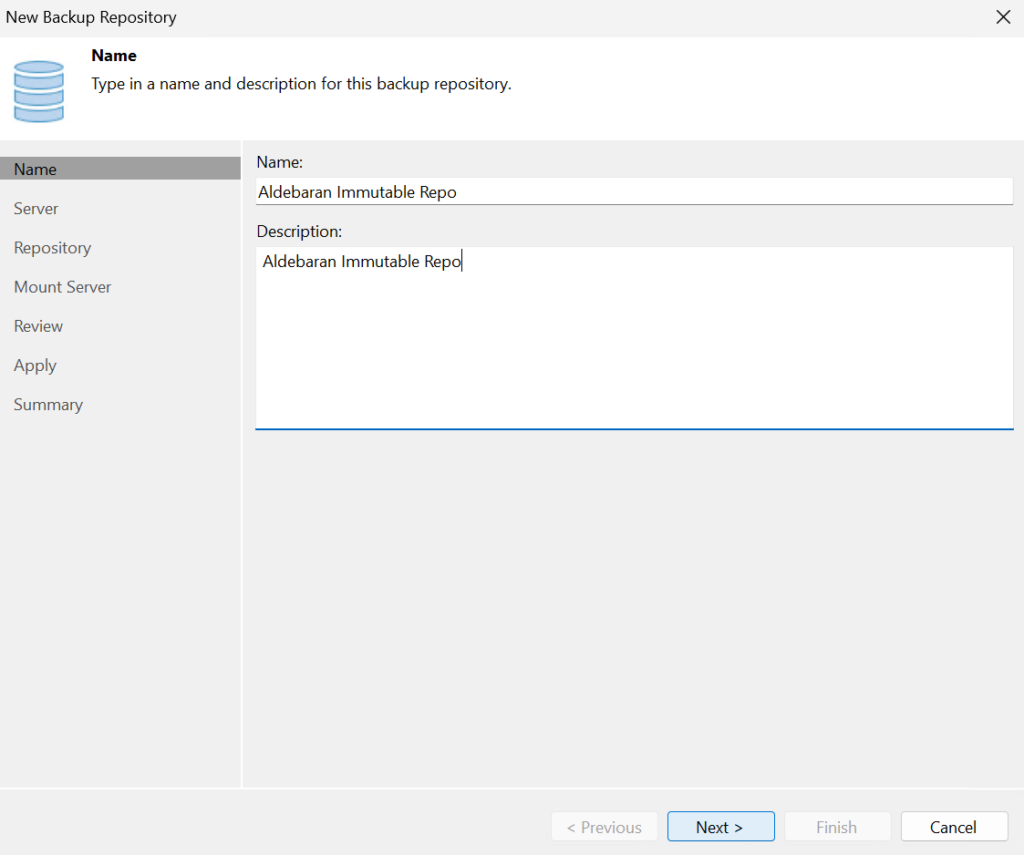
Then add a name and description, then click Next
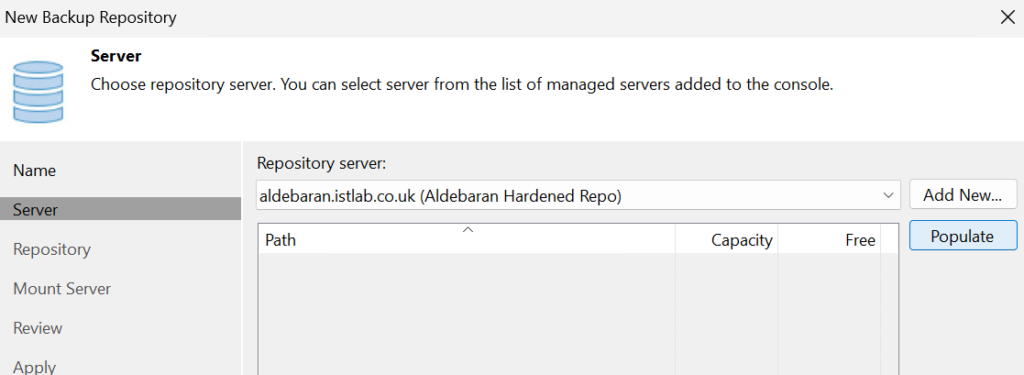
Click populate to find the paths on the server we added
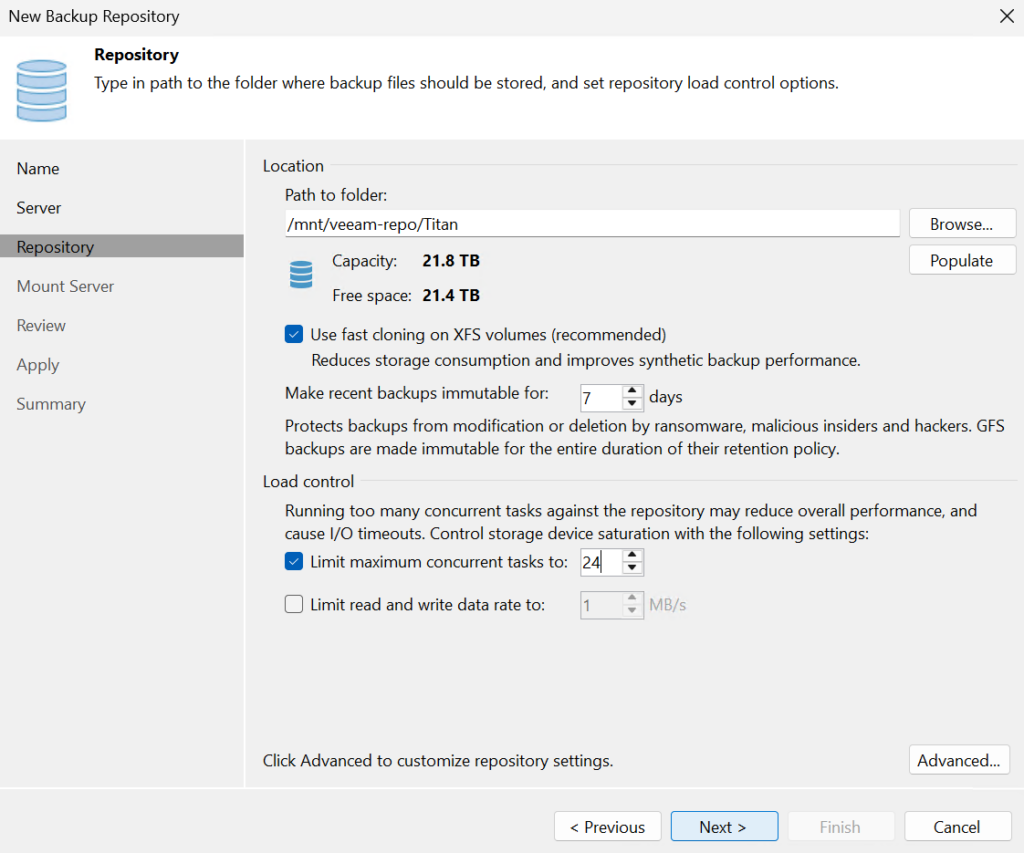
Select our mount point on /mnt/veeam-repo, then click Next
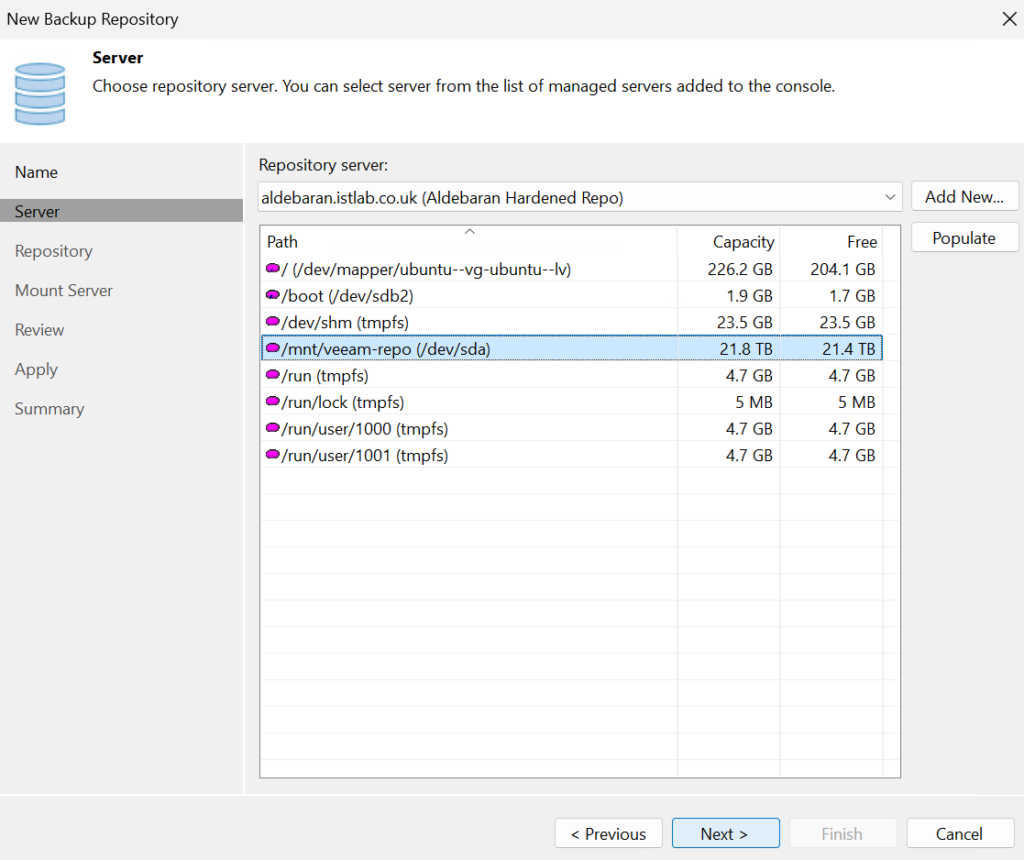
I also added a sub path on the location, you dont need to do this, but it is optional
You can then see the capacity, dont forget to set immutability for however long you want it, this should be the same as the number of daily backups you will have for your jobs, you can change this later, GFS backups are made immutable for their entire period
Once set, immutable backups cannot be removed until they have expired
We also want to set the number of concurrent tasks to ~3x the number of physical cores, this is a rough rule of thumb, if you have spare CPU on the repository during jobs and not enough are running in parallel you can increase it
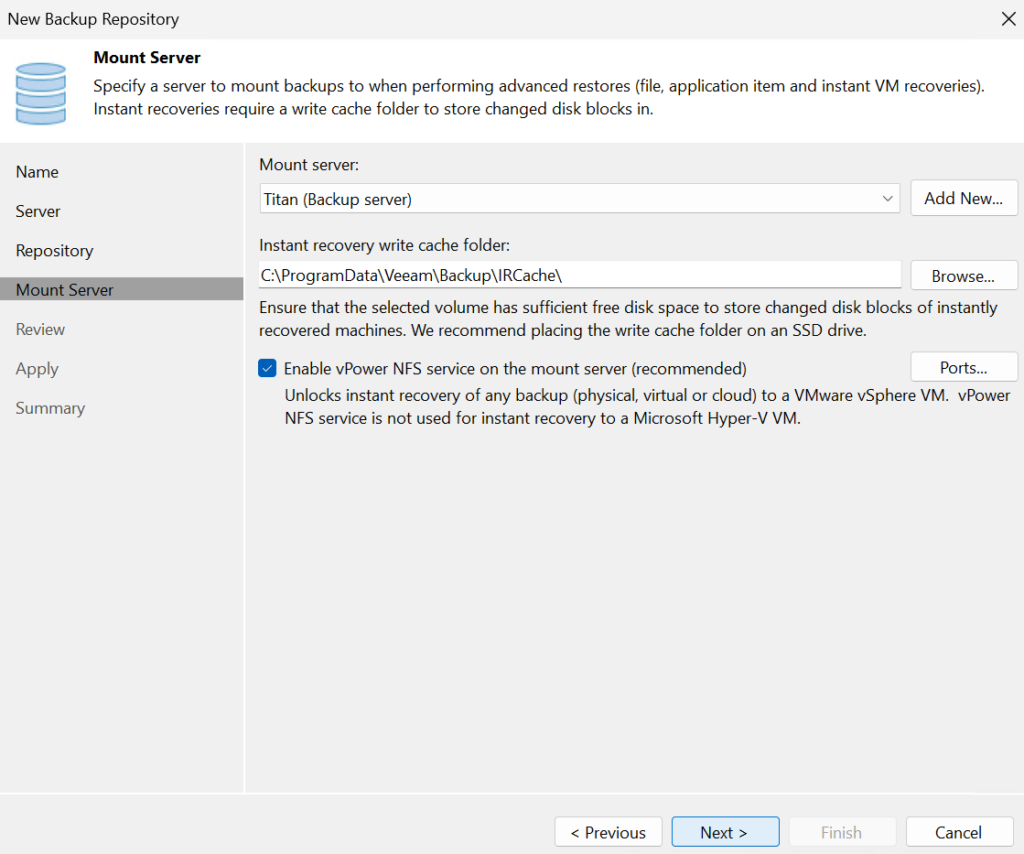
Now click Next
Keep these as defaults and click Next
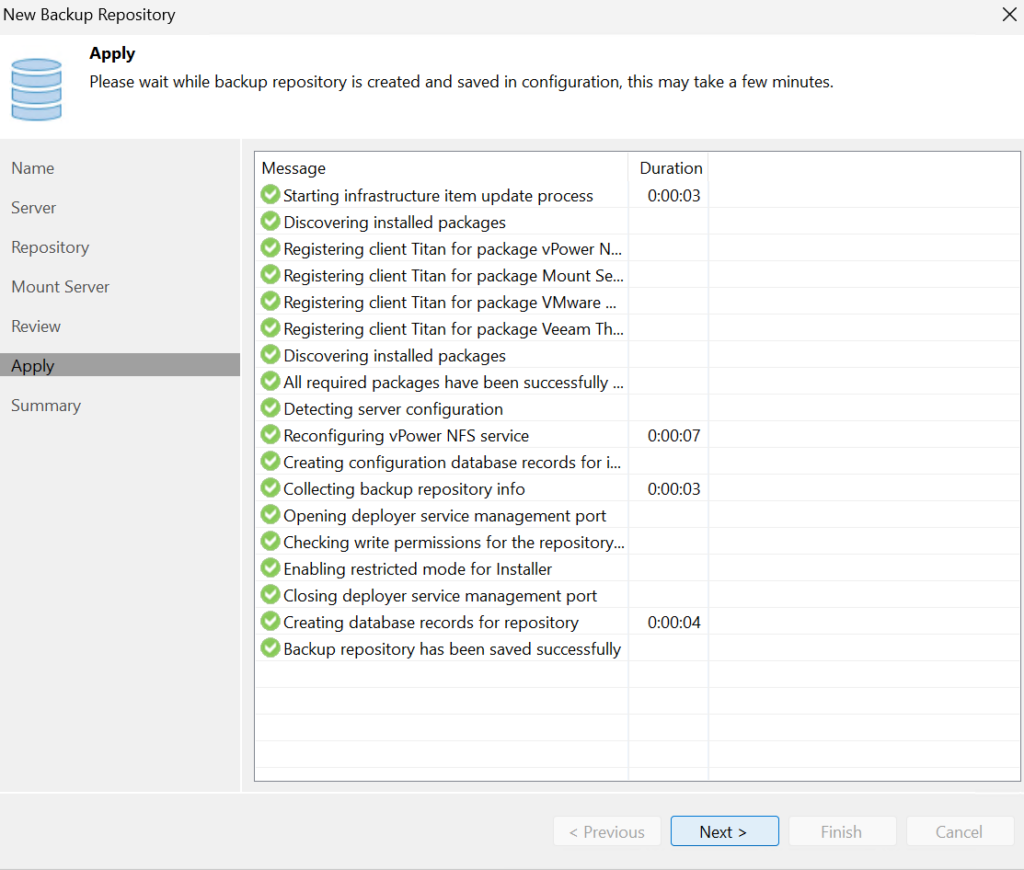
Then click Apply
When its done click Next, and Finish
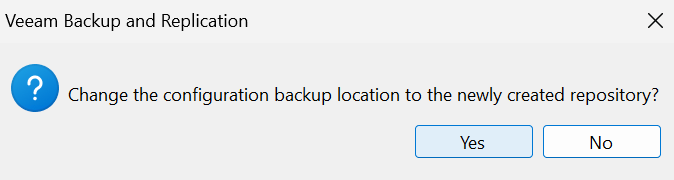
If this is your first repository, you absolutely need to click Yes here, the config cant be stored on the VBR server
Post Deployment Hardening Tasks
Enable the UFW on Ubuntu
sudo ufw enableRun the following commands to add the VBR rules
sudo ufw allow openssh sudo ufw allow proto tcp from <veeammgmt> to any port 6162,2500:3300
sudo ufw allow proto tcp from <proxy> to any port 2500:3300You need to do these one IP at a time, for example, on a VBR server on 192.168.1.12 we would use
sudo ufw allow proto tcp from 192.168.1.12 to any port 6162,2500:3300Disable root logon by editing
sudo nano /etc/passwdThen change the line
root:x:0:0:root:/root:/bin/bash
To
root:x:0:0:root:/root:/usr/sbin/nologin
Then once thtas all done, disable ssh
Ubuntu 2204 And Earlier
Disable and stop the SSH service with
sudo systemctl stop ssh
sudo systemctl disable ssh
Ubuntu 2404 And Newer
Disable the SSH socket
sudo systemctl disable --now ssh.socketThen disable and stop the SSH service
sudo systemctl stop ssh
sudo systemctl disable ssh
Since the repo is in Veeam, remove the veeamsvc account from the sudoers group
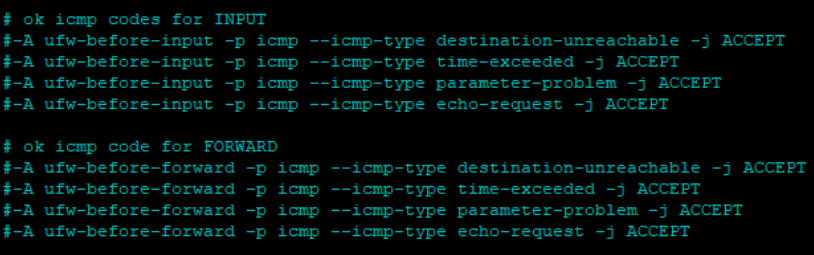
sudo deluser veeamsvc sudoLastly, disable ping in the UFW by editing the before rules with
sudo nano /etc/ufw/before.rulesAnd then commenting out the following lines
OS Updates
Periodically, its a good idea to update the OS
To do this, simply login via the remote console on your server IPMI, eg iDRAC/iLO, as the veeamrepo account and run
sudo apt update ; sudo apt upgrade -y