Last updated on May 1st, 2026 at 10:10
We are back with the v2 new and improved Hyper-V guide, if you read my old one from around a year ago there was a fair it that could be tweaked so here we are with several improvements to help try and get your Hyper-V environment deployed easily and running smoothly
For this Hyper-V deployment we will need the following requirements to be met for the hosts/storage/networking
Storage wise I am requiring a SAN here, with the poor reputation of storage spaces, I do not recommend using storage spaces direct under any circumstances, S2D, for a HCI setup in Hyper-V, if HCI is a requirement then consider proper software for this such as VMware/Nutanix
Compute/Storage Requirements – Minimum
- 2+ Hosts running a modern Windows Server version, 2022/2025
- External SAN for storage, iSCSI is preferable and will be used in this guide
- 4x10Gb NICs on 2 separate cards
For recommended requirements I would suggest
- 3+ Hosts – More important
- 6x10Gb NICs on 2 separate cards – Ideal but not required
Networking requirements
- Switch ports configured as individual ports with no Port Channel/Trunking/Link Aggregation configured and required VLANs trunked down
- 2x ToR/Core switches in MC-LAG/VLT/VSX HA, conventional stacking is not recommended
- A minimum of 5 VLANs
For my networking I had the following VLANs
- VLAN 30 – Host Management
- VLAN 31 – Live Migration
- VLAN 32 – Cluster Heartbeat
- VLAN 33 – VM Network
- VLAN 2000 – iSCSI
For some details on my hardware, I used the following
- 3x Dell FC630 Servers
- 2x2667v4 CPU/Server
- ~48GB RAM/Server
- 4x10Gb NICs
If you opt for a 6 NIC config, I would suggest creating a second SET switch and pull Live Migration or VM traffic out of the SET switch configured in this guide
The 4 NIC approach was used here to cover the minimum config and seeing customer deployments, there is usually less ports available on switches due to this being used for smaller environments compared to VMware, so seeing 4 is a lot more common than 6
Important – By continuing you are agreeing to the disclaimer here
1 – Host Setup
1.1 – Windows Install
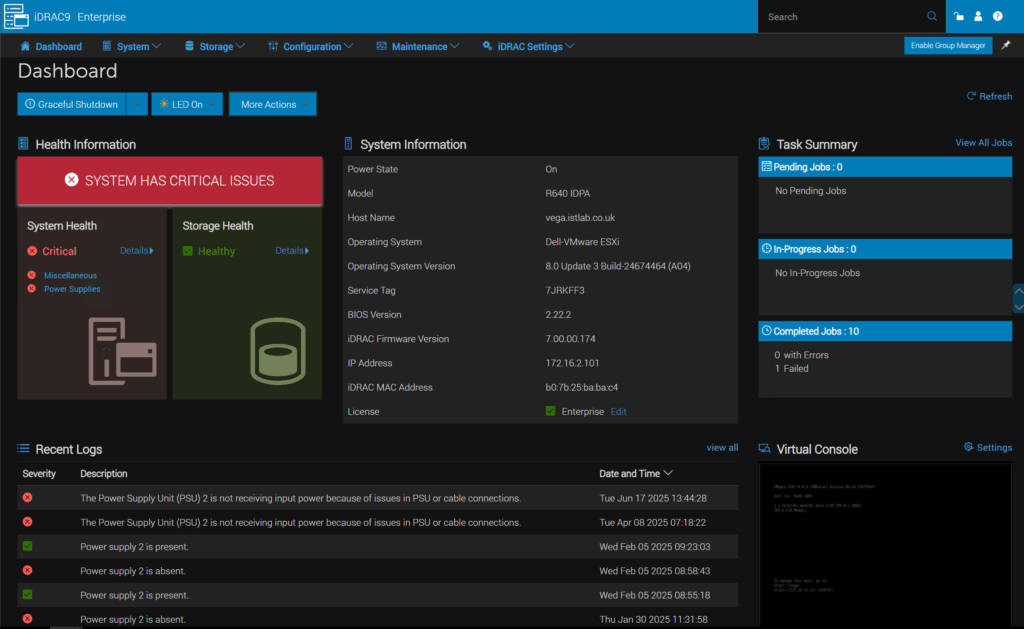
For this you will need to connect to your servers IPMI, eg iLO/iDRAC, for this setup I have Dell servers so I will be showing you through iDRAC
My servers use iDRAC 8 but will show this through on iDRAC 9 on another server, iDRAC 10 is the same
We will be connecting to the virtual console and connecting the ISO and installing that way, now due to how slow the transfer speeds are, the install can take hours, I highly recommend you burn a Windows Server install USB with rufus, insert the USB into the server and use F11 at boot for the one time boot menu and install via that as it will take less than 30 mins, depending on your USB instead, but the method in iDRAC is shown so it can be done even if you dont have direct access
In iDRAC 9/10 you can see the virtual console box in the bottom right, click the box
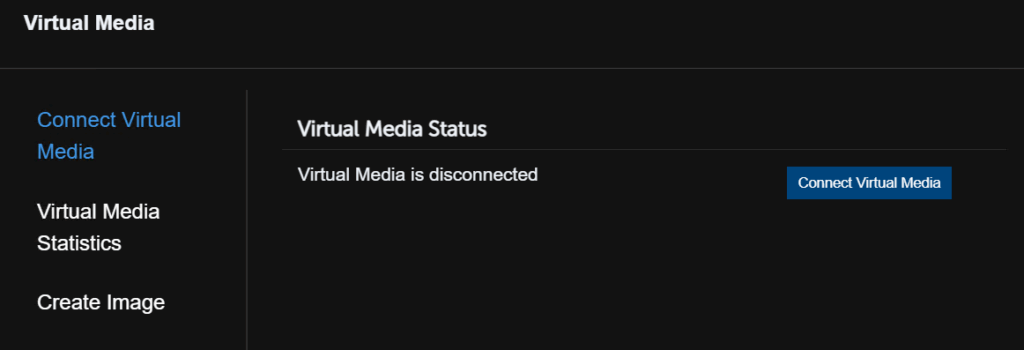
Click Virtual Media

Then Connect Virtual Media

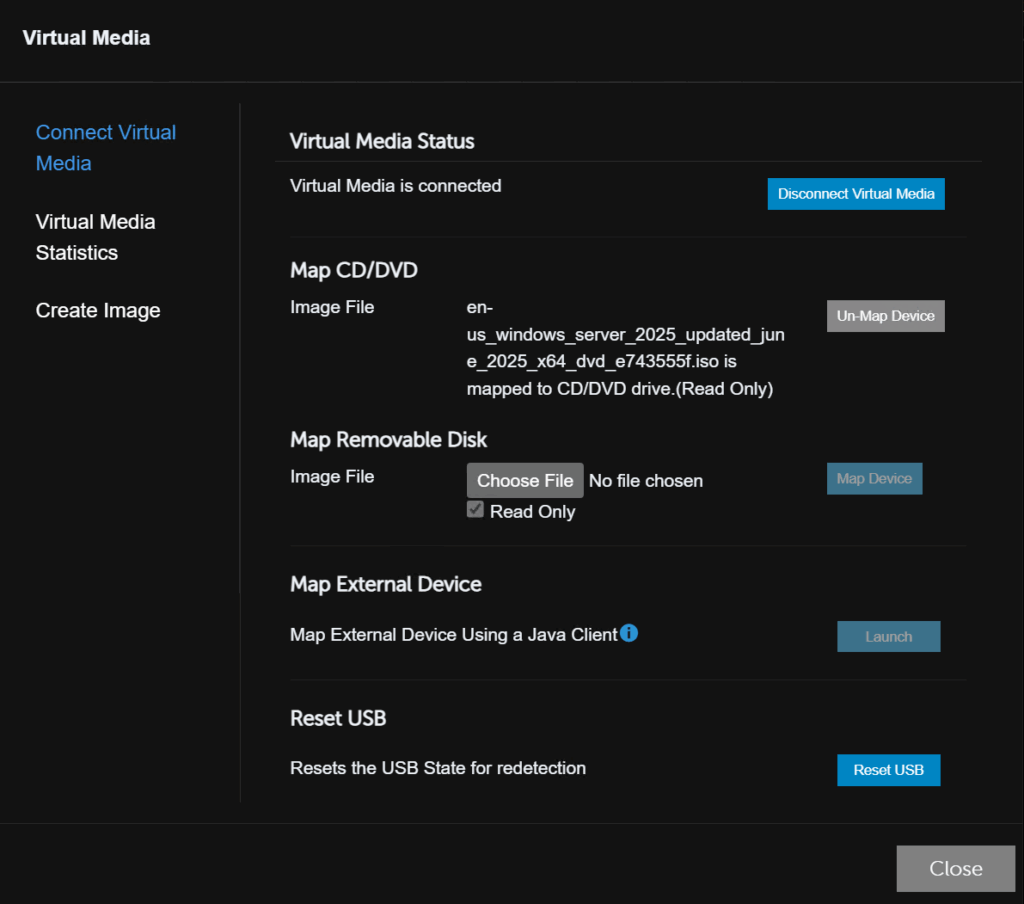
Under Map CD/DVD click Choose File
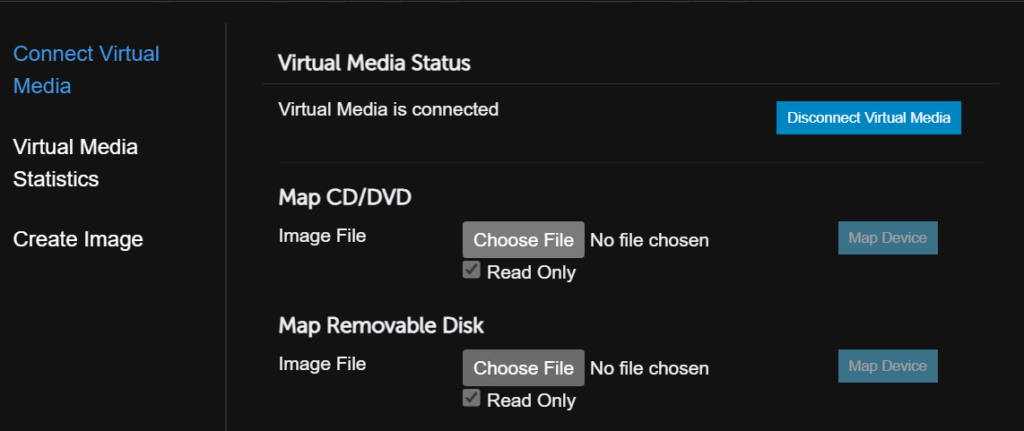
Double click your Windows ISO

Then click Map Device

Now click Close
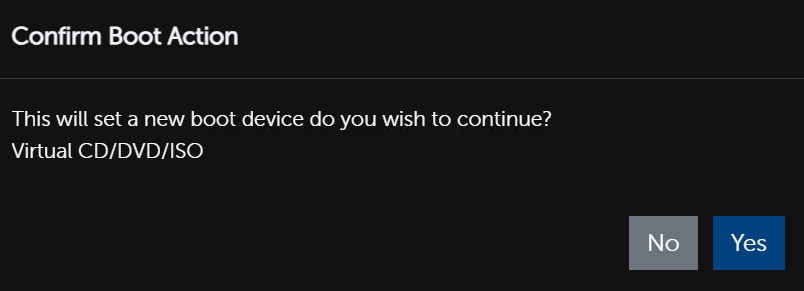
Click Boot on the top bar

Then click Virtual CD/DVD/ISO
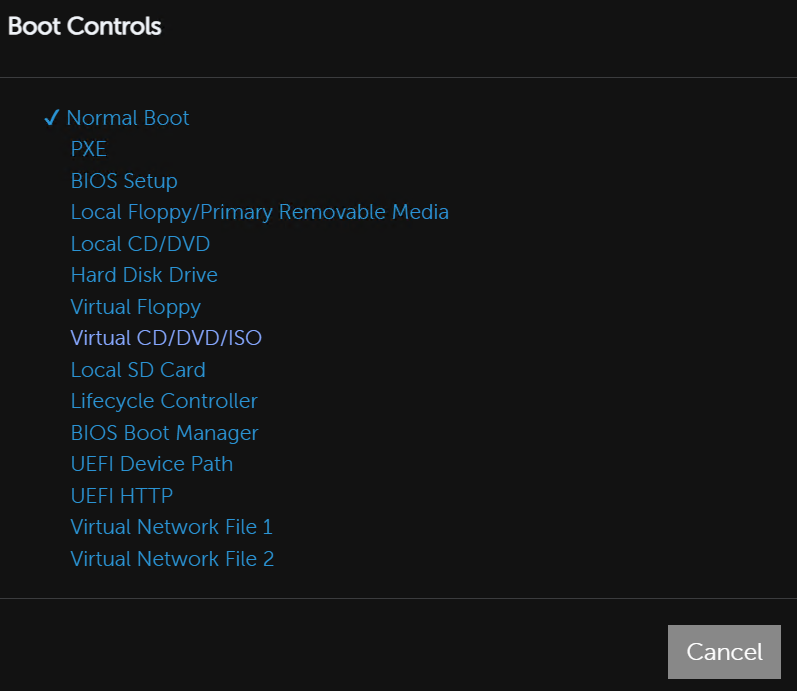
And click Yes
Then click power

And Reset System
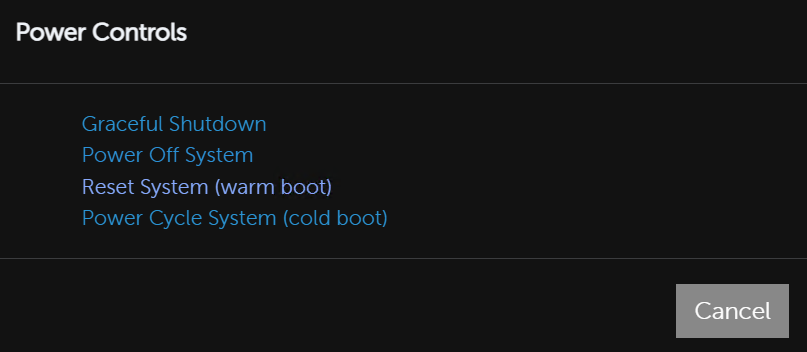
Then click Yes
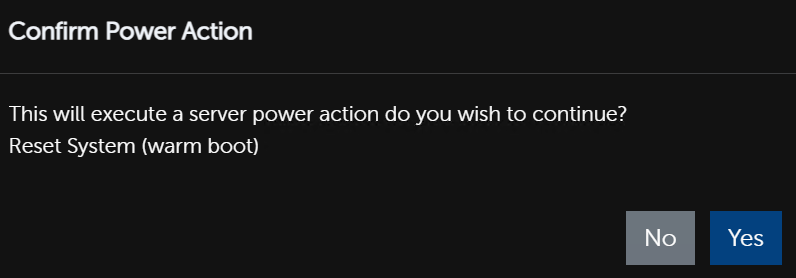
The system will then automatically boot to the ISO we set
On HPE iLO systems, you will need to press F11 to get to the one time boot menu and select the ISO to boot from
When it boots you’ll need to press any key to boot to the installer
Click Enter here

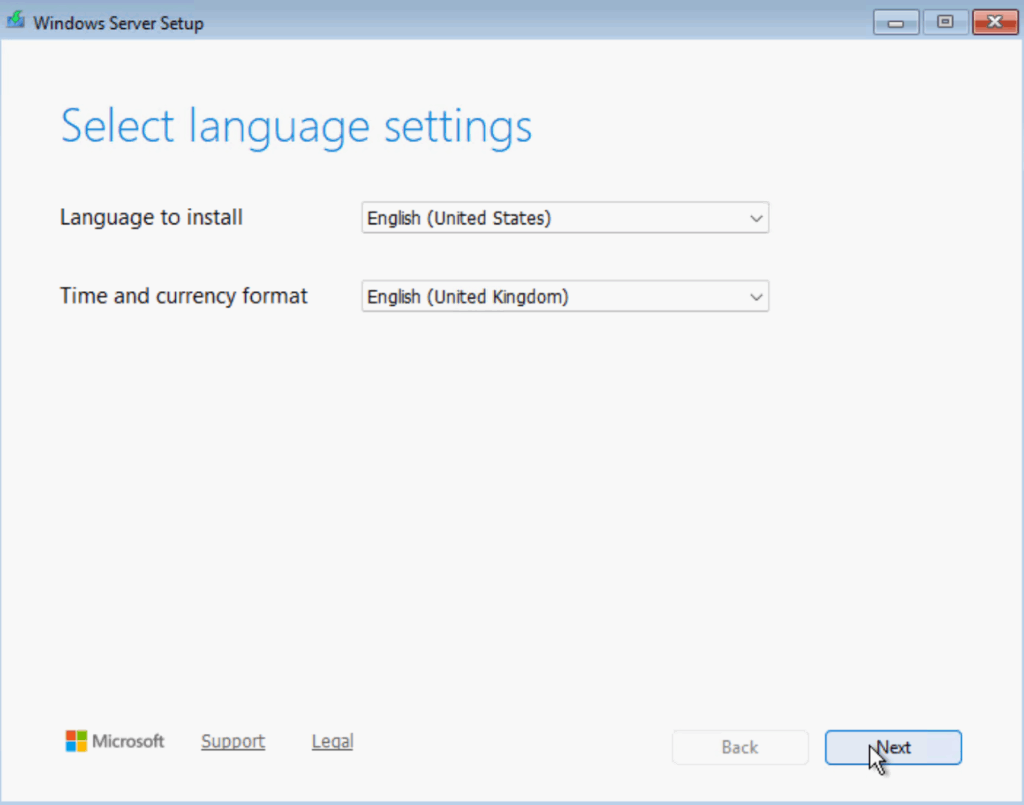
This will then take quite a while to load, but when it does select your install language and time format and click Next
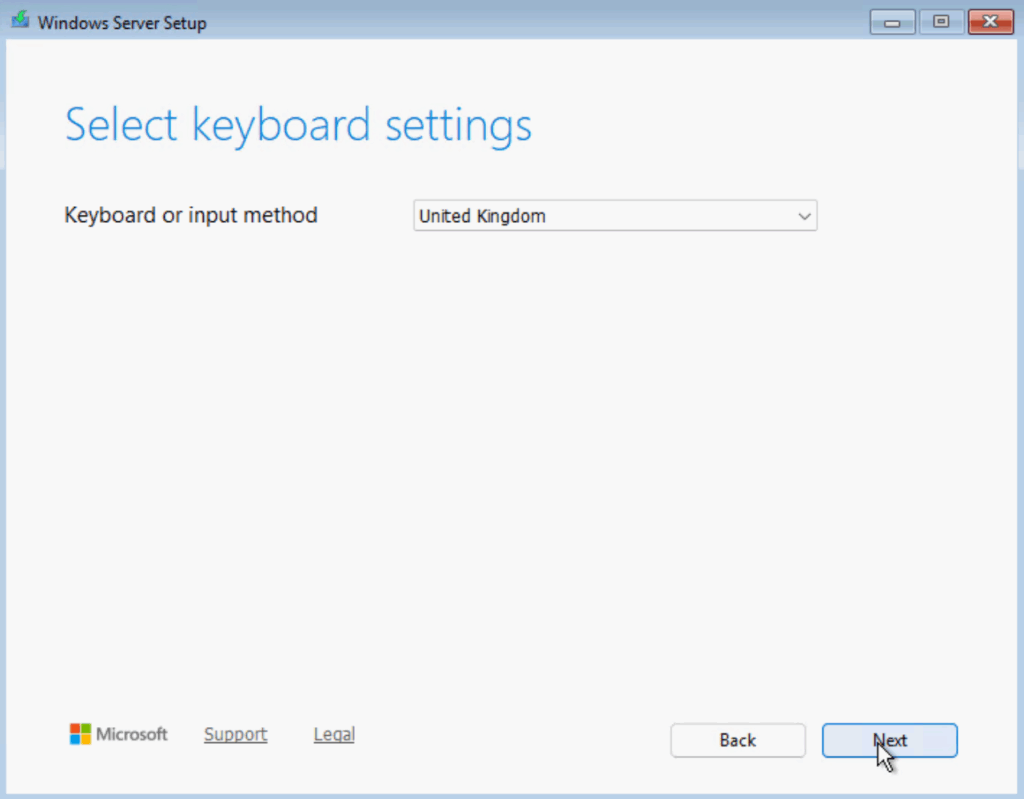
Select your keyboard type and click Next
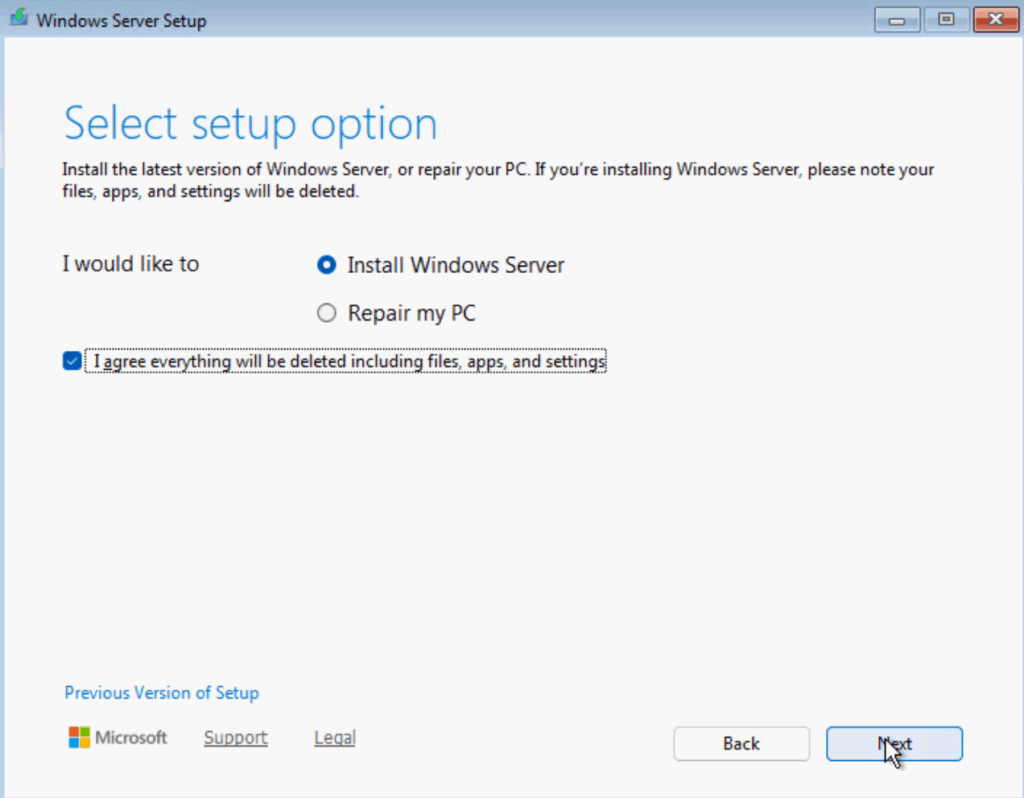
Select the radio button to Install Windows Server, check the box agreeing everything will be destroyed and click Next
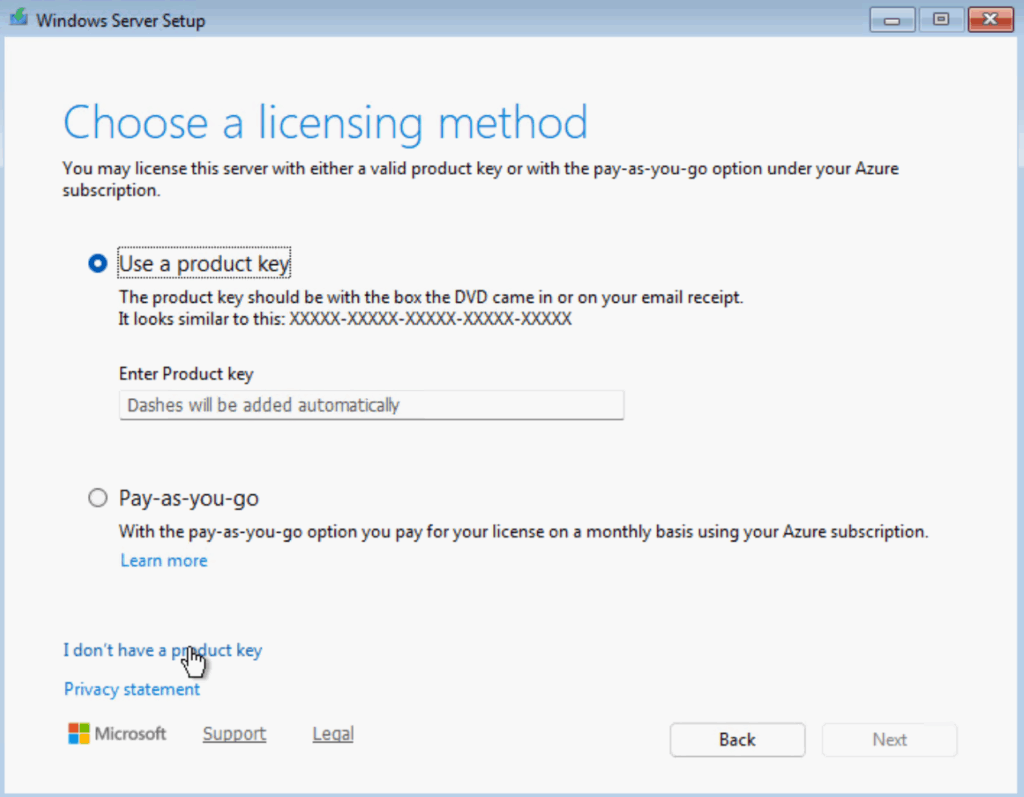
For now click I Dont Have A Product Key, we’ll add one later
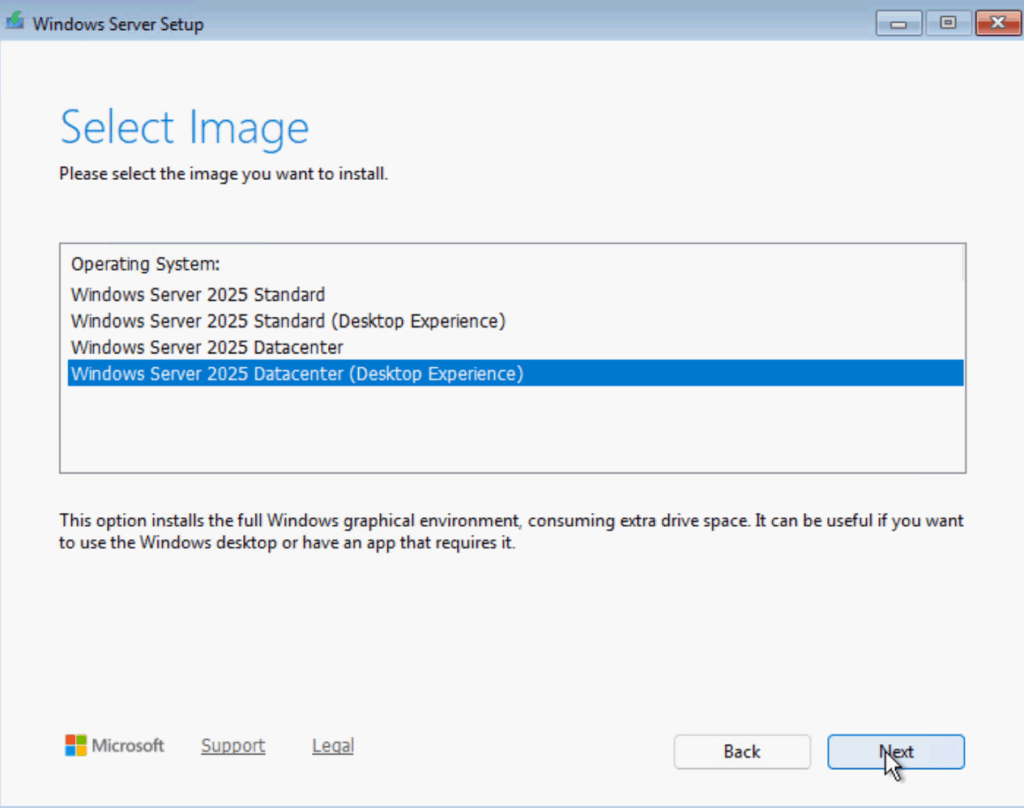
Select your server license version, I have datacenter licenses so I selected that, the desktop experience means you get a GUI, so its not server core
We will be adding the GUI for this, it cannot be changed after the installation, but its more beginner friendly, then click Next
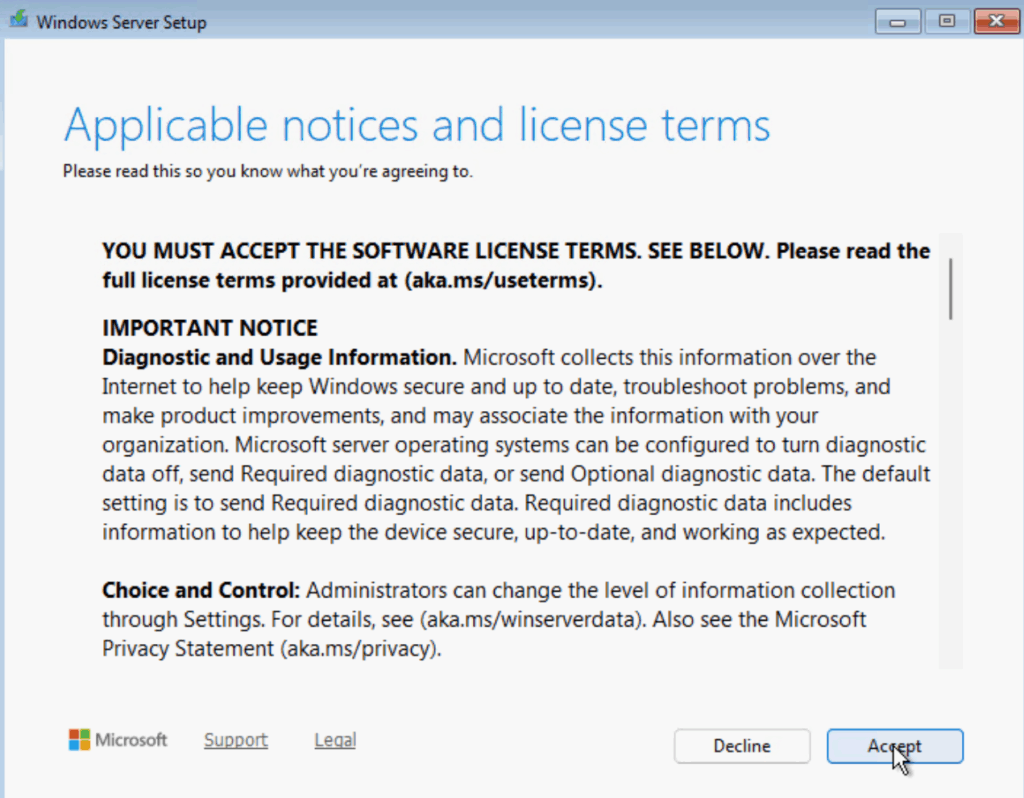
Accept the EULA
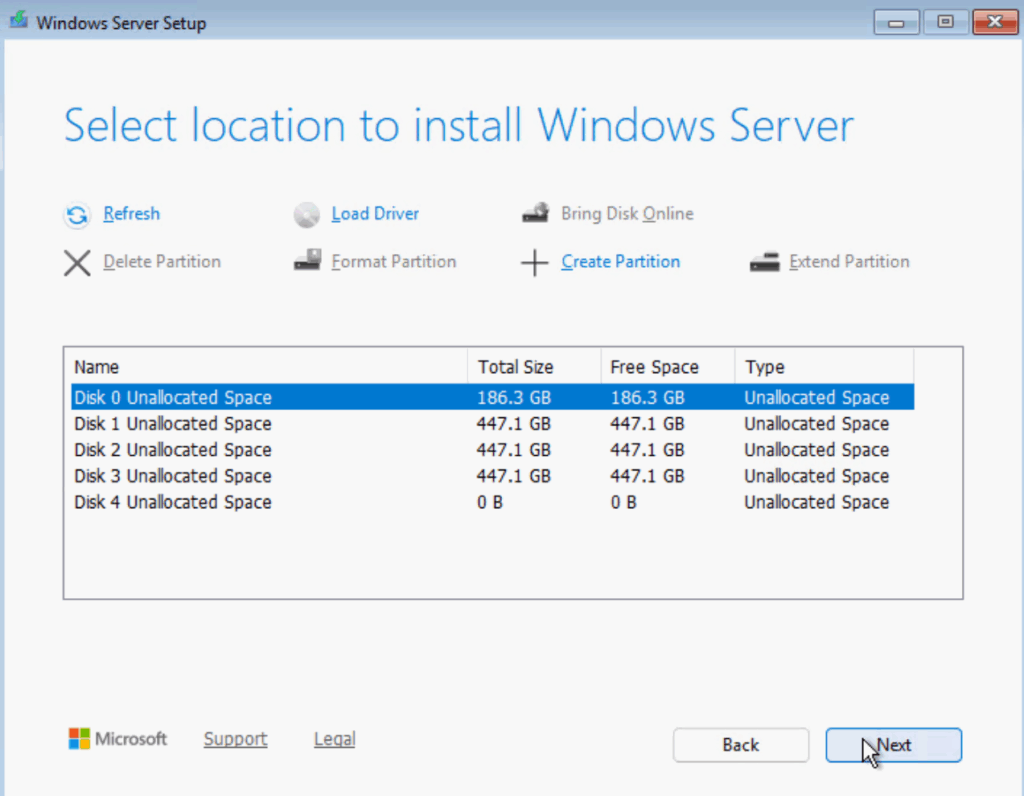
We now need to select our boot device, this should be a redundant RAID 1 device so you can sustain a disk failure, an example is a Dell BOSS card, or the HPE NS204i-U, for me this is my 186GB SSD, so I selected this and clicked Next
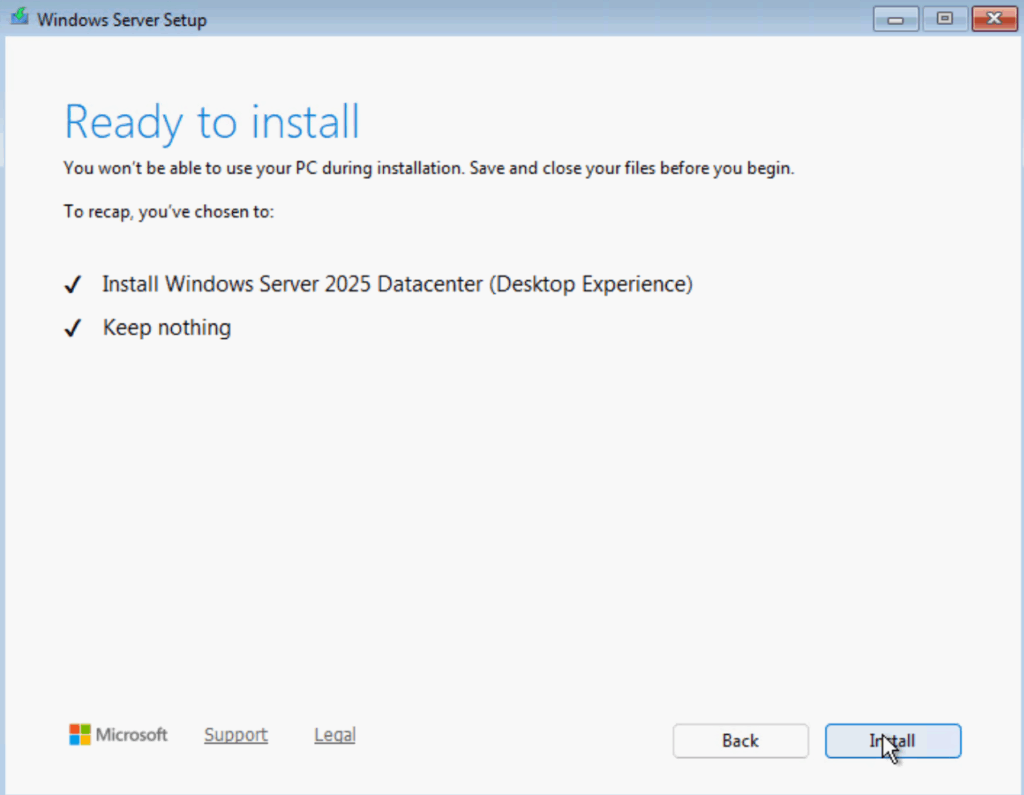
Then click Install
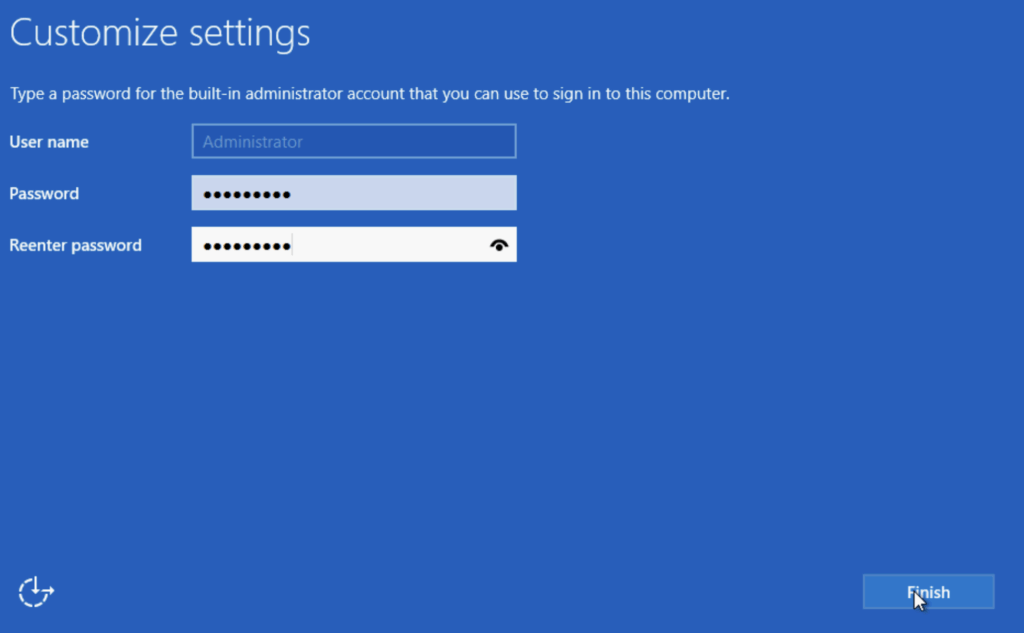
Wait for the server to reboot and set the administrator password and click Finish
The server should boot Windows automatically unless you have edited the default boot order
1.2 – Switch Setup
For this type of setup I have two Dell OS 9 switches setup in a VLT stack
All ports are configured individually with no port channels/trunks/lags or LACP
Lets take a look a host 1 for how the networking is configured
We have NIC1-4 for our 10Gb NICs

Switch 1 we have
- NIC 1 – Te0/1
- NIC 3 – Te0/2
Switch 2 we have
- NIC 2 – Te0/1
- NIC 4 – Te0/2
We will be using NIC1/2 for the SET switch with Management/VM/Live Migration/Cluster Heartbeat traffic, and NIC 3/4 for storage over iSCSI
This was all switches have redundancy baked in at the switch level
The storage switch ports will be the easier ones to configure, so lets start there, as there is only 1 VLAN, we set our iSCSI VLAN as the Native/Access VLAN on these ports
Your SAN will be configured in one of two ways, either with a pool of IPs on one network, or two networks, also referred to as fault domains
I prefer to have the same network as its simpler in my opinion and two separate networks doesnt really change anything, but some SANs mandate one setup over the other
My SAN has one network for both controllers, so I will set both ports to have a native/untagged VLAN of 2000, my iSCSI VLAN
If you have two networks, you tag one port with one VLAN and the other with the second
Here is the config change I made, my switch mandates I enter a tagged VLAN, so I added a VLAN that I will never use, your switch may not require this

My switch default to having jumbo frames enabled, for MTUs higher than 1500
You ideally want this, but you must ensure your SAN is setup for it, if you are unsure, dont configure this as while it will net better performance, it will cause issues if its not done right
For a command line style config, this is what my port has
interface TenGigabitEthernet 0/2
mtu 12000
portmode hybrid
switchport
vlan tagged 4092
vlan untagged 2000
And thats my storage network ports ready from the switch side
Now for the SET team NICs, the remaining couple
First, you need to decide on your native VLAN, this is what all untagged traffic will be placed on, now most people opt for the network they use the most, usually the server VLAN, this can reduce security as an untagged VM will be on this network
But which you opt for is up to you, in my case I will be using the server VLAN as it will be the most used, and in Hyper-V you have to tag every VM, so this makes my management a little easier, and this means we will run through tagging the windows management interface, so how to do that is there is you do the same setup
So I want VLAN 33 as my native VLAN and I want to trunk 30-32 down to the hosts, my config looked like this
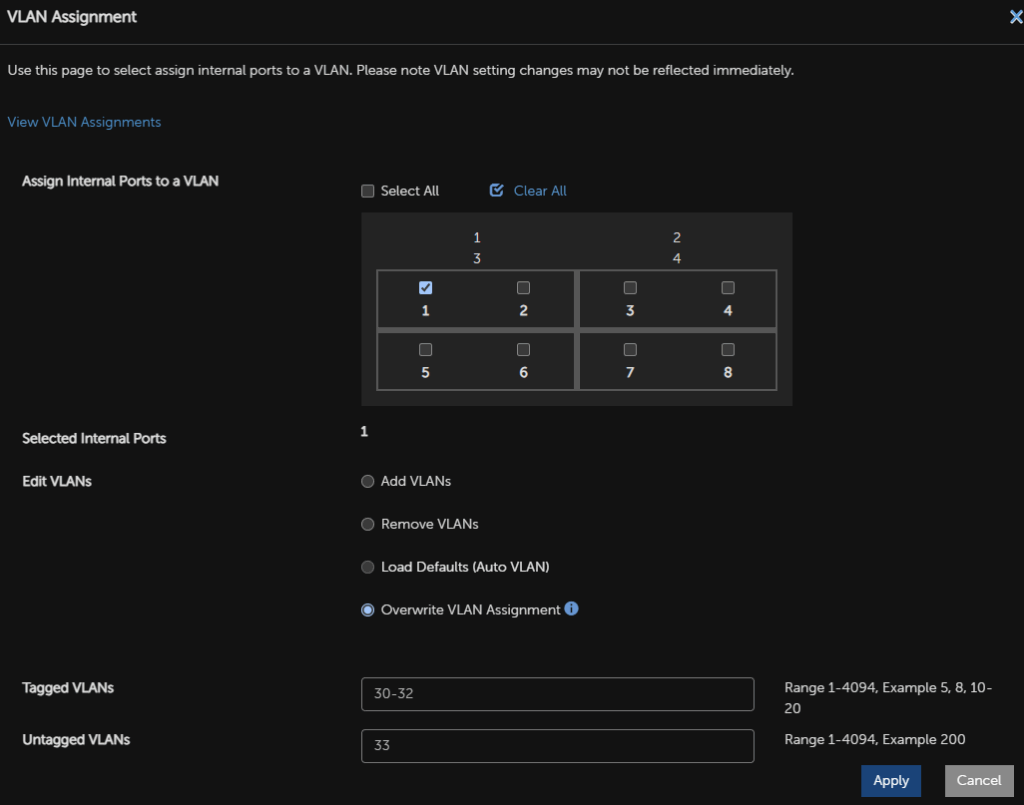
Again here, I also have the MTU set to over 1500, I recommend 9216, this is usually the maximum the switches can handle, but if you are unsure, stick with the default, especially for the SET switch as we dont really need a high MTU
The command line config for my switches looked like this
interface TenGigabitEthernet 0/1
mtu 12000
portmode hybrid
switchport
vlan tagged 30-32
vlan untagged 33
The important thing with any VLT/VSX/MC-Lag system, is that both switches are configured identically
1.3 – Installing Hyper-V
1.3.1 – GUI
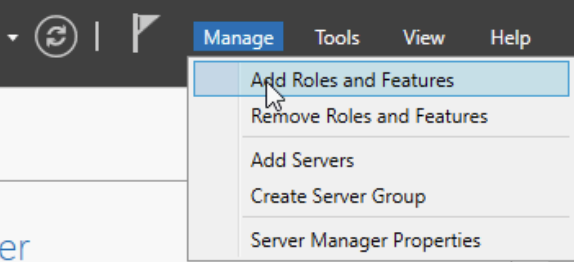
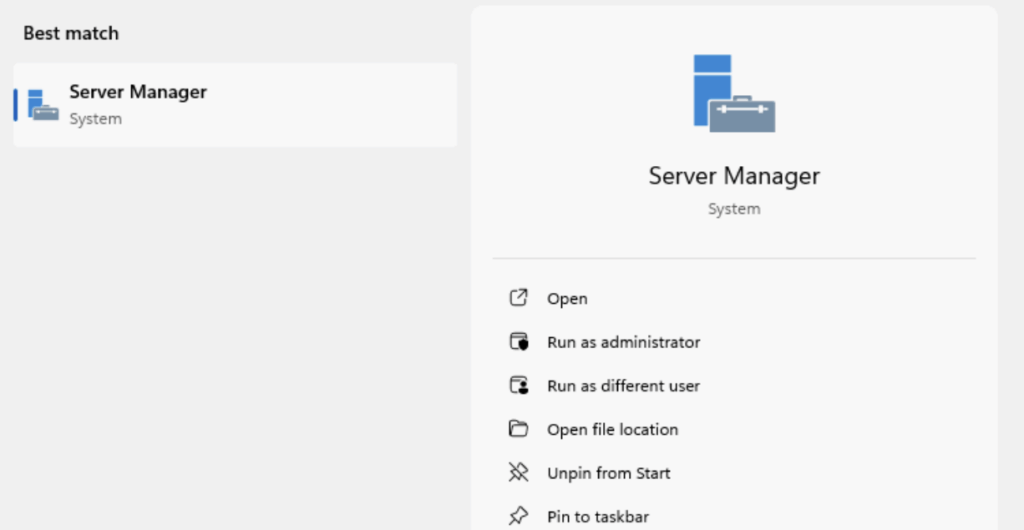
We first need to install Hyper-V, Server Manager should be open, if not you can search for it and open it

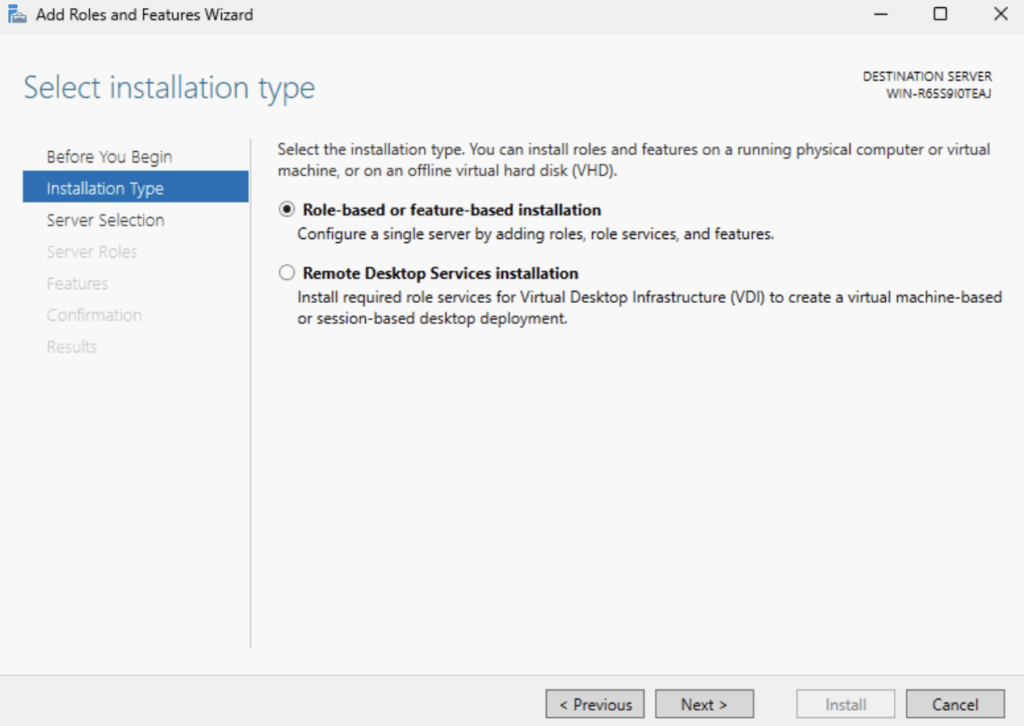
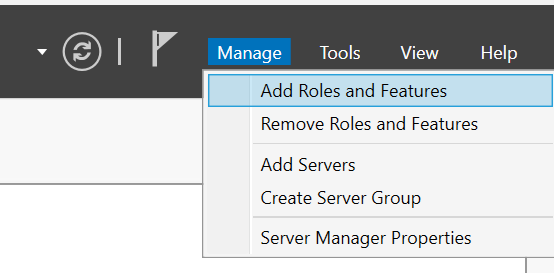
Click Manage/Add Roles And Features
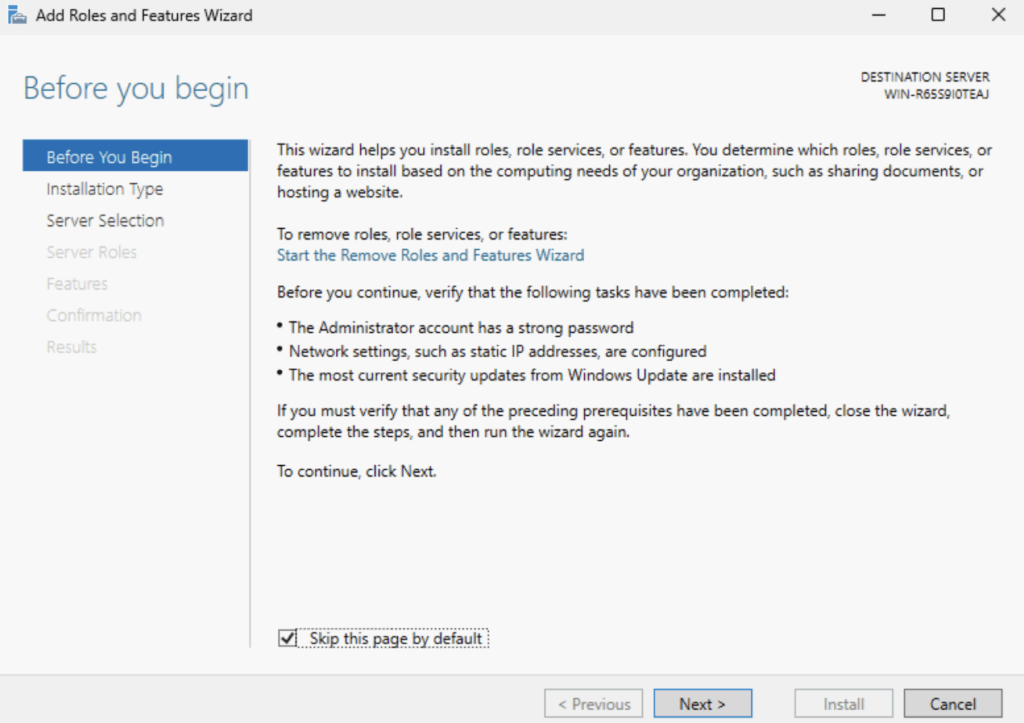
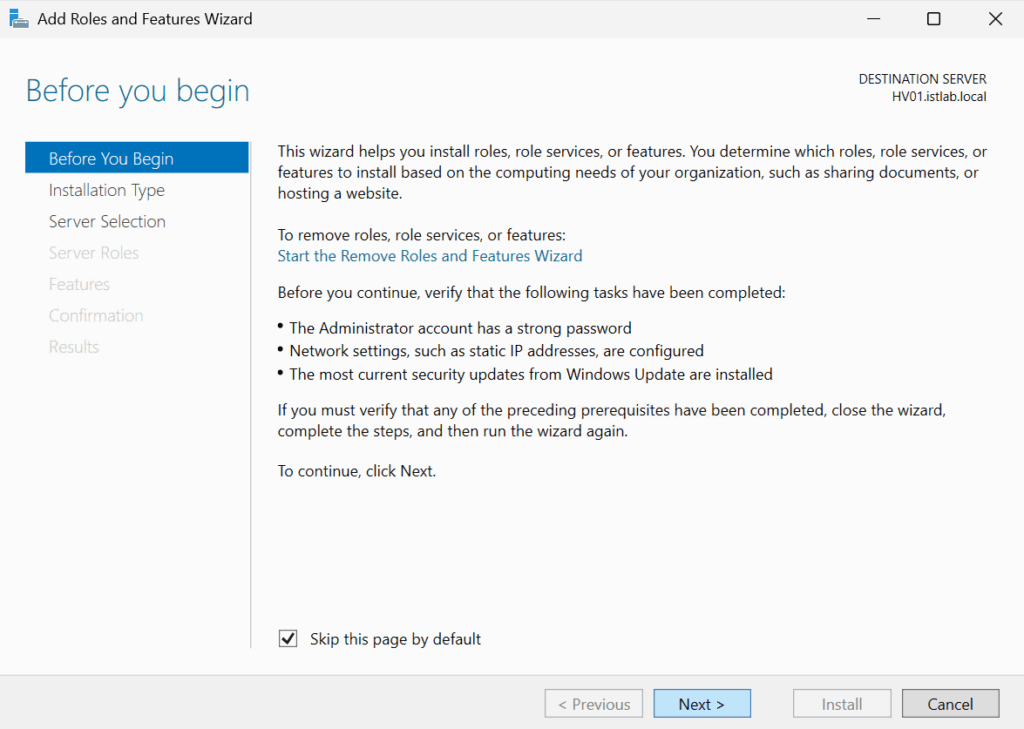
Click Next here
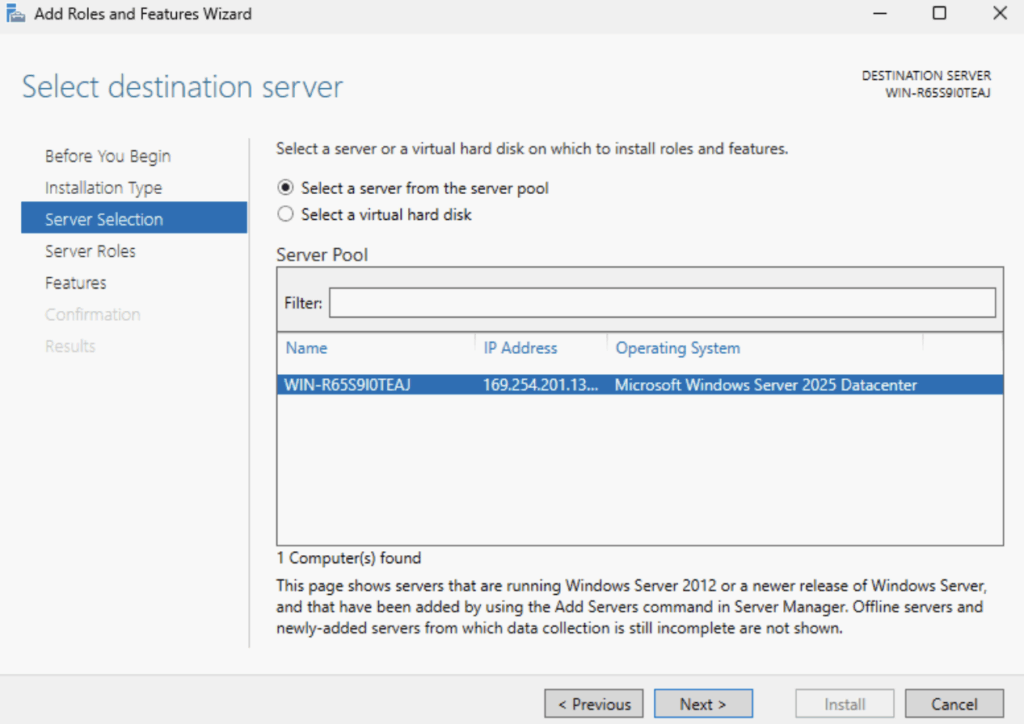
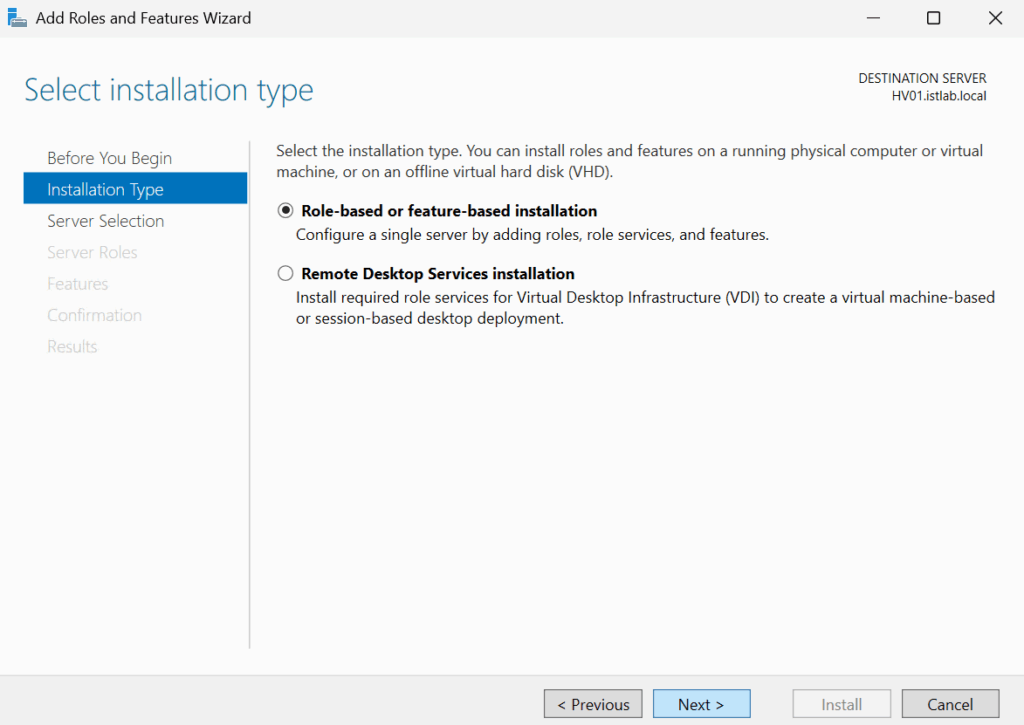
Click Next again
And again
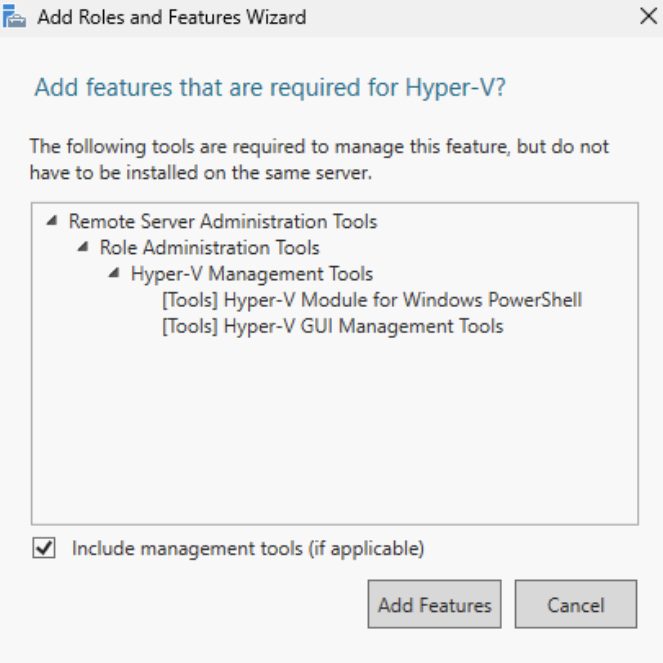
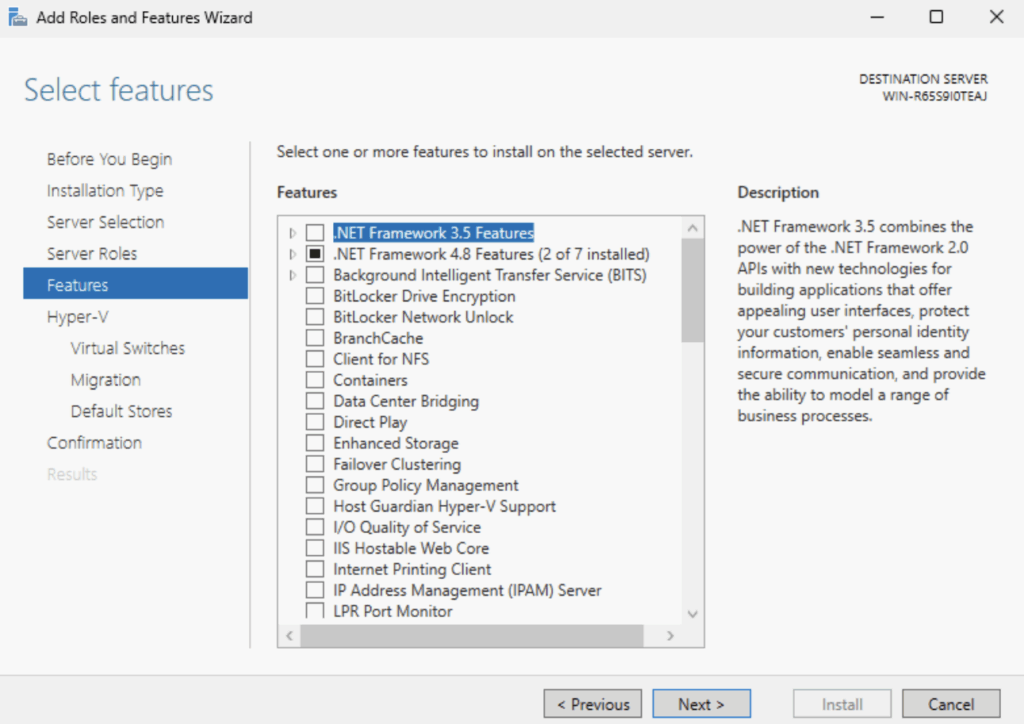
Select Hyper-V
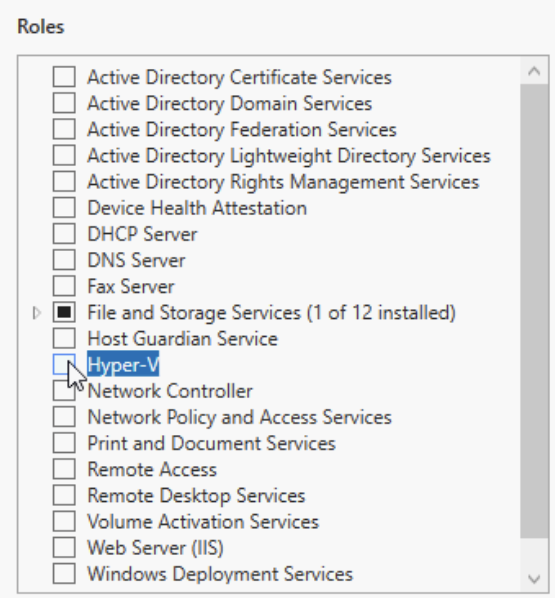
Then click Add Features
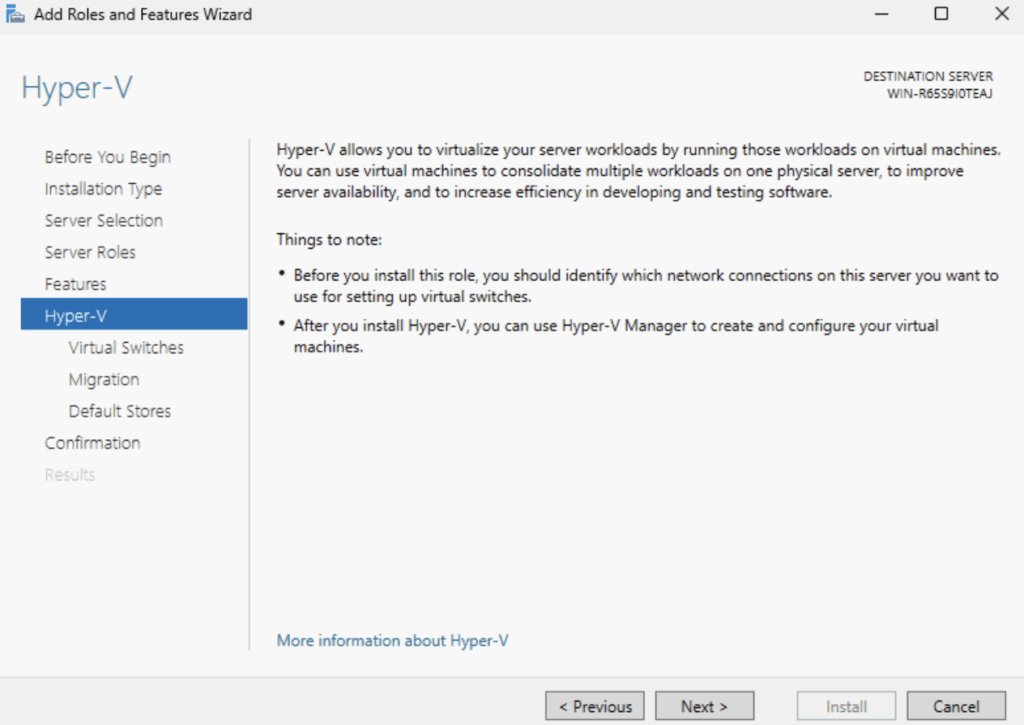
Click Next
Click Next again
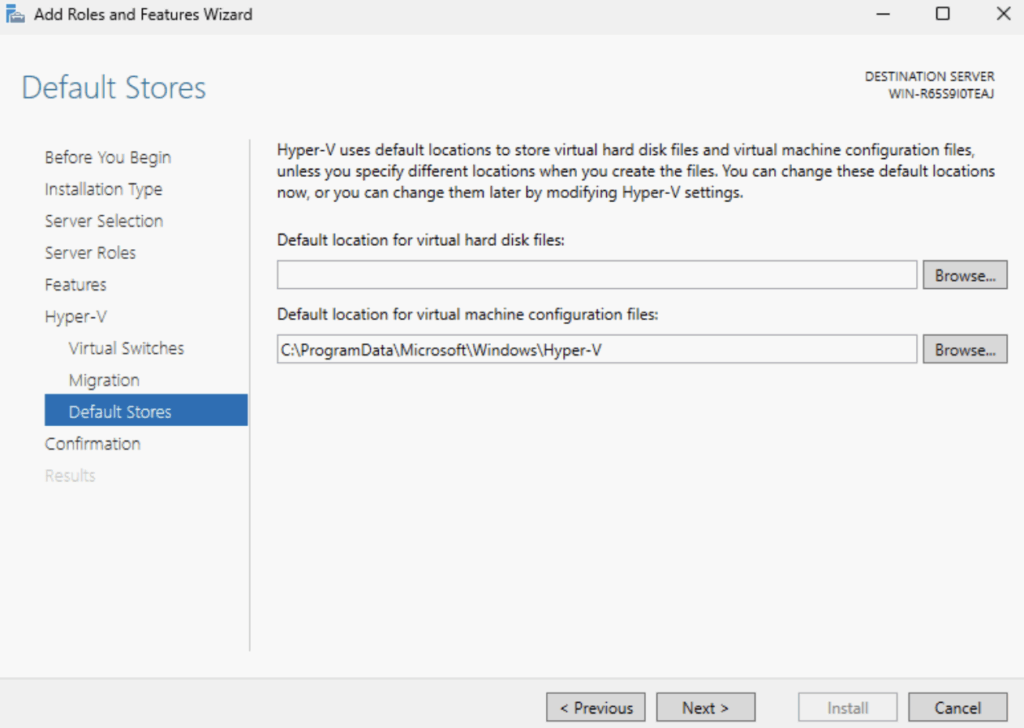
Dont set anything here and click Next
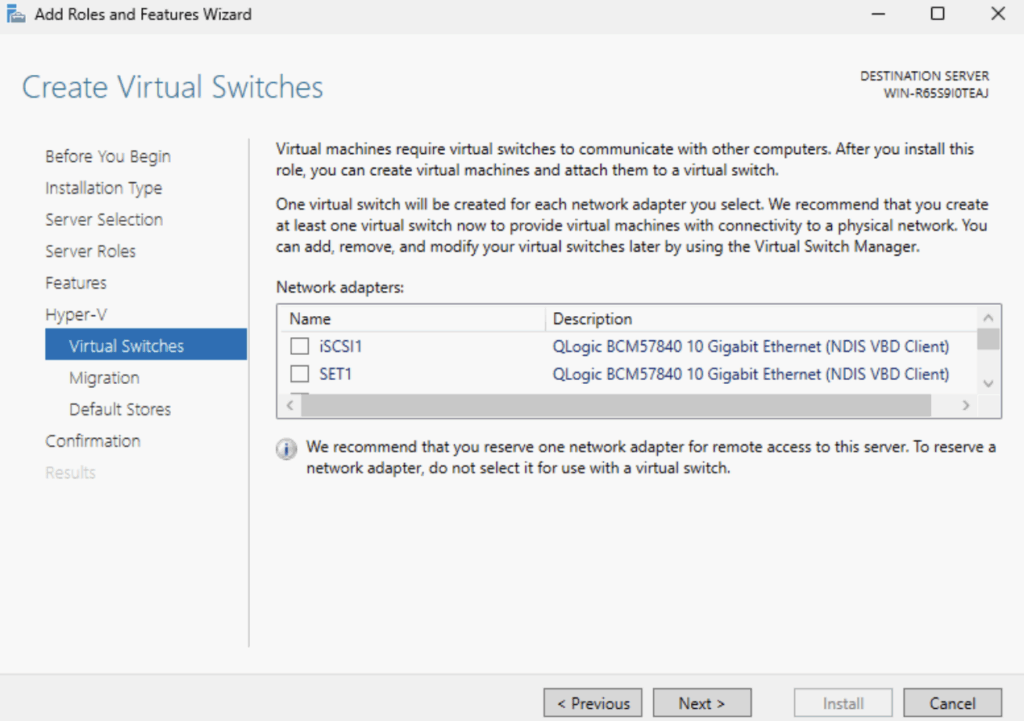
Again, dont click anything, just click Next
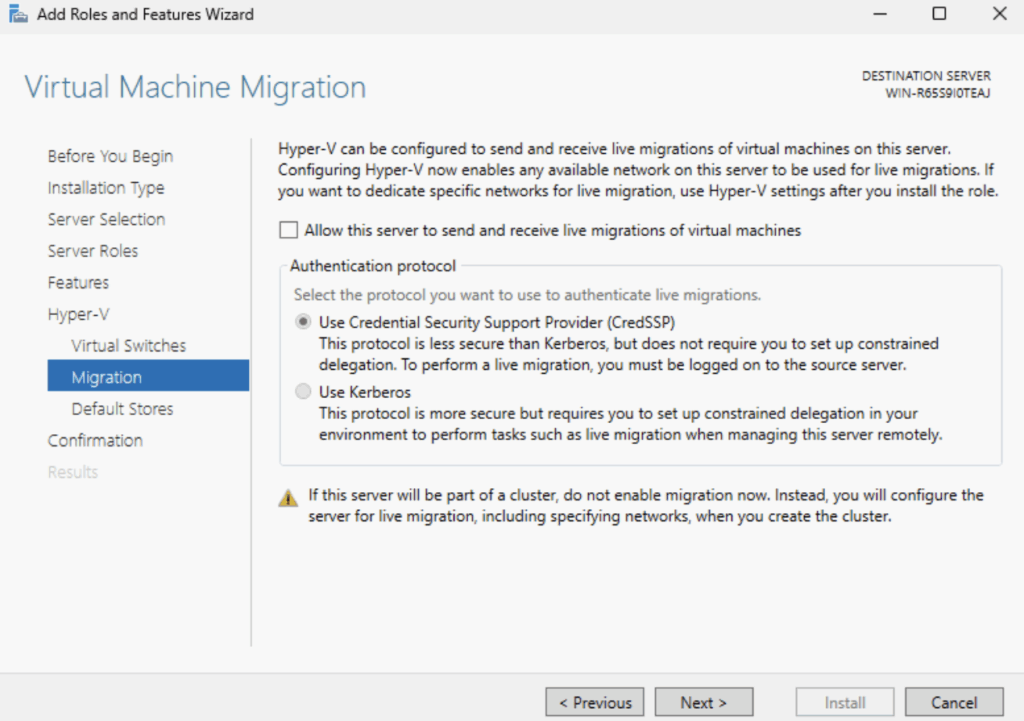
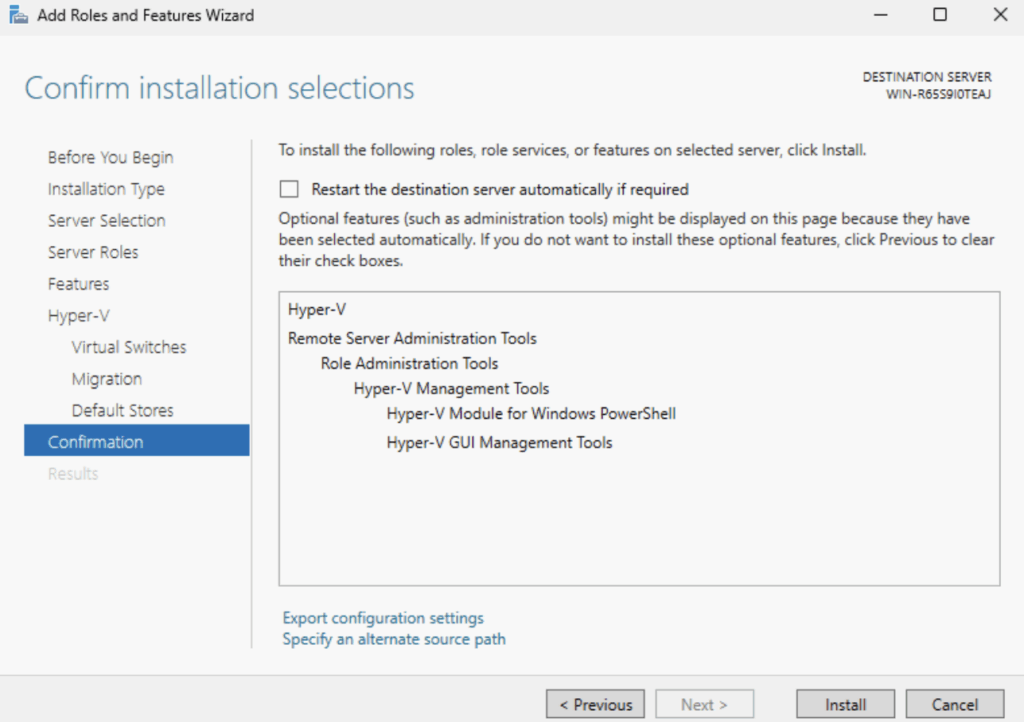
Click Next again
Now click Install
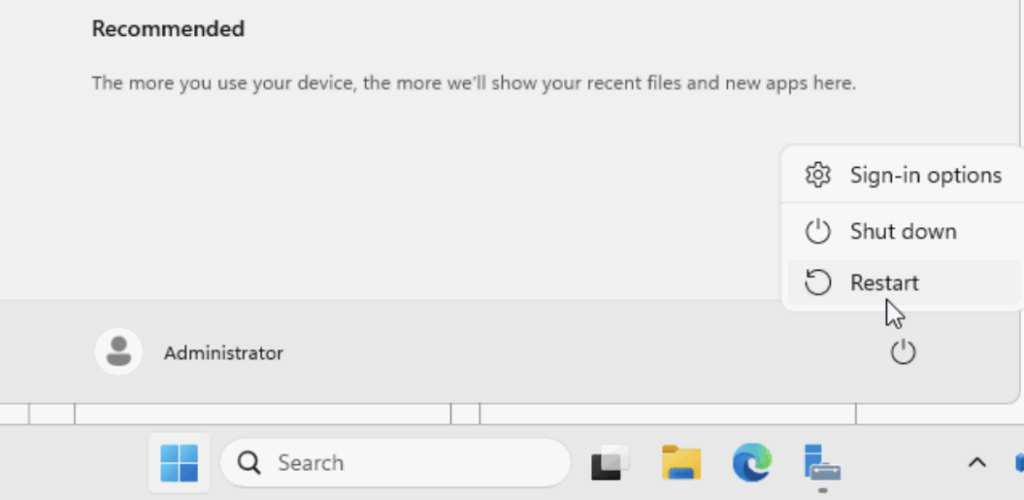
When this is done click Close
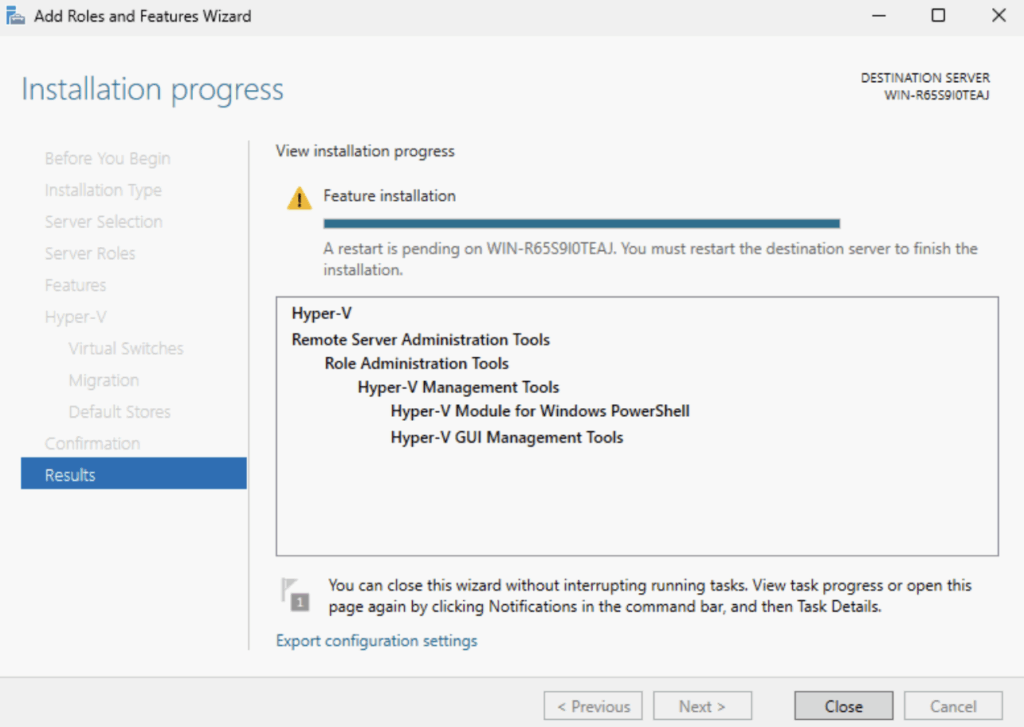
And restart the server from the Windows Menu
1.3.2 – PowerShell
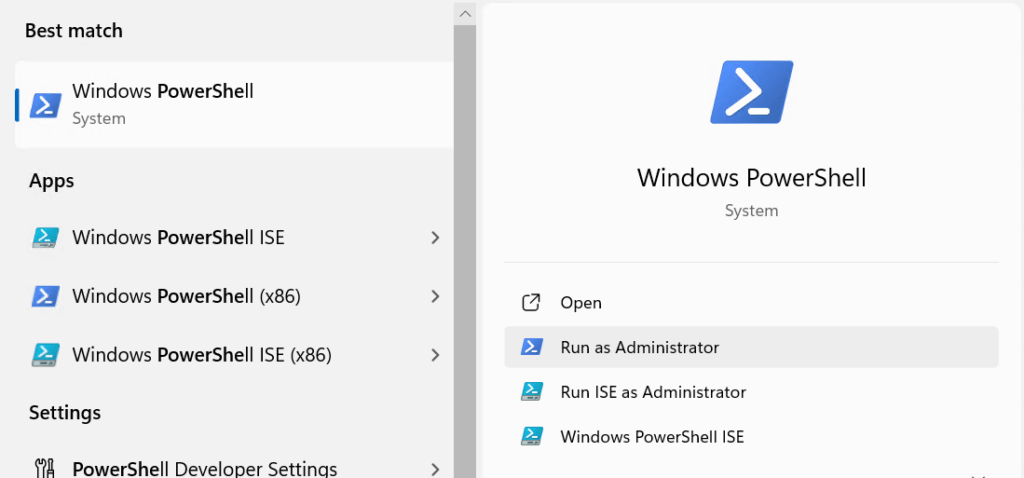
We can install Hyper-V with a single command in an administrative PowerShell window
To open it, search for PowerShell and click Run As Administrator
Then run
Install-WindowsFeature -Name Hyper-V -IncludeManagementTools -Restart1.4 – Setting Up The SET Switch
As we dont have networking, with our Management network being tagged, we need to create the SET switch from your servers IPMI, in my case, the iDRAC
The first thing we will want to do is rename those NICs to something a little easier to understand, open up Control Panel
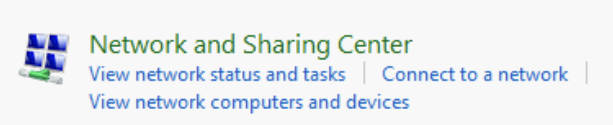
Click Network And Internet

Then Network And Caring Center
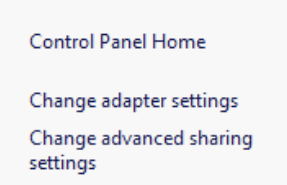
On the right, click Change Adapter Settings on the left
Right click the NIC and click Rename
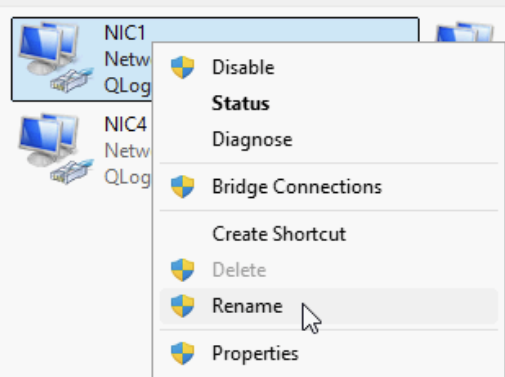
My NIC oddly wouldnt open the rename box, so if you click the NIC and then press F12 this allows you to rename it
From the switch setup section we said NIC1/2 were for the set switch, so I called this one SET1

And repeated on NIC2 to call it SET2

I repeated for the iSCSI NICs and ended up with this

Next lets search for PowerShell and click Run As Administrator

If we then run
Get-NetAdapterWe can see our NICs

Now we need to create the management switch and allow the management vNIC to run on it with
New-VMSwitch -Name "<vSwitch Name>" -NetAdapterName "NICx","NICy" -EnableEmbeddedTeaming $true -AllowManagementOS $falseSo for my server I ran
New-VMSwitch -Name "VM-Host-SET" -NetAdapterName "SET1","SET2" -EnableEmbeddedTeaming $true -AllowManagementOS $falseThe output will look something like this

Now we need to setup the management vNIC and set the VLAN which we can do with this command
Add-VMNetworkAdapter -ManagementOS -Name "<vNIC-Name>" -SwitchName "<SET-Switch>"
Set-VMNetworkAdapterVlan -ManagementOS -VMNetworkAdapterName "<vNIC-Name>" -Access -VlanId <VLAN-ID>
So for my setup I ran
Add-VMNetworkAdapter -ManagementOS -Name "Management-VM-Host-SET" -SwitchName "VM-Host-SET"
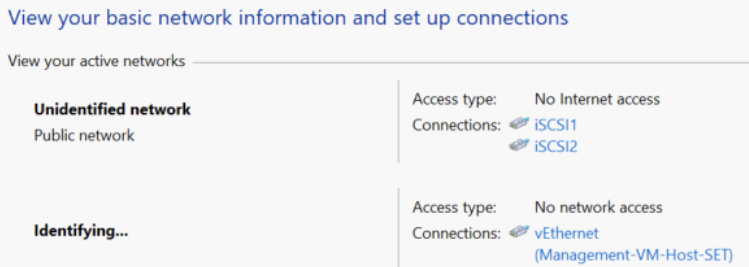
Set-VMNetworkAdapterVlan -ManagementOS -VMNetworkAdapterName "Management-VM-Host-SET" -Access -VlanId 30Now our management vNIC is on the right VLAN we can set the IP address from Control Panel back in Network And Internet

Then click Network And Sharing Center

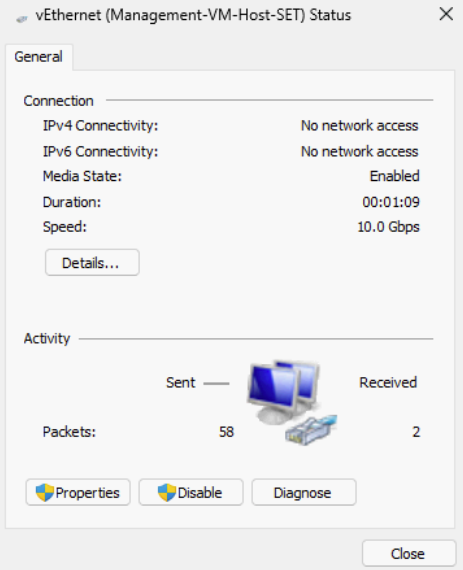
Then select the vEthernet adapter
Click Properties
Double click IPv4
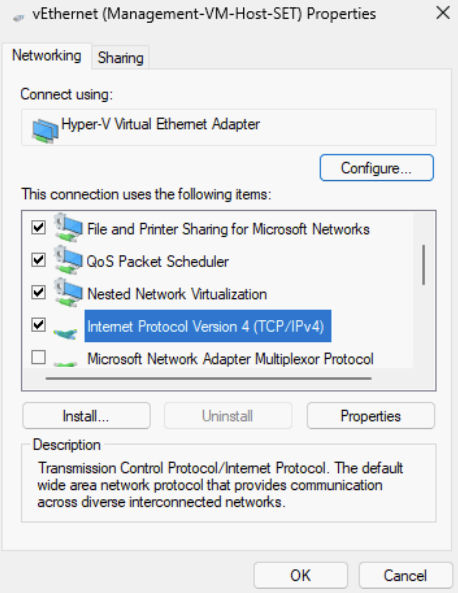
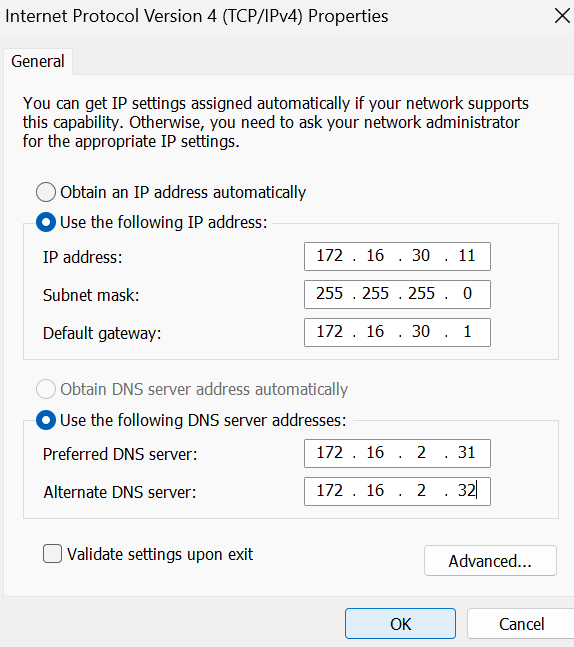
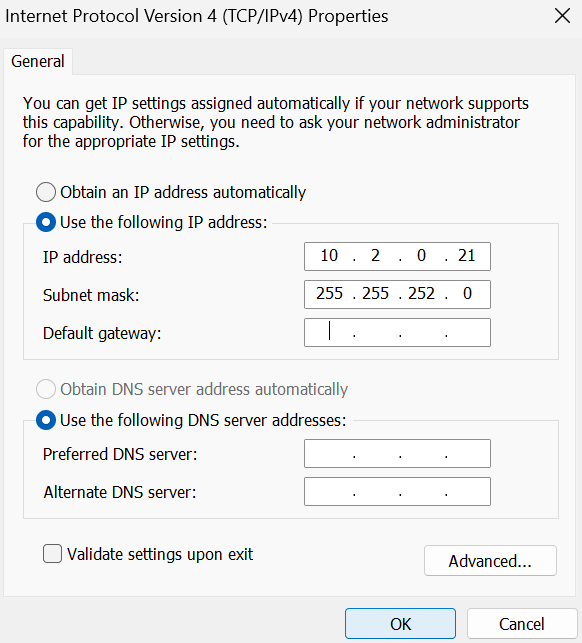
We can then enter our IP information for the host IP, subnet, gateway and DNS servers, then click ok, ok and close all the dialogue boxes
Its worth noting the DNS servers need to be your Windows DNS servers so they can join the domain properly, these are likely your Domain Controllers
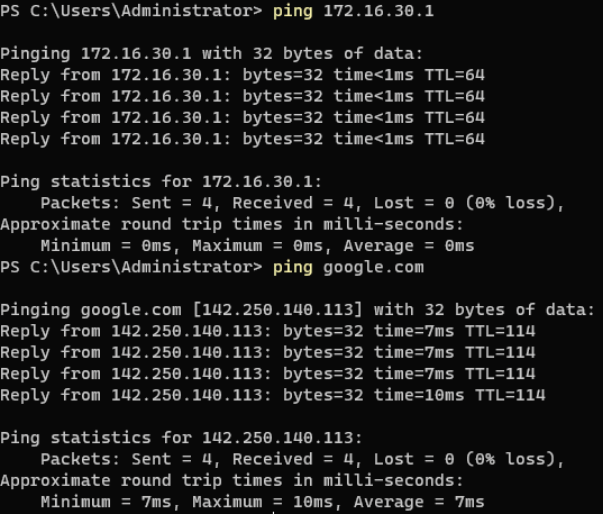
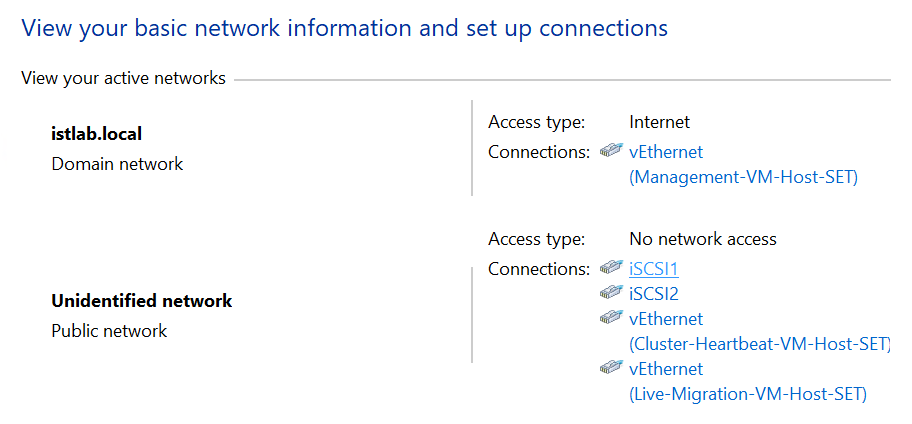
We can now see ping tests are working to the Internet and the Gateway
1.5 – Enabling RDP
We first need to add our server roles, Server Manager should be open, if not you can search for it and open it
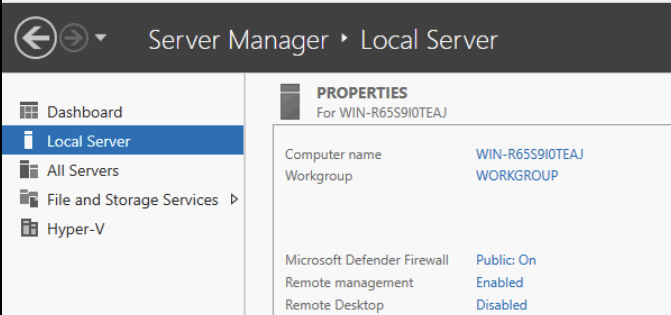
Click Local Server, then the ‘Disabled’ link next to Remote Desktop
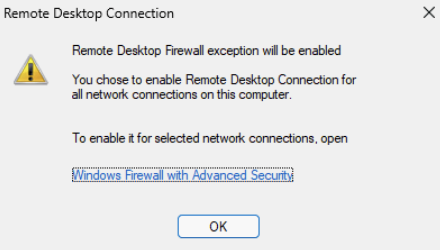
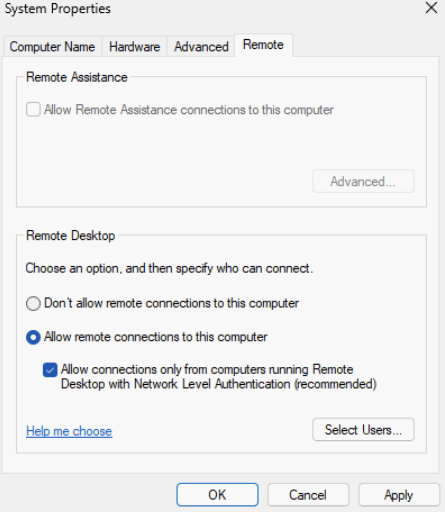
Check the radio button to allow remote connections
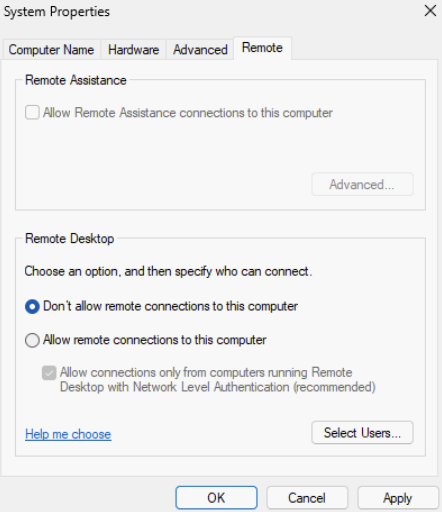
And click ok here
Then click ok
1.6 – Adding Cluster Networks
Now we have the management configured and RDP enabled we can connect that way to set the rest of the vNICs up
We now need a Cluster Heartbeat network, so I can run the following in PowerShell
Add-VMNetworkAdapter -ManagementOS -Name "<vNIC-Name>" -SwitchName "<SET-Switch>"
Set-VMNetworkAdapterVlan -ManagementOS -VMNetworkAdapterName "<vNIC-Name>" -Access -VlanId <VLAN-ID>
My environment needs the VLAN to be 32 for this network, the vNIC name I wanted was Cluster-Heartbeat-VM-Host-SET and my SET switch is called VM-Host-SET, so I ran the following
Add-VMNetworkAdapter -ManagementOS -Name "Cluster-Heartbeat-VM-Host-SET" -SwitchName "VM-Host-SET"
Set-VMNetworkAdapterVlan -ManagementOS -VMNetworkAdapterName "Cluster-Heartbeat-VM-Host-SET" -Access -VlanId 32
For the Live Migration network, its the same command with the corresponding name/VLAN, so I ran
Add-VMNetworkAdapter -ManagementOS -Name "Live-Migration-VM-Host-SET" -SwitchName "VM-Host-SET"
Set-VMNetworkAdapterVlan -ManagementOS -VMNetworkAdapterName "Live-Migration-VM-Host-SET" -Access -VlanId 31
We can verify all this by running
Get-NetAdapter
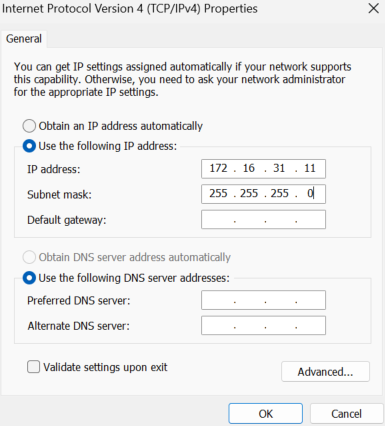
And like with the management networks we can click the vEthernet adapters in the Network And Sharing Center to apply their IPs

Now as these are not routable networks, and Windows doesnt want multiple NICs with gateways, we will configure IPv4 without a gateway or DNS is also not required, like this as an example for my Cluster Heartbeat network

And this for Live Migration
Now we can ping our Cluster Heartbeat and Live Migration IPs between the hosts to confirm this is working
Depending on your domain policies you may need to disable the firewall on Windows to test this, but it must be re enabled after
1.7 – Joining the Domain And Setting The Hostname
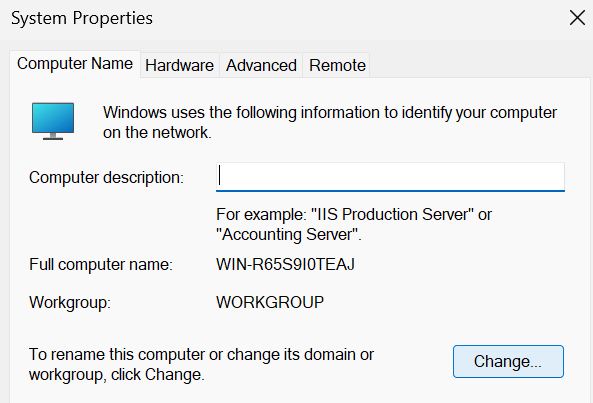
Now we have the networking sorted for Management, and the Cluster networks, we can get the server added to our DC, and set the hostname from the default
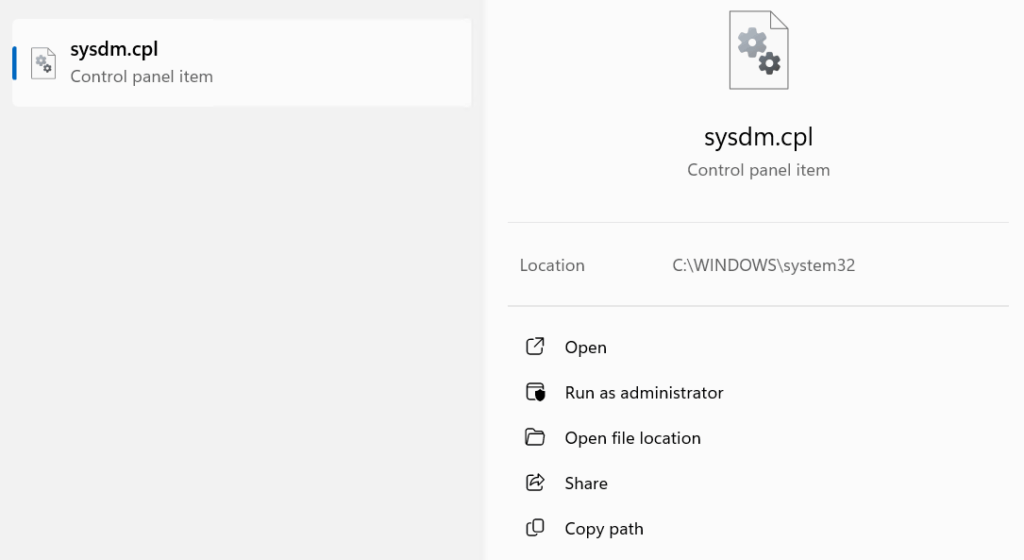
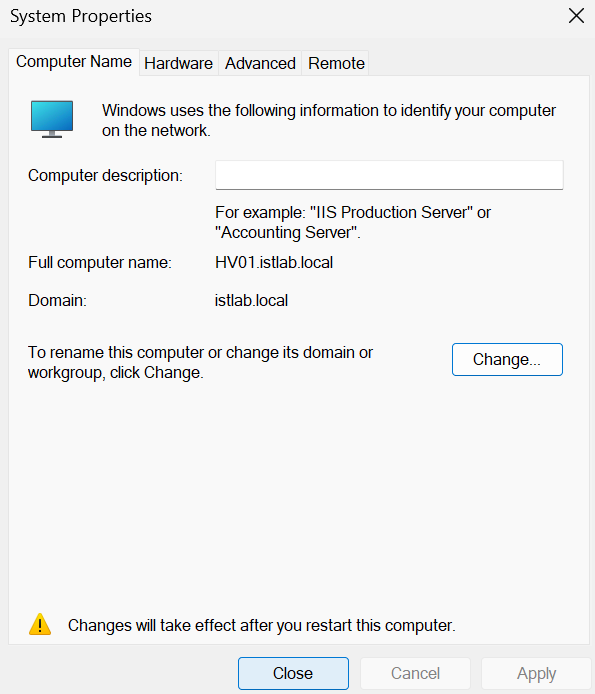
Search for and open sysdm.cpl
Click Change
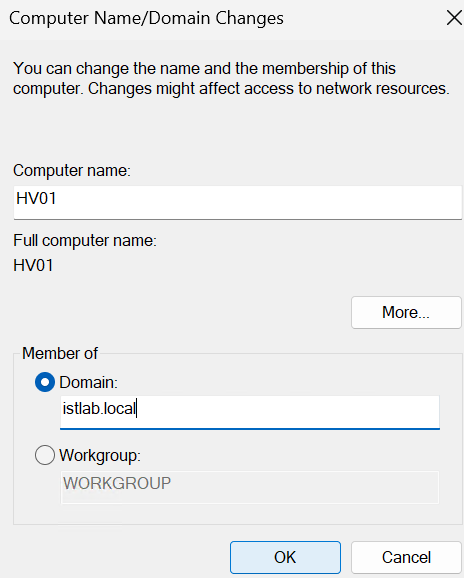
Enter the new hostname and your domain and click ok
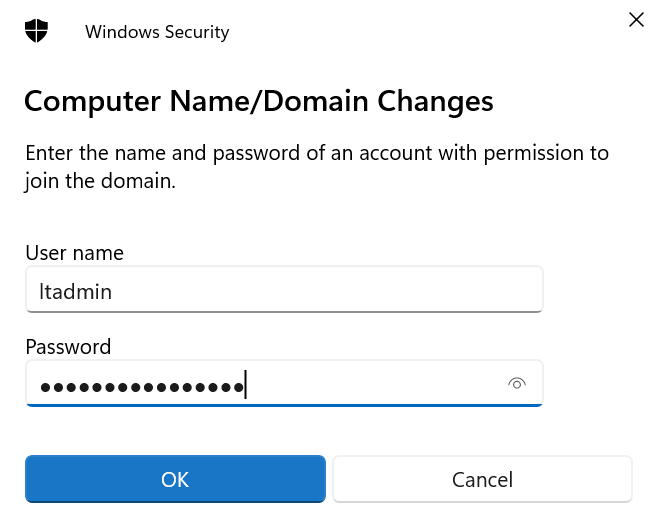
Enter domain admin credentials and click ok
When it joins the domain click ok here
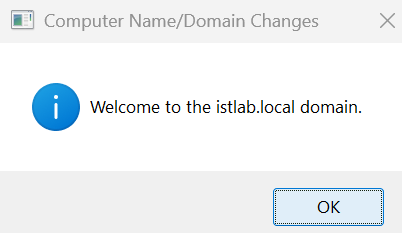
Click ok again
Click Close
Then Restart Now
1.8 – Installing The Remaining Roles
We now need the remaining roles to be installed for the cluster, which are
- MPIO
- Failover Clustering
1.8.1 – GUI
Open Server Manager
In the top right, click Add Roles And Features
Click Next if you have this page
Click Next again
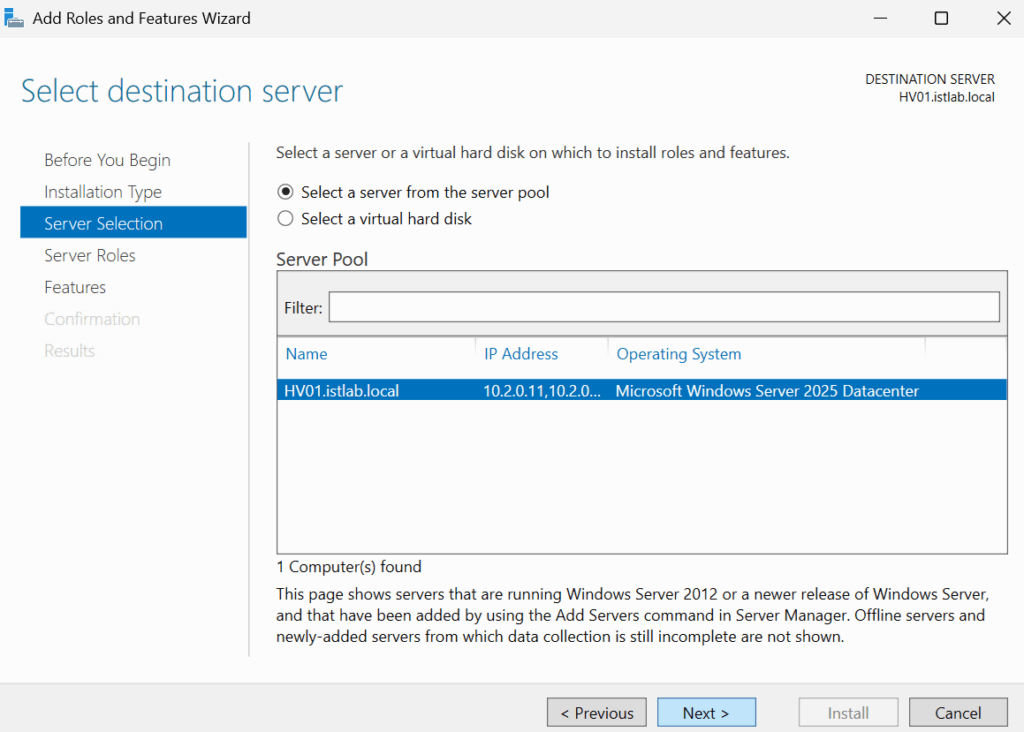
Select the server and click Next
Click Next here
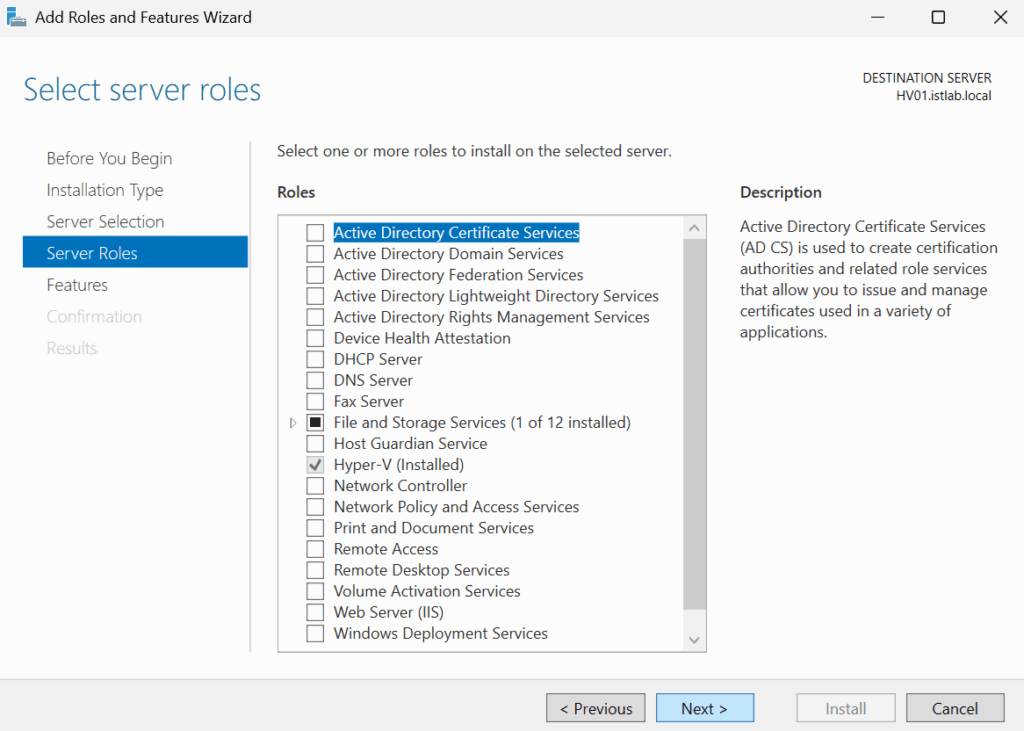
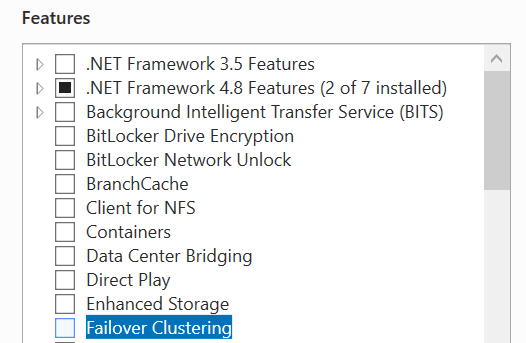
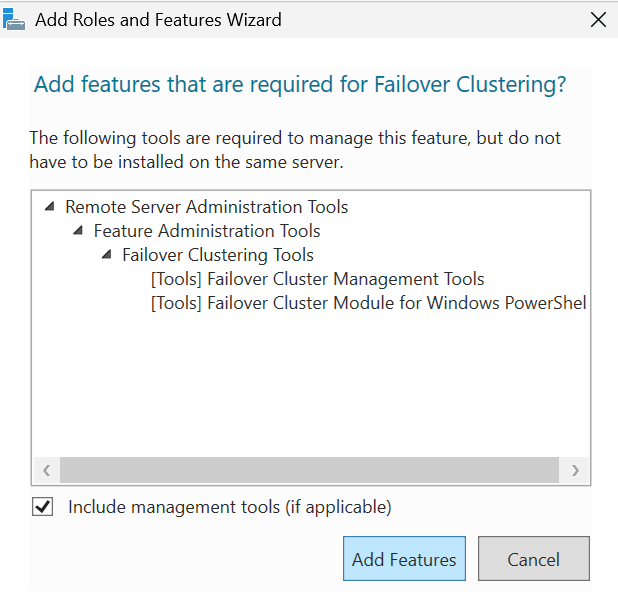
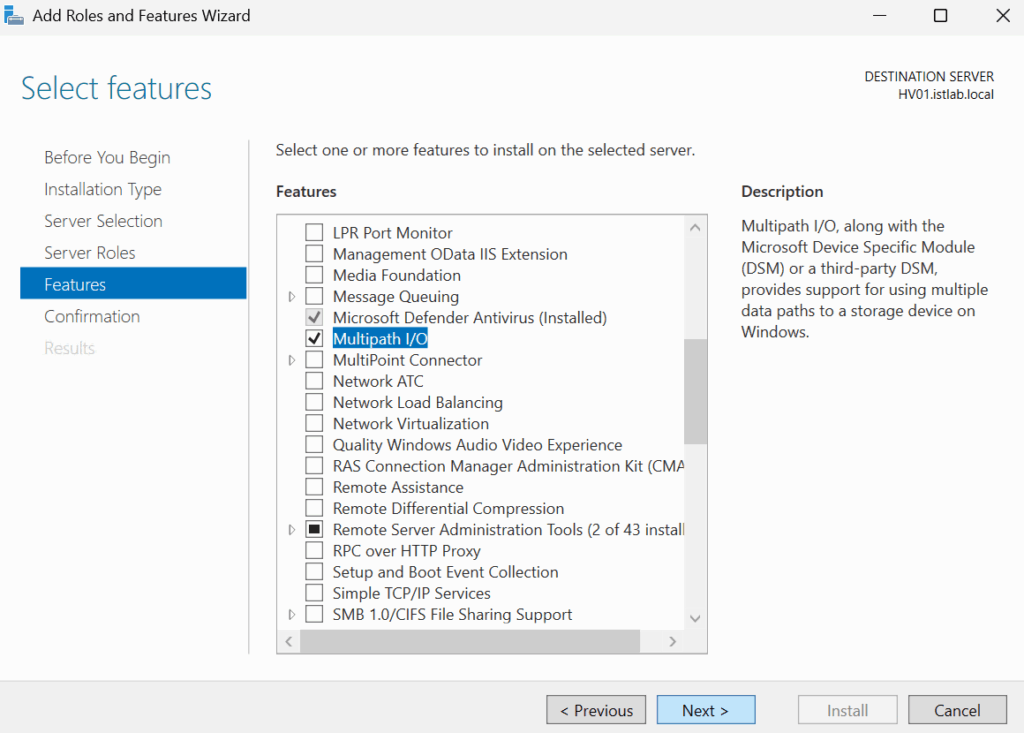
Check Failover Clustering
Click Add Features
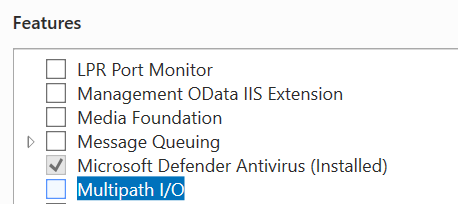
Check Multipath I/O
Then click Next
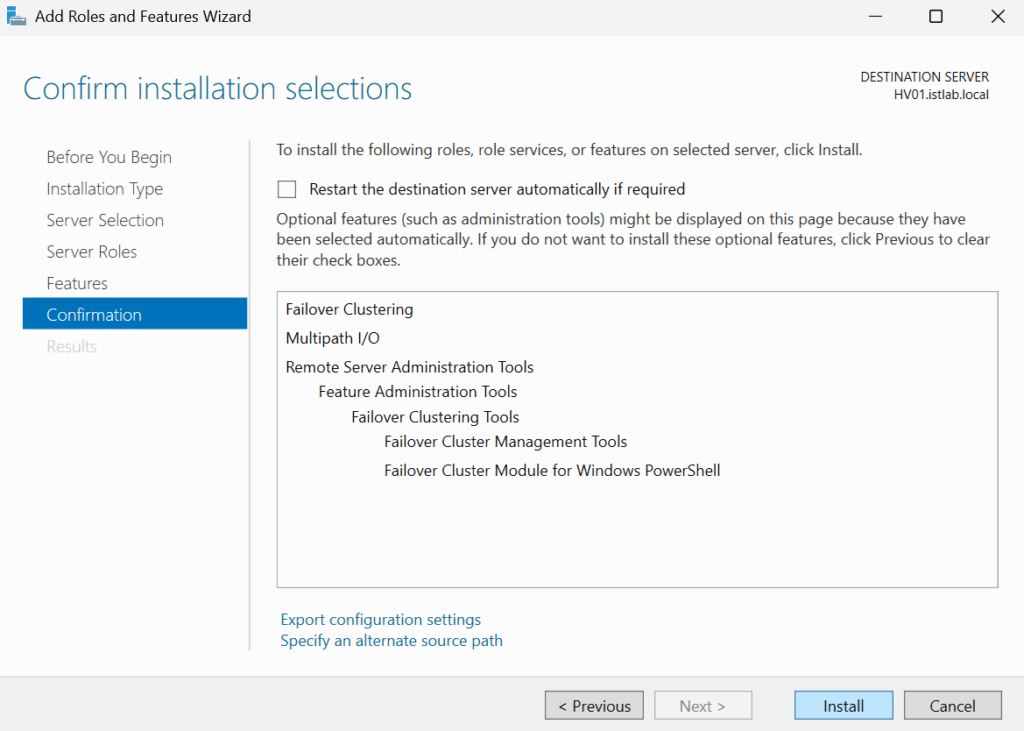
And click Install
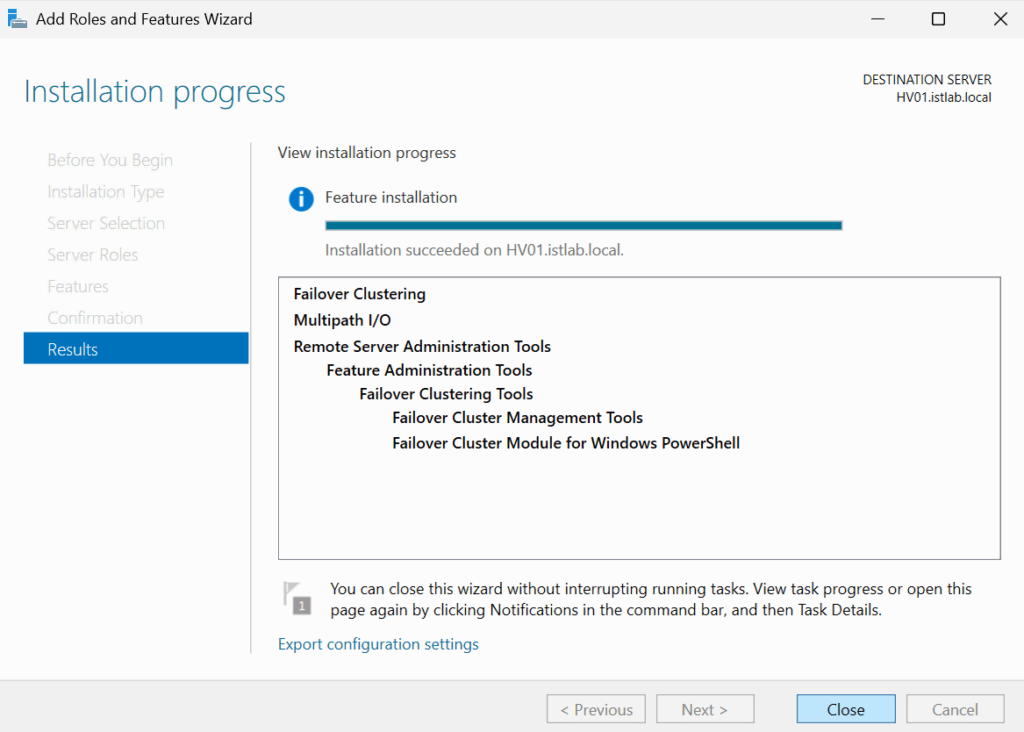
When thats done click Close
1.8.2 – PowerShell
We can run the following command in PowerShell to add these
Install-WindowsFeature -Name Failover-Clustering, Multipath-IO -IncludeManagementTools1.9 – iSCSI Networking
Now we need the iSCSI networking setup, we went through the switch configuration with just a native/access VLAN for the ports now we need to add the server IPs for it
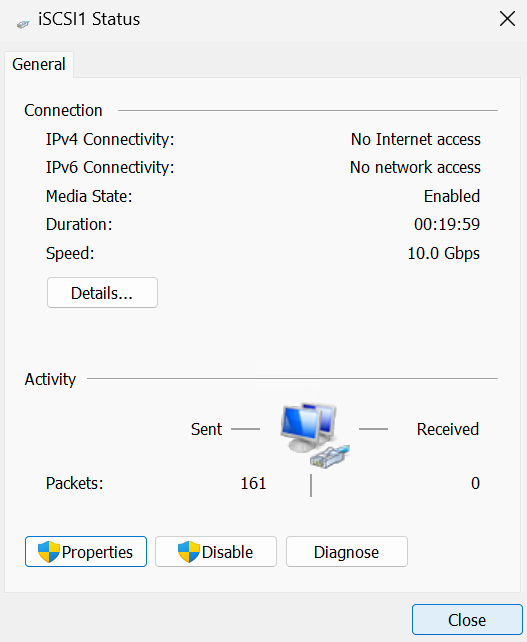
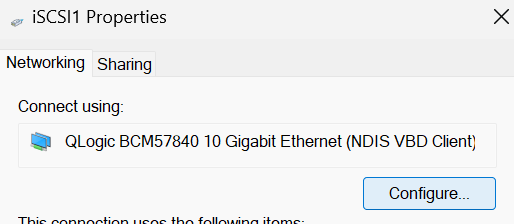
Back in Control Panel under Network And Internet/Network And Sharing Center we can click our iSCSI NICs to edit them, lets start with iSCSI1
Click Properties

Double click IPv4
Add an IP on the iSCSI network for this NIC
My iSCSI network is large in the lab, but is running on
10.2.0.0/22
We dont need DNS or a gateway, this should be a flat L2 network with no routability to it, most are configured as a /24
Once its set click ok

Click ok again
Then Close
And repeat for iSCSI2, this wants a separate IP, as my SAN doesnt require two networks, sometimes referred to a fault domains, but one flat network, iSCSI2 is on the same network, if your SAN has IPs on two VLANs you likely want an IP in the second subnet here, and the port will need to be set on that VLAN
Here was my config
My SAN has 4 IPs, and if I ping them we can see thats working, so we know the IPs are configured correctly

Now there is one more change we need to make around MTU, and if you havent got your switches on all iSCSI ports, SAN ports, and the SAN its self using an MTU of 9000, do not change this, only set this is if you know what you are doing
Click the NIC and then click Properties again, but this time click Configure
Click Advanced/Jumbo Packet and set the drop down to 9014 then click ok
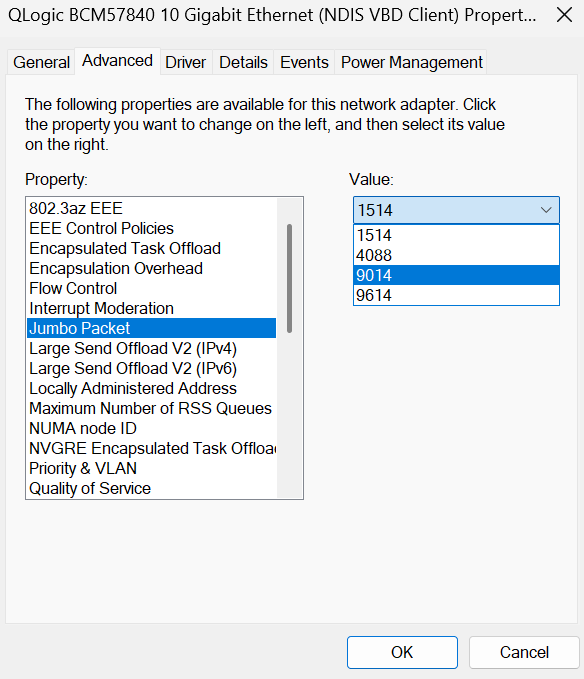
And repeat on iSCSI2
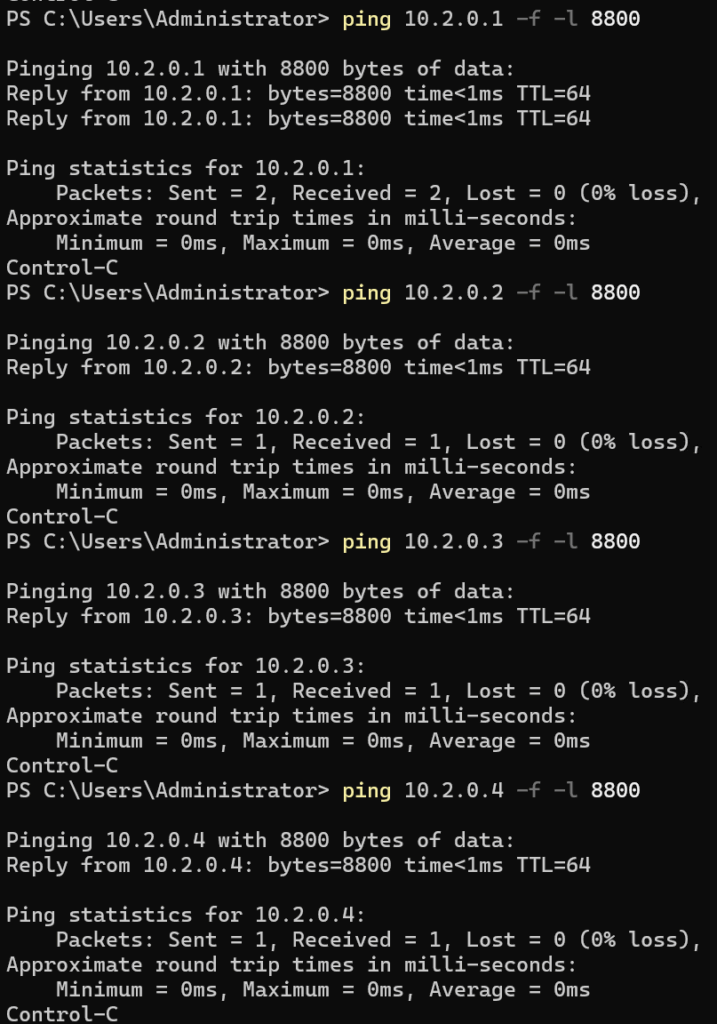
Now we want to test jumbo frames are working, we can use a ping packet size greater than 1500, but I will use 8800 since its right at the top of 9000, so ensures we dont have odd packet fragmentation is lower MTU values
To do this in powershell run
ping <SAN-IP> -f -l <MTU-Size>For I ran the following for all my SAN IPs
ping 10.2.0.1 -f -l 8800
ping 10.2.0.2 -f -l 8800
ping 10.2.0.3 -f -l 8800
ping 10.2.0.4 -f -l 8800
And the output was this, so we know iSCSI will work at higher MTUs
1.10 – Adding iSCSI Disks
This wont walk you through how to setup and provision volumes from your SAN, as there are many different vendors and the process is similar but different for each of them, this will be how to access those disks
But we will first point Windows at the SAN, this usually pre populates the initiator on the SAN making things a lot easier to then configure the SAN
Then configure the SAN and Windows can pick the disks up
So at the point I have done zero configuration for Volumes on my SAN
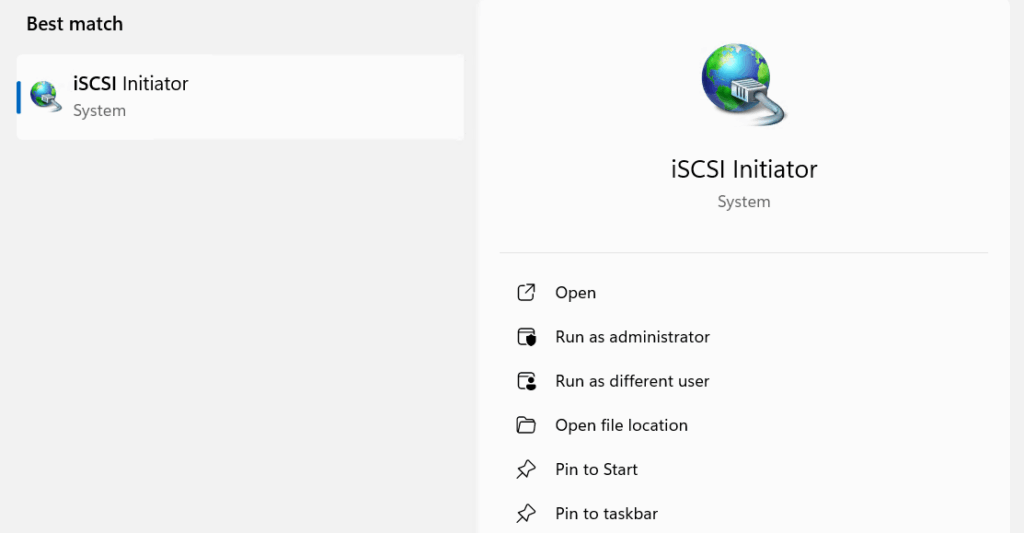
Open the iSCSI Initiator software
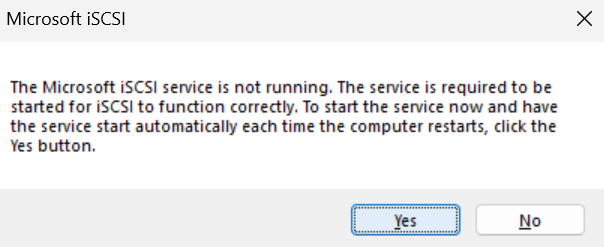
Click Yes here
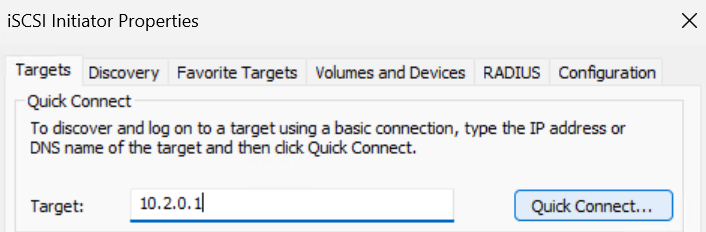
In the Targets box add the SAN IPs, your SAN may have multiple like mine, or a VIP address where if you connect to that everything else is populated
When you have your SAN IP added click Quick Connect
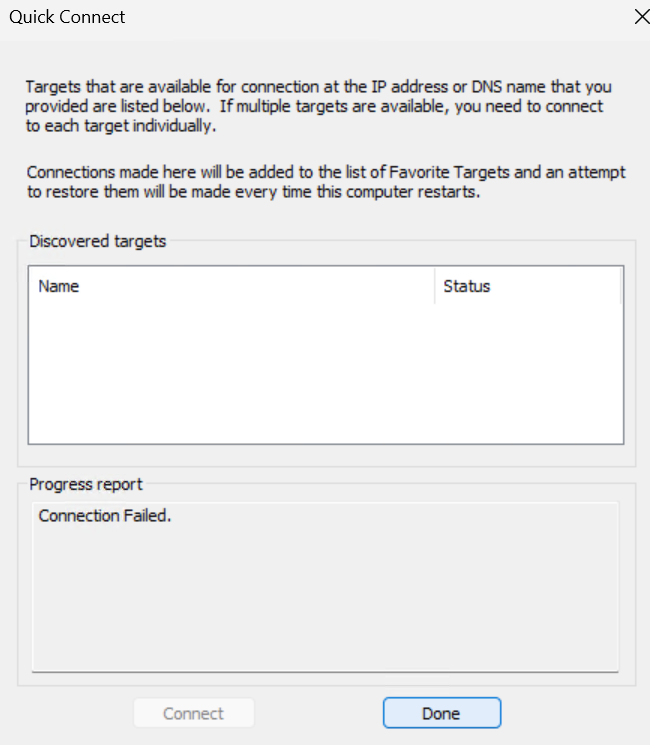
This will hang in Windows, as we have no volumes mapped
We can click Done here, this should populate the IQN on the SAN
Sadly, my SAN doesnt do this, most will however
So I will walk you through what I did on mine, now as I dont have a conventional SAN, Eg MSA/PowerVault/PowerStore/Alletra/Pure, I am using the iSCSI service on my VMware vSAN, so this part wont show you how to configure those SANs but I have included the steps as the general principle is the same for all SANs
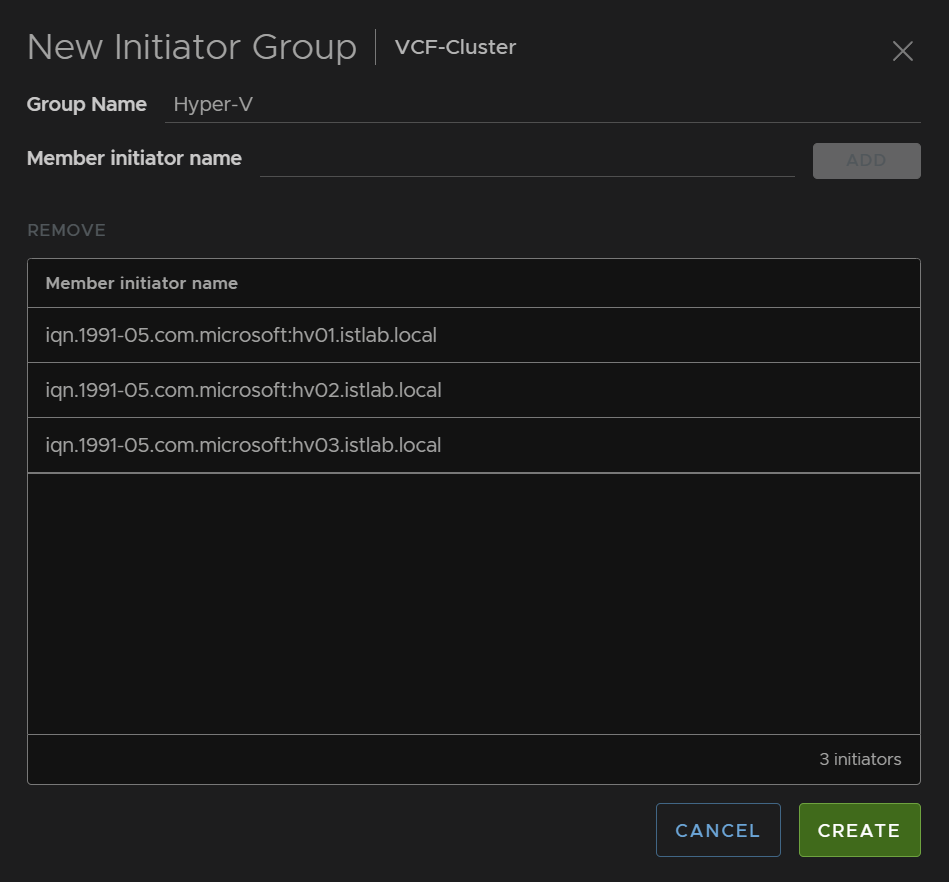
First we need to create an initiator group, now if you point Windows at the SAN these will be auto generated, mine arent so I will manually create the group and add the initiators
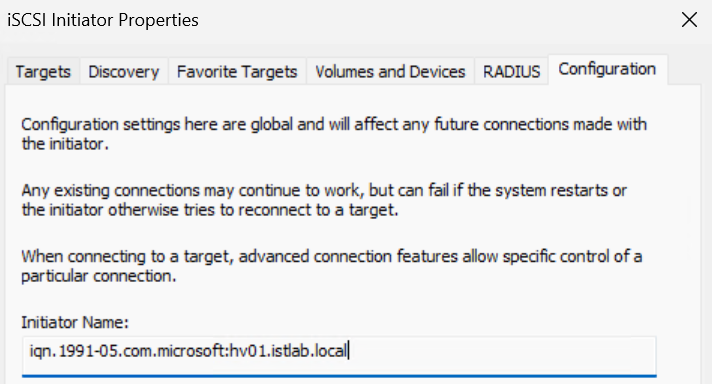
We can grab the Initiator Name from Configuration
Then I create the group and add the initiators, you should be able to select them, but I added mine manually, either works, what is important is the group contains the imitator names exactly as you seem them in Windows
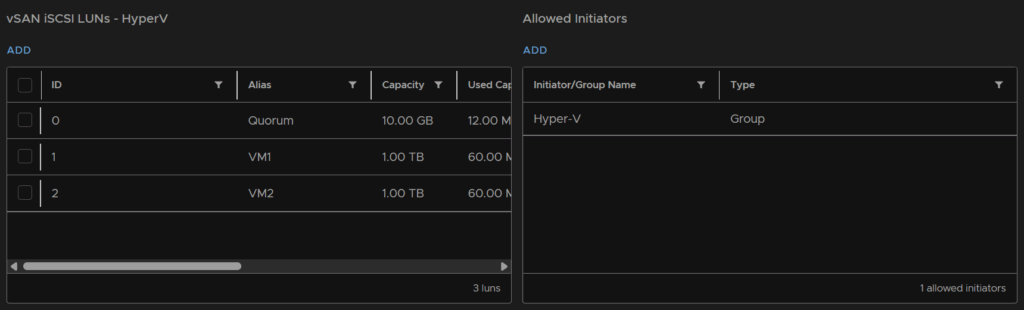
We then create some volumes, I have a volume group, we need a minimum of two disks
- Quorum – 10GB
- VM Data Disks
The VM data part can be any size, though I recommend more smaller ones for better performance, you can add however many of these you like at a time, I am using two as an example
Then you add the host imitator group we create earlier to this volume group, or the individual volumes if you didnt use a group
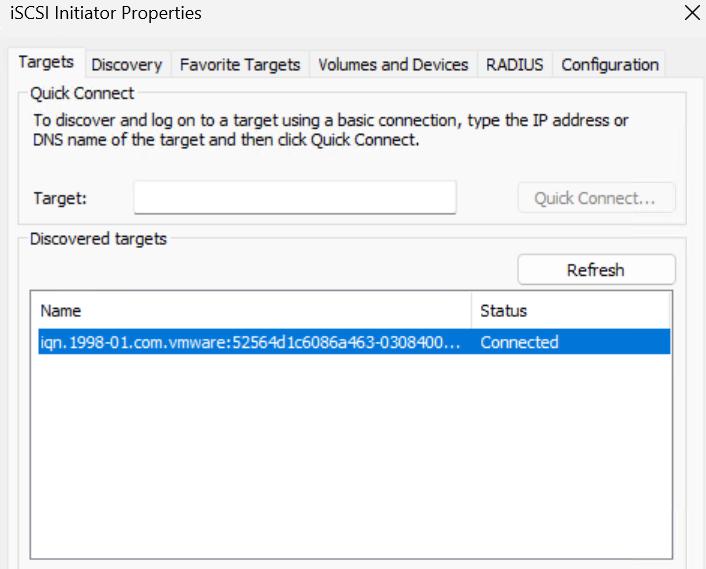
Now I filled that out on my SAN Windows has already connected to my SAN initiator
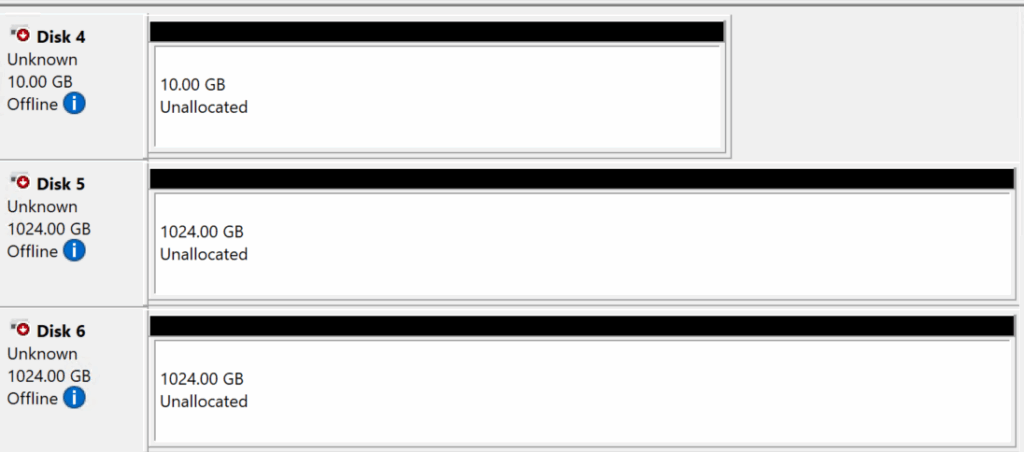
And checking in disk manager my SAN disks are there
You should notice that the disks are duplicated in
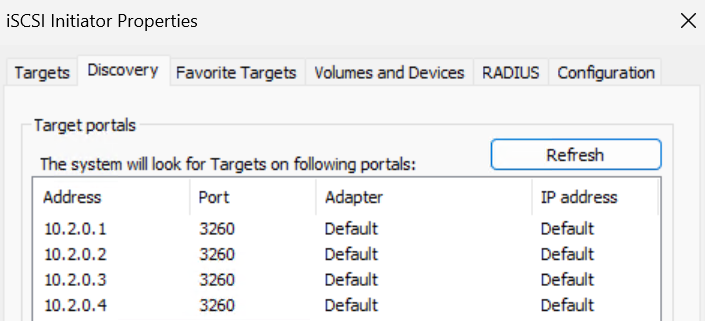
Now, if your SAN multiple IPs and not a VIP, add those in quick connect as well
Under Discovery I have all my SAN IPs as I dont have a VIP
1.11 – Enabling MPIO
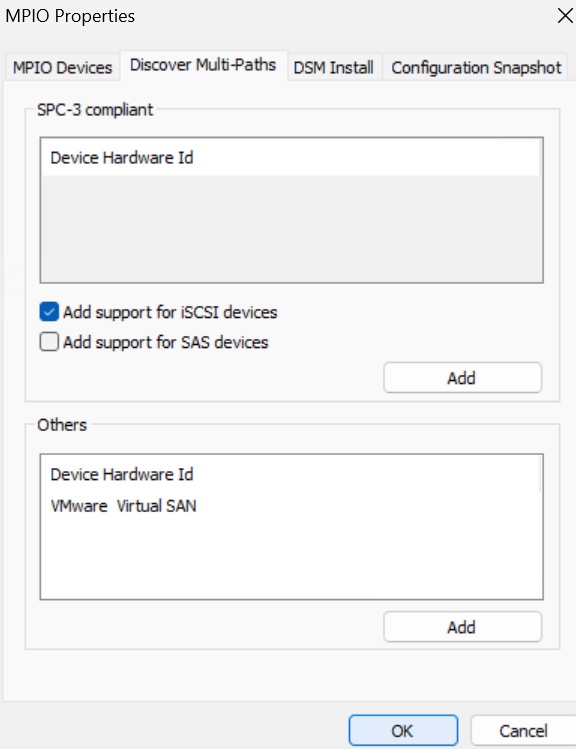
MPIO is how we fix the duplicated disks, as there are multiple paths to the disks they are duplicated, we need to tell Windows that there are multiple paths and they should still be treated as one disk
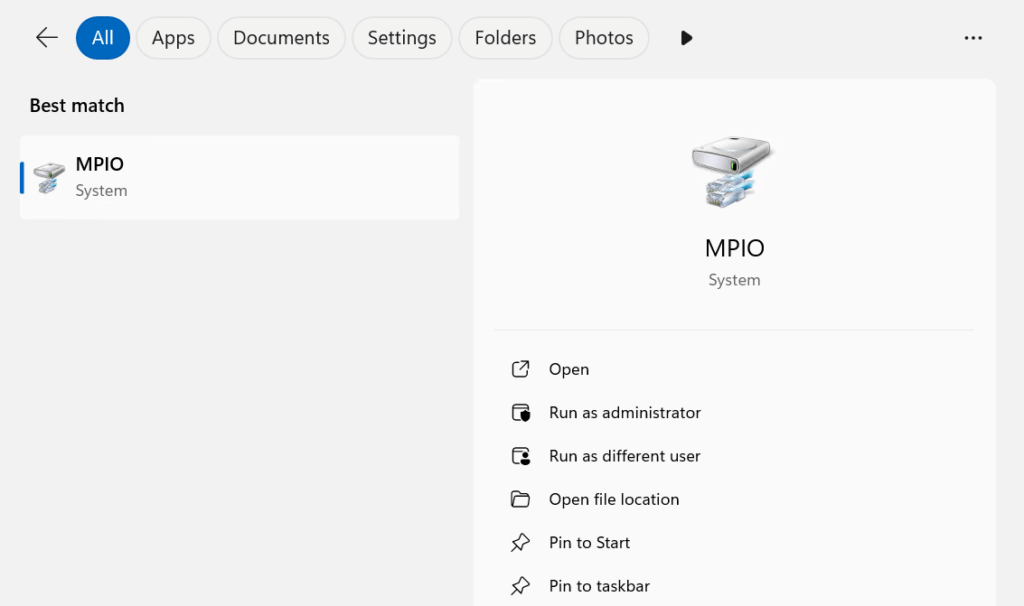
Search and open MPIO
Click the Discover Multi-Paths tab and check the box to add support for iSCSI devices and click ok
2 – Domain Configuration
2.1 – Setting Up An OU
Before we can start creating the cluster we need an AD OU, the cluster object will be in the same OU as the Hyper-V servers so its important we sort this first
Where you put this is entirely up to you, I am putting this in Lab Computers/Servers, and in there I will right click the last OU click New/Organisation Unit
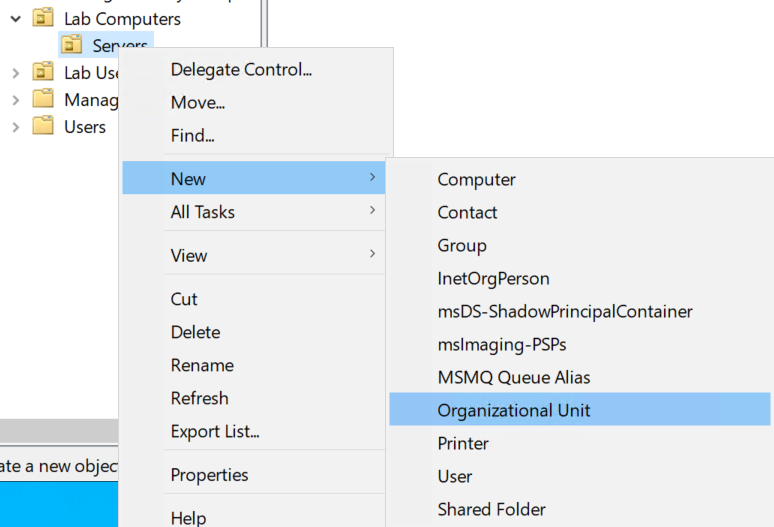
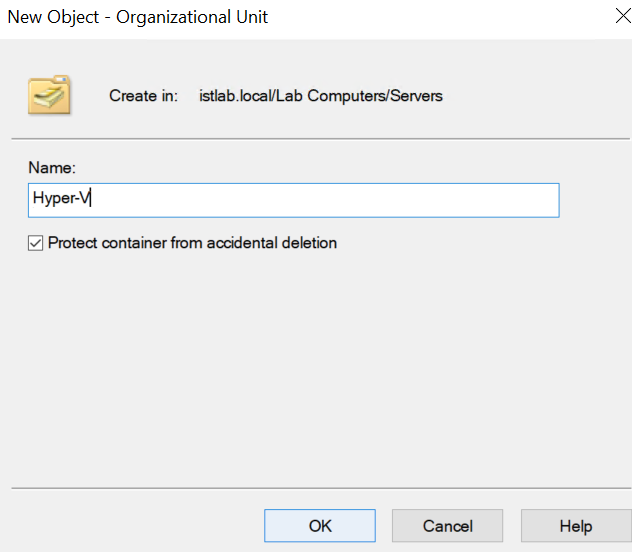
Give it a name, as I only have one Hyper-V cluster I called mine Hyper-V, you may want to create that OU and if you have multiple clusters create another OU beneath for each cluster
When you are done click ok
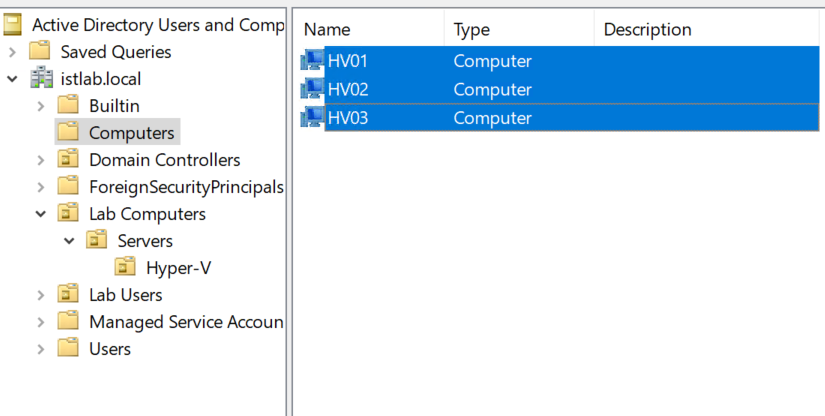
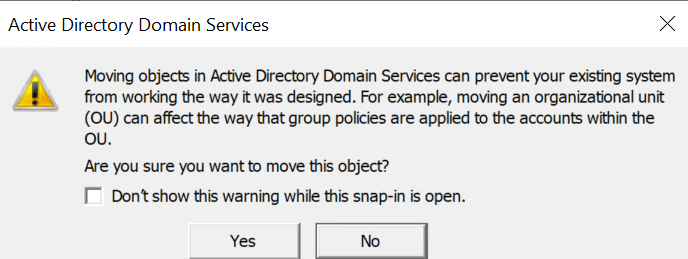
Now all the Hyper-V hosts will be the default OU, Computers, when you join machines, select them all and drag them into the new OU for this cluster, in my Case Hyper-V
Bare in mind, all GPOs that OU inherits will be applied to these servers
And click Yes
2.2 – Prepping The Cluster Object
Now we have our OU we need to prep the cluster computer object to avoid some validation issues
Right click the OU and click New/Computer
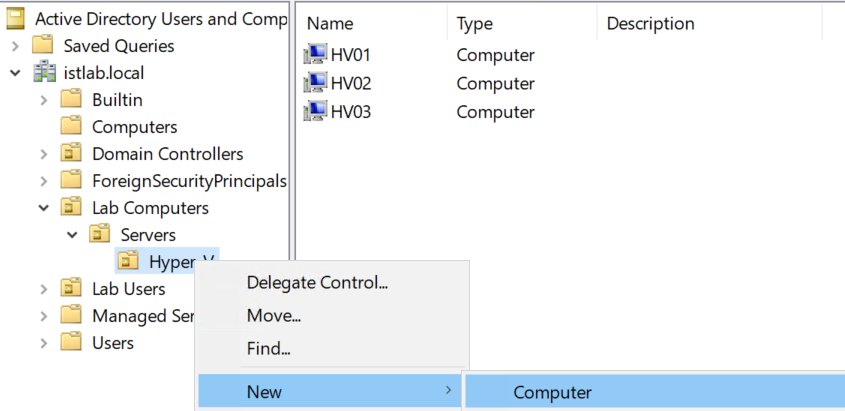
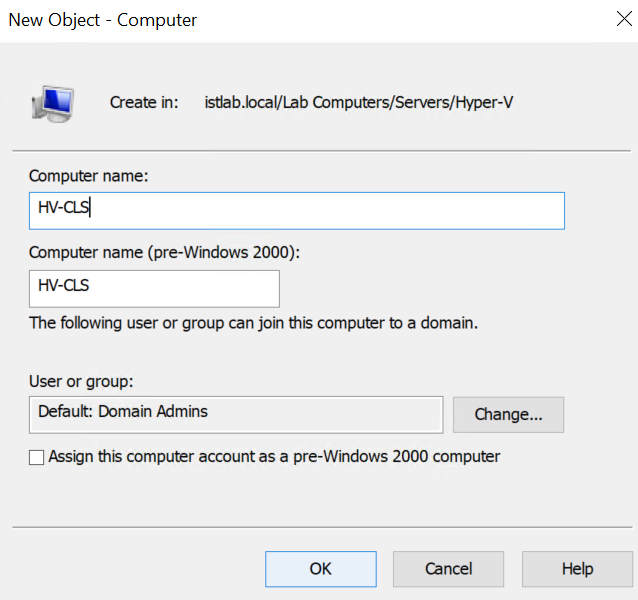
Name this exactly what you plan to call the cluster, this is very important, then click ok
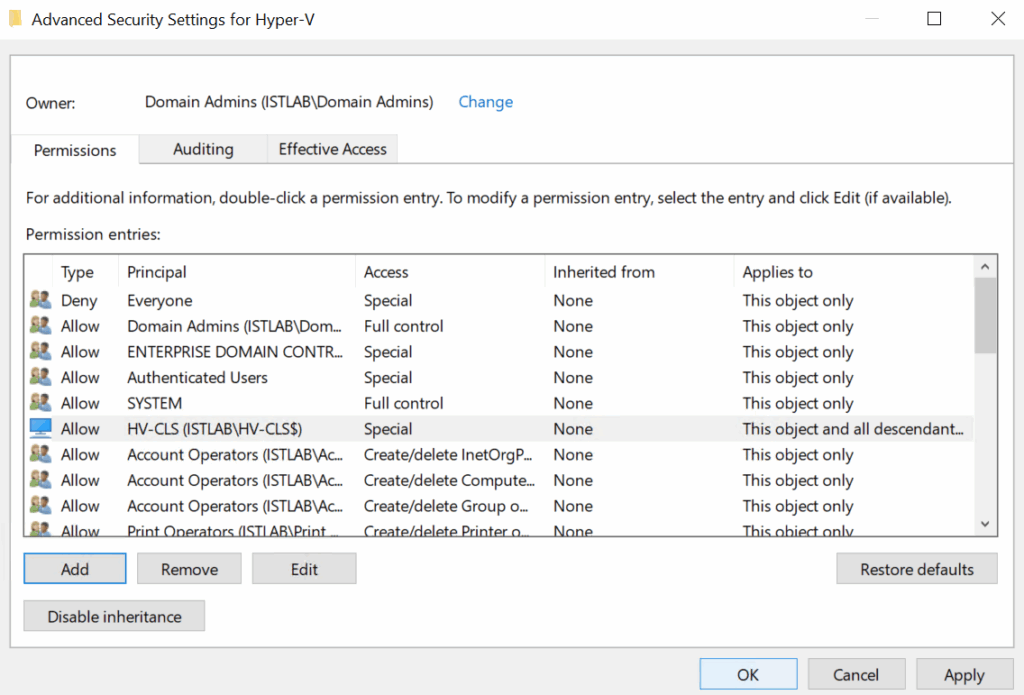
2.3 – OU/Cluster Object Permissions
Now we have our object we need to modify the permissions it has
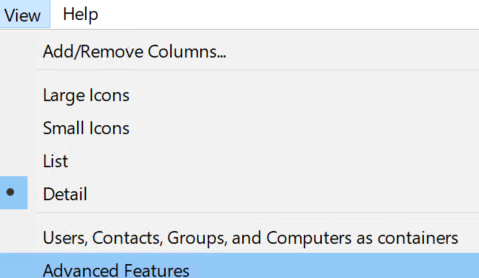
In AD click View at the top, then Advanced Features
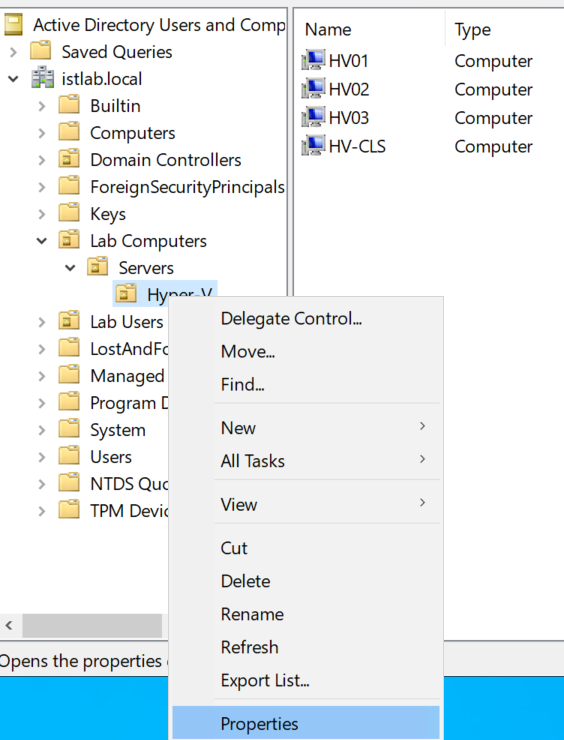
Right click the OU the cluster object is in, then click Properties
Click the Security Tab, then Advanced
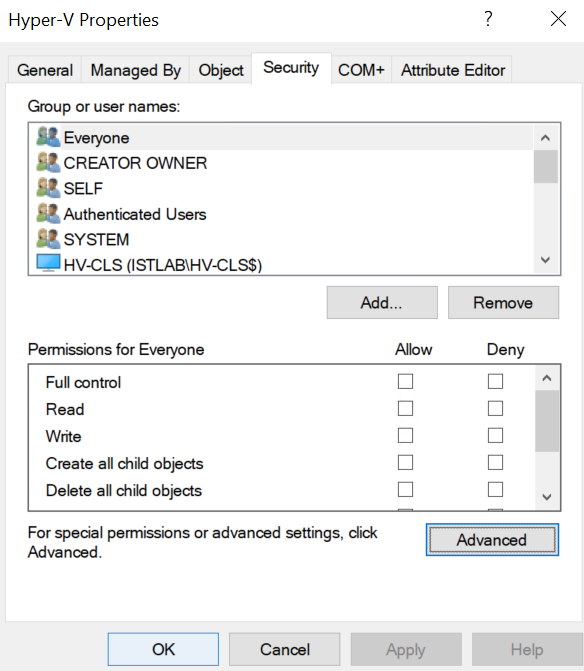
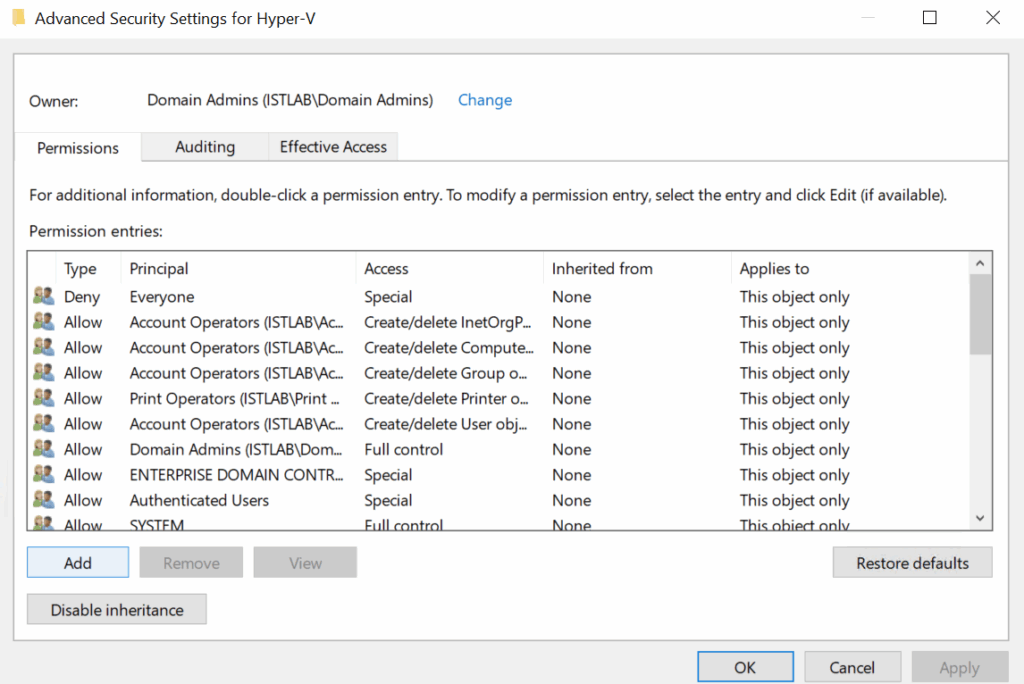
Click Add in the bottom left
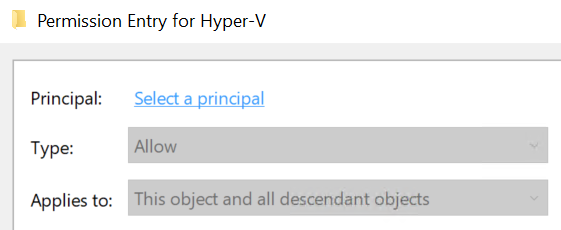
Click Select A Principle
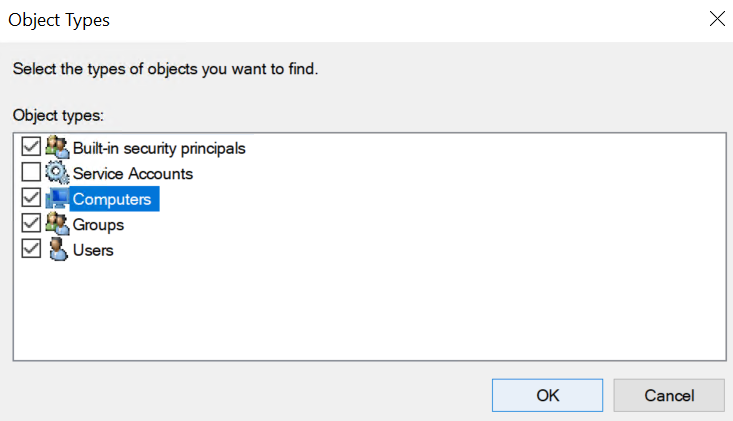
Click Object Types

Check Computers and click ok
Enter the cluster object name, mine is HV-CLS, exactly and click ok
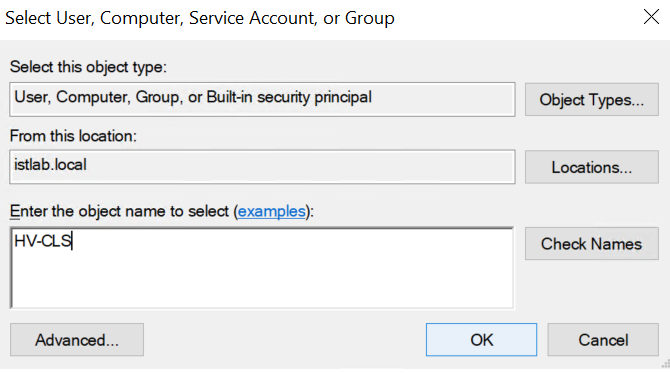
In the bottom left, you may need to scroll down, ensure Create Computer Objects is checked, and ensure, in the top left, Read All properties is checked, then click ok

Click ok again
And ok again
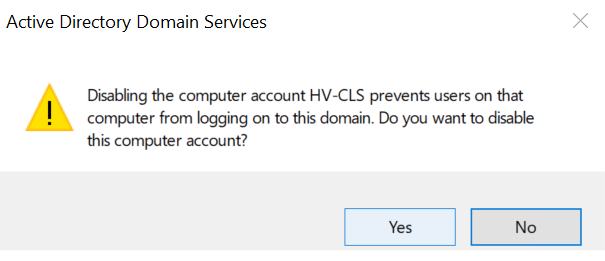
Lastly, we want to right click the cluster computer object and click Disable Account, so it is ready for the cluster creation
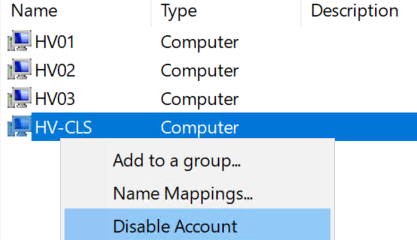
Then click Yes
3 – Cluster Setup
3.1 – Creating The Cluster
Now we have the object prepped, we can setup the cluster, we will need an IP address on the same subnet as the Hyper-V host management
My hosts are on VLAN 30 with these IPs
- 172.16.30.11/24
- 172.16.30.12/24
- 172.16.30.13/24
My host IP will be
172.16.30.10/24
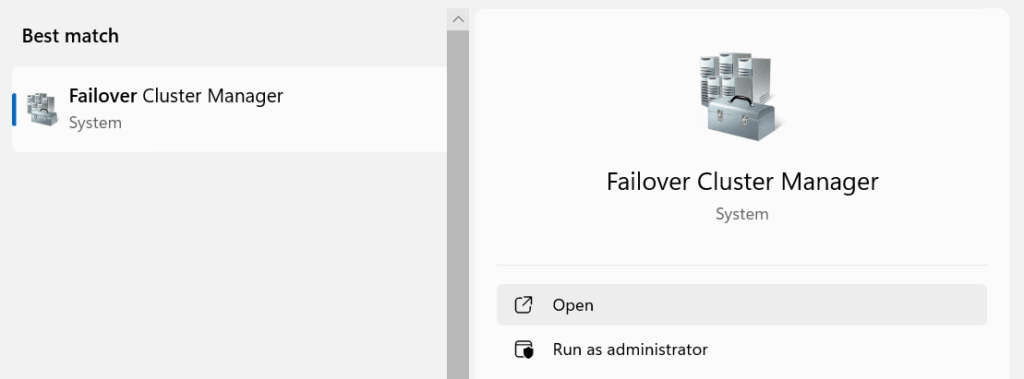
On one of the Hyper-V hosts search and open Failover Cluster Manager
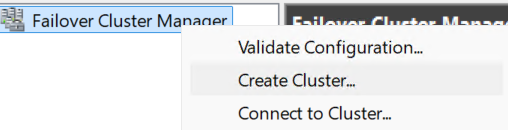
In the top right, right click Failover Cluster Manager and click Create Cluster
Click Next here
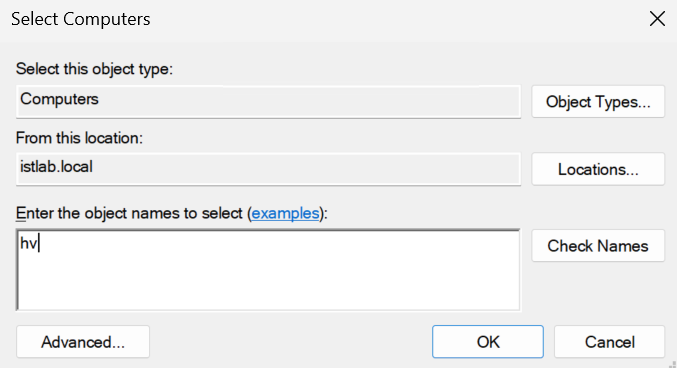
Click Browse
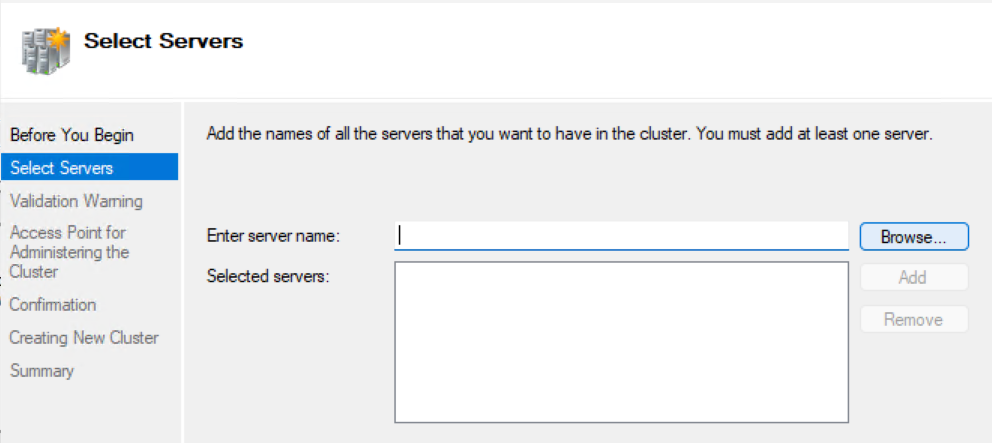
All my hosts start with HV, so I put that in then clicked Check Names
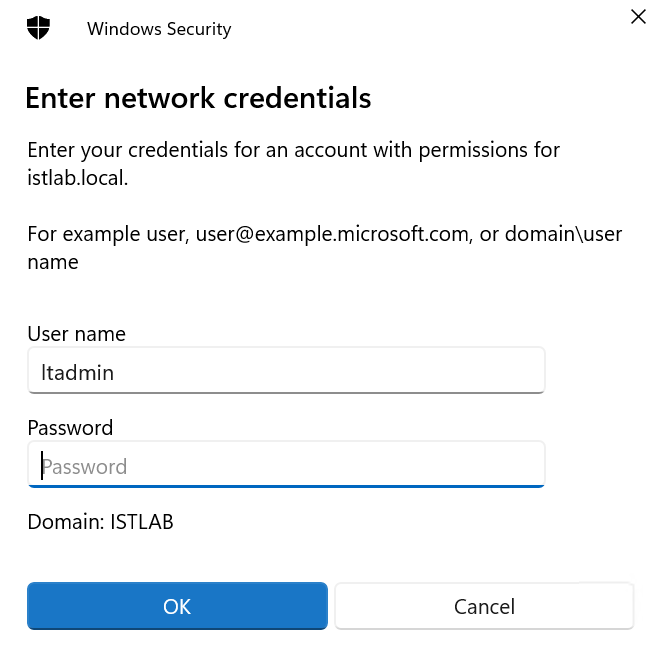
Enter domain admin credentials and click ok
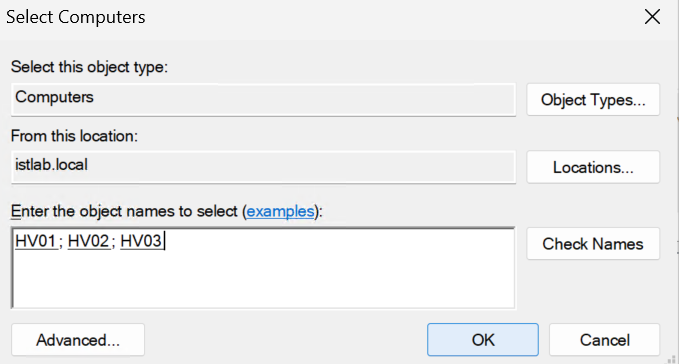
As we searched with the hv prefix it will bring up all our servers, use Ctrl to select multiple servers and select all the servers you want to add into the cluster
Ensure you do not select the cluster object
Then click ok

Click ok here
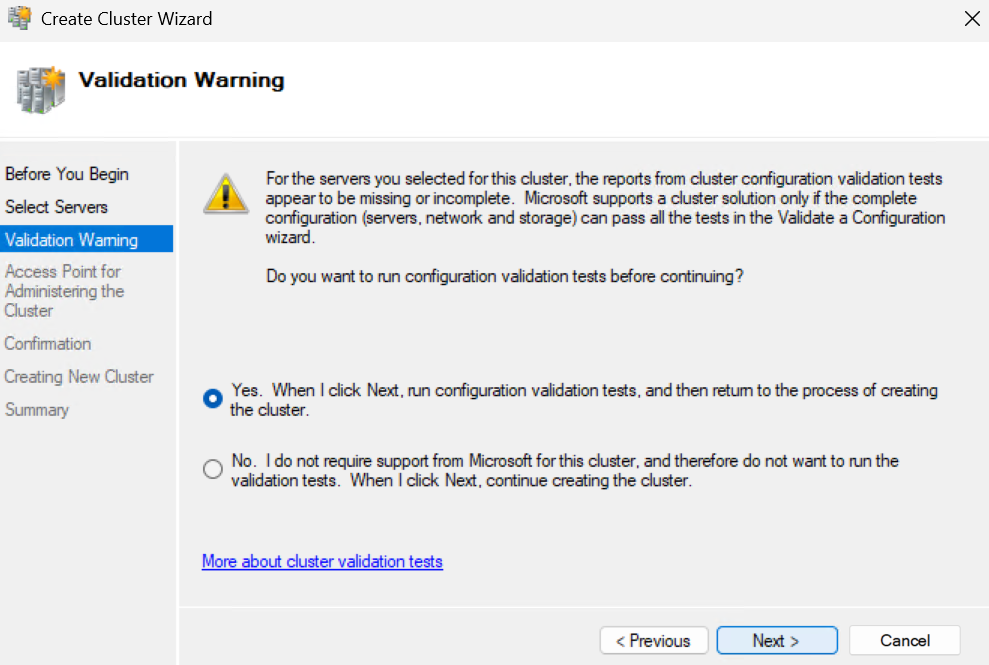
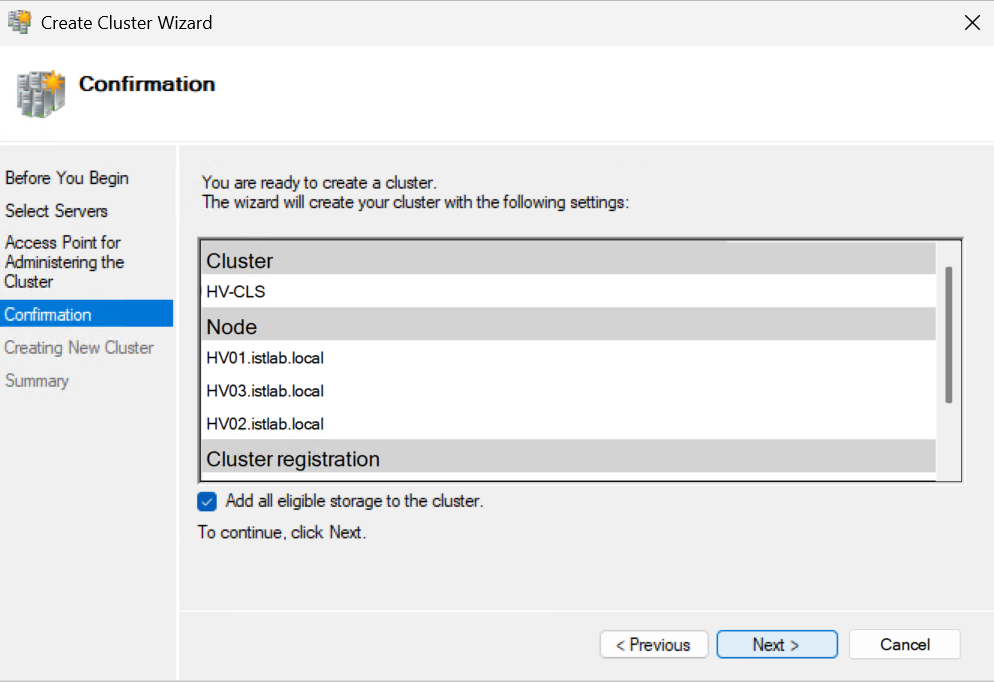
The hosts should get added and it will look like this, then click Next
Make sure the option to validate the cluster is checked, and click Next
For the validation, click Next

Click Next here and run all tests, this will take a minute to load
Click Next again
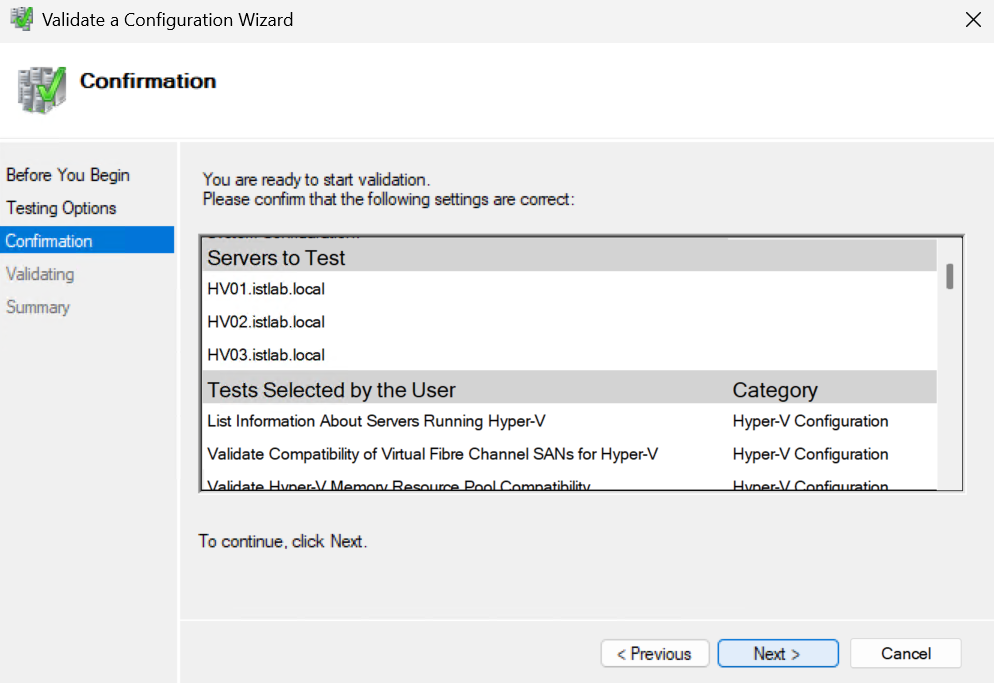
This will take a while to run through all the validations, when its done click View Report
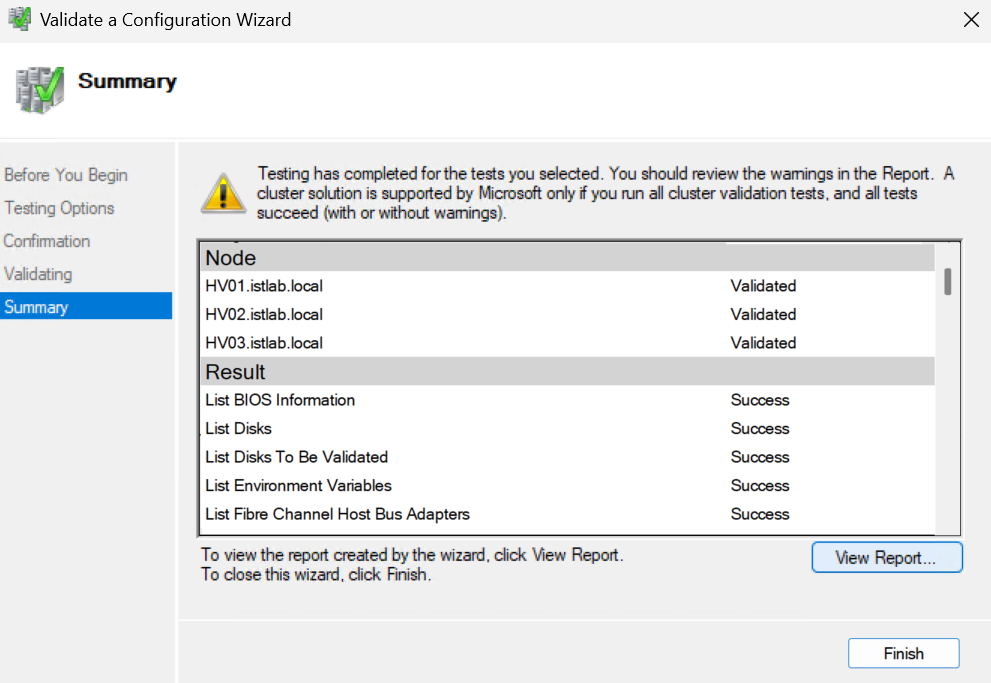
We want to review any warnings for any reason we might have issues

In Network, my adapters flagged for an RDMA consistency issue, this is important to check, as I am not using RDMA capable adapters I can ignore this, if you are, we dont need to do anything, just ensure all adapters are the exact same model running the same firmware

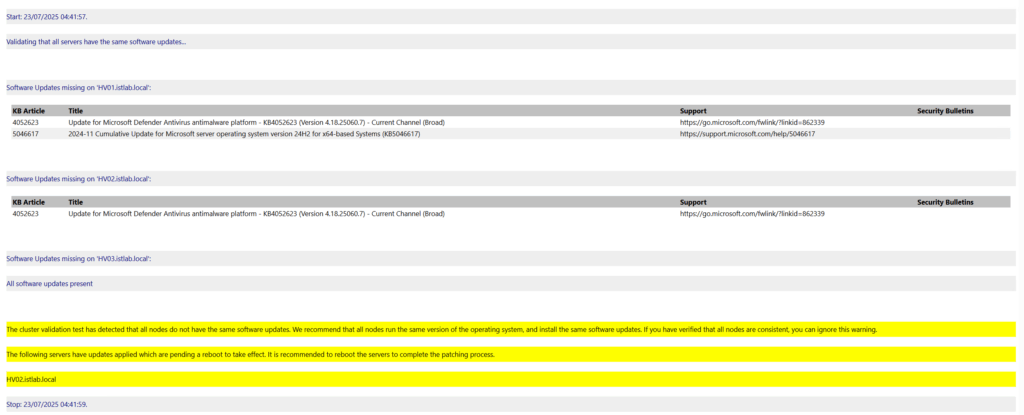
The other System Configuration warning was for software patch levels
It is recommended to have all servers on the same KB, unless you are actively patching the cluster, so I will remediate these before continuing
Interestingly it thinks HV03 is fine, which it isnt when I manually checked Windows updates#
When all updates are applied we can verify the build number by opening the Settings app
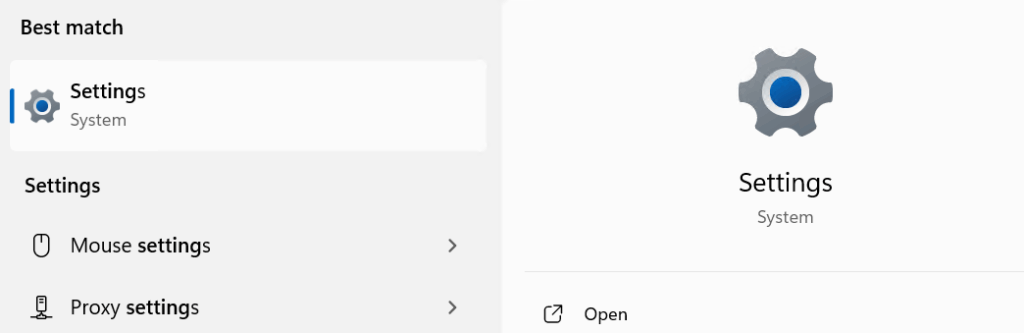
Click System

Scroll down to the bottom and click About

And ensure the OS build is identical on all nodes
Once thats all sorted, we need to enter the cluster name, this needs to be identical to the object we created earlier
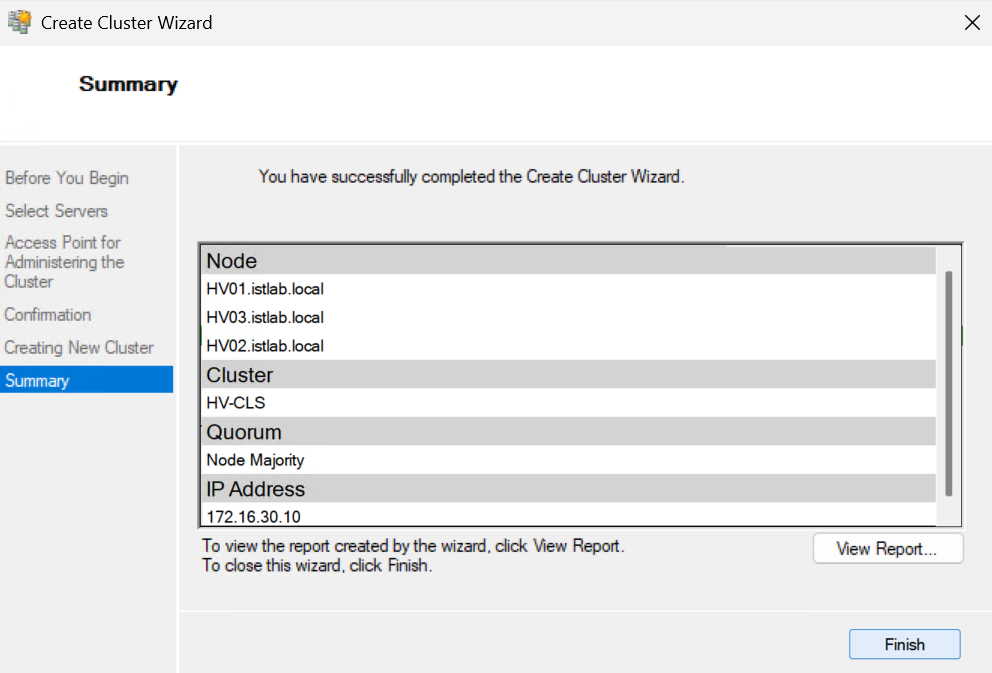
I called my object HV-CLS so thats what I entered, and add the IP address we want to associate with it, then click Next
And click Next here
When thats done click Finish
3.2 – Adding Cluster Shared Storage
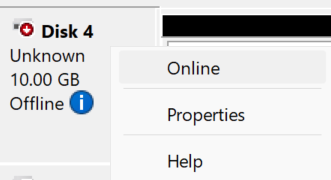
Now we have a cluster, we need some VM storage, and we have got our disks mapped, but offline, so lets get those online
On the first host, for me this is HV01 open disk management by right clicking the Windows icon
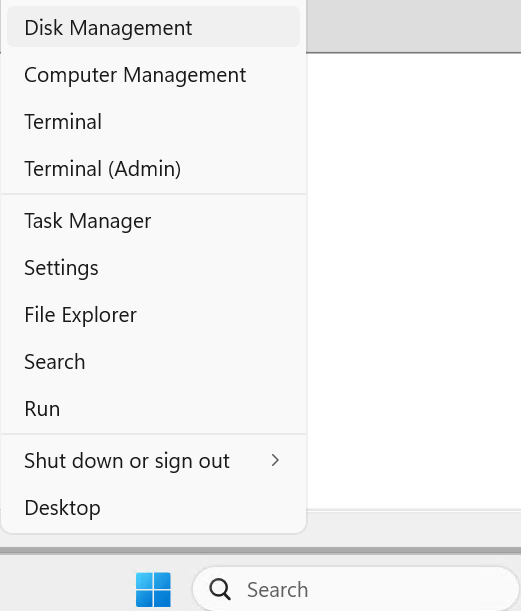
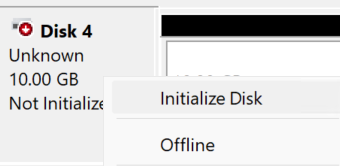
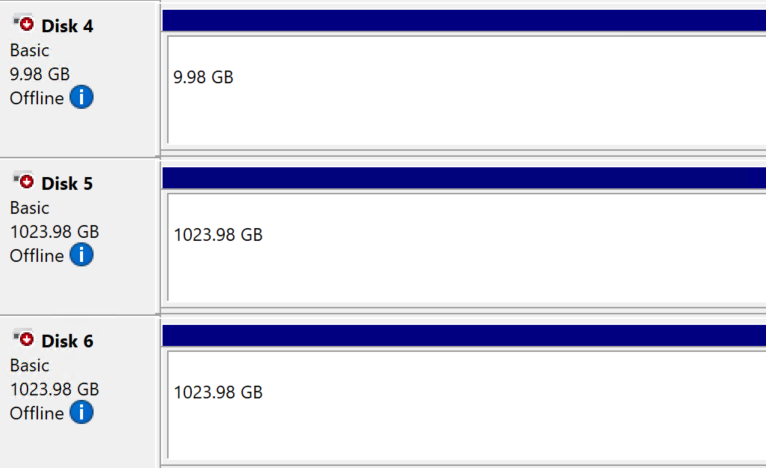
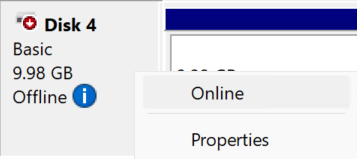
Right click all disks added by iSCSI, in my case 1x10GB and 2x1TB disks and click Online
Then click Initialize Disk
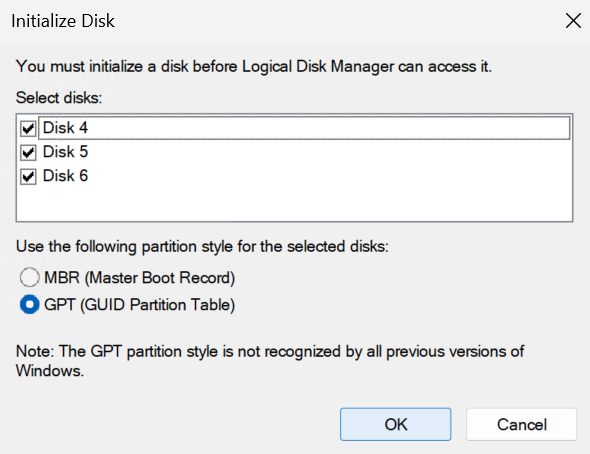
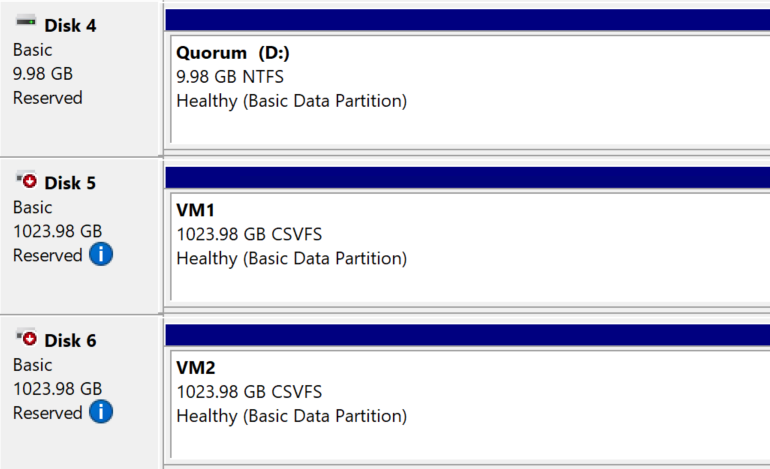
On my server I have made all three online, these are disk 4/5/6, and when initializing the first it lets us do them all, so lets do that, making sure GPT is selected and not MBR, then click ok
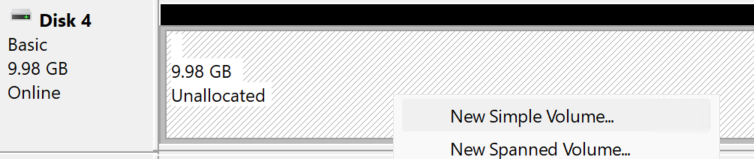
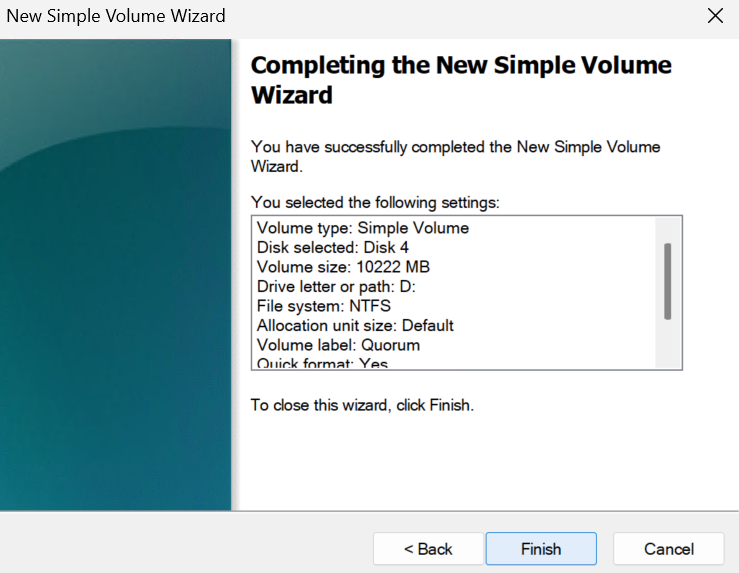
We will then need to do this for all disks added by iSCSI, right click the unallocated area and click New Simple Volume
Click Next
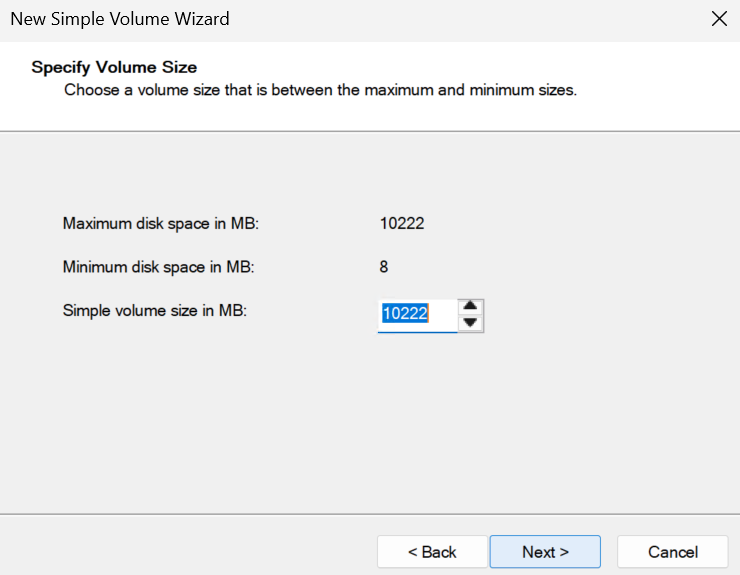
Next again, we dont need to change anything
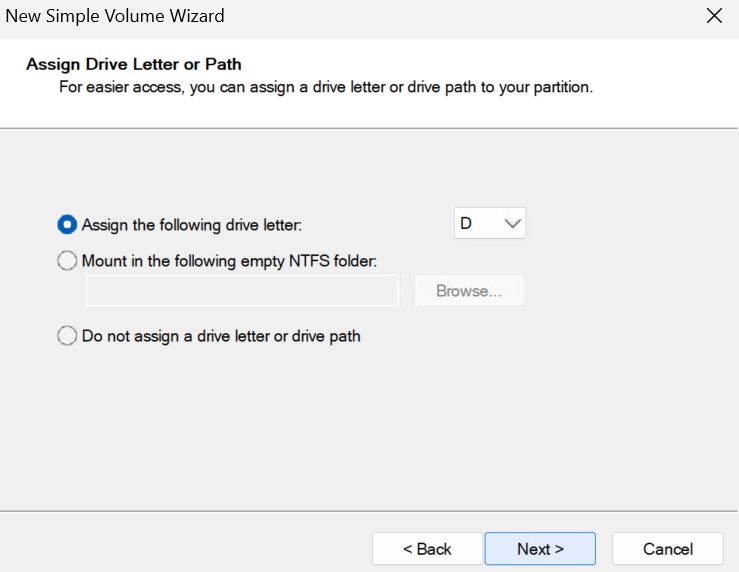
Next again
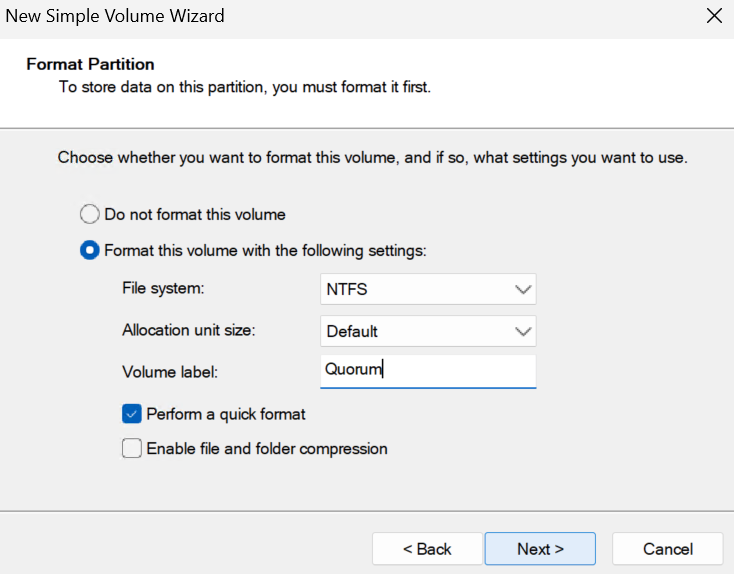
Fill in the Volume Label and click Next
Then click Finish
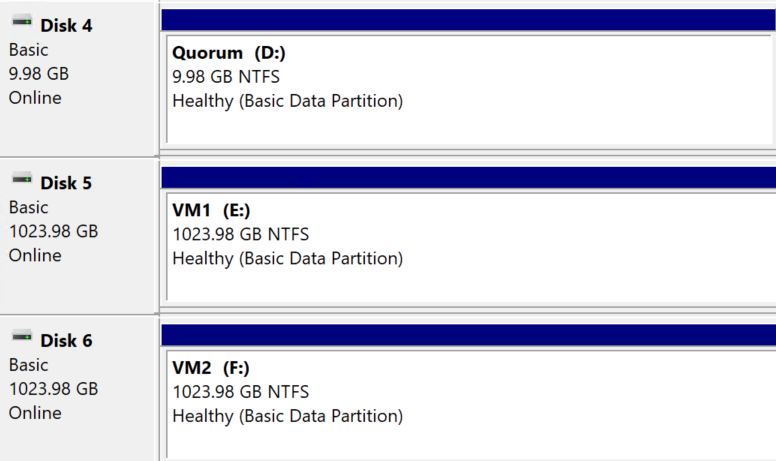
For the data disks I suggest naming them the same as you did in the SAN so it all lines up
Now there is one small issue, I have two identical volumes, so which is which, this is what we had on the SAN
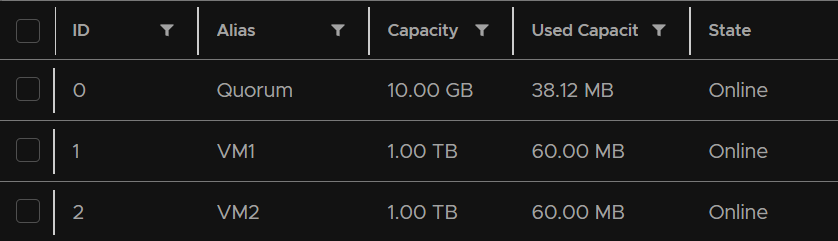
Now the ID is the LUN ID, it can be called either, but whatever SAN vendor you have, each disk will have a LUN ID
In Windows, if you right click the unallocated space and click Properties
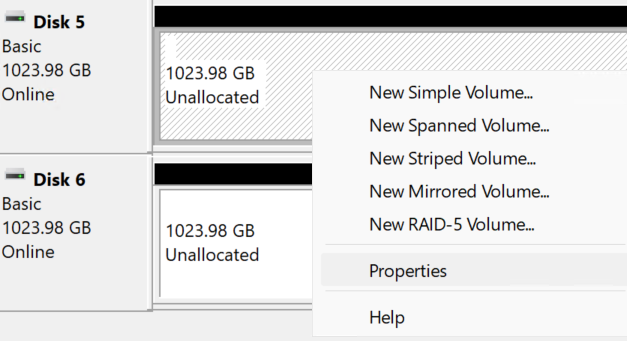
The location will tell you the LUN ID so you can match them up

When you are done it should look like this
It can take a while on much larger LUNs to format the disk
If we open Disk Management on our other hosts, you may need to rescan with this icon
They should look like this
Right click the disk, like before, and click Online
And repeat for all disks so it now looks like the first host

Repeat this on all remaining cluster hosts
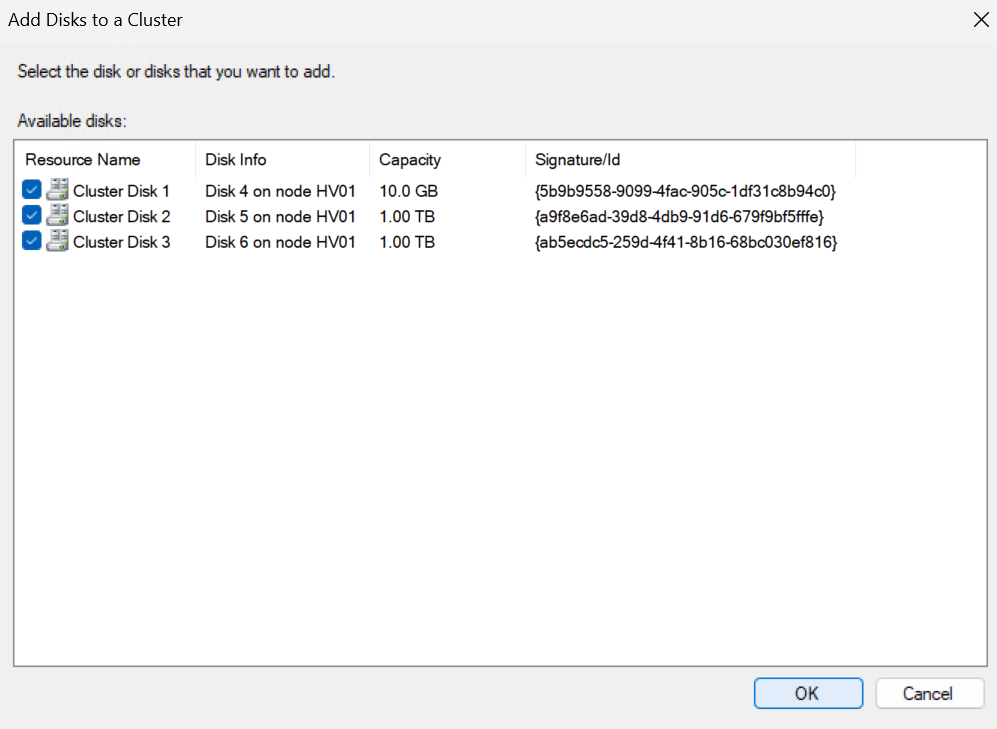
Back in Failover Cluster Manager, click Storage, then right click Disks and click Add Disk
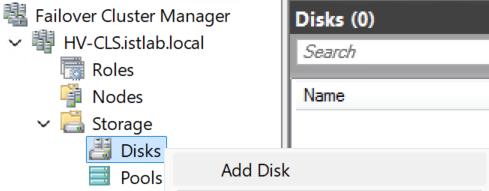
We should see all the disks checked, click ok
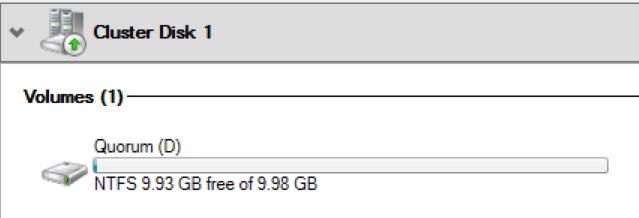
They dont carry their names over that we set on Windows, this is fine, click the disk

At the bottom we can see the Windows name
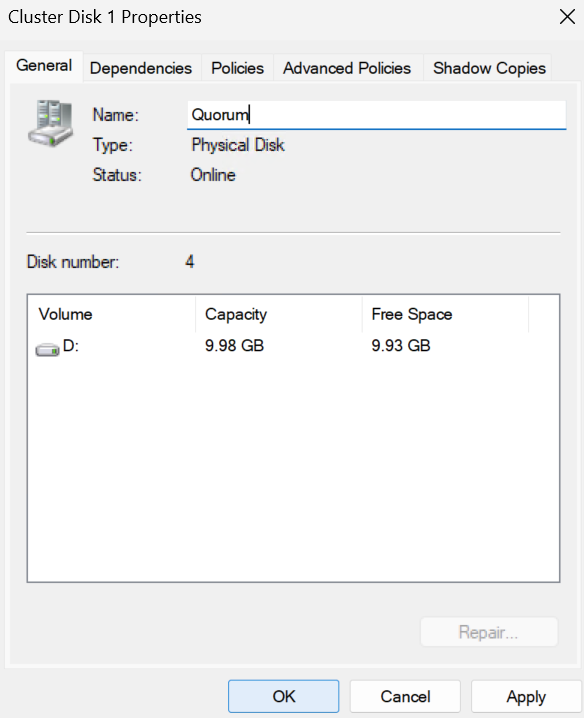
On the right click Properties
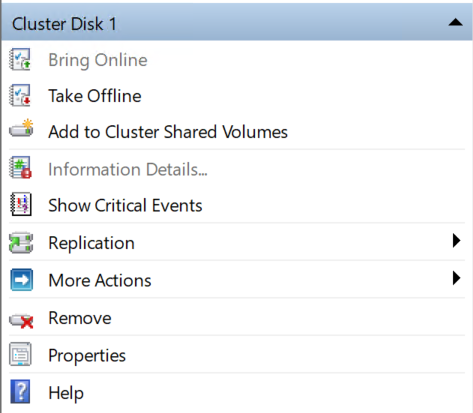
Here we can set the name and click ok
Repeat until you have them all, it should look like this

Click the first data disk

And on the right click Add To Shared Volumes
We now see the disks Assigned To has changed to reflect this

Repeat for all other data disks, but importantly not the quorum, like this

You’ll notice in disk manager they are marked as offline and reserved, this is expected and do not edit this as you will break the volume
The disk is only online for the Owner Node
We now have shared volumes to store our VMs
3.3 – Adding The Cluster Witness
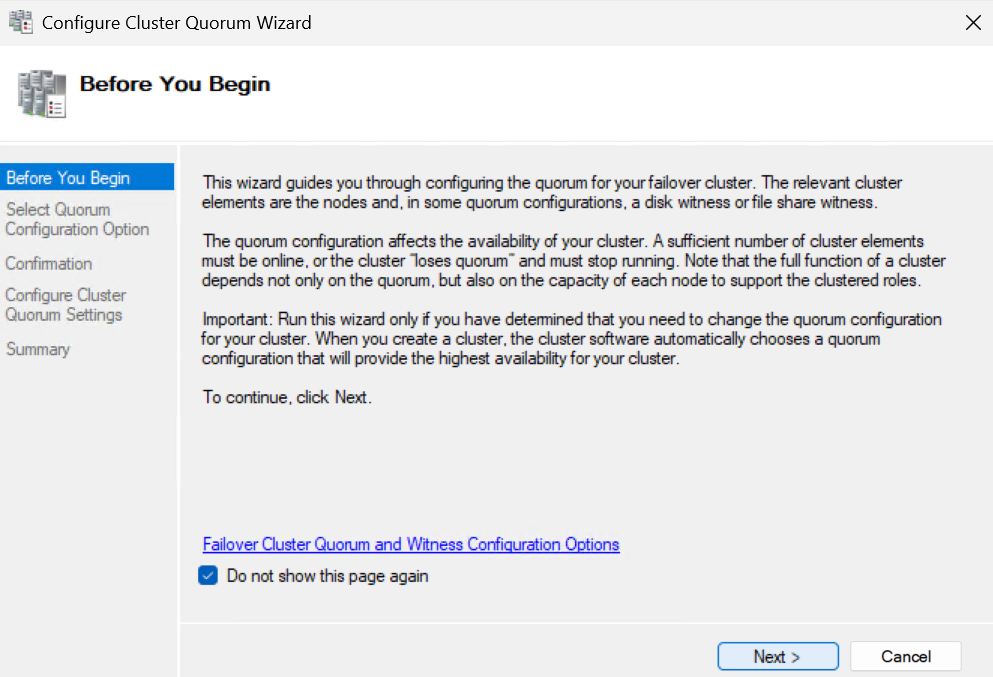
A cluster quorum should always be configured, as it helps the cluster make a decision in split brain situations
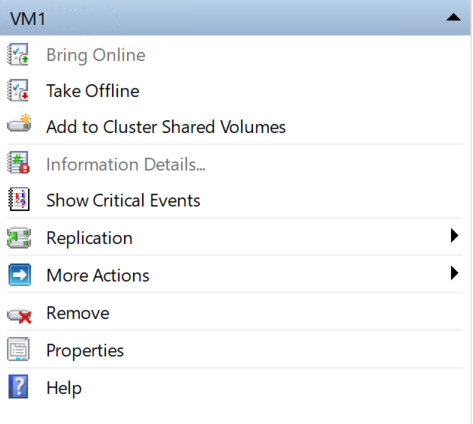
To configure this right click the cluster then click More Actions/Configure Cluster Quorum Settings

Click Next here
Select the middle option to manually select the quorum witness and click Next
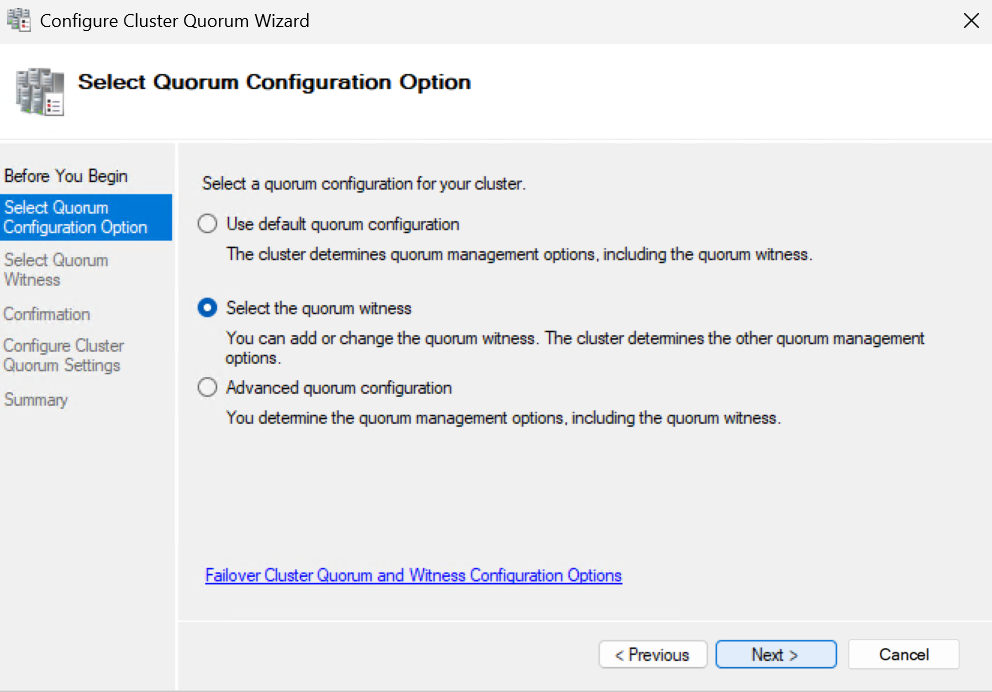
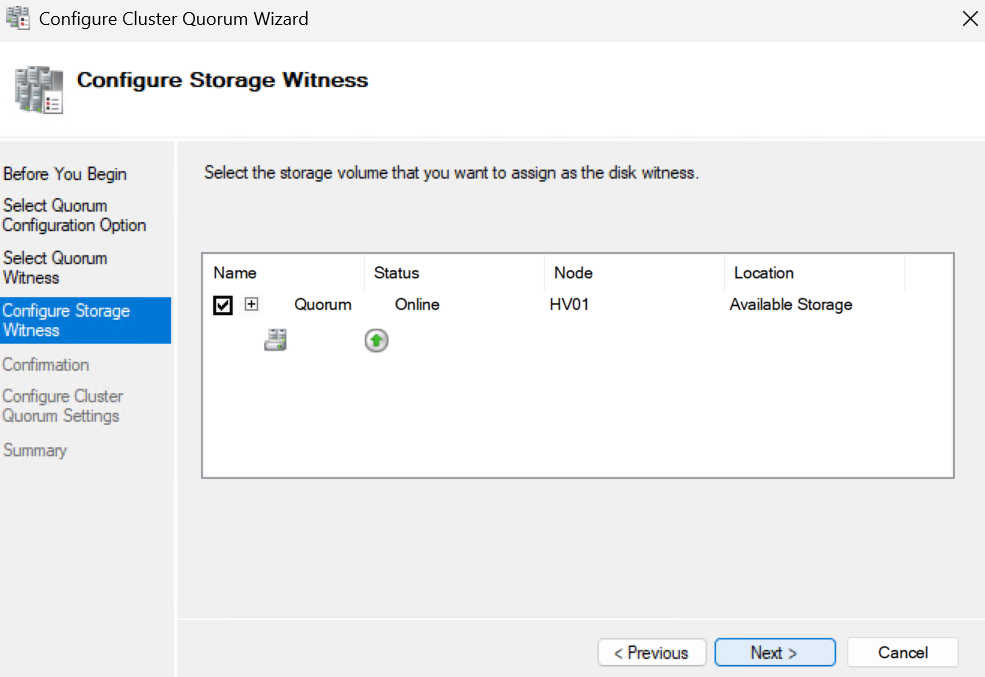
Click Configure Disk Witness, there are other methods, but with the SAN being highly available this is by far the best, then click Next
Select our quorum disk and click Next
You’ll notice our shared volumes are not here, this is why we didnt make the quorum disk a shared disk
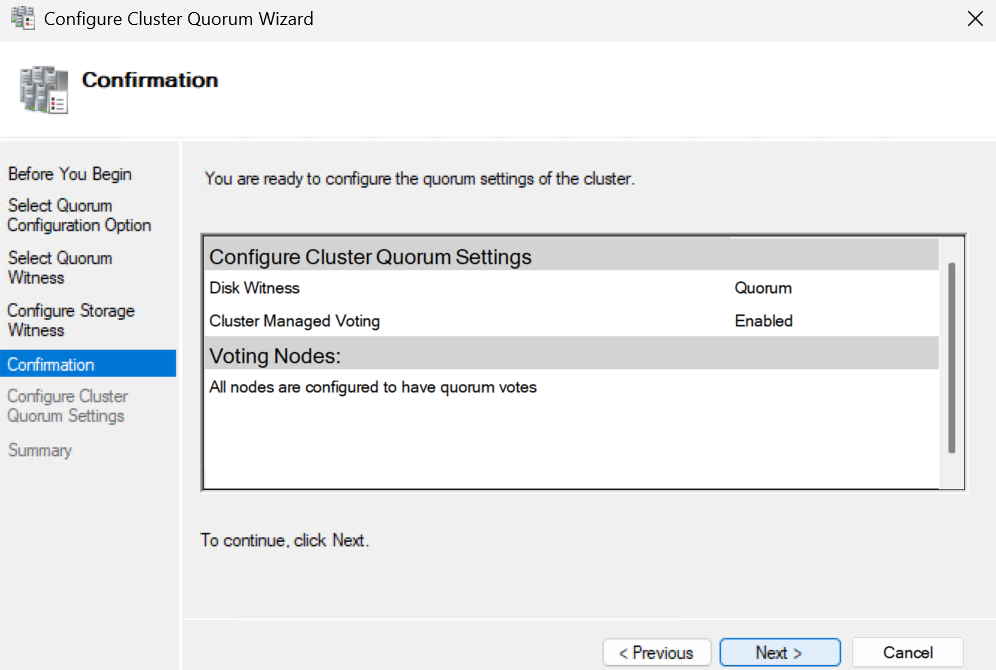
Click Next
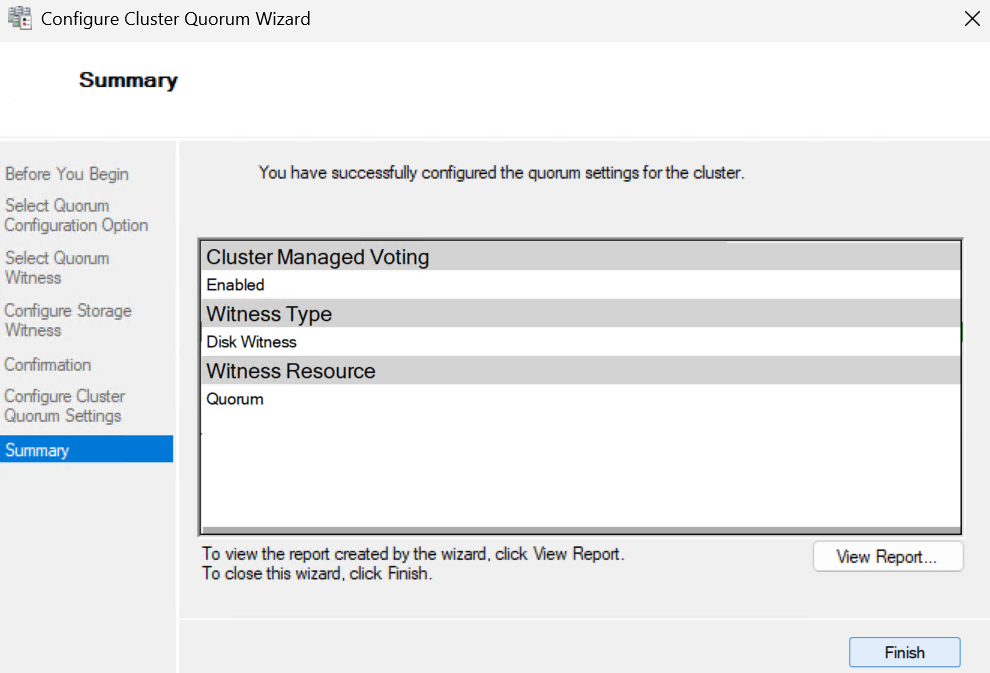
Then click Finish
3.4 – Setting Up The Cluster Networking
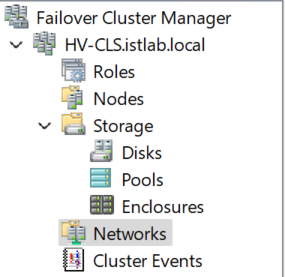
To access this, in Failover Cluster Manager, click Networks
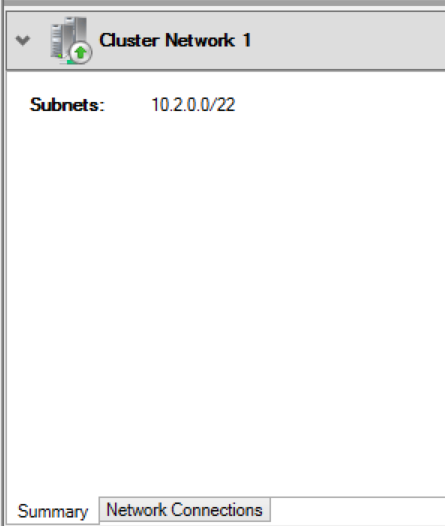
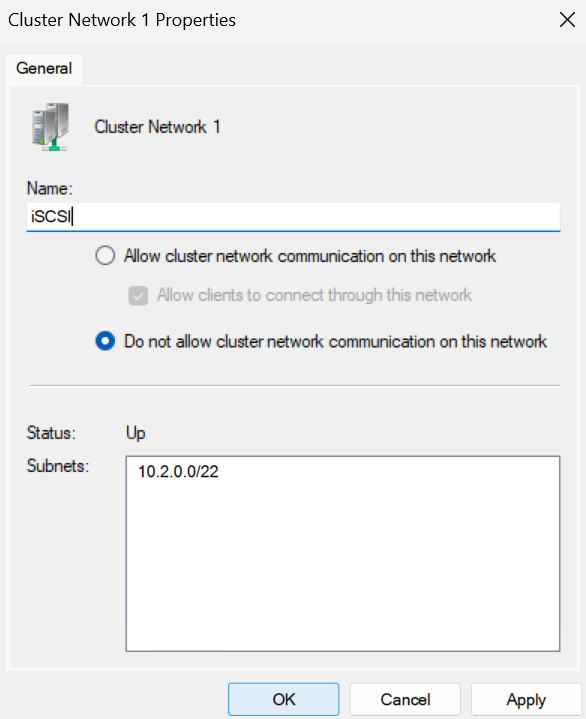
We can see our networks, but they arent named very helpfully, click one, lets start with Cluster Network 1
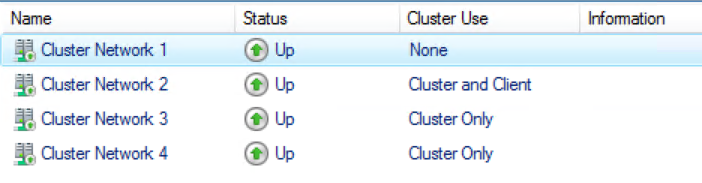
At the bottom this small subpage will be populated, here we can see the subnet, and so we know this is the iSCSI network
If you click the Network connections you can see the NICs attached
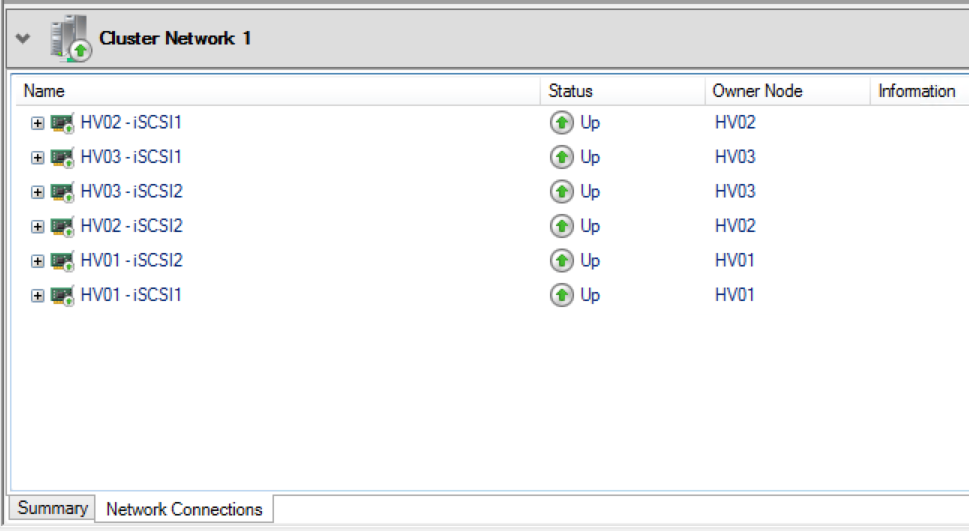
For iSCSI there are two NICs per host, the others show the vNICs we created on the SET switch
If we then click Properties on the right
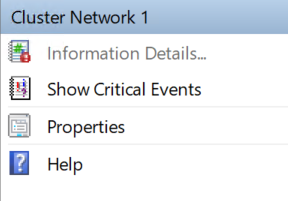
We can rename it and click ok
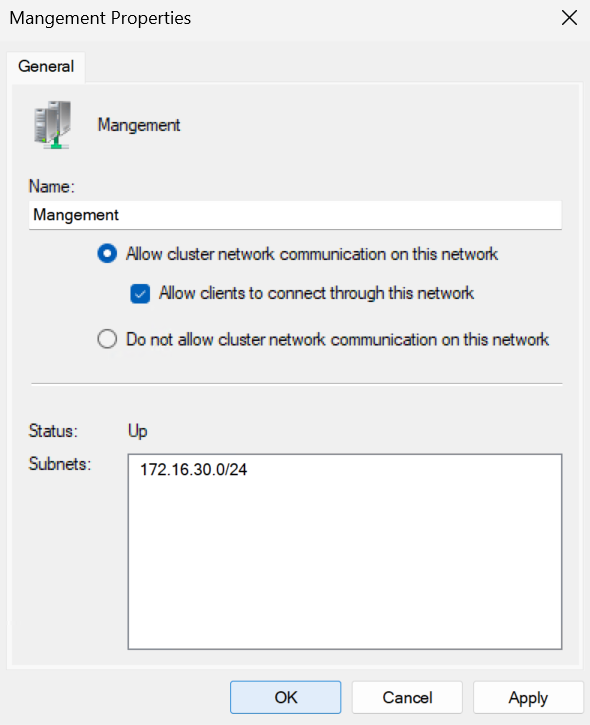
On the management cluster network we can change the name and click ok
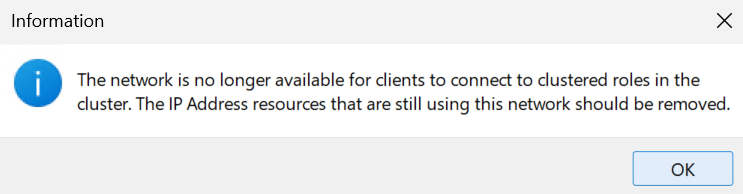
You will see this informational message box, we can ignore this and click ok
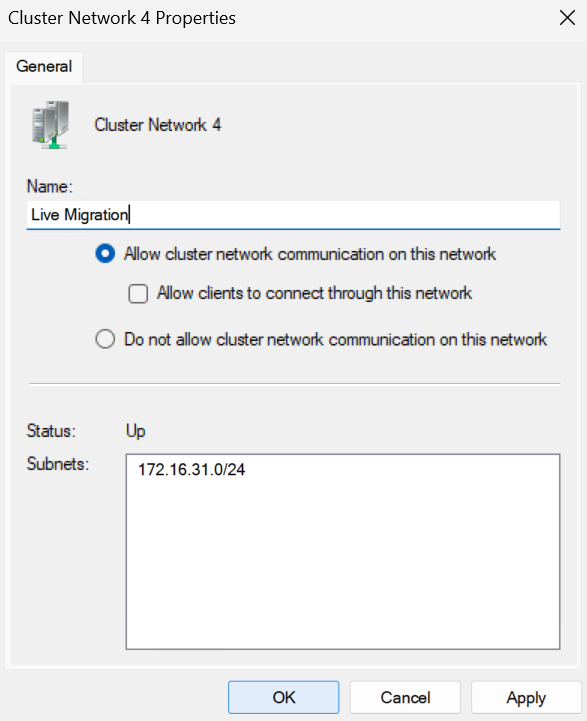
For the cluster network we want to ensure we dont have the box to allow clients to connect checked, and click ok
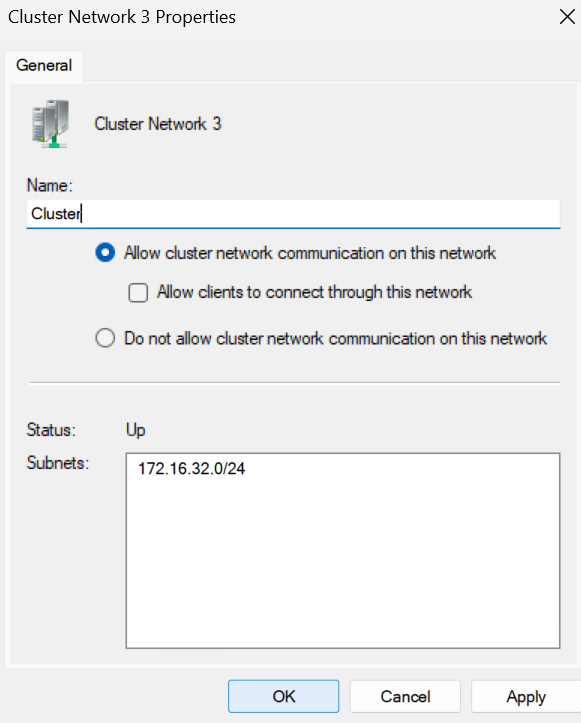
And the same for Live Migration
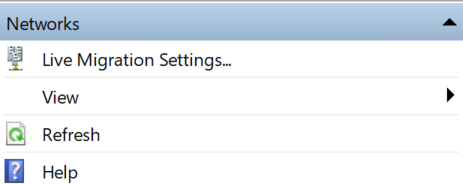
On the right, irrelevant of what network you have selected, we have the Live Migration Settings button, click this
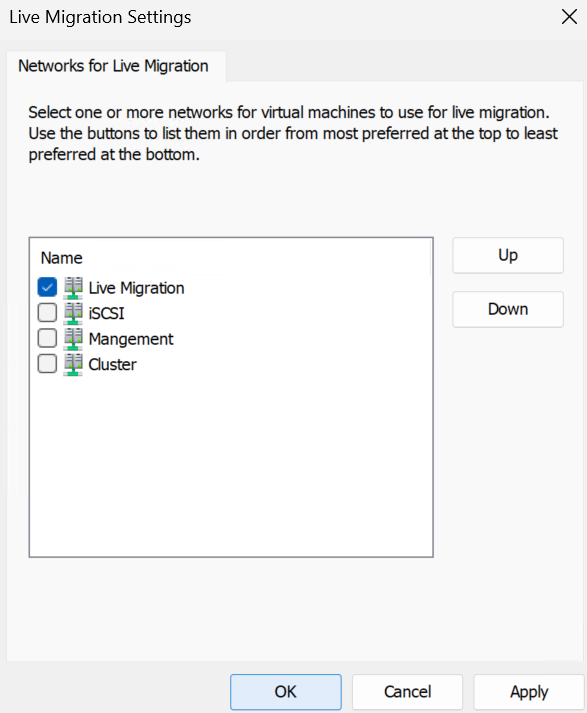
Remove all networks except for the Live Migration network and click ok
4 – Windows Admin Center
Windows Admin Center, WAC, provides a much better UI for managing your Hyper-V cluster, however, while it has gotten a lot better over the last year, but it can be a bit flaky so if it derps out and needs refreshing and is a bit slow, this is expected and should get better as Microsoft continues to improve it
We will be adding our cluster to it, but you can add all your VMs and manage them from here as well, so it is very useful if you have a larger Windows environment
4.1 – Creating The WAC VM
The spec for WAC wants to be
- 4vCPU
- 8GB
- 90GB C Drive
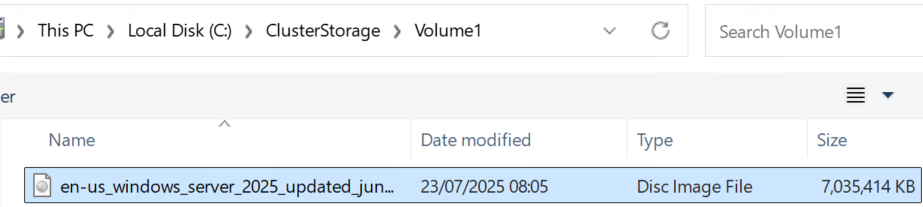
We now need a virtual machine on Windows Server for WAC to run on, you will need to place the ISO for your version of Windows server on the cluster storage
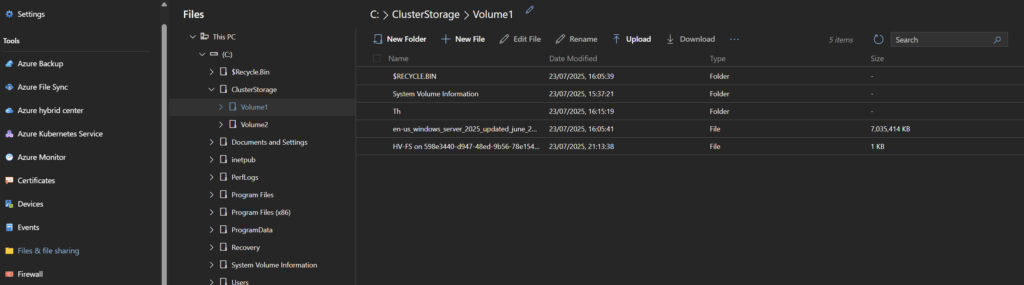
The default location for the cluster storage is C:\ClusterStorage, then you will have your volumes

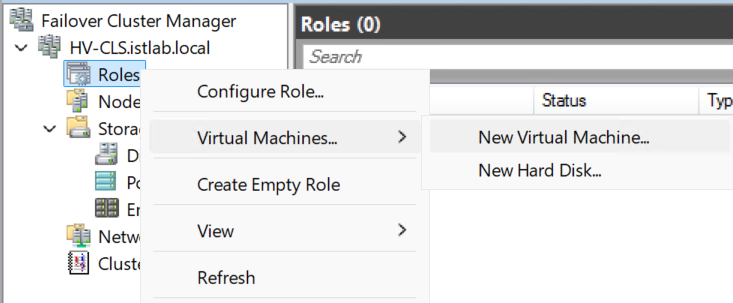
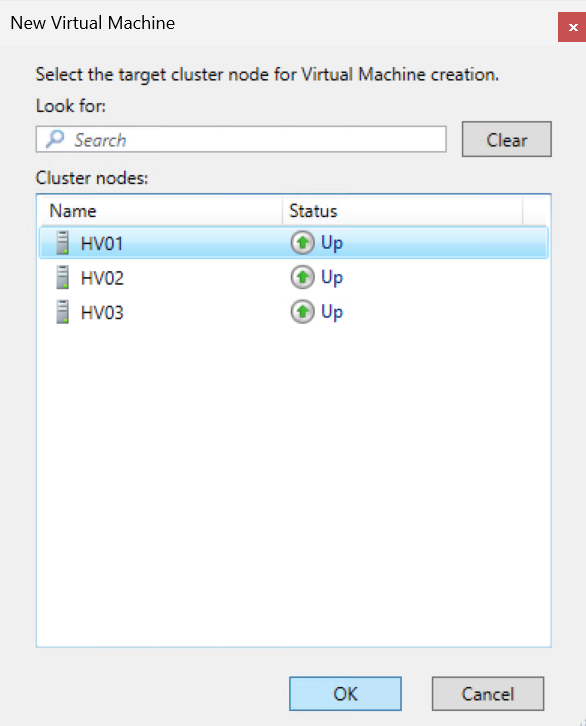
Once the ISO is copied over we need to create our VM, in Failover Cluster Manager, expand the cluster and right click Role, then click Virtual Machines/New Virtual Machine
Select a node with space, as this is our first VM, it doesnt matter which node we select, then click ok
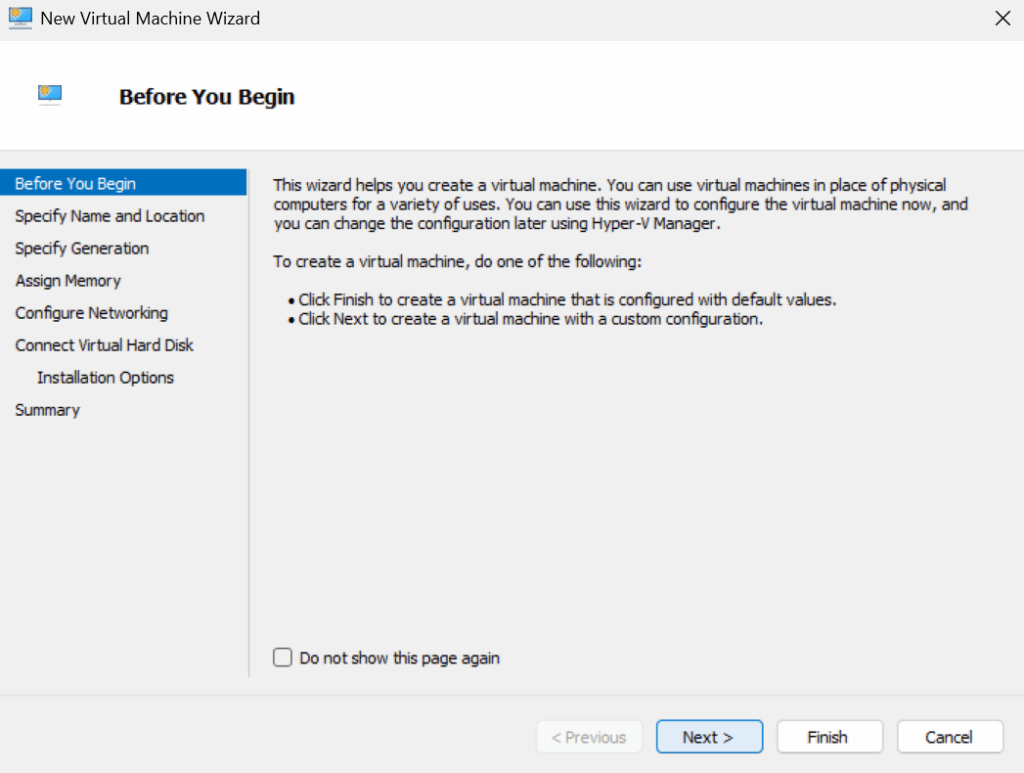
Click Next here
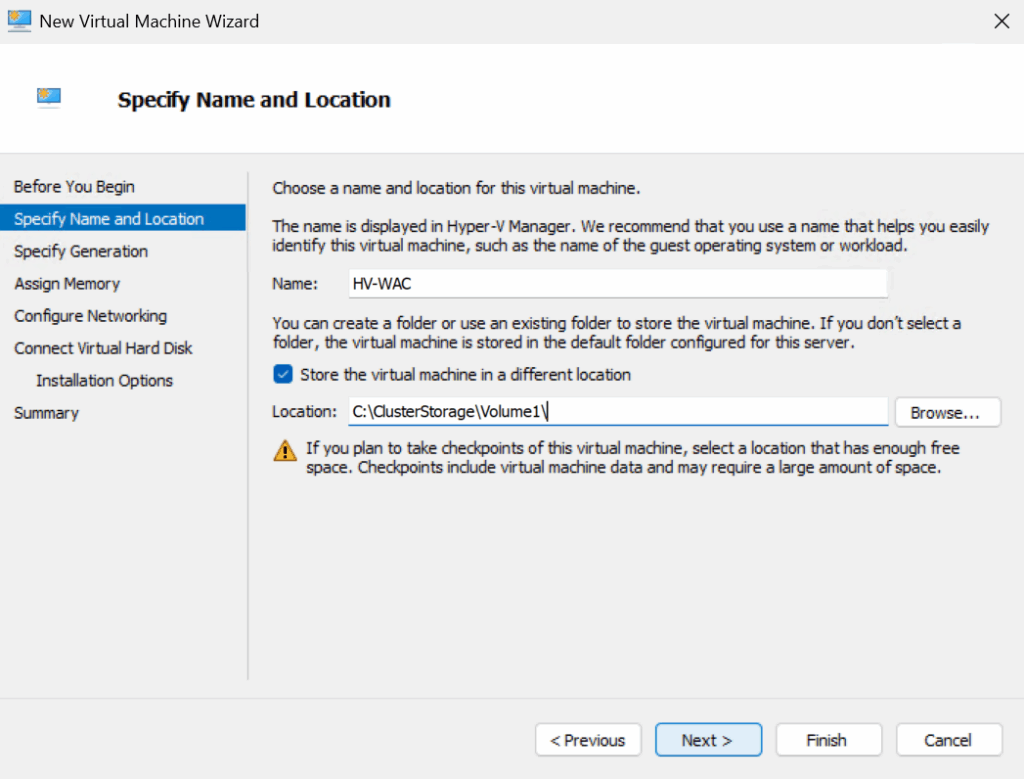
Give the VM a name and check the box to storge the files in a different location and click Browse
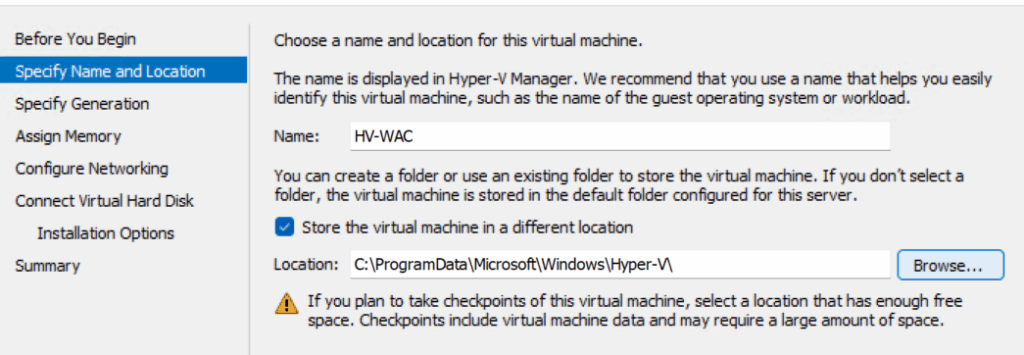
This must be one of the volumes under C:\ClusterStorage
Then click Next
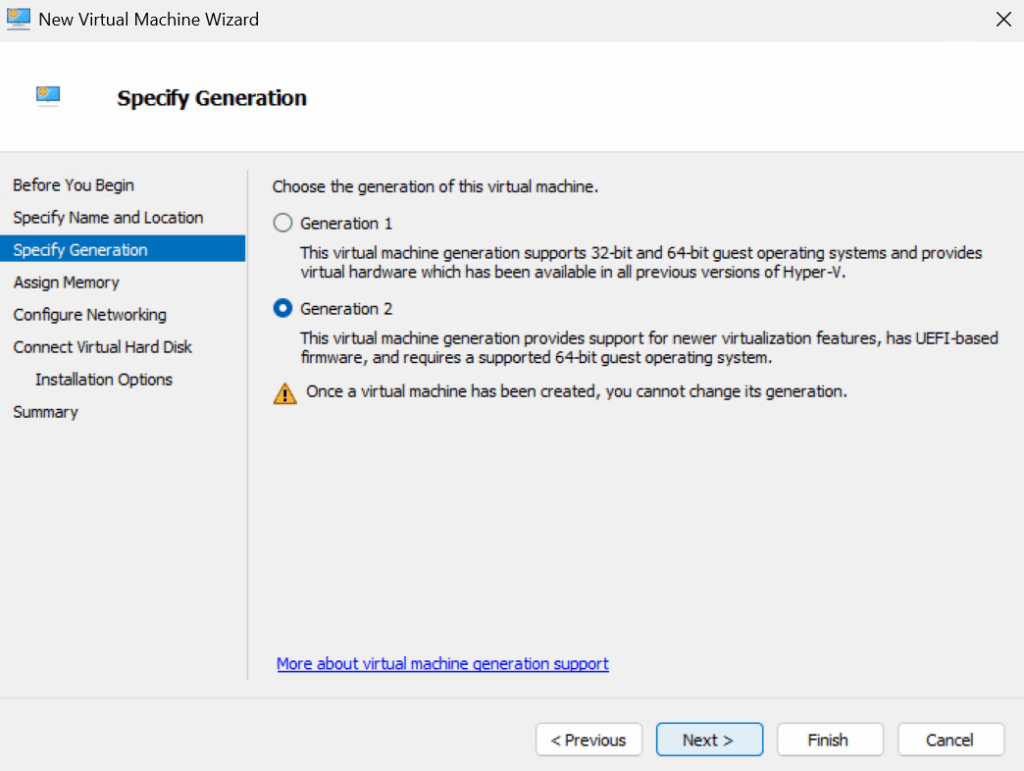
Select the VM generation, this will likely always want to be Generation 2 then click Next
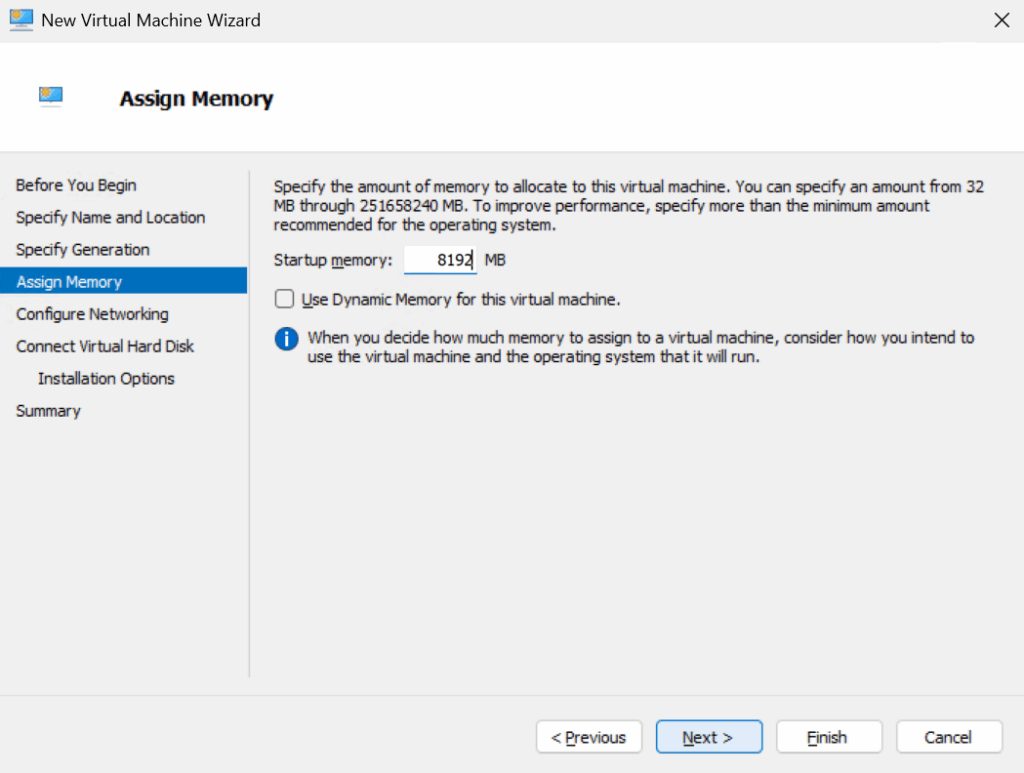
Enter the amount of RAM the VM needs in MB, I want my WAC server to have 8GB so I entered 8192, then click Next
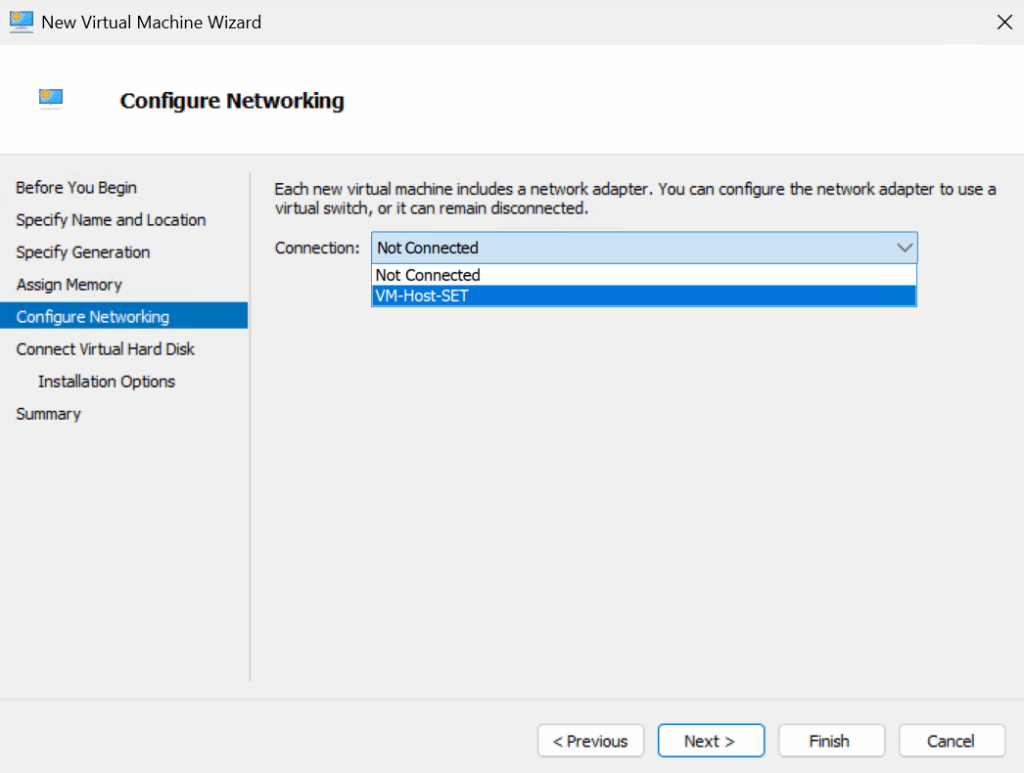
For the networking, click the Connection drop down and select the SET switch we created earlier, and click Next
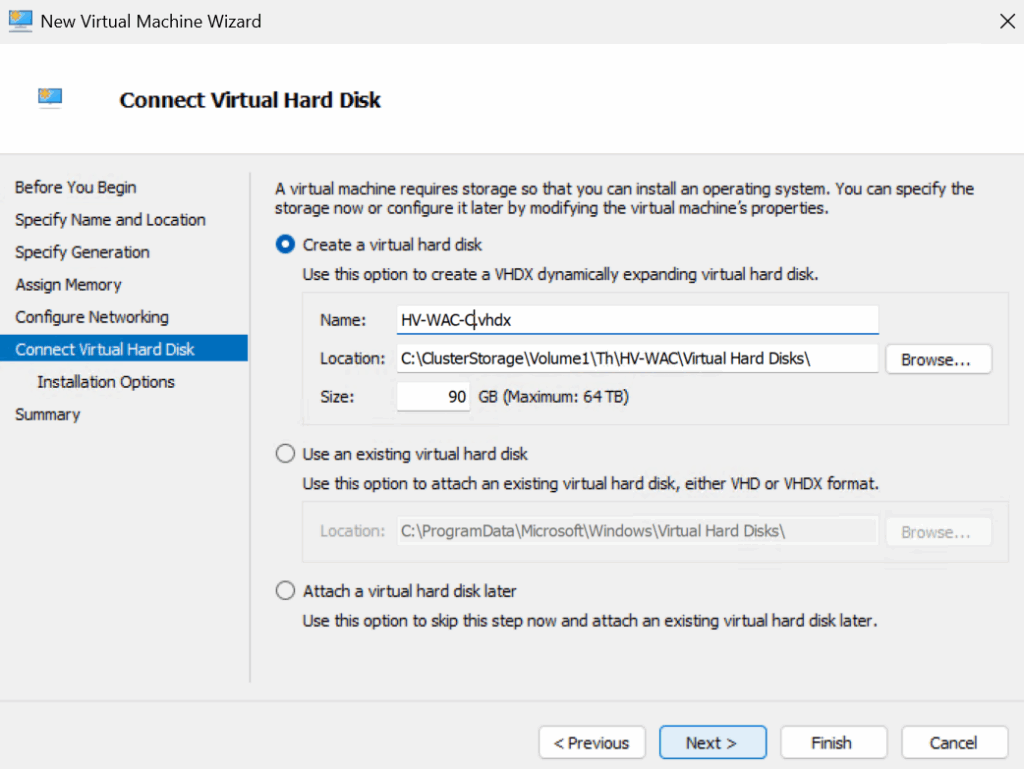
Enter a name for the virtual hard disk, I appended -C to the default, as this will be the C drive, and enter a size, for this 90GB is plenty, then click Next
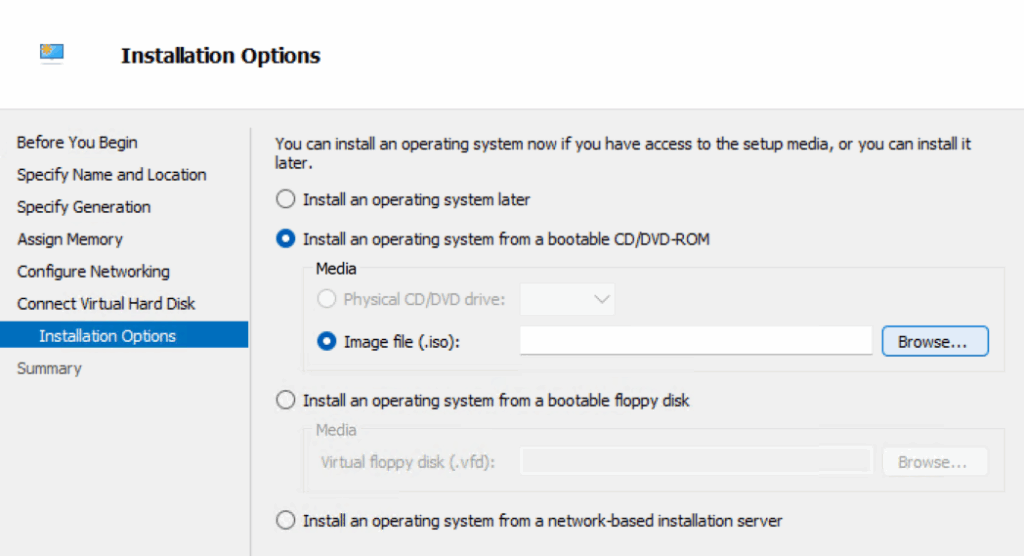
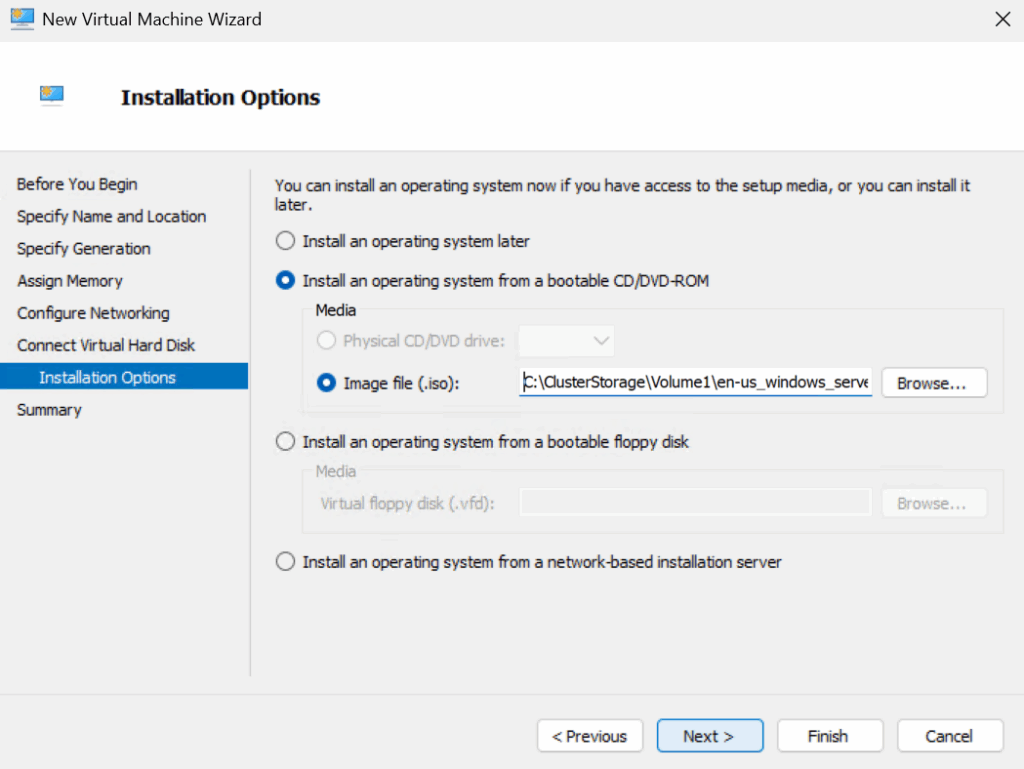
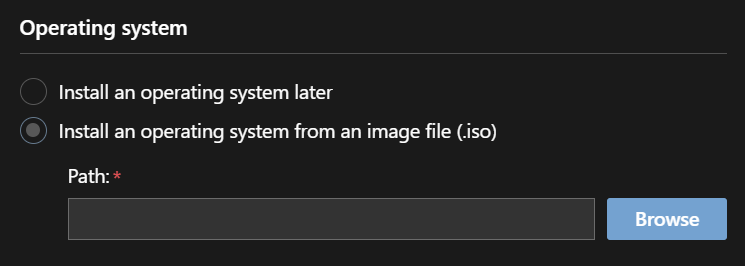
We now want to select the radio button to install an operating system from a CD/DVD ROM, then the radio button for Image File, and click Browse
Double click the ISO you have on the cluster storage
And click Next
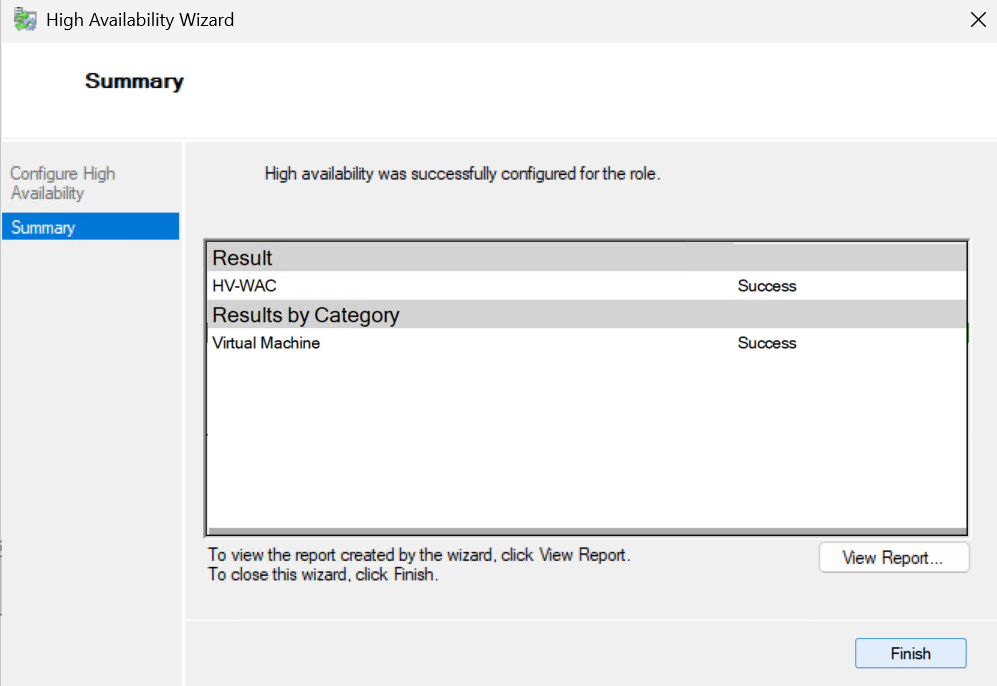
Then click Finish
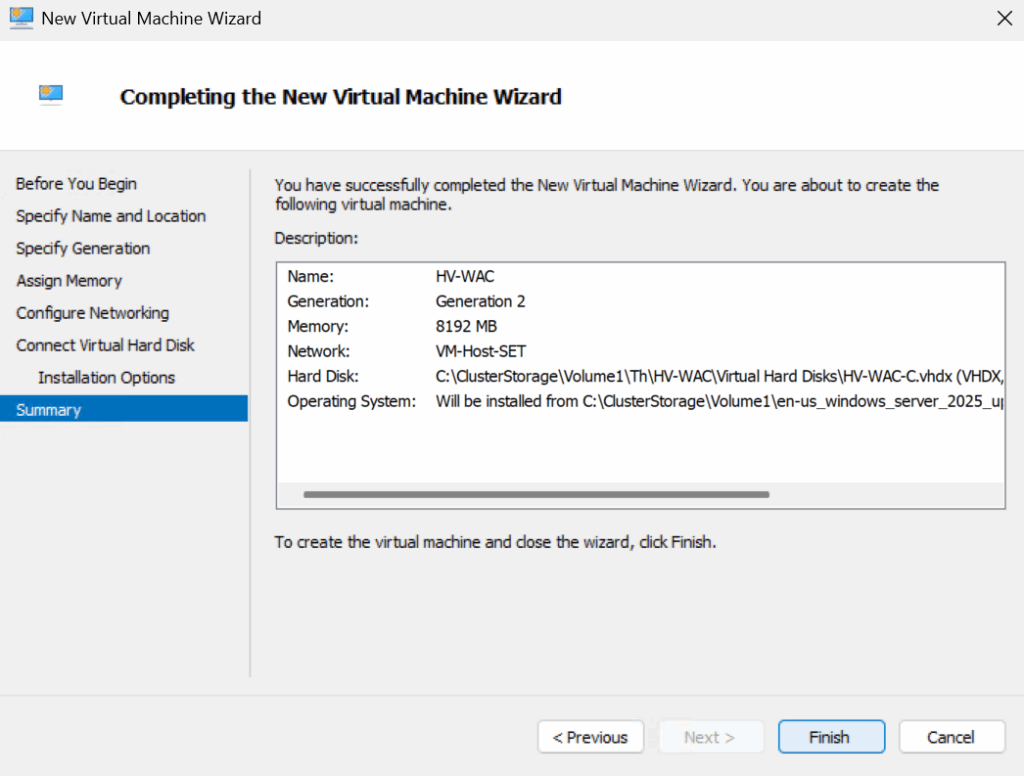
And Finish again
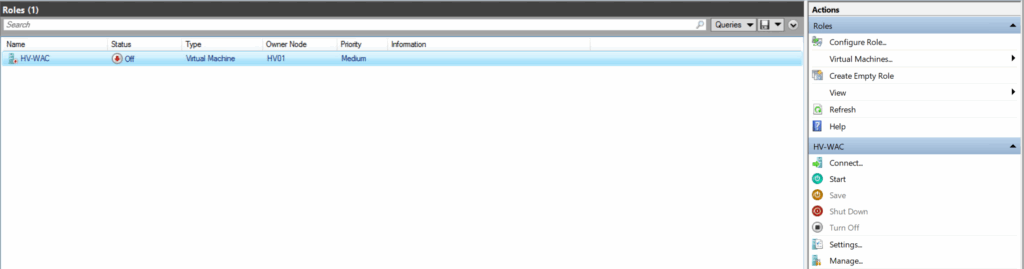
Now our VM exists, but before we boot it, there are a couple of bits we need to change, click the VM and on the right click Settings
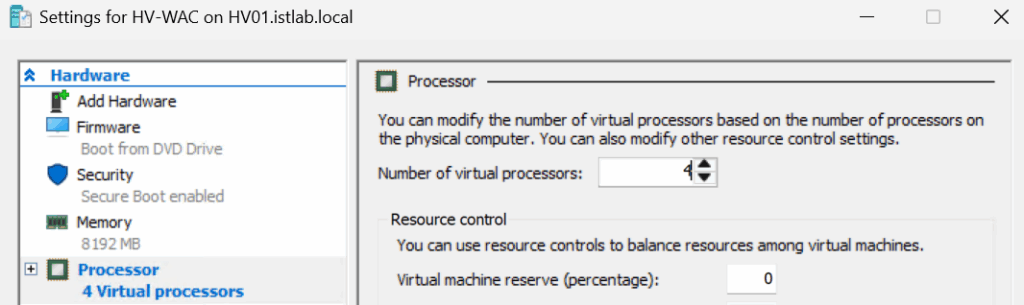
Click into the Processor tab, the default here seems to be 16 for me, which is way too much, set this to 4, for our 4vCPU in the specs
Now, from our networking config all VMs are put onto VLAN 33 by default, the VM VLAN, but this VM is management and so I want it on the management VLAN
So click the Network Adapter, check Enable Virtual LAN Identification, and enter the VLAN tag, in my case 30, then click ok
Its worth noting, as VLAN 33, our default VM VLAN, is the native VLAN on the ports the SET switch uses, if we want VMs on this VLAN we do not need to tag them like this, and if you do, they wont get any networking

On the right, we can now click Start, and then Connect and install Windows like normal
I recommend you install the GUI, Desktop Experience, for installing and configuring WAC
4.2 – WAC Install
Now download WAC, it can be found here
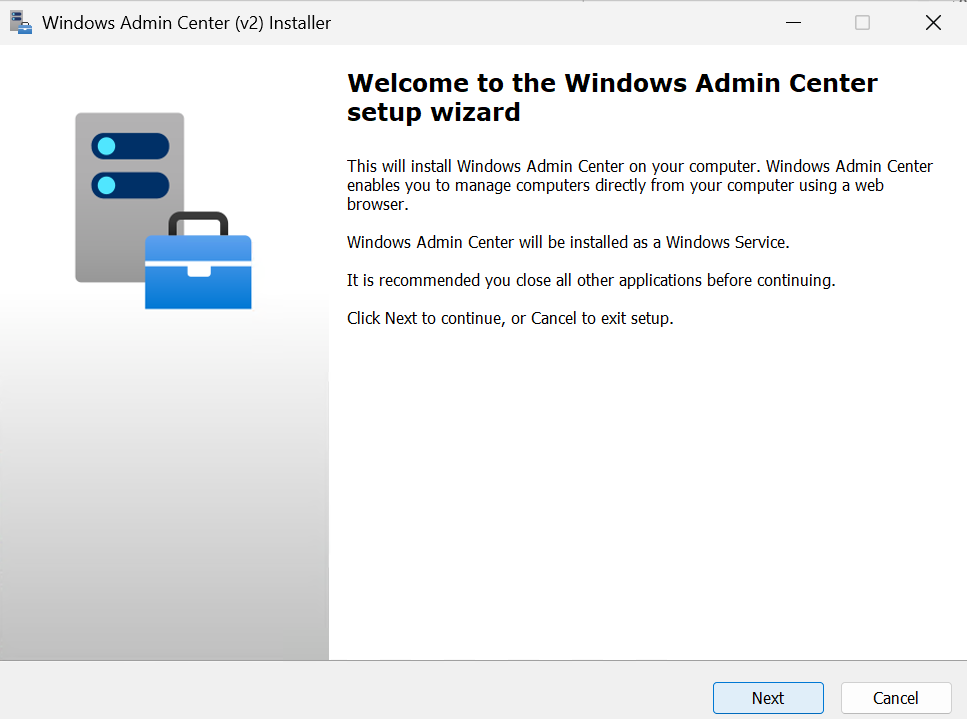
Double click the installer

Click Yes here
Click Next
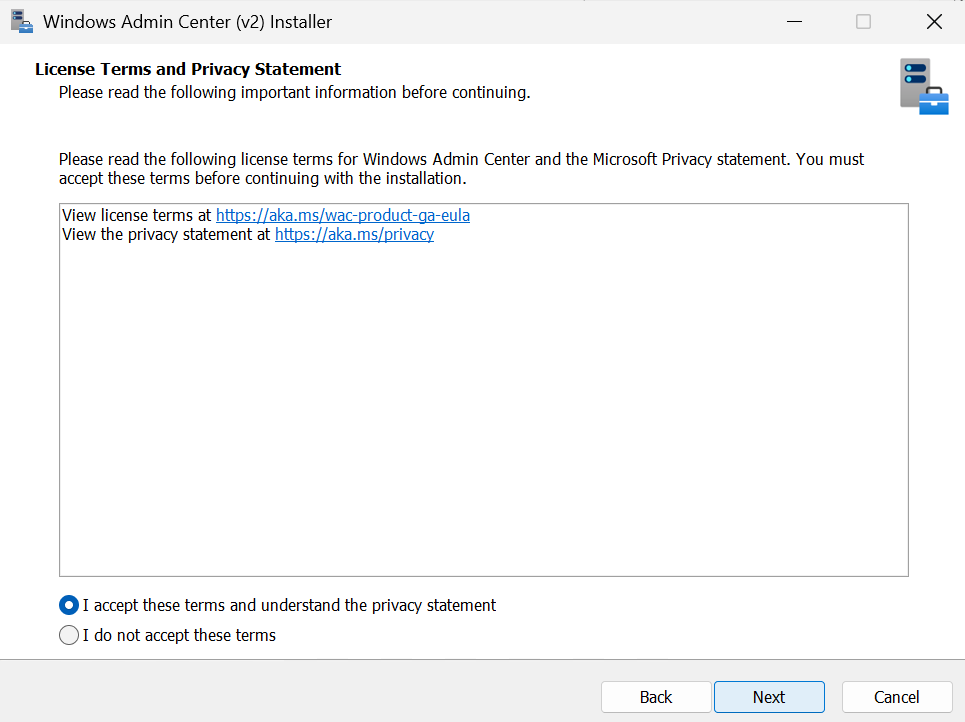
Accept the EULA and click Next
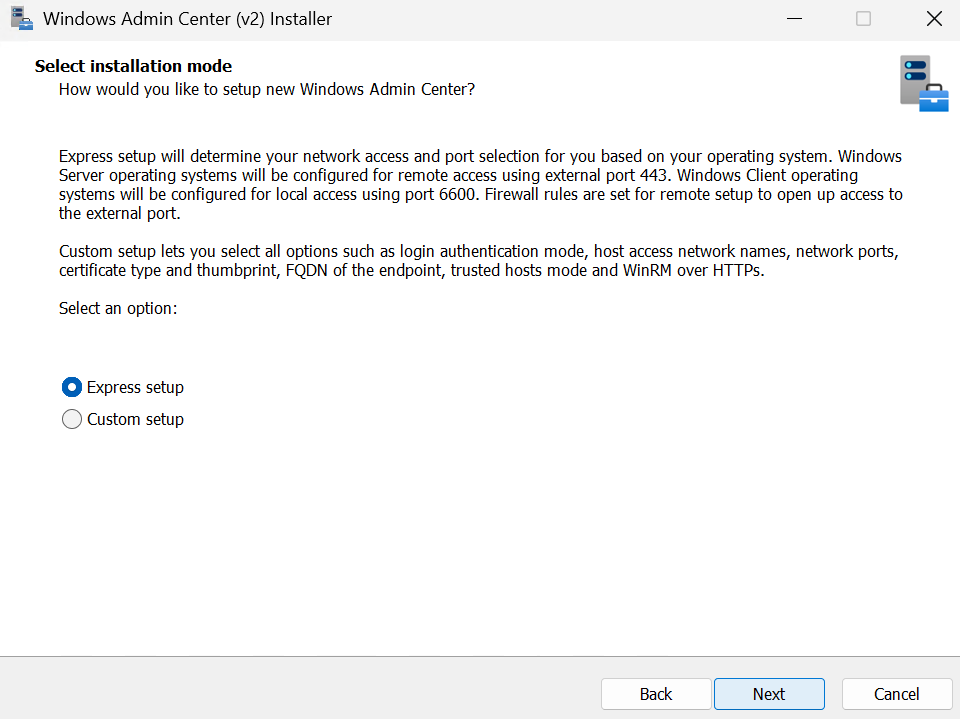
Use the default Express Setup and click Next
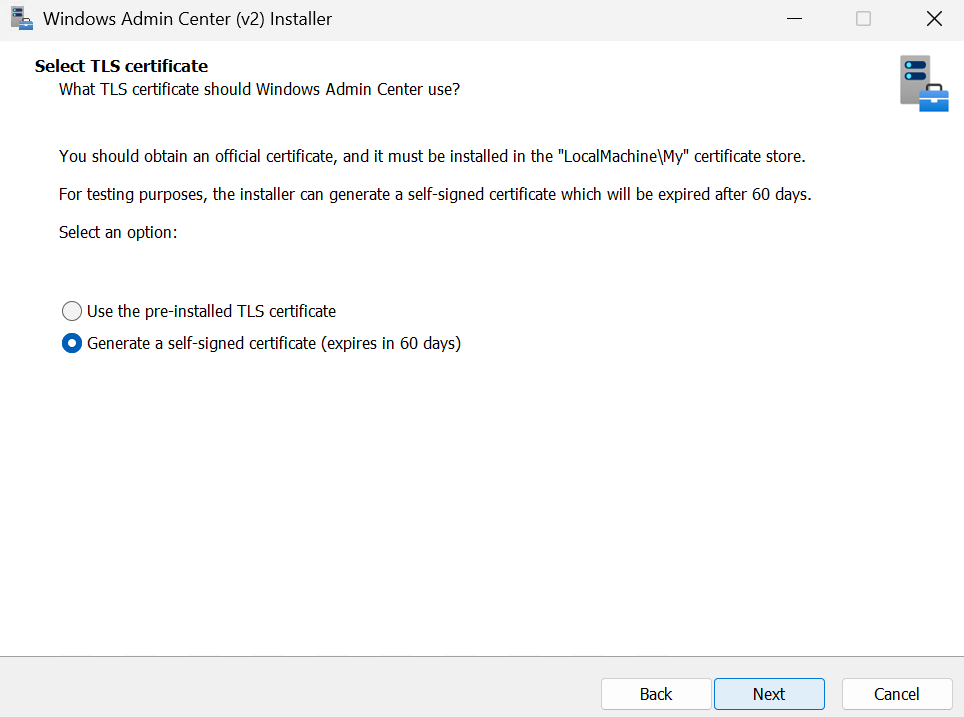
As I am not bothered about certificates for the WAC UI I am using the self signed option, but you can use your own with the first option, then click Next
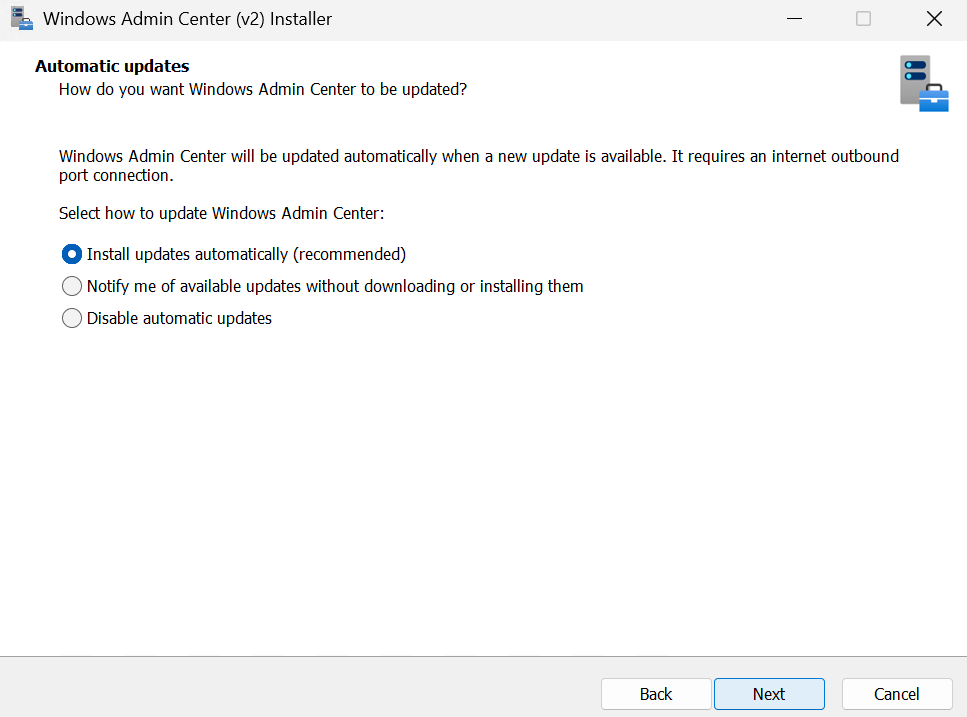
Make sure you select the radio button for automatic updates and click Next
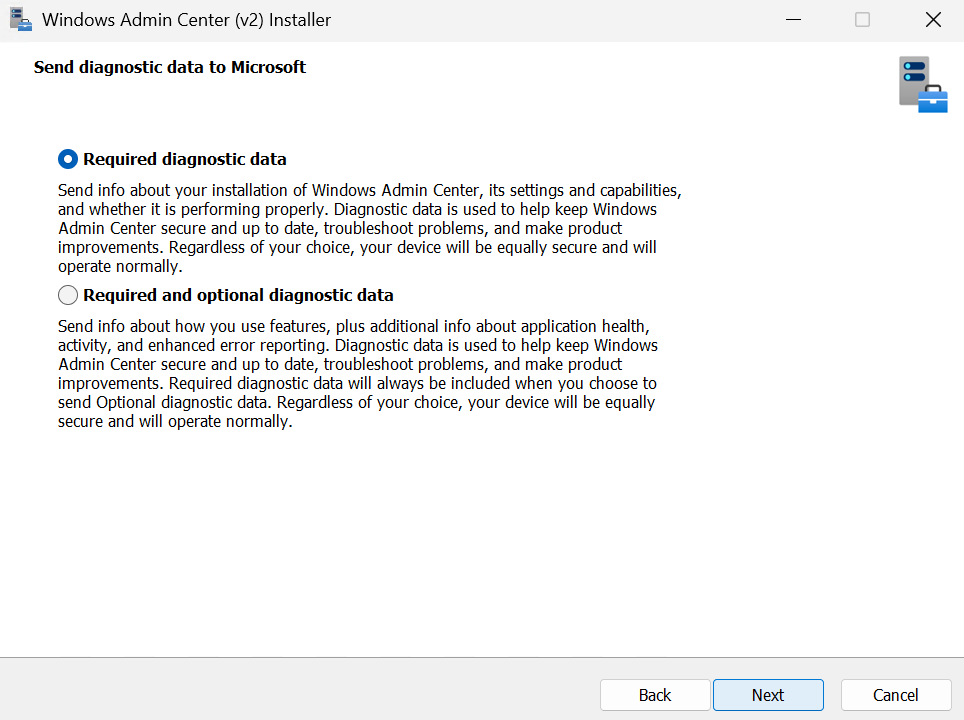
Click Next again
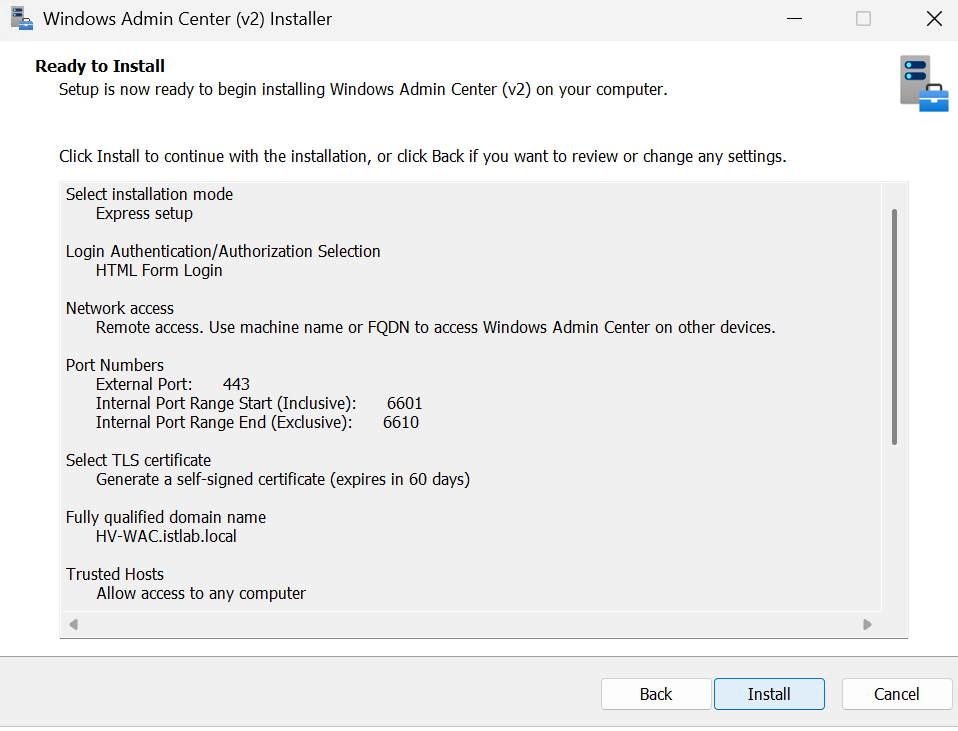
And click Install
And click Finish
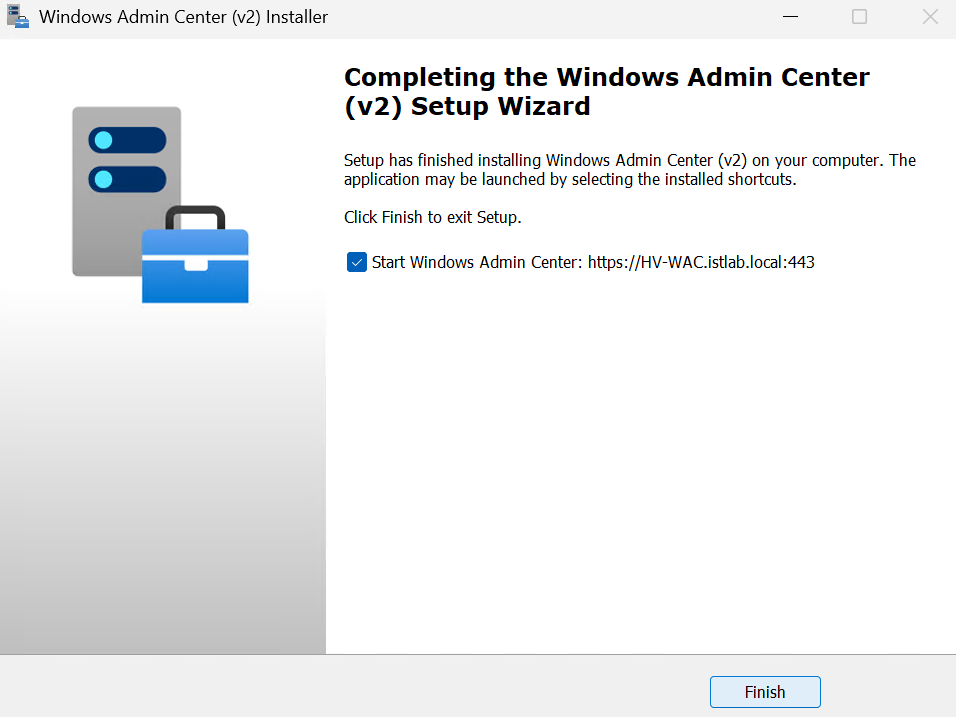
4.3 – Accessing The UI
The installer will put the firewall rule in when its deployed so it can be accessed from other servers
The UI can be found on
https://fqdn
You can login by default with any Domain admin in the form
domain\user
For example

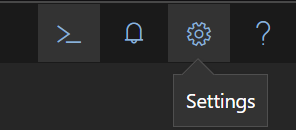
We can add additional groups from the settings menu, in the top right on the gear icon
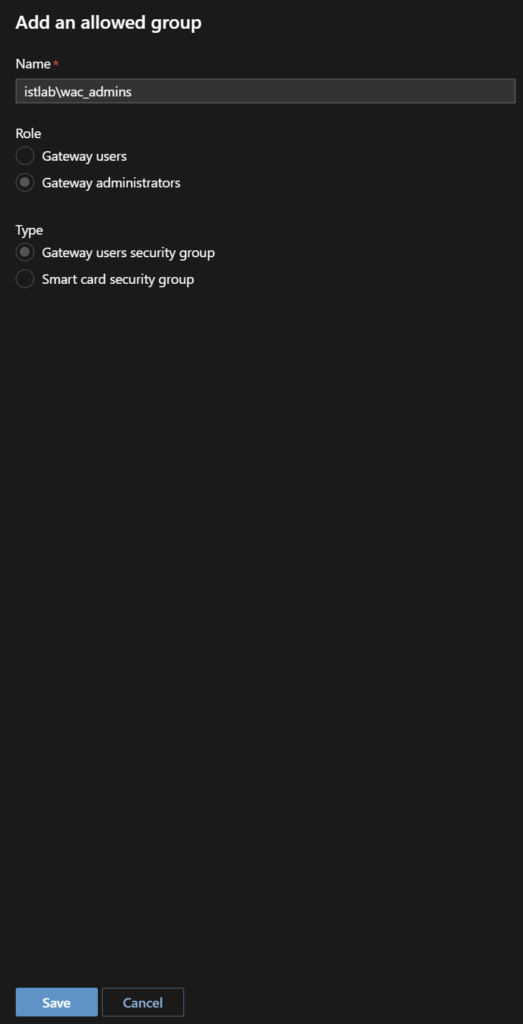
Click Gateway/Access then click Add to add an AD group
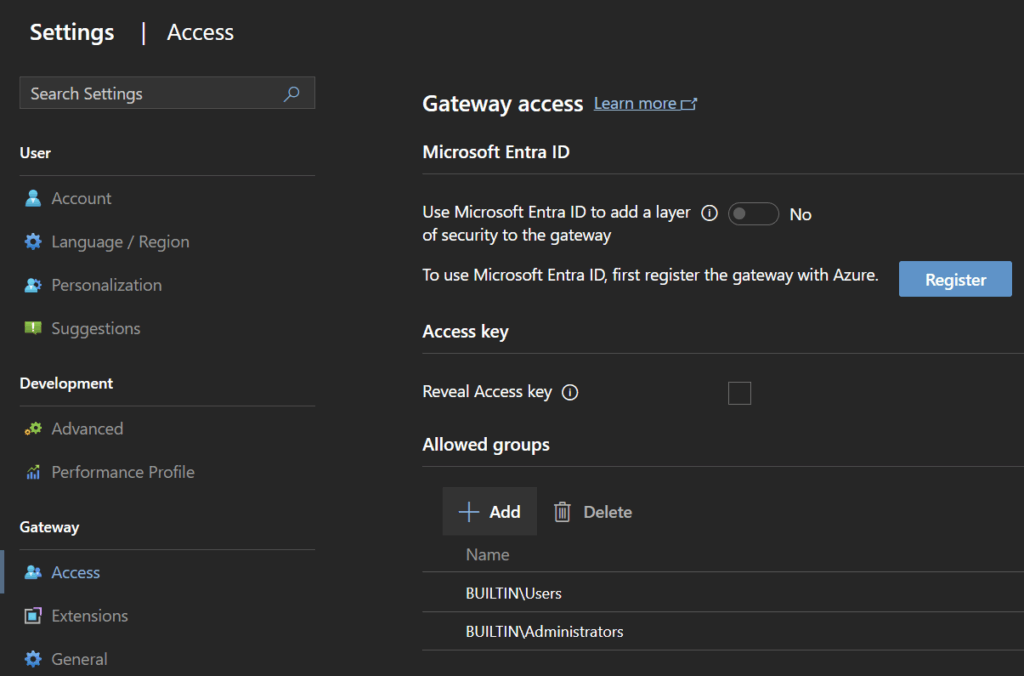
The group wants to be in the format, for an admin group, select the role Gateway Administrators
domain\group_name
The group name, cant have spaces
When its added click Save at the bottom
Now users in that group will be able to login as admins
4.4 – Adding The Hyper-V Cluster
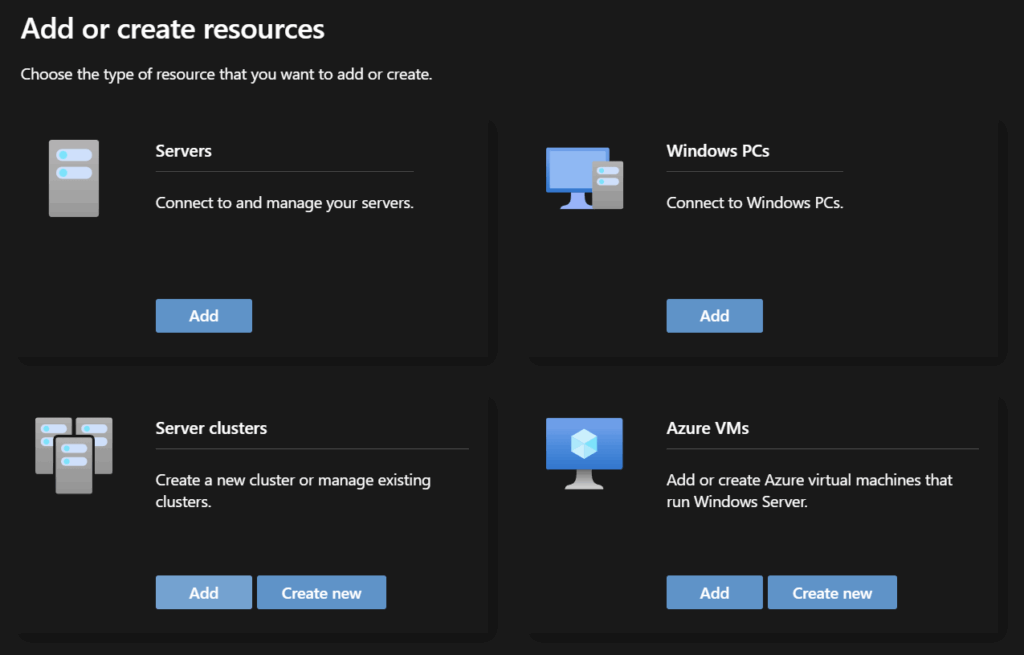
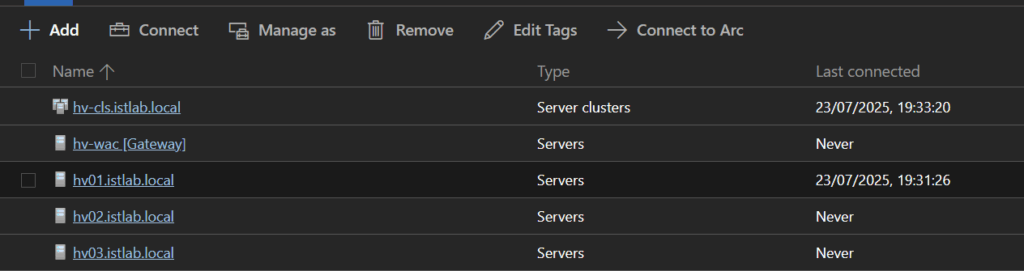
From the main menu, you can click Windows Admin Center in the top left to get back there, and click Add

Click Add on Server Clusters
Enter the cluster FQDN, this should auto populate the hosts after a little bit, then click Add

Now we can click the cluster to begin managing it

4.5 – Creating VMs
On the left panel from the cluster, click Virtual Machines

Enable the toggle for Detailed Mode

This gives us more info on VMs, including the guest memory pressure which is very helpful for rightsizing VMs

Click Add/New

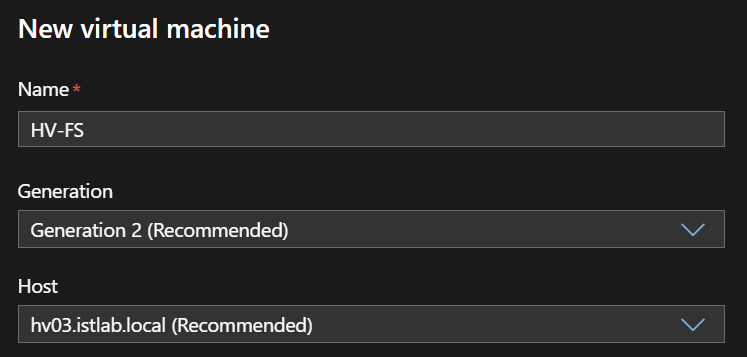
Give the VM a name, I am building a file server, so I called it HV-FS
Keep the Generation and Host on the recommended values
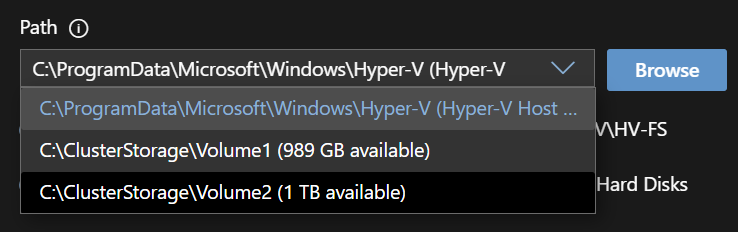
On the path drop down, click a cluster volume to place the VM on, it also shows free space to help you balance the VM data around, I am using Volume 2 for this
Enter the number of vCPUs and the RAM amount
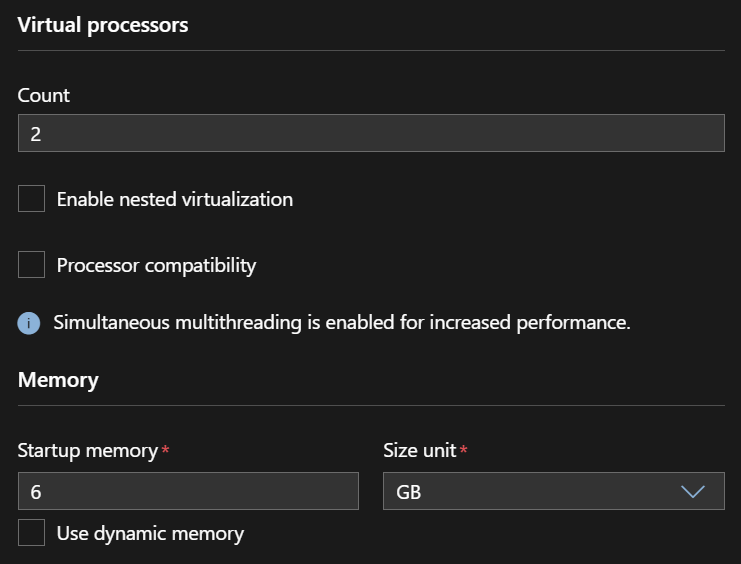
Select the virtual switch and as this VM is going on VLAN 33, the native VLAN we can leave the Isolation Mode on Default, you would add the VLAN tag here
Then click Add on Storage
Enter the capacity for the C drive, I use 90GB, you can add additional disks, I added a 500GB disk for my file server data
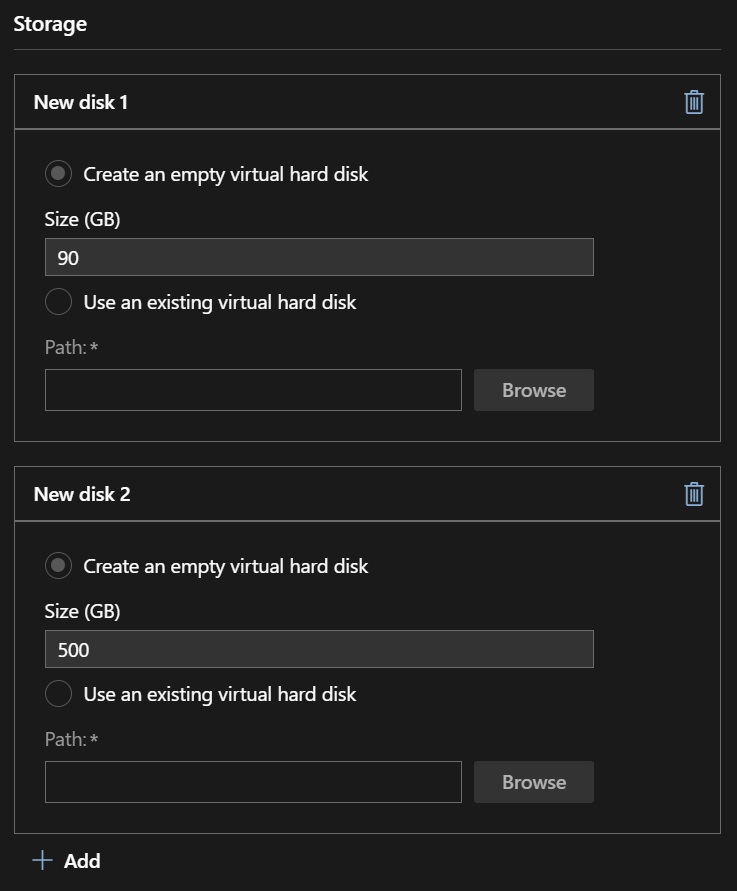
Now disks are added you’ll not that both the VM configuration and disks are now noted to be on the selected volume
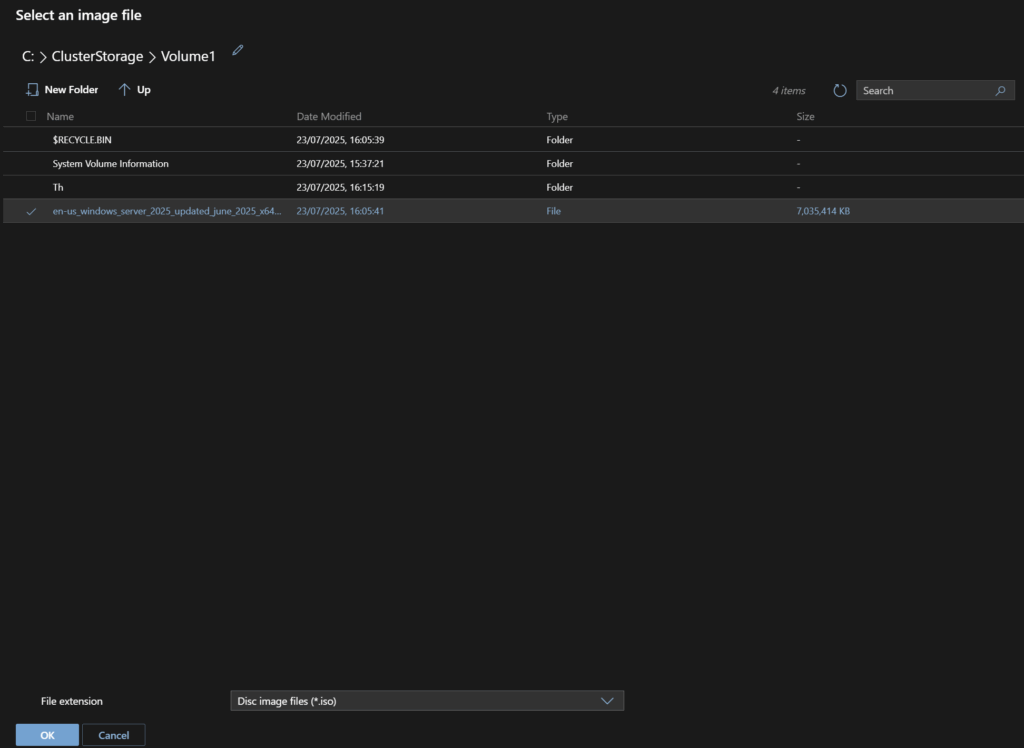
Under Operating System click the radio button to install an OS from an ISO and click Browse
Select the ISO we uploaded earlier and click ok
Now click Create
It will take a couple of minutes to create
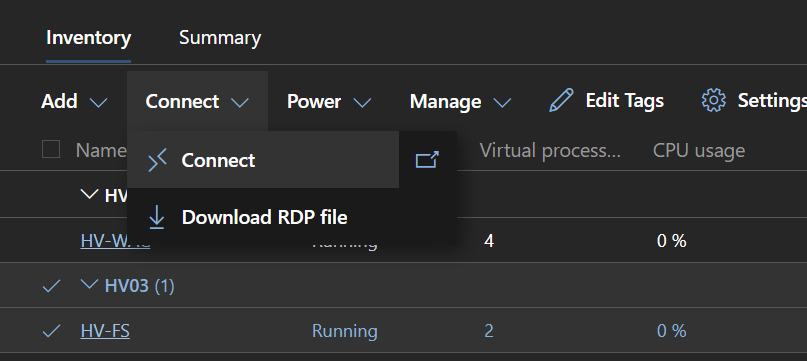
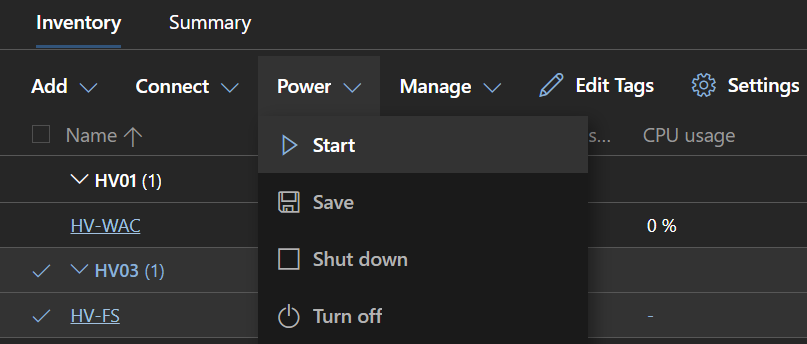
Once its created, click the VM, then click Power Start
We can click Connect/Download RDP File
The Connect option is really buggy and often doesnt work from what I can see
Open the RDP file, you may need to enter credentials again into the Hyper-V host
As the Windows ISO usually needs you to press a key to load you will likely see this
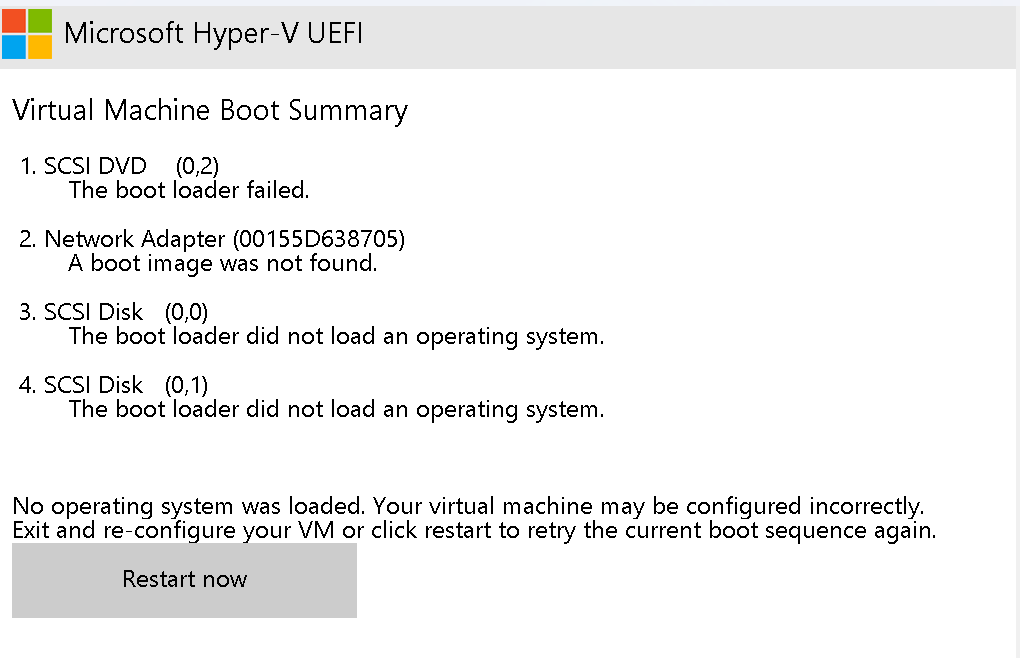
Click Restart Now, or if the mouse doesnt work click Tab, then Enter, and you can boot to the Windows ISO
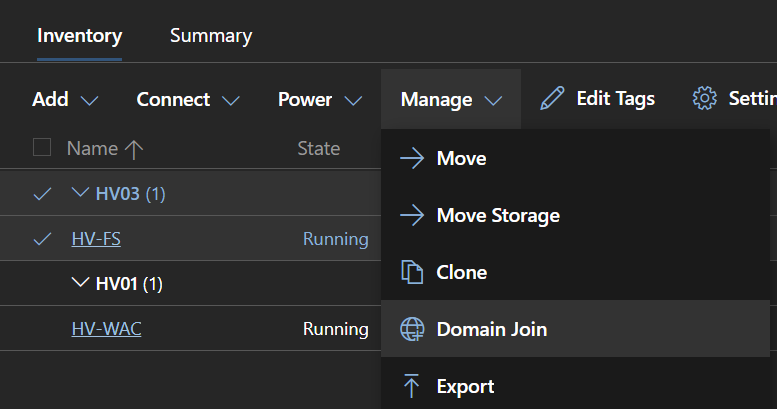
Once Windows is installed, the default administrator account has been set and we have networking set, we can domain join the VM from WAC
Select the VM and click Manage/Domain Join
Enter the domain, domain admin credentials and the default administrator account and click Join
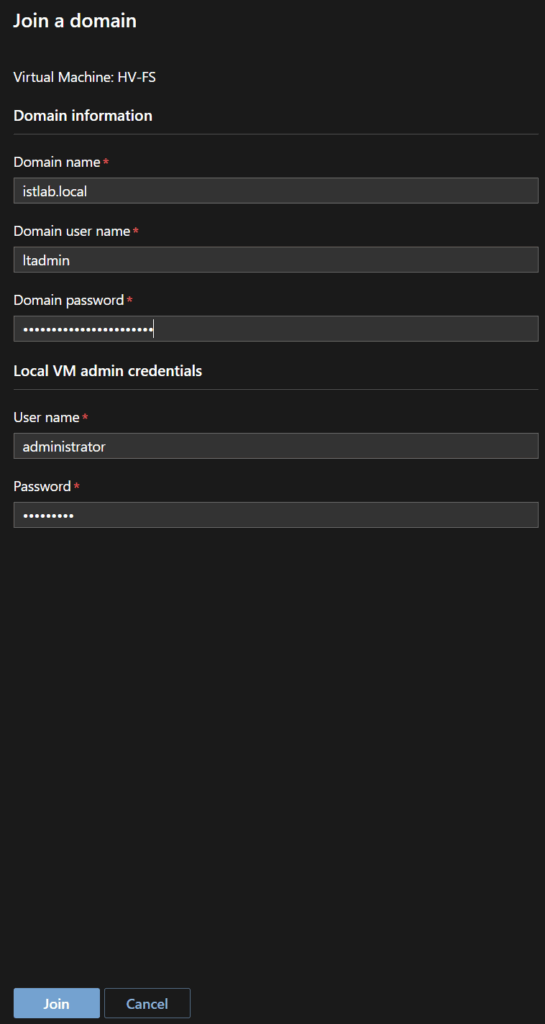
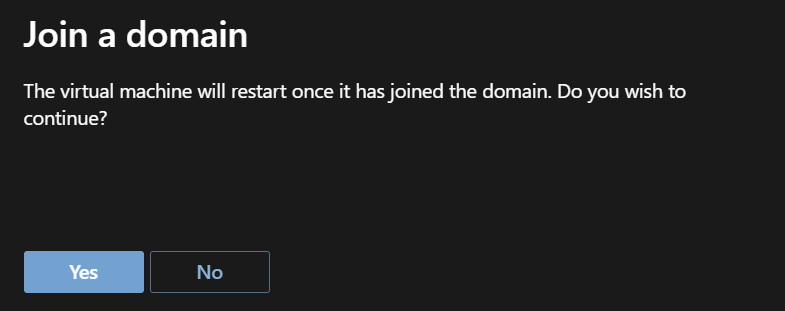
The machine will reboot, click Yes
4.6 – Managing Servers
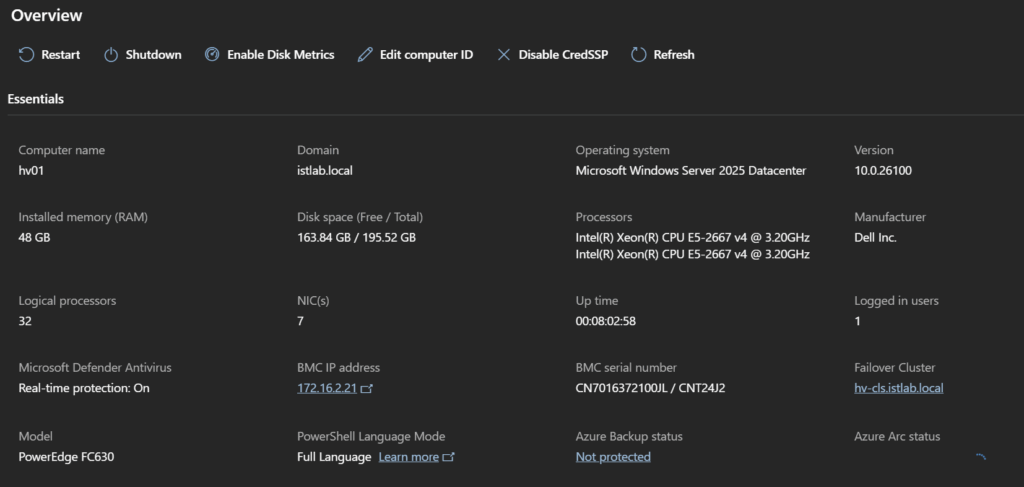
We can also manage the hosts from WAC, we can click any host from the top level menu
The overview will give us a lot of information on the server
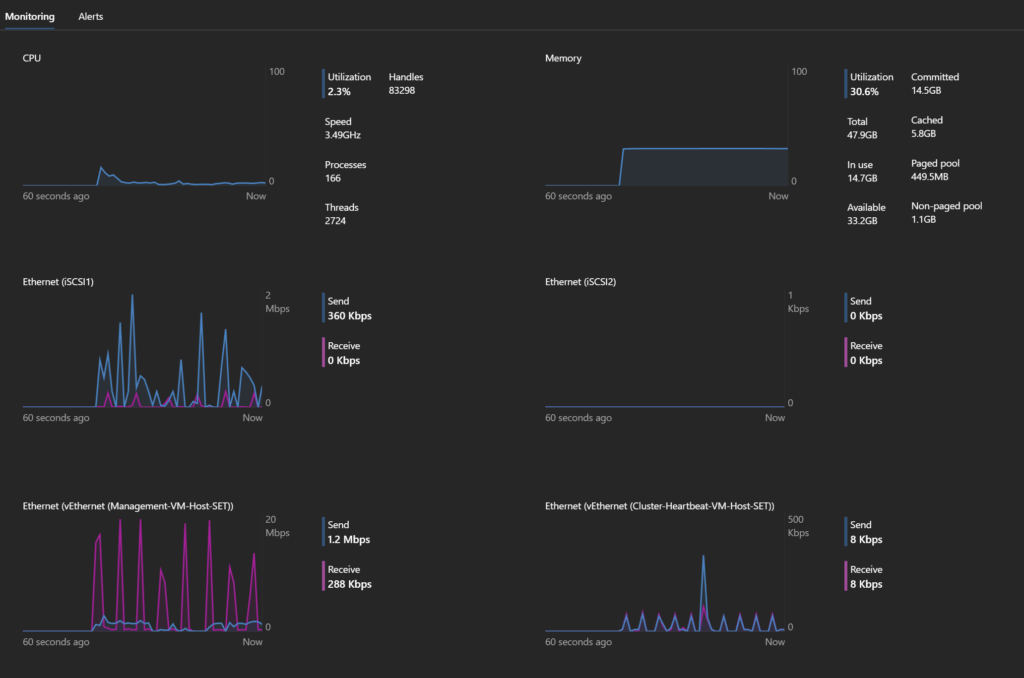
We can monitor system resources and network throughput below
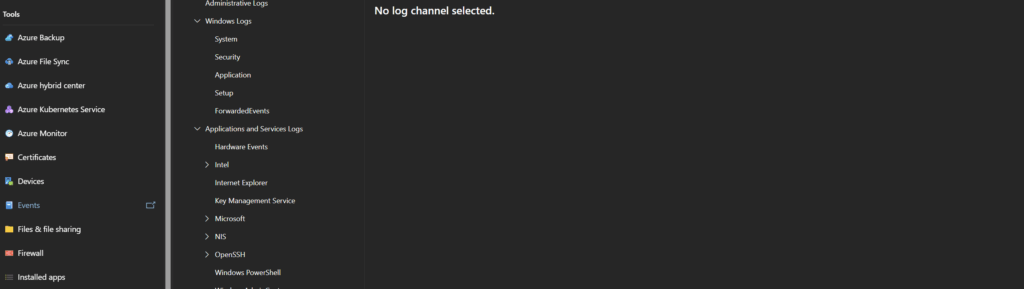
The events tab gives us access to event view for Hyper-V troubleshooting
We can upload and download files from the server if needed
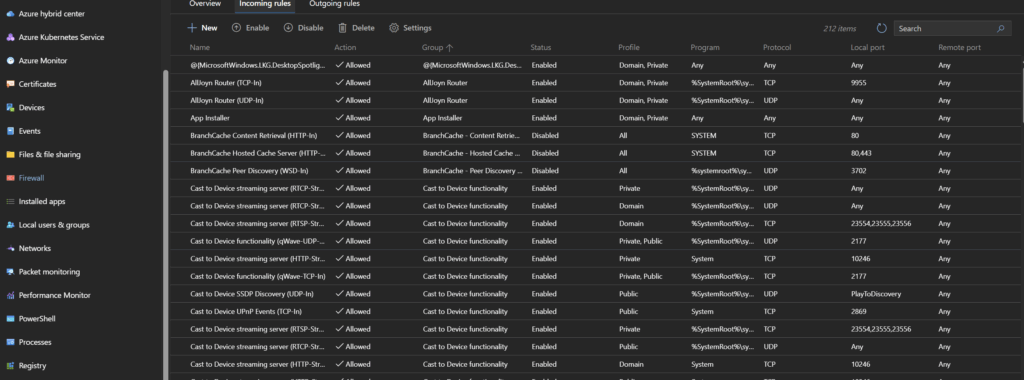
Firewall rules can be viewed and edited
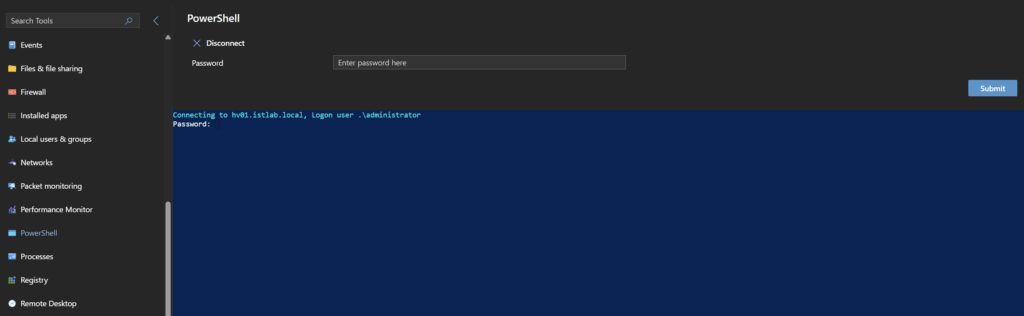
You can use remote powershell, though this seems to use the local administrator account
Remote desktop is also available

Thank you for a detailed explanation with pictures! I do not have a SAN but I have a PowerStore and want to do this with a Share. Do you know of any instructions? I’m having issues adding the share to the cluster. Thanks in advance.
What do you mean sorry, a PowerStore is a SAN, so if you mean the cluster Quorum you can configure a ~10GB volume from that attached to the Hyper-V host group and use that for a quorum like I did with my 10GB disk
This is what I normally do for customers using SANs, just did one for a PowerVault and another for a PowerStore this way
Hope that helps <3
I appreciate the detailed guide in setting up the Hyper-V with different options, if you don’t mind I do have a question, does the WAC or SCVMM provide similar functionality in terms of networking power of Distributed switch (VMware)?
Thank you!
Glad they go appreciated <3
No, I dont think there is an equivalent of that in Hyper-V
Hyper-V is definitely a very basic Hypervisor so I am not surprised basic switches is all you get in it
In this guide you state you want to allow management to use the “SET” switch but then set the value to $false, is that a mistake? New-VMSwitch -Name “VM-Host-SET” -NetAdapterName “SET1″,”SET2” -EnableEmbeddedTeaming $true -AllowManagementOS $false
No thats done on purpose, when I tested with $true, which is what I did first, it caused issues with setting VLANs for subsequent vNIC adapters, so thats why its done this way
Thanks for providing very detailed instructions with a screenshot.
We are setting up a Hyper-V environment with two nodes running Windows Server 2025 Datacenter, both domain-joined, with Failover Clustering installed. Each node currently has only two NICs—one used for management/RDP and the other dedicated to iSCSI (Dell PowerStore). iSCSI volumes map correctly to both nodes, but when attempting to create the cluster, we receive the error: “Could not retrieve the network topology for the nodes. The cluster network interface was not found.” Our question is whether the two-NIC configuration is sufficient for building a cluster, or should this configuration still be used for testing purposes?
I would always recommend using SET switch, redundancy is key and critical in any production setup
Really, I will say 4x10GbE is the minimum, and 10GbE NICs are so cheap these days its a no brainer, the storage at the very least will be 10GbE with it being a PowerStore, so if switch capacity is an issue, direct connect is the way to go
Id always go via the switch for iSCSI, the PowerStore can do direct connect, its just not designed with it in mind so has a couple odd things, but I have set it up before in VMware and Hyper-V
Then use the remaining 2x10GbE for a SET switch running everything else, like I have in the guide
I really cant recommend only 2x10GbE for everything unless its a lab
Id start there, and see if, following this guide, you get the same issues cropping up, there may be something else at that point
Hi Leaha
A nice thoroughly post about setting up a Hyper-V Cluster.
I really like it!
I often implement Hyper-v Clusters for customers.
I agree in your setup.
Just a couple of highlights I want to mention :
– it’s really recommended to implement the core edition instead of the full GUI (more secure, lower footprint and much less updates needed – it’s true, it’s much more difficult but handy to copy/paste the needed Powershell commands)
– mention also that NTFS has to be needed underneath for the CSV’s (except if using S2D – and I agree with you, using S2D in production is not recommended, I do also prefer a true SAN) – if using REFS (what is recommended if using S2D or using a standalone Hyper-V with local-storage there will be a performance penalty because of redirection of the owner in case of a cluster
– In case of 10Gbps, I prefer using 3 dual networkcards – because being old-school – I prefer to use separate physical NICs for live migration – I had too many issues with live migration consuming too much bandwidth of the NICs, so I don’t like combining them with other roles – in case of 25GBps or higher it’s no issue, because most to the time the storage can’t follow in that case – I know you can setup QOS on the different vNICs but not all engineers are very aware with Hyper-V, therefore making it less complex
Thx again, I like those posts
regards
Nico
Hi, thanks for your feedback
There are a couple of reasons why some design decisions were made for this guide
For the NICs, I did outline the recommendation for 6 NICs, as I would also recommend this, but also see Hyper-V customers being very small organisations and sometimes, 6 NICs isnt possible, either due to NIC cost, or usually switch cost/capacity
I did look into QOS, but couldnt get anything working, if you have any documentation I would greatly appreciate it please, as QOS to ensure bandwidth is consumed by a single service is very important
For NTFS, yes NTFS is required for CVS, and section 3.2 covers setting up the cluster storage which includes the initial NTFS partition as without it you cannot create the CVS, so this was covered
Yes, Core is generally recommended, but again, these organisations typically are very small teams and managing Windows via the GUI is easier for them, if you came here from the Reddit post, it was outlined there, but I didnt touch on it in the post, but this was why this was chosen, it also makes the guide as accessible as possible, anyone who can use server core can use server GUI, so it fits the widest possible audience
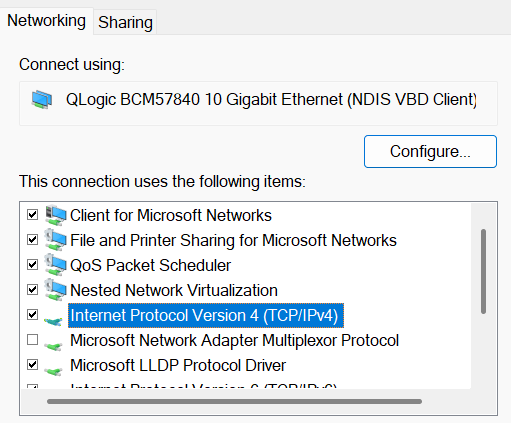
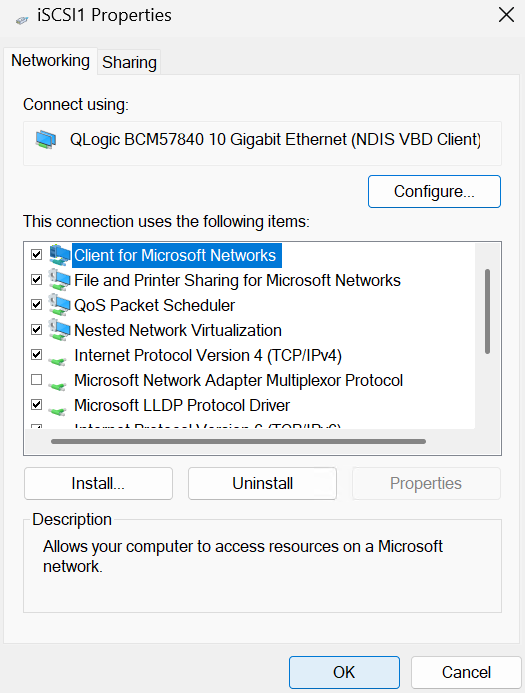
For the dedicated iSCSI NICs, I would recommend that you unbind everything except TCP/IPv4.
Keeps it cleaner with no extra, unnecessary traffic hitting those NICs
Yeah, thats a good point 🙂
RE: Windows Admin Center VM – Have you deployed this instead of a VM?
https://learn.microsoft.com/en-us/windows-server/manage/windows-admin-center/deploy/high-availability
I’ve deployed these within a cluster, alot easier than a VM.
Hmm, I havent seen that, wonder if its new, definitely sounds better/easier, HA is always good in a cluster, and with the new WAC V mode, the one more aligned for virtualisaion, should be a big win