Last updated on January 28th, 2026 at 07:28
I recently had a play with Apple CarPlay in a friends car and being able to wirelessly stream my phone to the car with music and sat nav on a large screen was a LOT better than I expected it to be
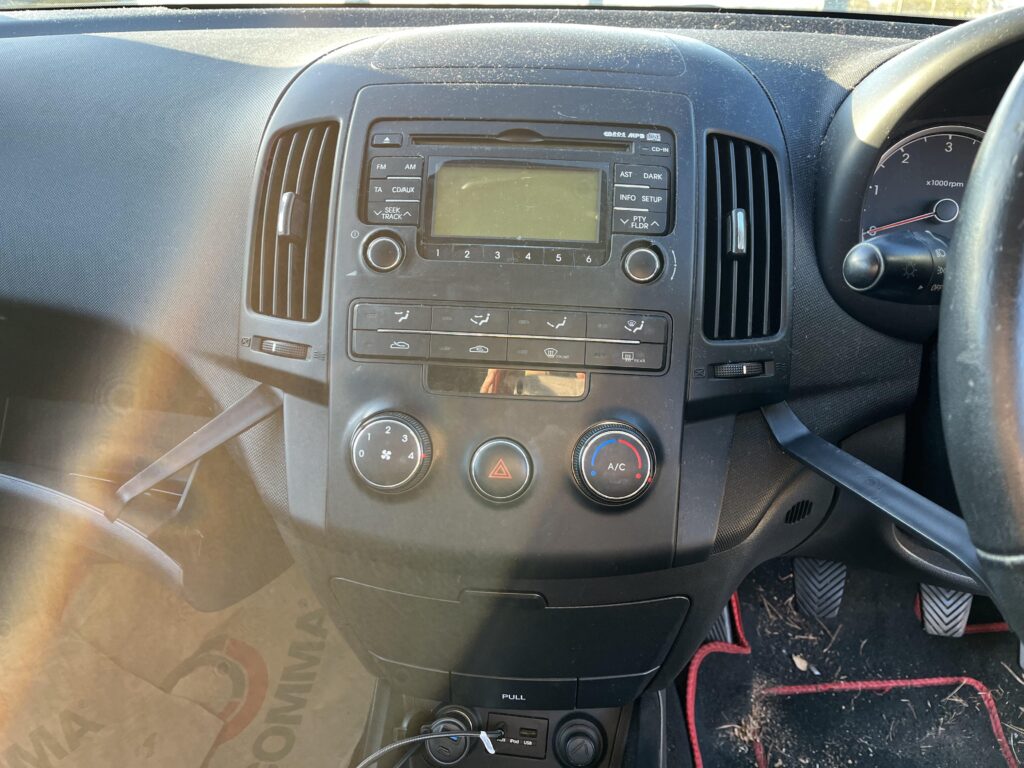
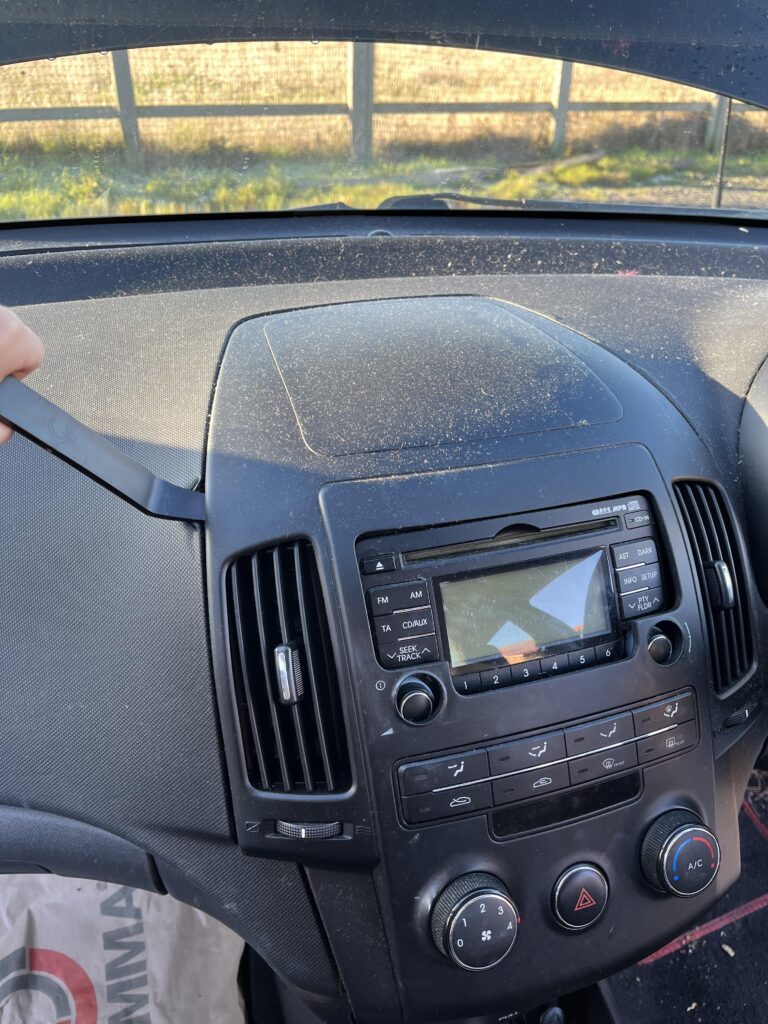
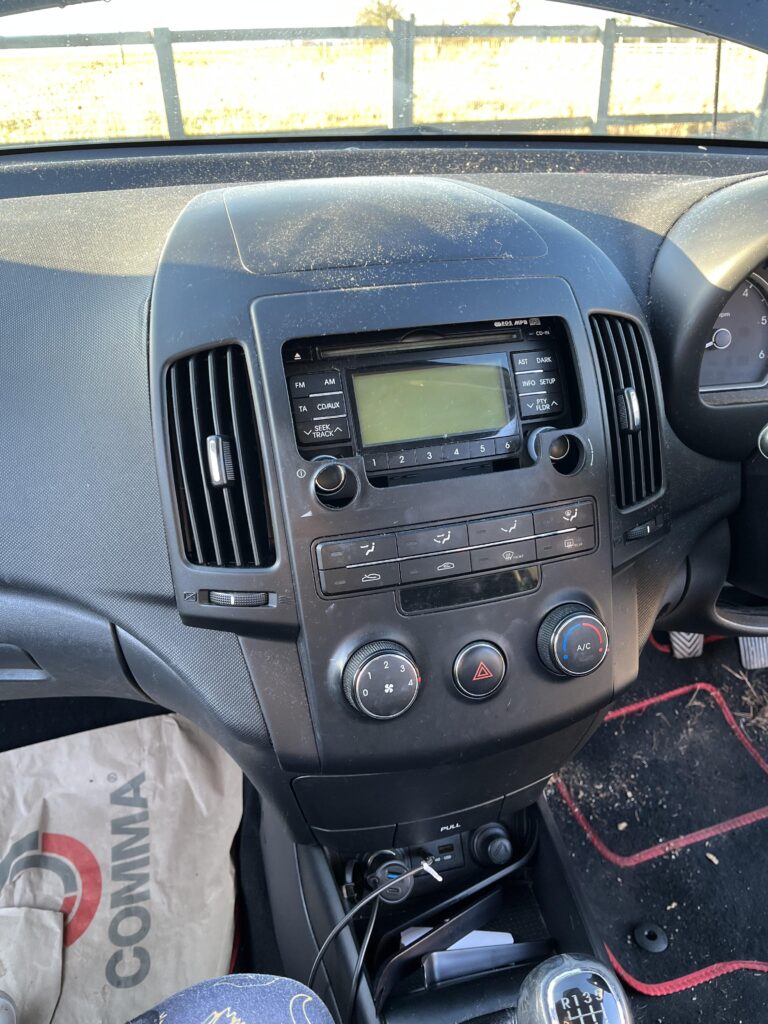
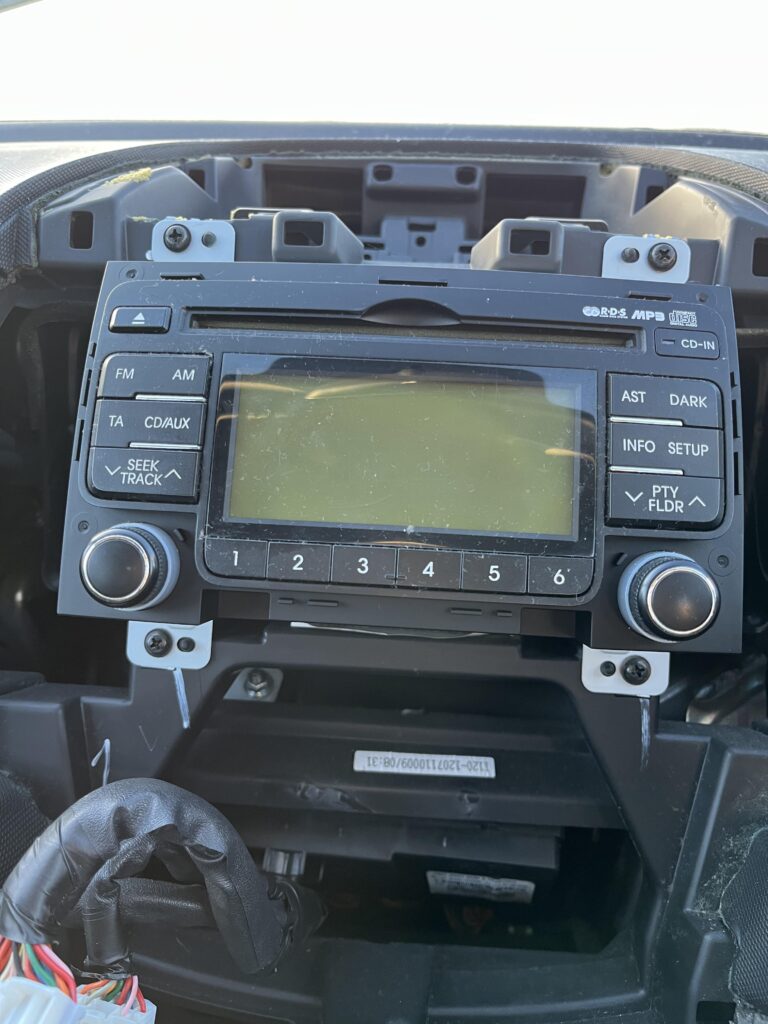
Now.. Sadly, my 2011 Hyundai I30 is very far away from that with a very basic stereo sporting, FM radio, MP3 support and a headphone jack, very not CarPlay compatible
So I started looking into which models did have it, and with the age of my car I considered looking at the Mk2 version of the I30, 2012-2017, which it seems only a some in 2016 or 2017 seem to have it, with wired only, meaning you’d really need the Mk3, 2017+, model, which is a very hefty expense
So with a new car thoroughly out of the question due to price, and there being nothing wrong with my current 2011 model, which I really love, its been a truly excellent car for the 5 years Ive had it, I looked at the possibility of upgrading my current car
And yes, it needs a vacuum, dont judge me lol
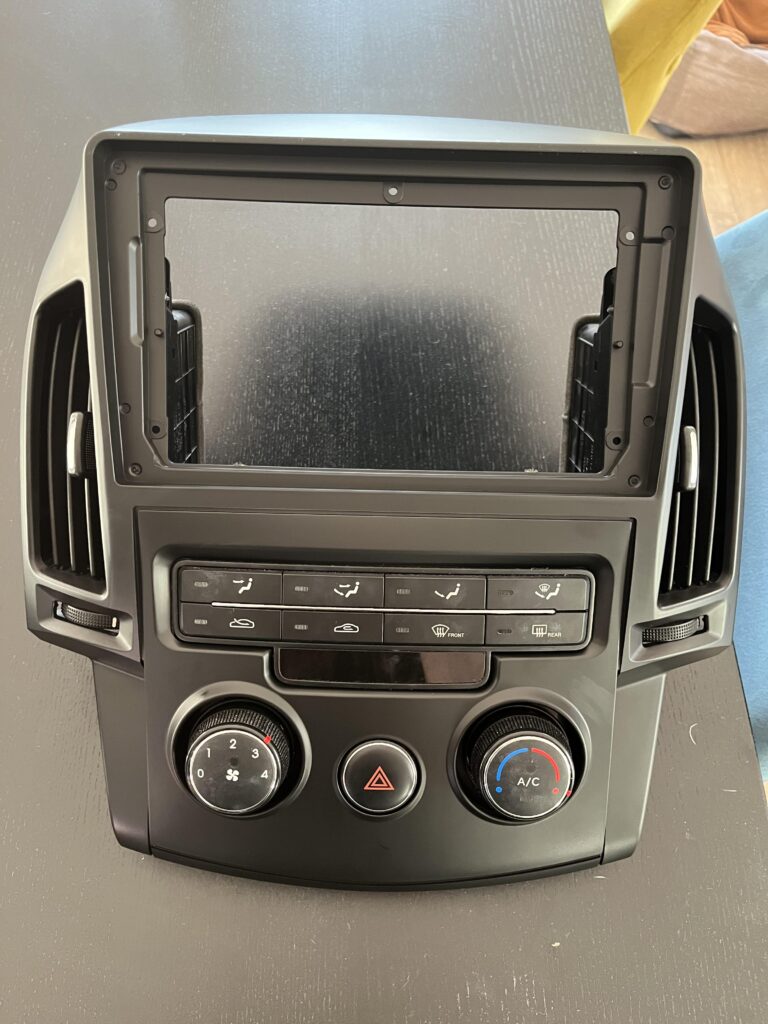
Now I initially thought this would be dead simple, the car uses a standard double DIN sized stereo, so swap in a new one, right? Sadly.. No, while it has a standardized size, the head-unit/fascia is custom fit with plastic that covers parts of standard size, so you cant drop an after market unit in without taking a Dremel to it
After scouring online for other options, eBay has a load of generic branded units that interestingly offer three key benefits, a custom head-unit/fascia, all the cables needed and a large 9 inch screen, vs 7 inch with a standard double DIN stereo sizing
So I opted to buy one after some messaging with the seller, and for price, it seemed like clearly the way forward
So what did I buy
I got this, for £120 you really couldnt ask for more, I then needed some prying tools to try and remove the factory fascia, which I got this, for an extra £4
So the total cost was ~£125, time wise, I had a vague idea of what I was doing, but was largely winging it, and it took me ~3 hours, so if you wanted to do the same with this guide, and are even slightly competent with cars, which I am not, you can definitely do it quicker
Spec wise, my unit was the following
- 4 Core A53 At 1.3GHz
- 4GB RAM – Was advertised as 2GB so bonus
- 64GB Storage
- 1280x720p 9 Inch Screen
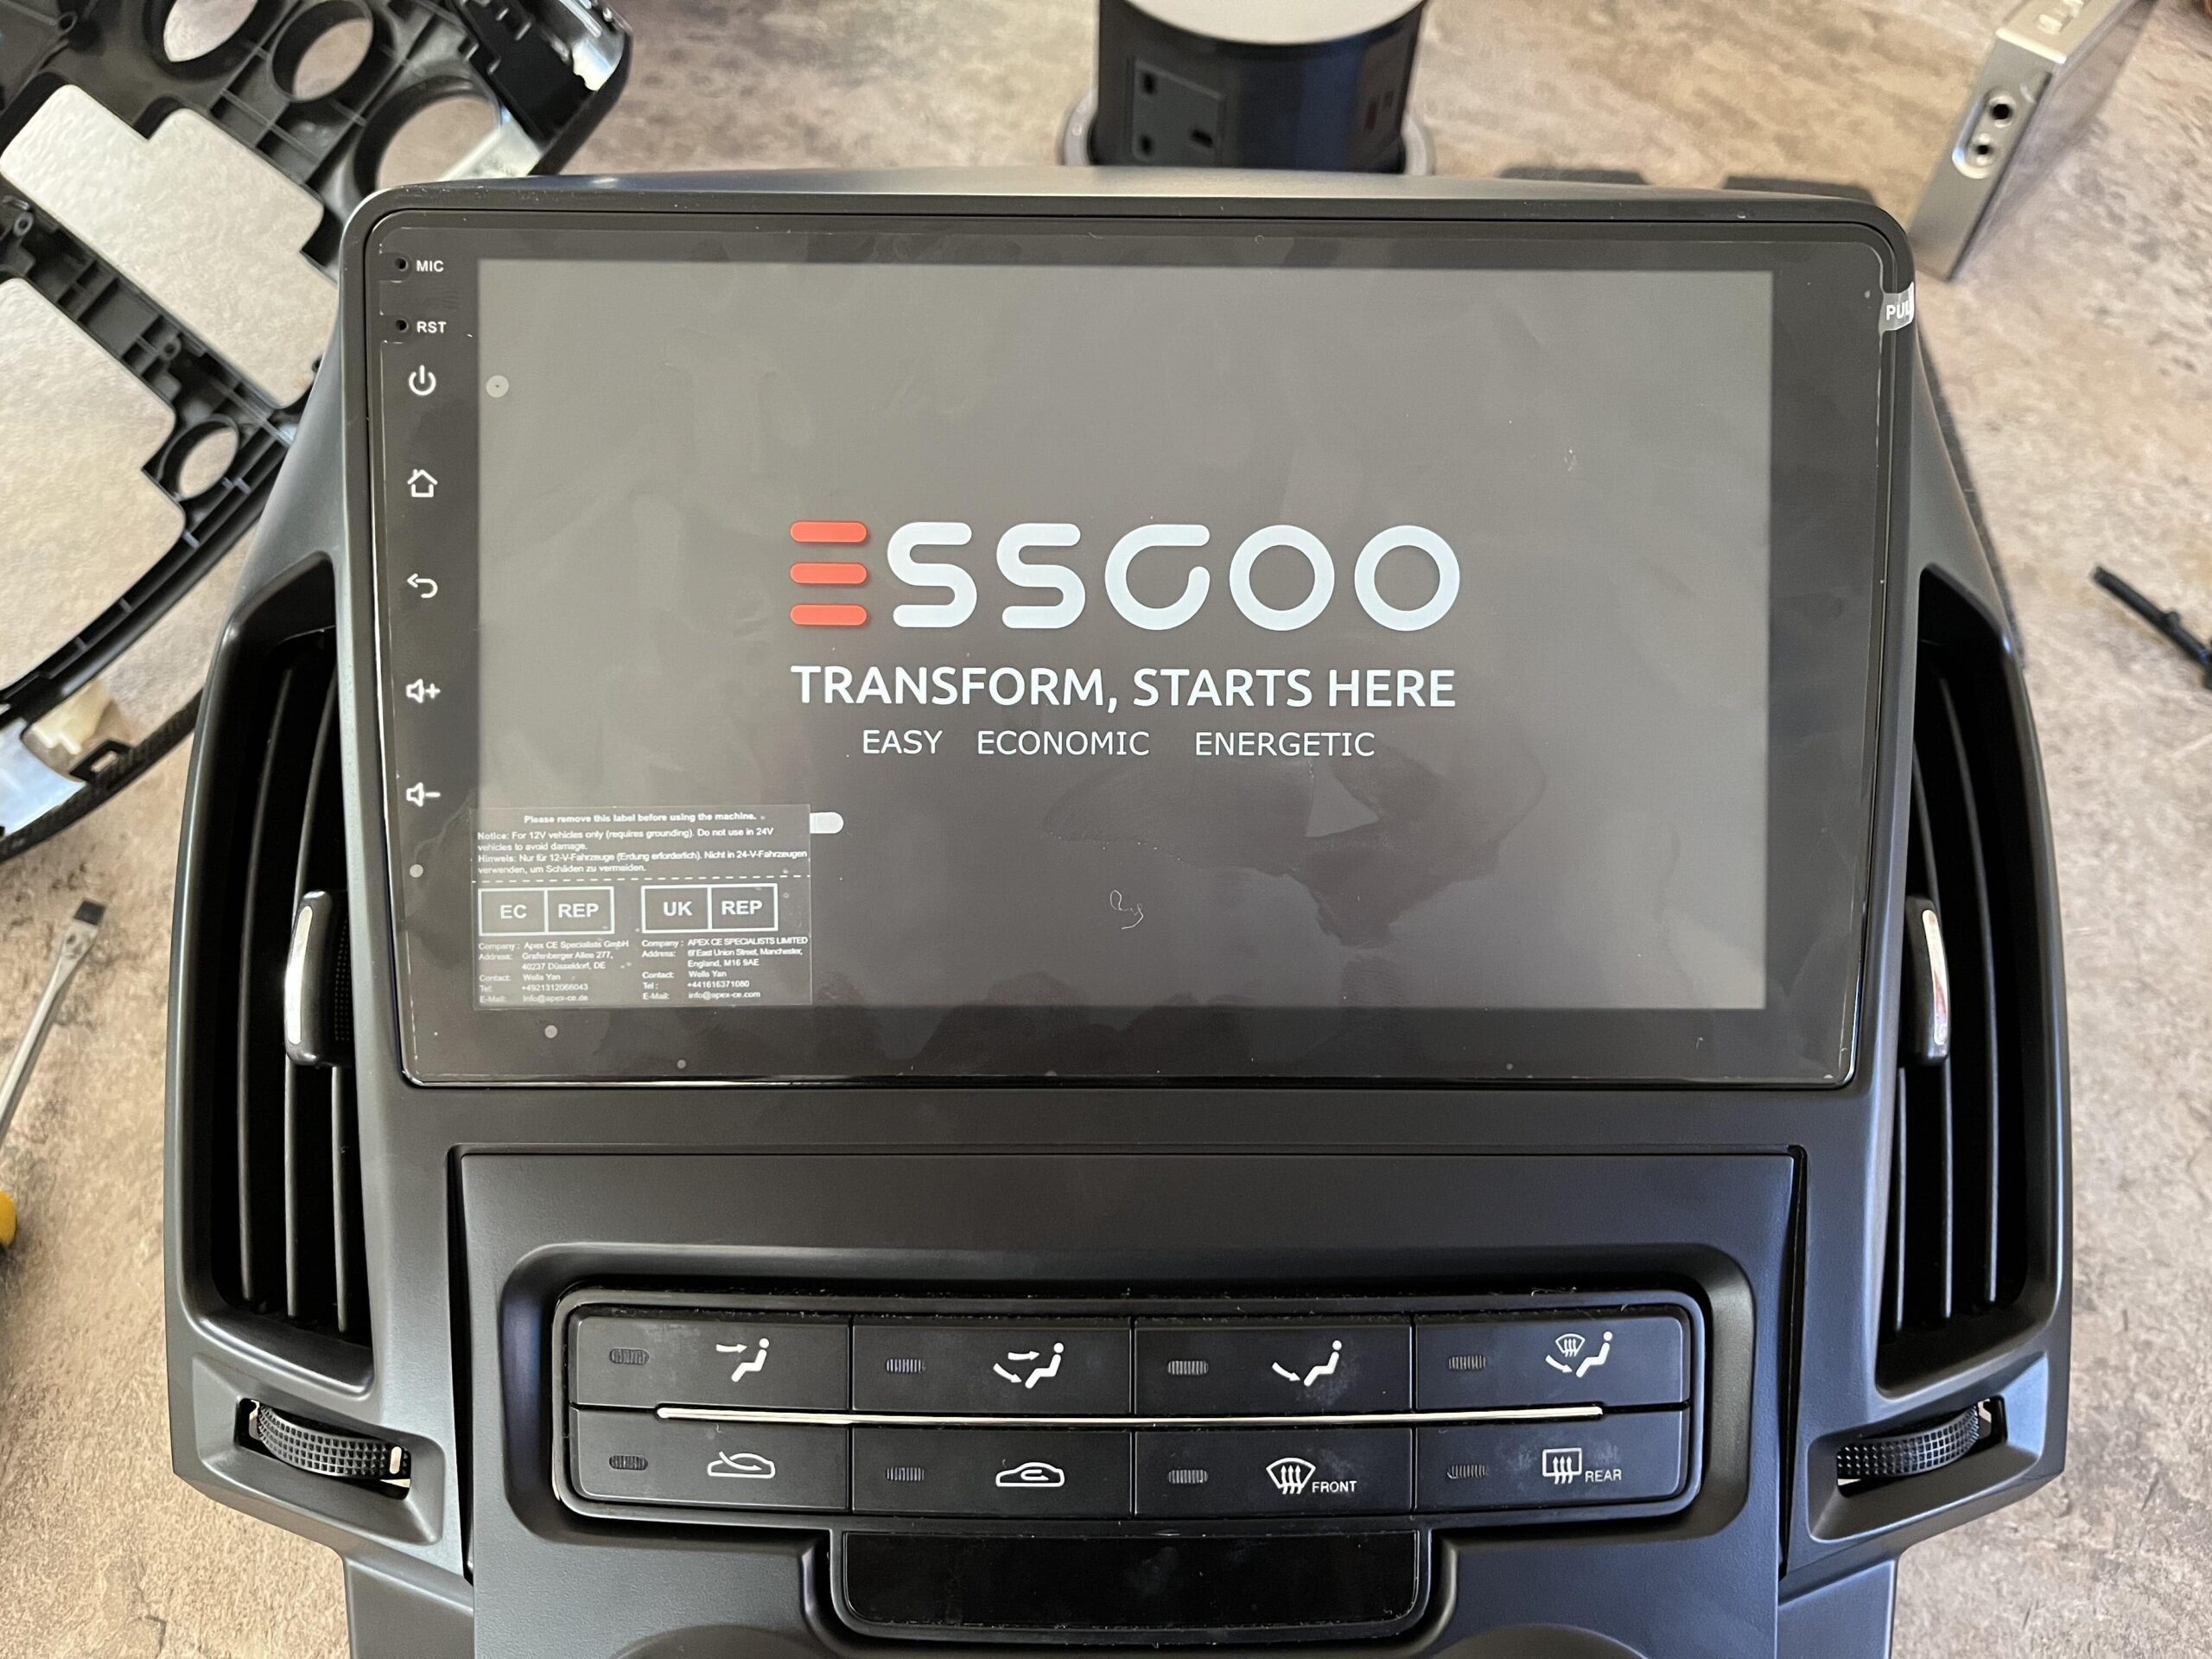
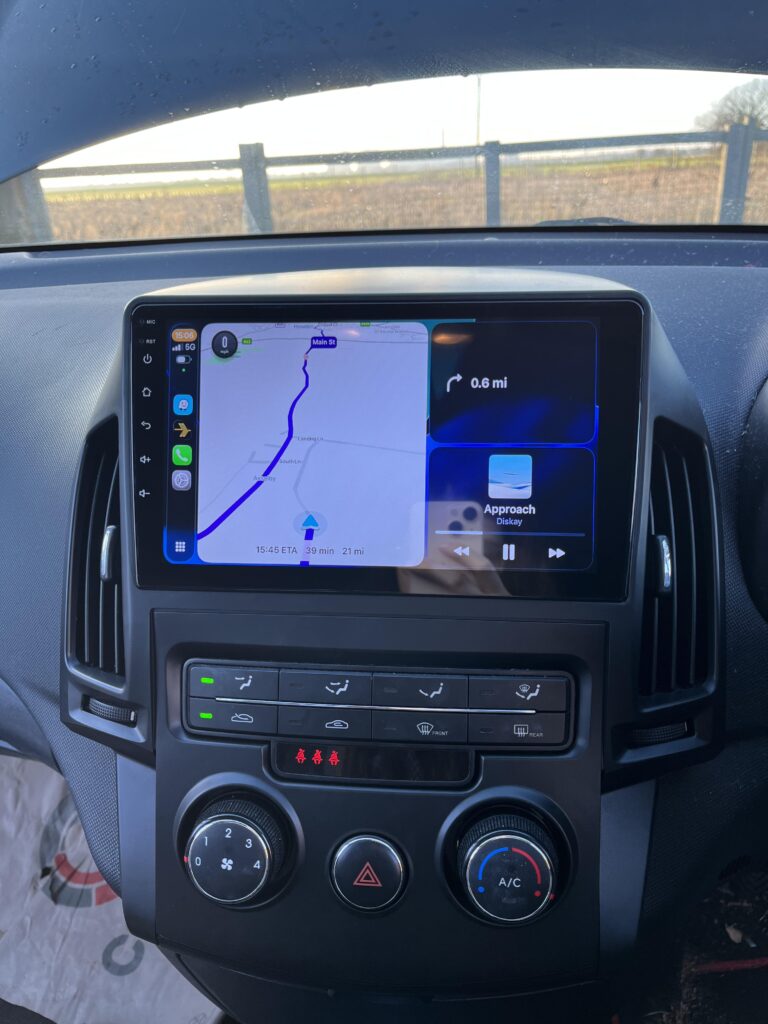
What did the end result look like
Well, it fit pretty well, it was quite a lot of effort getting the new fascia back in, but the end result was really good, especially for the price
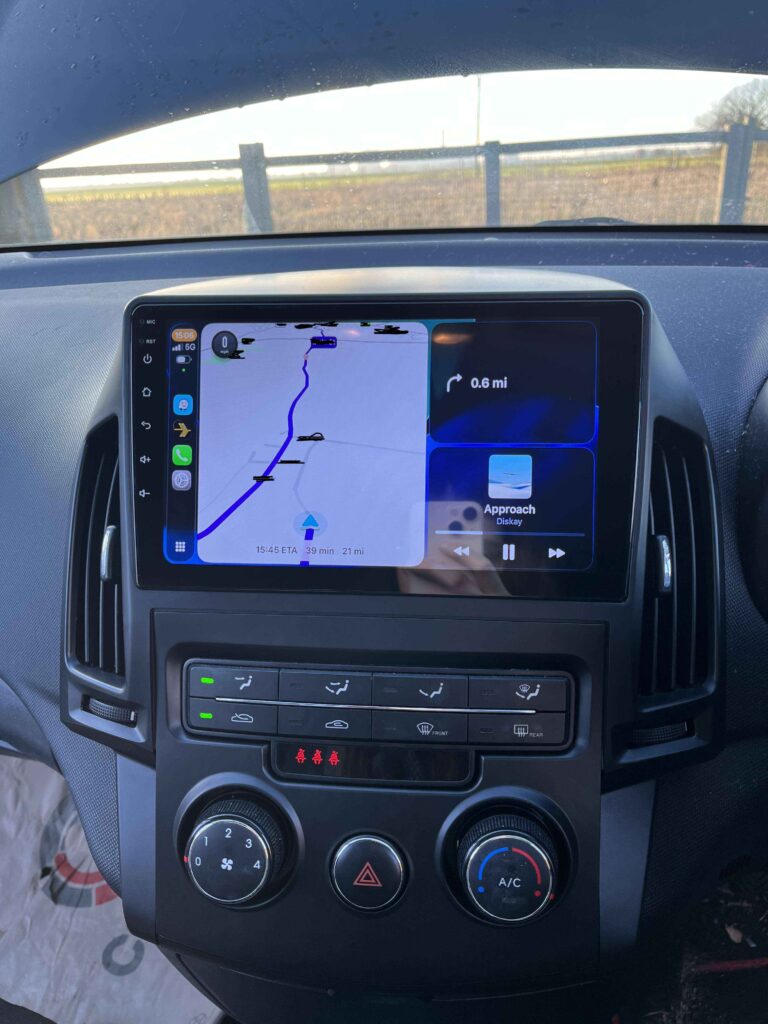
Its worth noting, the FM radio no longer works, all the cables the old unit had were connected so I am not 100% sure why, but, for me, I never used it, and the point of this was never to use the FM radio, else you may as well leave the factory stereo in, so I dont see it as an issue
The car 3.5mm jack also no longer works which I expected, the USB port does work for power, to charge your phone with no issues
Important – By continuing you are agreeing to the disclaimer here
1 – Whats In The Box
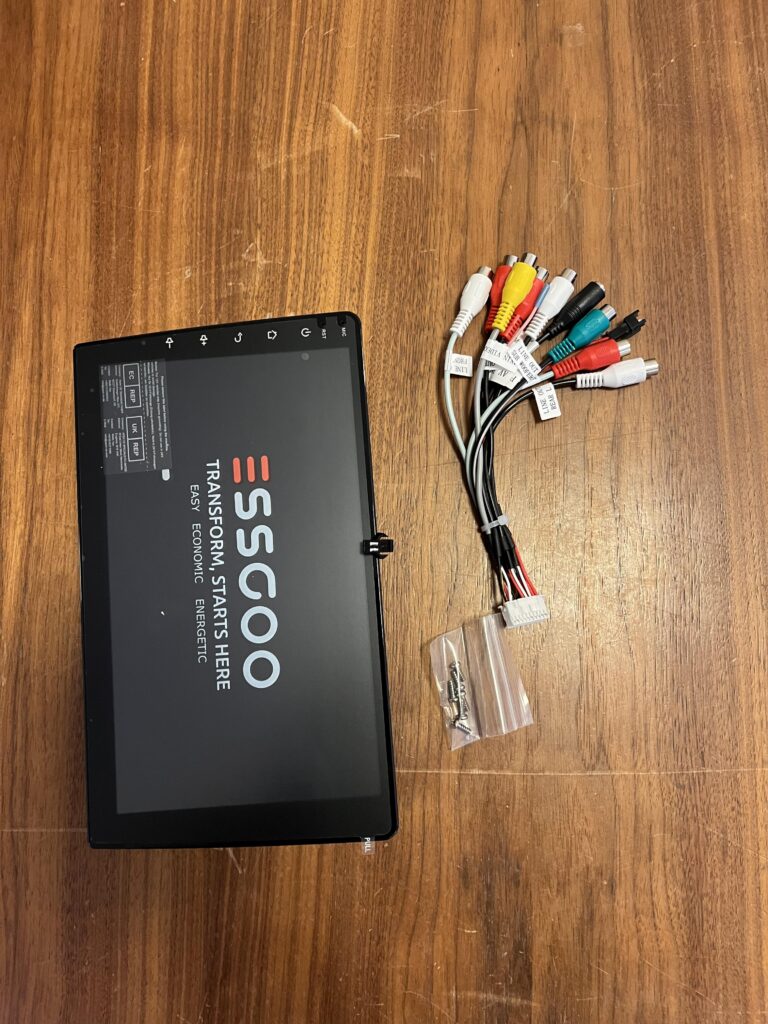
Now we have our items ordered, what came in the box for the new stereo unit
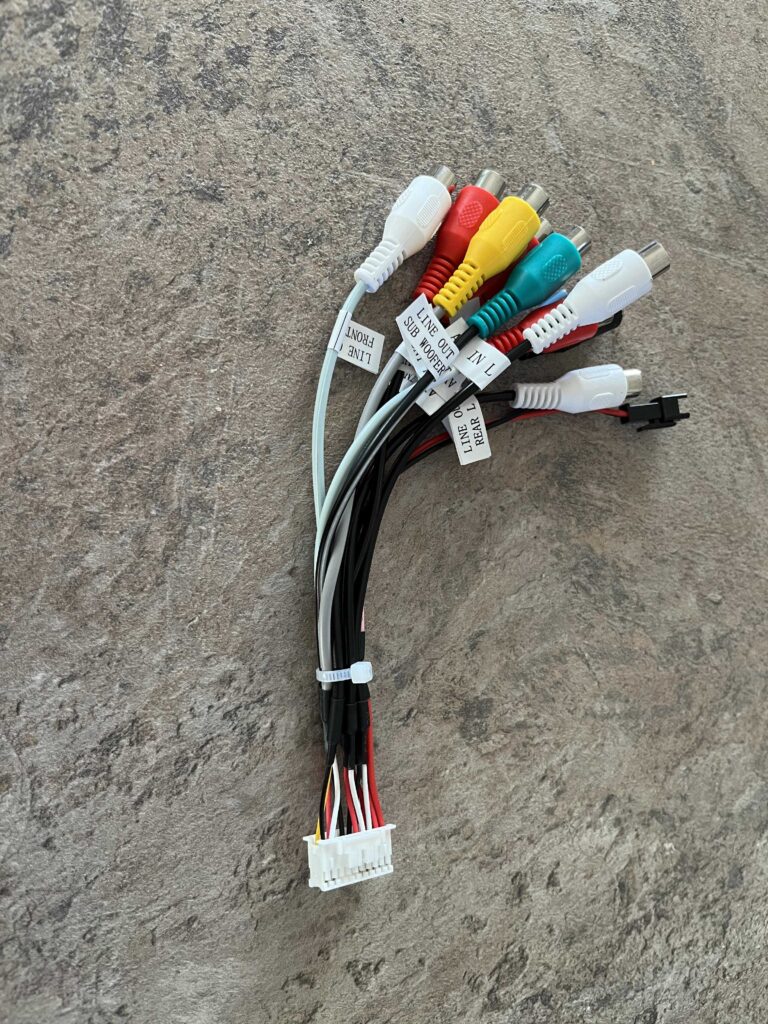
We have the unit its self, and this comes with a generic AV cable, which we will need for this
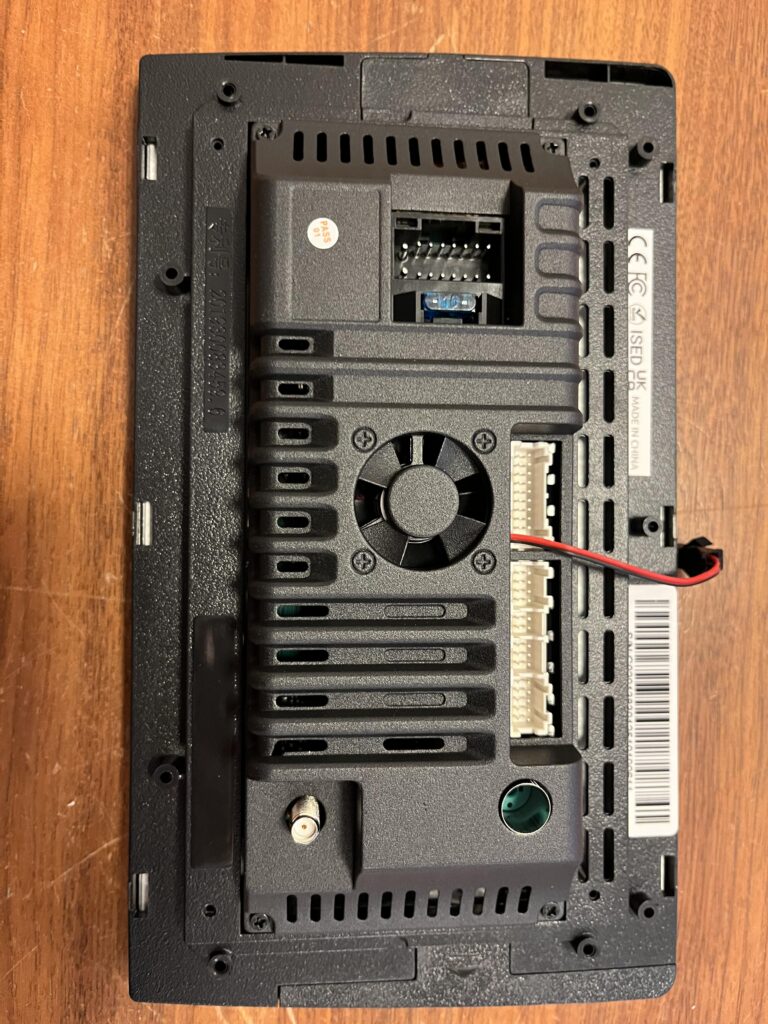
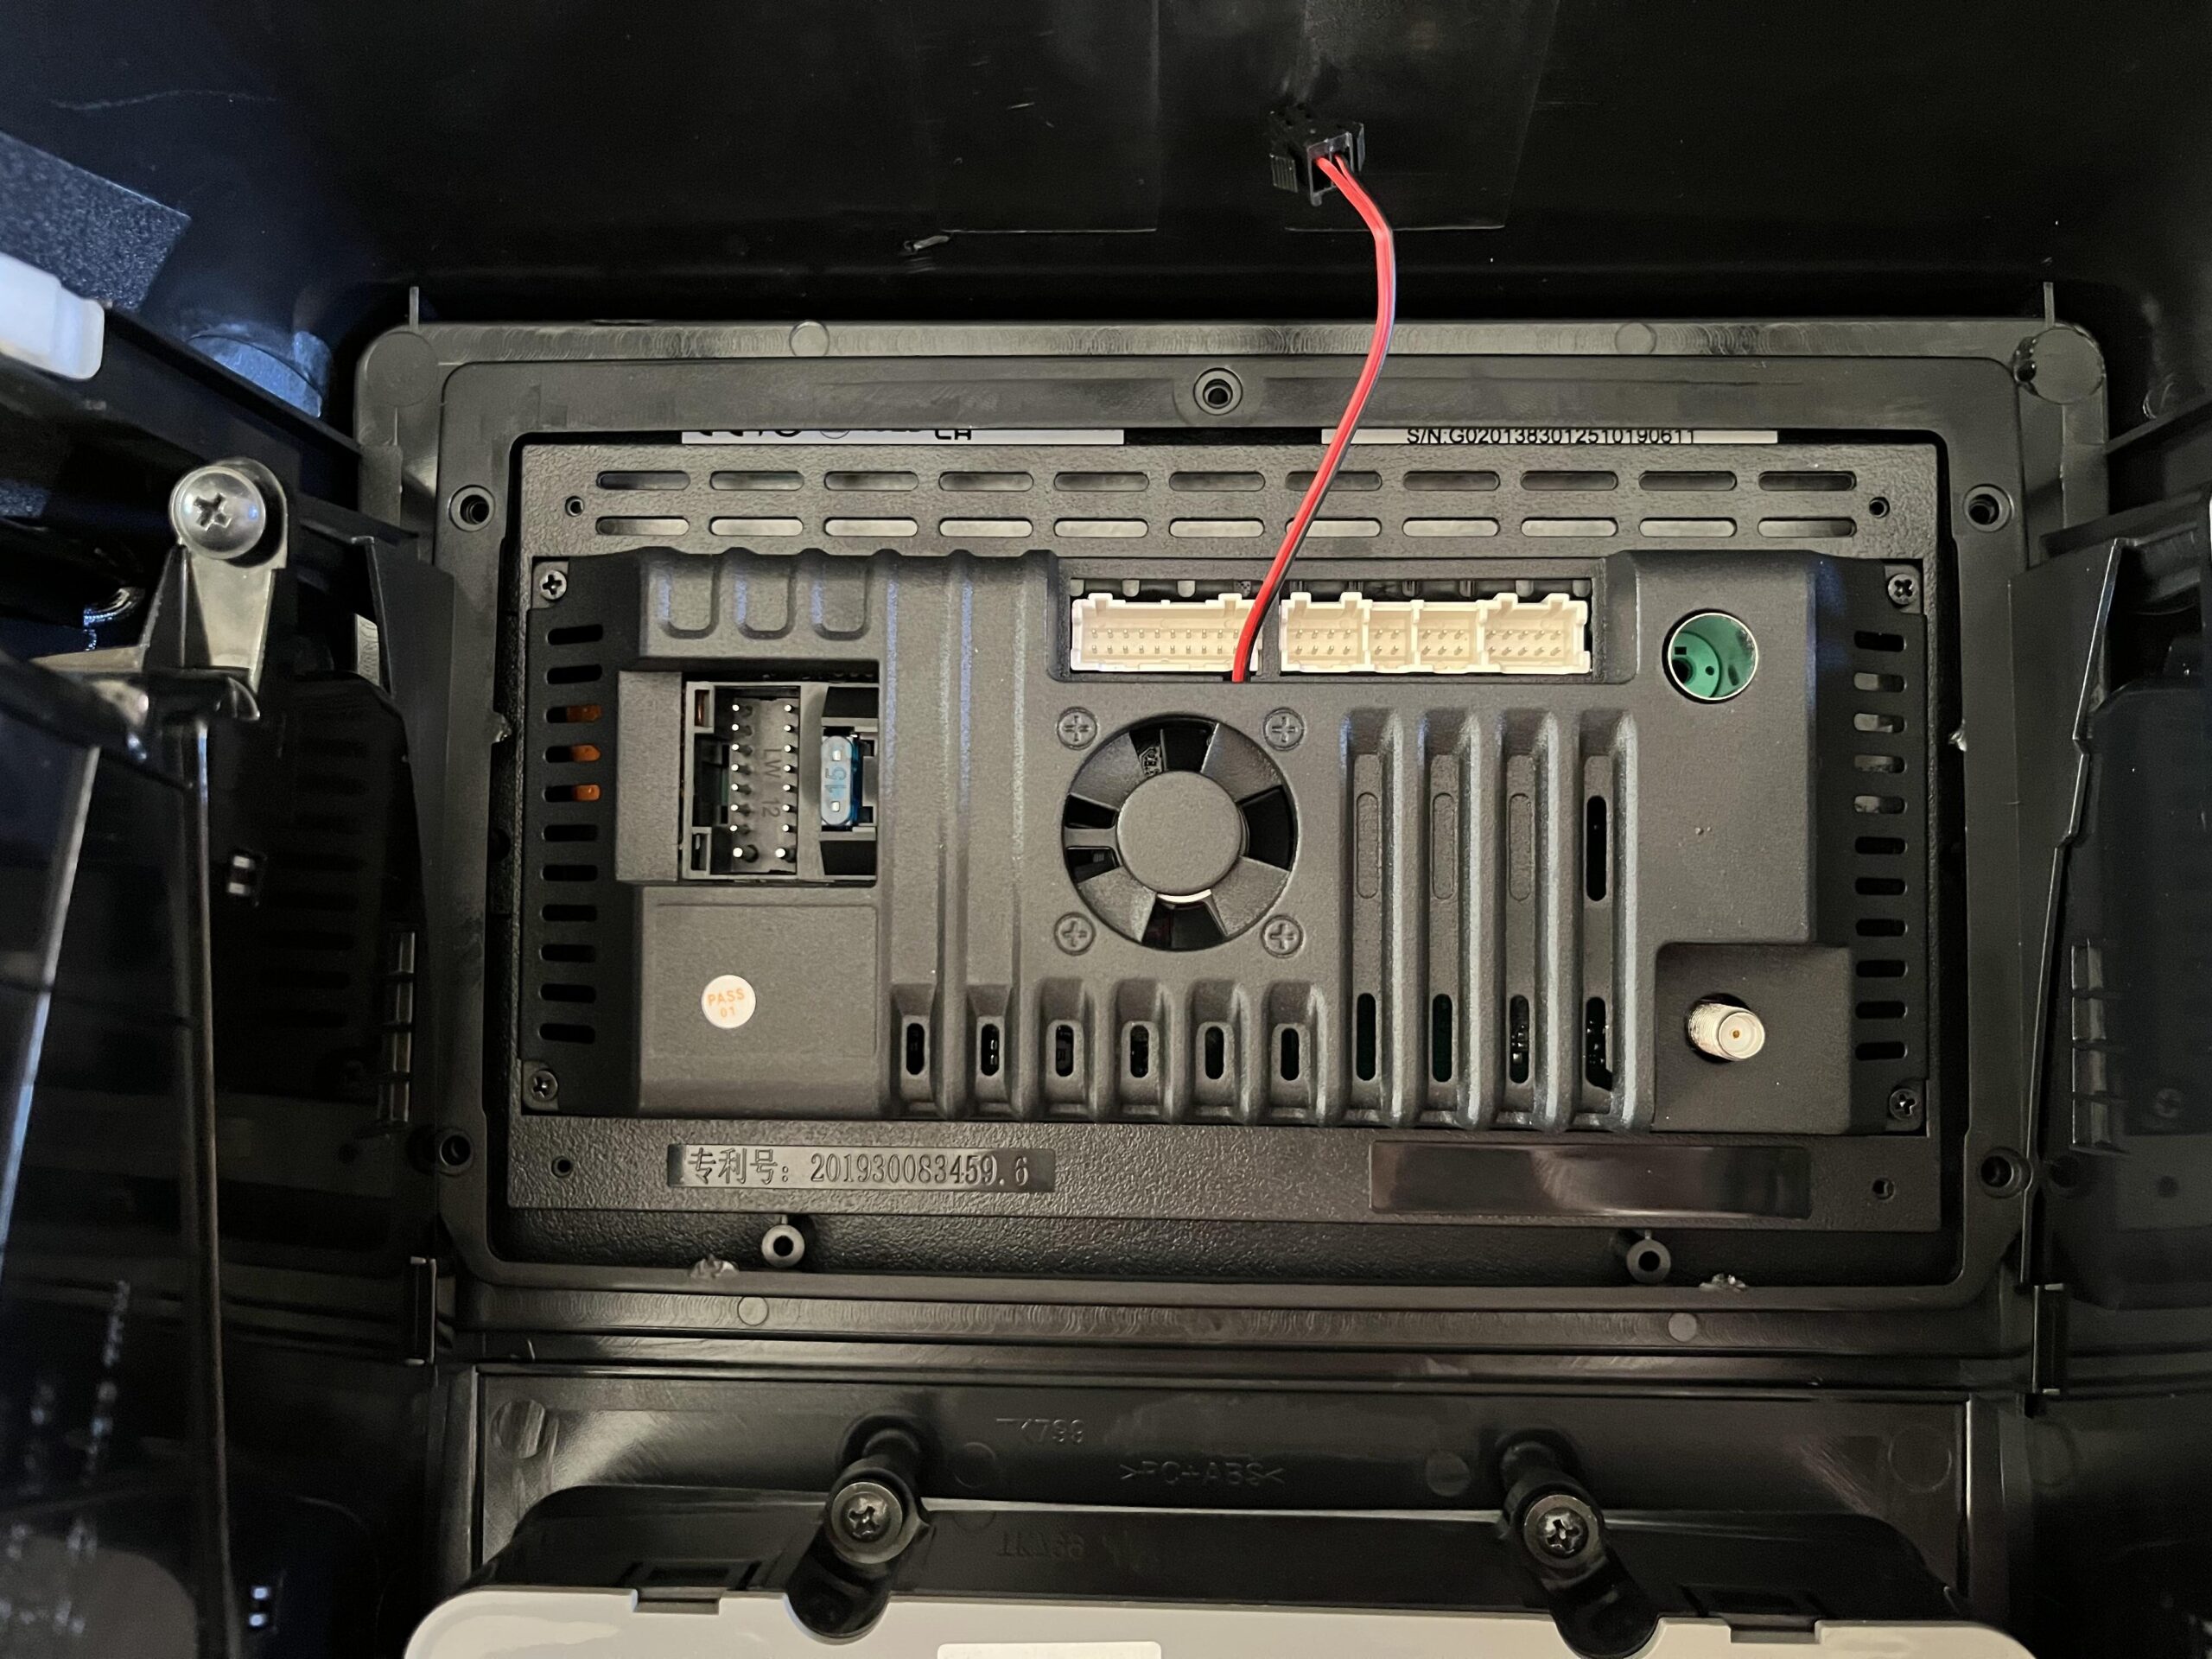
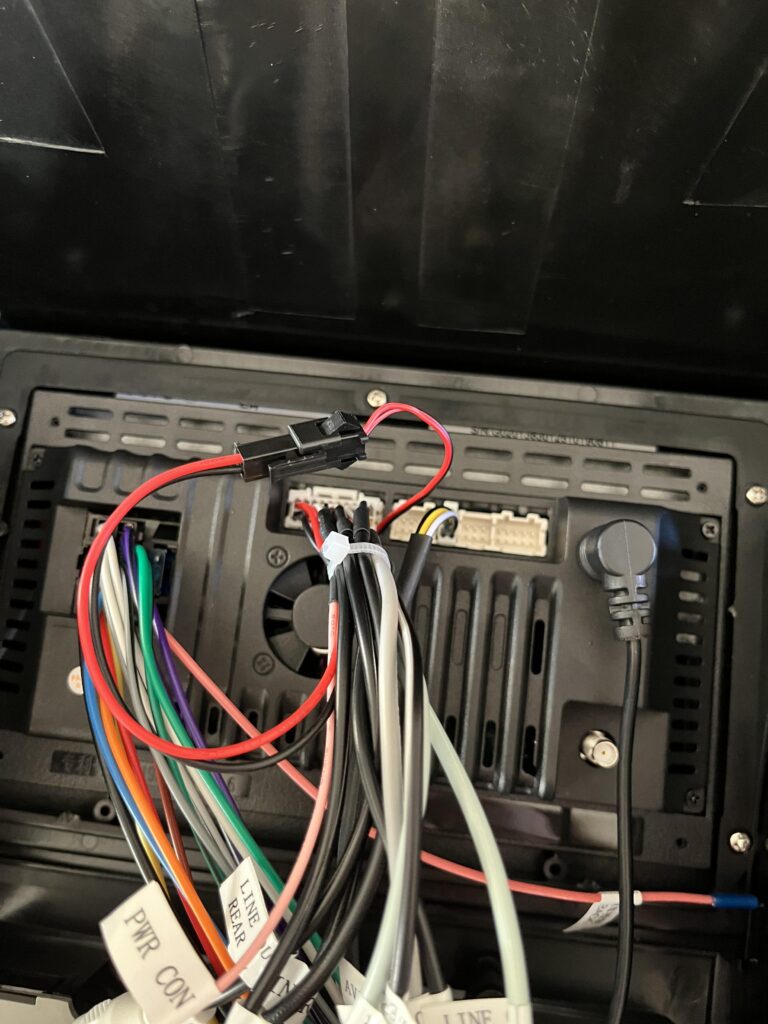
The back of the unit looks like this, the important one is the black connector to the top of this picture, and some of the white ones on the right
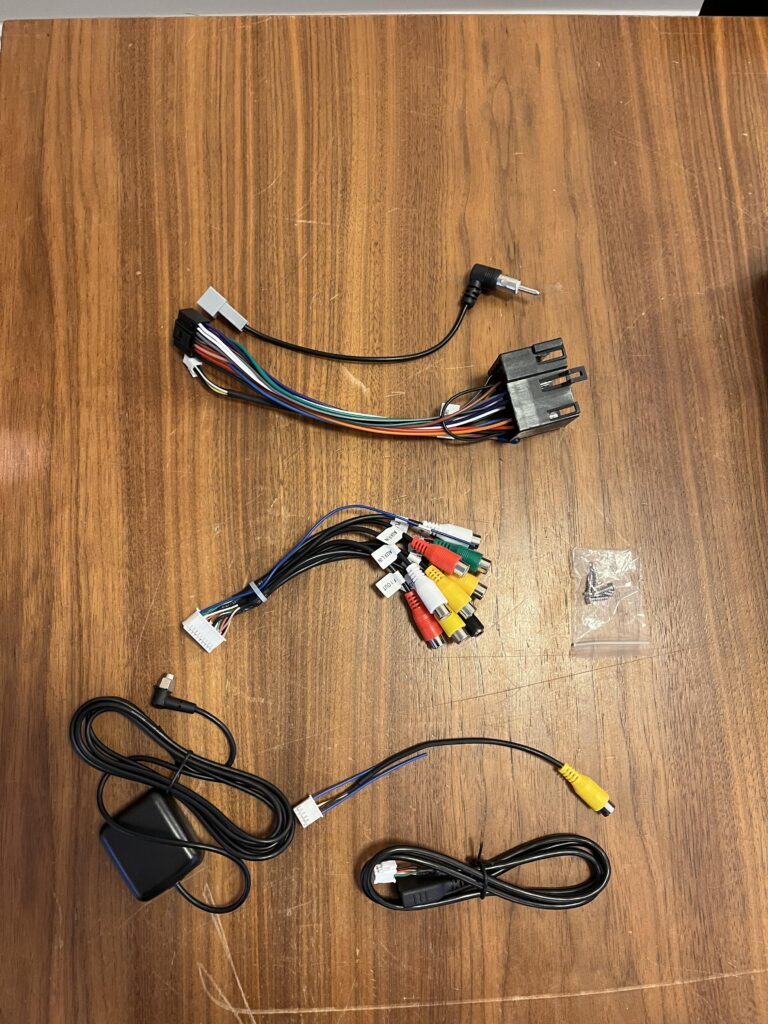
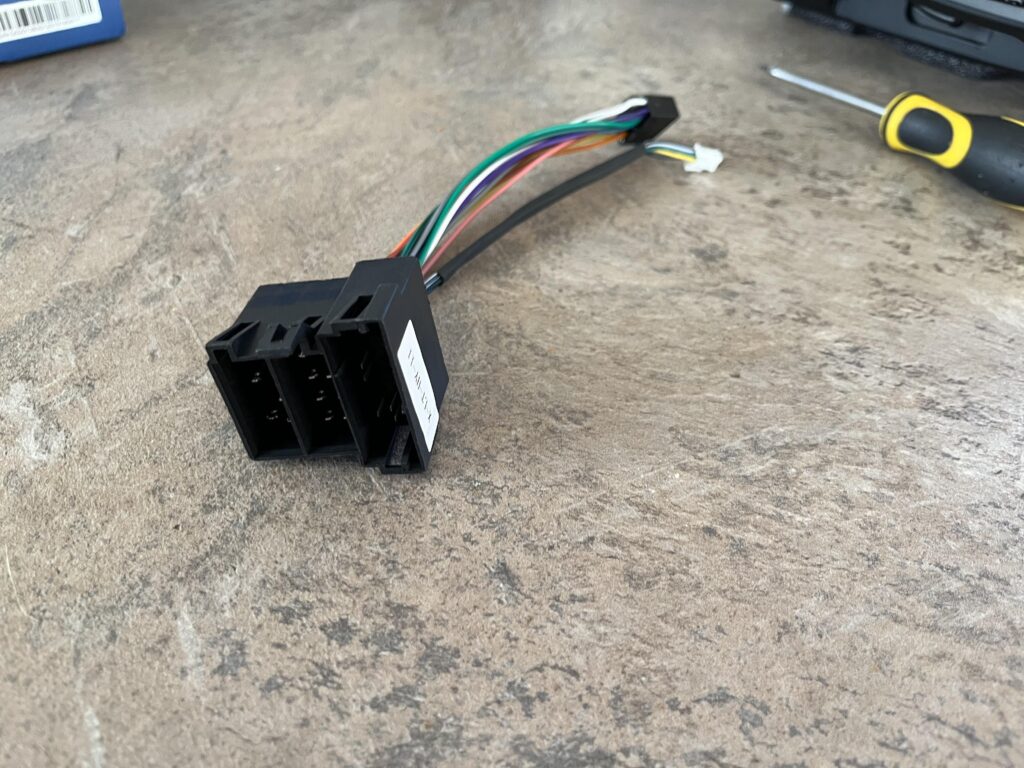
Then, there is a box of additional cables marked with the car model, I30, the top one is the FM radio connection, the one below with the chunky back connector is the wiring harness, this is the most important bit as its used to convert the I30 cables to the new stereo
Then there is another AV cable, which we will wont need
Under that we have the cable with the black box, which I believe is the external microphone, I think, it could also be an external GPS device, either way I did not use this as I dont need either of these features due to CarPlay, and some privacy concerns with the data
There is also a video cable for a reverse camera, its worth keeping this after the setup, I didnt set it up as its a lot more work and requires splicing power elsewhere in the boot which is a bit out of my skill set
And lastly there is a USB cable which I didnt use
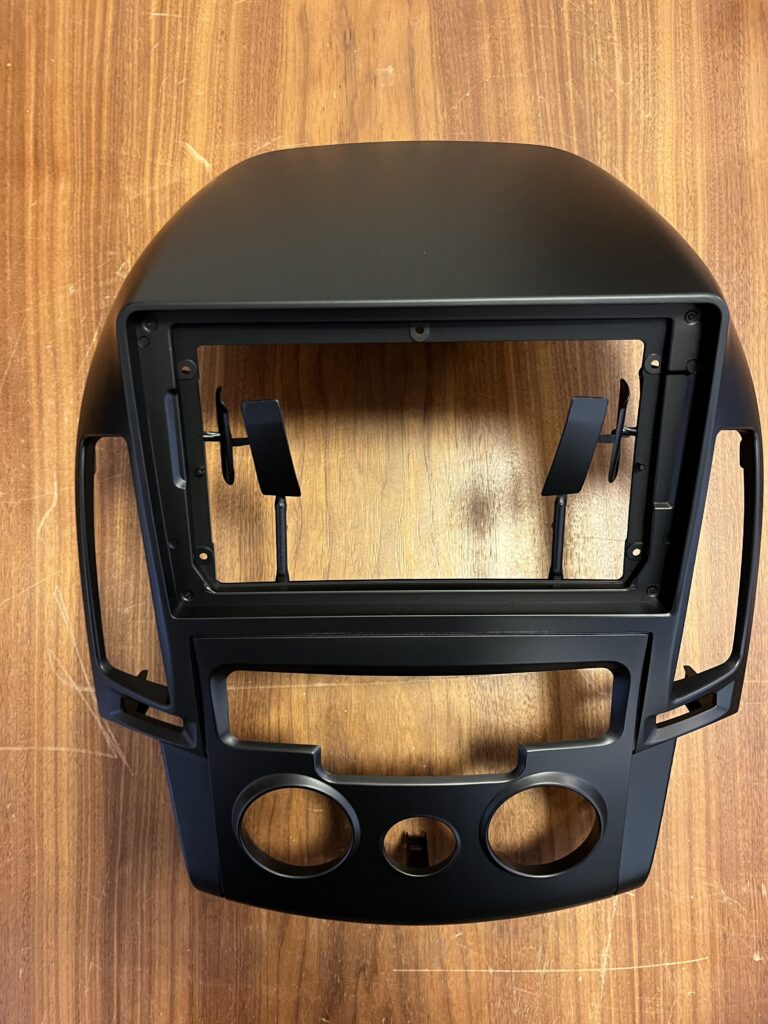
And lastly, there is the fascia to fit everything together in the car
2 – Removing The Original Fascia
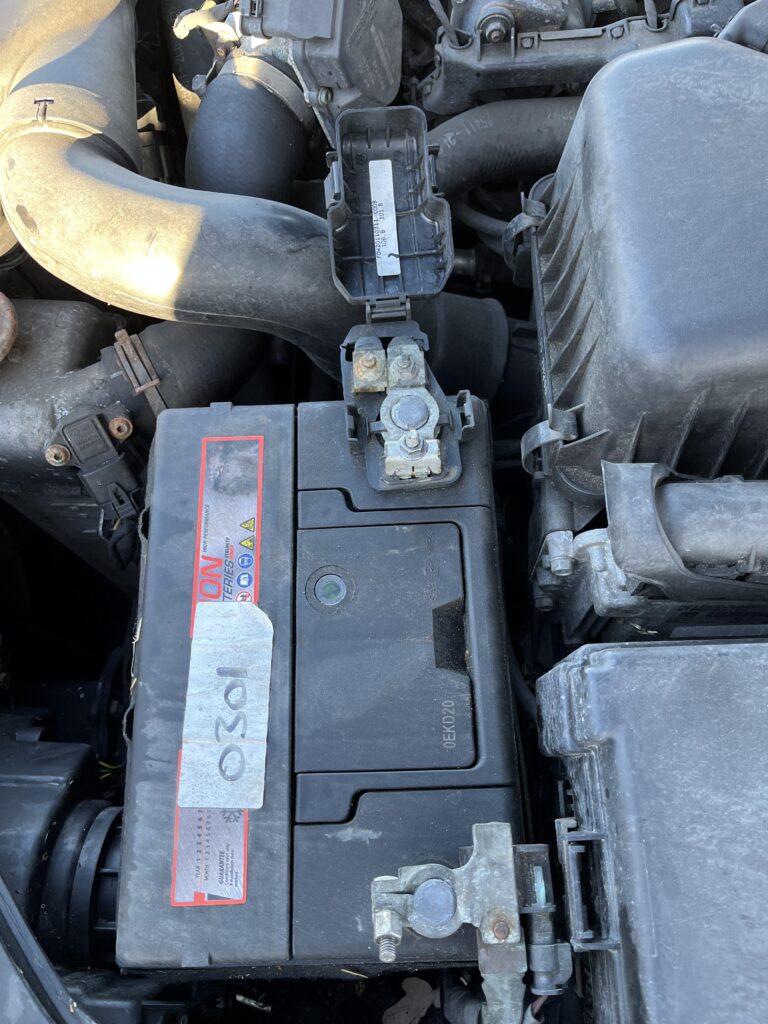
Before we touch anything we need to disconnect the car battery from under the bonnet, there is a lever on the right side of the driver foot-well to release the bonnet latch
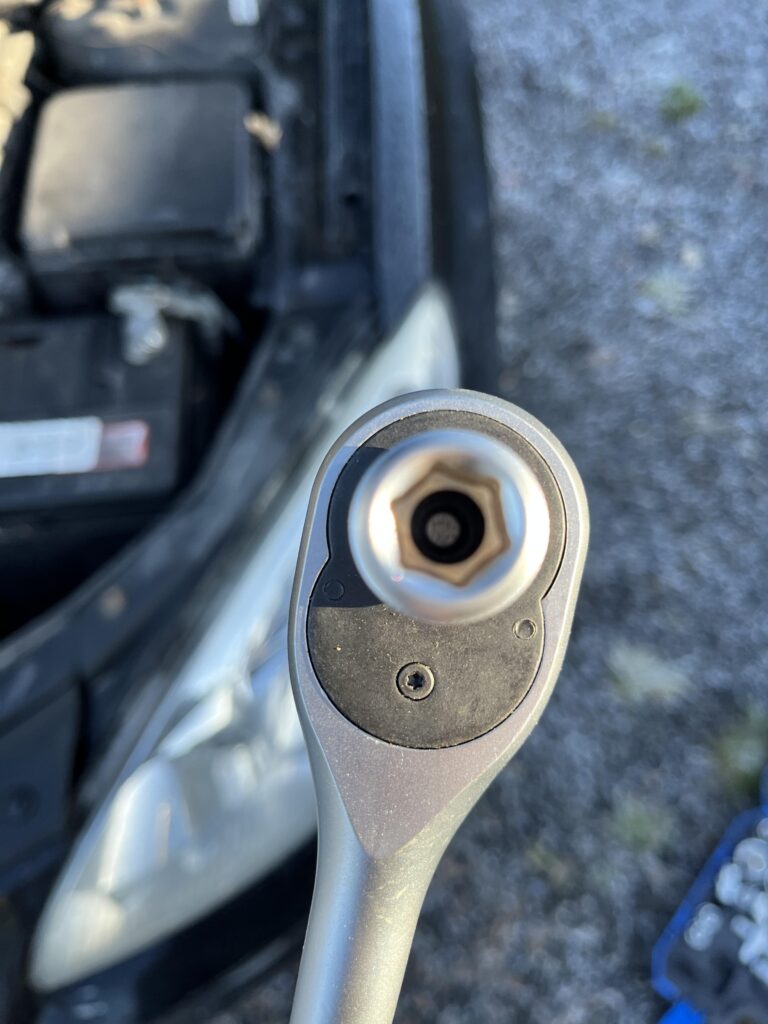
We then need a 10mm socket
The battery has both a positive and negative terminals to disconnect, the positive one has a cover that you need to press the releases in on both sides before you can lift it off, it took a bit of wiggling on my car
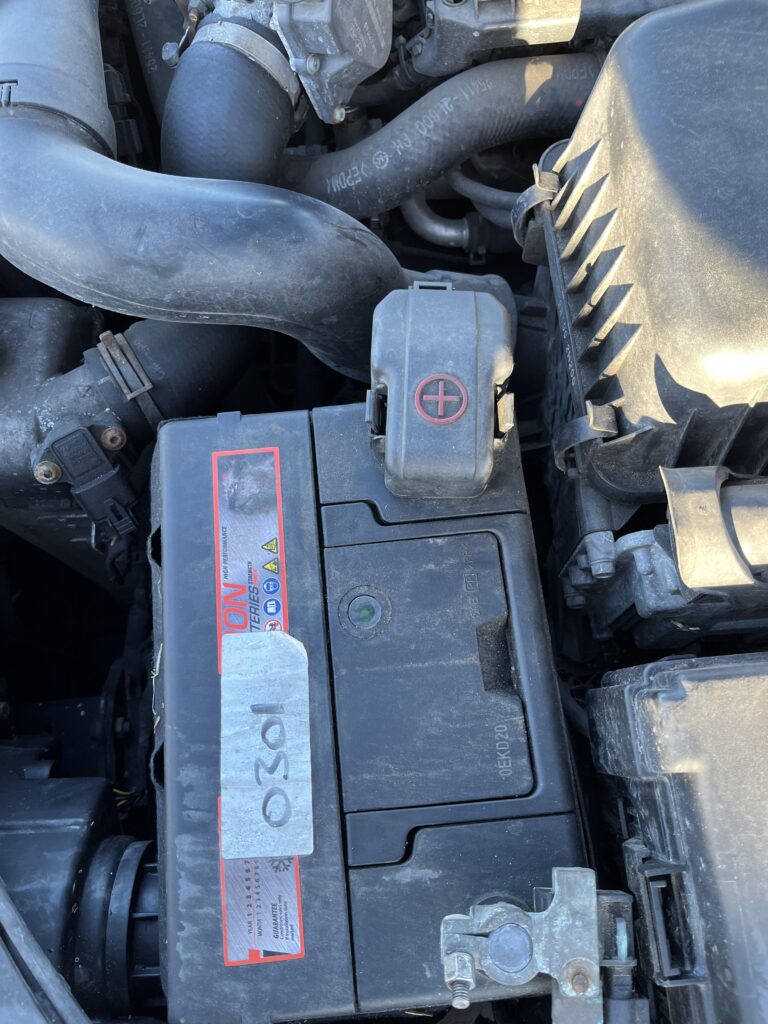
Whatever you do, do not let anything bridge the two terminal together else you will electrocute your self a bit
Then we can use the 10mm socket to loosen the nuts on the side of the terminals, twist to the left to loosen them, the terminals will then lift off, the positive one was a little harder to pull up to remove it
Now for the tough part, getting the fascia off, this requires quite a lot of prying force, I often felt like I was using too much, but it really was needed
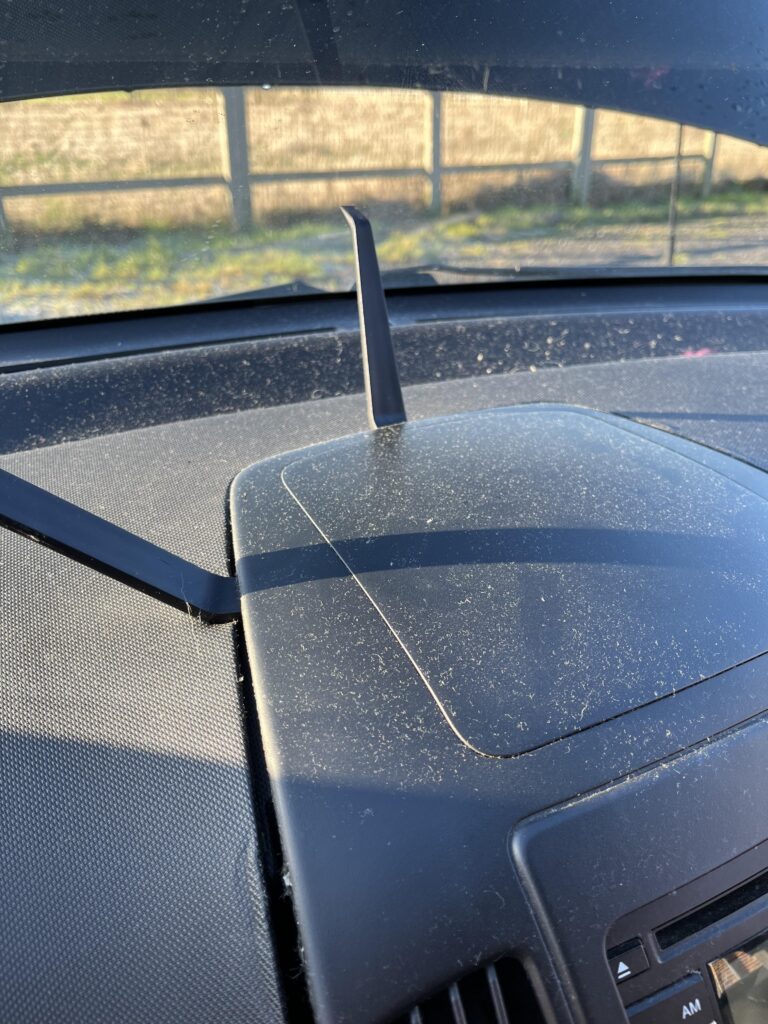
I started with the bottom, on the right side wedging the prying tool into the unit
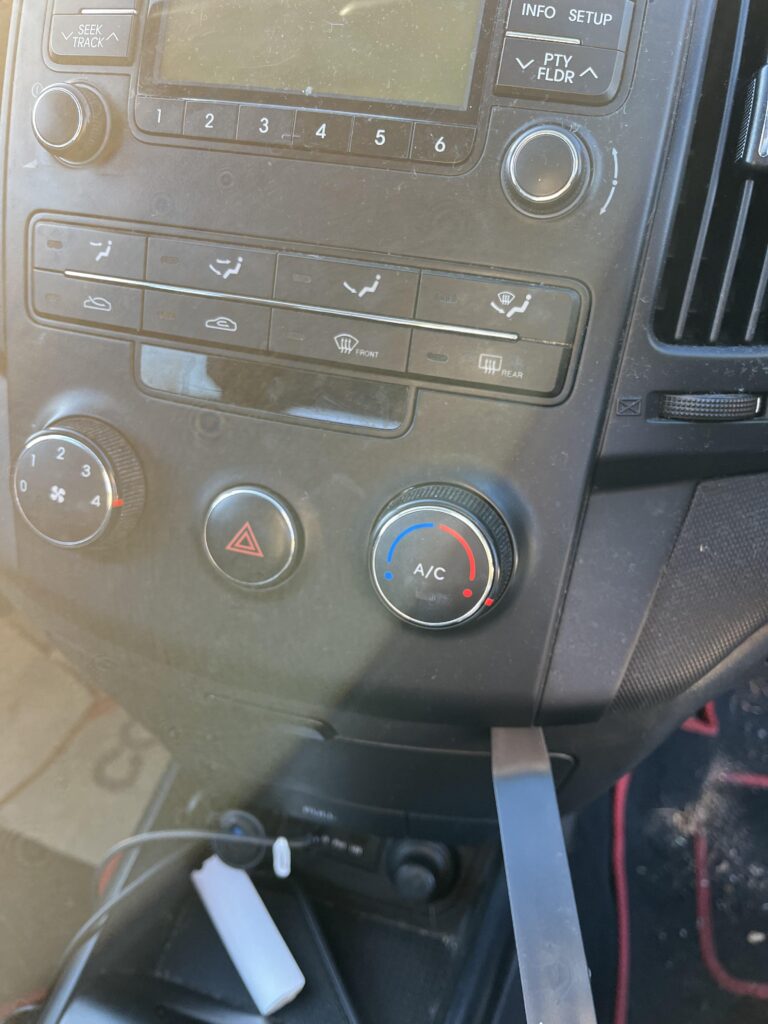
This loosens it just a little where I can get another tool in the bottom left side, then really pull up, you should hear a click of sorts as the clips come undone
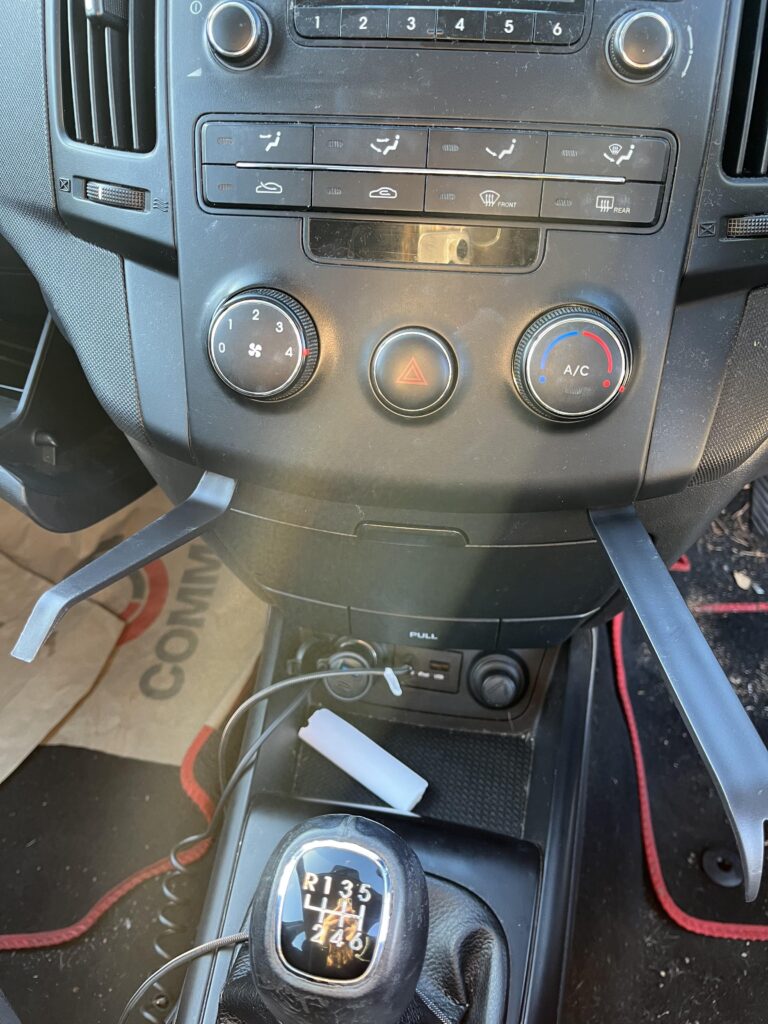
We can then move up on both sides again pulling out to release the clips
Take your time with it, it does need a bit of force, but you dont want to damage anything either
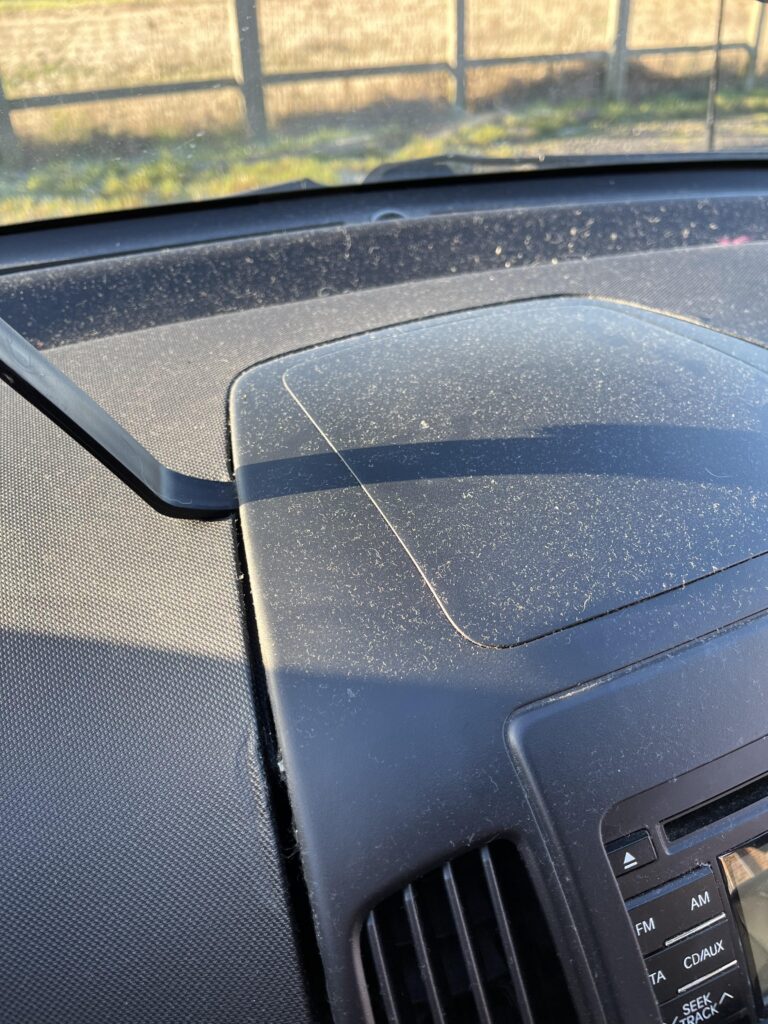
I then moved up to the left only, you want to be extra caseful here, as the material next to the fascia cant be molded and changed, you can see it morphing a little below, again there is another clip to remove
There is another a little further up on the same side
We can then move to the top center for the next clip to remove
We can then move to the right getting the remaining clips, the are opposite the ones we did on the left
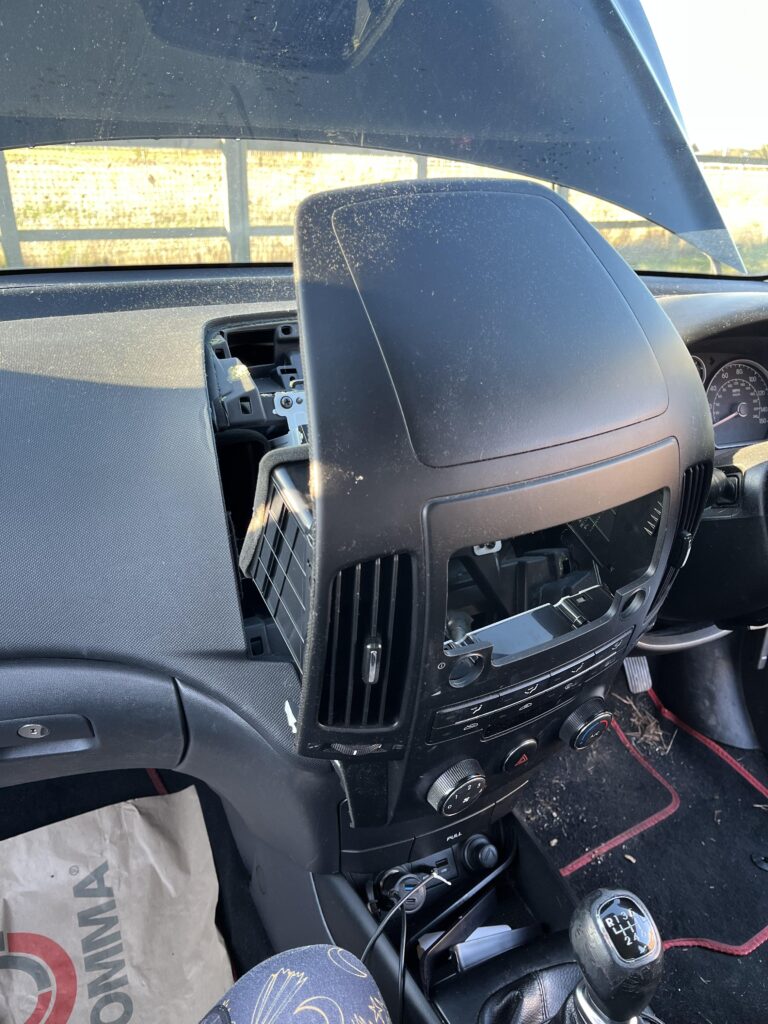
The unit we can see below starts to come loose and pulls away
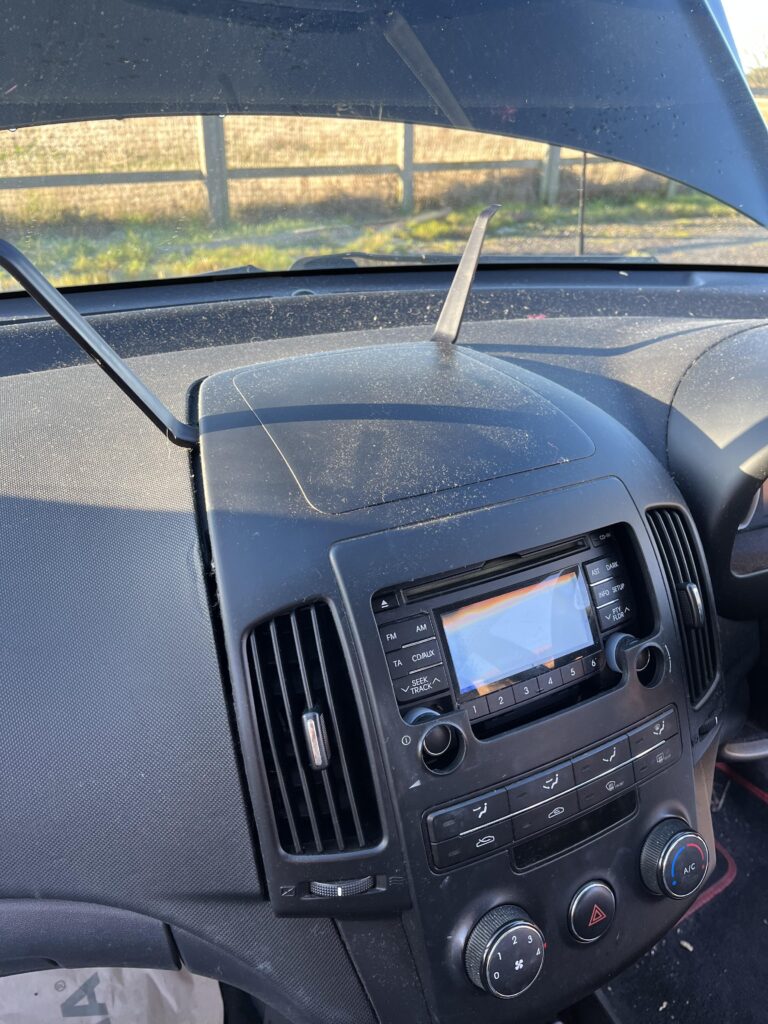
When its fully loose and the clips are detached, the unit will sit away from the car a little this like
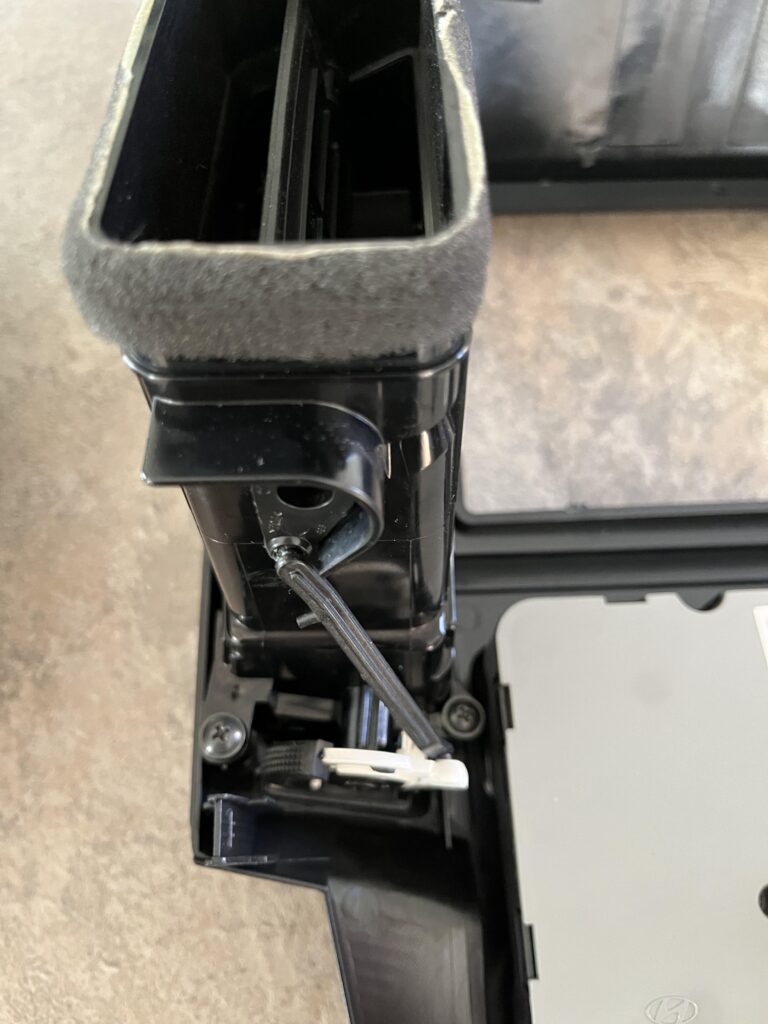
No we want to pull the unit away from the top pivoting from the bottom like below, this is because the climate control cables dont have much slack on them
For the climate control, we have three cables to remove, they each have a push tab at the top of them to release them, then you can just pull them out
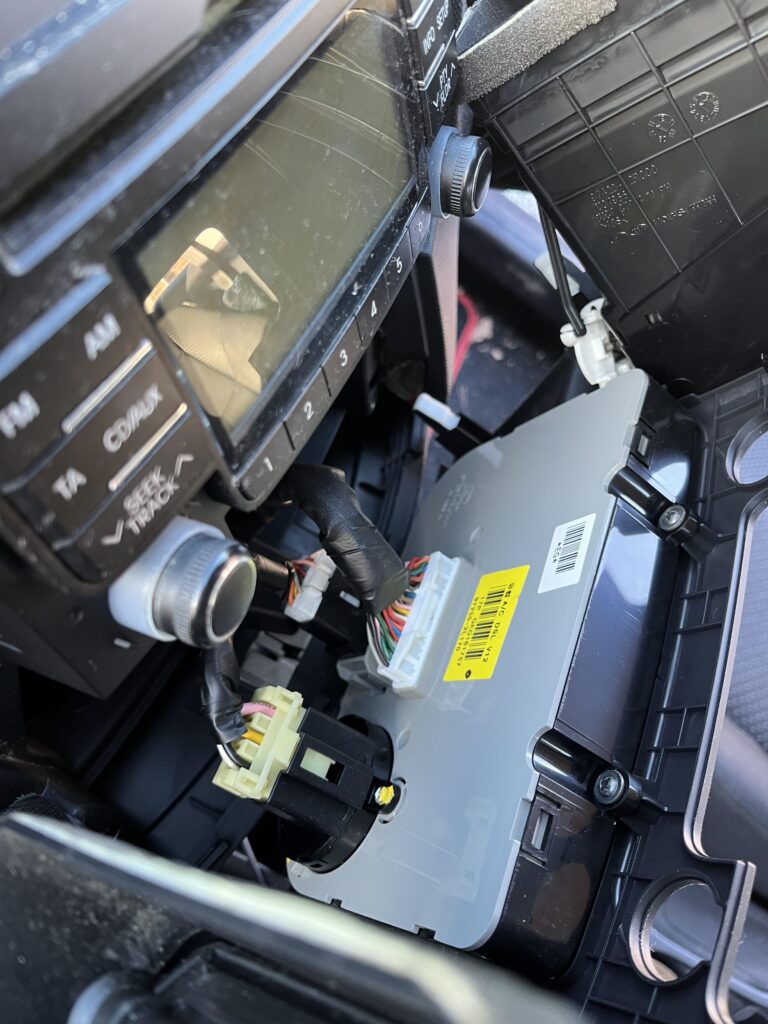
Then you can just pull the rest of the unit will come off and look something like this
Then we can take this somewhere else to do work with the new fascia
3 – Migrating Everything To The New Fascia
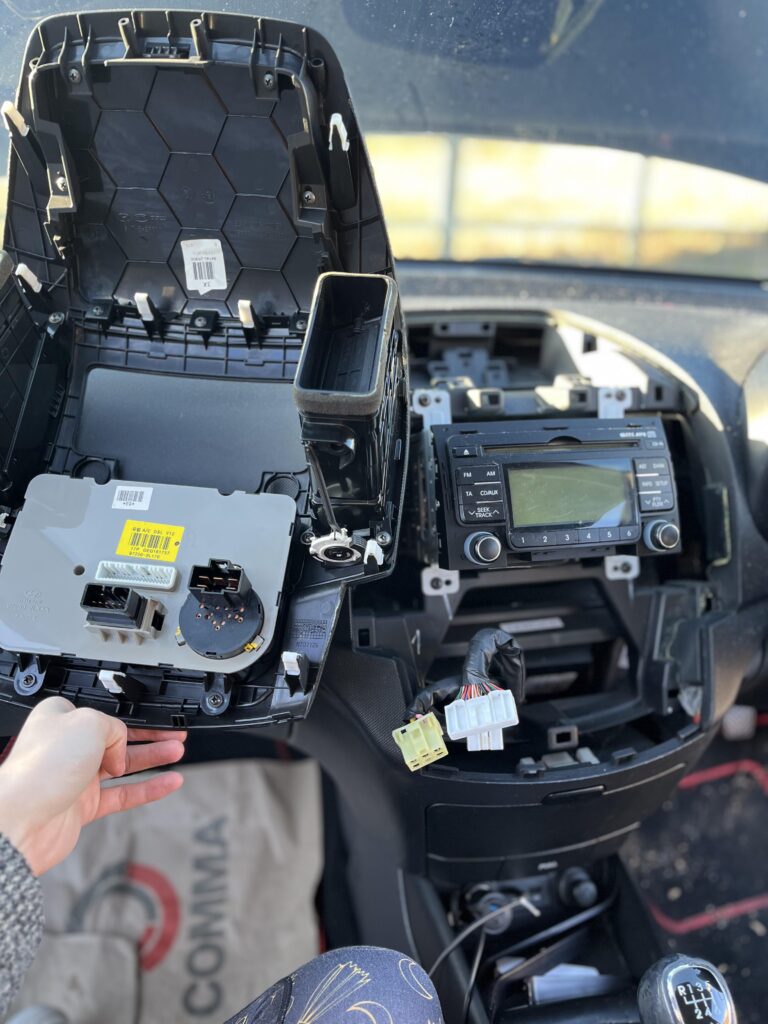
Next setup a workspace like a table and setup both fascias side by side to slowly migrate bits over
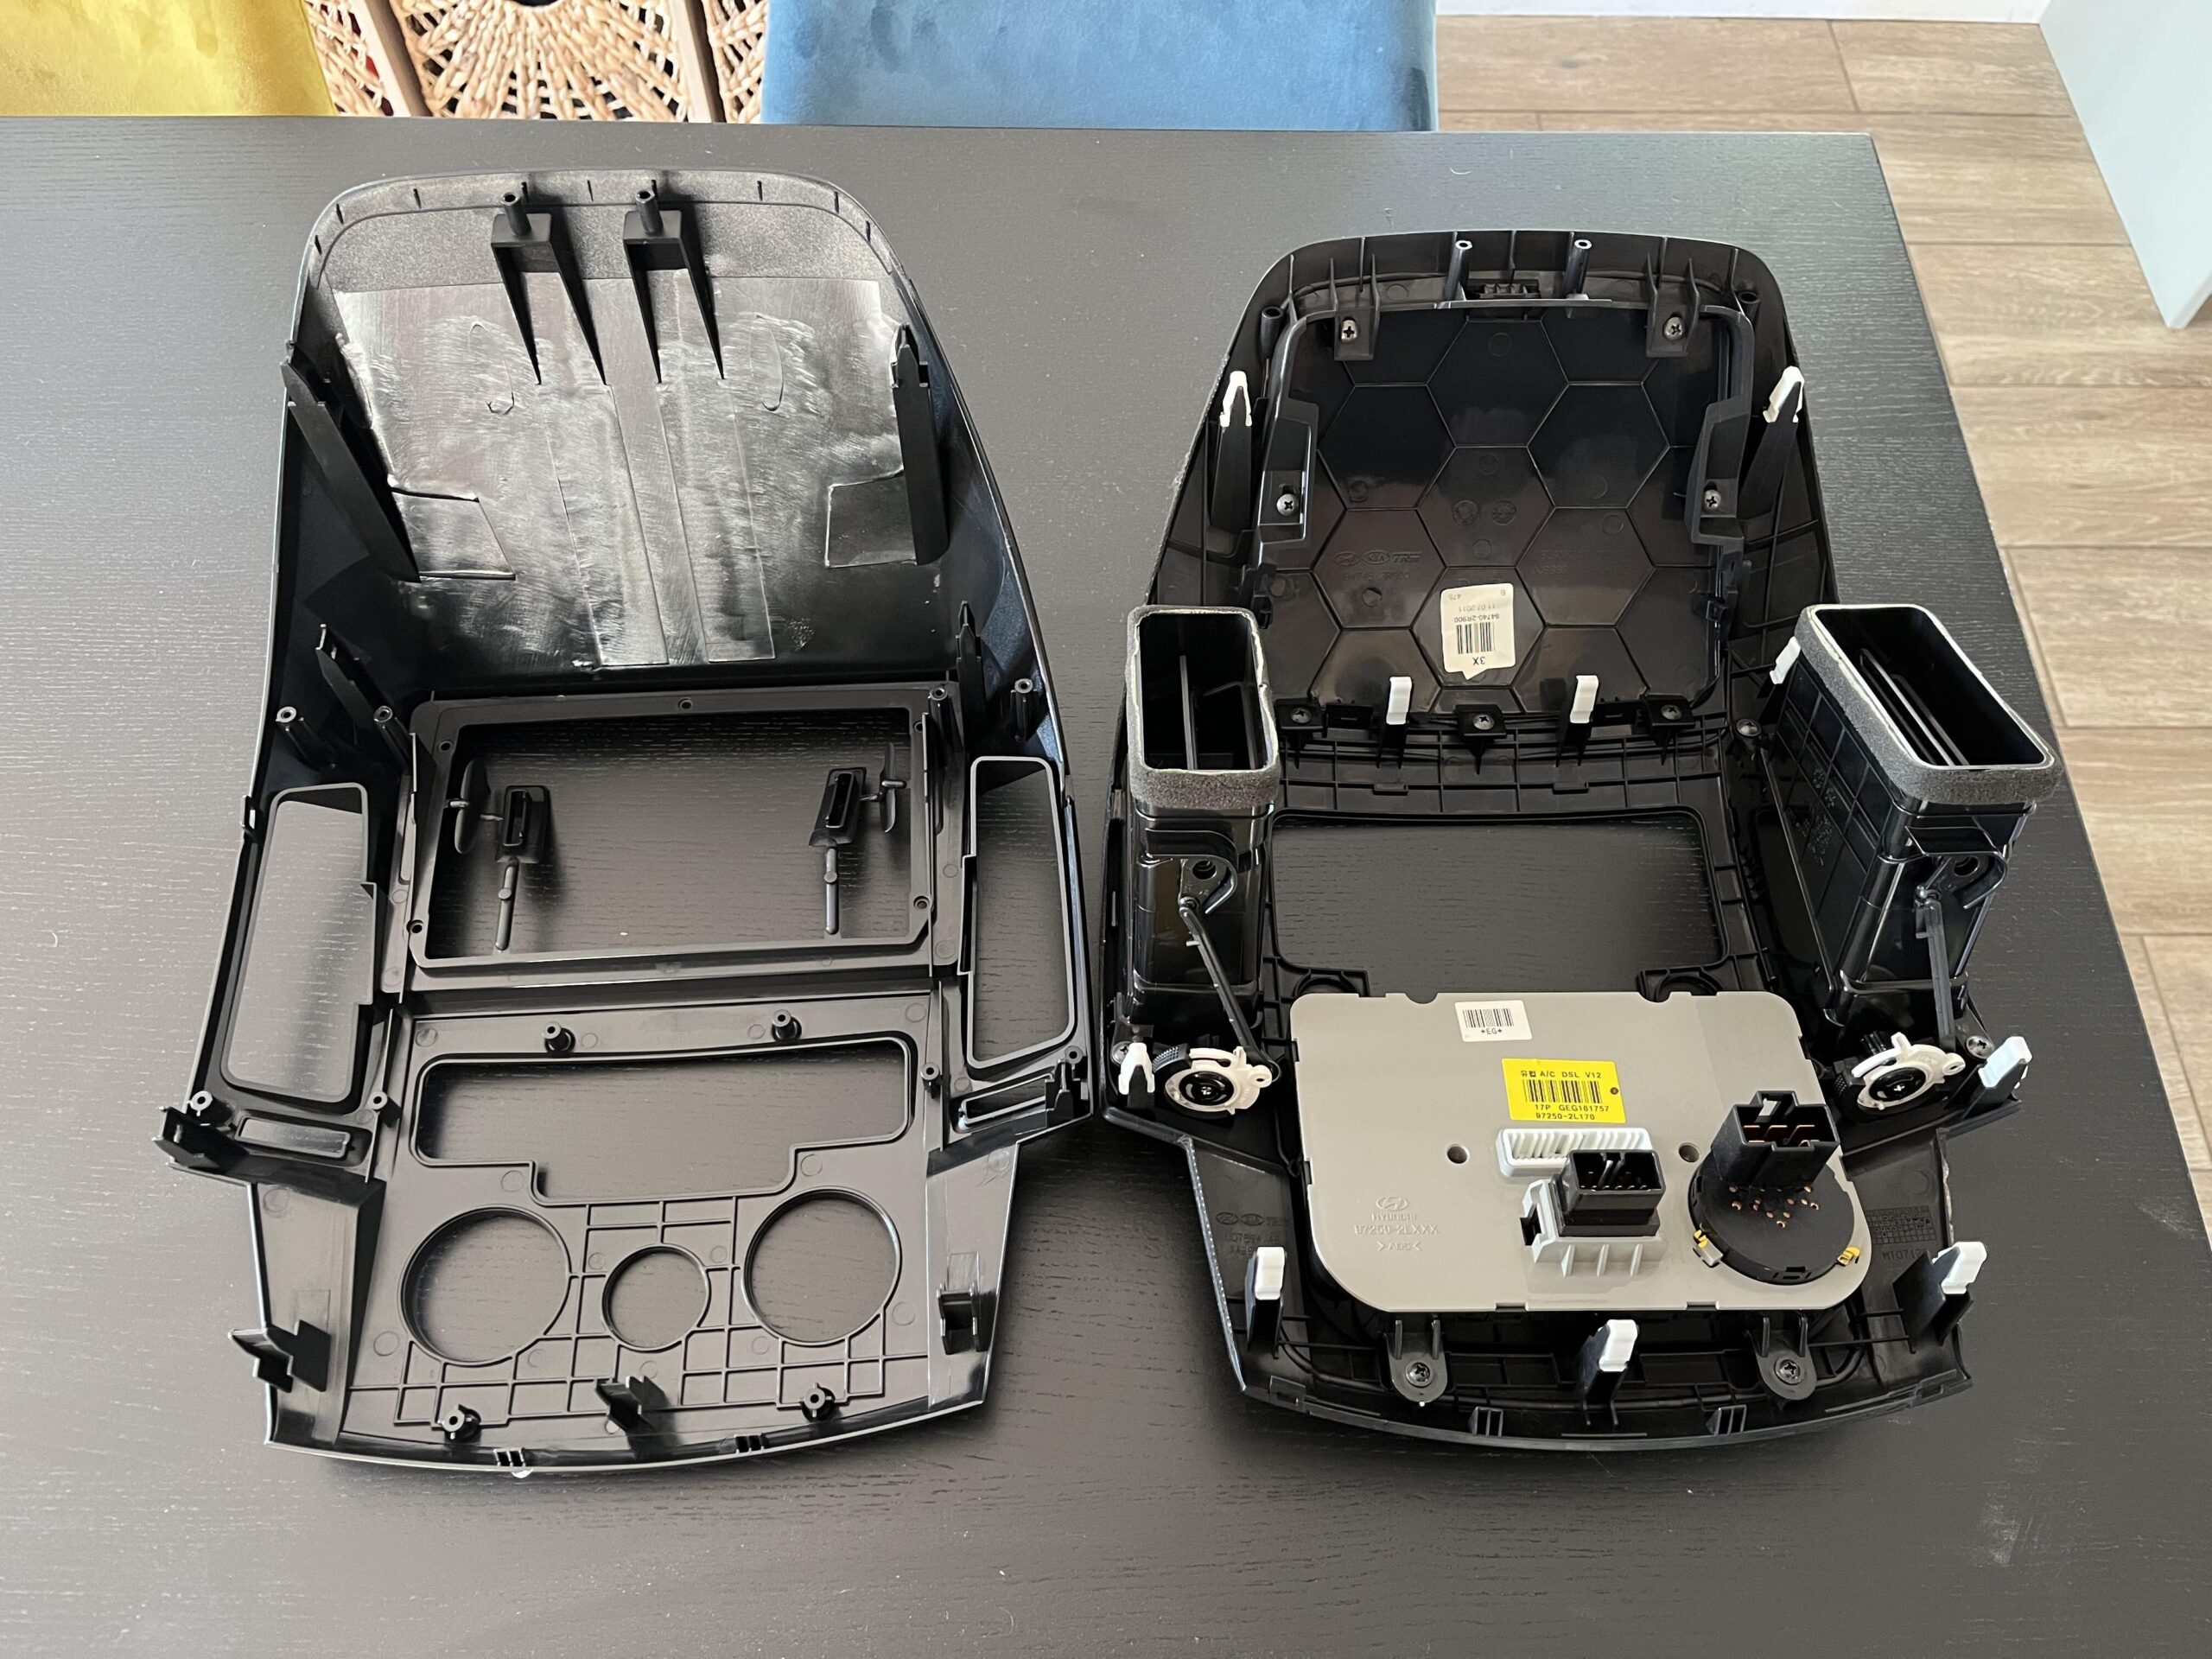
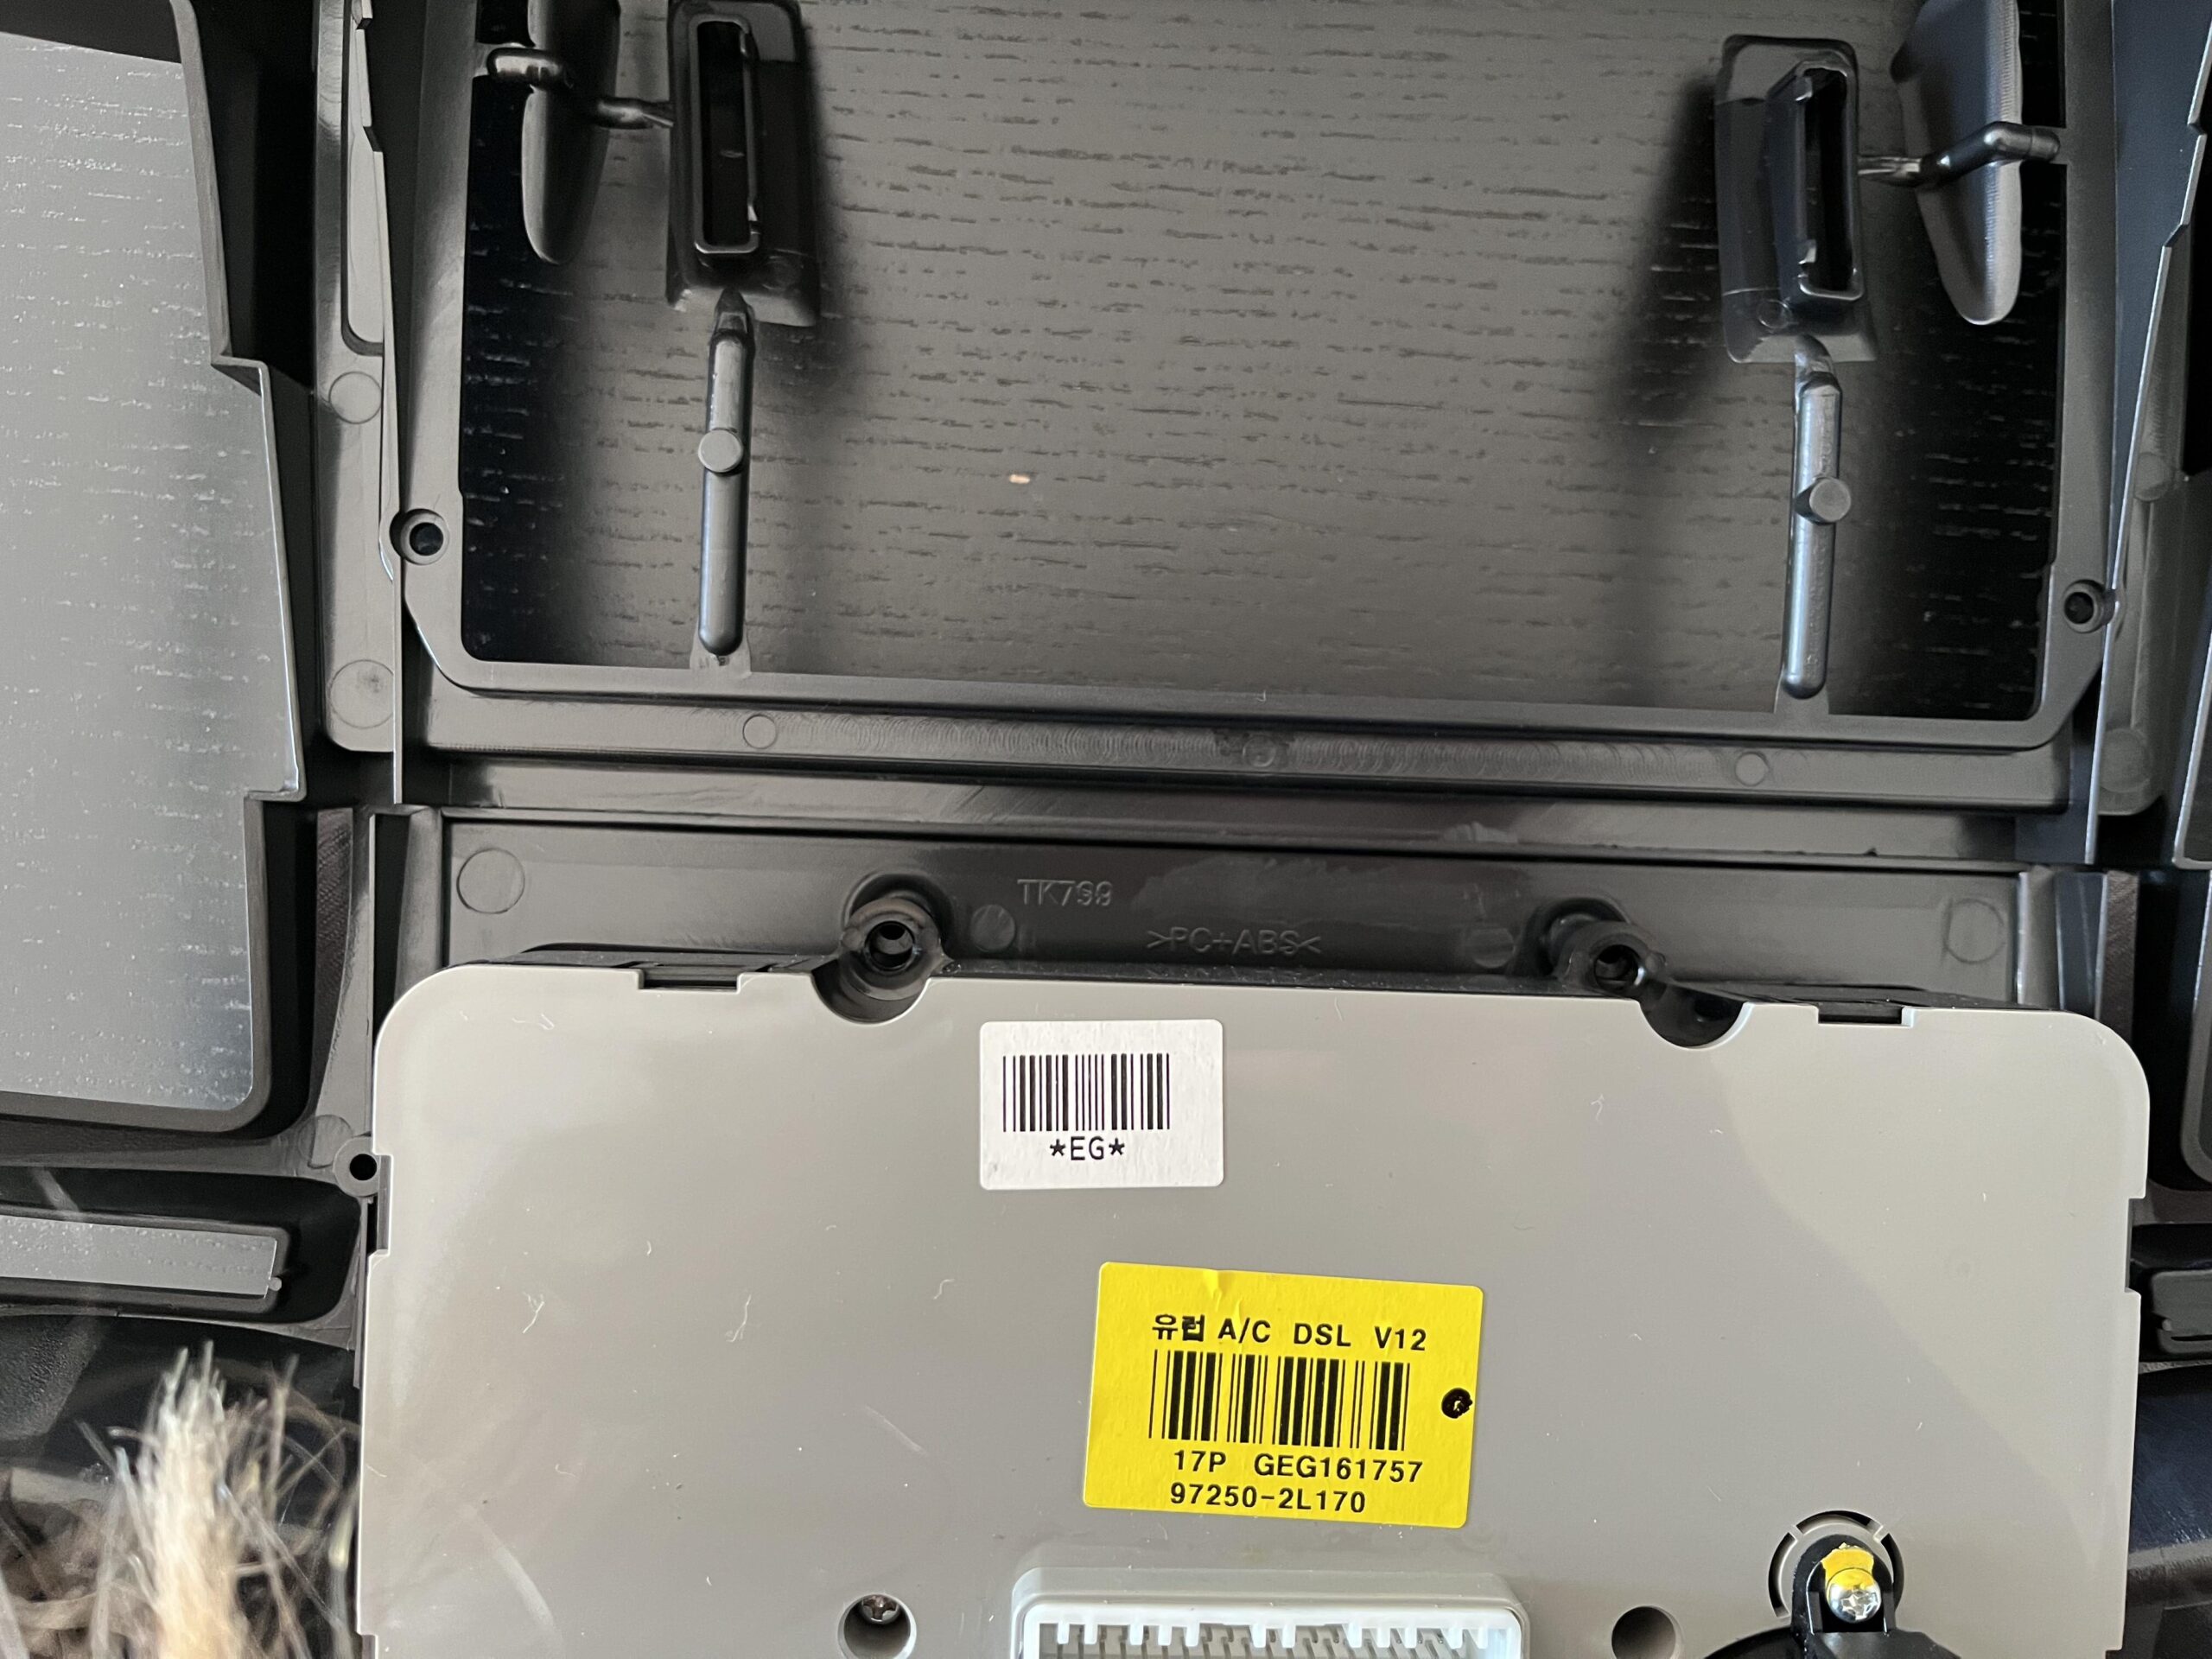
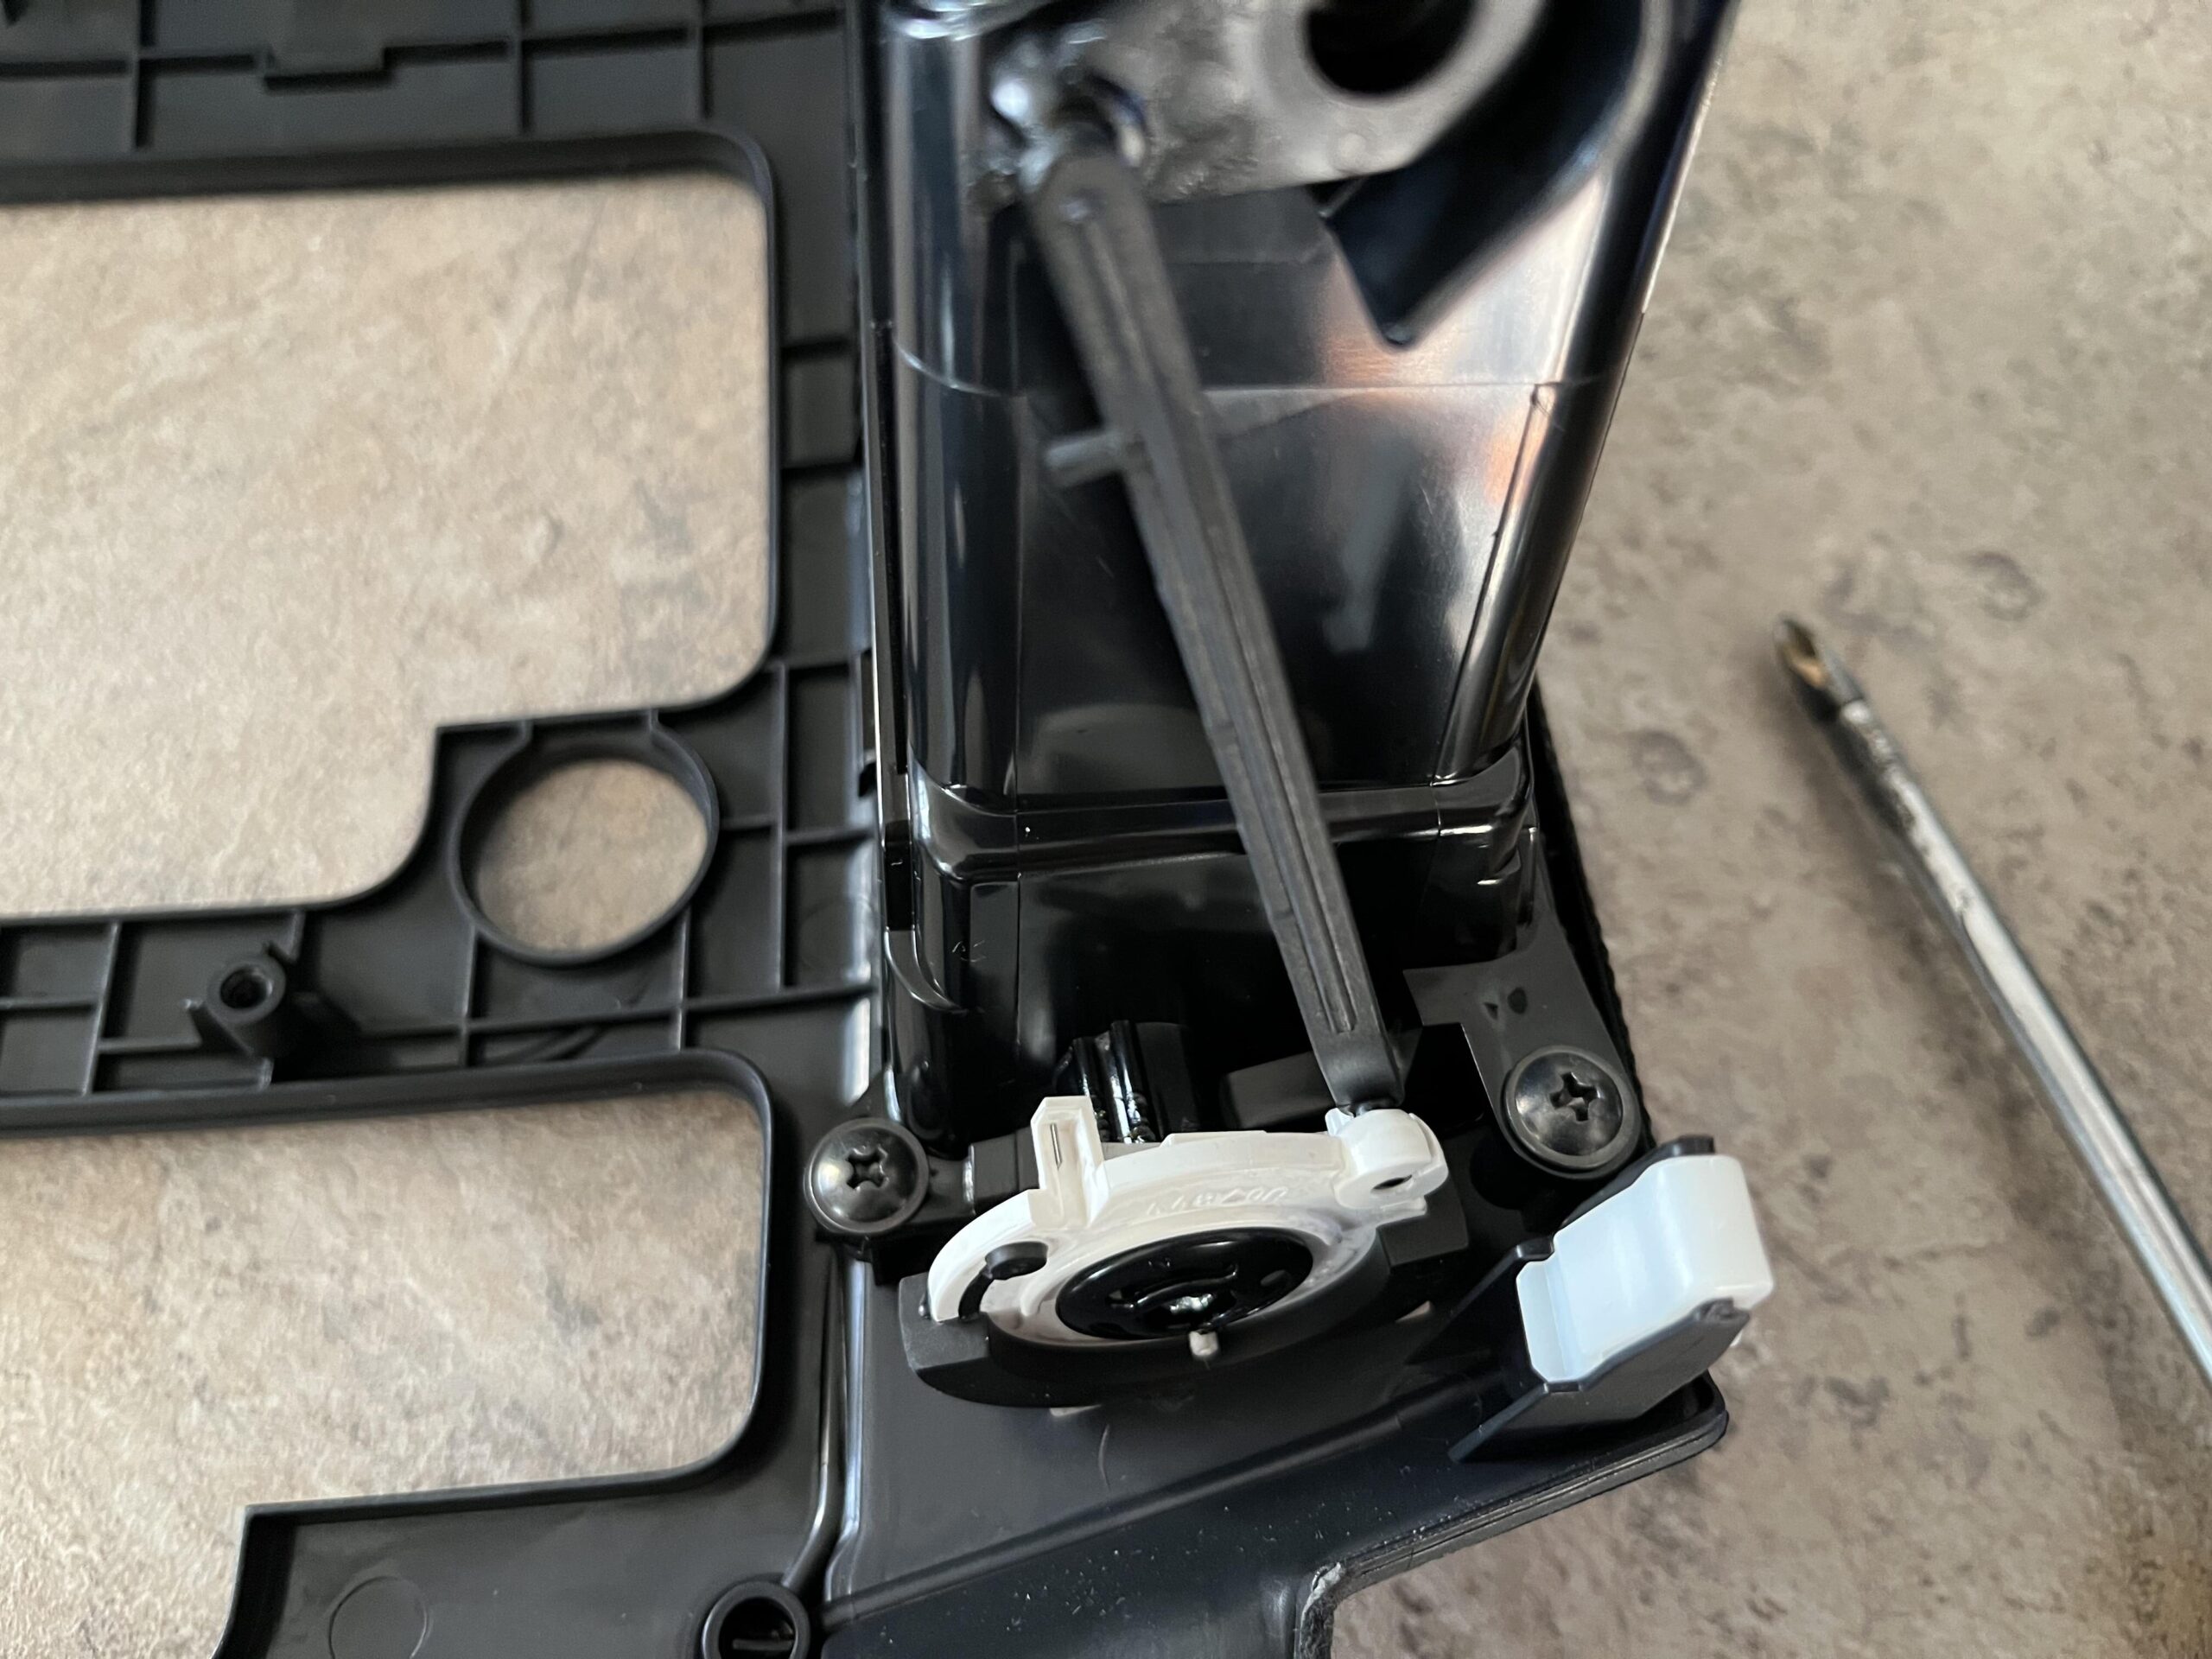
First, lets start with the climate control, there are two silver screws in the middle, dont undo these
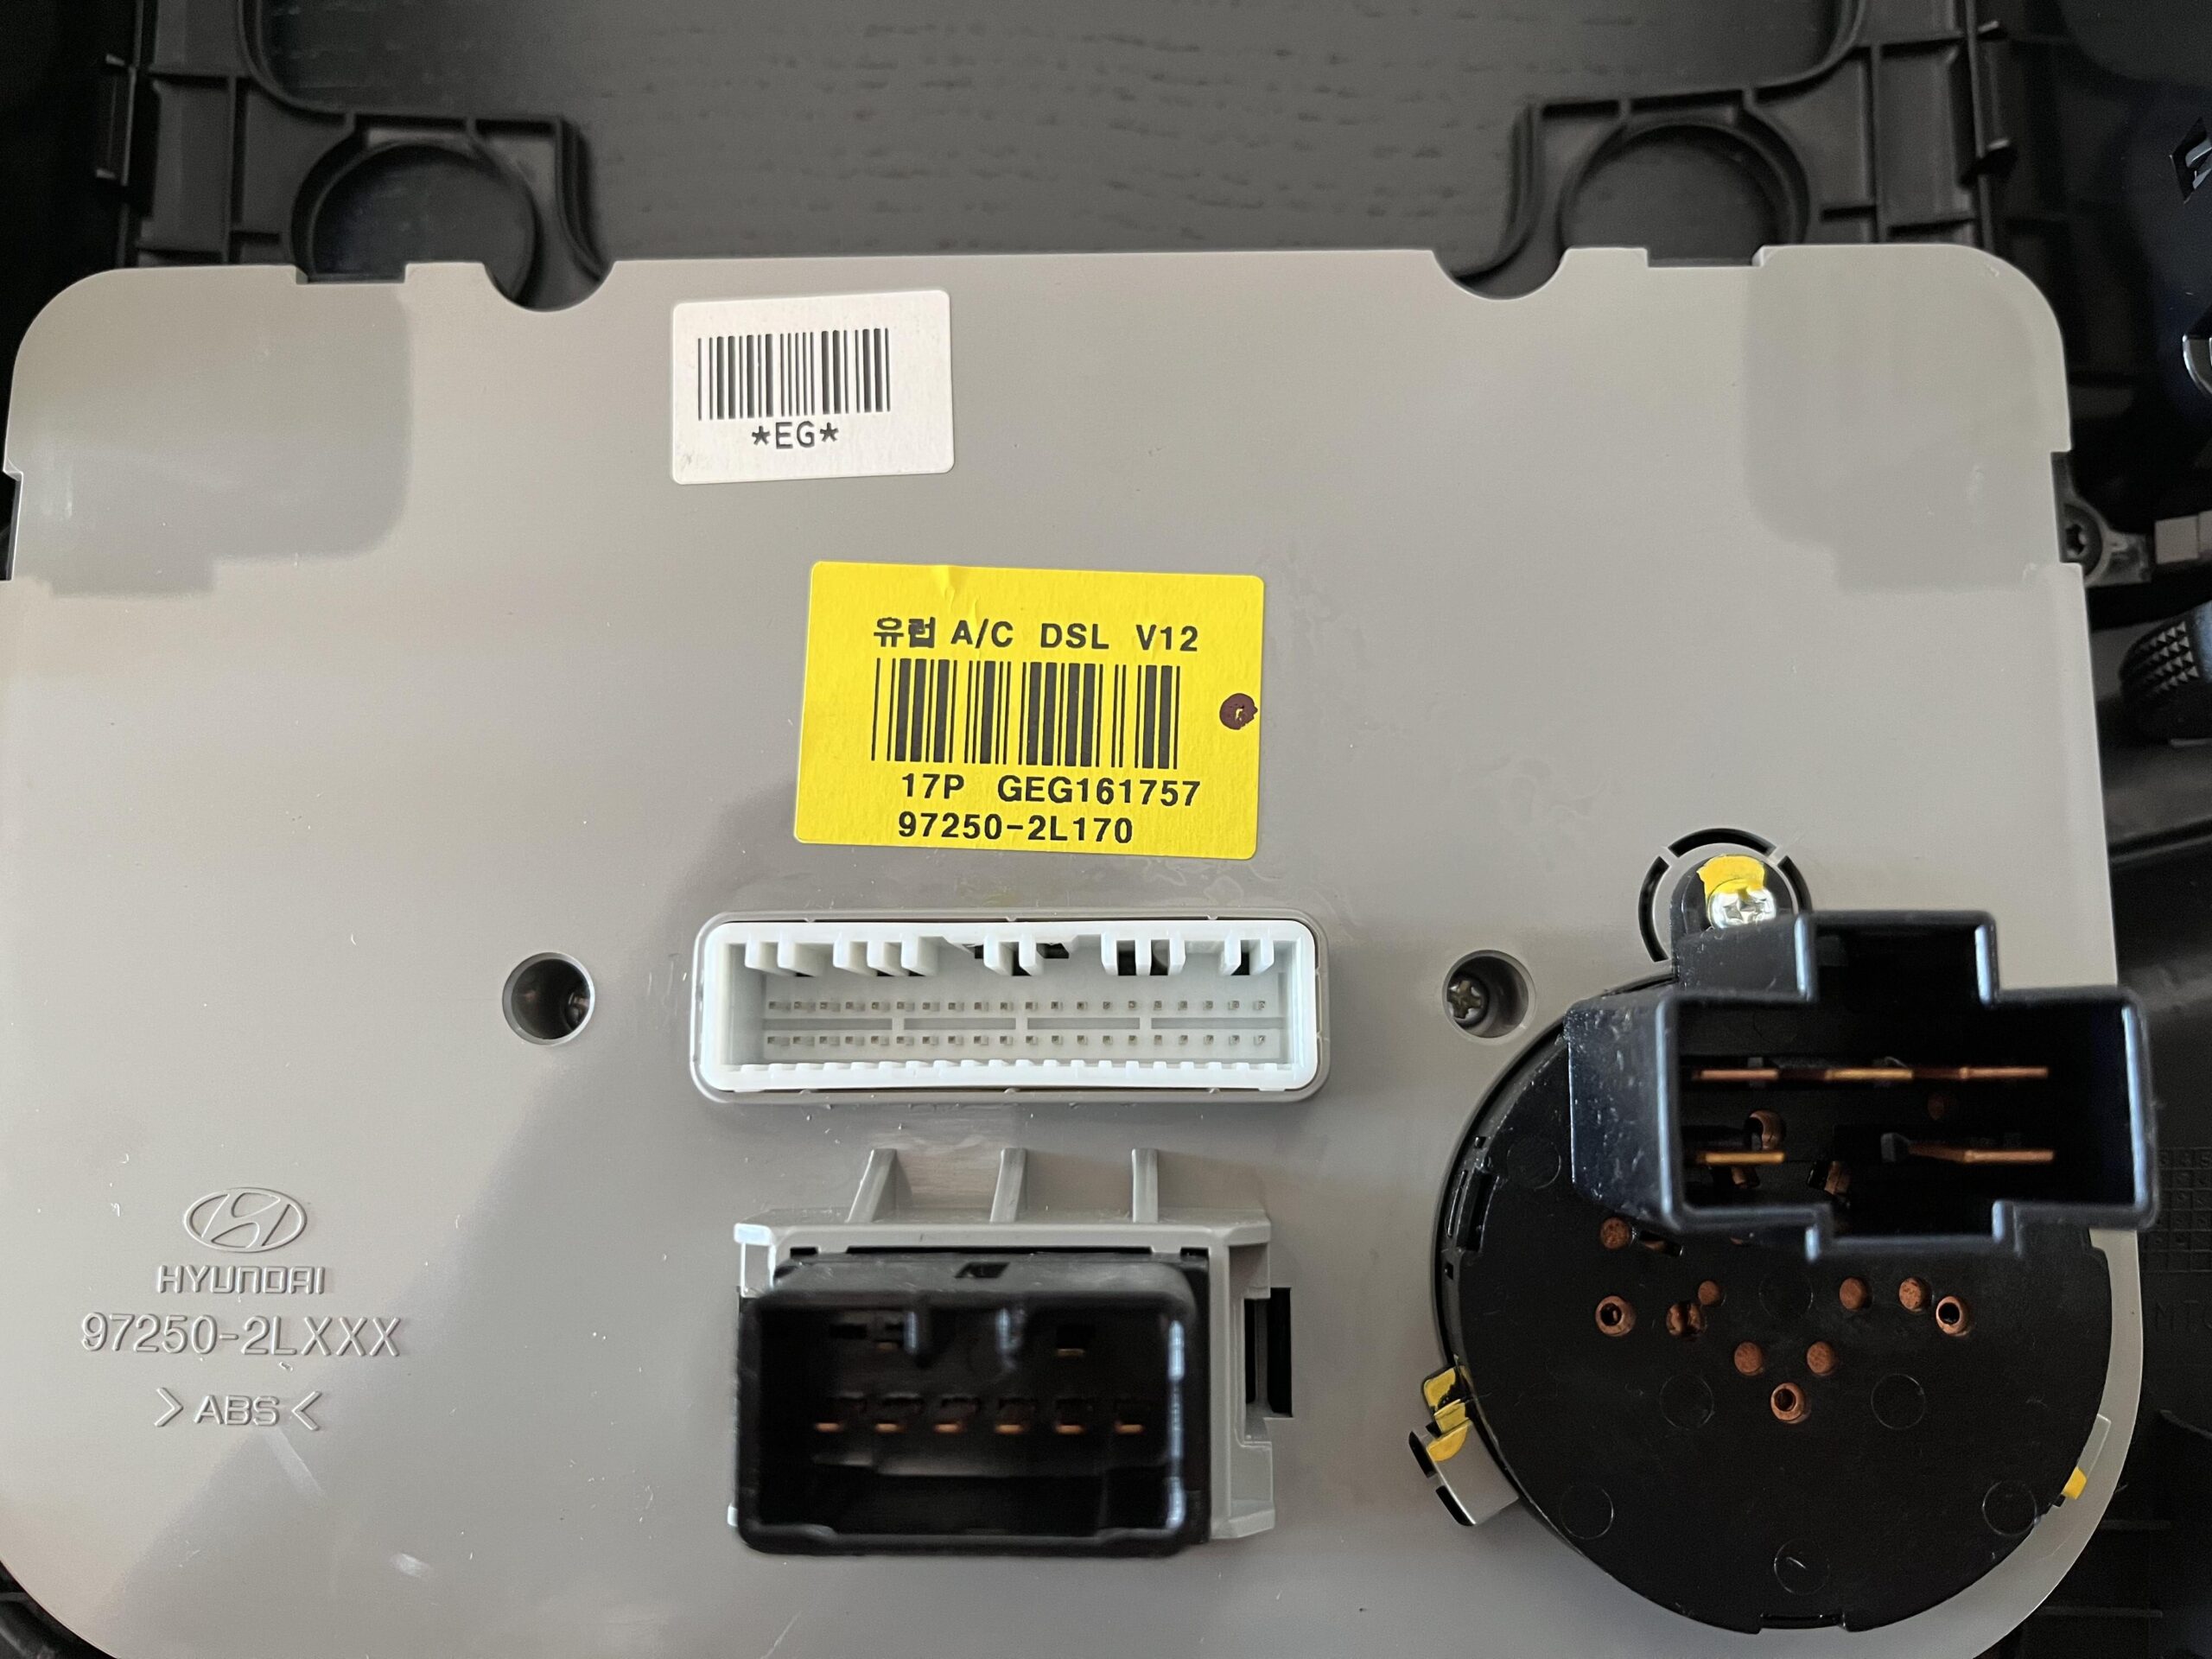
There are a total of four screws to remove, two at the bottom
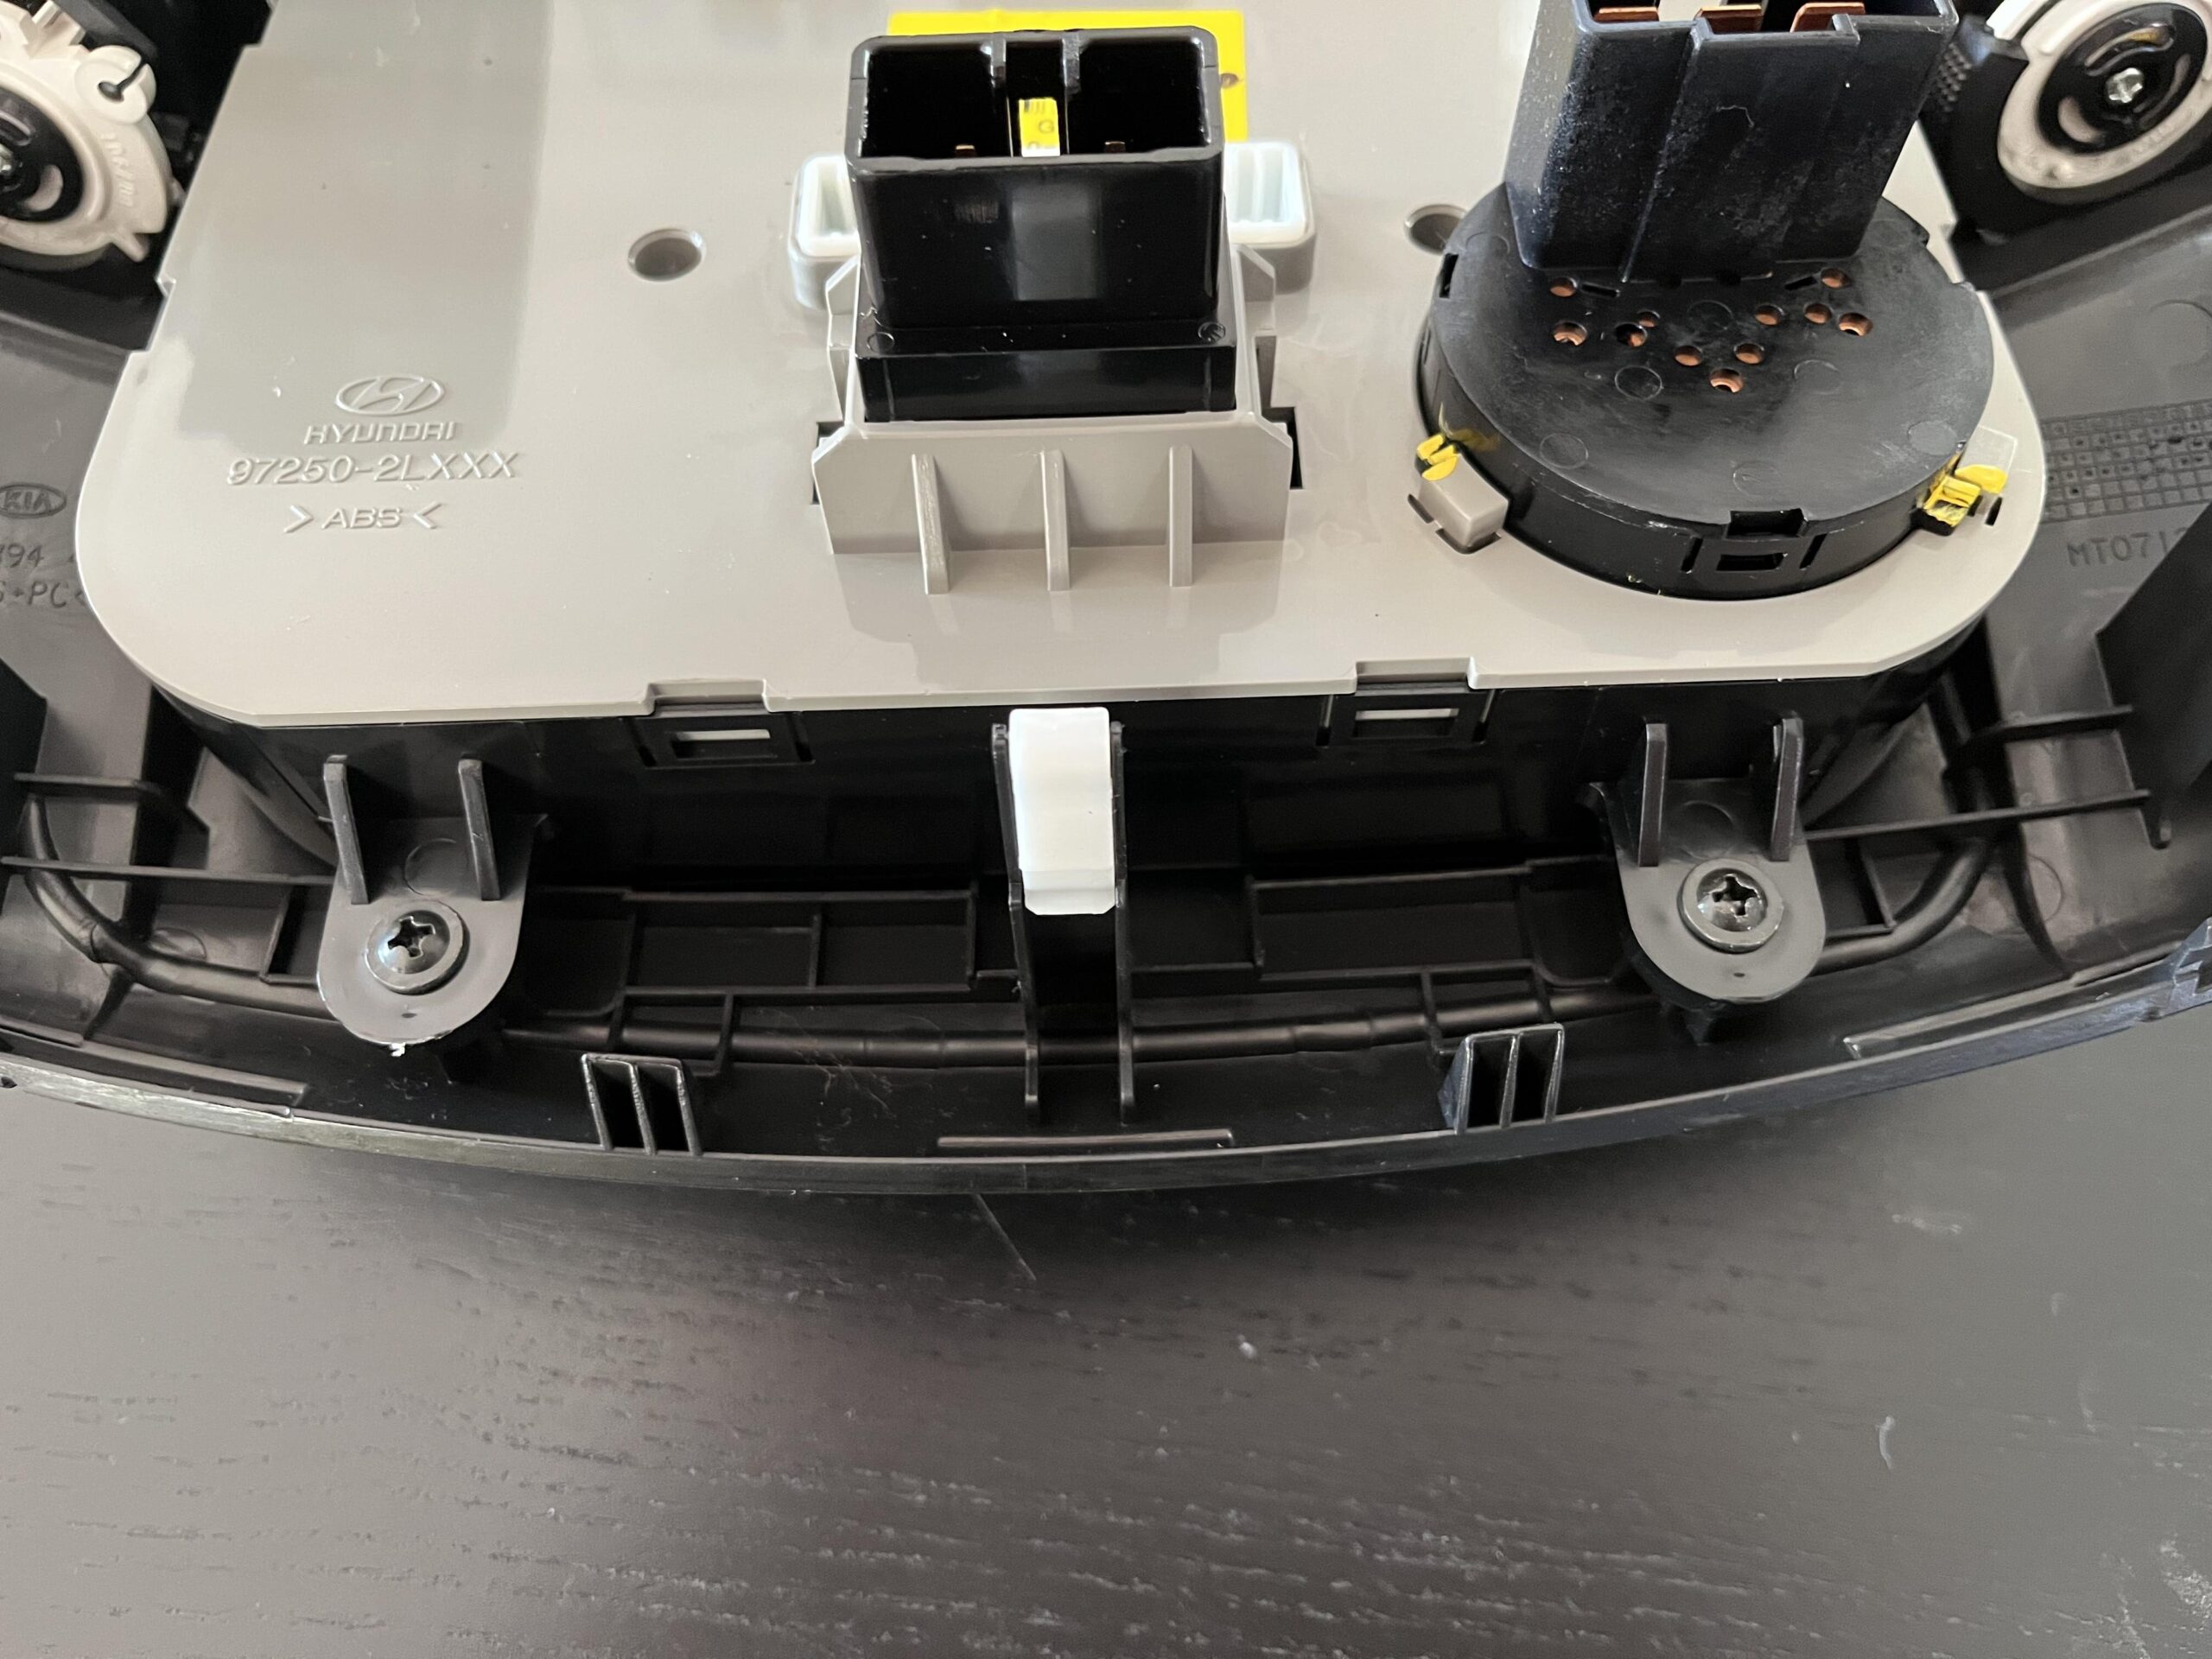
And two at the top

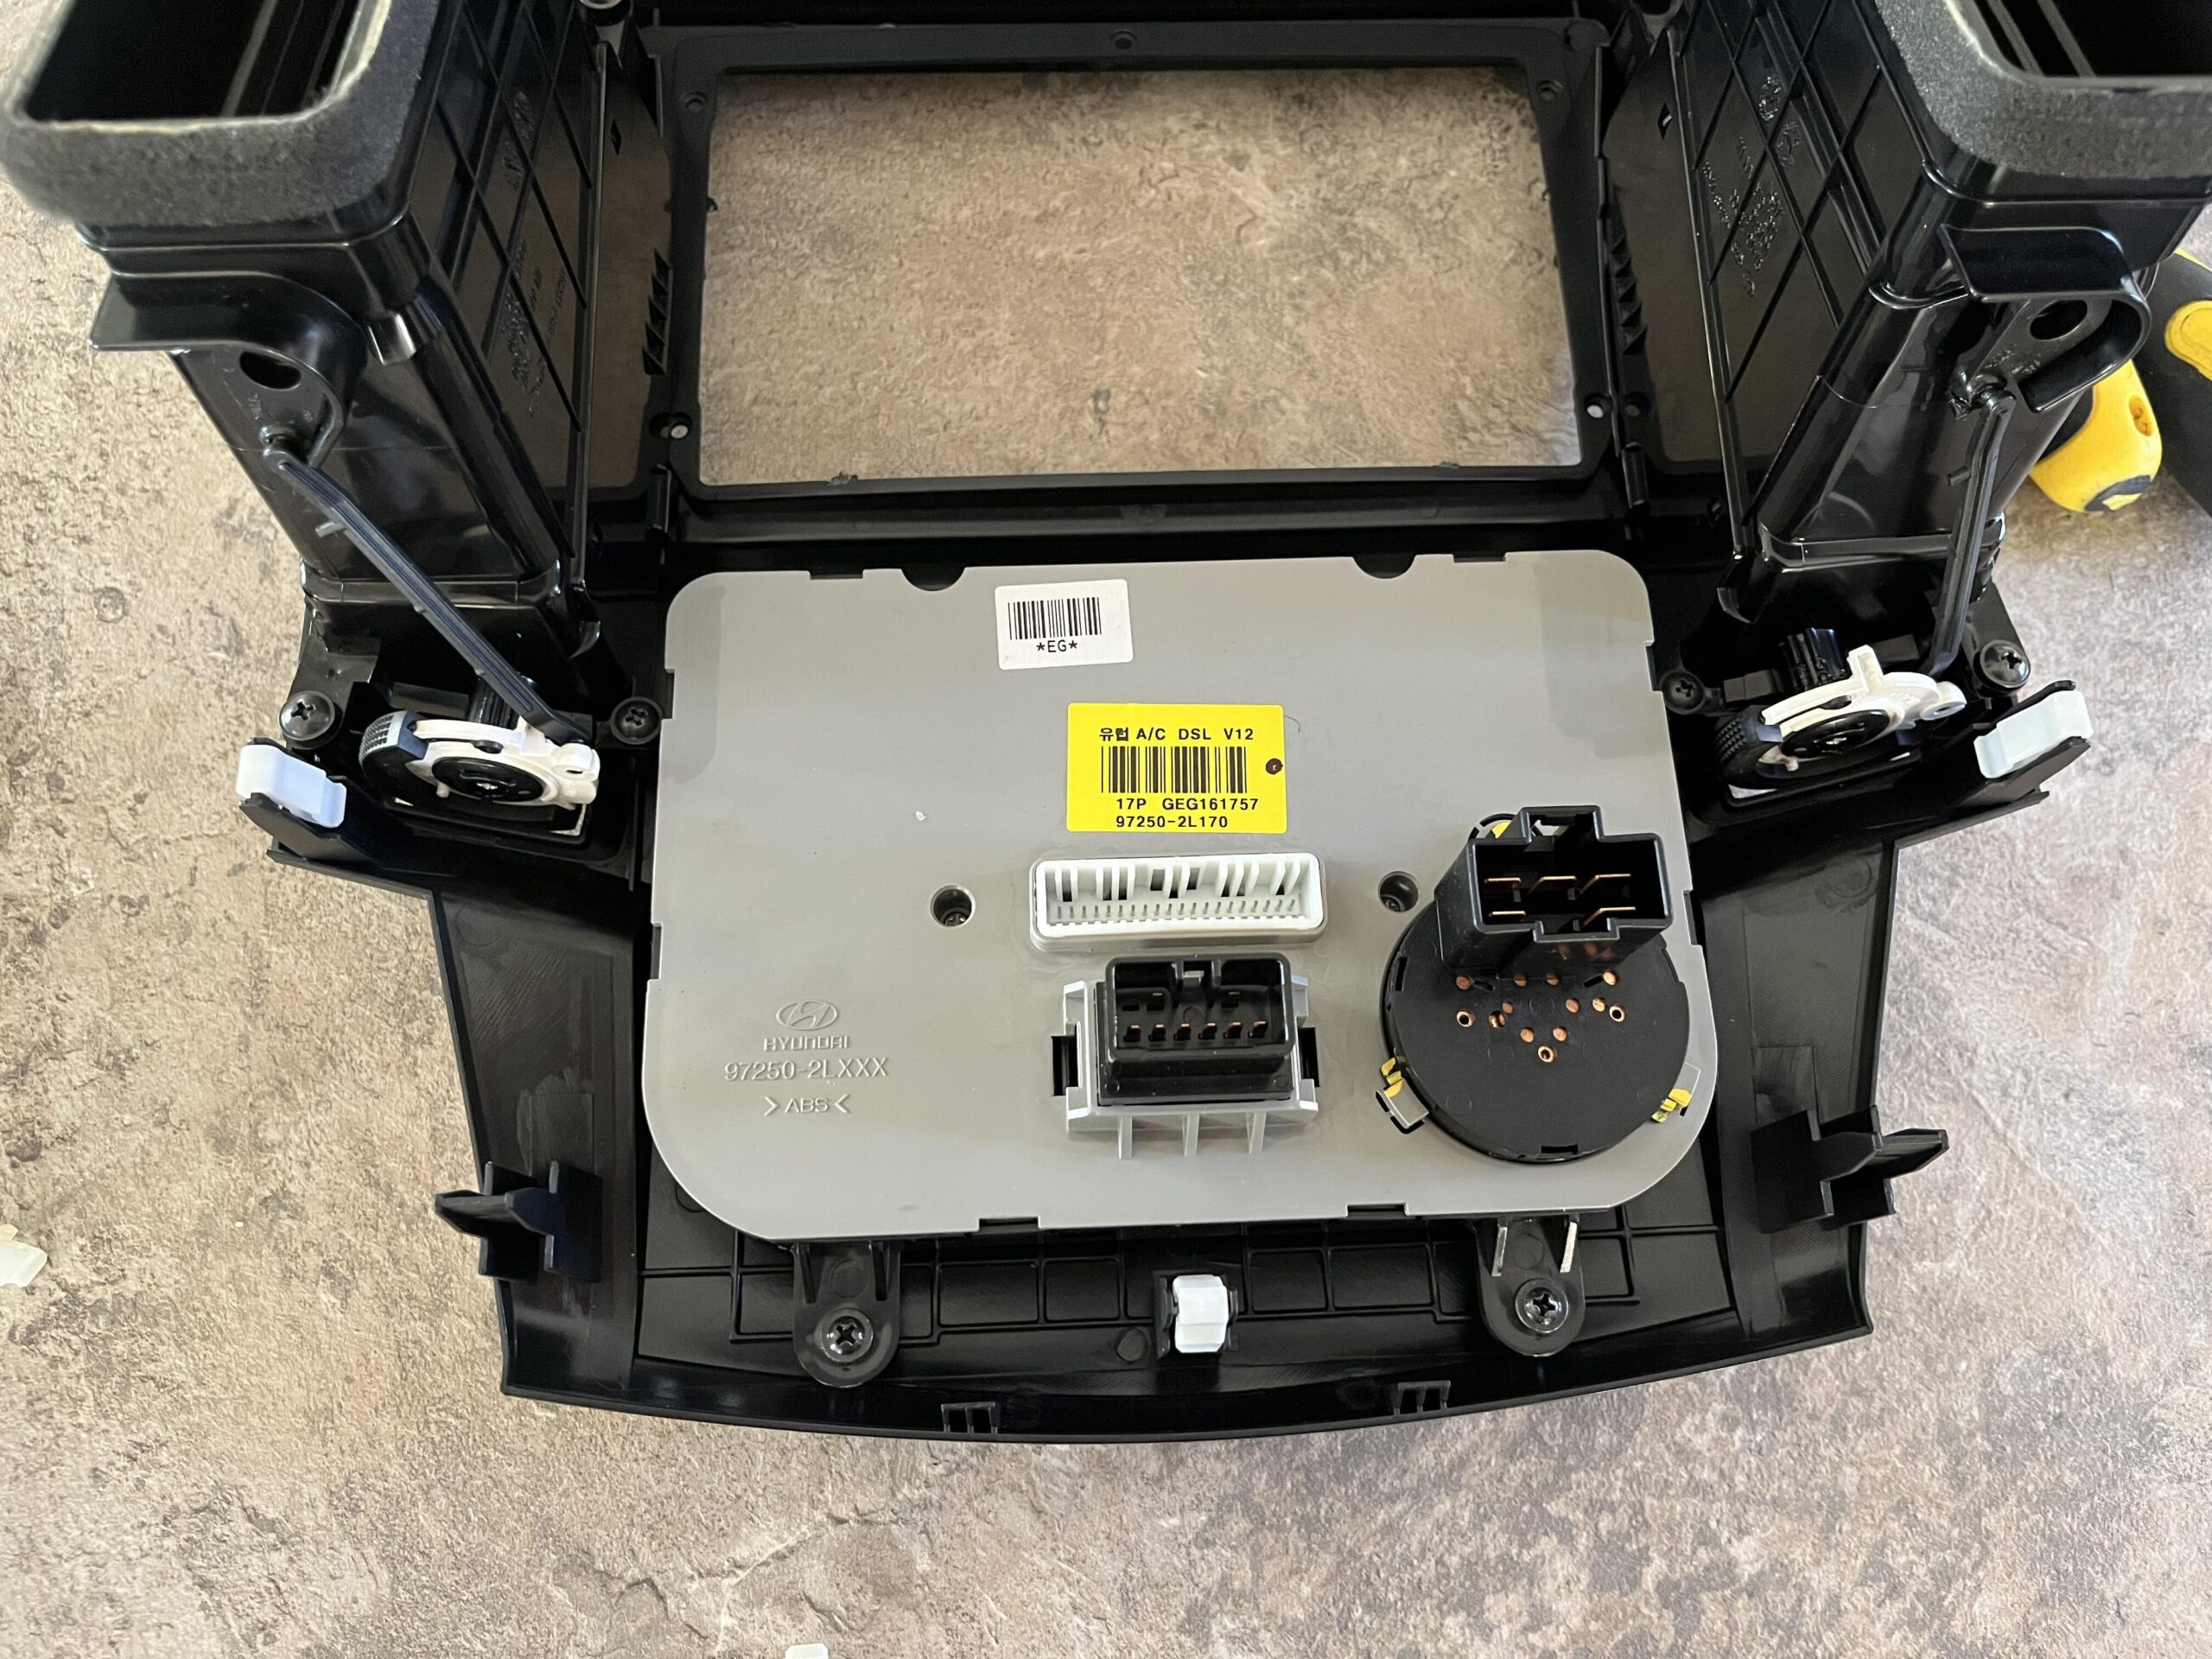
Once the screws are removed, the climate control module will life out easily
Once its back in the new fascia, we need to add the screws back, starting with the two at the bottom

And the two at the top
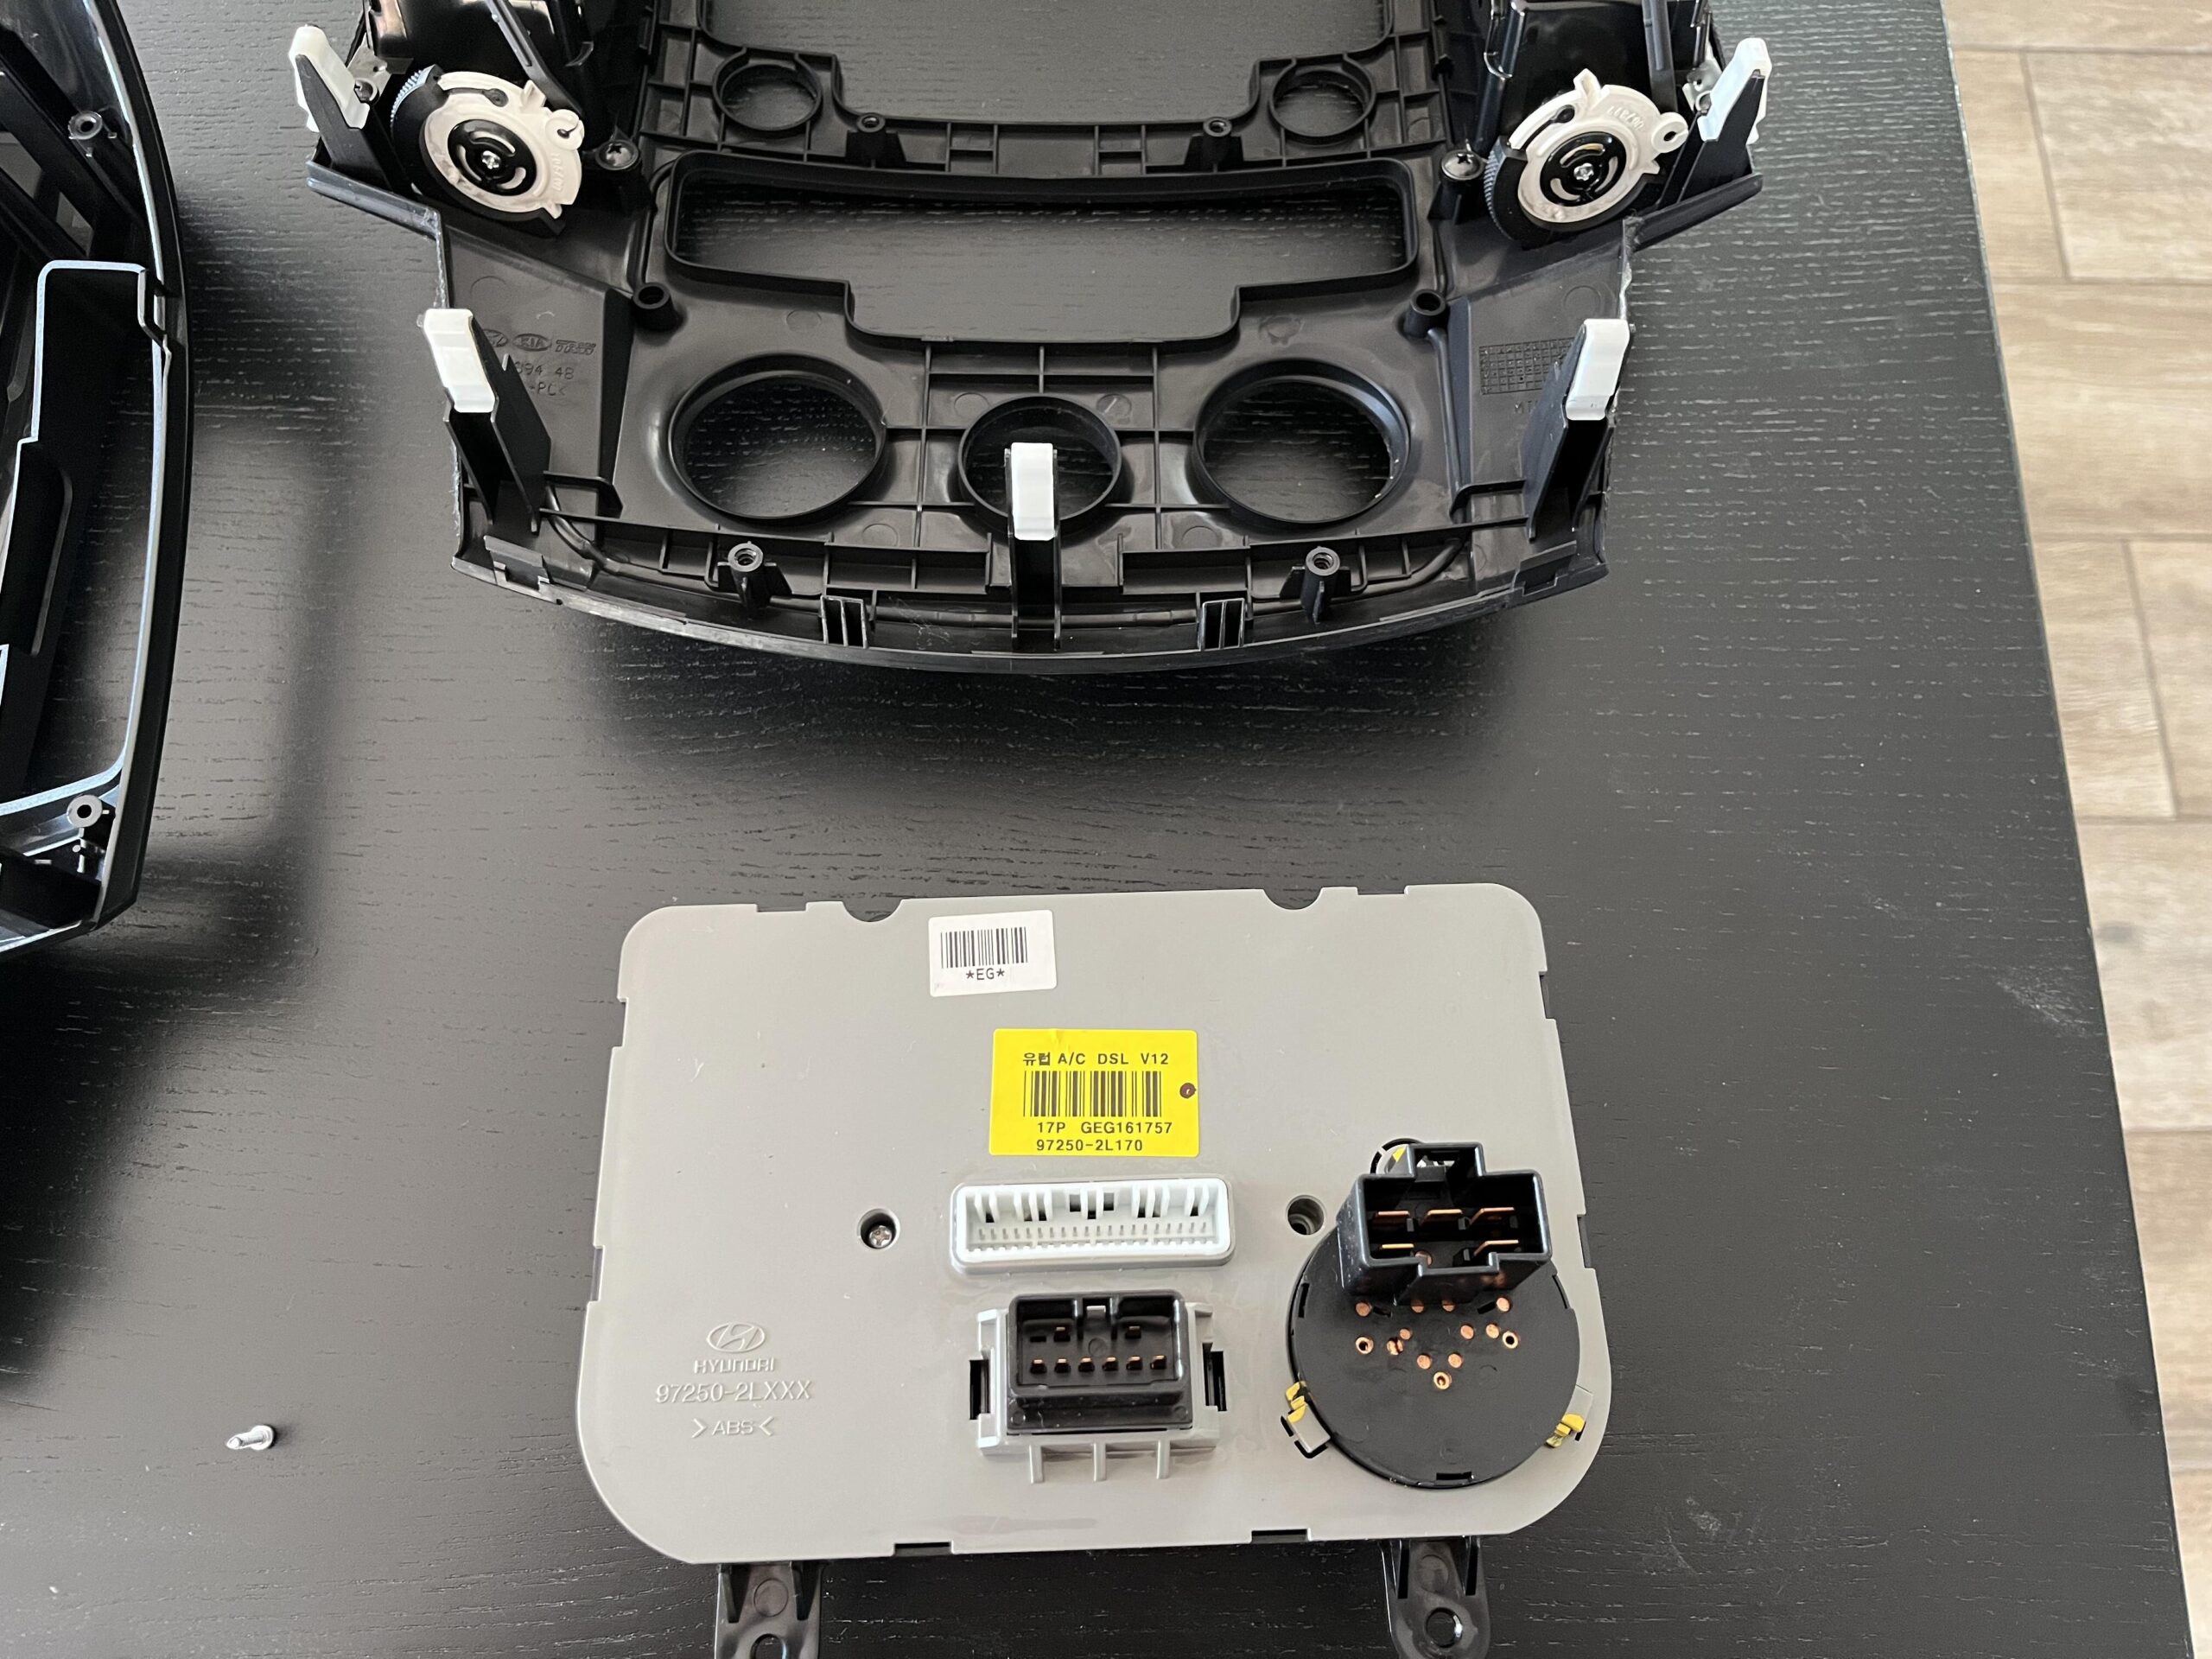
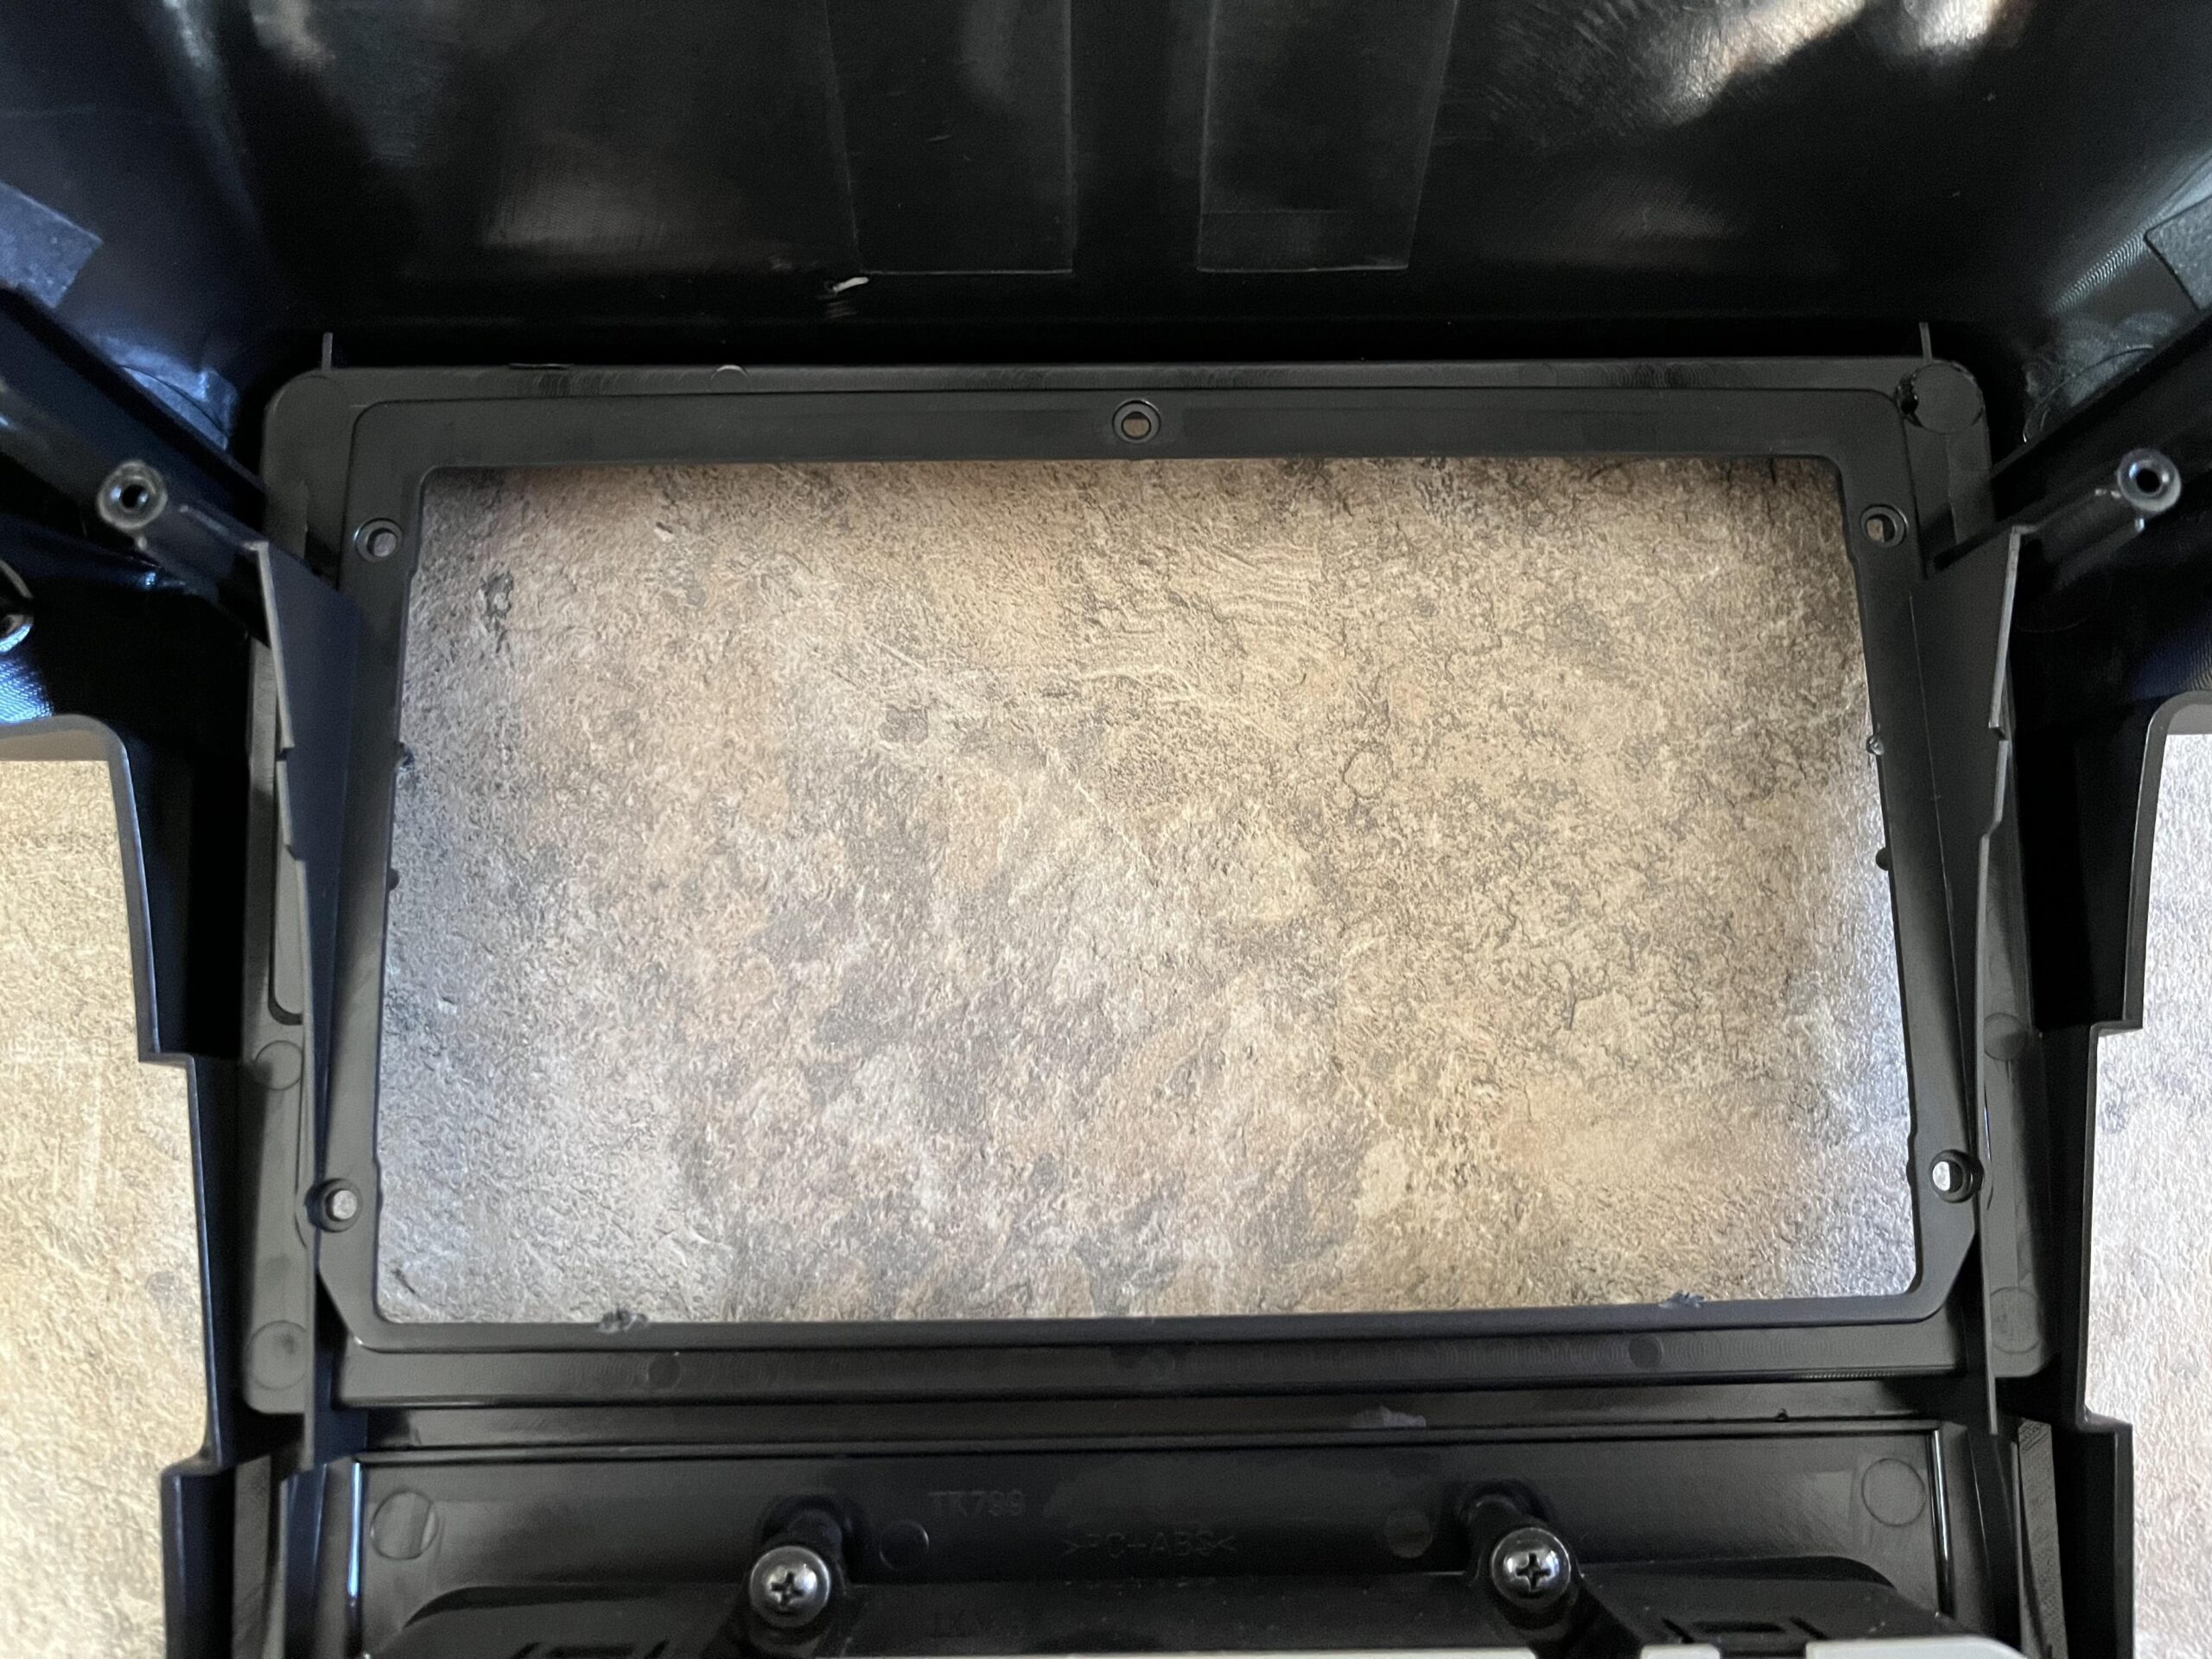
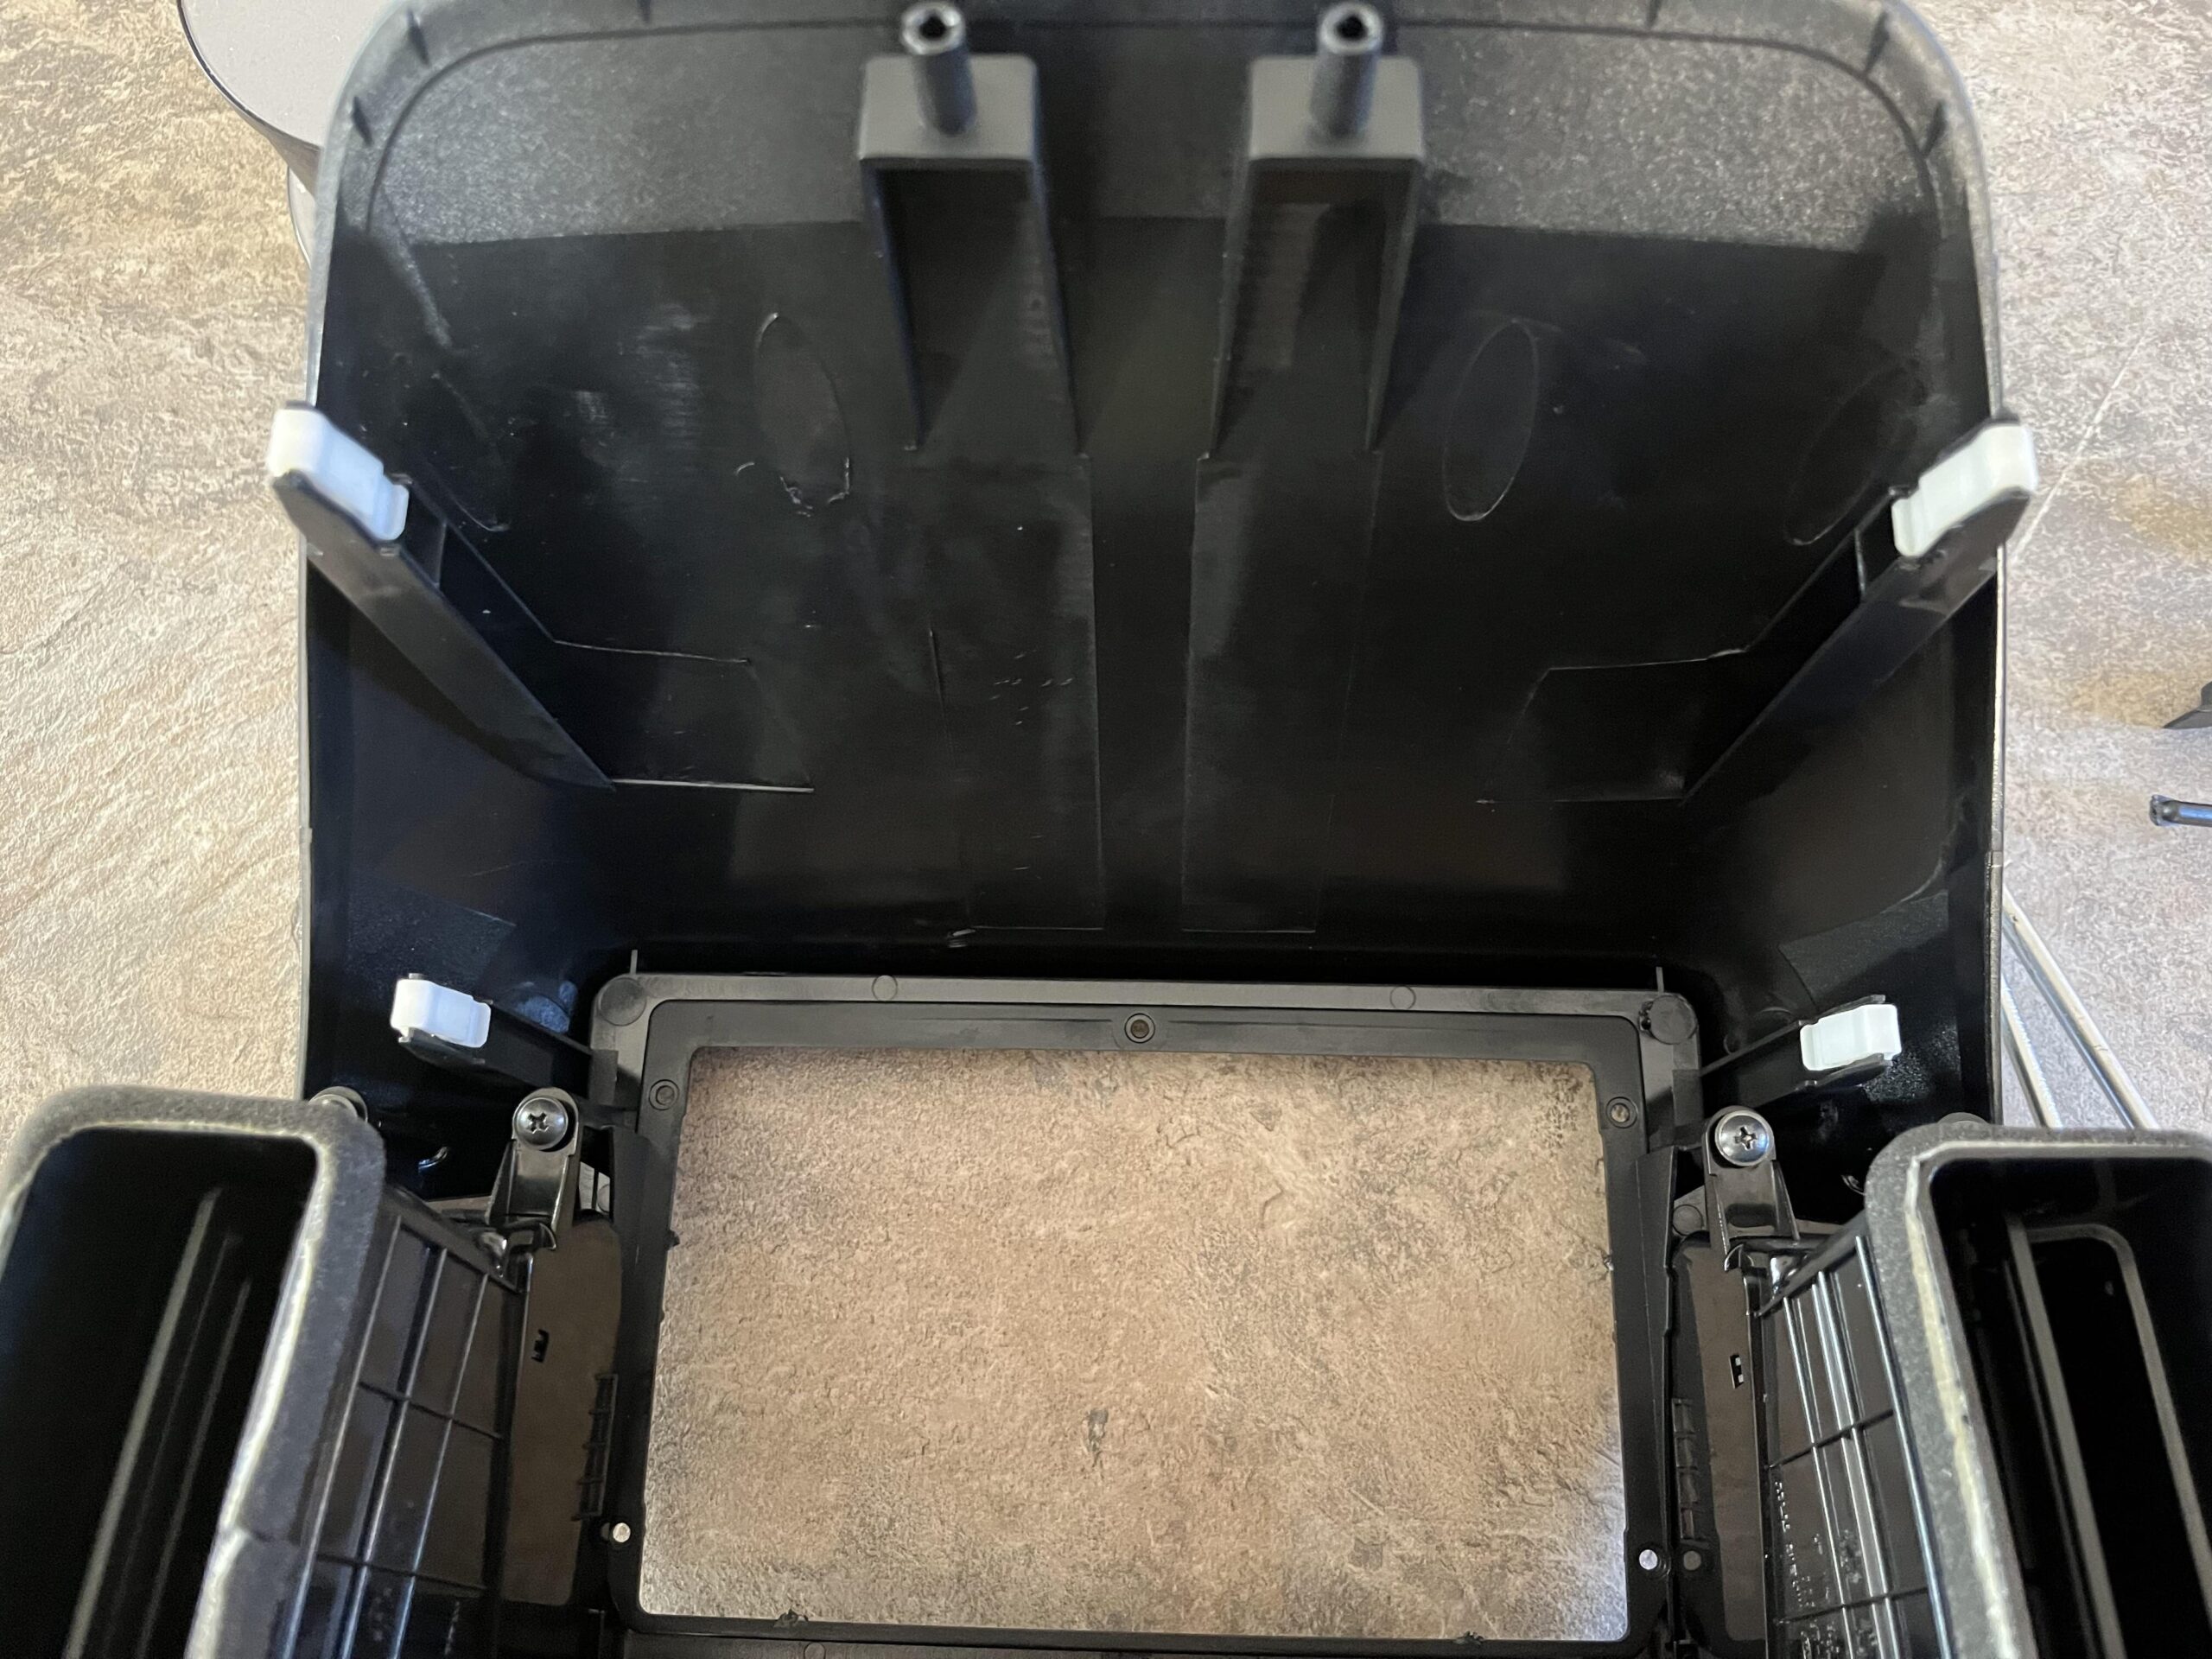
Where the stereo goes, there are some molding supports that needs removing, the bits of plastic in the middle, these just twist out and are easy to remove
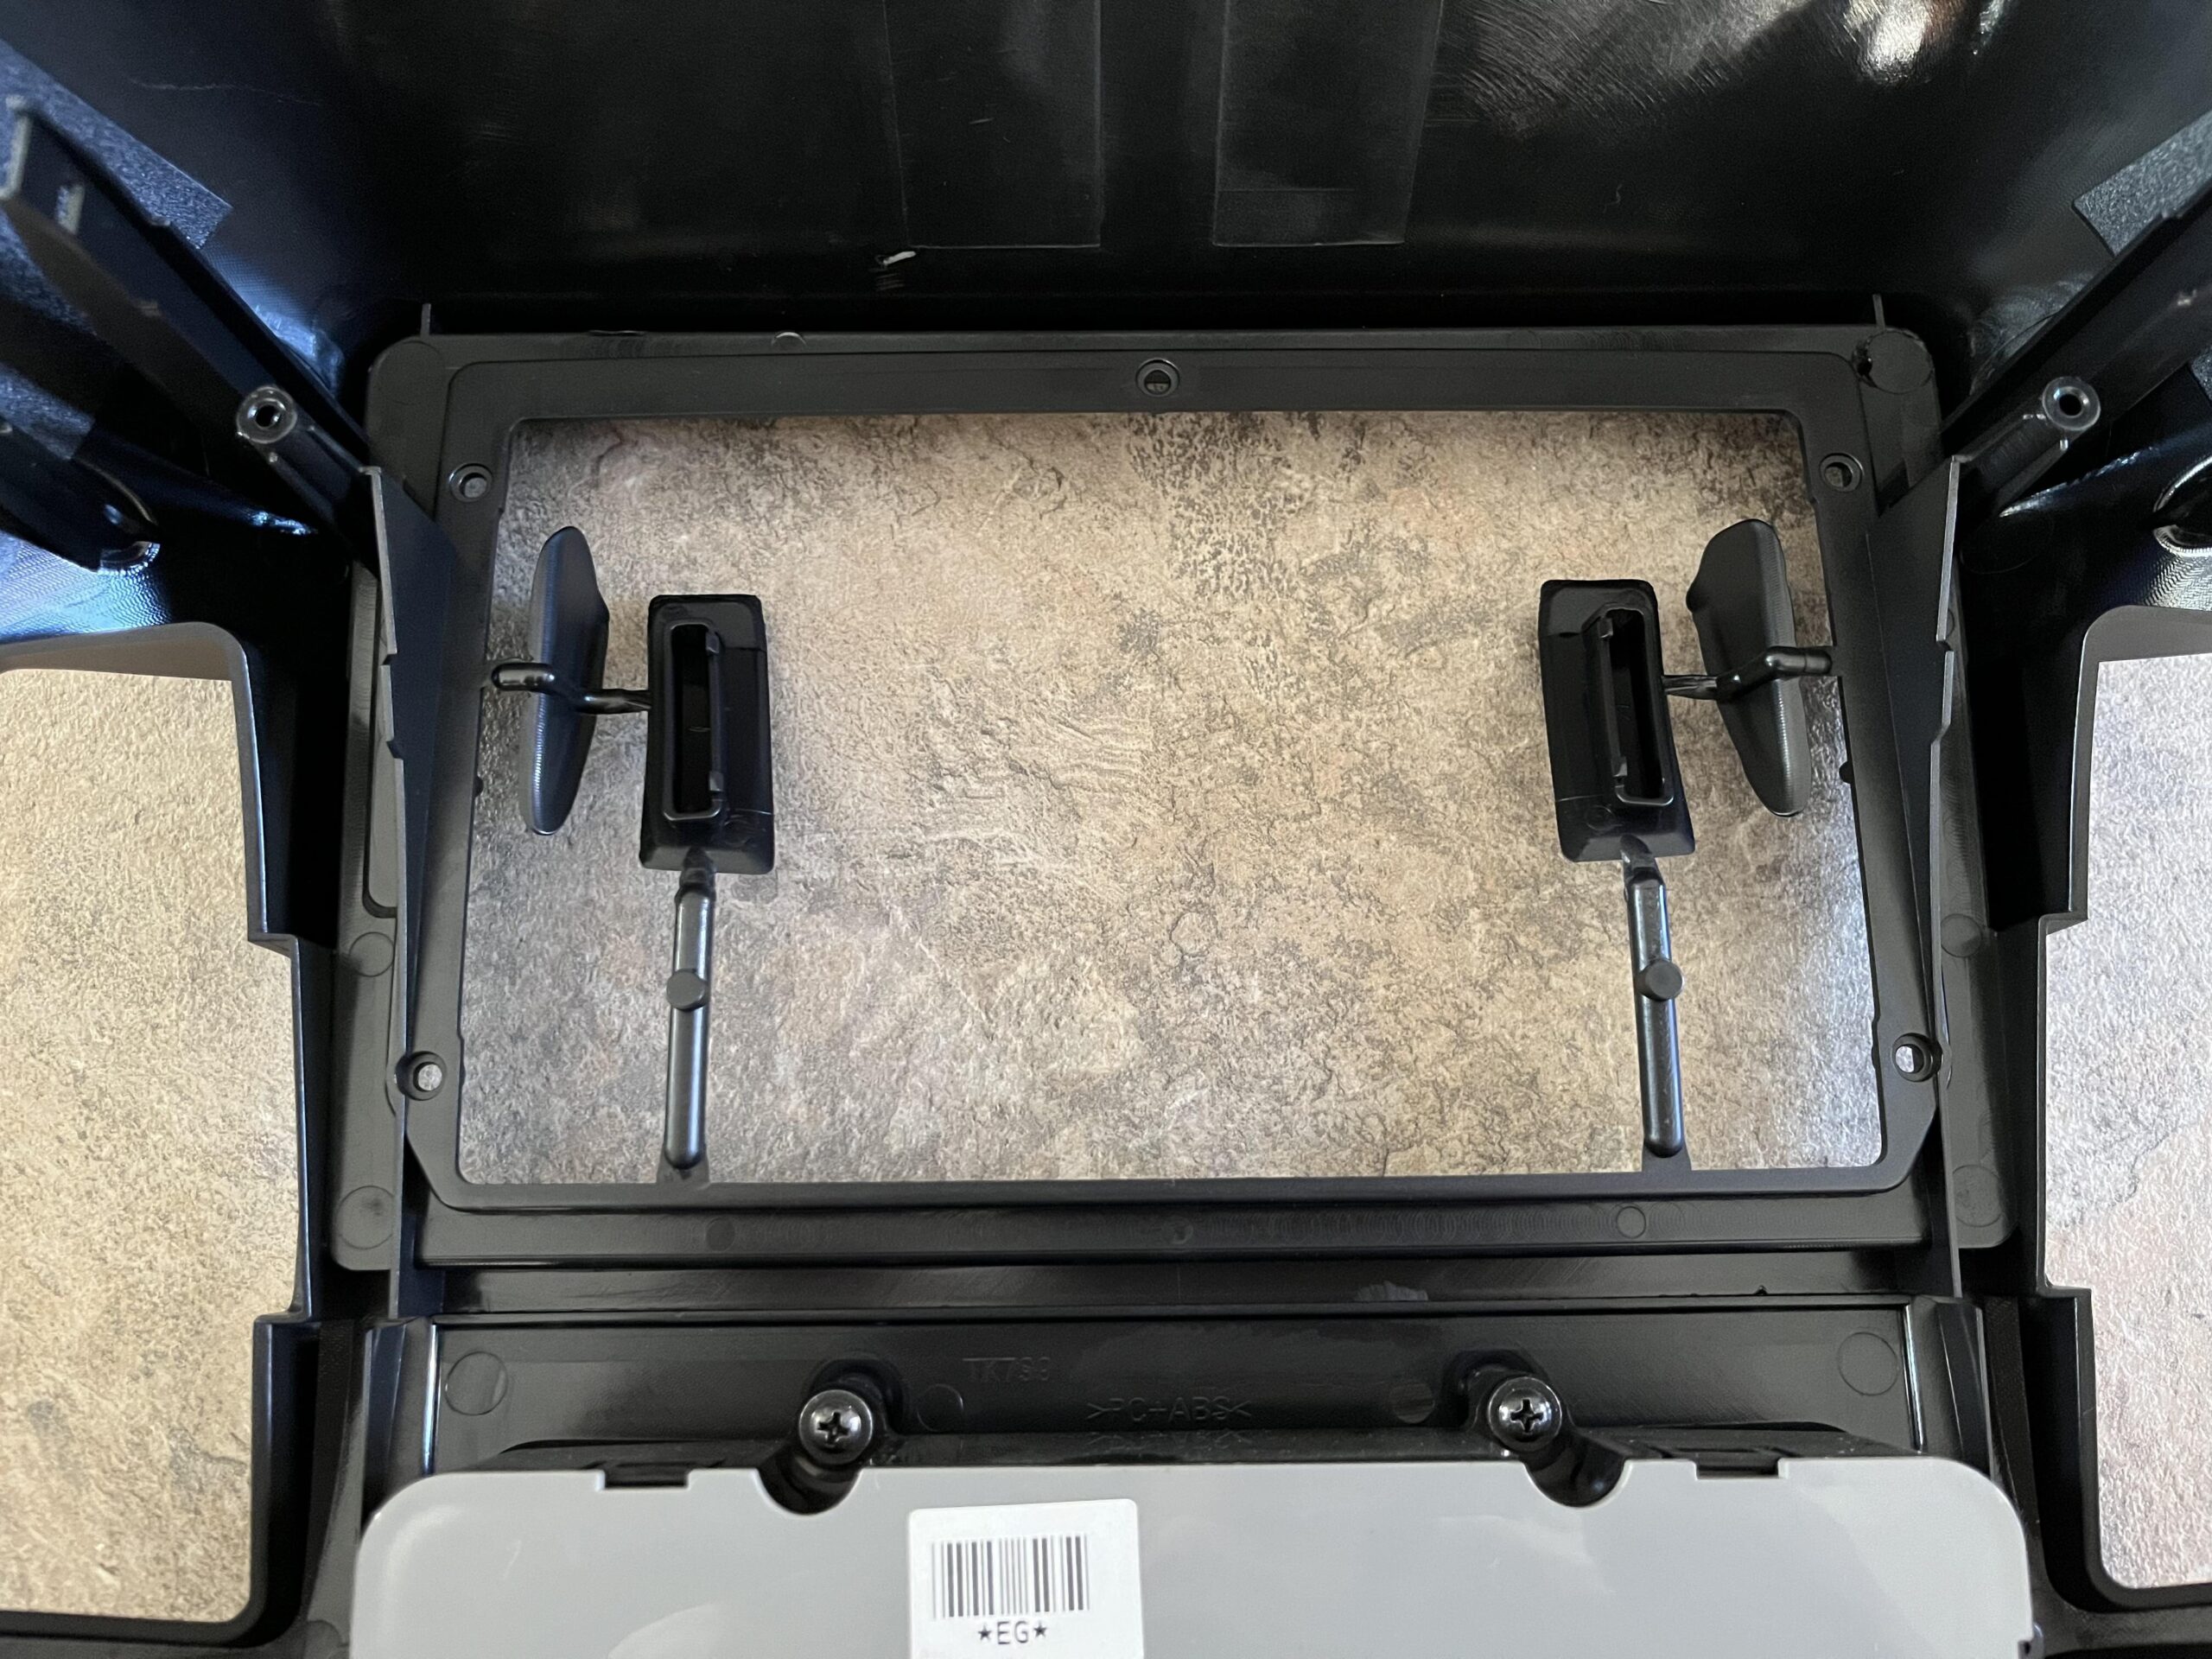
When they are removed, it should look like this
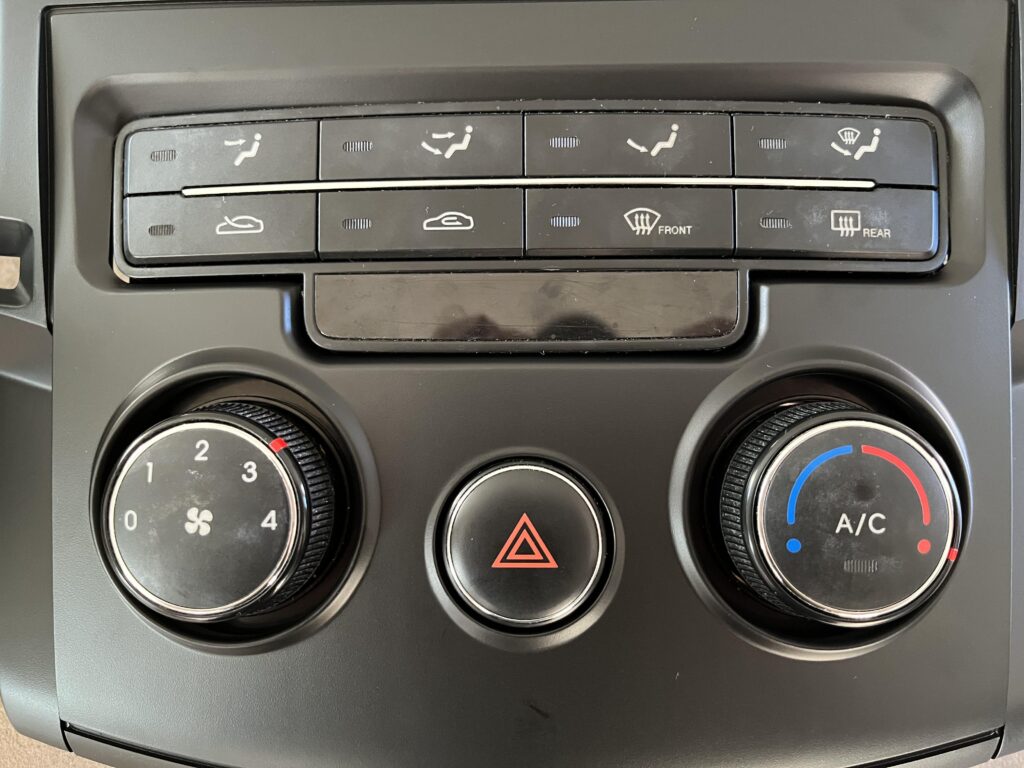
Once thats done, flip the new fascia over and check the climate control lines up properly and is in place, it should look like this
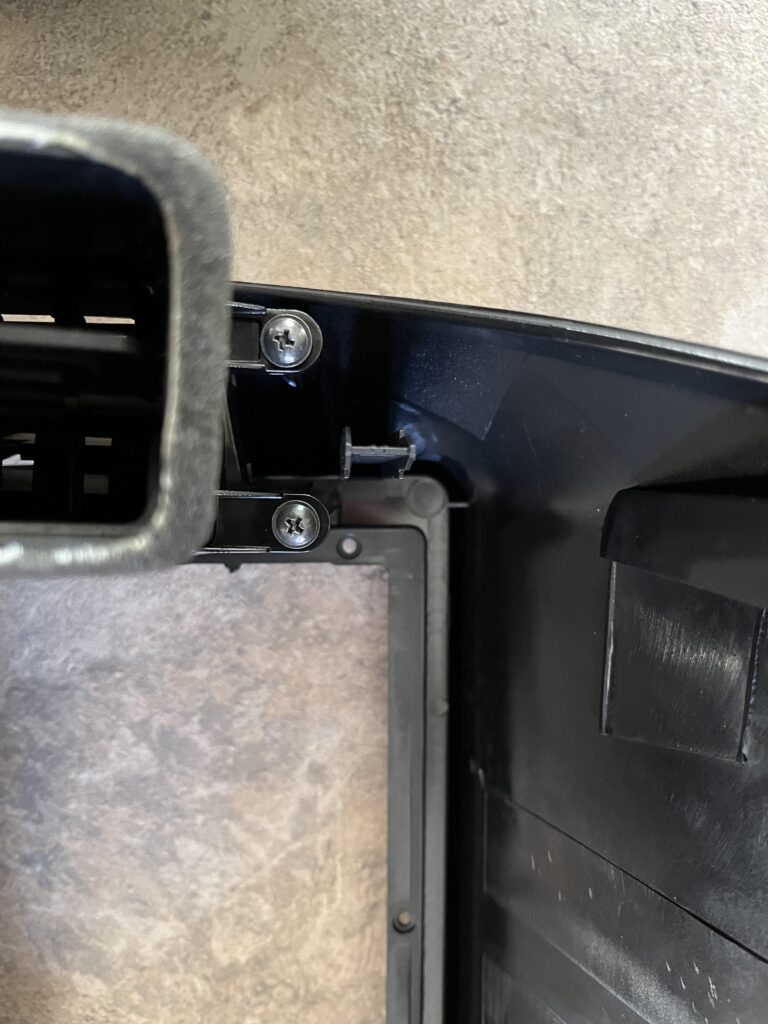
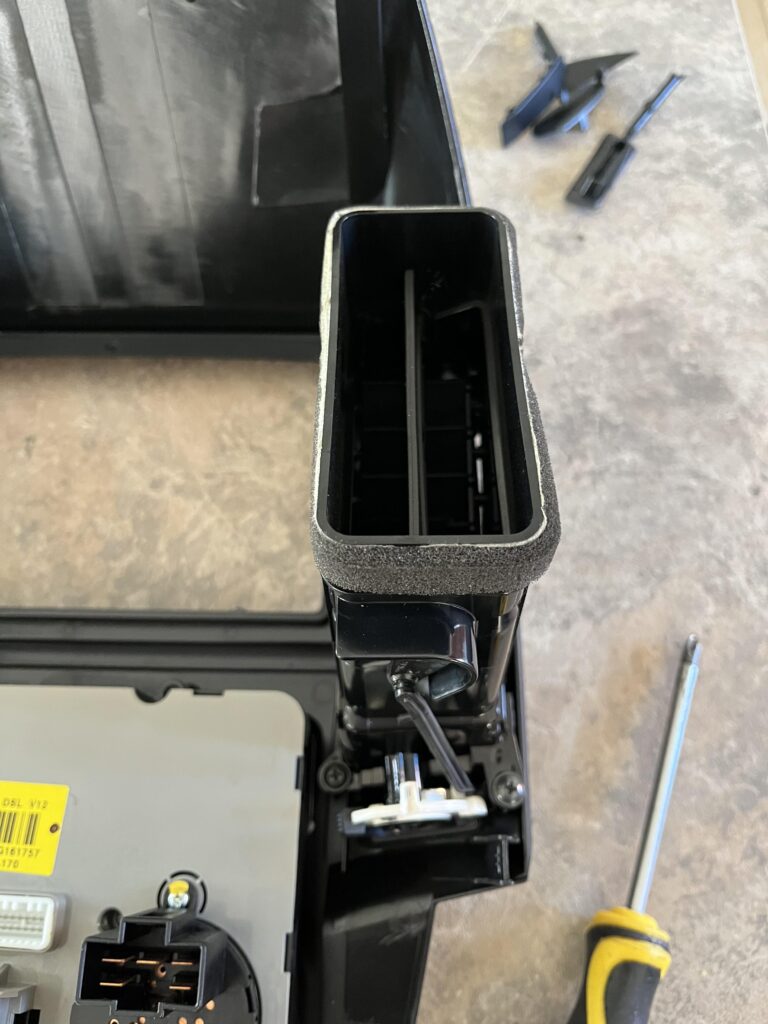
Next we need to do the air vent ducts, lets start with the left side
There are two screws on the bottom to remove
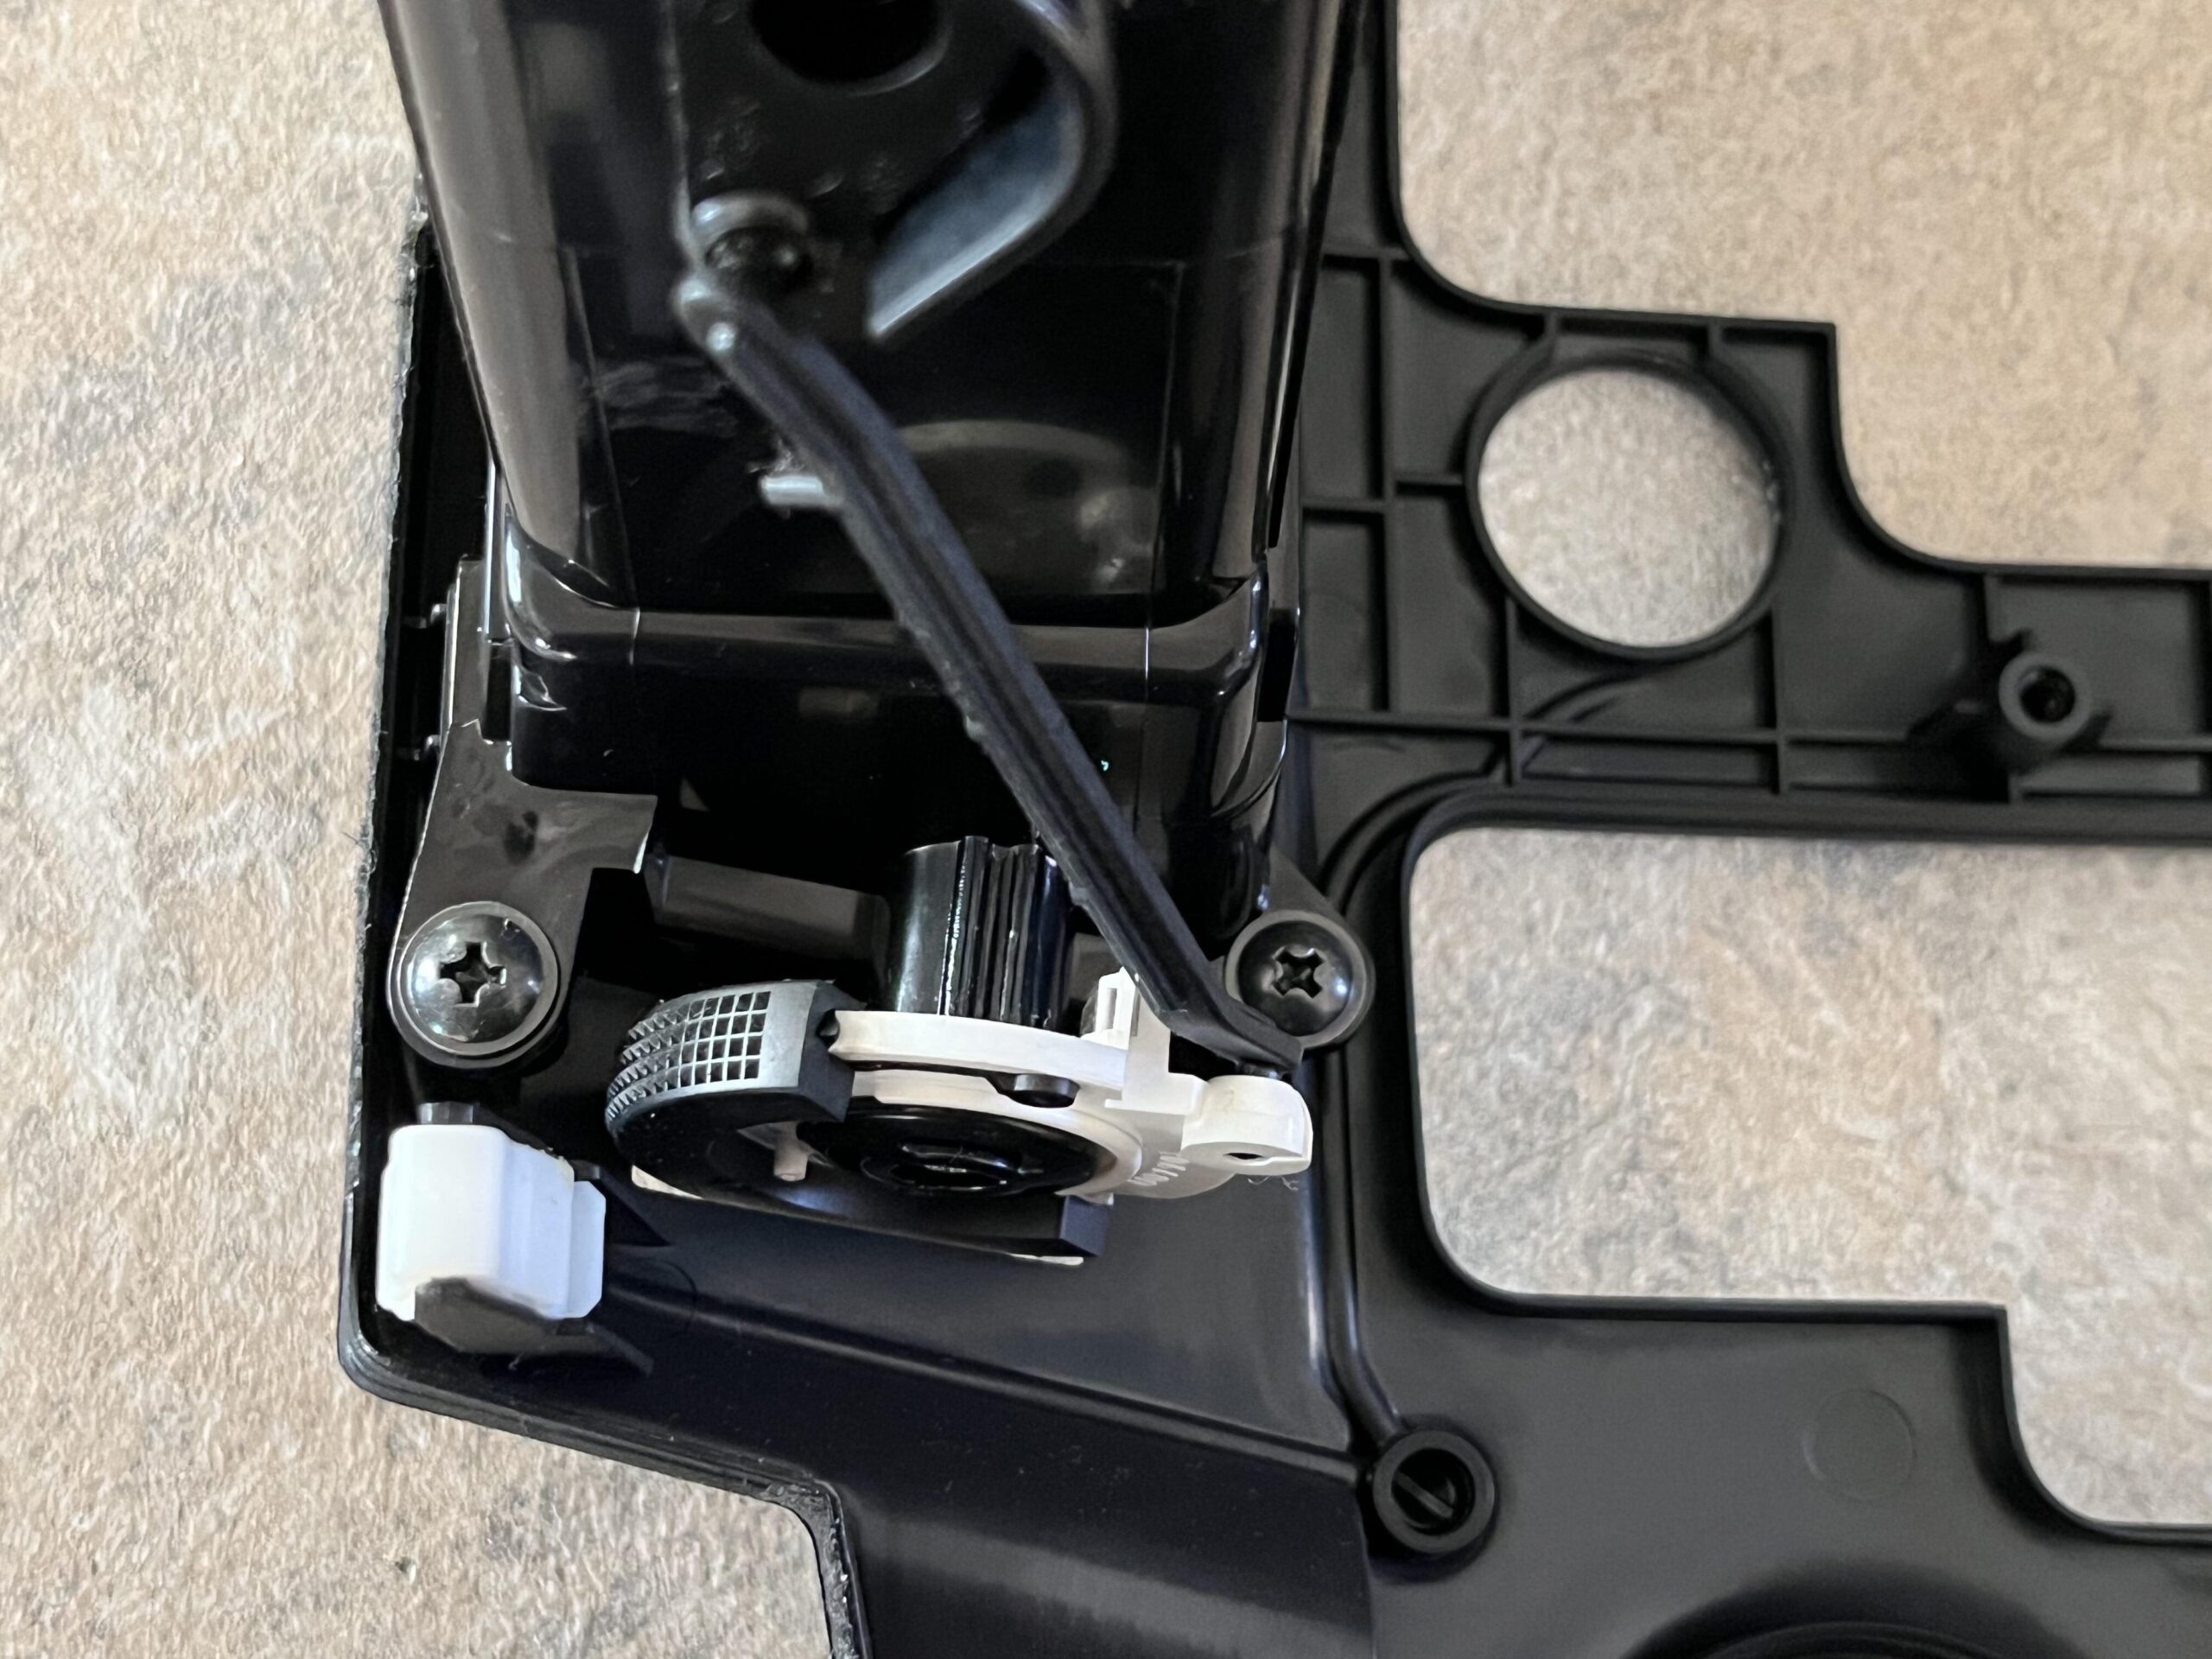
And two on the top
It will then wiggle out, be careful not to damage anything
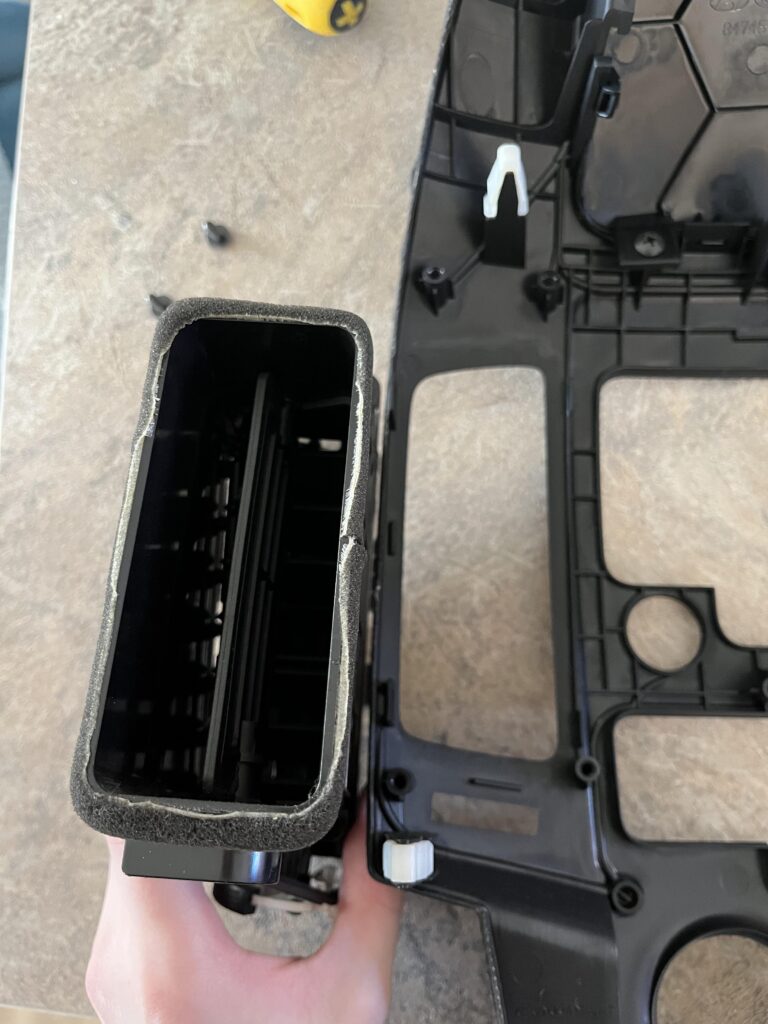
We then need to place it in the new fascia and re attach the screws, the molding tolerances dont seem to be super tight, so it didnt line up 100% bit did go in without much difficulty
What also makes installing the duct a little more difficult is due to the slight cut off at the top next to the stereo cut out, as the larger screen cuts the vent off a little
I would suggest doing these screws a little first, but not all the way
We then need to do the top two screws, again do them slightly and ensure everything is in place, then tighten all four screws
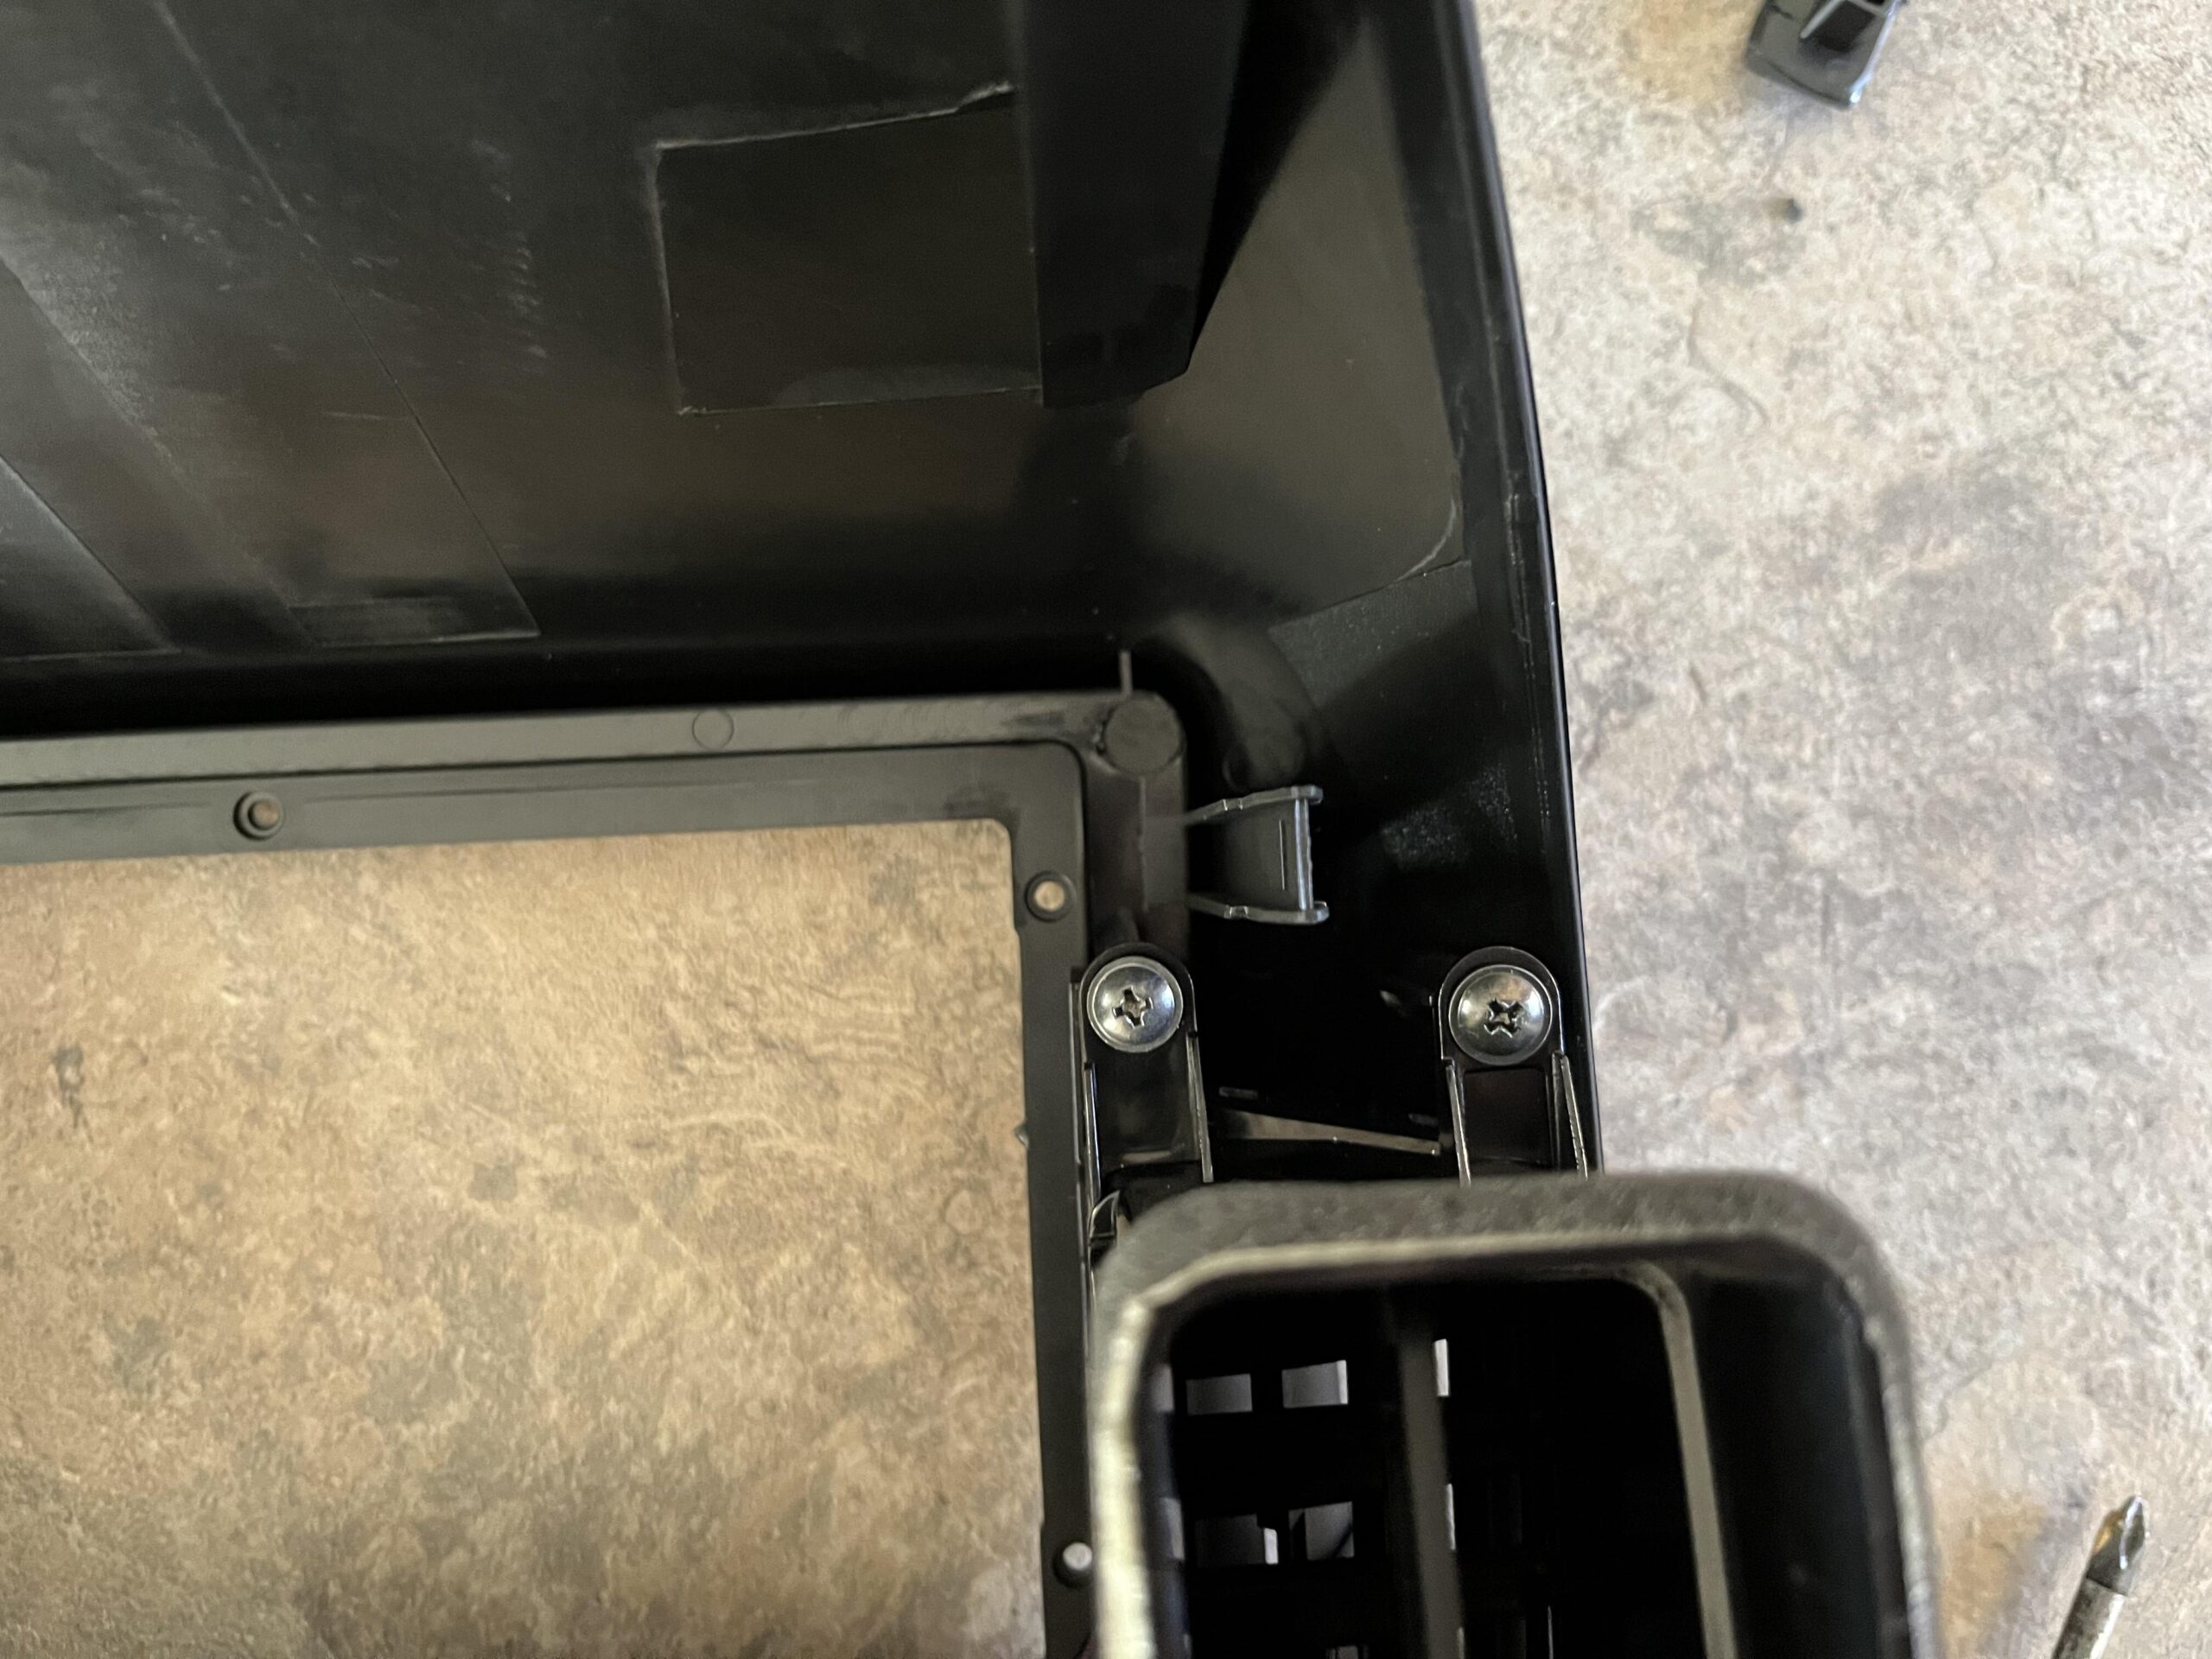
We then need to repeat for the right size, which also has two screws on the bottom
And another two on the top

We can then transfer the right duct to the new fascia and slightly tighten the bottom screws
Then slightly tighten the top two screws and when everything is in place, tighten all four down
When its done, flip the new fascia over and check its all in ok, it should look like this
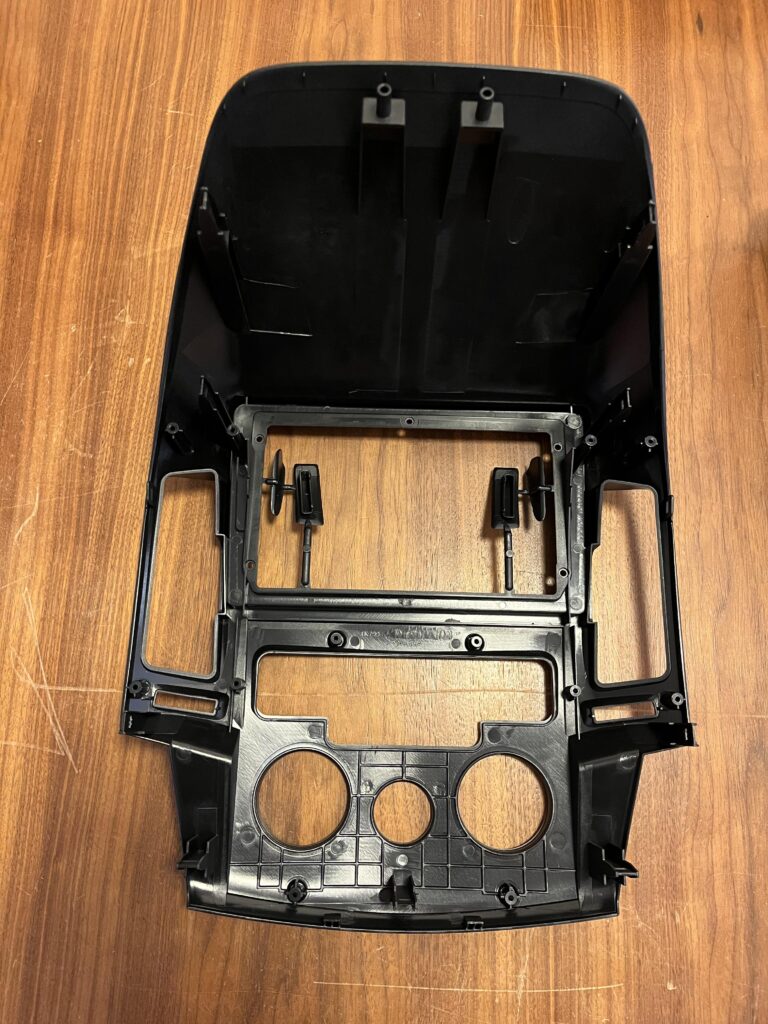
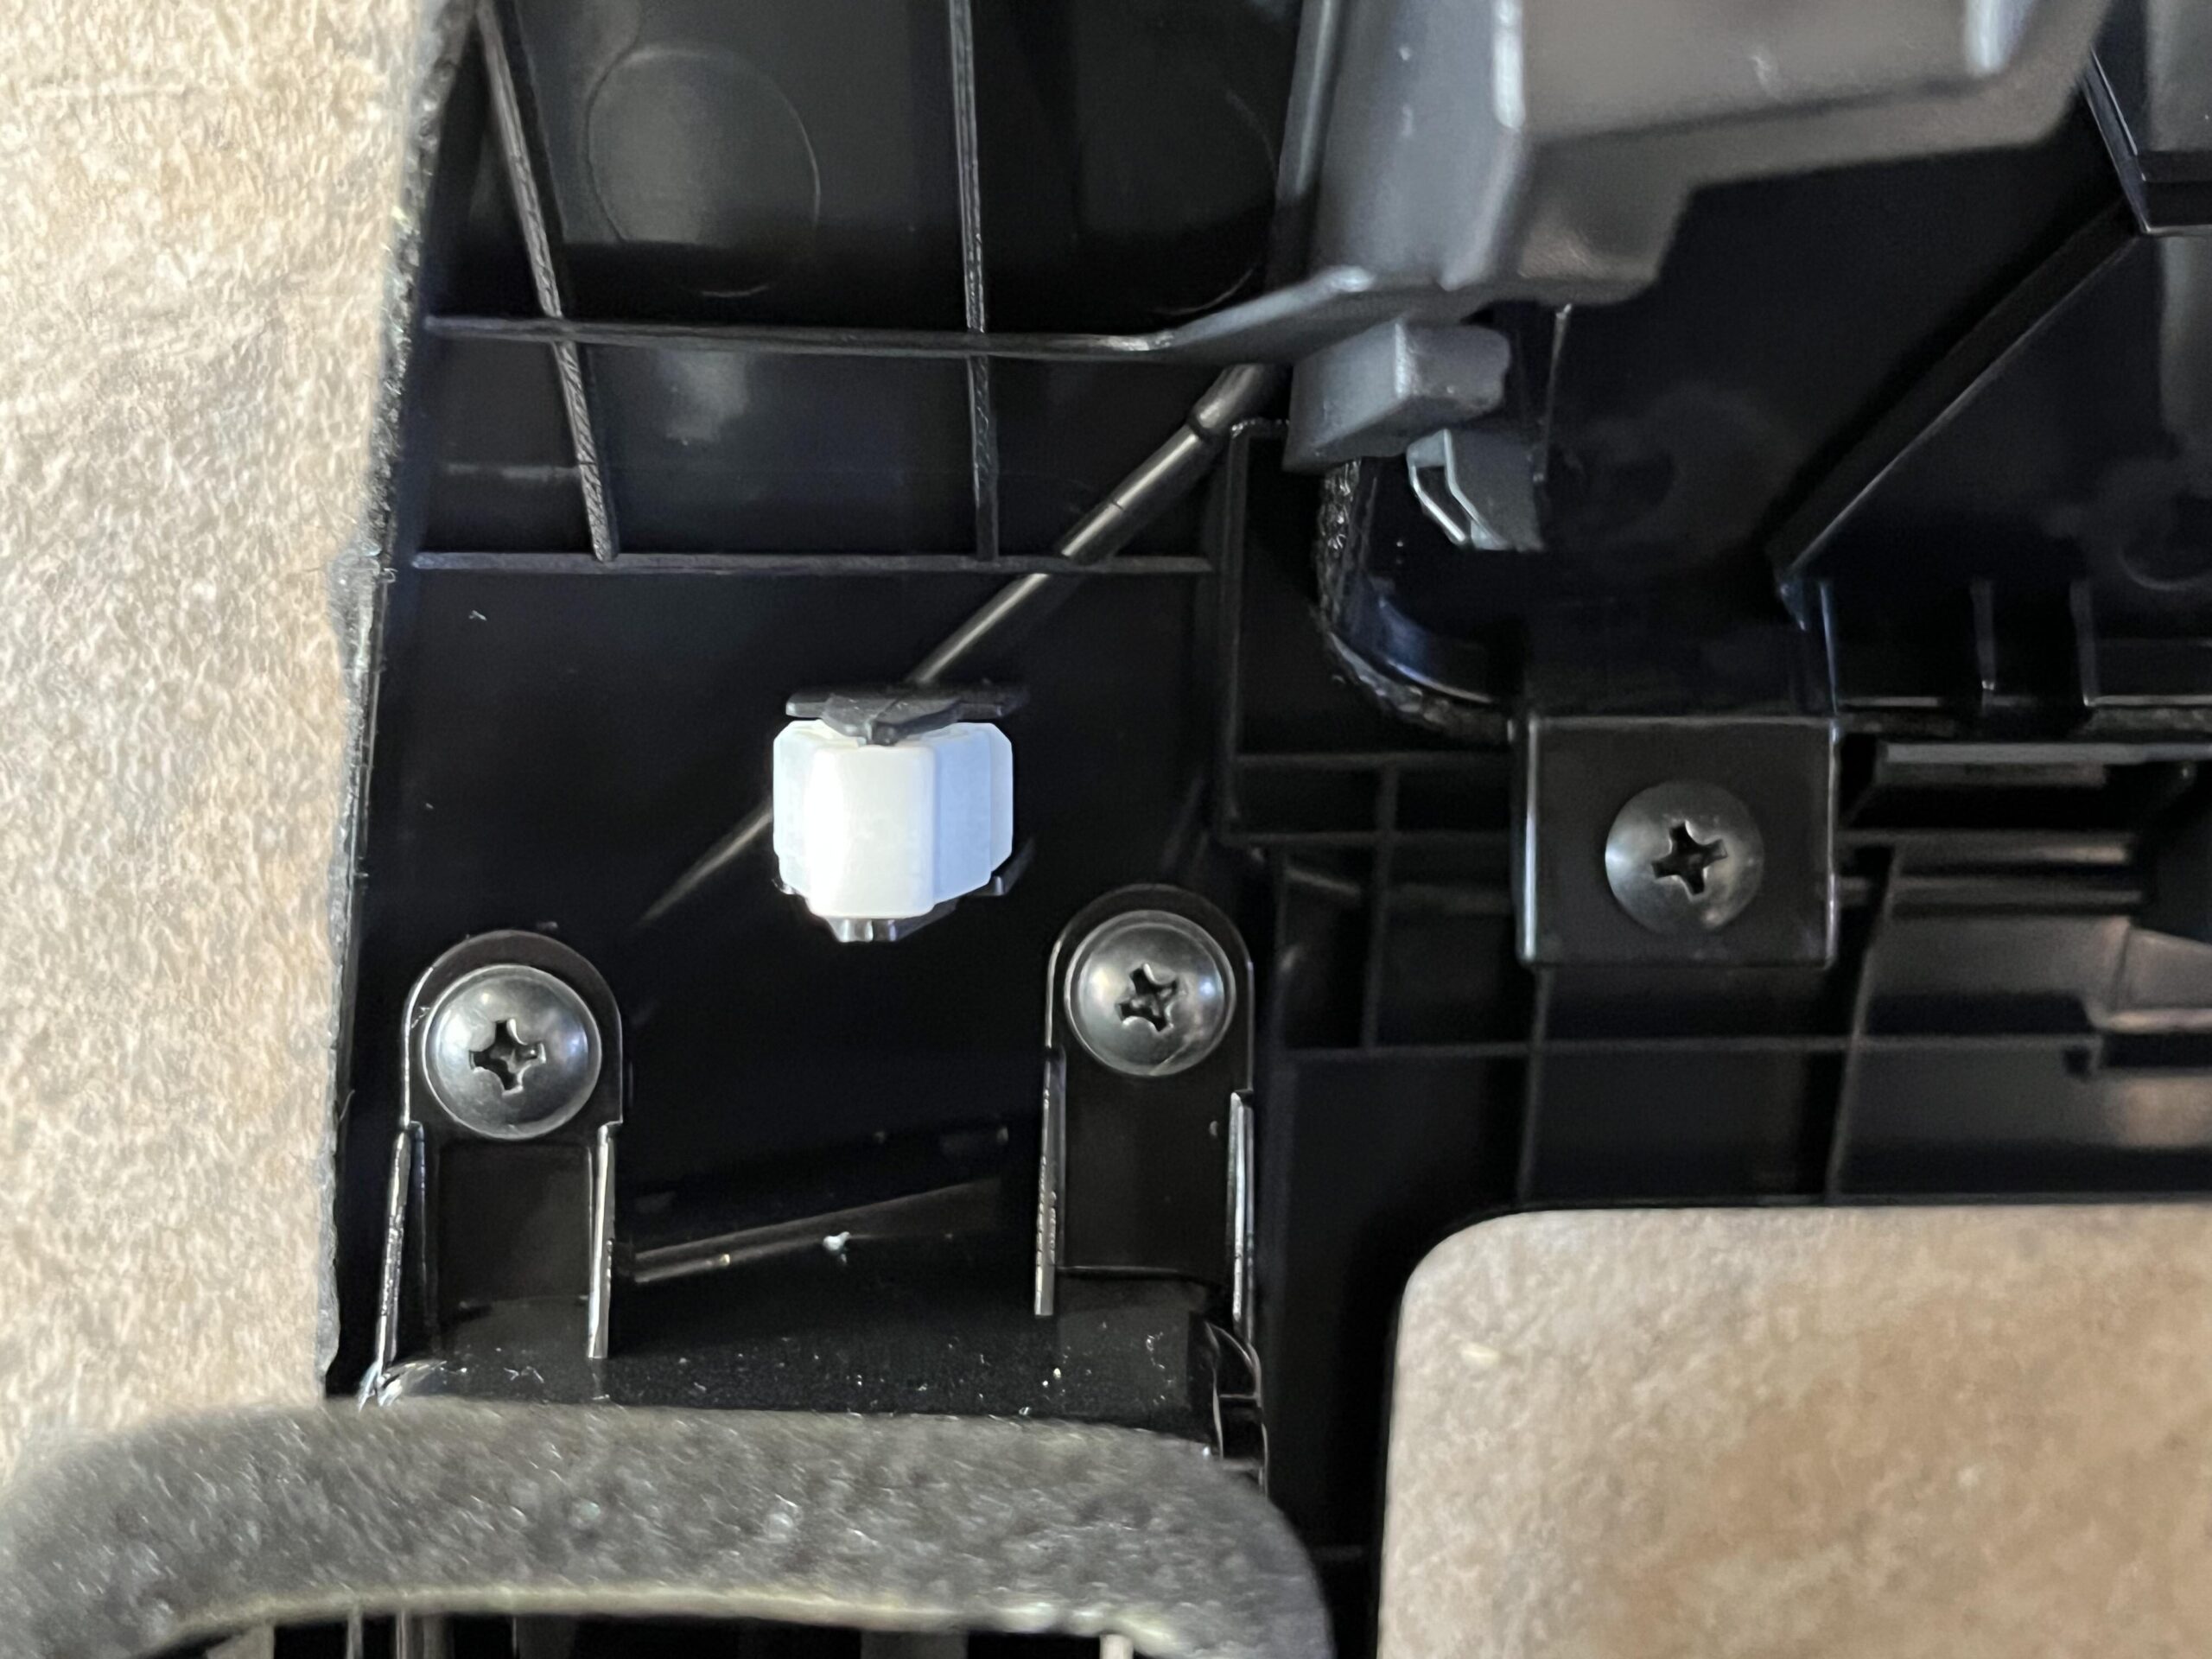
The old fascia should look like this with everything removed, and just the white clips
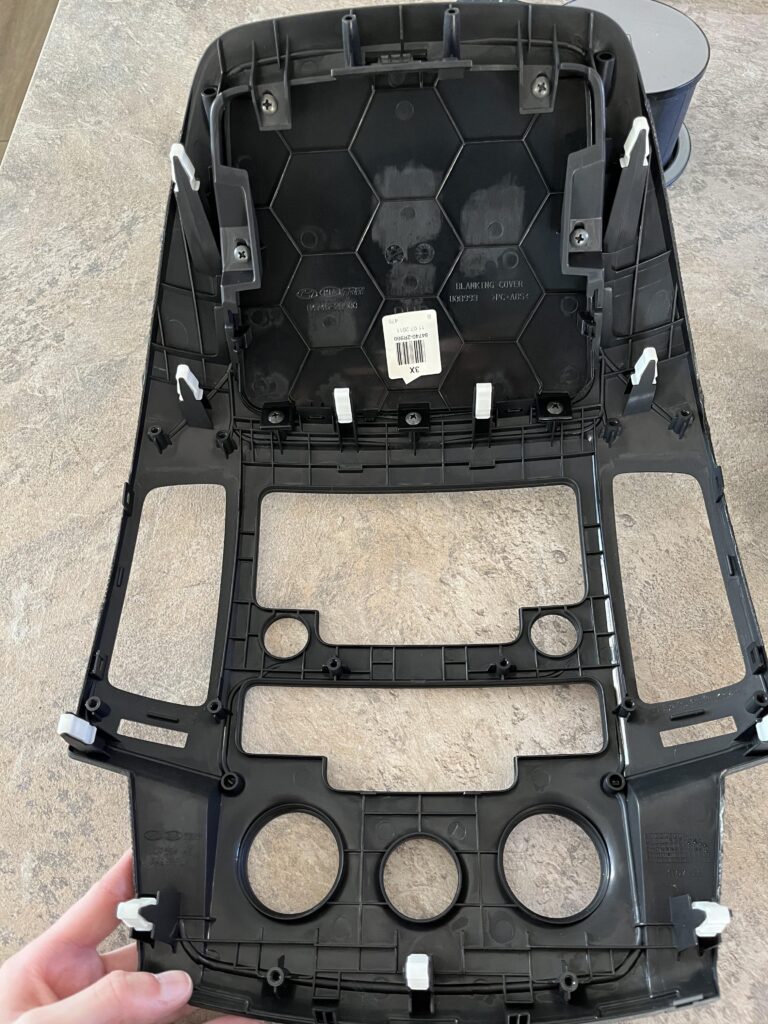
Lastly, we need to transfer those white clips over to the new fascia
They can be popped off easily with a flat head screw driver, bit take care not the bend or snap them
There is two extras on the old fascia, so worst case you can afford to break up to two
Its worth noting, on my unit, in the picture below, two on them on the bottom left and right clip posts, the white clips wouldnt click on properly, if you have these, leave the white clips off as they will get stuck when you re attach this in the car and cause issues there
Repeat for the top section which should look like this
4 – Installing The New Stereo
First, we need to remove the old stereo, as thats still in the car, there are four screws, two on thw top and two on the bottom that need to be removed
It should now look like this

The unit will now pull out, but be careful, there stereo cables have very little slack on them and you dont want to damage them
The top cable has tabs that need squeezing to release the cable, then the bottom two have a tab on only one side, they are pretty stiff to remove
And then there is one cable on the other side, a small grey one, that also has a push tab on the top for the radio antenna
Its worth noting the cable order, is the wider thinner cable, then the brown chunky one, followed by the grey chunky one
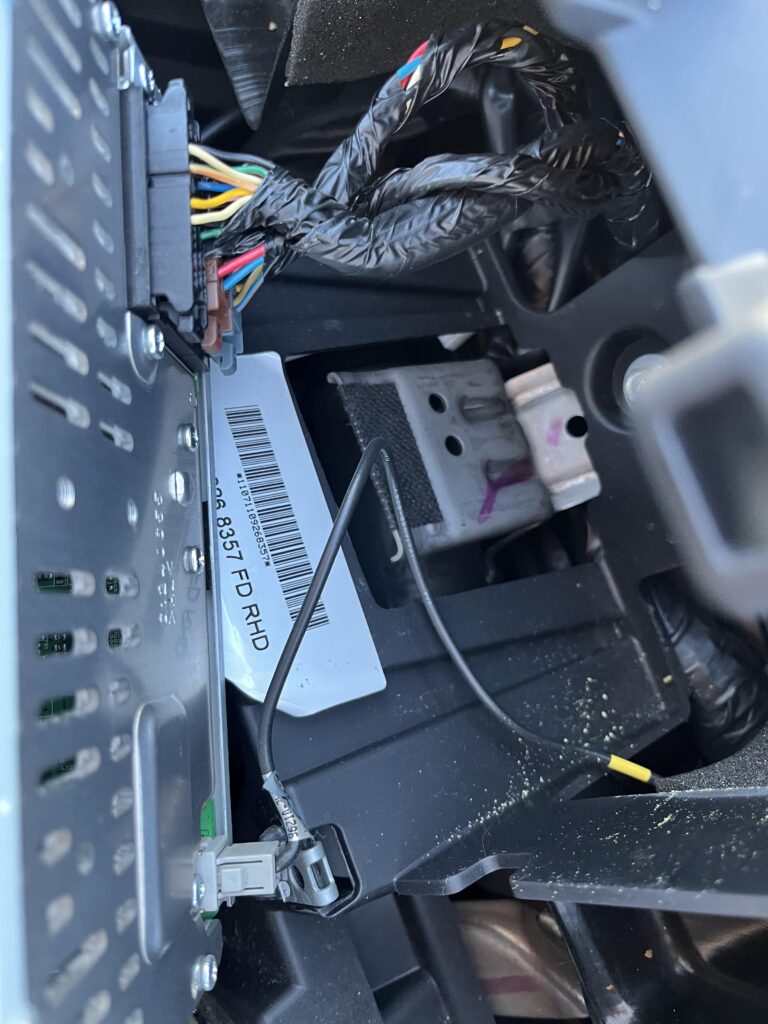
Once they are all removed it will pull out like so
Now, back inside with the new fascia we have built, we need to add the new stereo, it will just drop into the slot, make sure the small cable for the fan doesnt get caught on anything
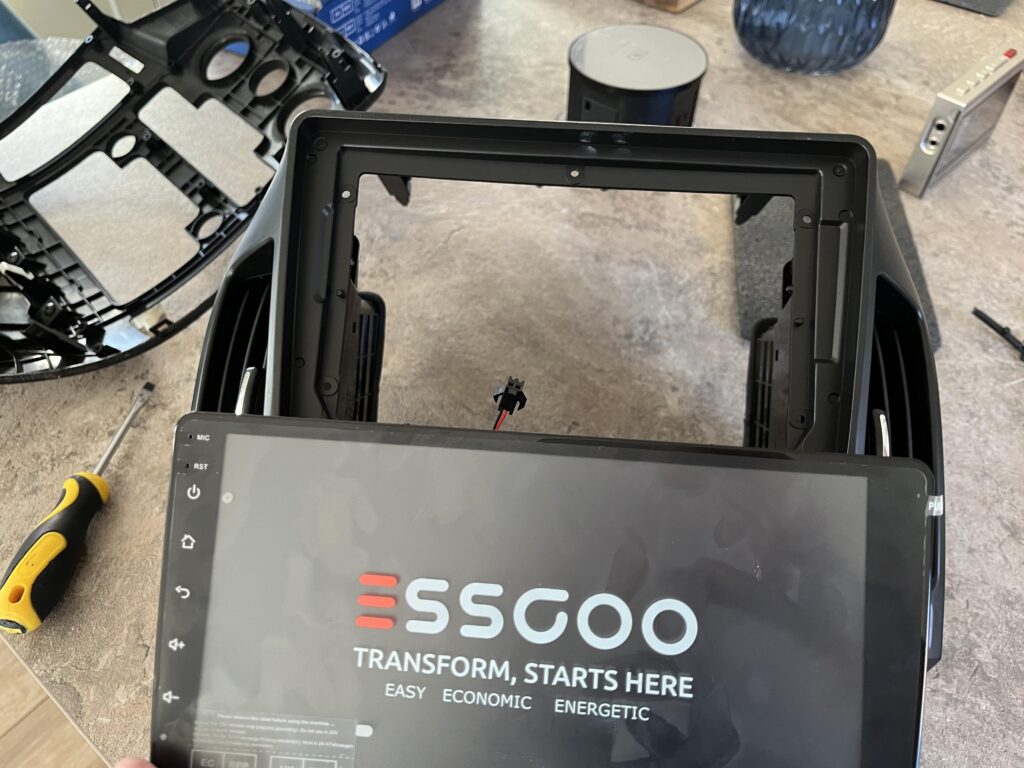
It should look like this
We then need to carefully flip the entire fascia over, making sure the stereo unit doesnt fall out as its not secured
It should look like this
There should be a bag with screws included that we need to secure the stereo, mine had a spare which was really nice to have
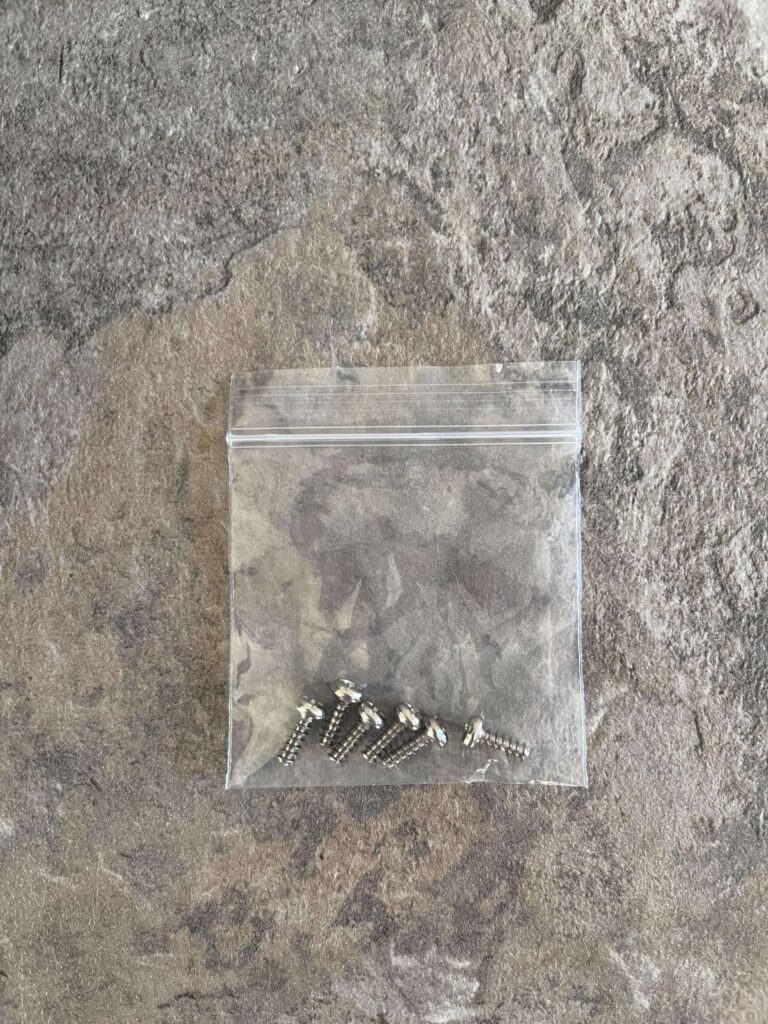
Place them in the five holes, two on the left, two on the right and one on the top
Now thats installed, we need to get the cables in and ready for the installation in the car
Lets start with the wiring harness cable, the chunky black one meant to take the stereo cables in the car
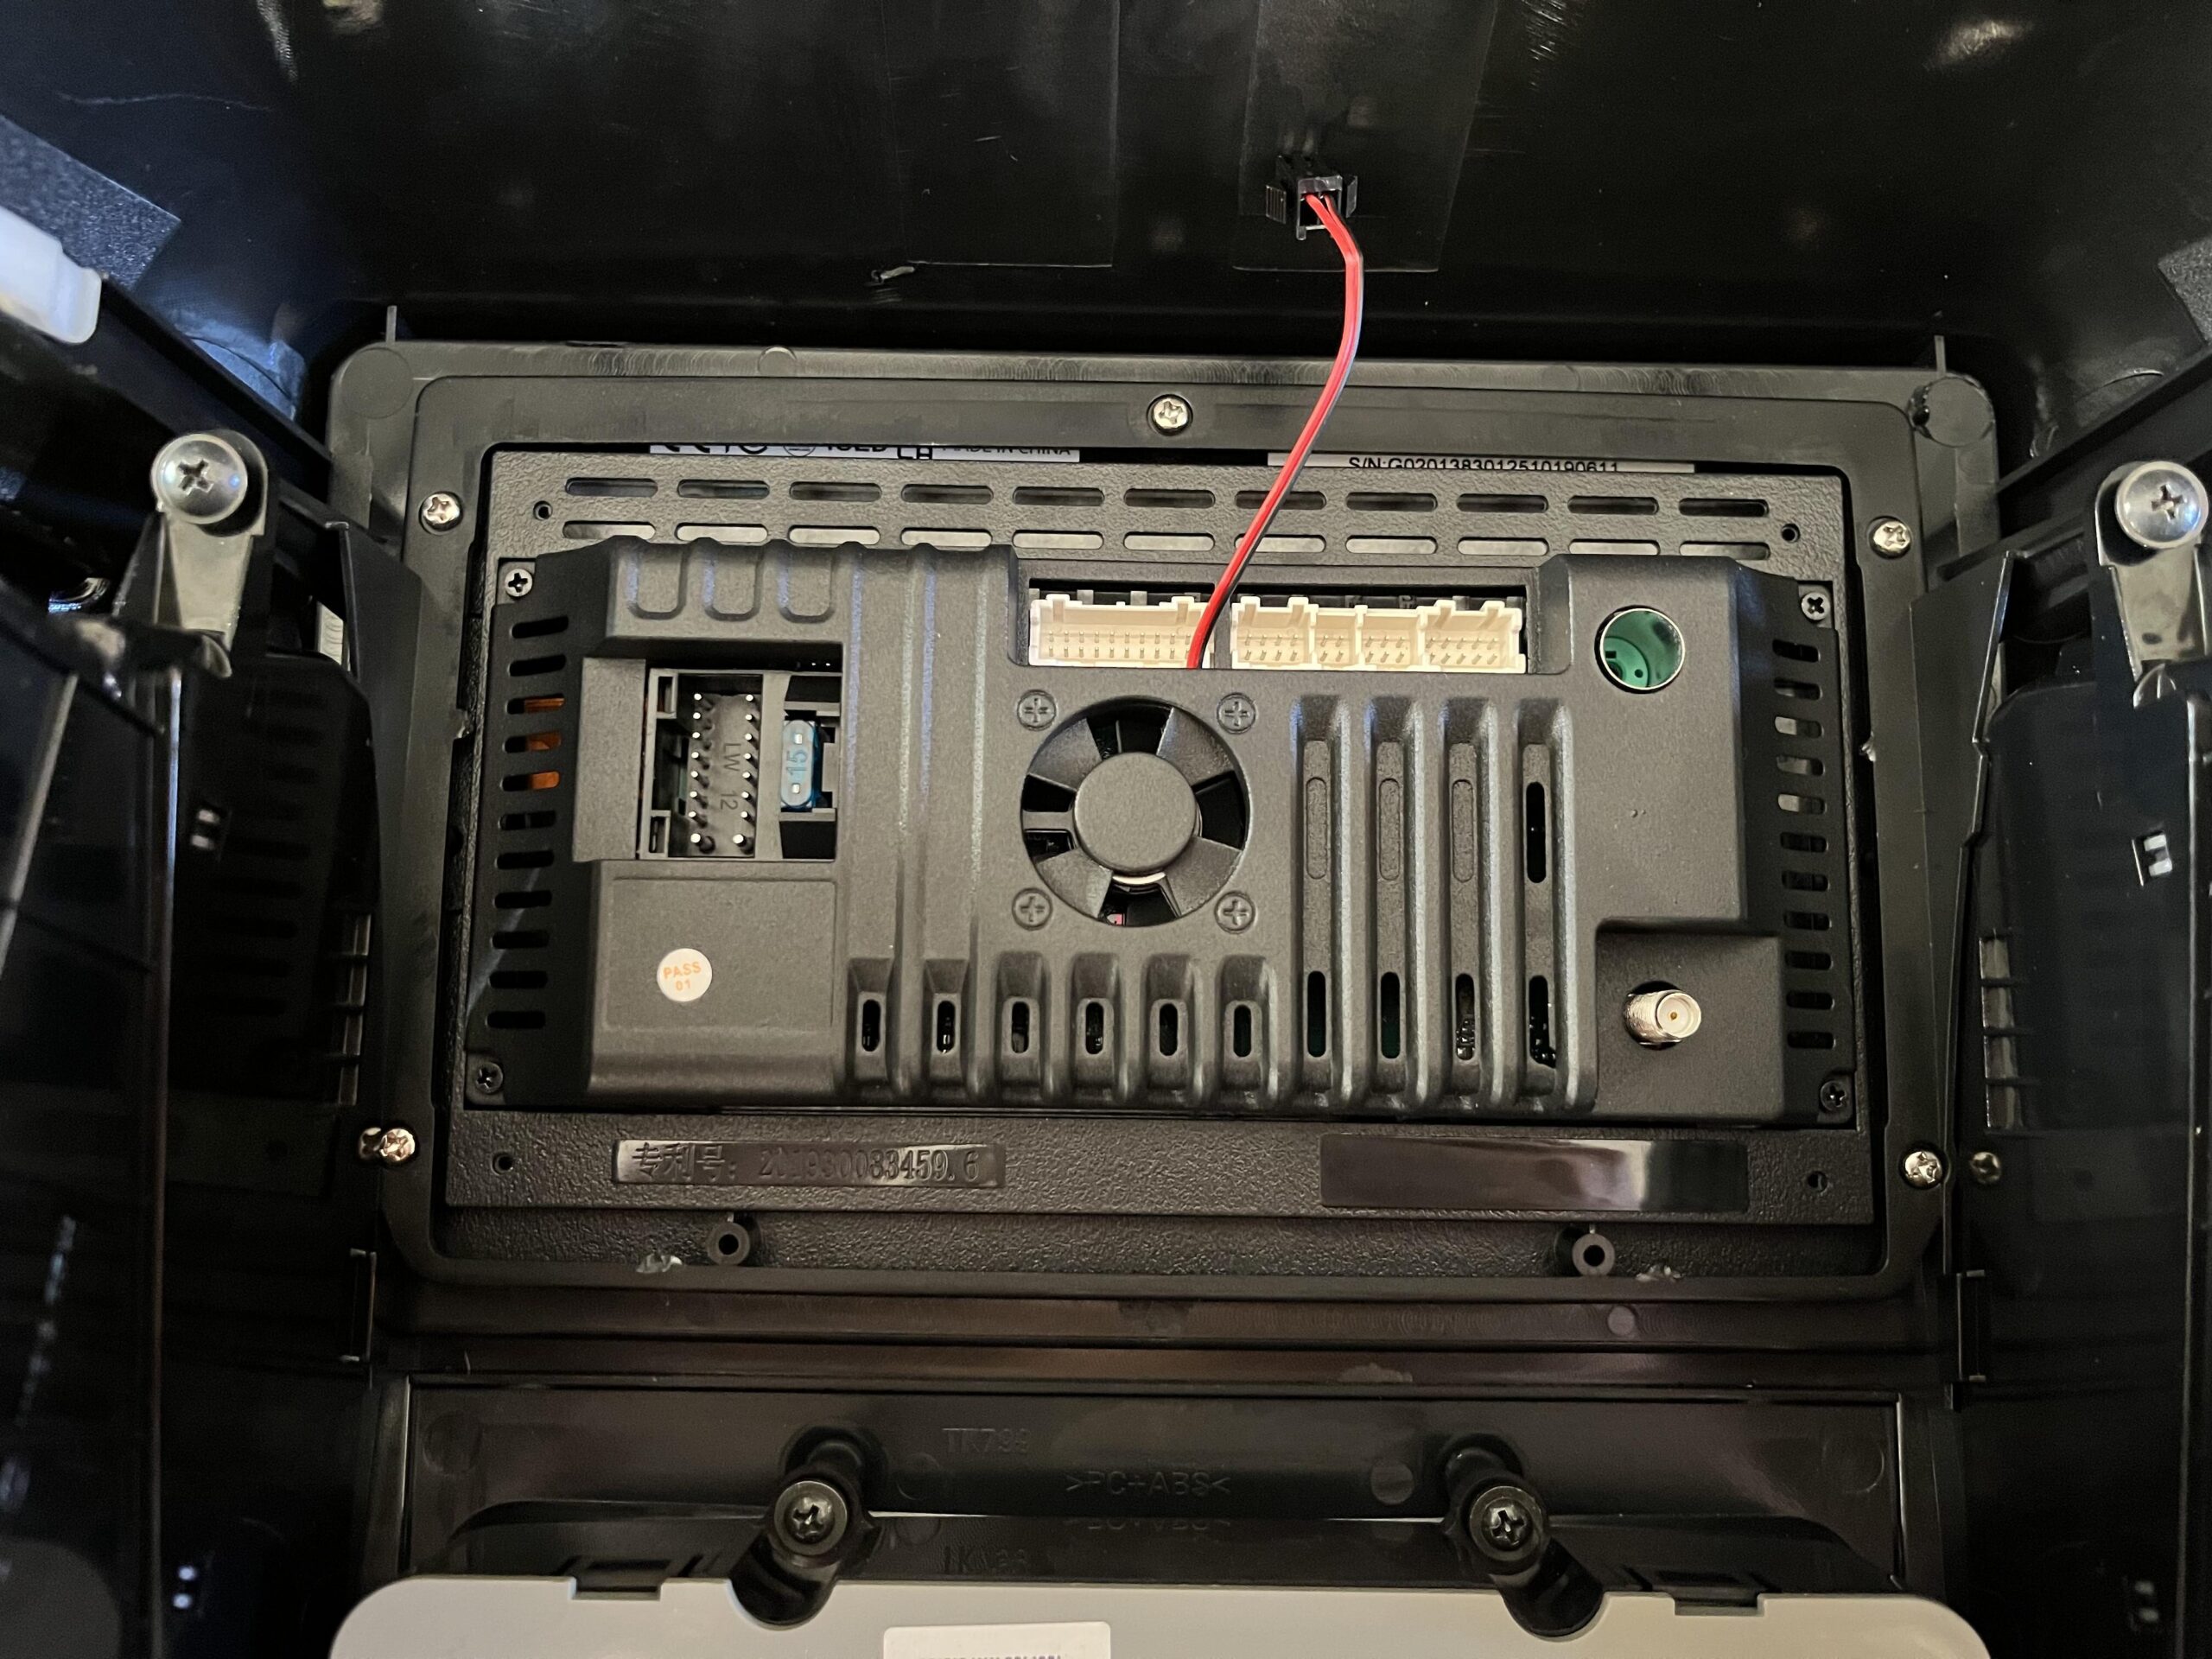
Connect the other end to the black connector on the new stereo on the left, and the little white 2×2 pin cable to the 2×2 white slot on the new stereo, like this
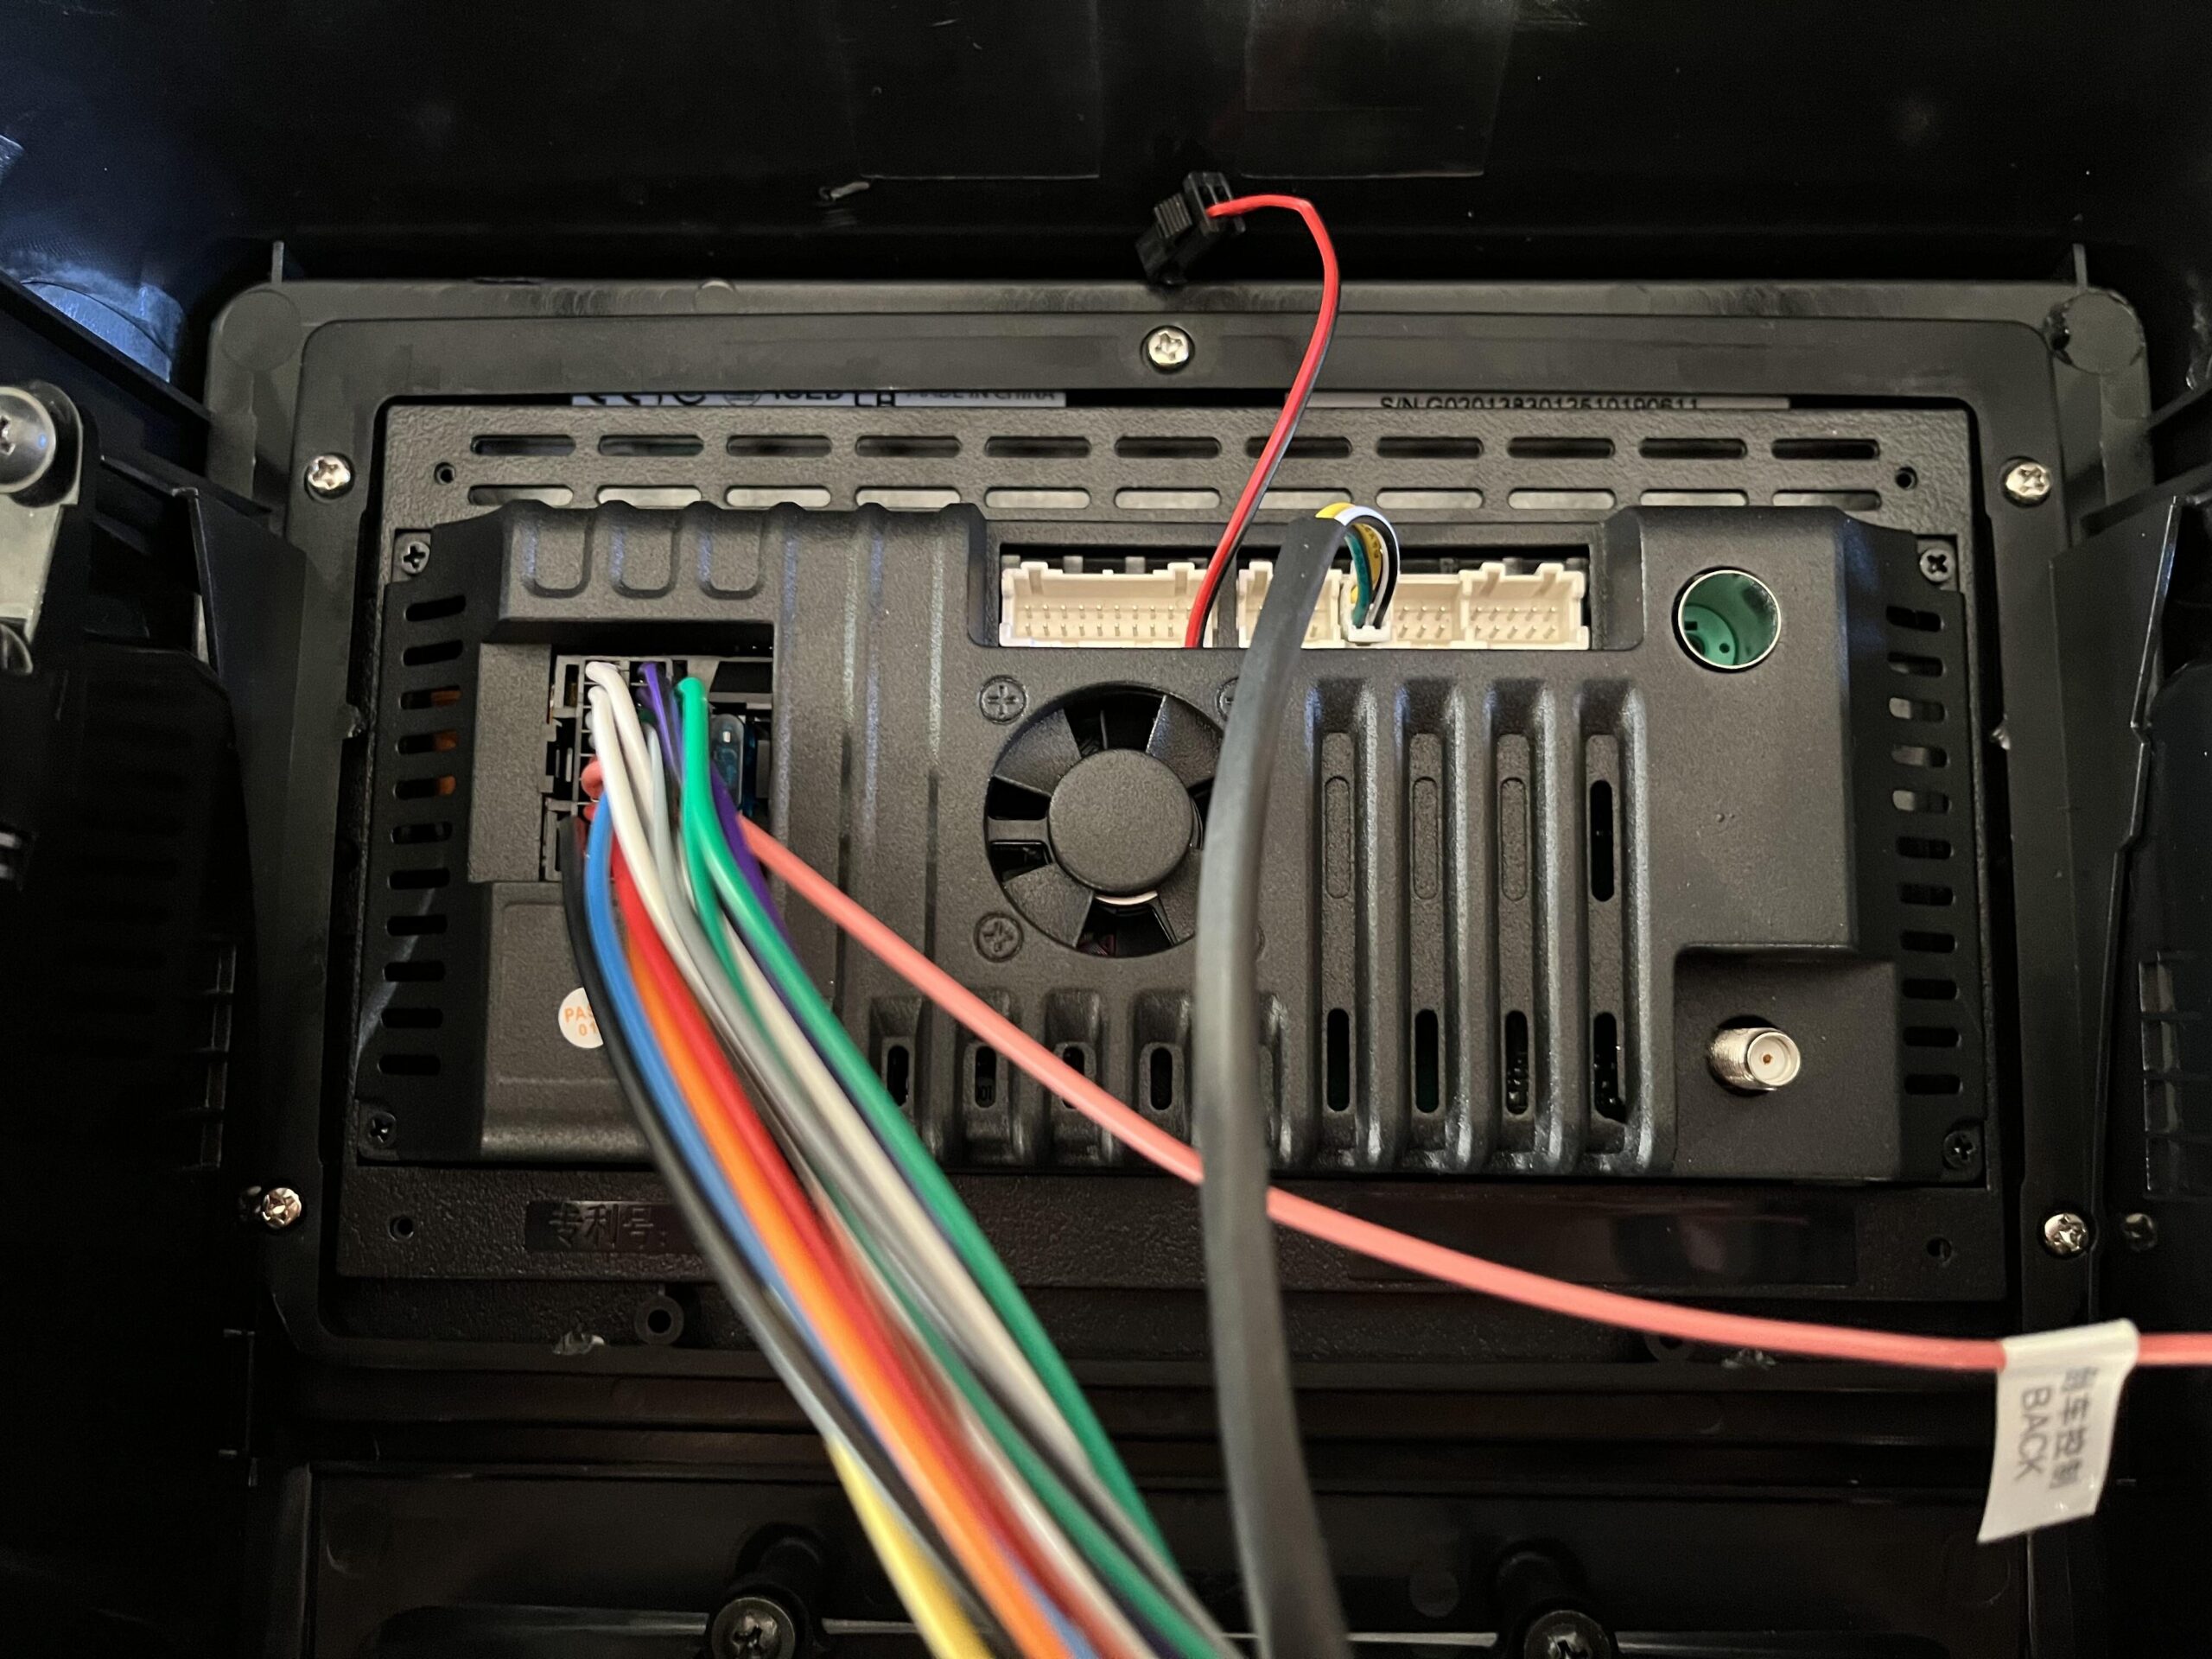
Next up is the antenna cable
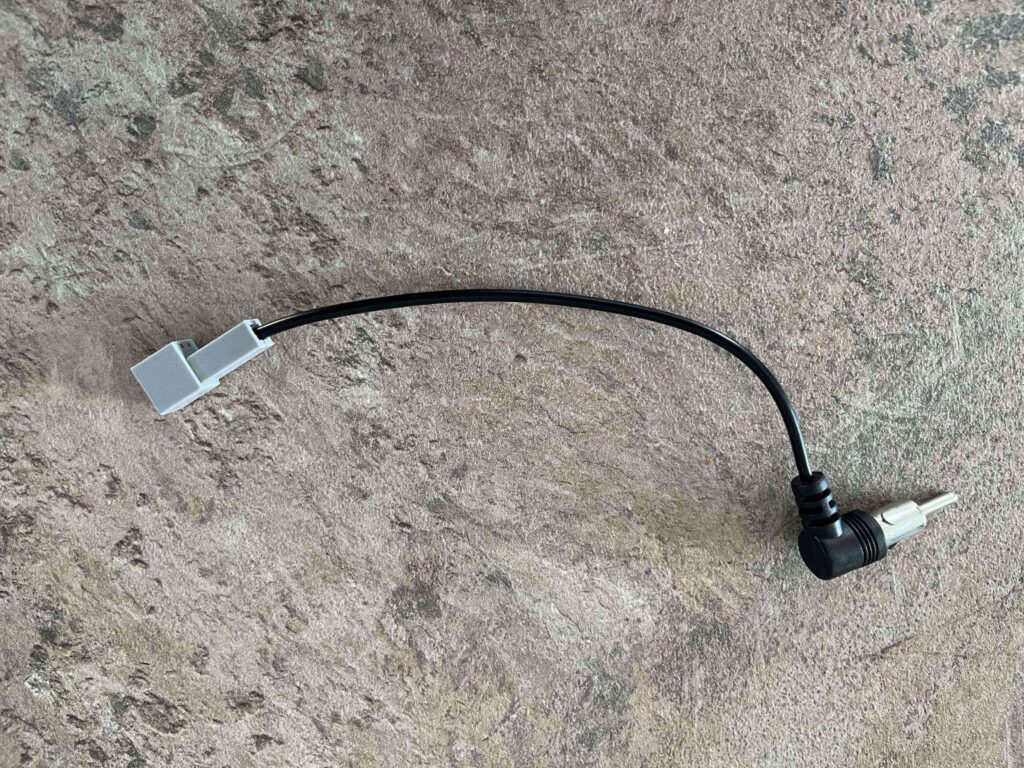
This goes in the circular slot in the top right
Now we need the AV cable, the one with the stereo unit, not the one with the I30 specific cables
This connects to the largest one of the white cable slots at the top of the new stereo like so
We can then take the 2×1 fan cable and connect it to the 2×1 cable that is on the AV cable
Now we can take the unit to the car and hold it at the bottom to attach the climate control cables, you may want an extra pair of hands if you have anyone as this is a pain with the lack of slack on the cables
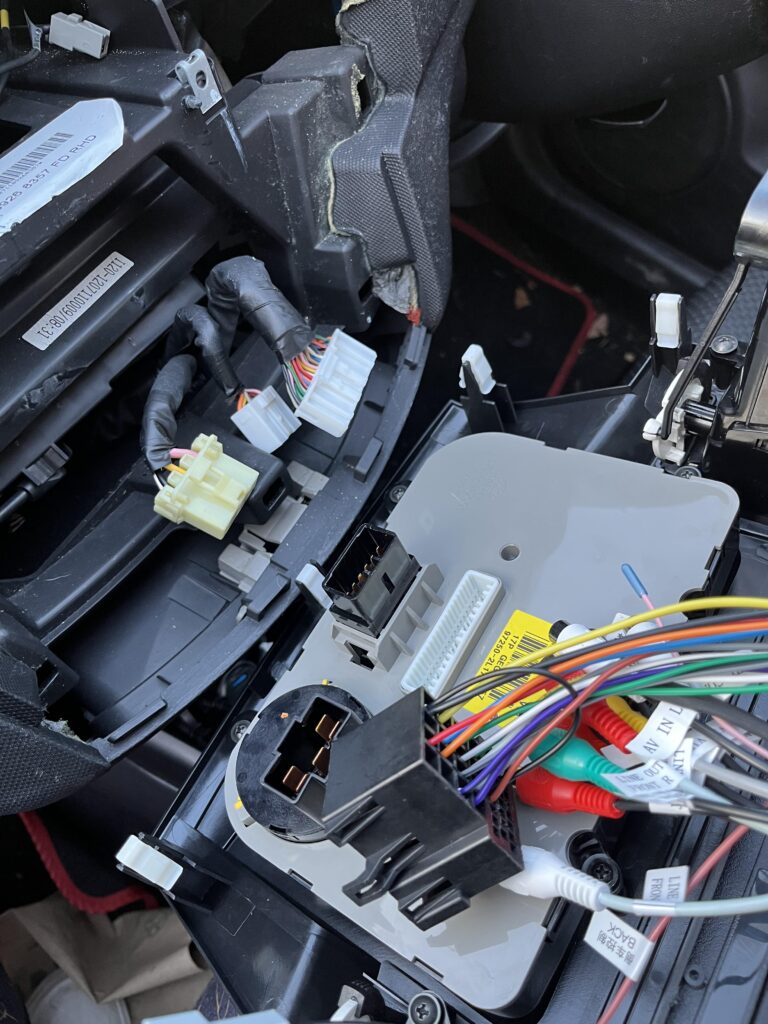
It should look like this
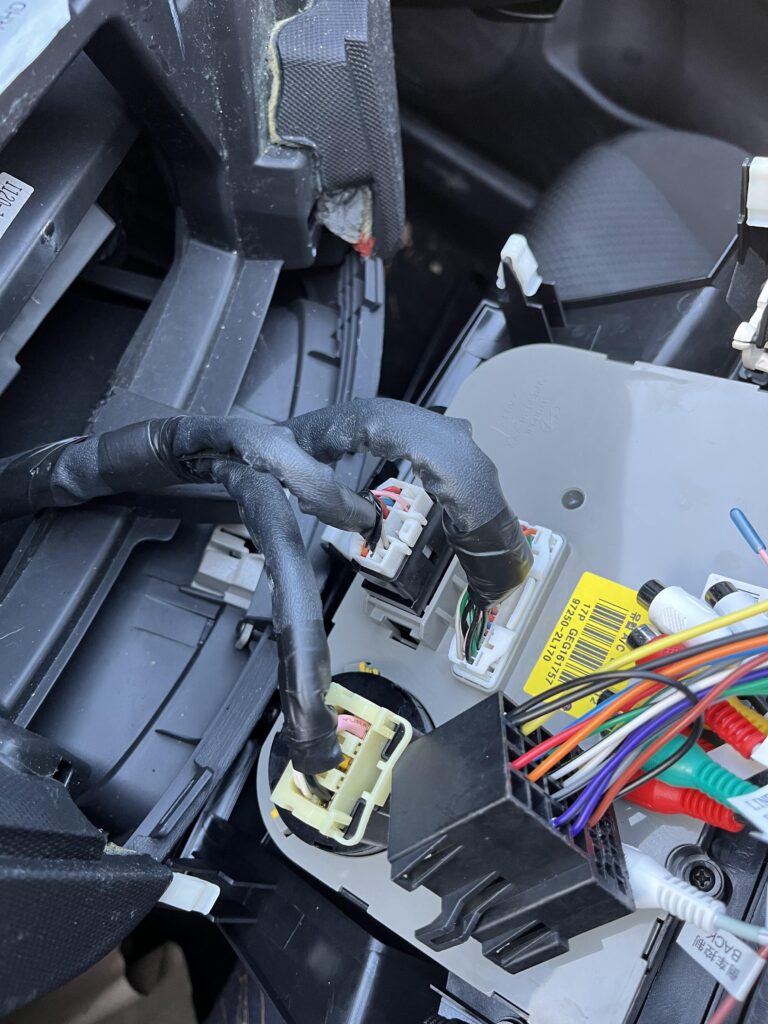
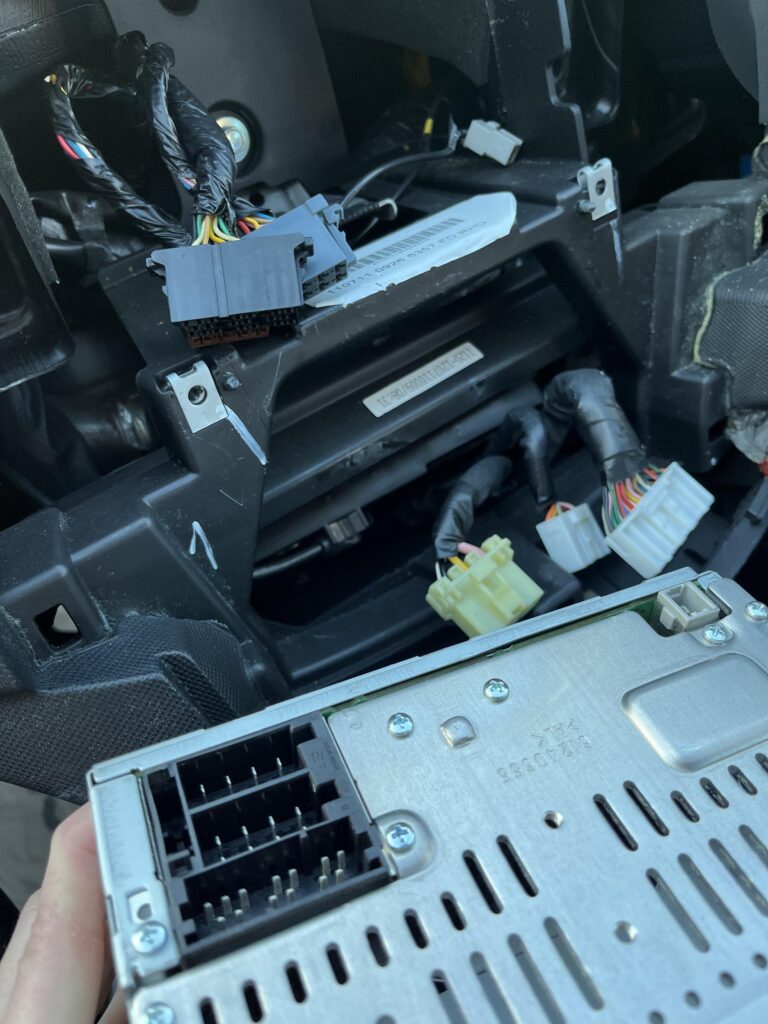
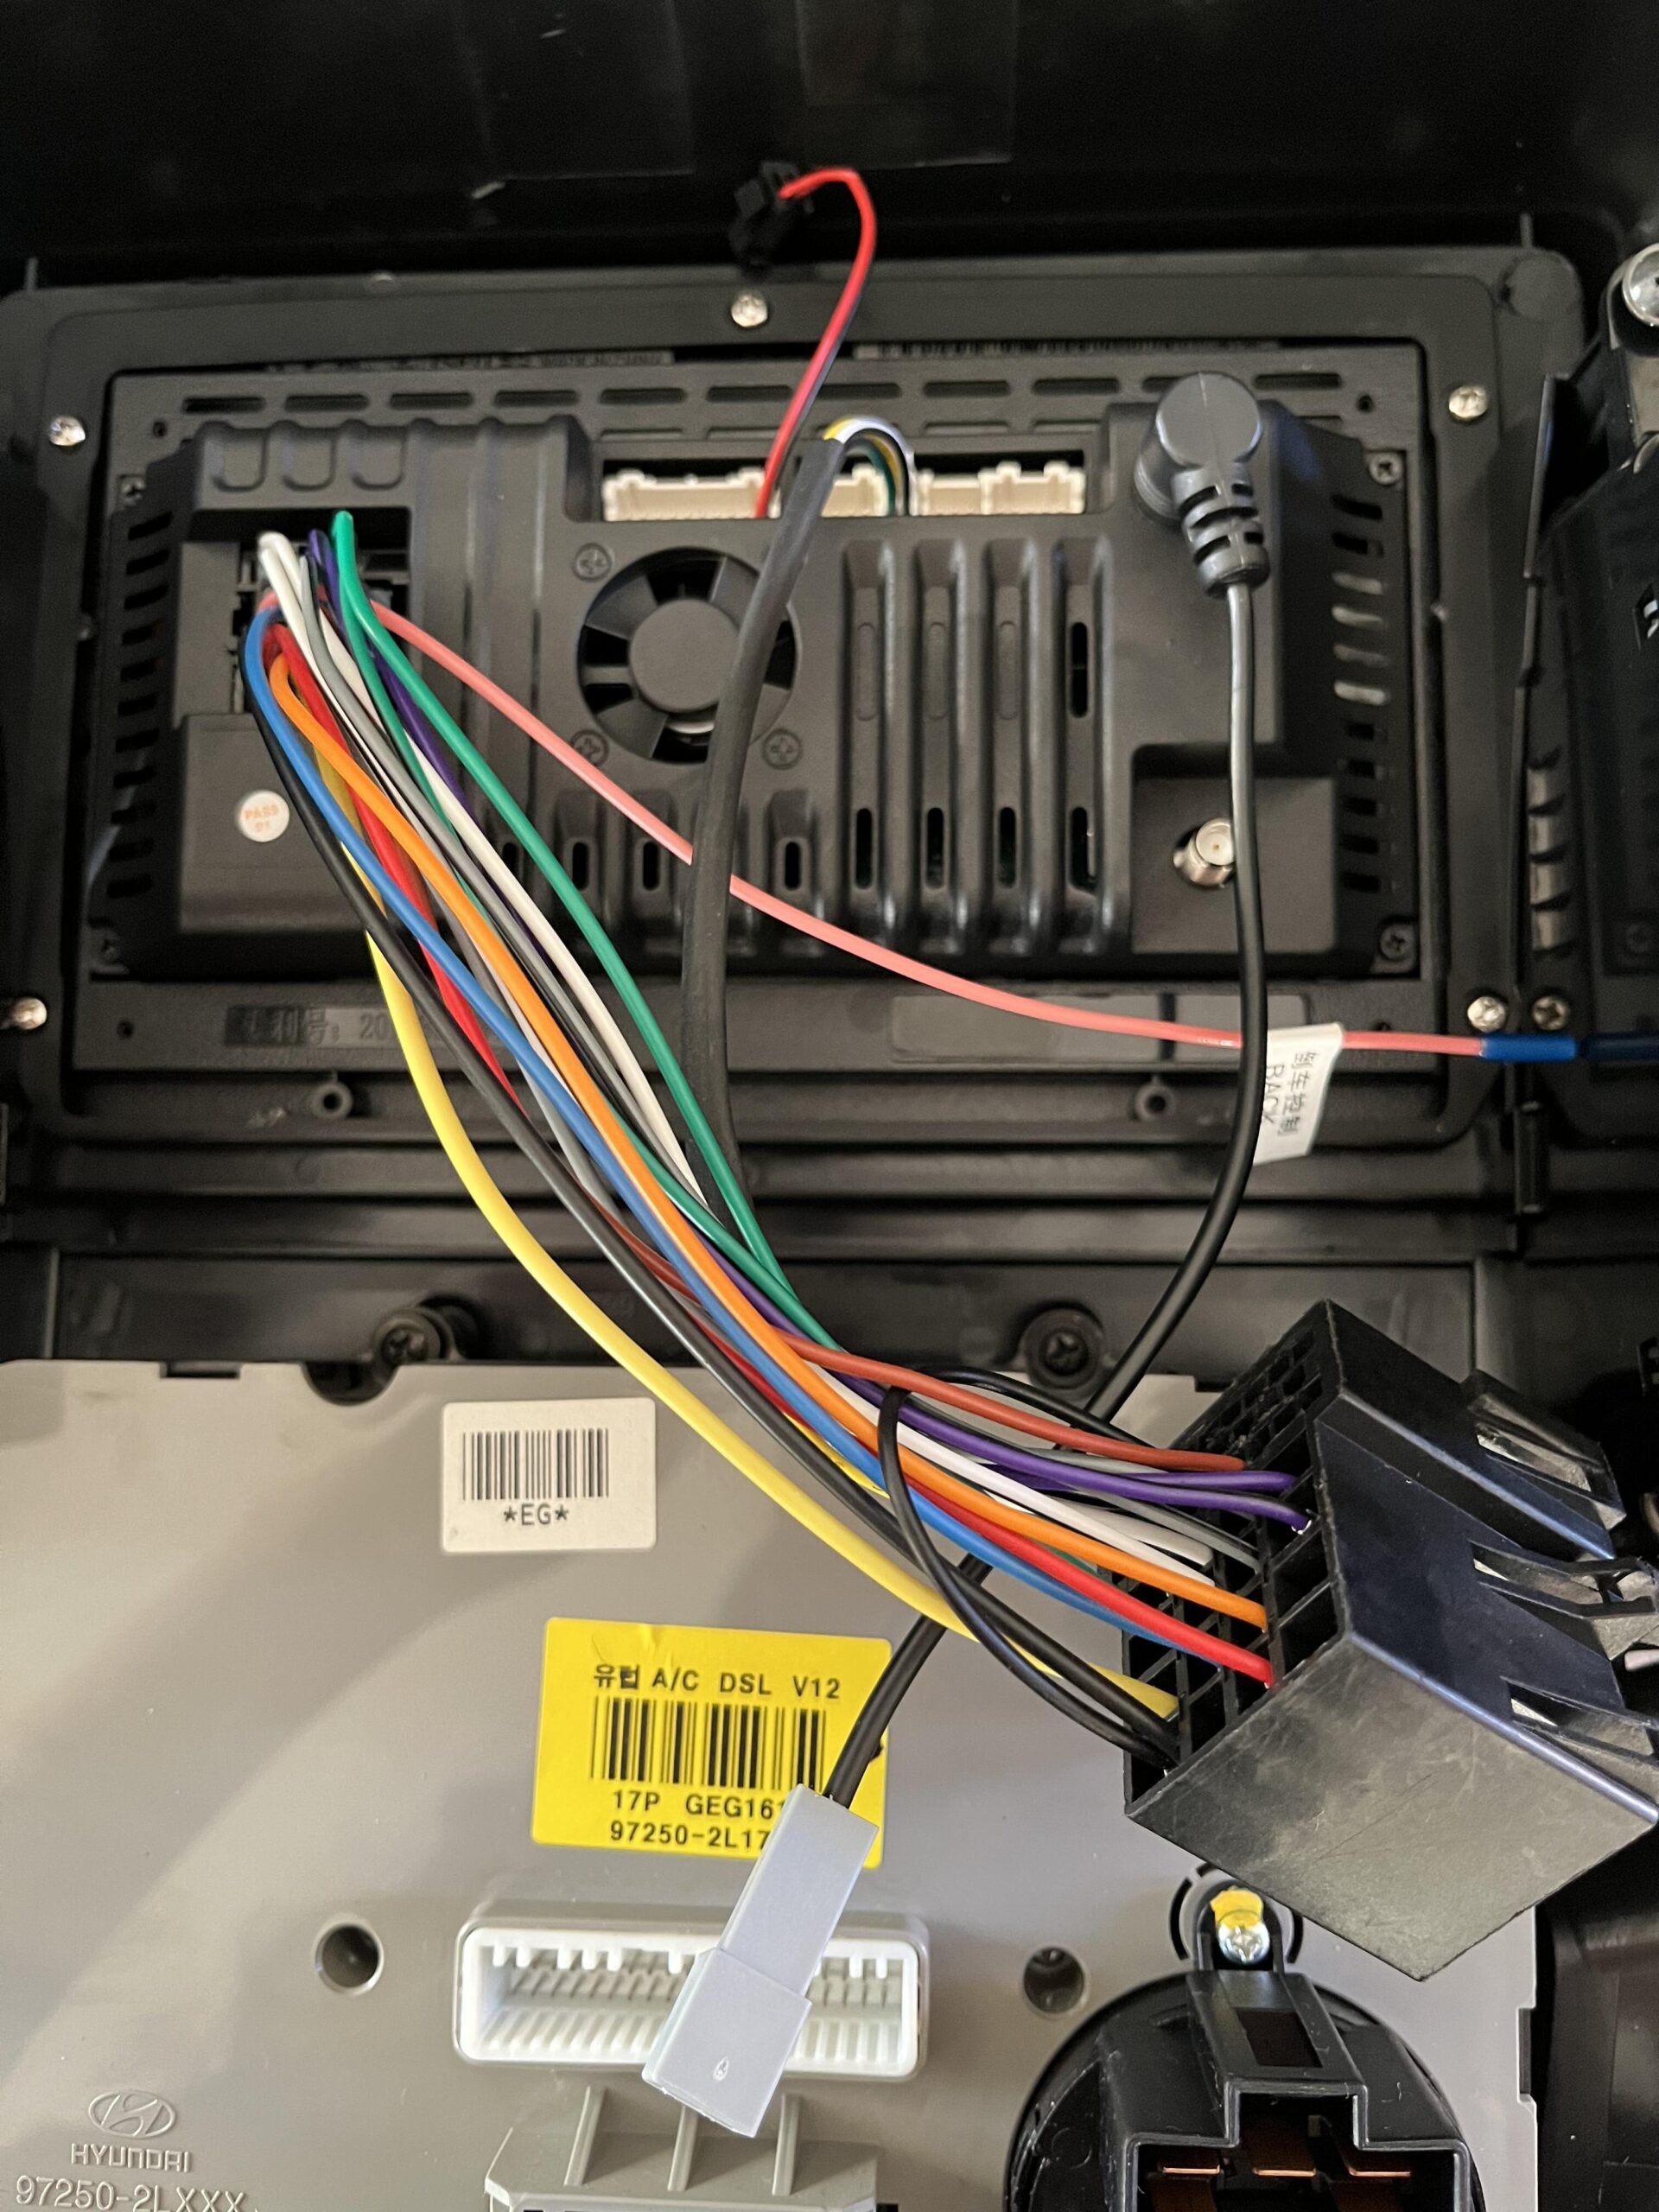
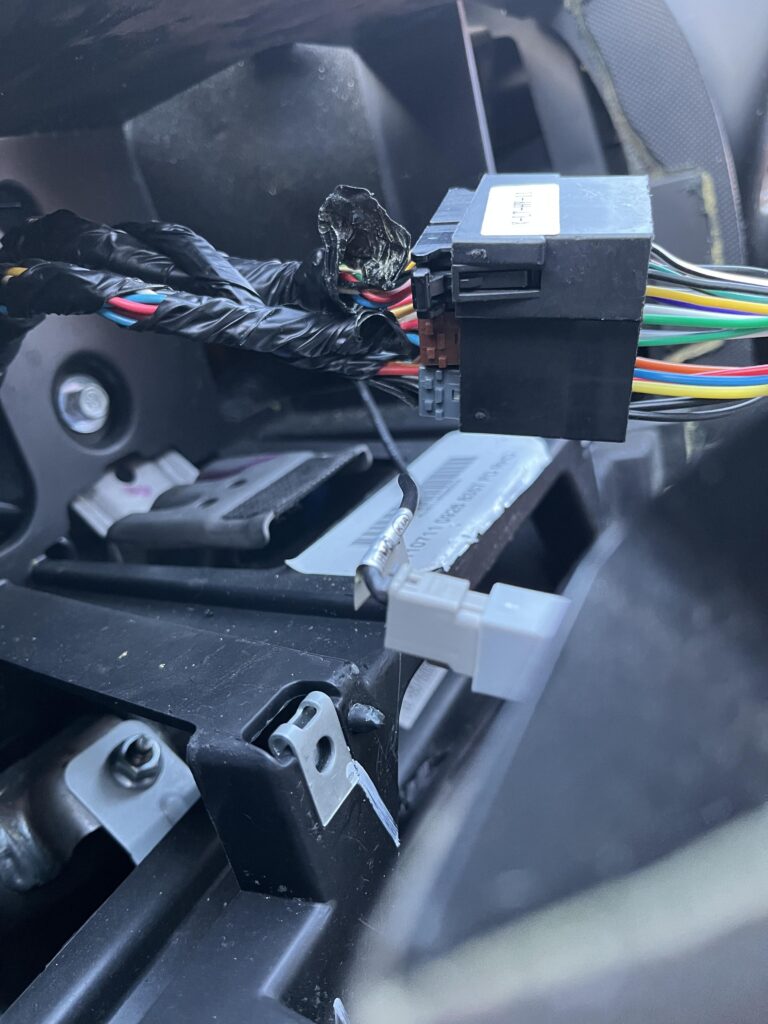
We then need to connect the car connectors to the new unit, they are keyed so you cant mix them up or get them upside down
We also need to add the small grey antenna cable
Its worth noting the grey and brown ones were really stiff and needed a fair bit to get them fully in
Now is the tricky part, getting the unit it, I started with the left side, opposite to the drivers seat, and pushed it in till you hear the clips click in, then do the right side
This needs a lot of strength like it did when we pried it off at the start, take your time and be careful everything lines up and doesnt break
This took me ~30 mins and was definitely the hardest part
Its also worth noting, the new unit might not 100% slot in at the top and look just slightly off, its not really noticeable unless you are really looking at the top, but it is expected
5 – Configuring Steering Controls
The last thing is the steering controls, my home screen on the new unit will look different, I changed it before I figured out the steering controls
Its also worth noting, depending on the unit you bought, the screen and process may be different
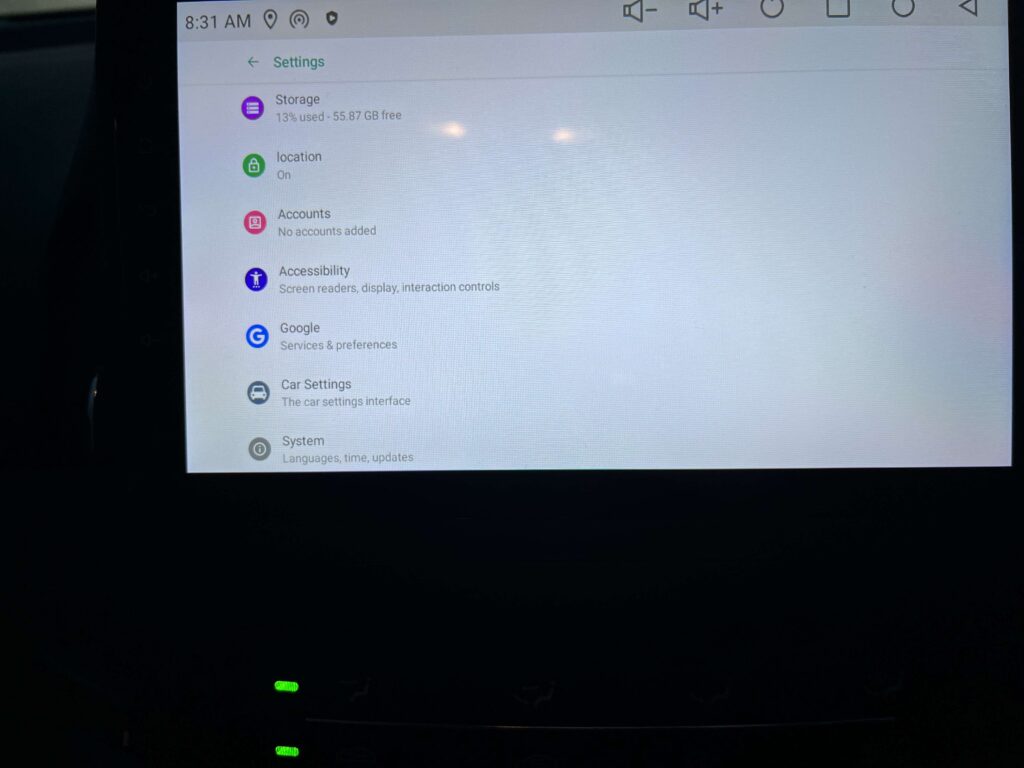
Click the settings cog on the left

Scroll to the bottom in the Android setting menu and click Car Settings
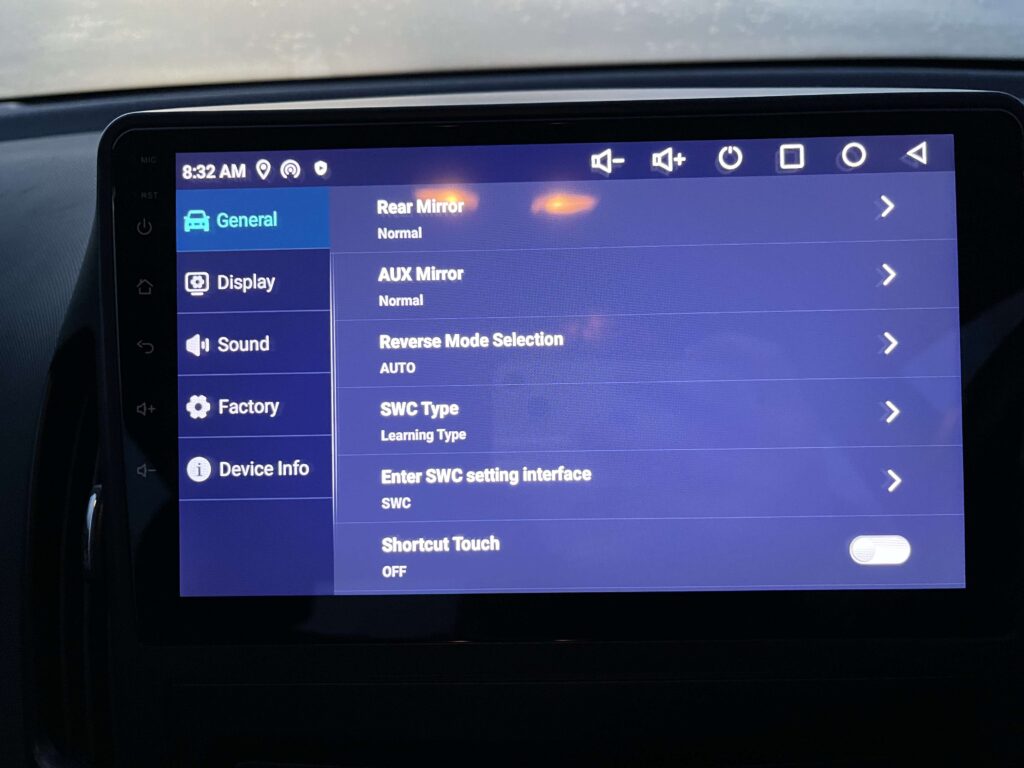
For this car, it will automatically work, we just need to ensure SWC Type is confiured to Learning Type, if its not, mine wasnt by default, click it and change it
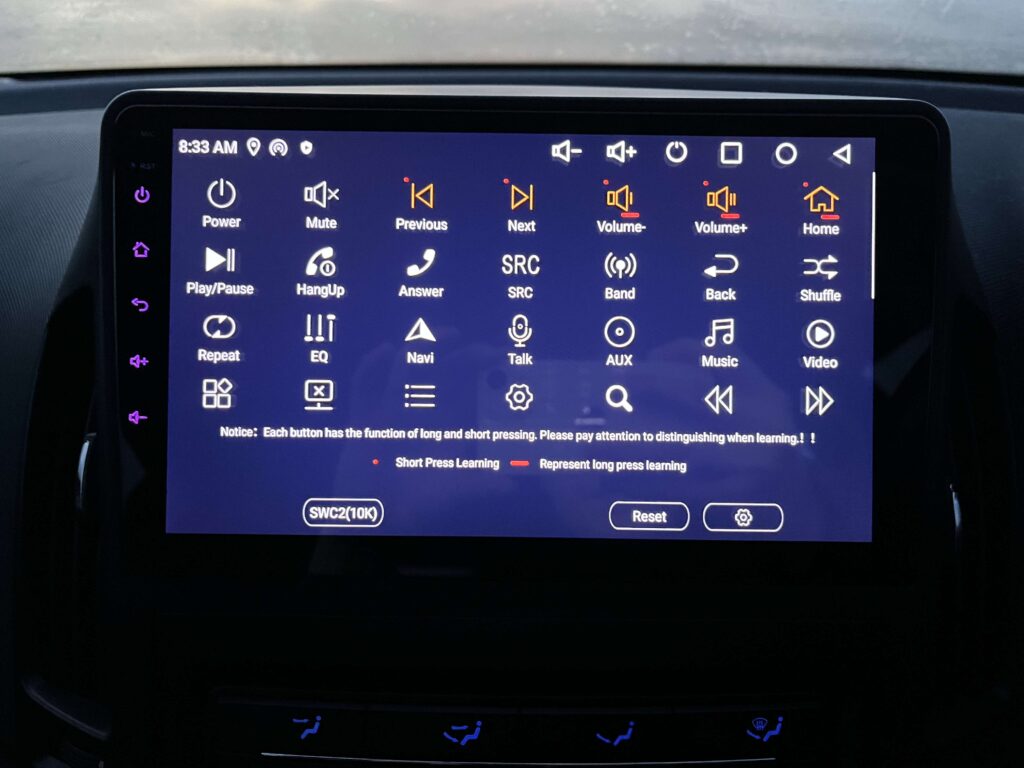
To then configure the steering wheel controls, click Enter SWC Setting Interface
Click a function, then press the button to bind it to, I was able to configure the volume controls, then the other pair of buttons, that would change track on a CD, to the change track function for CarPlay, and the source button on the wheel, I initially configured to home, but found play/pause was a little better
To test its working, you’ll need to click off this and back to the home screen as they dont work on this configuration screen
After that, CarPlay and Android Auto work fro the onboard Zlink app simply by connecting your device with bluetooth and it just works

Hello, I have a quick question about the CarPlay Stereo. Is the radio easy to use, or does it freeze occasionally, or is it generally slow when swiping, etc.?
Do you mean the FM radio? – I couldnt get that working
For CarPlay/Android Auto, its fine, there is a little lag, but compared to my Friends 2022 Skoda Scala, its basically the same, so I think the general lag is caused by wireless Carplay/Android Auto
After a few months I am very happy with it, the only slightly annoying thing is it can just not pair and needs a good few retired, but given the price I find it perfectly fine, has been a huge upgrade, and SO much better on longer journeys where I need the SatNav
Hey, I meant more the general performance of the screen itself 😅
Like when you swipe through menus or open apps — does it feel smooth like a phone, or is it a bit laggy/slow?
Just trying to figure out if it feels responsive overall or kind of clunky sometimes. Thanks!
Hello, first of all, great blog entry. I have one quick question. Does your Hyundai i30 have buttons on the steering wheel? I want to try to upgrade my i30 too, and knowing that would help me a great deal.
Thanks!
Yes it does, just the left half, I put instructions on how to set that up on the guide in section 5 but let me know if you get stuck, my email is on the site footer on the right 🙂