In this guide we will be taking a look through the deployment of the full VCF 5.2 suite, using the cloud builder
We will go through installing and configuring ESXi for the management network and setting the certificates up, I will give a very rough overview of the networking, but this varies per vendor and wont be covered in great detail
Then, deploying the cloud builder appliance, the deployment booklet, and the bring up phase, this will then build the vCenter, vSAN cluster, NSX managers and the SDDC Manager
In the post bring up phase, we can create our Edge cluster, create the AVN for Aria, connecting to the depot for updates, deploy the full Aria suite and lastly setup Tanzu ready for your containerised workloads
So what does that included with VCF 5.2
- SDDC Manager
- vCenter
- vSAN (1TiB/Core)
- NSX-T
- Tanzu
- VCF Operations (Aria)
- VCF Automation (Aria)
- Aria Operations For Logs
- Aria Operations For Networks
- Identity Manager (For Automation)
For this, vSAN storage as the principle storage is a requirement, so for production support vSAN ready nodes will be needed, and NSX-T is not optional for networking, VLAN segments can still be used, but the configuration of the overlay is mandatory, and does offer a lot of benefits
You will also need four 10Gb or better network ports, you can get away with two, but I dont recommend it
For the hardware, this deployment was done on physical hardware in my lab, using vSAN OSA, which has the following
3x R640
- 2x Xeon 6130
- 512GB RAM
- 6x10Gb NICs
- 1x960TB SSD (Cache)
- 4×1.92TB SSD (Capacity)
1x R740
- 2x Xeon 6130
- 512GB RAM
- 6x10Gb NICs
- 1×1.92TB SSD (Cache)
- 4×1.92TB SSD (Capacity)
1x Dell 4148F-ON
- 48x10Gb SFP+
- 2x40Gb QSFP+
- 4x100Gb QSFP28
VMware requirements for this lab are
- vCenter – 4vCPU 21GB
- 3x NSX Manager – 6vCPU 24GB
- 1x SDDC Manager – 4vCPU 16GB
- vSAN ~32GB in RAM Cache
- 4x vSAN File Nodes – 4vCPU 8GB
- 2x Edge Nodes – 4vCPU 8GB
- 2x Edge Nodes – 8vCPU 32GB
- 3x Control Plane Tanzu Nodes – 4vCPU 16GB
- Aria Lifecycle – 2vCPU 6GB
- VCF Operations – 4vCPU 16GB
- VCF Automation – 12vCPU 54GB
- Aria Operations For Logs – 8vCPU 16GB
- Aria Operations For Networks Controller – 8vCPU 32GB
- Aria Operations For Networks Collector – 4vCPU 12GB
- Identify Manager – 4vCPU 16GB
There are also a few other requirements, Broadcom list the following, pulled from the cloud builder
Physical Network
Here, they key takeaway, is all switch ports need to be the same, with an MTU of 9216, not in a LAG or port channel of any kind of logical NIC grouping, VLT/VSX/MC-LAG will still work
And example of the port configured on my switch, has the native VLAN on the default 1, though it is best practices to change this, eg 4092, I have the needed VLANs trunked, this included other VLANs VMs may need, and an MTU of 9216, here is what I have on my Dell OS10 switch
interface ethernet1/1/44
description “Vega VMNIC0 System-VDS – Mezz 1”
no shutdown
switchport mode trunk
switchport access vlan 1
switchport trunk allowed vlan 2,7-8,11-16,2000
mtu 9216
flowcontrol receive on
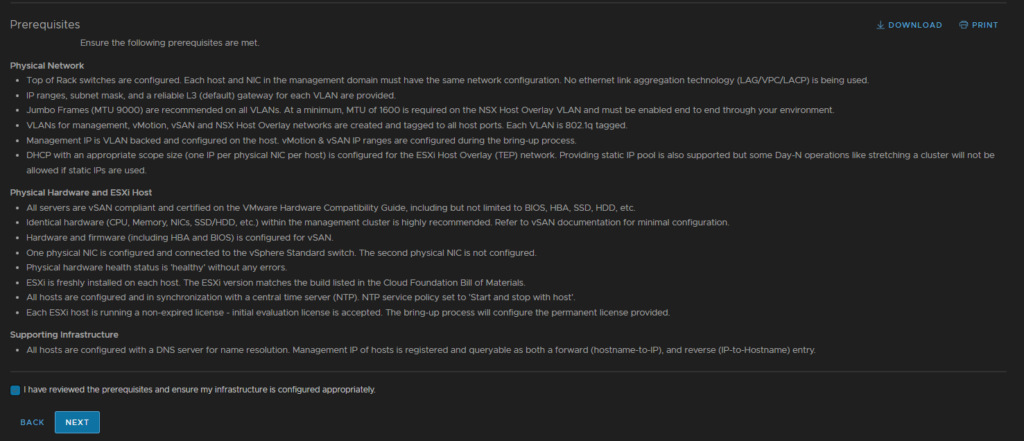
- Top of Rack switches are configured. Each host and NIC in the management domain must have the same network configuration. No ethernet link aggregation technology (LAG/VPC/LACP) is being used
- IP ranges, subnet mask, and a reliable L3 (default) gateway for each VLAN are provided
- Jumbo Frames (MTU 9000) are recommended on all VLANs. At a minimum, MTU of 1600 is required on the NSX Host Overlay VLAN and must be enabled end to end through your environment
- VLANs for management, vMotion, vSAN and NSX Host Overlay networks are created and tagged to all host ports. Each VLAN is 802.1q tagged
- Management IP is VLAN backed and configured on the host. vMotion & vSAN IP ranges are configured during the bring-up process
- DHCP with an appropriate scope size (one IP per physical NIC per host) is configured for the ESXi Host Overlay (TEP) network. Providing static IP pool is also supported but some Day-N operations like stretching a cluster will not be allowed if static IPs are used
Physical Hardware And ESXi Host
- All servers are vSAN compliant and certified on the VMware Hardware Compatibility Guide, including but not limited to BIOS, HBA, SSD, HDD, etc
- Identical hardware (CPU, Memory, NICs, SSD/HDD, etc.) within the management cluster is highly recommended. Refer to vSAN documentation for minimal configuration
- Hardware and firmware (including HBA and BIOS) is configured for vSAN
- One physical NIC is configured and connected to the vSphere Standard switch. The second physical NIC is not configured
- Physical hardware health status is ‘healthy’ without any errors
- ESXi is freshly installed on each host. The ESXi version matches the build listed in the Cloud Foundation Bill of Materials
- All hosts are configured and in synchronization with a central time server (NTP). NTP service policy set to ‘Start and stop with host’
- Each ESXi host is running a non-expired license – initial evaluation license is accepted. The bring-up process will configure the permanent license provided
Supporting Infrastructure
- All hosts are configured with a DNS server for name resolution. Management IP of hosts is registered and queryable as both a forward (hostname-to-IP), and reverse (IP-to-Hostname) entry
For the different networks we will need a total of eight VLANs, I added my VLANs which are used over the guide
- Management – ESXi – VLAN 11
- VM Management – vCenter/NSX/SDDC – VLAN 12
- vMotion – VLAN 13
- vSAN – VLAN 14
- NSX Host TEP – VLAN 15
- NSX Edge TEP – VLAN 16
- Edge Uplink 1 – VLAN 7
- Edge Uplink 2 – VLAN 8
Important – By continuing you are agreeing to the disclaimer here
1 – ESXi
1.1 – Deploying ESXi
For this we will be looking at a Dell server with iDRAC, the same overall approach can be taken on any other server with IPMI, eg HPE’s iLO
We are going to log into the iDRAC IP, you can set this under the F2 options then under iDRAC Settings/Network, then open the virtual console from the bottom right by clicking the screen image
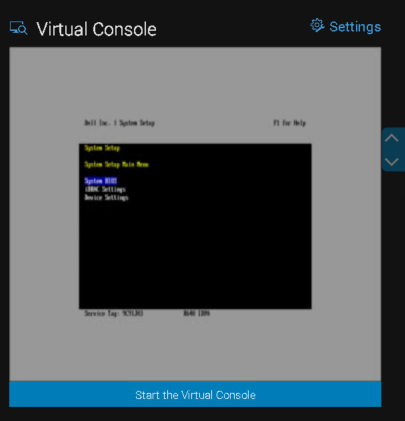
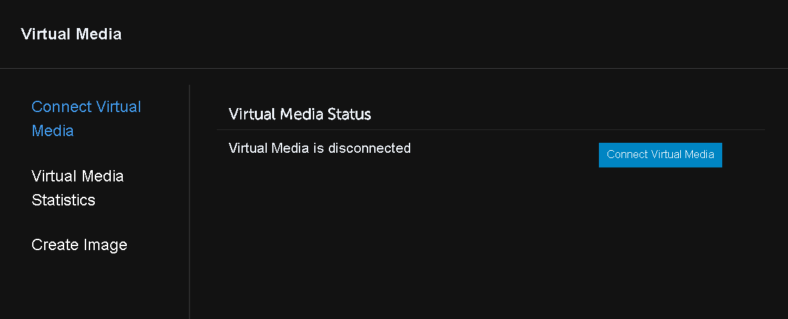
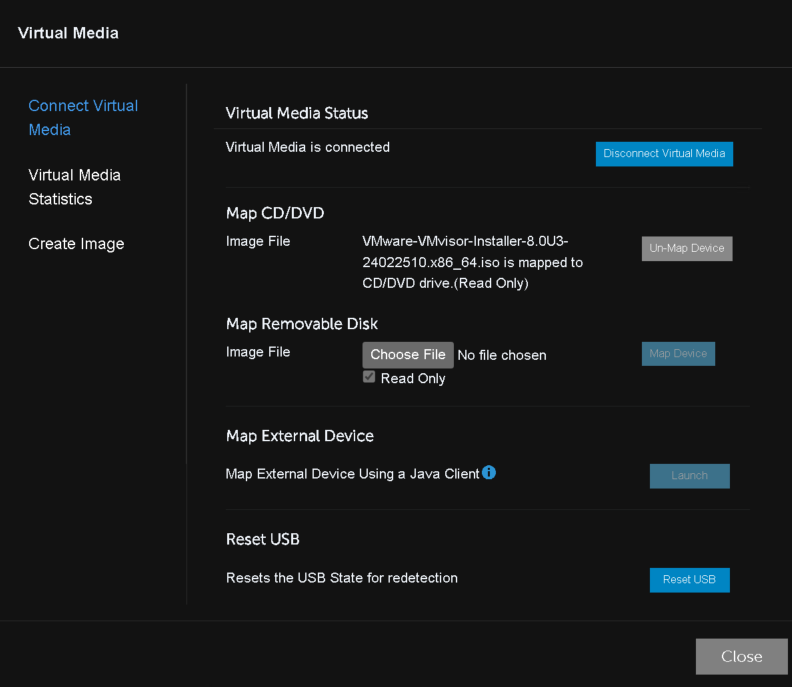
In the window, we will select Virtual Media

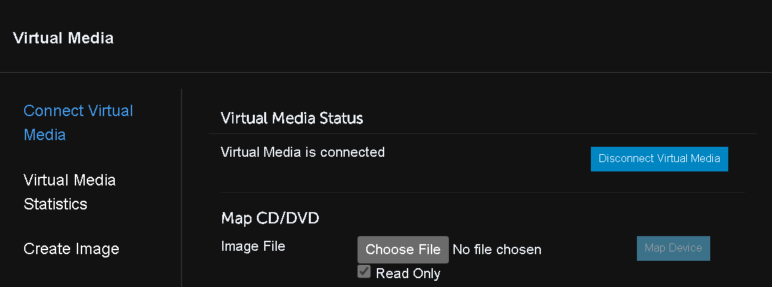
Connect a virtual media
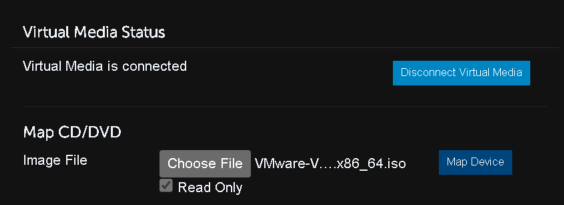
Under map CD/DVD click Choose File
And select the ESXi ISO, the version should match the target VCF version BOM here, but for any other version, its under the release notes

Then click Map Device
Now click close in the bottom right
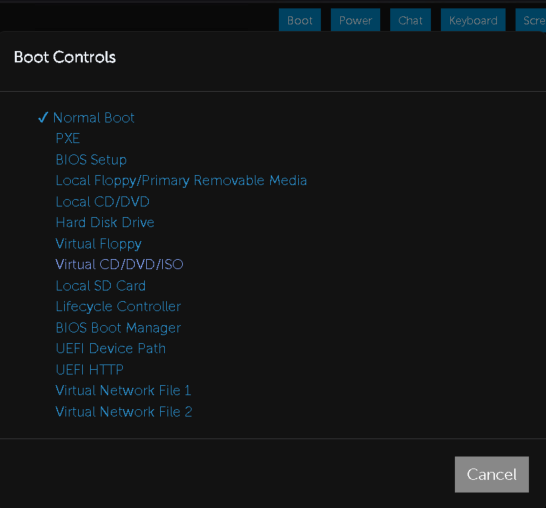
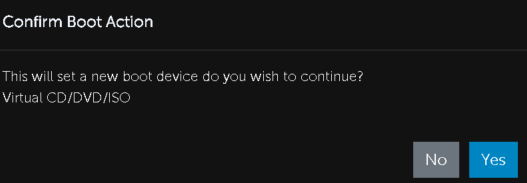
Click Boot at the top bar, then select Virtual CD/DVD/ISO, this will force iDRAC to boot the server to the virtual media we mounted on next boot only
And click Yes
If the system is on, do a Reset (warm boot), if its off, the only option will be to power it on, so use that
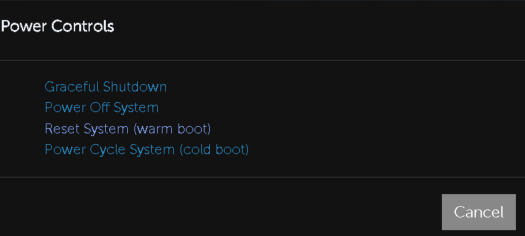
And confirm

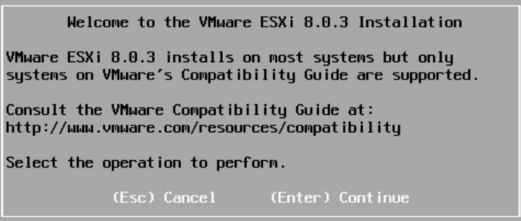
Once that boots to ESXi, you should see this screen, click Enter to continue
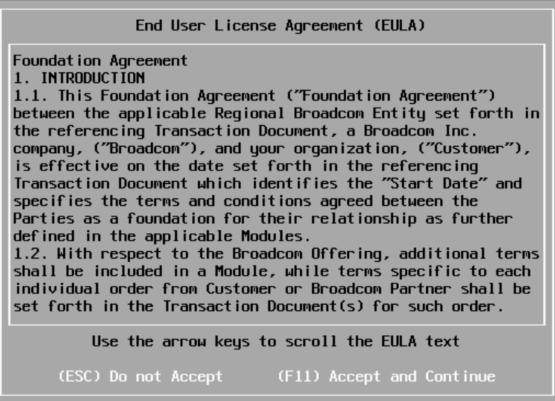
Press F11 to accept the EULA
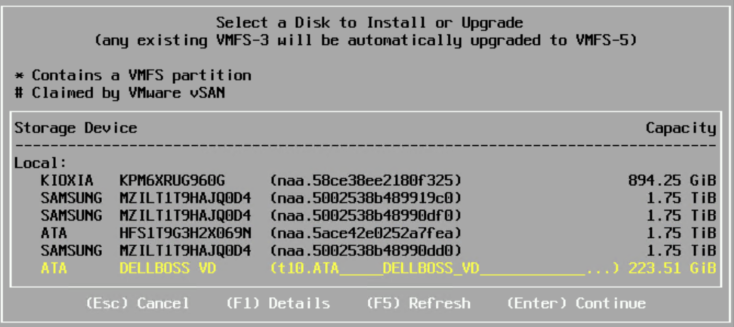
It will then scan for devices

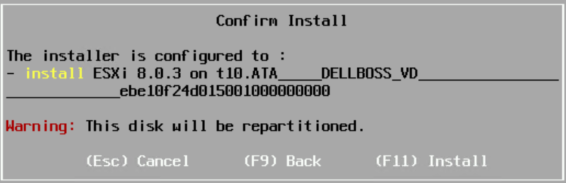
Select the boot device you want, for Dell servers this will be the BOSS card
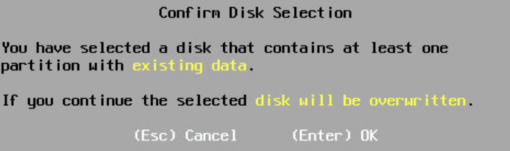
If there is any data you may see this
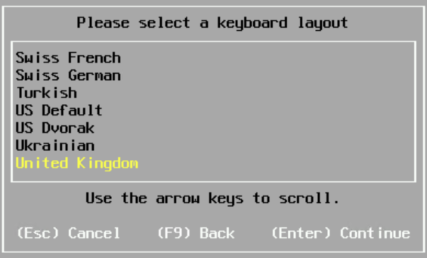
Select your keyboard language
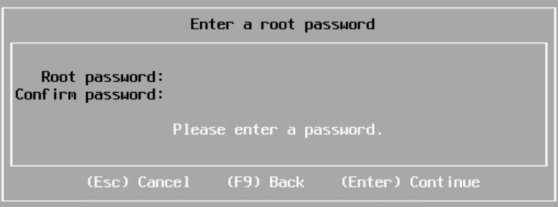
Set a root password, something easy, we can change this in the UI to something random
Then press F11 to install
1.2 – Configuring ESXi
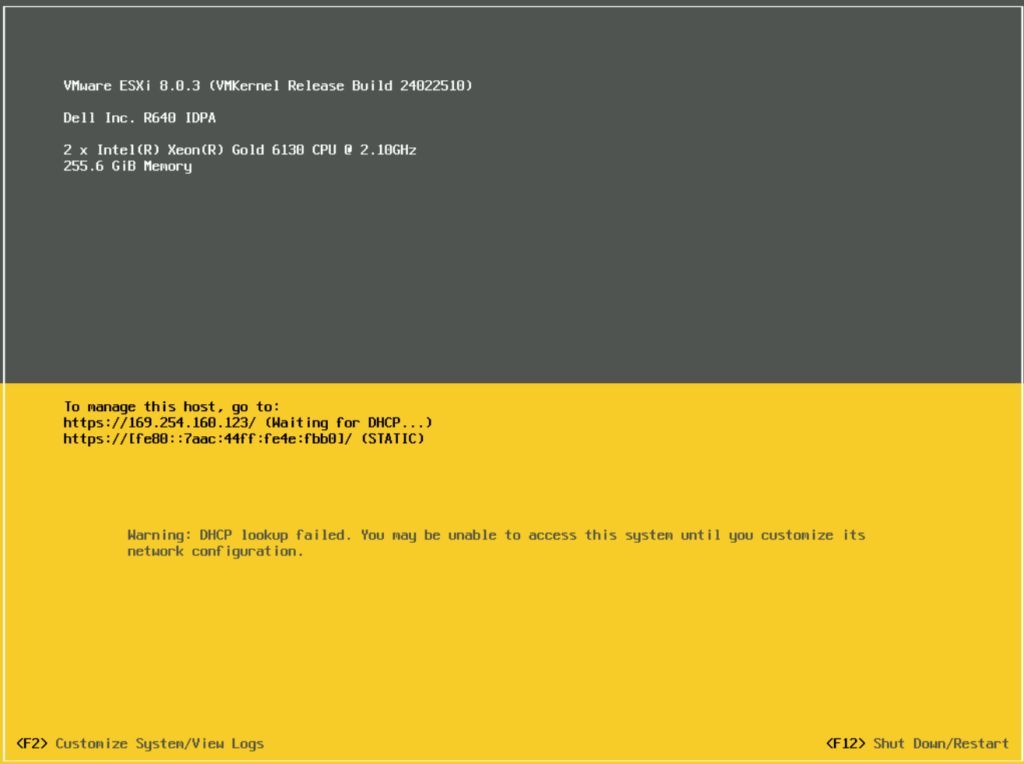
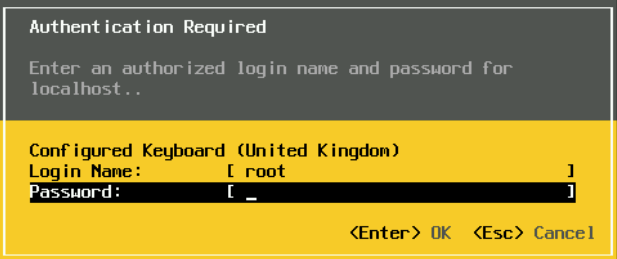
When the host boots, it should look like this, press F2 to login
Enter the root credentials and press enter
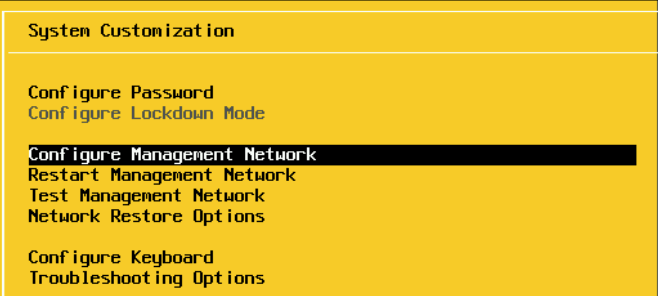
Scroll to Configure Management Network and press enter
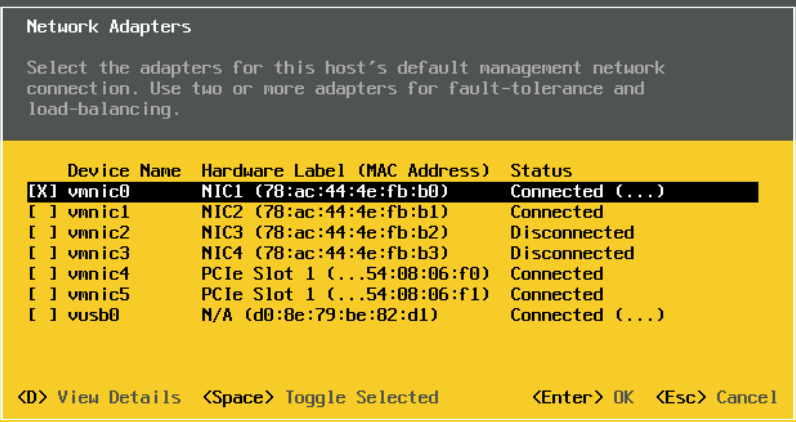
Press Enter on Network Adapters and ensure that a connected Nic is selected, these should all be configured the same on the switch

In my case VMNIC0 is connected so I will press Escape and leave it as it is
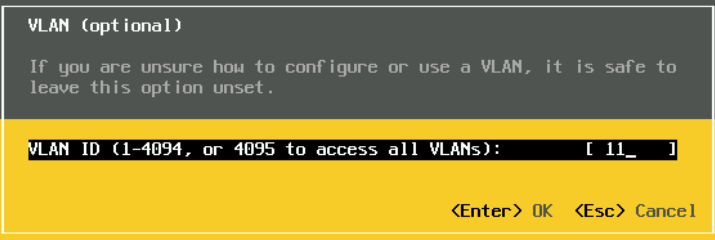
Press enter on VLAN

And enter your ESXi management VLAN, I am using VLAN 11
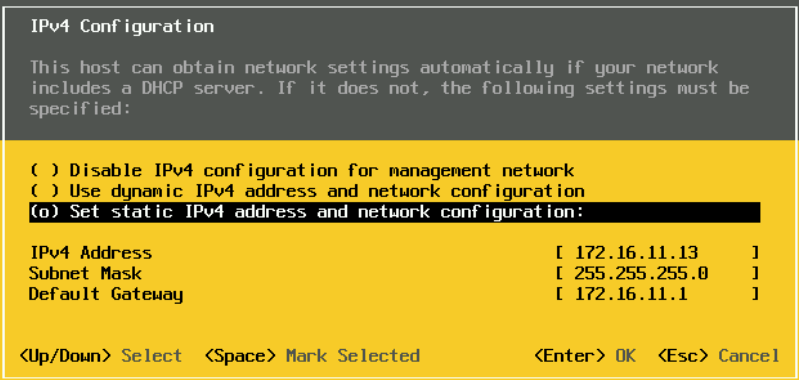
On IPv4

Use the space bar to select the third option to set a static IP and add your management IP details in and press enter to Save
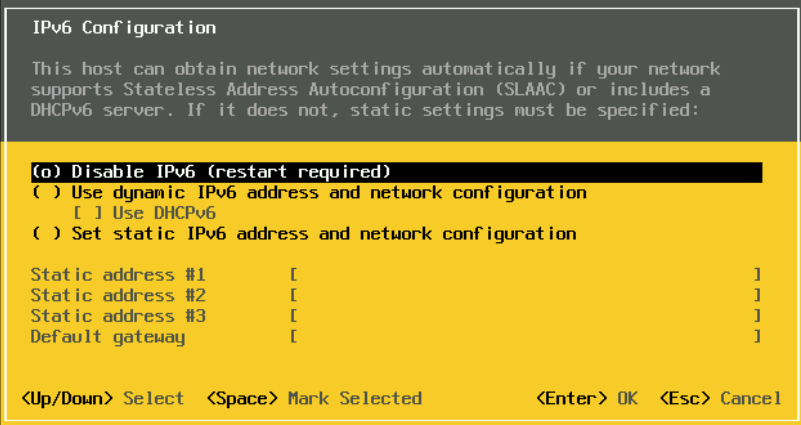
For IPv6, select disable on the first option, unless you are specifically using it, and press enter
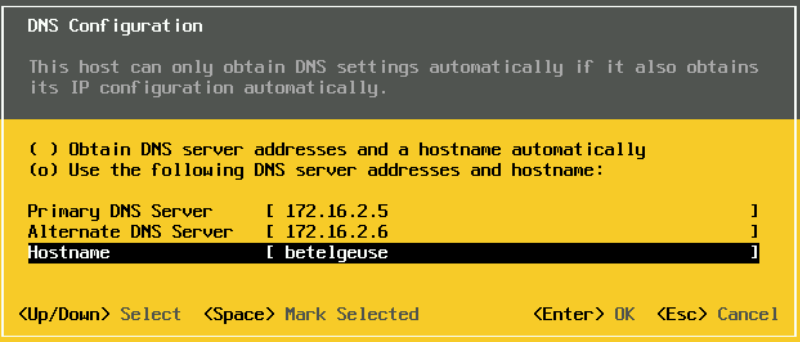
Add your DNS servers and the hostname for this server
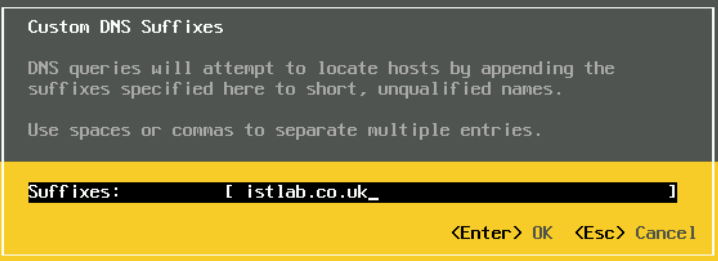
Add your domain under DNS Suffixes
Then, login on the WebUI at
https://fqdn
or
https://i[
Navigate to Manage, then Security & Users, then Users on the left, and click the root account and click Edit User to change the root password to something more secure

Then add the password

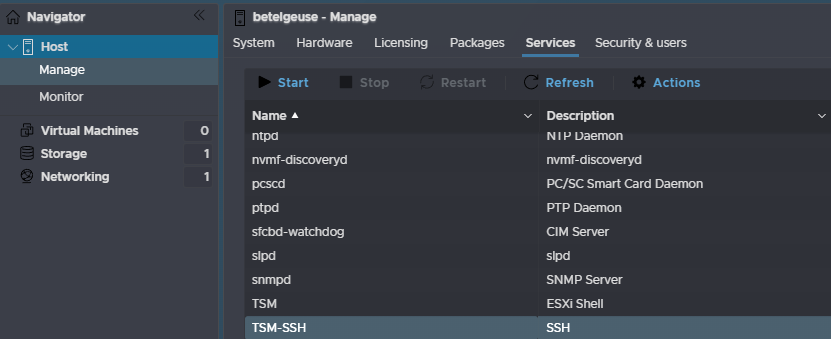
Then we need to enable SSH, click Manage, then Services the click TSM-SSH and click Start
Now we need to SSH into the host with the root credentials, using something like Putty and run the following to set the hostname/FQDN correctly for the certificate and renew it for the cloud builder
For my host, betelgeuse, lets set the hostname with
esxcli system hostname set -H=<hostname>So for my host this is
esxcli system hostname set -H=betelgeuseThen set the FQDN with
esxcli system hostname set -f=<fqdn>Which for my host is
esxcli system hostname set -f=betelgeuse.istlab.co.ukNow renew the certificates with
/sbin/generate-certificatesRestart the management agents with
/etc/init.d/hostd restart && /etc/init.d/vpxa restartAnd reboot the host with
rebootWhen it comes back up, you will need to restart SSH for the cloud builder
Lastly, we need to setup NTP on all servers, you can use a windows App or a docker container, for this
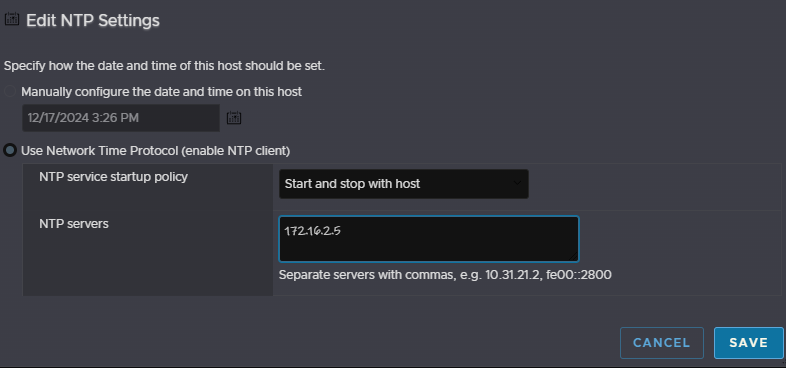
Head to Manager, then System, then Time & Date, and click Edit NTP Settings

Select the second radio button to use a NTP server, select the service to start and stop with the host, and put the IP address for your NTP server and click save
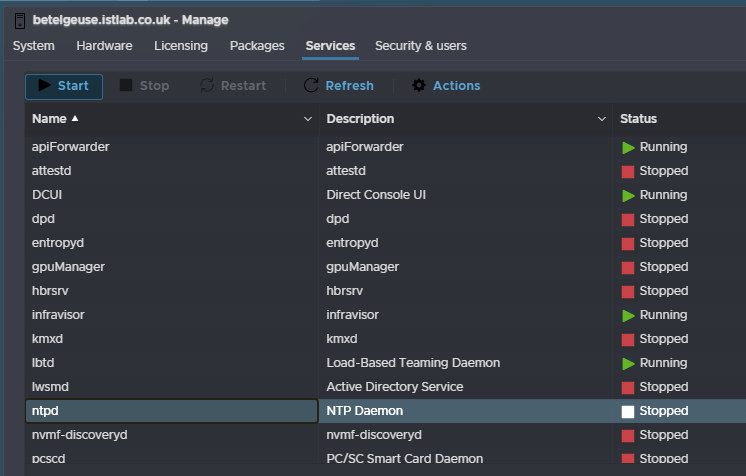
Then, under services, click ntpd, and click start
2 – Cloud Builder
2.1 – Deploying The Cloud Builder Appliance
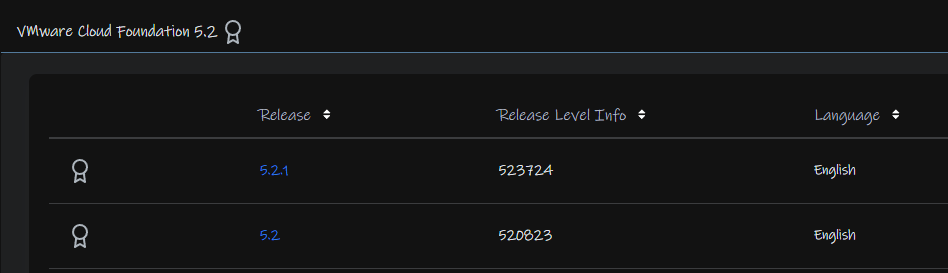
We first need the Cloud Builder OVA, to get this, on the Broadcom portal, search for VMware Cloud Foundation

Expand your entitlement and select the release you want, I am deploying 5.2
And we need the OVA, its ~28GB

You will also need the deployment parameters booklet

The VM needs deploying somewhere thats not the VMware cluster you are building, this can be a VM on workstation on your laptop/desktop, in this case, I have another VMware environment it can do in, do I can deploy the OVA there
As the process varies, I will only cover the parameters needed when deploying it
Enable FIPS compliance only if you need it, and add an admin password within the requirements
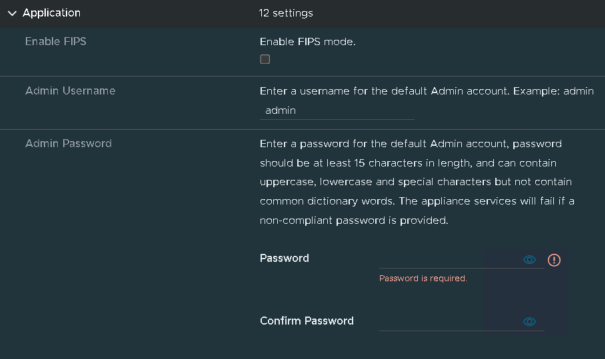
Repeat for the root password

Add a hostname, IP address, subnet mask, gateway, DNS server, domain, search domain and NTP server, this will vary on your network, and add the FQDN to your DNS server as well

Then deploy the template
2.2 – Filling Out The Deployment Parameters
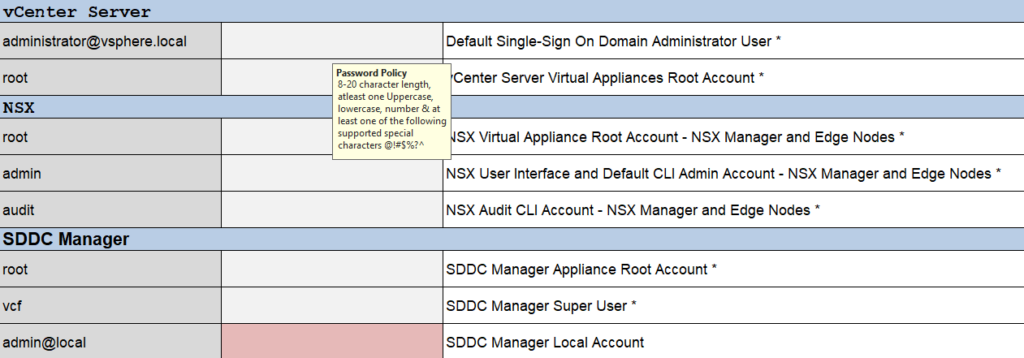
Firstly, we will want to head to the credentials tab

Add the ESXi root password, they should all be the same

Then we need passwords for the rest of the accounts
The important bits here is the requirements, they must be 8-20 characters, and can only use @!#$%?^
Then we need the Hosts And Networks tab

Here, we will need the networking for the VM management net, where vCenter, SDDC and NSX go, the Management network, where the ESXi hosts are, and vMotion/vSAN networks
We will need the corresponding VLANs, portgroup names, which you can set, network CIDR, gateway and MTU, which I left default
It is worth noting, it will error if you dont put vSAN/vMotion gateways, however these should also be non routable and not have a gateway
You should also ensure the switches have an MTU to handle the requirements, and should be 9216

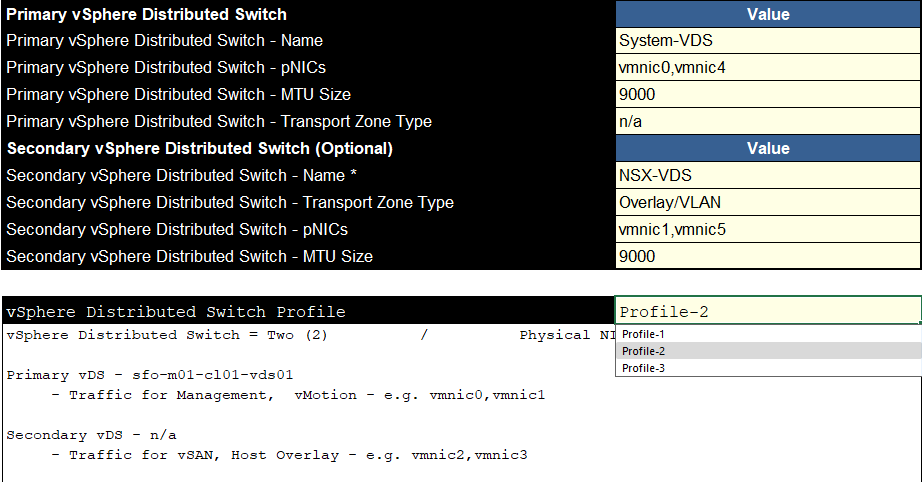
For networking, we can select a few profiles, profile 1 shouldnt really be used, as it only uses one VDS, the other two will split traffic for better throughput
I recommend Profile 2, this puts the NSX overlay on the vSAN switch giving a little better balance rather than throwing everything except for vSAN onto one VDS
This is very suitable as it keeps the two main data users, vMotion and vSAN, separate maximising bandwidth
Then, you can name the switch name, pick the NICs, which there should be two for each, one of these must be the NIC, ESXi management is currently using, and the purpose for NSX
Over on the right, we need to add our hosts names, without the domain, you can use up to 8, then add the IP start and end ranges for vMotion and vSAN

Optionally, you can provide the thumbprints for the ESXi certificates that are installed, I opted to not validate them, so it wont check

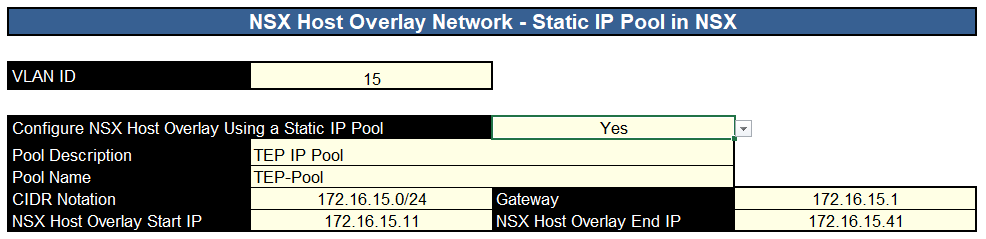
Then we need the NSX networking, we need the host TEP VLAN, and we will want a static pool using the drop down, give the pool and description and a name, then provide the network CIDR, gateway, start and end IP
Lastly we need the Deploy Parameters section

We need to add our DNS servers and NTP servers

You can add licensing here, I didnt and did this later
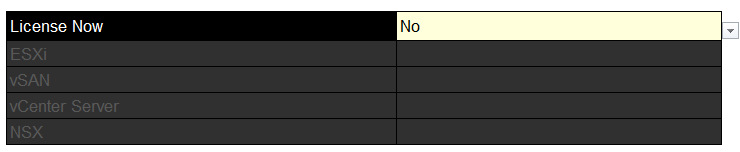
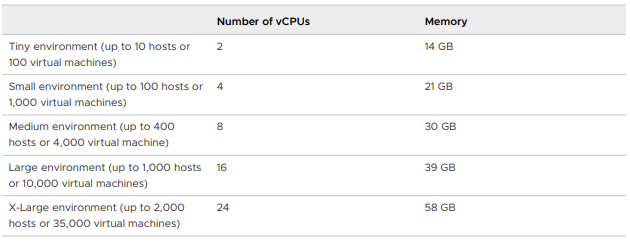
We need the vCenter hostname, IP address, size, which will be based on your environment size, and the storage, which likely wants to be default

Broadcom have this sizing for vCenter 8, which is used in VCF 5.2, Tiny should only ever be used as a POC, or for a lab, not for production
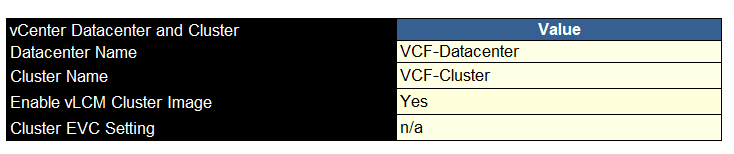
We will then need the datacenter name, cluster name, do you want cluster images enabling, which you do, and EVC if applicable
Then we need the VCF architecture, consolidated is where you are having one domain where everything goes, standard is for when you want a dedicated management server cluster and workload clusters for your VMs
In my case, its a small four node cluster, so we are using consolidated, and if so, you will need to add names for the resource pools

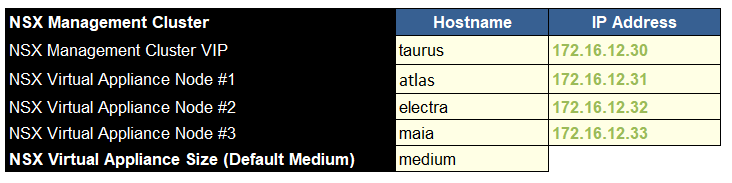
We then need to add the NSX management cluster VIP name and IP, as well as the names for the three appliances forming this cluster and their IPs, and the node size, which should be medium at a minimum, you likely dont need large
Now we need the SDDC manager config, we need the hostname, IP address, a name for the network pool, this has the vMotion/vSAN IP address ranges in, and the management domain name
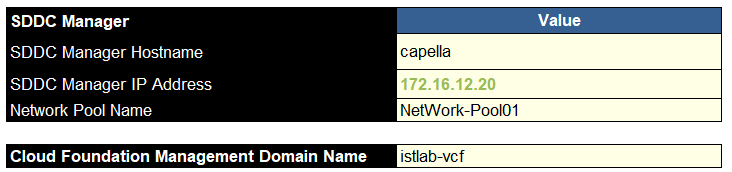
Over on the right, we need the DNS domain name, this will be applied to all machines as a look up and for their FQDN
As well as opting in or out of the CEIP and enabling SDDC FIPS requirement, if needed

Then we have the vSAN datastore name, you definitely need deduplication and compression enabling for the most space efficiency, and my lab doesnt have ESA certified hardware, new deployments should, so you likely need this enabling, but its worth noting, for production support you need HCL certified hardware, particularly the drives, and the deployment will fail if you dont, if you bought vSAN ready nodes you should be clear

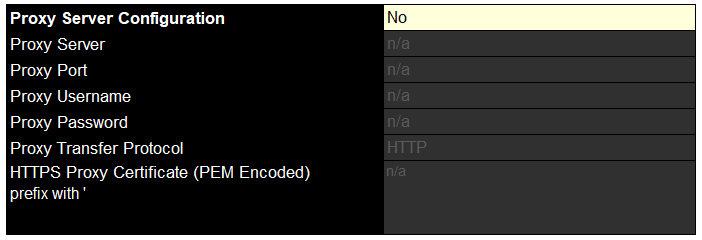
If you have a proxy you can set that here, I dont though
2.3 – Starting The Bring Up Phase
Once the OVA has been deployed, go to the Web UI on
https://fqdn
Or
https://ip
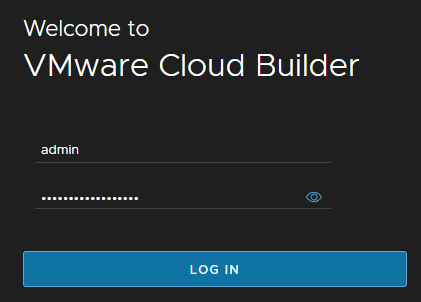
Login with the admin credentials
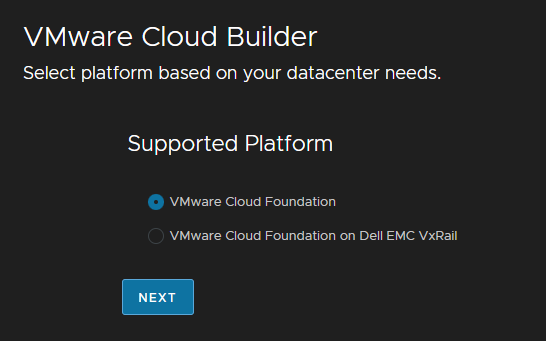
Select your platform, unless you have VxRail it will be this option
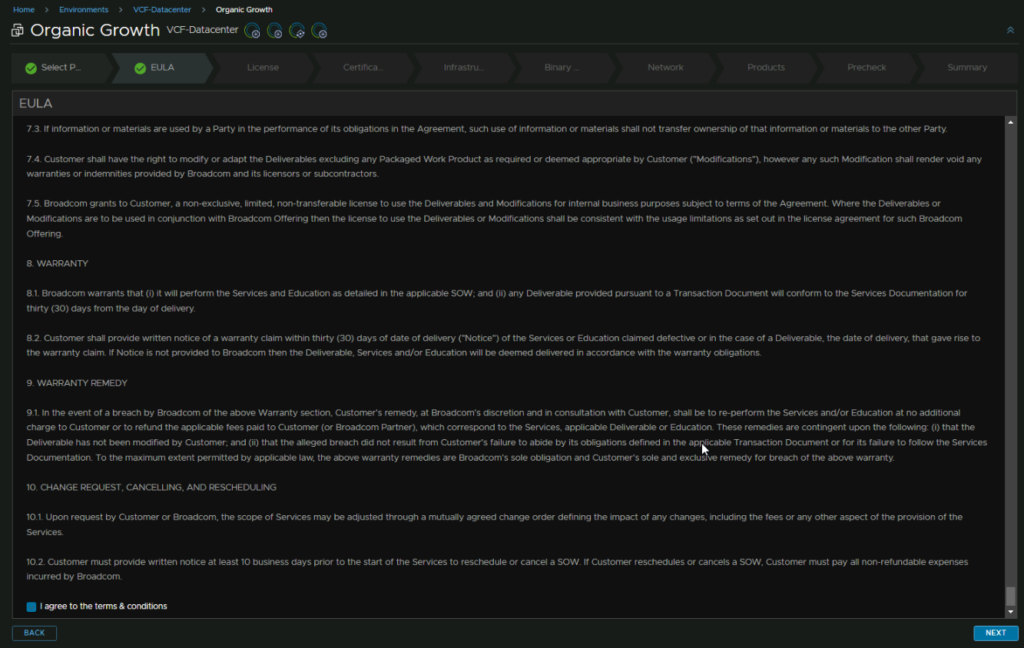
Review and accept the prerequisites
Click next here, as we have completed the work booklet
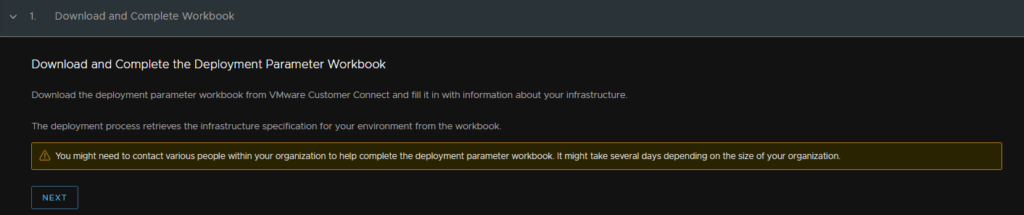
Then upload the booklet

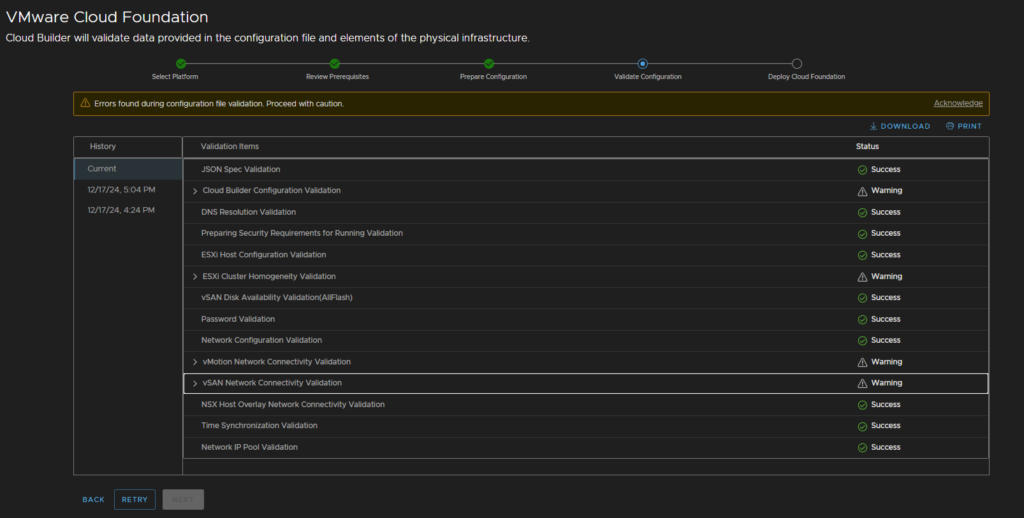
Ensure the config file was uploaded successfully, if there are issues this will fail and they need correctly, unfortunately, it doesnt say whats done wrong

Once the check has done, check any warning or errors
Errors prevent the installer from going on
Mine has failed the ESXi homogeneity validation due to my lab having a different host
vMotion and vSAN warnings are for the gateway not being valid, this is because the networks are non routable, this will be fine
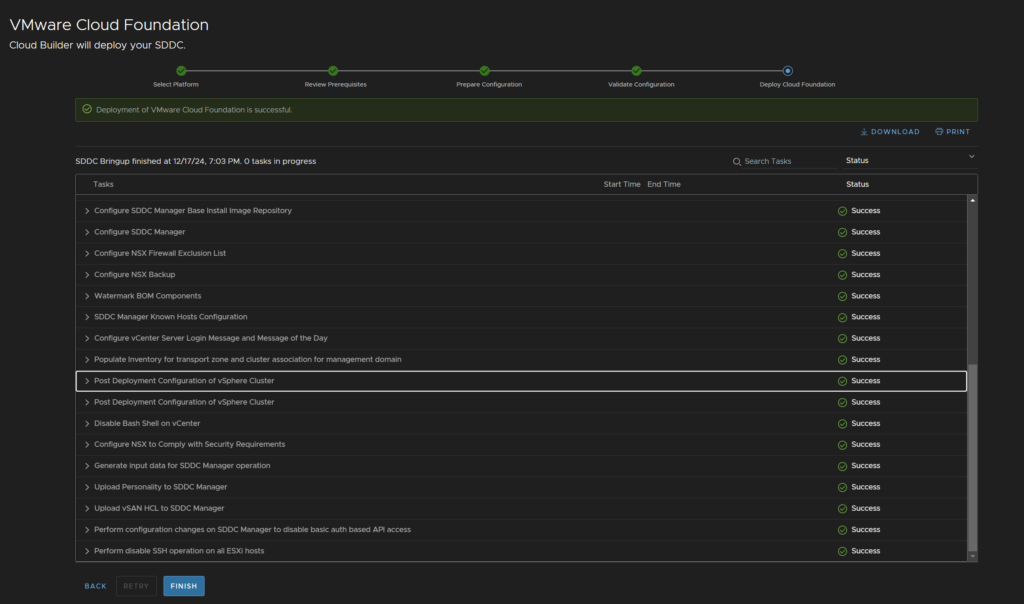
When you click next the deploy process will start
If any errors occurs, you’ll need to look into what failed and perhaps why from the vCenter/NSX manager and retry from that point
When it is done it should look all green
3 – Post Bring Up Configuration
3.1 – Applying Licenses
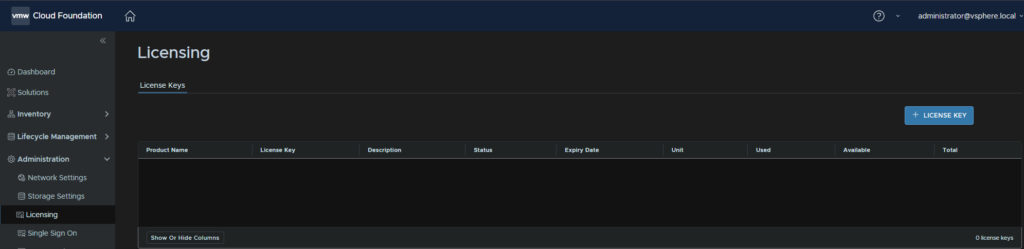
You can add your licenses from Administration/Licensing and click + License Key on the right
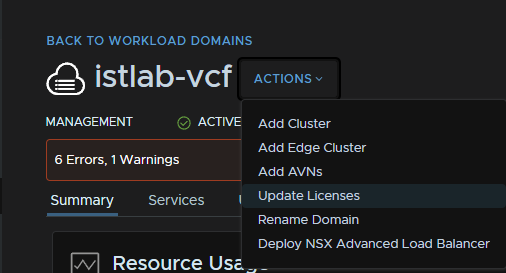
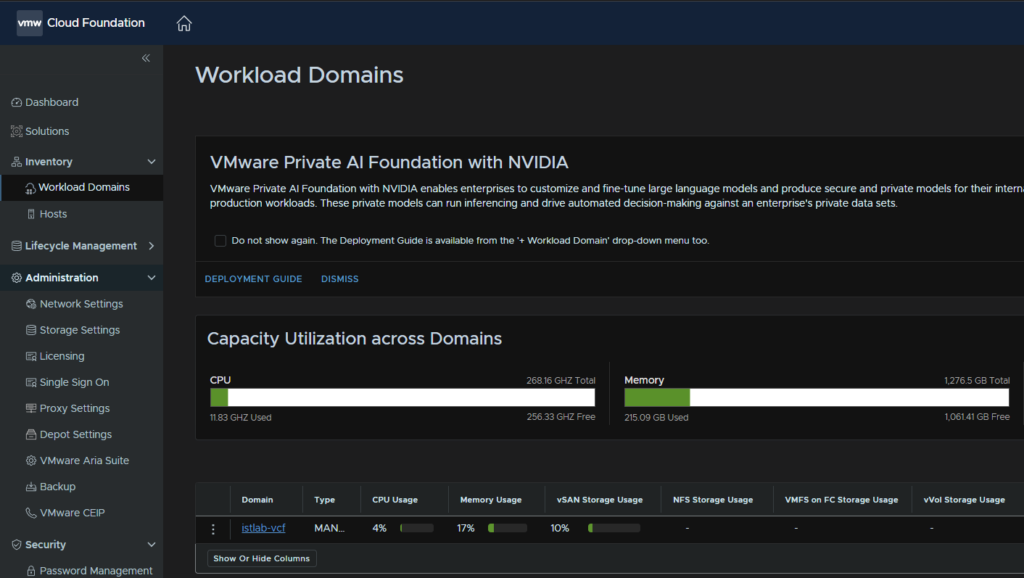
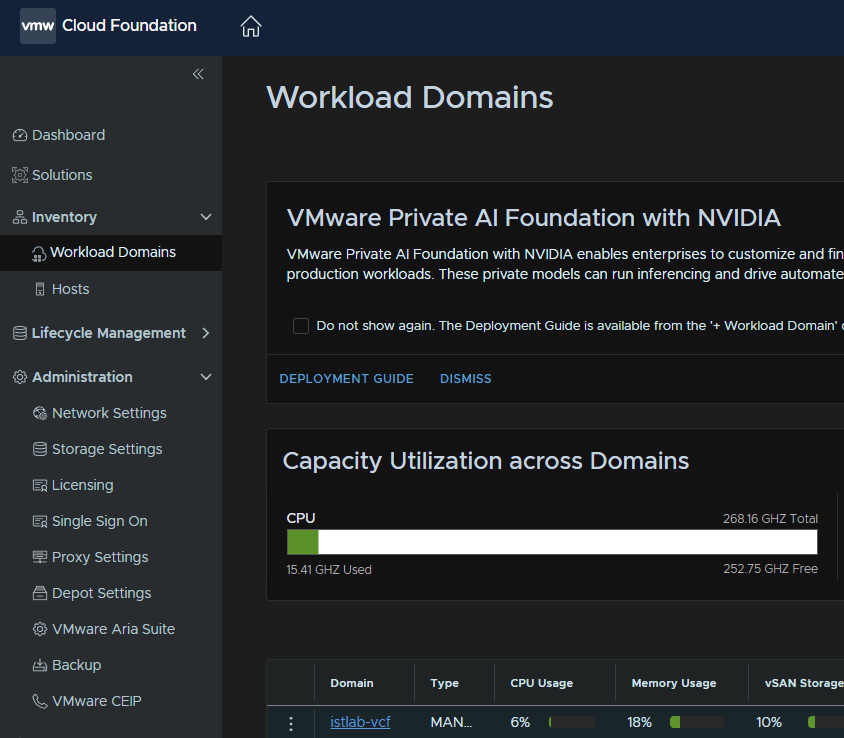
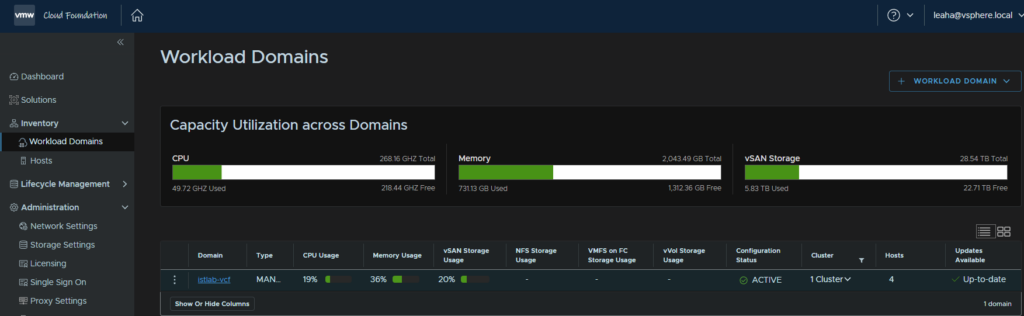
Once added you’ll need to apply them, go to Inventory/Workload Domains
Then click your workload domain, mine is the istlab-vcf

Then click Actions and click Update Licensing
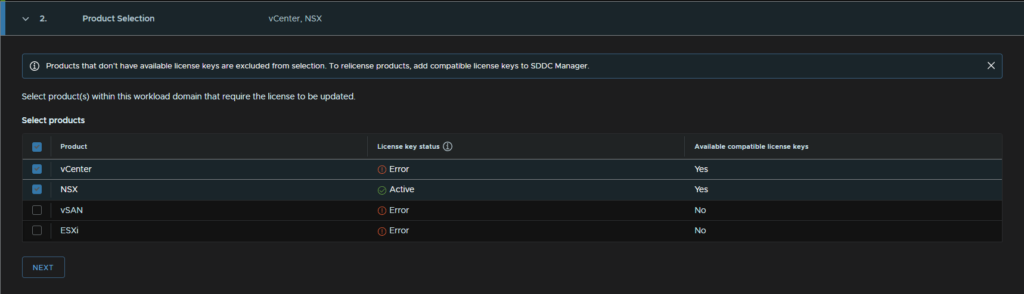
Click Next here

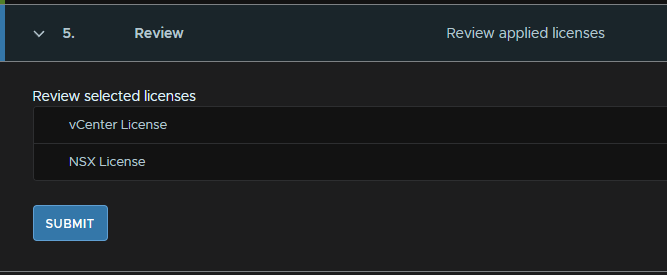
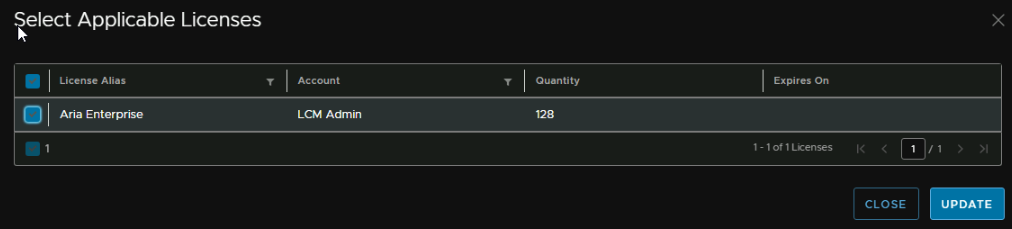
Select the licenses you want to apply, and click next
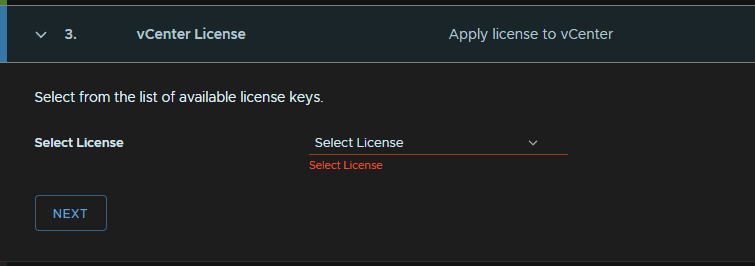
For each, select the license in the drop down and click next
Then review and submit
3.2 – SDDC Manager Backups
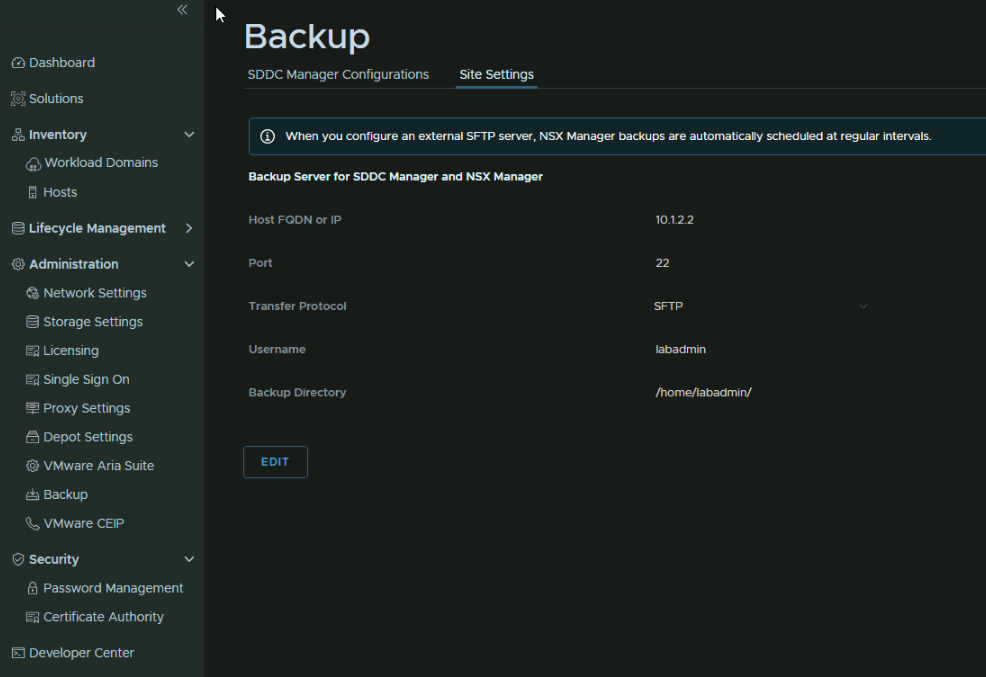
The default config for SDDC manager backups is to backup to its self, you will want to move this to an external SFTP server, an Ubuntu server with SSH enabled will do fine, this will also configure NSX backups
Head to Administration/Backup/Site Settings and click Edit
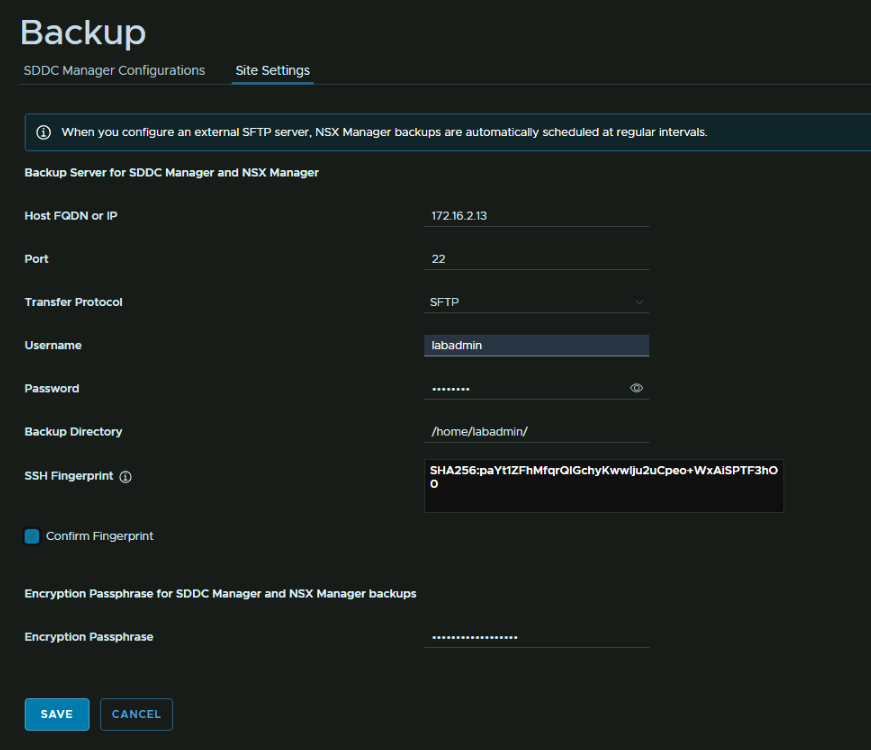
Add an IP address for the SFTP server, the port, which is 22 by default, protocol, SFTP is the only option, add a username for the server and password
For the directory, you want an absolute file path on the SFTP server, on the Ubuntu server I just want it in the home folder of the labadmin user, the SSH thumbprint will auto populate, and click Confirm Fingerprint, and add an encryption password at the bottom, then hit Save
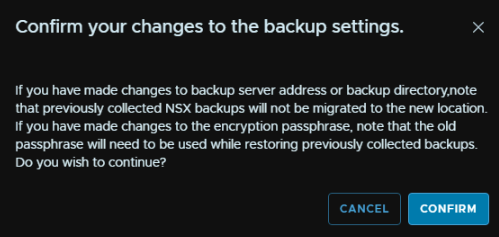
And then confirm
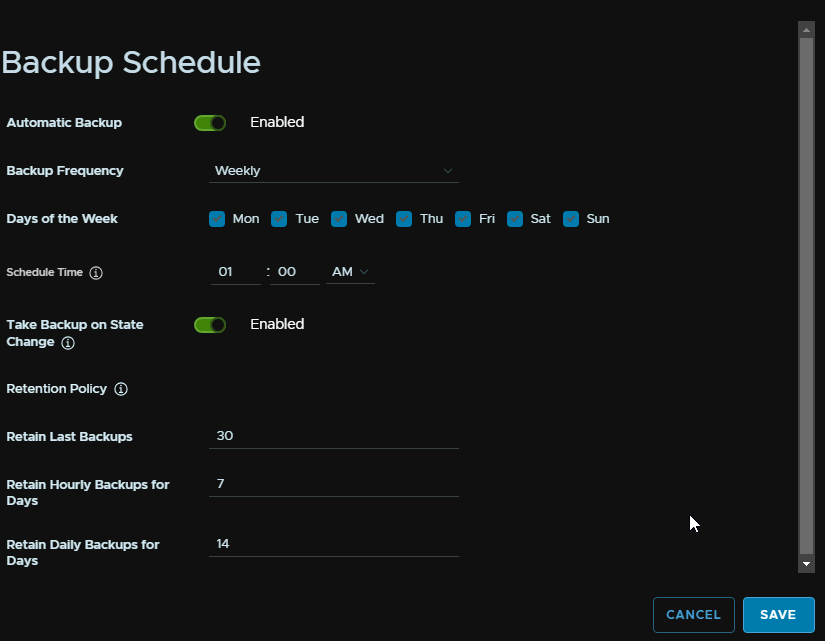
Then from the SDDC Manager Configurations menu, click Edit to set a schedule
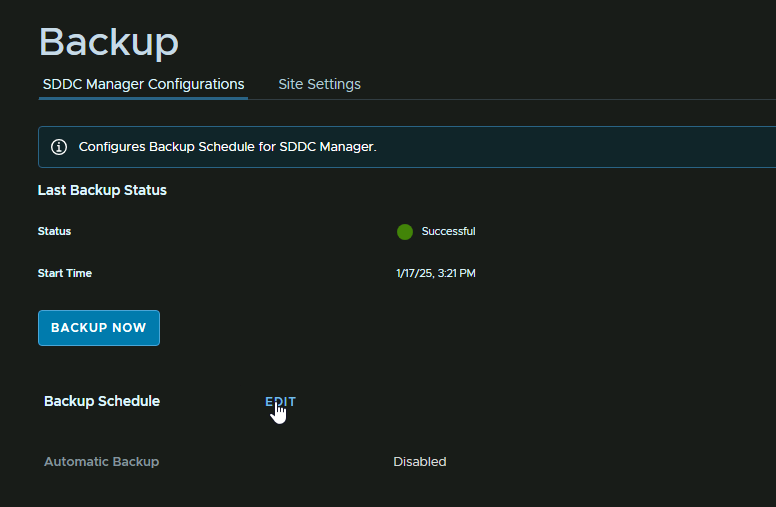
Check the Enabled toggle, now I want this to take backups every day, so select the frequency to be weekly, and check all days
Then set a time, and you will also want to enable the toggle to take a backup on state change, so if something changes it will back it up
Then set the policy, as I will likely end up with more than one backup a day due to the state change backup, I have set the total max to 30 to factor this in, hourly I have set for 7 days and to keep the daily backups for 2 weeks
Then click Save
Disk wise, these are very small, its only the vCenter that are quite large

4 – NSX Networking
4.1 – Deploy An Edge Cluster
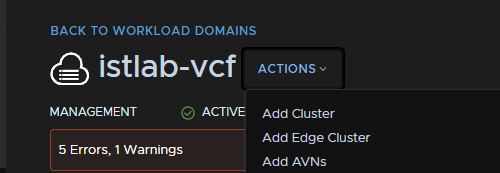
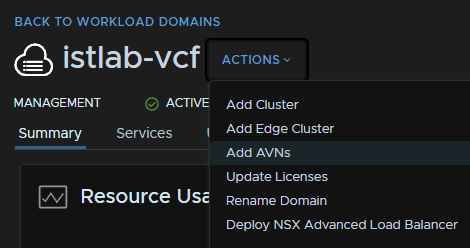
To setup an edge cluster, go to Inventory/Workload Domains
Then click your workload domain, mine is the istlab-vcf
Then Action/Add Edge Cluster
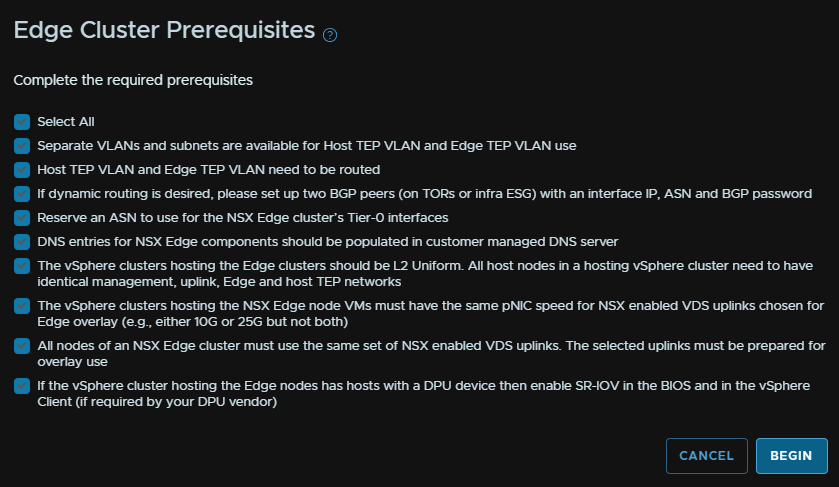
You will need check all the prerequisites are completed, the only exception here is the Edge TEP will not be in its own VLAN
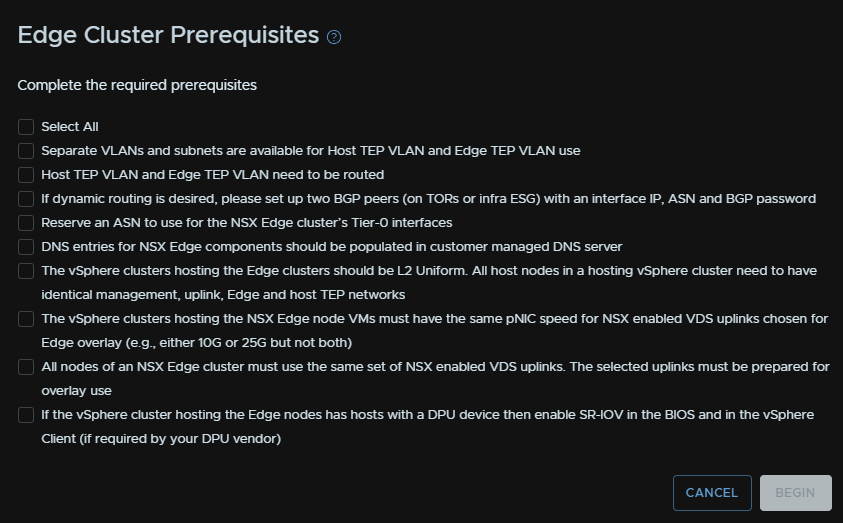
You will also need your Edge nodes to be registered in your DNS server
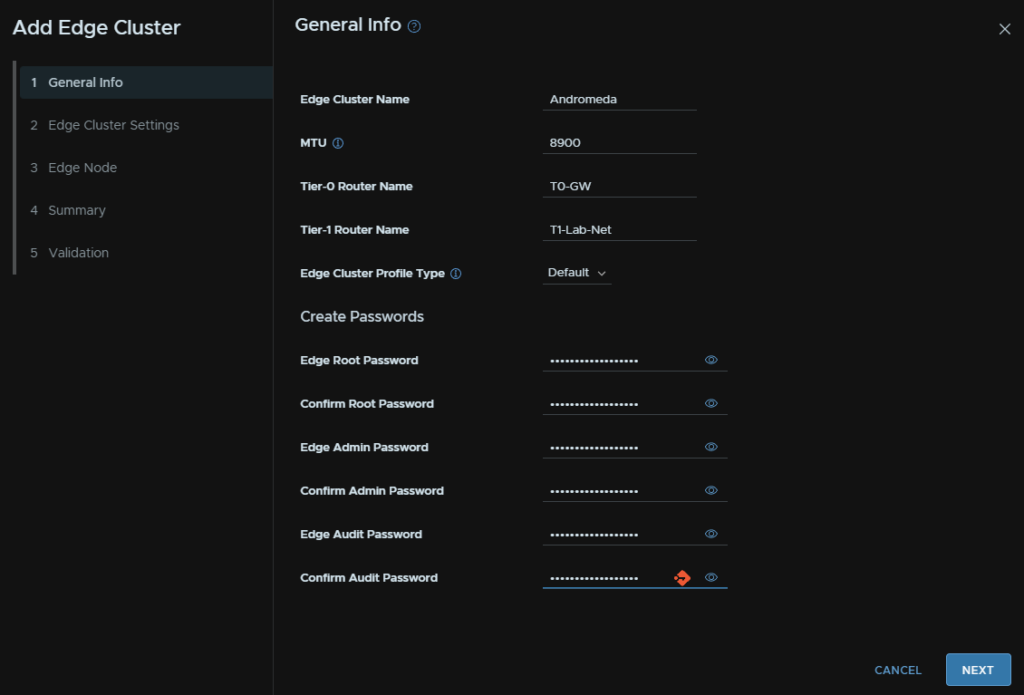
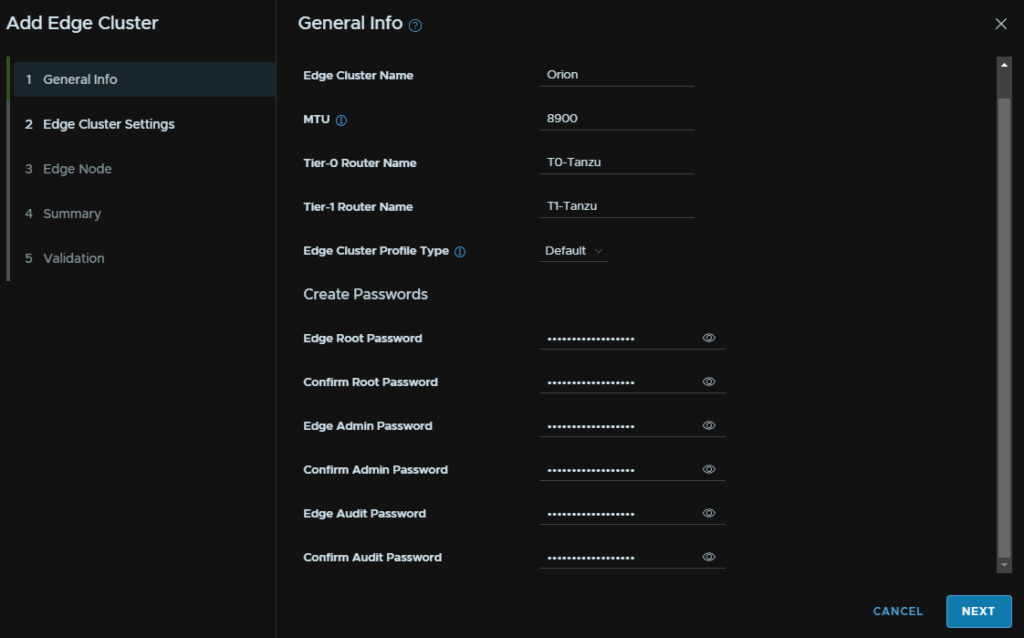
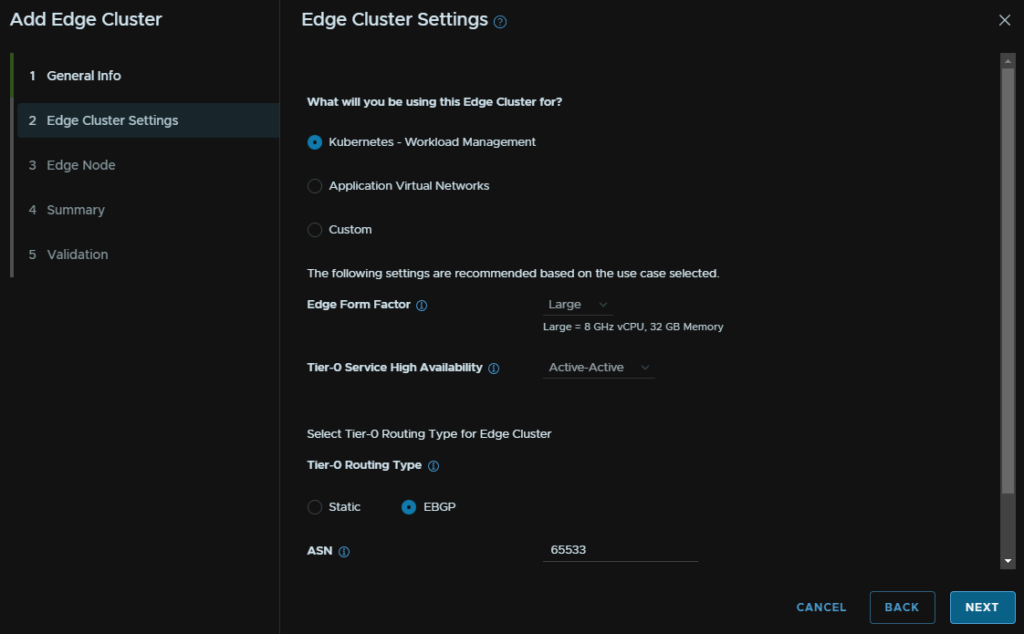
Then give the Edge cluster a name, set the MTU, this wants to be 8900, else inter TEP communication will fail, set a name for the T1 and T0 gateways, select the Edge cluster type, stick with default here, and add your passwords
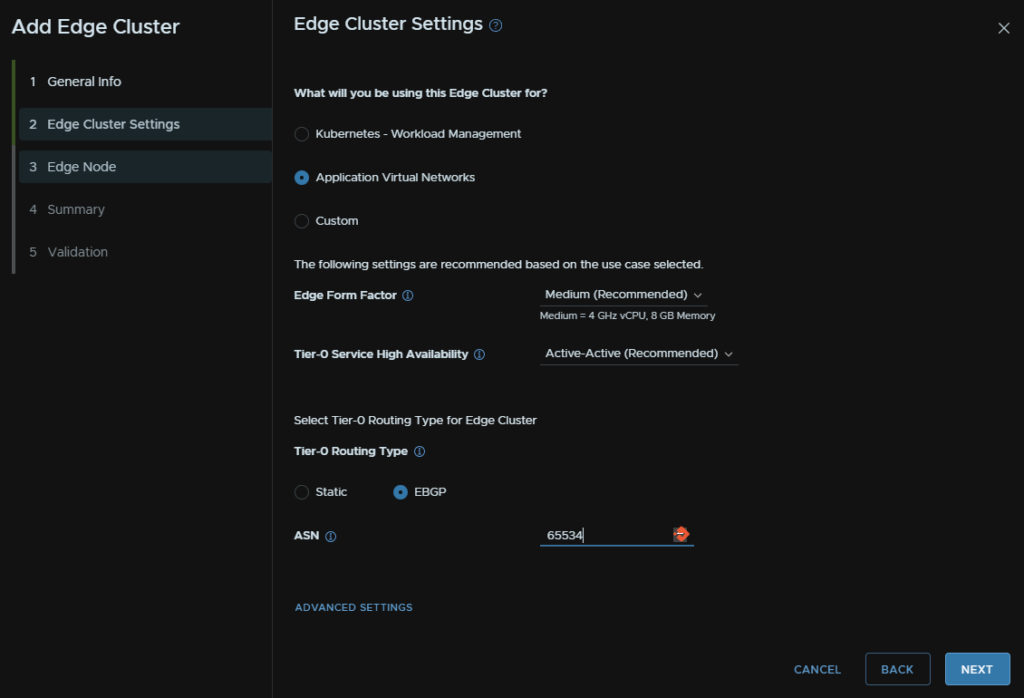
Select the use case, in this case, virtual servers, leave T0 in active active, for routing we will use EBGP the ASN must be different to the router
Sizing wise, I chose medium as it fits my requirements, and if you also want Kubernetes I would suggest keeping this cluster for Application Virtual Networks and doing a separate cluster
The size the Edges VMware have this documentation
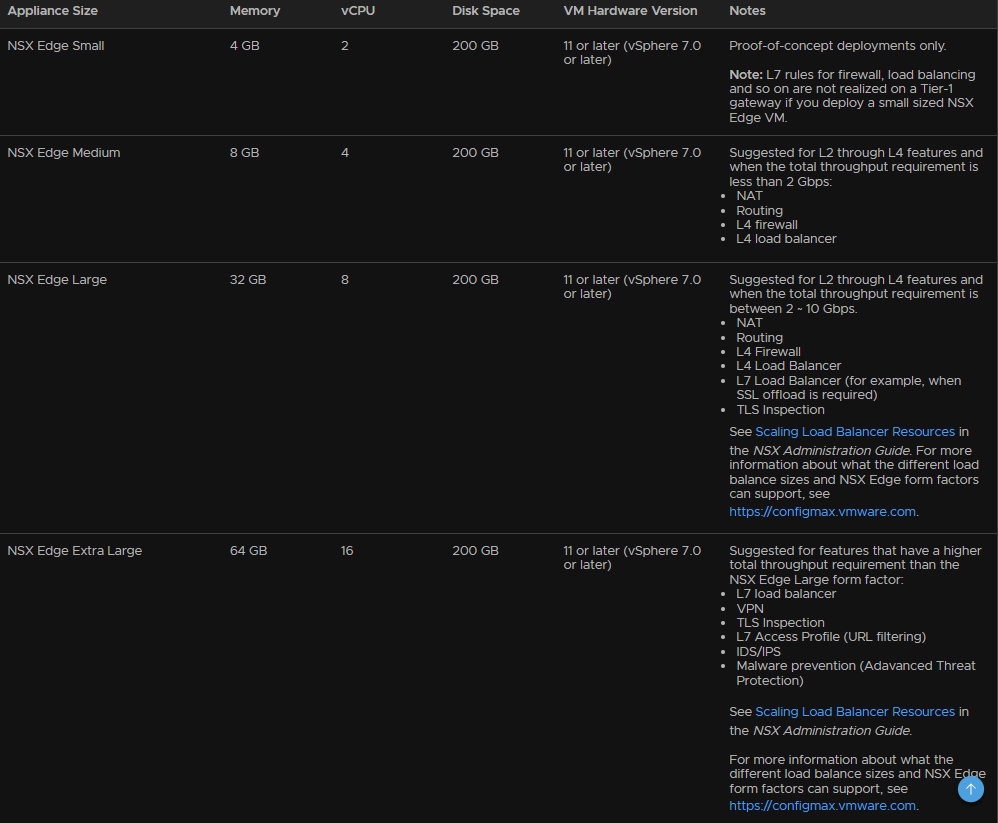
So base the size on how your environment stacks up in terms of throughput and features
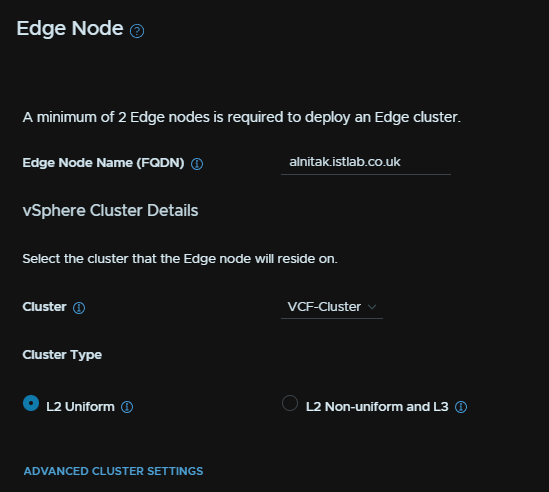
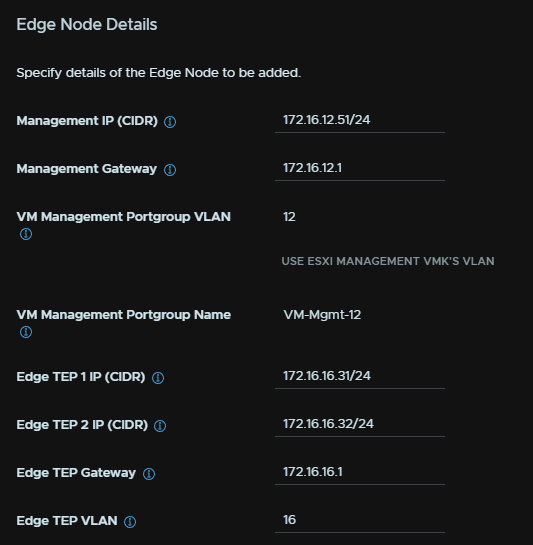
Then enter the first Edge FQDN, select the vSphere cluster, you will want L2 uniform for the type, add a management IP in CIDR notation and the gateway, the VLAN is automatically selected
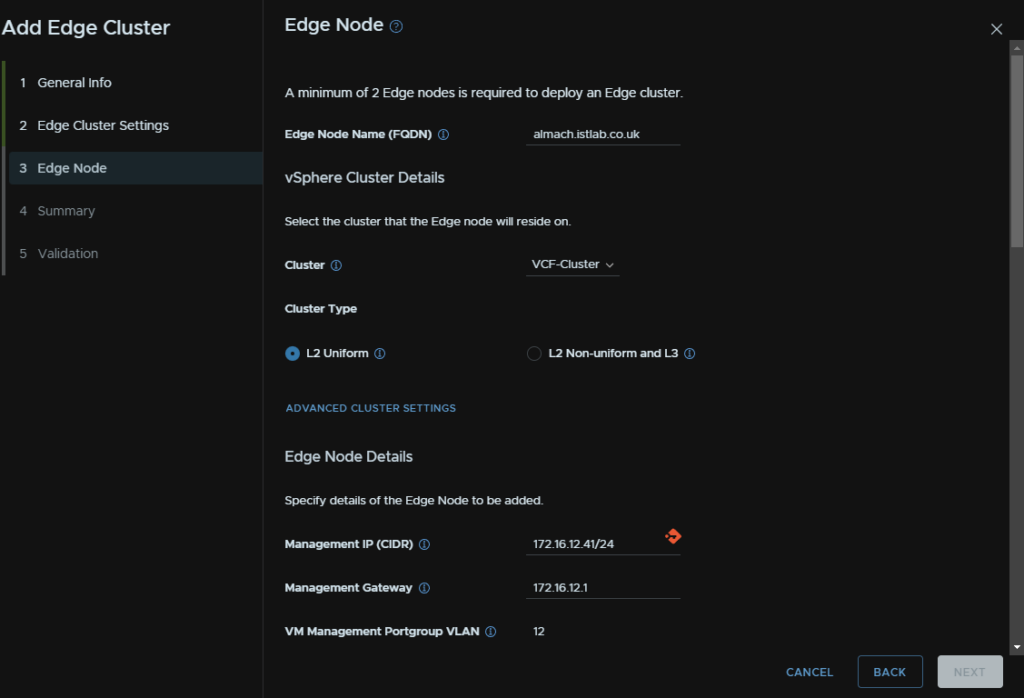
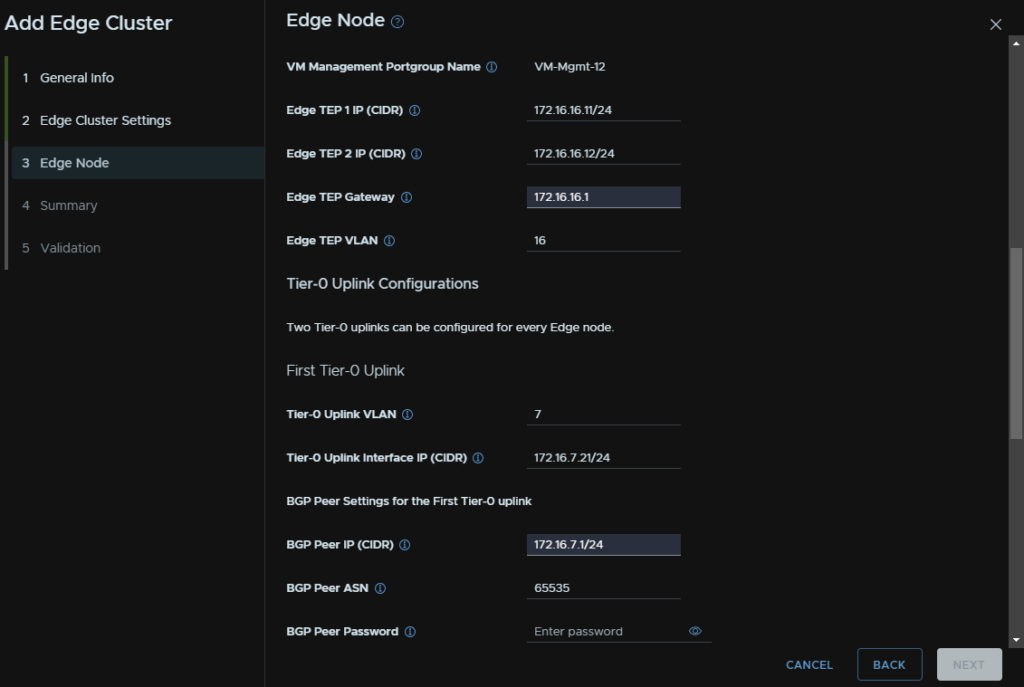
We then need two TEP addresses, this must be a different VLAN to the host TEPs else the deployment will fail, the gateway and the VLAN
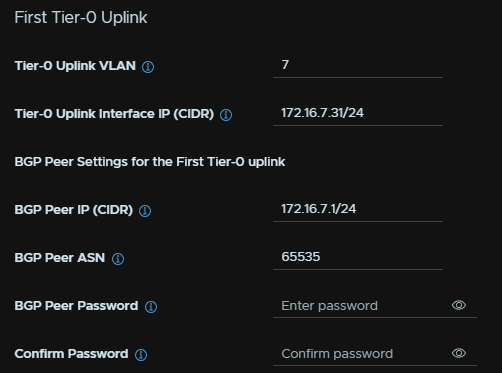
We then need the VLAN of your first uplink network, I am using 7, an IP for the uplink the Edge will use, the IP of the BGP peer, which is my router’s IP, the gateway on that network, and then the router ASN, OPNsense doesnt have a password set
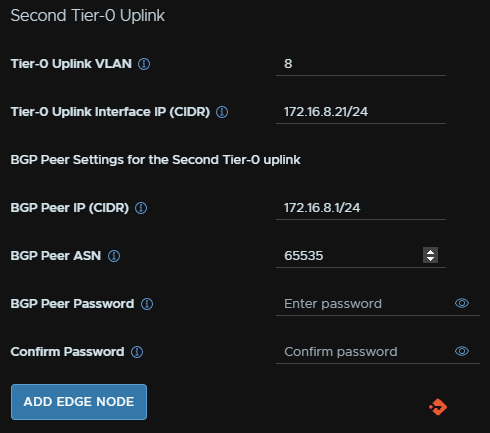
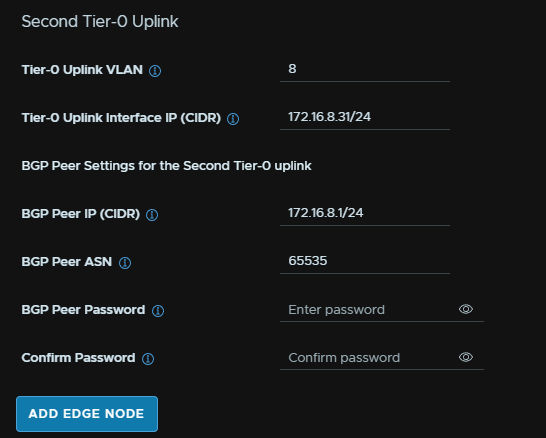
Then fill out the interface for the second uplink VLAN, in my case, VLAN 8, I am using the same IPs to keep things simple, when thats done click add Edge node, and repeat for a second
I have the same ASN on both as I only have one router, in a production environment each core switch should hold one of the two uplink VLANs with their own ASN number, so yours will be a little different
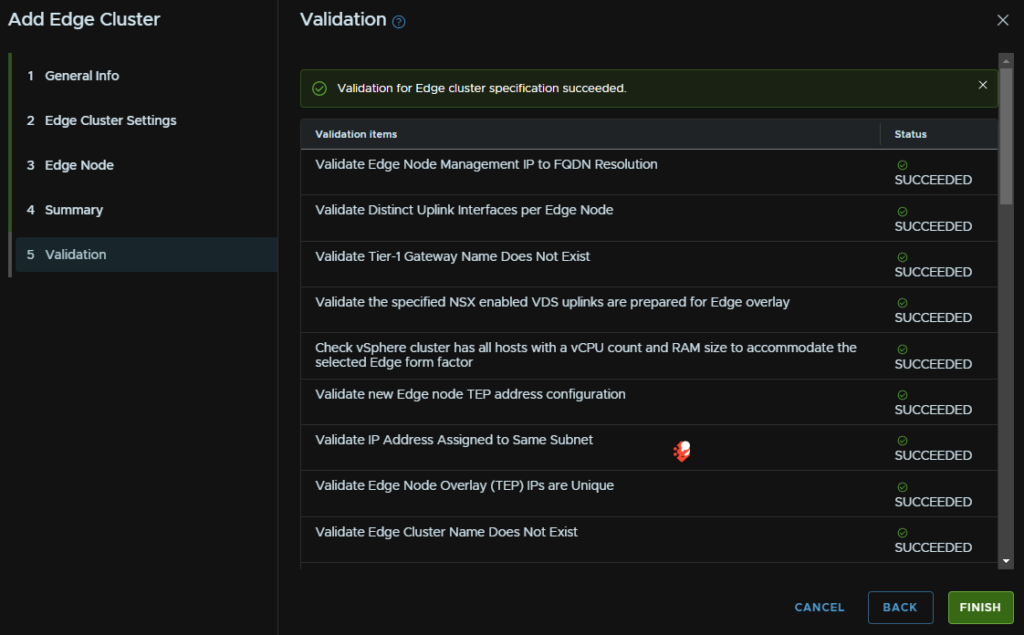
Then click Next and check the summary, when you are happy, click Next, wait for the validation to succeed and then click Finish
Just ensure you have the right config as you cant update the Edge cluster and removing it requires a CLI script

One thing to note, and I have no idea why I was getting this error, but it was consistently happening with some test Edge clusters to confirm, was BGP would always fail and the T0 Gateway from NSX would report as down
Assuming you have routability to the uplink networks, which I would suggest having as a test, you should be able to ping your uplink interfaces from another network
I found I could not, oddly, ping works from the router on the same VLAN, but you 100% should be able to ping over L3
I am assuming this is something with OPNsense, as while the static route helped, the refresh of the route map service is what got it working, so its unlikely you will have this is a production environment, but I have included what I did in case it helps anyone else
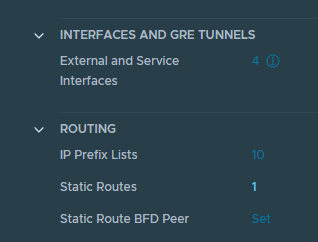
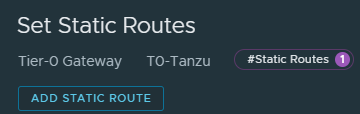
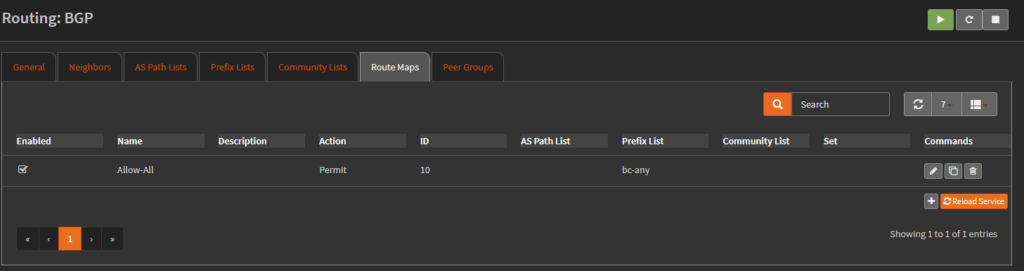
The only solution I would find was setting a static route on the NSX T0 GW the SDDC manager create, you can find this under Routing, where my 1 is it should say Set and click it
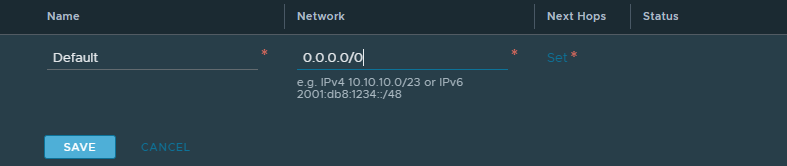
Add a new static route
Give it any name, and the network 0.0.0.0/0, then click Set to add hops
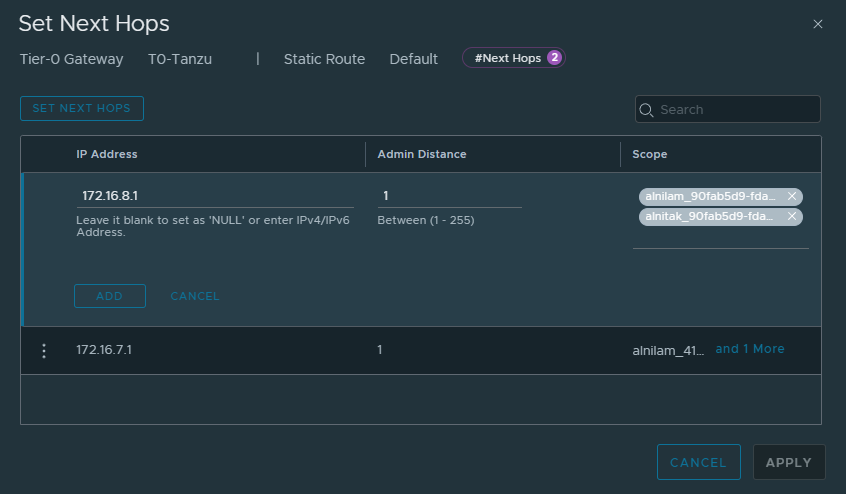
Add two hops, with the next hop as the BGP neighbour, and for the scope select the uplink interfaces on the corresponding networks and click Apply
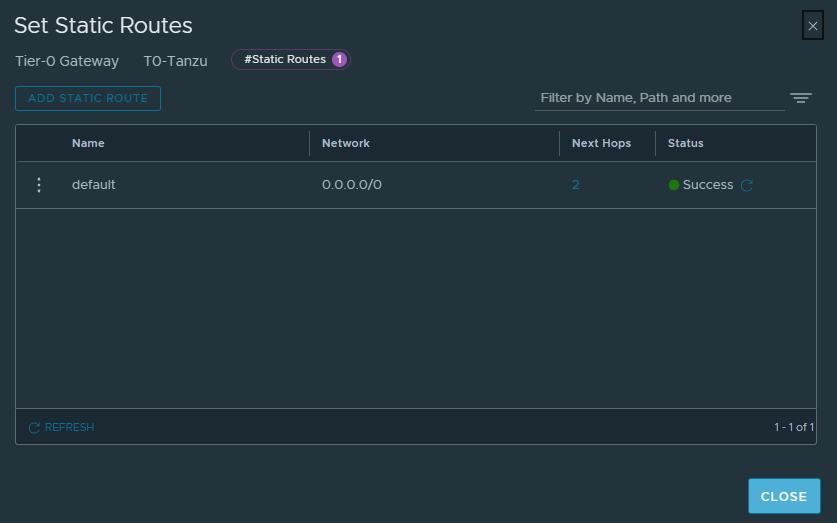
It should then say success
And then restarted the route map service in OPNsense
I get the feeling this is an OPNsense issue, but I dont have anything else using BGP to confirm
Within moments I could ping the uplink interfaces
I then waited for this take to pass ok, I did have to restart the whole job

4.2 – Deploying The Application Virtual Networks
Now we have the NSX Edge cluster setup we need some networks to move on and get Aria setup
Head to Inventory/Workload Domains and select your domain, mine is istlab-vcf
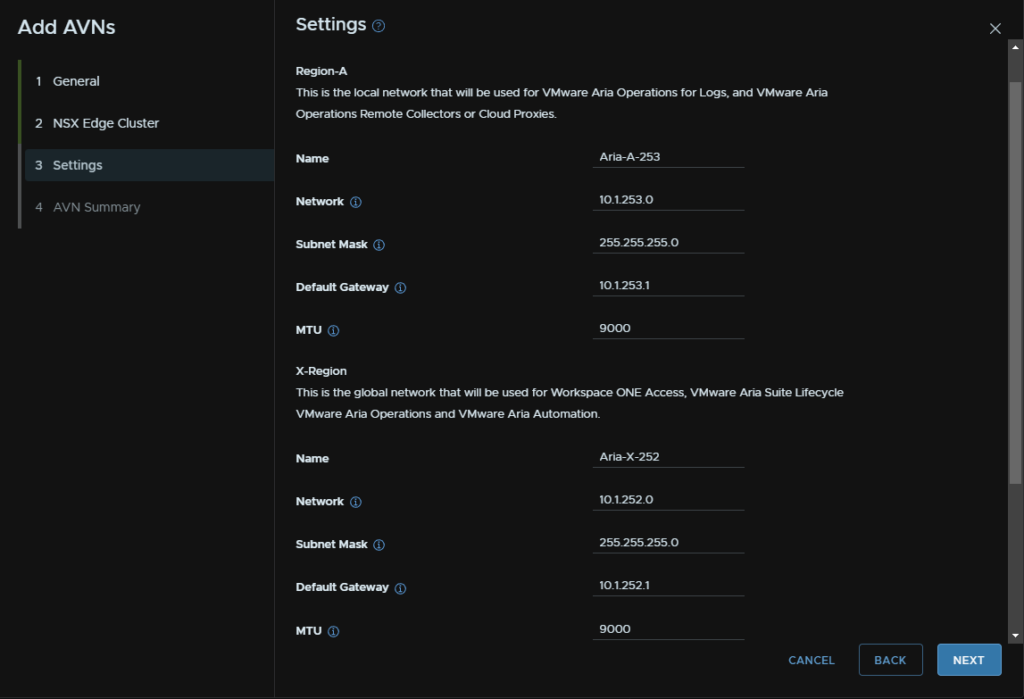
Click Actions and then Add AVNs
This is an Application Virtual Network
For Aria, we are going to setup some virtual networks to deploy the appliances onto
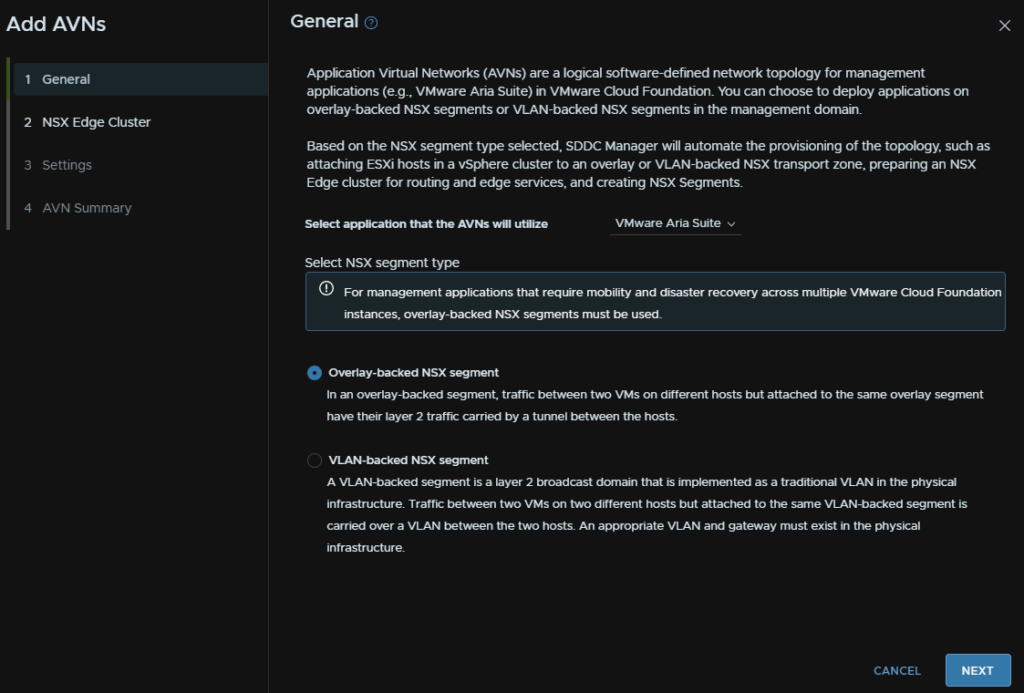
Select the NSX Cluster and the T1 gateway from earlier

We need a Region A network and a Region X network, you’ll need 2 subnets for this
/24 is overkill but I find it easier to manage
5 – Aria
5.1 – Setting The Depot Up
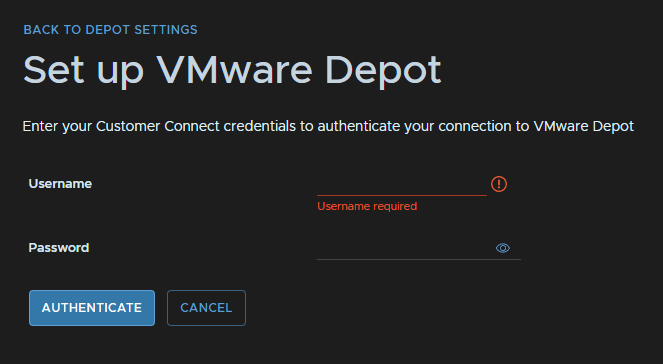
To set the Depot up head to Administration/Depot Settings and under VMware Depot, click Authenticate
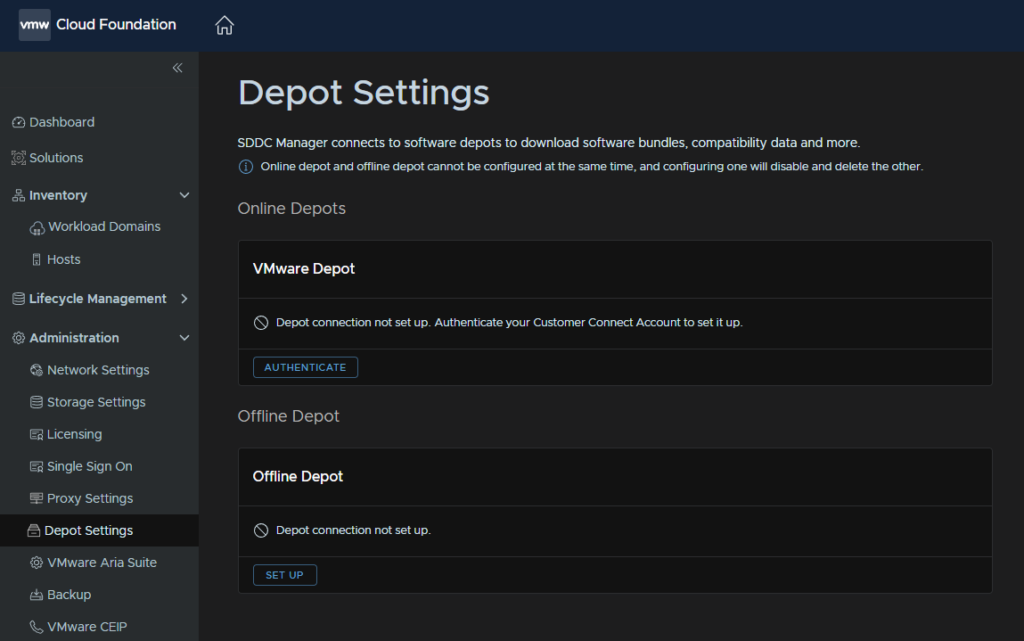
Enter your Broadcom portal account details and click Authenticate
It is worth noting, the your Broadcom account will have its password expiry, and the account used here will need updating, if you change it and dont update it here, it will lock your account out
5.2 – Installing Aria Suite Lifecycle
After about 15-30 mins of connecting the software depot, bundles should pull through
The first thing we are going to check is Lifecycle Management/Release Versions, this shows we have our one Workload Domain on 5.2.0.0, what we are interested in here is the version of the Aria Suite Lifecycle from the BOM on the right, thats what we want to download and install
You can switch release versions by clicking it
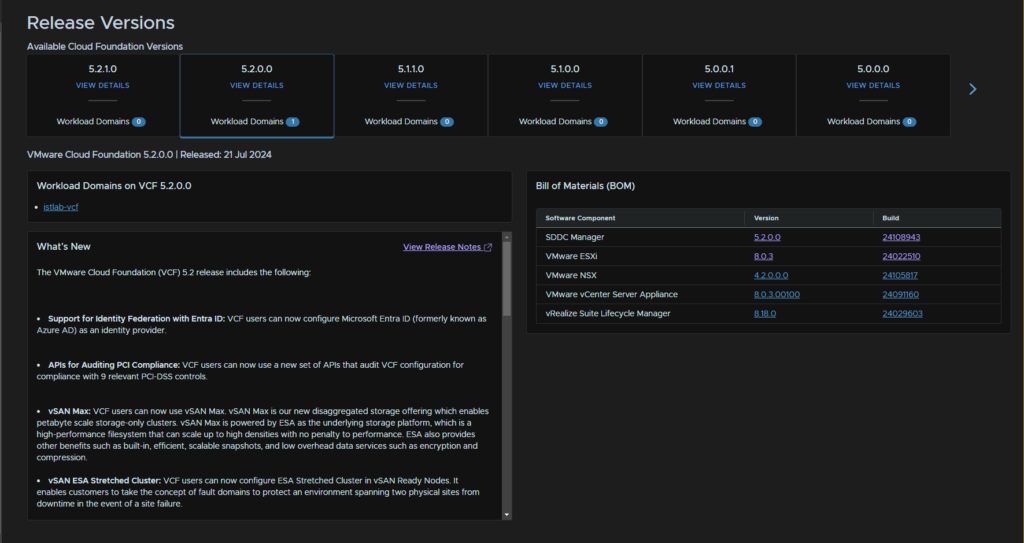
Here the BOM lists it as 8.18, vRealize is the old name for Aria, which oddly hasnt been updated here yet
So if we now head to Lifecycle Management/Bundle Management, we can search through for it, though there is a lot
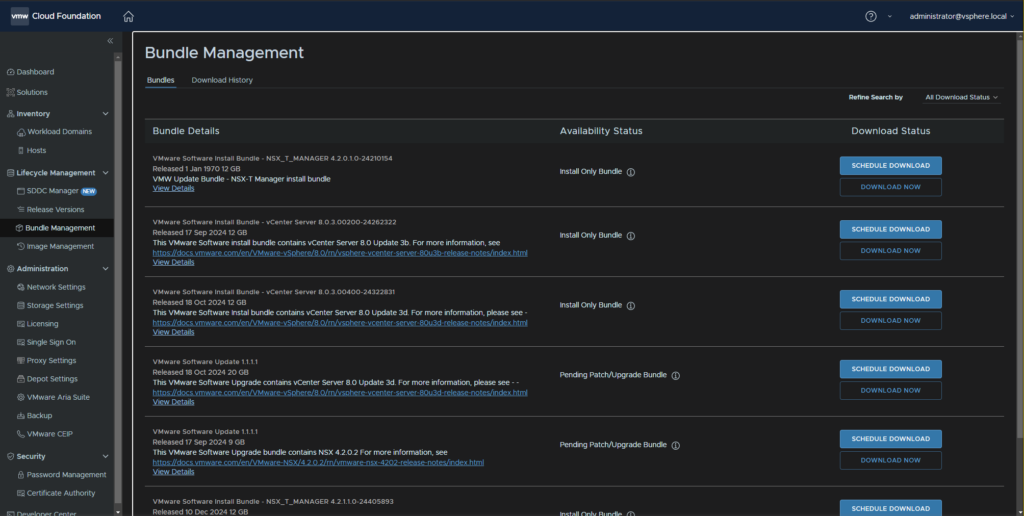
At the bottom we can show more bundles
After showing more bundles I was able to see the bundle we need here, and I can click Download Now to grab it

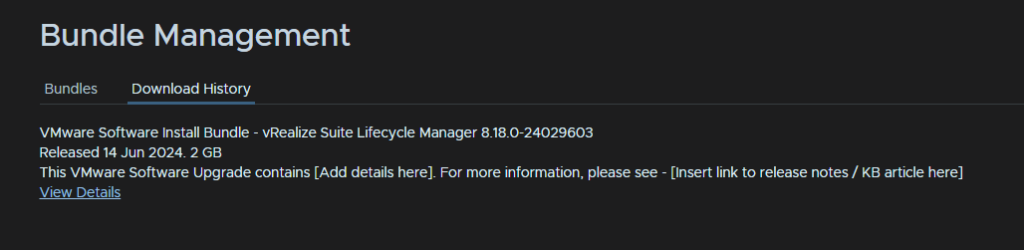
Now thats been downloaded and verified it will show up in Download History
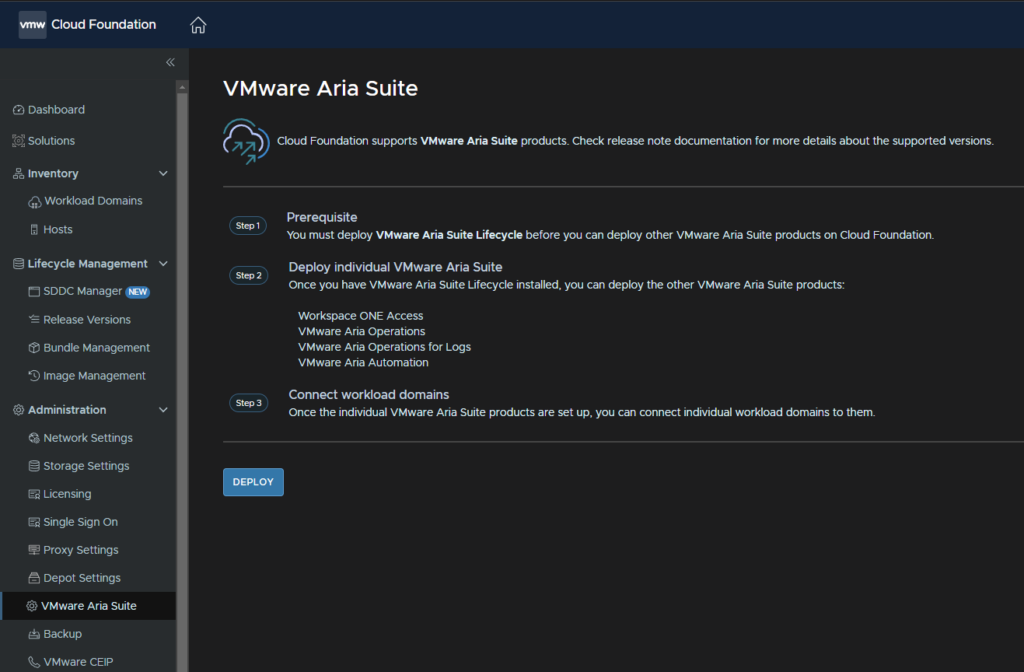
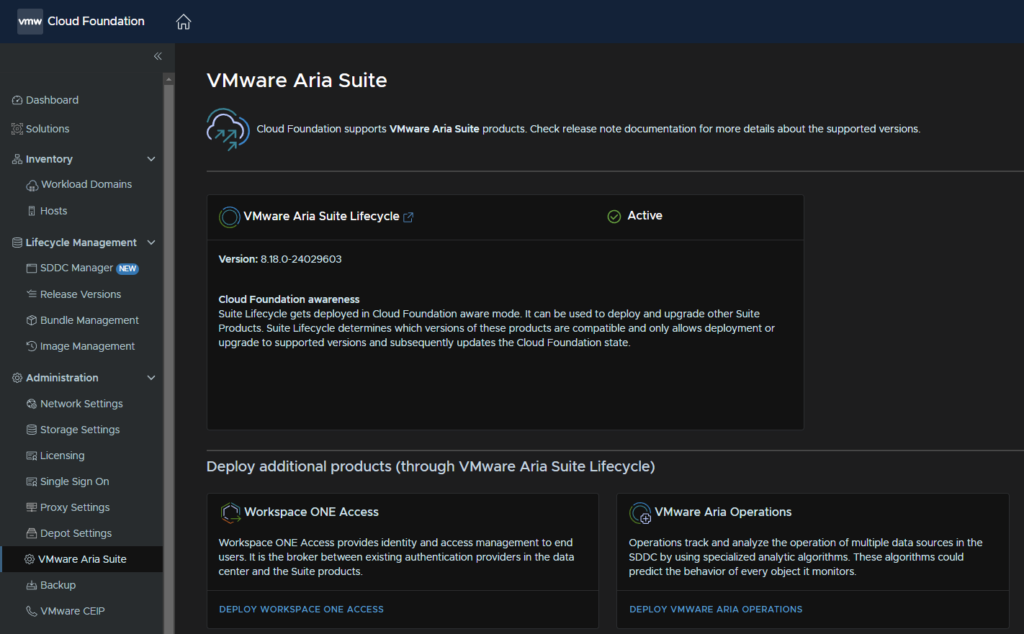
Now we can head to Administration/VMware Aria Suite and click Deploy
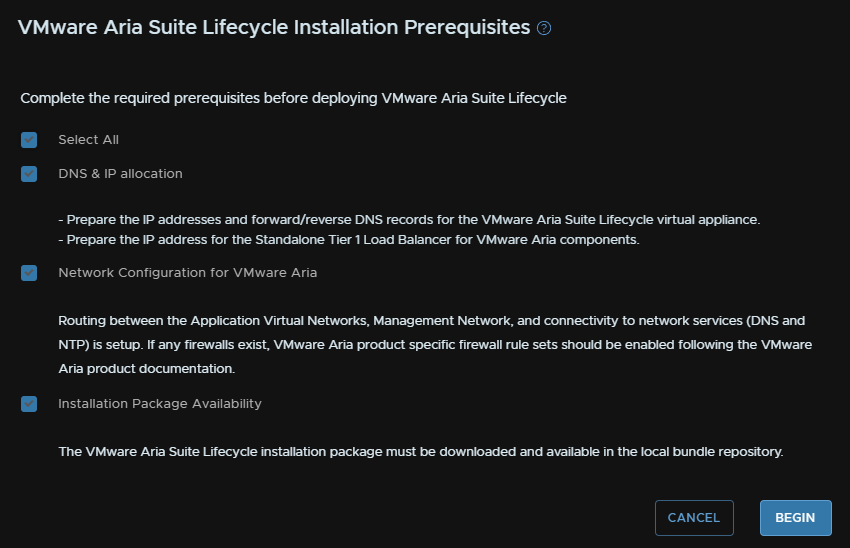
Check the prerequisites and click Begin
It will auto detect the Cross instance NSX segment we created earlier, the X instance, and has pre populated the DNS servers from the SDDC manager during its deployment
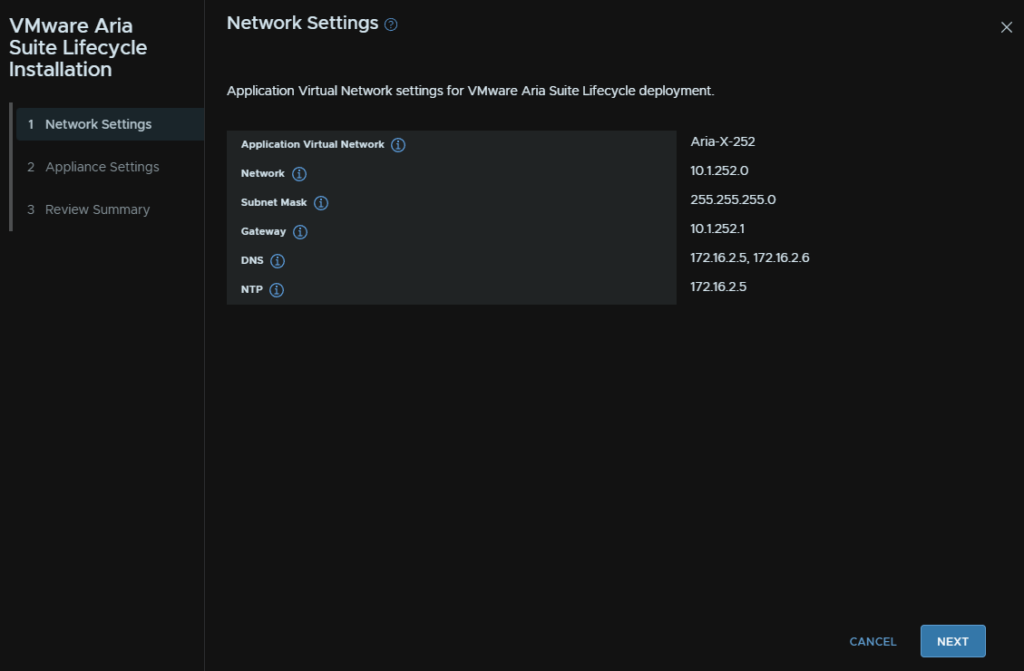
We then need an FQDN for the appliance, registered to DNS
And the a free IP on the NSX segment, Aria will generate the IP for the appliance from the fqdn resolution in DNS, this IP goes in the NSX T1 Gateway entry, I have used 10.1.252.10
Then a password for the vcfadmin@local account, and the root account
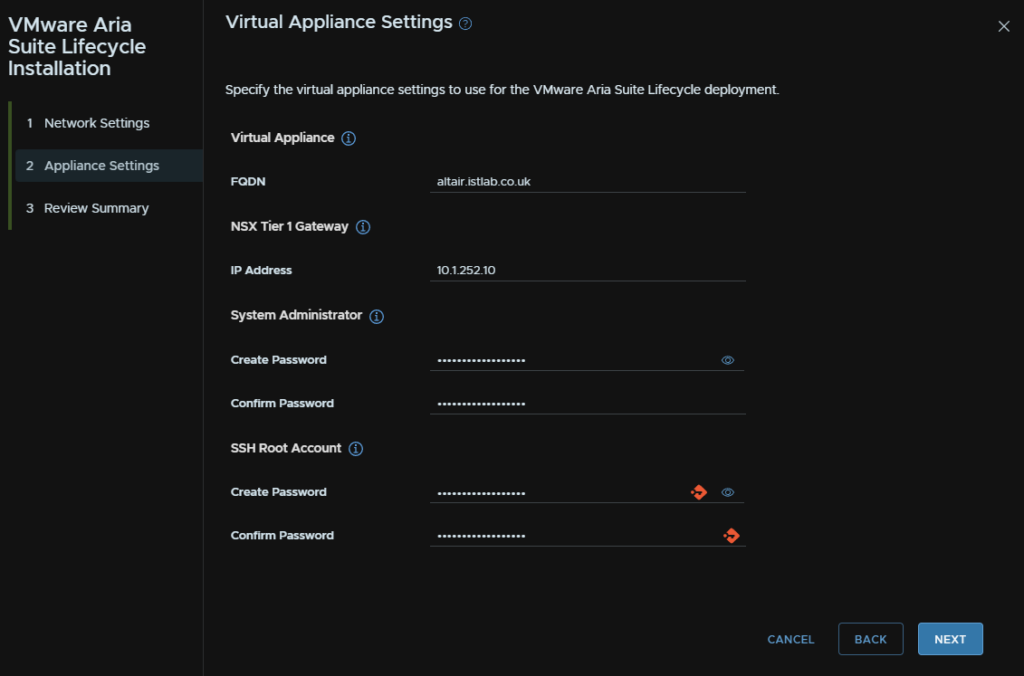
Then hit review and finish
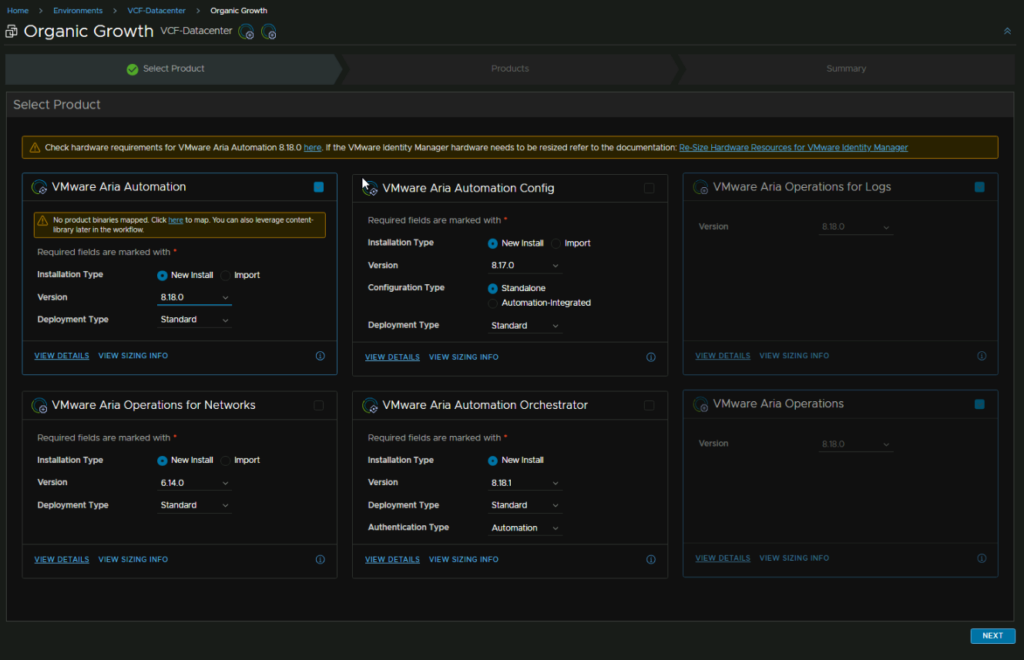
5.3 – Mapping All The Aria OVAs
We will want to create an Aria content library for Aria Lifecycle to use when deploying appliances
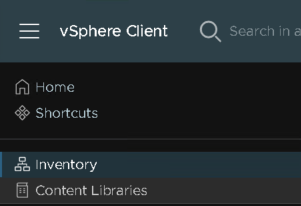
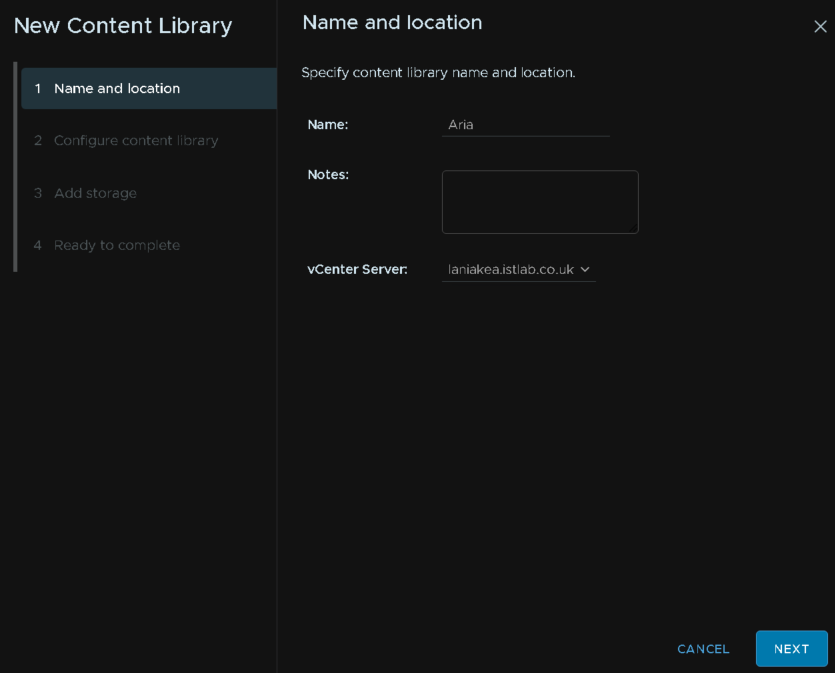
In vCenter, click the three lines menu and click Content Libraries
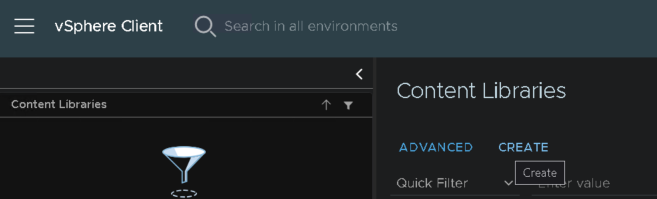
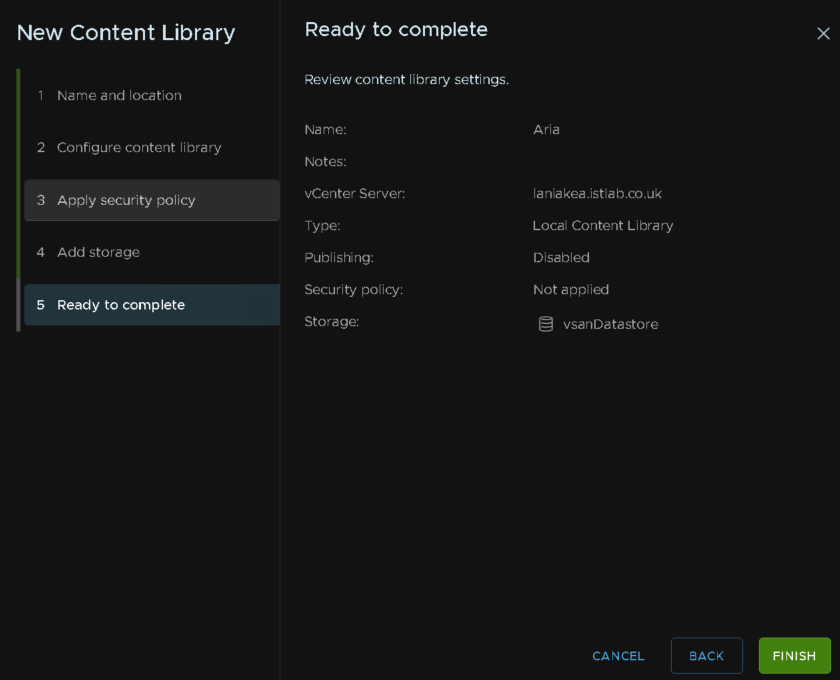
Then click Create
Give it a name
Keep it as a local content library
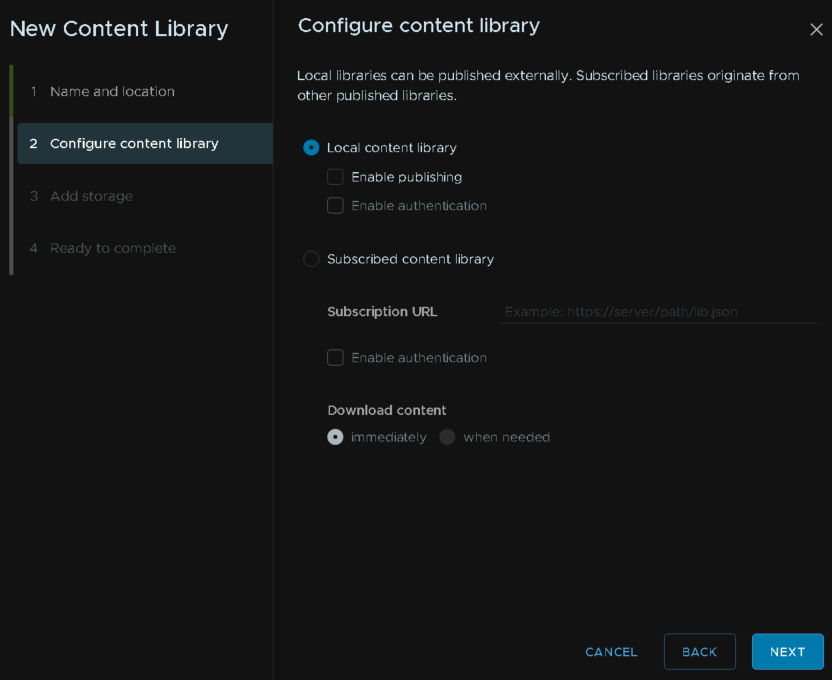
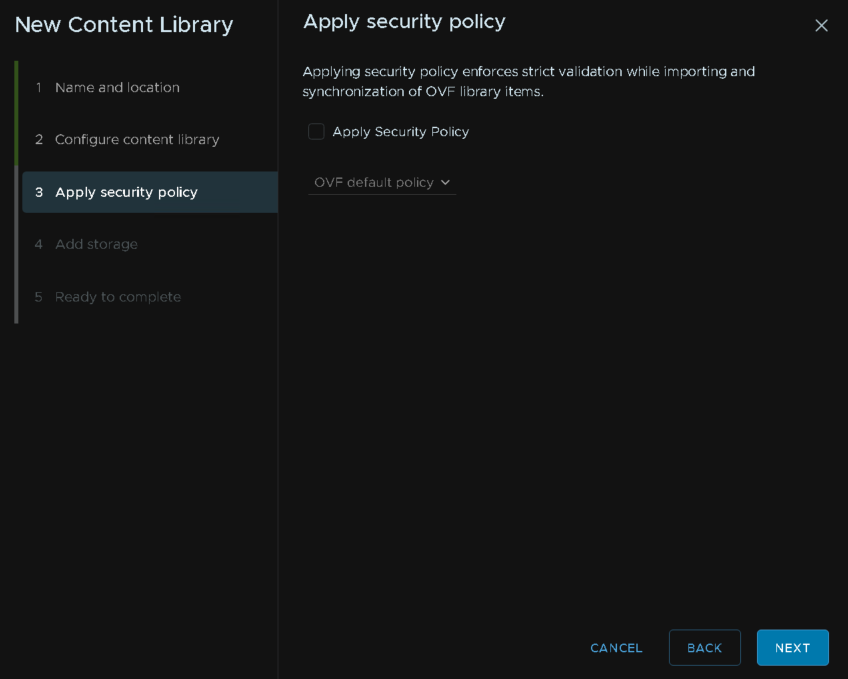
Click next here
Select your storage, this will be the vSAN datastore
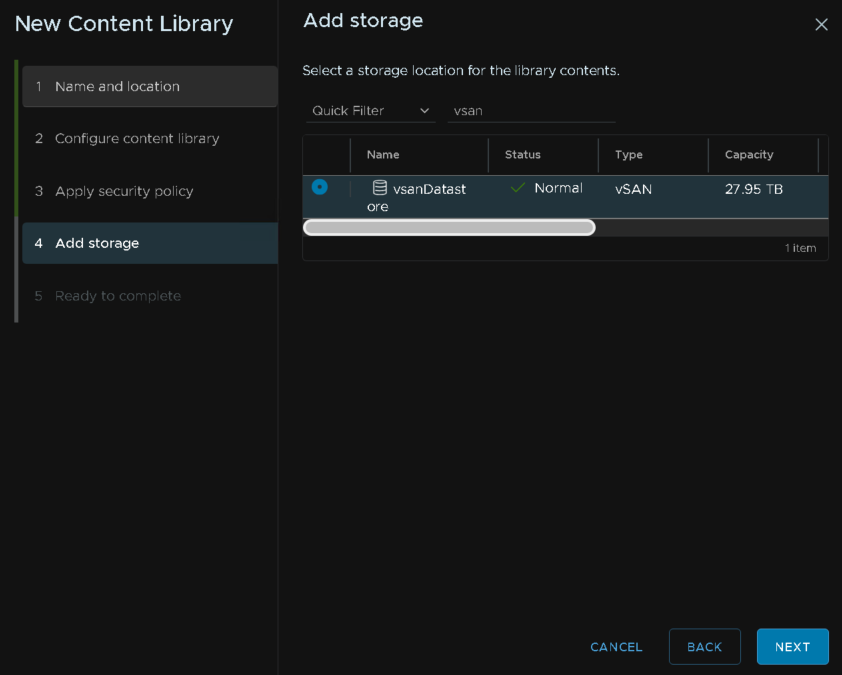
Then click finish
Search and click Aria Universal in the Broadcom Portal
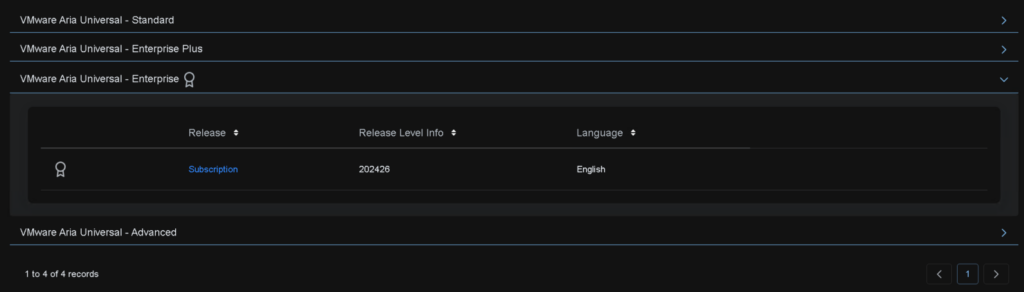
Click Aria Universal Enterprise and click the Subscription link
We need OVAs from most of these, we dont need anything from Automation Config, Automation Orchestrator and Lifecycle as its deployed
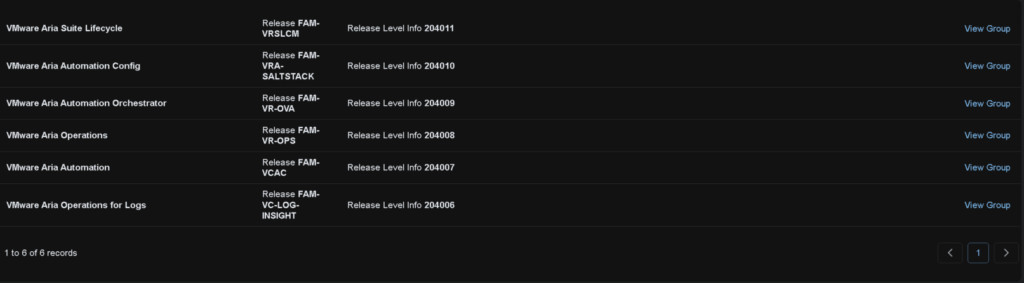
Do not rename any of the downloads, as Aria Lifecycle can have issues with different named files
From Aria Operations we need these, I have 8.18.0 to match our BOM for VCF 5.2

From automation we need this, this ISO has the IDM appliance which is a pain to get, so its easier to extract it from the ISO

Once this has downloaded, we can double click to mount the ISO, and under the ova folder, we can see the vidm.ova and vra.ova file, we need to copy that and upload it to the content library

This for Aria Operations For Logs

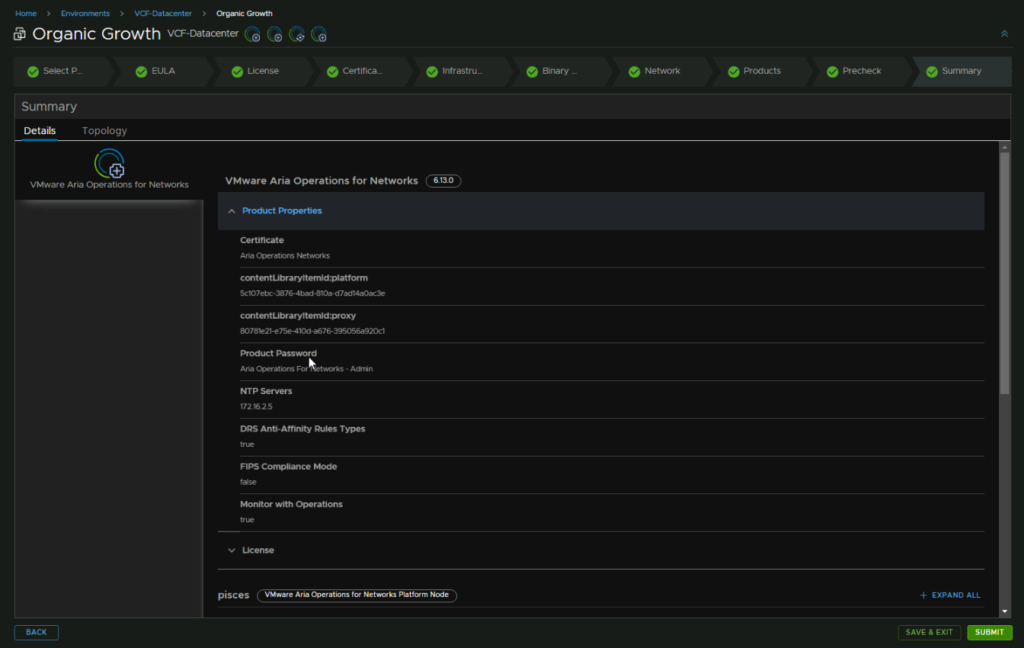
Aria Operations For Networks is under its own tab

We want release 6.13 for now, as everything else is 8.18, its likely interoperable with 6.14, but I want to keep with what was release when I planned this, and this gives me room for a full upgrade later
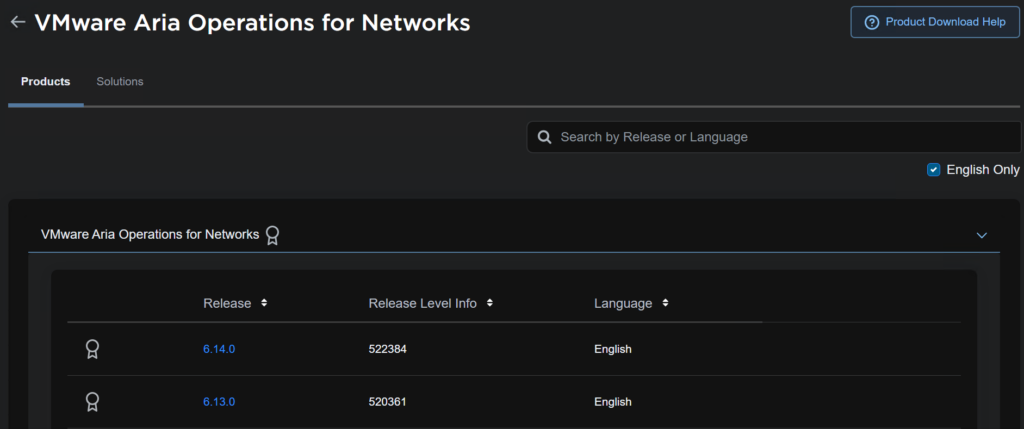
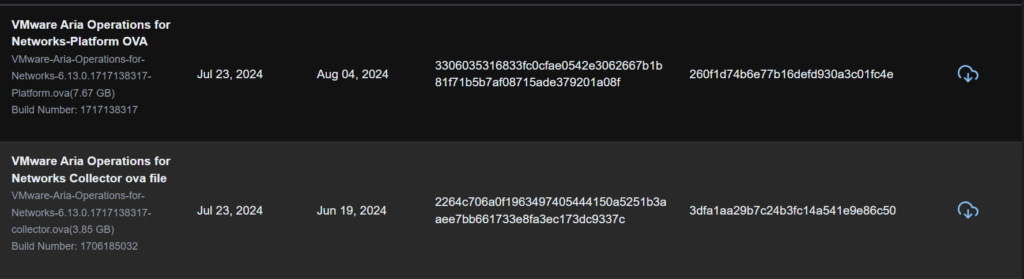
We then need both the platform and collector OVA and upload these to the Aria content library
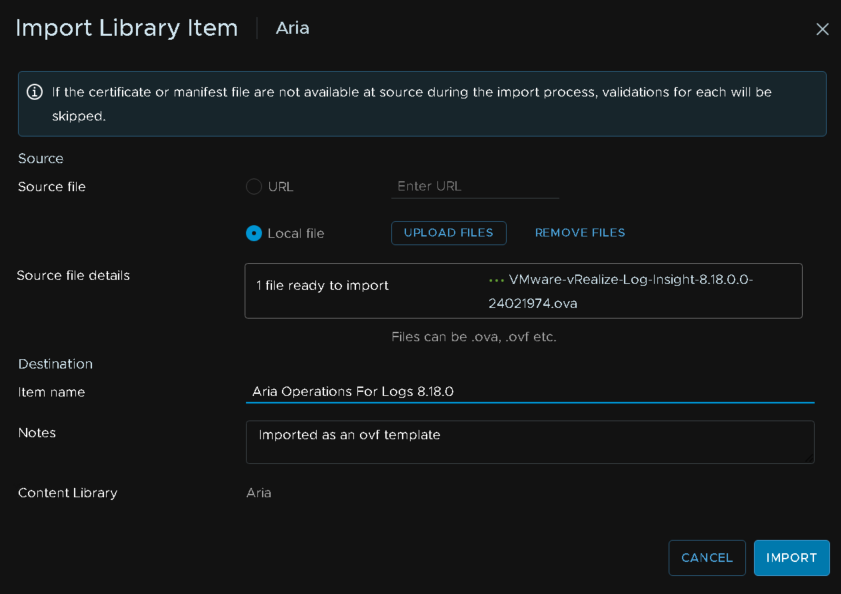
Once we have our OVAs, head back to the content library and select it, the click Actions and Import Item
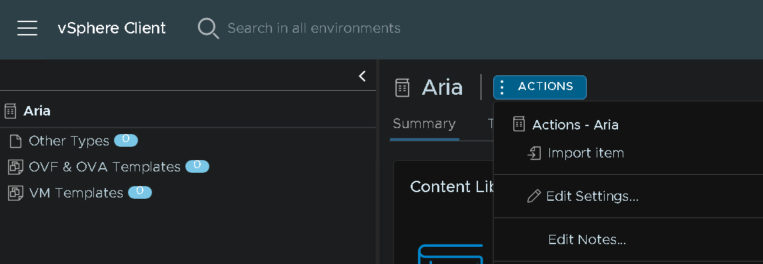
Select local file, and Upload File

Double click the OVA and give it a friendly item name, then import
5.4 – Installing Identity Manager
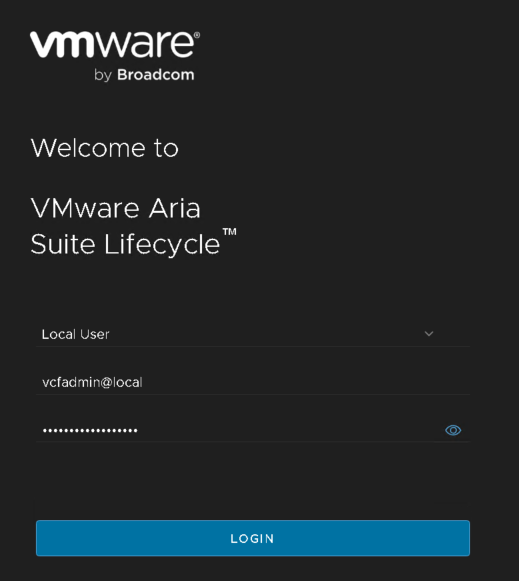
Head to Administration/VMware Aria Suite, and click Deploy on the workspace one widget at the bottom
Login to Aria Suite lifecycle with the vcfadmin@local setup in the deployment
Head to Locker first
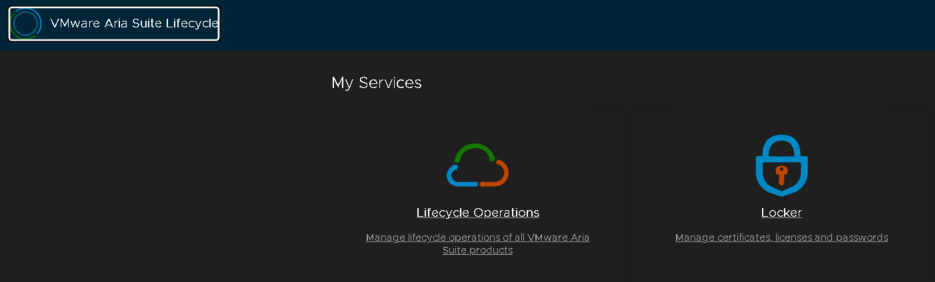
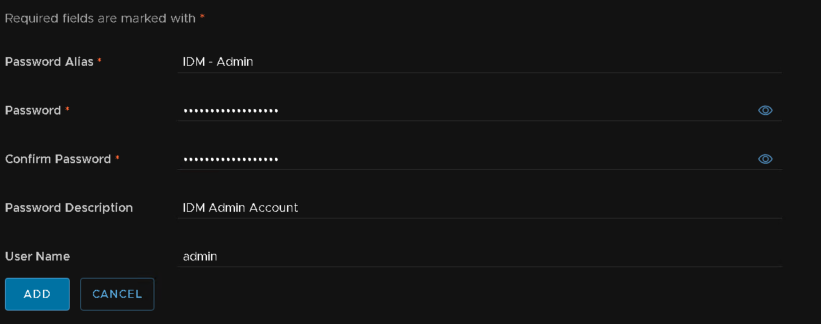
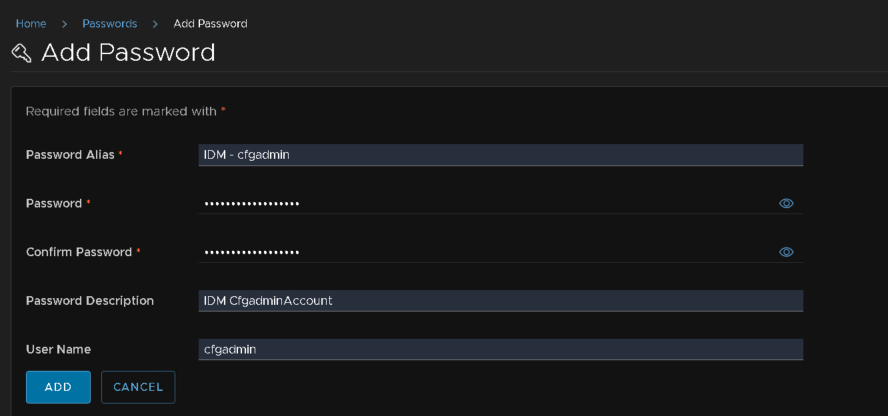
We want one for the IDM admin account
And another for the cfgadmin, the username doesnt matter here
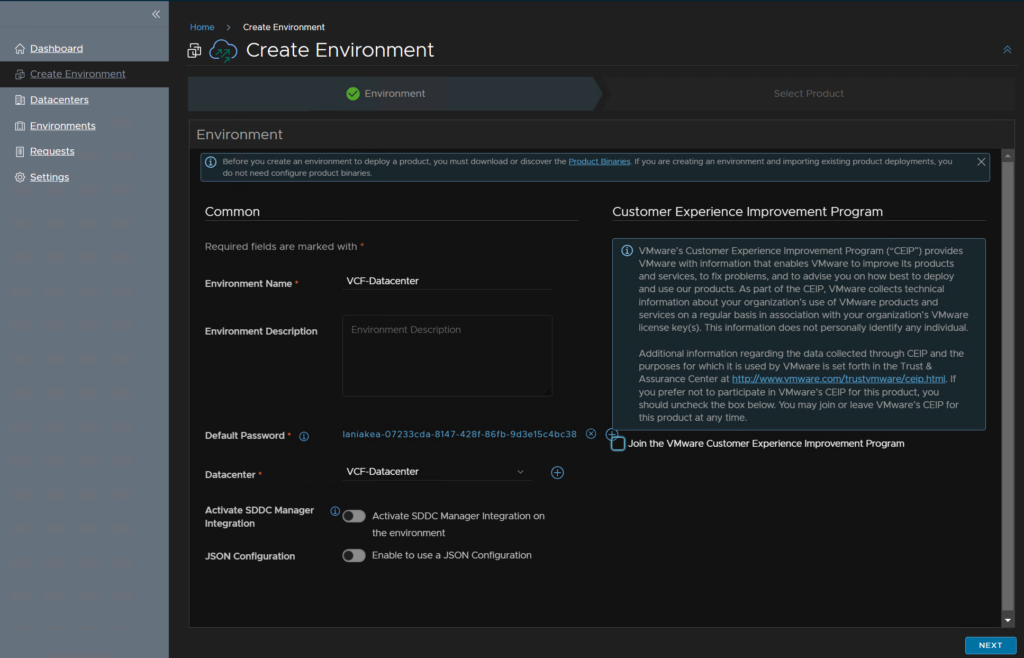
Head to LifeCycle Operations
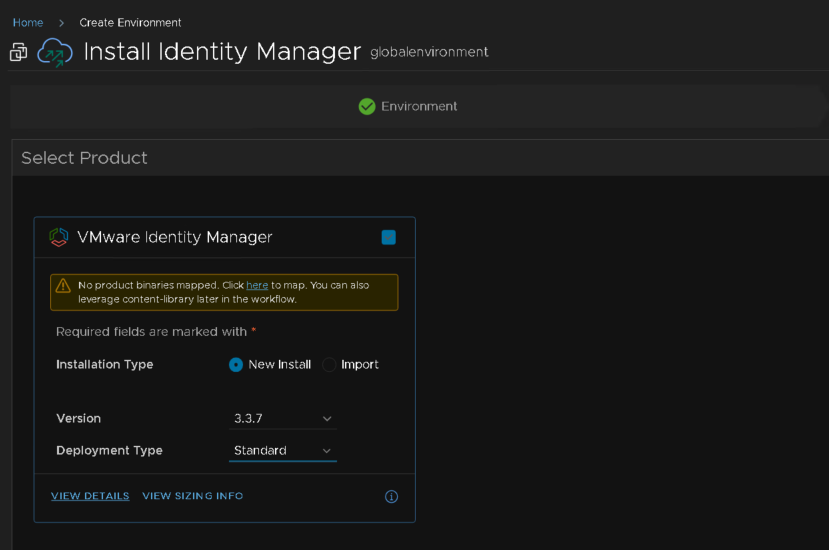
Head to Create Environment on the left, then, enable the toggle on Instal Identity Manager, the environment name is fixed, select the datacenter, this must have those Aria segments we created earlier, and the Activate SDDC integration is also enabled and fixed
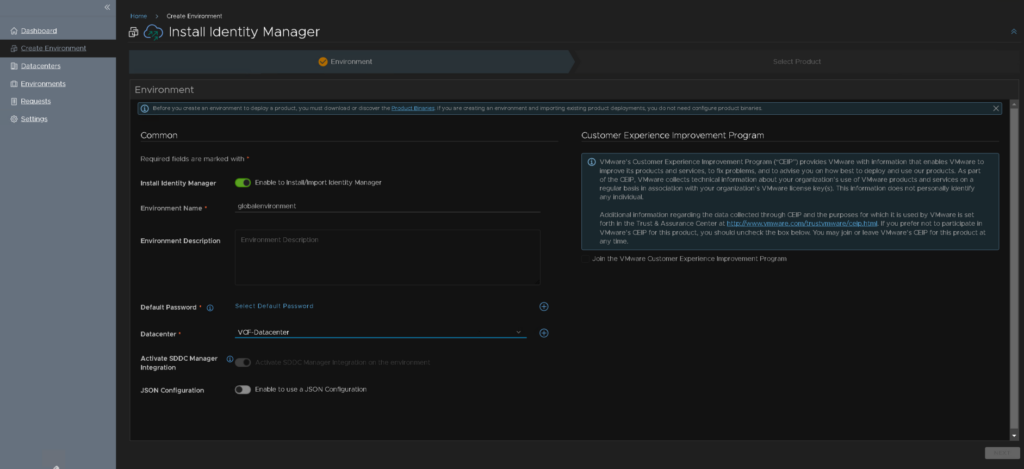
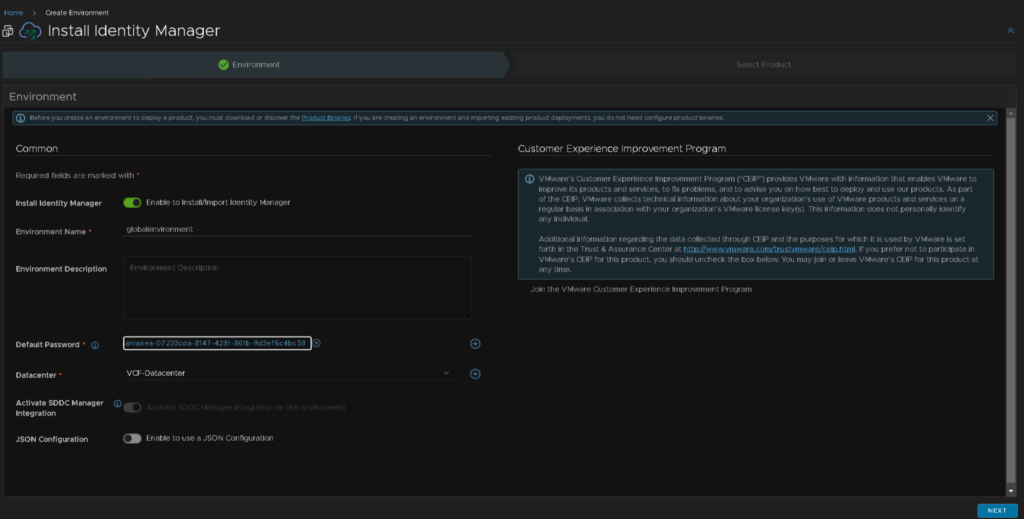
Under default password click it to select something, it can be anything, we will select the right ones later

I just used the vCenter one for now, and then click next in the bottom right
Select the check box to select it, and as this is a relatively small VCF deployment I am doing a standard non clustered deployment, the click next in the bottom right
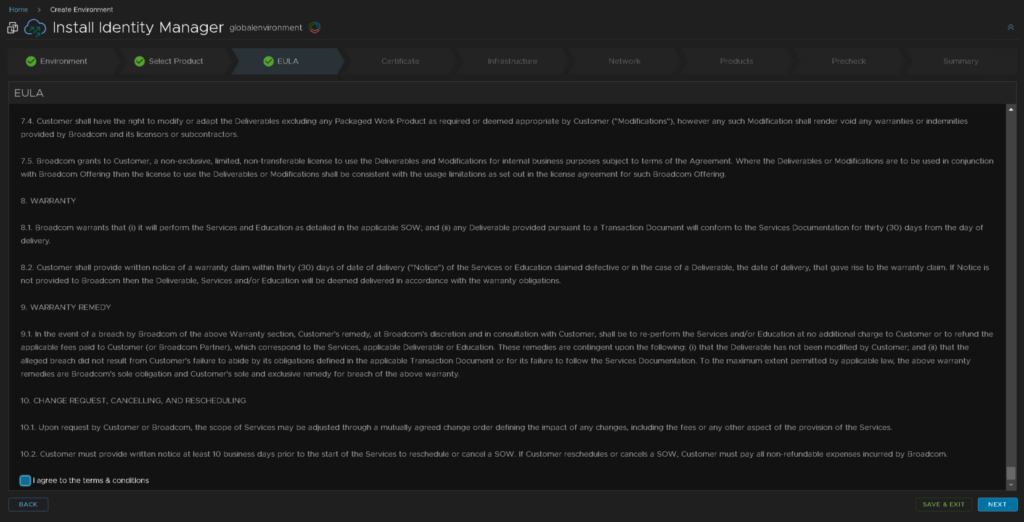
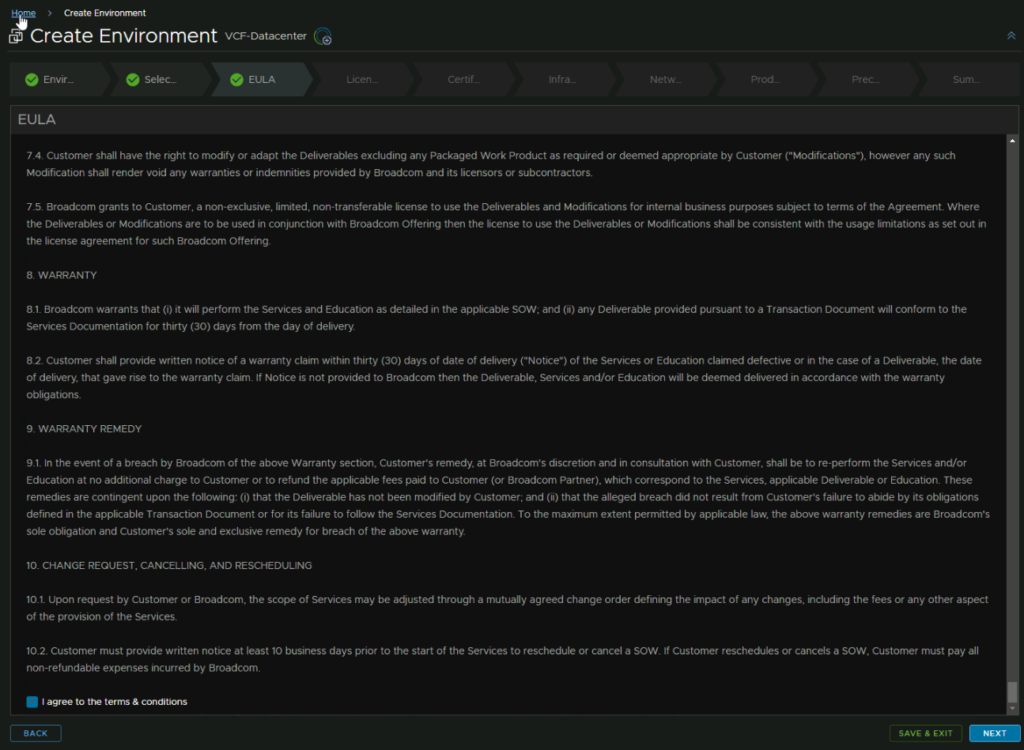
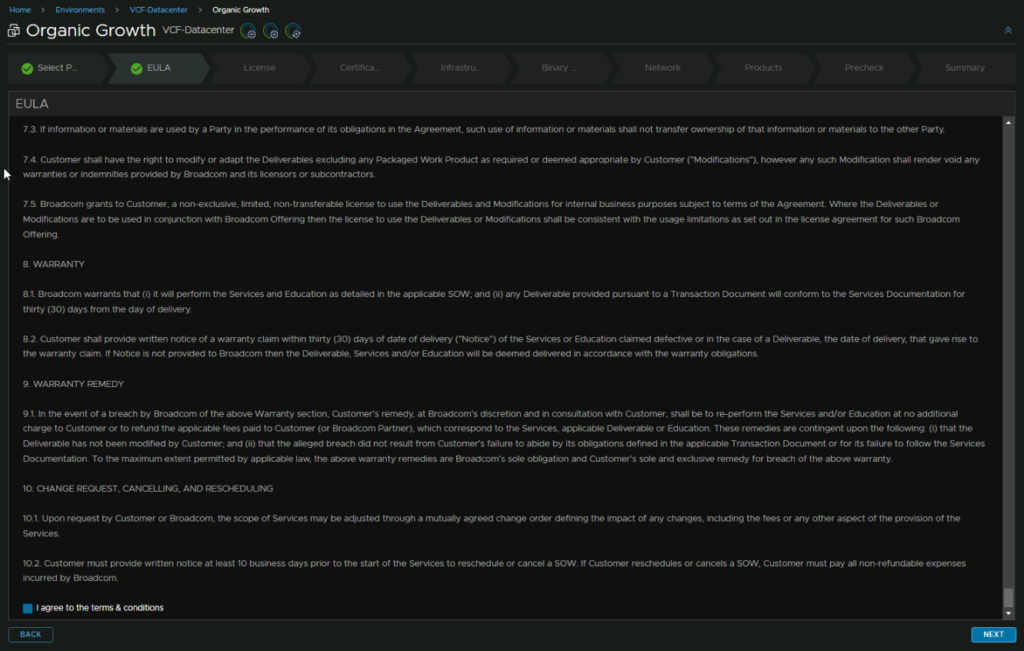
Accept the EULA
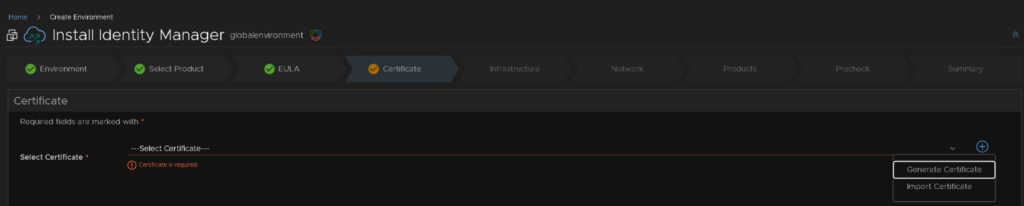
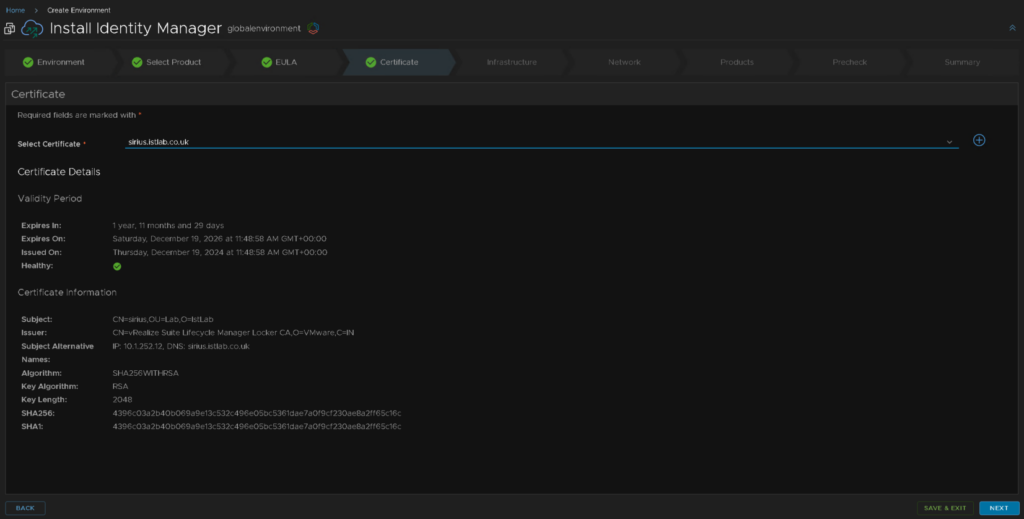
Click the plus here on the right to create a new self signed certificate
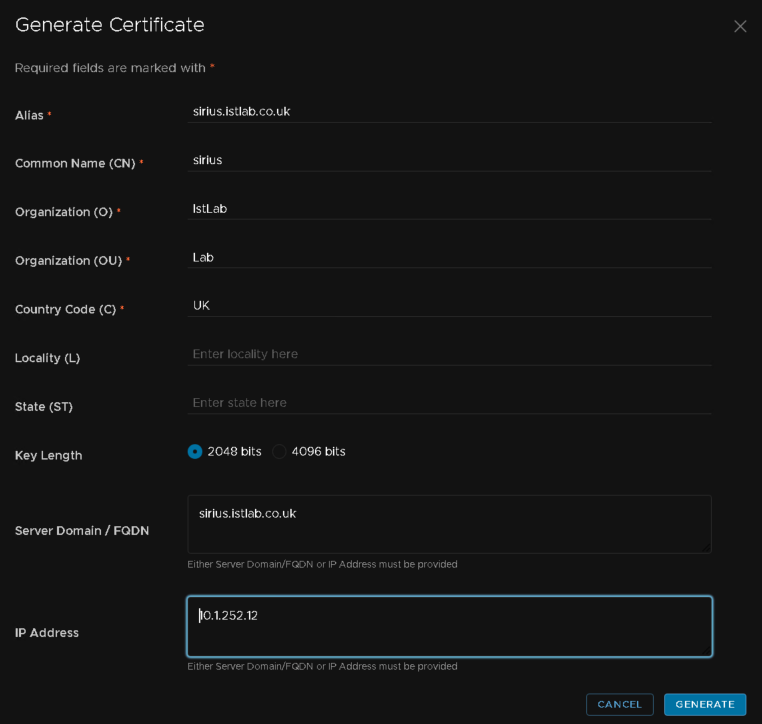
For this we will need an fqdn for the machine, and an IP on the X region segment, mine was 10.1.252.0/252
For alias, this can be anything, I have used the FQDN, as its internal the CN, O, OU and C dont largely matter, but at the bottom, the fqdn and associated IP must be correct for your server
Then click generate
We can then select our certificate and click next in the bottom right
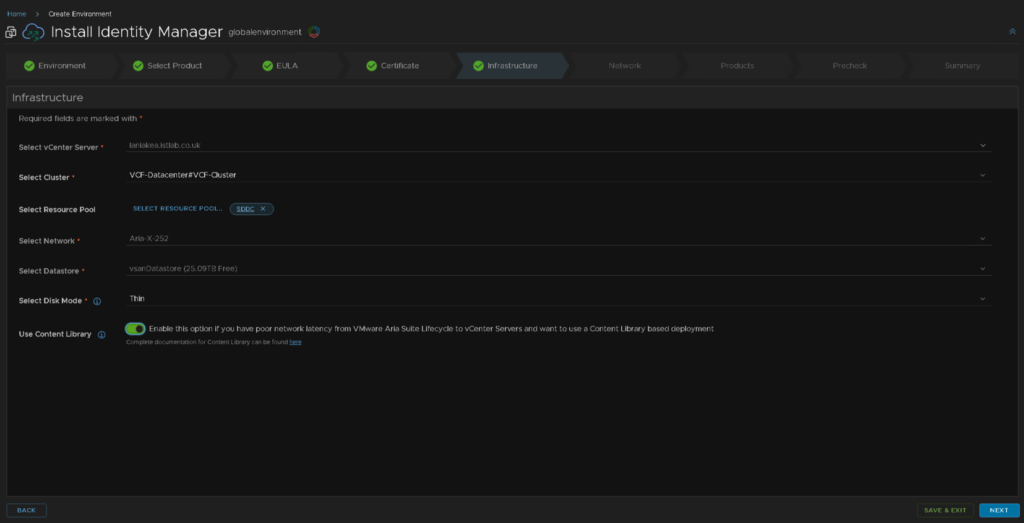
The Infrastructure is mostly populated, but make sure the cluster is correct for where all your management VMs are, and the resource pool is correct
We will also make sure thin disk mode is enabled and enable the content library for deployment and click next
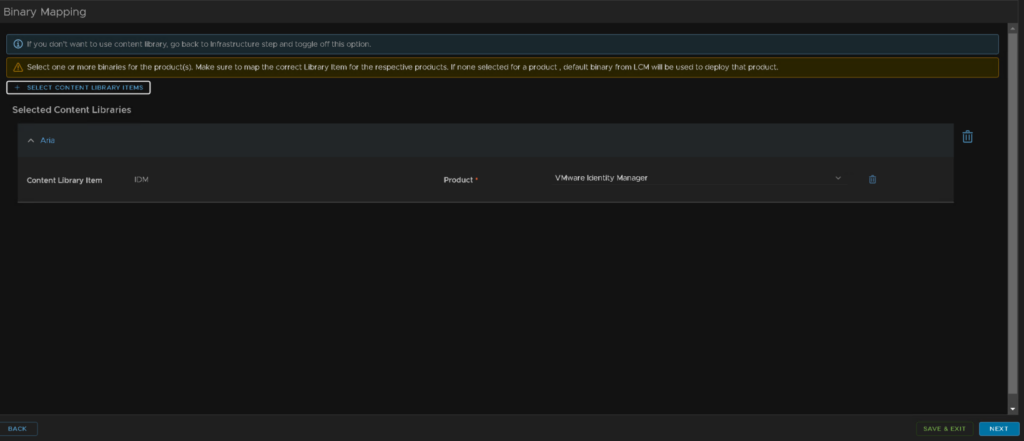
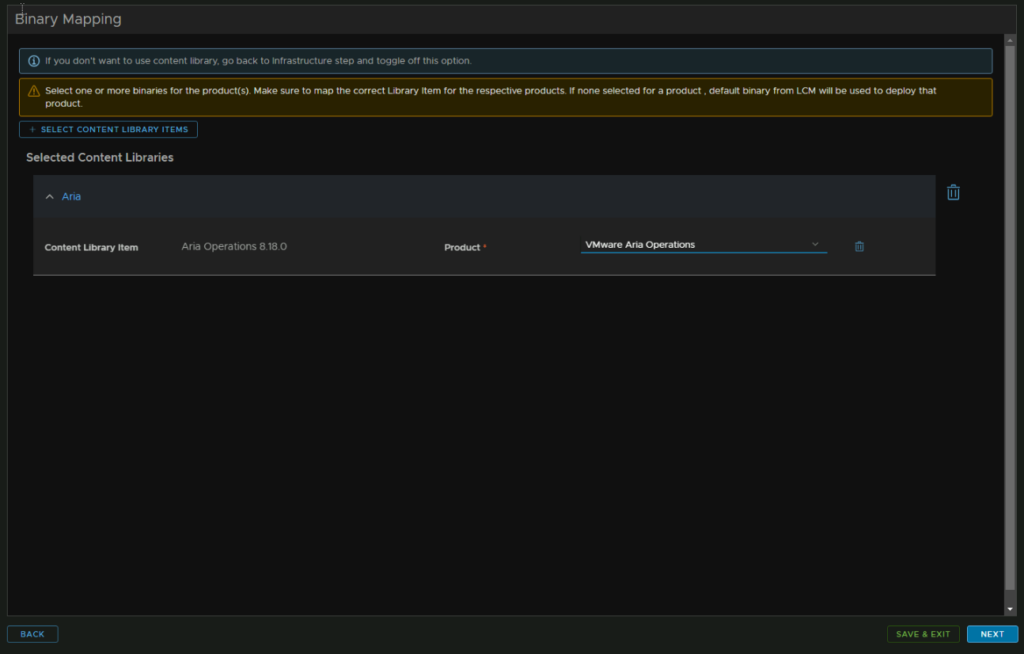
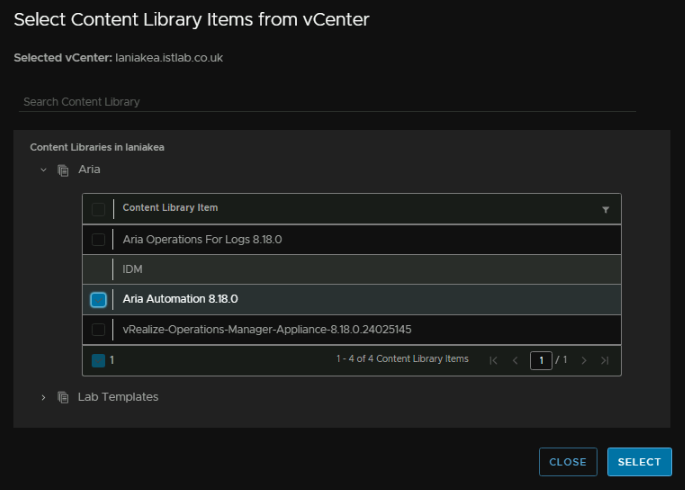
We then need to map the content library item, click Select Content Library Items

If its empty, vCenter and Aria havent synced, click into Datacenters and click the refresh arrow
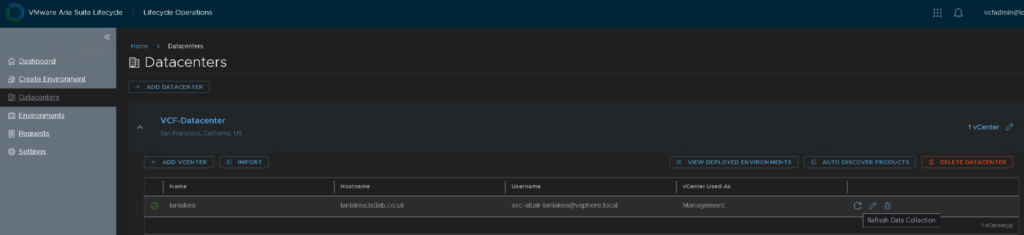
To head back to the config, go to Requests and click Pending Action on the global environment request

We can then select the IDM OVA, IDM is the friendly name I added in the content library
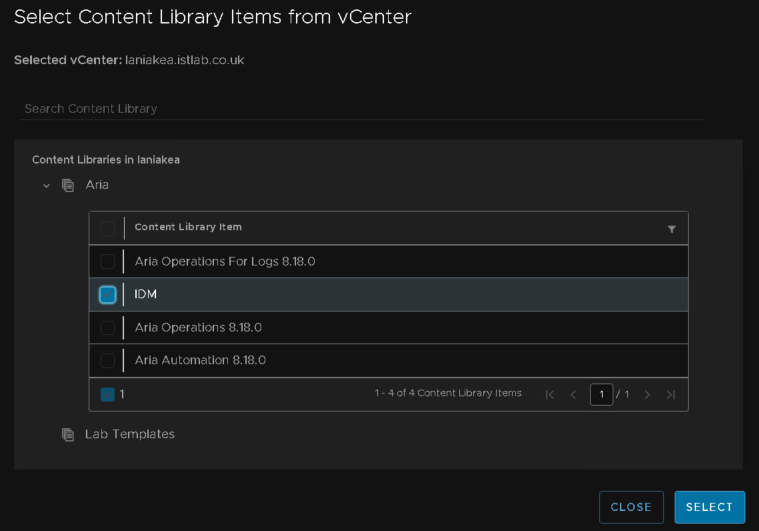
Then click next
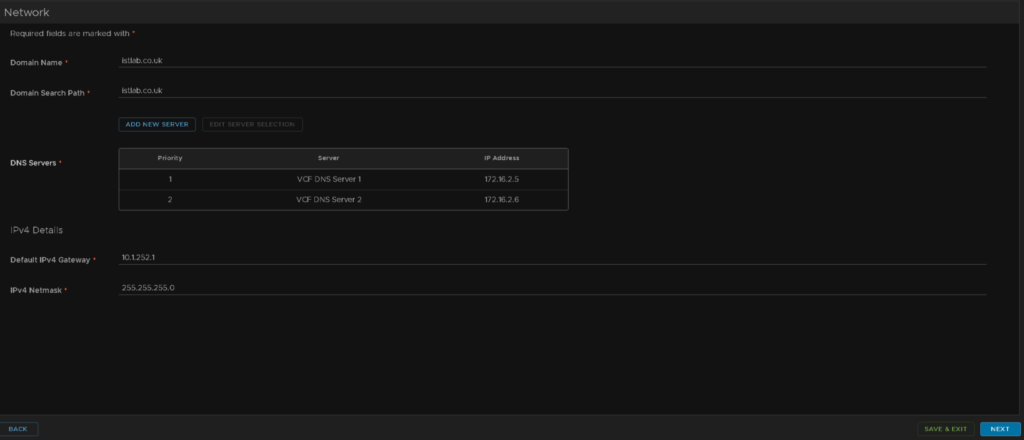
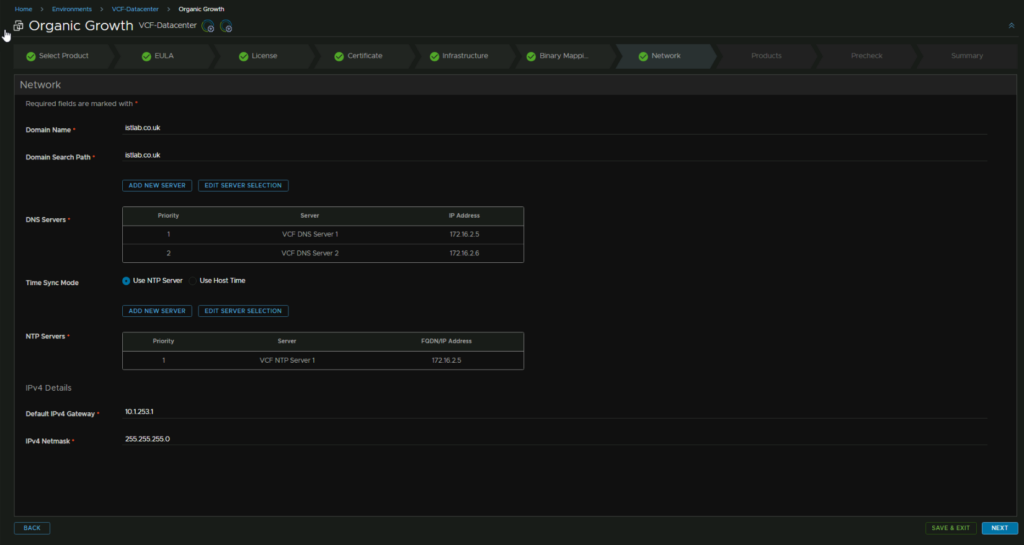
Under network, this should be correctly setup with your domain, search path and IPv4 details from the SDDC manager, and the DNS should also be correct, but you can add new servers
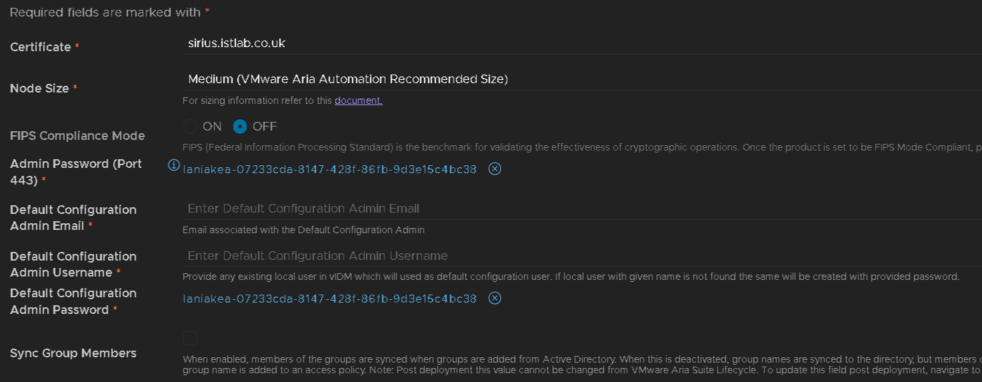
Lastly we have a few configuration details to enter
Ensure the correct certificate at the top is selected
For node size we want medium, as this is recommended for Aria automation
FIPS I am leaving off
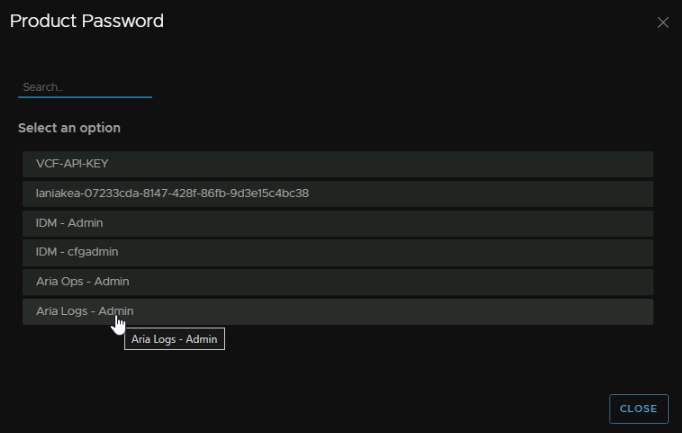
For the Admin and config admin passwords, you can click the little x and select the right one from the oens we created earlier
We will leave group members off as I am not adding this to AD
With the passwords added we have, I used my email for a login here, we did configure cfgadmin as the username in the password, but it will be overridden if you put something different here which caught me out when coming back to this
Meaning the admin to login to the UI is
[email protected]
And the password set in the IDM – cfgadmin secret as the password
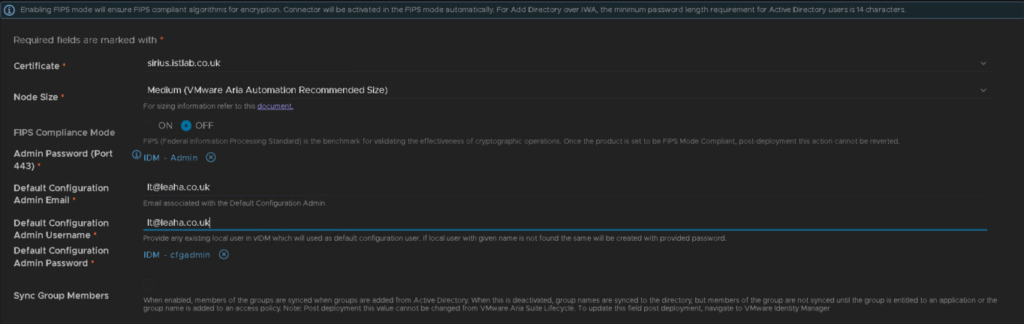
At the bottom, add the VM name, FQDN and IP address
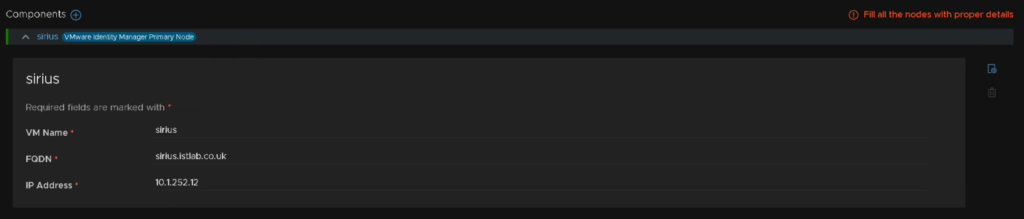
Then click next in the bottom right

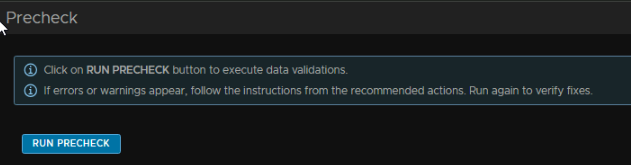
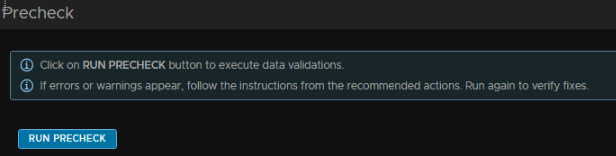
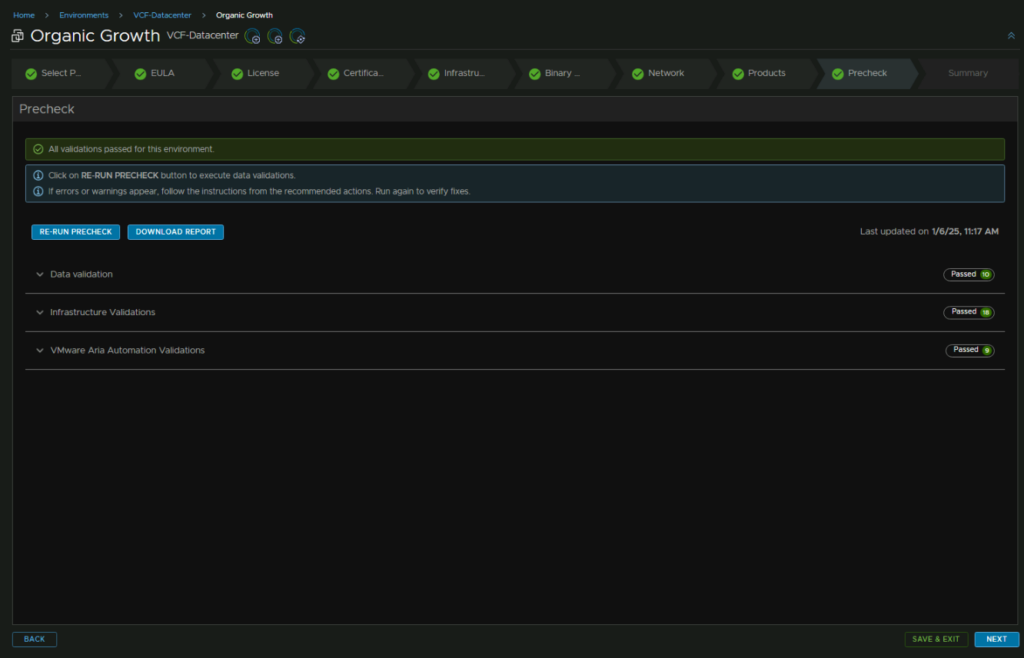
Click the Run Precheck box and ensure its all happy
I did get an error and some warnings, IDM doesnt seem to think vSphere 8U3 is a valid version, but it definitely is, and its the latest, so we can ignore those warnings, but I had an issue on the cfg admin password containing characters that werent allowed
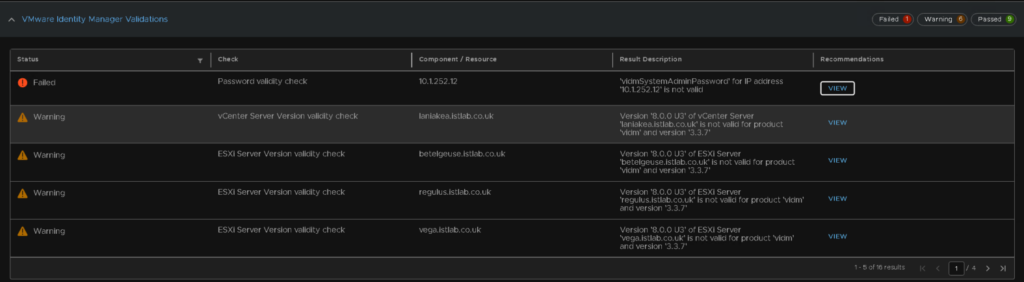
After fixing the passwords and re running the pre check, that error has gone, and I will ignore the vSphere version issues
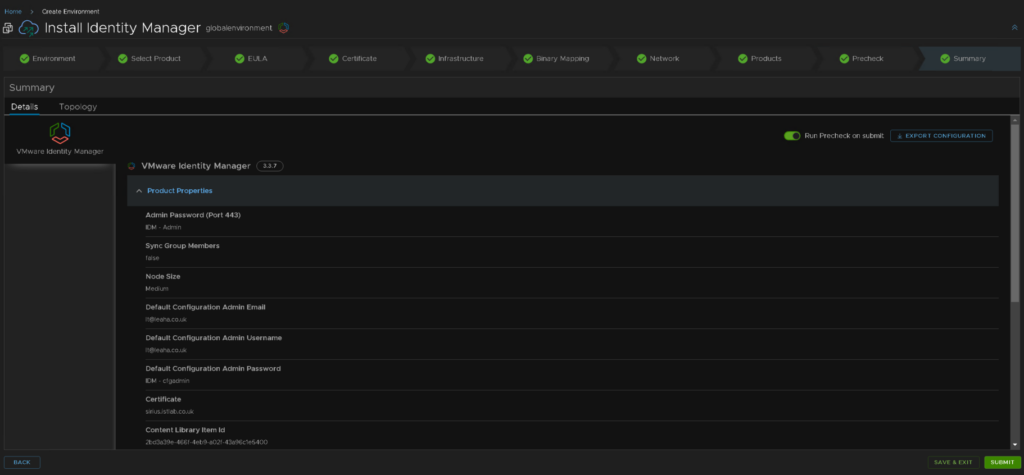
Then hit submit
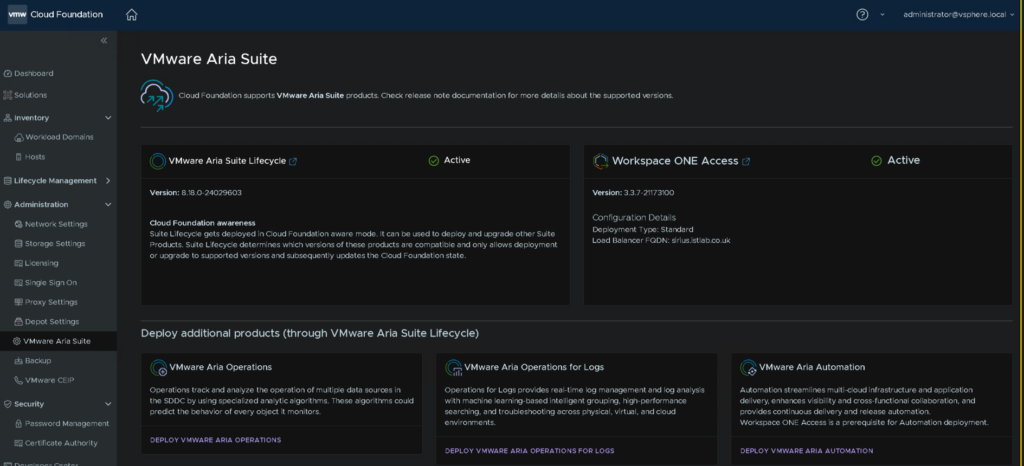
Once thats all done it will also show up in the SDDC manager under Administration/VMware Aria Suite
5.5 – Installing VCF Operations
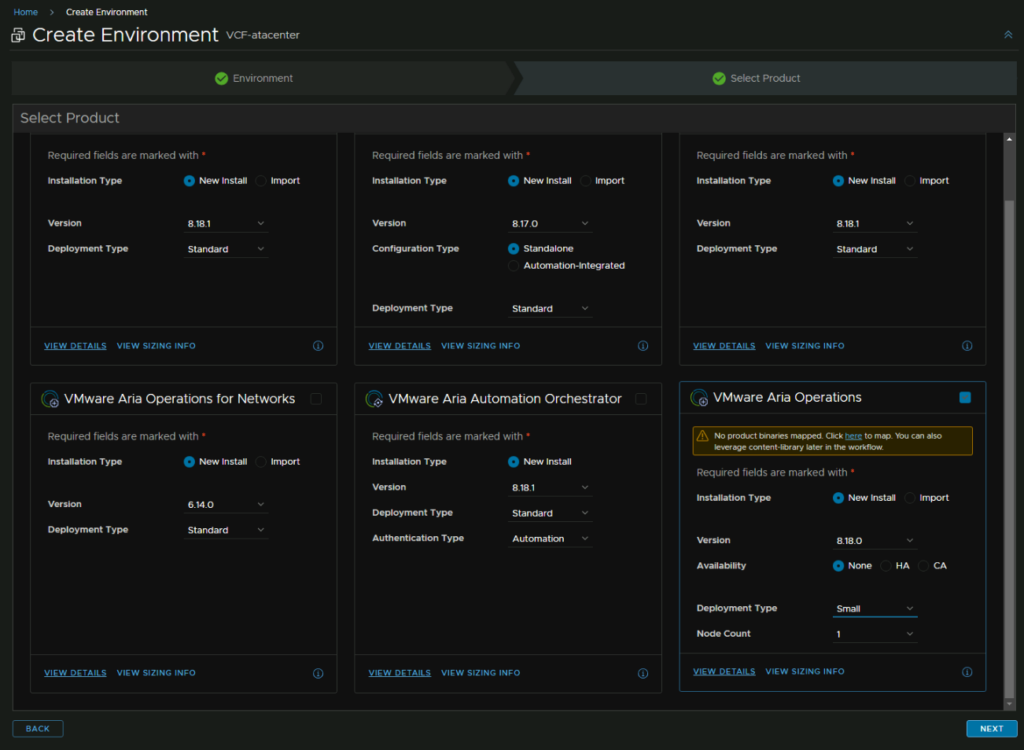
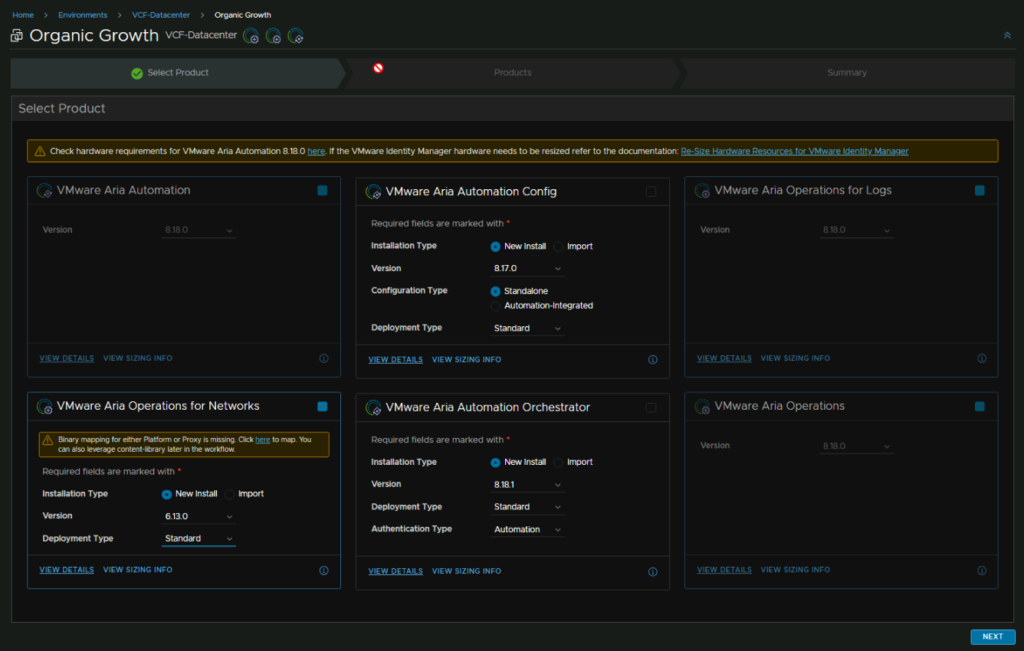
For the remaining Aria products we will need a new Environment for them
So click Create Environment, give it a name, I used the same as the Datacentre name, select any default password, we’ll need to change this later anyway, select the vCenter Datacentre, and I have disabled the SDDC integration
This is because, with it enabled, it forced clustered deployments for all supported appliances, Operations, Logs and Automation, the first two this isnt too bad, but Automation is 12vCPU and 54GB RAM per node, so the resources used are getting a little daft at this point, a single appliance is suitable for large environments, 3 nodes main advantage is HA, but at 12vCPU and 54GB each, its a bit much
For my deployment I worked out the requirements for an SDDC integrated, the smallest is 274GB and 76vCPU vs 86GB and 27vCPU using one logs appliance at 8vCPU and 16GB and 1 small Ops appliance and 1 Medium Automation appliance, so this made it clear that we weren’t waiting the resources in an SDDC integrated deployment, and given the patching is not managed by the SDDC manager
I dont really see any drawbacks other than, the SDDC integrated mode wont let you upgrade to something not interoperable, but Aria is widely operable, patching once per year in the correct order will largely always be interoperable and checking the interoperability matrix isnt much effort to ensure an upgrade works fine, which you should be doing anyway
To keep things simple, we will add VCF Operations first, then add more to the environment, so select Aria Operations, with the SDDC Manager integration, it enforces a cluster deployment
We can see the size definitions for 8.18.x below to get an idea of how big we might want VCF Operations
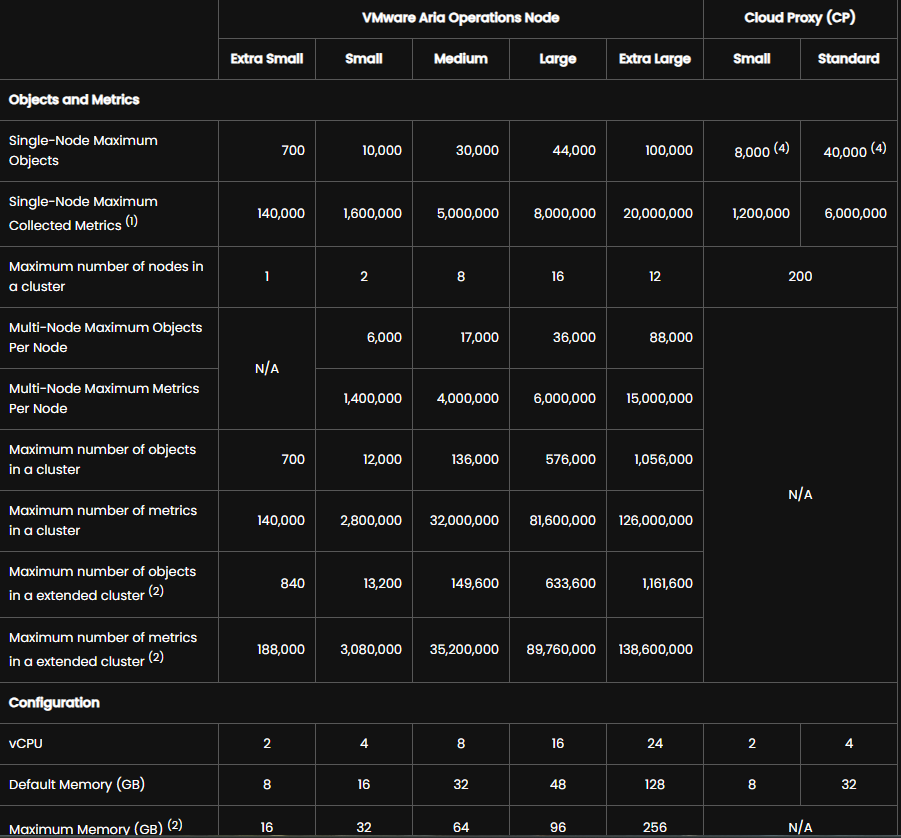
This is a little cleaner in the OVA deployment, but it gives the following which I find a little more helpful
- Extra Small: Use this configuration for environments up to 350 VMs. This deployment will require 2 vCPUs and 8GB
- Small: Use this configuration for environments between 350 and 5000 VMs. This deployment will require 4 vCPUs and 16GB
- Medium: Use this configuration for environments between 5000 and 15000 VMs. This deployment will require 8 vCPUs and 32GB
- Large: Use this configuration for environments between 15000 and 20000 VMs. This deployment will require 16 vCPUs and 48GB
- Extra Large: Use this configuration for environments between 20000 and 45000 VMs. This deployment will require 24 vCPUs and 128GB
So based of this, I wouldn’t do extra small, unless its a lab, so small should be the base, as I have under 5000 VMs, more like 200 in reality, this will be perfect
Accept the EULA
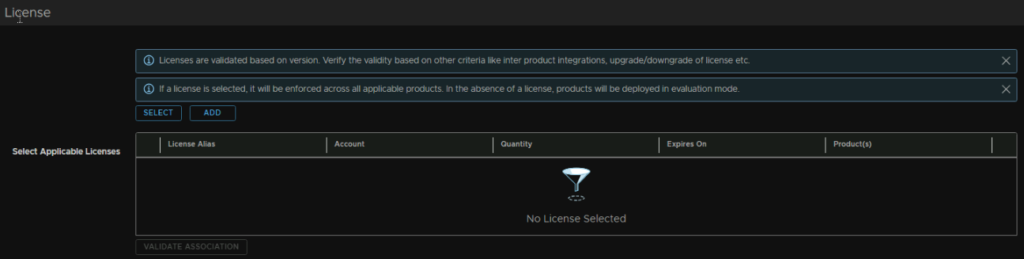
We can click Add here to add our license
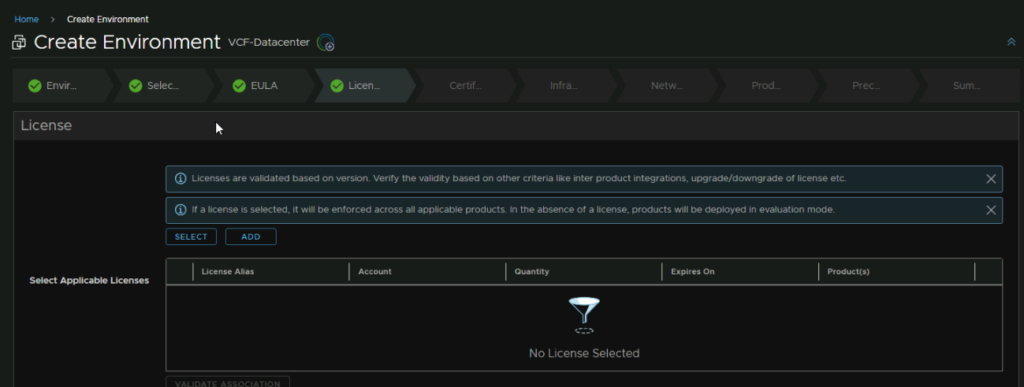
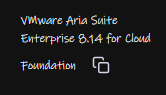
In the Broadcom portal, it will either be the solution key, or Aria Enterprise
Name the license and add the key, and click Validate
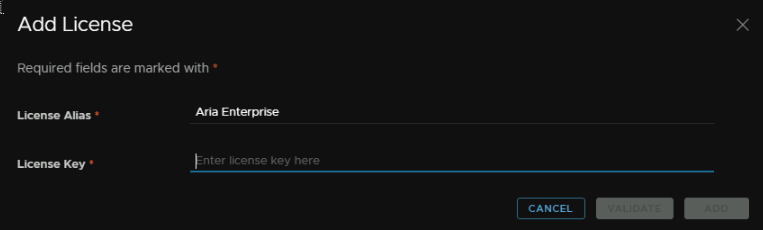
It might take a few mins, but when its done, you can then click Add

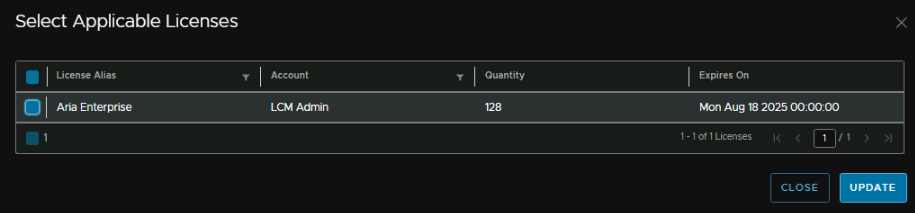
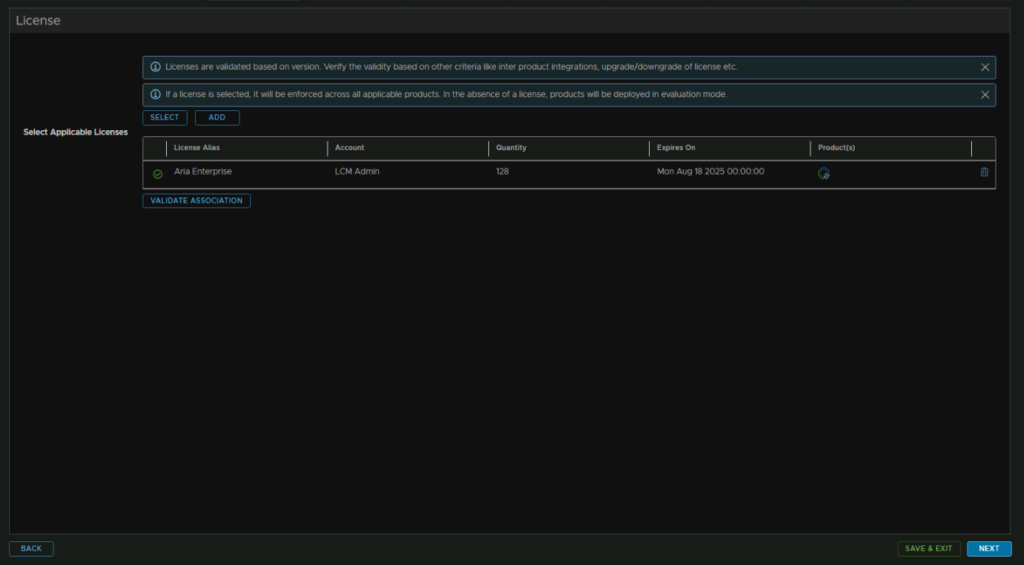
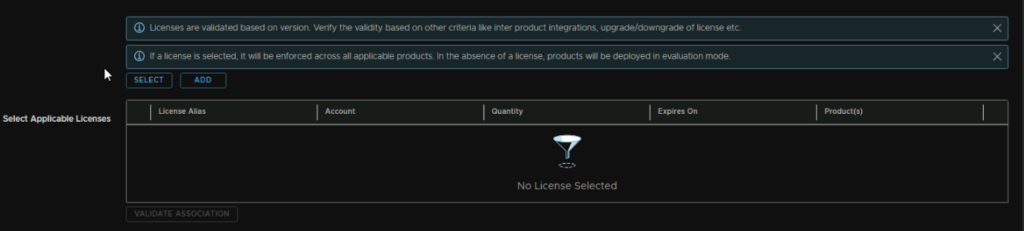
Now click Select
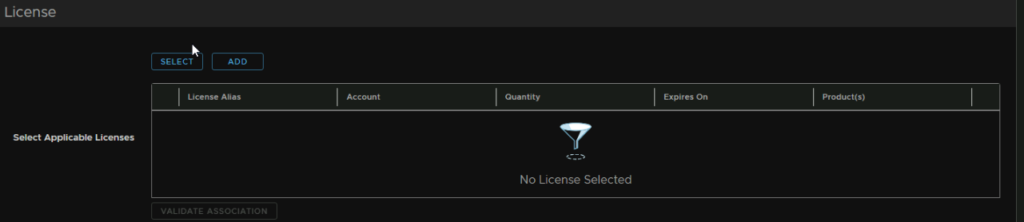
And select the license
Now click Next, the Red warning on says its for validation, which was odd, I just validated it, so I am continuing, as it should be fine
Click Validate Association and click Next

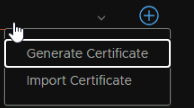
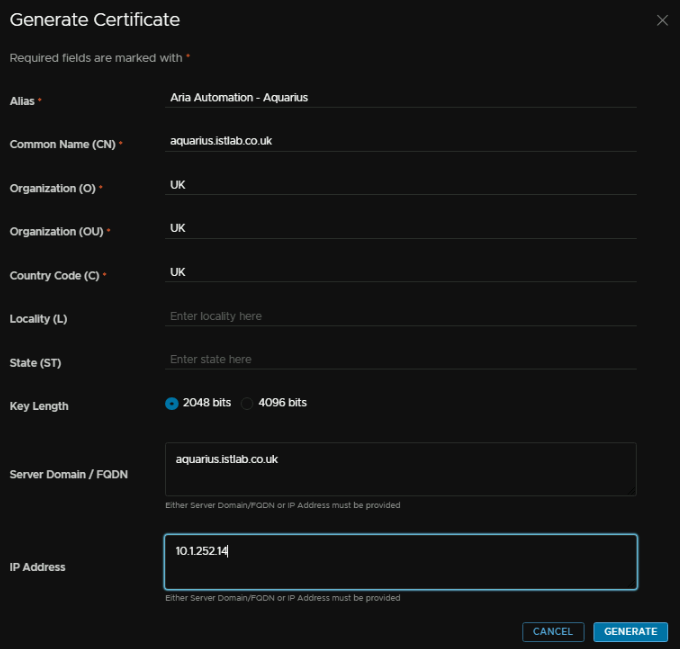
Now we can click the Plus to add a new certificate

And click Generate Certificate
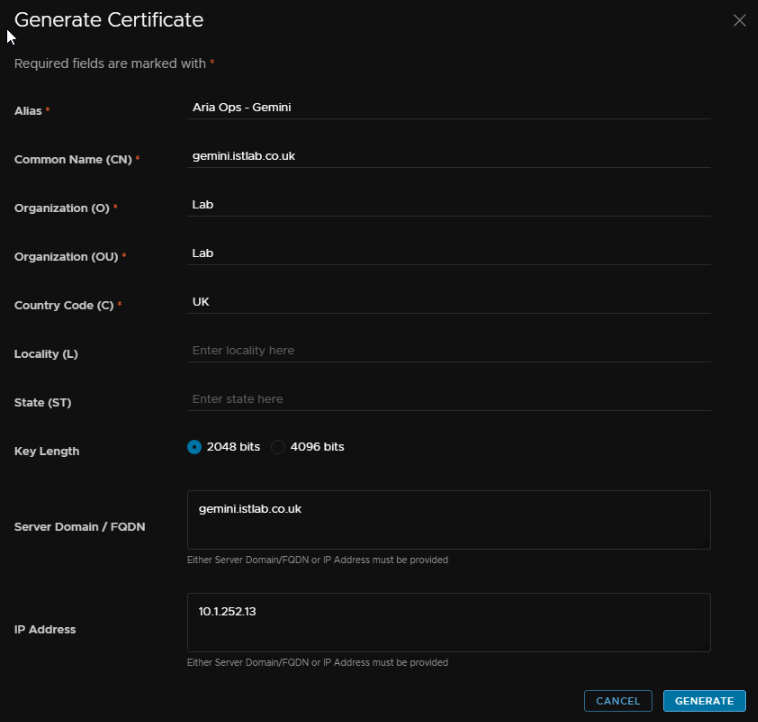
We need an alias, this is just a friendly name, then a CN, this want to be the FQDN of the appliance, O, OU and C can be what ever, server name / FQDN needs to be the FQDN and IP address wants to be the IP you want, this should come from the Aria X Region segment we created earlier
Select the certificate, and click Next in the bottom right

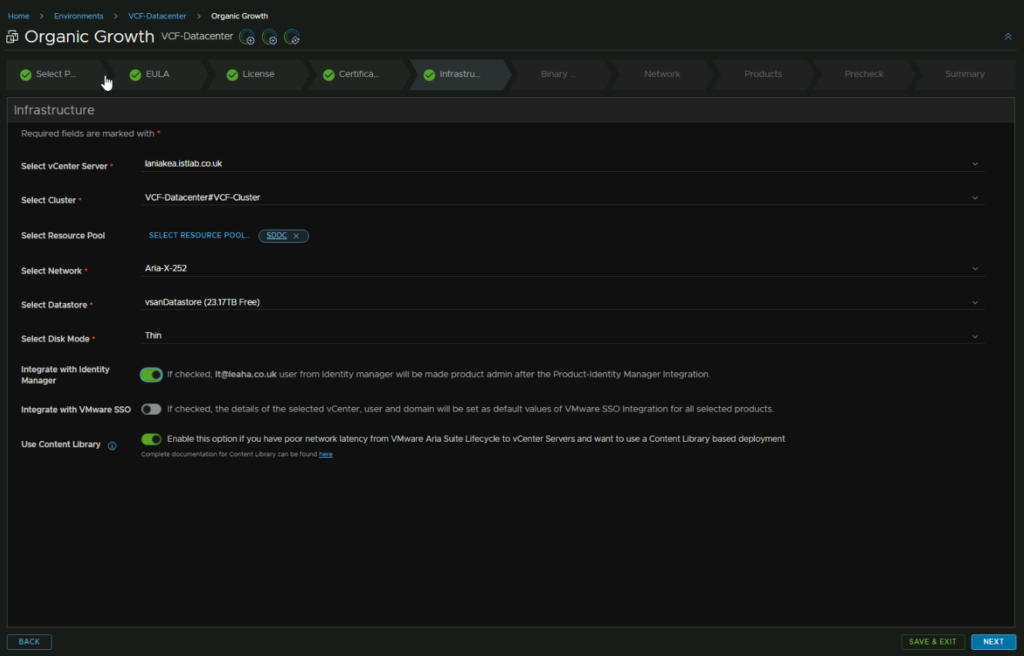
Then we need to set where this will be deployed
Select your vCenter server, cluster, resource pool if you want, network, which is the X region Segment, datastore, which will be the vSAN datastore and disk mode
You can then integrate with IDM or VMware SSO on the vCenter, I left this off, as I wanted to keep it separate
I also checked Use Content Library, so I can deploy it from there

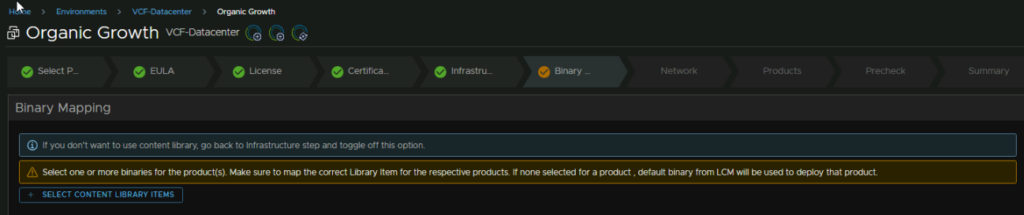
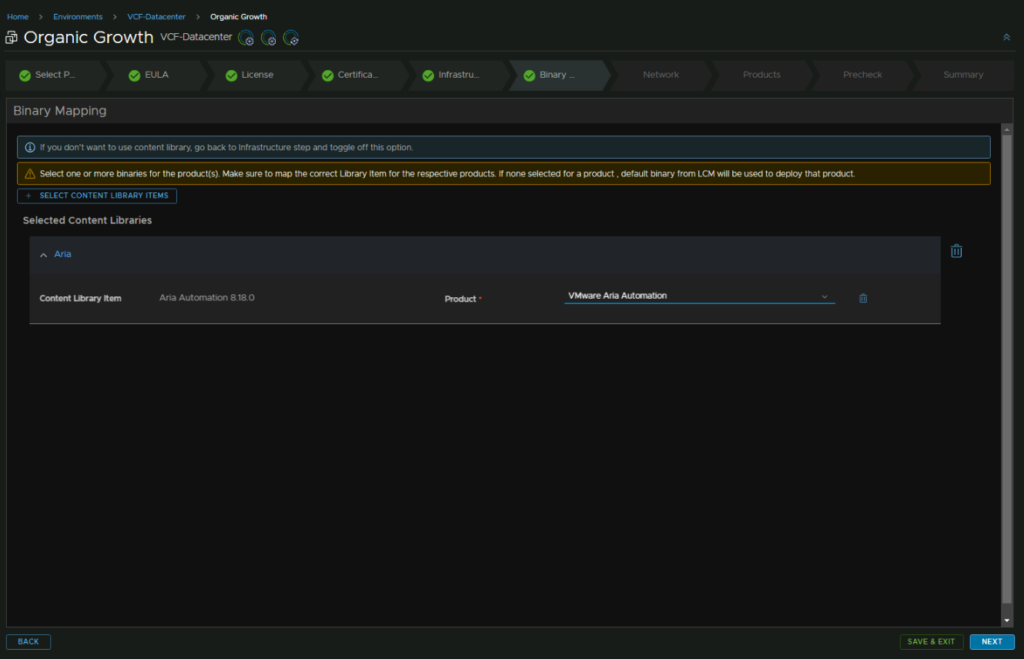
If the Binary section doesnt appear, go back and re enable the box, it can be a little buggy
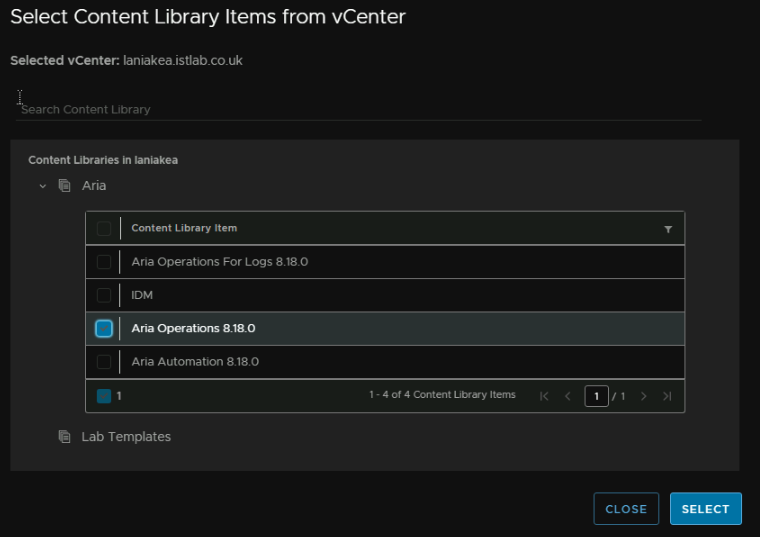
Click Select Content Library Item

And select the Aria Ops Template
Then click Next
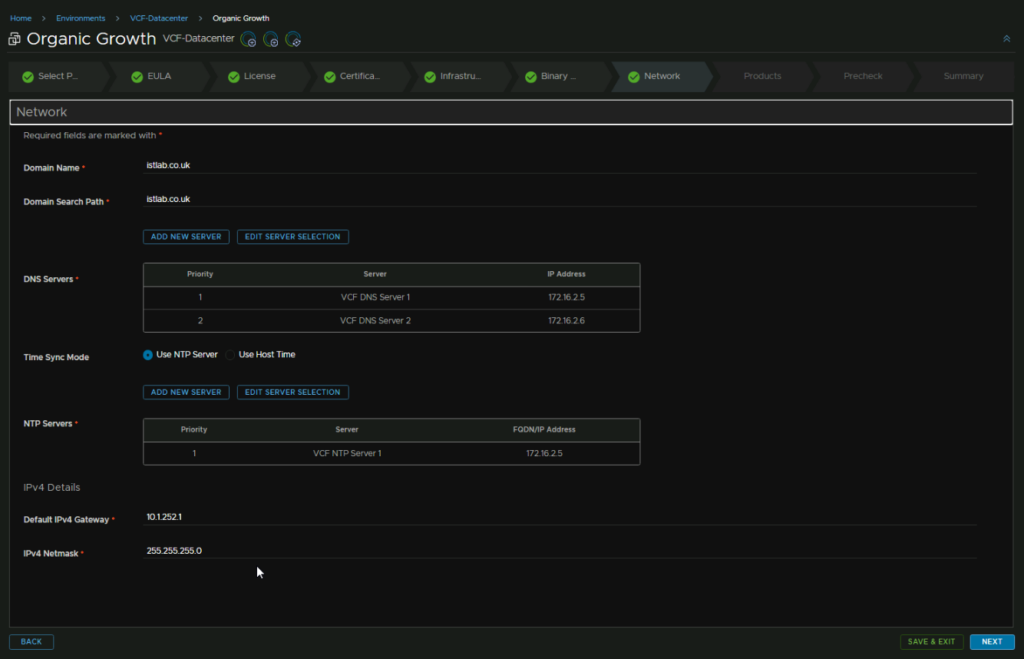
For network, add your domain, and search domain

For DNS, click Edit Server Selection, as we already have DNS from the Aria Lifecycle deployment
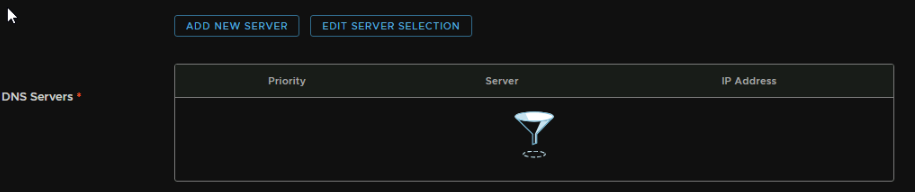
Select the DNS servers and click Next
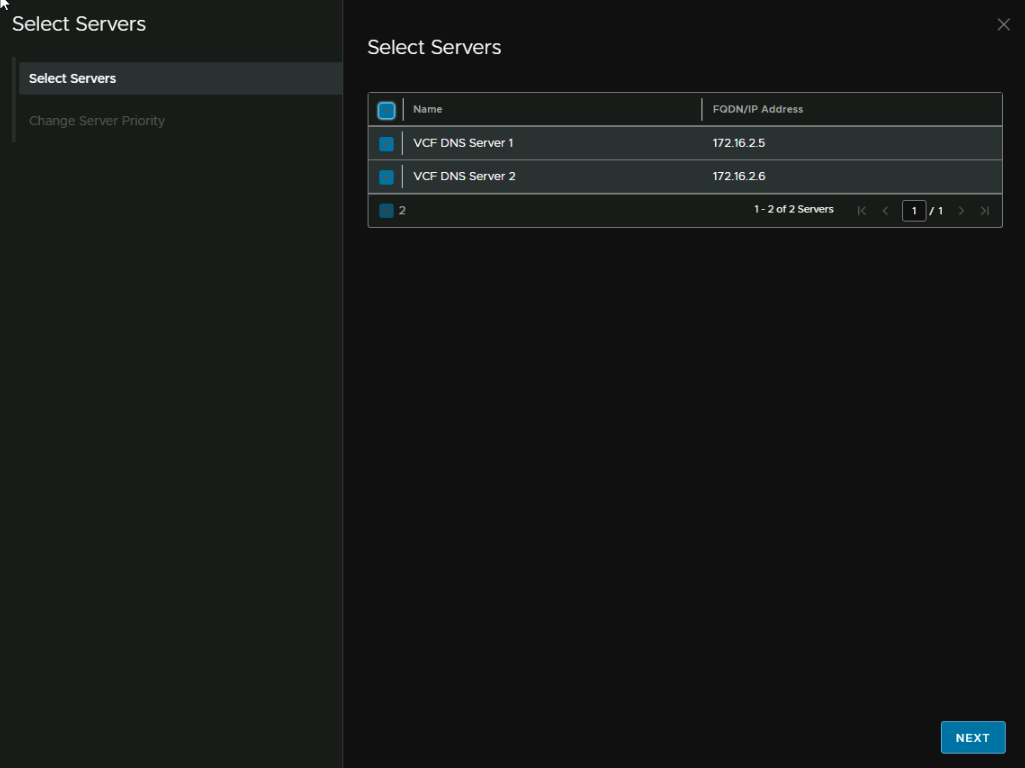
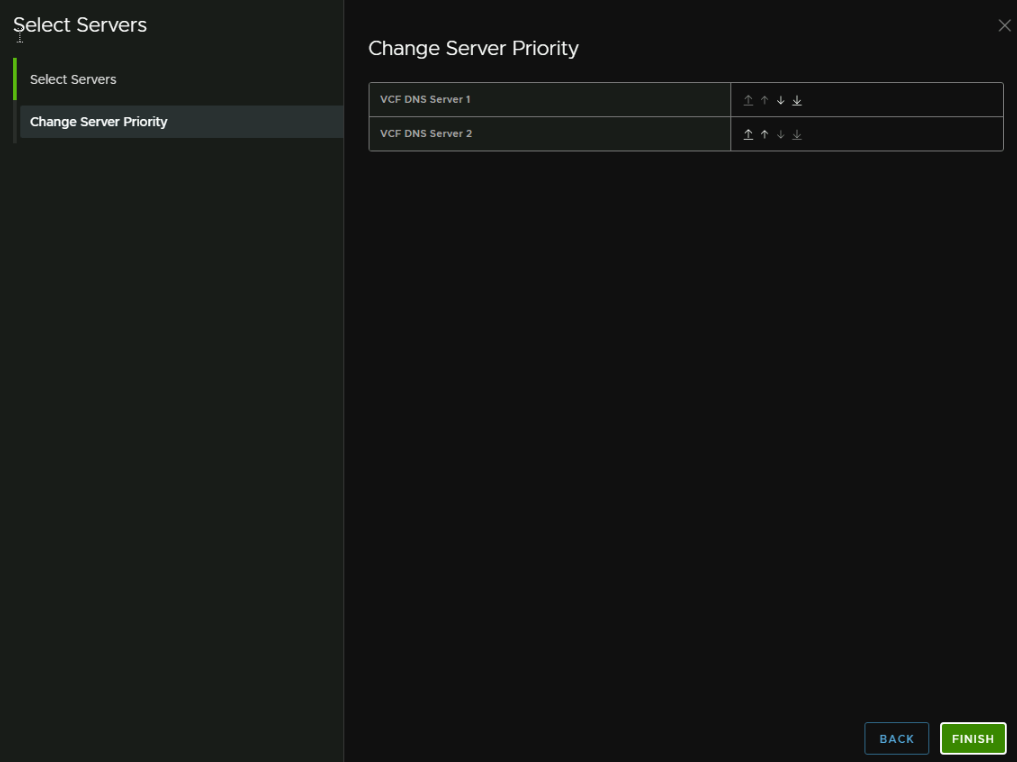
Check the order is ok, and click Finish
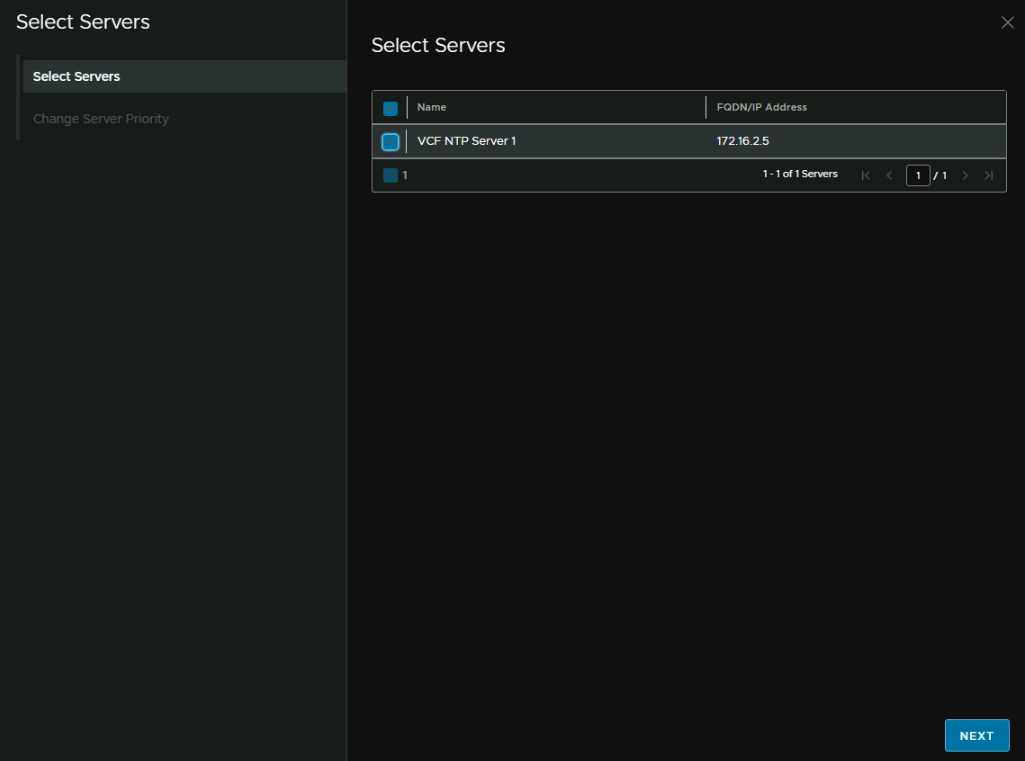
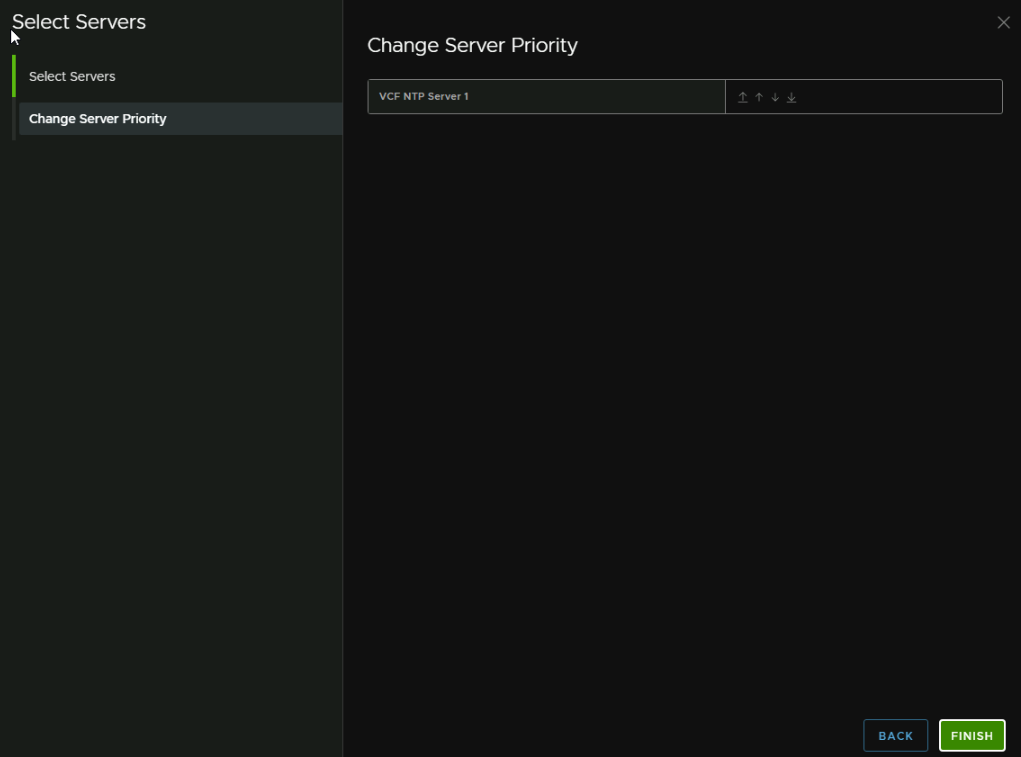
Check Use NTP Server and then click Edit Server Selection

Select the NTP server, which is populated from the Lifecycle deployment, and click Next
Then finish
And lastly, the gateway of the X Region Segment, and the subnet mask
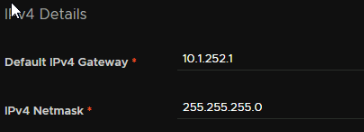
It putting it all together, it should look like this, when you are happy, click Next

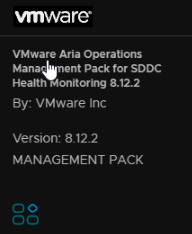
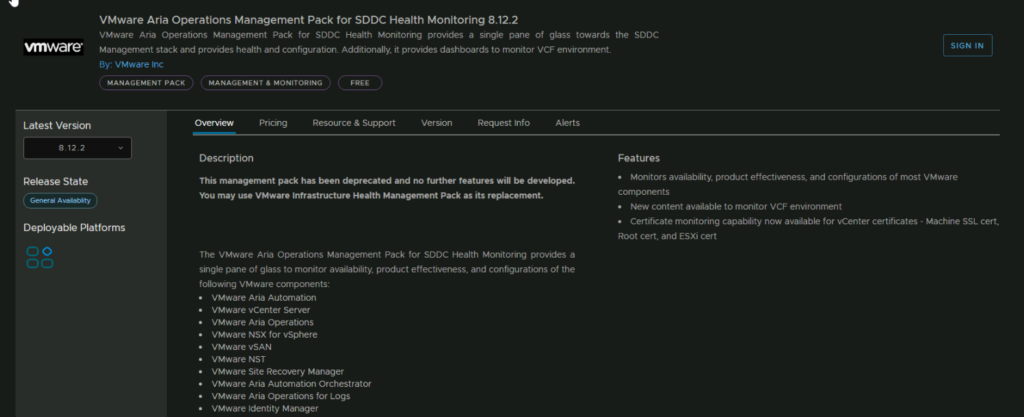
Now, in the next bit, we will want to enable the SDDC Management Pack, this is a separate file addon, you can find all the versions here
The latest version is 8.12.2 here
We can then Sign In
If your Broadcom account gives you an Error 403 when signing in, you will need to create an account, using your Broadcom account

Then we can click Download

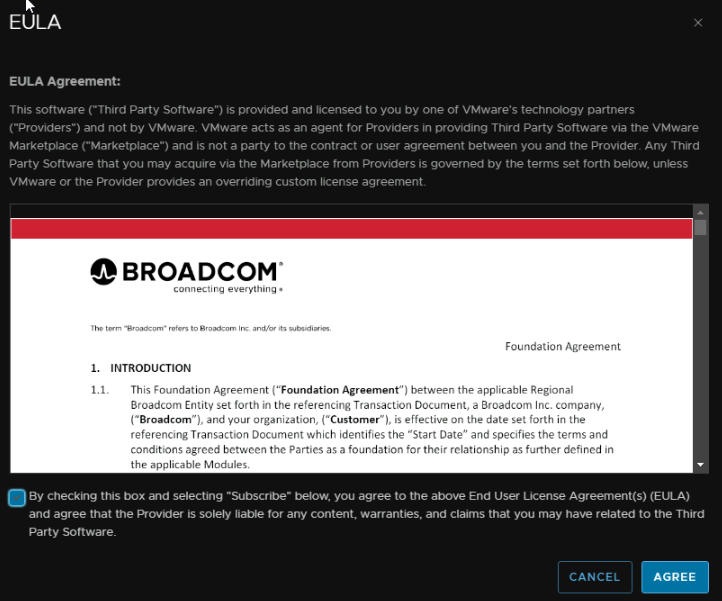
And accept the EULA
Login to the Lifecycle appliance with the root account with WinSCP, head to /data and create a folder, I called it ‘Add-Ons’

And drag the pak file over to upload it

Back in Lifecycle for creating the environment with VCF Ops, make sure you are on the product tab
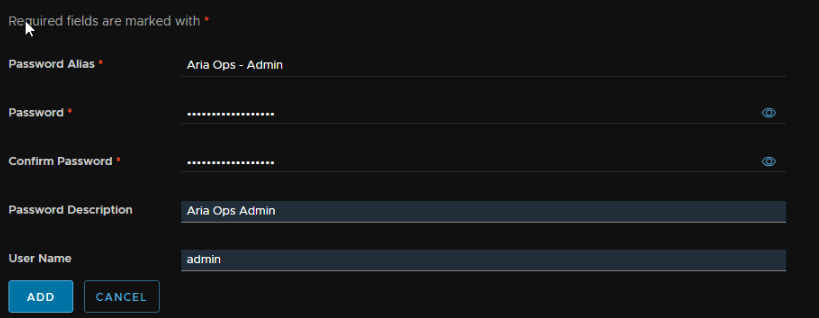
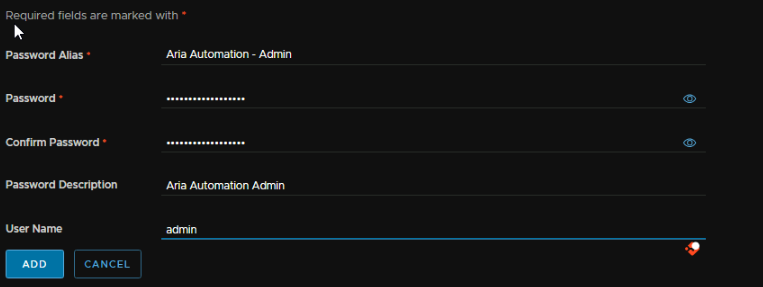
Then we can click Add Password

Click Save
Add an alias name, this can be anything, add a password and a description and set the username to ‘admin’ for the Aria Ops appliance, then click Add
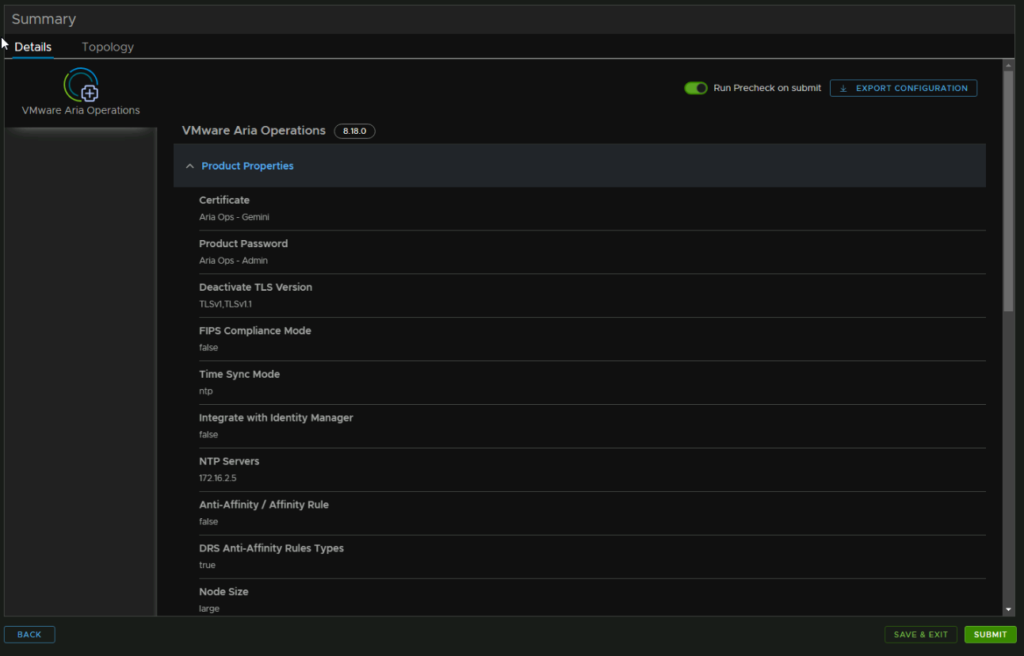
For the last bits of the detail, firstly, select TLSv1,TLSv1.1 at the top drop down to disable it,, you can enable FIPS compliance if you need it, I dont so I left it off, then click the X on the Product Password to clear it
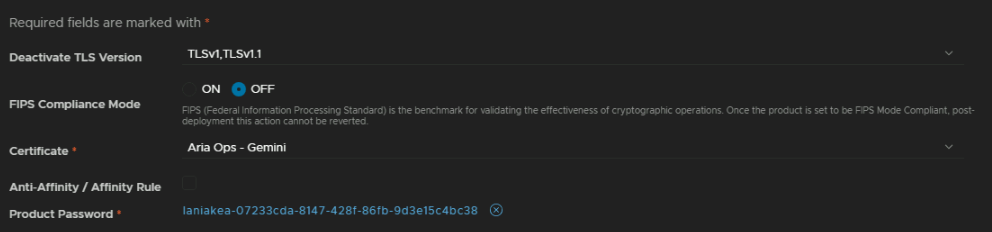
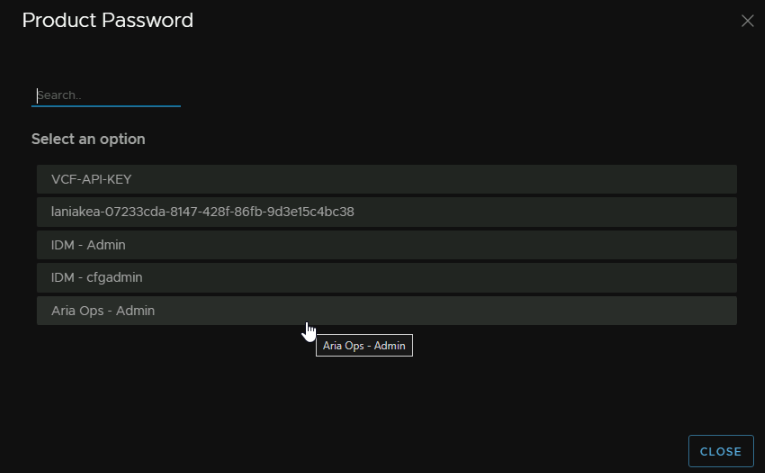
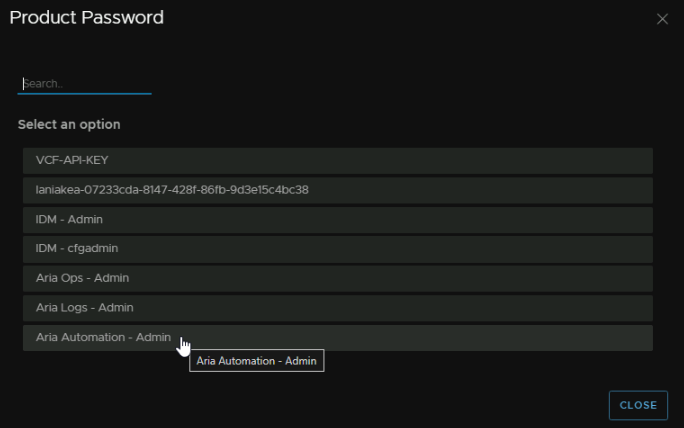
Then click Select Product Password

And click the Admin password for Aria Ops
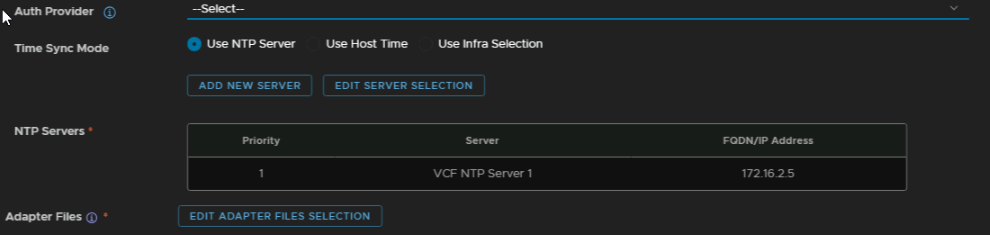
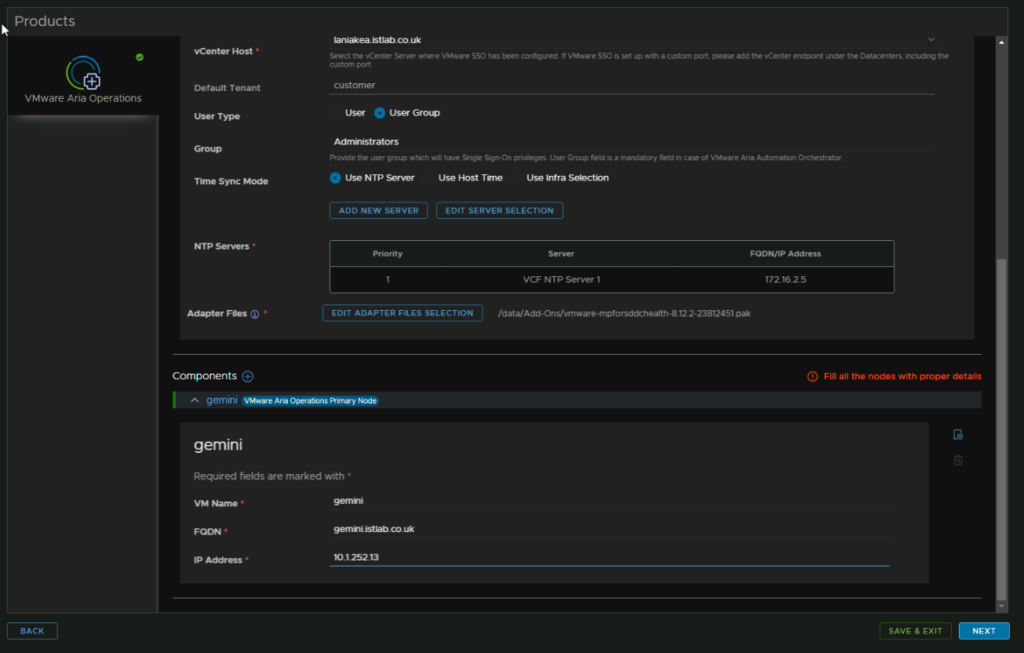
Check Install SDDC Management Pack, check the SSO integration is correct if you set it, I changed it to ‘–Select–’ to keep it standalone, NTP should also be the same, then click Edit Adapter Files Selection
Under base location we need the directory we uploaded the SDDC Management Pack to, for me this was /data/Add-Ons, then click discover, and select the file and click Add
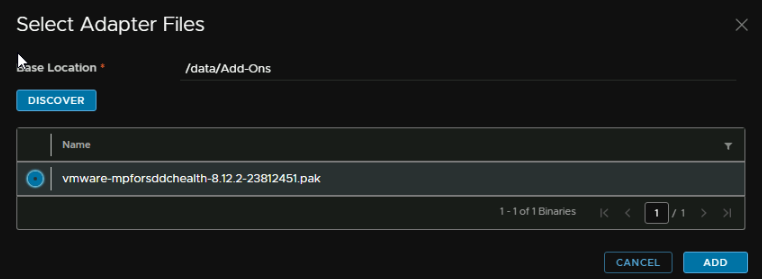
It should now show up here

Add the VM name in vSphere, the FQDN, and the IP associated with this, on the Aria X Region Segment
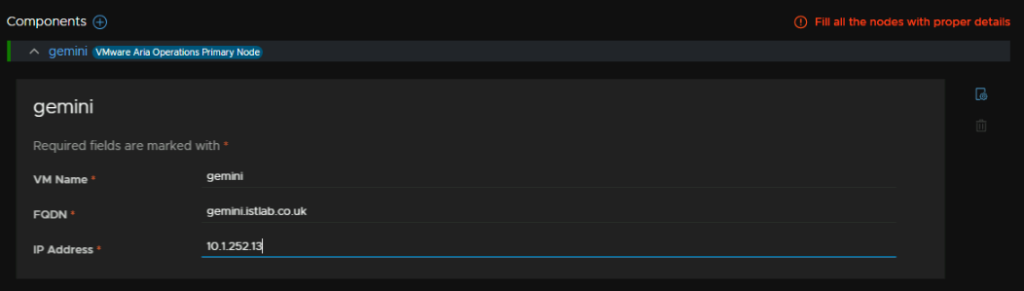
Now click Next in the bottom right
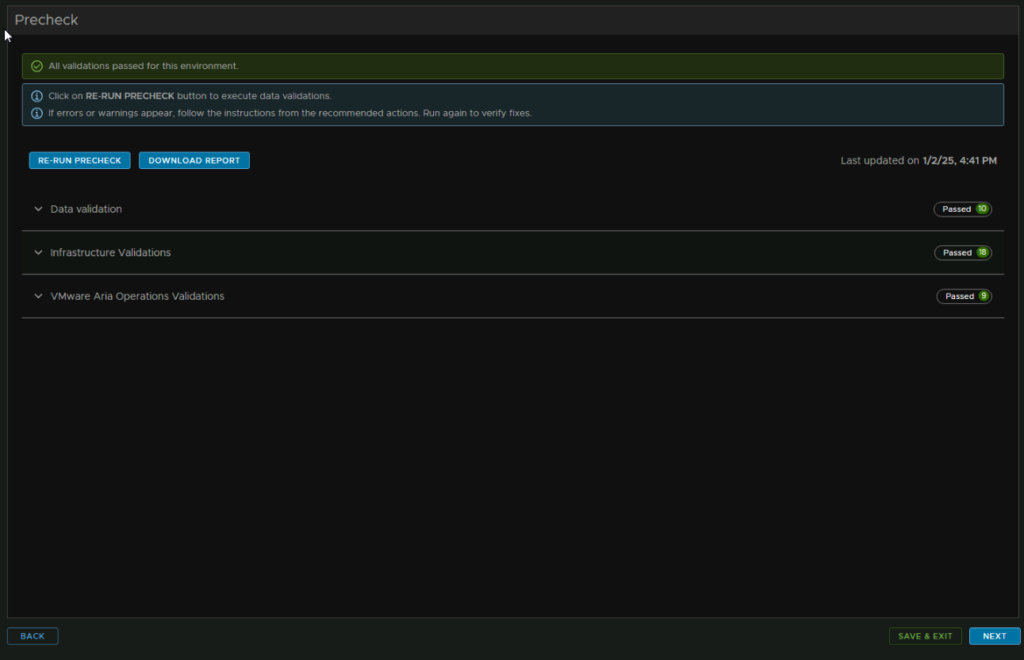
Click Run Precheck

Once this is all clear, click Next in the bottom right
Check you are happy with everything and click Submit
If you need to access the appliance with the root account, the password will be the same as the admin account
5.6 – Installing Aria Operations For Logs
Now we have the Lifecycle environment setup and Aria Ops, we can get the Logs appliance deployed, head to Environments, click the three dots on the new environment and click Add Product
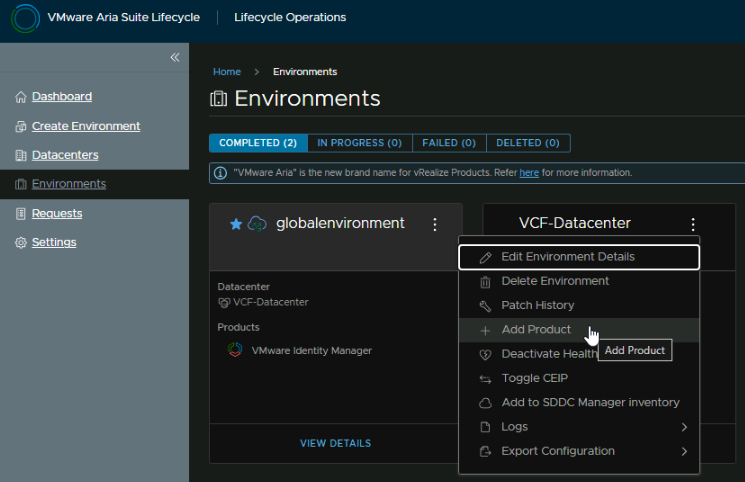
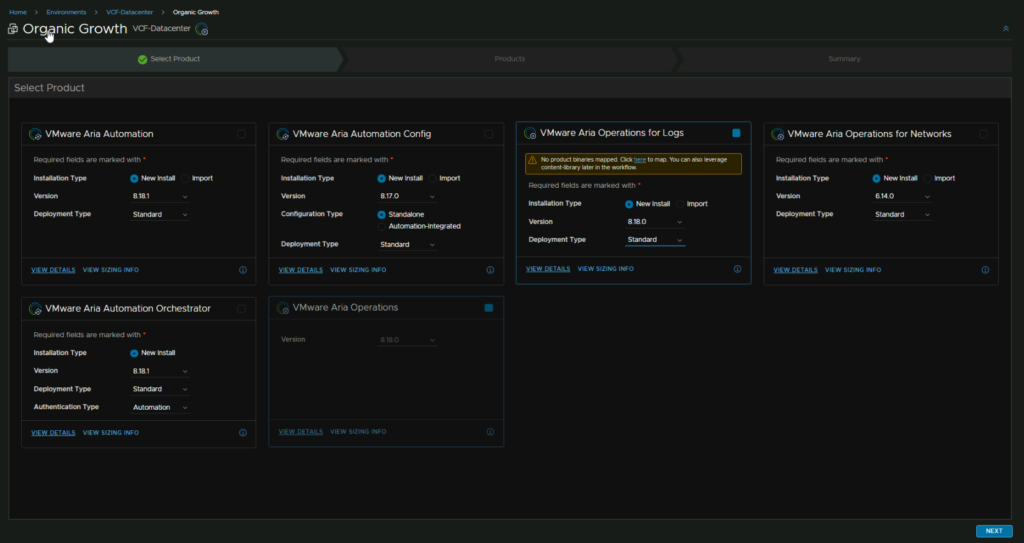
Select Aria Logs as a new install, we will be going for a standard single node deployment, as this is a small environment, but you can always scale out later to a cluster if our requirements changed, the click Next
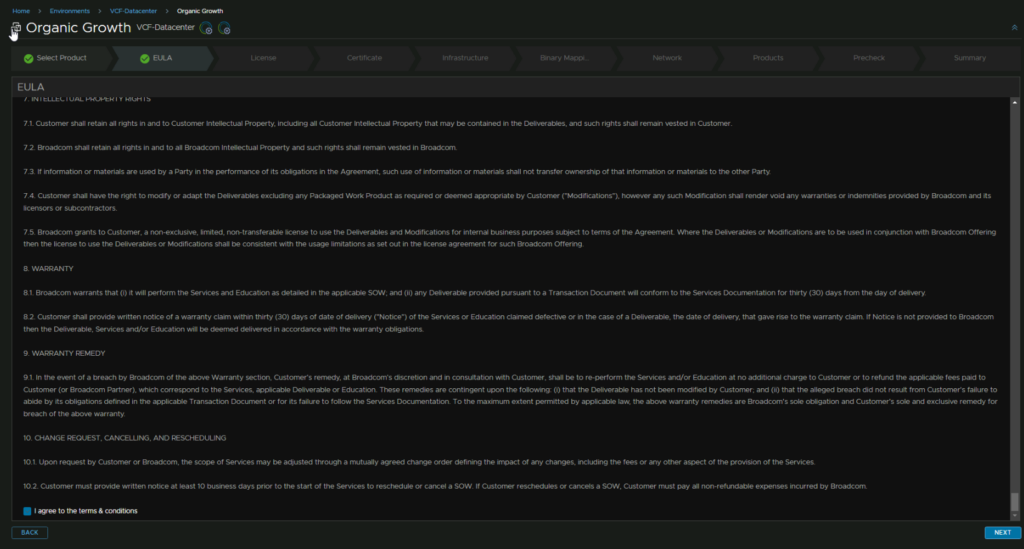
Accept the EULA
Click Select to add the license

Then click Next, mine is showing the error on license validation, but I will come back to that as it did validate it during the Aria Ops install
Click Validate Association and click Next

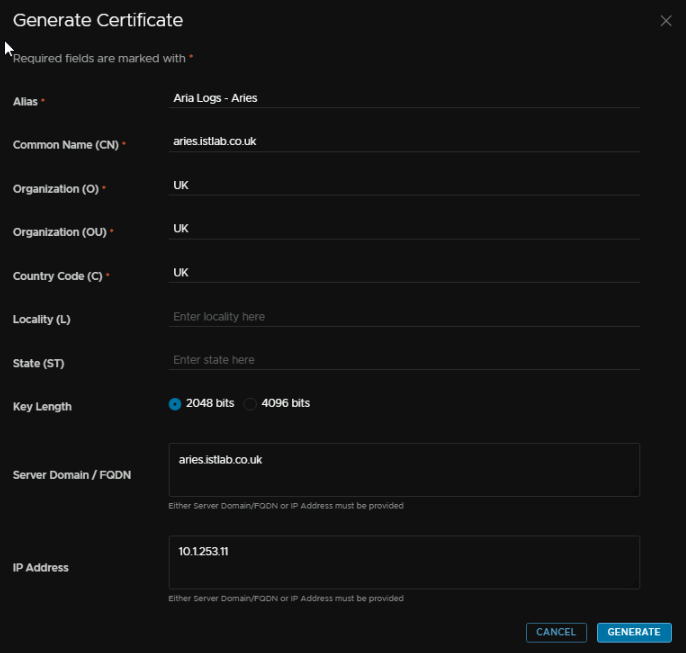
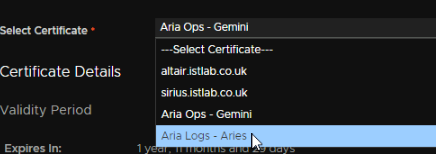
Its auto selected the Aria Ops certificate, we cant use that so click the Plus to create a new one

Give the certificate an alias, which is just a name, it can be anything
We then need the CN, I would recommend the FQDN here
O, OU and C can be anything
The FQDN needs to be the server FQDN, and the IP address needs to be the server IP, this wants to be on the Aria A segment we created earlier and click Generate
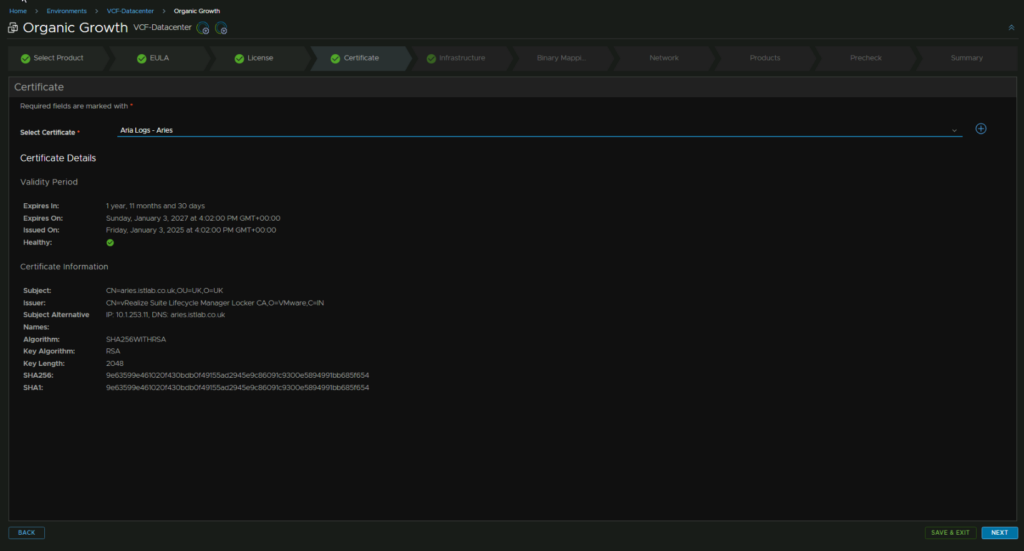
Then select the certificate
Then click Next
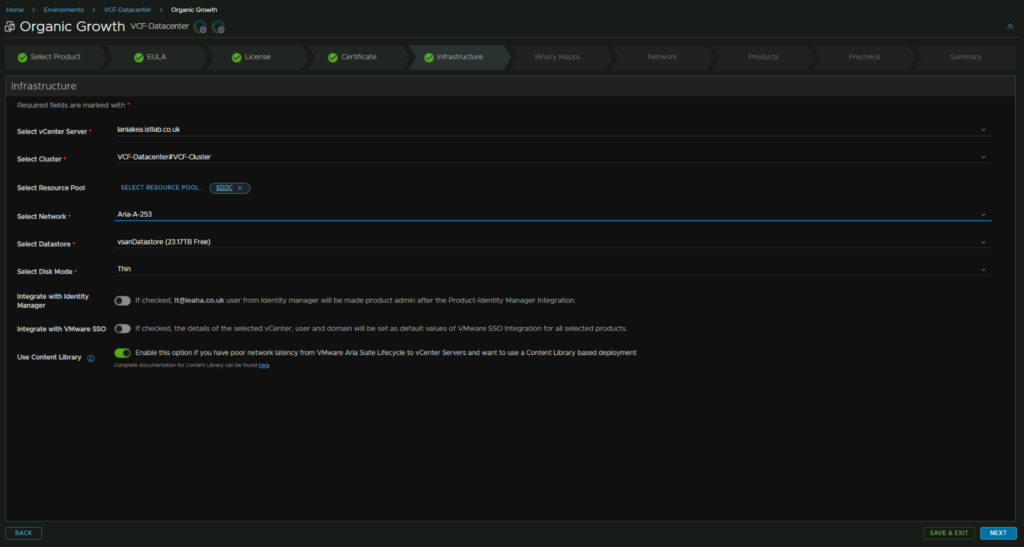
Now make sure your vCenter is selected, the cluster is correct, add a resource pool if you want, select the Aris A Region Segment, the datastore, and disk mode
With identity, like Aria Ops, you have the choice to integrate with IDM/vCenter which may be helpful in larger organisations, I want it separate, so I have de selected those
And enable the content library option at the bottom, then click next
If the Binary section doesnt appear, go back and re enable the box, it can be a little buggy
Click Select Content Library Items

Select the OVA in the content library
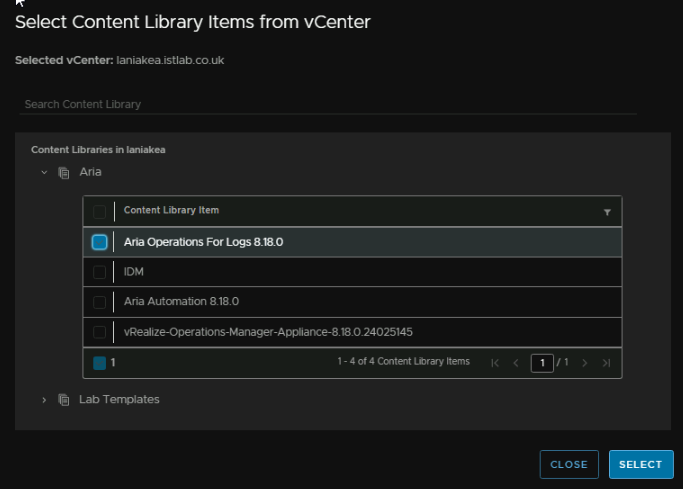
And make sure the product is selected

Then hit next
For the network section, add your domain name and search path, for me these are the same, make sure DNS is correct and NTP, this is all auto puled as we configured Aria Ops
Lastly make sure the gateway and subnet are correct for the Aria A segment, as the default is for the X segment used in Aria Ops
For the node size, Broadcom have this documentation
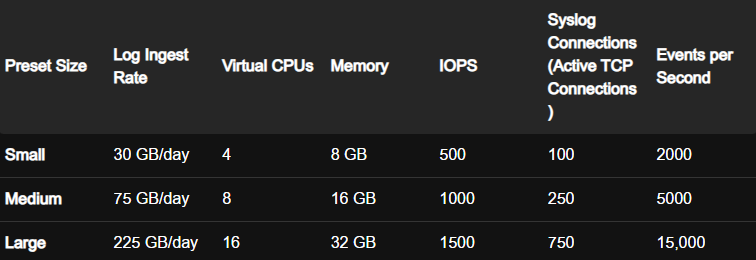
This is based on
- Each virtual CPU is at least 2 GHz
- Each ESXi host sends up to 10 messages per second with an average message size of 170 bytes/message, which is roughly equivalent to 150 MB per day, per host
Small is only really for a POC with VMware recommending Medium for a production environment though it can handle 200 hosts
Medium supports 500 ESXi hosts
Large supports 1500 ESXi hosts
If you have remote servers logging to this, this will affect the amount of hosts, so you can use the log ingest rate above
All sizes come with 490GB of storage so if you want to keep logs for a while this will need to be edited later
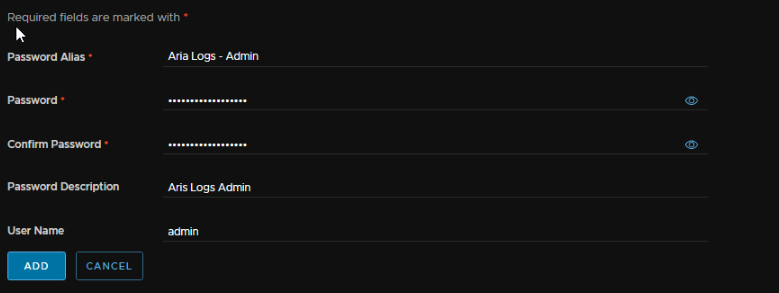
We will click Add Password to create an admin account

Then click Save

Add an alias, which can be anything, the password, a description and the username ‘admin’ then click Add
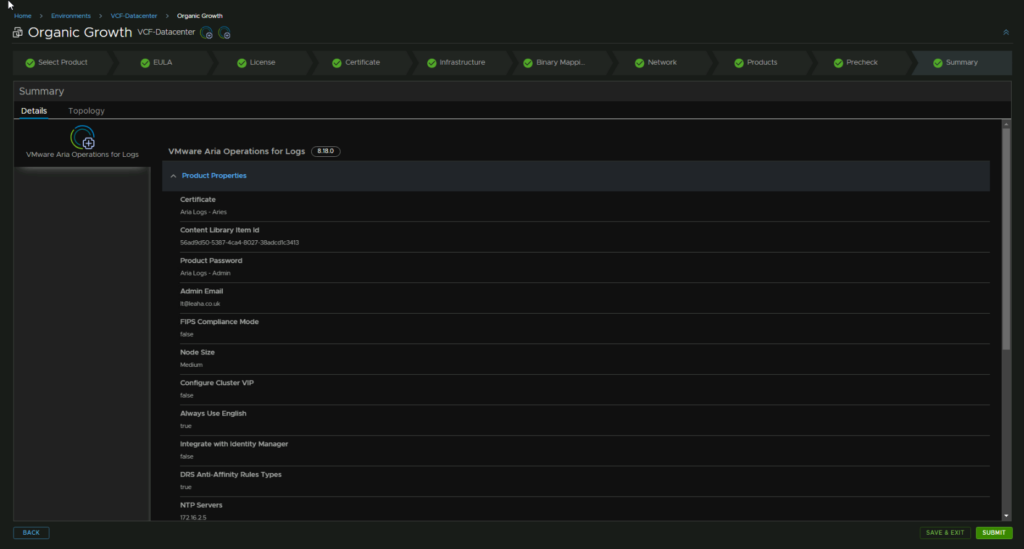
Now we can select the node size, medium is plenty for me so thats what I am deploying, I have disabled FIPS but you can enable it if needed, select the certificate, I selected no on the VIP, as its 1 node and I wont need to expand, I checked the box for always using English and added an admin email to be my own
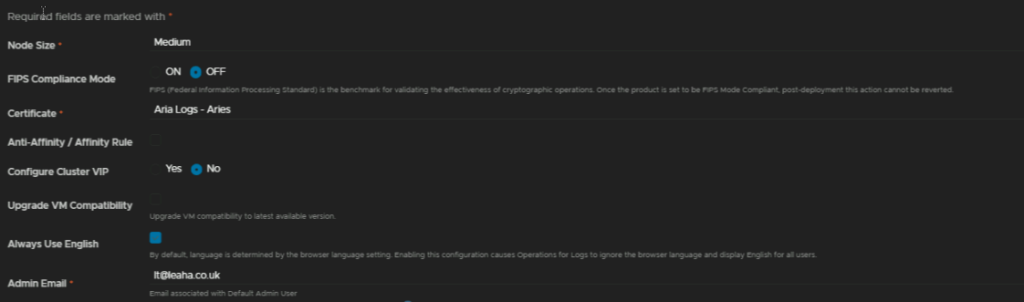
Now we need to click the X on the product password

Click Select Product Password

And select the Aria Logs Admin one we just created
Enable the Monitor With Ops checkbox, check the auth provider info is correct, I dont want to use it, so I changed it to ‘–Select–’ so it wont use one and that NTP is correct

Under components add the VM Name, FQDN and IP address for the appliance, if you deployed a cluster there will be multiple

Then click Next in the bottom right
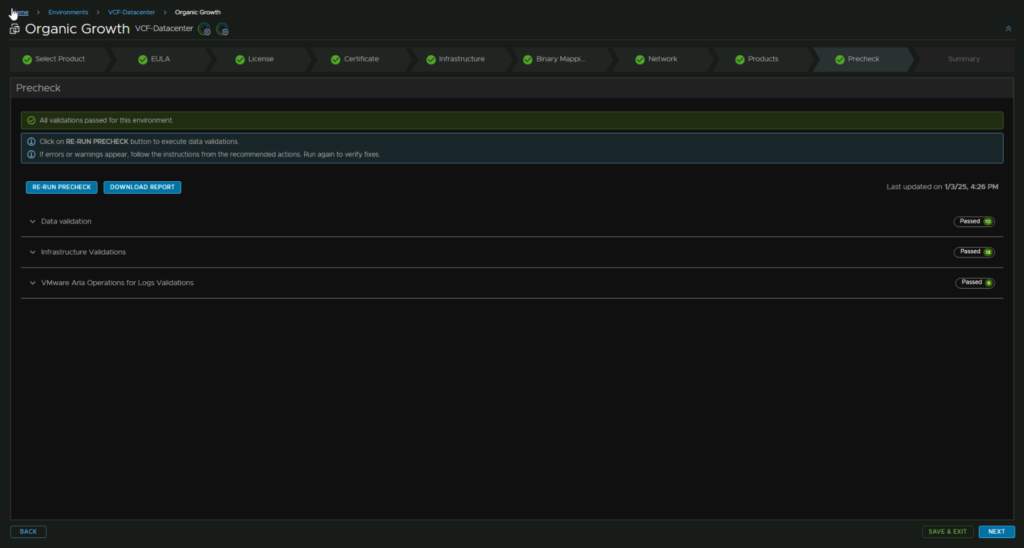
Now run the pre check
As we left to create the password, it may fail on Data Validation, this seems to be because it unchecked the content library option on the Infrastructure tab, so if thats the case head there and enable it, then re run the pre check
Once this is all green, click Next
Check you are happy with everything and click Next
This will take time, my deployment took 50 mins, and it spend a lot seemingly hung but did go through fine
If you need to access the appliance with the root account, the password will be the same as the admin account
5.7 – Installing VCF Automation
Next we can get VCF Automation deployed, head to Environments, click the three dots on the new environment and click Add Product

Select Aria Automation, the New Install and Standard, a cluster requires three nodes and only had the benefit of HA, given each node is 12vCPU and 54GB of RAM, its a lot of resources used that we dont need, then click Next
Accept the EULA
Click Select to add your license
Then select the license and click Update
I am getting an error on it due to validation, but it was validated when it was added so I will check back later, once its selected, click Next
Click Validate Association and click Next
Now we need a certificate, it will select one it already has, but if you click the + we can create a new one. then click Generate Certificate

For the certificate, we need an Alias, as this is a friendly name it can be anything
The CR, this should be the fqdn
O, OU and C can be anything
FQDN needs to be the DNS FQDN and the IP must be what the FQDN resolves too, and this needs to be on the Aria X segment we created earlier
Then click Generate
Now we can select the certificate from the drop down, then click Next in the bottom right

On the Infrastructure tab, ensure everything is set correctly, for me this was pulled from the VCF Ops deployment, as it was done first, but ensure the right vCenter is selected, Datacenter, resource pool, though this is optional, the network segment, this needs to be the X segment, and disk mode, VCF Automation requires IDM so we will enable that check box and enable Use Content Library, then Click Next
As Automation normally requires IDM, I am not sure how VMware SSO integration will work for this, so I would stick with IDM, but you can always deploy it using that, and if it doesnt work, delete it from Lifecycle and start again
If the Binary section doesnt appear, go back and re enable the box, it can be a little buggy
Then click Select Content Library Items
Click the OVA and then click Select
Select the product and click Next
For the network, everything should be populated correctly, but check the domain, search domain, DNS, NTP, gateway and subnet mask
Now click Add Password

Then click Save
Add an alias, this can be anything, then the password, a description, ands the username admin, then click Add
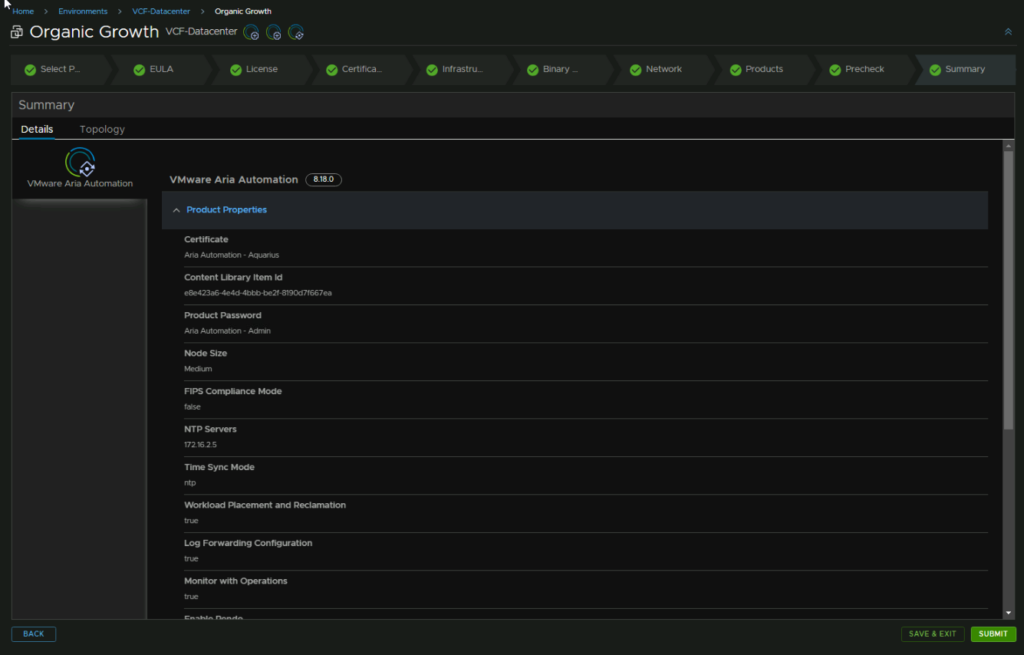
Then select Medium as the node size, this is plenty for about any environment, enable FIPS if you need it, enable Workload Placement And Reclamation for VCF Ops metrics, and make sure the right certificate is selected

Under the Product Password, click the X to remove the default one

Click Select Product Password

And select the Aria Automation Admin password
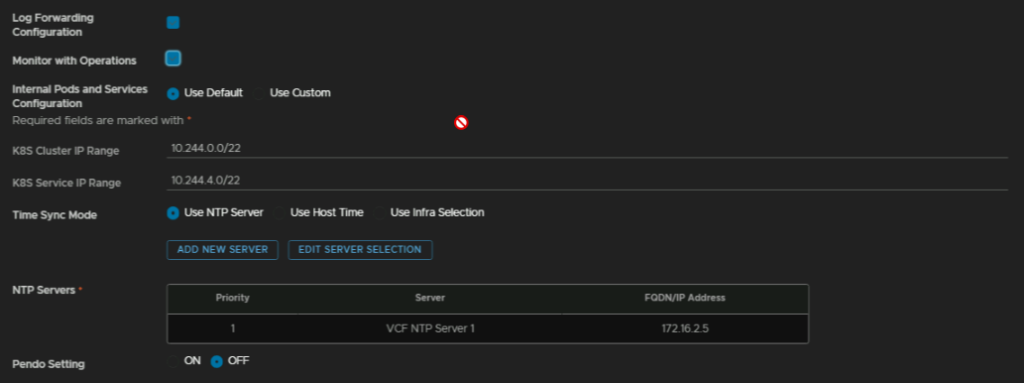
We then want to enable Log Forwarding and Monitor With Operations, keep the Internal Pods And Service on default, make sure you are using the NTP server and the address from earlier is correct and leave Pendo on default
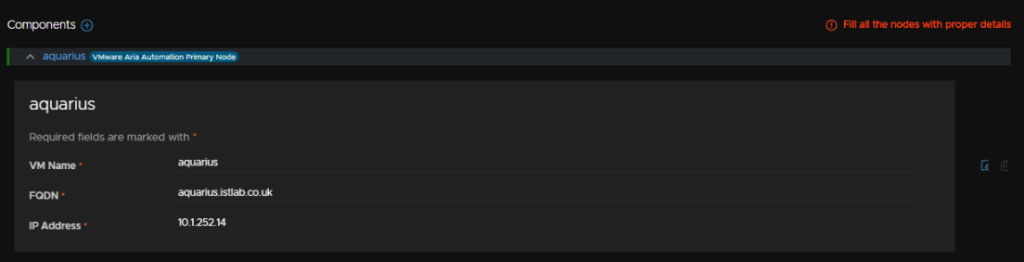
And for the appliance at the bottom, add the VM name, FQDN and IP address
Then click Next in the bottom right and run a Precheck
If anything crops up, address the errors, but when its clear, click Next
Then check the settings and click Submit, the deployment will take quite a while, mine took 35 mins
5.8 – Installing Aria Operations For Networks
In Aria Lifecycle, head to Environments, click the three dots on the new environment and click Add Product

Select Aria Operations For Networks as a new install, select the version you downloaded the OVAs for and use a standard deployment and click Next
Accept the EULA and click Next
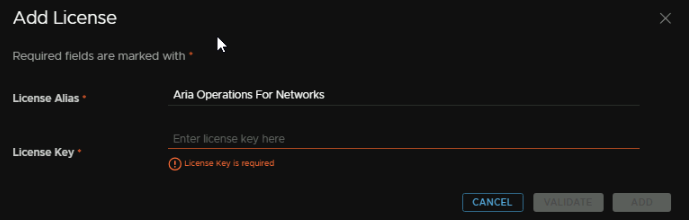
Click Add to add your license, as its separate to Aria Enterprise we have already got
Add an Alias, the key then click Validate, it might take a while, but when thats run Add will be available
Then click Select
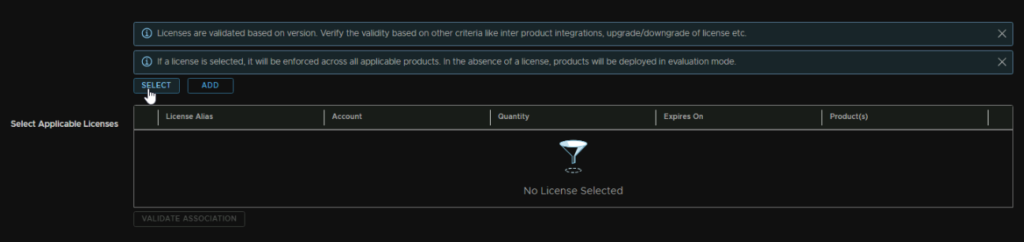
Select the license and click Add
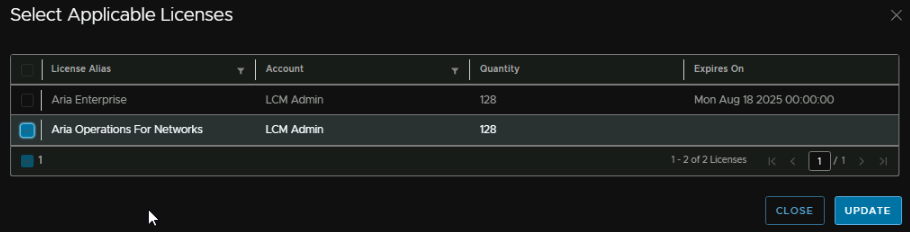
Then click Validate Association and Next in the bottom right

Now we need a new certificate as it will select one from the list, so click the + and then Generate Certificate

For the certificate, we need an Alias, which can be anything, a CN, the FQDN is fine here
O, OU and C can be anything
The FQDN needs to be the appliance FQDN, and then comma separated, the collector FQDN
And the IP needs to be what the FQDN resolves too, and also, separating with a comma, the IP address of the collector, though it doesnt have an FQDN, this wants to be on the Aria X segment, then click Generate
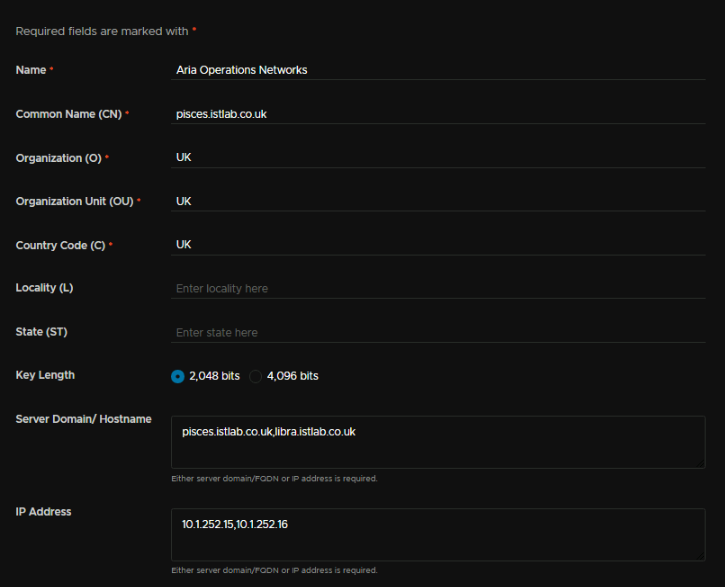
Select it from the drop down and click Next

Then, everything should be pre populated, but check the right vCenter, Cluster, Resource Pool, though thats optional, network, the Aria X segment, datastore and disk mode is set
I am not integrating this with IDM/VMware SSO, but am enabling the content library
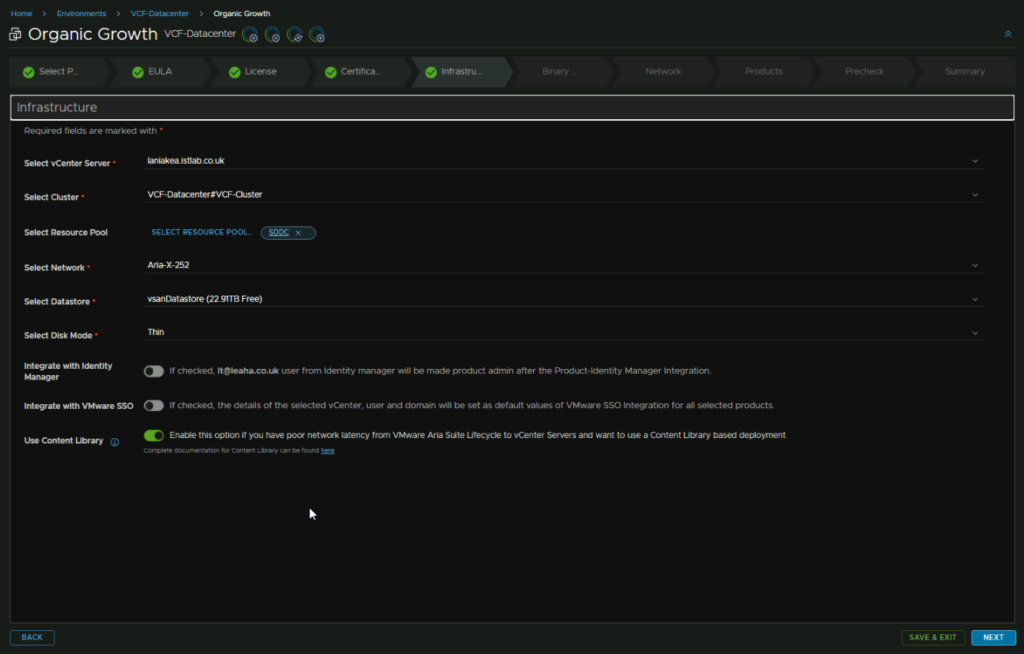
It originally didnt bring me to the Binary page, so I went back and re checked the content library option which fixed that
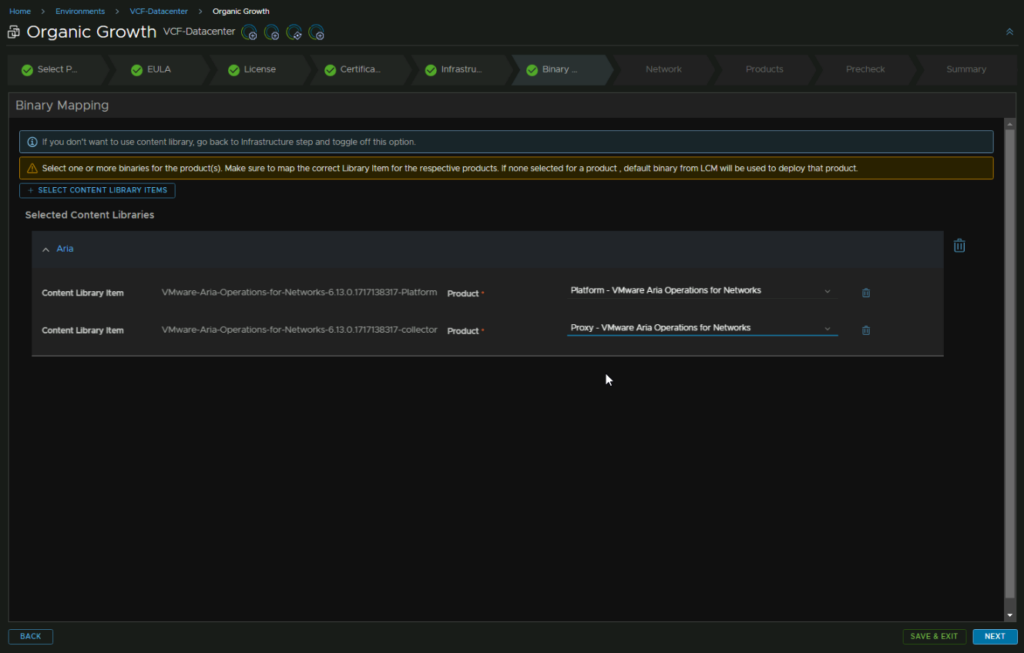
But here, click Select Content Library item

We need to select both the platform and collector OVAs from the content library
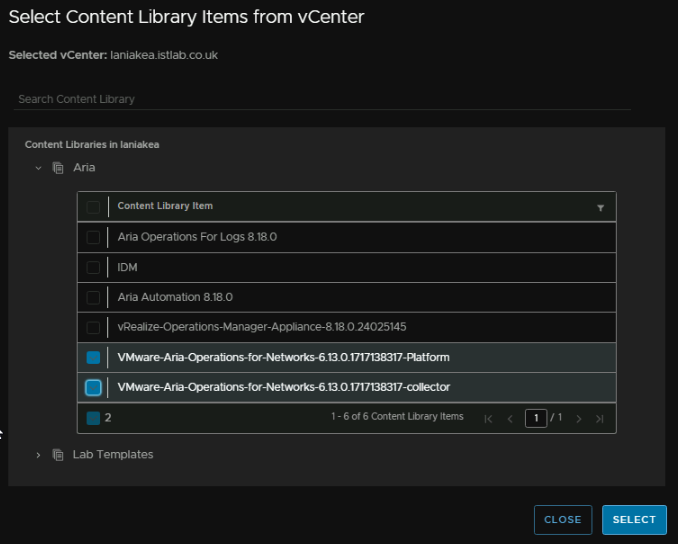
Then select the products making sure they line up correctly, then click Next
This page should also be populated correctly, but check the domain name, domain search path, DNS, NTP, IPv4 gateway and subnet mask are correct, then click Next

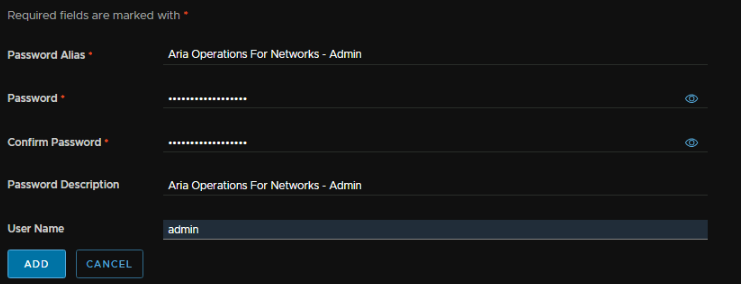
Then we need to add a product password, so click Add Password

Then click Save

Add an Alias, this can be anything, then the password, a description and the username ‘admin’, its worth noting this doesnt actually change or affect the default username for logon, the default admin username will always be admin@local in with WebUI
Enable the FIPS if you need it, make sure the right certificate is installed, and I dont need affinity rules

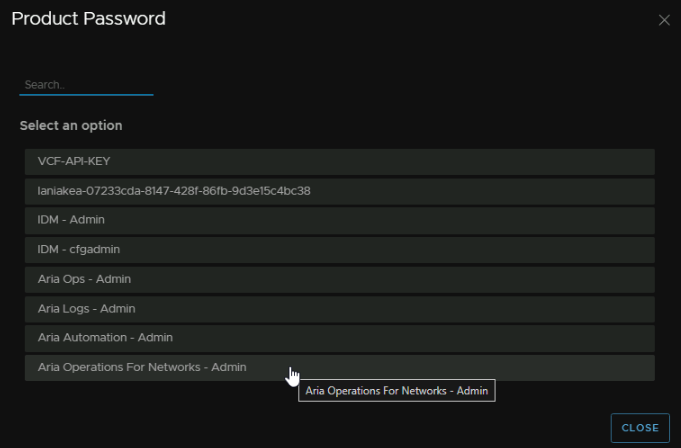
Click the X to remove the default password

Click Select Product Password

And select the Aria Ops For Networks Admin password
Enable Monitor With Operations and the NTS server is correct

For the appliance size, the main server specs have the following
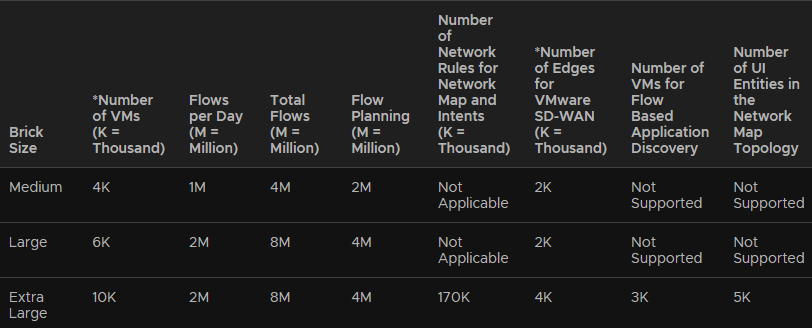
And the collector has the following
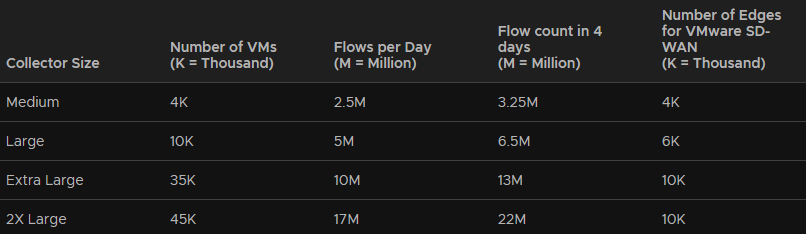
As I have well under 4k VMs and wont have millions of flows, medium on both will be more than plenty
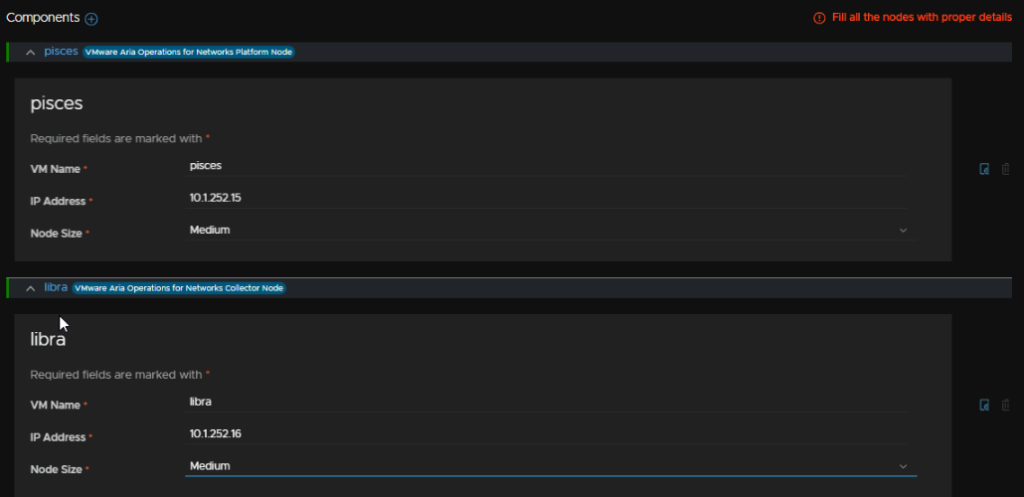
Then for the components you need to add the VM names, IP addresses and select the sizes, then select Next
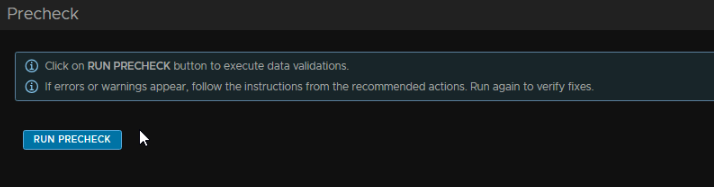
Then run the precheck
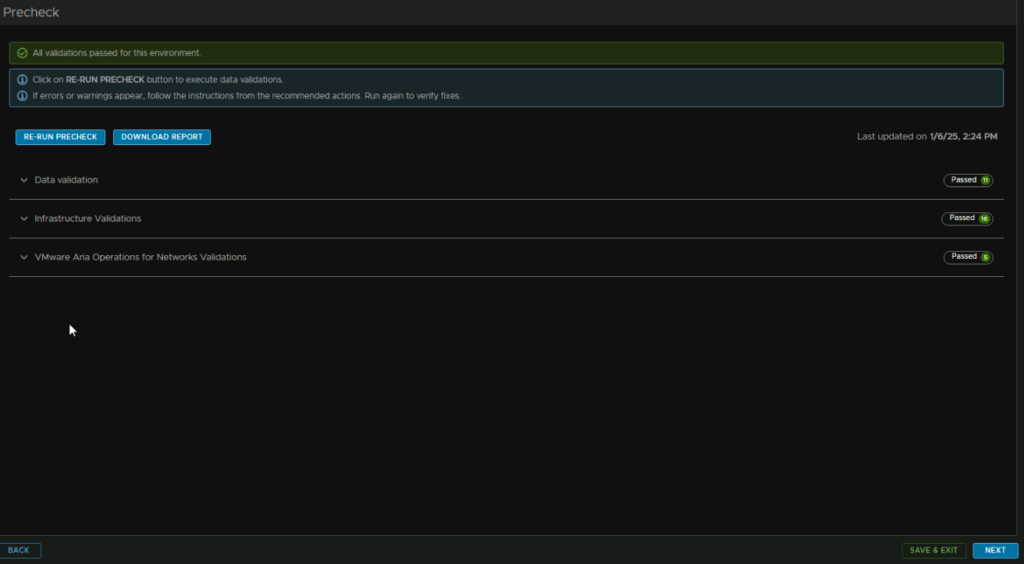
Once thats all green click Next
Check over everything and hit submit, my deployment took ~28 mins
6 – Tanzu
6.1 – Tanzu Edge Cluster
For Tanzu you need an Edge cluster of at least large, which is 8vCPU and 32GB per node, I have chosen to de a separate cluster for this for two reasons, firstly, if you have no interest in Tanzu, the Edge cluster deployment guide will fit what you need and if you dont need a large cluster medium is fine, and by having separate clusters, if anything happens to either cluster, everything is logically separated, which is better
So, to add a new Edge cluster, head to Inventory/Workload Domains and select your workload domain, mine is istlab-vcf
Then click Actions and click Add Edge Cluster

Ensure you meet the requirements and click Next
We are then going to add an Edge cluster name, set the same MTU, add a new T0/T1 gateway name, keep the cluster profile on default, and add our passwords, then click Next
Then make sure Kubernetes is selected for the use case at the top, and add a BGP ASN that is different from your cores and the other Edge cluster, the click Next
Add an Edge node FQDN, select your cluster, and for the Cluster Type, select L2 Uniform
For that edge FQDN, add a management IP in CIDR notation, add the gateway, then two TEP IPs from the TEP VLAN, add the gateway and the VLAN tag, this will be the same network as our initial cluster
Then add an Uplink IP on your first Uplink VLAN, this is the same network as the last Edge Cluster, you’ll need the VLAN tag, Edge IP in CIDR notation, and the BGP ASN for that device
And add the details for the second uplink VLAN
I have the same ASN on both as I only have one router, in a production environment each core switch should hold one of the two uplink VLANs with their own ASN number, so yours will be a little different
Then click Add Edge Node
And repeat for the second Edge node
Then click Next and check the summary, when you are happy, click Next, wait for the validation to succeed and then click Finish
Just ensure you have the right config as you cant update the Edge cluster and removing it requires a CLI script
6.2 – Tanzu Deployment
Now we have our Tanzu Edge cluster, we can get the solution deployed
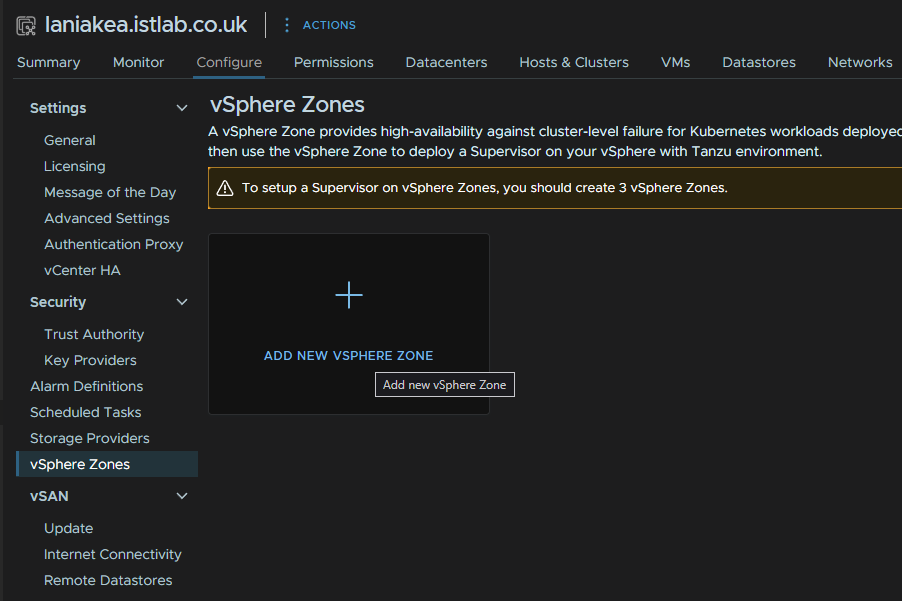
We first need a vSphere Zone, click the vCenter from vSphere and head to Configure/vSphere Zones then click Add New vSphere Zone
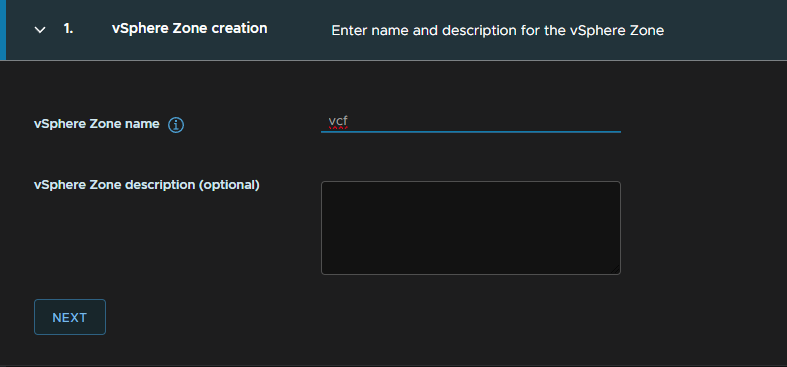
Give the zone a name and click Next
Select the cluster and click Finish

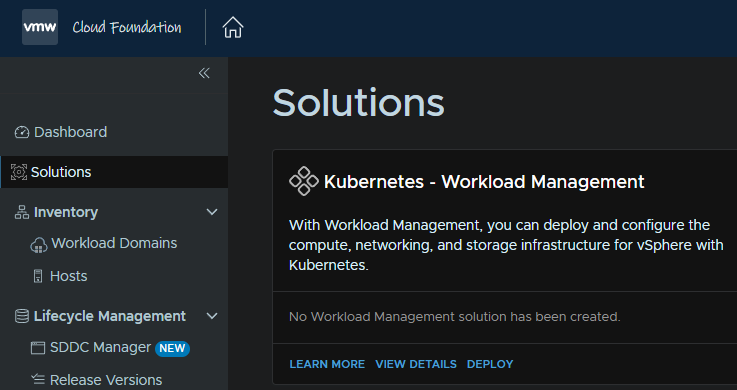
From the SDDC Manager we can click Solutions, the Deploy on Kubernetes
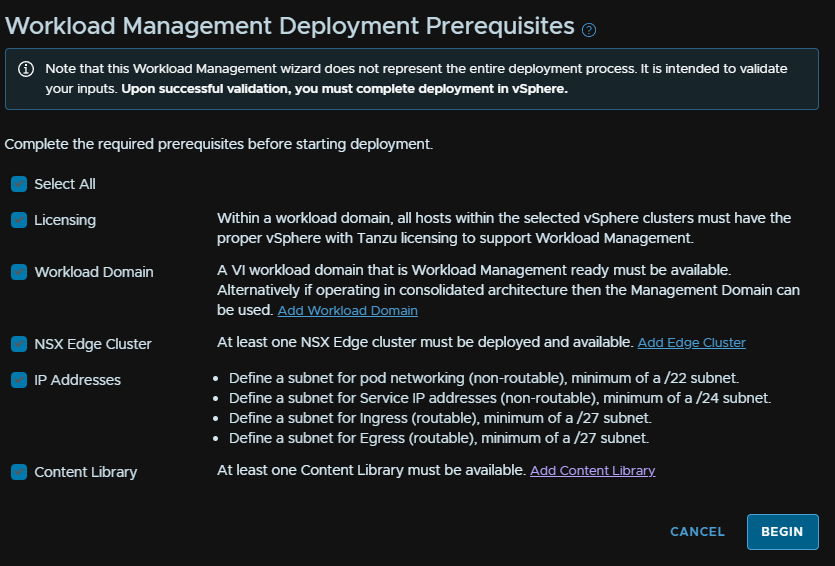
Check you meet the prerequisites and click Begin
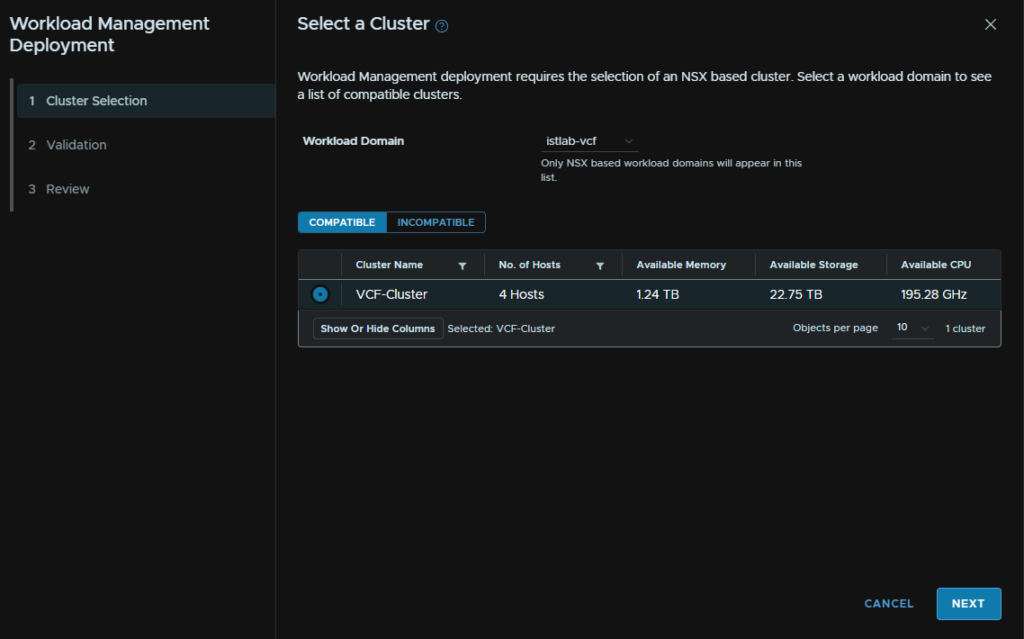
Select your workload domain and cluster, then click Next
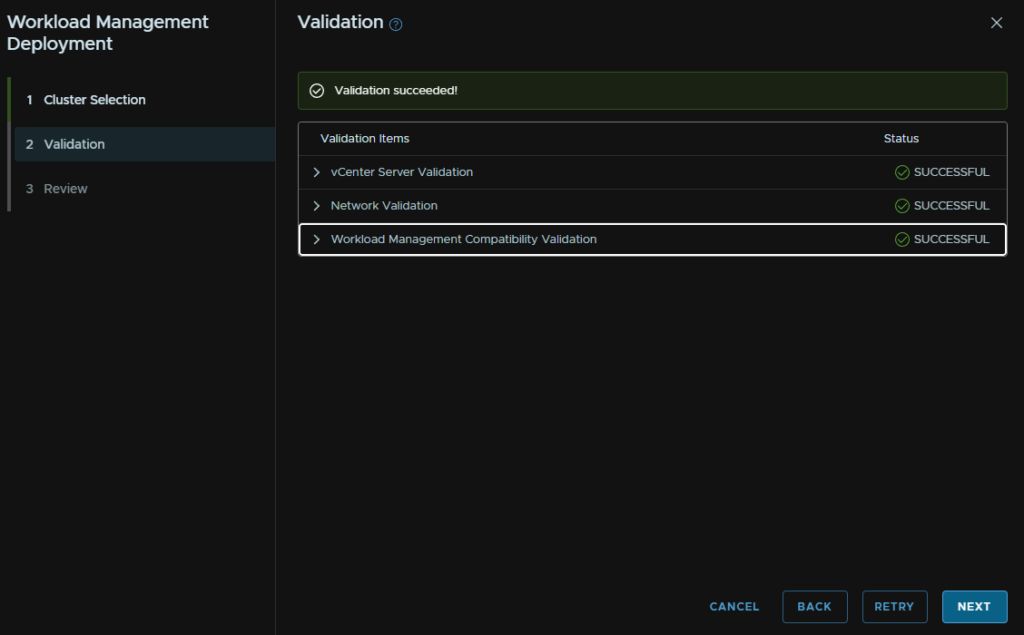
Wait for the validation to run and click Next
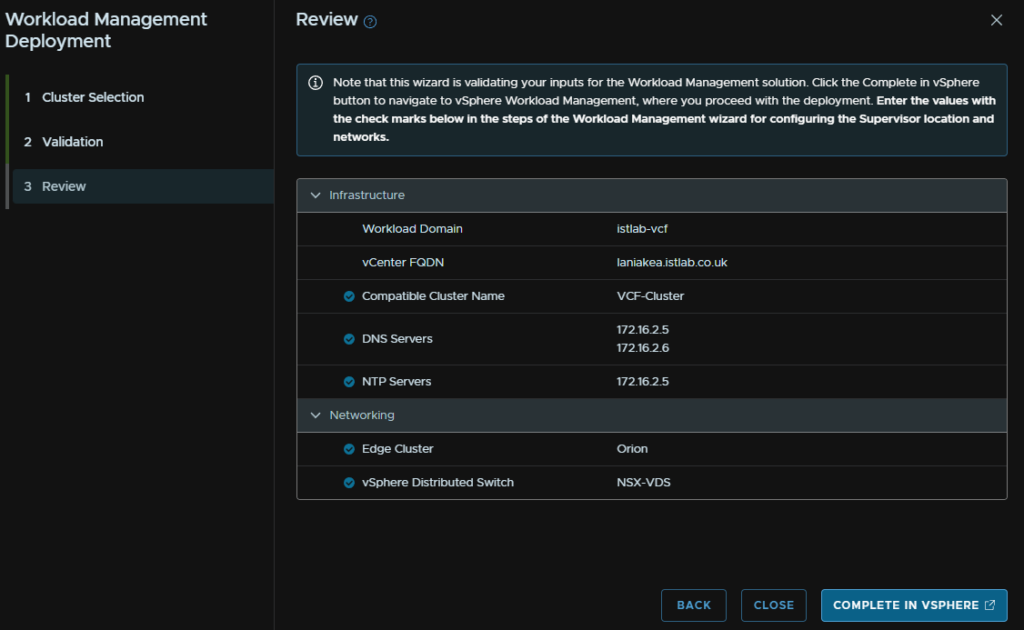
Check the DNS/NTP is correct and click Complete In vSphere
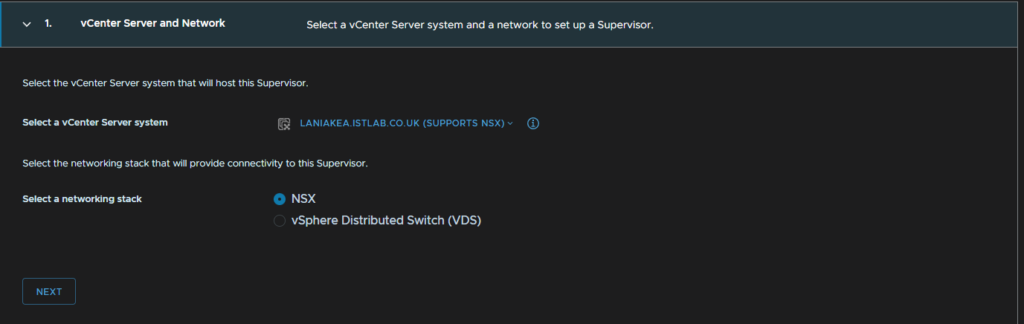
Make sure NSX is selected here and click Next
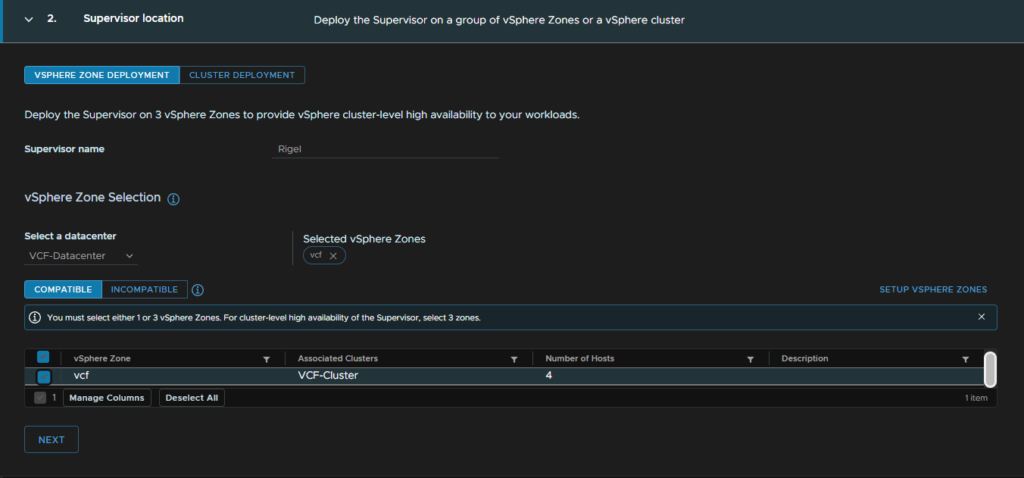
Give the supervisor a name, select your datacenter and check the zone we created earlier, then click Next
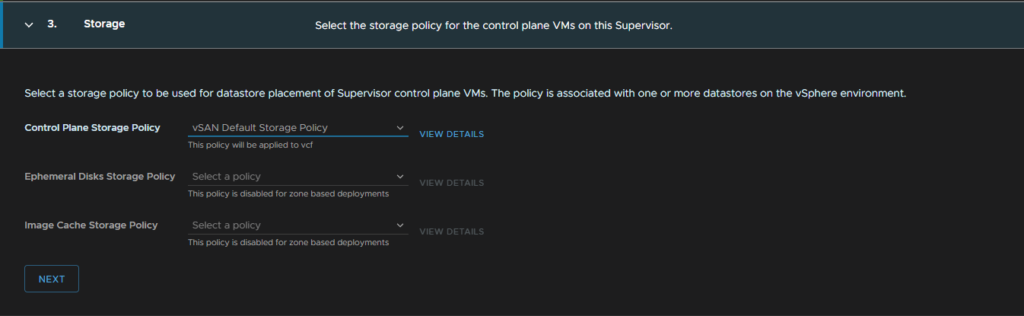
Select a policy for storage, you can use the vSAN default, or a custom one if you have it, I am using the default, then click Next
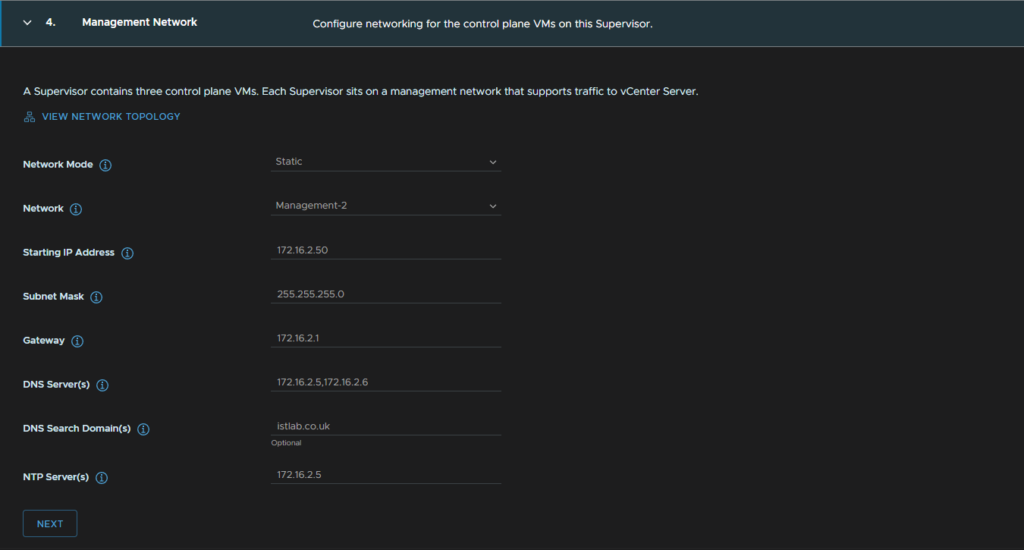
Then setup the Management network, I have a separate VLAN for this with other management VMs, you want to select Static for the network mode, select the management network port group, this is not an NSX port group for me
Then fill in the networking including a starting IP address, the system will use five, the subnet, gateway, DNS, search domain and NTP, then click Next
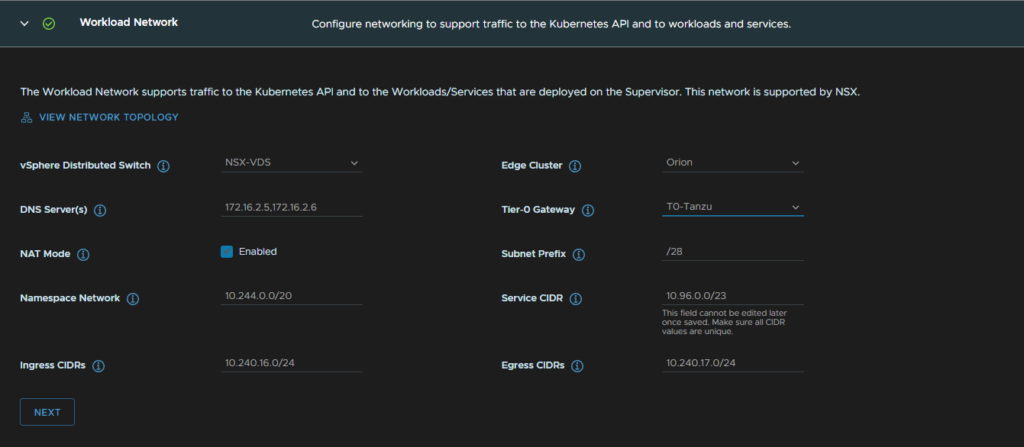
For the workload domain, I am using the stock configuration here as the namespace network doesnt overlap with mine, and the service CDIR should be left unchanged
For DNS I have added my servers from before, the VDS selected is my NSX VDS, Edge Cluster is the new cluster we just deployed, the T0 gateway on the cluster is selected
Leave subnet prefix at the stock, for ingress/egress CIDR, choose a network that doesnt overlap with your network, for me the 10.244.0.0/16 network isnt used anywhere else, so it seemed best to use more IPs in that with a couple /24 blocks for each
When thats filled out click Next
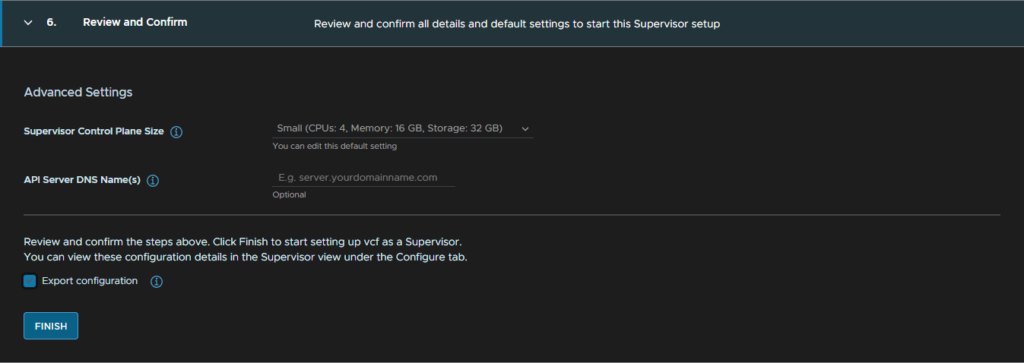
Keep the supervisor on small, unless you are planning a big deployment, I left the API DNS blank as its optional and exported my config, then click Finish
Once thats finished the cluster should be all green

Now we need to apply our license, in the SDDC manager head to Administration/Licensing

Then click + License Key

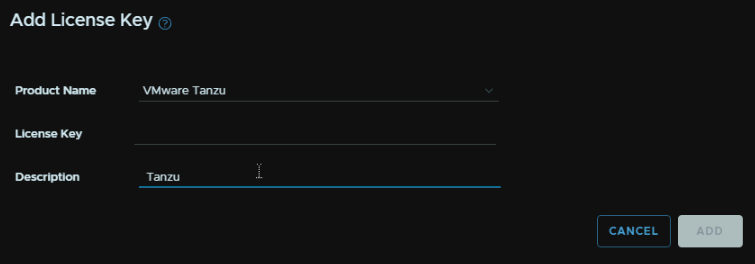
Select the product for Tanzu from the drop down, add your license key, and a description, the click Add
Then head back to Solutions and click View Details, this should also be showing our new workload management solution
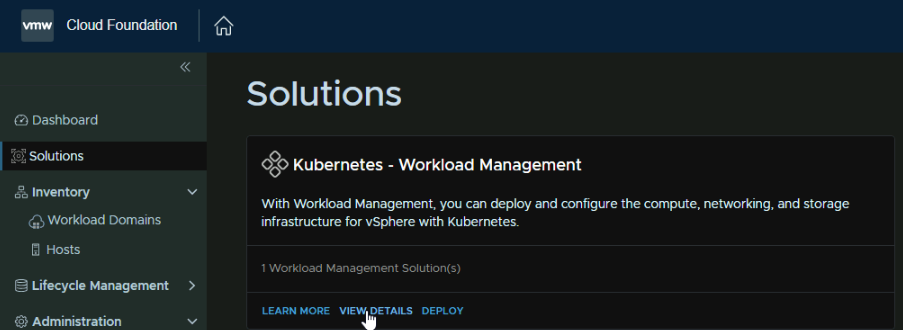
We can then click the three dots on our cluster and click Update Workload Management License

Select the license key and click Apply
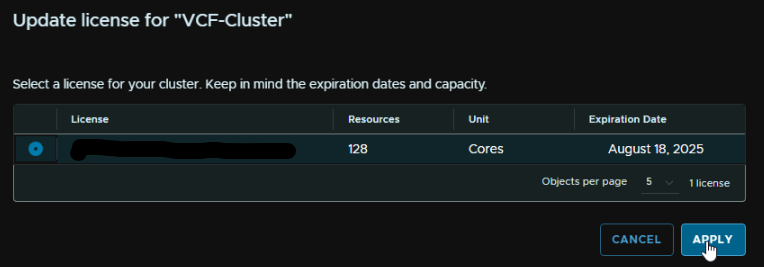
We can see thats worked as the license expiry has been updated

6.3 – Consumption Interface Deployment
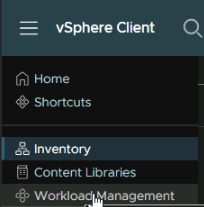
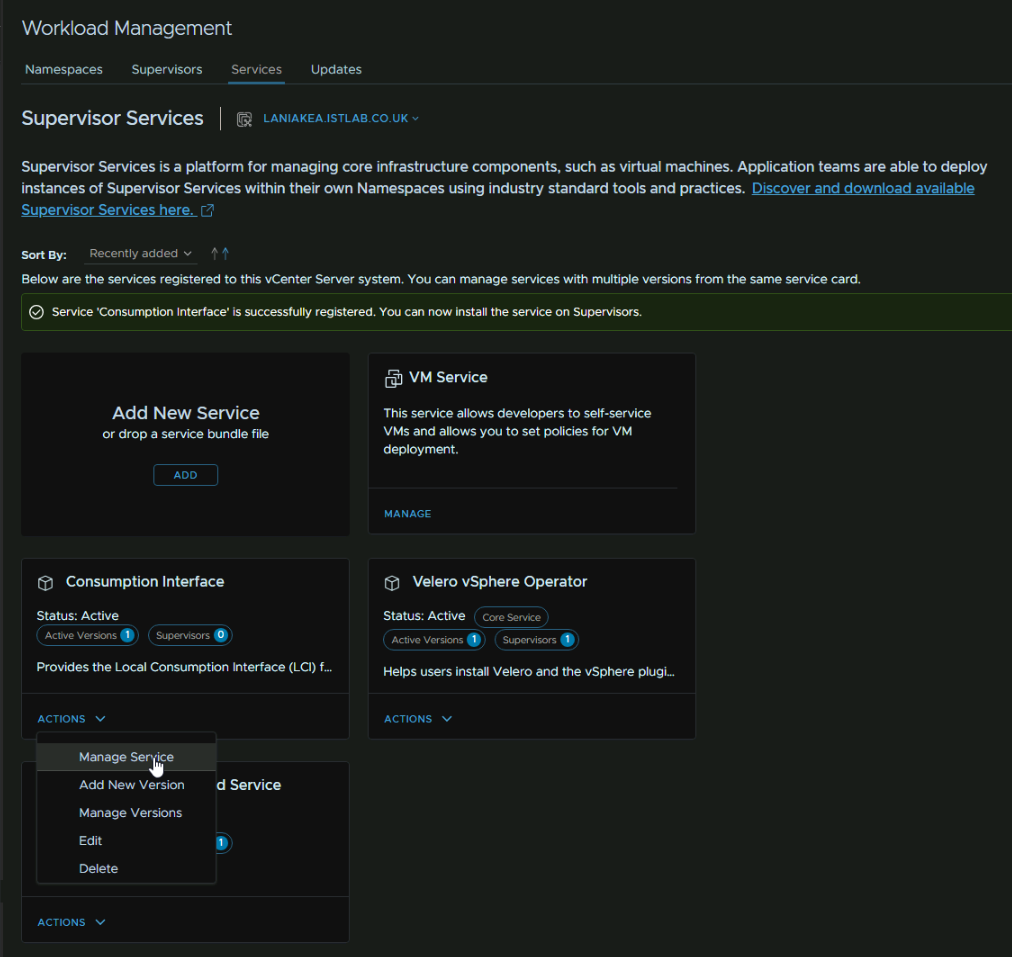
Once you have namespaces deployed, click on the three lines in vSphere and click Workload Management
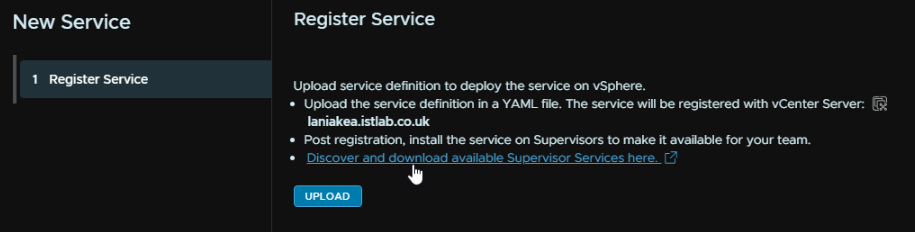
Click the Services tab, the click Add under Add New Service
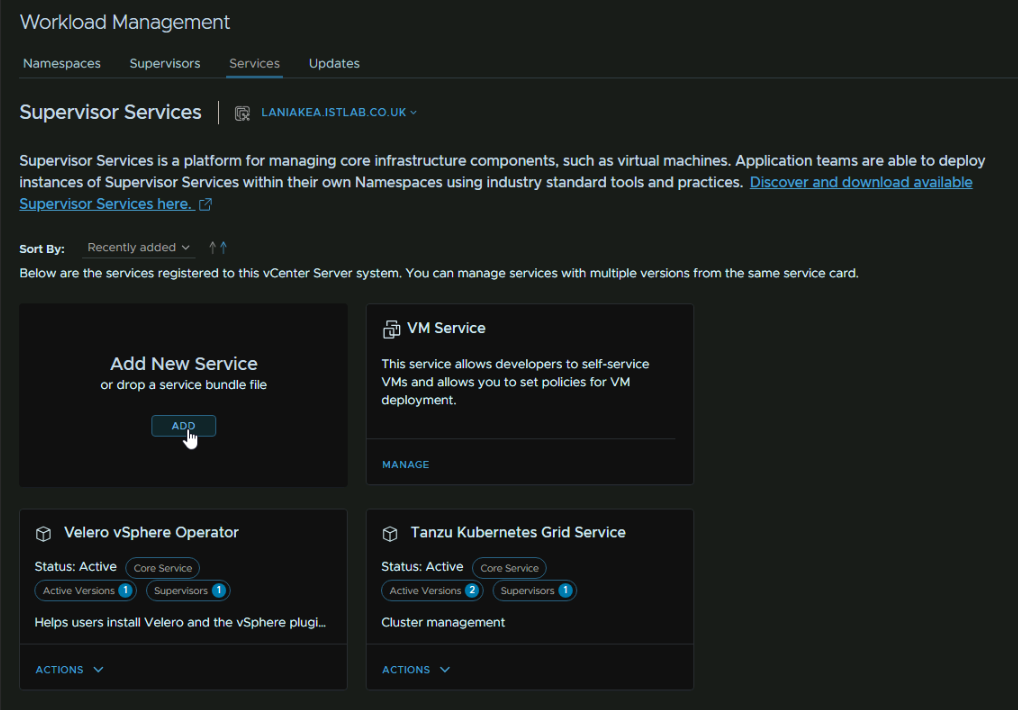
Click the link to discover and download new services
Then scroll down till you reach the Consumption Interface section, and click the like to download the latest version
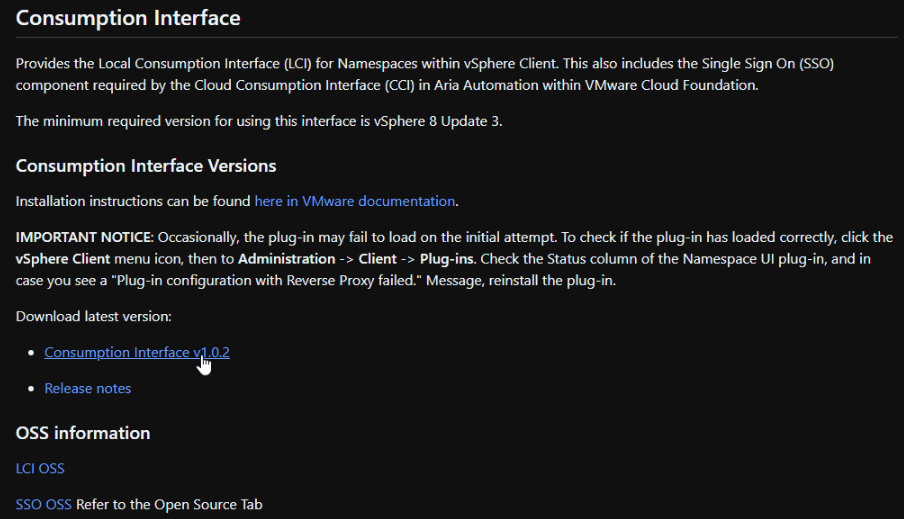
This will open a tab in VMware Jfrog, and save the YML on the popup

Head back top vSphere, and this time when adding a new service, click Upload
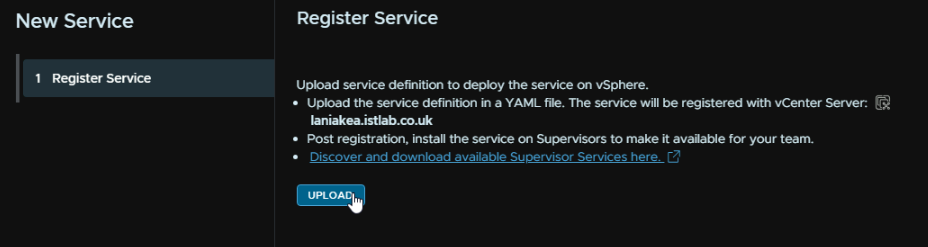
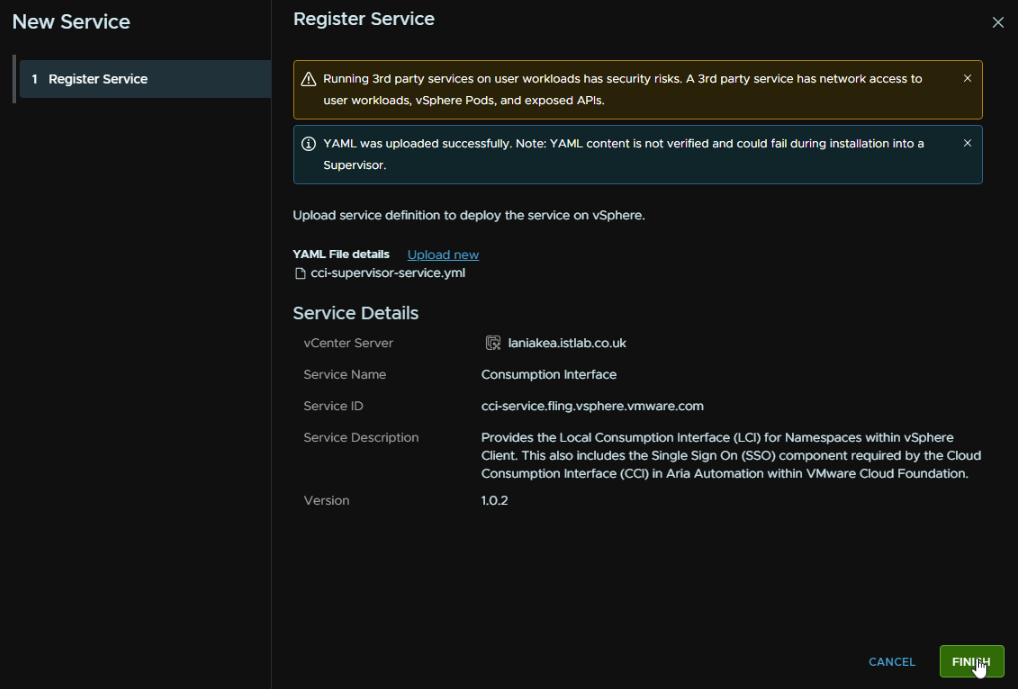
And double click the YML we just downloaded

And click Finish
Now we have added the service, we need to enable it, for the new consumption interface widget, click the Action drop down and then Manage Service
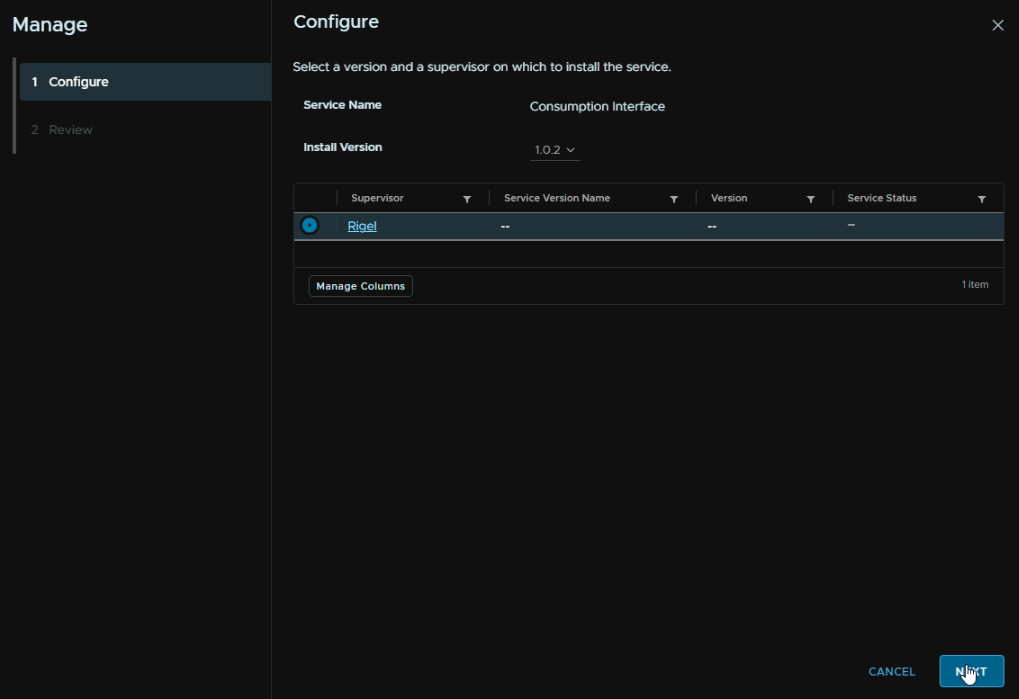
Select the supervisor, and then click Next
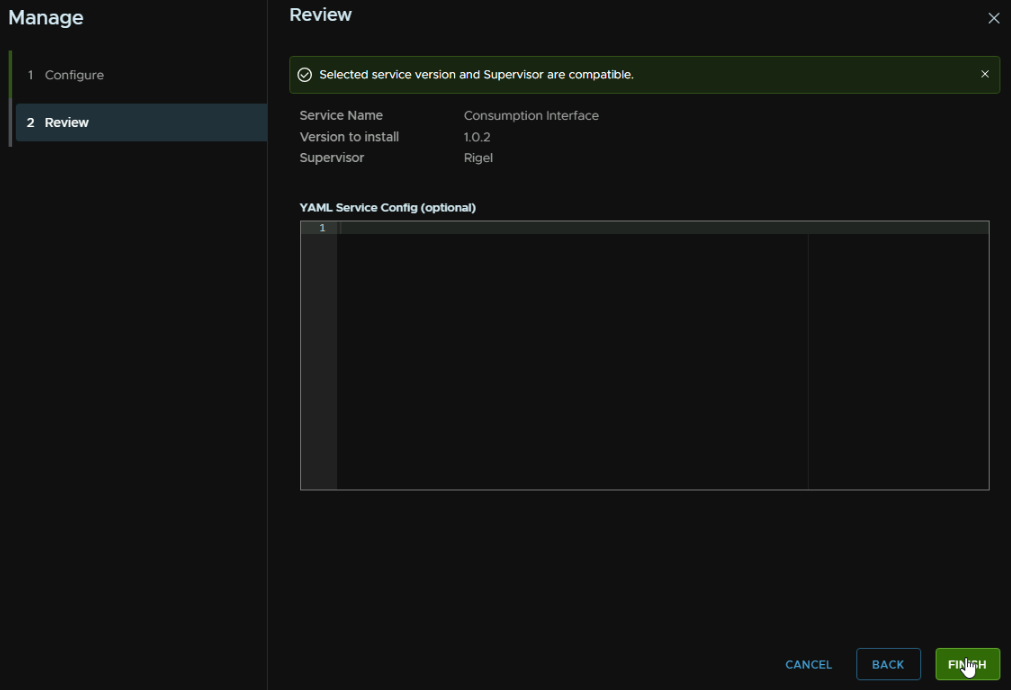
Wait for the compatibility check to run, and click Finish, dont add any service config
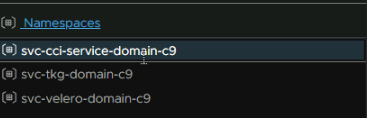
You will see a new namespace pop up
And the plug in should be installed in a few mins, the pops can take 5 mins to spin up

Which you can see in the Pods widget in the Namespace Summary
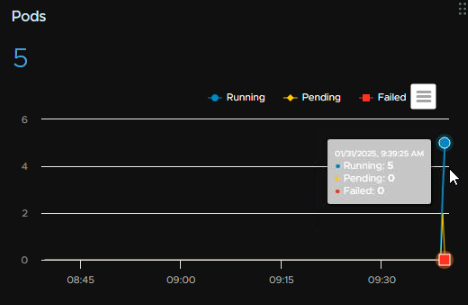
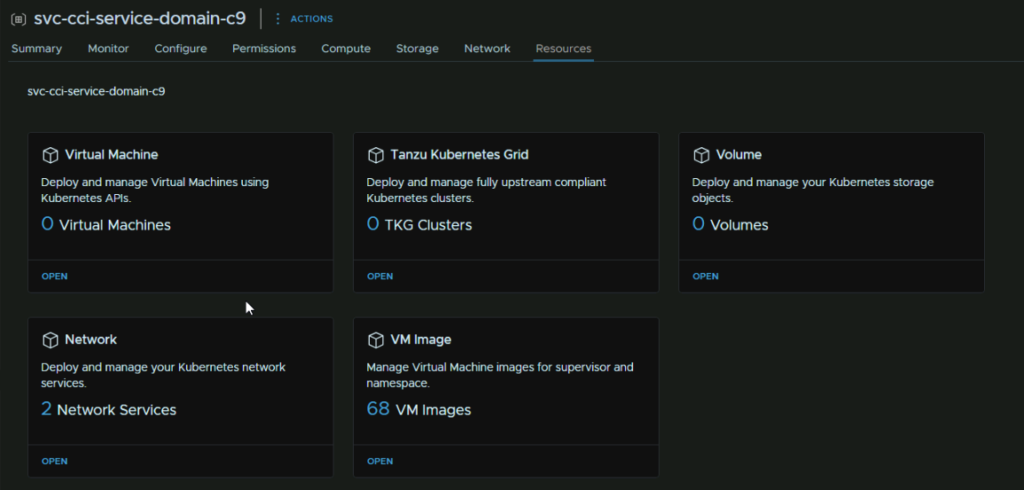
Once you have refreshed your browser, you can see the Resources tab is populated for all namespaces, this will be helpful for Devs who want to create cluster, and they can use the vSphere UI for this with the plug in for their dedicated namespaces
7 – Post Deployment Bits
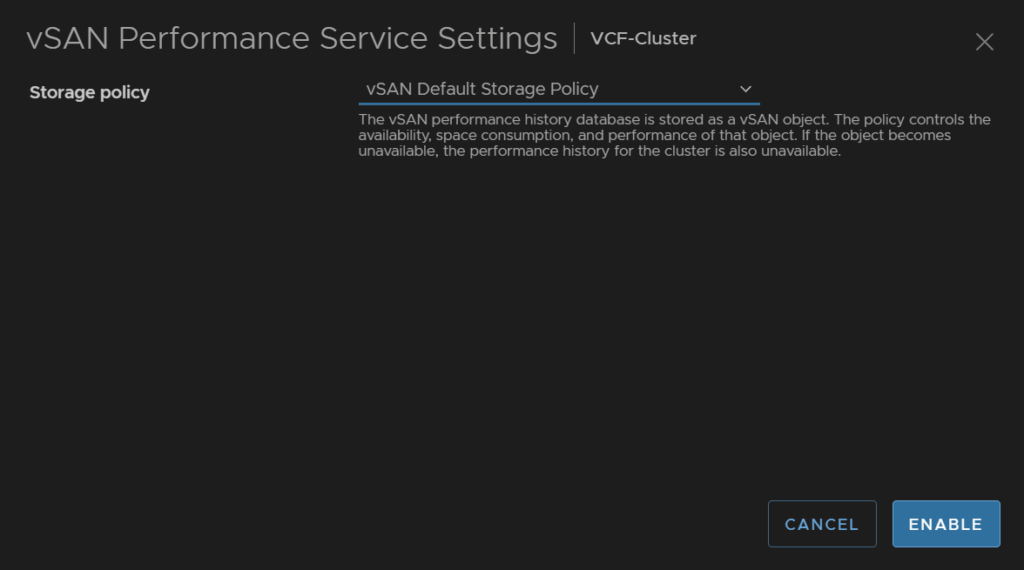
Once VCF has been deployed, there are a few bits you want to do, the vSAN performance stats want enabling, click on the cluster
Then go to Monitor/vSAN/Performance and click enable
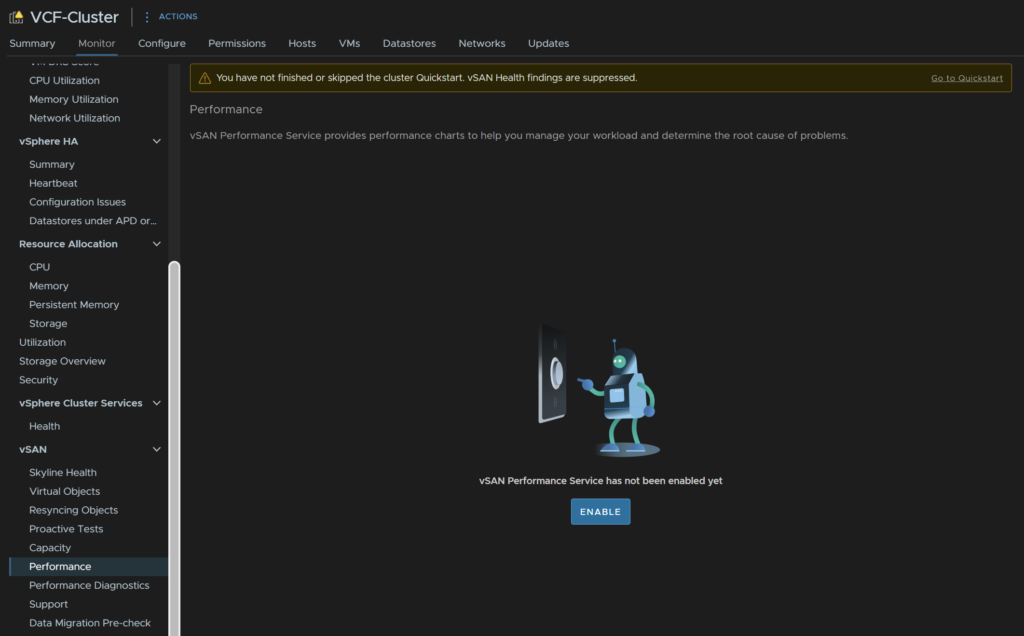
Then click enable
All the local datastores will have the same name, so you’ll want to rename them from the Datastores tab, right click the datastore and rename

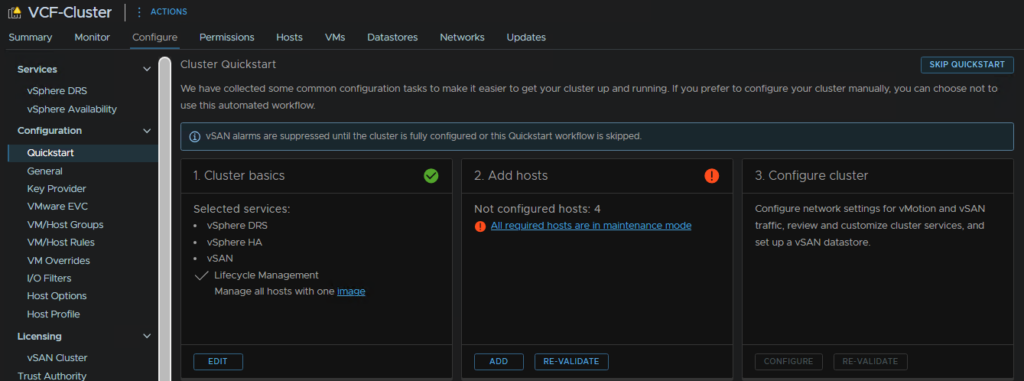
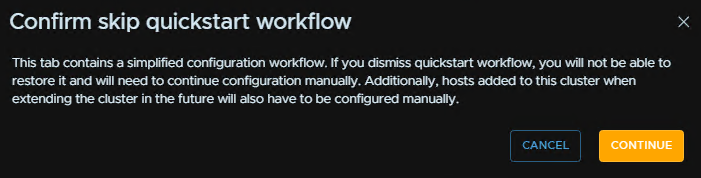
This also doesnt skip the vSAN quick start, which we can skip to remove the warning, click the cluster and head to Configure/Configuration/Quickstart and click Skip Quick Start
Then click Continue
The NSX passwords will expire after 90 days, and with SDDC managing them, and there being a total of 7 appliances, with three accounts each, password expiry is going to be a problem, give we have random 15+ character passwords, I would suggest disabling password expiring for the NSX appliances
Sadly, SSH is disabled, so this will have to manually done via the console, when you are logged in run
set user admin password-expiration 9999
set user audit password-expiration 9999
set user root password-expiration 9999
You can confirm this with
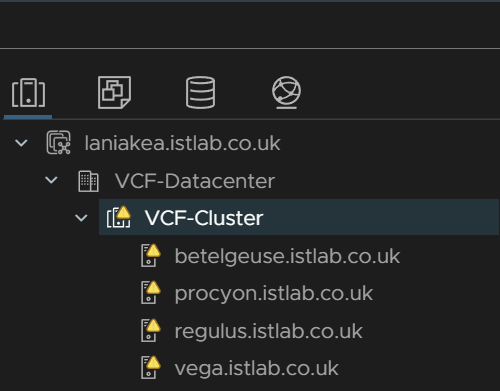
get user admin password-expirationI kept getting this error on the hosts
vSphere HA agent on this host could not reach isolation address
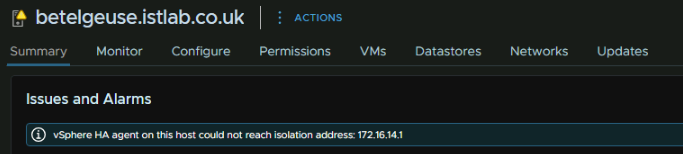
This is caused by a vSphere HA setting, as the vSAN network getaway must be populated when it should be an isolated address, click the cluster, then go to Configure/Services/vSphere Availability and click Edit on vSphere HA

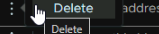
Under Advanced Settings, there is an isolation address thats populated, click the three dots
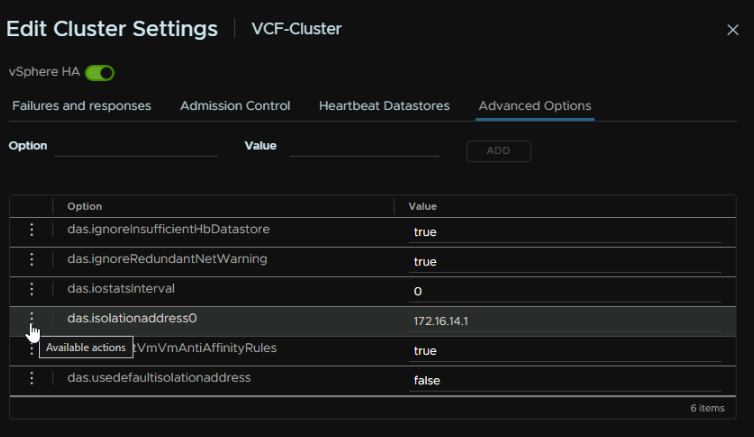
And click Delete
Also remove the das.useddefaultisolationaddress

It should look like this
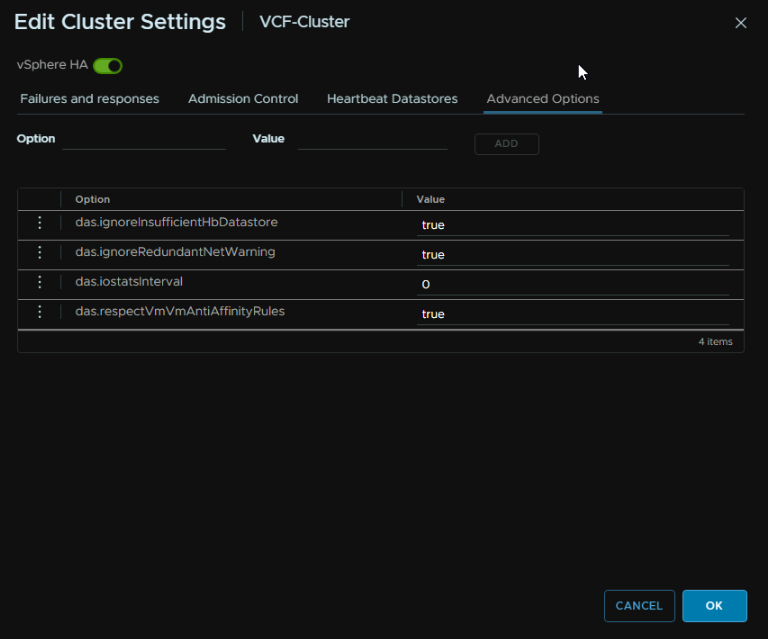
Then disable vSphere HA

Wait a few mins and turn it back on
vSphere will take a good few mins to initialize, but once the election has completed the host warnings will disappear
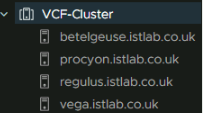

Nice names 🙂
I am thinking about using VCF inside my homelab.Do you notice a much higher resource consumption on a basic VCF Deployment without Workload Management & Aria vs. a traditional vSAN + NSX Cluster?
The workload management does use a fair bit of CPU, so if you want to tidy resources, skip it, while I like Tanzu for K8s, for a home lab its very overkill haha
For NSX, do a single node management cluster for the managers, they pull a lot of CPU, my home lab has the manager using ~4GHz, so 3 of those is a bit much
Aria Automation also uses a lot, 6-7GHz is the base, so it might be worth skipping that, I leave mine off, the home lab isnt full VCF, more of a DIY approach, compared to the office lab I manage, which this guide was built with
Hope this helps 🙂
Very descriptive blog, I loved that a lot. Will there be a part
2?
Feel free to surf to my blog post … empty youtube comment
Yes, it will be configuring all the services, but its a rather long list and they are quite complex, but its in the works, likely based in VCF 9now thats out