In this article we will be going over all the features in the Veeam Data Platform suite, VDP, what tiers you need for them, and how you can use them to level up your backups
We will also be using Wasabi for offsite immutable backups in object storage, as it is bar far the cheapest option and is dead simple to setup
Price wise, it starts at $7/month wholesale, it comes to $2100/25TB block, and your Wasabi partners can certainly get a bulk buy discount to this bringing the cost down even further
If you want an all in one solution, where you have Veeam support for everything then Veeam Data Vault is the best option, it is a fair bit more expensive Wasabi, but if you want someone else managing the data and one support vendor, its the best for this
Azure Blob and AWS S3 are not bad solutions and achieve the same goal, they just have none of the management benefits that Veeam Data Vault offers while costing significantly more than Wasabi, so I dont feel they are a good option from a value standpoint
The products included at various levels in VDP that we will be covering are
- Veeam Backup And Replication – VBR
- Veeam Enterprise Manager – VEM
- Veeam ONE
- Veeam Recovery Orchestrator – VRO
Veeam have information on the feature comparison here, but here is a rough breakdown
Foundation
- Full hypervisor/agent support
- Instant recovery
- Backup for Entra
- Inline ransomware detection
- Immutability
- Syslog event forwarding
- Security Analyzer for VBR
- SureBackup
- Cloud VM support
Advanced
- Everything in Foundation
- Veeam Threat Center And Threat Hunter
- Integrated AV
- Veeam ONE reporting and monitoring
- Veeam Enterprise Manager
Premium
- Everything in Advanced
- Proactive threat assessment
- Orchestrated data recovery with the Recovery Orchestrator
Personally I found the sweet spot to be in the Advanced tier, Foundation offers the basics but misses a lot of really good features, and Premium brings some nice features mainly with the orchestrator, but unless you are a very large organisation I felt it wasnt needed much
Important – By continuing you are agreeing to the disclaimer here
1 – Veeam Backup And Replication
1.1 – Installation
For the VM spec, you will want to go with the following for a VBR install, I have found this works fine for around 6-8 concurrent jobs and around 150-200 total backed up servers, if you have a larger setup then you may need to adjust the RAM amount, Veeam also have more information for the system requirements here
- 4vCPU
- 16GB RAM
- 150GB C Drive
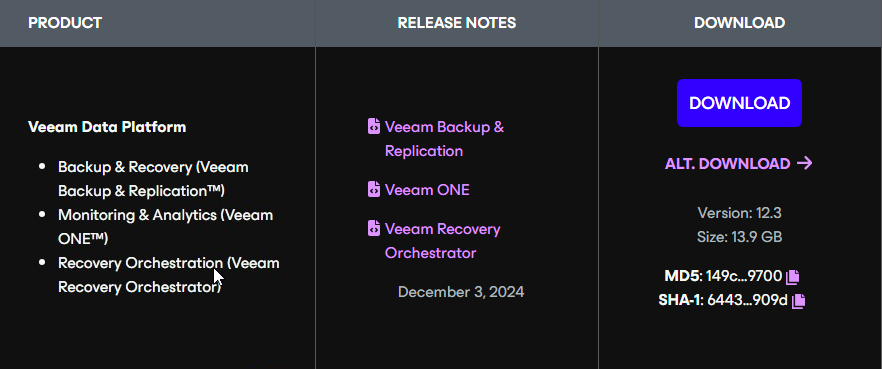
For Veeam Data Platform we will want to download the ISO from either your Veeam account, or you can grab it here as a trial, the trial part is fine if you already have your production license which you can add during the install
Just make sure you sign in before clicking download so it wont ask you for all your business information
Then click Download, if you scroll down
Mount the Veeam ISO for installation
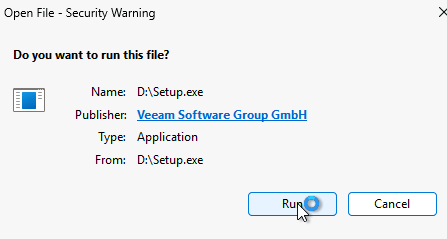
Run the Setup executable

If you get this, click Run
Click Install
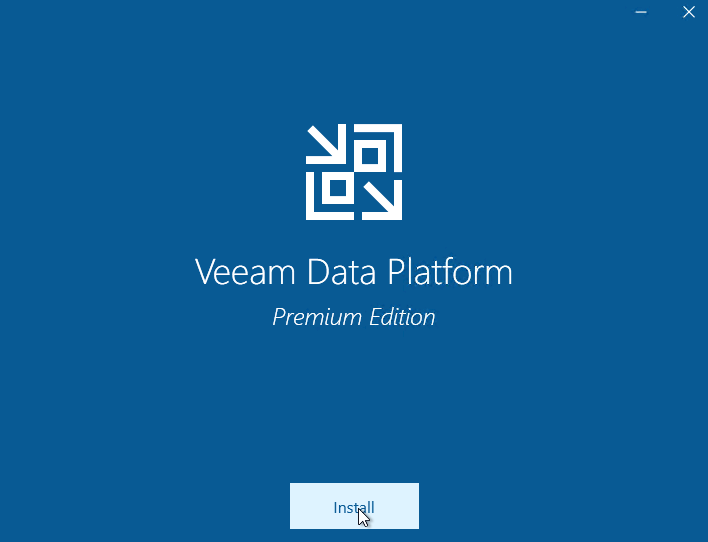
Then click VBR, the middle option

Then install VBR again

The initialisation will take a while

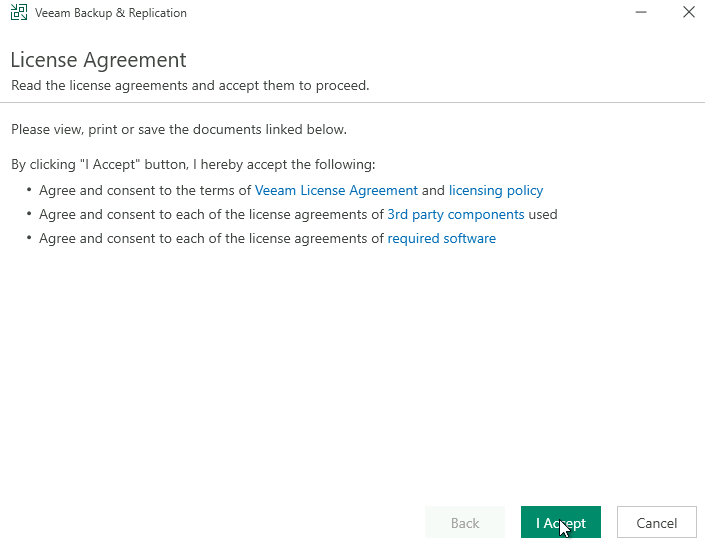
Accept the license agreement
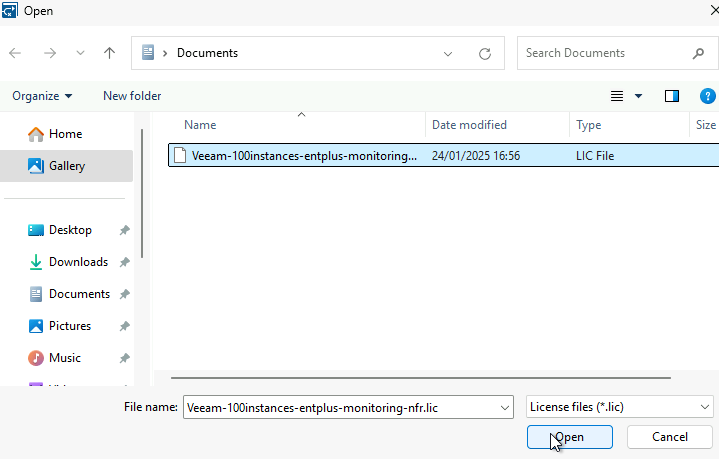
You need to browse for you license file here
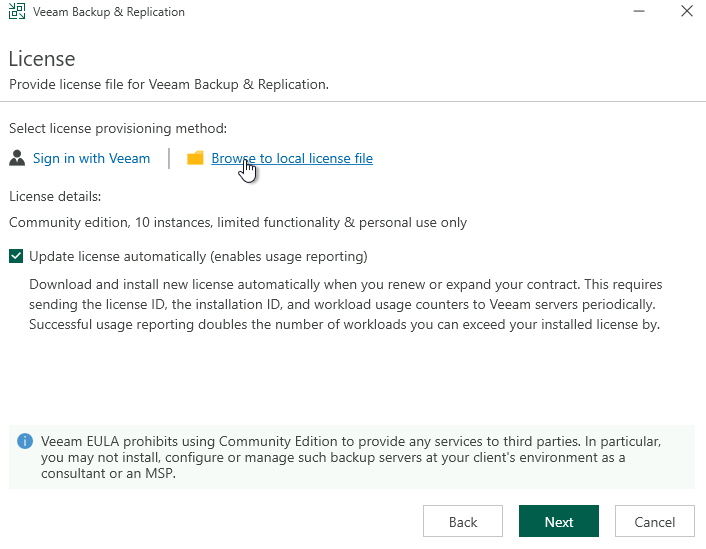
And click the license and then ok
Then click Next

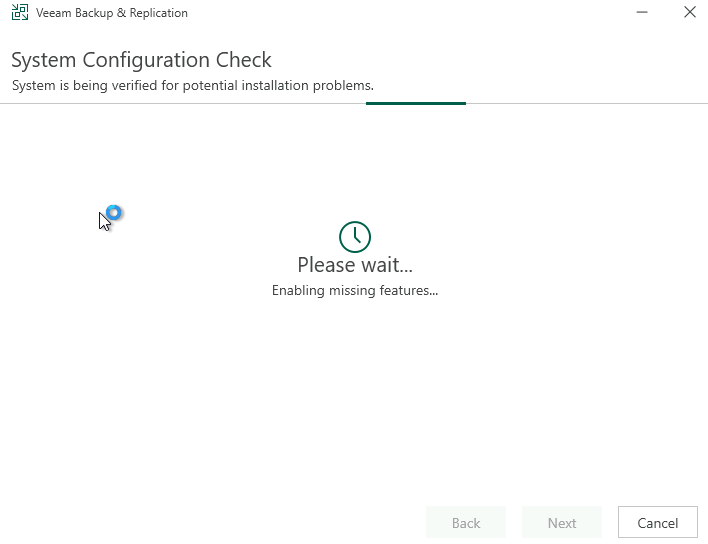
A system configuration check will then be done
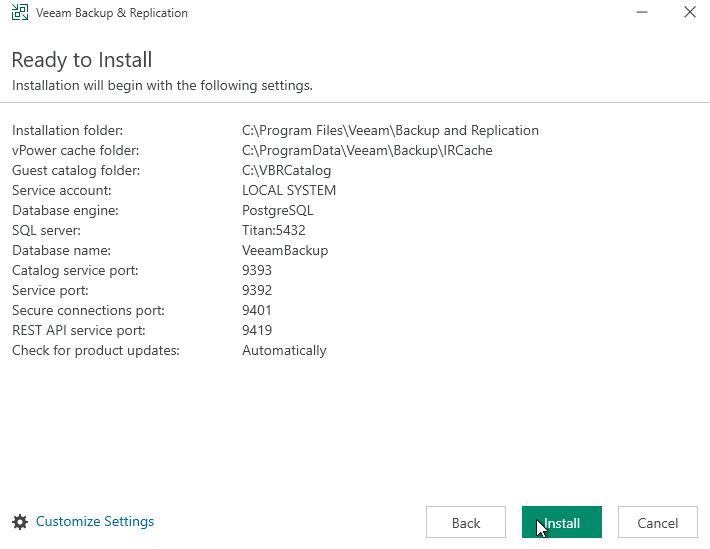
Then click install
You will want to access this via the Veeam console on remote machines, as RDP will be disabled later, if you re run the installer and select the option to install the console only at the bottom, they can remotely connected to any VBR server

1.2 – Windows Firewall GPO
Before we start, VBR needs to be able to connect to the Windows servers via the ADMIN$ share, and the default is for the Windows firewall to block it
We can use GPO to create a policy that applies only in the OUs that we are going to target with VBR, I have a single OU for physical servers, but you can have multiple OUs and bind the GPO to them all
Open Group Policy Management ad an Admin

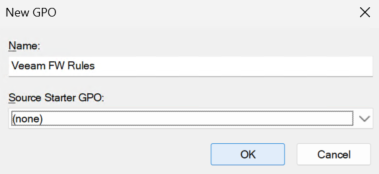
Right click Group Policy Objects and click New
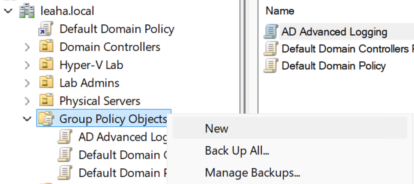
Give it a name and click ok
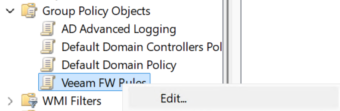
Now right click the policy and click Edit
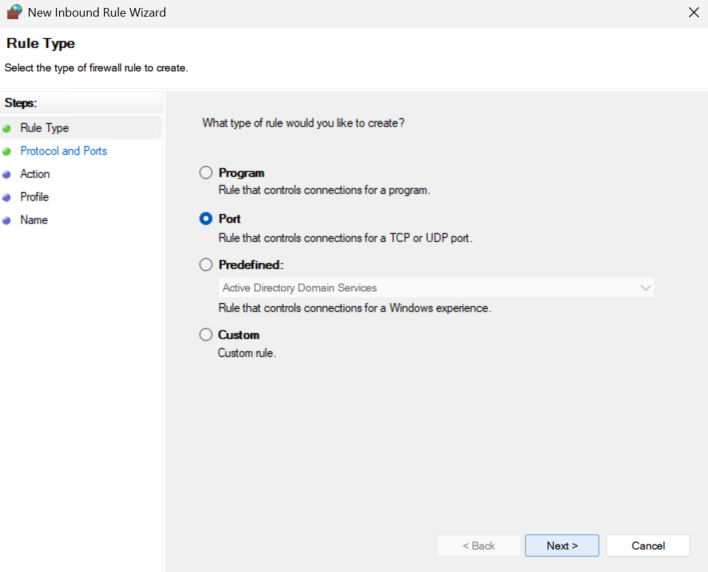
Head to Computer Configuration/Windows Settings/Security Settings/Windows Defender Firewall With Advanced Security/Windows Defender Firewall With Advanced Security/Inbound Rules, right click that and click New Rule
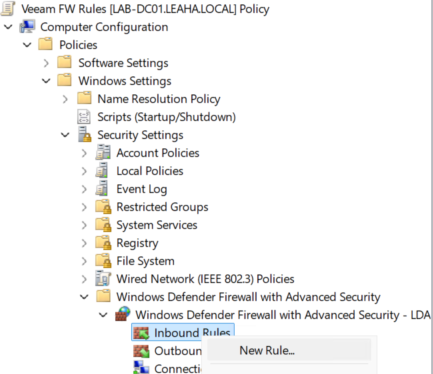
Select Port and click Next
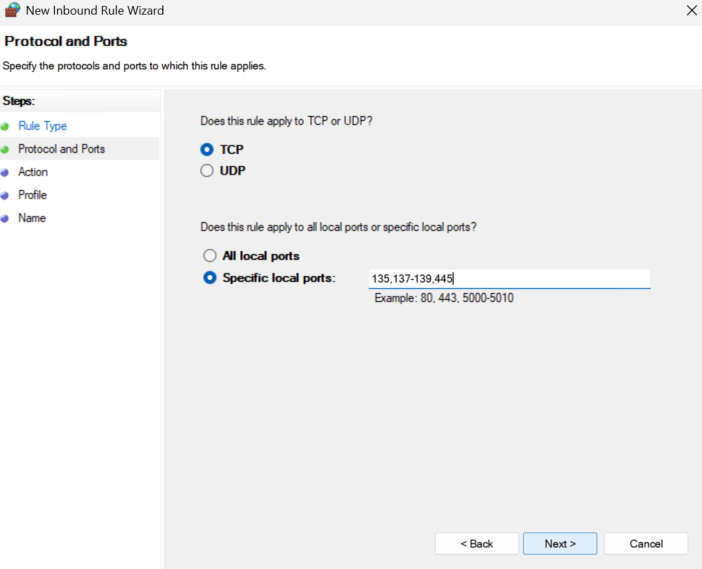
Select TCP and enter the ports
135,137-139,445
And click Next
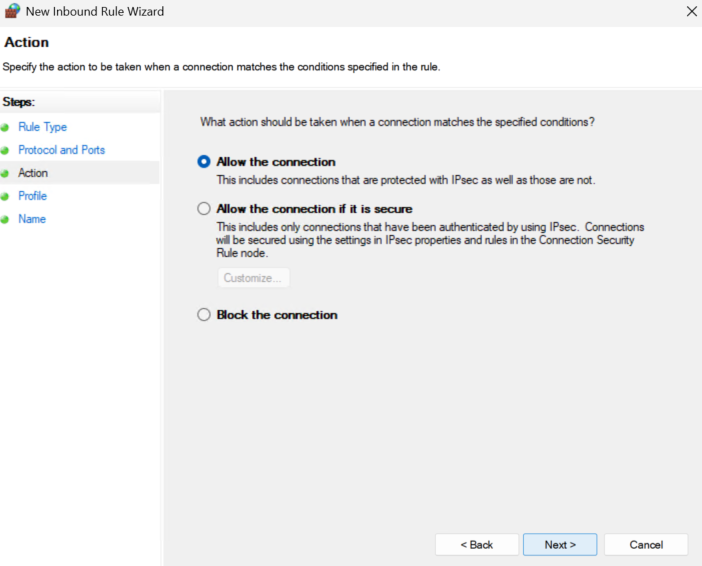
Make sure you have Allow The Connection selected and click Next
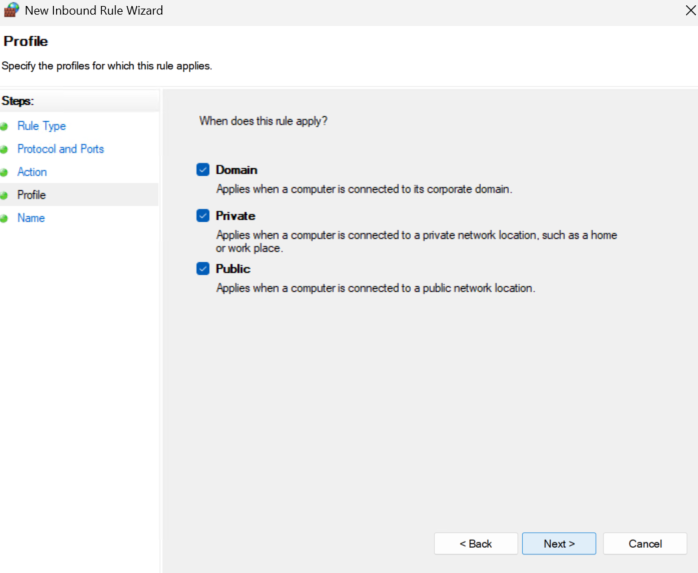
Apply this to all and click Next
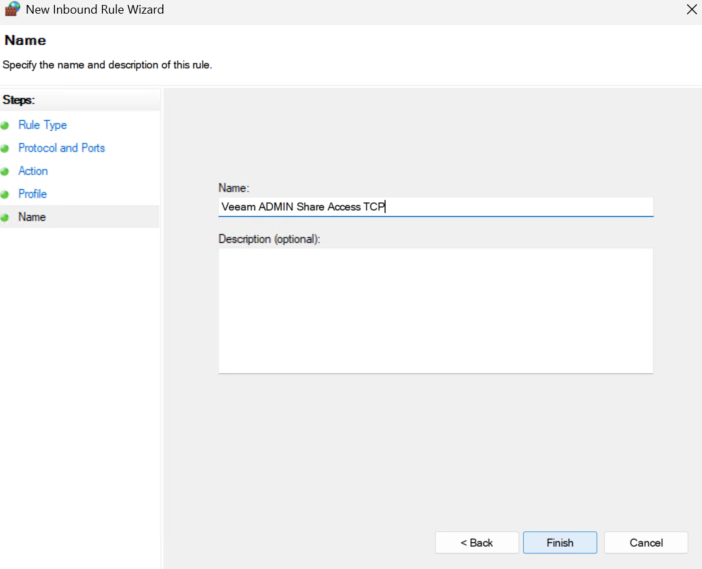
Name it, including TCP and click Finish
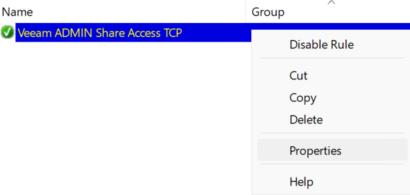
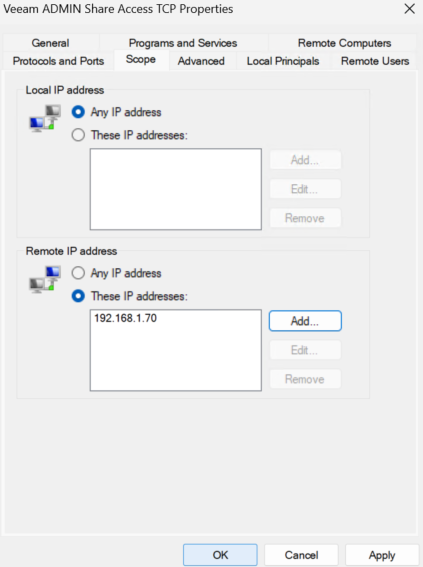
Right click the rule and click Properties
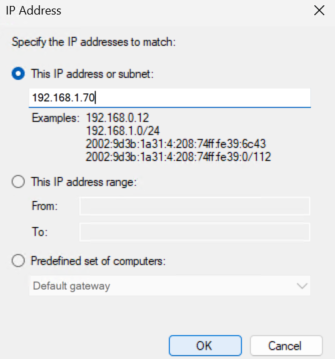
Click Scope, and under Remote IP addresses check These IP Addresses and click Add
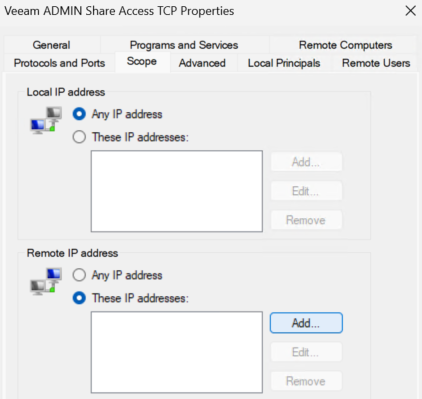
Add the IP address of VBR and all proxies, when we set them up later we can come back and edit the GPO, then click ok
And click ok again
Repeat for a new rule but selecting UDP instead of TCP
It should then look like this

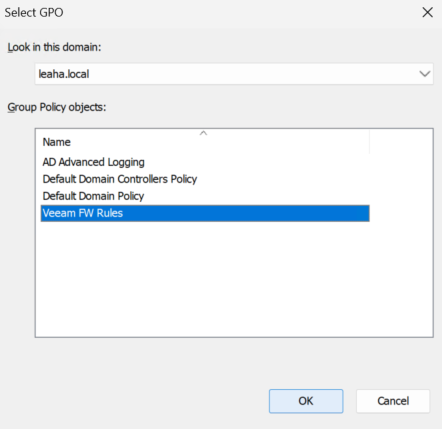
Close the editor, right click the OU where the servers you want to manage by Veeam agents are and click Link An Existing GPO

Then select our Veeam firewall policy and click ok
On the remote machines, update GPO with
gpupdate /force1.3 – Configuring Your Hypervisor
1.3.1 – VMware
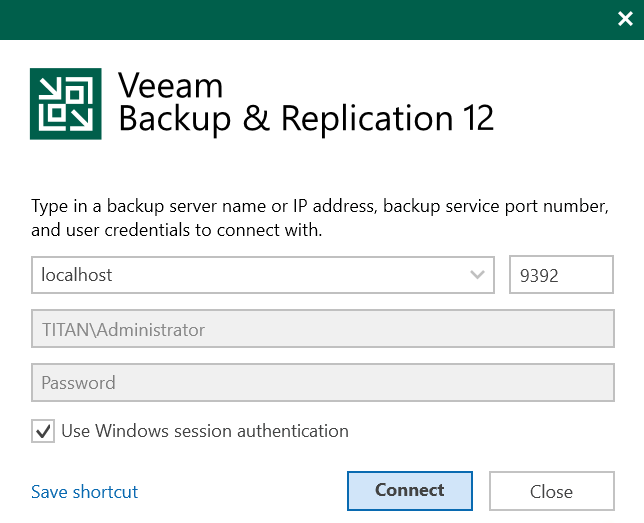
Now that VBR has been deployed open the application from the desktop

Click Connect
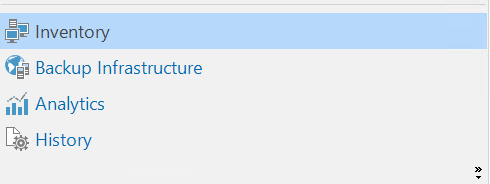
It should drop you on the inventory page
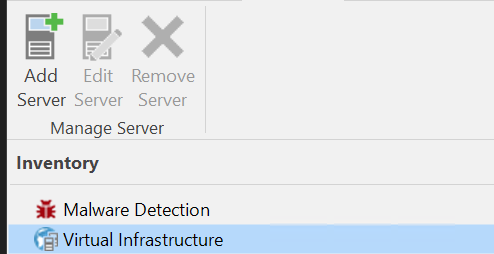
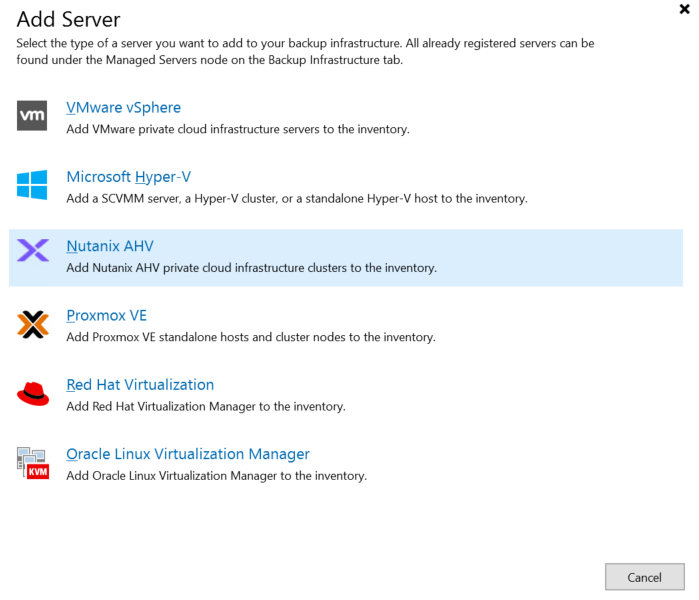
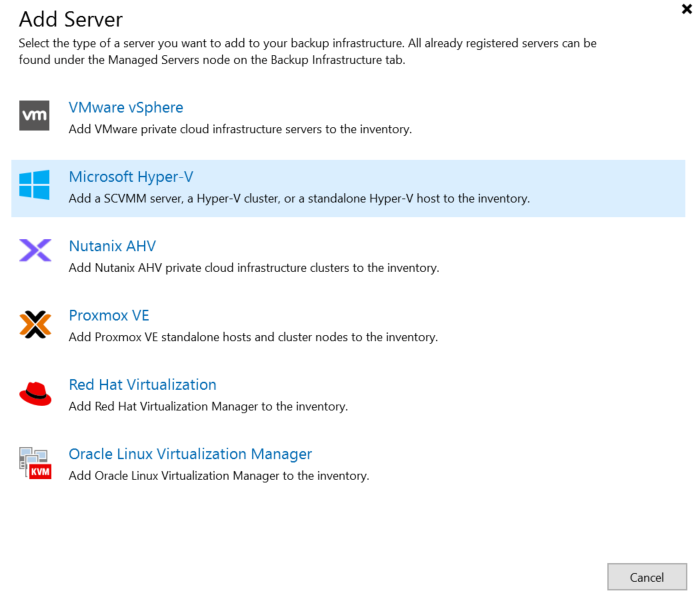
From Virtual Infrastructure, click Add Server

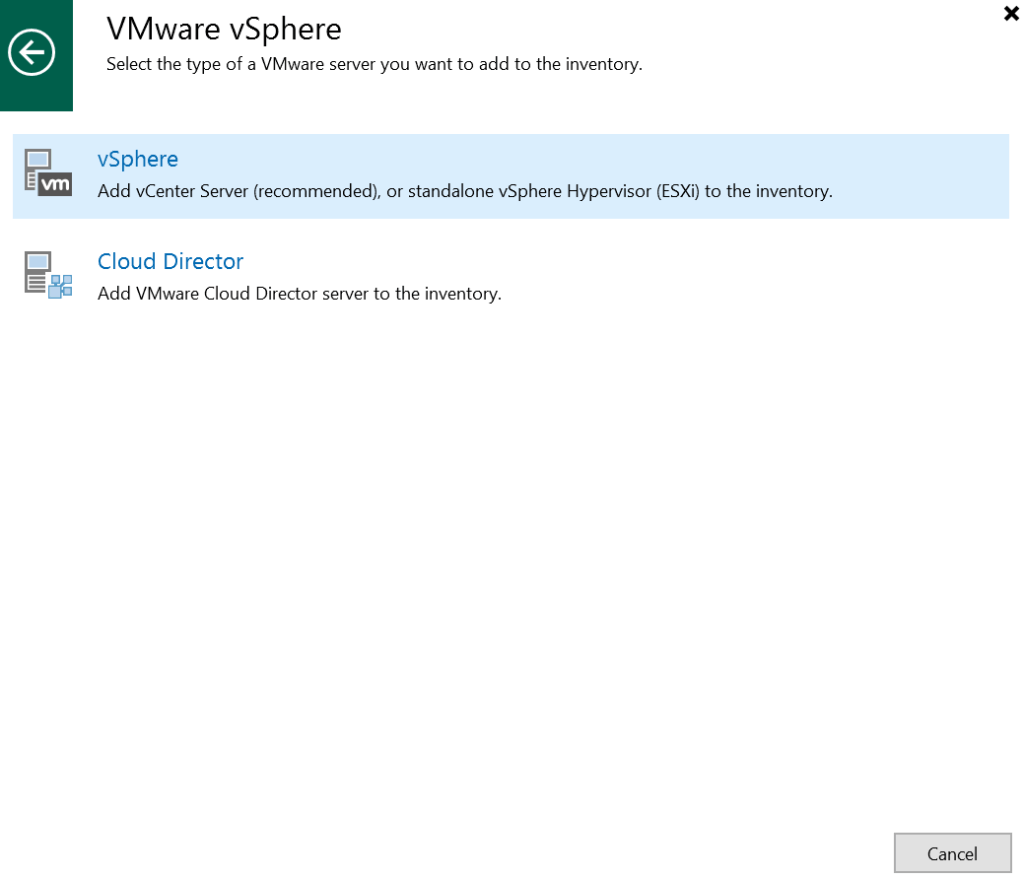
You can add your flavour of hypervisor, I am adding vSphere here
For Hyper-V or Nutanix you can use the same approach with the cluster details, in place of vCenter

Select vSphere
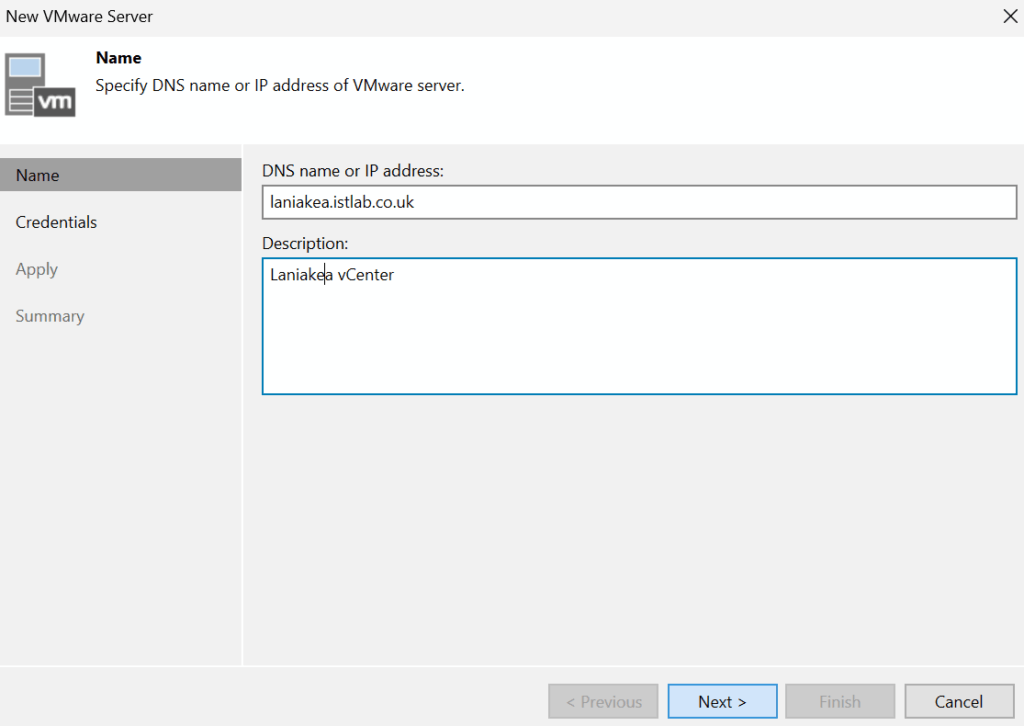
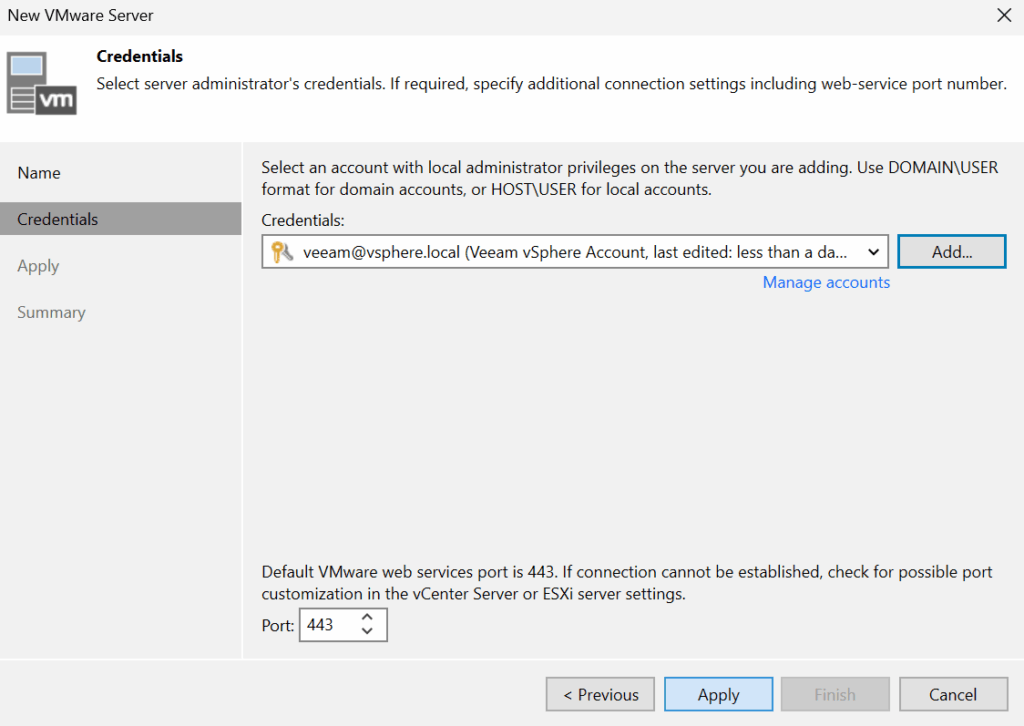
Enter your vSphere FQDN and a description, then click Next
Click Add so we can add our credentials
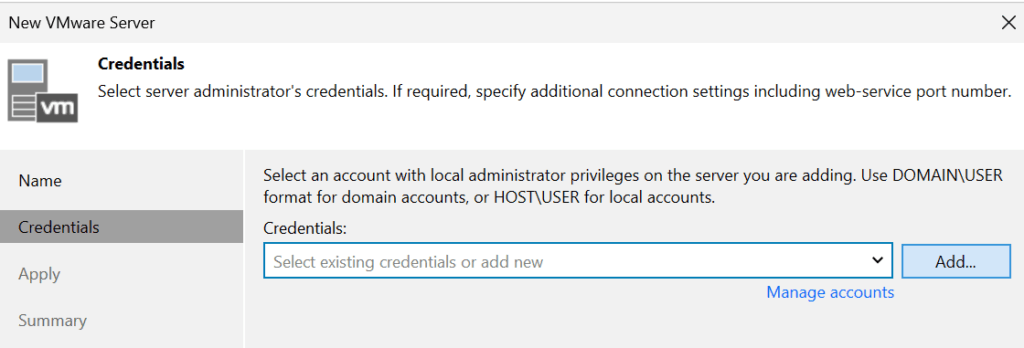
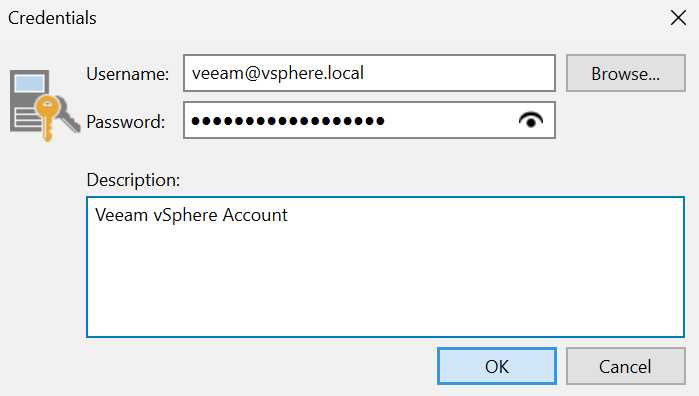
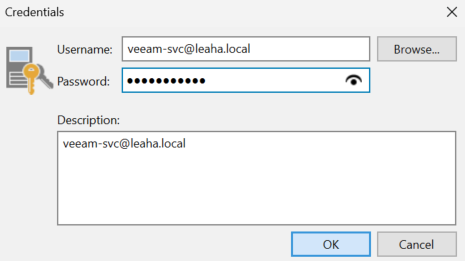
I would recommend a dedicated Veeam service account for your hypervisor with full admin permission, enter your account details and a description and click ok
Then click Apply
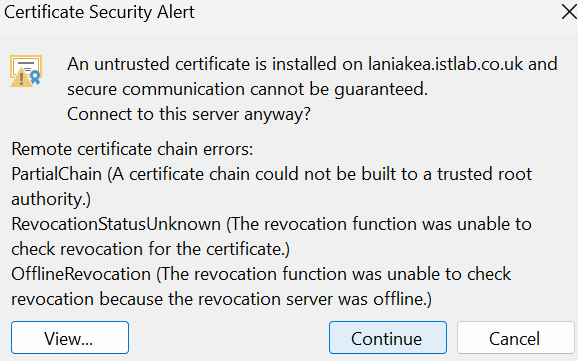
Click Continue on the certificate popup
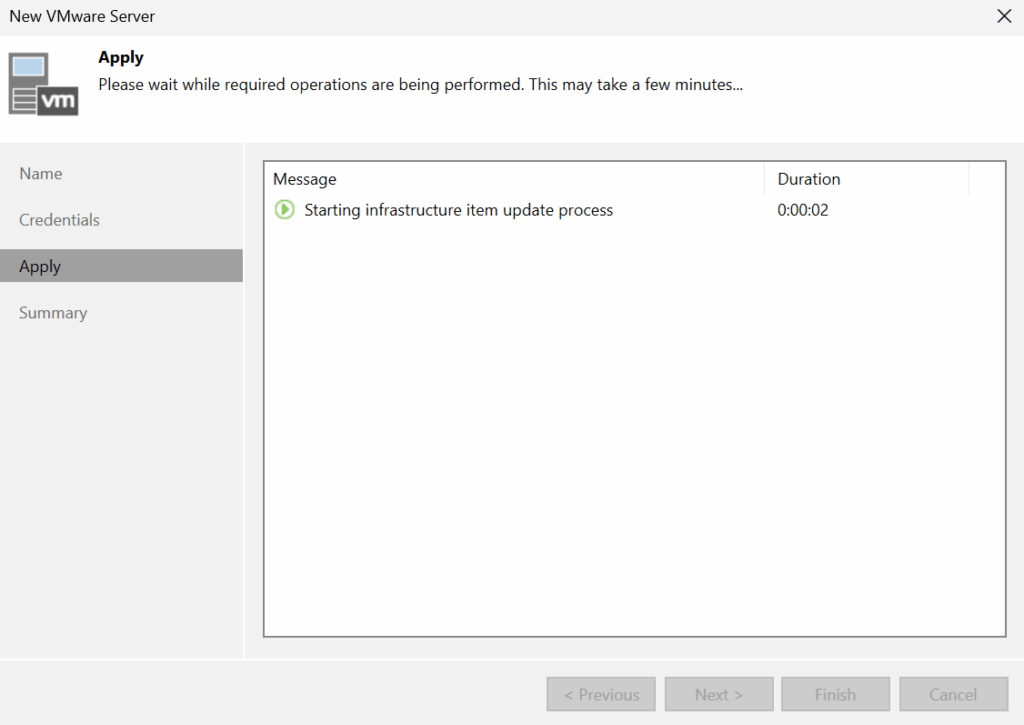
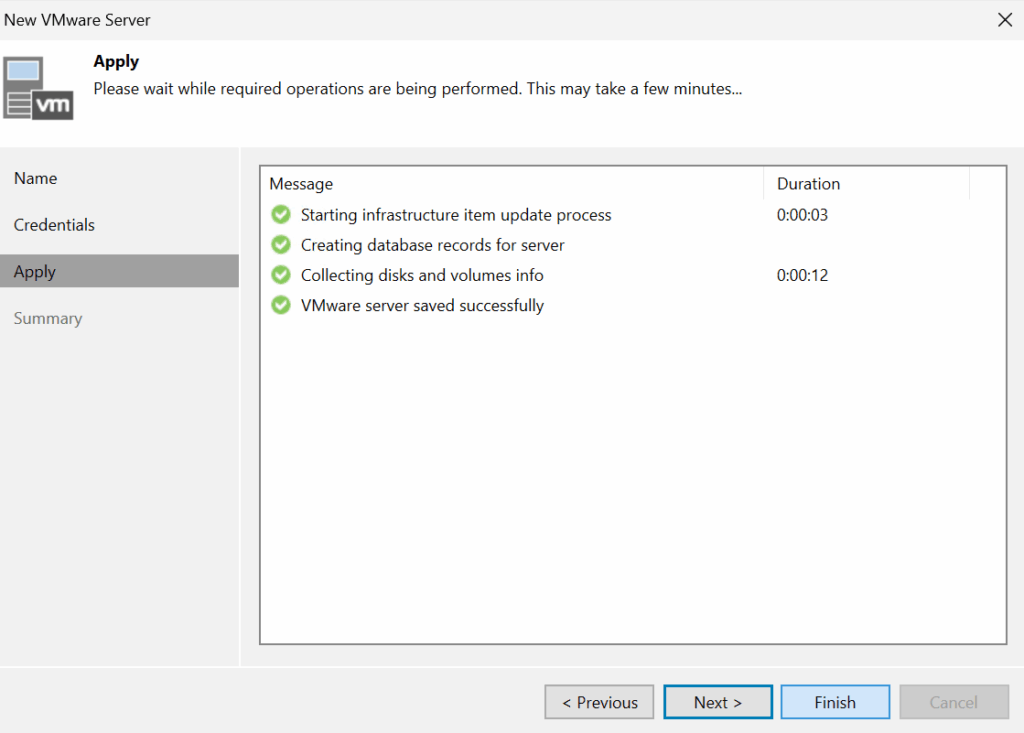
Then wait for Veeam to import your hypervisor
When its done click Finish
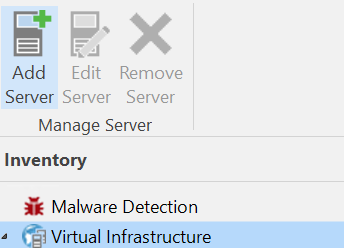
1.3.2 – Nutanix
Now that VBR has been deployed open the application from the desktop

Click Connect

It should drop you on the inventory page

From Virtual Infrastructure, click Add Server
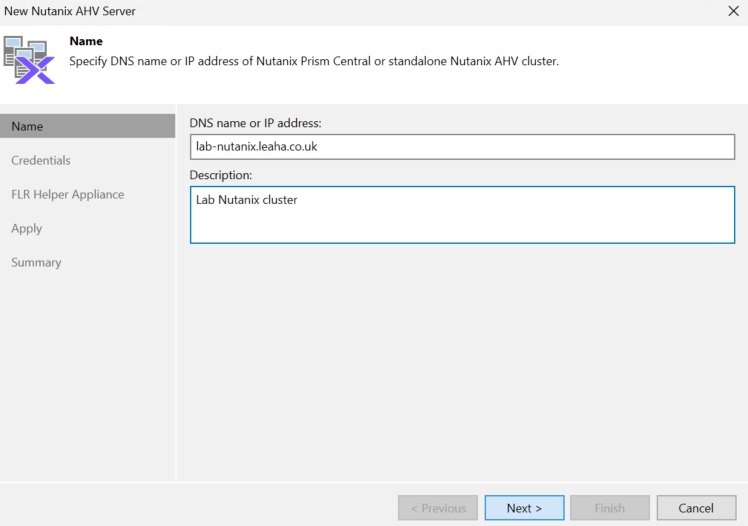
Click Nutanix AHV
We can either add Prism Central, or Prism Element, as I have a single cluster, I only have prism Element, so I will be adding that
Enter the FQDN and give it a description then click Next
Click Add
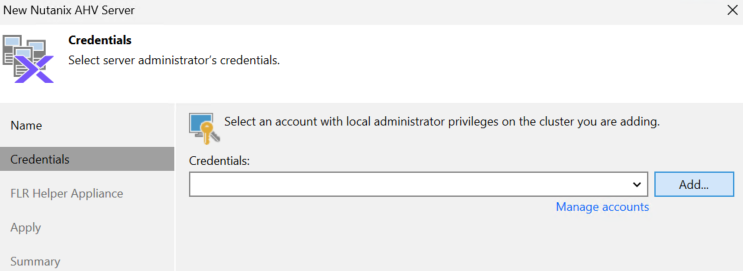
I recommend adding another admin account as a Veeam service account
Enter the username and password of the admin account to connect to Prism and click ok

Click Next
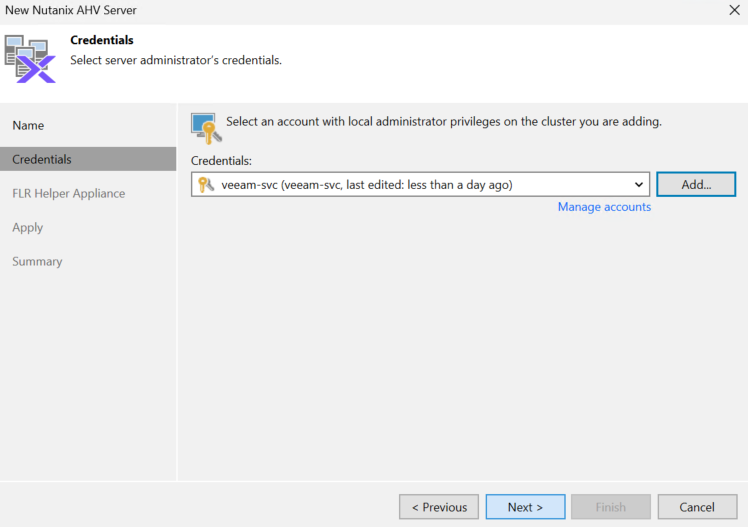
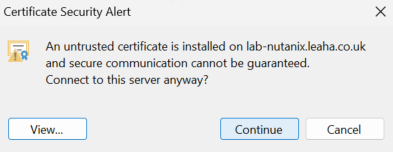
Click Continue to trust the certificate
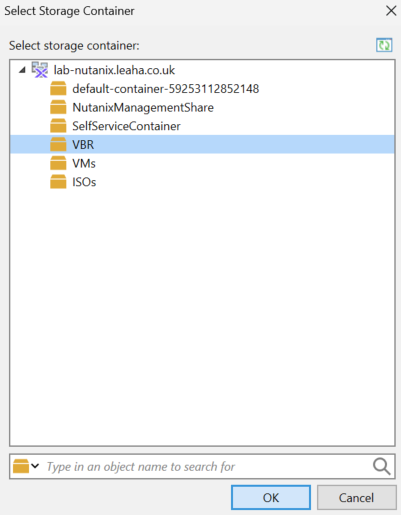
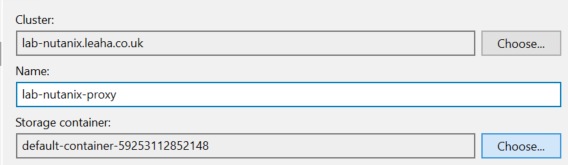
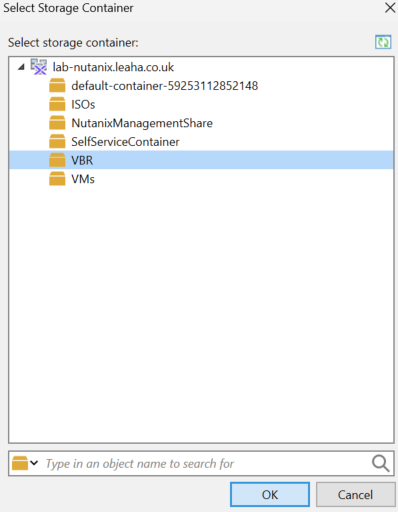
Now we need a storage container for the helper appliance, click Choose on Storage Container

We will need a cluster name, VIP and iSCSI services IP setup for this bit in Prism Element
Select your storage container, I have set one up for VBR, then click ok
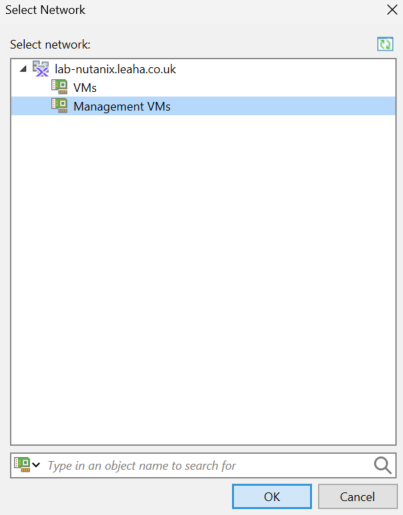
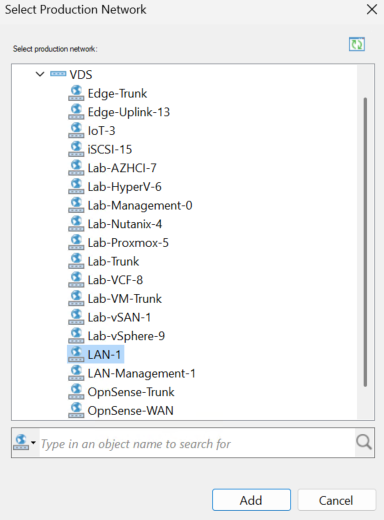
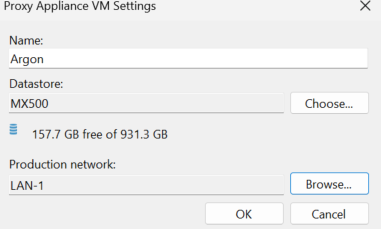
Click Choose on Network

Select a subnet and click ok
And enter a static IP for the helper, this wants to be on the iSCSI services network, and click Apply
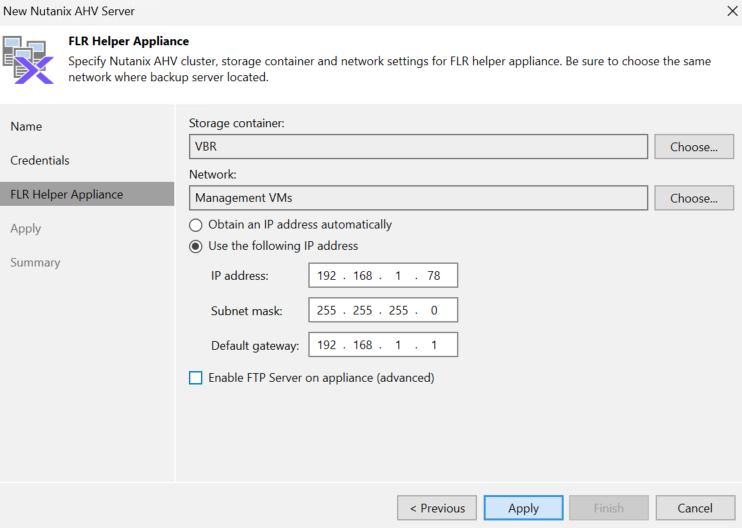
Click Finish
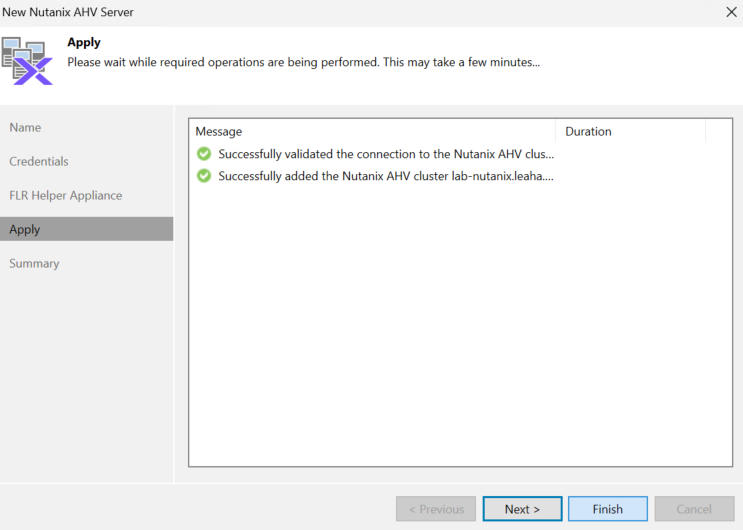
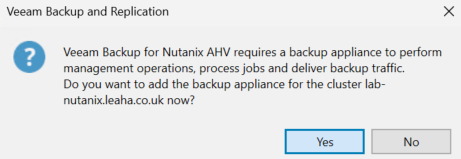
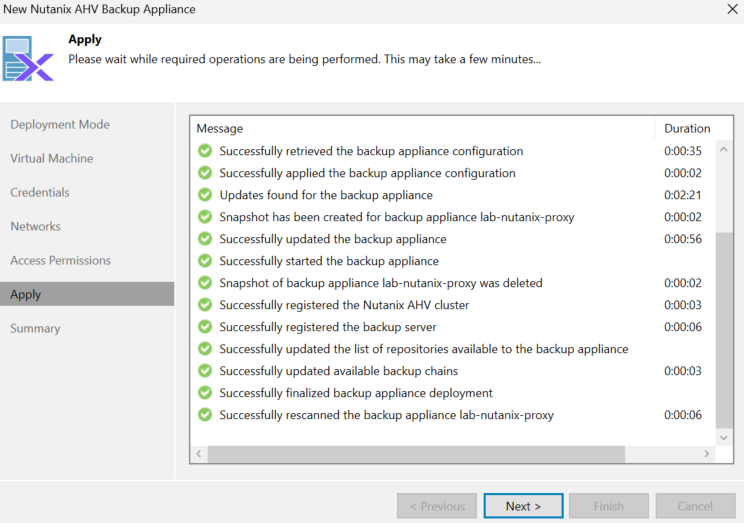
Then click Yes to setup the backup appliance
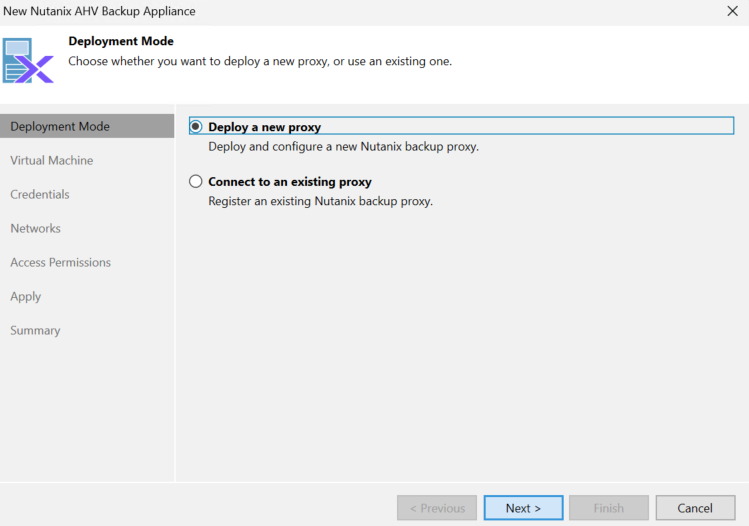
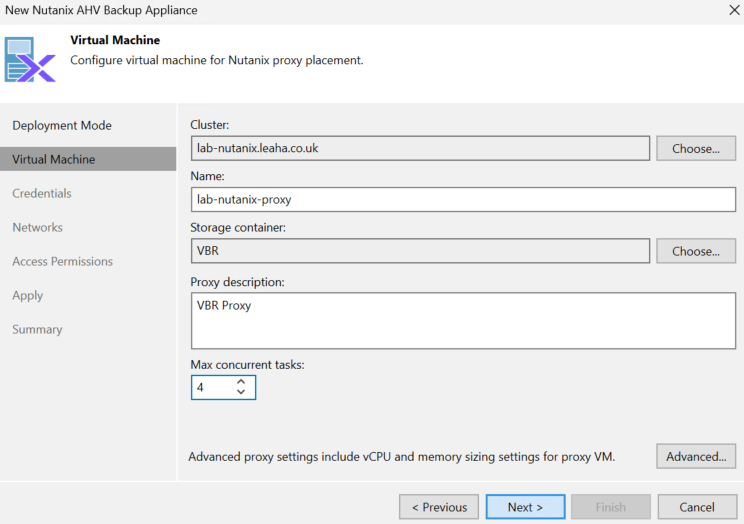
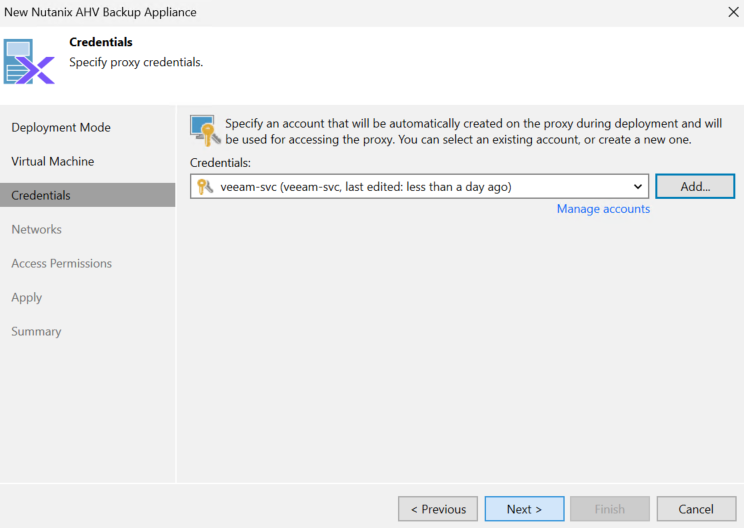
Click Deploy A New Proxy and click Next
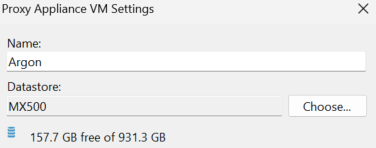
Enter a VM name and click Choose to select a storage container
Select the container and click ok
Add a description and configure the number of concurrent tasks, you can change vCPU and RAM from Advanced, but I recommend leaving it at the default and clicking Next
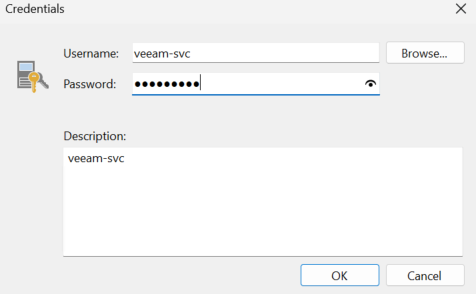
Click Add for a new credential
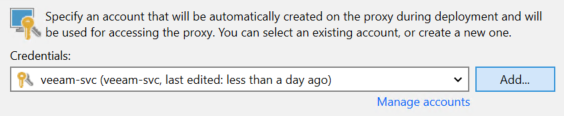
Add a Veeam service account and click ok
Then click Next
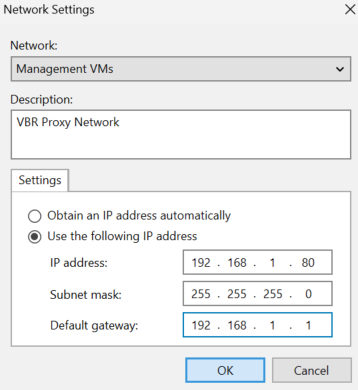
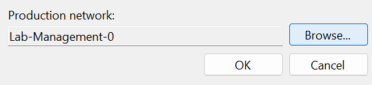
Click Add

Select the subnet from the dropdown, add a description and set a static IP and click ok
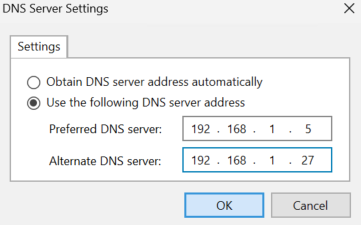
Click Obtain Automatically under the DNS settings

Add your DNS servers and click ok
Then click Next
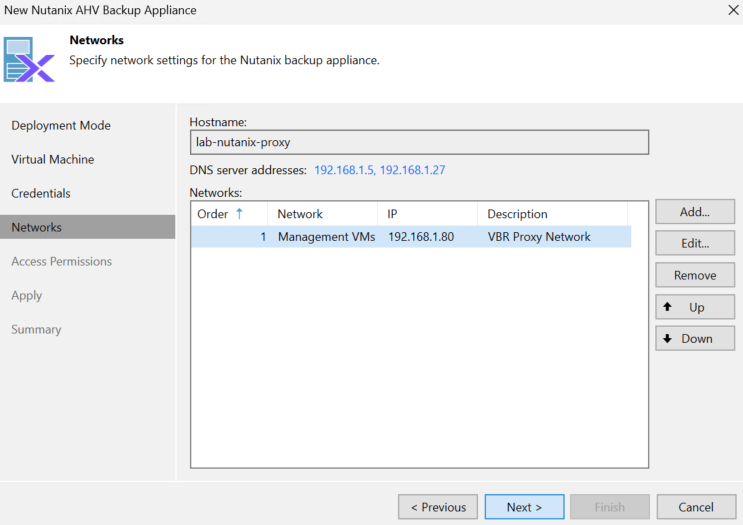
Click Apply
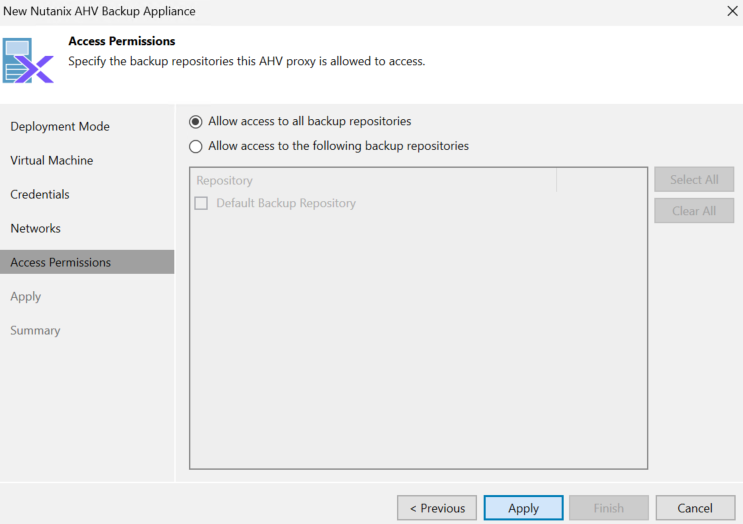
When thats done click Next
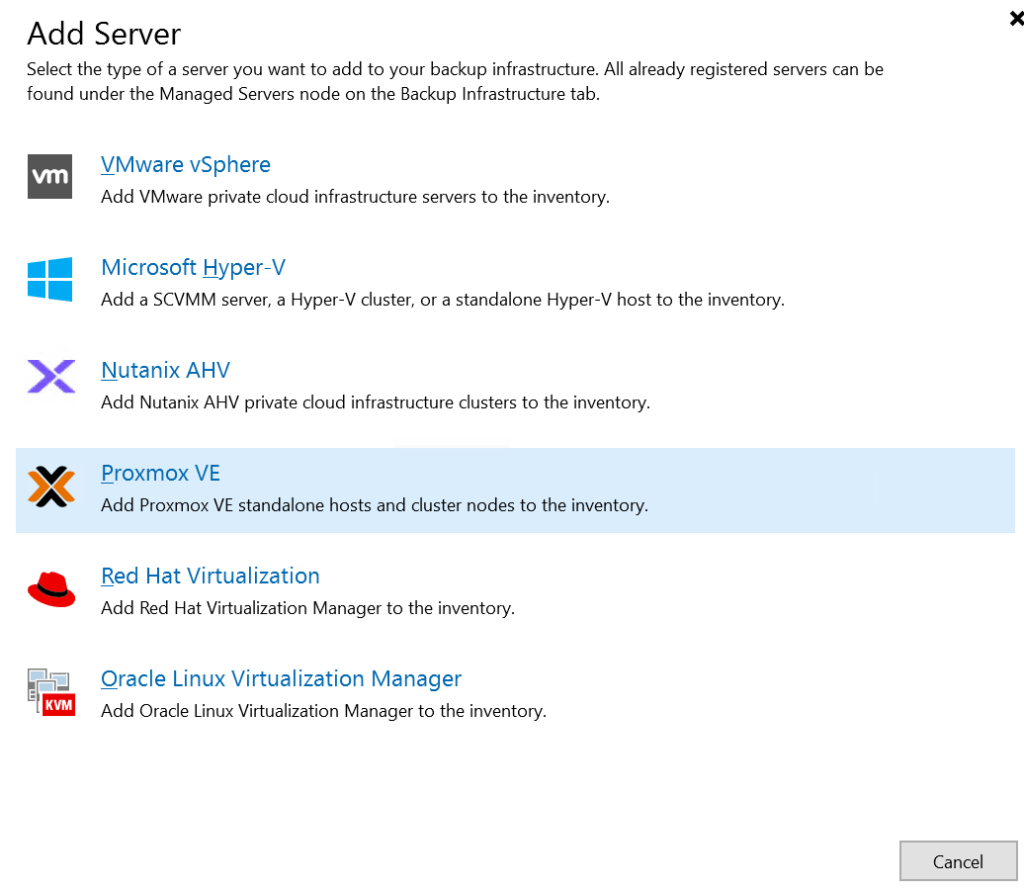
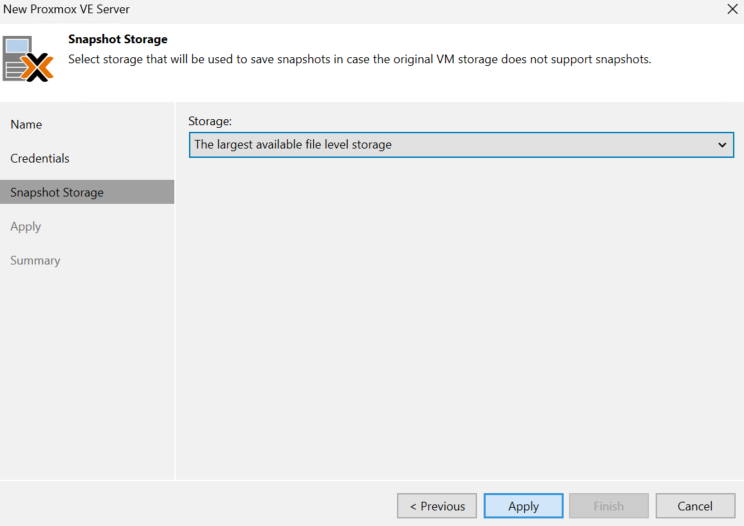
1.3.3 – Proxmox
For a cluster each node must be added separately, Veeam have more info here
I will be adding a standalone node
Click Inventory

Then Virtual Infrastructure/Add Server
Click Proxmox VE
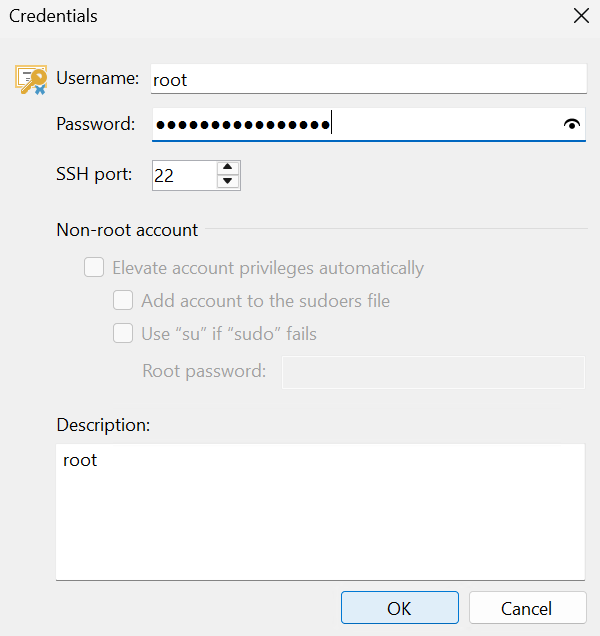
Click Add for a new password
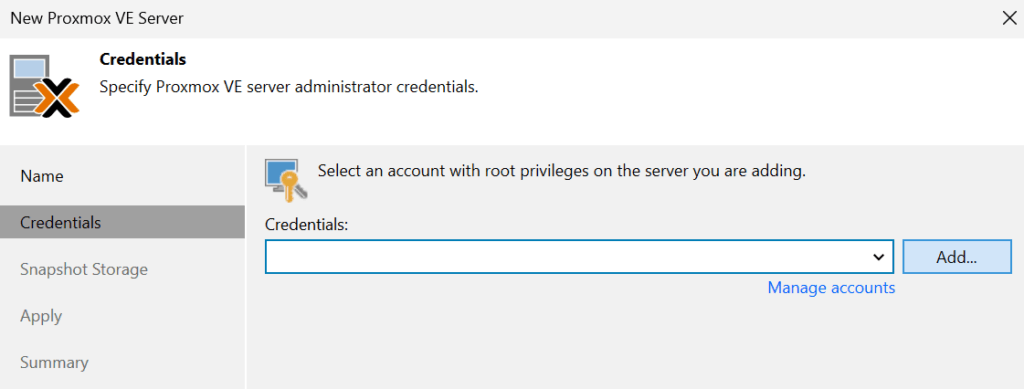
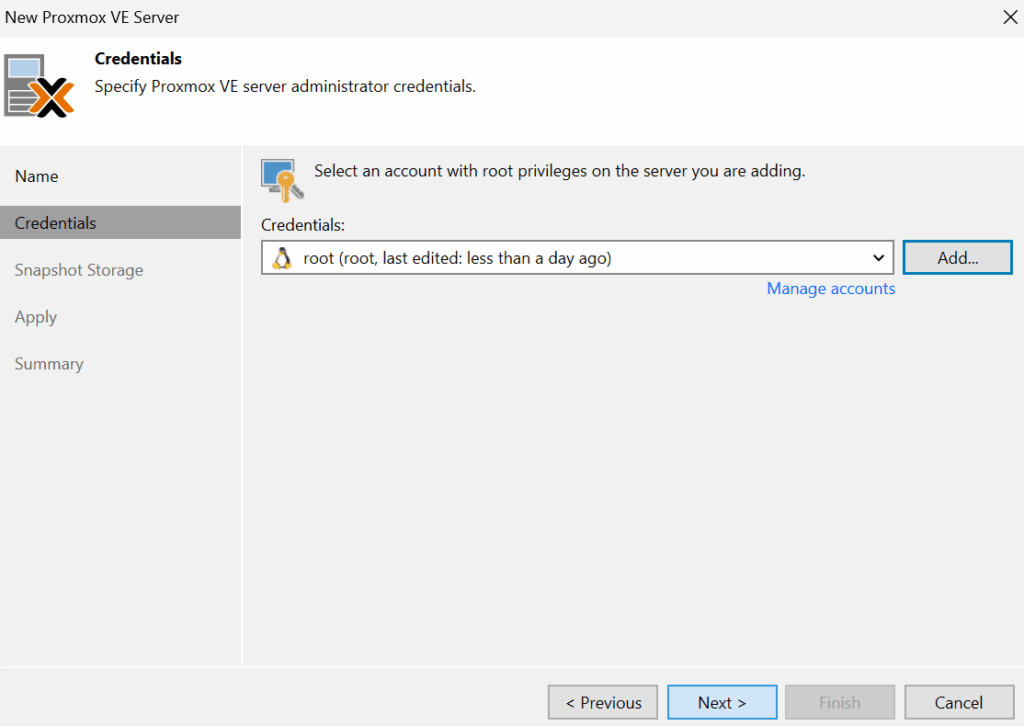
Enter the root credential, or ideally a service account, and click ok
Then click Next
Accept the SSH fingerprint

Leave this at the default and click Apply
Then click Finish
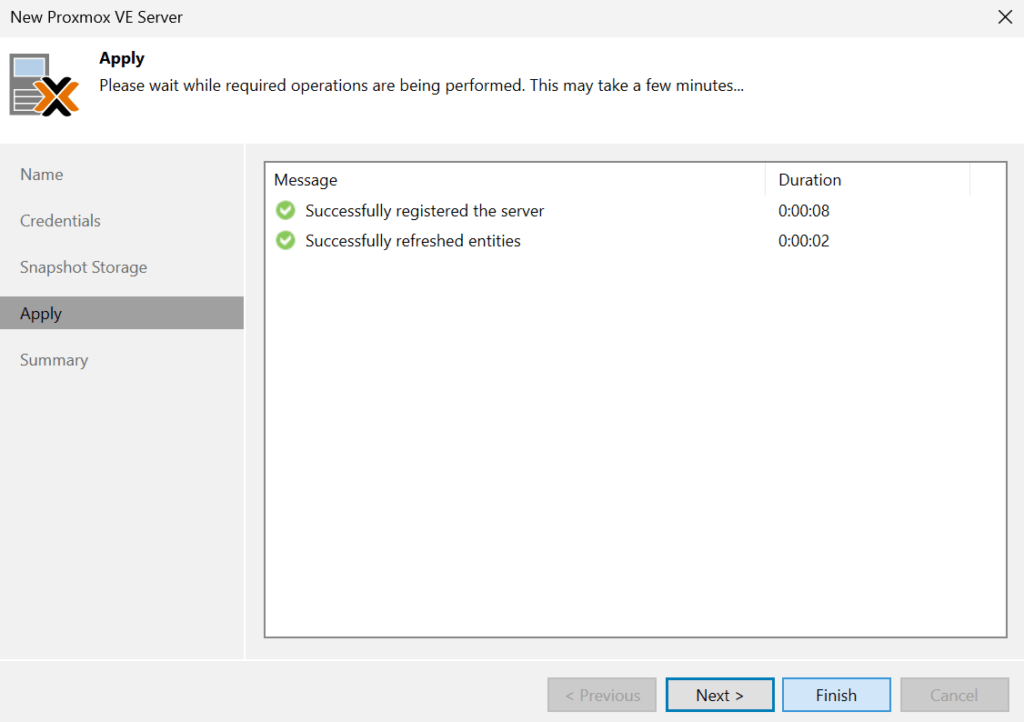
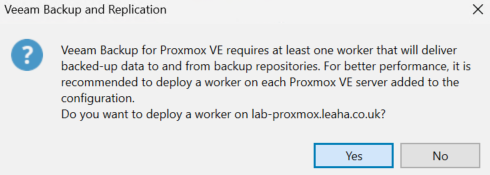
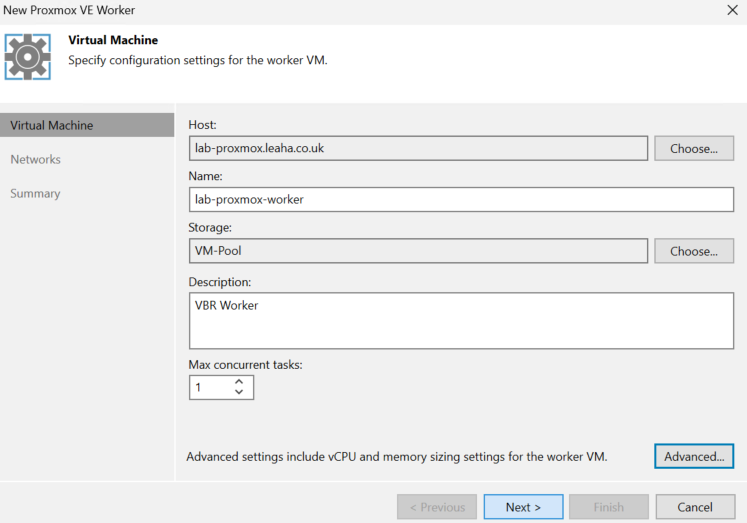
We will need a worker, click Yes
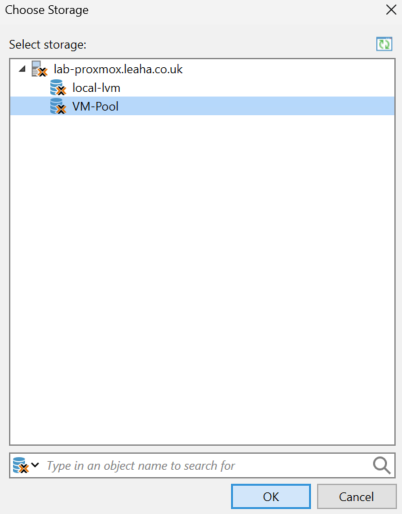
Give it a name and click Choose for storage

Select the storage available to the node and click ok
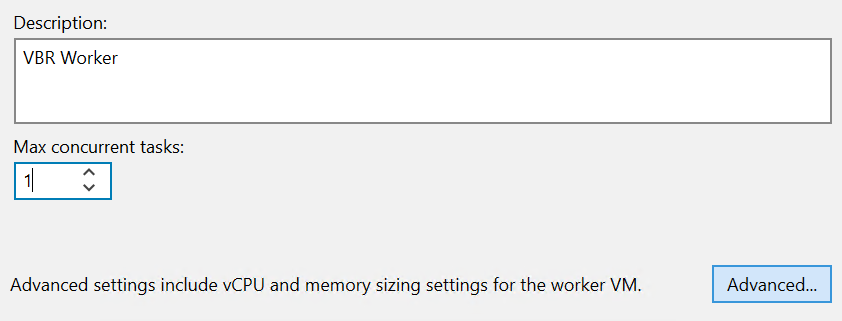
Add a description, and you can then change the max number of concurrent tasks, the default is 4, as this is a tiny server I have set this to just 1, click Advanced to change CPU/RAM configurations
This will change based on the number of concurrent tasks, and you can set this as needed, increase it for more tasks or decrease for less, however you shouldnt need to edit this, then click Next
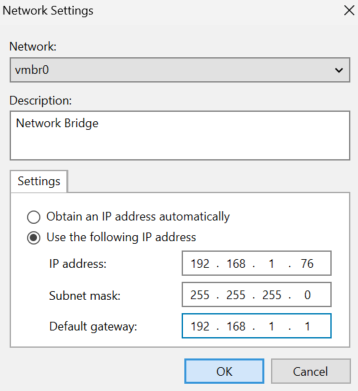
Under networks click Add
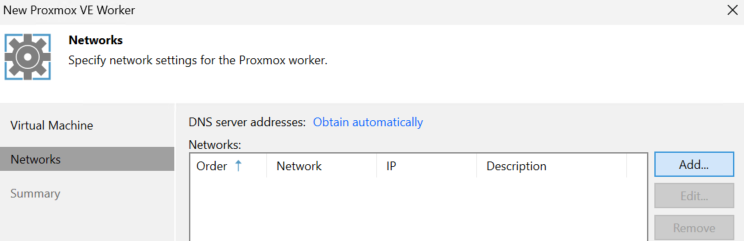
Select the network Bridge you want to use and add a static IP address and click ok
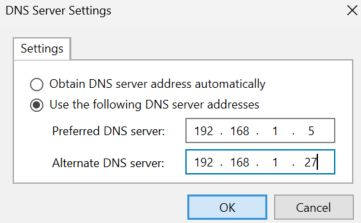
Then click the Obtain Automatically here to set DNS servers

Add your DNS servers and click ok
Then click Apply
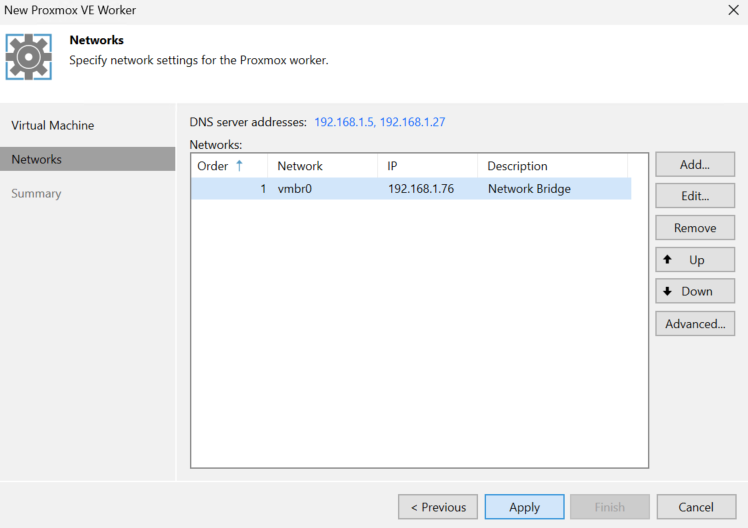
Make sure the box to test the worker configuration is enabled and click Finish
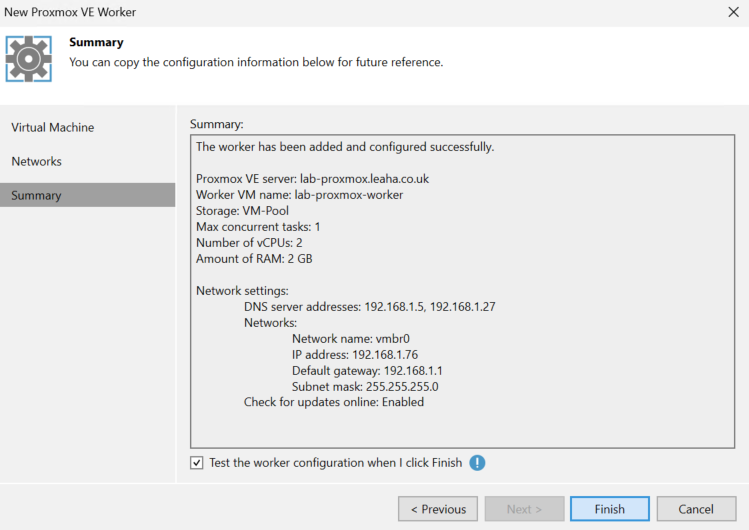
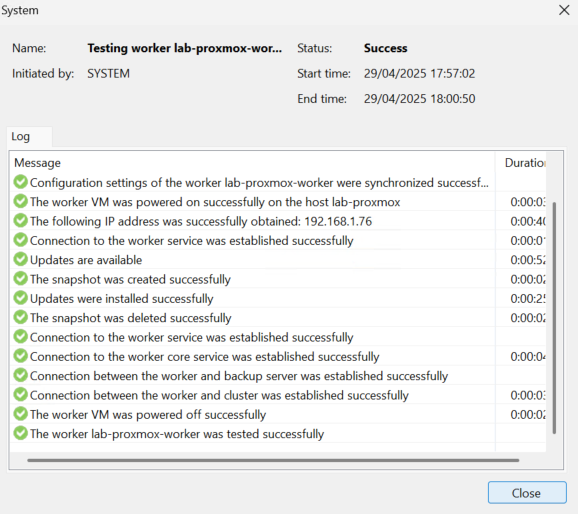
The worker will be deployed and started by VBR

Then the networking will be set and the VM updated and ready to use
1.3.4 – Hyper-V
Before we start, I have found that the lack of the search domain, with VBR being off domain can cause issues, so lets add that in
Open control panel and head to Control Panel/Network And Internet/Network And Sharing Center and click the the network connection
Click Properties
Click the IPv4 connection and then click Properties
Click Advanced
On the DNS tab, click Add on the Append These DNS Suffixes
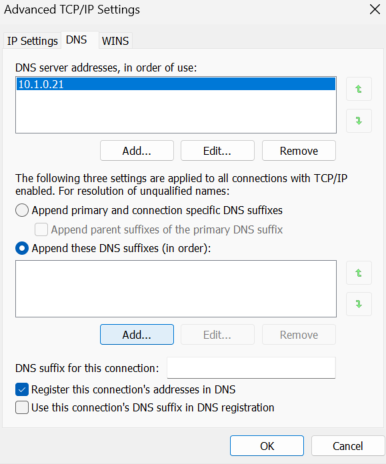
And add the AD Domain suffix and click Add
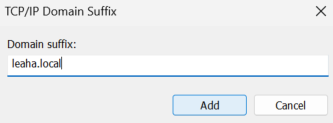
Then click ok, ok, close and close again to close everything down and ensure its applied
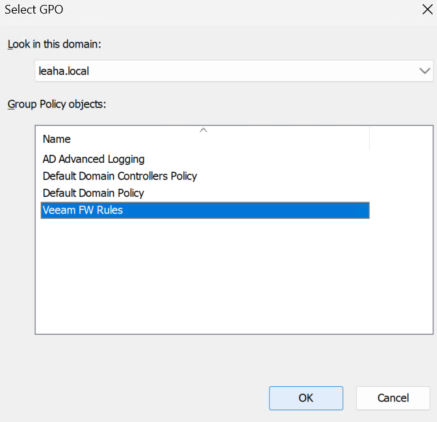
We also need to ensure the Windows Firewall GPO has been applied to the Hyper-V hosts as using the ADMIN$ share is required
In GPO right click the Hyper-V host OU and click Link Existing GPO
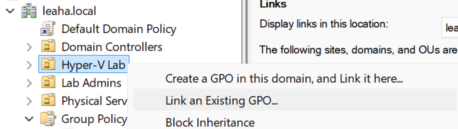
Select the Veeam FW Rules GPO and click ok
And on each Hyper-V host run
gpupdate /forceNow that VBR has been deployed open the application from the desktop
Click Connect

It should drop you on the inventory page

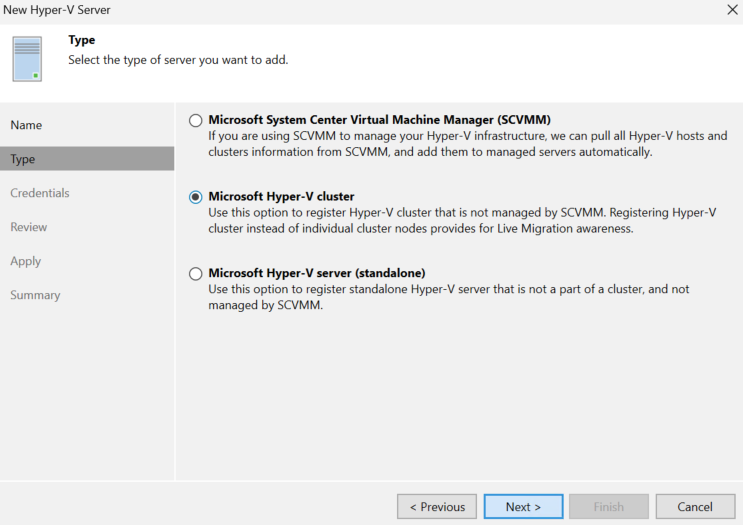
Select Microsoft Hyper-V
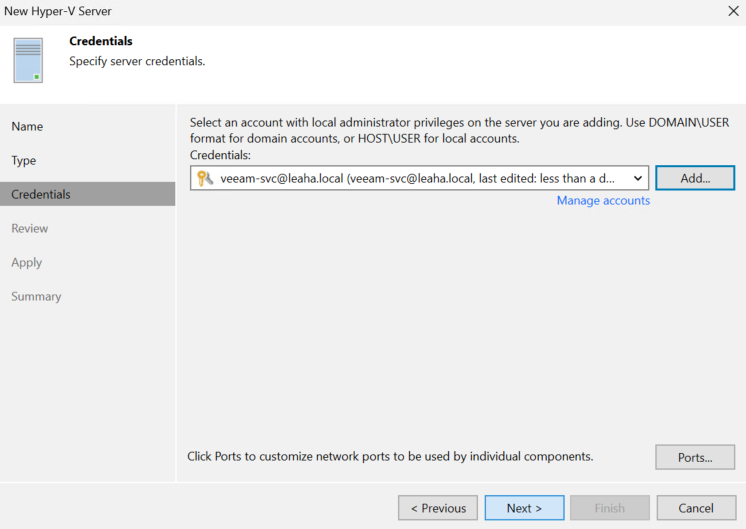
Enter the cluster FQDN and add a description, its worth noting your DNS will need to resolve to your Windows DCs, then click Next

Select Microsoft Hyper-V Cluster, as we dont have SCVMM
Click Add to add a new credential
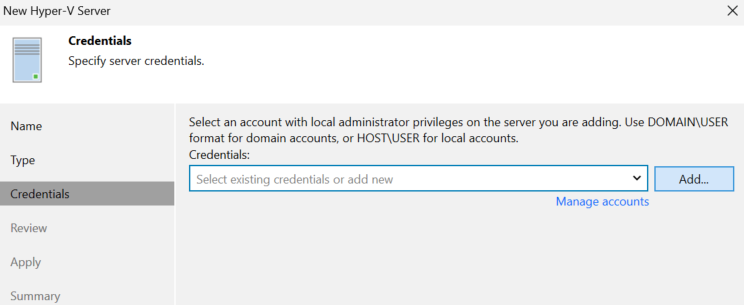
Enter the credentials of a domain admin service account with a password that doesnt expire
For the username use
username@domain
Then click ok
And click Next
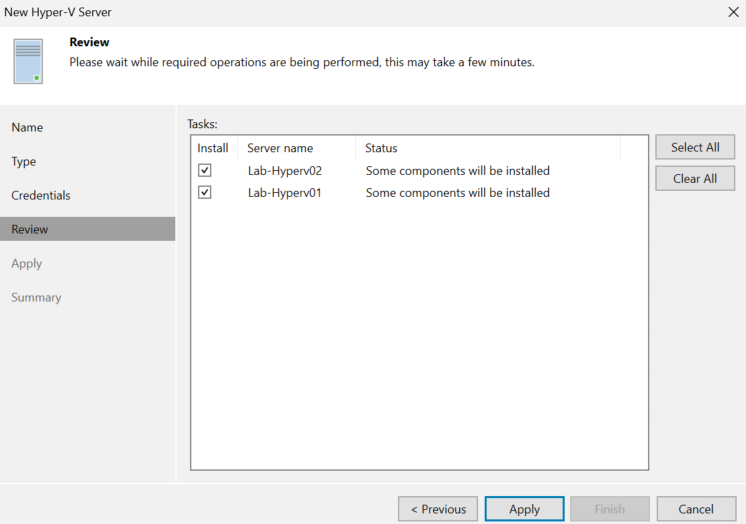
Wait a while until the Status column is populated, it should say
Some components will be installed
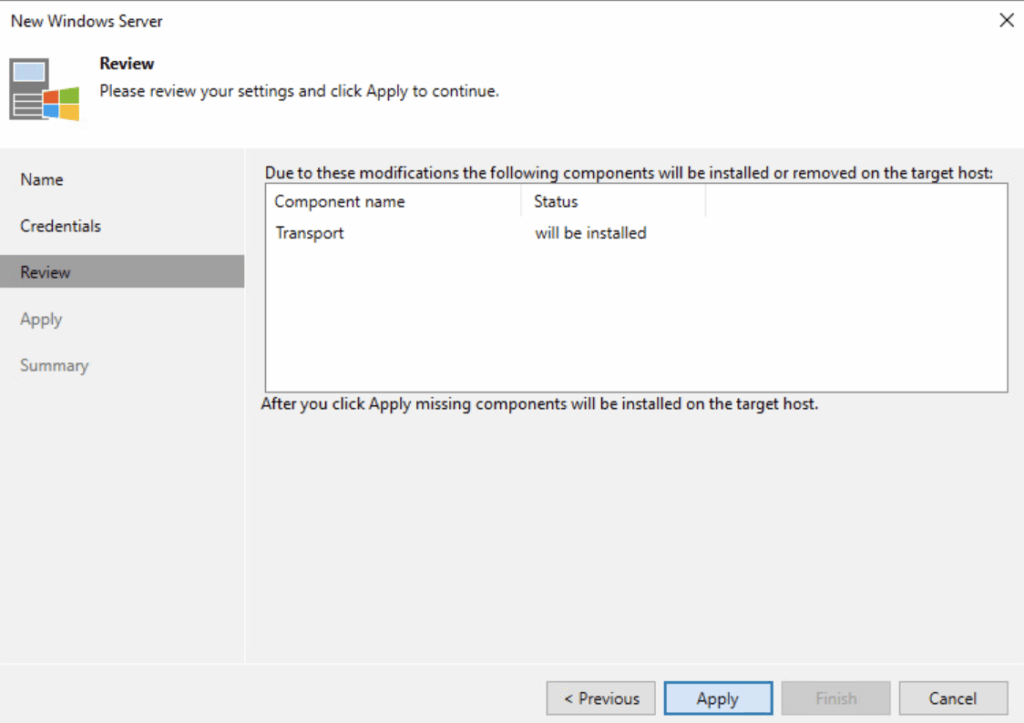
Then click Apply
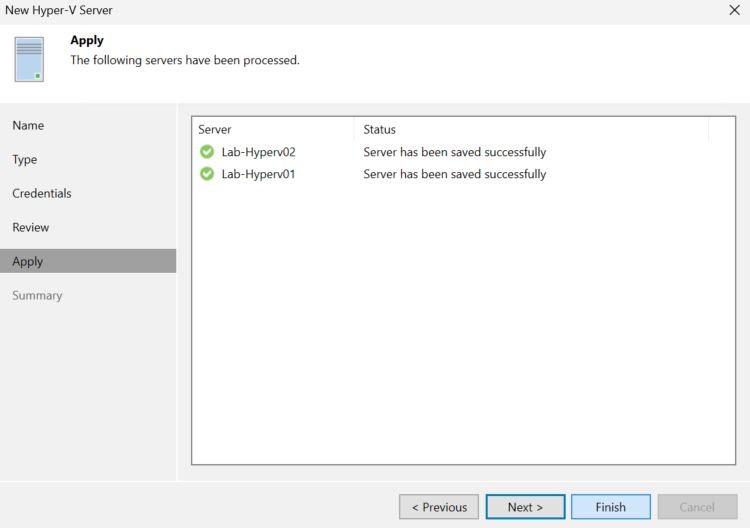
Once thats done click Finish
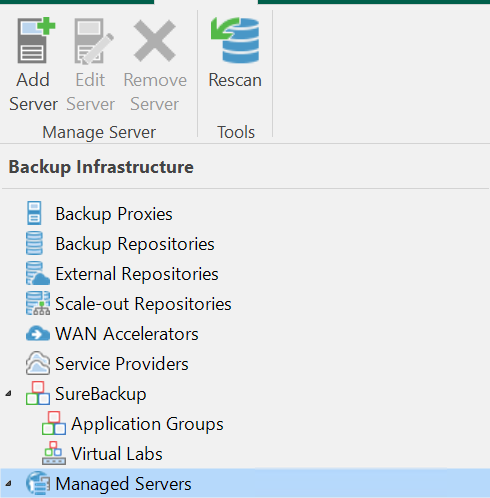
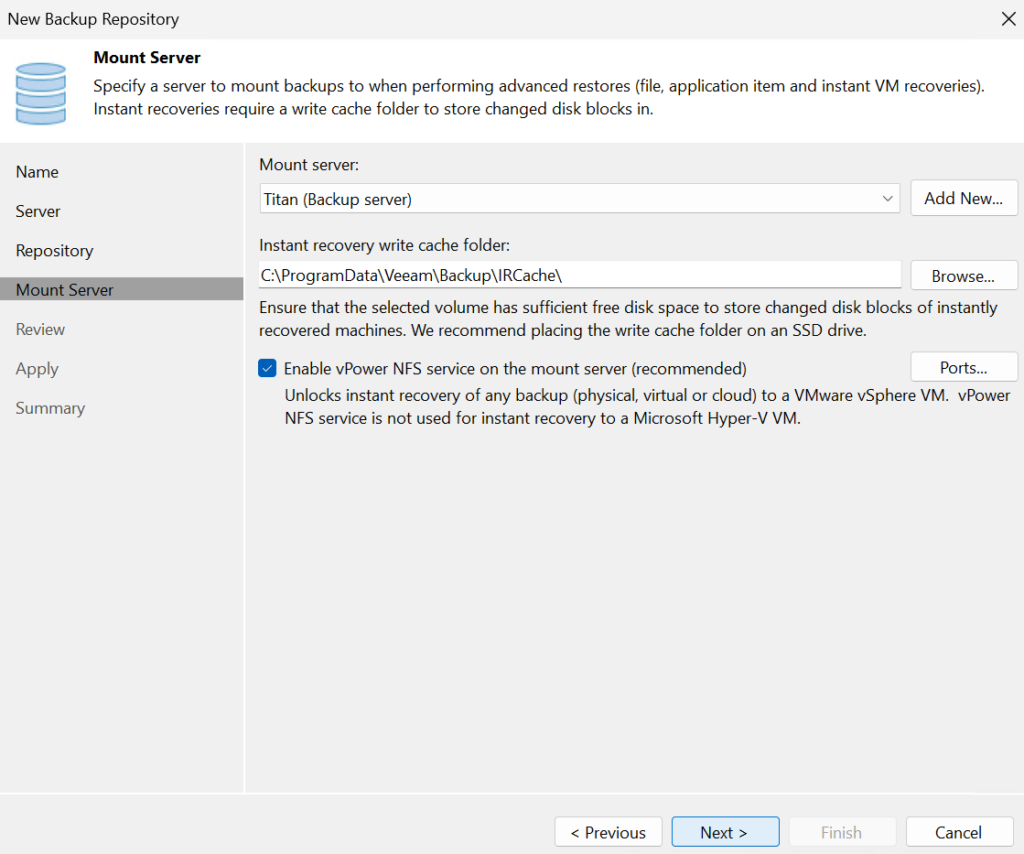
1.4 – Managed Servers
Managed servers can be used for a variety of purposes for backup infrastructure, like repositories, proxies or WAN accelerators
Repositories should only be Linux servers
Proxies can be either Windows or Linux
WAC Accelerators can only be Windows
1.4.1 – Adding A Managed Windows Server
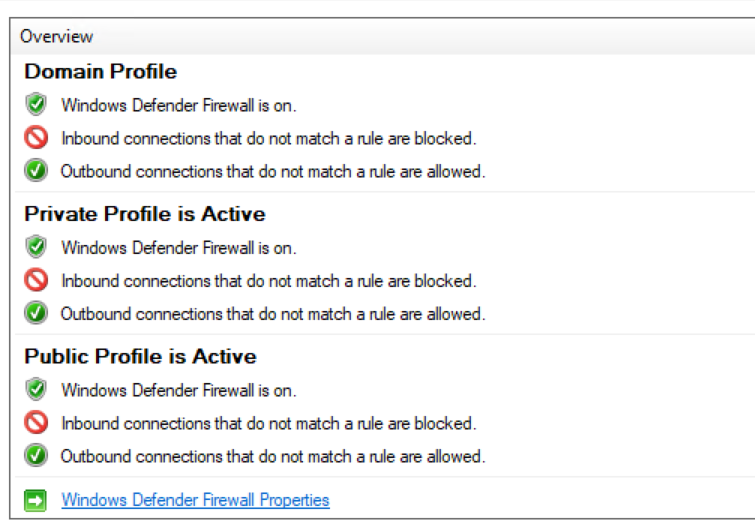
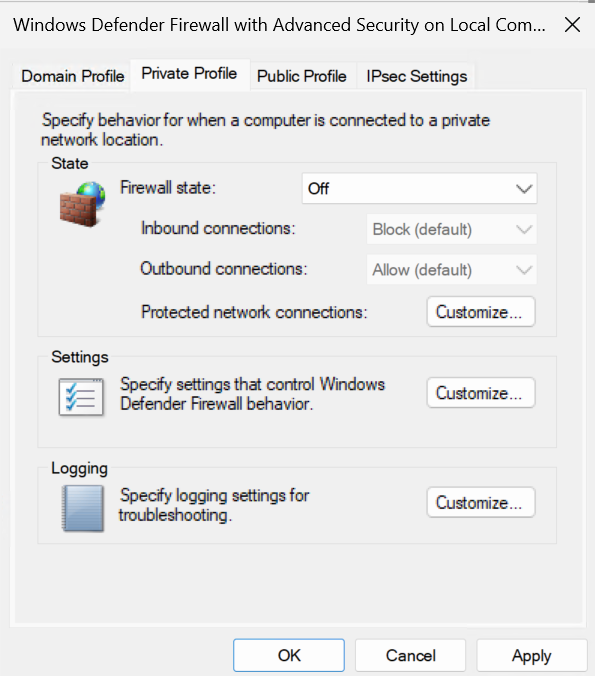
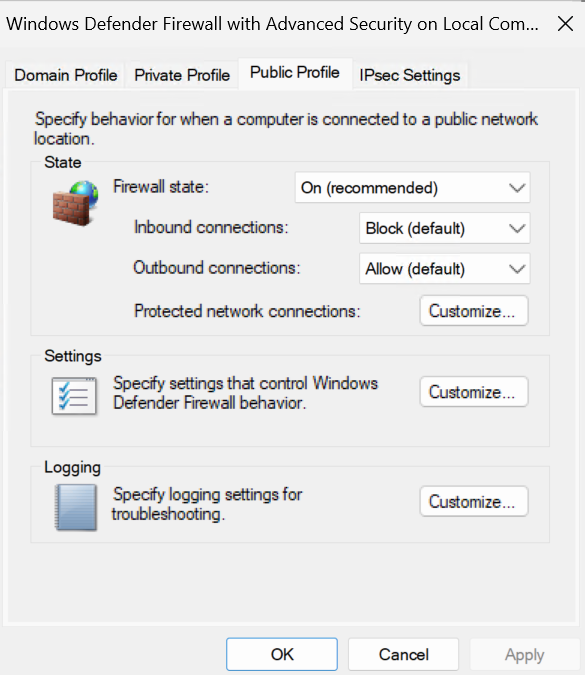
The first thing we need to do is disable the Windows Firewall to add a managed server into Veeam, this is only during the add process and Veeam will automatically add a rule for the appliance programs to have the correct firewall access
Open Windows Defender
Then click Windows Defender Firewall properties
Now, this machine should be off domain, as its a Veeam component, so we only need to edit the Private and Public sections of the firewall, set the firewall state to Off and click Apply
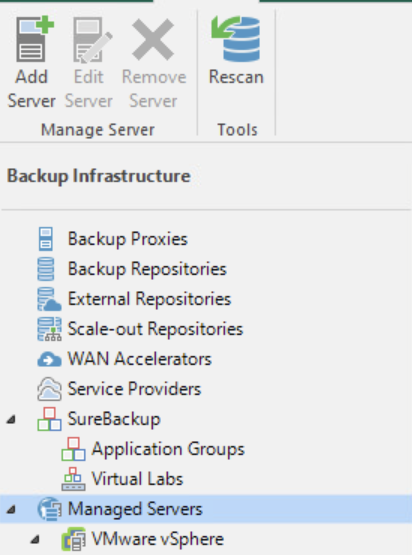
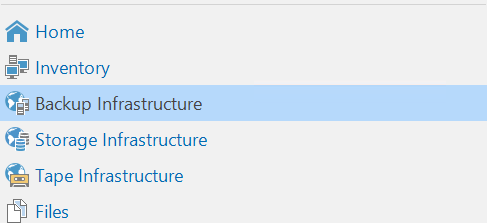
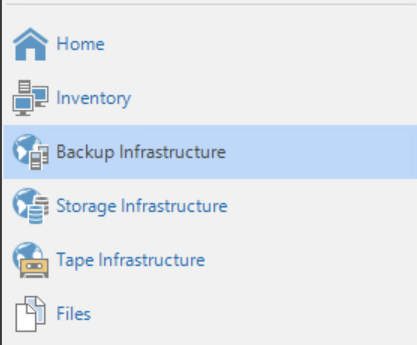
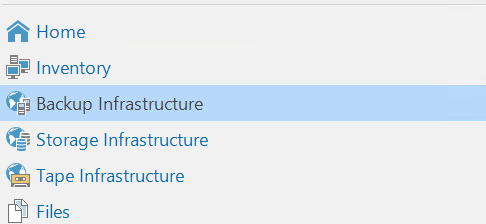
Head to the Veeam Console and open Backup Infrastructure

Click Managed Servers then Add Server
Then click Microsoft Windows
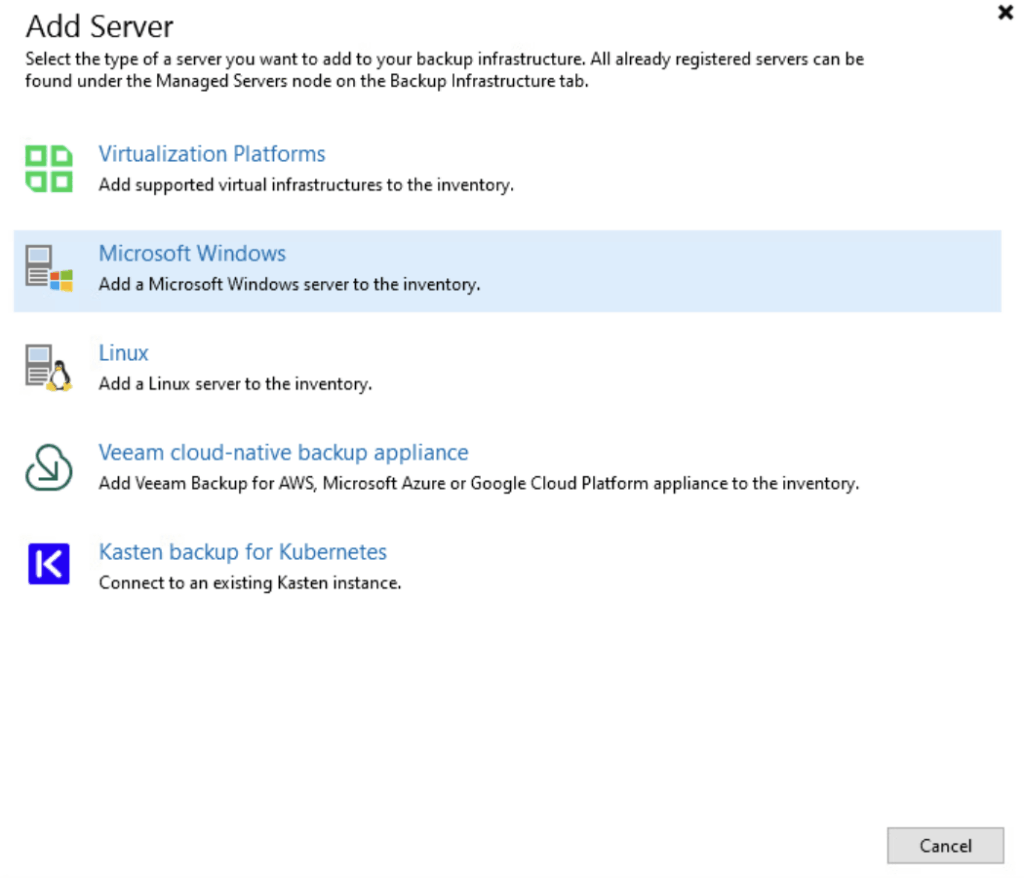
Add the server FQDN or IP and add a description
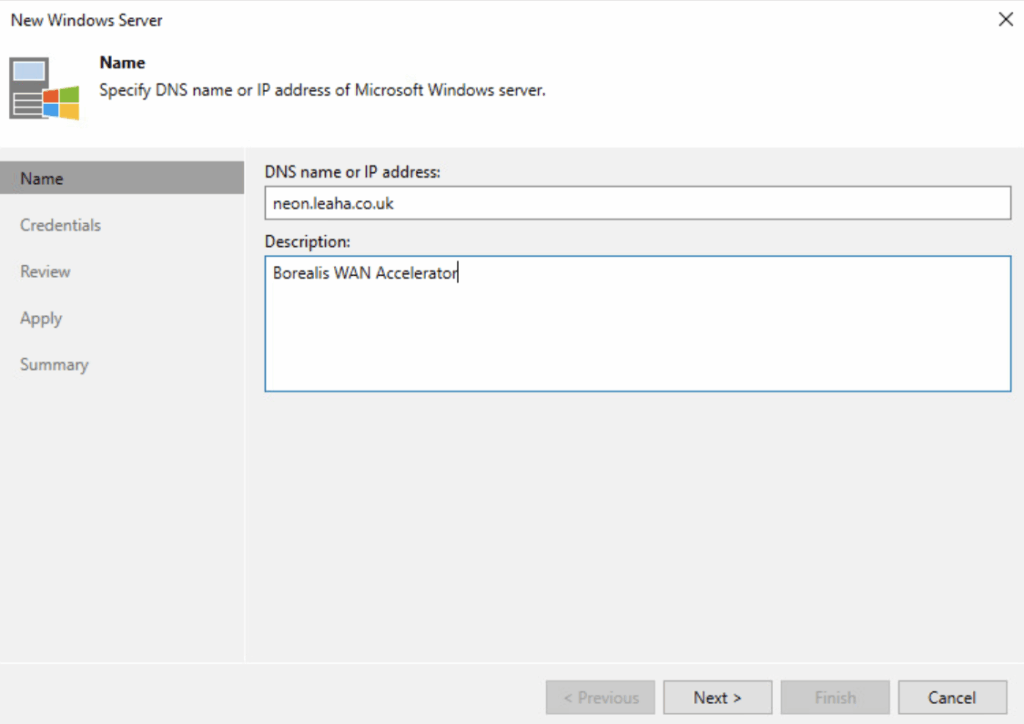
Select the server credential, you can click Add if you dont have it in Veeam
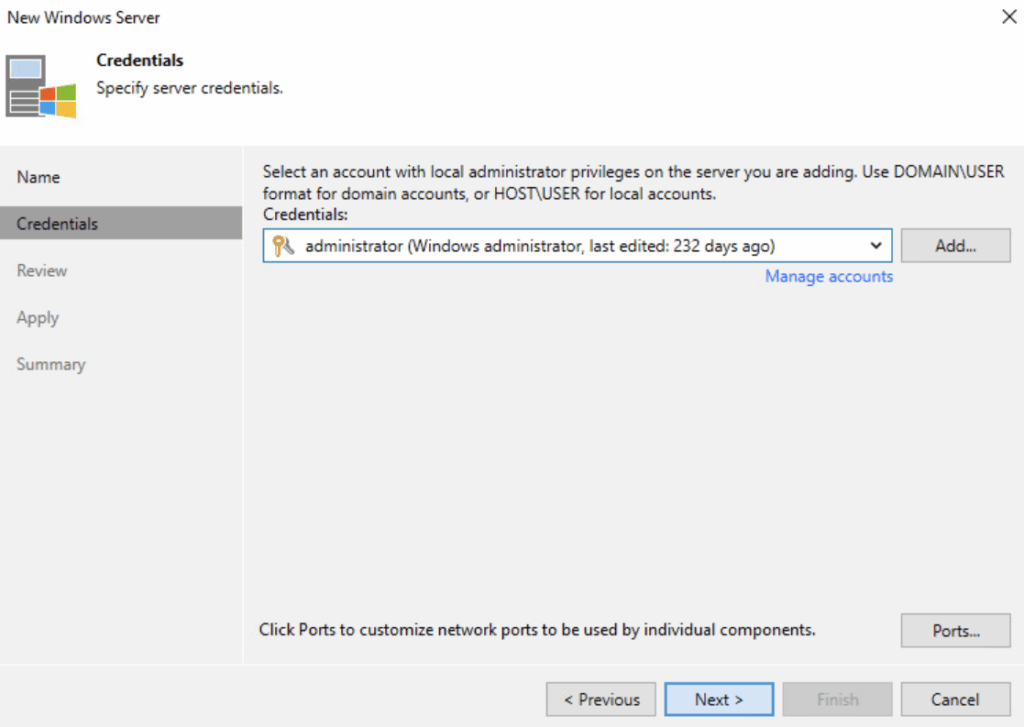
Wait while it picks up the server
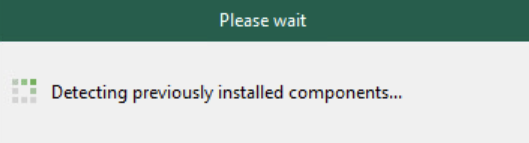
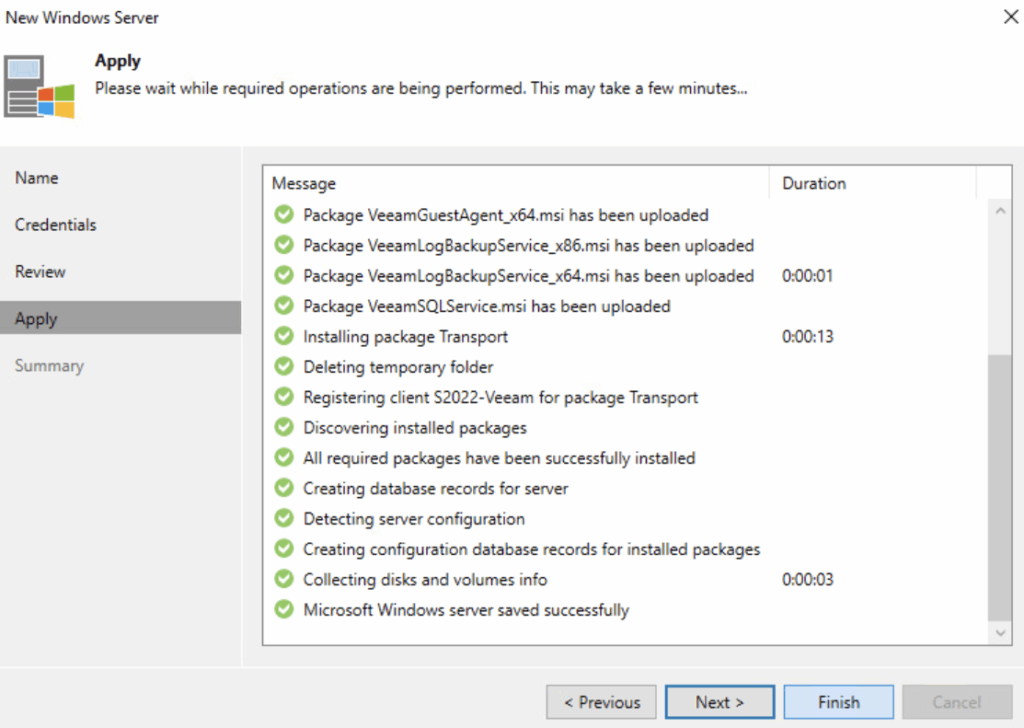
Then click Appy
It will upload the components, when its done, click Finish
Then We can now go back to the server and re enable the firewall on the Private and Public sections
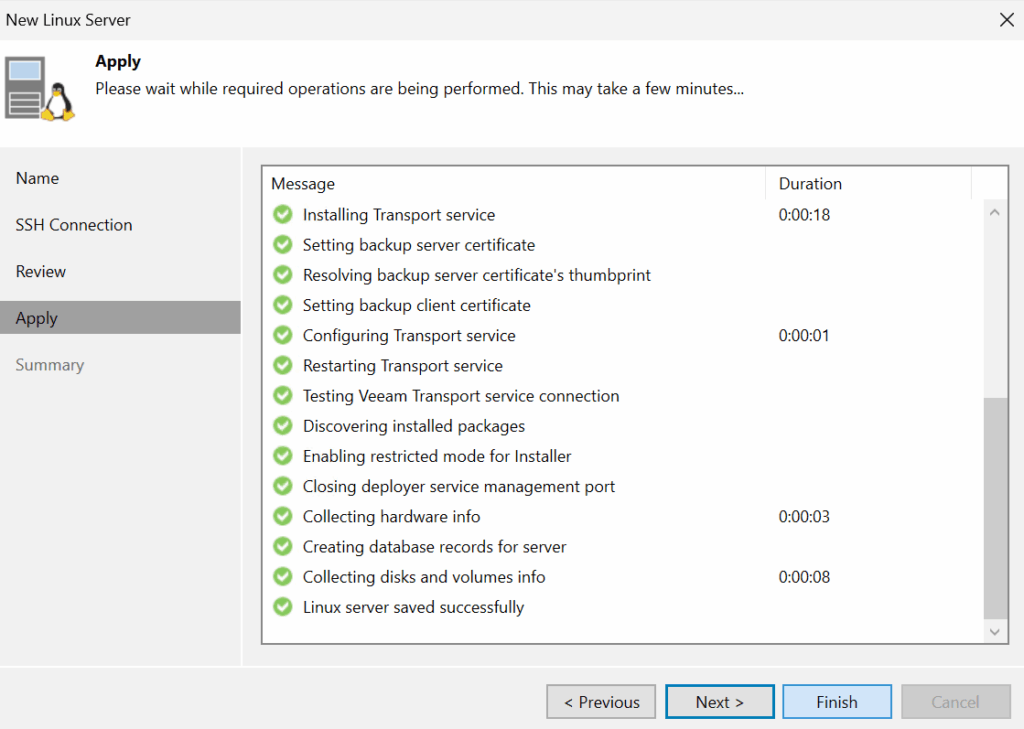
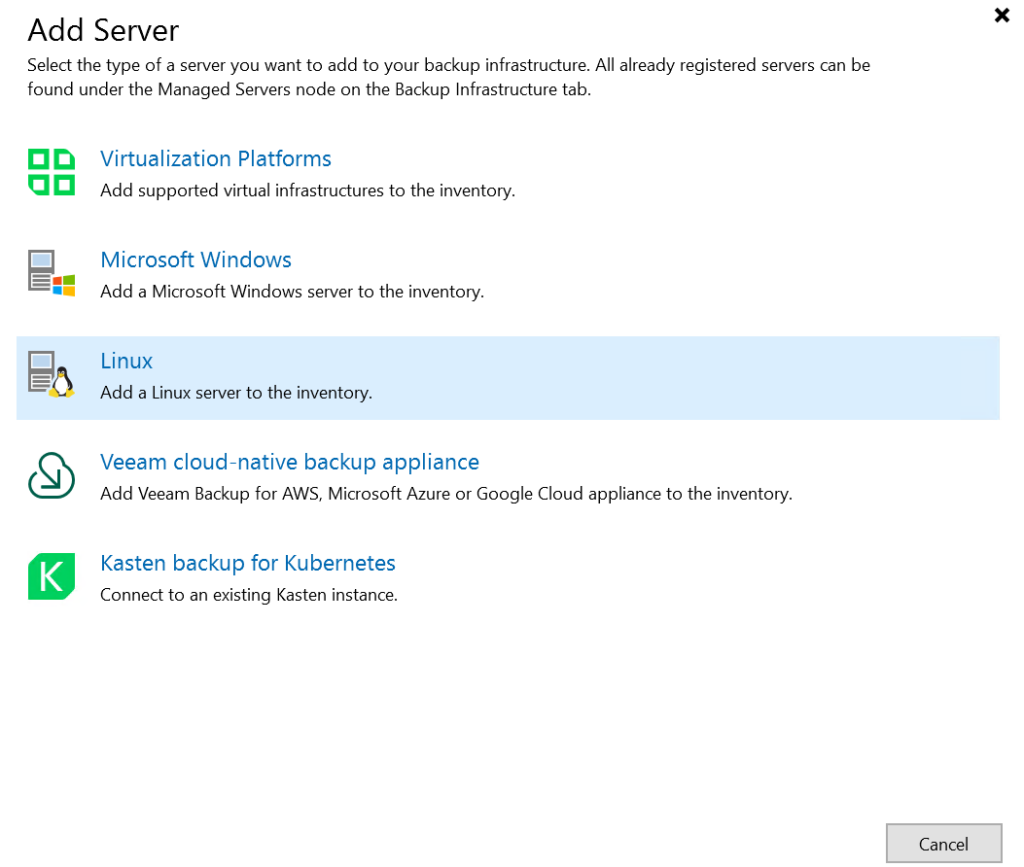
1.4.2 – Adding A Managed Linux Server
Head to Backup Infrastructure
Click Managed Servers then Add Server
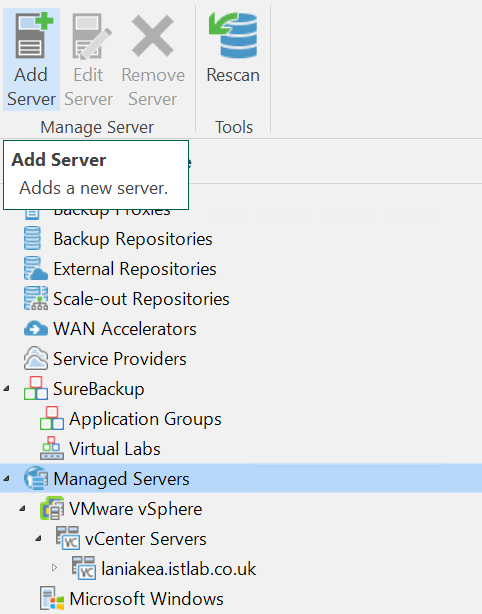
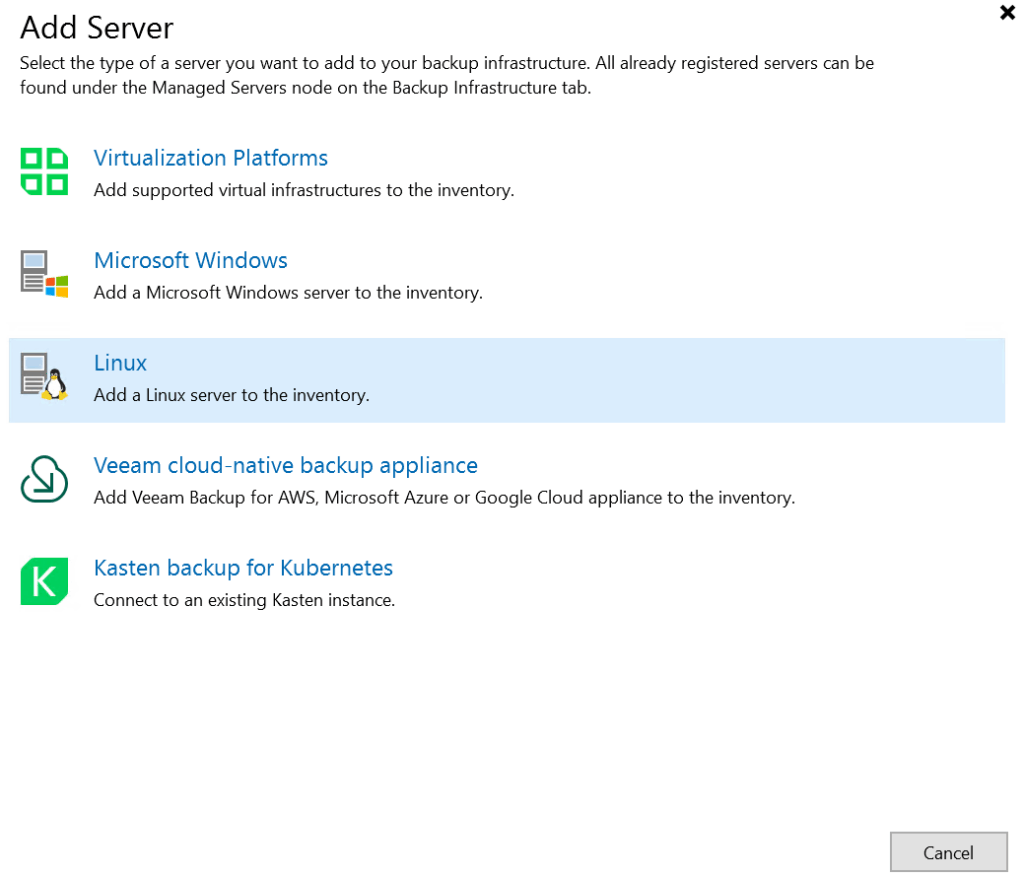
Then click Linux
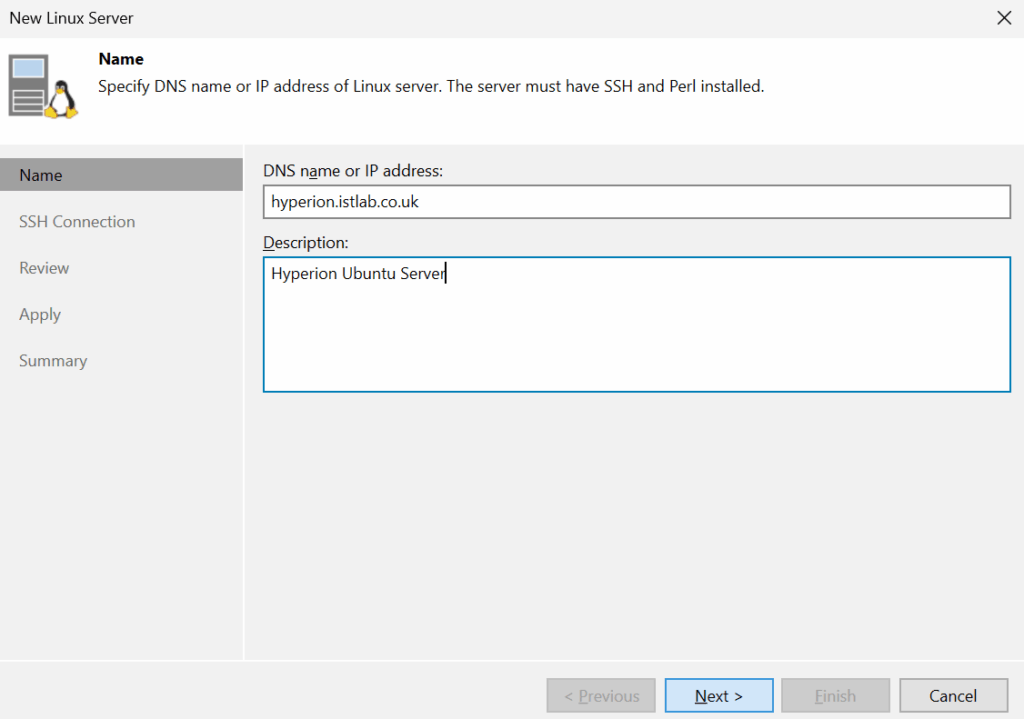
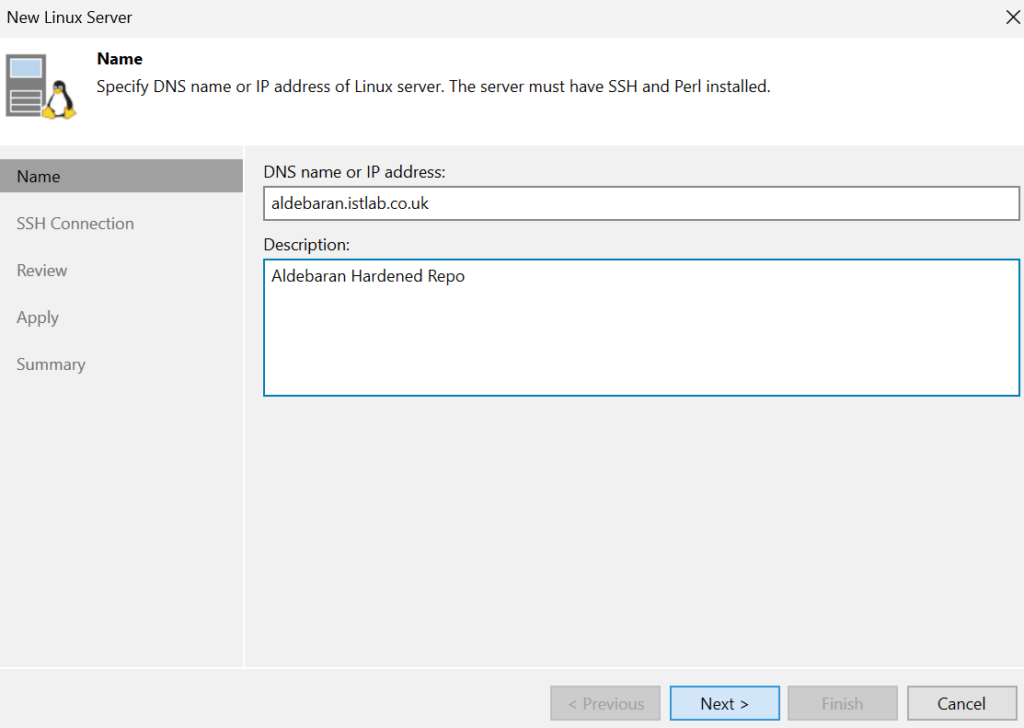
Add the FQDN and a description
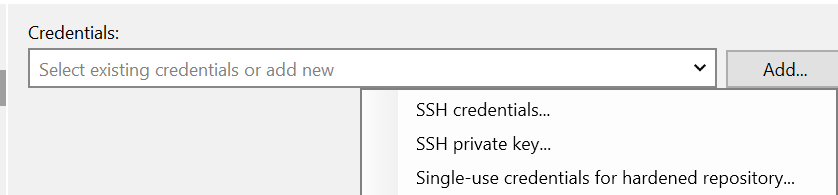
Click Add to add a credential, then SSH Credentials
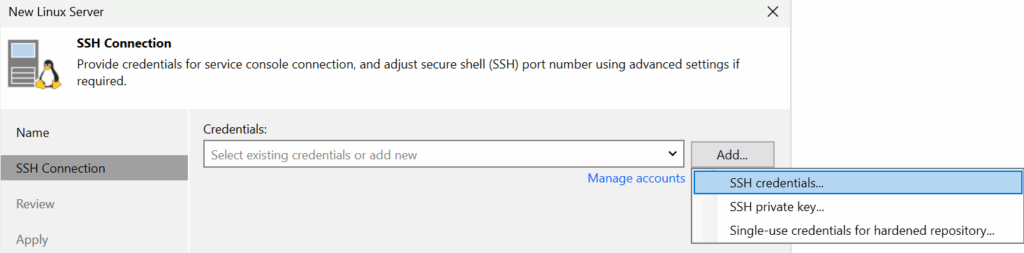
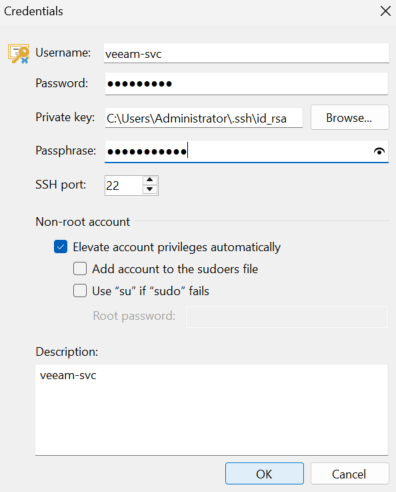
Add the username and password of a sudo user you want, ensure you check the Elevate Account Privileges Automatically box, a description and click ok
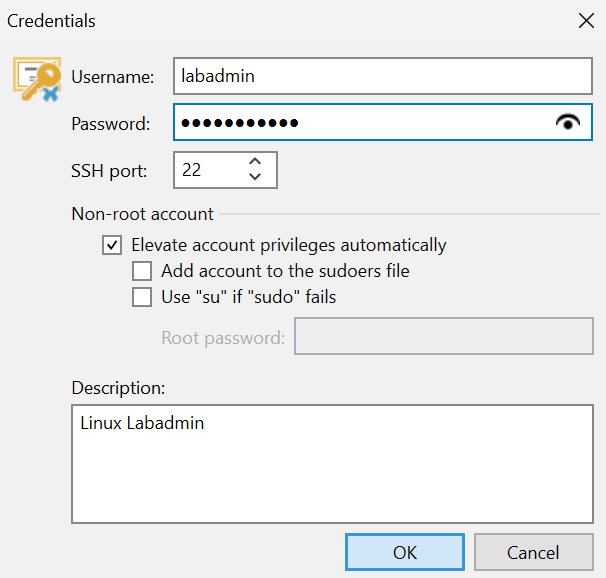
Now click Next

Click Yes on the SSH fingerprint

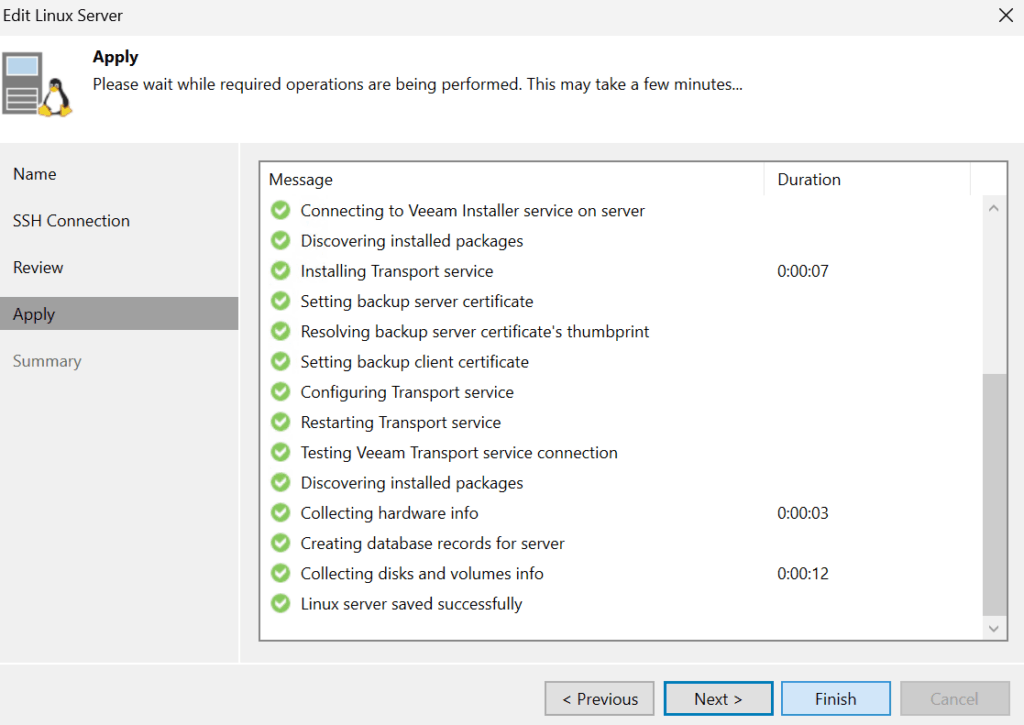
Then click Apply
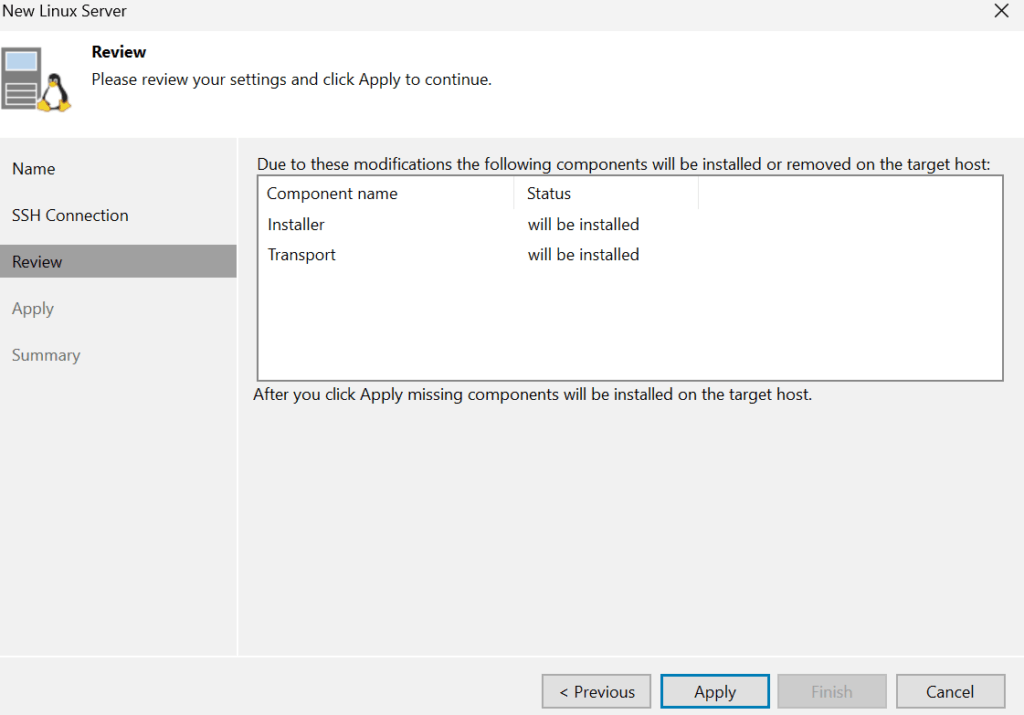
Click Finish when its done
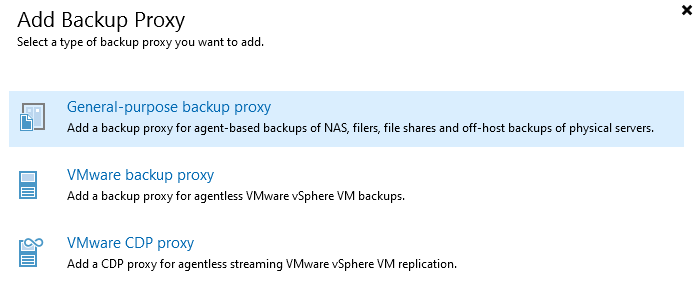
1.5 – Adding VMware Proxies
First we’ll need a managed server, Windows and Linux are usable, so its what works best for your environment for which you want to use
The server specs should be about 2 GB of RAM per vCPU, a proxy will handle 2 items per vCPU, each VM disk counts as an item, disk space isnt that important, the enough for the OS, a good fit for both Linux and Windows proxies is
- 4vCPU
- 8GB RAM
Head to the Veeam Console and open Backup Infrastructure
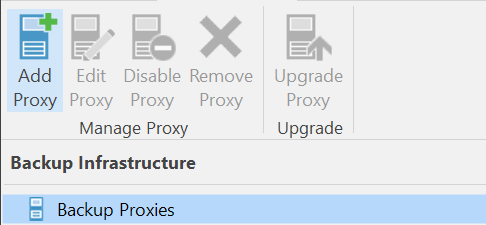
Click Backup Proxies then Add Proxy
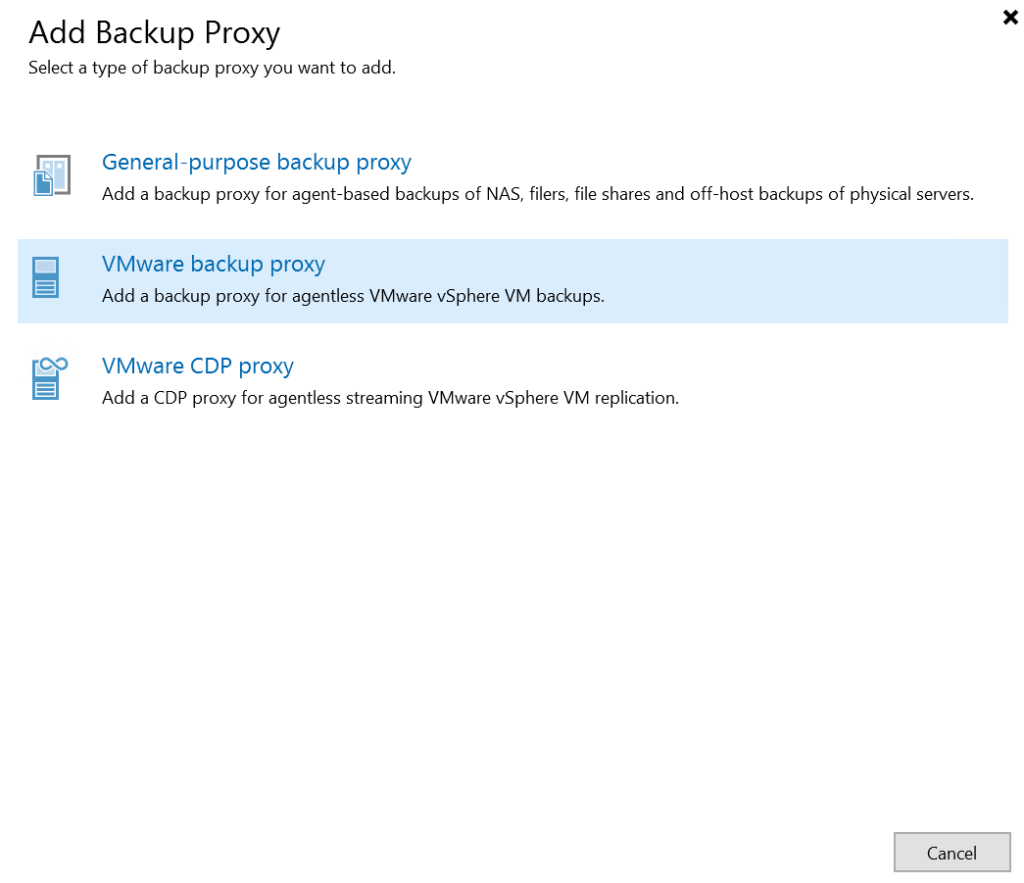
Select VMware Proxy
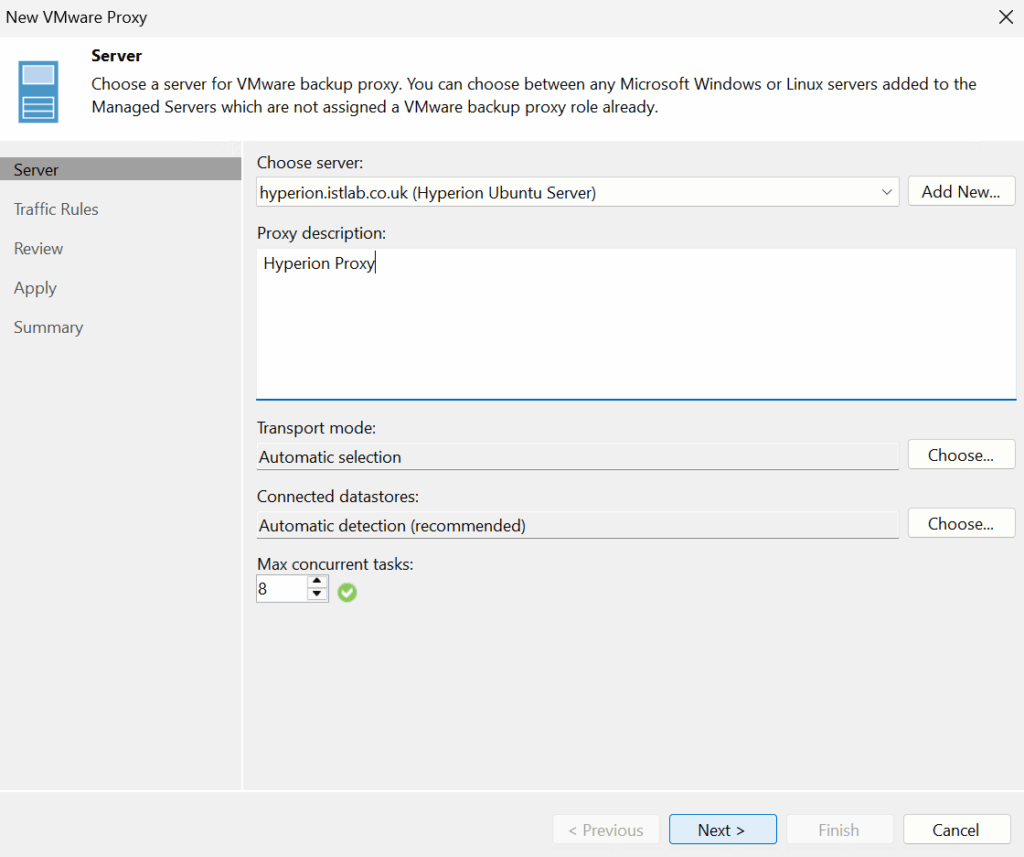
Select the server from the drop down, this will be a server we added before as a managed server, I will be using my Linux servers for this, add a description then click Next
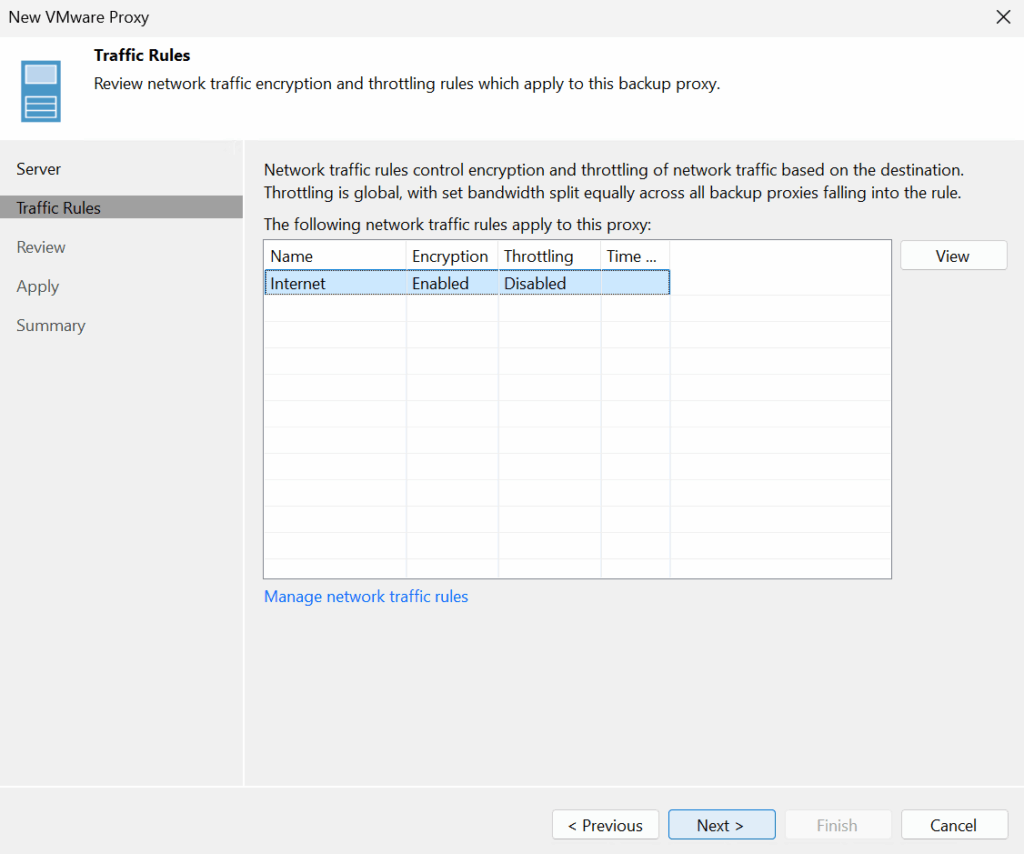
Check the network rule is encrypted and not throttled here, which should be the default, then click Next
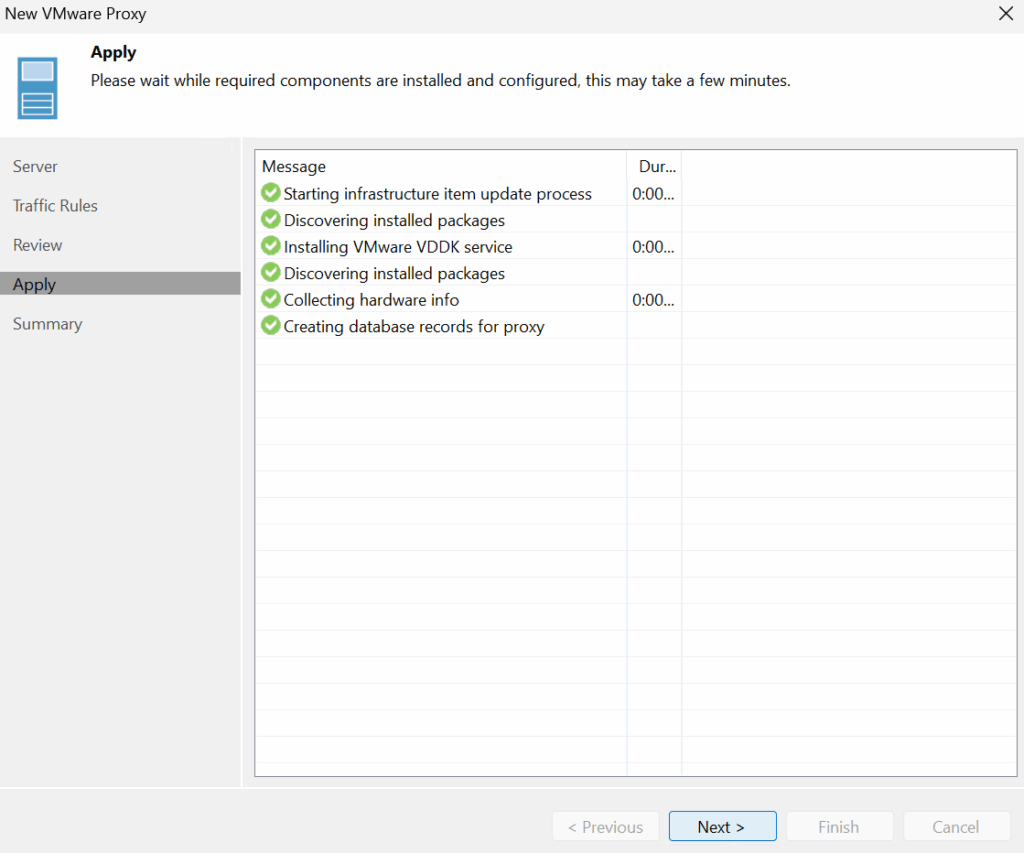
Then click Apply
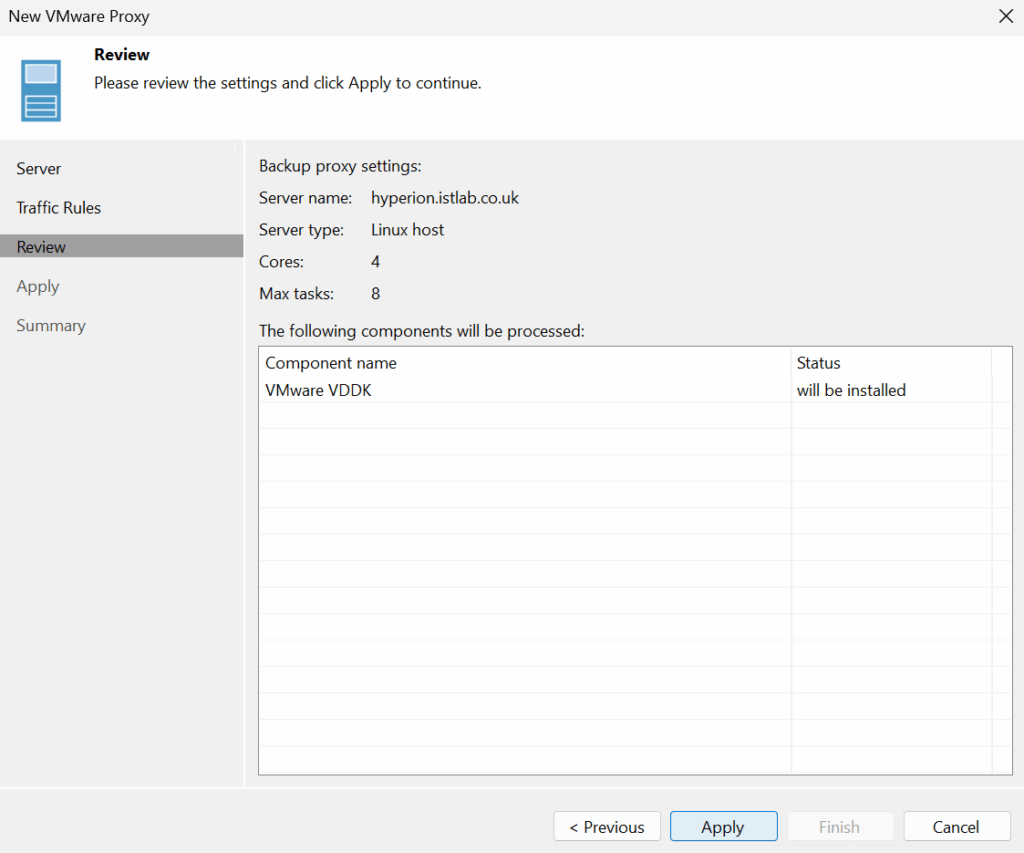
Then this is done, click Next then Finish
1.6 – Agent Servers
1.6.1 – Windows
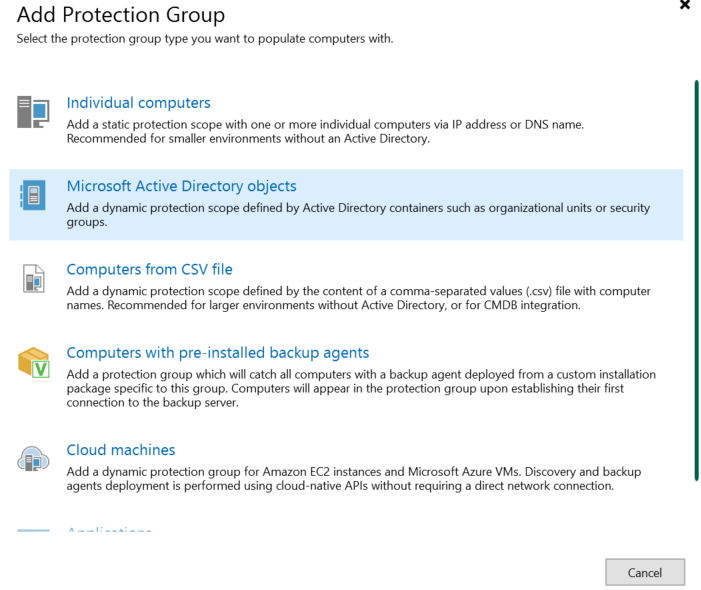
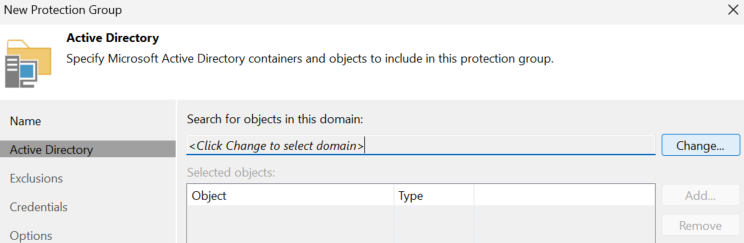
To add agent based backups for Physical servers head to Inventory

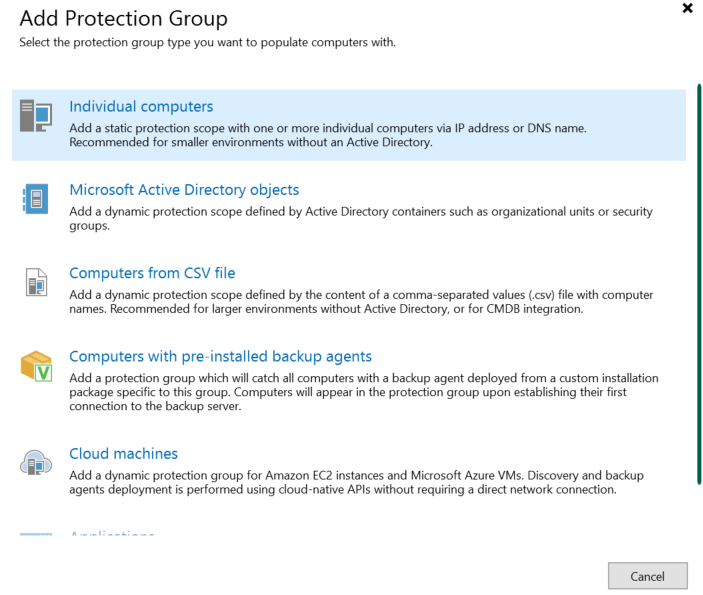
Click Physical Infrastructure then Create Protection Group

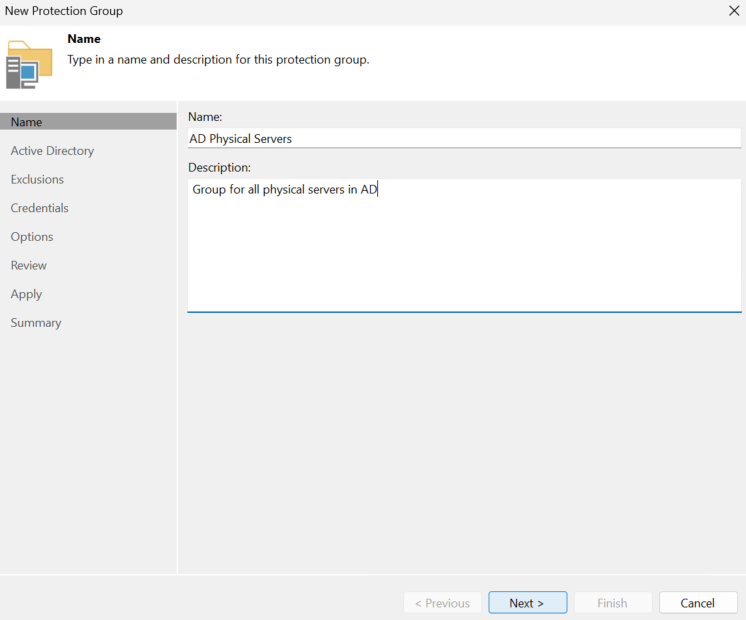
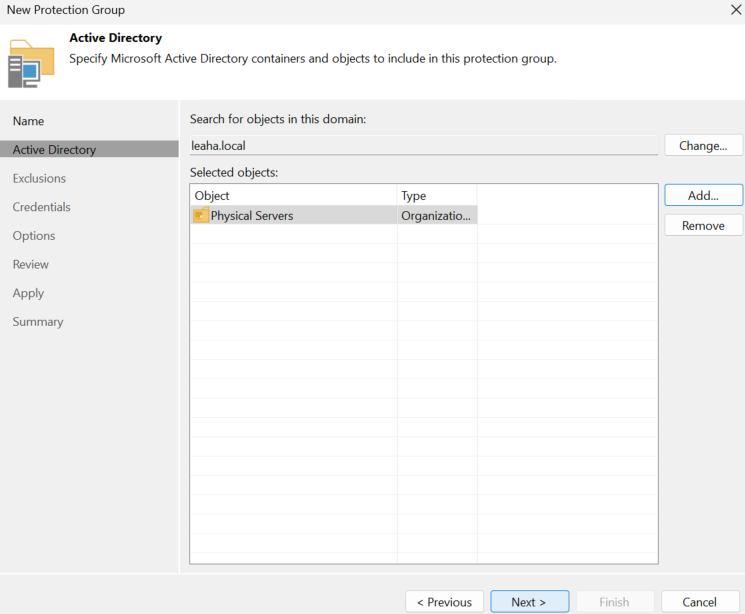
There are a few options, like adding individual servers, we will be added an AD group, click Microsoft Active Directory
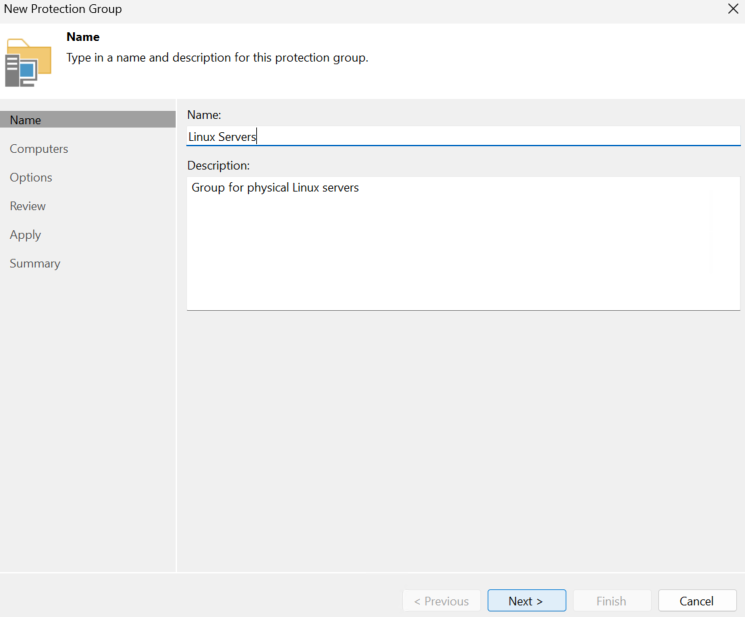
Give it a name and description, then click Next
Click Change
Put your domain in and click Add
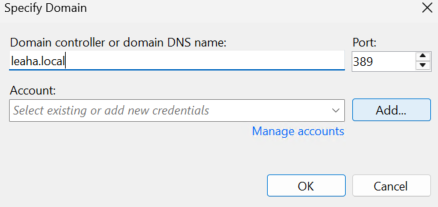
We’ll need a domain admin account, we will use a Veeam service account and add its credentials
The username should be
username@domain
Then click ok
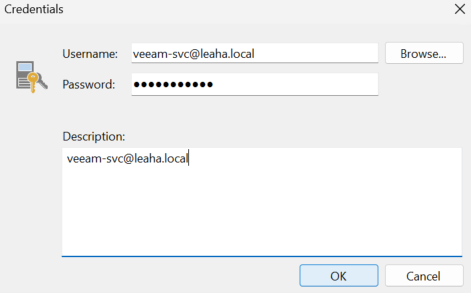
And click ok again

Then click Add
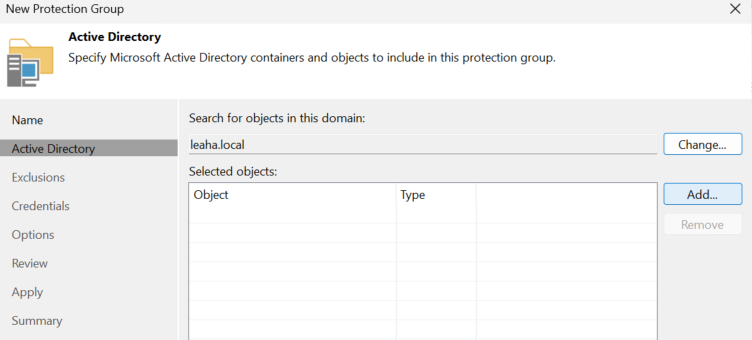
Expand the domain and select the OU you want to use Agent backups for and click ok

Click Next
Click Next here
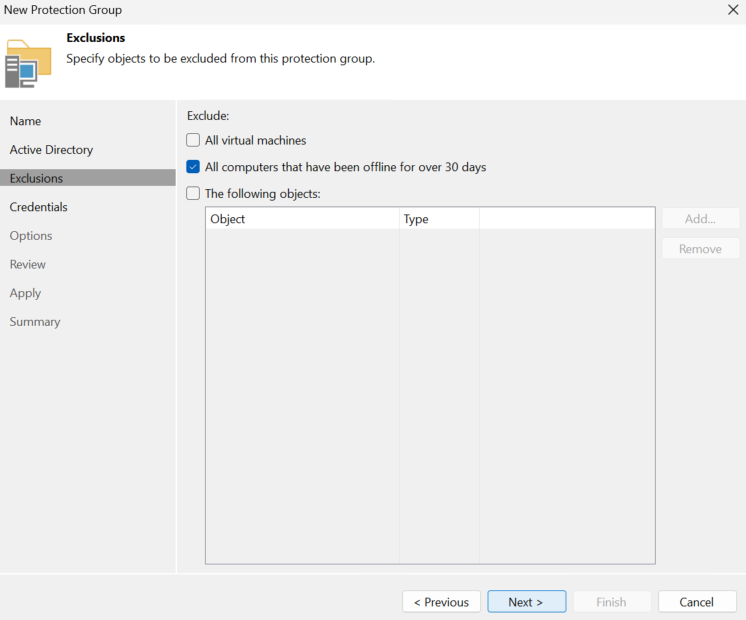
You may need to uncheck the exclusion on VMs as this can cause issues
My recommendation is to uncheck this and ensure physical servers are in their own OU and add that
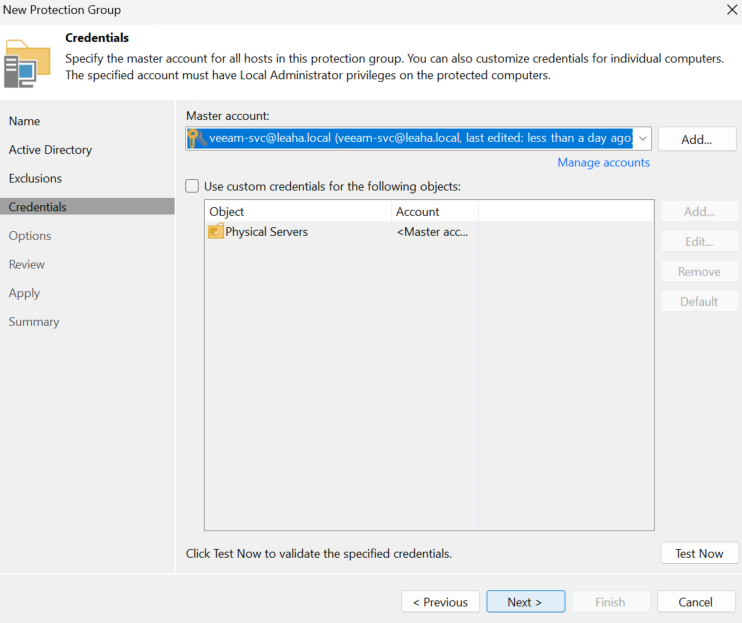
Make sure the master service account is a Veeam service account, you can specify credentials per OU as well if needed, then click Next
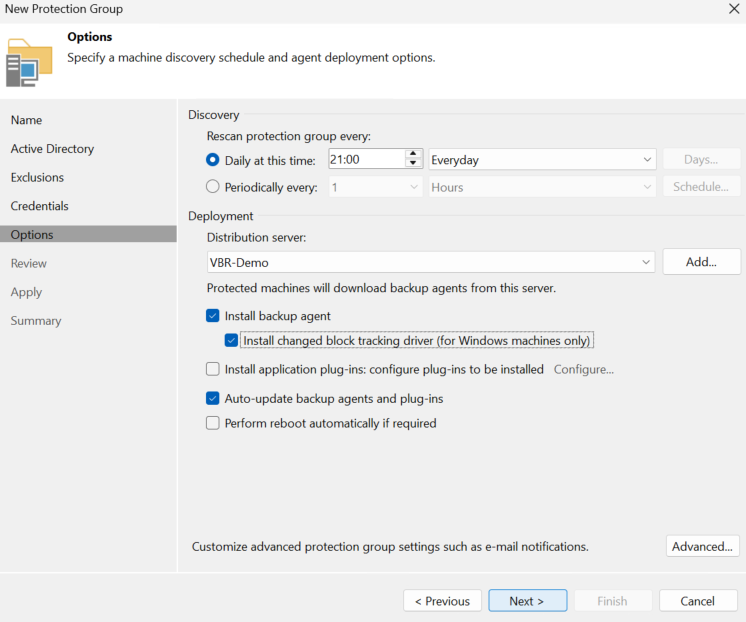
Check the box to install the CBT module, and you can setup email notifications under Advanced, but if you are using Veeam ONE, leave that disabled and click Next
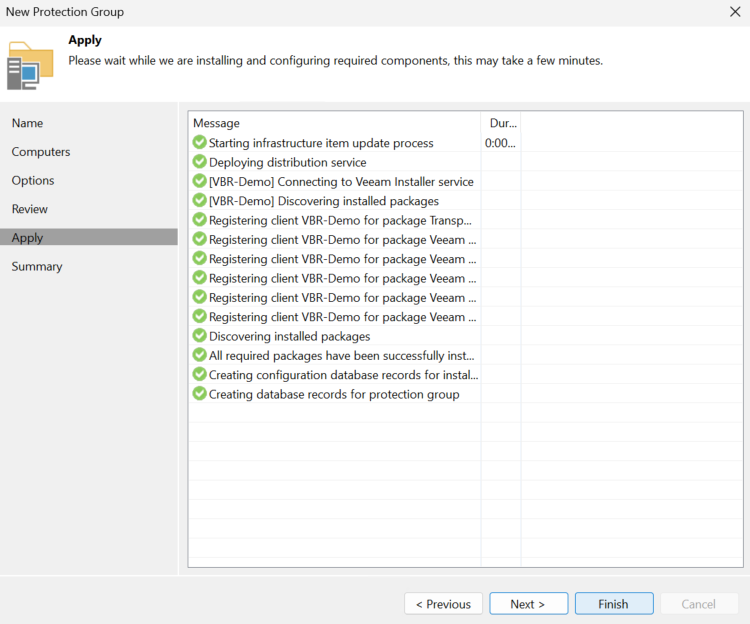
Click Apply
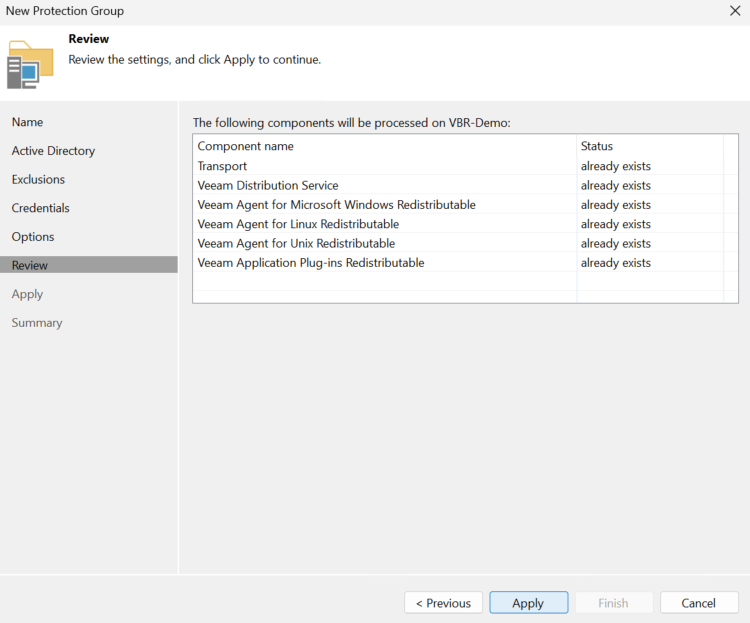
And click Finish
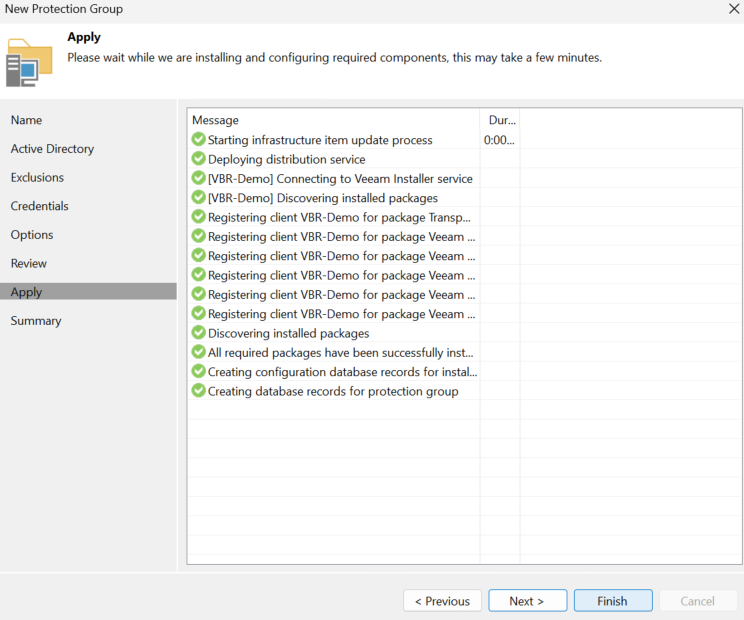
It will then perform a scan on the OU, my test lab is now adding the packages to my machine
It will upload and install the needed packages, this can take a while
And the CBT module will need a reboot to work properly
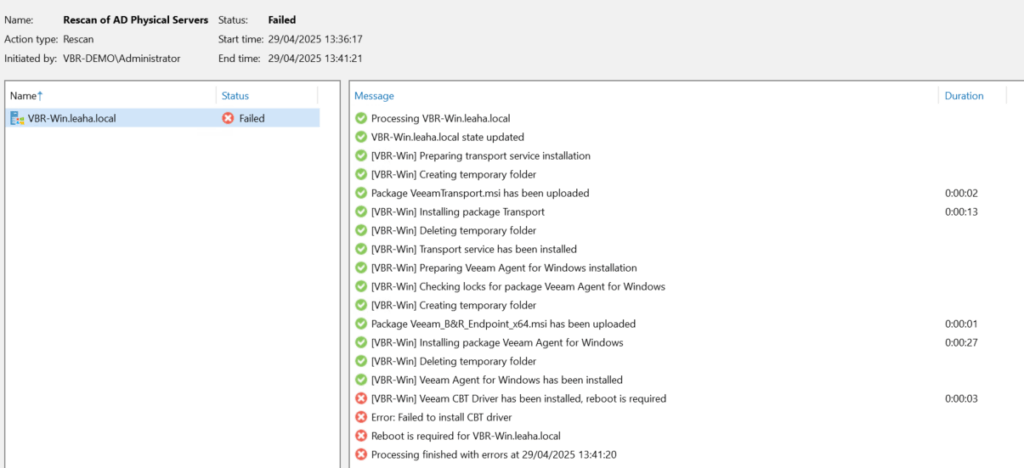
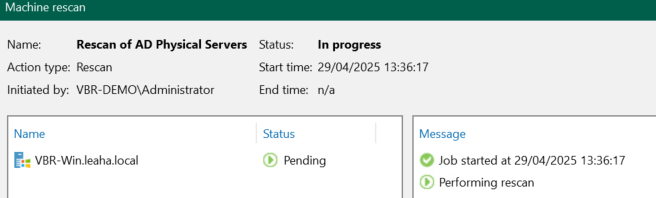
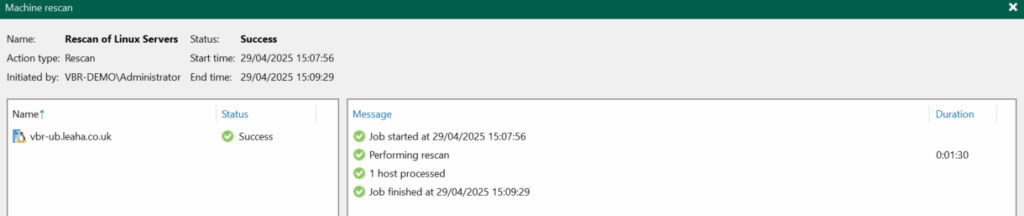
We can the right click the protection group and click rescan to check everything is working as expected
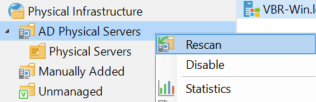
Which should then be all green
1.6.2 – Linux
The more secure way of adding Linux machines via SSH is with keys, not passwords
This will walk you through the process to create keys for VBR to use for Ubuntu but should work on other Linux systems
On the VBR server, open PowerShell, if you dont have OpenSSH installed, this is installed by default on Server 2022/2025
Add-WindowsCapability -Online -Name OpenSSH.Client~~~~0.0.1.0Generate a new key pair with
ssh-keygen -t rsa -b 4096It will then enter a file to save the key, press Enter here
Generating public/private rsa key pair.
Enter file in which to save the key (C:\Users\Administrator/.ssh/id_rsa):
You will get this out
Created directory ‘C:\Users\Administrator/.ssh’.
Set a secure passphrase
Enter passphrase (empty for no passphrase):
Enter same passphrase again:
And you will then get an output like this
Your identification has been saved in C:\Users\Administrator/.ssh/id_rsa
Your public key has been saved in C:\Users\Administrator/.ssh/id_rsa.pub
The key fingerprint is:
SHA256:P0pjaZ1byMOa/fanHEMC154Ob7HDcK719qJtohnylP8 administrator@Xenon
The key's randomart image is:
+---[RSA 4096]----+
|                 |
|             .   |
|          . . .  |
|           o . . |
|        S   + *  |
|         * + @ o |
|        B & . %  |
|       + X Oo*o=o|
|        + *+=*E=+|
+----[SHA256]-----+
We then need to transfer the public key to the remote host, we can use this command
Get-Content C:\Users\<your-user>\.ssh\id_rsa.pub | ssh user@host "cat >> .ssh/authorized_keys"For my user is Administrator, and we can see that from the above part when the SSH key was generated
My remote host is vbr-ub.leaha.co.uk, and I have a veeam-svc sudo user, as this is best practices, on the target Ubuntu server
So the command I will run is
Get-Content C:\Users\Administrator\.ssh\id_rsa.pub | ssh [email protected] "cat >> .ssh/authorized_keys"Its worth noting that I have the SSH private key stored locally, this should also be backed up externally
To add agent based backups for Physical servers head to Inventory
Click Physical Infrastructure then Create Protection Group

Then lets use individual Computers, if you have a larger environment, Computers From CSV File might be better
Give it a name and description
Click Add
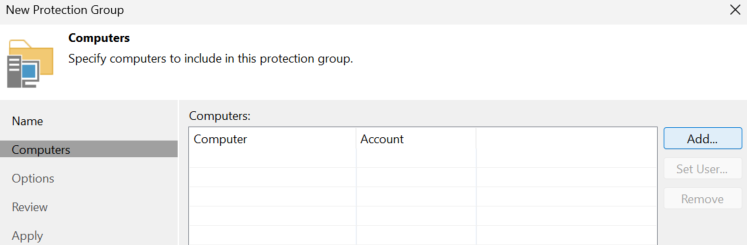
Enter the server FQDN and click Add/Storage/SSH Private Key

Enter the username and password for the Veeam service account, then click Browse to select the Key
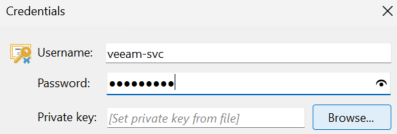
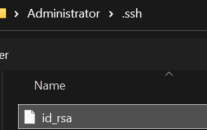
And double click the file we generated earlier
Add the private key passphrase, and check the box to elevate account privileges automatically, then click ok
Click ok again
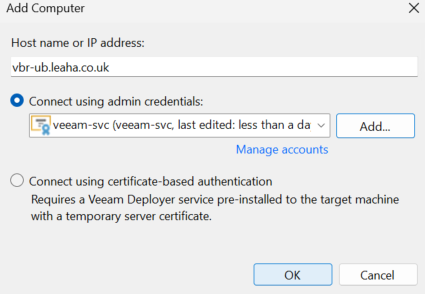
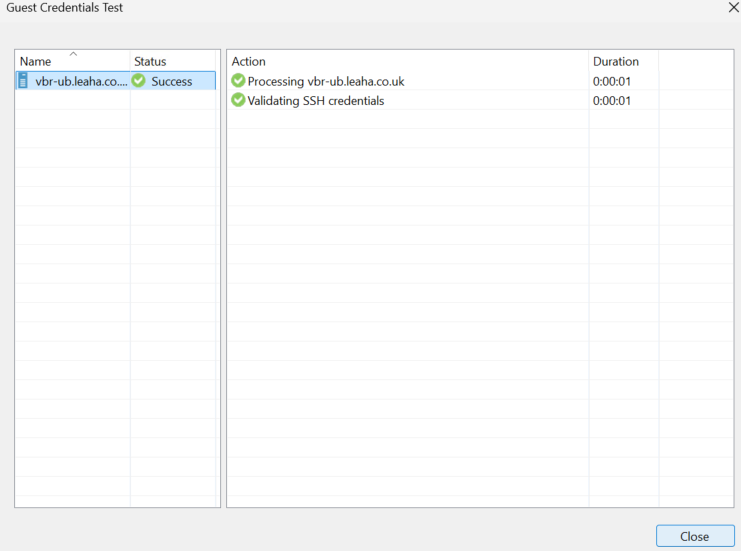
Click Test Now
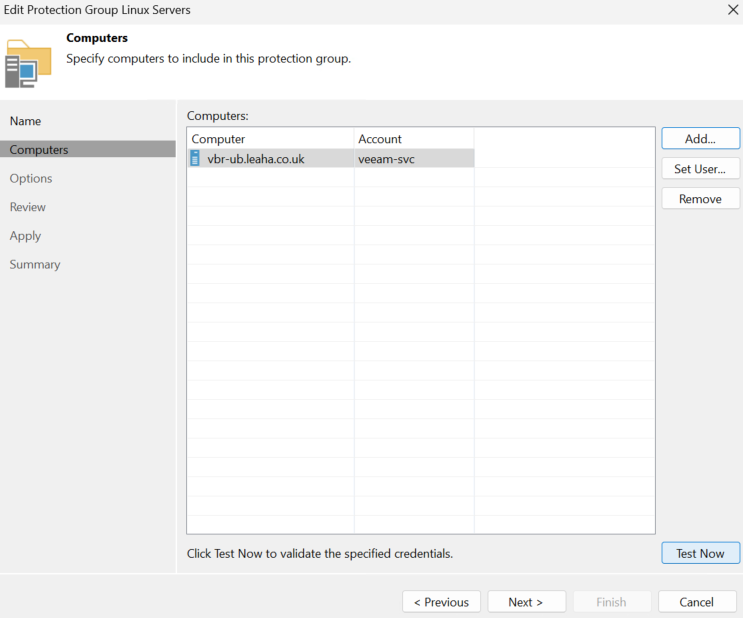
It should be successful and click Close
Then click Next

Next again
Under Advanced you can set email notifications, but if you will be adding Veeam ONE later, then you can leave this blank
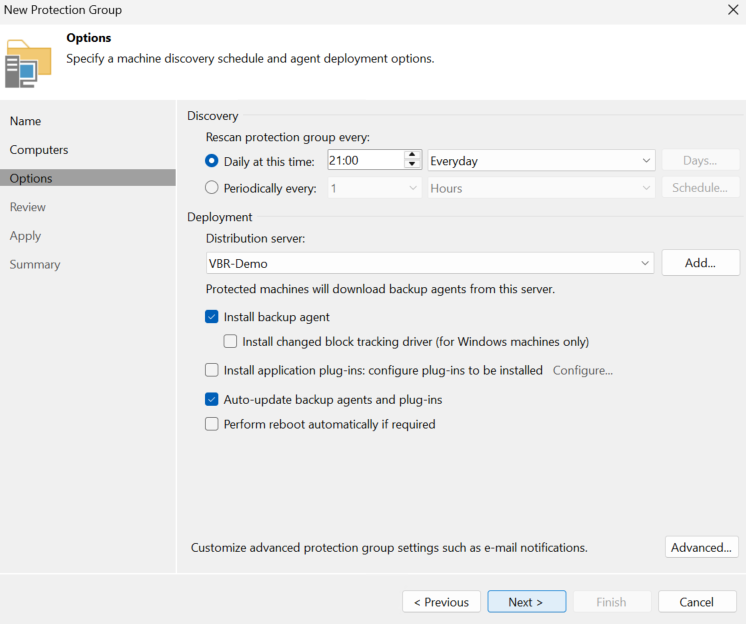
Click Apply

Once thats installed, click Finish
And the group will perform a rescan which will take a couple of minutes
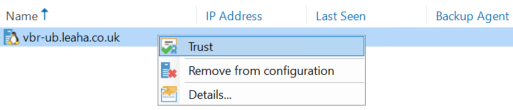
Its worth noting, later down the line when we secure our server with the security analyzer, Linux hosts may fail a rescan with this issue

This is caused by Veeam not automatically trusting Linux servers
To fix this, from the protection group in Physical Infrastructure, right click the host and click Trust
And click Yes
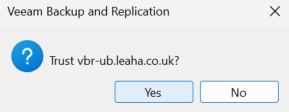
A rescan will now work
1.7 – Linux Hardened Repository
There are two main choices for how you want to deploy and configure a Linux Hardened Repository
- Veeam Hardened Repository ISO
- Custom Server Build – Ubuntu
For this I will walk you through how to setup both, for the custom server by Linux distro of choice is Ubuntu, but you can use another distro if you prefer
Veeam Hardened Repository ISO Pros
- Much easier to manage for Windows Admins
- Veeam Support – As of April 2025 this is experimental meaning to SLA from Veeam
Custom Server Pros
- Arguably better for admins familiar with linux
- Fully customisable and exactly how you want it
The custom server has the main con that you dont get support, you are responsible for fixing it and if the OS is the issue, Veeam will not support this
1.7.1 – Configuring Server RAID
1.7.1.1 – Dell
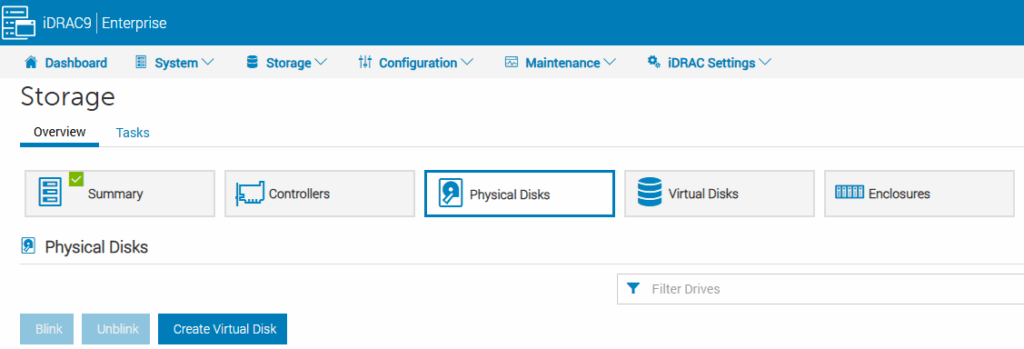
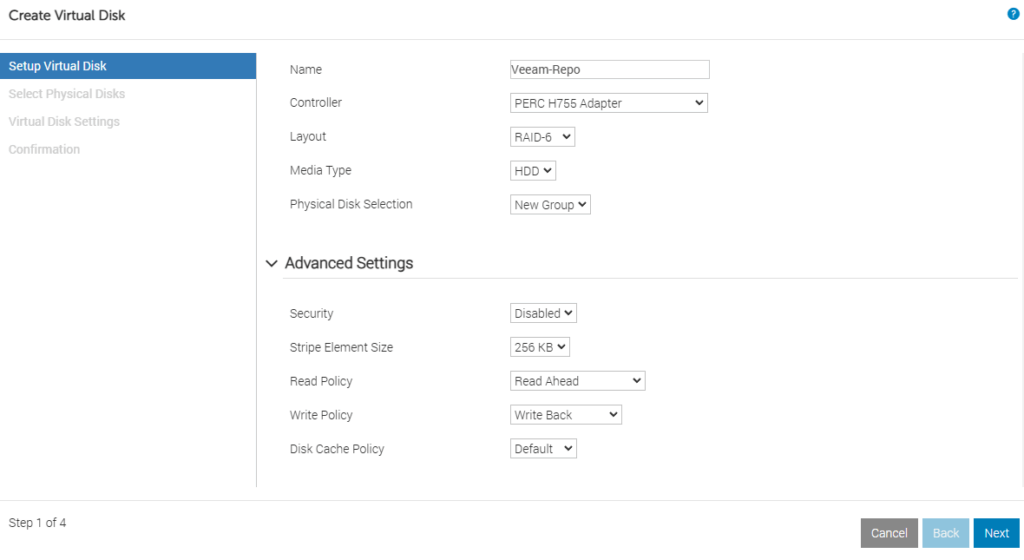
Log into the iDRAC and head to Storage/Overview/Physical disks and click Create Virtual Disk
Give a name to the disk and select the layout, I want RAID 6 as this is backup server so resiliency is important
For advanced settings, make sure Read Ahead is selected for the read policy for a backup server this gives extra performance, and write policy should be write back only if your controller has a battery backup onboard so you dont loose data in the event of a power outage, the Dell H700 series have one by default, and write through if you dont
Then click Next
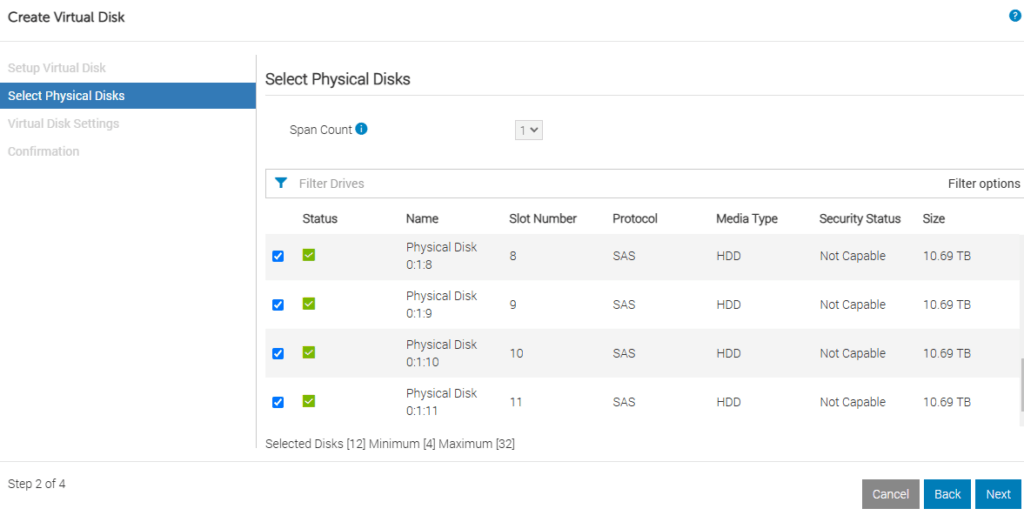
Select all the disks you want in this RAID pool and click Next
Click Next here
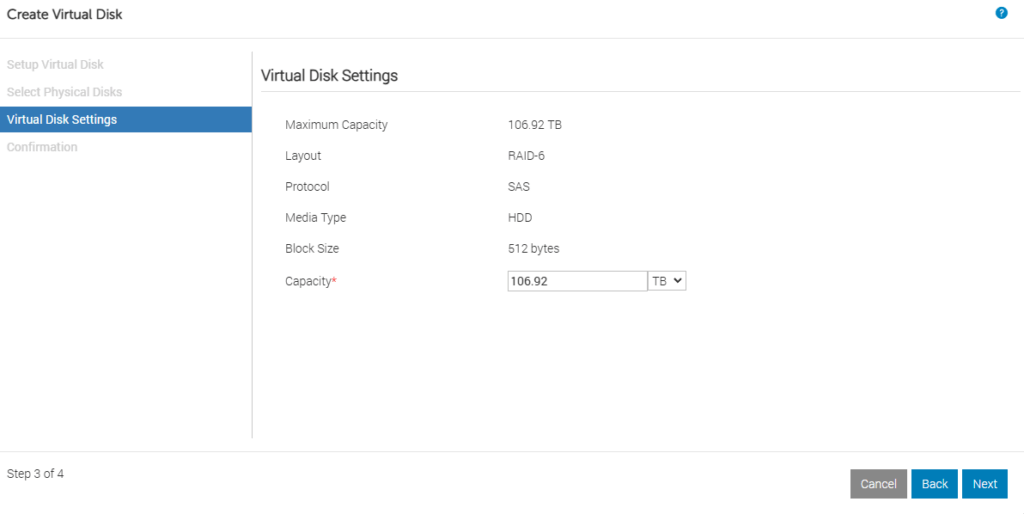
Then select a time to apply, I am using Apply Now as this is a new server and its not doing anything yet
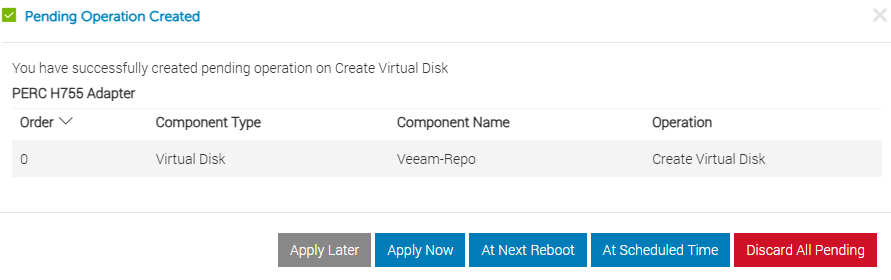
Once thats applied you will likely need to reboot the server
1.7.1.2 – HPE
This for an older HPE Gen 8 model, but having done this on a G11 the process is largely very similar
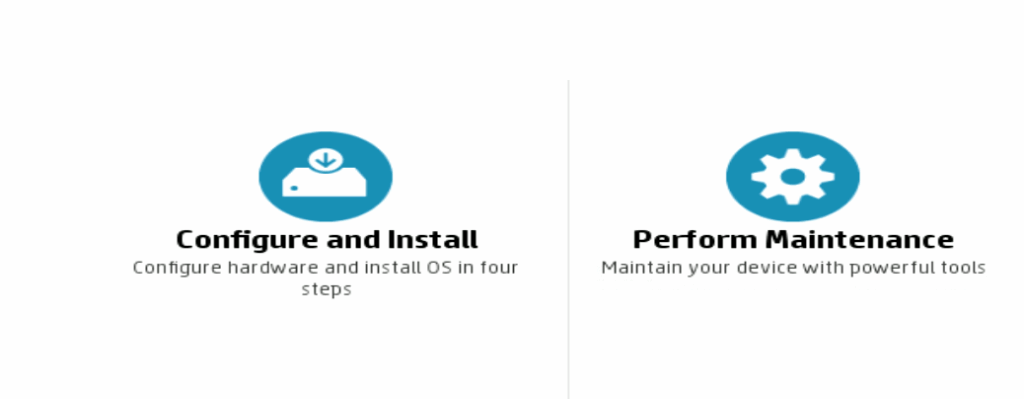
To do this you’ll need to reboot the server, during the boot, press F10 when this pops up, at the bottom of the screen, for Intelligent Provisioning

You may get a screen asking you to setup intelligent provisioning, you can just click through it as we wont be needing it
When it loads you’ll want to click Perform Maintenance, on newer models you may not be given this option but just get a list of options
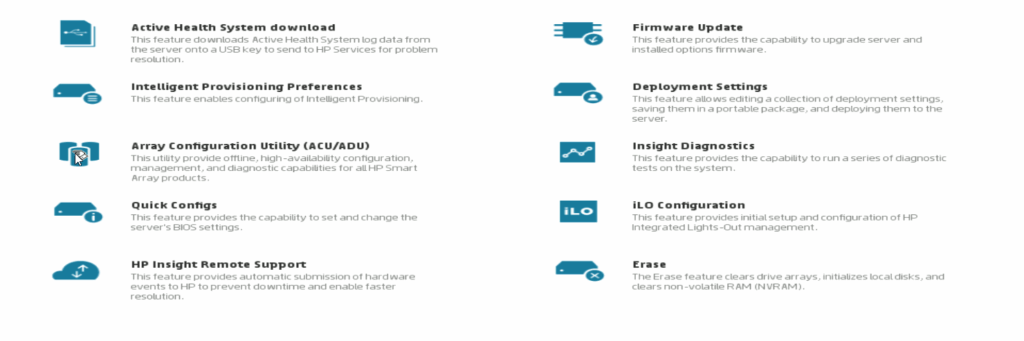
We then want to click into the option for the Array Configuration Utility
You may have multiple devices, as I have a low end integrated B120i, I have installed a separate P420 which I am running my drives through, so I will select that, the Configure
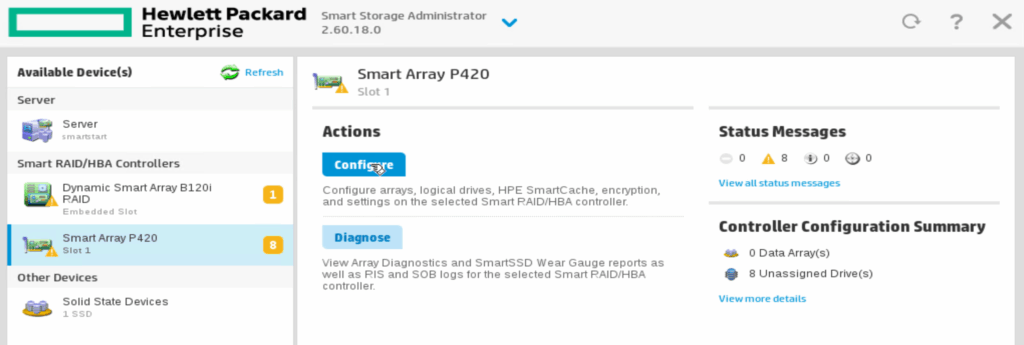
Then click Create Array

Select the disks you want in your pool then click Create Array
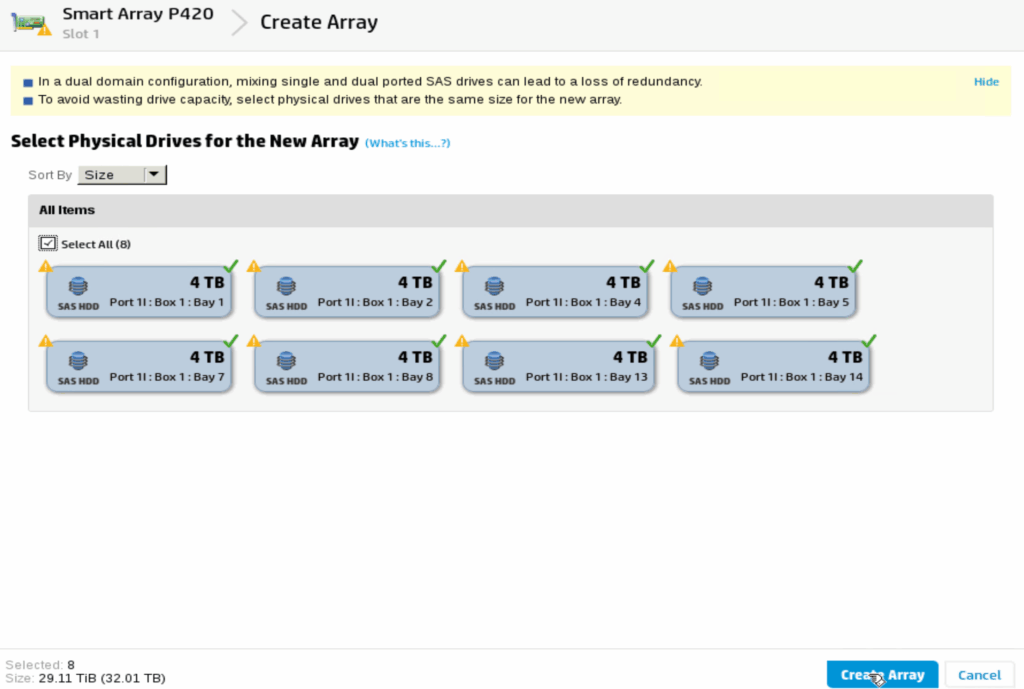
Select RAID 6, this allows you to have two disks fail, which is a must for a backup repository
Leave stripe size, sector track and size on the default, then scroll down
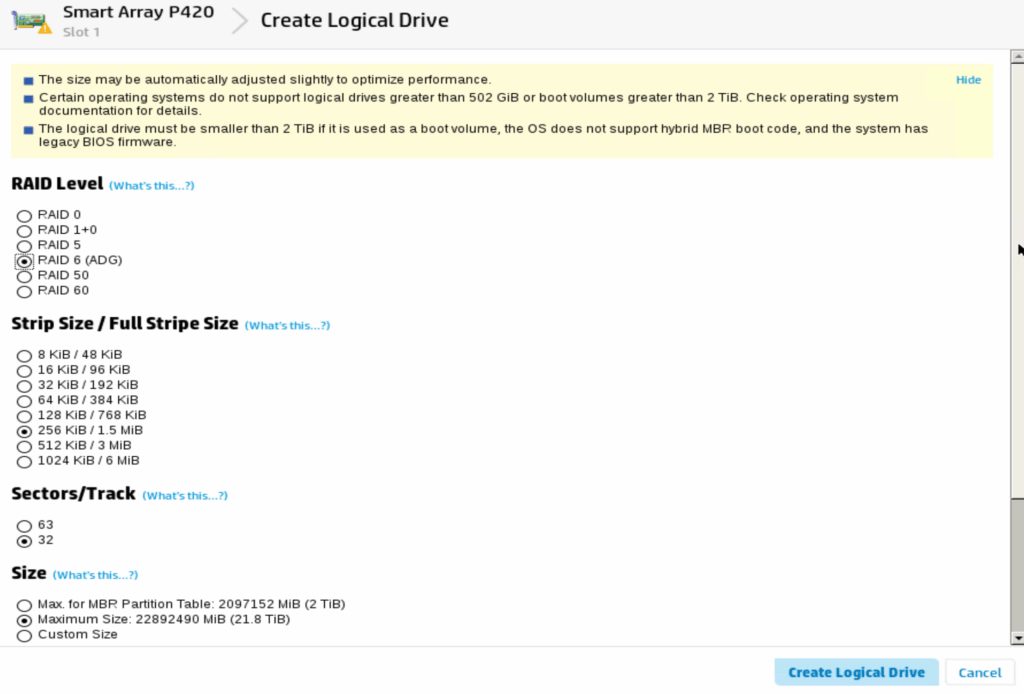
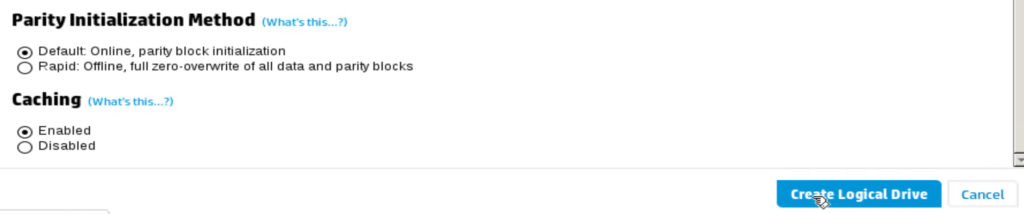
Leave parity on Default, and ensure caching is enabled for a massive performance gain, then click Create Logical Array
Click Finish
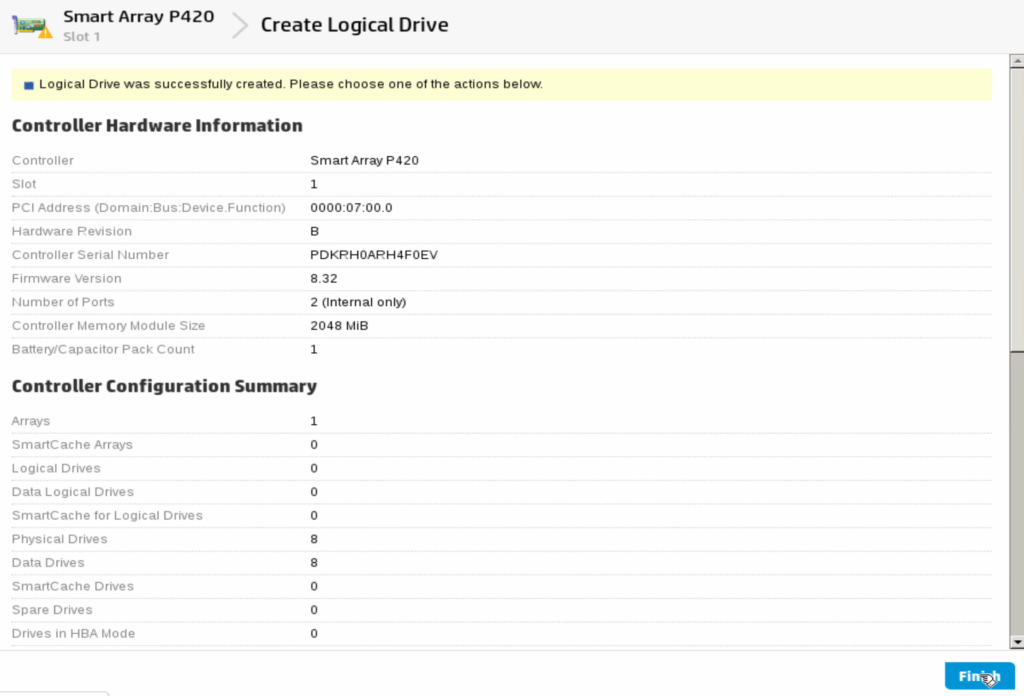
Id then give it 15 mins before rebooting to initalize
1.7.2 – Veeam Hardened Repository ISO
1.7.2.1 – Installation
You can download the ISO here
Veeam are only supporting servers on the official RHEL compatibility guide here
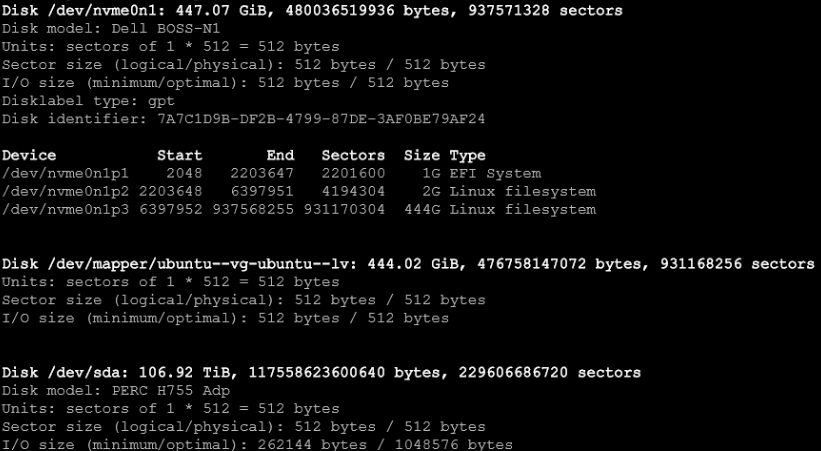
The server requires at least two disks of 100GB and one must be smaller, which is where the OS will be going
I will be using a VM to demo the setup, as I dont have a spare server, and it wouldnt install on a desktop I was going to use as a little hardened repository, this wont change the process
Spec wise, for a repo, having a decent amount of cores, to load more jobs, is very helpful, something like 16-20 cores on modern CPUs, and ~32-64GB of RAM in line with Veeam’s recommendations
As I will be running only a couple of jobs, I have set the following specs
- 2 CPU
- 8GB
- 128GB Boot Disk
- 1TB Data Disk
Make a bootable ISO using Rufus, or attach this via your IPMI and select the option to install the OS, this will delete all data on the server
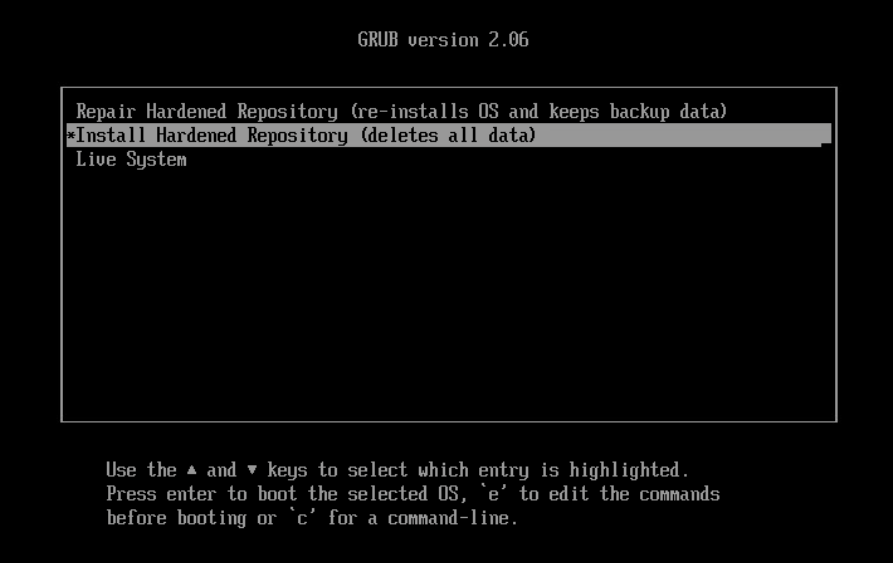
You will then get to this menu, where we can configure a few bits
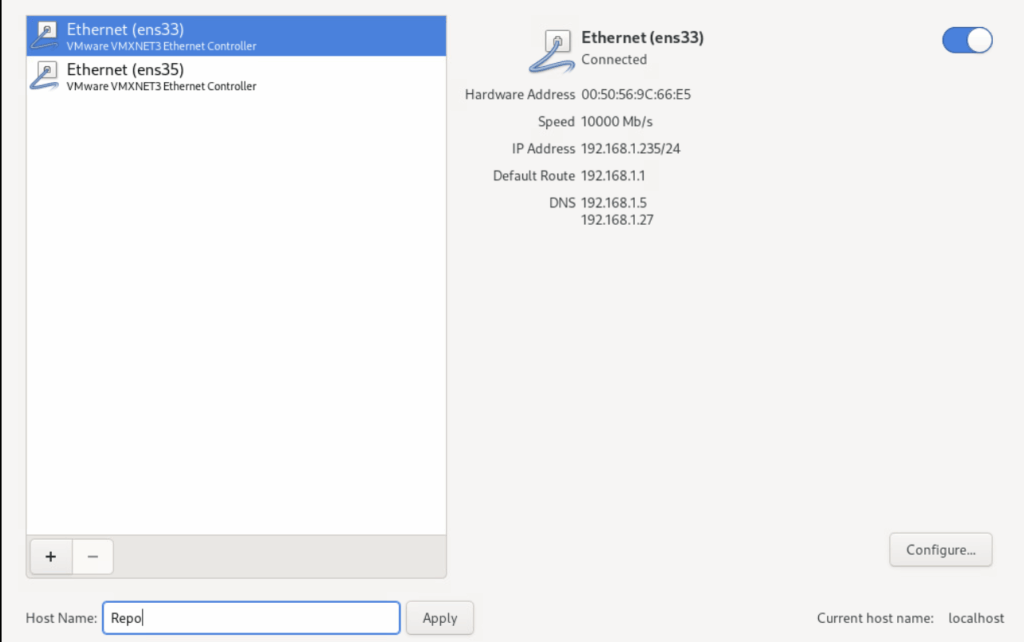
Lets start with networking by clicking Network & Hostname
Enter a hostname at the bottom and click Apply, then click the + at the bottom of the box with your network adapters in it
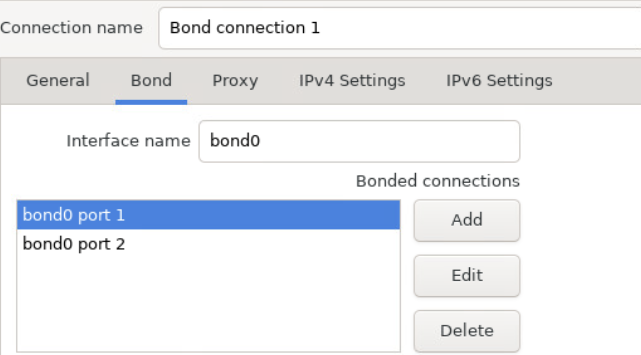
Make sure Bond is selected, then click Add
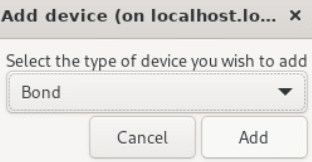
Click Add
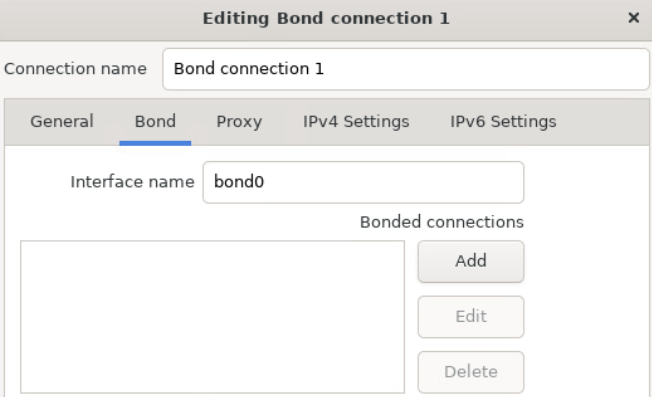
Make sure Ethernet is selected and click Create
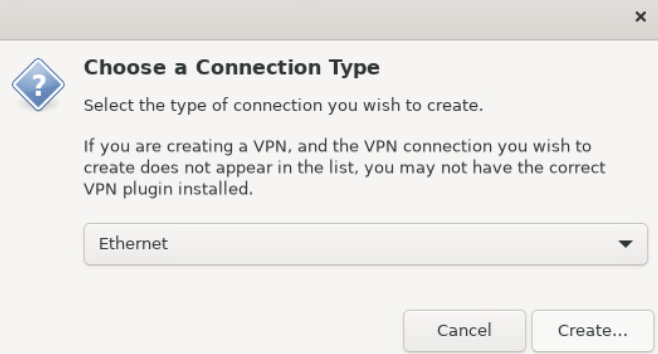
Click the Device drop down and select one of your two redundant NICs, leave the rest at stock and click Save
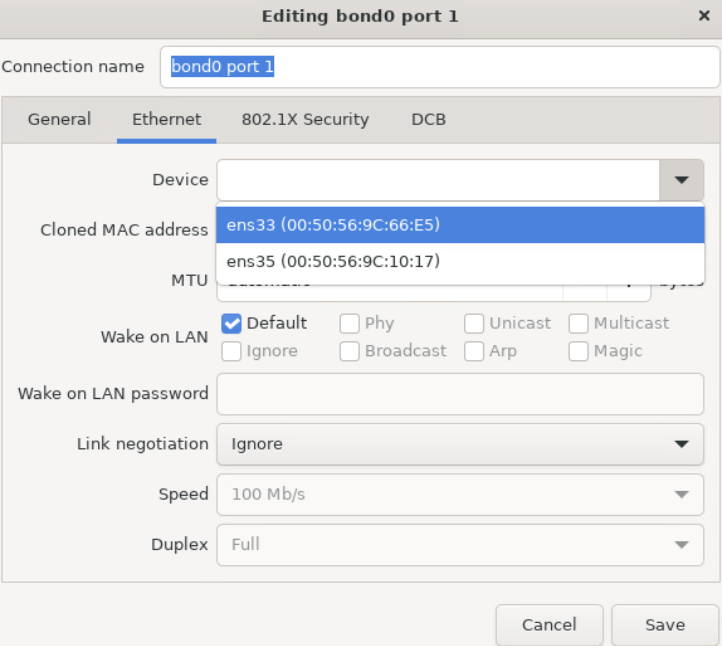
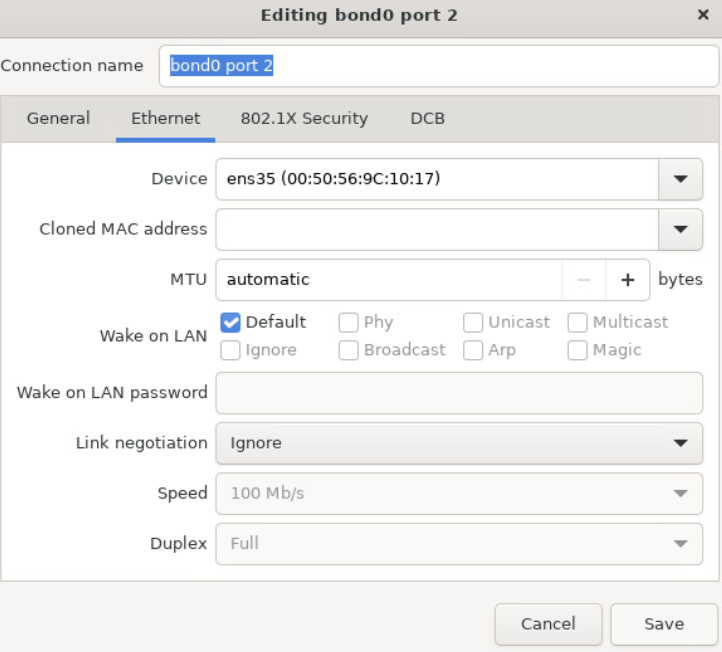
And repeat for the second device
It should look like this
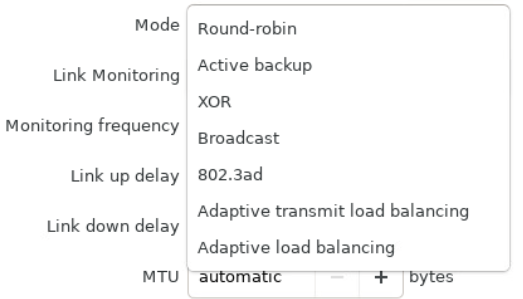
Now we need to set the mode
If the connection switches are a Dell VLT stack, HPE VSX or MC-LAG, like your cores may be, using a port channel not in LACP, active mode, then you want XOR
If yopu have an LACP port channel, select 802.3ad
If neither of those work, round robin should
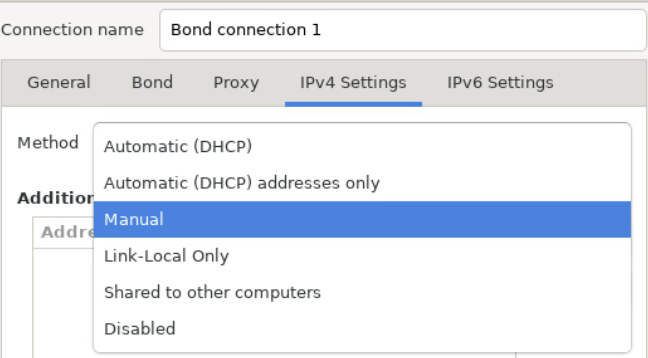
On the IPv4 tab, we will change this to manual
Then click Add
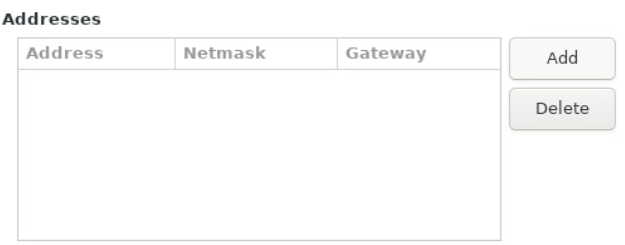
And fill in your IP details
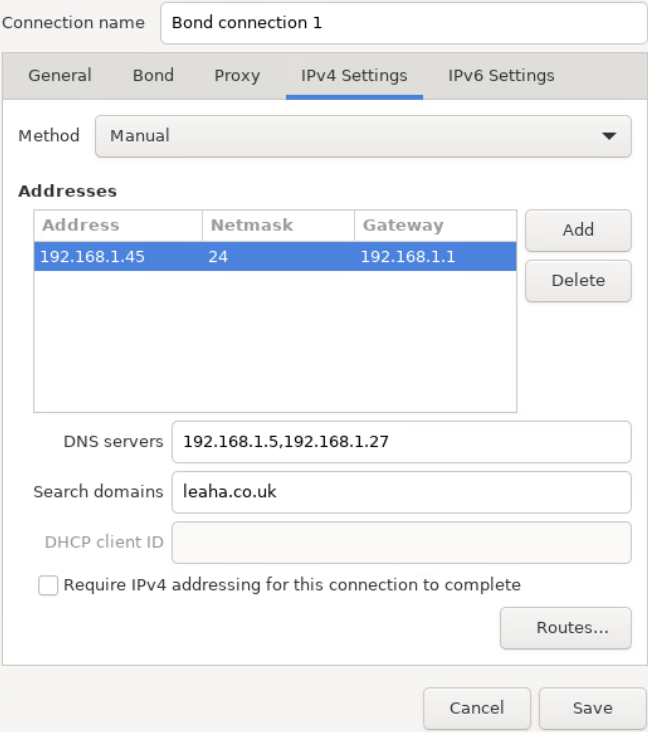
And, unless you are using IPv6, disable it

Then hit Save at the bottom
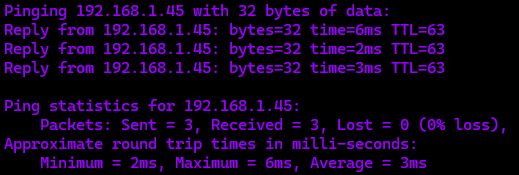
To test this is working, run a ping test, if its not, you may need to edit the bond mode
Once thats set, click Done

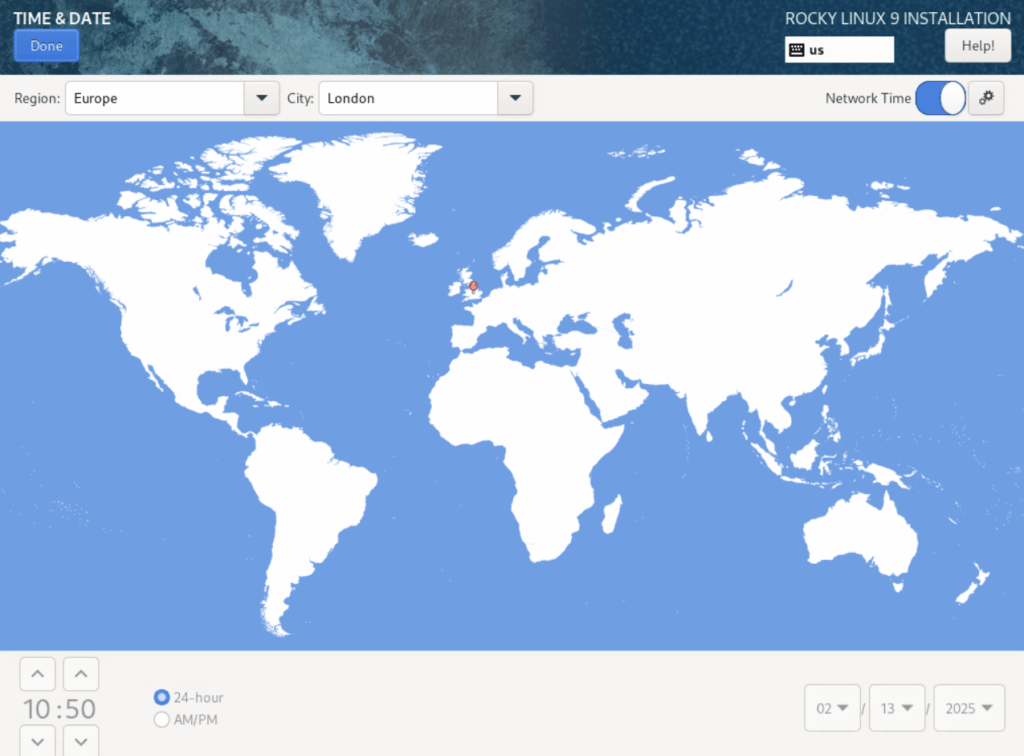
For the Time & Date section, select your timezone and click Done
For Keyboard Layout, if you are using a US keyboard then click Done
Otherwise, click English US, then the – icon
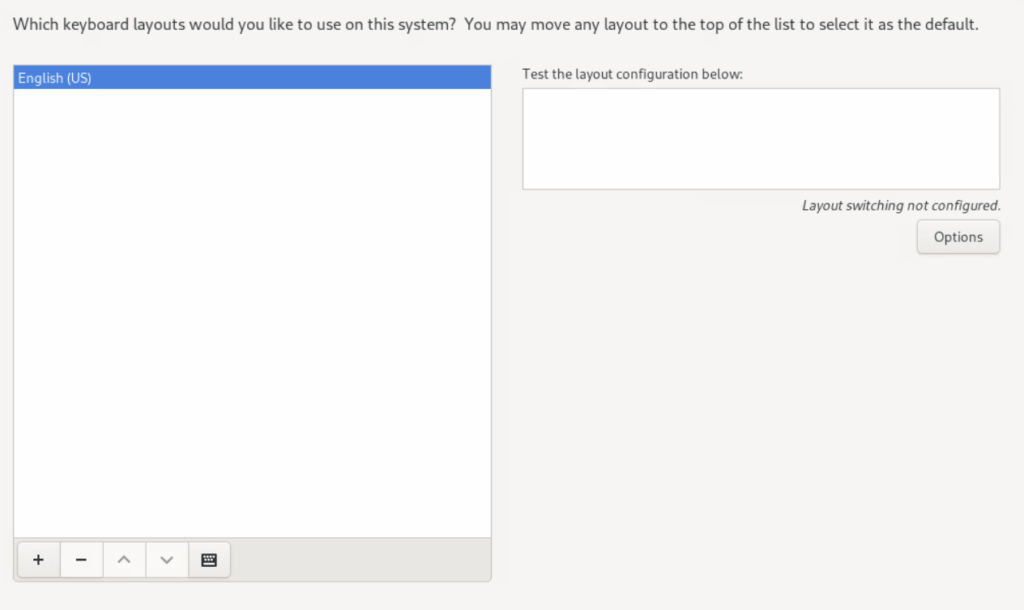
Then select the keyboard layout you do want
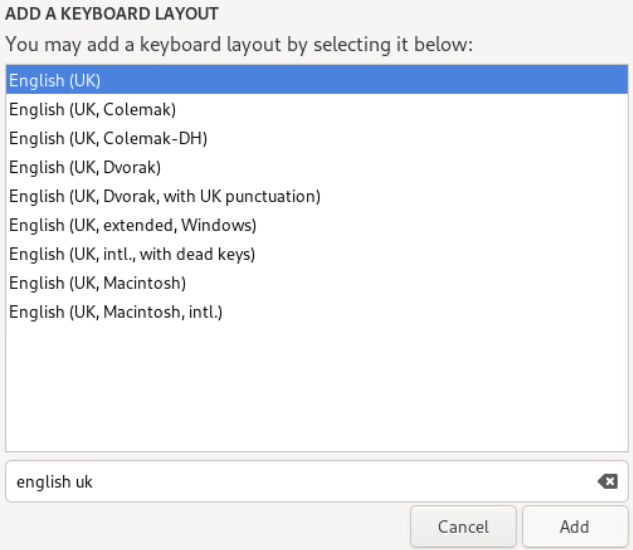
And click Done
Now everything is set, click Begin Installation
And click Yes

One its done, click Reboot System
1.7.2.2 – Post Deployment Configuration
Now we have the server OS installed, we need to configure it
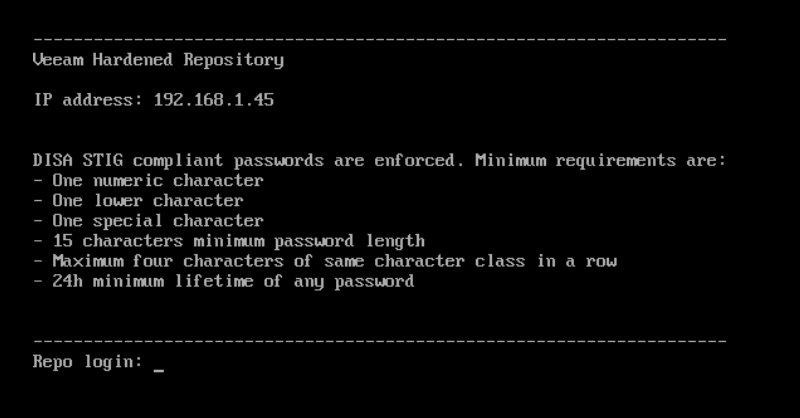
When it boots back up, it should drop you at a screen to login like this
Interestingly mine lost its IP config so I’ll need to check on that
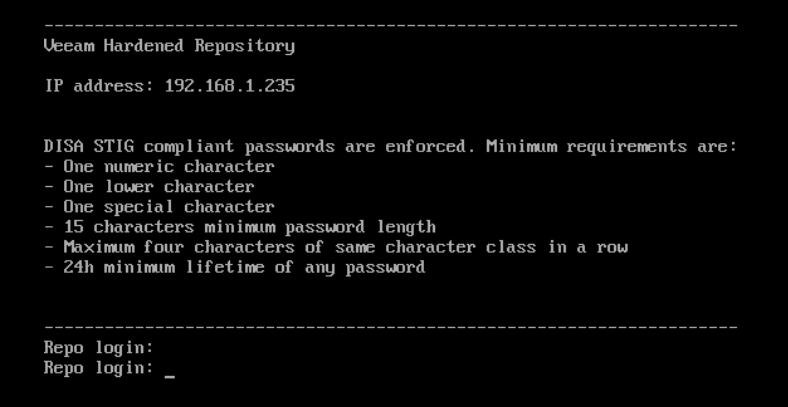
You can login with the following
- Username – vhradmin
- Password – vhradmin
You will then need to set a new password, the requirements are at the top of the screen
Its worth also noting, you cant have the same character class consecutively

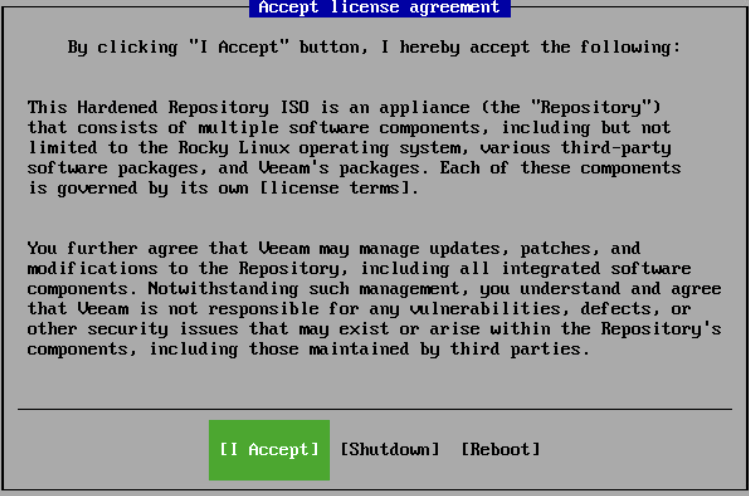
Use Tab to accept the EULA, and press enter
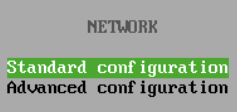
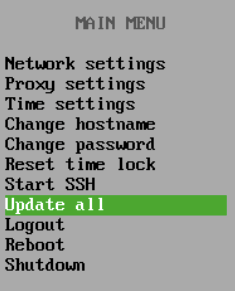
Lets check the network thats not applied properly in my case, click Enter on Network Settings

Then Standard Configuration
Select the up adapter, the bond reports as down, but does respond on ping and can be edited under Advanced Configuration if needed, so this is a UI issue
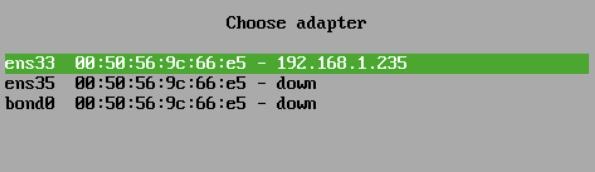
Select Disable

And Yes

It should look like this

This left me with just the Bond IP, and ping works fine on that IP and persists through reboot
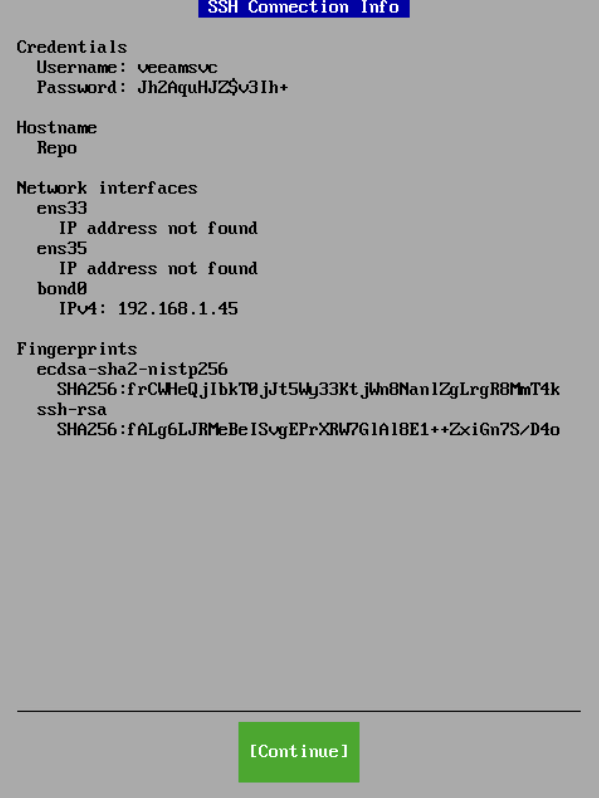
Heading back to the main menu, start SSH
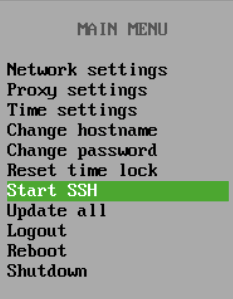
And click Continue, noting the password, this changes every time you start and stop SSH, as its meant to be temporary
1.7.2.3 – Adding The Hardened Repository
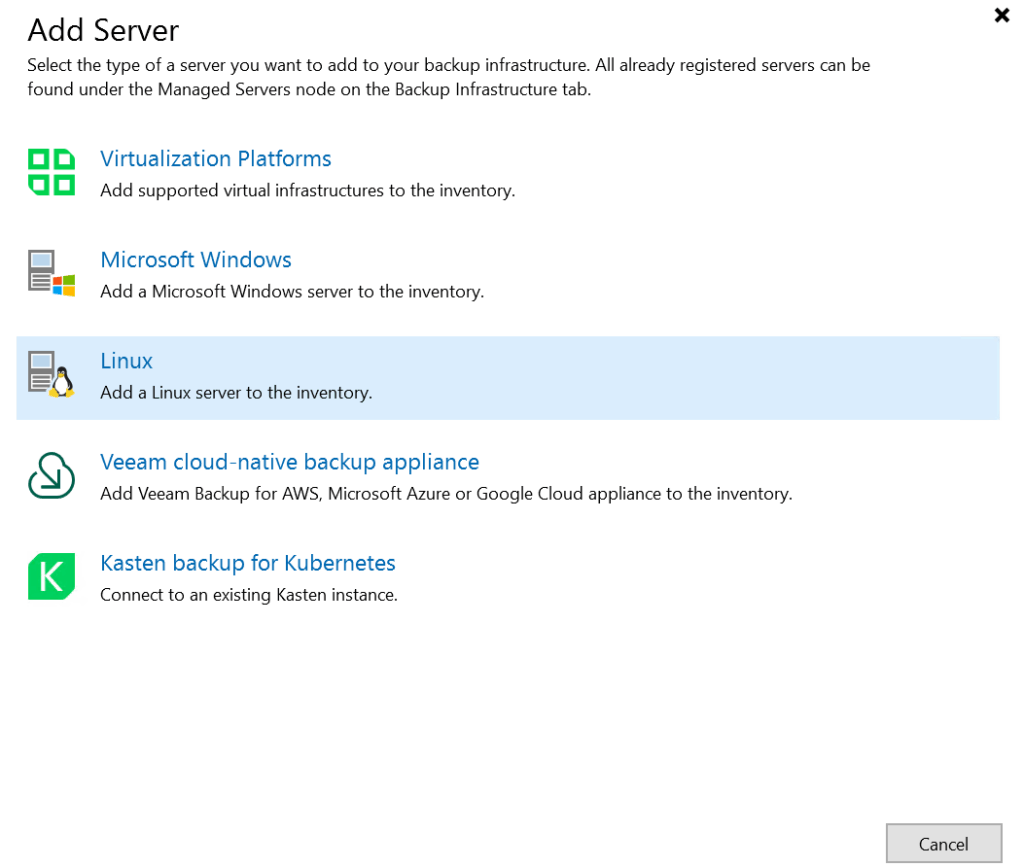
Head to Backup Infrastructure

Then from managed Servers click Add Server

Select Linux
Add the host name and description
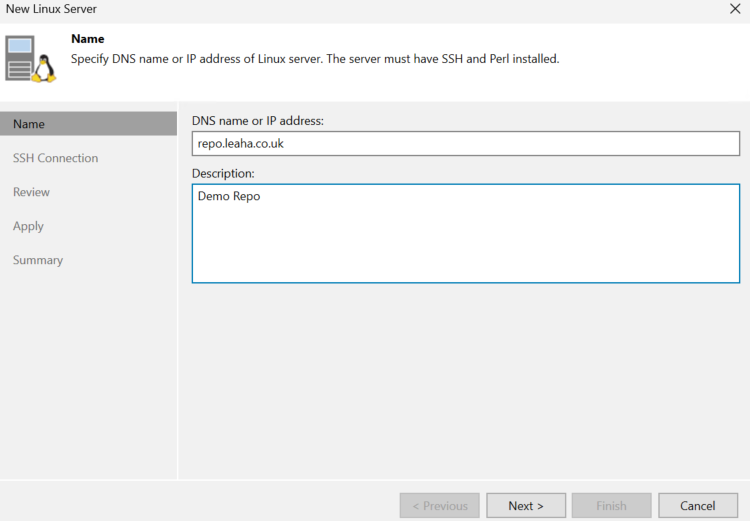
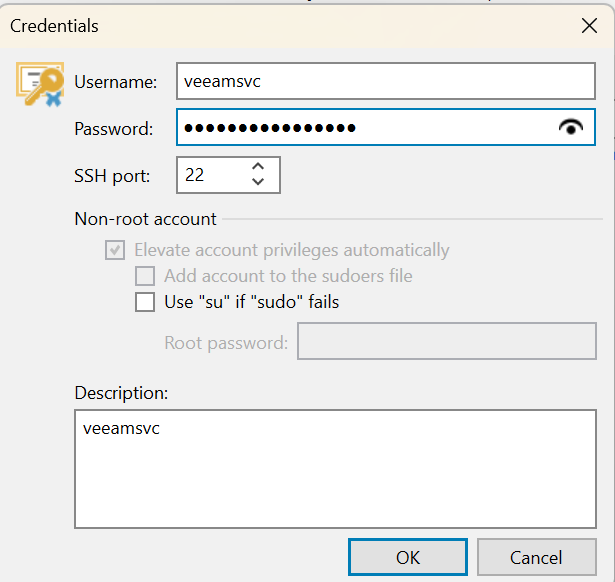
Add a new single use credential for the veeamsvc account

Add the credentials and click ok

Accept the thumbprint warning

Then click Next

Click apply

Then Finish once its been added
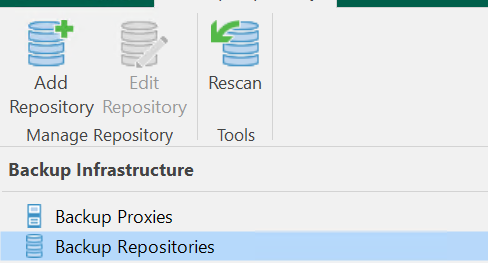
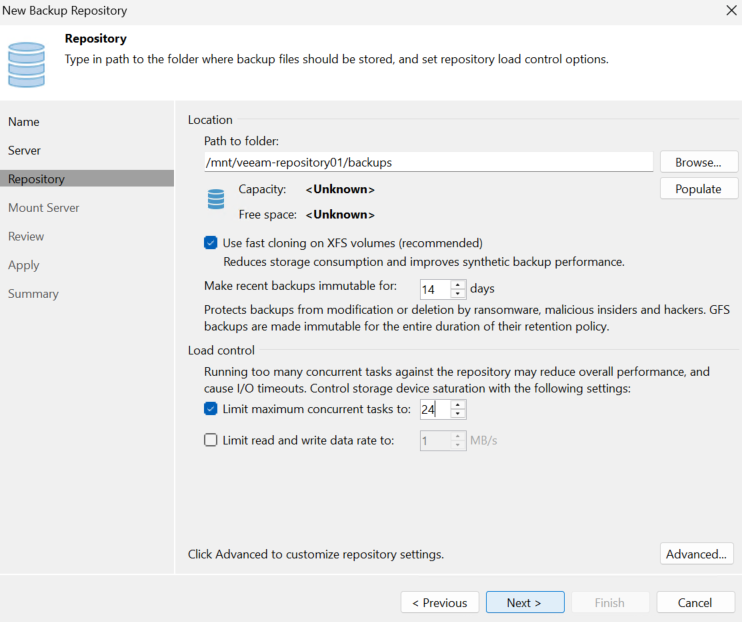
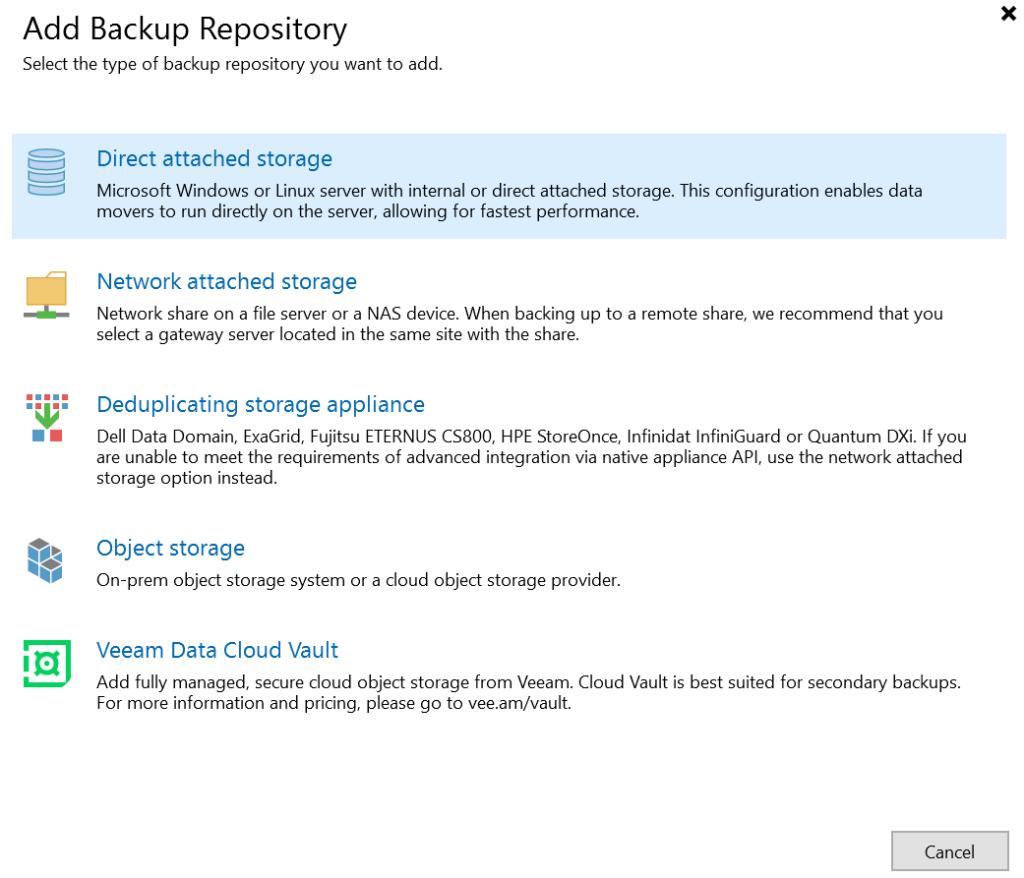
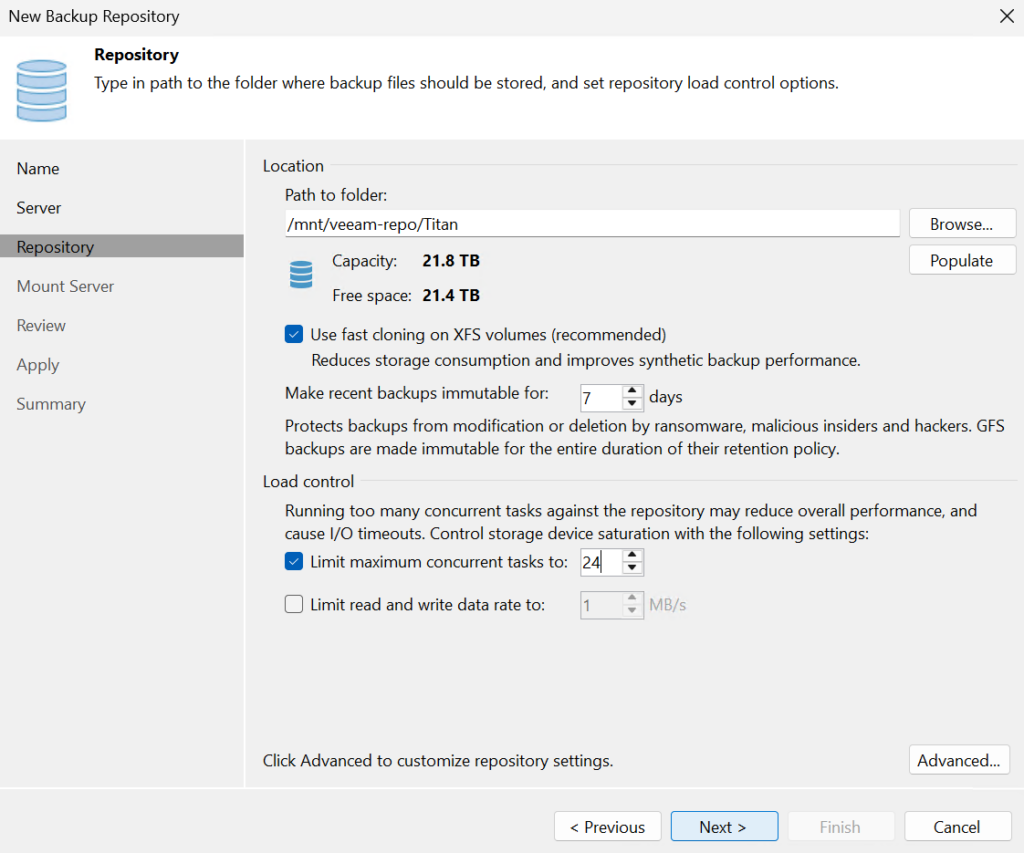
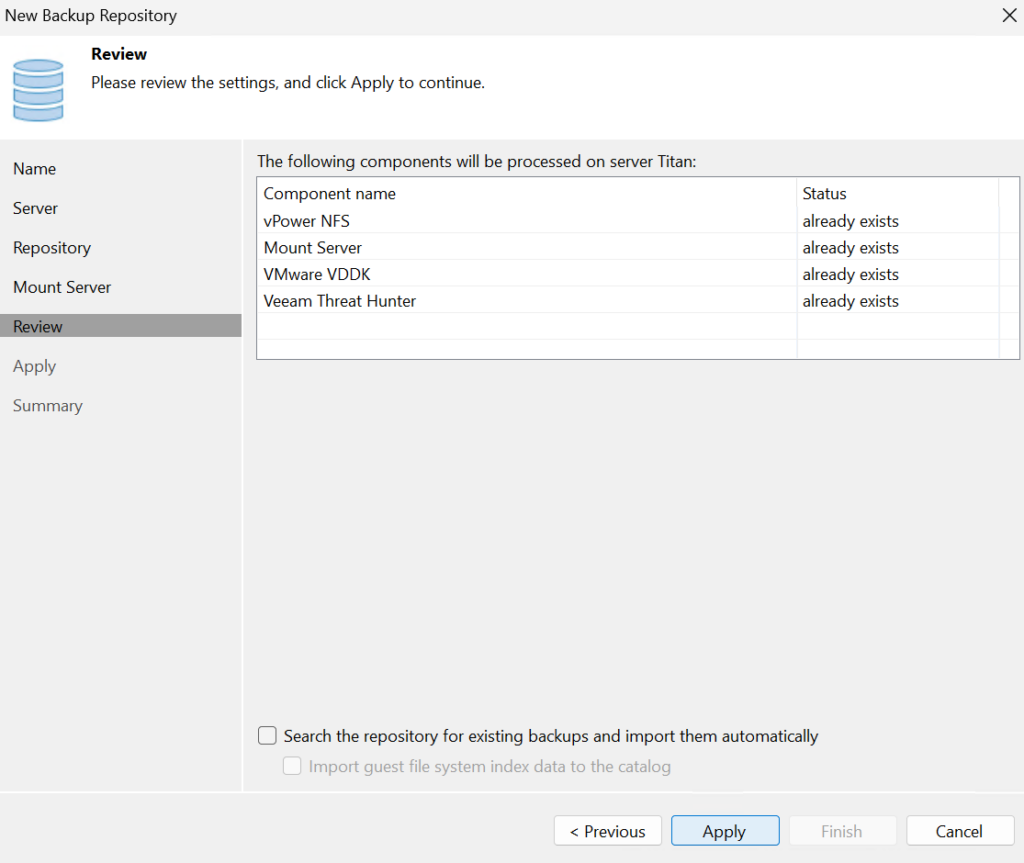
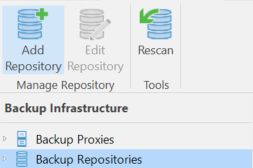
Now lets add a repository, click Backup Repositories and Add Repository
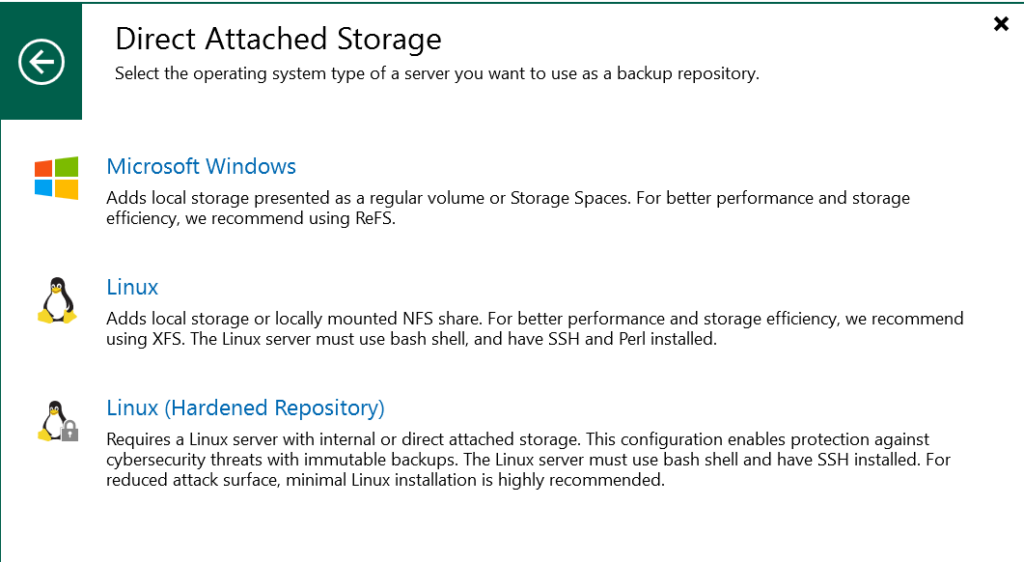
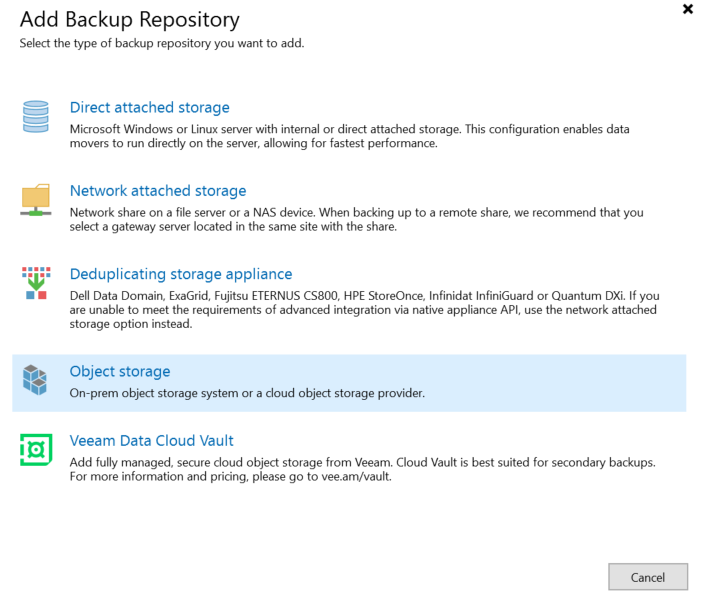
Select Direct Attached Storage

Then a Linux Hardened Repository at the bottom

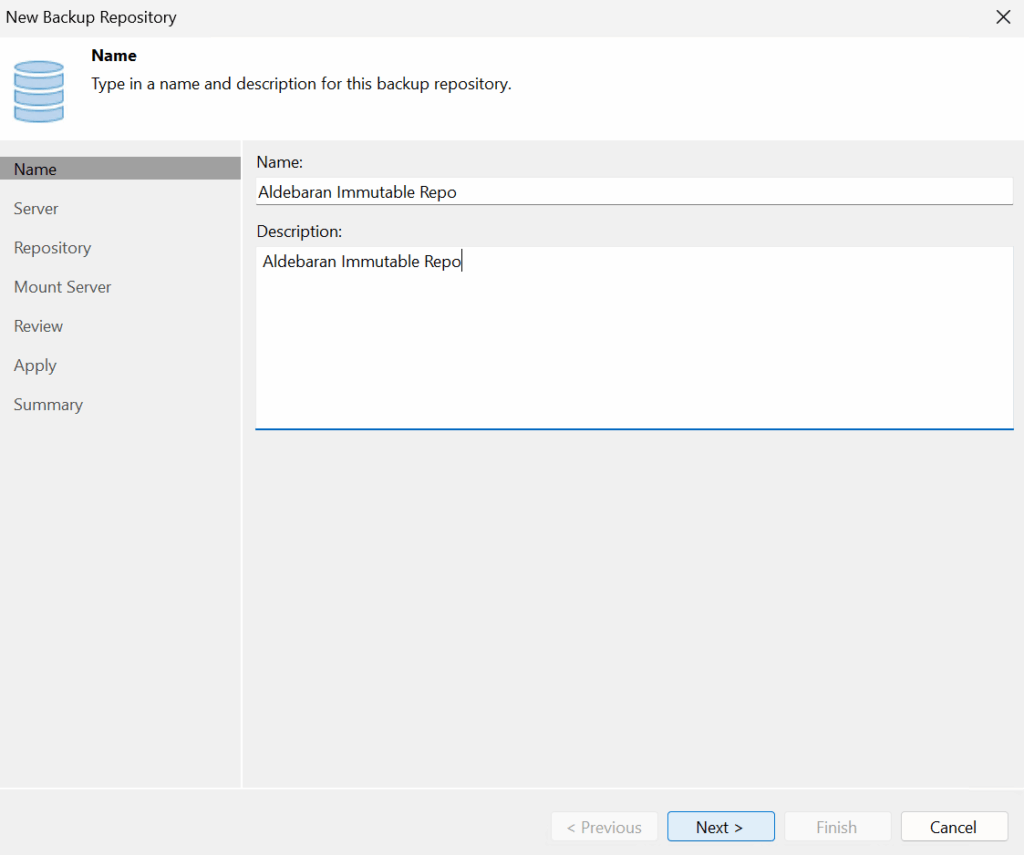
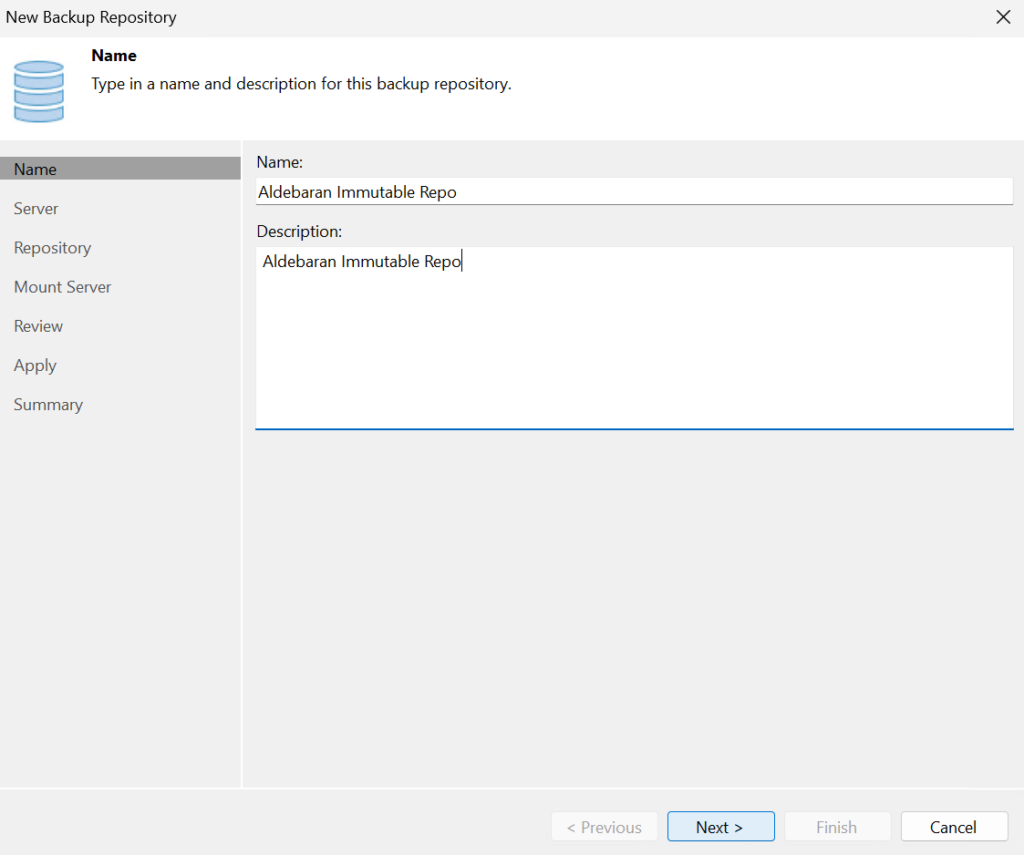
Then add a name and description, then click Next
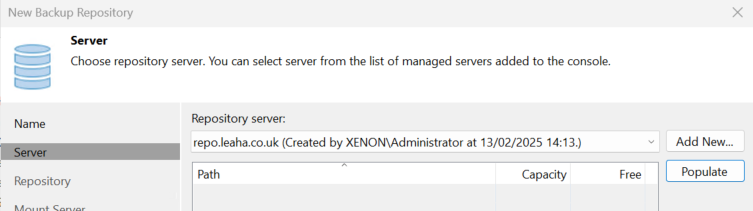
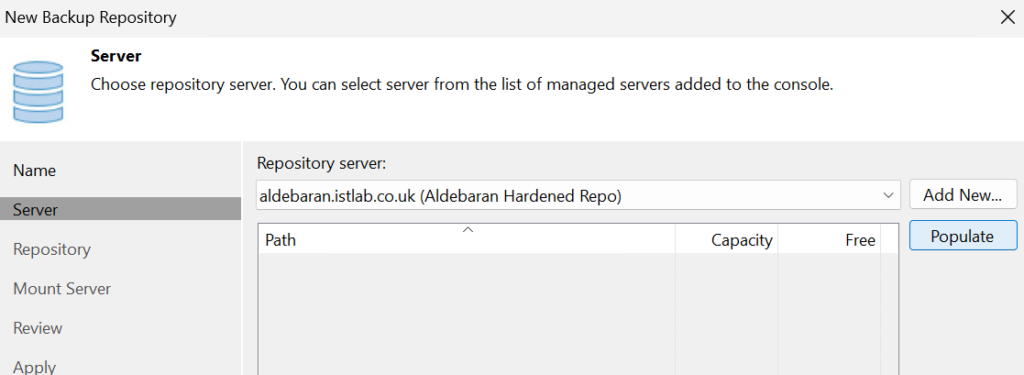
Click populate to find the paths on the server we added
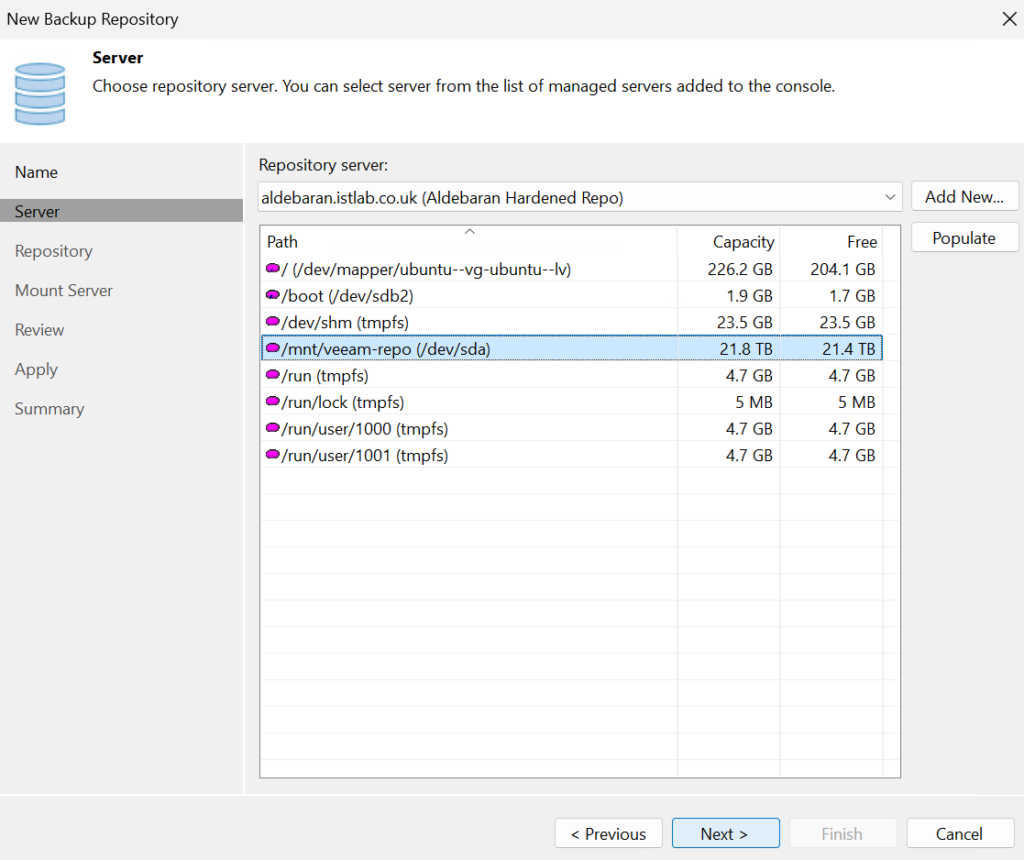
Select our mount point on /mnt/veeam-repository01, then click Next
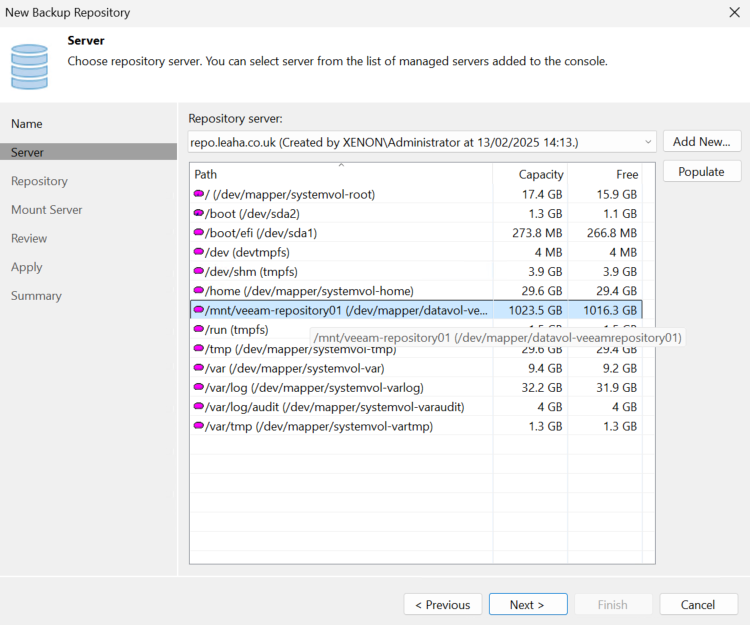
You can then see the capacity, dont forget to set immutability for however long you want it, this should be the same as the number of daily backups you will have for your jobs, you can change this later, GFS backups are made immutable for their entire period
Once set, immutable backups cannot be removed until they have expired
We also want to set the number of concurrent tasks to ~3/4x the number of physical cores, this is a rough rule of thumb, if you have spare CPU on the repository during jobs and not enough are running in parallel you can increase it, though this can increase RAM usage, so keep an eye on the repository resource usage if its bottlenecking anything
Now click Next
Keep these as defaults and click Next
Then click Apply

When its done click Next, and Finish
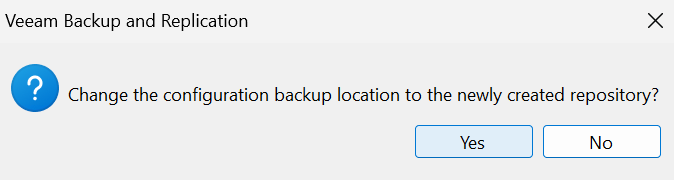
If this is your first repository, you absolutely need to click Yes here, the config cant be stored on the VBR server
1.7.2.4 – Applying OS Updates
To apply OS updates you’ll need to connect to the server console via your IPMI, eg iDRAC/iLO and login here
Then click Update All
1.7.3 – Custom Ubuntu Server
1.7.3.1 – Ubuntu Install
To start, you’ll need an Ubuntu Server ISO, the latest LTS version is ideal
Boot into the iso on the server you want to have as your repository
Navigate through the installer selecting your keyboard language
When the installer loads for networking we need to create a bond for the NICs we want to use
For this server there is only 2 connected NICs
Click create bond with the mode balance-alb, this is a simple load balanced setting that doesnt need any particular switch config
If your systems use LACP you can select 802.3ad and an XMIT Hash of Layer2+3
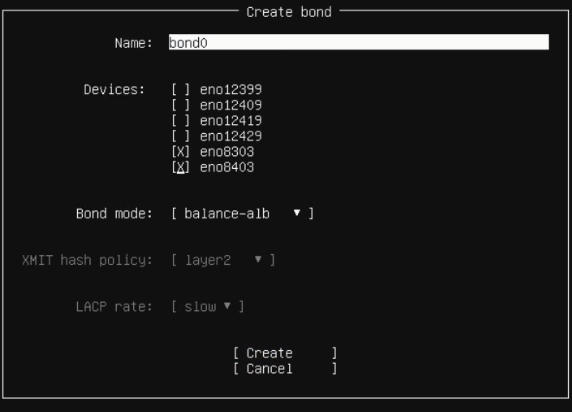
If the connection switches are a Dell VLT stack, like your cores may be, using a port channel not in LACP, active mode, the above will likely not work, however this should
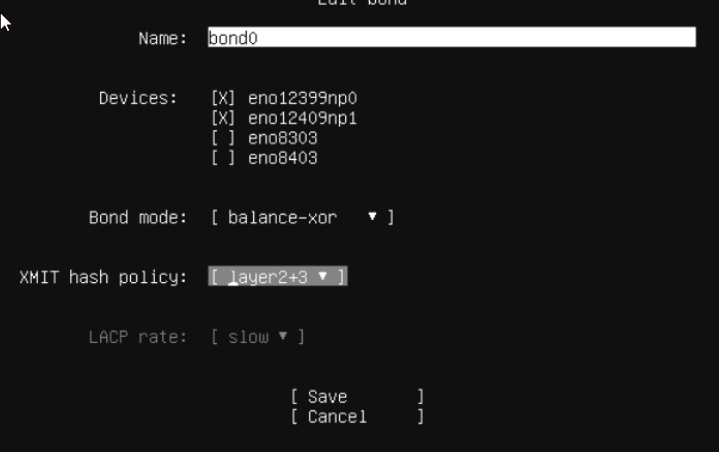
Once thats created we need to edit the bond and set a static IP on it, this works similarly to a VIP in VMware systems
How you set the static IP on the bond will depend on your networking, but you this is the same as setting a static IP on any NIC on Ubuntu
Then fill in the proxy server if you have one, if not skip over it, then continue with the mirror check
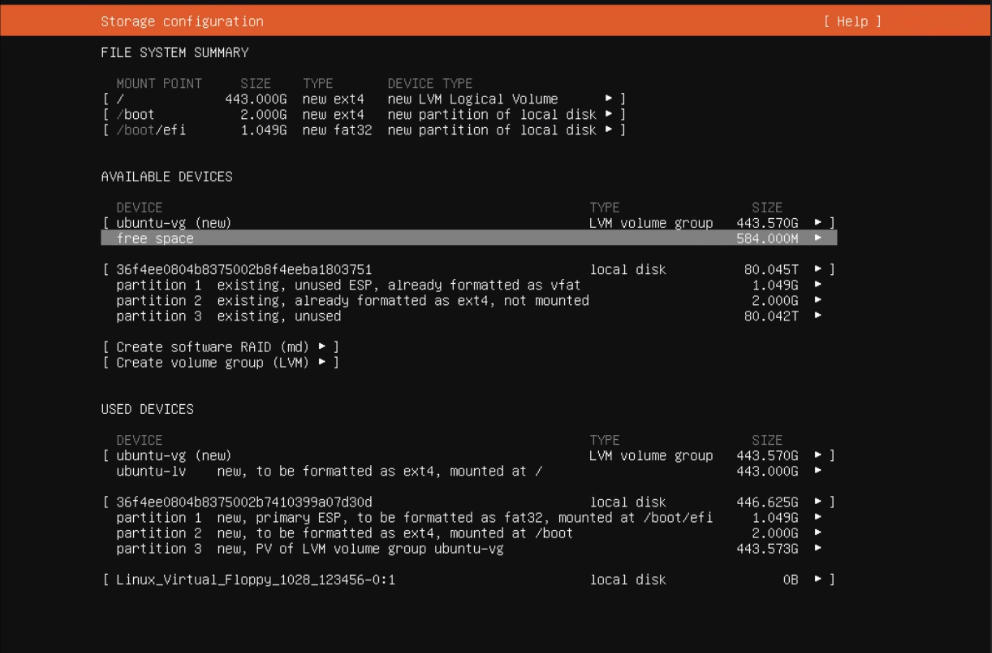
Then setup the main disk for use, this wants to be the main boot drive, like a BOSS card for Dell servers, this will be 512GB max, do not use the main large disk pool as this is needed for the repository and cant have the OS installed to it

Then confirm and continue
And configure the LVM to use the full disk, as this is just the boot volume, making sure the 80TB disk is not in a Logical Volume, if it is, delete it
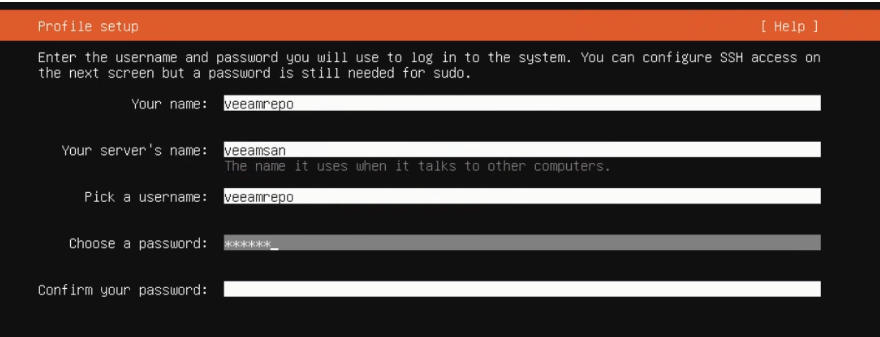
Now we need to setup an the default account, this has sudo privileges
Skip over Ubuntu Pro
Install SSH – this will be disabled later
We need nothing from here, so skip over it and wait for the OS to install
1.7.3.2 – Initialising Disks
This will wipe the disks you are initialising
Now those OS is installed lets get the disks initialised, run the following to check you have the right disks
sudo fdisk -lThis will then show everything
This shows the root partition and the system files are on sdb, perfect
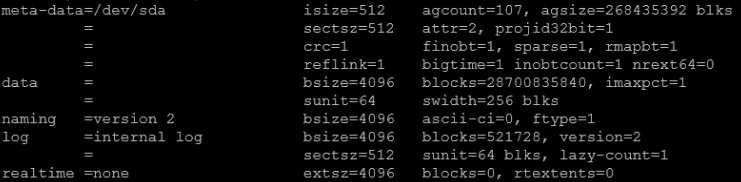
We want to initialize the 107TB disk for use in the Veeam backup repository, in my case it is sda3, typically on servers using virtual RAID volumes its sda or sdb, so make sure you substitute the right device in here
sudo mkfs.xfs -b size=4096 -m reflink=1,crc=1 /dev/sdaYou may need to add -f to force this, but the system will tell you
You then get this
Now lets create a mount point
sudo mkdir /mnt/veeam-repoNow we need an fstab entry to mount this on book, note the UUID of the drive, sda3 in our example, with
sudo blkid
Then run
echo 'UUID="Disk UUID" /mnt/veeam-repo xfs nosuid,nodev,nofail,x-gvfs-show 0 0' | sudo tee -a /etc/fstabAnd run the following to check its in there
sudo cat /etc/fstabNow we need to reload the daemon
sudo systemctl daemon-reloadThen run the following to mount drives under fstab
sudo mount -aAnd we can confirm its mounted with
sudo mountAt the bottom we have

1.7.3.3 – Add Veeamsvc Account
Now we need the veeamsvc service account adding
sudo useradd -d /home/veeamsvc -m veeamsvc -s /bin/bashThen set the password with
sudo passwd veeamsvcThen add the veeamsvc account to the sudoers group
sudo usermod -a -G sudo veeamsvcTake ownership of the repository with this account
sudo chown -R veeamsvc:veeamsvc /mnt/veeam-repoAnd run
sudo chmod 700 /mnt/veeam-repoFurther hardening tasks can be done post Veeam install
1.7.3.4 – Adding The Hardened Repository
Head to Backup Infrastructure
Then from managed Servers click Add Server
Select Linux
Add the host name and description
Add a new single use credential for the veeamsvc account
Add the credentials and click ok
Then click Next

Click Yes on the SSH fingerprint warning

Click apply

Then Finish once its been added
Now lets add a repository, click Backup Repositories and Add Repository

Select Direct Attached Storage
Then a Linux Hardened Repository at the bottom
Then add a name and description, then click Next
Click populate to find the paths on the server we added
Select our mount point on /mnt/veeam-repo, then click Next
I also added a sub path on the location, you dont need to do this, but it is optional
You can then see the capacity, dont forget to set immutability for however long you want it, this should be the same as the number of daily backups you will have for your jobs, you can change this later, GFS backups are made immutable for their entire period
Once set, immutable backups cannot be removed until they have expired
We also want to set the number of concurrent tasks to ~3x the number of physical cores, this is a rough rule of thumb, if you have spare CPU on the repository during jobs and not enough are running in parallel you can increase it
Now click Next
Keep these as defaults and click Next
Then click Apply
When its done click Next, and Finish

If this is your first repository, you absolutely need to click Yes here, the config cant be stored on the VBR server

1.7.3.5 – Post Deployment Hardening Tasks
Enable the UFW on Ubuntu
sudo ufw enableRun the following commands to add the VBR rules
sudo ufw allow openssh sudo ufw allow proto tcp from <veeammgmt> to any port 6162,2500:3300
sudo ufw allow proto tcp from <proxy> to any port 2500:3300You need to do these one IP at a time, for example, on a VBR server on 192.168.1.12 we would use
sudo ufw allow proto tcp from 192.168.1.12 to any port 6162,2500:3300Disable root logon by editing
sudo nano /etc/passwdThen change the line
root:x:0:0:root:/root:/bin/bash
To
root:x:0:0:root:/root:/usr/sbin/nologin
Then once thtas all done, disable ssh
Ubuntu 2204 And Earlier
Disable and stop the SSH service with
sudo systemctl stop ssh
sudo systemctl disable ssh
Ubuntu 2404 And Newer
Disable the SSH socket
sudo systemctl disable --now ssh.socketThen disable and stop the SSH service
sudo systemctl stop ssh
sudo systemctl disable ssh
Since the repo is in Veeam, remove the veeamsvc account from the sudoers group
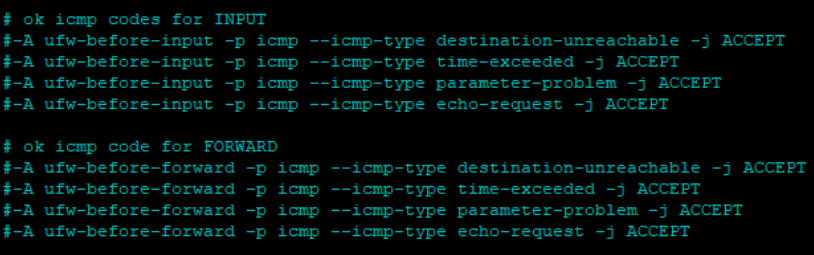
sudo deluser veeamsvc sudoLastly, disable ping in the UFW by editing the before rules with
sudo nano /etc/ufw/before.rulesAnd then commenting out the following lines
1.7.3.6 – Applying OS Updates
Periodically, its a good idea to update the OS
To do this, simply login via the remote console on your server IPMI, eg iDRAC/iLO, as the veeamrepo account and run
sudo apt update ; sudo apt upgrade -y1.8 – Setting Up SMTP
This is only really needed if you dont have Veeam ONE, if you do have Veeam ONE, leave this unconfigured and skip it as it will manage the alerting for jobs and other metrics, otherwise you get multiple emails for the same thing
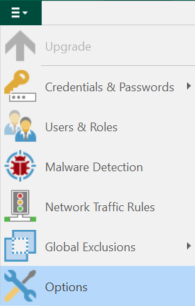
Click on the three lines in the top left, and click Options
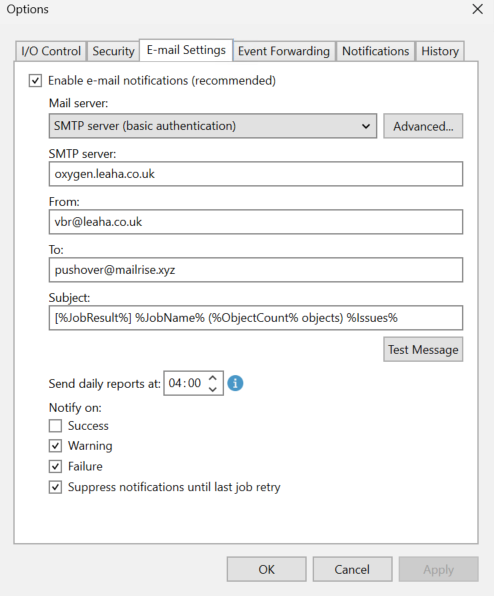
On E-Mail Settings, you can set your mail server, for example for basic authentication you can set the SMTP server, from address, to address and what to notify on, I recommend unchecking Success
Under Advanced, you can set the port, which you will want 587 for encrypted email, enable SSL, and authentication for the SMTP server, mine doesnt have this though
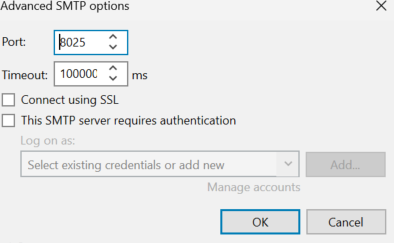
You can also use Gmail or M365

When you have everything set click Test Message to check it works, and click ok
1.9 – Adding Backup Jobs
1.9.1 – VM Jobs
Now we have the repository and the vCenter added we can back some VMs up
These jobs are incremental, we will configure Veeam to do a full backup once a week and each backup in between will be incremental only storing the changes
As this forms a chain, with the full backup and subsequent incremental backups, you can say keep 10 backups but can end up with more as if deleting a chain in line with the retention policy would being you below 10 backups it wont, leave you with more
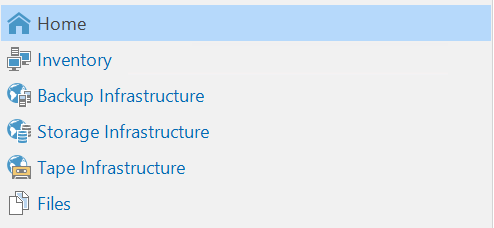
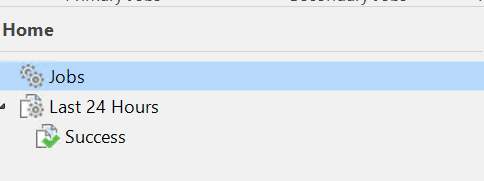
Head to the Home tab
Then to to Jobs, you will then have the option to add a backup job
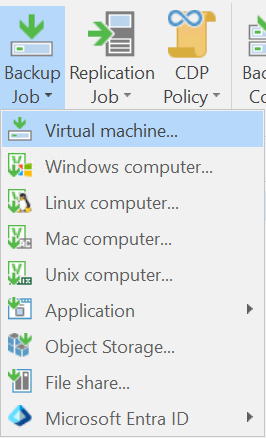
You can backup various machines such as VMs, various physical machines or Entra ID
As we have added a vCenter, we will add a VM, this will allow us to select various VMs to backup
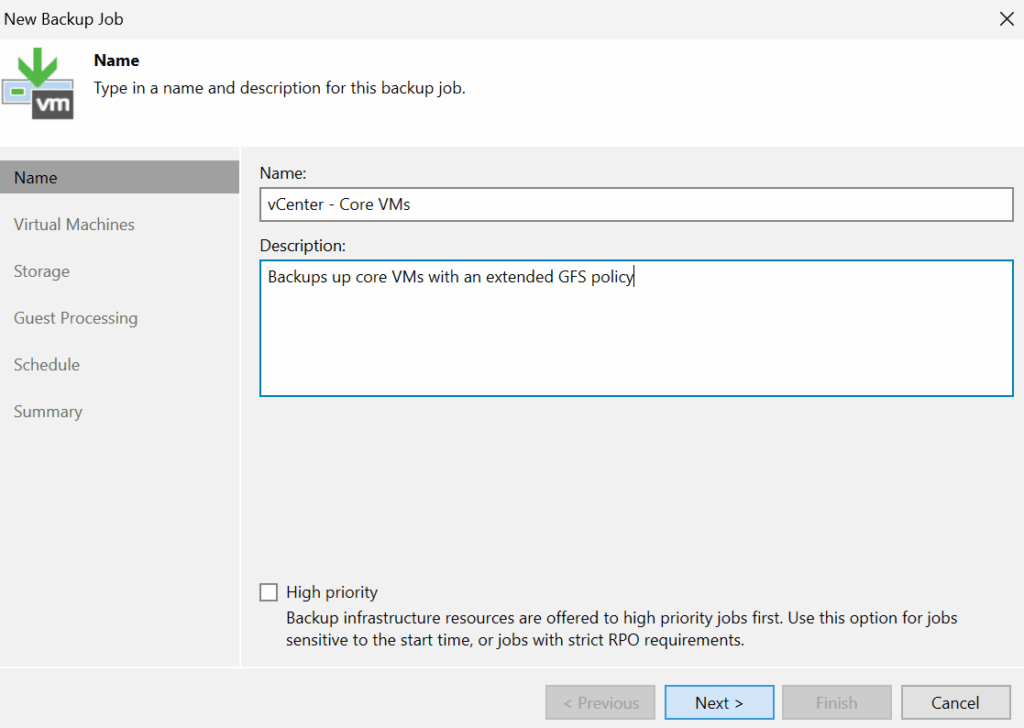
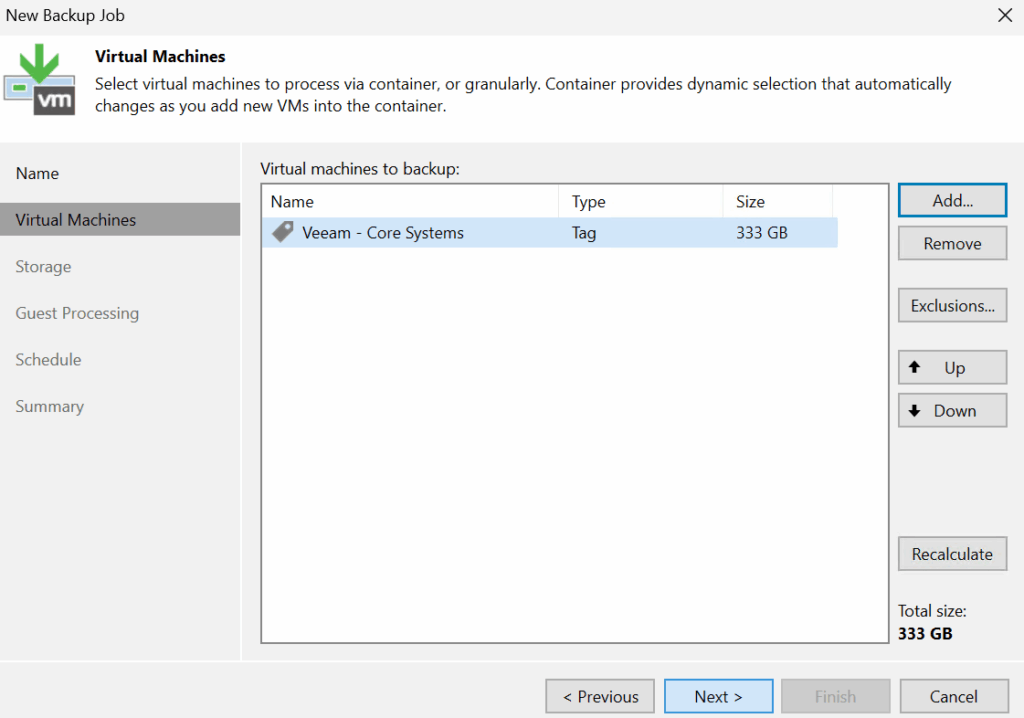
Give the new job a name
Now we need to add the VMs from vSphere into this job, I am going to add all the vSphere VMs I need backing up in here
Click add to add a VM
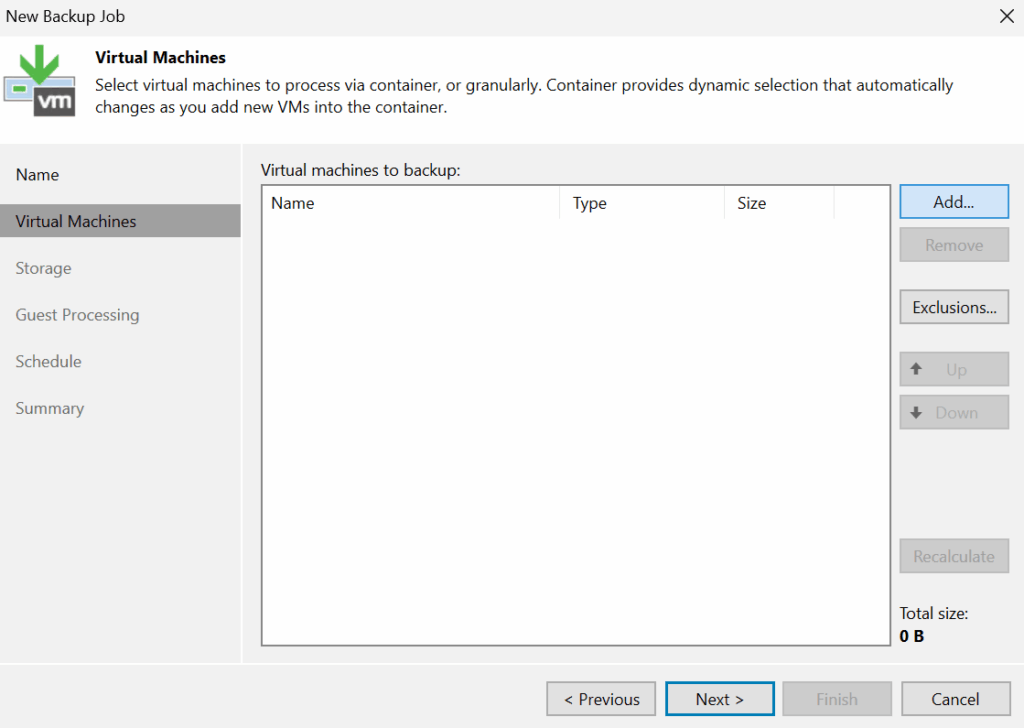
Expand the vCenter tree and select the VM, you can select multiple with the Ctrl button
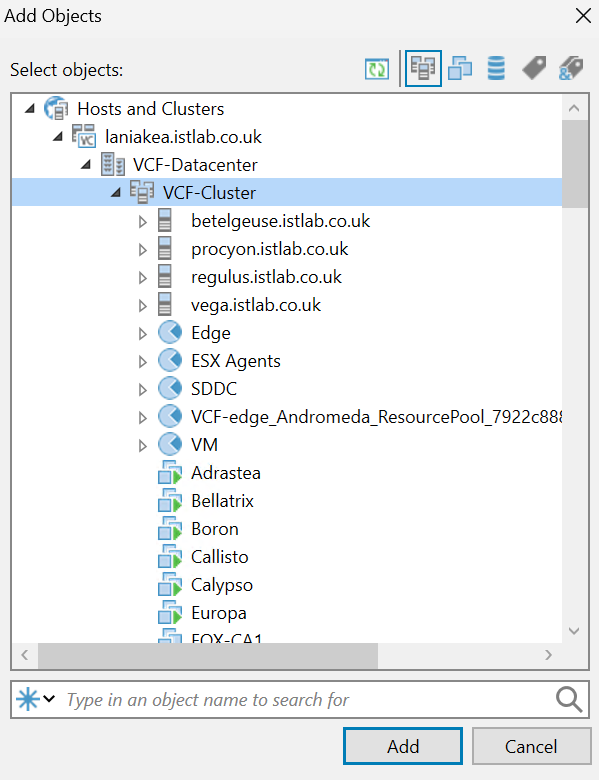
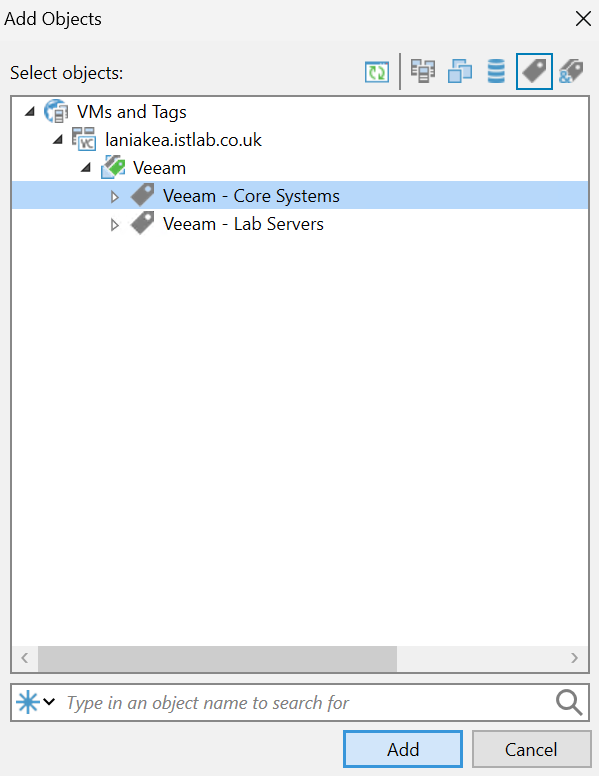
We also have a different option to have vSphere manage the backups, this is what I will be using, we can assign tags to VMs in vSphere, and from the Tag menu we can backup the tag, which includes all VMs with it, so we can manage the job through tagging VMs
Now we have all the VMs and the disk space it will use, and click Next
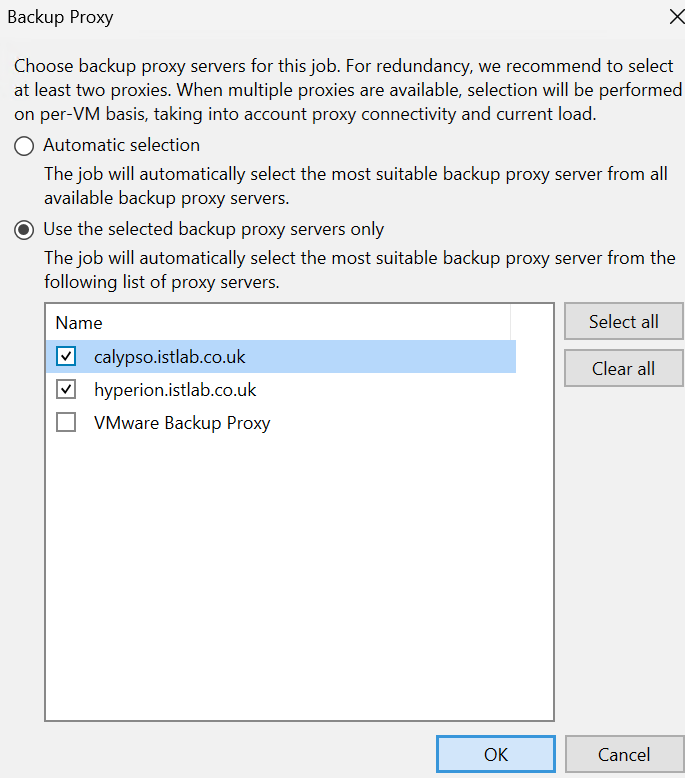
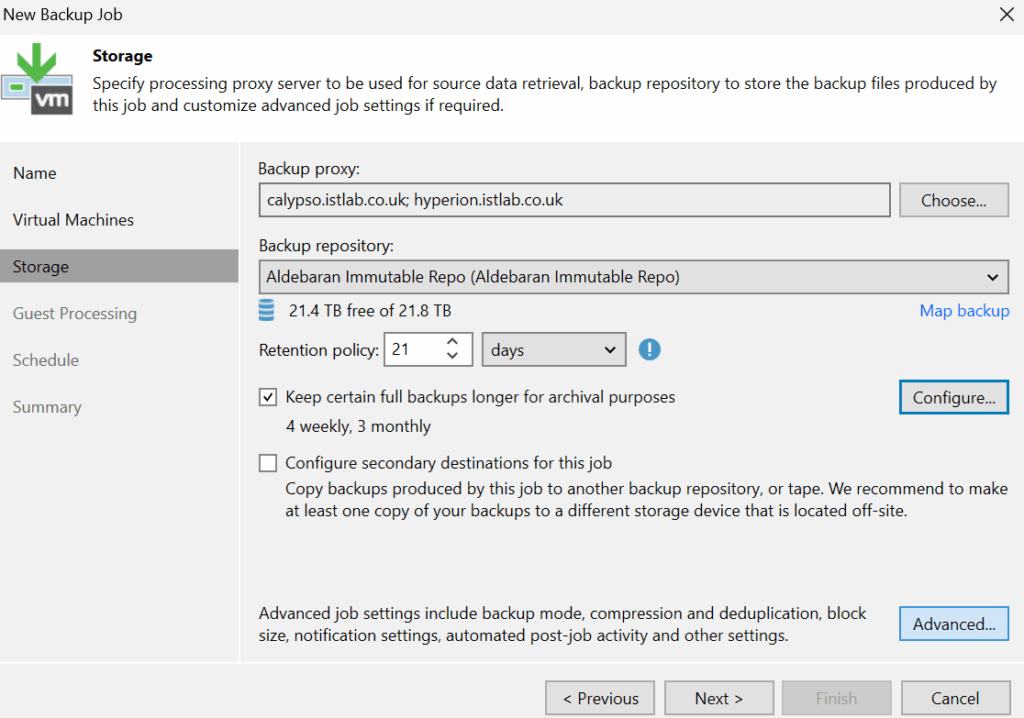
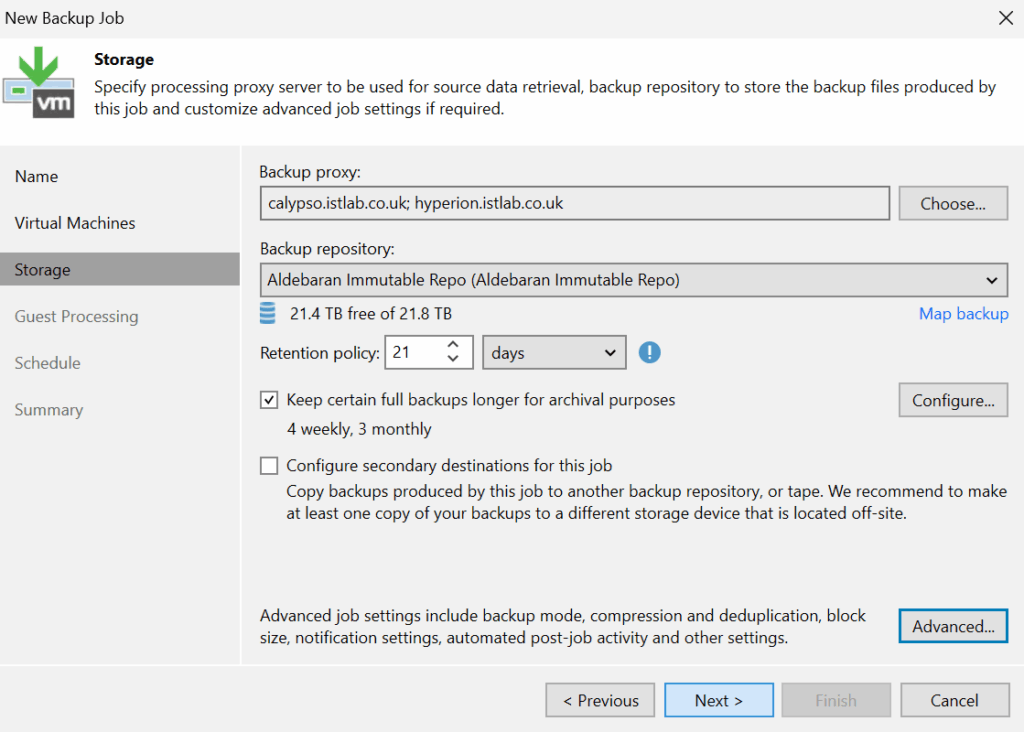
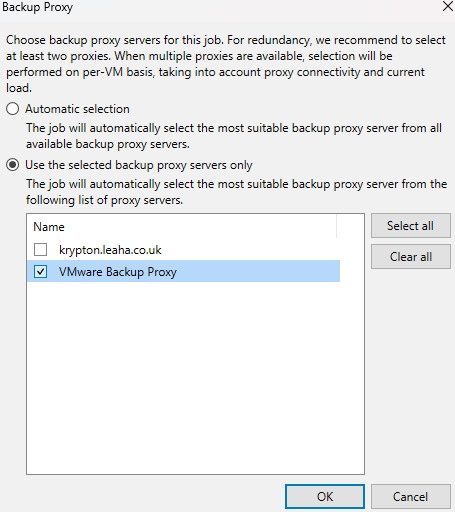
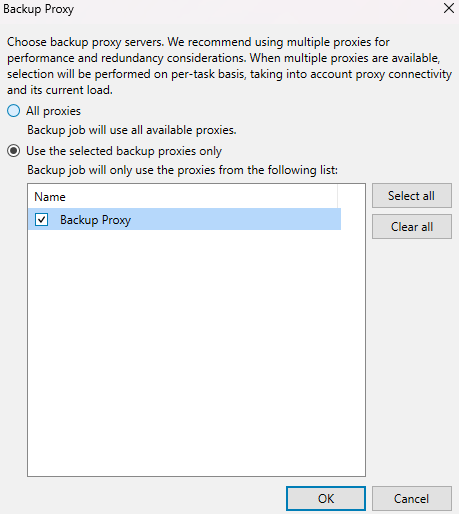
Click Choose for the Backup Proxy
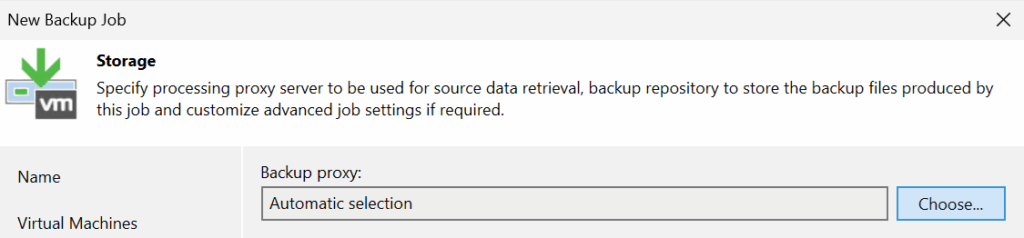
Select the VMware Proxies we setup earlier, we dont really want to use the VBR server as a Proxy, then click ok
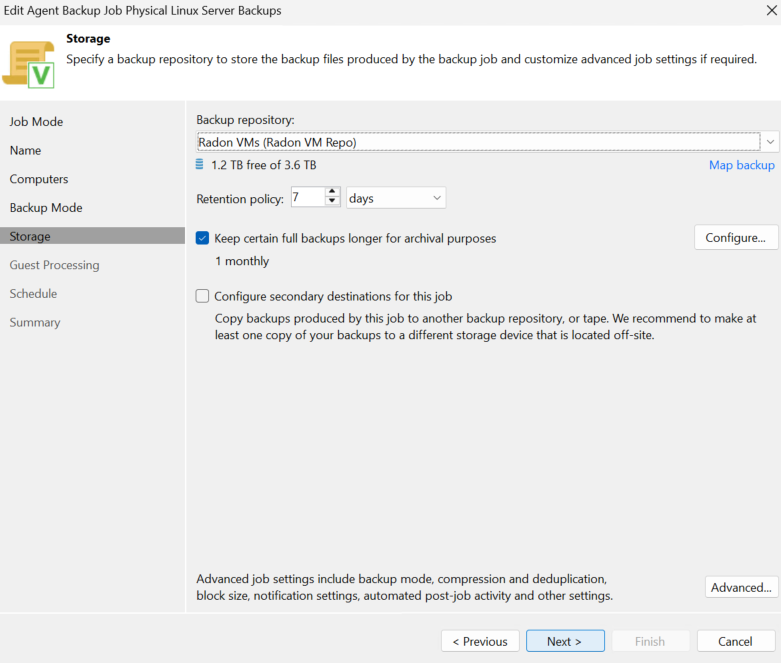
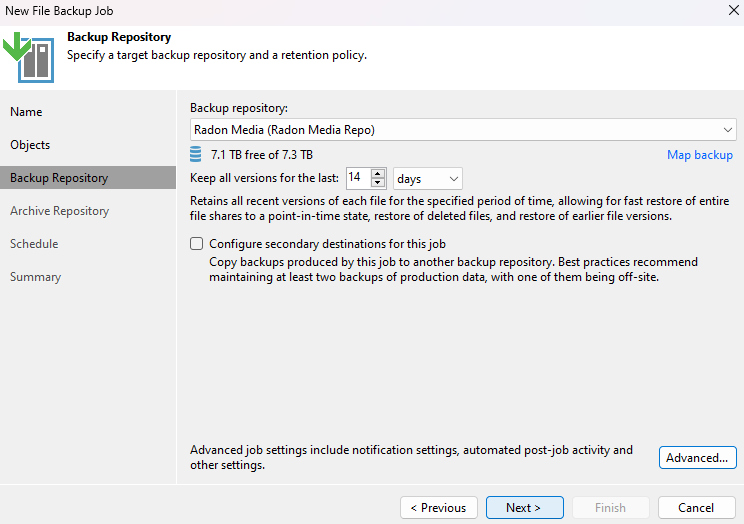
Select your backup repository and a retention policy, this will depend on your RPOs

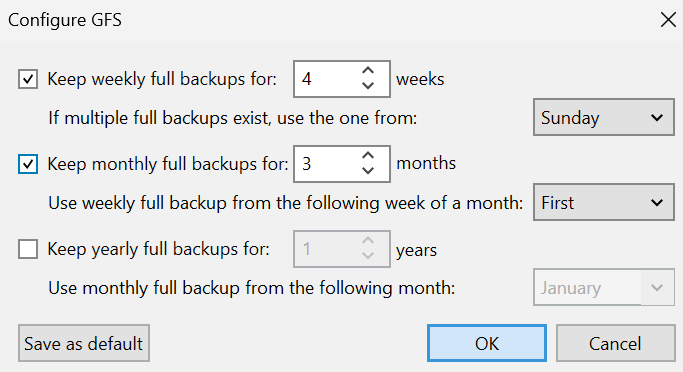
Enable GFS policies and click Configure

And configure this inline with your business requirements, here is an example of what I am using
Just be careful with going too aggressive with these if you are in doubt on an immutable repository, as you cant remove backups if you overfill the server
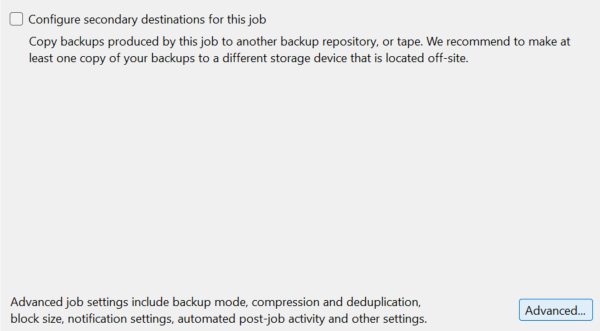
I would recommend enabling this, to help keep in line with the 3-2-1 rule, ideally you want an external object storage repository, both Wasabi, for the cheapest solution, though it requires more effort to setup and manage, or Veeam Vault, its more expensive, but its easier to manage and is done from Veeam
And point this to that repository, we will add a Wasabi Repository later and go over backup copy jobs later

The click advanced in the bottom right
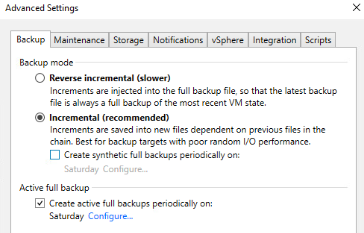
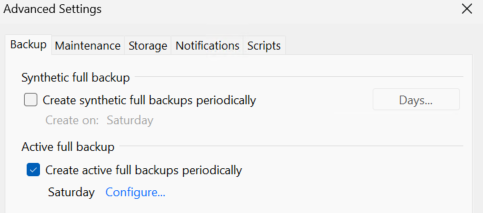
The default for backup is this
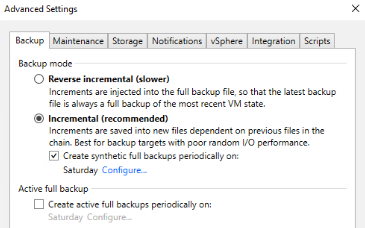
I would recommended changing the backup mode and checking the box under Active Full Backup at the bottom, then unchecking Create Synthetic Backups, as this will give you a clean backup by getting the entire backup from the target VM, this is best run on a Saturday or a Sunday when the business isnt operating as it will have a large impact on the network
This is worth enabling, as the default, a synthetic full backup on Saturdays, uses the previous backup chain to create a synthetic full backup without querying the target VM, its not bad, but its less clean compared to using active full backups, so I would recommended only using this if you cannot do an active backup, or if you are going to a cloud repository, like Azure Blob or Wasabi, where you are charged for ingress data, or, as its over the internet, the bandwidth is limited
Wasabi doesnt charge for ingress data, so if your internet upload is good, keeping it enabled is fine
It should look like this
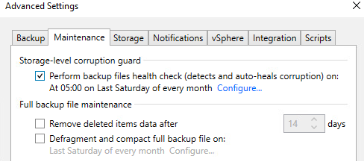
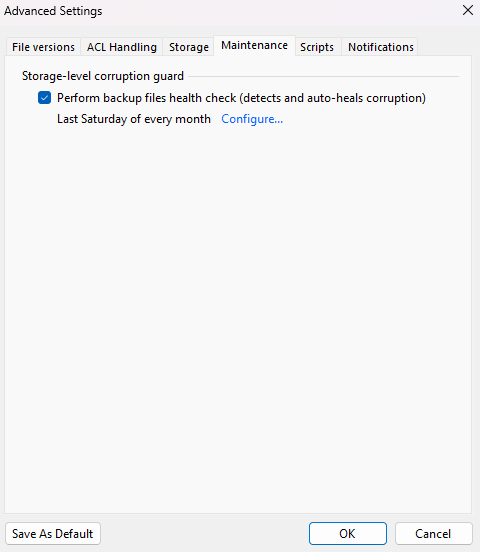
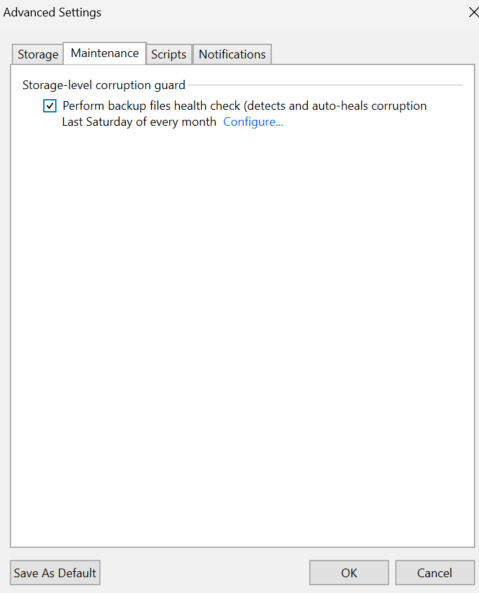
You also want to go to the Maintenance tab, second one from the left, and enable Storage Level Corruption Guard to error check and correct backups
The only time you dont want to enable this is if you have a very limited bandwidth to your DR site or cloud repository, or, like with Azure Blob, get charged data fees as its all read from the repo
So with a 1Gb upload to Wasabi with no data fees, this is worth enabling
The default is monthly, but you can change this to weekly if you need
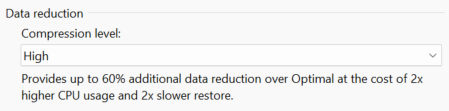
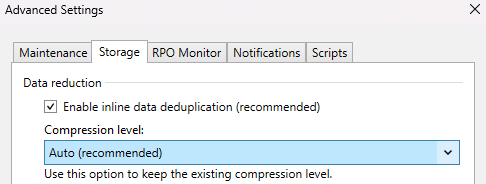
Optionally, under storage, you can increase the compression level, I would use optimal, the recommended, or high, but only high if you really need every GB of disk space, this can increase the amount of backups you can hold, but exponentially at the cost of CPU meaning backups take longer, and restores are longer too
If you are unsure, dont change this
You also have the option for encryption on your backups if you want, though this isnt strictly needed, as you should have a hardened repository, but is recommended for best practices
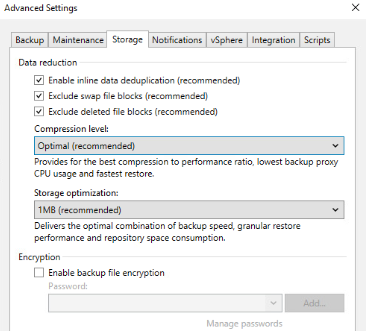
High has the following overhead

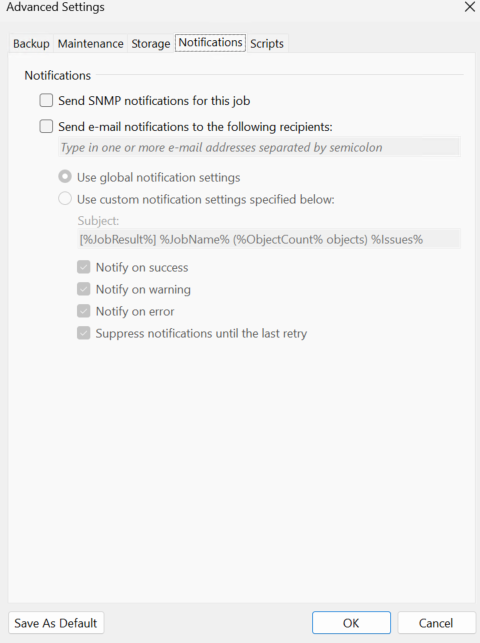
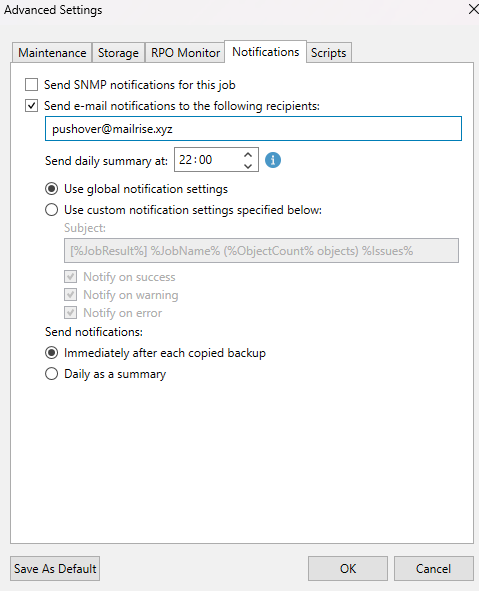
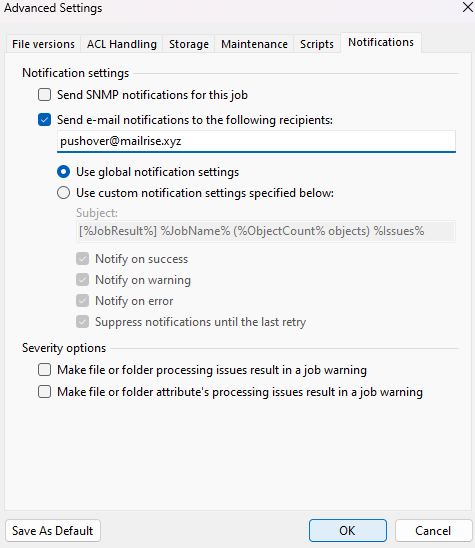
Notifications can also be set to send you email alerts using SMTP using the global settings, all you need is an email to send them too, if you are deploying Veeam ONE later, leave this disabled
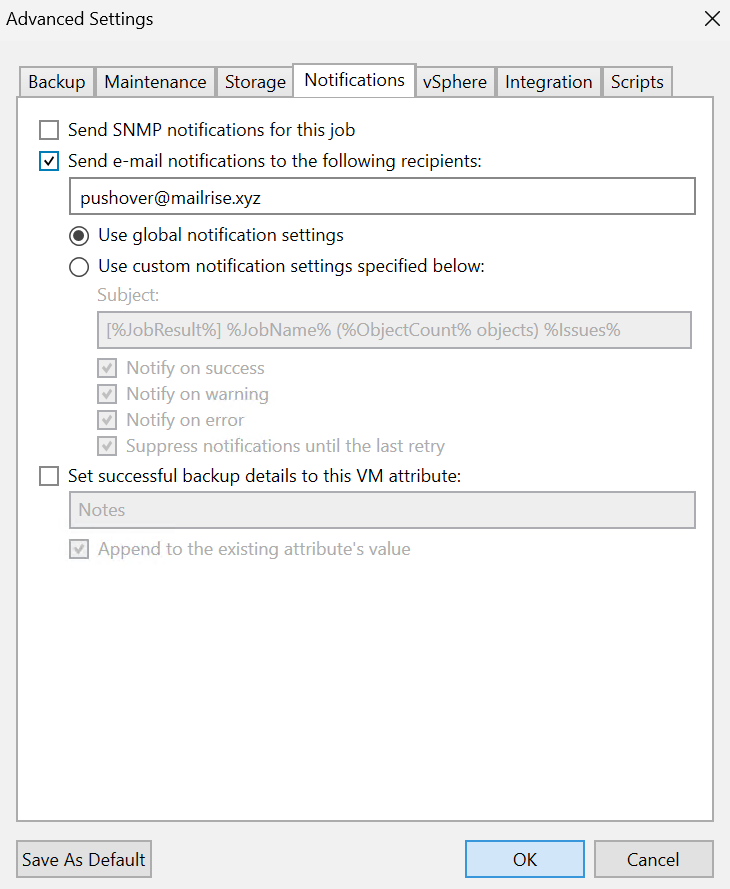
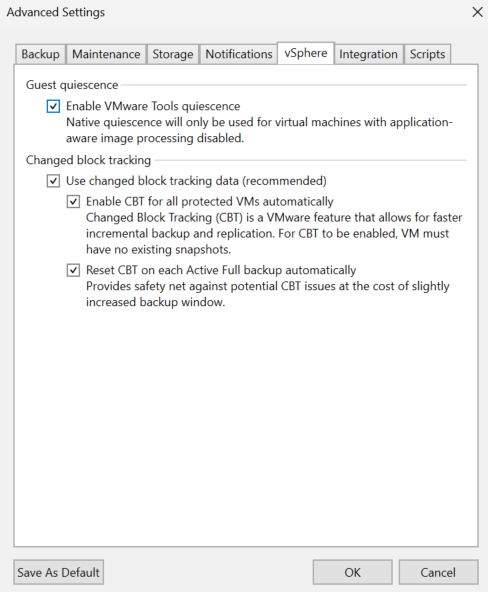
And for vSphere, check the Enable Guest Quiescence box, then click ok
Now click Next
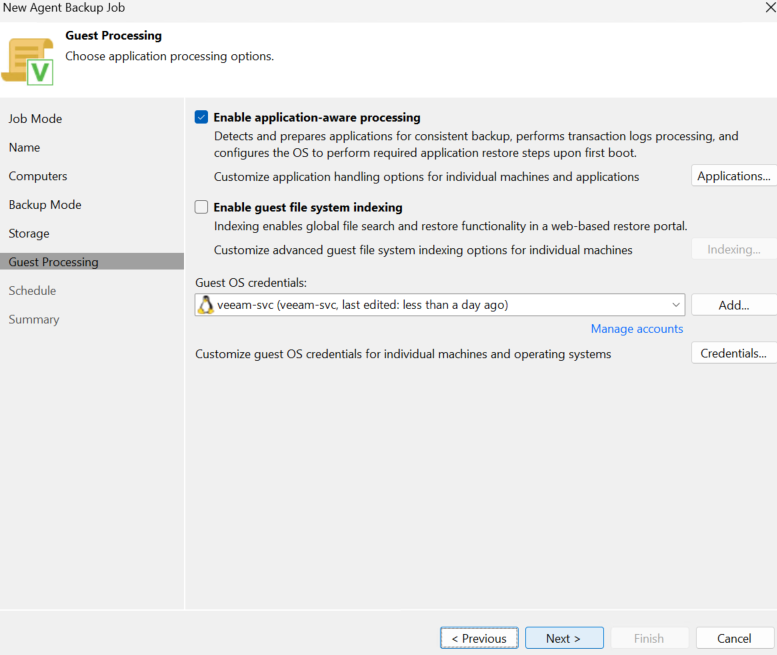
If you need Application aware processing for things like databases, or AD, you can configure it here, its worth noting you need valid credentials for all services in the job, you can specify default creds, and add specific ones for certain machines, if, for example, you have 10 Linux servers with the same service account, and 1 windows server, the windows server will need different credentials, so you can specify it for this one server
I do recommend file indexing for a file server if you want self service restores in Enterprise Managers on a file server, the malware detection is nice, but as you have software on servers for that, its not particularly needed
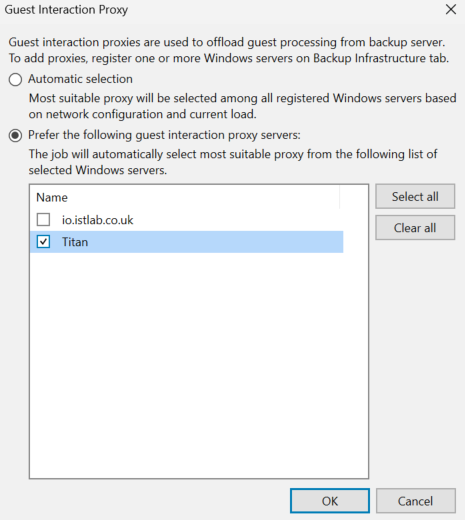
To set it up, select choose, you will need a managed Windows server for this, I am using the VBR server, click Choose
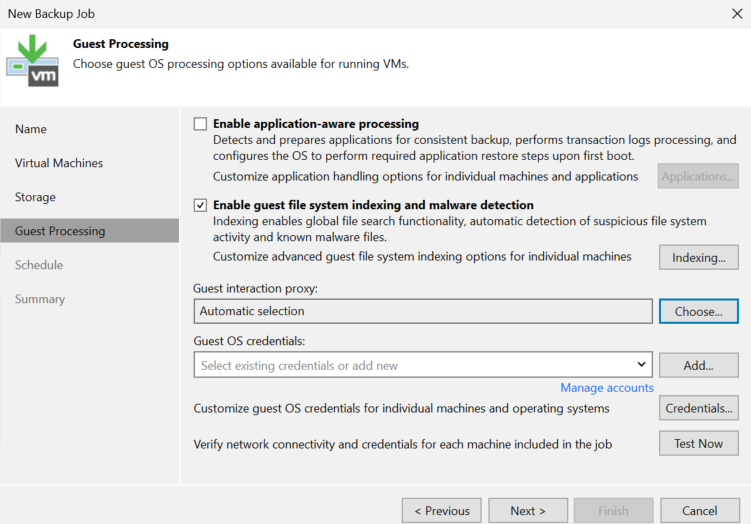
And select the preferred Windows server and click ok
If you already have the guest credentials in, select them, or add them by clicking Add
You can also click the Credentials box to change the credentials used for each object, this is one of the drawbacks of tags, this is one object, so if you have multiple credentials, you will need to split them by tag

When you are done, click ok and Next
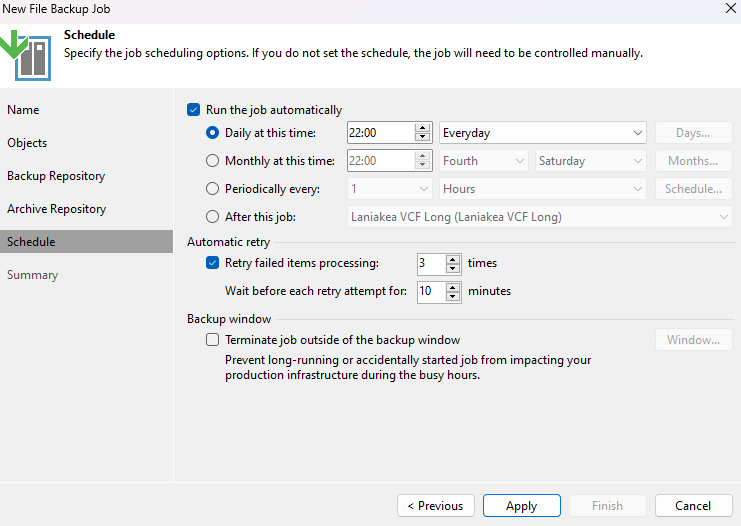
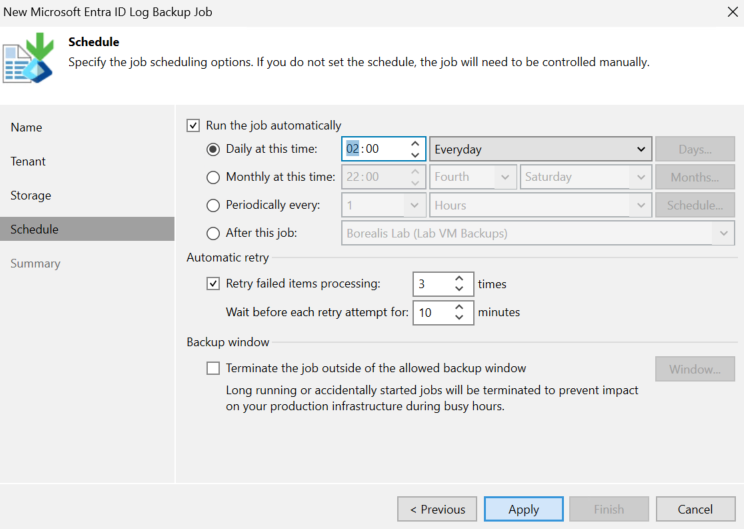
Configure the schedule for the job, the time and frequency will depend on your business RPO, you can use daily for a 24 hour RPO, or use the periodically section for an X hour RPO, then click Apply

And click Finish
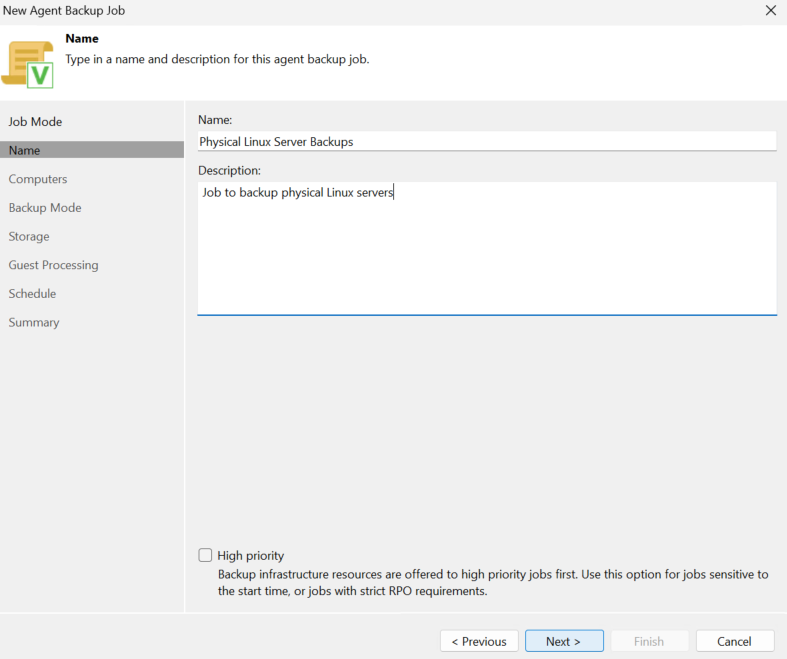
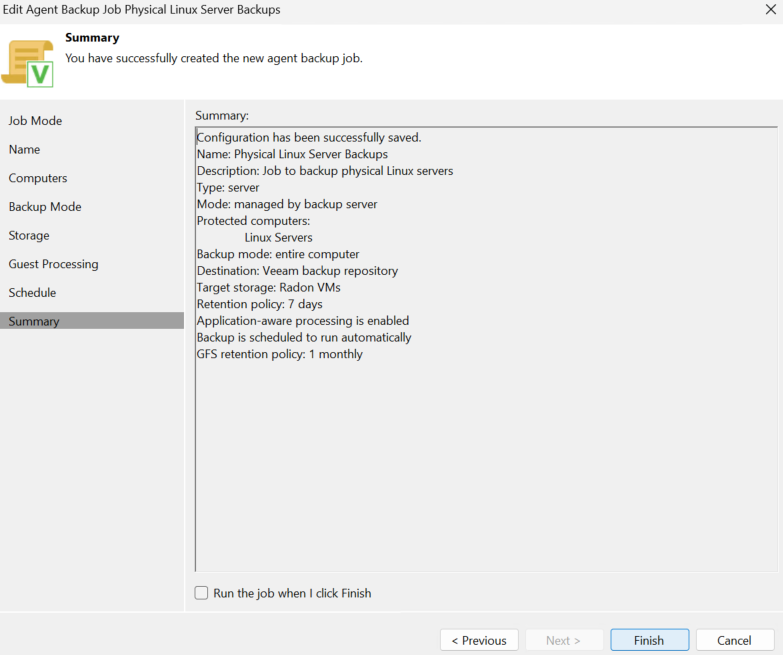
1.9.2 – Physical Machine Jobs
With our repository and physical servers added we can then back them up with jobs, the process here will be done for a Linux server, but the process is the same for Windows as well
Click Next
Give it a name and description and click Next
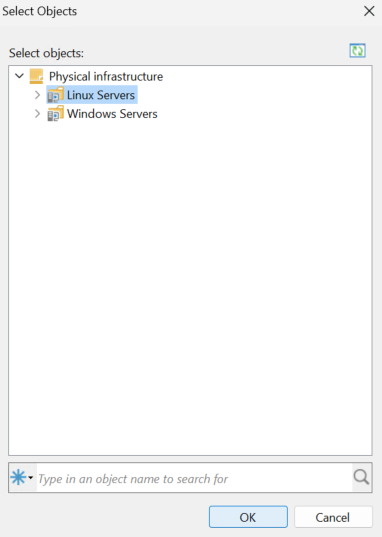
Click Add/Protection Group
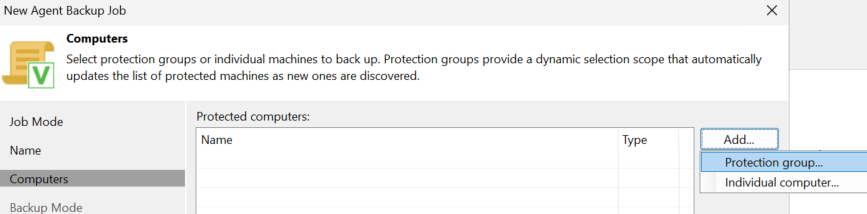
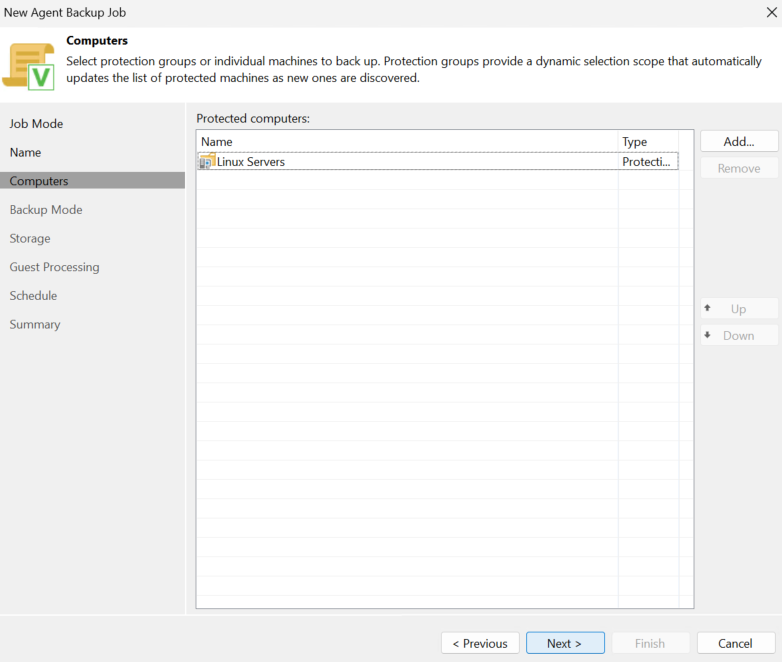
Select your protection group and click ok
Then click Next
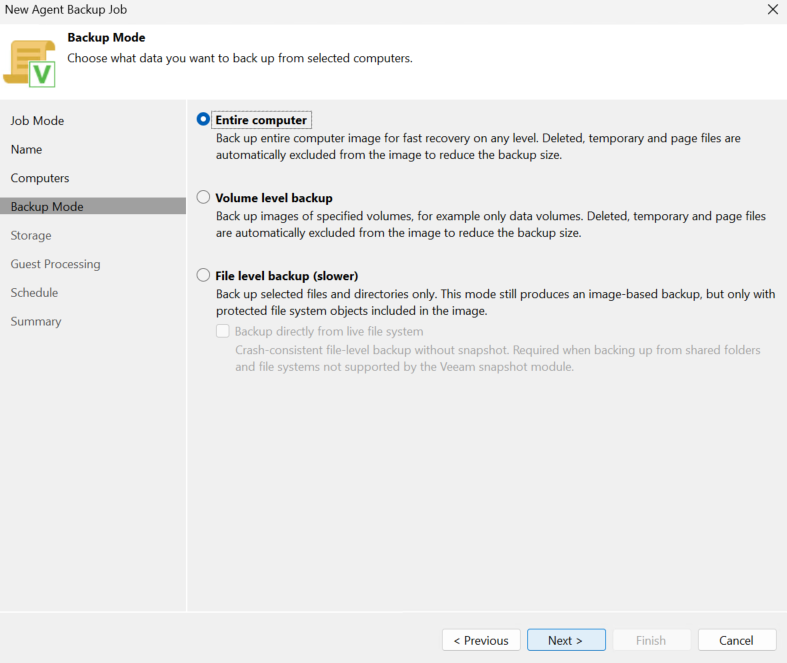
Select the backup mode, you can backup volumes, Eg just the C drive, or just /
For this I will be backing up the entire machine, then click Next
Set your backup repository, and a retention policy inline with your RPOs, enable GFS backups and click configure
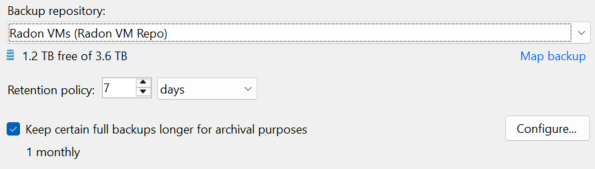
Set your GFS policies inline with what you need and click ok

Click Advanced
Choose to create synthetic full backups, useful
When the throughput from the server is very low, personally, if the throughput is high enough, I prefer active full backups for a nice clean copy from the source
Under Maintenance, enable Storage-Level Corruption Guard, the only time you wouldnt want this is on remote repositories when you also have a slow internet connection, sub 1Gb, and if you arent using Wasabi you need to be aware of data charges too

You can adjust the data reduction if needed

High offers more compression but means slower backups and restores
And under notifications you can configure this, but if you will be deploying Veeam ONE leave this disabled and click ok
Then click Next
Application aware processing is worth enabling, and we can use the Veeam service account for this as it has admin access, then click Next
Set the job schedule inline with your RPO and click Apply

Then click Finish
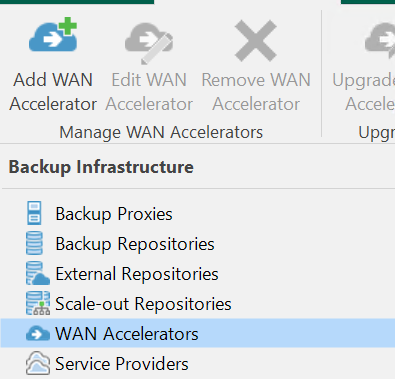
1.10 – Adding WAN Accelerators
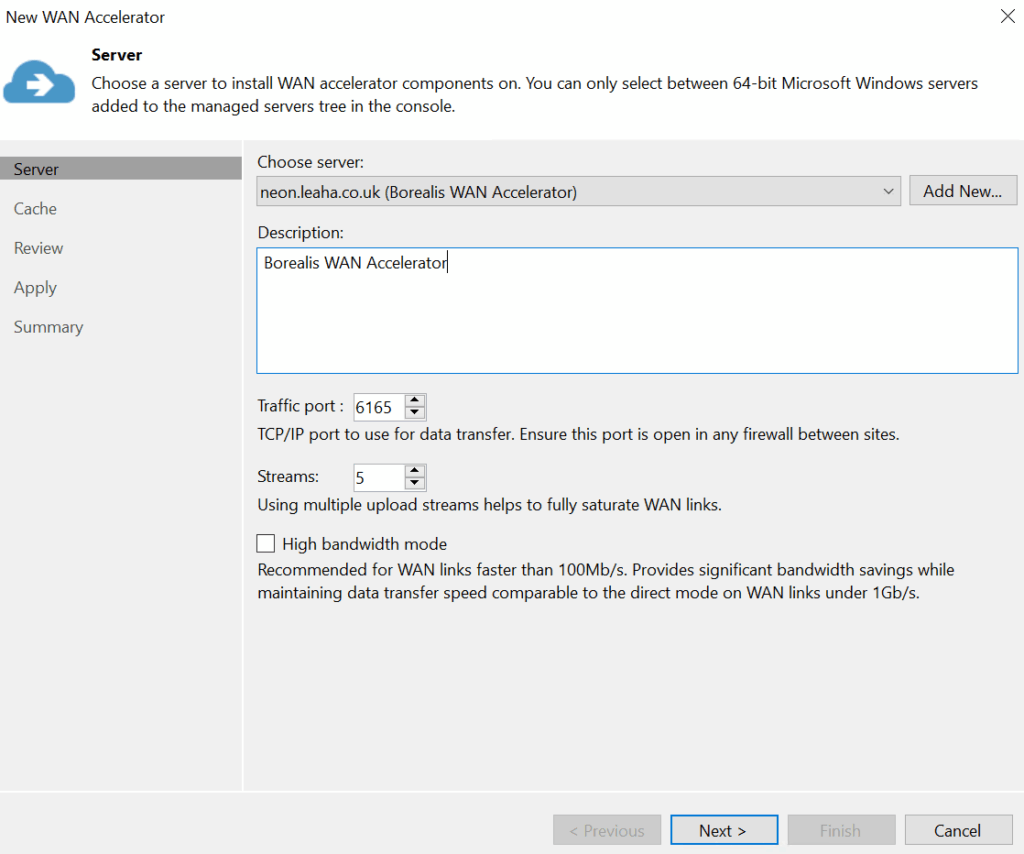
For a WAN Accelerator, you will need a blank off domain windows server, Veeam recommend 4 vCPU and 8GB, disk space can vary by how much you put through it, but 150GB should be a good starting point, Veeams recommendation is enough for your OS, I say 90GB for Windows, then 10GB for WAN accelerator cache per OS
Its worth noting, Windows Server 2022 and 2025 count as two OSs for this
If you have a sub 500mbps connection to your DR setup then a WAN accelerator will help you get more effective bandwidth, if you have more than 500mbps then a WAN accelerator can actually harm the effective bandwidth due to the overhead of the compression and decompression on each side
You will also want a VMware proxy in the DR environment
To add a WAN Accelerator we will need to add a managed windows server, so see section 1.3.1 first if you havent already added one
We should now have both WAN Accelerators and both vCenters

Then we can click WAN Accelerators and click Add WAN Accelerator
Select the server and add a description, ensure port 6165, 6164, 6162 and 6160 are enabled on the firewall between the WAN Accelerator servers
If you have a network speed between the sites thats over 100mbps, you will want to check High Bandwidth Mode, as mine is 10mbps, I am keeping this disabled, then click Next
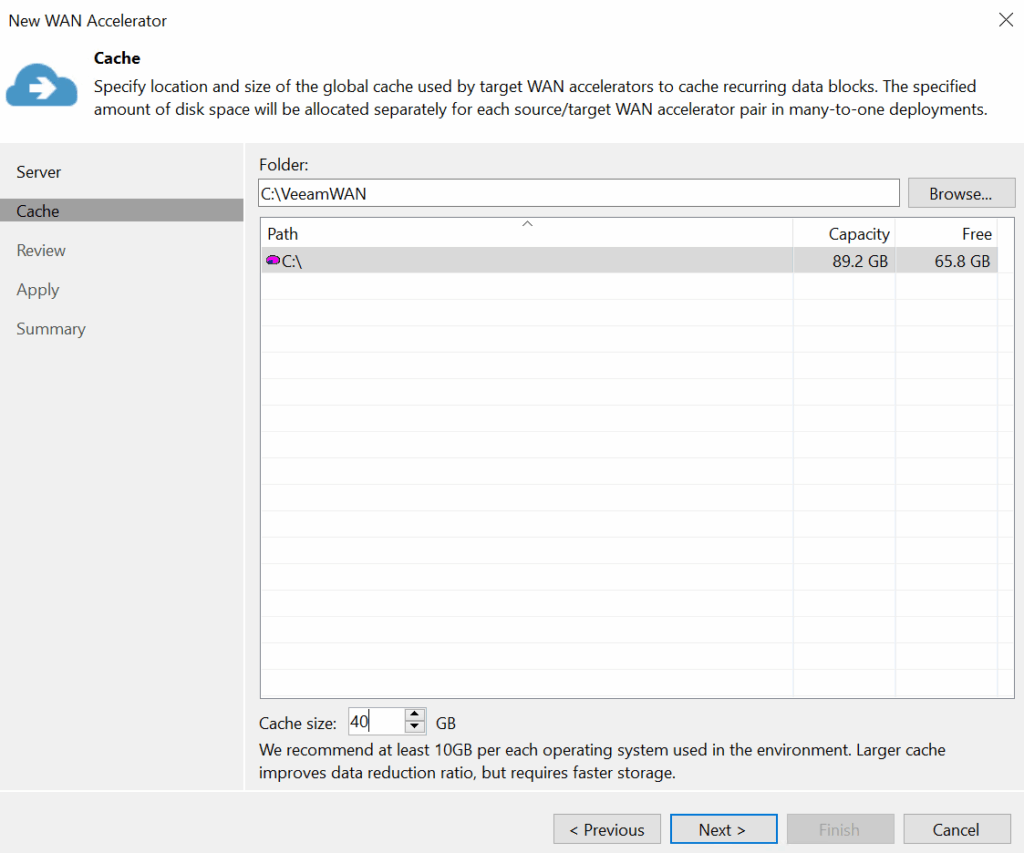
Select the folder to store the cache, for small environments like mine the C drive is fine, but you can also use a separate drive in larger environment
Veeam recommend at least 10GB per OS and the default is 100GB, which is good for the 150GB server size
I have changed mine to 40GB with a smaller C drive as I only have 2 machines I plan to replicate, so this fits comfortably within the recommendations, then click Next
Then click Apply
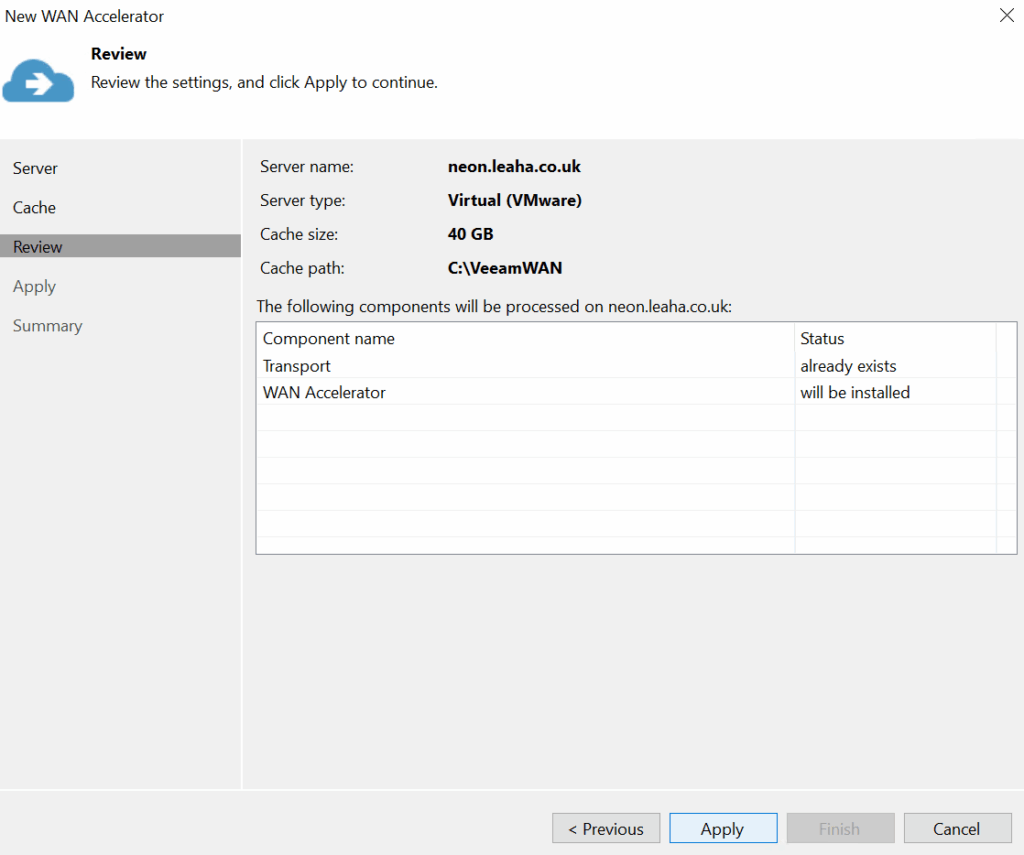
Then click Next and Finish
Then repeat for the other WAN Accelerator
To leverage the WAN Accelerator on the first replication, we need to manually populate it for the target site, DR
Right click the WAN Accelerator and click Populate Cache
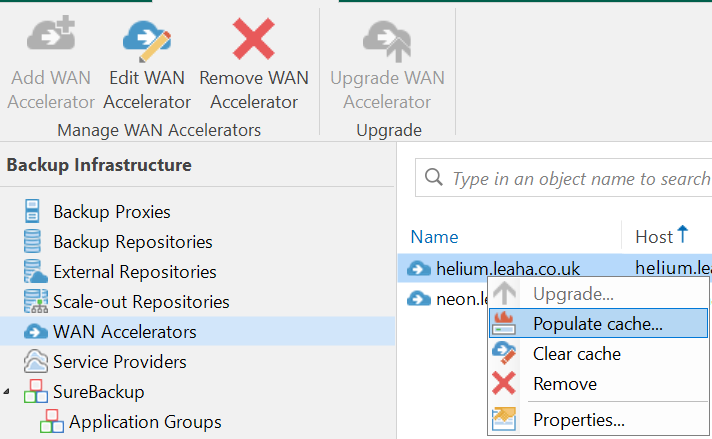
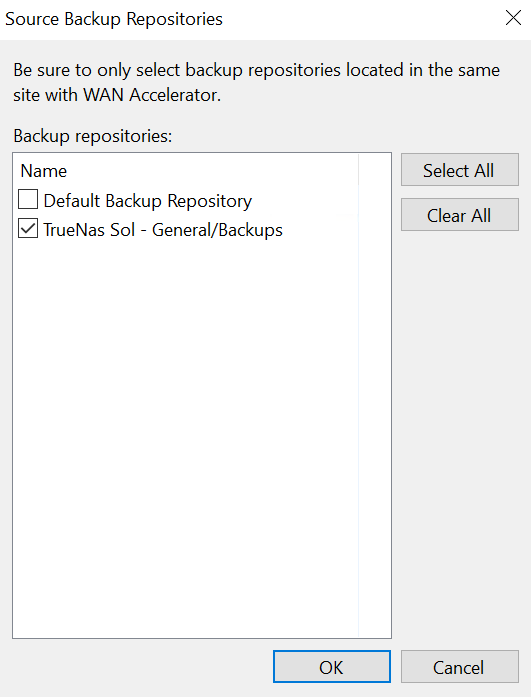
Select the source backup repository, if you have a repository thats at DR use that, as I only have one at my Production site I will use that, then click ok
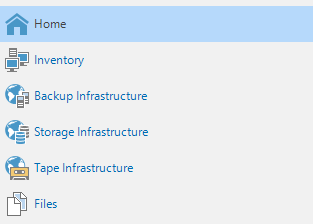
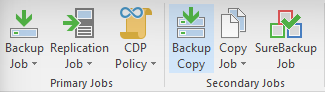
1.11 – Backup Copy Jobs
If you have a DR backup repository the best way to get all your production VM backups to DR is through a backup copy job
In the bottom left, click Home
Then click Backup Copy job
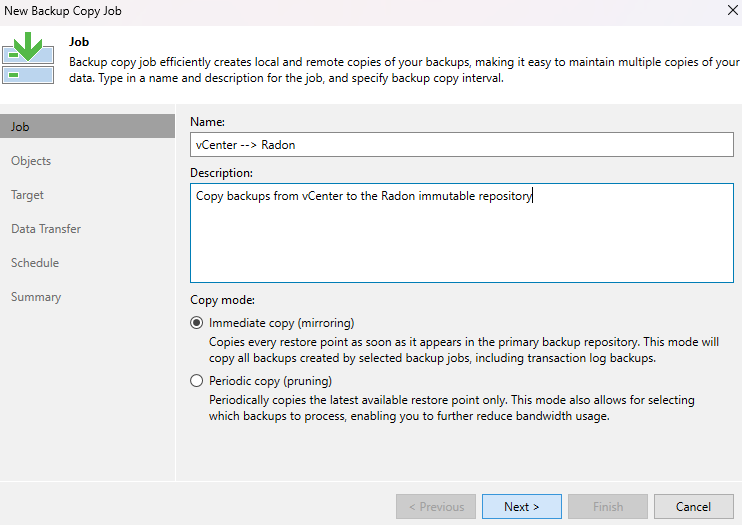
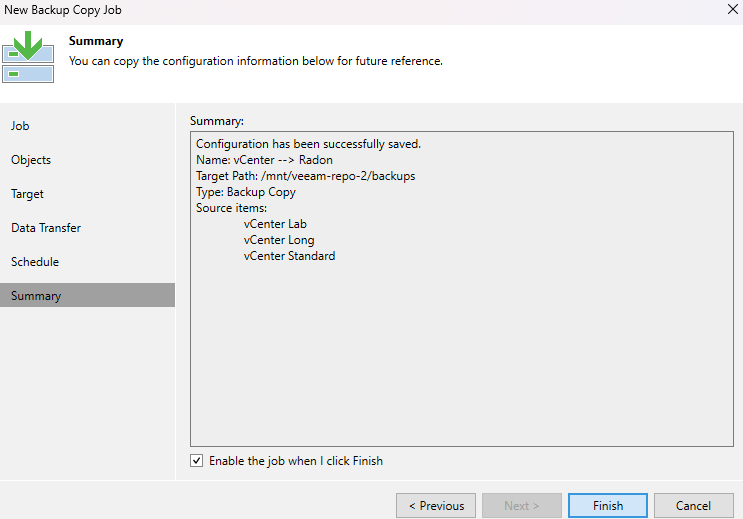
Enter a job name and a description, and for copy mode, use immediate so all restore points are copied to DR as son as they are created, then click Next
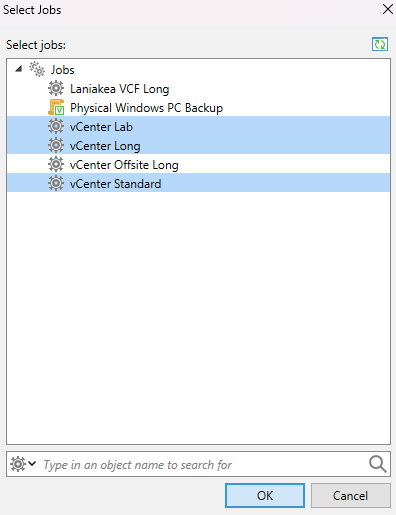
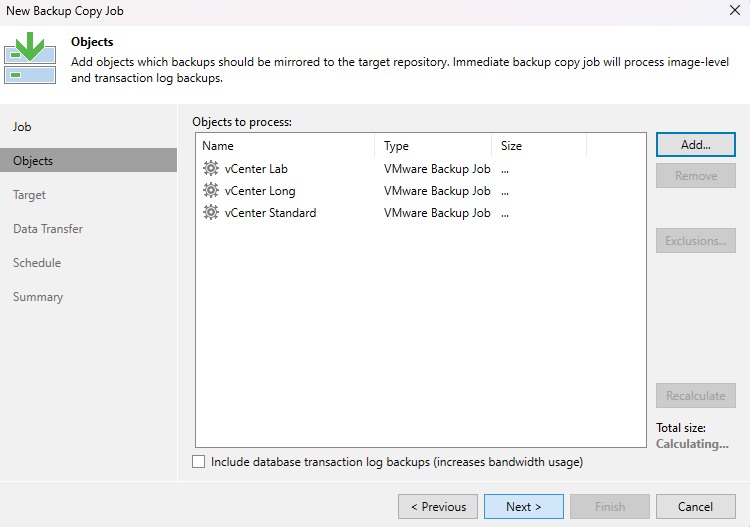
Click Add/From Jobs on the right
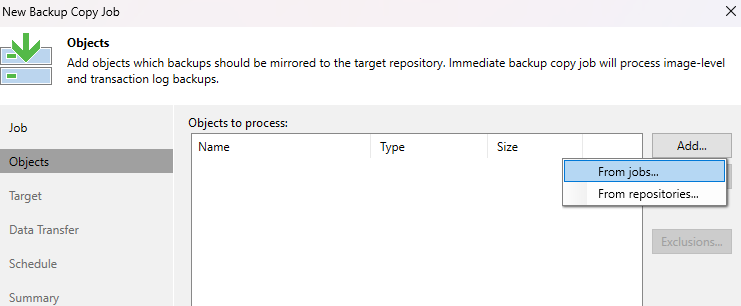
Select the backup jobs you want to copy restore points from, then click ok
You may want database transaction log if you have SQL servers in these backups jobs, then click Next
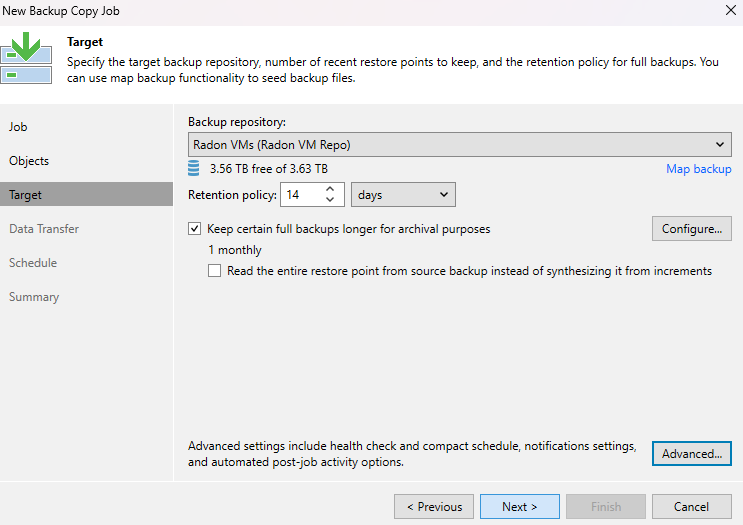
Select the DR immutable repository and the retention policy

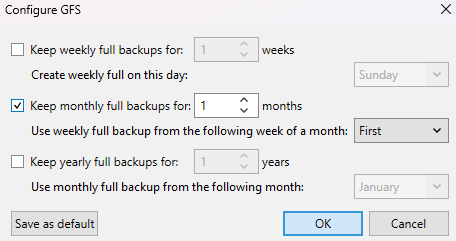
Check the box to keep archival backups

And set this inline with your company RPO, I only want 1 monthly backup, so thats all I will keep
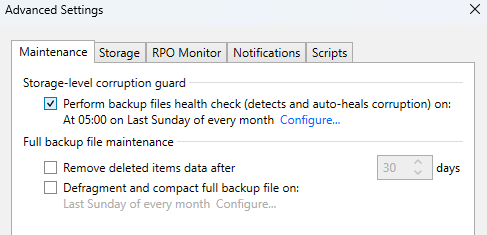
On the maintenance tab we can enable Storage Level Corruption Guard, but take care with the high bandwidth used as it will read all backups, only enable this if you have a 1Gb or higher connection, and for cloud repositories you have Wasabi, so you dont get a lot of extra data exfil charges
Under storage, like with backups, you can adjust the compression level, this is only really needed when storage is at a premium and you need any MB, if unsure, dont change this
And under Notifications, enable email notifications to the email you want, use the global settings and click ok
Then click Next
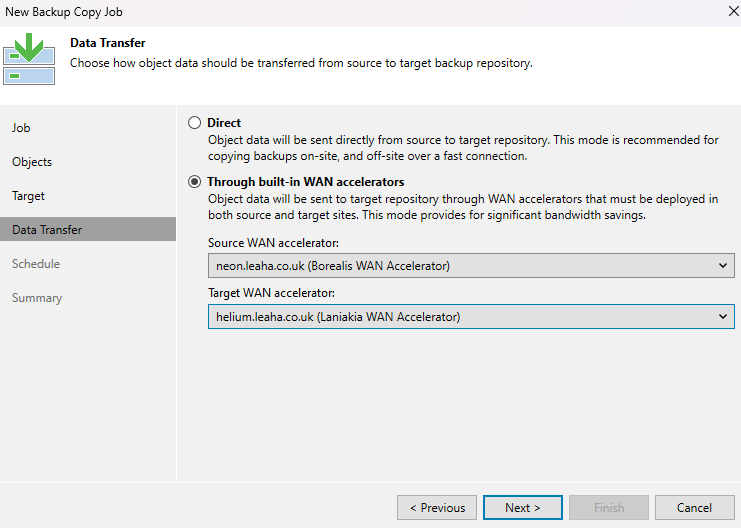
If you have a sub 500Mbps connection you can enable WAN Accelerators
With the source WAN Accelerator being in production, and the target WAN Accelerator in DR
Then click Next
You can limit the times this runs, also helpful if you have tight bandwidth and, for example, only want this to run in the evening
However your company RPO will likely dictate how this is set
I am leaving this to be allowed at any time, and click Apply

Then Finish
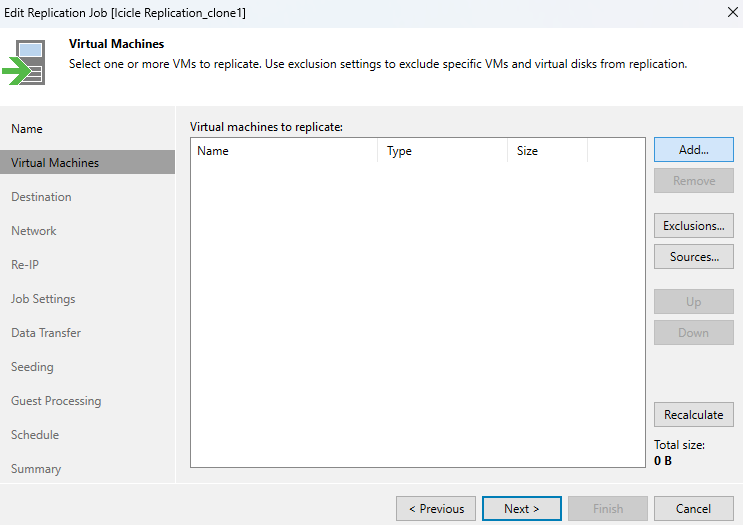
1.12 – Adding Replication Jobs
Replication jobs are key for any DR environment using Veeam, normally you have your production Environment with the live VMs and you will want a copy ready to be spun up at DR
Replication jobs are perfect for this, however both Production and DR need to be using the same hypervisor
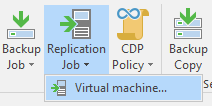
On the Veeam Console, click into Home in the bottom left
Then click Replication Job/Virtual Machine at the top
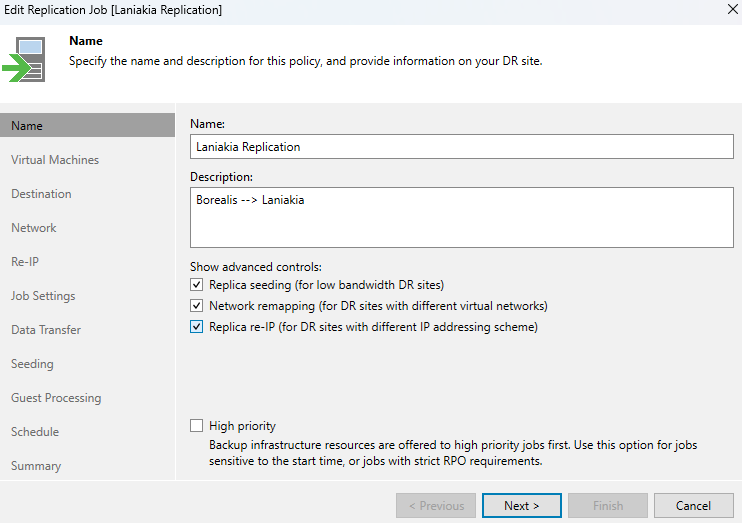
Give the job a name and a description
Then there are three check boxes that are very important
Replica Seeding should be checked if you have low bandwidth between Prod/DR, eg less than 500Mpbs and you have a repository at DR that a backup copy job is going too
What this does, is VBR will pull a copy from the local repository to DR environment, then synchronise that backup data to the production machine so replicas are up to date
Network remapping you almost certainly need, most Production/DR sites utilise a different cluster, or in a VMware environment, a separate vCenter, if this is the case, you will need this
Replica Re-IP is for when your DR network isnt stretched with production and uses a different subnet, so this will change the IP of machines to match the DR networking
This only works for Window servers and doesnt work for Linux
For this example, we will enable al three to showcase what they can do
When you have the options you need, click Next
Click Add here on the right to select some VMs
Now you can select VMs by expanding the Hypervisor and selecting them
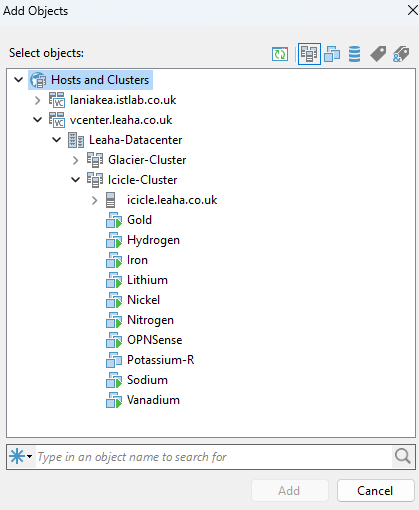
Or by using the tag menu, at the top, for a VMware environment
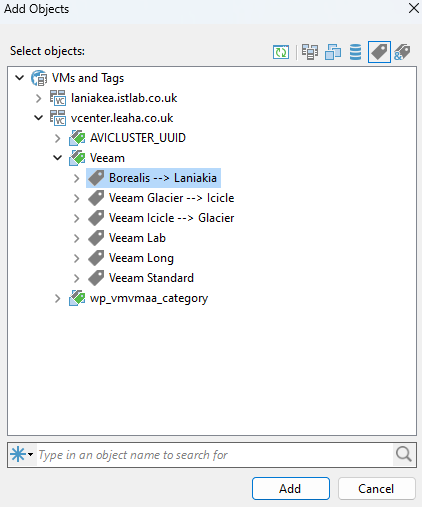
You could also select the entire cluster and add exclusions for VMs to new VMs are automatically replicated too
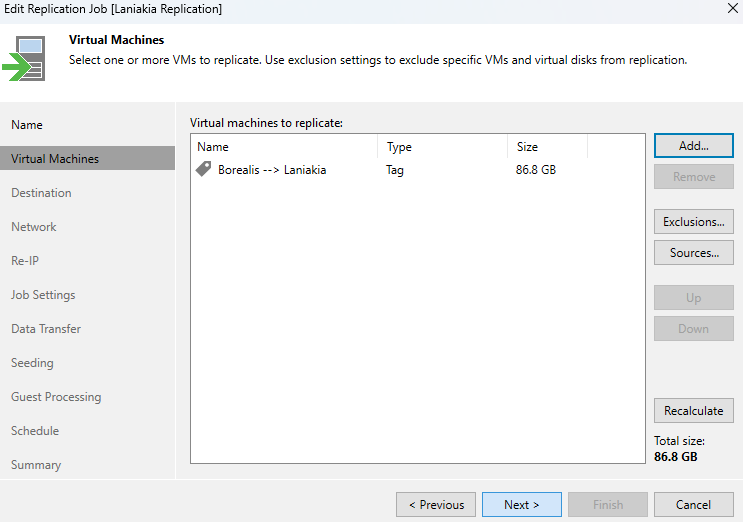
Now we have our VMs, click Next
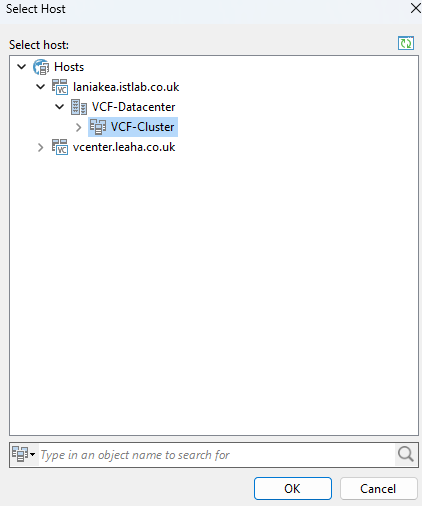
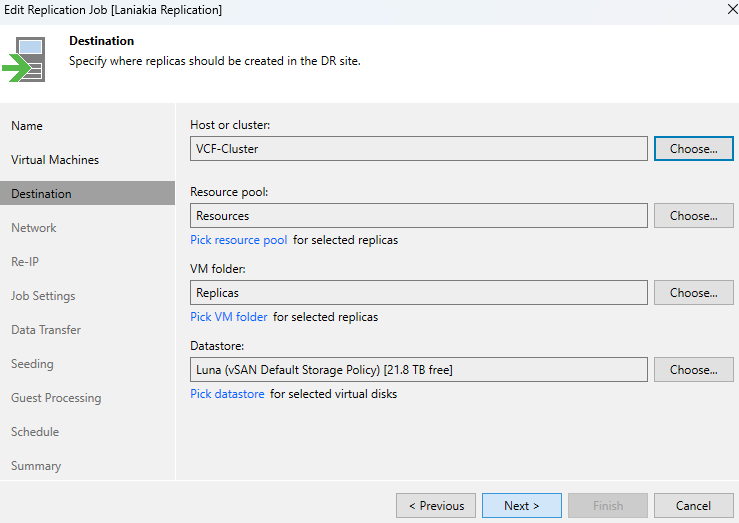
Click Choose for a host or cluster
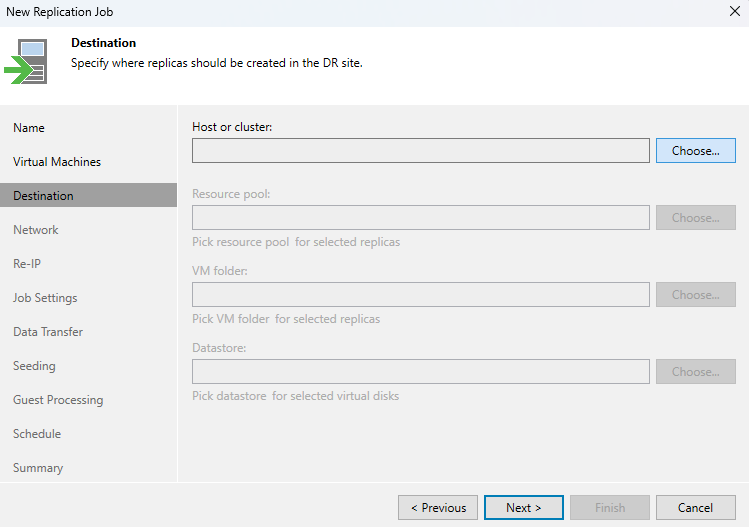
Select the cluster in the DR environment, for VMware this should be a separate vCenter
Make sure the resource pool and folder are correct, for VMware, and for storage this wants to match the datastore you want your replicas to go
If you have multiple, in vSphere, a datastore cluster is a better option if you have a single replication job and you want to distribute that over multiple LUNs
Then click Next
Now we need to do our network mapping for VMs, click Add
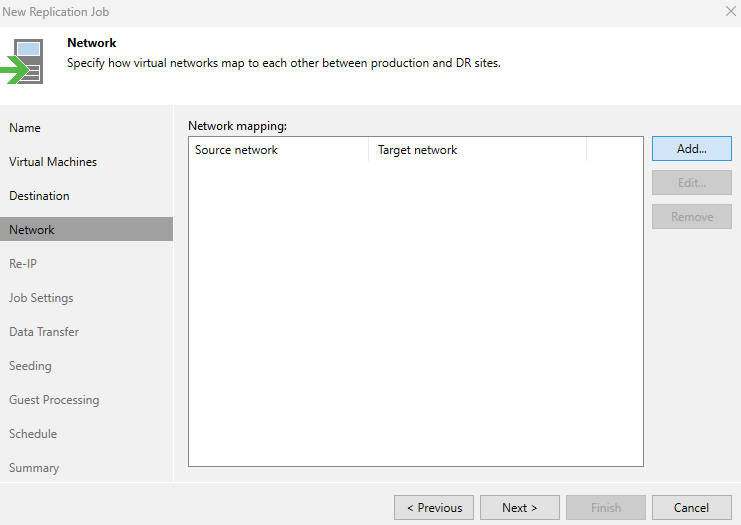
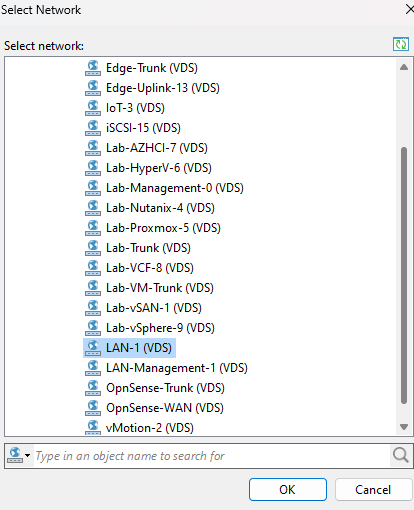
Click Browse for our source network, the network VMs in production are on
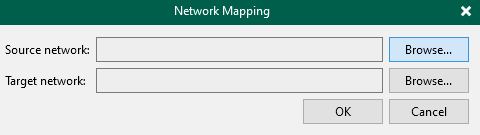
Expand the host and select the network, then click ok
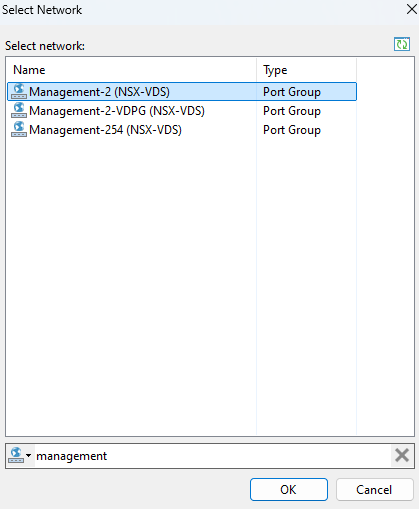
Click Browse for the target network
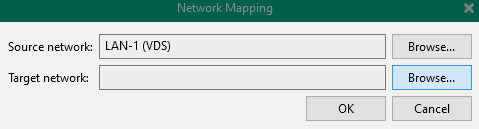
Select the corresponding network in DR and click ok
Then ok again
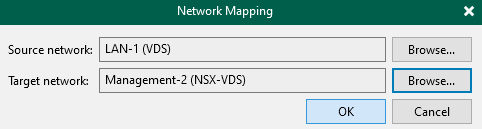
You can add multiple mappings if you have several networks, I only have one, so I am clicking Next here

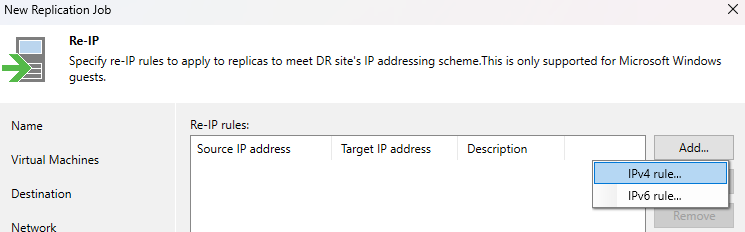
For a Re-IP if you DR subnets are different, click Add, then IPv4 Rule, or if you have IPv6, select that
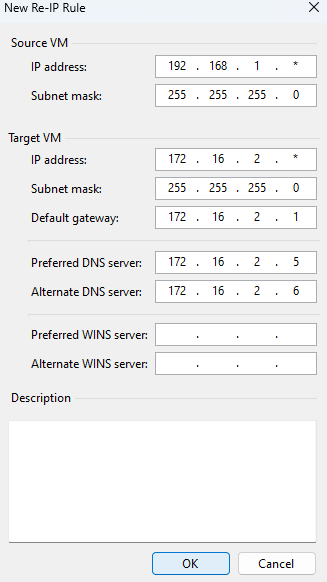
Then we need to fill out out networking info
For the source VM, ensure the IP address and subnet is correct, the * at the end will be for your VM IPs, as my subnet is a /24
For the target VM, we need the corresponding network, this should be the same subnet size, add the gateway in DR and the DR DNS Servers
Then click ok
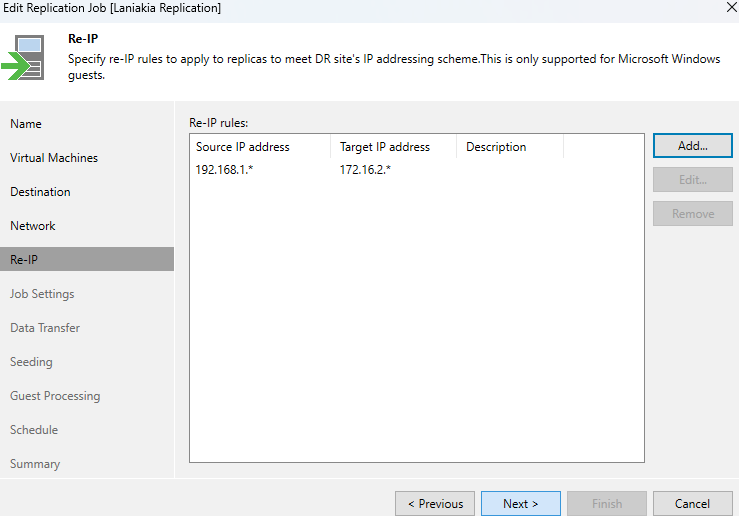
If you have multiple networks you can also add multiple rules
When you are done, click Next
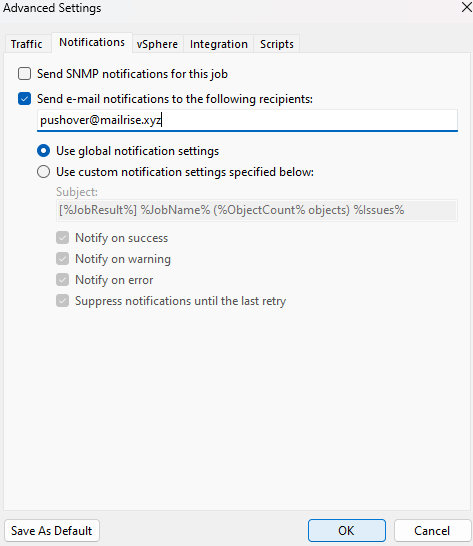
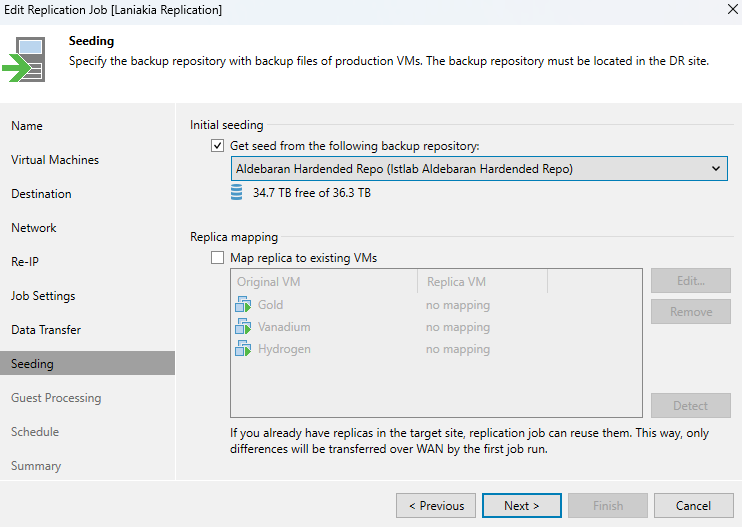
Now select a repository for metadata, this should be your Hardened Repo in DR, add a replica suffix to help ID them, and the number of restore points you want to keep in line with your RPO, then click Advanced
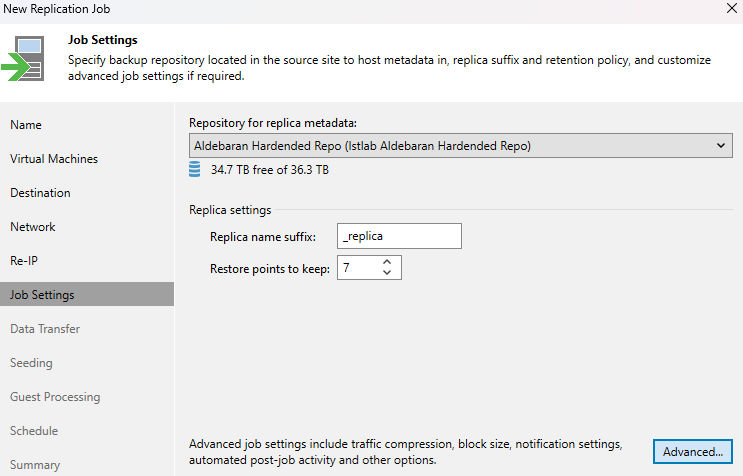
Click the Notifications tab, and enable email notifications using the global default, then click ok
If you are using Veeam ONE later, skip this
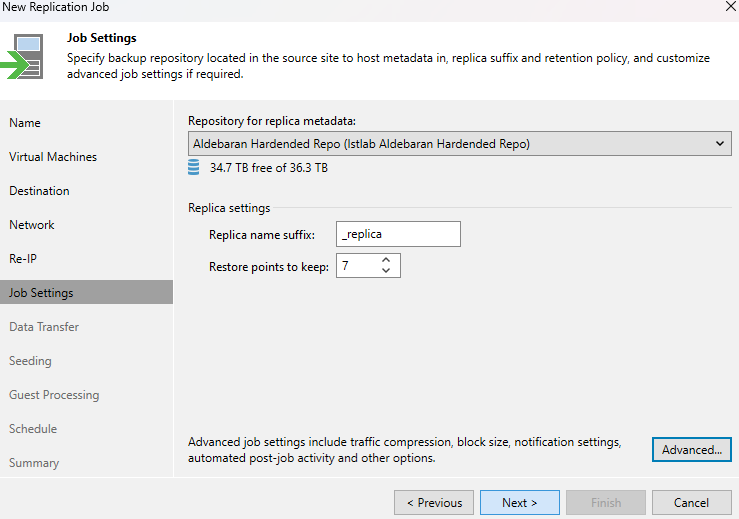
Now click Next
Now we need our proxies, you should have, ideally two but one is ok for smaller environments, there should be equal proxies in Production and DR
As this is a small lab, I have the VBR server as a proxy, since this is a sub 20 instance deployment and another proxy on the second host
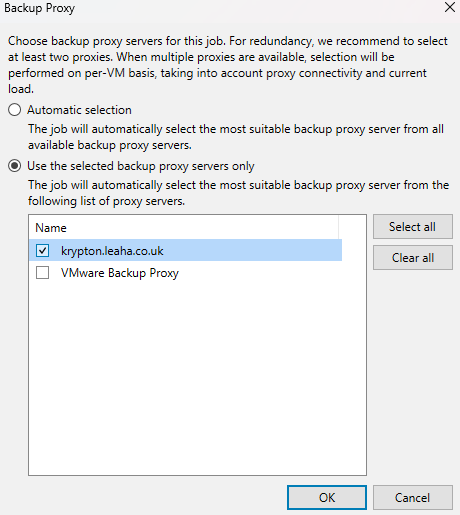
Click Choose on the source proxy
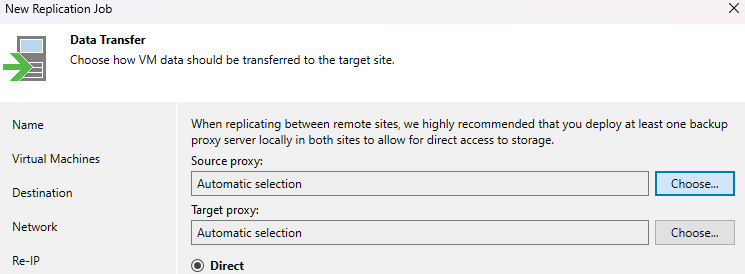
Select the second radio button to specify a proxy, and choose the Production Proxy or Proxies then click ok
Click Choose for the target proxy
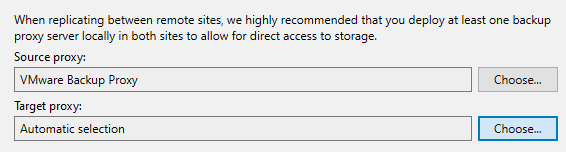
Use the second radio button again and select the DR Proxy or Proxies and click ok
If you have a connection to DR thats less than 500Mpbs, than you can select your WAN accelerators here, source should be the Production WAN accelerator, and target will be the DR WAN accelerator
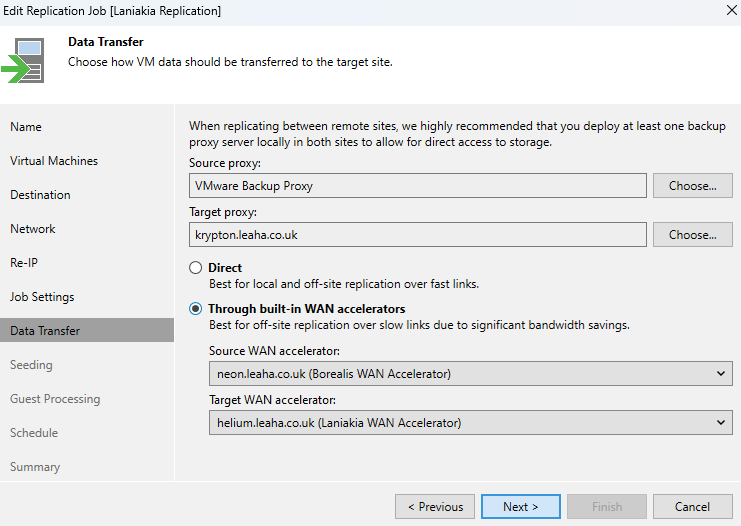
We can then leave Replica Mapping unchecked for this, and make sure Initial Seeding is enabled, and select the DR hardened repository so it can pull the backups from there, then click Next
You can enable application aware processing if needed for servers like DCs and SQL, you will need suitable admin credentials for the server
I dont need it, so I keep it disabled
However, if you have different credentials for certain servers, you can click the Credentials box and specify them per object, so this can be per VM, if you added VMs, or per tag when using tags
Then click Next

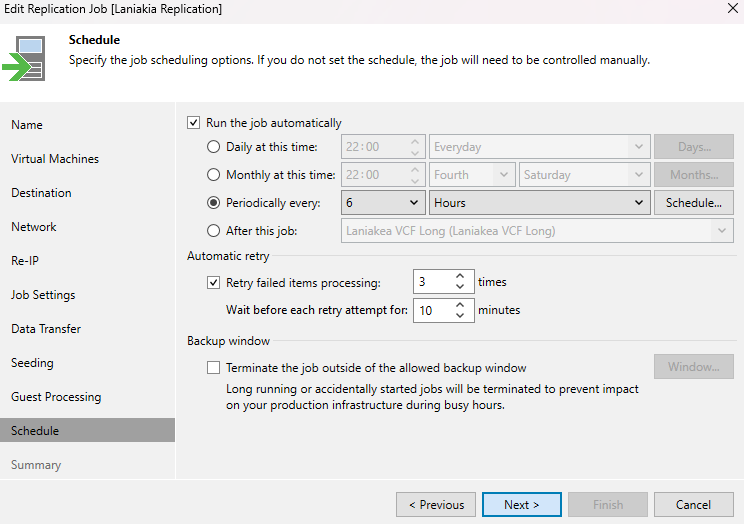
Then set a schedule that aligns with your companies RPO, I opted for every 6 hours since if production died in this example, 6 hours of data loss is acceptable, but you may find only 2-3 hours would be, and you can set the schedule accordingly
Then click Finish
1.13 – NAS Backups
1.13.1 – Add A NAS Share
Veeam has the ability to backup NAS shares on SMB/NFS
It consumes 500GB/VUL License and can be made immutable using an immutable repository
This will want its own proxy, unless you have a very small environment, so you can add a managed server like you do for the VMware proxies and commission it as a General Purpose Proxy when adding a new proxy
Proxy size should be
- 2vCPU, plus 1vCPU/2 concurrent jobs
- 2GB RAM, plus 4GB/concurrent job
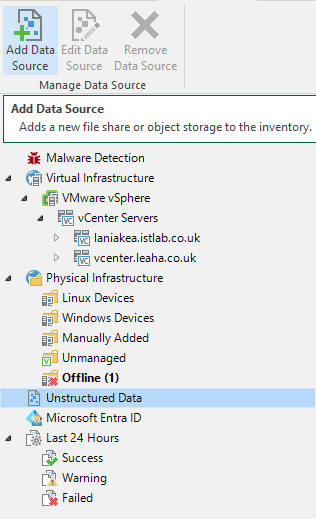
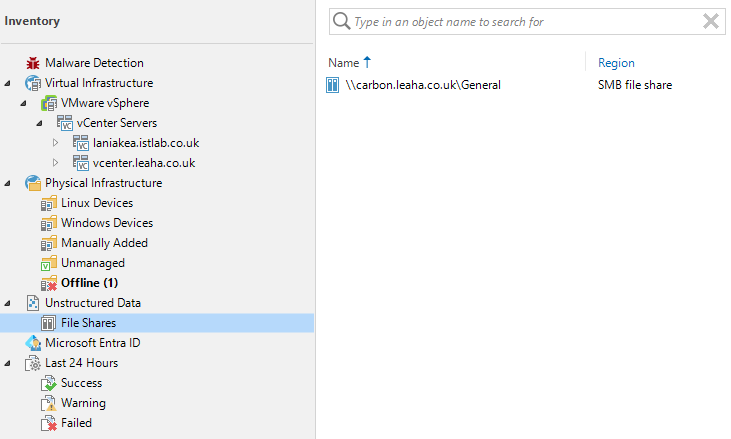
Head to Inventory in the bottom left
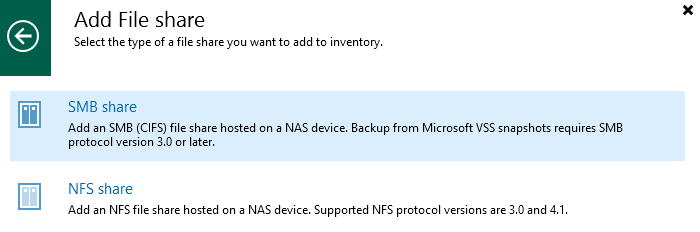
Click Unstructured Data, then Add Data Source
I have a TrueNas server, which is what I want to backup, just using the File Share option, however, if you have a NAS filer, you want to use that option
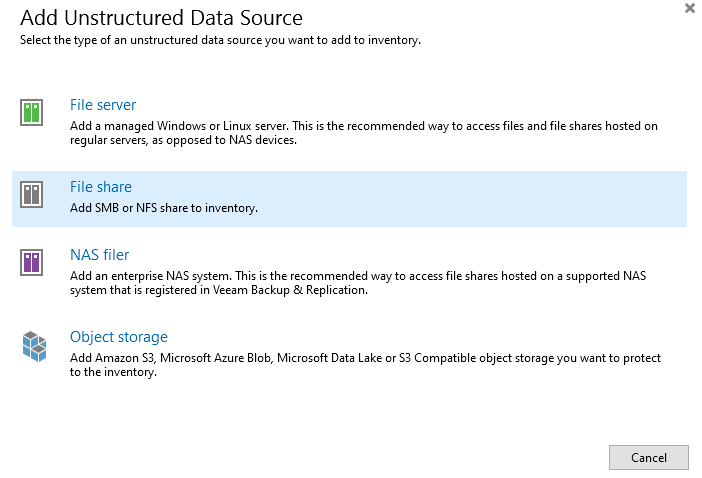
NAS Filer options will include
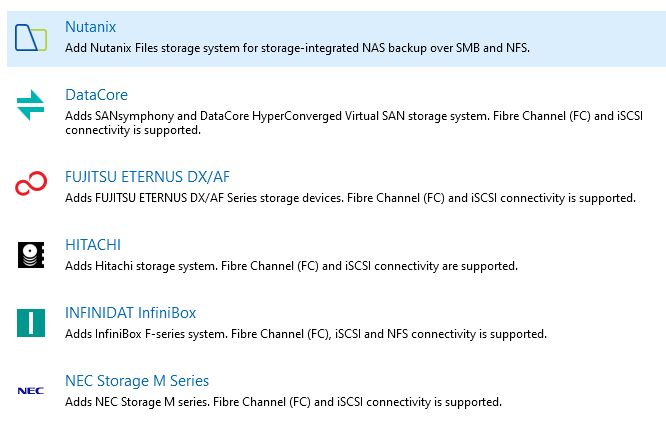
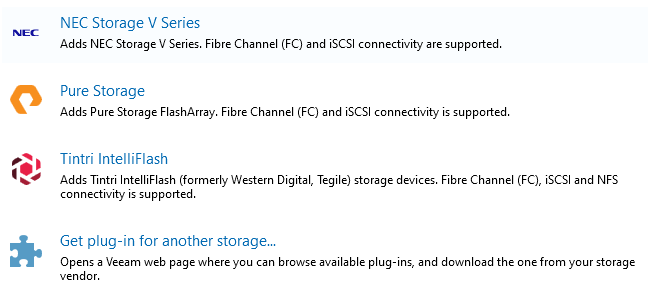
Interestingly Nutanix Files is there, but not vSAN FS, so you will have to use the file share option for that
I cant demo this sadly, as I dont have a system like that at home, so we will be continuing with the file share add, to show what Veeam csn do
Select your file share type, I am using SMB
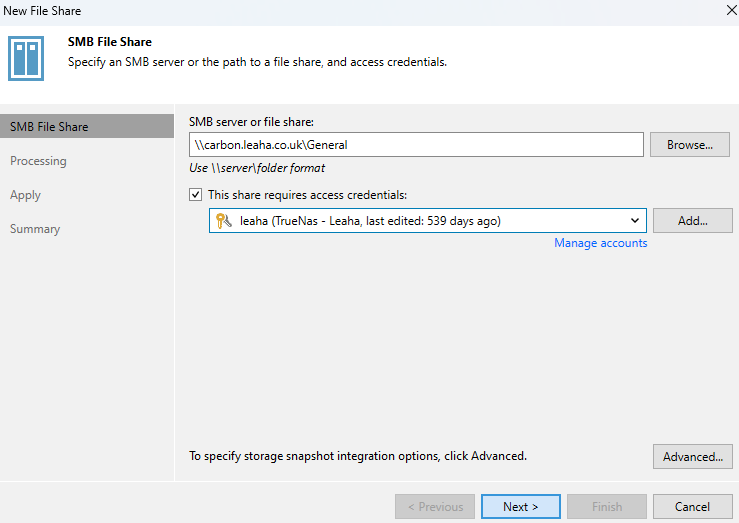
Provide the full SMB path in the format
\\<server-fqdn>\<share-name>
Check the box to add credentials, and select the credential you want, if you dont have one, click Add on the right to add one, then click Next
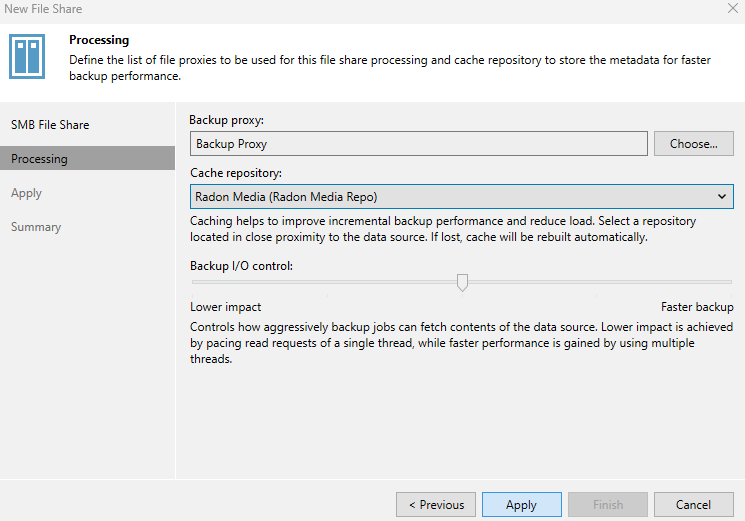
Click Choose to select your proxy and a cache repository

And select the proxy you added for this, as I have a very small lab, I am using the VBR servers Proxy, but for a production environment you should have one or two as dedicated proxies, then click ok
For cache select the repository the backups are going to, likely your production repository

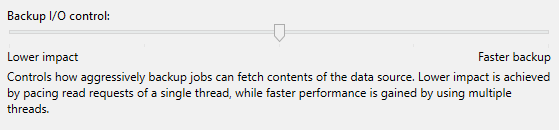
You can use I/O control to adjust the impact the backup has vs the speed, I would leave this at the default
Then click Apply
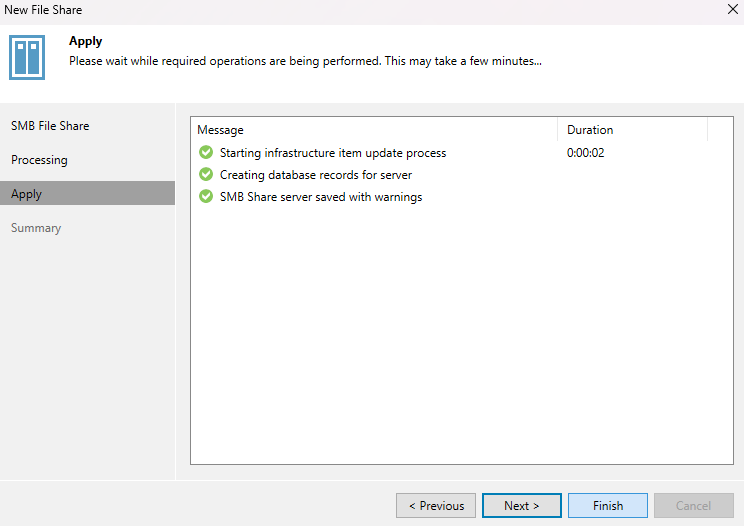
Then click Finish
We can now see the file share has been added
1.13.2 – NAS Backup Job
Now we have our NAS, we can setup a job to back it up
Head to Home in the bottom left
Click Backup Job/File Share, in the top left

Enter a name and a description, then click Next

Click Add
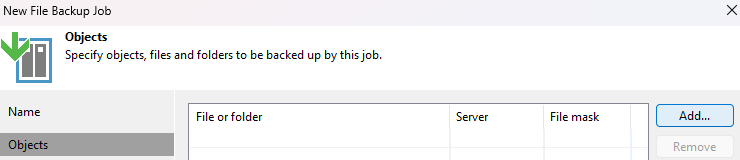
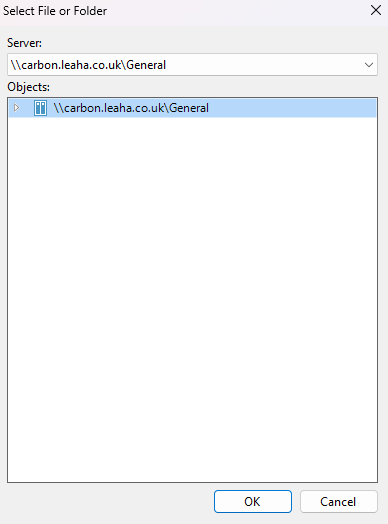
Select the share, you can also expand it to backup certain directories, then click ok
Click Next
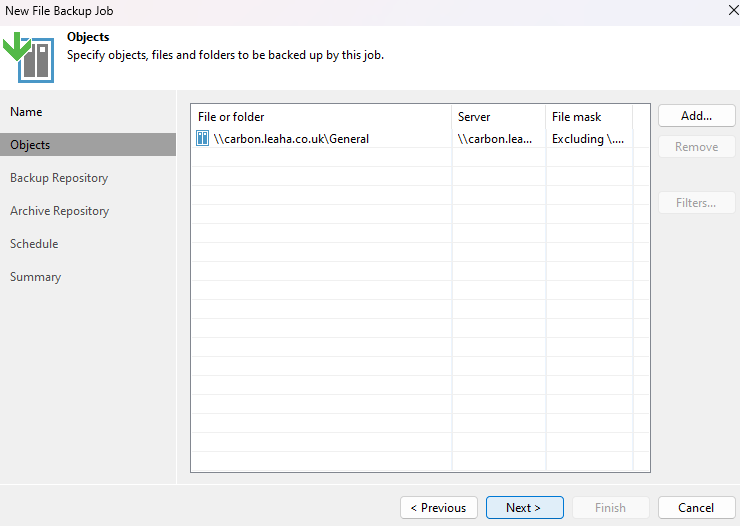
Select the hardened repo you want the backup to go to, and the number of days you want to keep versions, backups, for, then click Advanced in the lower right
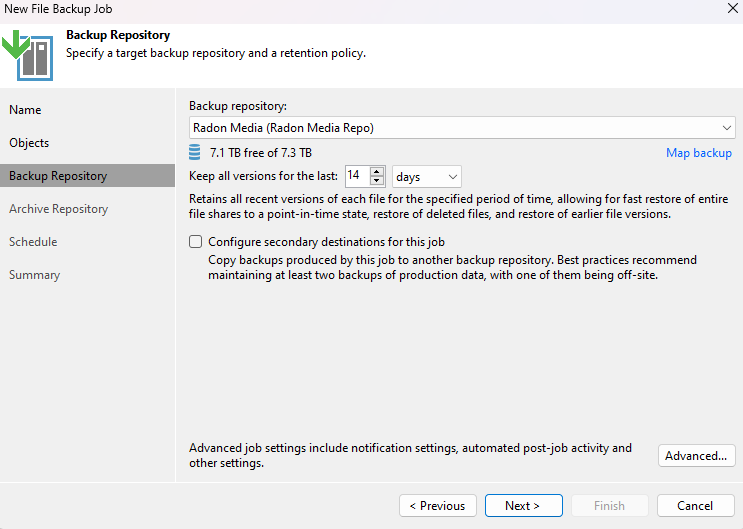
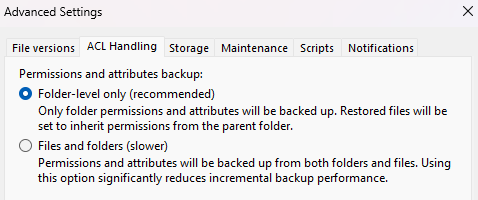
Under ACL Handling, the default is just to get permissions for folders, you can enable ACL permissions to be backed up per file, so restored files get their original permissions, instead of the folder inherited permissions, but its much slower
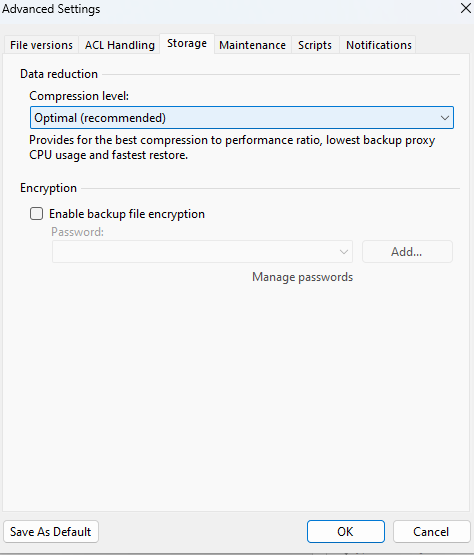
Under the Storage tab you can set the compression level, if you are backing Media up leave, like video, you may want to set this to None, as video doesnt really compress in the way Veeam does, and if unsure leave it at Optimal
You can also set an encryption password
Under Maintenance, enable backup files health check
Lastly, under Notifications, enable email notifications, enter the address you want them to go to and use the global settings then click ok
If you are setting up Veeam ONE leave this disabled
Now click Next
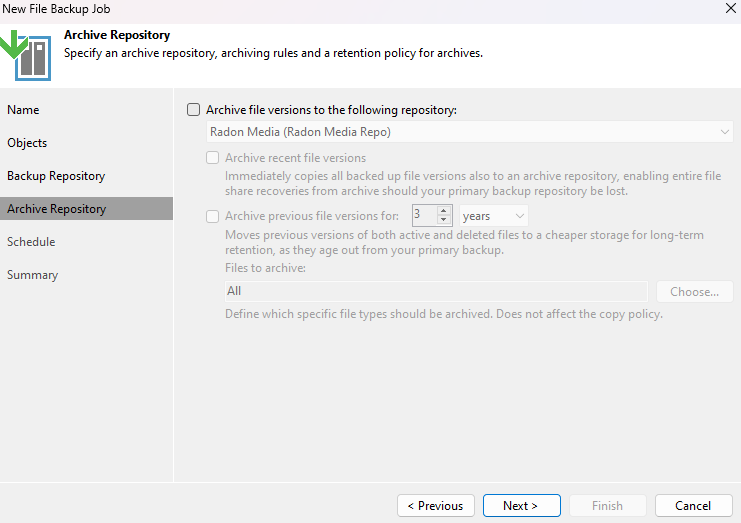
You can enable archival repositories to move older data to cheaper storage, or additional storage and apply a different retention policy, I am leaving this disabled
Set a schedule that aligns with your RPO, then click Apply
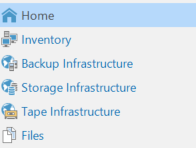
1.14 – SureBackup
For this we will be using a single ESXi host with a standard switch, this shouldnt case any issues resource wise, as a DRS cluster can migrate VMs to other hosts
This was done due to some potential networking concerns with the muti host setup and distributed switches as this requires you to setup a port group on a VLAN per production network, and while technically this is fine, you would have duplicate IPs connected your your network, which the separate VLAN means there shouldnt be any conflicts, but I prefer the complete isolation approach that a single host with a standard switch offers
1.14.1 – Setting Up A SureBackup Lab
For this example, we will be using vSphere for this lab, but you can take the same approach to other platforms, like Hyper-V
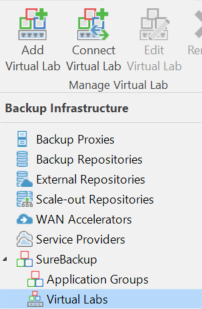
Click into Backup Infrastructure
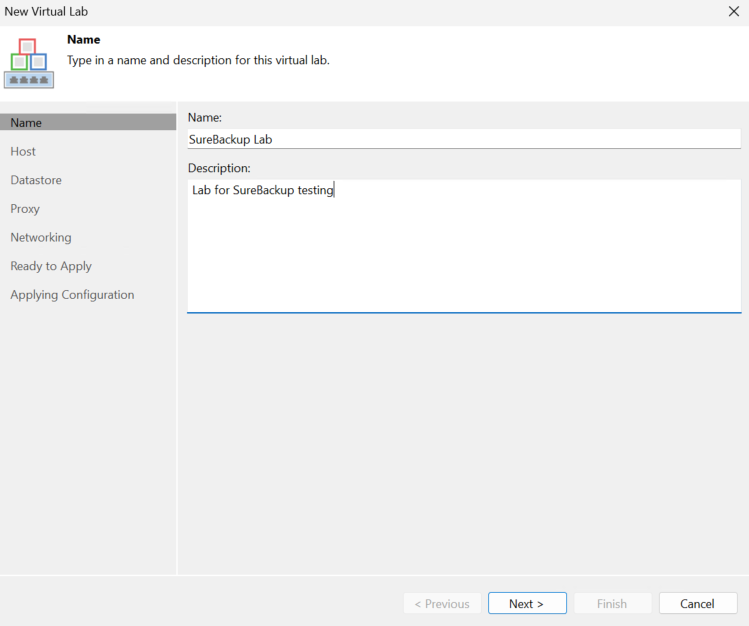
Click SureBackup/Virtual Labs, then Add Virtual Lab
Give it a name and description then click Next
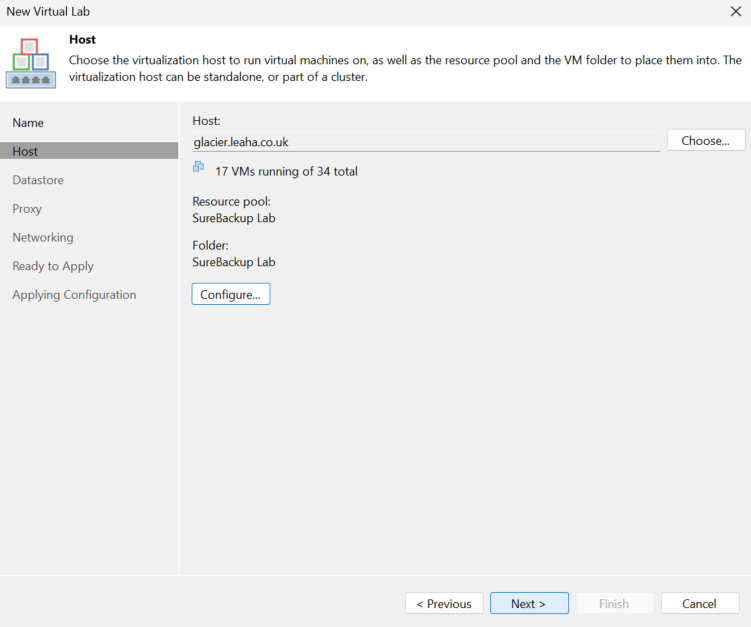
Click Choose to select a host, you cant use a cluster
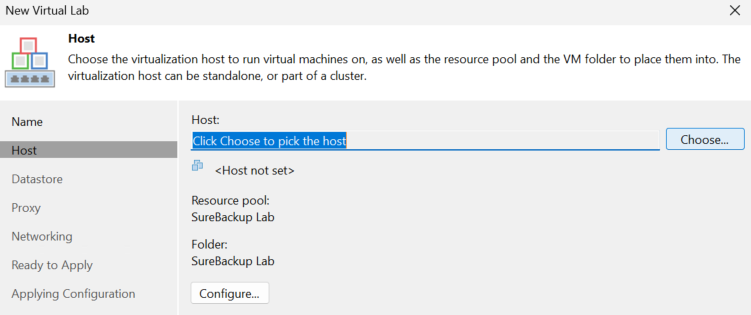
And click ok when you have selected the host
Its worth noting, if you have production and DR, it wants to be on the same site as the VBR server, so if VBR is in DR, then select a DR host

Then click Next
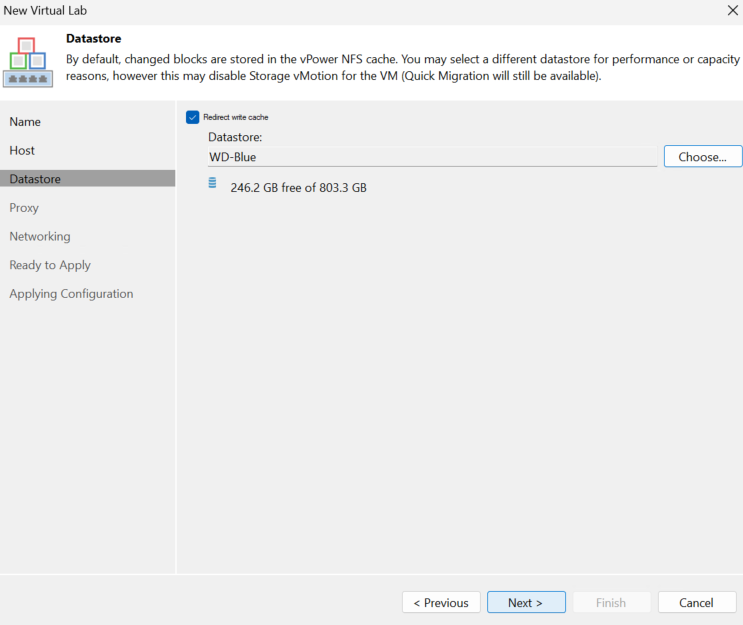
Check the box to enable redirect write cache and choose a datastore on the host, then click Next
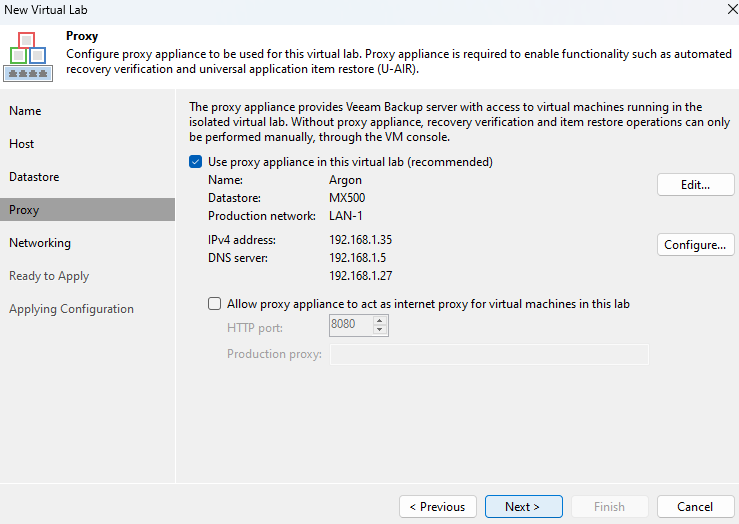
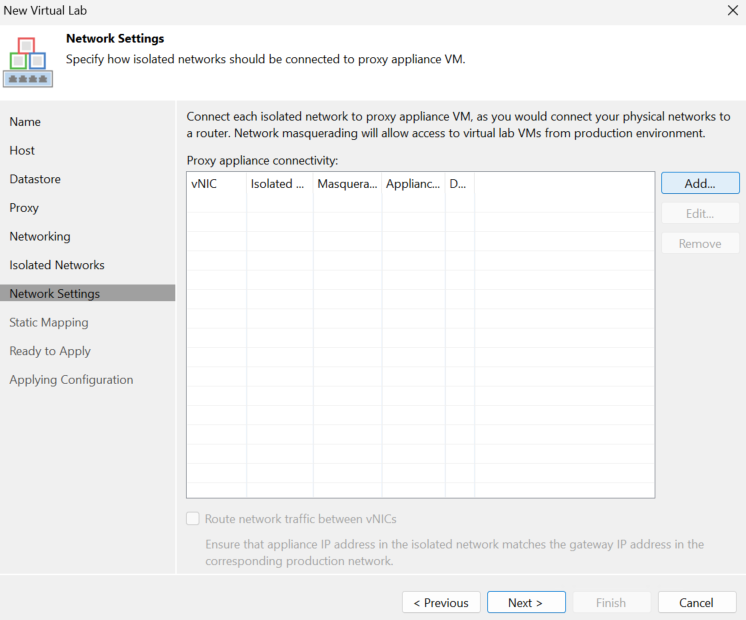
Make sure the check box to use a proxy is enabled, and click Edit
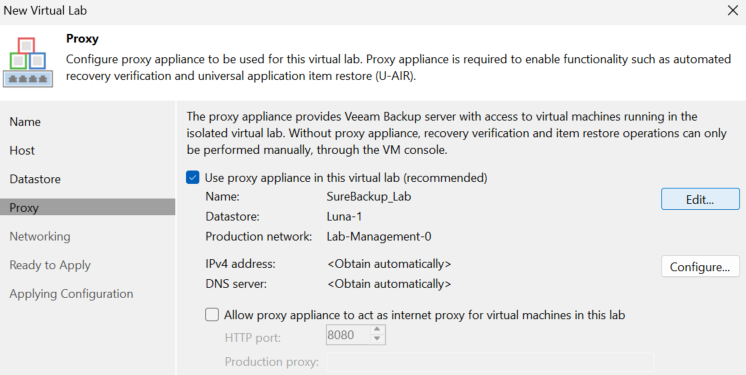
Give the proxy a name, and click Choose and select the datastore to put it on, its only a few GB
Click browse for the network the put the proxy on
Select it and click Add, I am using my main server network
Then click ok
Then click Configure to set the proxy networking
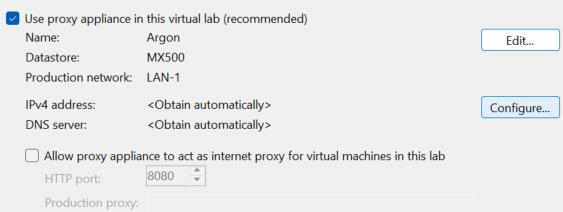
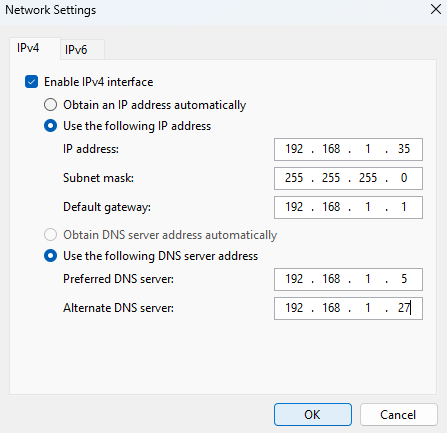
Set an IPv4 address for it on the network we selected earlier, and the subnet, gateway and DNS then click ok
Then click Next
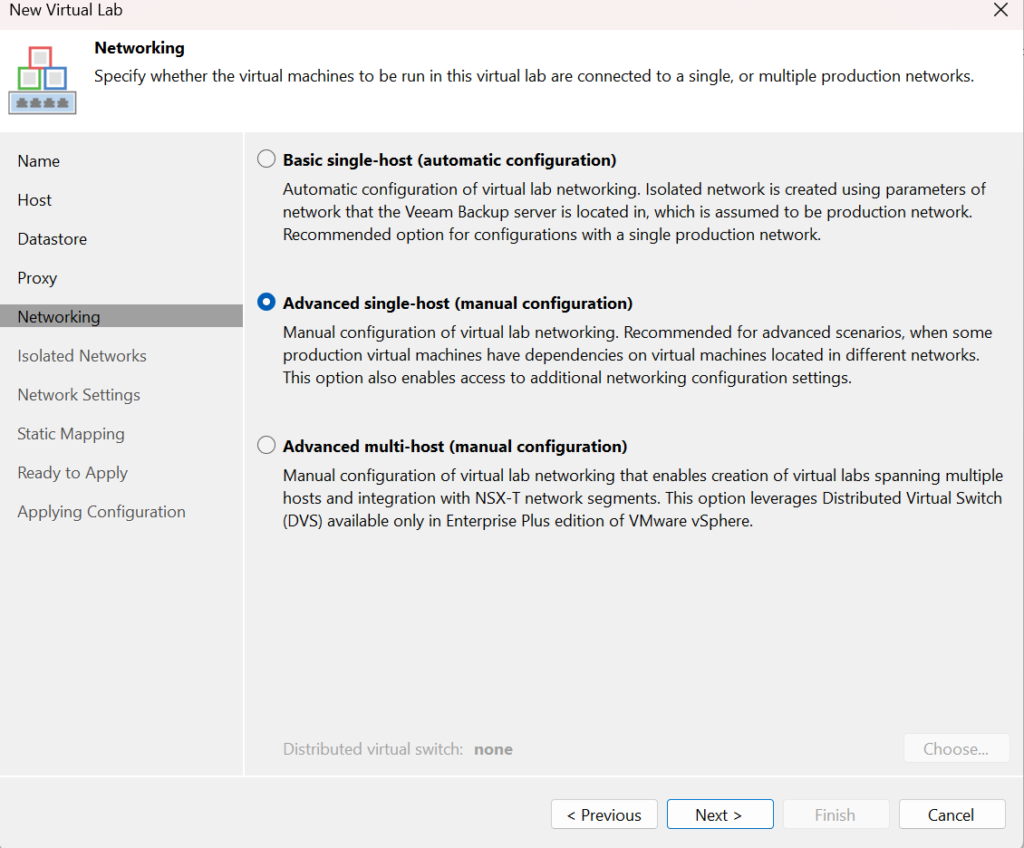
We will be using an Advanced single host setup, so select that and click Next
You may get an error pop up for being unable to resolve the network, close that off
Now we need a network mapping, this will be for all networks any VMs in the SureBackup jobs, so all your production VMs, are using, click Add
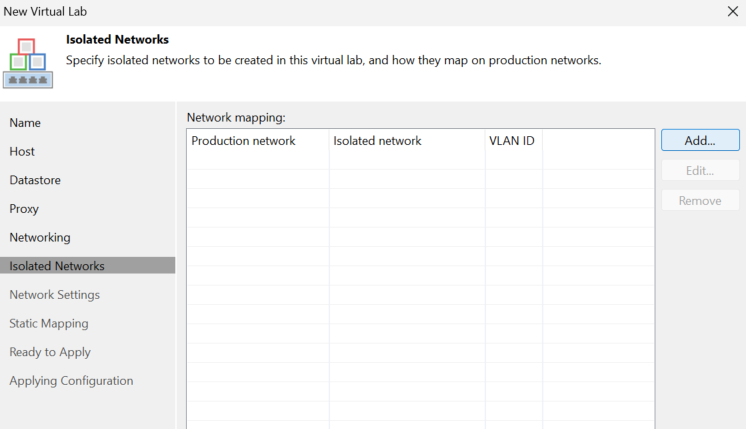
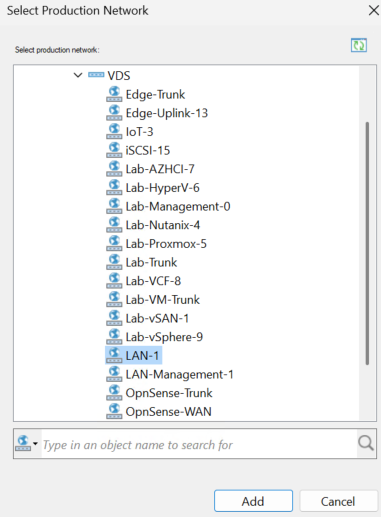
Click Browse for a production network
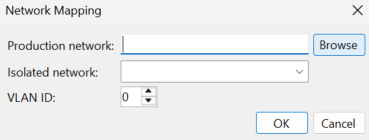
And click Add
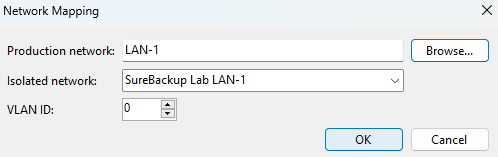
It should look like this and pull the correct VLAN tag
And repeat for additional networks, like a DMZ
I also added my IoT network, as I have a VM on that, when you have all your networks, click Next
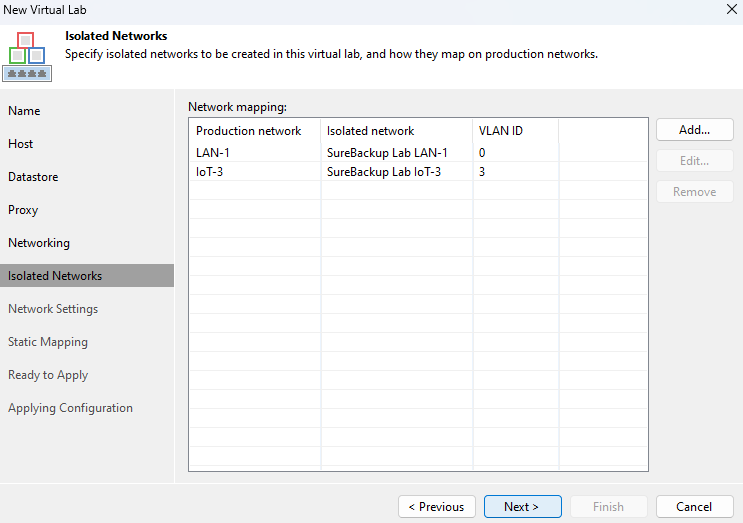
Now we need a network mapping, click Add
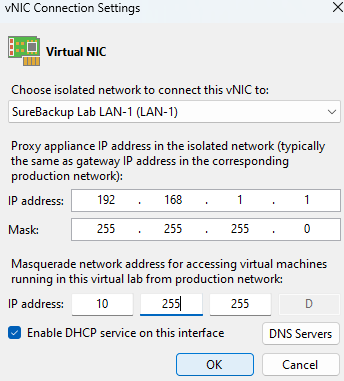
Select an isolated network, and add in an IP address for the proxy, this should be the gateway in the production network, and the subnet mask, then at the bottom for the masquerade IP, select a network range you will never use in your network, this must never be a network in use, and enable the DHCP service, then click ok
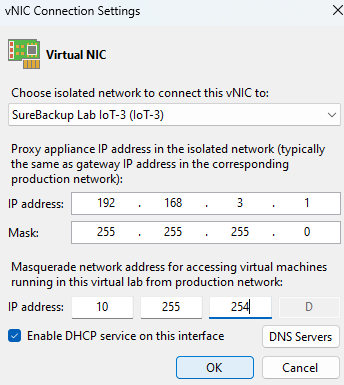
And repeat for your other networks, here is what I did for my IoT network
Enable the ability to route traffic between vNICs, some VMs may need to go between networks for some testing later, and click Next
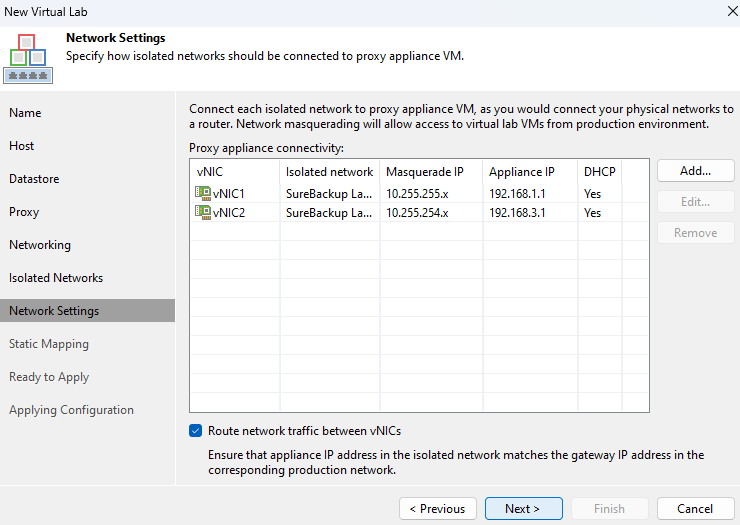
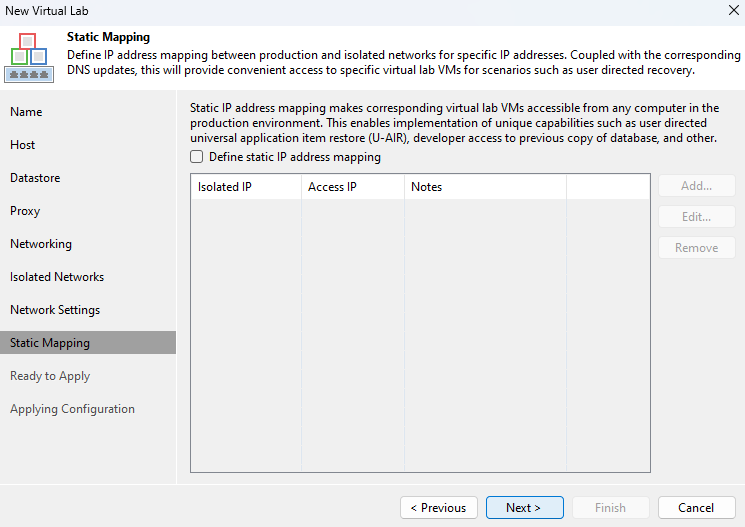
Leave static mapping blank, and click Next
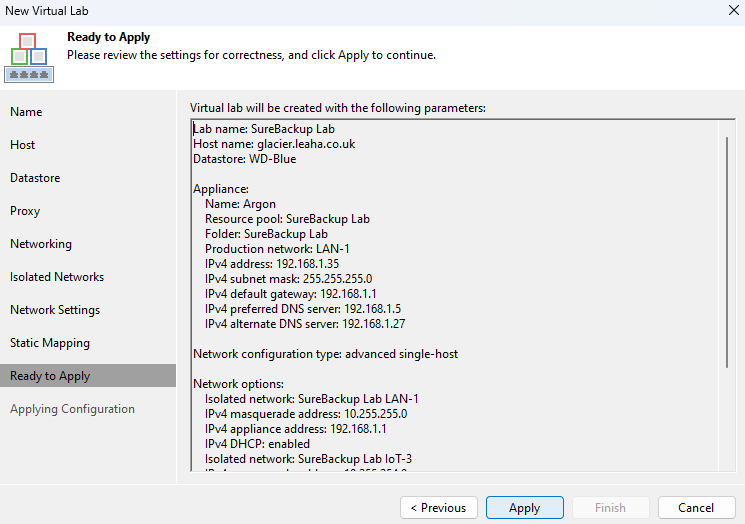
Then click Apply
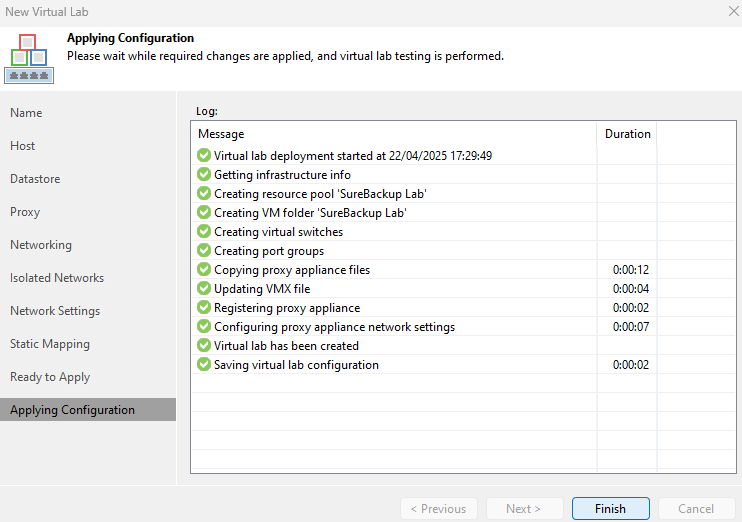
Then click Finish
1.14.2 – Adding A Job
Now we have the lab setup, we can add a job to use it and ensure our backups will boot and networking is ok if we need them in a recovery scenario
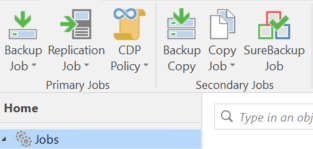
Click Home in the bottom left
Click Jobs, then SureBackup Job
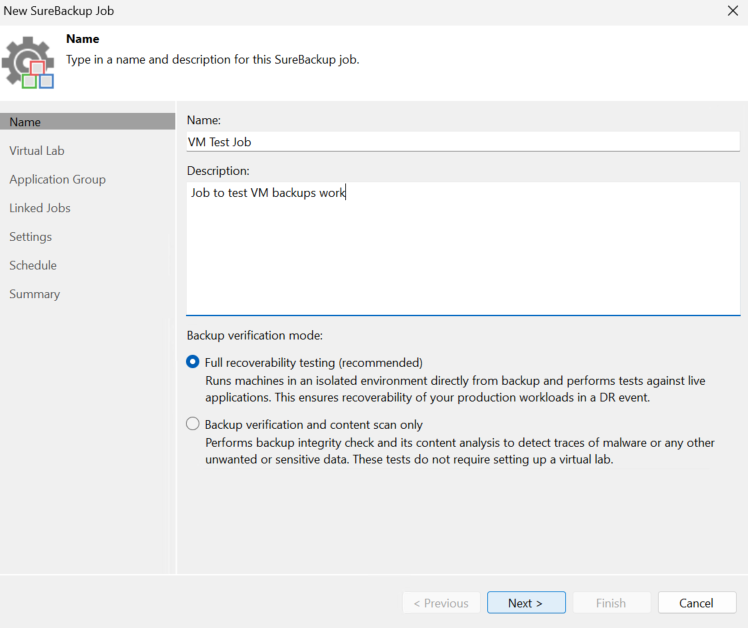
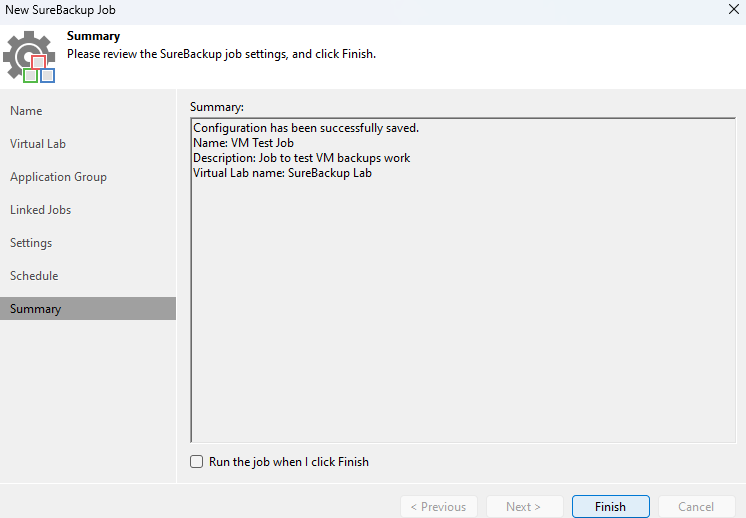
Give the job and name and description, and make sure the mode is on Full Recoverability Testing, then click Next
Select the virtual lab and click Next

Click Next here
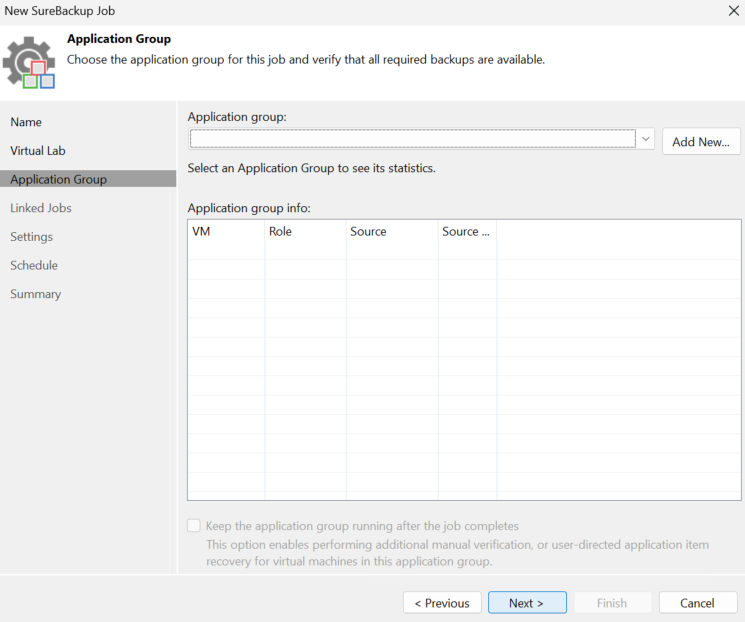
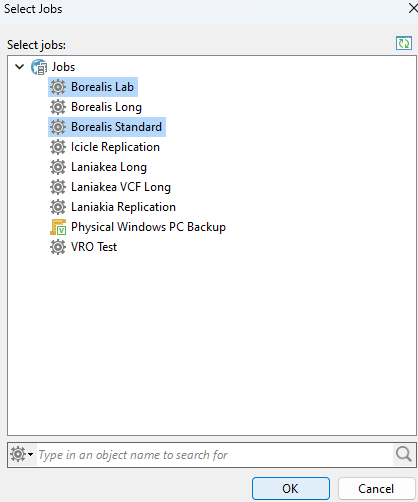
Enable the testing of backups from the following jobs, and click Add
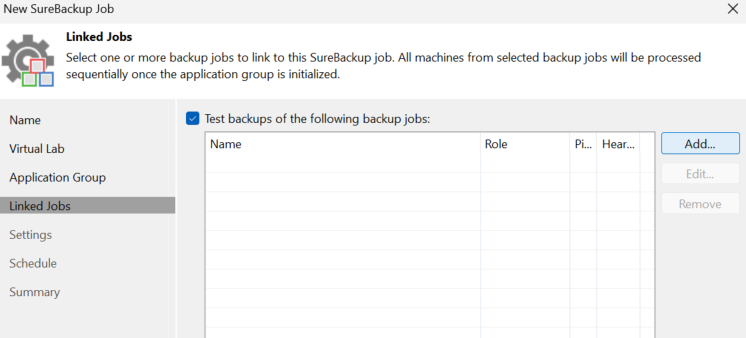
Select the main production jobs you have that you want to test and click ok
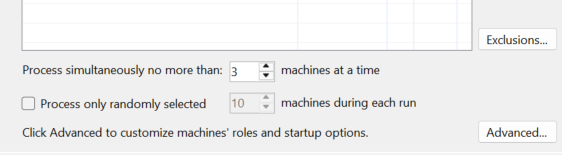
At the bottom, you can exclude certain VMs that are in the jobs, change how many active VMs are being tested at once, this will increase the resource use but speed the job up
Or, if you have a lot of VMs, you can use the check box to process a random x amount, which is very useful, I only have ~16 VMs, so I will test the lot
Then click Next

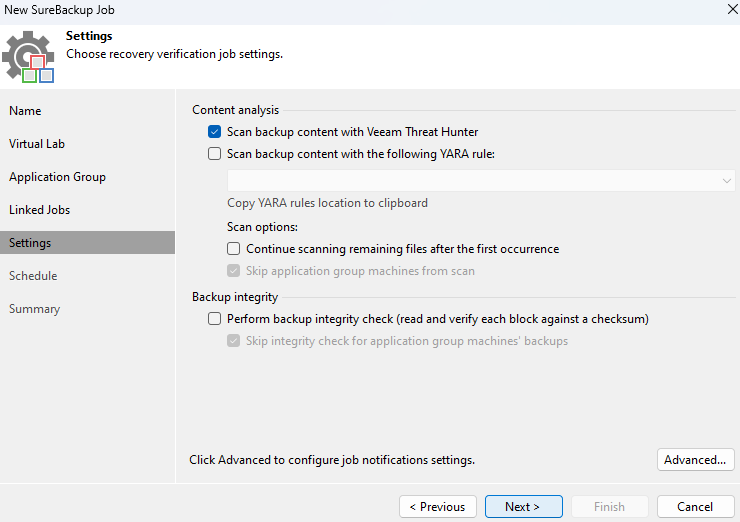
Now we can scan backups with AV or YARA rules, I will be enabling AV scanning using Veeam Threat Hunter, this only works for Windows and does take a lot of CPU, so it may be worth adding an extra job that doesnt run as often for this
If you click Advanced you can enable SMTP, this want disabling if you are using Veeam ONE
Then click Next
And set a schedule, I find once per day is more than frequent enough, and click Apply

And Finish
1.15 – Entra ID
1.15.1 – Adding Your Tenant
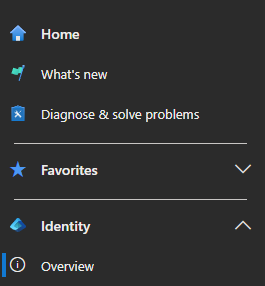
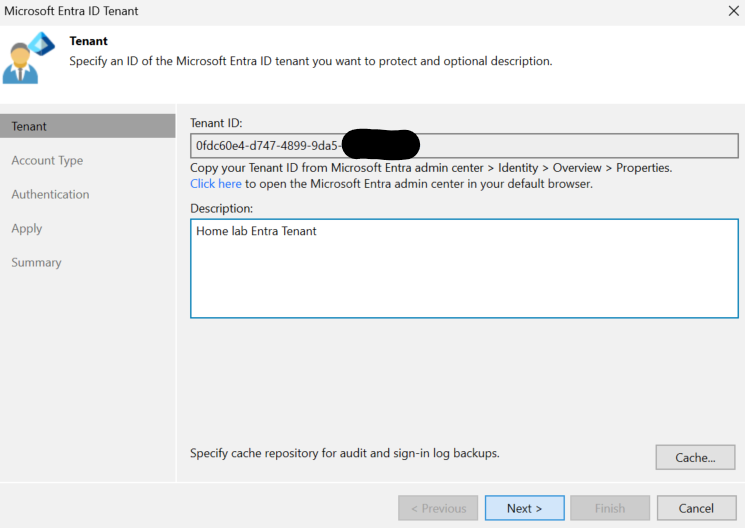
On the bottom left, click into Inventory
Then Microsoft Entra ID and click Add Microsoft Entra ID Tenant

Then Microsoft Entra ID and click Add Microsoft Entra ID Tenant

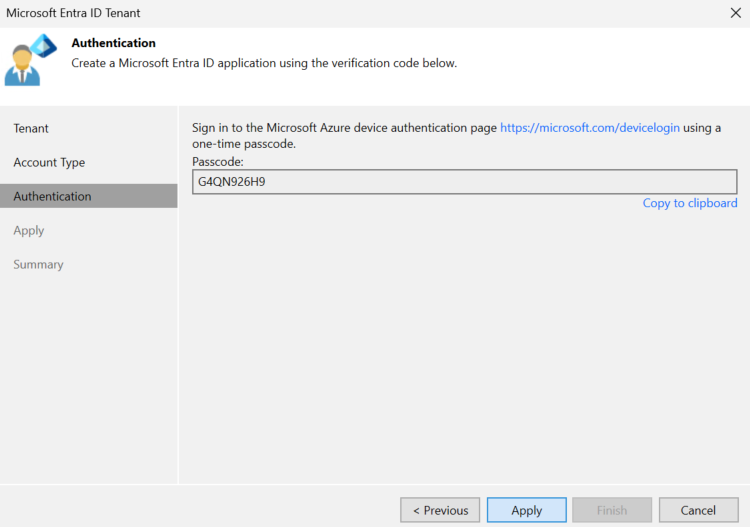
Now we need our Tenant ID, head here
Click into Identity/Overview
And then copy your Tenant ID

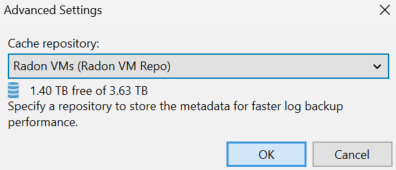
Paste this into the Tenant ID section in Veeam and click Cache in the bottom right
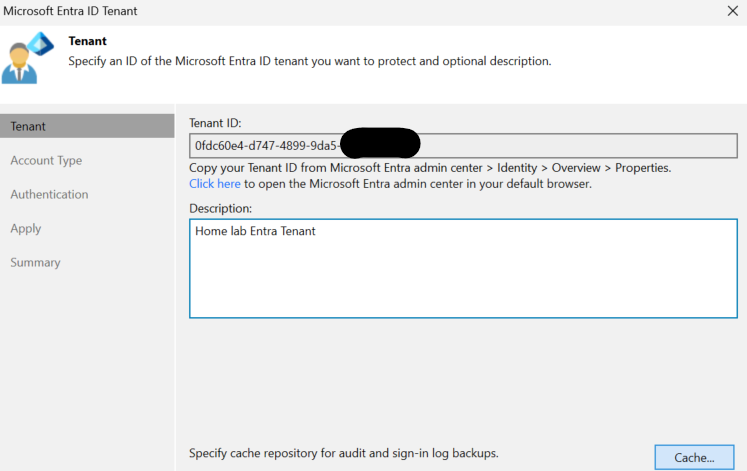
And select a repository for storing cached data, I will be using my Hardened repo, and click ok
And click Next
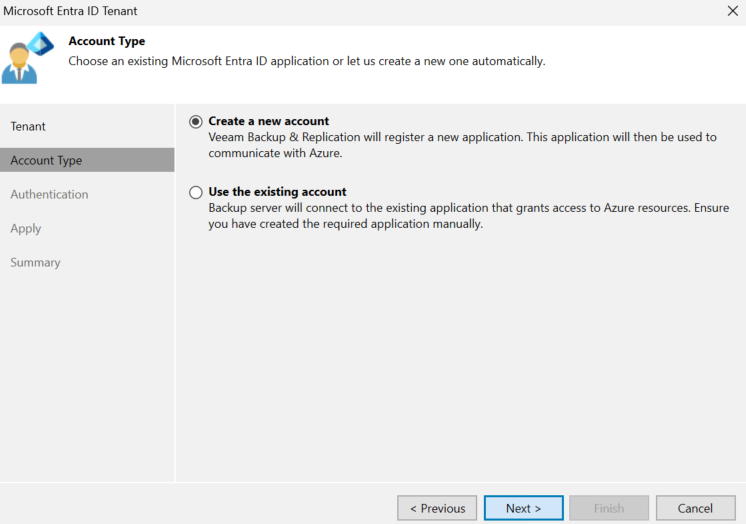
Select Create A New Account and click Next
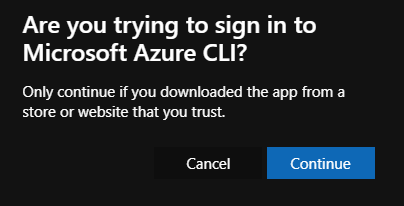
Now click the link or head here
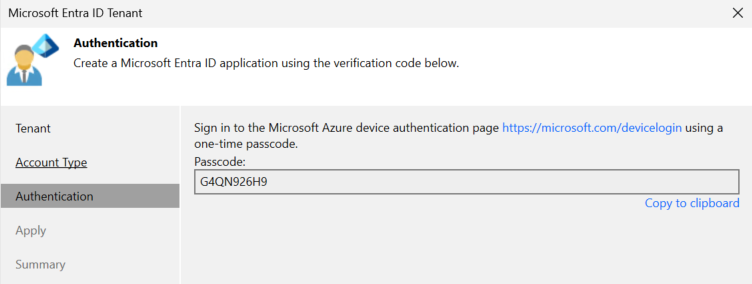
Enter the displayed code and click Next
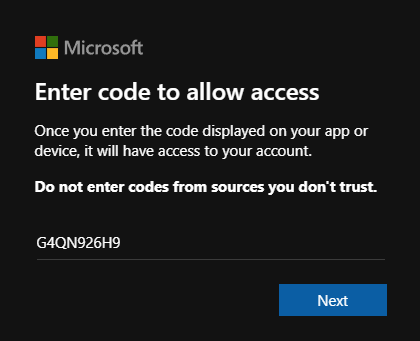
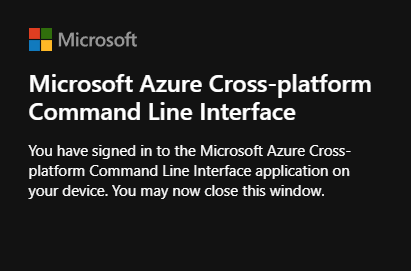
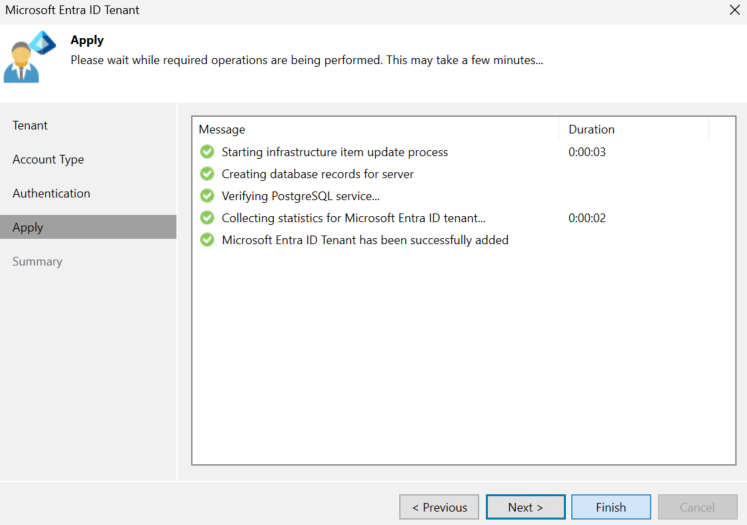
Login with a global admin, this is just for creating the Azure App with the privileges Veeam needs, it will not have global admin and click Continue
It should look like this
Then in Veeam, click Apply
Once thats run, click Finish
1.15.2 – Adding An Identity Backups
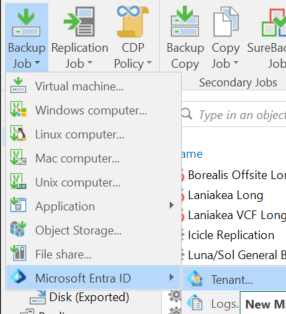
Head to Home in the bottom left
Then click Backup Job/Microsoft Entra ID/Tenant
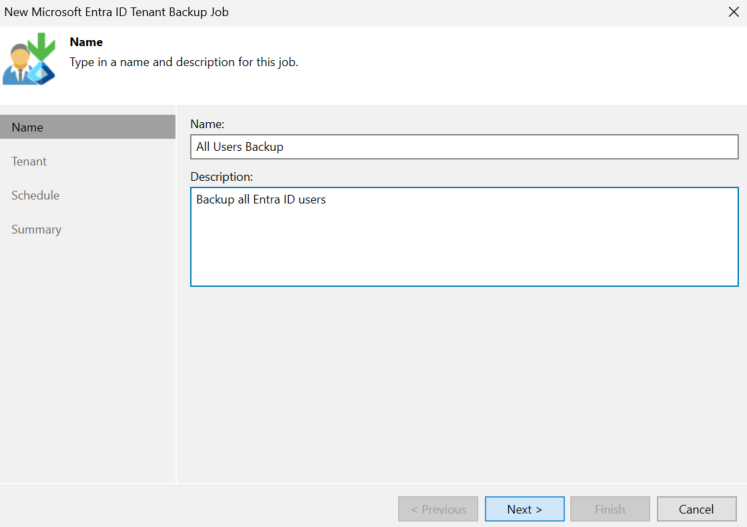
Enter a job name and description, then click Next
Select the tenant to backup, and a retention policy, under Advanced you can enable notifications, though I will keep that disabled as Veeam ONE will manage that, and you can also encrypt the backups if needed
Once you are done, click Next
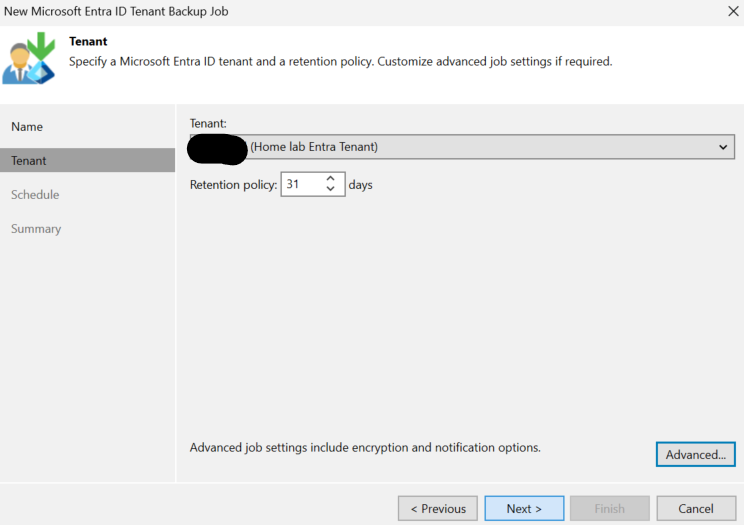
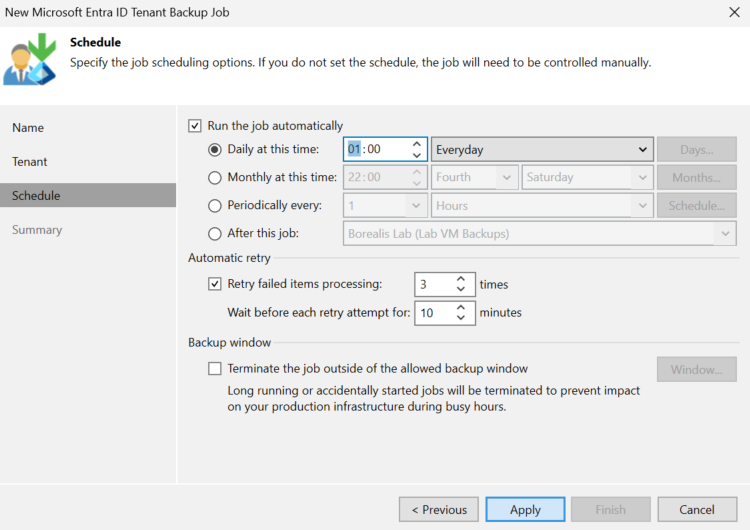
Set a schedule inline with your RPO, and click Apply
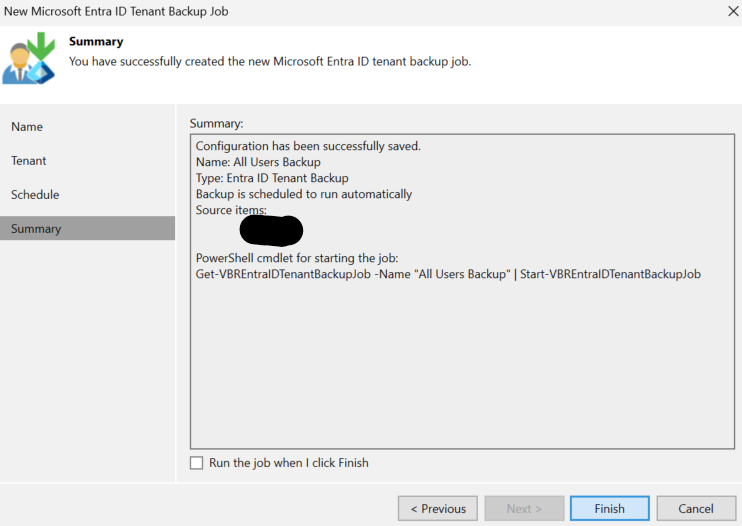
When click Finish
1.15.3 – Restoring Identity Backups
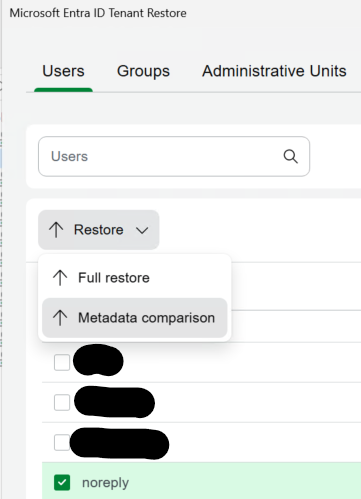
You can then find the backups to restore under Backups/Disk

And then select the backup and right click it and click restore

You can restore users, groups administrative units, roles and applications, when selecting an object, you can click Restore and do a Full Restore for everything, or a Metadata Comparison to restore certain attributes
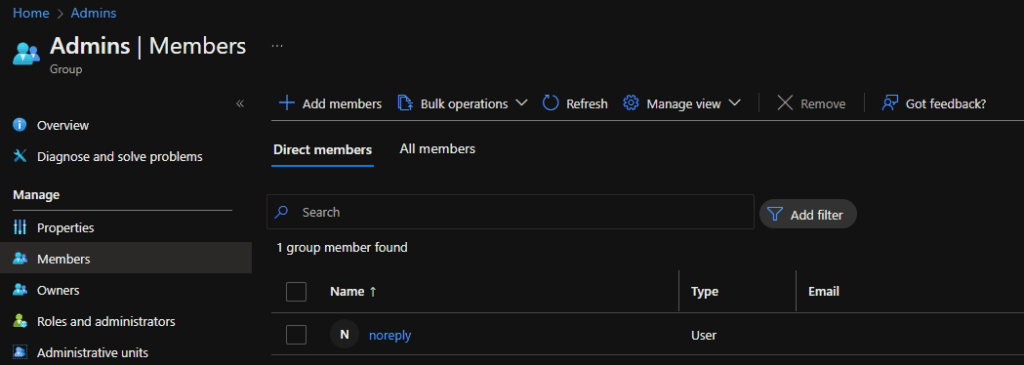
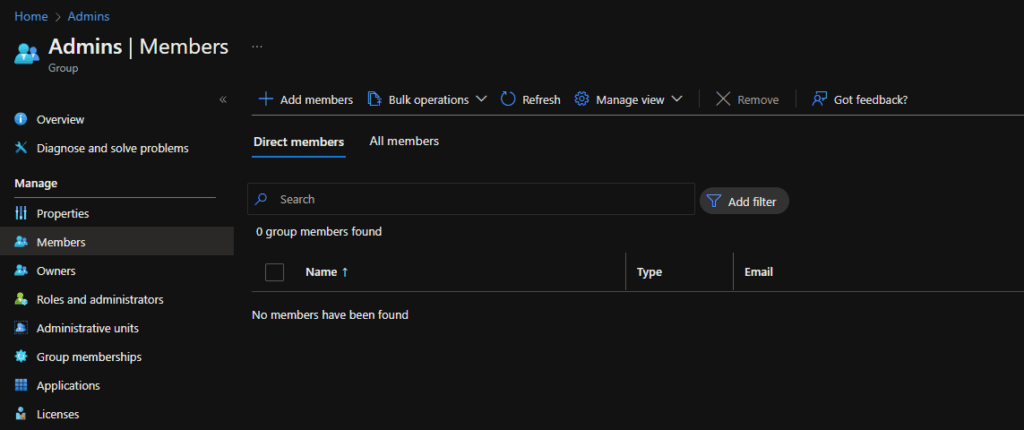
I’ll test this with my noreply account, I added to a group called ‘Admins’ as a test to demonstrate what it can so
I added this account to a group called ‘Admins’ as a test for this we with the toggle to only show changes to the live systems we should see this appear
Eg in Entra
We can see the selected restore point towards the top and a Previous/Next button to switch between them
On my first one the group isnt there, we can see that with the -, and the + for latest/production showing its there
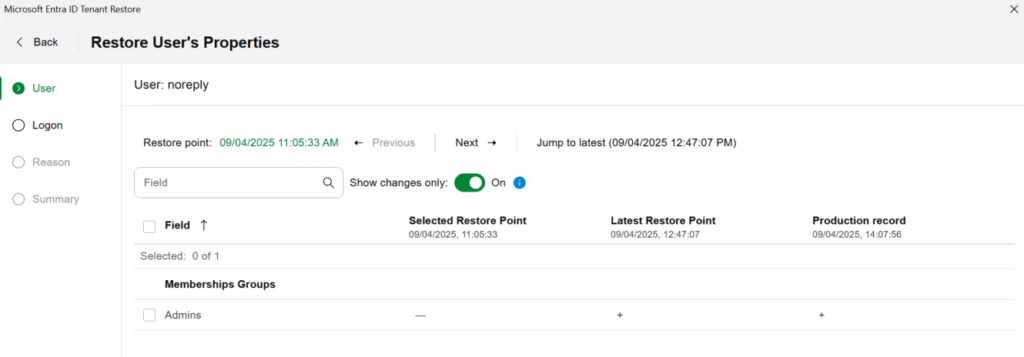
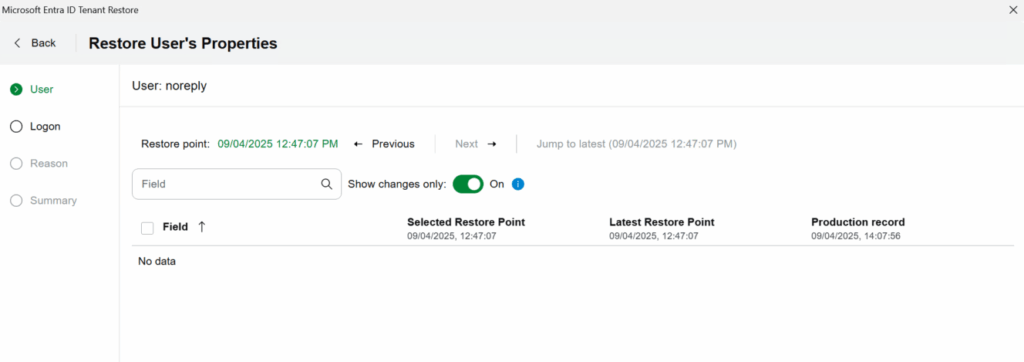
The latest was taken after the change and we can see changes is now empty as they all match
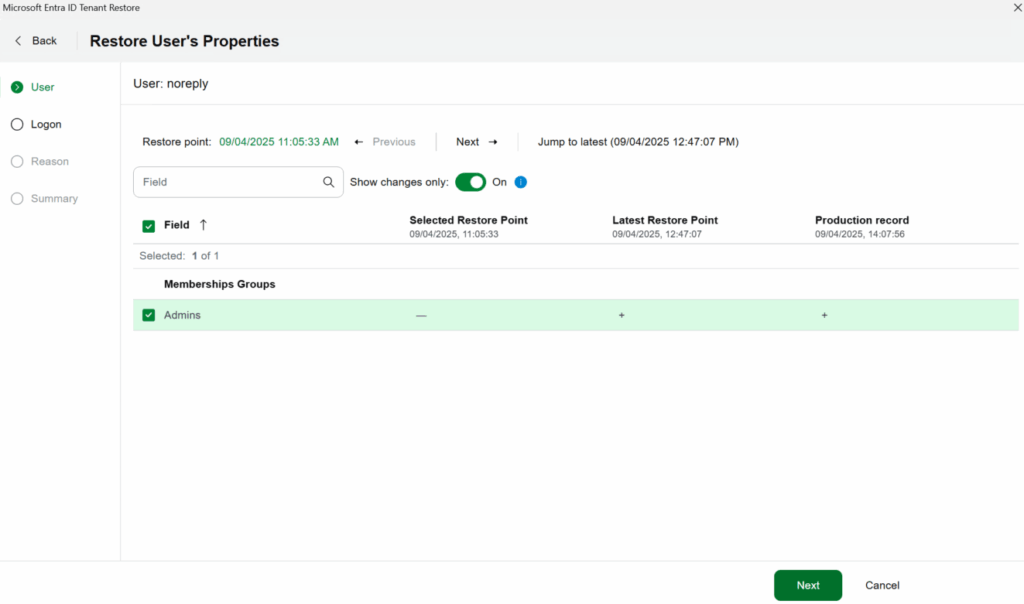
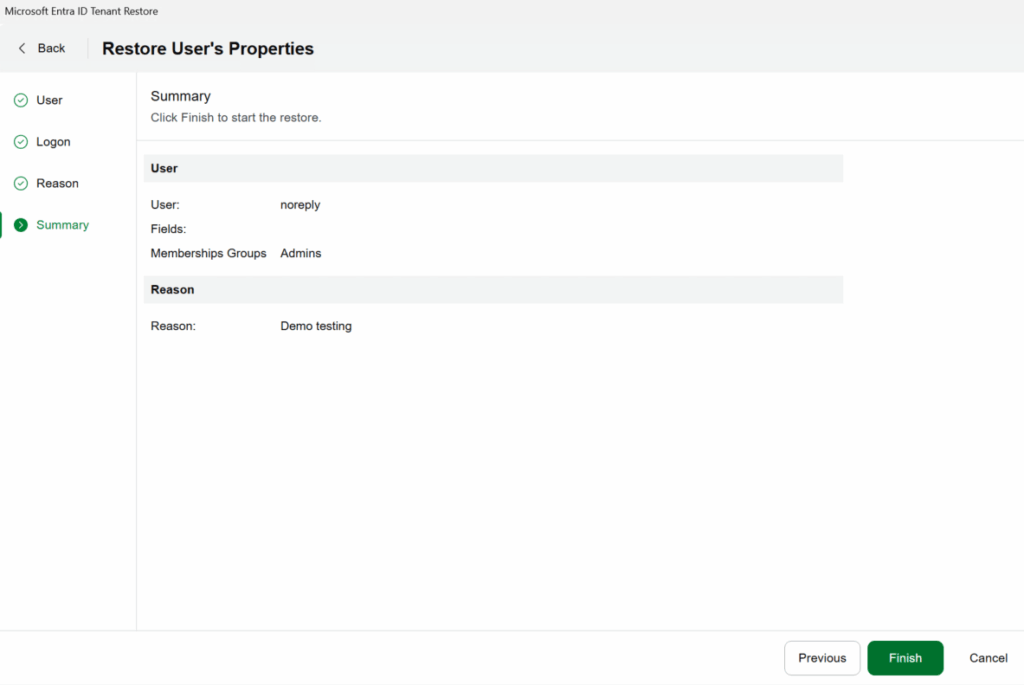
So, lets restore this back in my tenant by checking the box on what we want to restore, this is multi select, and click Next
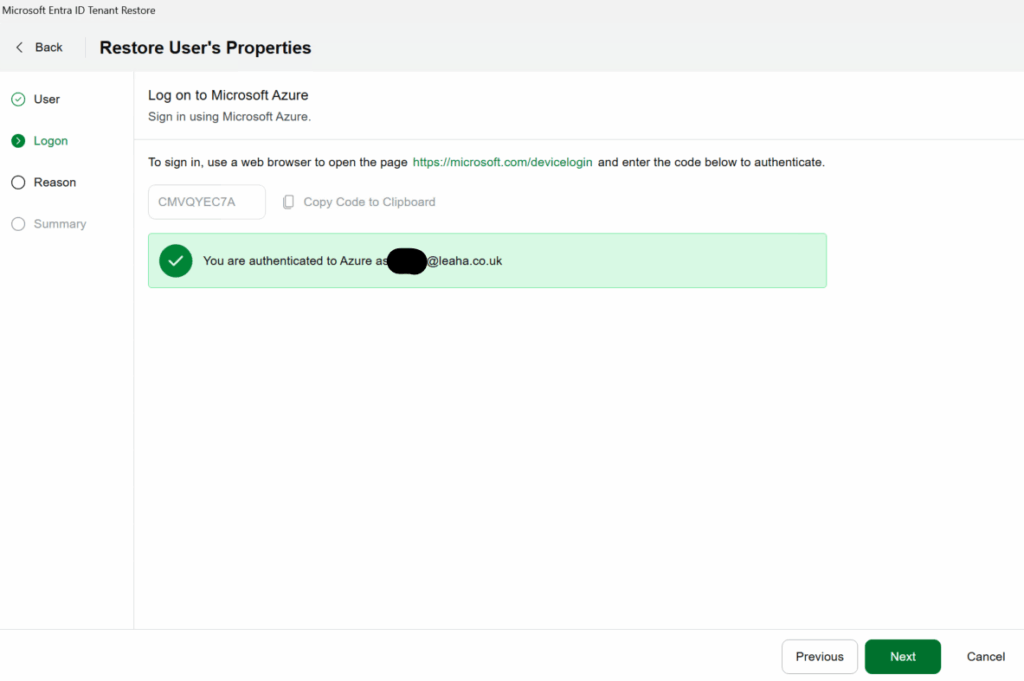
We’ll then need to go here or click the link in the VBR console to use the onscreen code to login
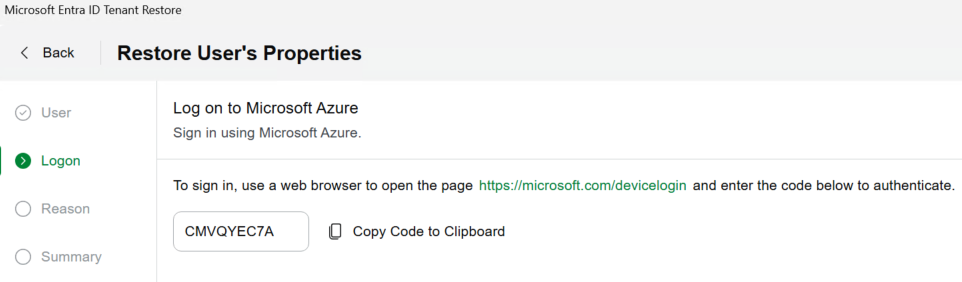
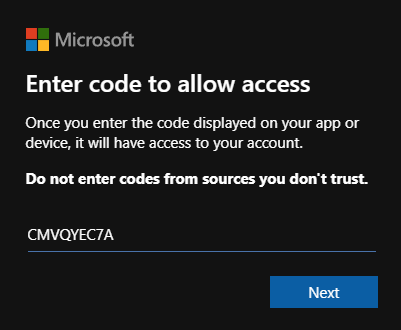
Enter the code onscreen and click Next and sign in as an admin account, the admin account will need the relevant permissions to be able to edit Entra for the changes you select, EG you may need to activate PIM for certain admin roles
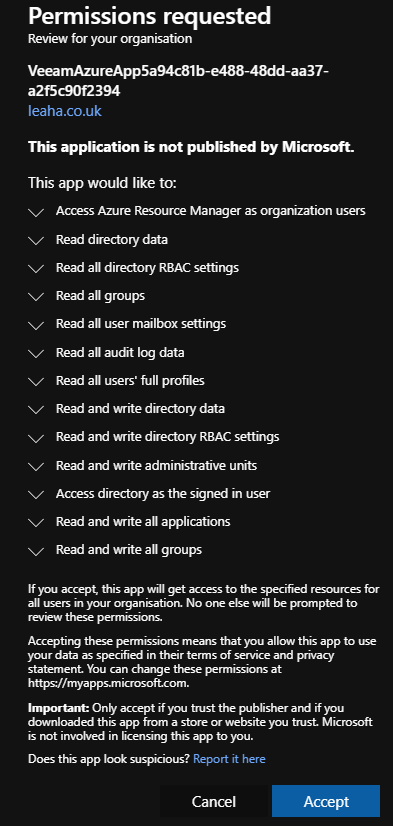
Veeam will say the permissions required, accept them
And it should show this
BR will then show you are authenticated, click Next

VBR will then show you are authenticated, click Next
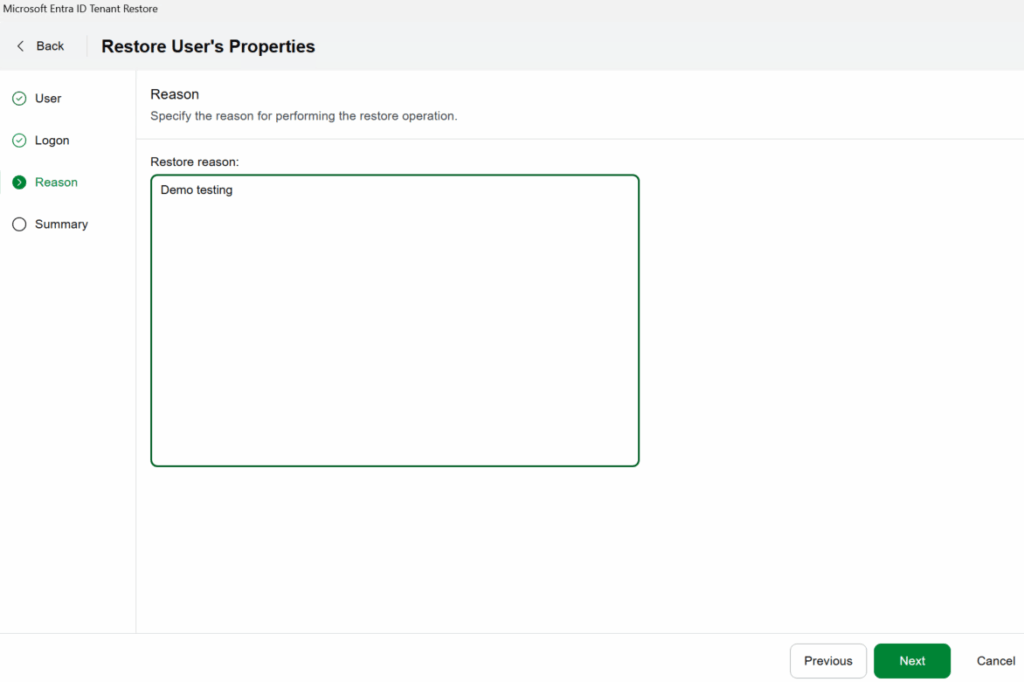
Enter a reason for the restore and click Next
And click Finish
It will pop up to show you the progress
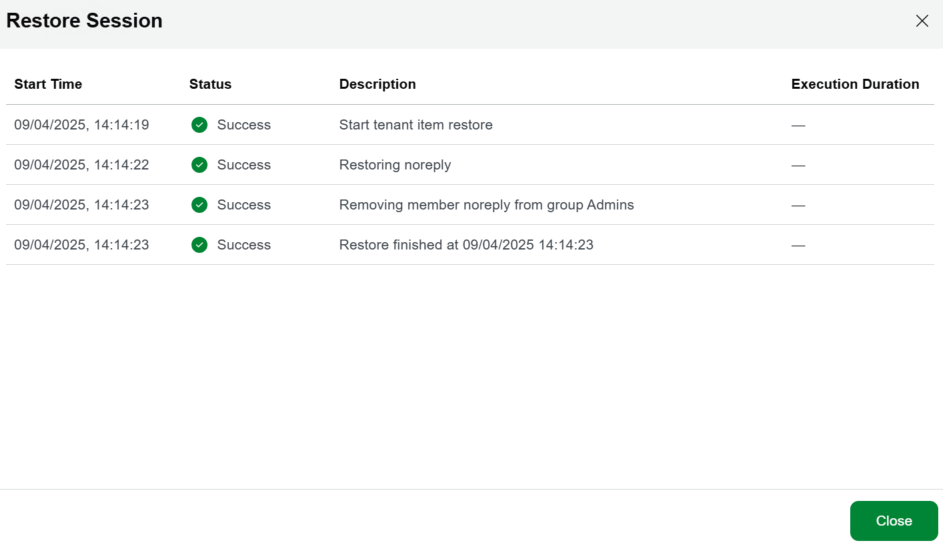
Back in Azure, if I refresh the admin group, we can see this has disappeared
And like with anything in Veeam, we can restore anything at a point, so with the same method, I can use the latest restore point to put the change back

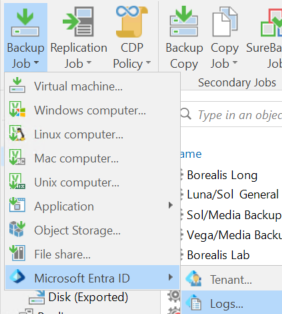
1.15.4 – Adding A Log Job
Head to Home in the bottom left

Then click Backup Job/Microsoft Entra ID/Logs
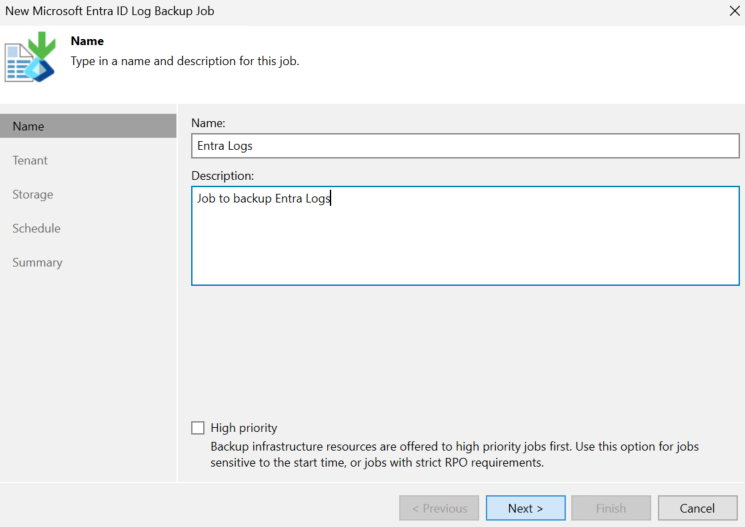
Give the job a name and description
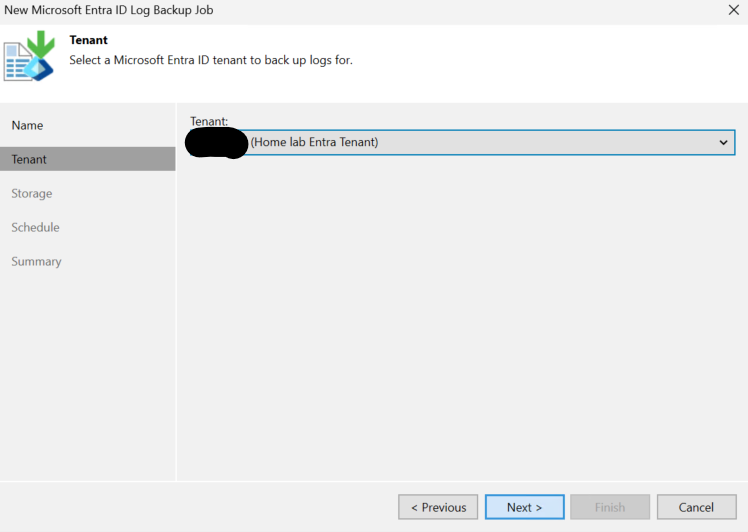
Select the tenant and click Next
Select the repository, ideally a hardened one, and the retention policies and secondary jobs if required
Retention, the Entra default is ~30 days so it would make sense to set this a fair bit higher
Then click Advanced
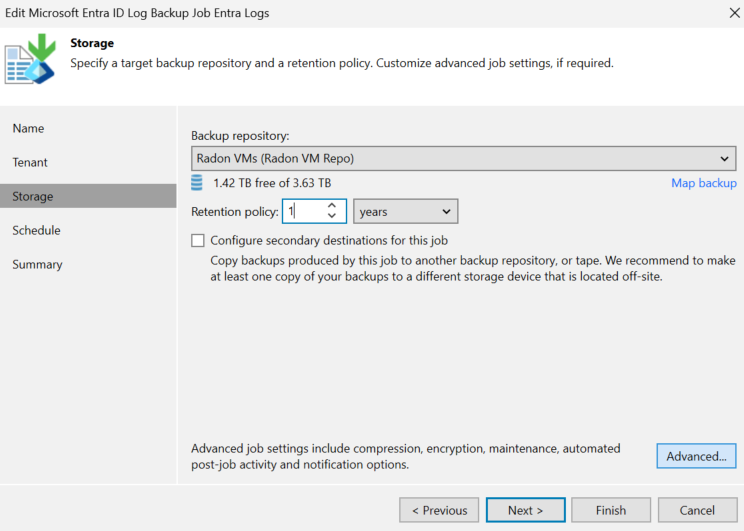
Under Maintenance enable storage level corruption guard and click ok
Then click Next

Set a schedule that aligns with your RPO and click Apply
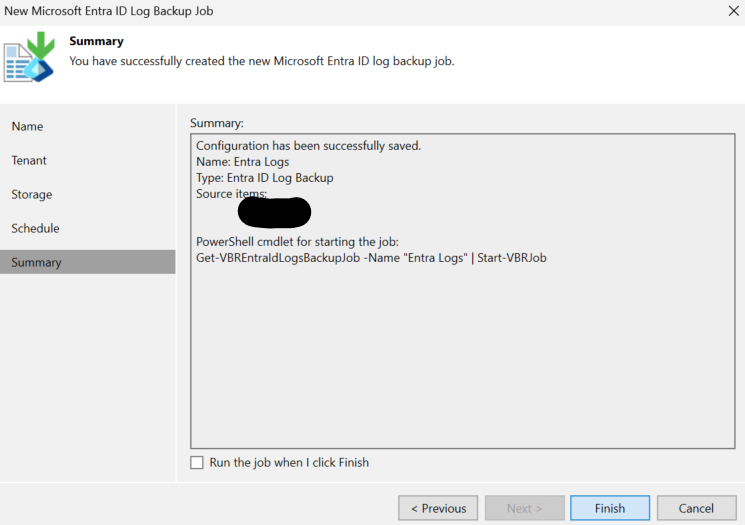
And click Finish
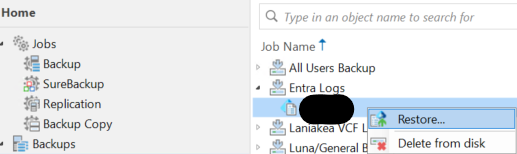
1.15.5 – Restoring Logs
You can then find the backups to restore under Backups/Disk
And then select the backup and right click it and click restore
We can select a log file we want to restore, and click Copy To
Mine only has audit logs as I only have the Entra free license, if you have a full Entra license, you will also get sign in logs
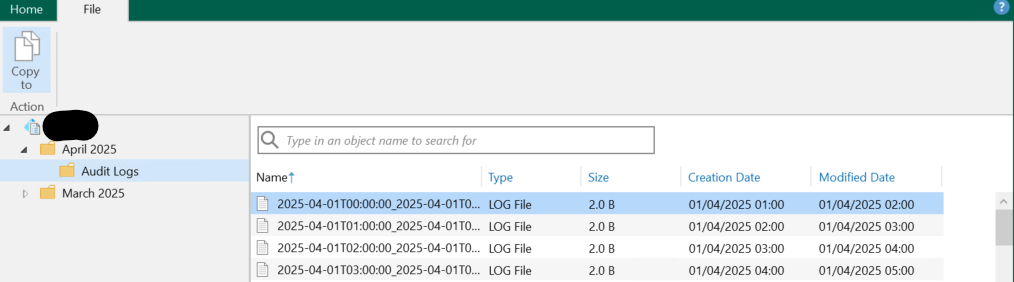
We can select an SMB share we added earlier, as well as the VBR server its self from the Restore To drop down, and the folder path, which is vary depending on the restore location, the click Next

Then click Finish
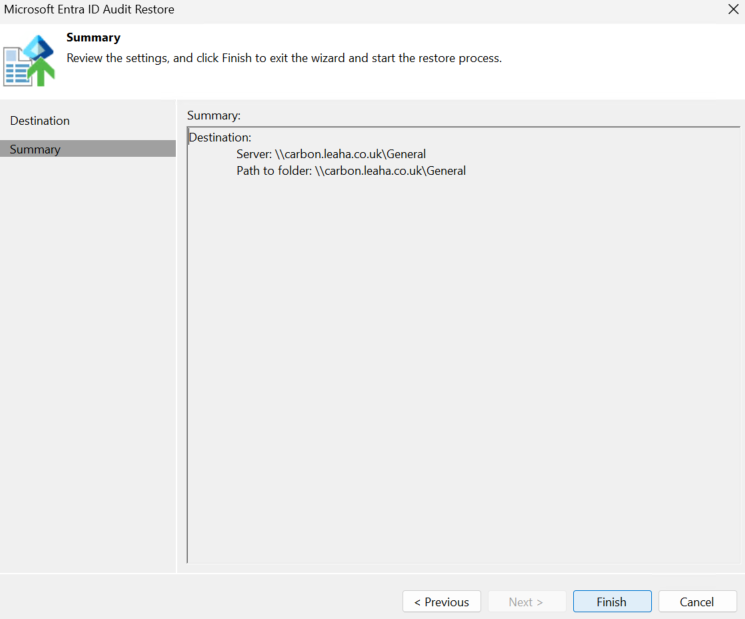
And you can then access the logs from the restored location
1.16 – Wasabi Immutable Cloud Backups
1.16.1 – Creating A Bucket
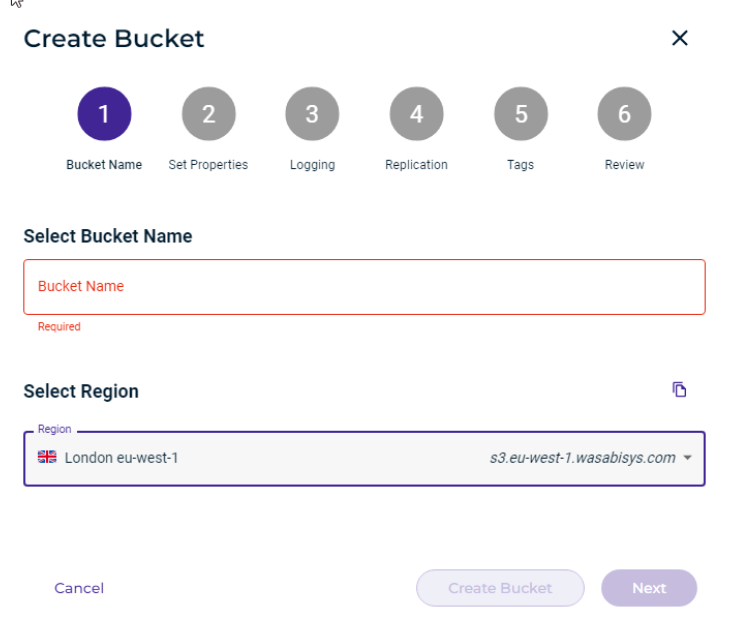
Log into the Wasabi portal, and heat to Buckets, and click Create Bucket
Give the bucket a name, this must be globally unique to all Wasabi buckets, so adding a prefix from your organisation is a good idea to ensure uniqueness
Then select a region and click Next
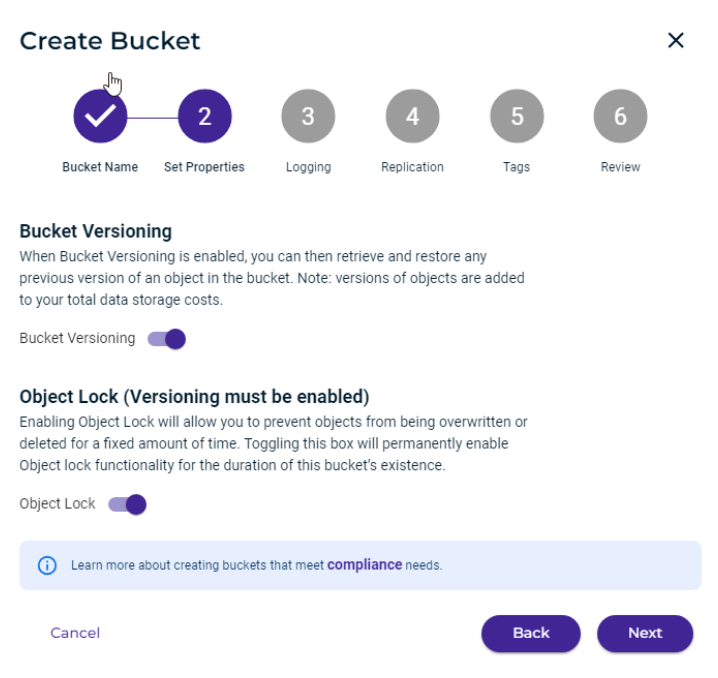
Enable versioning this can use extra storage, if you have enabled that, enable Object Lock this is required for immutability, then click Next
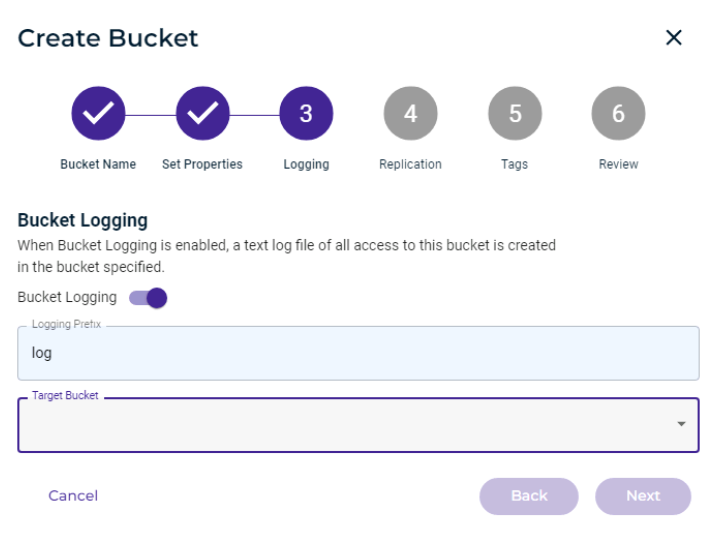
Enable logging giving a prefix, and then selecting your bucket at the bottom and click Next
Enable replication if you have target buckets, though for this case you wont need it likely, click Next
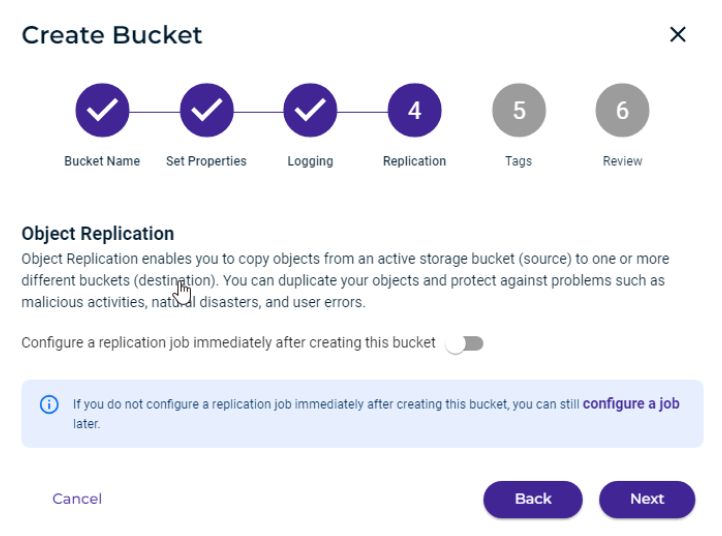
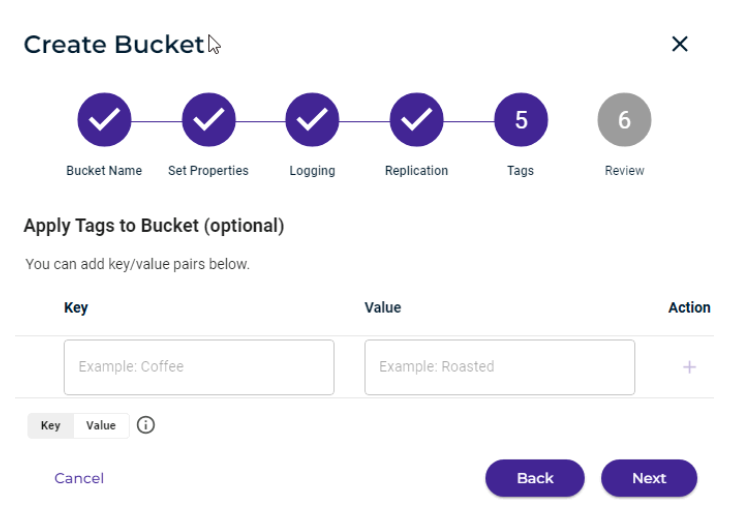
Add tags if you need, I am leaving this blank and clicking next
And click Create Bucket
1.16.2 – Creating Accounts
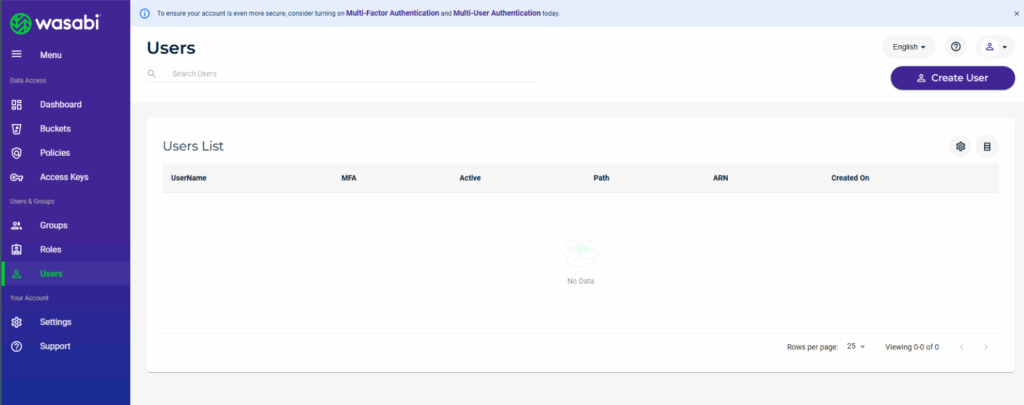
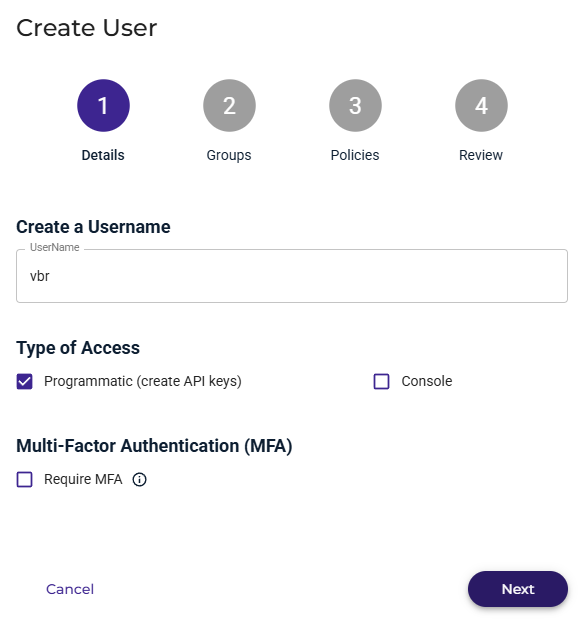
Lets head to Users and click Create User
I am going to allow Programmatic Access, as I will need to keys and click Next
We’ll leave this as stock for now
Click Next here, we will sort permissions is a more secure way later
And click Create User

You will receive a prompt to copy keys, ensure you copy this, it will not be shown again
Once you have them copied, close the window, and click Close
Now we have a separate account without access to the Wasabi console to use for our bucket and auditing purposes
1.16.3 – Locking Down A Bucket
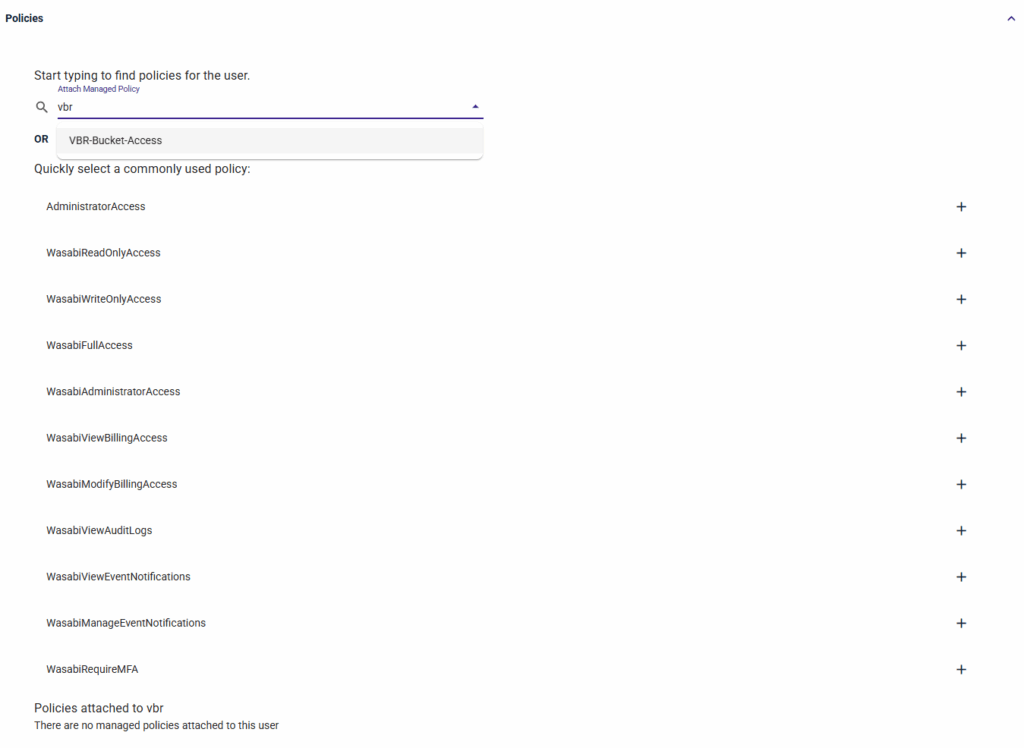
You’ll need a custom policy for this in Wasabi
Click Policies, then Create Policy

Name the policy, and add a description
For the Policy, add the following swapping the ‘yourbuckename’ for the name of your bucket
{
   "Version": "2012-10-17",
   "Statement": [
       {
           "Sid": "VisualEditor0",
           "Effect": "Allow",
           "Action": [
               "s3:GetBucketLocation",
               "s3:GetObject",
               "s3:PutObject",
               "s3:DeleteObject",
               "s3:GetBucketVersioning",
               "s3:GetBucketObjectLockConfiguration",
               "s3:ListBucketVersions",
               "s3:GetObjectVersion",
               "s3:GetObjectRetention",
               "s3:GetObjectLegalHold",
               "s3:PutObjectRetention",
               "s3:PutObjectLegalHold",
               "s3:DeleteObjectVersion"
           ],
           "Resource": [
               "arn:aws:s3:::yourbucketname/*",
               "arn:aws:s3:::yourbucketname"
           ]
       },
       {
           "Sid": "VisualEditor1",
           "Effect": "Allow",
           "Action": [
               "s3:ListBucket",
               "s3:ListAllMyBuckets"
           ],
           "Resource": "*"
       }
   ]
}
And click Create Policy
We can then head back to Users
Click our user

Expand Policies at the bottom and search for the new policy and click it to attach it
Once clicked it will show up at the bottom
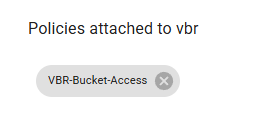
We can then click out, its auto saved
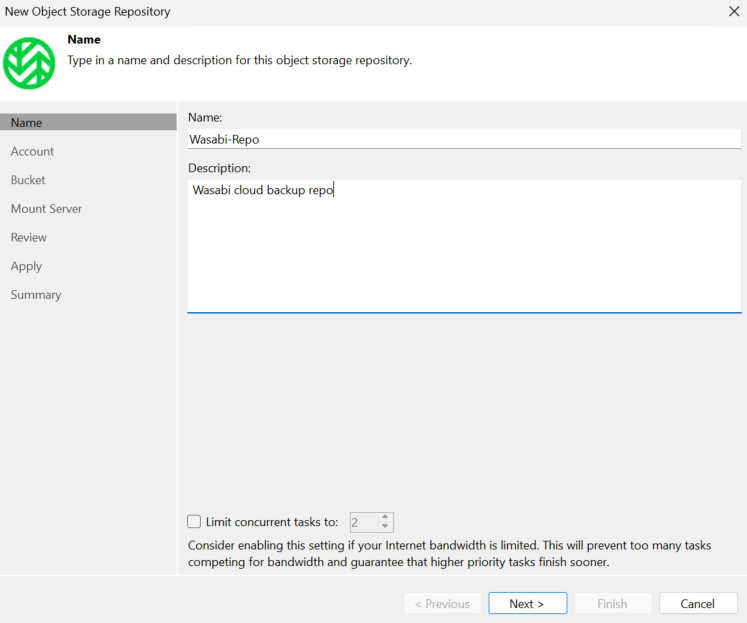
1.16.4 – Adding A Wasabi Repository
Now we have our jobs setup, we also want a copy off site if you dont have a multi site setup, or you are looking for an additional copy on another medium, as part of your 3-2-1 backup policy
In VBR, head to Backup Infrastructure in the bottom left
Click Backup Repositories and then click Add Repository
Then select Object Storage
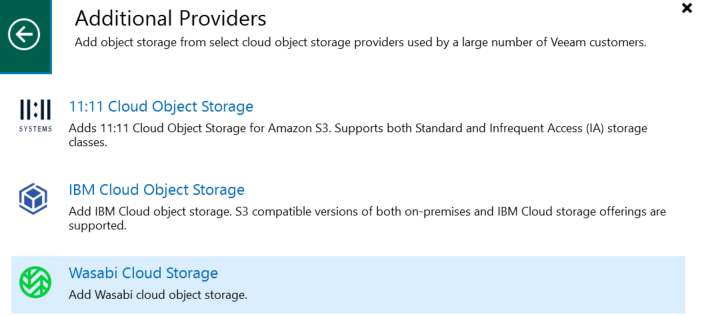
Then Additional Providers
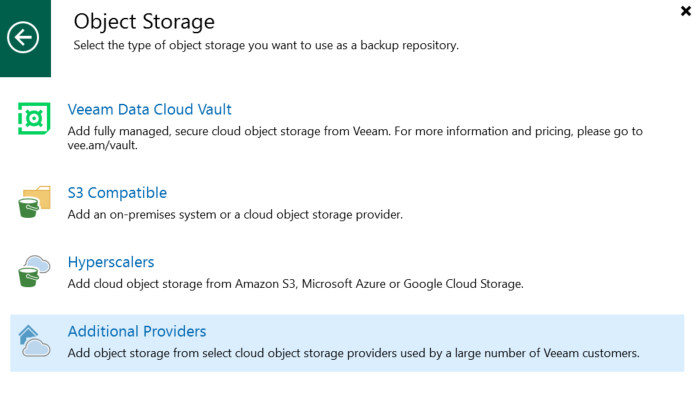
And click Wasabi Cloud Storage
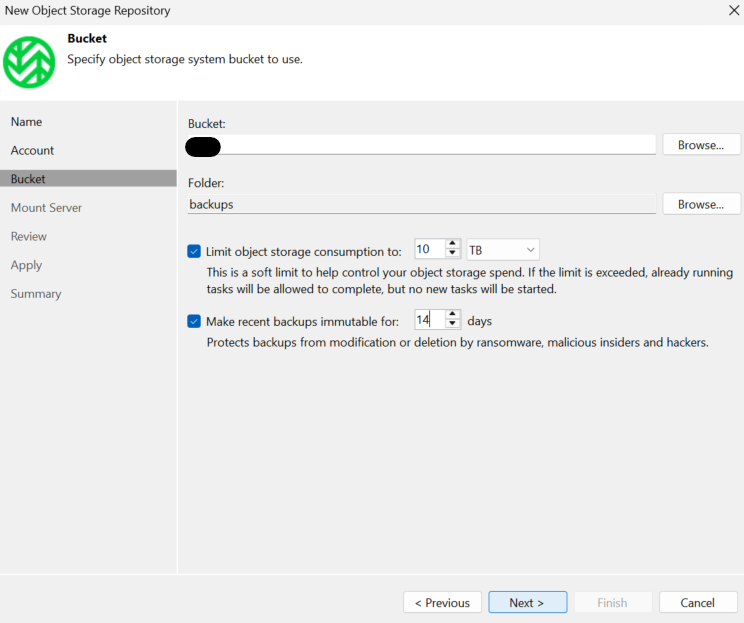
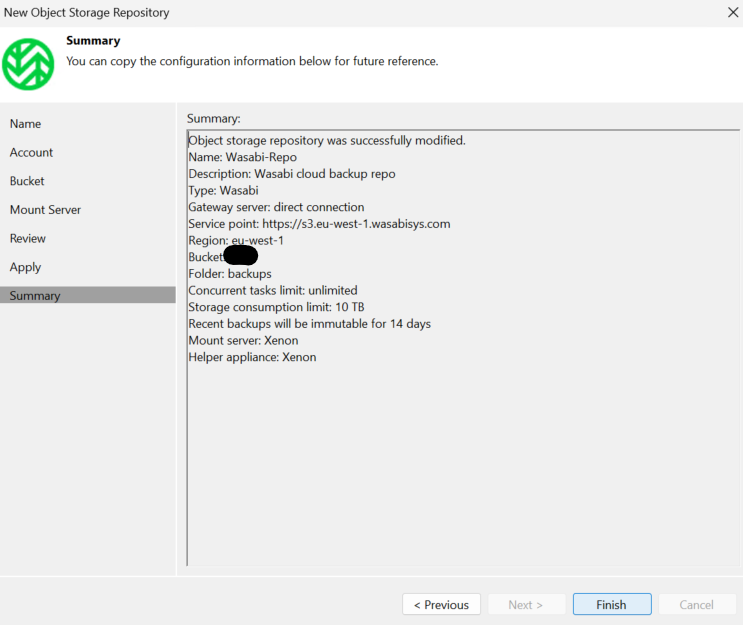
Give the repository a name and description then click Next
For account, enter the region you created your bucket in, this isnt a drop down and needs typing
If you cant remember the Bucket will say in the Buckets menu in the Wasabi portal

Enter the region and click Add
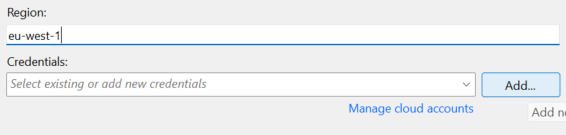
Add the access and secret key you got when the user was created, add a description and click ok

Then click Next

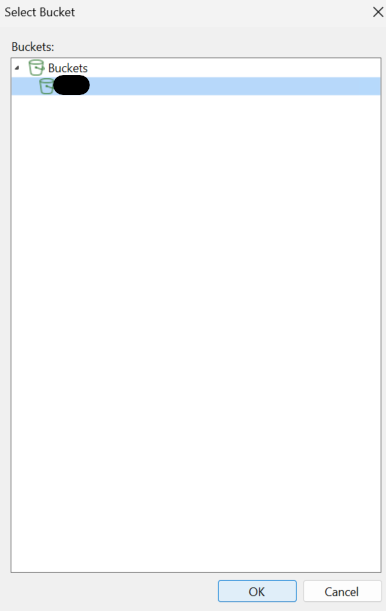
Click Browse under the Bucket section
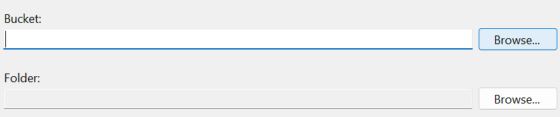
Select your bucket, which should be the only one from the custom policy we created and click ok
Click Browse under Folder

Click New Folder
Give it a name and select it, then click ok
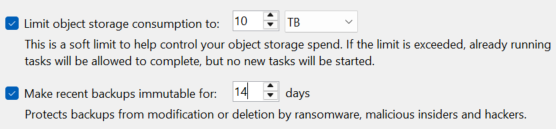
I recommend limiting the object storage consumption to the amount you have paid for, so it doesnt go over for any reason
And set immutability for however long you want it for, usually the duration of your daily backups, as GFS backups have immutability applied for their entire retention
Then click Next
Click Apply
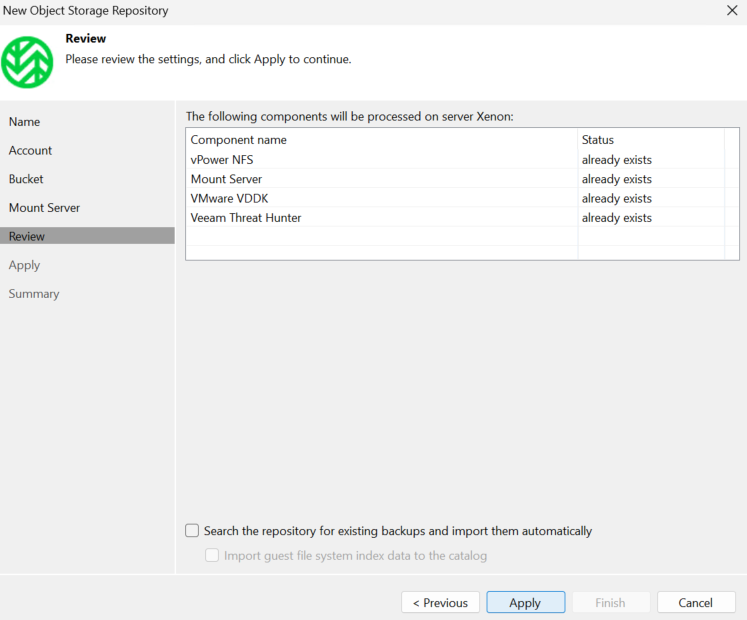
Once thats done click Next
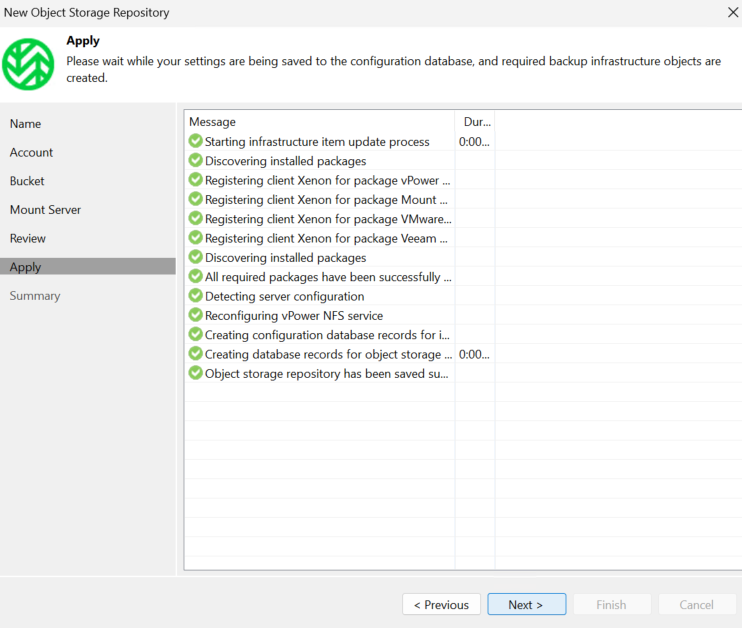
And then Finish
We now have a secure bucket that only the user we created can access and we can use this like any other repository for backup/copy jobs
1.17 – Security Compliance
1.17.1 – Enabling MFA/Auto Logoff
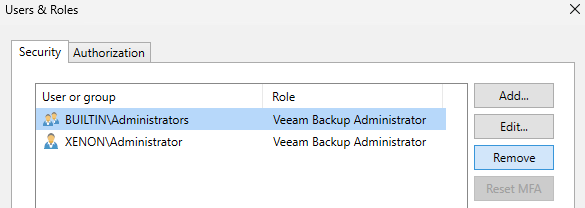
MFA should be enabled on all VBR accounts, except a break glass service account excluded from the MFA, as a last resort or if MFA breaks, this should not be regularly used
To do this, click the three lines in the top left, and click Users & Roles
By default, it will look something like this
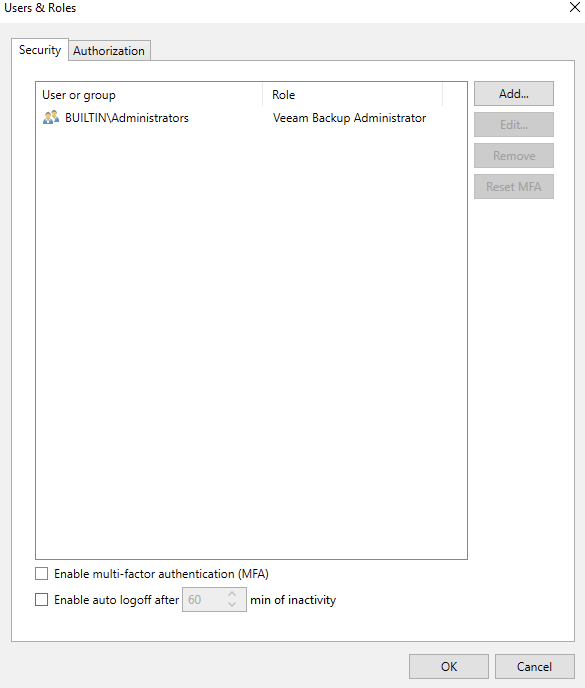
You’ll first want to remove any groups, the default is an administrator group for local admins, as MFA doesnt work with them
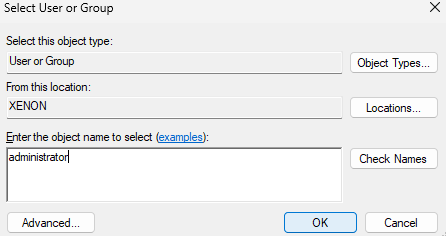
Simply click add, then browse
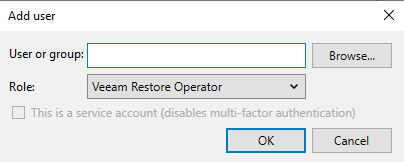
Type in the name of an account in the default admin group you want to have access to VBR
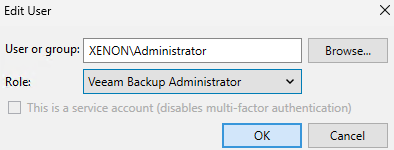
Then click ok, then change the role to Veeam Backup Administrator and click ok
You’ll need to repeat this for all account you want to access Veeam, setting the role accordingly
Once all accounts are added, click the group you had, in my case, just the default administrators group, then click remove
Once they have all been removed you can enable MFA at the bottom, and set an auto log off timer, eg 30/60 mins

This will force all users to setup MFA when they log in, but before you click ok to apply, you should also have a break glass account incase of any issues that doesnt use MFA with a secure password, the default administrator is a good candidate for this, but a custom named account is the best
To disable MFA for an account click the account and click edit
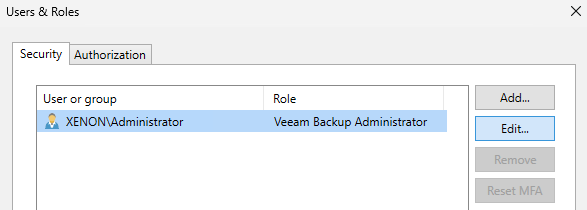
And check the box for this is a service account, MFA is no longer applied to the account
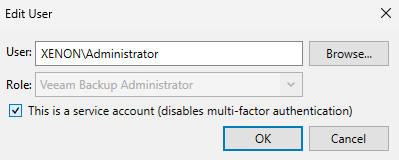
Click ok, and then ok again to apply changes
Then add additional user account, that are not service account for additional users, using the Add button, these should have MFA enabled, and will need adding via computer manager first, like a standard local Windows user
1.17.2 – Enabling Password Loss Prevention
Password loss prevention can only be enabled by Veeam enterprise manager, which should be a separate server
Veeam outline this requirement here
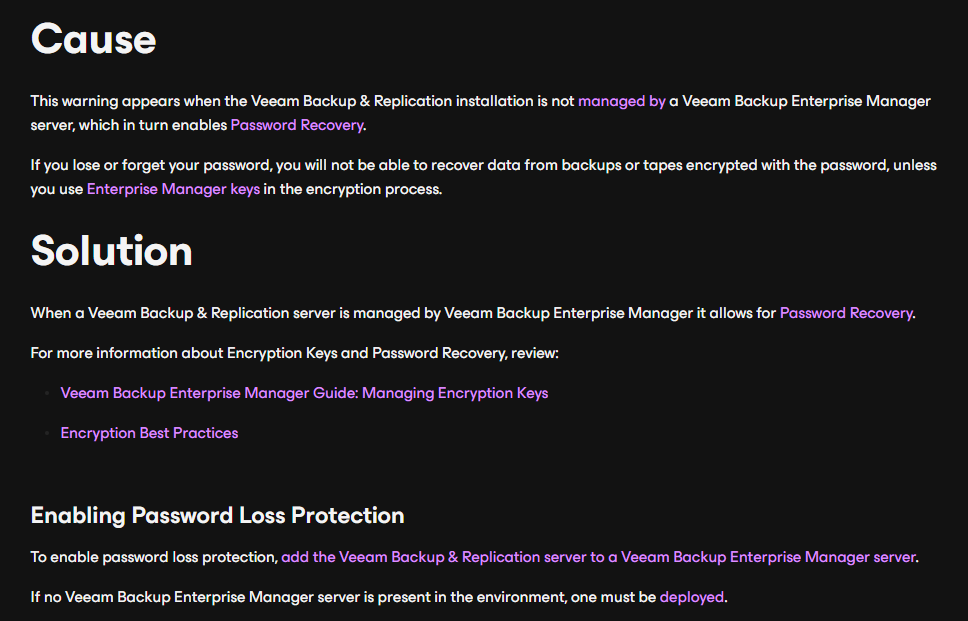
This will be automatically resolved when we install VEM later in this guide, so we can leave this for now
1.17.3 – Disabling Insecure Versions Of TLS/SSL
Before proceeding, power the VBR server off and take a snapshot in case the registry changes cause any issues
First, you will want to disable TLS 1.0 and 1.1, this can easily be done via PowerShell, as an admin with the following
reg add "HKEY_LOCAL_MACHINE\SYSTEM\CurrentControlSet\Control\SecurityProviders\SCHANNEL\Protocols\TLS 1.0\Server" /v Enabled /t REG_DWORD /d 0 /f

reg add "HKEY_LOCAL_MACHINE\SYSTEM\CurrentControlSet\Control\SecurityProviders\SCHANNEL\Protocols\TLS 1.0\Server" /v DisabledByDefault /t REG_DWORD /d 1 /f

reg add "HKEY_LOCAL_MACHINE\SYSTEM\CurrentControlSet\Control\SecurityProviders\SCHANNEL\Protocols\TLS 1.0\Client" /v Enabled /t REG_DWORD /d 0 /f

reg add "HKEY_LOCAL_MACHINE\SYSTEM\CurrentControlSet\Control\SecurityProviders\SCHANNEL\Protocols\TLS 1.0\Client" /v DisabledByDefault /t REG_DWORD /d 1 /f

reg add "HKEY_LOCAL_MACHINE\SYSTEM\CurrentControlSet\Control\SecurityProviders\SCHANNEL\Protocols\TLS 1.1\Server" /v Enabled /t REG_DWORD /d 0 /f

reg add "HKEY_LOCAL_MACHINE\SYSTEM\CurrentControlSet\Control\SecurityProviders\SCHANNEL\Protocols\TLS 1.1\Server" /v DisabledByDefault /t REG_DWORD /d 1 /f

reg add "HKEY_LOCAL_MACHINE\SYSTEM\CurrentControlSet\Control\SecurityProviders\SCHANNEL\Protocols\TLS 1.1\Client" /v Enabled /t REG_DWORD /d 0 /f

reg add "HKEY_LOCAL_MACHINE\SYSTEM\CurrentControlSet\Control\SecurityProviders\SCHANNEL\Protocols\TLS 1.1\Client" /v DisabledByDefault /t REG_DWORD /d 1 /f
Then we will want to disable SSL 2.0 and 3.0 with
reg add "HKEY_LOCAL_MACHINE\SYSTEM\CurrentControlSet\Control\SecurityProviders\SCHANNEL\Protocols\SSL 2.0\Client" /v Enabled /t REG_DWORD /d 0 /f
reg add "HKEY_LOCAL_MACHINE\SYSTEM\CurrentControlSet\Control\SecurityProviders\SCHANNEL\Protocols\SSL 2.0\Client" /v DisabledByDefault /t REG_DWORD /d 1 /f
reg add "HKEY_LOCAL_MACHINE\SYSTEM\CurrentControlSet\Control\SecurityProviders\SCHANNEL\Protocols\SSL 2.0\Server /v Enabled /t REG_DWORD /d 0 /f
reg add "HKEY_LOCAL_MACHINE\SYSTEM\CurrentControlSet\Control\SecurityProviders\SCHANNEL\Protocols\SSL 2.0\Server /v DisabledByDefault /t REG_DWORD /d 1 /f
reg add "HKEY_LOCAL_MACHINE\SYSTEM\CurrentControlSet\Control\SecurityProviders\SCHANNEL\Protocols\SSL 3.0\Client" /v Enabled /t REG_DWORD /d 0 /f
reg add "HKEY_LOCAL_MACHINE\SYSTEM\CurrentControlSet\Control\SecurityProviders\SCHANNEL\Protocols\SSL 3.0\Client" /v DisabledByDefault /t REG_DWORD /d 1 /f
reg add "HKEY_LOCAL_MACHINE\SYSTEM\CurrentControlSet\Control\SecurityProviders\SCHANNEL\Protocols\SSL 3.0\Server" /v Enabled /t REG_DWORD /d 0 /f
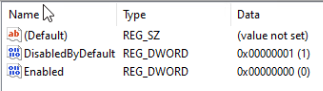
reg add "HKEY_LOCAL_MACHINE\SYSTEM\CurrentControlSet\Control\SecurityProviders\SCHANNEL\Protocols\SSL 3.0\Server" /v DisabledByDefault /t REG_DWORD /d 1 /fWe can then verify these changes have been made by heading here in Regedit
Computer\HKEY_LOCAL_MACHINE\SYSTEM\CurrentControlSet\Control\SecurityProviders\SCHANNEL\Protocols
And we’ll see the folders for the SSL/TLS changes we have made
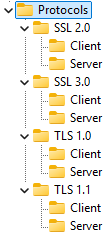
And they should look like this
With DisabledByDefault on 1
And enabled on 0
You will need to reboot to apply these changes as they are registry edits
1.17.4 – Security Script
You can take another powered off snapshot before proceeding here, but the one before the registry changes is also fine
There is no undo command for this script, if something breaks, you will need to manually revert them, restore the snapshot, or the configuration backup
For the rest of the security Analyzer bits, this can be done automatically, Veeam have a handy script for meeting the goals for the Security Analyser in VBR 12, you can find it here
But ensure you have read the entire article
First things first, ensure you have a config backup taken within the last 24 hours, and that no jobs are due to run in the next couple of hours
Ideally, take a powered off snapshot of the VM too, if applicable
Now thats done, we can move forward with the script
Its worth noting, as Veeam mention in the KB, this is irreversible, you’ll need to manually revert the changes, hence the powered off snapshot and the config backup
Once youve downloaded and extracted the ZIP folder with the script, open PowerShell as an admin and run the following to allow execution
Set-ExecutionPolicy UnrestrictedAnd selecting ‘a’ when prompted
Then run the script, for example, I put mine in the downloads folder, so I ran
cd C:\Users\Administrator\Downloads\KB4525-1.8Then run
& '.\Veeam Security & Compliance Analyzer 1.8.ps1'Press R here to run

It will then generate a report of the security analyzer, showing what is passed and fine, and what is not implemented
Some bits cannot be fixed here, eg MFA and SMTP email notifications, and these are noted by not having the ‘Use Apply Configurations Option To Fix’ if you havent already done them
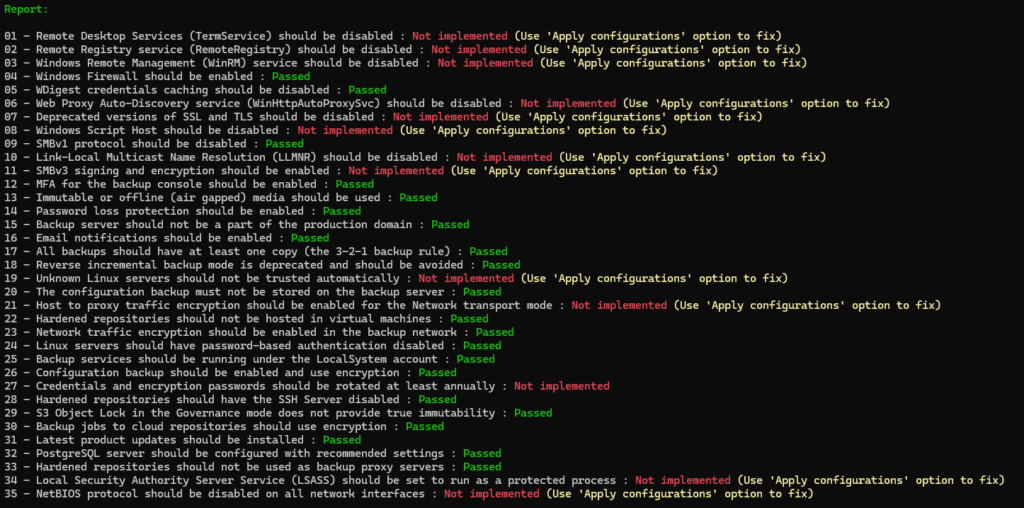
You can use option 2 to apply all fixes, or option 3 to apply specific fixes
Part of this will disable RDP, so ensure you have console access via your Hypervisor, or IPMI in the case of a physical server
I have gone for option 2 to fix all issues
Once thats done, we can run option 1 to re check the compliance report, some bits so need a reboot
You RDP session will not be terminated if its active on reboot
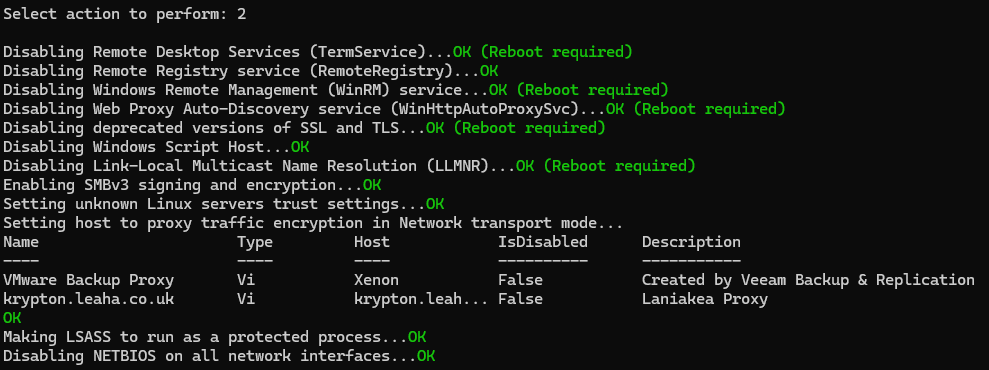
We can see with option 0 a lot has been applied, but we do need to reboot, and all we will be left with is the annual credential rotation which you would need to do manually
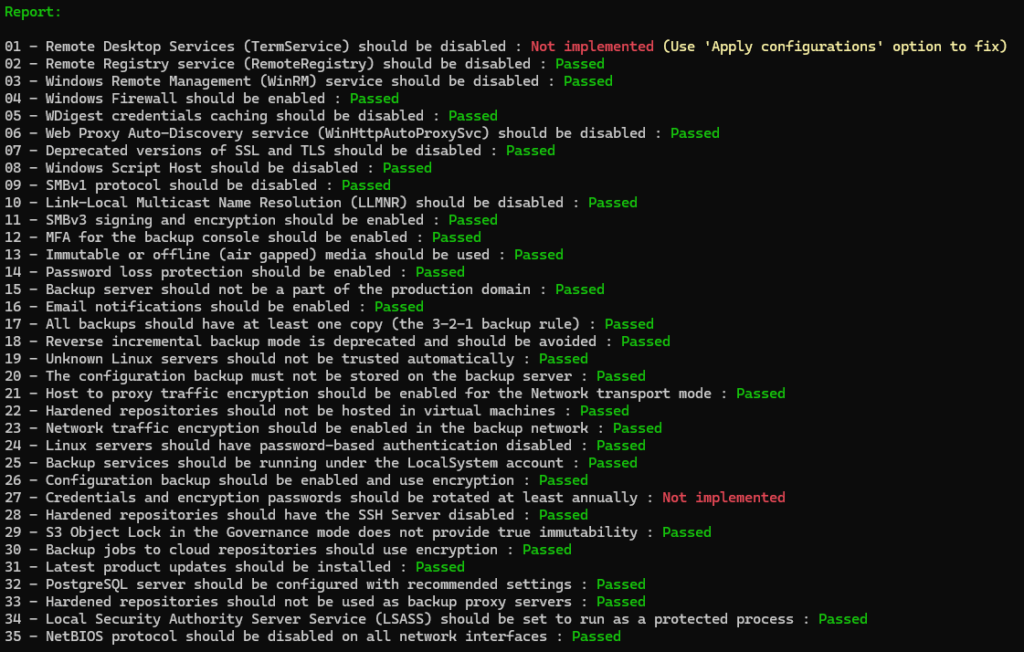
Following the reboot, RDP service will be fixed, with the exception of password loss prevention
I havent rotated my passwords, so thats something I need to manually do
Then set the Execution policy back to the default with
Set-ExecutionPolicy DefaultAnd selecting ‘a’ if prompted
Assuming you have done everything above, everything should now be green when ran from the GUI under Home, on the top bar
1.18 – Application Restores
Veeam has the ability to do application restores from backups to connected production systems, its worth noting you will need application aware processing enabled for this
This is very helpful for restoring a single object to production in a backup without needing to restore the entire VM
We can do item level restores for the following
- AD Objects
- GPO
- Exchange Mailboxes (On Prem)
- SQL
- SharePoint (On Prem)
- Oracle
The premise applied to all objects, but this example will use AD, and I will be looking at the restore to any DC for an object
SO we will be checking which DCs have our FSMO roles, and using a DC that doesnt have any to show that you dont need to use the server owning specific rules and the restored object will get replicated
I have a three node replicated AD setup in my lab with a couple of admin accounts
Firstly, lets delete an object, I have two domain admins, my account, ltadmin, and a generic account, sysadmin, lets delete the sysadmin account
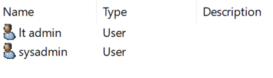
Now I just have ltadmin
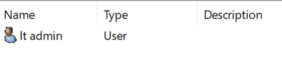
Now, lets head to Veeam to look to restore that object, head to Home in the bottom left
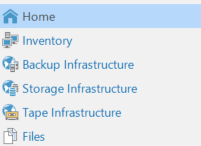
Click into either Disk or Disk (Copy) under Backups, this will depend on what backup we will from, search for the VM, in our case, DC2, and click the VM

Click Application Items, then the application you want to recover from, in this case, its AD
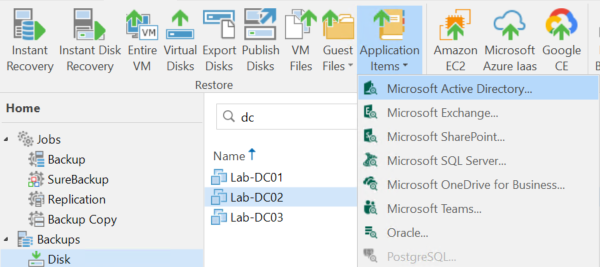
Pick a restore point, then Next
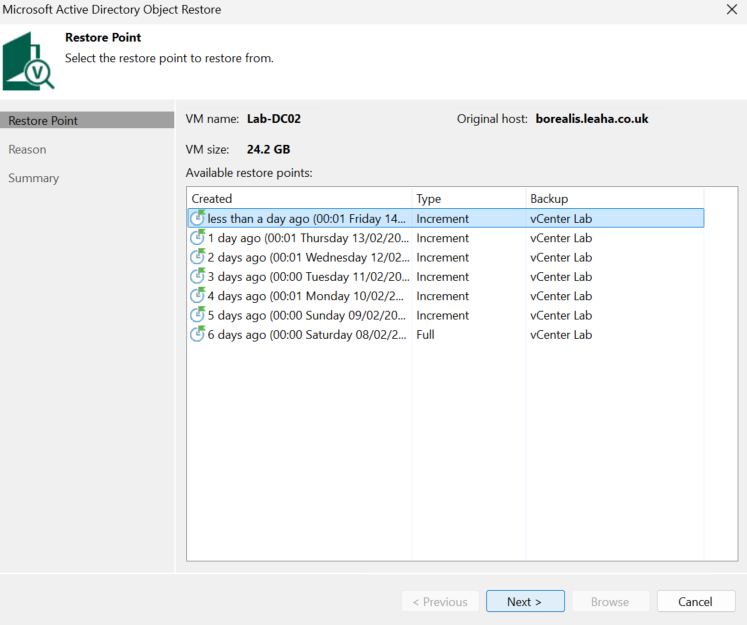
Optionally, add a reason and click Next
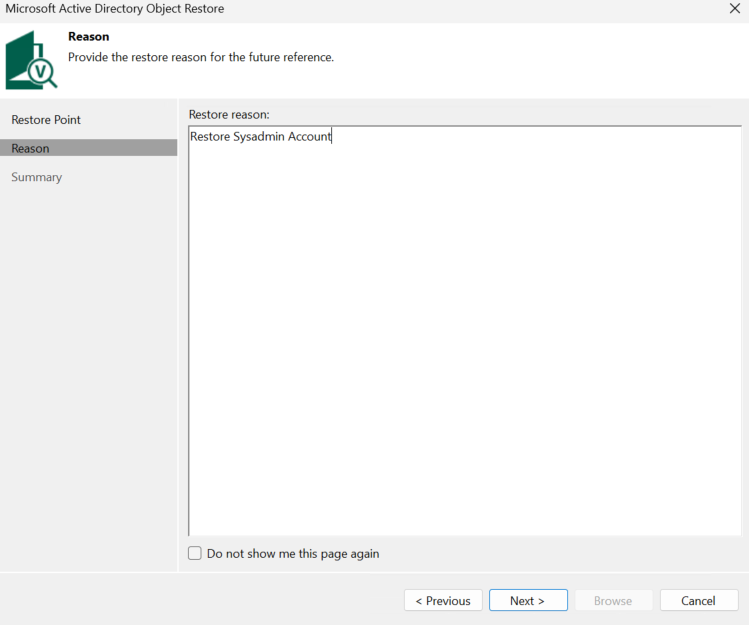
Then Browse
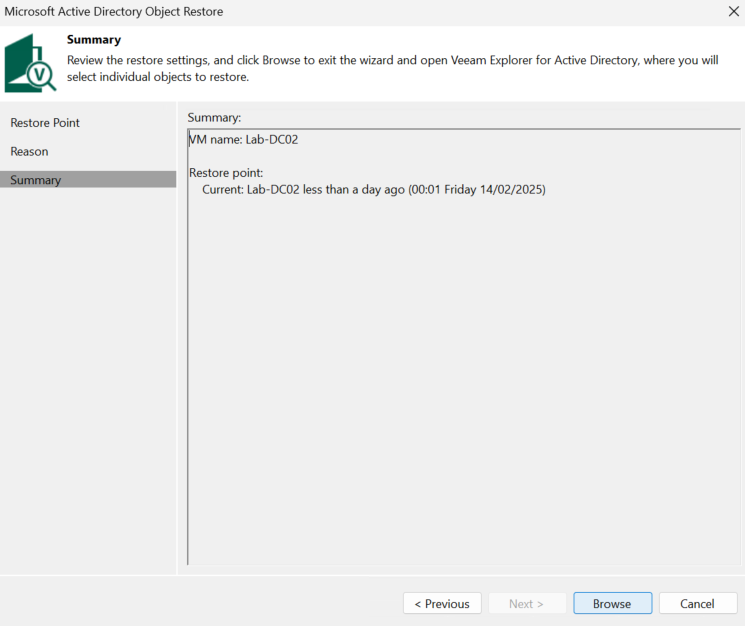
Wait for it to mount the backup
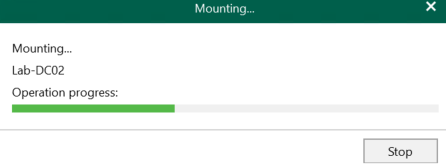
Lets select the OU with our deleted user, we can see they exist in the backup
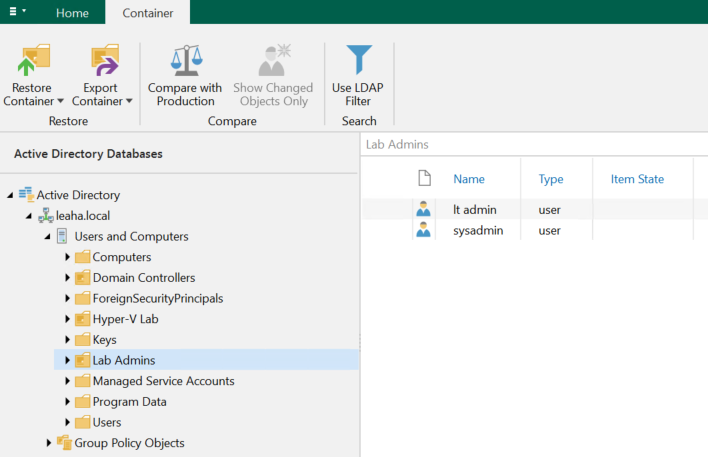
We can also use Compare With Production to see object states, the deleted account is in a tombstone state
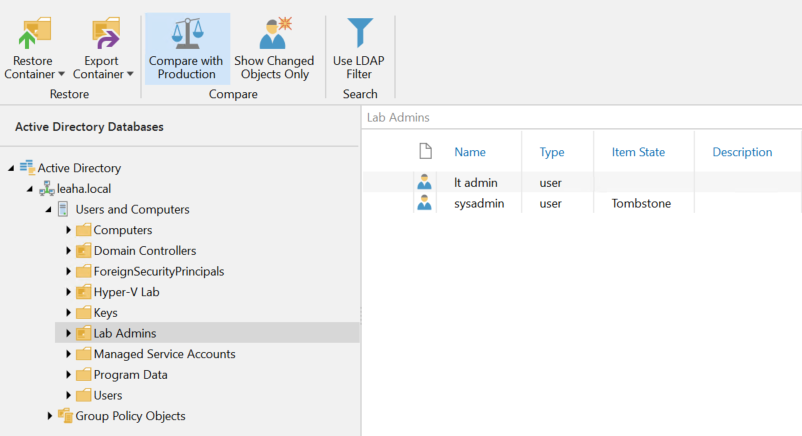
And Show Changed Objects Only will show us objects in backups that are not in production, or differ, so if you have a lot of users this is helpful as you wont be interested in accounts that are the same
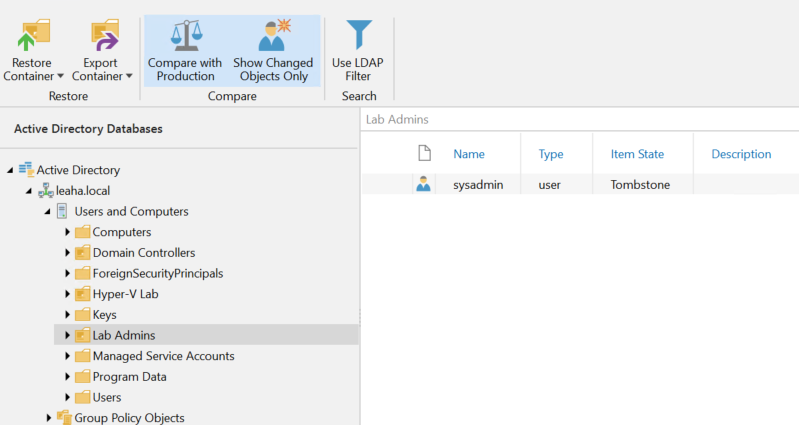
You can select the object, or even the entire OU to restore, but lets click the sysadmin user I deleted and click Restore Object
Oddly its saying the original location is DC03, so I can just click that and it will go back to DC3, or I can use Restore Objects To
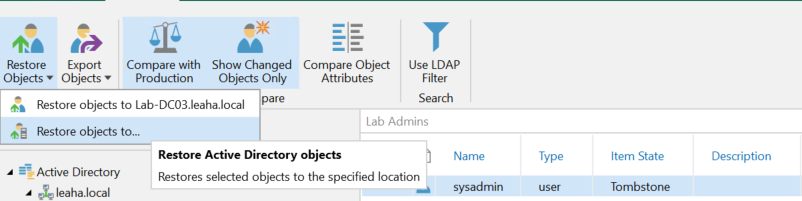
The first option will just restore it
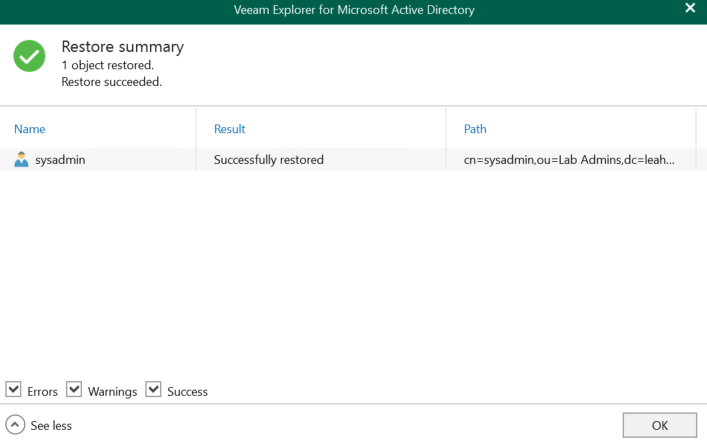
And immediately, on all DCs, the object is available again, and that user can sign in again
If we opt for the latter we can set a server to restore, the entire domain, and we can specify a domain admin for the restore and click Next
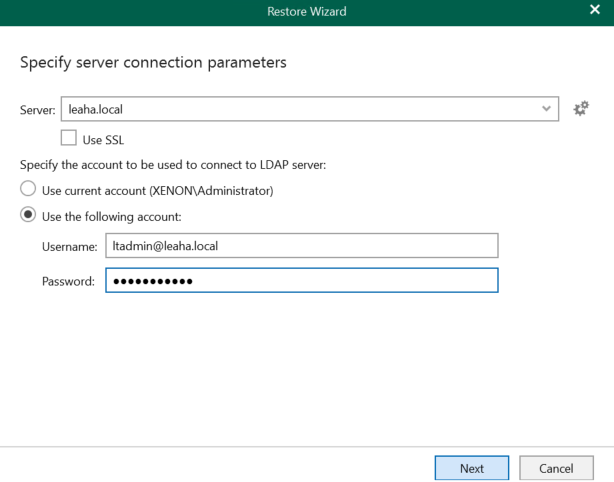
We can restore to the original OU, or select another and click Next
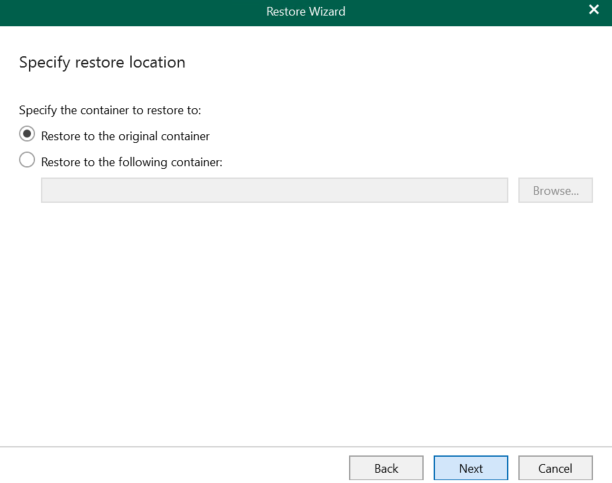
You can also set the password for the user if needed and click Next
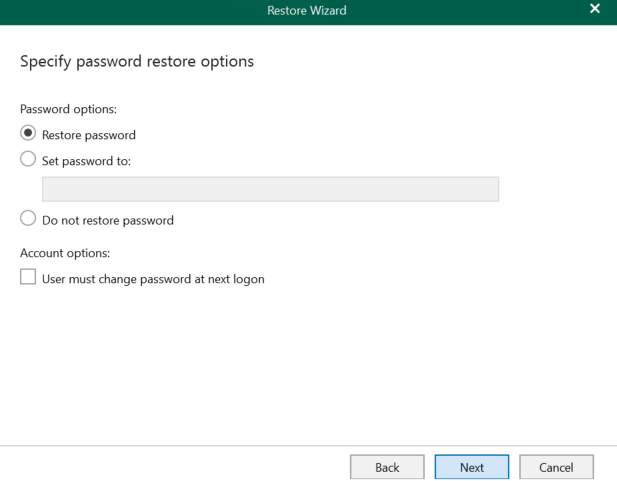
We can also enable/disable the account
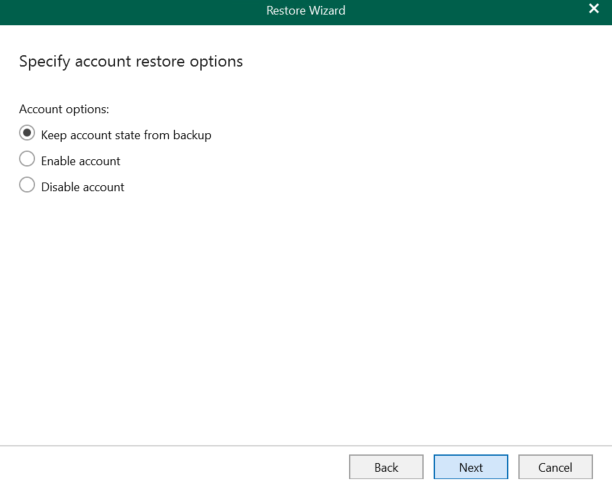
And we get some extra options, but I would leave these at stock, and click Restore
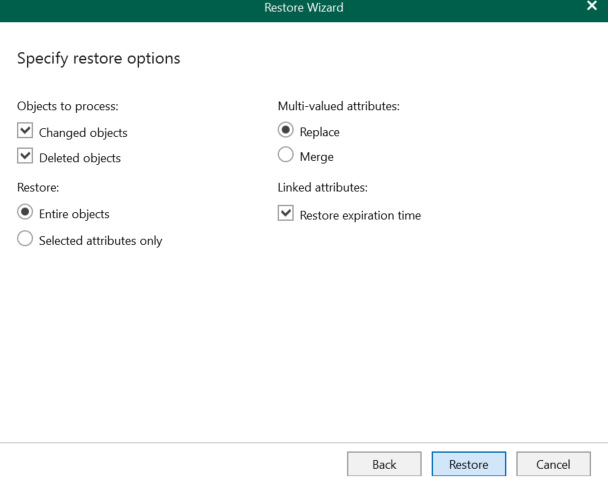
1.19 – Using Instant Recovery
Instant Recovery is a feature that allows a VM to be published from the backup repository, to help speed up the VM performance, write caching is setup, either by an explicit datastore in VMware, or a storage location in Hyper-V
This allows very quick access, sub 5 minute, to a VM thats been backed up should it be deleted or restored for any reason
This is mainly helpful for large servers, eg a ~5TB file server where restoring it can take hours, and you need access immediately
This isnt really worth it for VMs up to 100GB as restoring that can take under 10 mins
In this example, we will take a server I want to access and the original is still in place
Click Home in the bottom left
Select Backups/Disk, or Backups/Disk (Copy), expand the job and find you VM, then right click it and click Instant Recovery
Here we will use a web server which has been powered off due to an issue
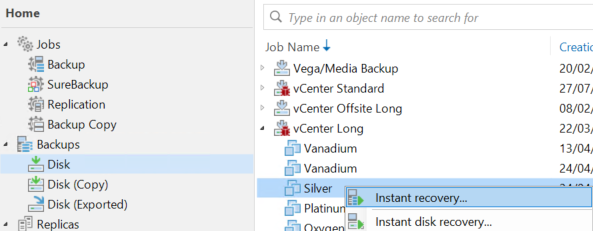
Select the restore point, the default is the latest, but you can change that using the Point button, then click Next
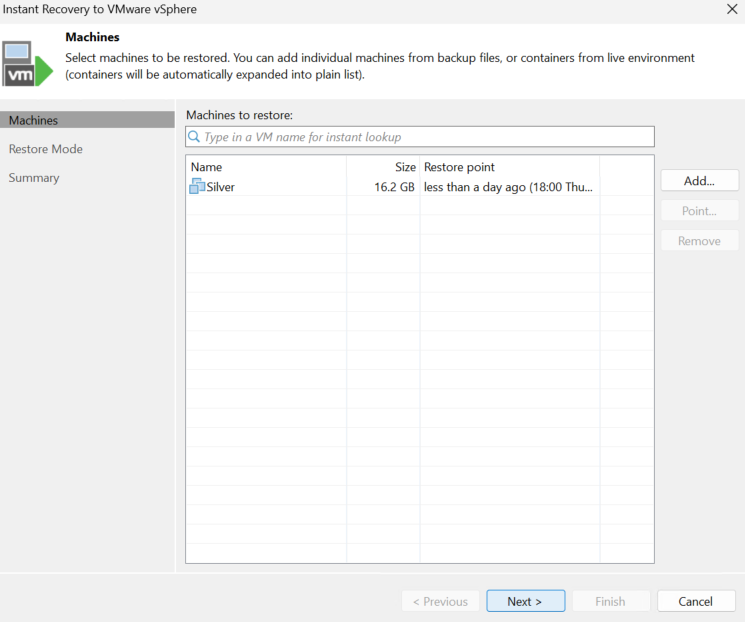
We can either restore the VM to the original location, this is best when the source VM has disappeared, as I have the old VM, and we dont want to delete it, which restore to original location will do, we want to recover it with a new name, so I will be going with the second option and leaving the box to restore tags enabled, then click Next
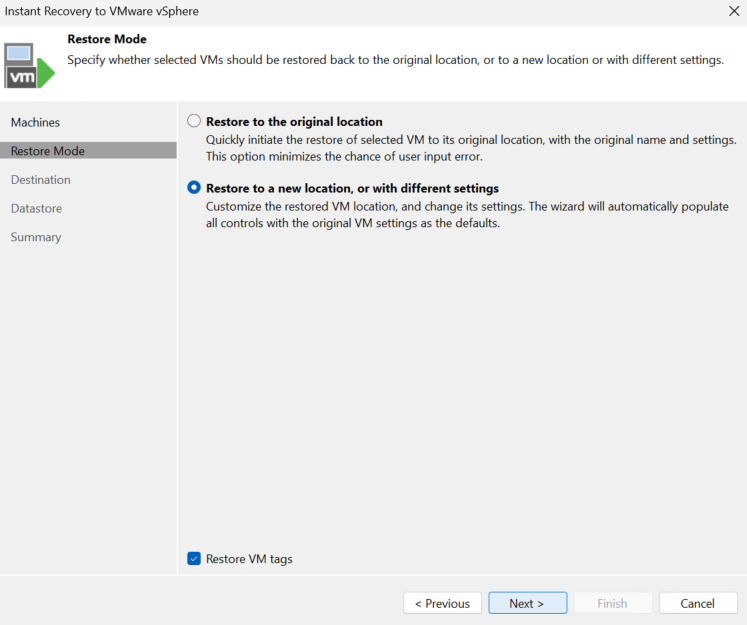
Change the restored VM name, and click next
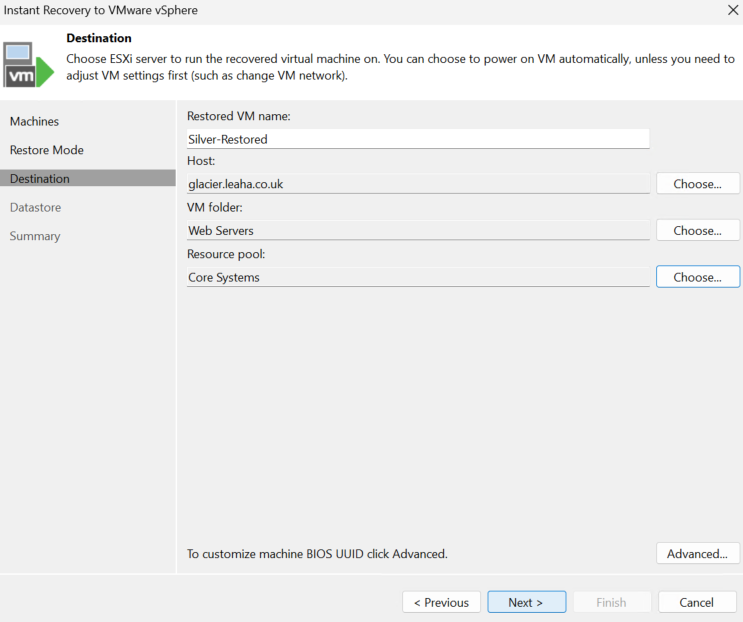
Check the box to redirect write cache, this massively improves VM performance, a data store should then be automatically populated, if not you can choose another and click Next
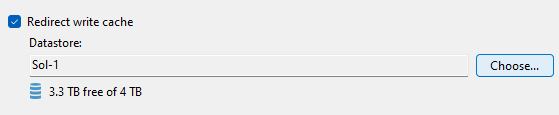
Select the datastore and click ok, this will want to be another datastore to where the VM wants to end up, as it causes issues with the migration and can force smart switch which we dont want
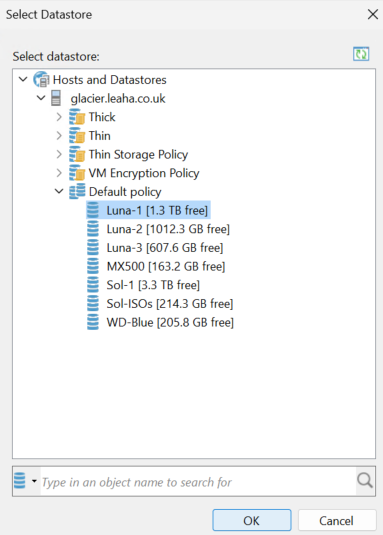
Then click Next
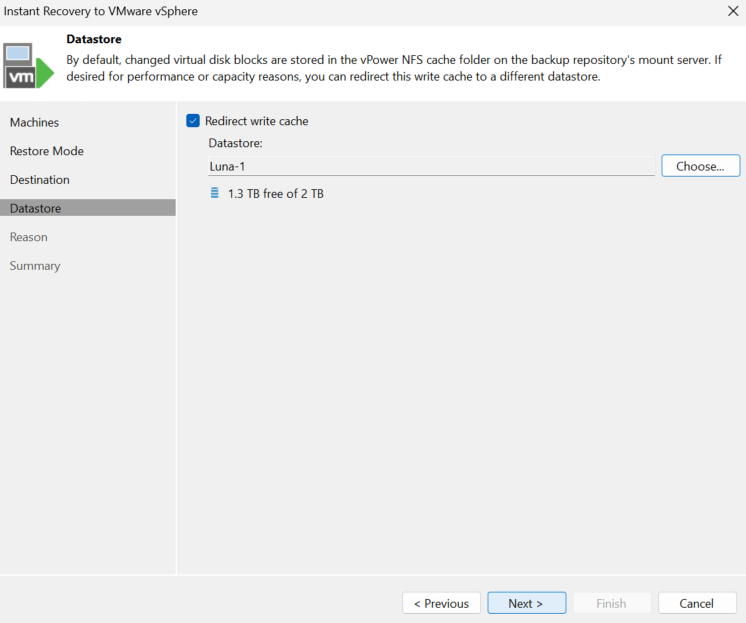
You can check the box to connect the VM network, this can be handy to leave off if you want to look at it in the console, and the original is still on, or you dont want users connecting to it, leave the option to power the target VM on and click Finish
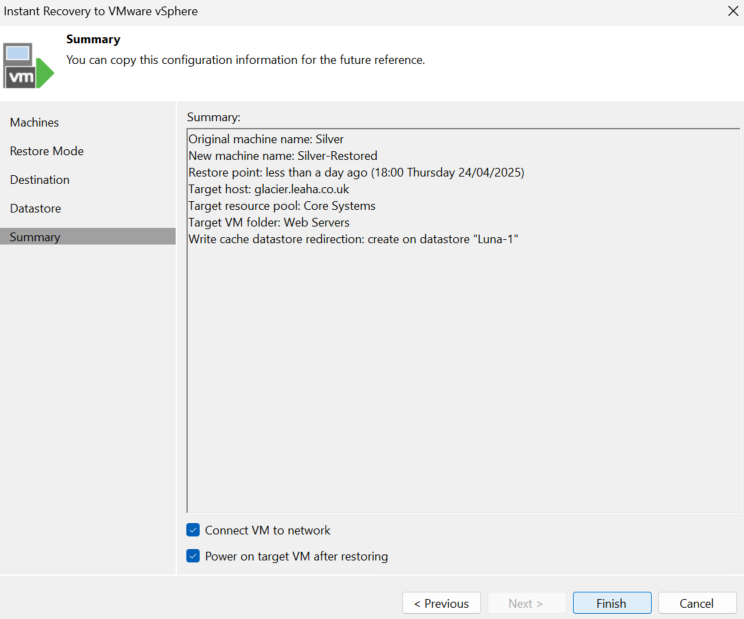
This will create a VM using the vPower NFS datastore and boot the VM up on the host
Once its published, click Close
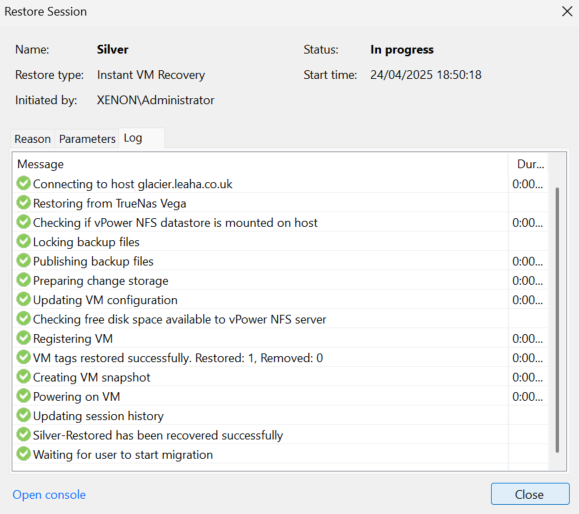
We can see the VM has booted with networking, tags, and has a snapshot when the restore was started for IO redirection
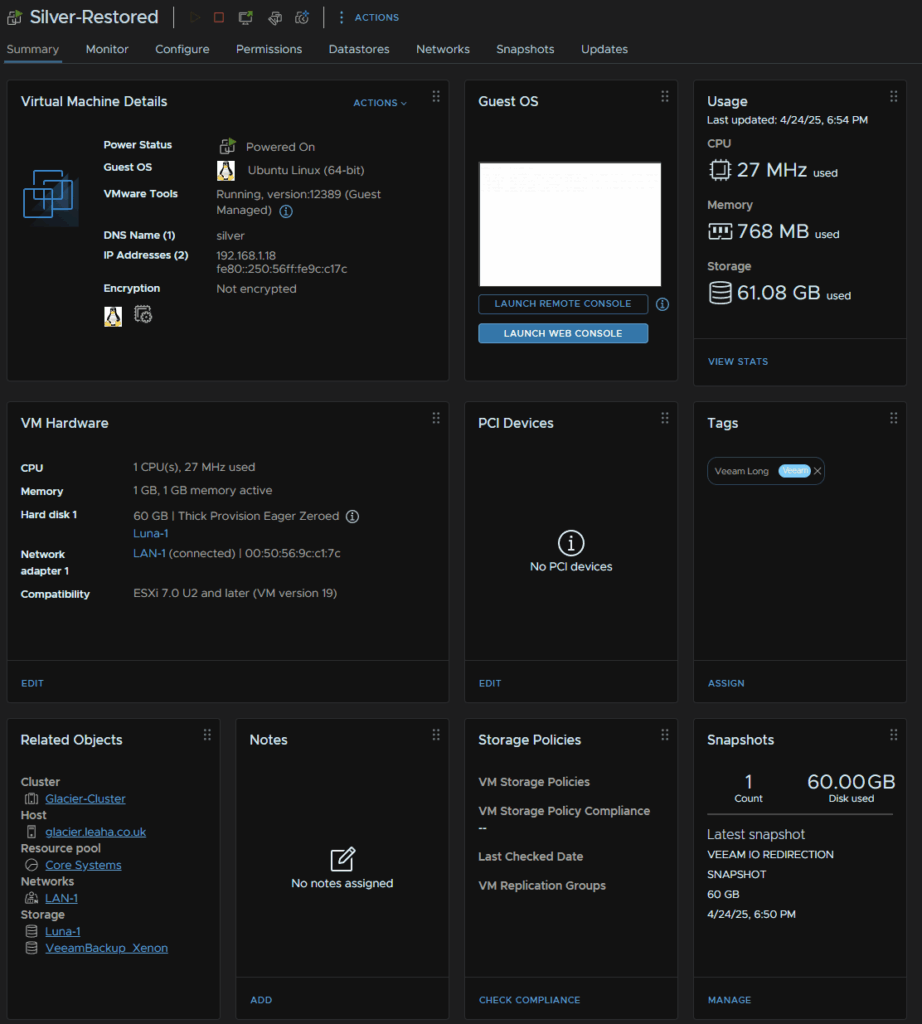
You can now access the VM from the network and I can see my web server has booted fine
In Veeam, we have an Instant Recovery option thats appeared under Home
We can click Instant Recovery then the VM and click Migrate To production, this will allow us to live migrate the VM onto production storage
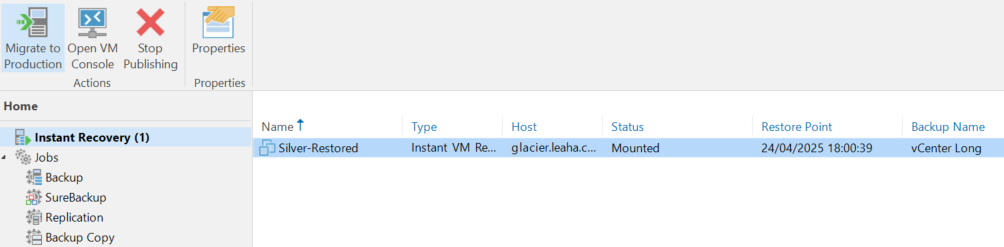
The datastore should be auto populated, but make sure its target datastore, which needs to be different to the write cache we selected earlier otherwise the migration can fail to use use vMotion which we need, if not click Choose and select the one you want, then click Next
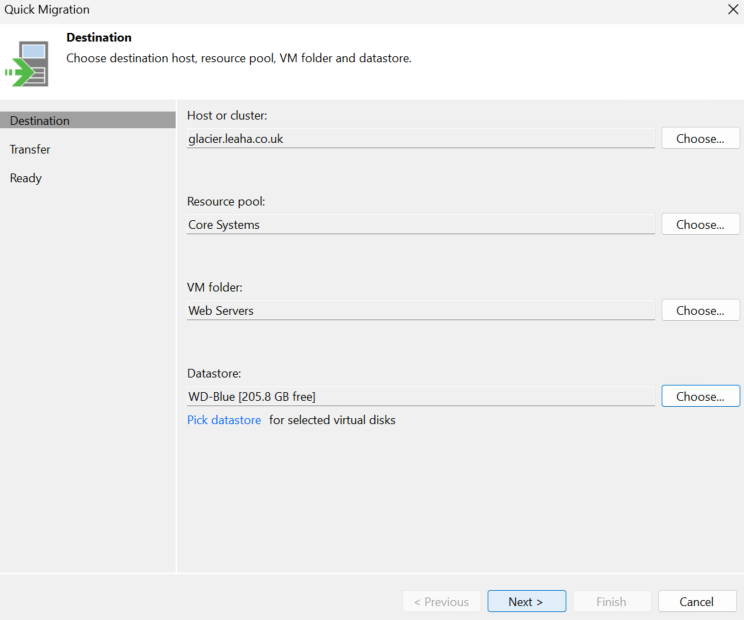
Click Next here
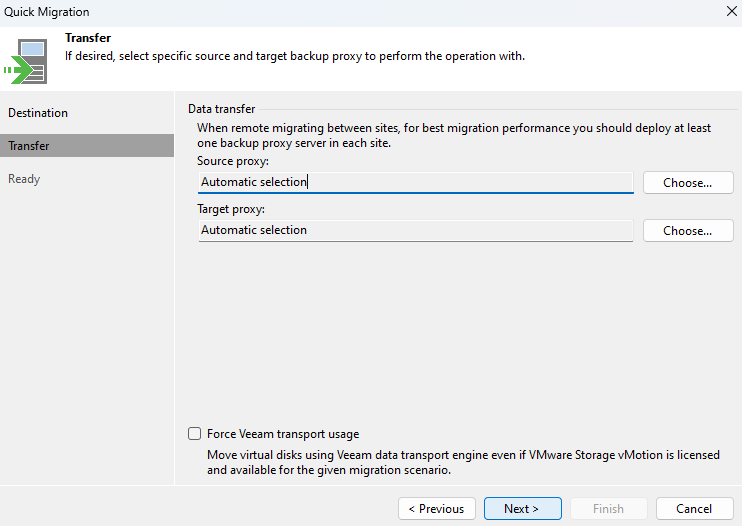
Uncheck the box to remove source files and ensure the mode is Storage vMotion, Smart Switch isnt bad, bit it will cause the VM to be unavailable at the end of the switch, and with a different VM I tested services didnt come up making the restore useless so I dont recommend it
Then click Finish
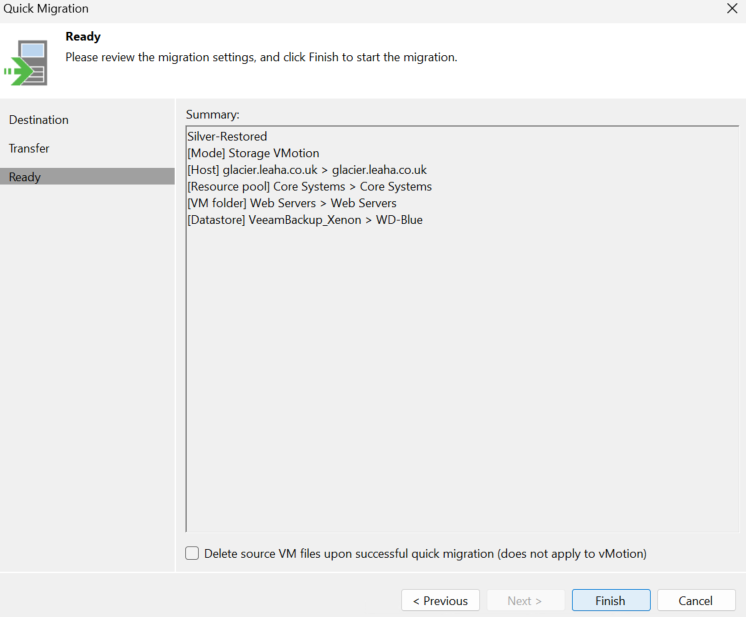
The VM will then be migrated to production storage while its active resulting in no downtime

Once thats done we can see its on the datastore ready to be used
1.20 – Restoring Physical Machines
1.20.1 – Recovery ISO
1.20.1.1 – Linux
For Linux servers, I would recommend download the generic recovery ISO, a specially built one has an unsigned version of the kernel and will cause issues with secure boot systems documented here
You can download the latest version here
Scroll down the page after logging in, we then want to download the bottom one
1.20.1.2 – Windows
For Windows you must create a custom one, to do this open VBR and head to Home/Backups/Disk, expand the job with your physical Windows server and select it and click Recovery Media, this requires at least 1 restore point

Click Next
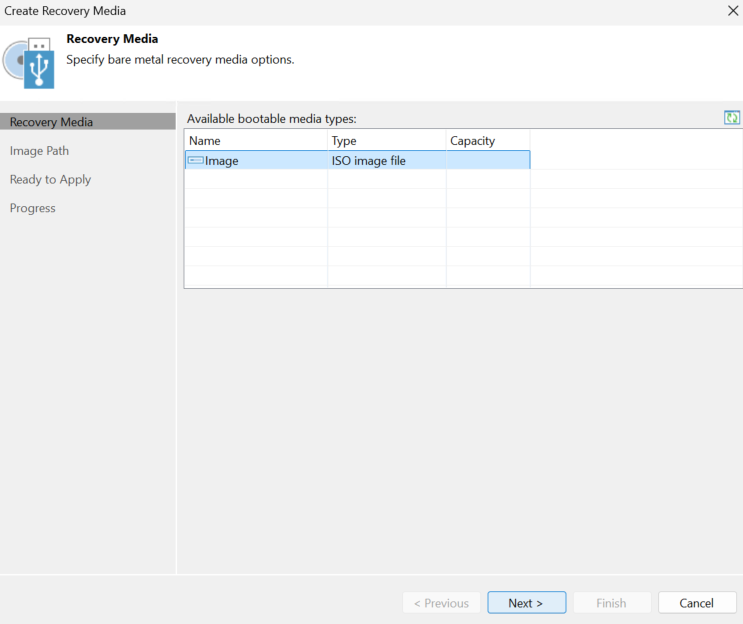
Specify a location to store the ISO locally, we can move it later, then click Next
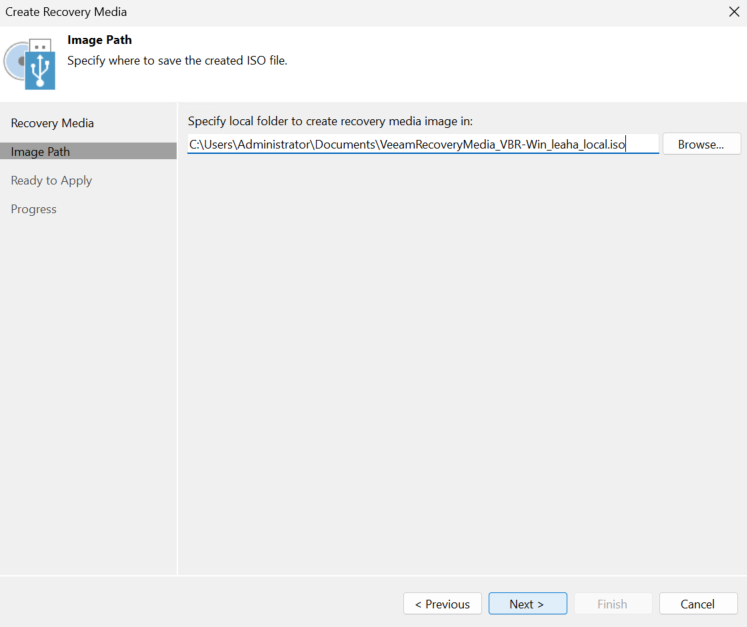
Click Next again
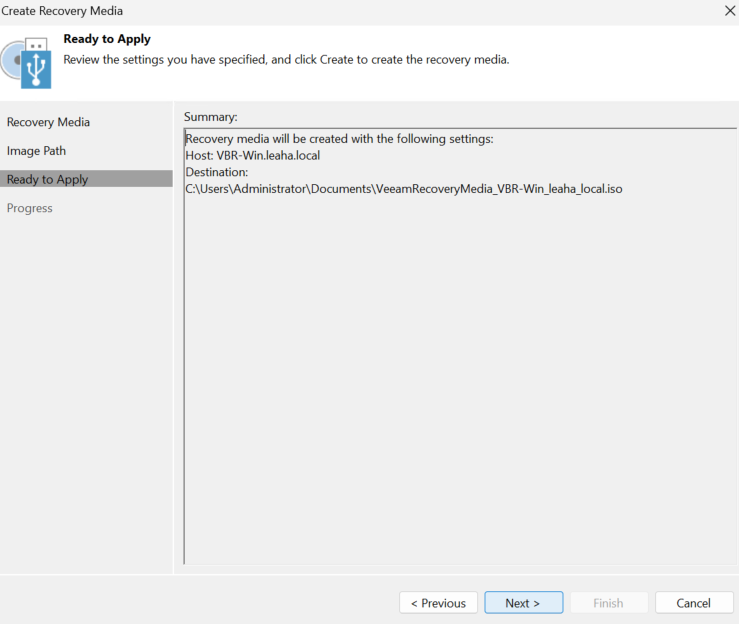
When thats done click Finish
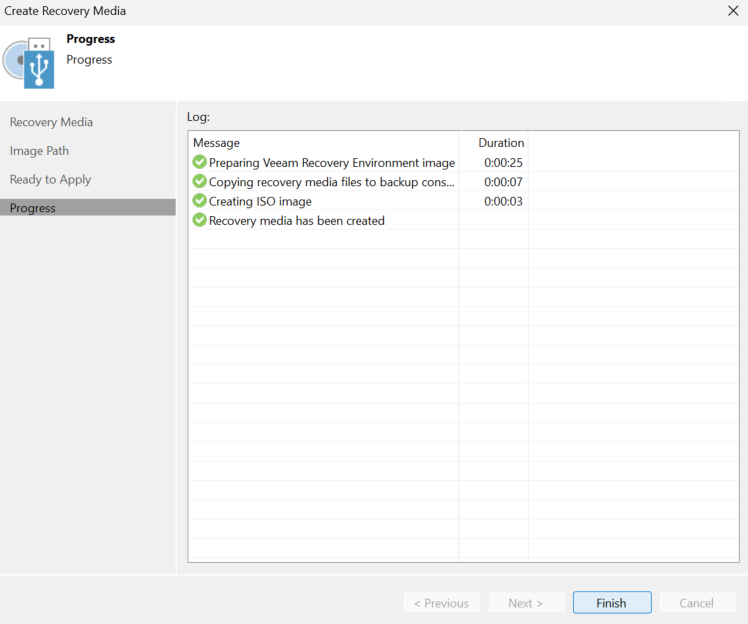
1.20.2 – Restoring The Server
1.20.2.1 – Linux
To test this I have a test file on my Ubuntu server under ~

We will remove this and ensure its restored with the full server restore

We will need to boot our recovery ISO we downloaded earlier, this can be done via a bootable USB with rufus or mounting the ISO to the IPMI/BMC of your server
When that boots hit Enter on the top option
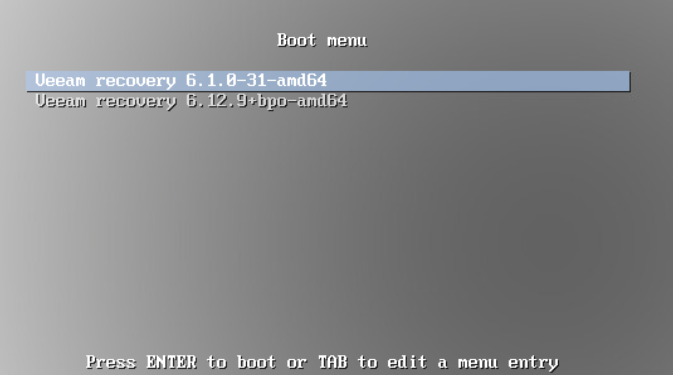
Use tab to move to Start SSH Now and click Enter
Note down the username, password and IP address and press Enter to continue

Use Tab and Enter to accept the EULA and click Enter on Continue
Press Enter to restore volumes, I skipped Configure Network as I have DHCP on this network, if you dont you will need to set an IP address manually
Press Enter on Add VBR Server
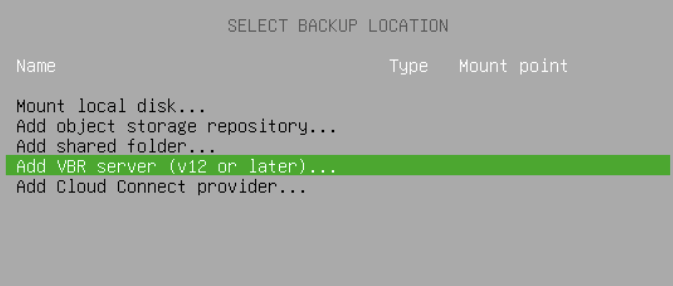
Enter the VBR server IP address, leave the port on the stock setting, and head to the recovery token box
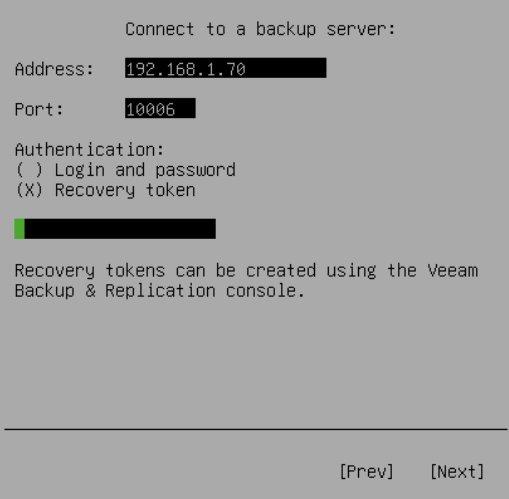
Leave it blank for now and heave to the VBR console and head to Home
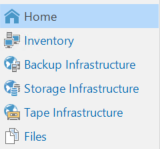
Head to Backups/Disk, expand the job with this server, click the server backup and click Create Recovery Token
Copy the token and click Create
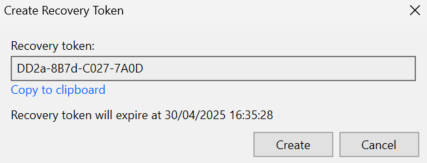
In the server to restore, enter the token, and press Tab to select Next and press Enter
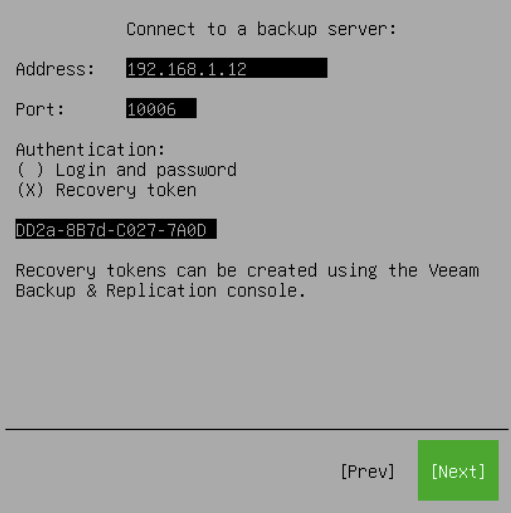
Press Enter on Accept for the SSL certificate
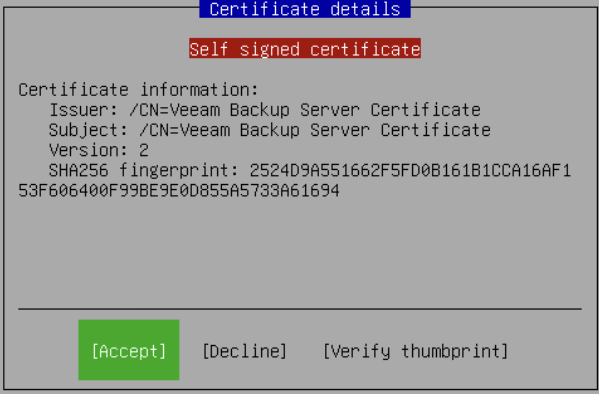
Press Enter on the hostname

And use the arrow keys and Enter to select a restore point on the right

Select what we want to restore, so as I want to restore the enter volume group, I will click Enter on ubuntu-vg on the Current System
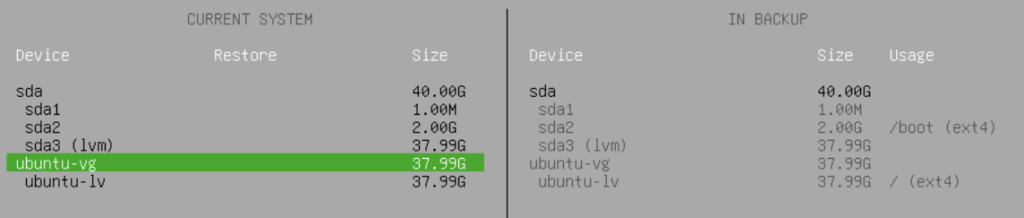
Then click Restore From
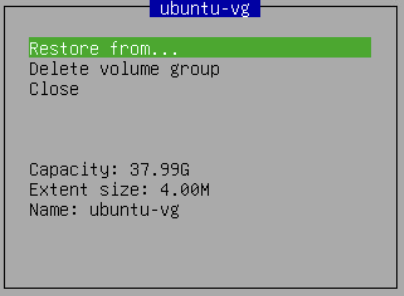
Press Enter to select the Restore
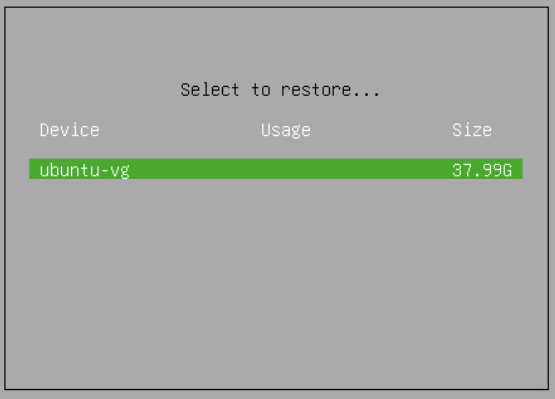
We can see this is now under the Restore tab on the left, as thats all I want, I will press S to start the restore
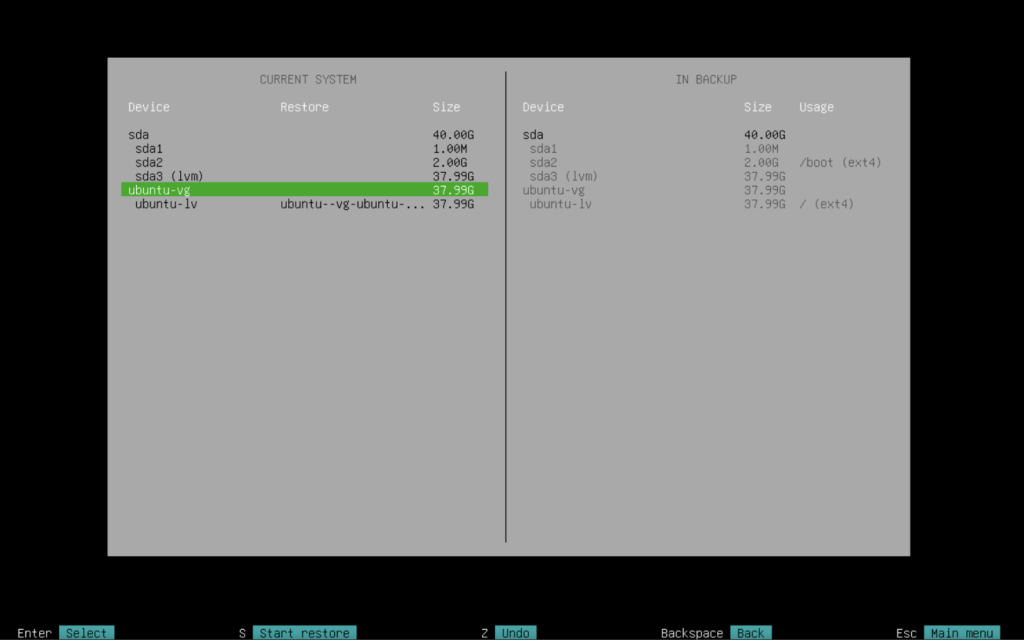
The restore will then start running

Once thats finished press Escape

Then reboot, and remove the ISO
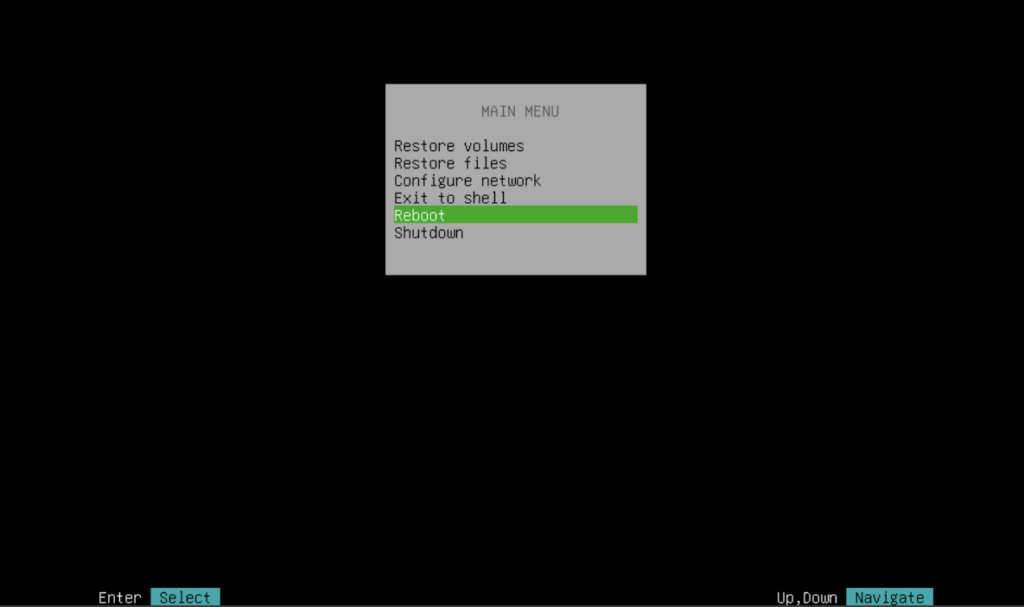
And when the server is back, I can see my file again

1.20.2.2 – Windows
To test this, I have a VBR TEST file on my desktop
Which I will remove, so we can restore the OS to get this back, of course if the disk was corrupt you can use this to also restore everything
Our file is now gone
We will need to boot our recovery ISO we created earlier, this can be done via a bootable USB with rufus or mounting the ISO to the IPMI/BMC of your server
This will load the Veeam recovery environment, click Bare Metal Recovery

Select Network Storage and click Next
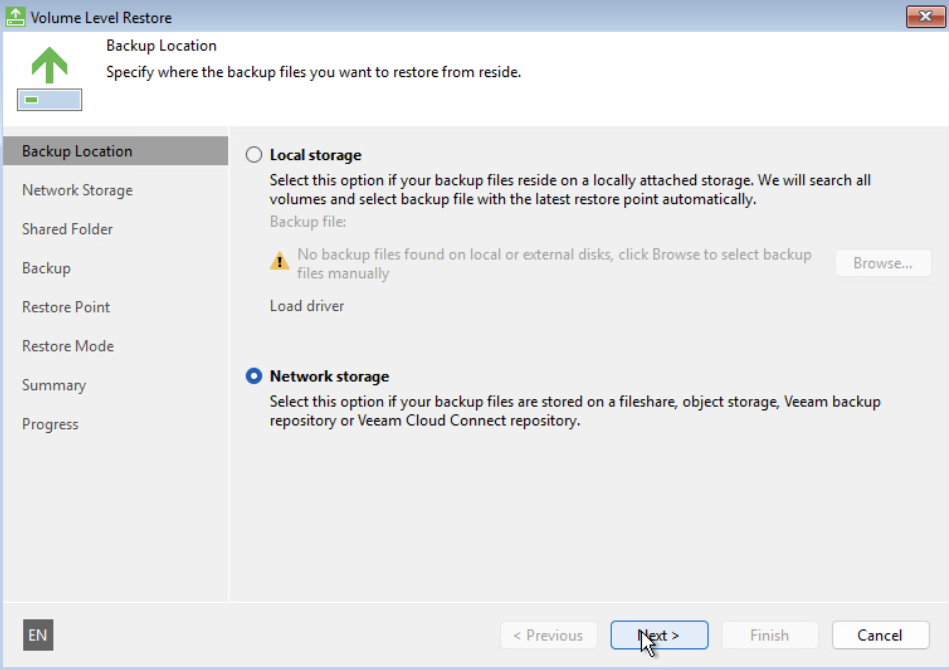
Click Veeam Backup Repository and click Next
I have DHCP enabled, so I didnt need to set an IP, but this can be done under Configure Network Settings
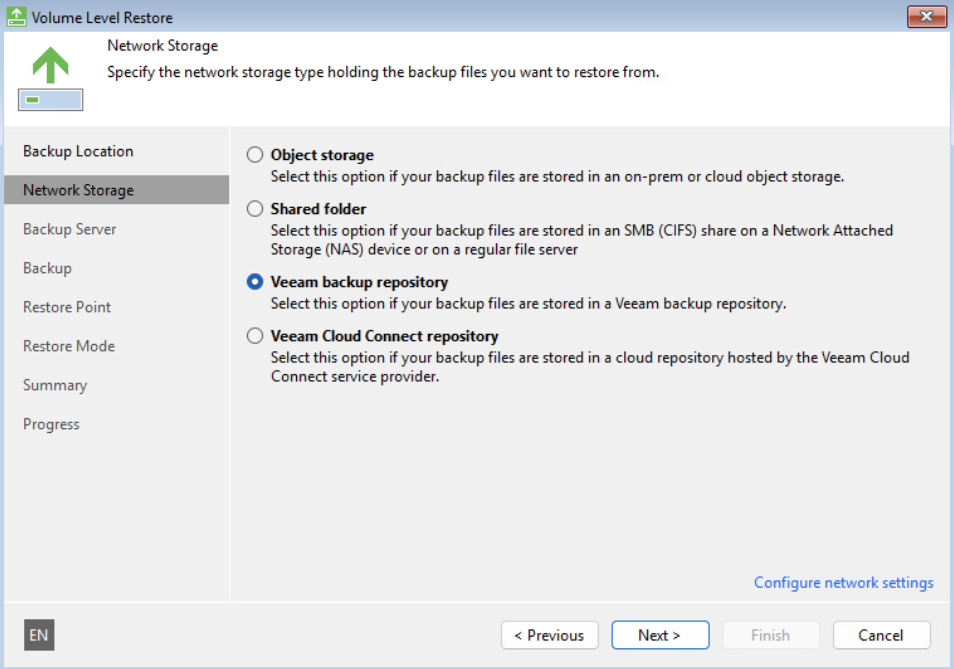
Enter the VBR server IP address, and click the radio button for Recovery token and heave back to VBR

Head to Home
Then head to Backups/Disk and select the job and the server backup, then click Create Recovery Token
Copy the recovery token and click Create
Enter the token and click Next
Select the backup and click Next
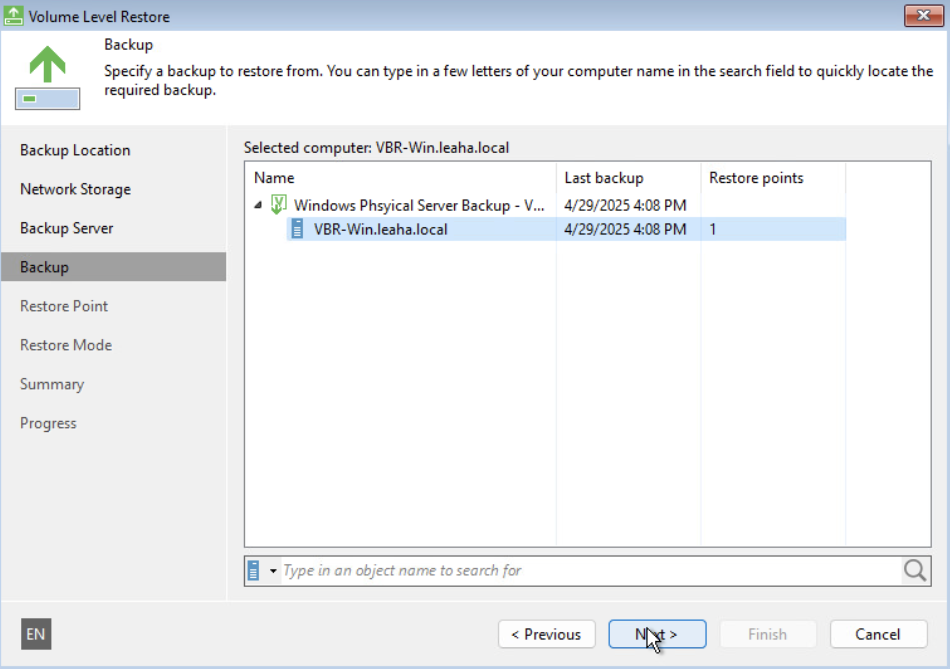
Click the restore point and click Next
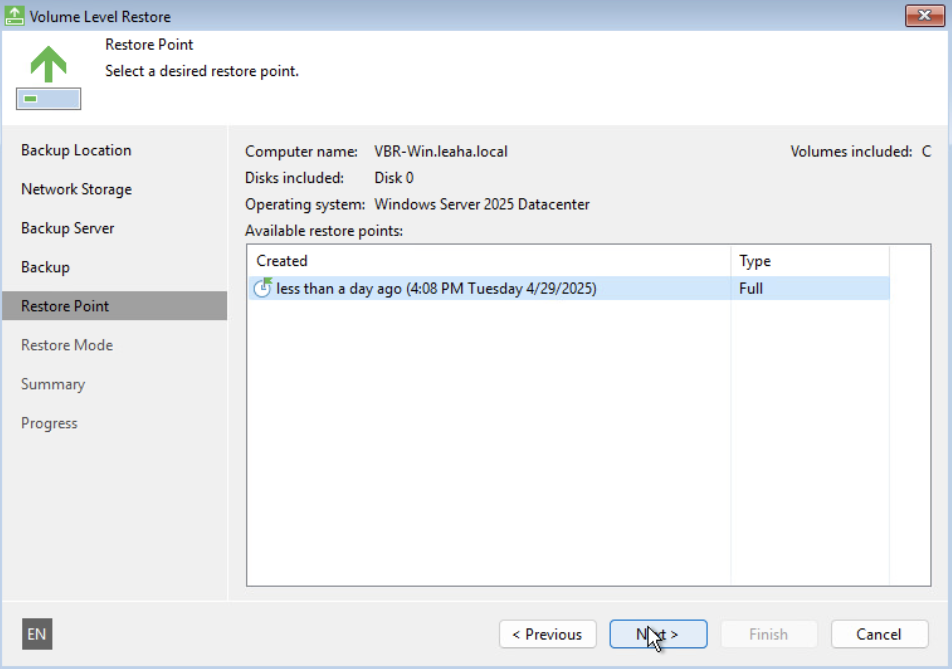
Select the restore mode, we can restore the entire server, or the C drive with System volume, we will be putting the entire server back and clicking Next
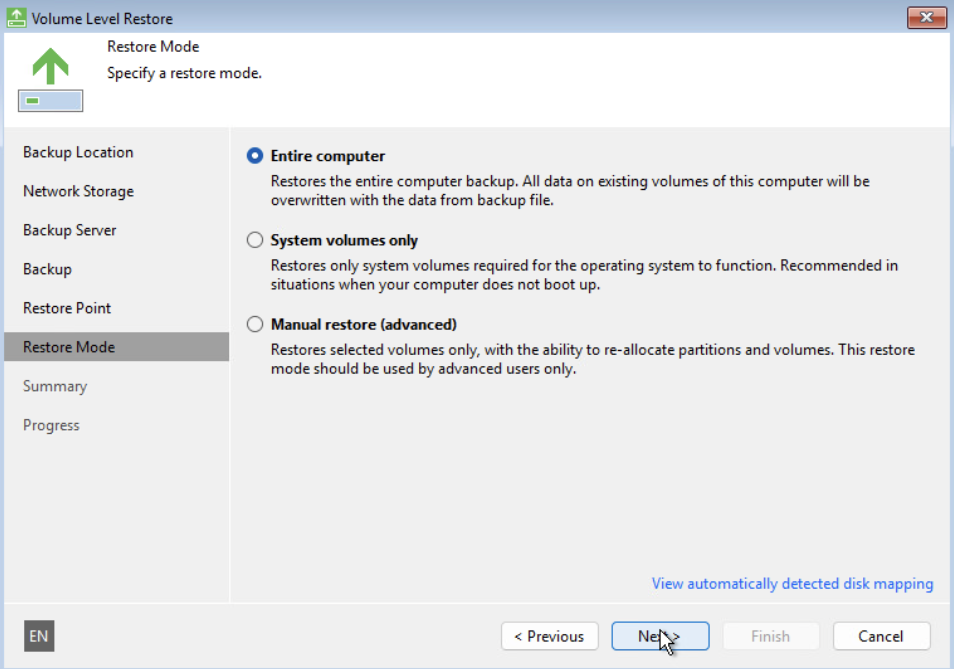
And click Restore
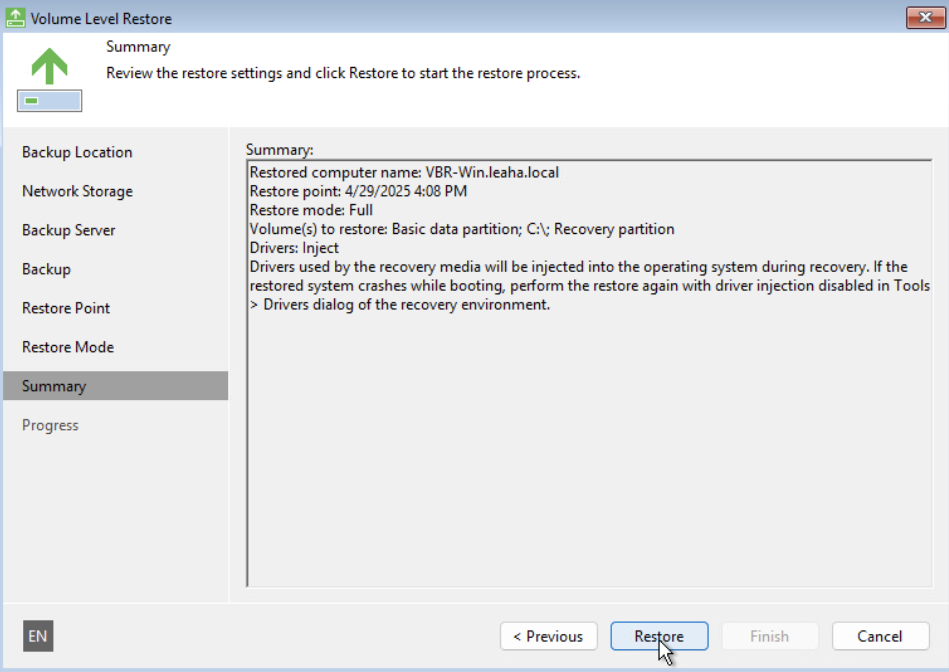
Once its done click Finish
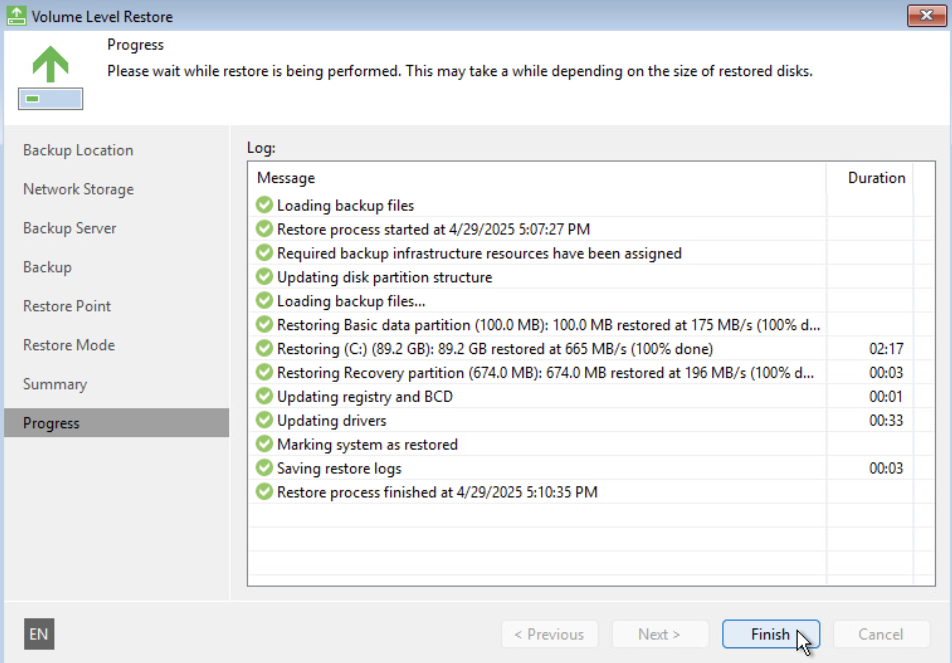
Click Yes to reboot the machine, and then disconnect the ISO
Our server and the file is now back in place
2 – Veeam Enterprise Manager
2.1 – Installation
For this, a separate Windows server with the following specs will be needed for VEM
- 4vCPU
- 12GB
- 150GB
Mount the same ISO we installed VBR with, then run the setup.exe

Click install
Then click Veeam Backup And Replication 12.3
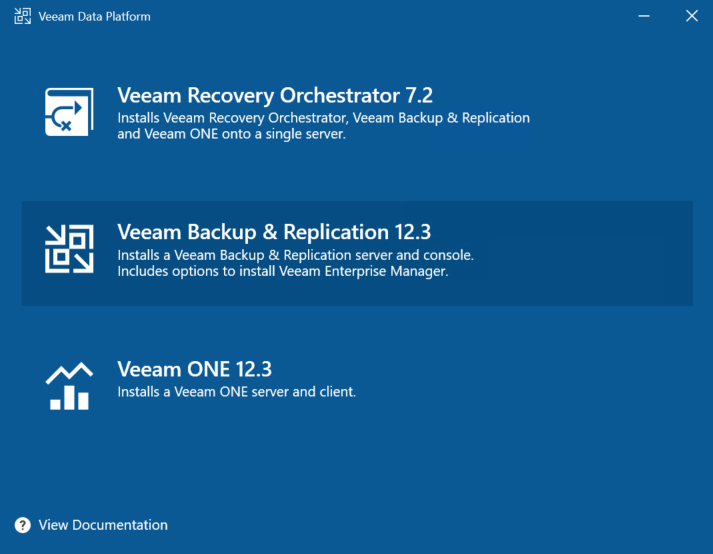
The click Install Veeam Enterprise Manager
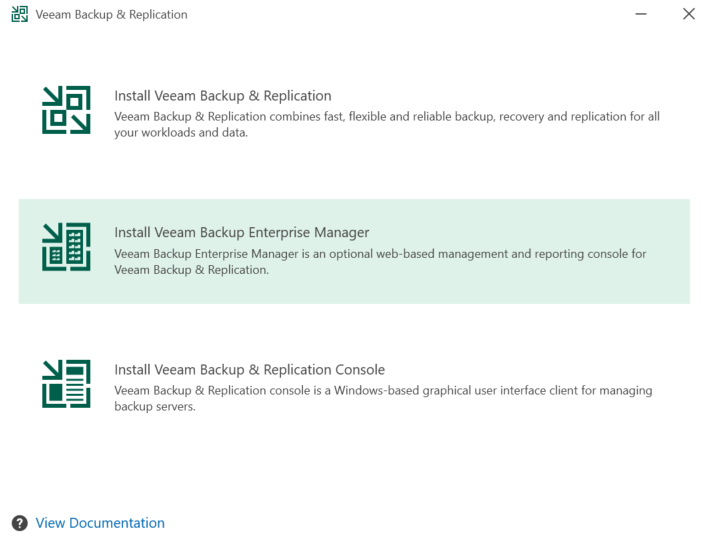
Accept the EULA
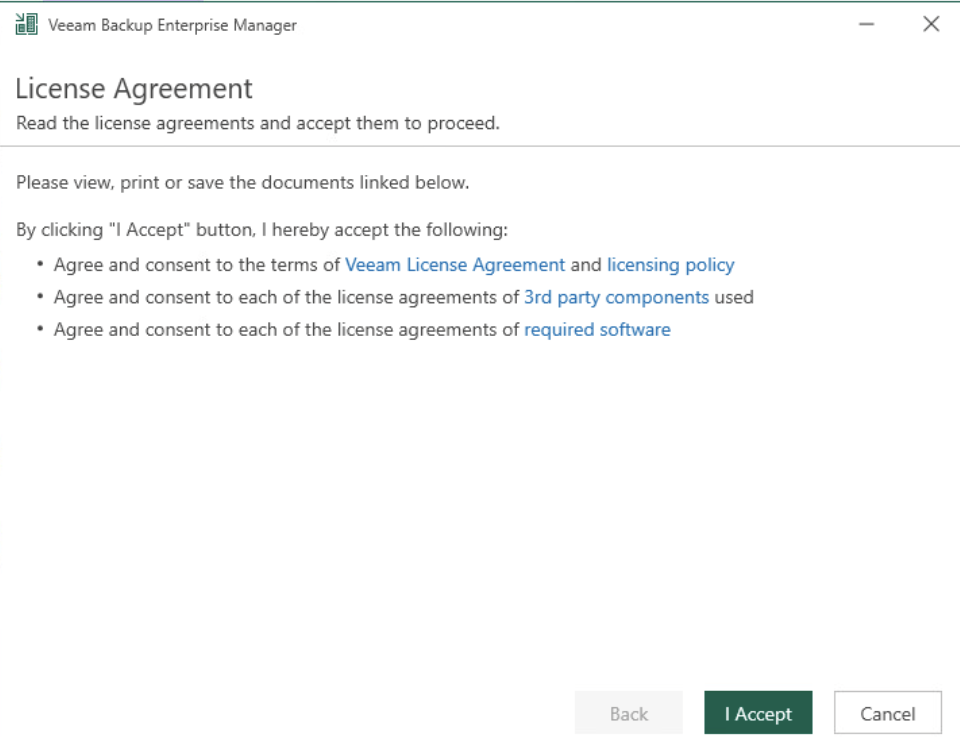
Upload the license file, or sign in
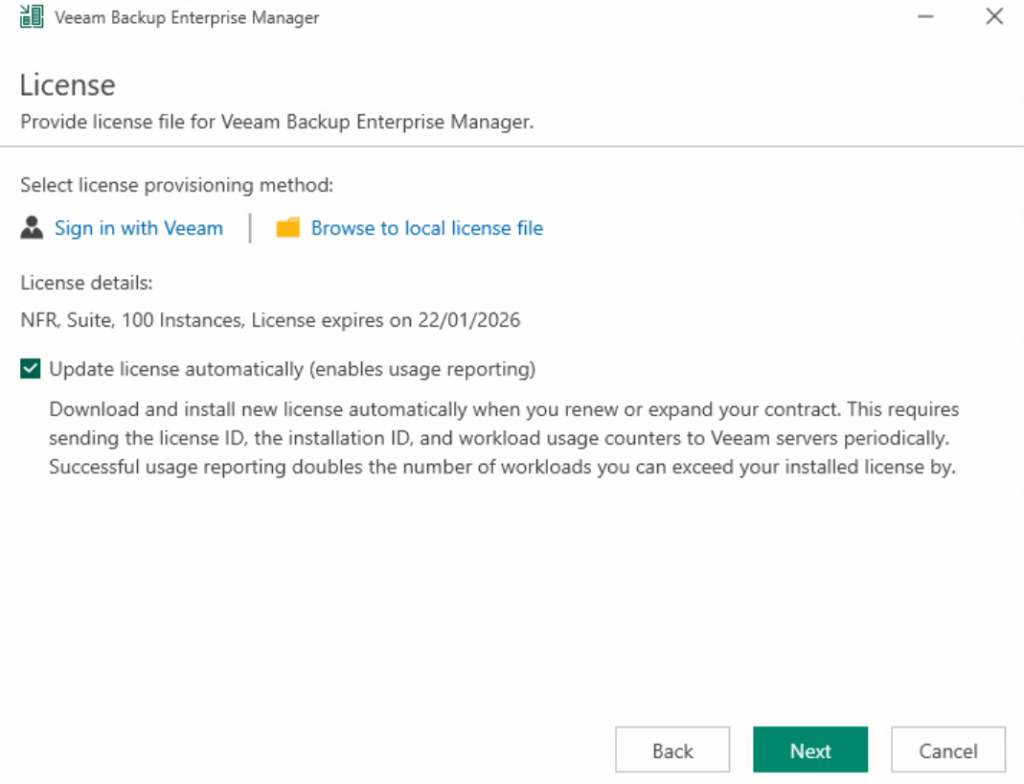
Wait for the configuration checks to run
The rest should be auto configured, with the service account as the local system account, and the database as PostgreSQL, then click Install
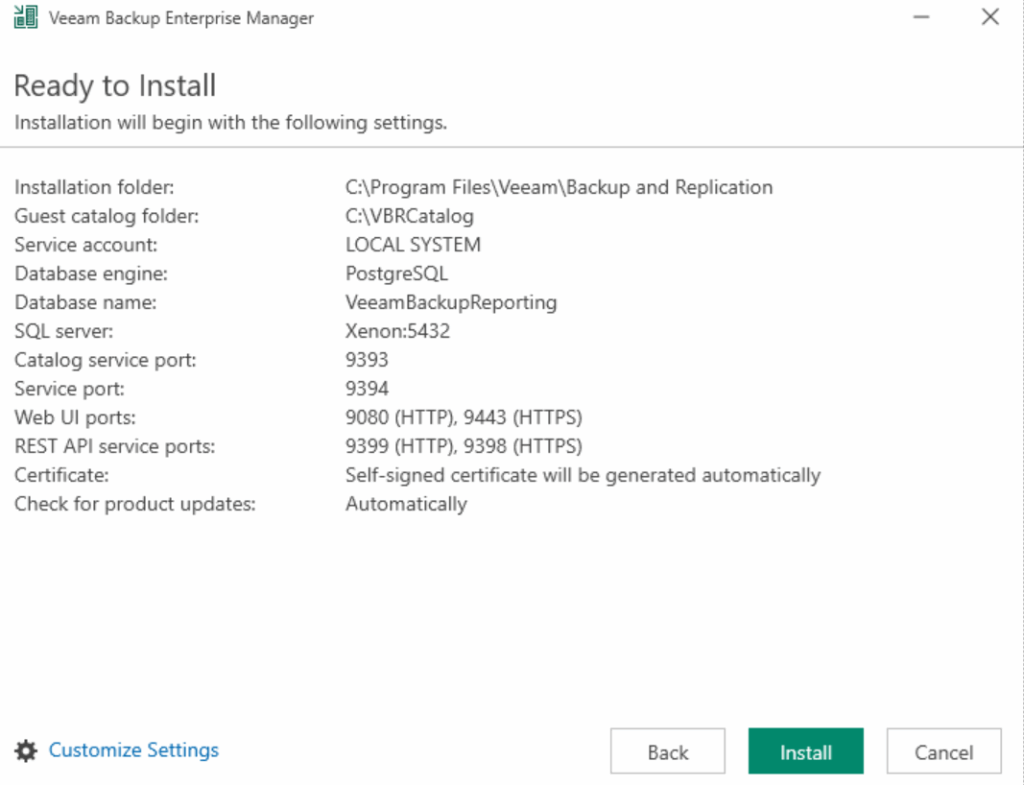
Then click finish
You can access the WebUI on port 9443, using the account you installed the Enterprise Manager, this should be off domain, you want the computer name as the domain, eg
xenon\administrator
2.2 – Add VBR Servers
Navigate to the werb portal on
https://fqdn:9443
And login with the administrator account
Click configuration in the top right of the WebUI

Under backup servers, click add
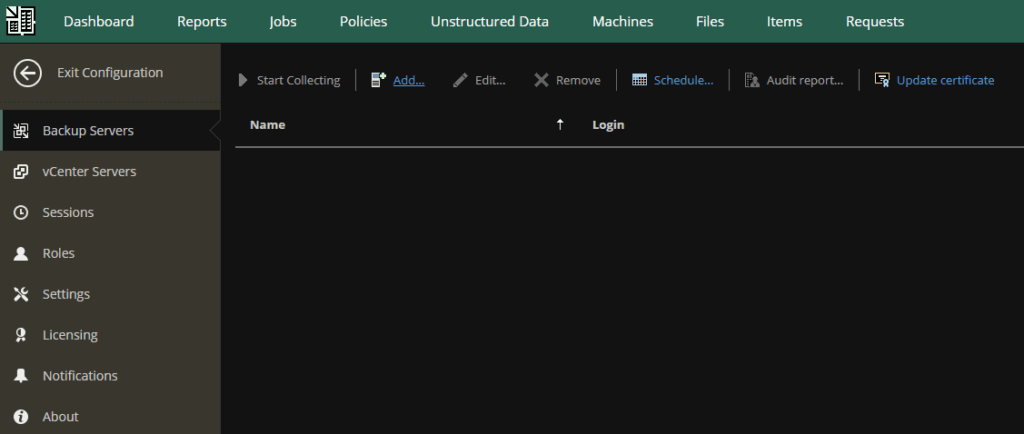
Put in the FQDN of your VBR server, add login details, this should be a local account as VBR shouldnt be on the domain, and leave the ports at the default unless you specifically changed them during the VBR installation
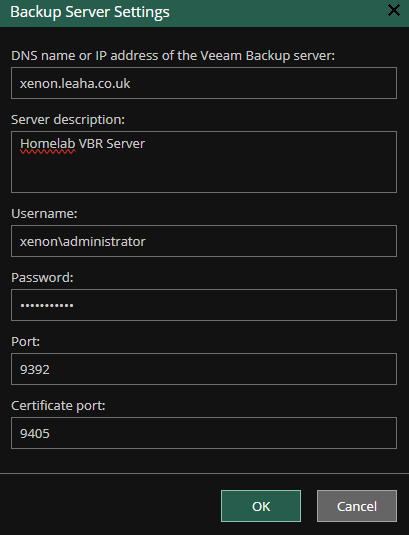
And accept any certificate pop ups
2.3 – vCenter Plugin
From the dashboard, click Configuration

Then head to Roles and click Add
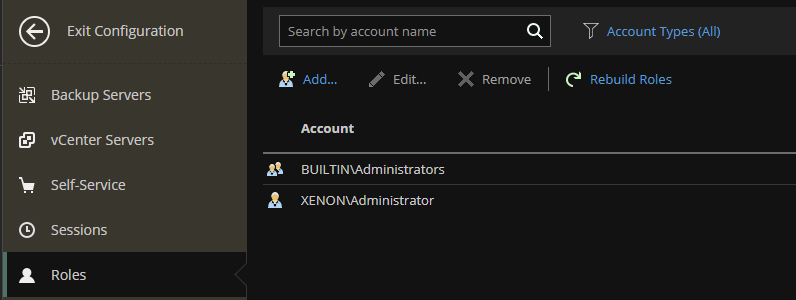
And select the account type as vSphere Role, the vSphere role should be Administrator, and the role should be Portal Administrator, then click ok
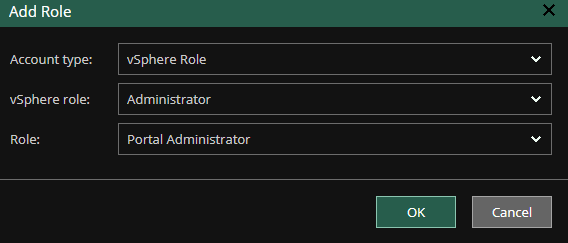
From the vCenter Servers section, click the VCenter you want to install the plugin to, and click Check Version
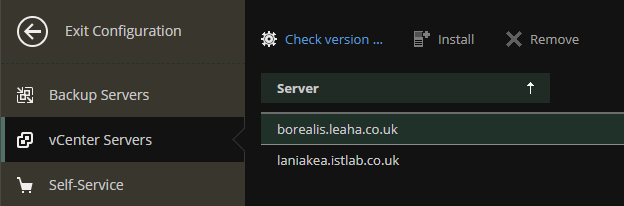
Supply vSphere administrator credentials and click ok
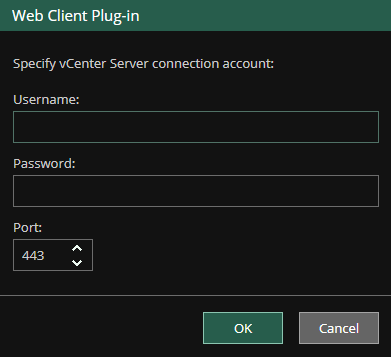
The Install option should now be available for the vCenter, click your vCenter again, then Install

The install will start

And it will be installed in a couple of mins
If you find there are any issues with the installation, its likely DNS, ssh into the vCenter as root and run
/opt/vmware/share/vami/vami_config_net
And run option 0, likely, DNS search path isnt populated like this
You can use option 4 to fix this
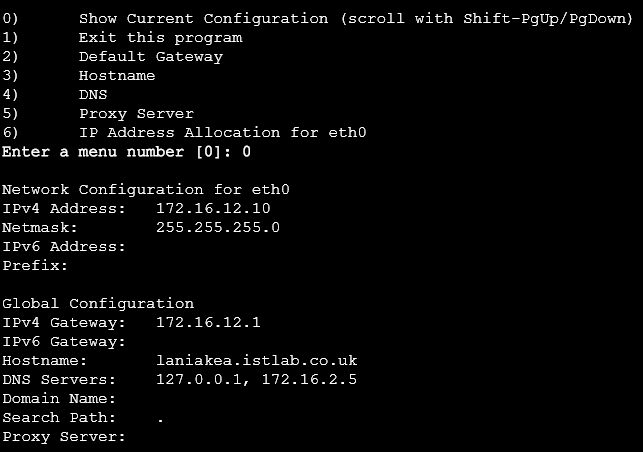
Then remove the plugin and try again

If we log into vSphere, you may need to refresh your session, if you click the three lines in the top left, we should see a Veeam plugin at the bottom
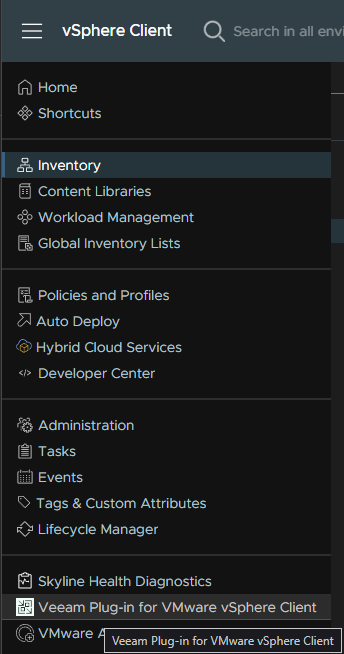
It will give you a good overview of Veeam’s status for VMs in vSphere, it also seems only repositories included directly in vSphere backup jobs are listed
Eg, my TrueNas SMB share is listed, however there is a backup copy job to a hardened immutable repo that isnt listed, likely because its a copy job
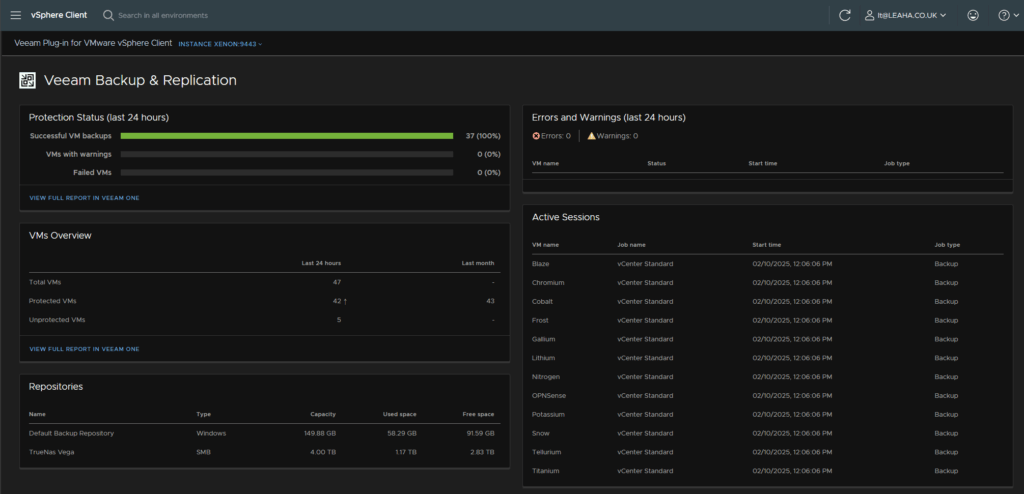
The vCenter plugin also allows two very helpful features in the vSphere WebUI
We now get two options when right clicking a VM
- Veeam ZIP
- Quick Backup
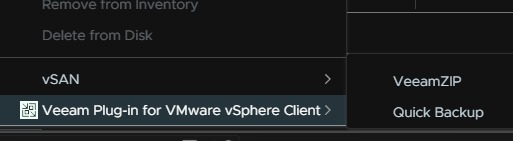
Veeam ZIP allows for a one off full backup with its own retention period, you can select the VBR server, as long as its in Enterprise Manager, the repository, encryption key, retention and compression level, you can also disable guest quiescence, but I wouldnt recommend it, basically in any scenario
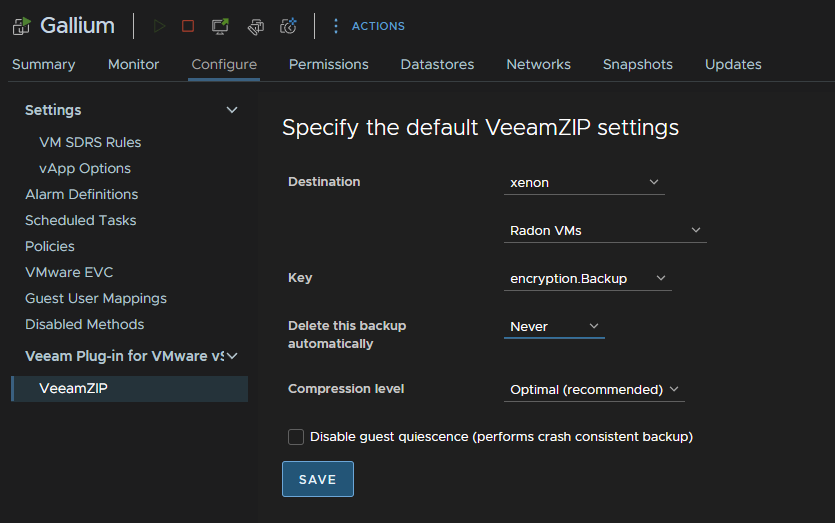
The retention has the following option
If the retention is less than the immutability period on your repository, it will be kept until the end of the immutability period
Quick Backup is pretty simple, all that does is an incremental backup for the VM inline with the job its attached to
This is really helpful for if you are doing work on a VM, in addition to a snapshot, and extra quick incremental backup is very helpful as a restore option, and when it calls the VBR job, it only actions the VM Quick Backup is on, so if you have 50 machines, taking an incremental backup for a couple of machines takes a while, and isnt often worth it, but being able to do t for just the selected VM is much better
If you select a VM in vSphere, there is also a little widget showing when it was lasted backed up
2.4 – Overview
Enterprise Manager offers a good overview of your Veeam estate, even on a single VBR server setup like mine, its helpful, given logging into VBR with MFA via the console is a little annoying, with its WebUI, if you want to check on it, and not edit anything, its very helpful, and significantly more so if you have multiple VBR servers as its all in one place
It is worth noting that all servers using Enterprise Manager must use the same VBR license, you can merge them though if you have multiple, though if they have different expiry dates, I am not sure how that would work
The default dashboard includes a good amount of information for all connected VBR servers
You have a summary of all servers, the amount of VM/Image data, file data for NAS backups, jobs in the last 24 hours and status, the error looks to be for my failed SureBackup job
The graph at the bottom represents processing throughput, in MB/s across all selected VBR servers on the right, if you have multiple, there will be different coloured bars for each VBR server
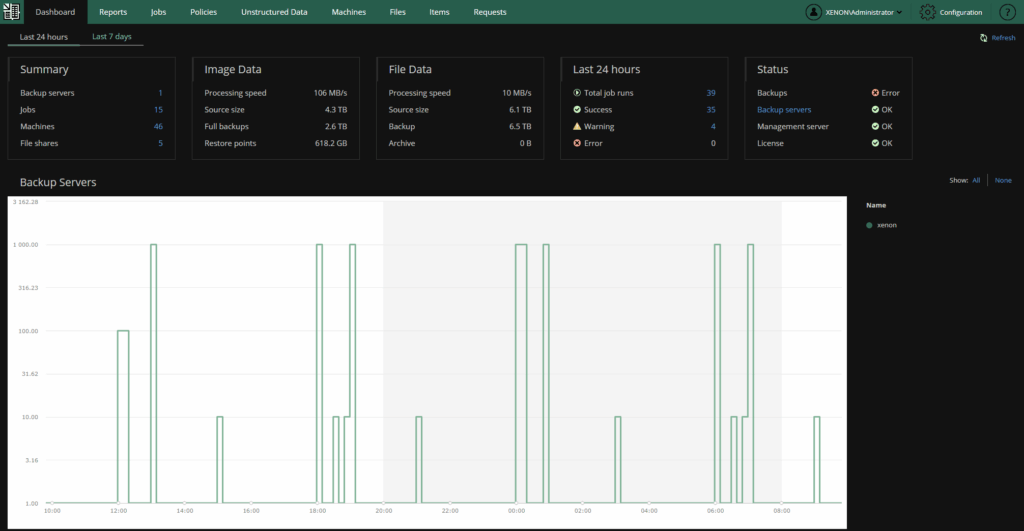
The jobs tab will give you an overview of all jobs across all VBR servers
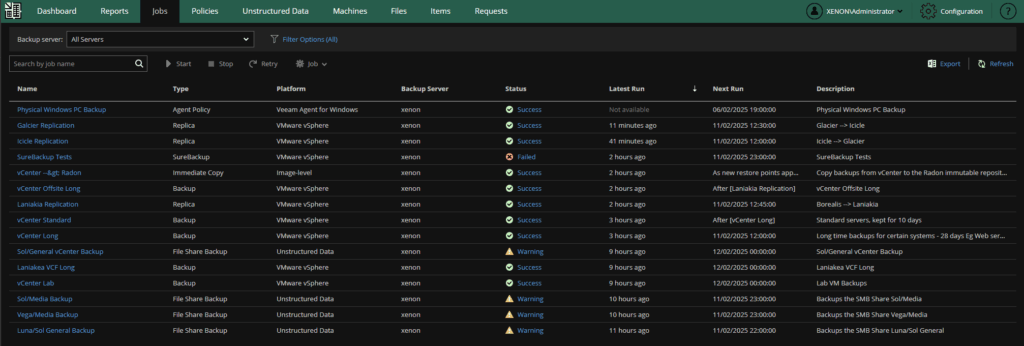
And for Unstructured Data and VMs you can see all NAS shares and VMs across all VBR servers
If you have guest file system indexing, you can see and search files here, if you dont, like me, you can click Pick From List, select a VM or NAS share and browse the files that way
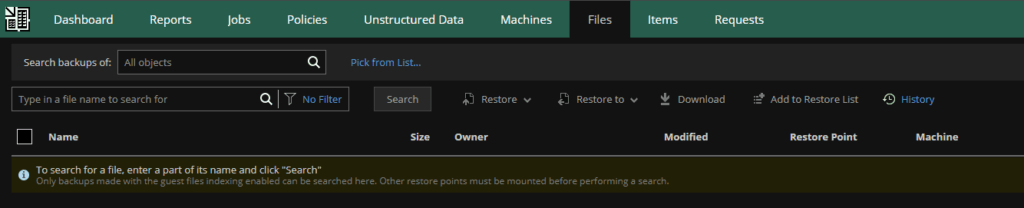
Items allows you to do the same for Exchange and SQL

From Configuration on the right

And under the Licensing tab, we can see what our license usage is against all VBR servers
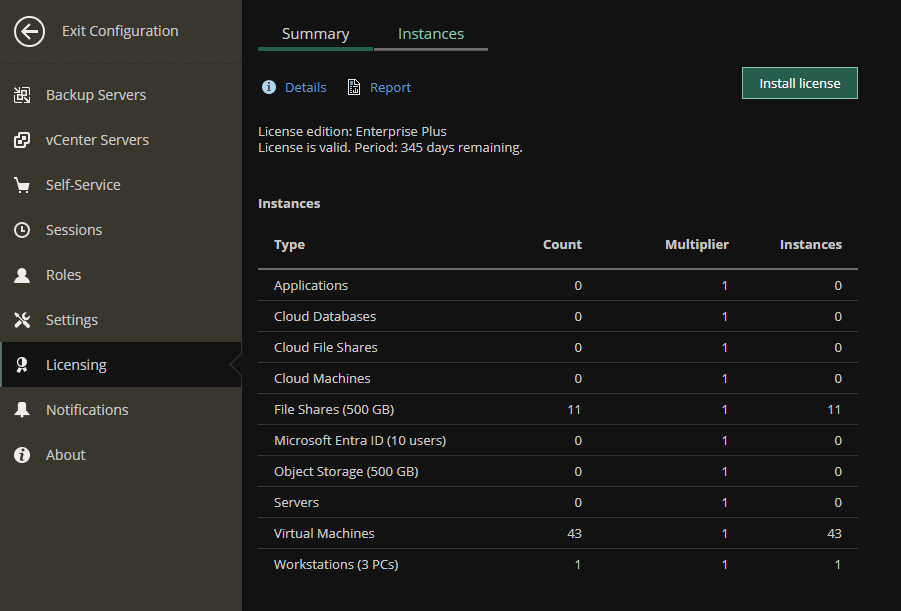
2.5 – SMTP Notifications
Enterprise Manager can also send notifications via SMTP
From the dashboard click into Configuration on the right

Click on the Notifications tab
And set your mail server type
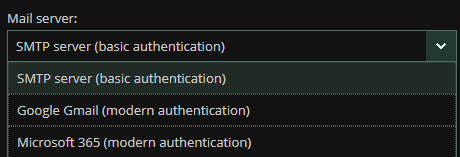
For a local SMTP server, which I will be using, you can add the address and port, though you will likely want port 587 and using SSL encryption with authentication
And click Save when you are done
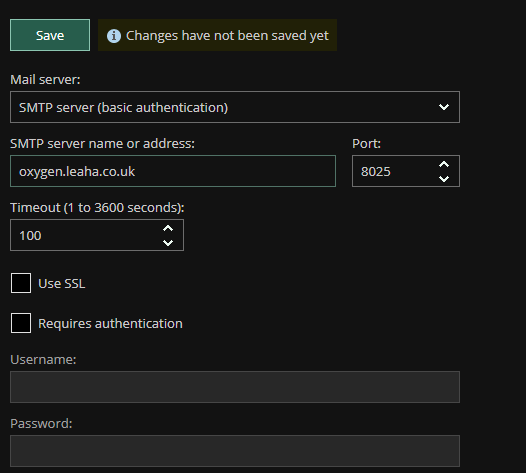
M365 has this info
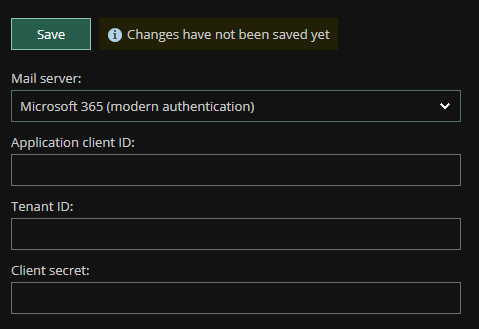
And for Gmail
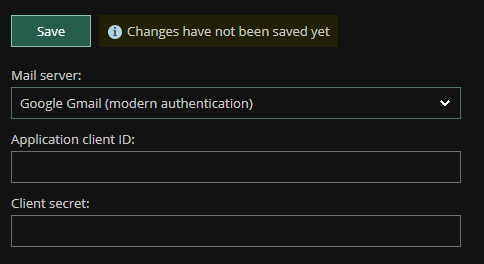
You can add notifications for Job Summary, and click Test, if that comes through ok, click Save
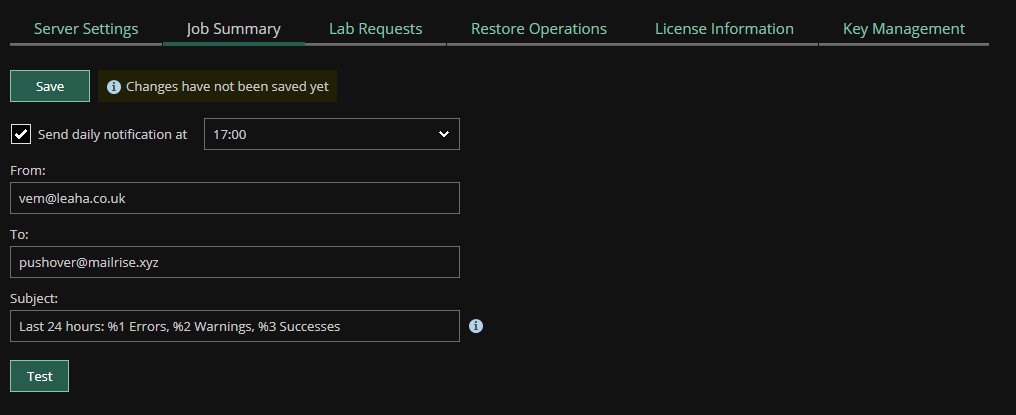
You can do the same for lab requests and restore operations
The license information tab will check for Product and Hypervisor updates, you can also disable contract expiry notifications and enable them for license usage
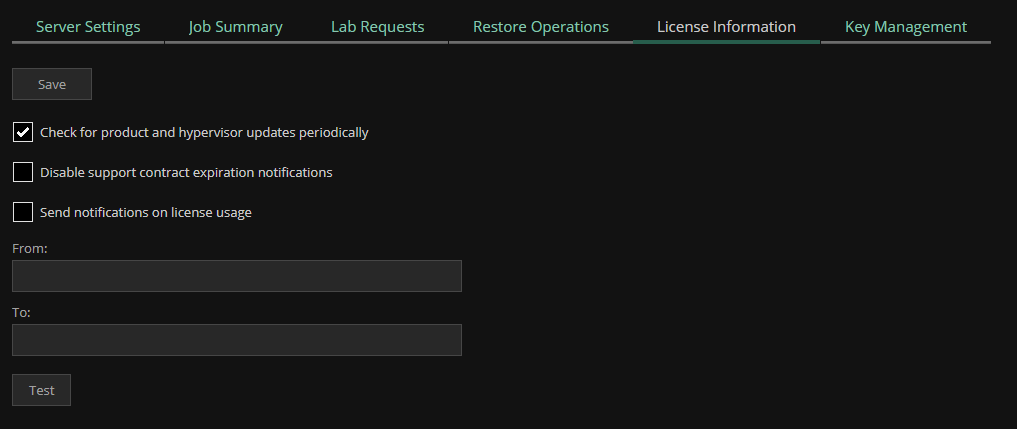
3 – Veeam ONE
3.1 – Installation
Mount the Veeam Data Platform ISO we got from the VBR installation
You can install this on the same, or a different server, to the VBR server, best practices is to use a different server
Spec wise the VM will
- 4vCPU
- 16GB
- 150GB
The installer will also use SQL Express, so for small deployments, this is fine, however the installer doesnt allow you to change this and must be done via the Server Settings after its deployed
Run the setup.exe
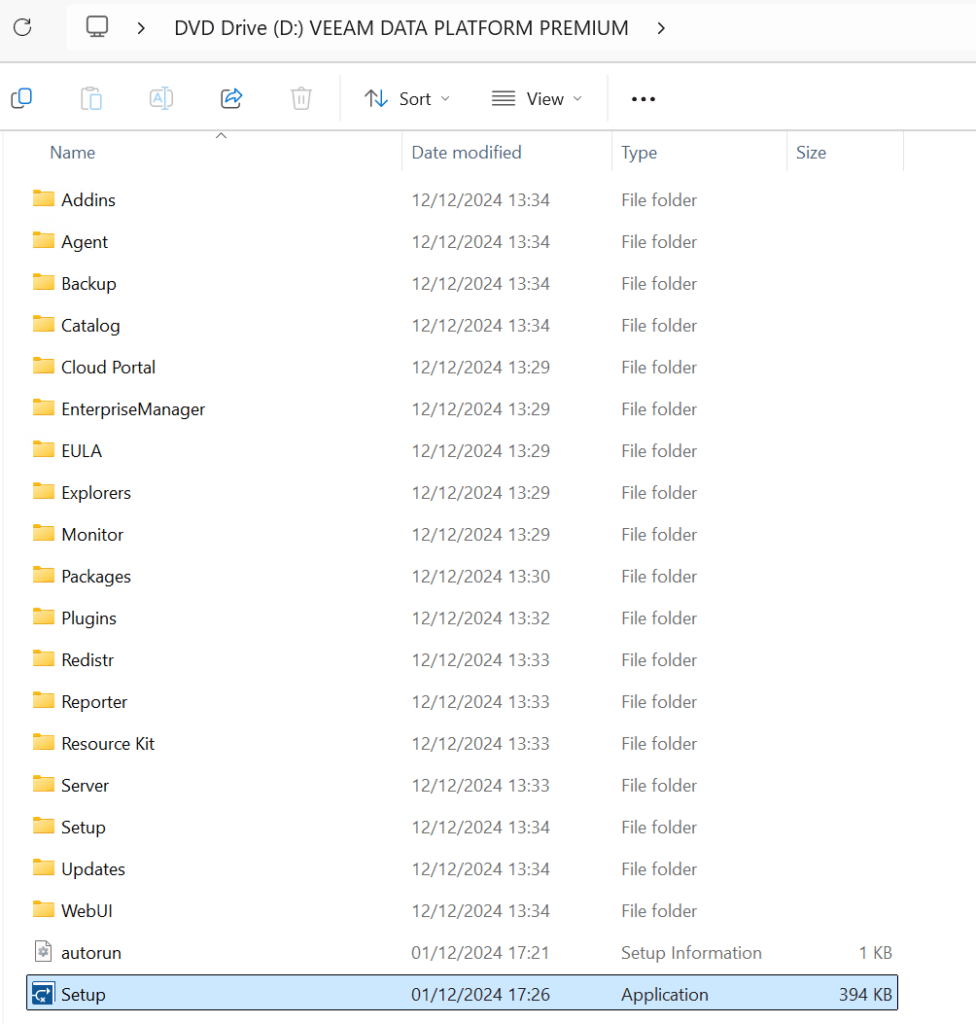
Click install

Click Veeam One
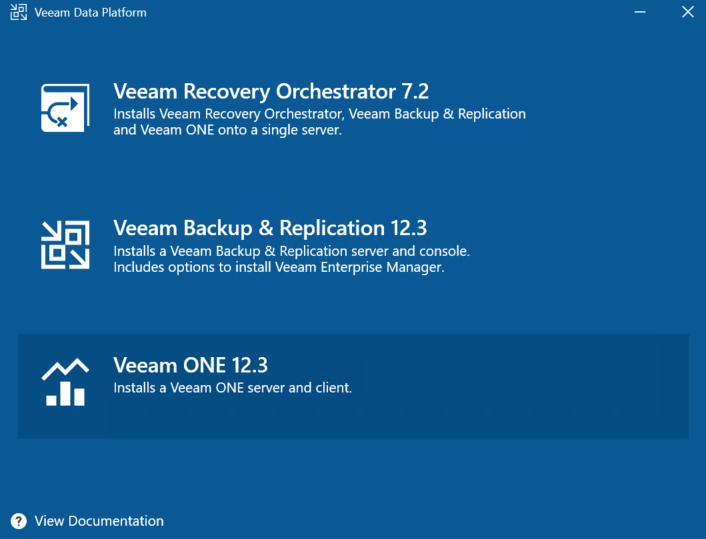
Click Install Veeam One
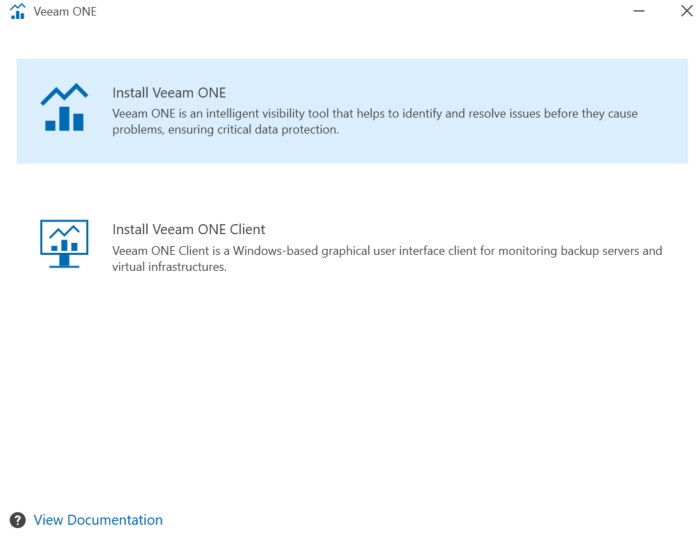
Wait for the initializing wizard to start, it might take a while

Accept the EULA

Browse to your license file, or sign in to Veeam
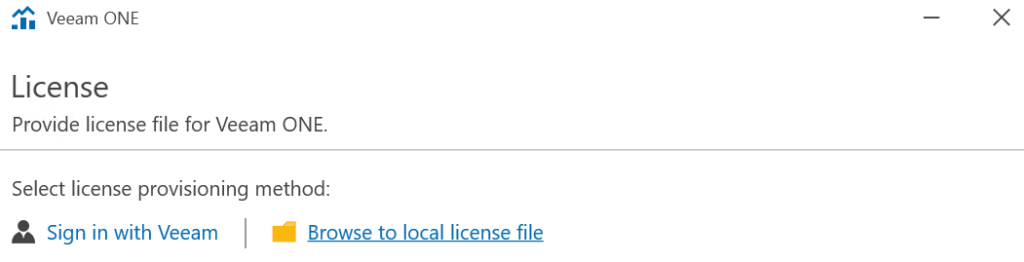
For browsing to your license file, double click the file
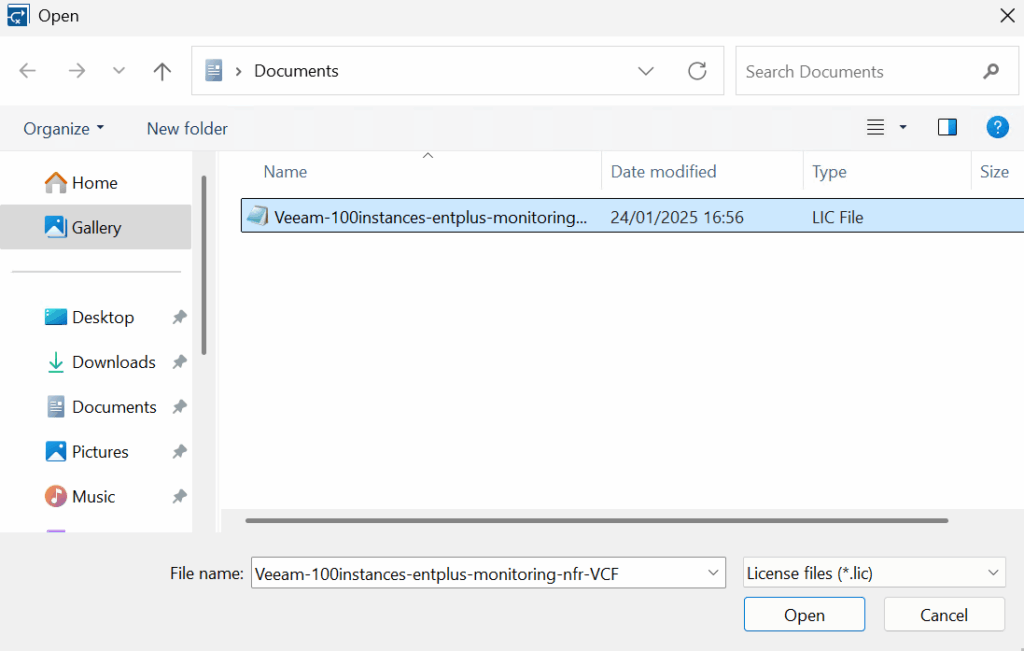
Now click Next
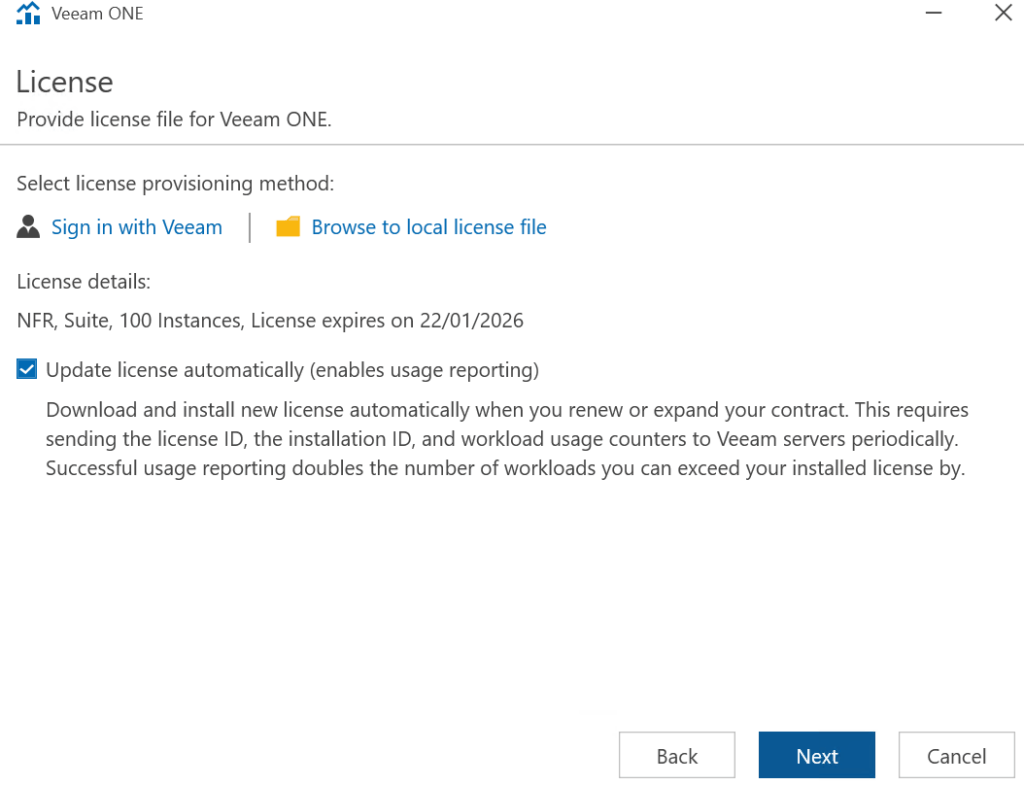
Now you need a service account, an account with local administrator privileges is needed, I am using the local admin account as the server is off domain
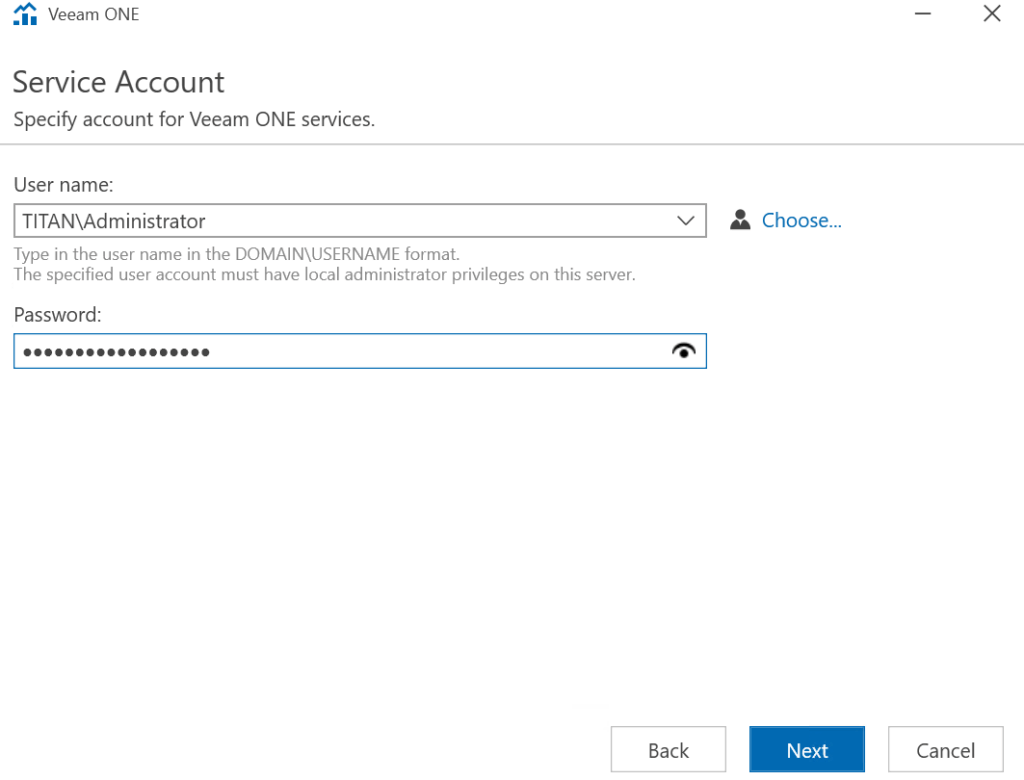
Wait for the system configuration check to run
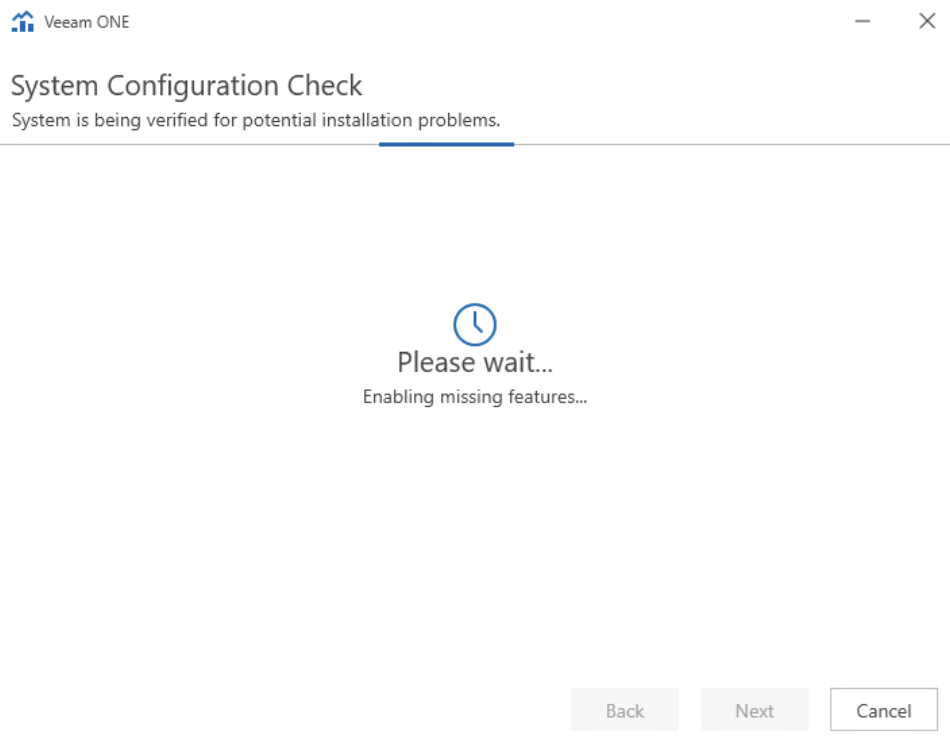
If it highlights anything, you’ll need to address this, eg I need to reboot my server, I also saw an error on the OLE DB Driver which a reboot fixed in another deployment
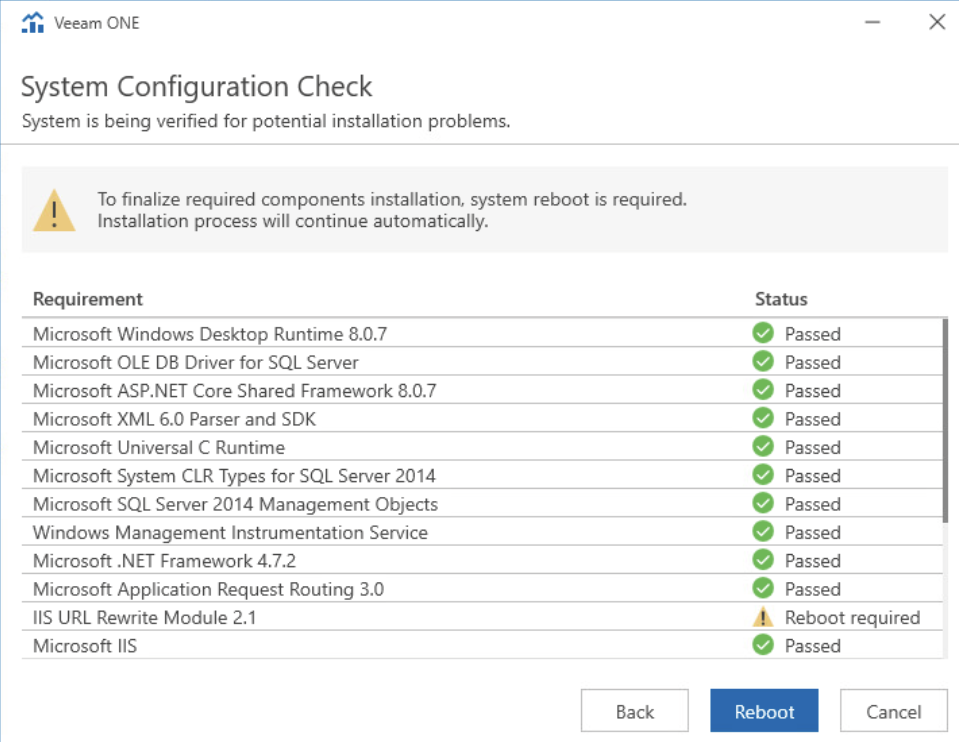
Once thats passed and issues are addressed, click install
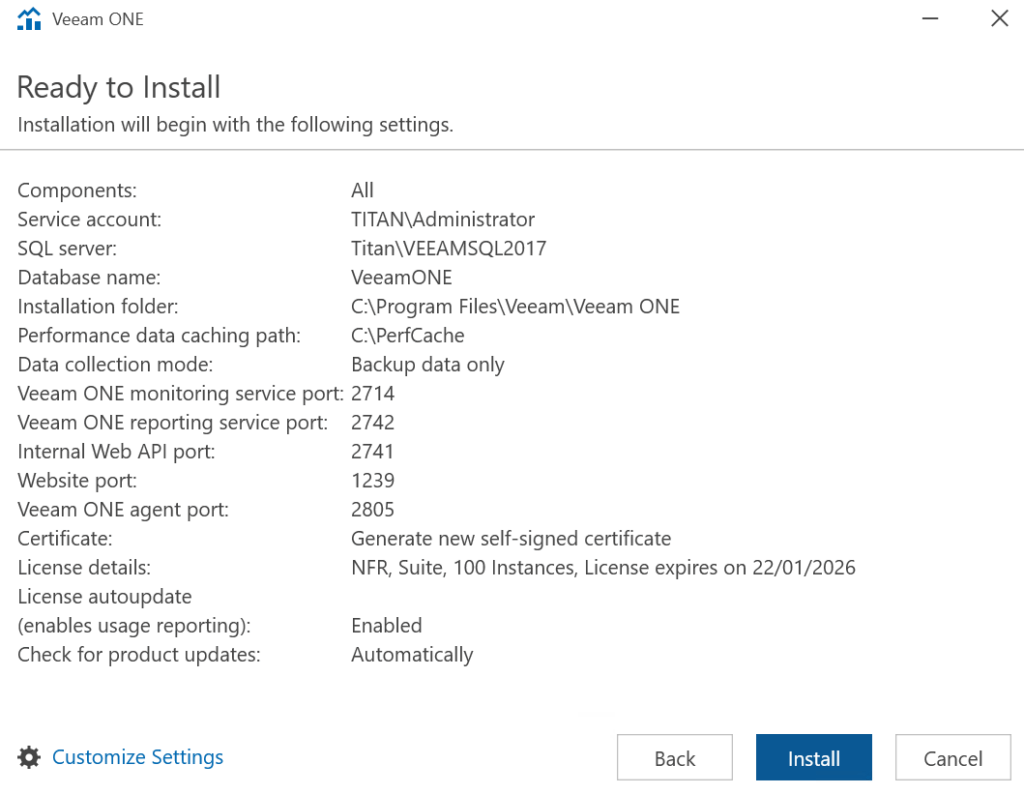
Once its done, click finish
Then reboot the server
3.2 – Notification Setup
To configure Veeam ONE we will need to use the client for this, double click the desktop shortcut

Then click Connect
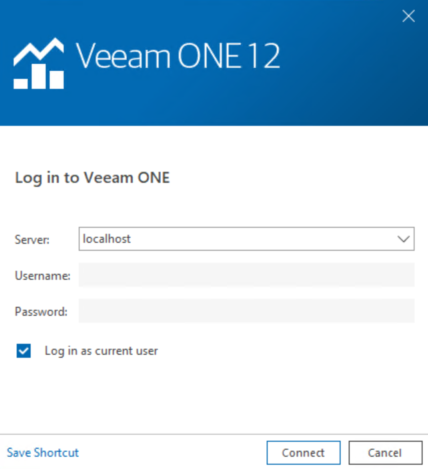
When you first login, you should get a pop up for the notification settings, as Veeam ONE is all about dashboards and alerting, this needs to be setup
Click the check box to enable email notifications, select the SMTP Type
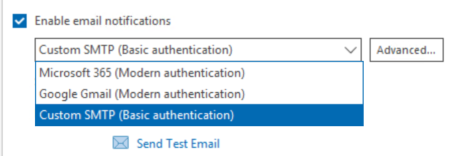
Then add your SMTP server and the from address you want notifications to show from
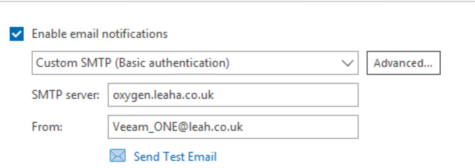
If you click Advanced you can change the default port from 25, this should use SSL on port 587, and you can setup authentication, at home my SMTP server is unencrypted so, I just changed the port number
And click ok when this is set
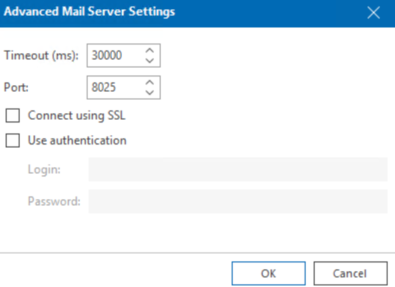
Click Send Test Email

Enter the recipient address you want your alerts to go to and click ok
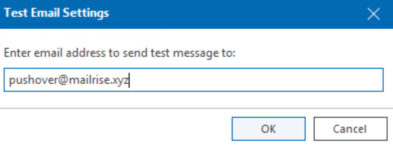
If you got your email, everything is setup correctly, then click Next
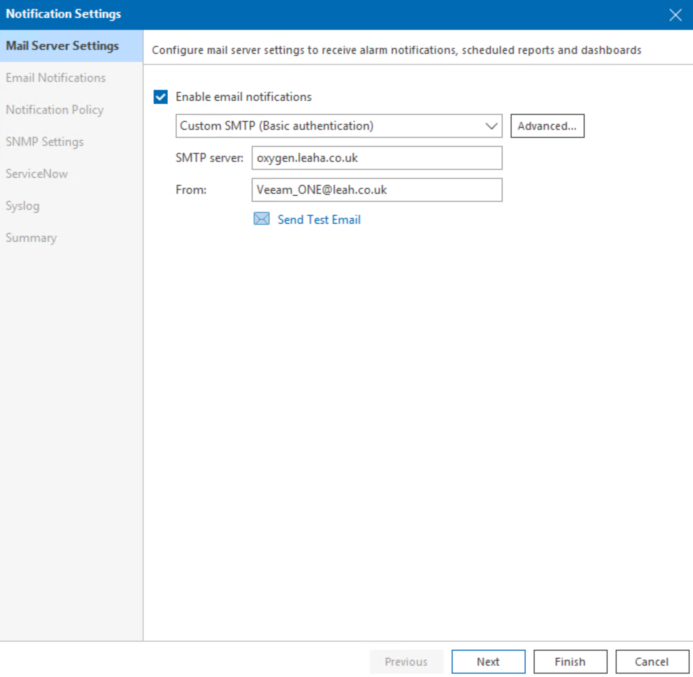
Add a new recipient by filling in the email address and clicking Add
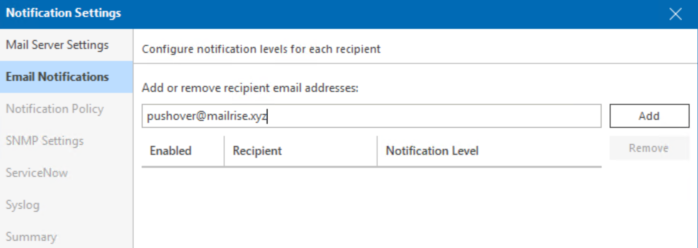
You can also configure the notification level you want to recieve, for now I am leaving this on Any State, the default, then click Next
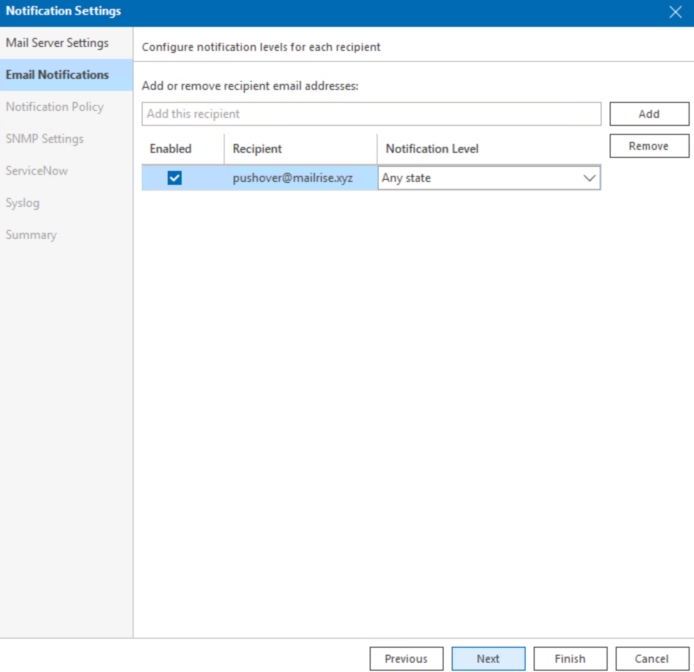
You can edit the notification policy, however I am leaving this at the defaults and click Next
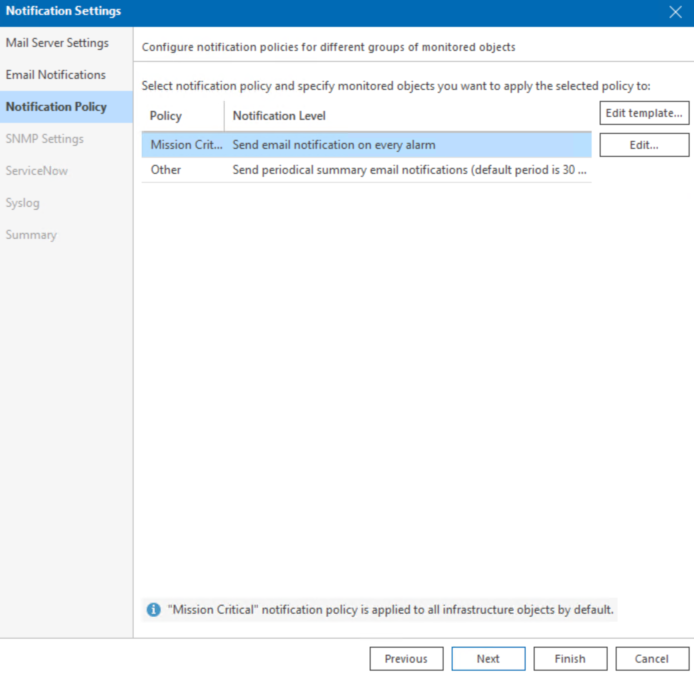
You can also add SNMP traps, ServiceNow integration to generate tickets when alerts are generated, and configure an external syslog server, as I dont use these I have left them blank and clicked Finish at the bottom of the pop up
3.3 – Adding VBR/VEM
Now we have setup SMTP you should be on the main menu under Veeam Backup And Replication in the bottom left, click Add Backup Server towards the top
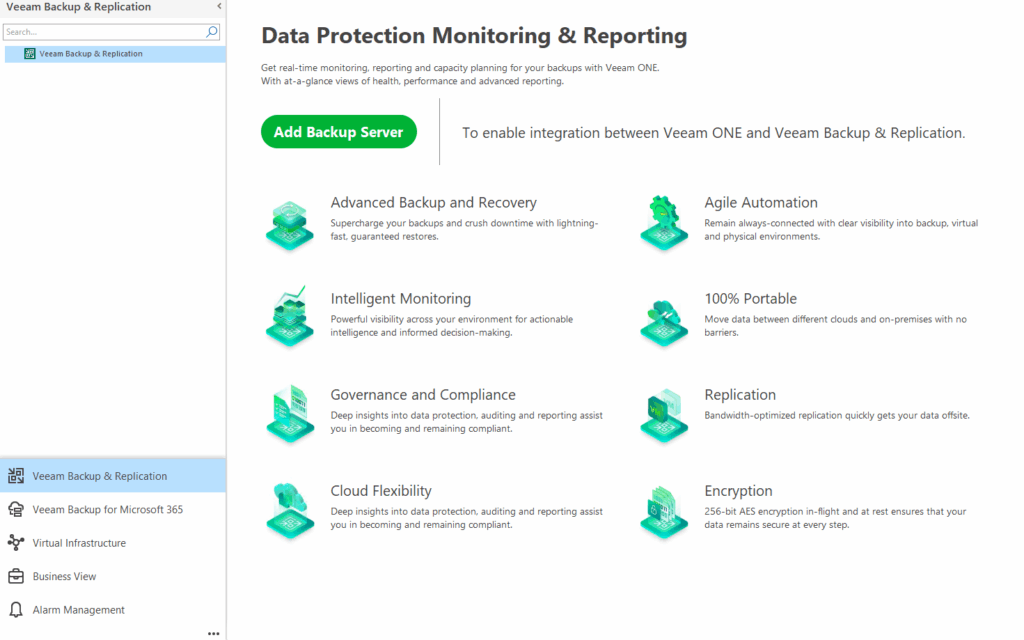
As we have setup Enterprise Manager, we will be adding that, and I have added the server FQDN, selected the server type as Enterprise Manager, prompted for the Veeam ONE Agent and allow the VBR console to display analytics data, then click Next
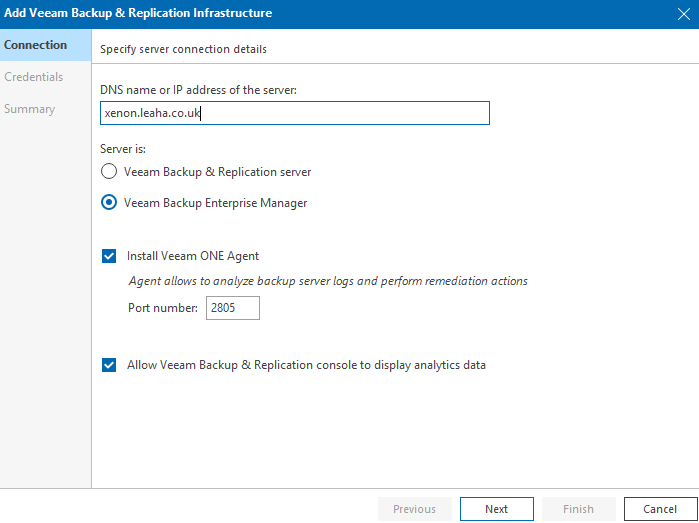
Click Add for a new credential for Enterprise Manager
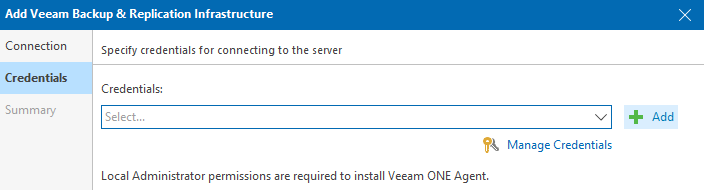
Add the username, this should be servername\account, as we are using local accounts, and it should have the Enterprise Manager role, Portal Administrator, then click Save
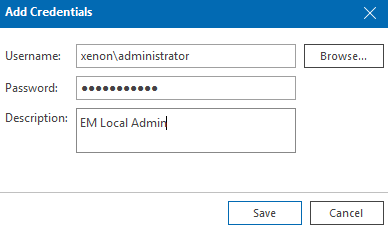
Then click Next

Then Finish
It will take a good 15 mins to start importing data
3.4 – Adding Virtual Infrastructure
Its worth noting as this monitors VMs, VMs in vSphere that are not backed up will contribute to licensing if you add vSphere/Hyper-V
But it does have some good features in the reporting so we will look in how to get around the licensing increase below
Also, if you have VMware VVF or VCF, then VCF Operations, formerly Aria Operations, is significantly better for VMware monitoring
If you have Hyper-V, then it might be worth buying additional licenses for VMs you arent backing up but want to monitor
Now we have VBR/VEM added, we will want to add our virtual infrastructure, the process should be similar for both hypervisors, it only supports Hyper-V and VMware for now, but this will be for VMware
In the Veeam ONE client, click Virtual Infrastructure in the bottom left
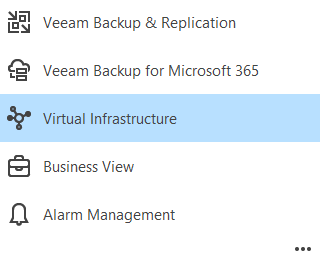
Then click Add Server
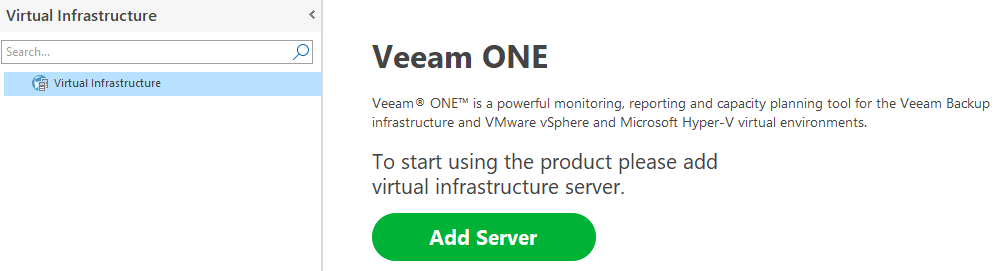
Select your hypervisor
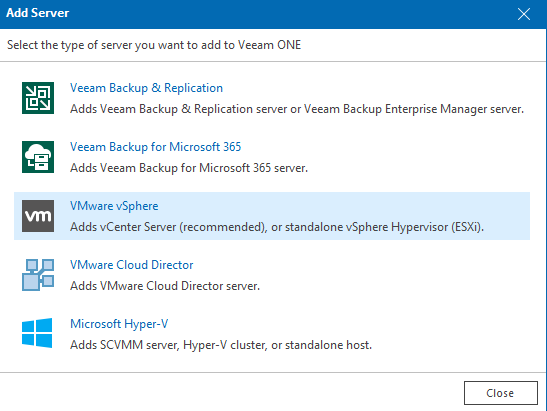
Enter the vCenter FQDN and make sure the vCenter Server radio button is selected, then click Next
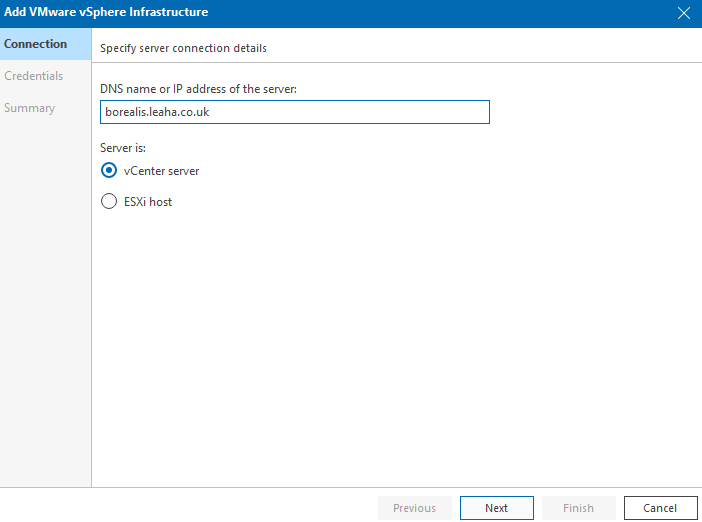
Click Add for a new credential
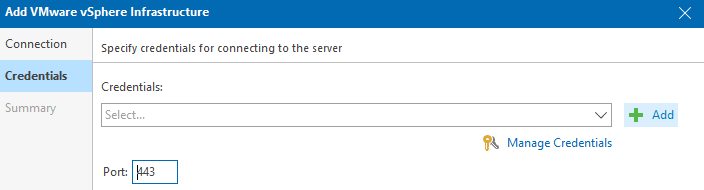
I added a user to my vSphere domain with read only rights for this, as best practices, but you can use the administrator account, then click Save
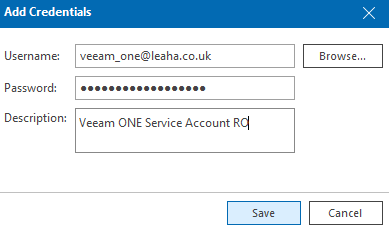
Then click Next
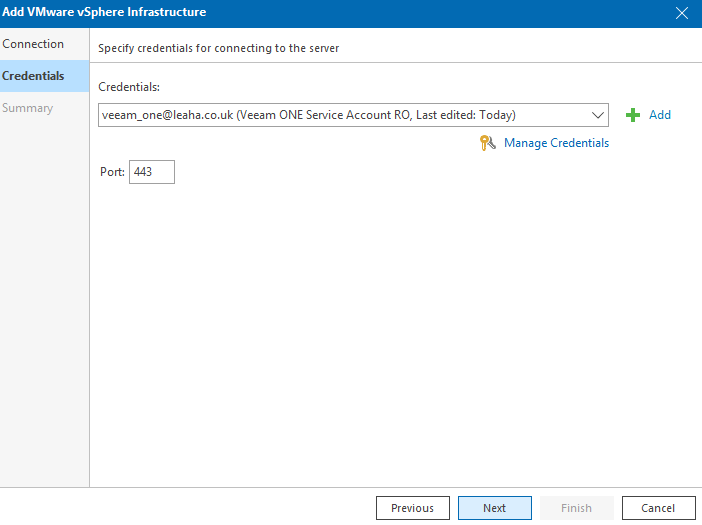
Trust the certificate
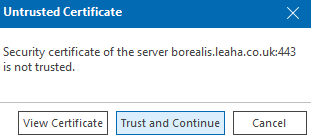
And click Finish
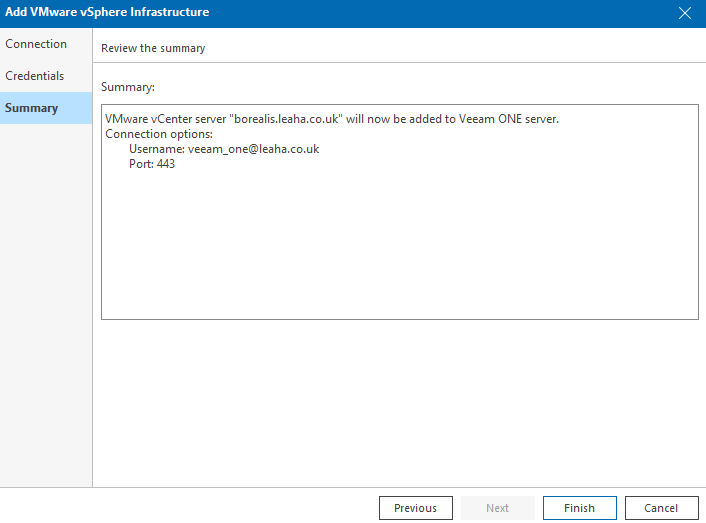
Now thats in, we have the extra licenses issue to address, if we click the three lines in the top left and click License
And head to Instances, its VMs we are interested in, and the type VMs is hyper linked, click on that
It will show us whats using the licenses, VMs backed up by VBR will have the host as the VBR server, vCenter or both, what we are interested in is the VMs that have only the vCenter as the host, for example

These are the 10 VMs adding to my license count as Veeam ONE is monitoring them but they arent in a job
Its worth noting, powered off VMs arent in this list, so if you have powered off VMs that arent backed up, add them
Close the licensing info off, click the three lines in the top left and click into Settings/Server Settings
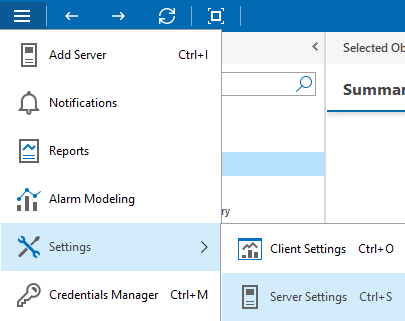
Under the Monitored VMs section, click Create New on the exclusion rule section
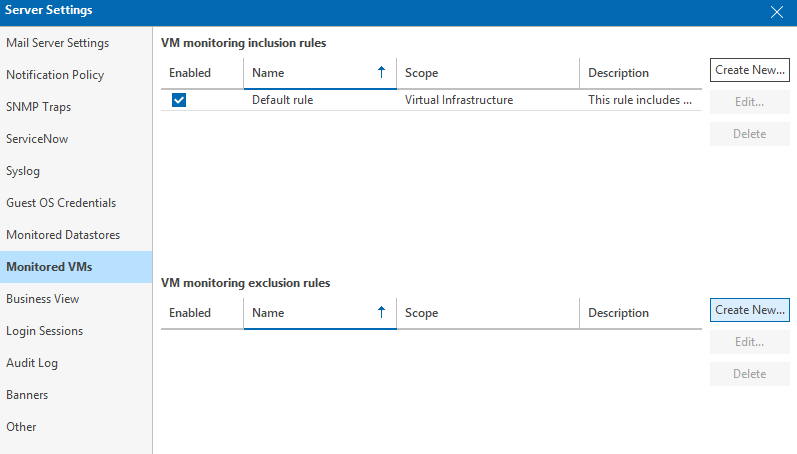
Give it a name and description, then click Next
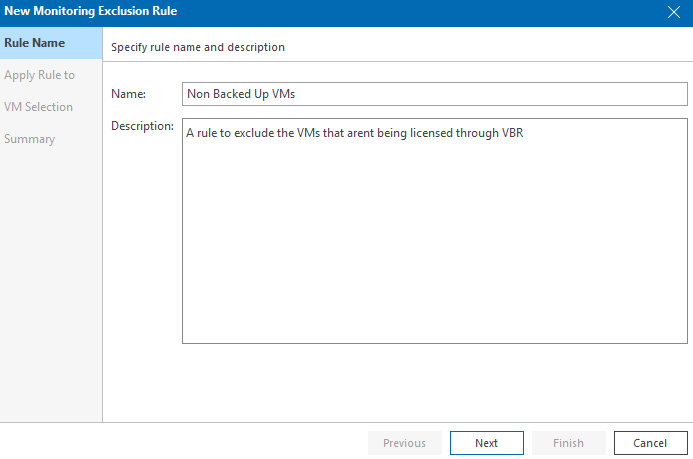
Click Add/Infrastructure View
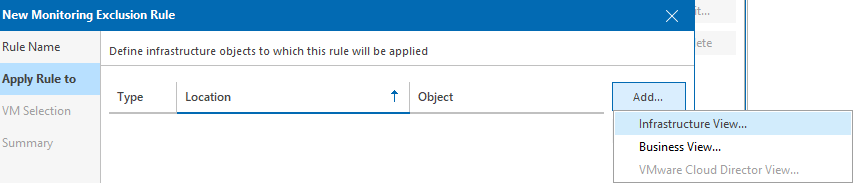
Expand your cluster, then resources and select the VMs we got from licensing which only have a host for the vCenter, and any powered off VMs, then click ok, for example
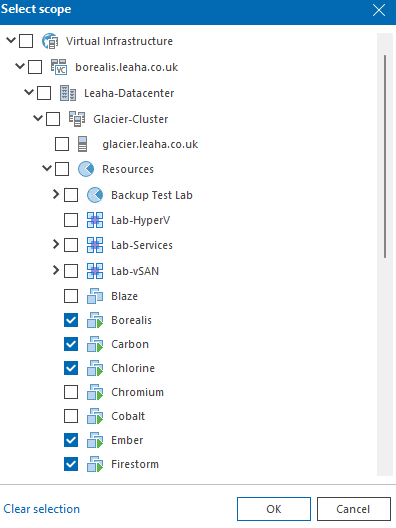
Here is my list, I added Inferno to the list, its often switched off but does get occasionally used, so I dont want it adding to the license count, then click Next
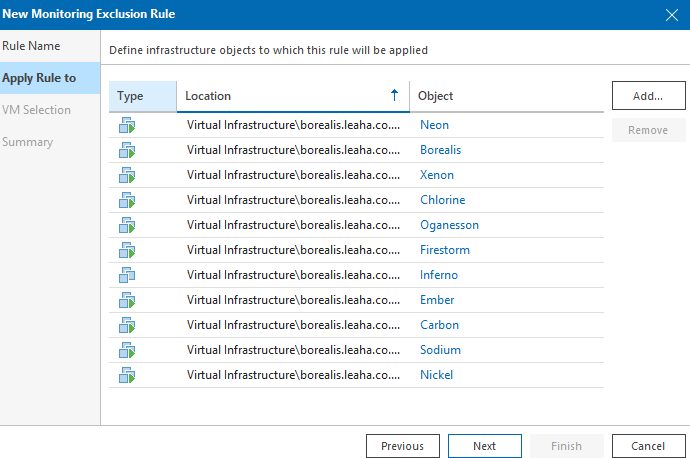
Select By Infrastructure Location, and click Next
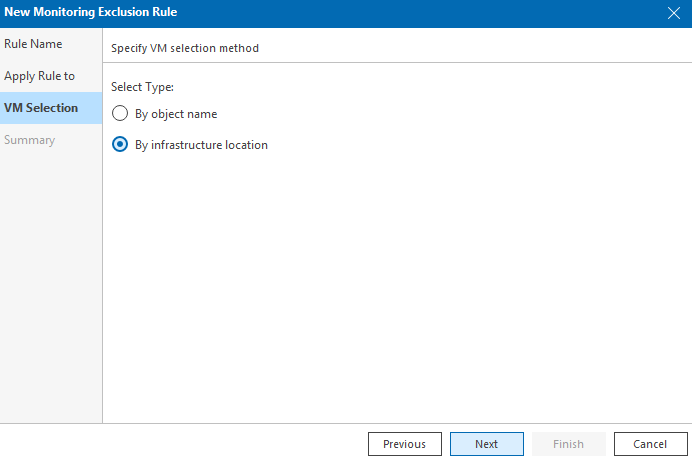
And Finish
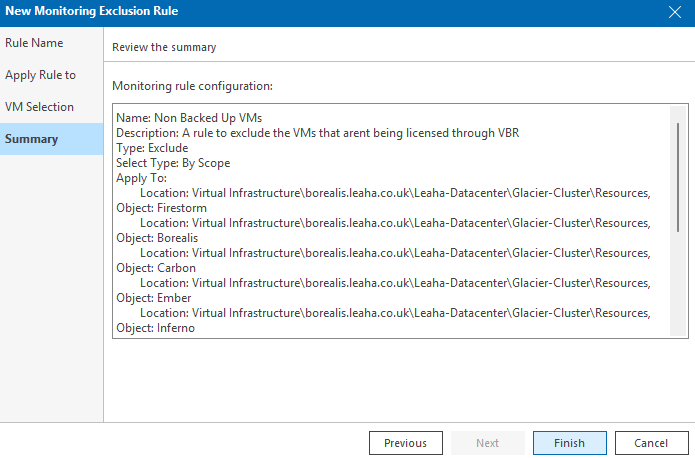
You’ll notice the Selected VMs at the bottom has dropped from 53 to 43 now, and click ok
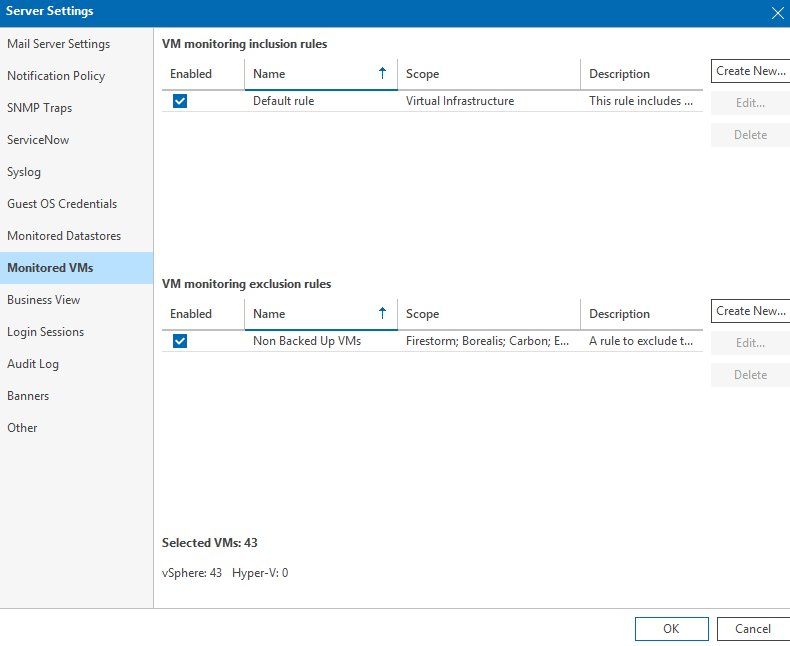
If we check back in licensing, its gone back down removing the VMs not backed up
3.5 – Managing Users
We want to ensure we are using local users, they can belong to these groups in Computer Management

3.6 – Firewall Preparations
Before we add anything to Veeam One, we want to prep the Firewall on any Windows servers that are backup components, for example, proxies and VBR its self, we need to allow remote management out for Veeam One to be able to read else you will get errors about the server RPC being unavailable
If you add Veeam M365 to Veeam one you will need to do this on that server and any of its Windows Proxies
Search for Windows Defender Firewall and open it
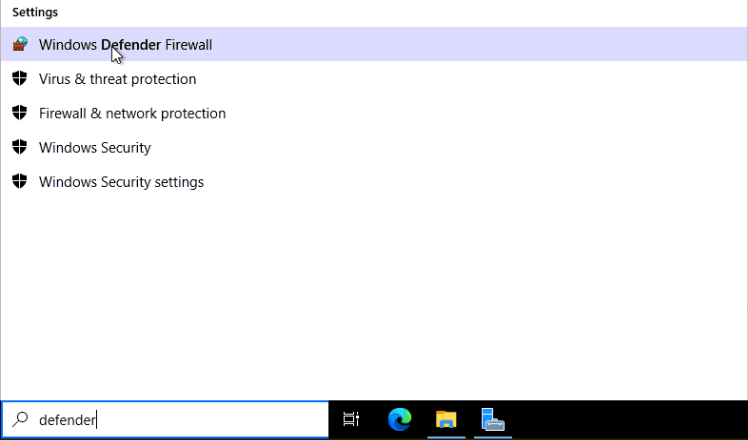
From there click the option to allow an app or feature through the firewall
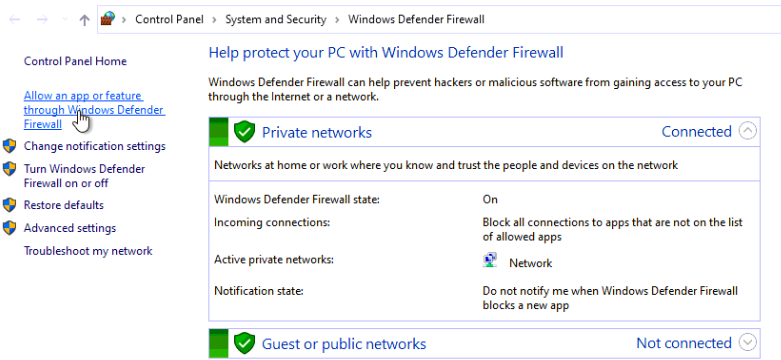
Check Remote Event Log Management, and tick Private network, assuming your machine is off the domain, which a Proxy should be, then click ok
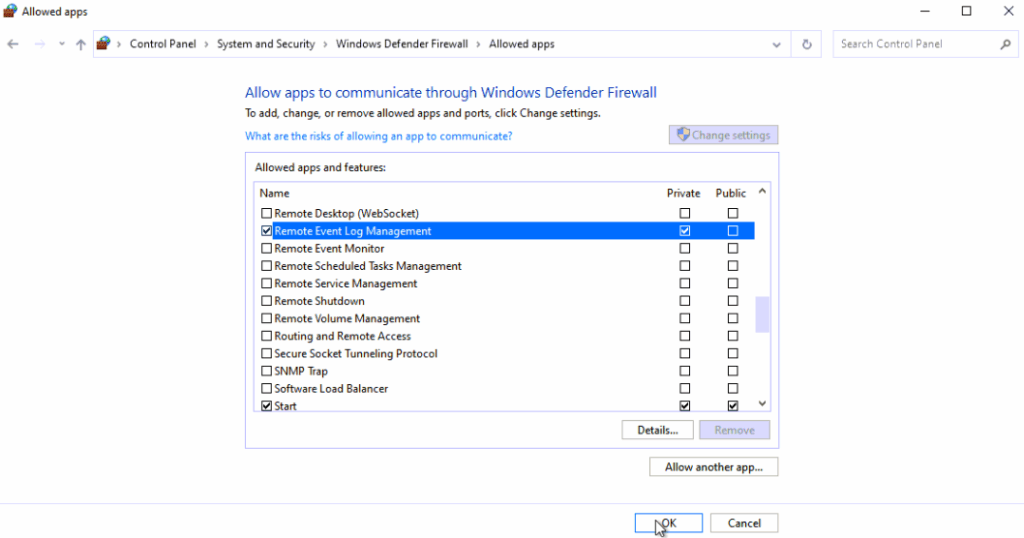
3.7 – Backup Performance Data Collection Failure Alarm
You may see an alarm like like on Proxies or other Infrastructure in Veeam ONE

This is usually a credentials issue, by default, Veeam ONE will use the same credentials, if the proxy has different credentials, you will get this error
To add a new user account, one the client up on the server and click the three lines in the top left, the Settings/Server Settings
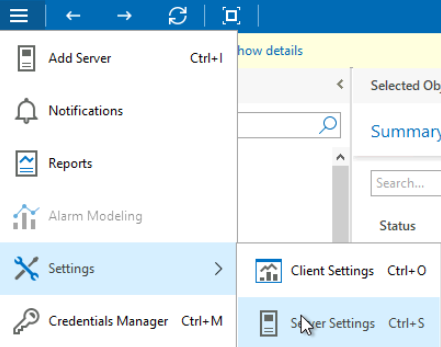
Click Guest OS Credentials and then Add for the credential type your servers withy this error are
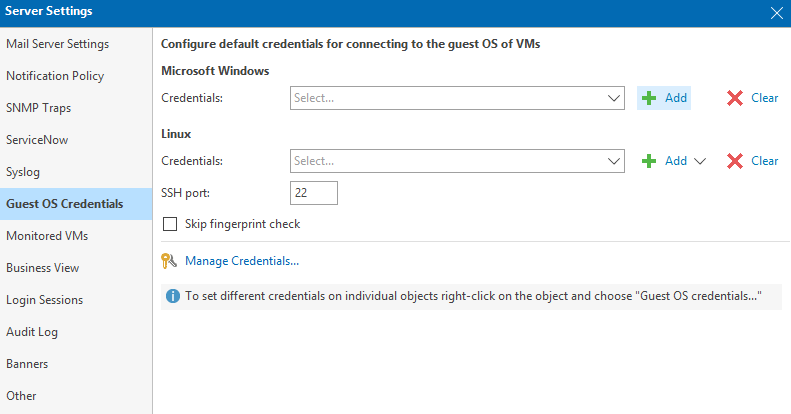
Add the details and click Save
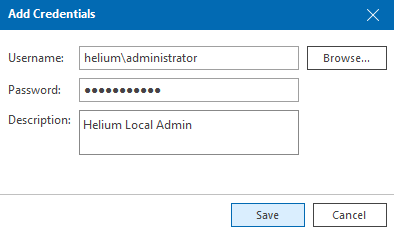
You can set it here to change the default credential for added servers if you want, I didnt, I left it on the VBR server, since thats set to use the default, click ok when you are done
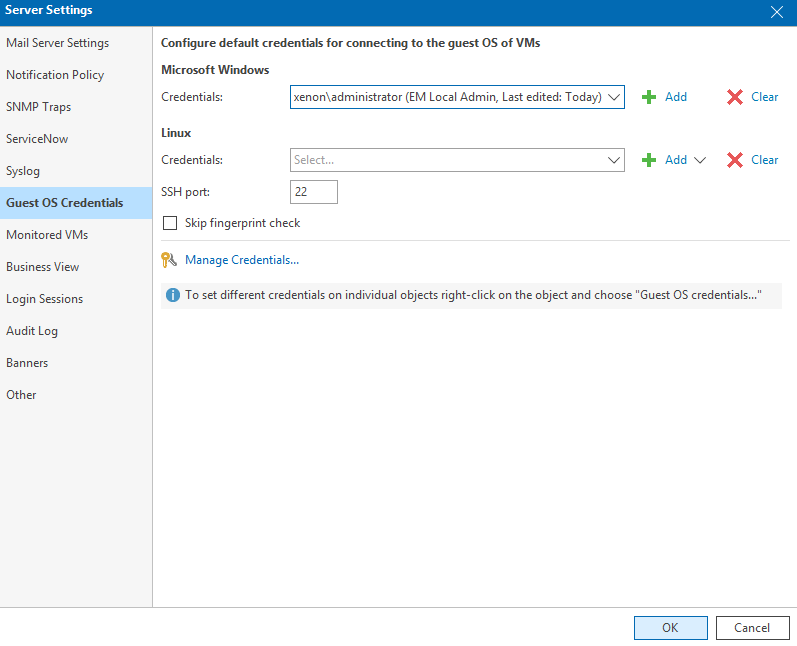
Right click the server with the error and click Connection Settings
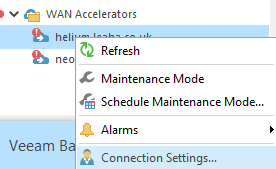
Select the Use Custom Credentials button, and select the credential we just added, then click ok
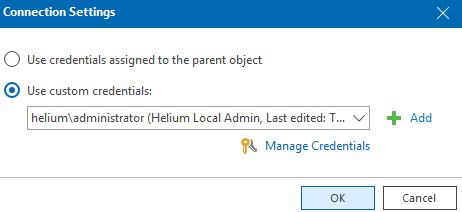
Alarms should then clear automatically in 15-30 mins
3.8 – Alarm Tweaks
The below are examples of how you can tweak the alert definitions in Veeam ONE to fit yours needs, not a best practices guide for how you should tweak them
3.8.1 – Host NIC Link Status
One of the things Veeam ONE will alert on is host NIC stats for your virtual infrastructure, this is only a problem though, if like me, you have extra NICs you arent using
For example, one of my hosts has four NICs, as its a home lab, I use just one NIC so I dont want it alerting for the three that will always be down
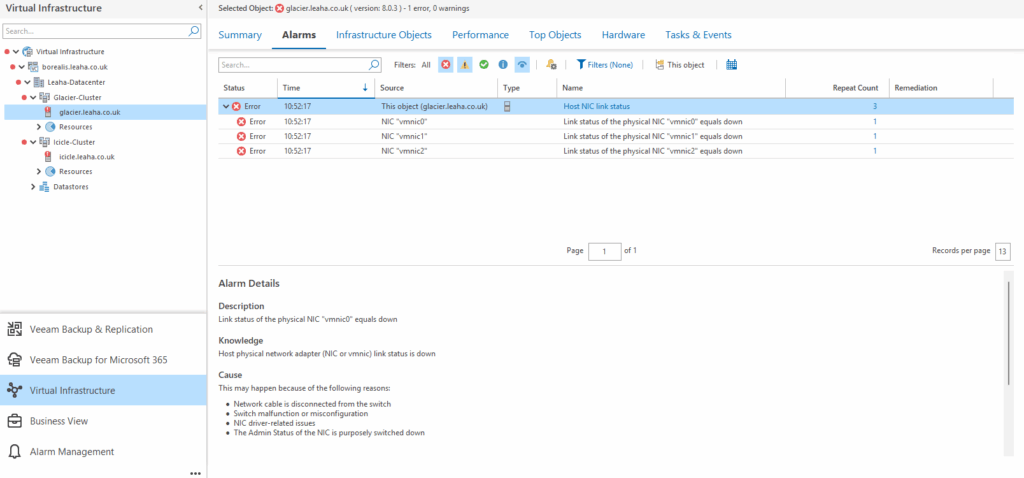
So we have two options for how to deal with this
Option A
This is the easier option and is also most likely applicable to your infrastructure, if you have extra NICs on your ESXi/Hyper-V hosts its likely they all have the same spec as so the NICs not in use will be the same
So we can disable alerting for the NICs across the board
Option B
If you are like me in my home lab and have two very different specs of host, we will need some custom alarms applying to each host, as one host is using VMnic 3 and the other VMnic1 so I can disable alerting for certain NICs like in Option A
3.8.1.1 – Option A Implementation
Right click the top level alarm, and click Edit Alarm
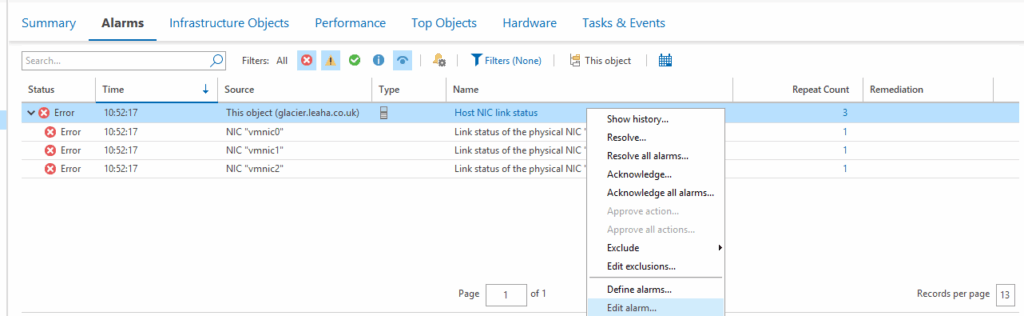
Head to the Rules tab, and in Excluded NICs as the NIC names exactly as they appear in the source tab for the alert
I am going to removing alerting for vmnic0, then click Save at the bottom
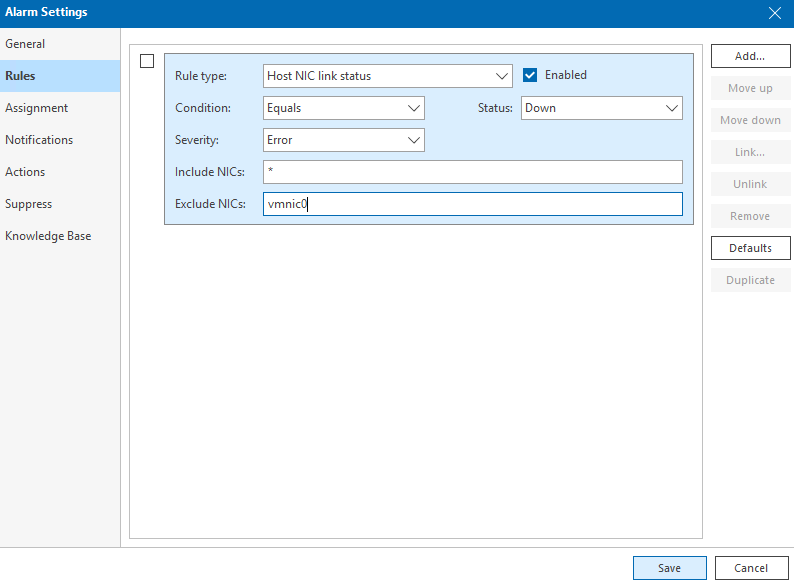
If I right click the alarm on vmnic0 and click Resolve

That alert wont crop back, its also automatically removed its self from my other host, which only has vmnic1 connected
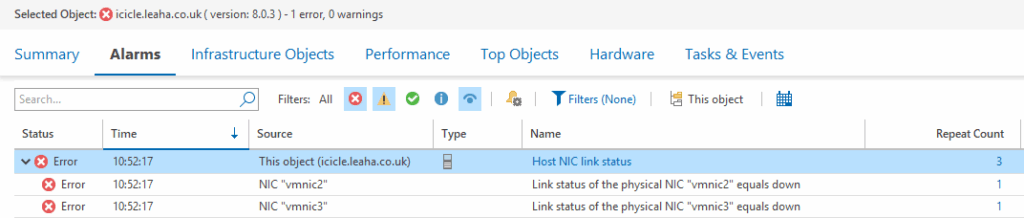
3.8.1.2 – Option B Implementation
What we need is an alarm for each different host, I have two different hosts, so I need two alarms, if I had a third host with the same NIC config as the first, I would only need two alarms still, as I can reuse one
Head to Alarm Management in the bottom left
Under Alarm Management/VMware vSphere/Host search for ‘NIC’ right click the alarm and click Edit

Edit the name of the alarm, I opted to add a bit noting which VMnic is excluded and alarms are kept on for
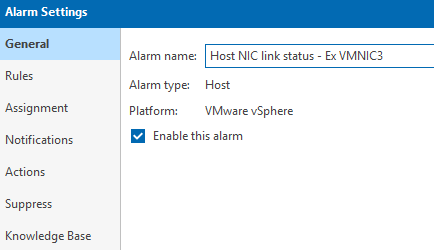
Under Rules, enter the NICs, exactly as they showed up in the alarm that you dont want to be alerting, in the exclude NICs box, comma separated with no spaces
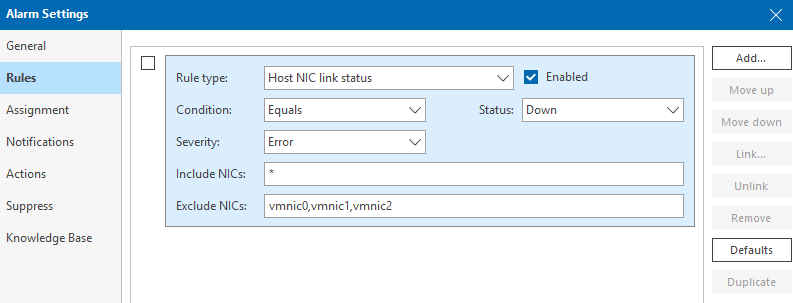
For Assignment, click the default Virtual Infrastructure and click Remove

Then Add/Virtual Infrastructure

Select the hosts that have the NIC configuration you are customising the alert for, as I am only monitoring VMnic3, I selected all hosts that only have VMnic3 in use, then click Assign
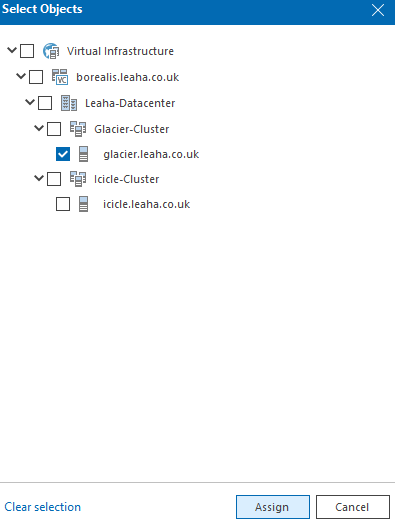
And Save
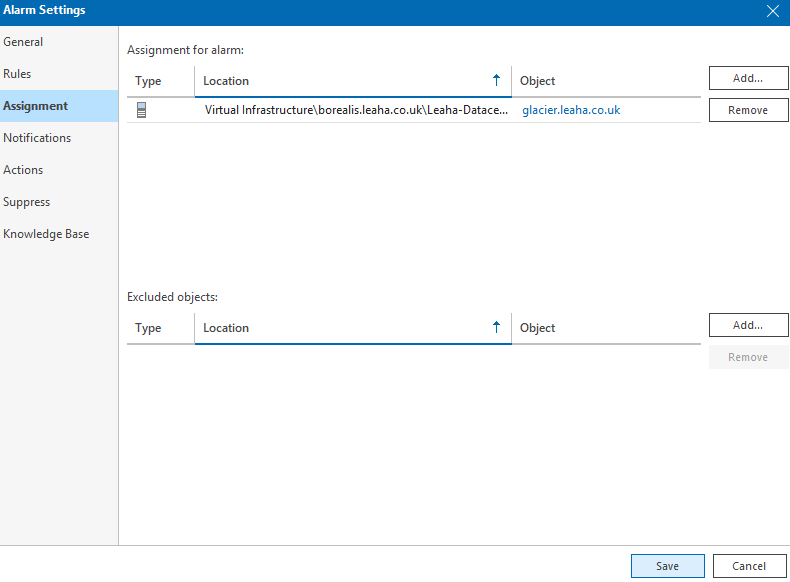
This has fixed my first host, but also disabled NIC monitoring for the other host, as the only default alarm no longer applied

So we need a new alarm for that host, and for every subsequent differently networked host
Back in Alarm Management/VMware vSphere/Host with the search filter ‘NIC’, right click the white space and click New
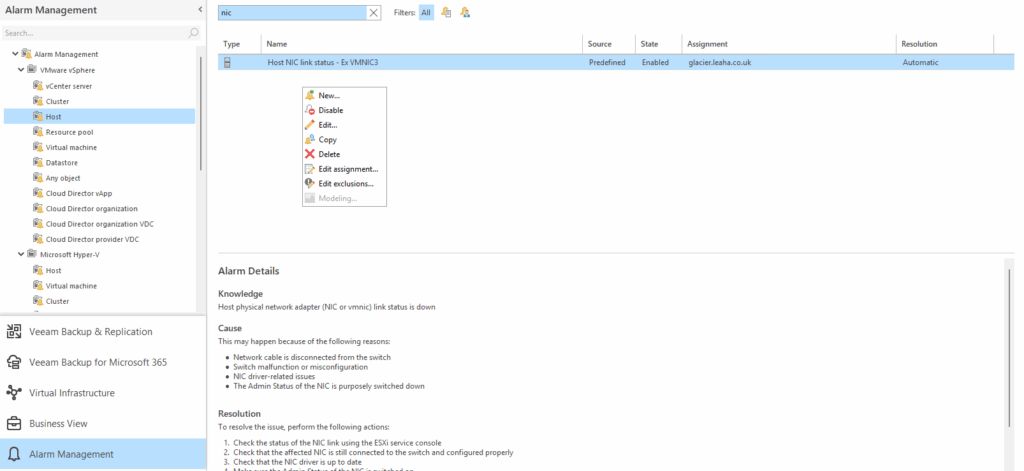
Name the alarm, like we did when we changed the default rule
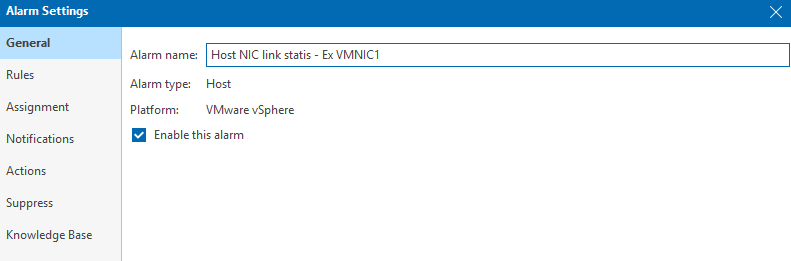
Click Add under Rules

Select the second radio button for a specific condition and click Next
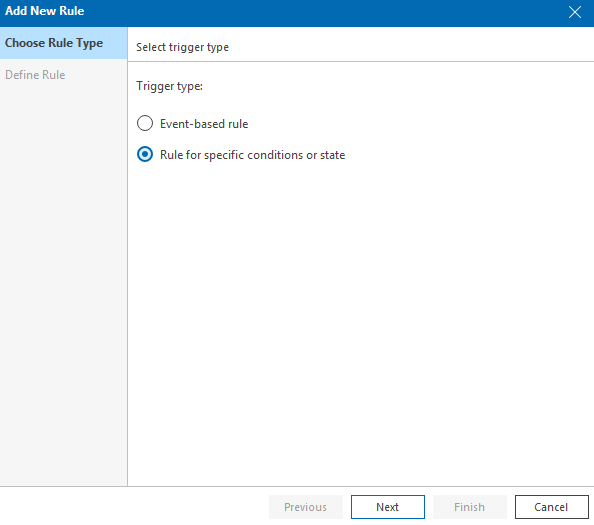
Select Host NIC Link Status then click Next
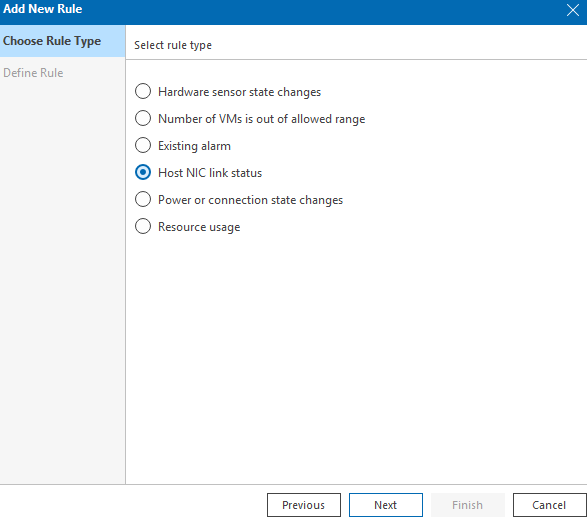
Set the top box to Equals, status to Down, severity to Error, included NICs add a *, and under excluded NICs, add all NICs you dont use, picked up in the initial alarm, comma separated with no spaces, and make sure the check box for enable the rule is checked, then click Finish
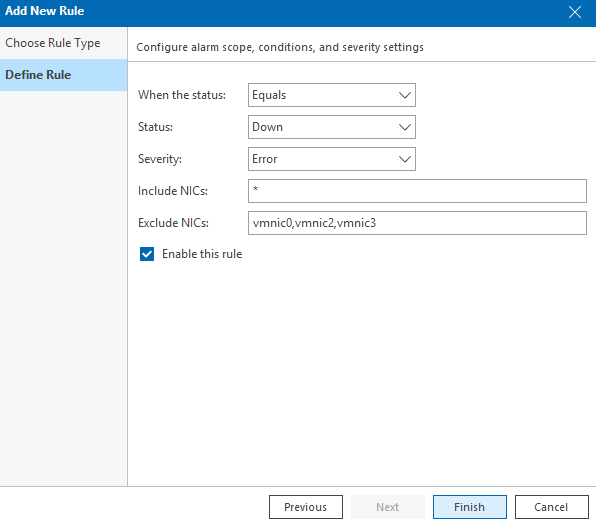
It should look like this
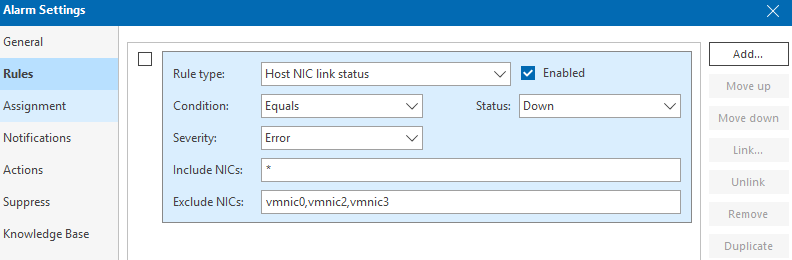
Under Assignment click Add/Virtual Infrastructure

Select the host matching this NIC configuration and click Assign
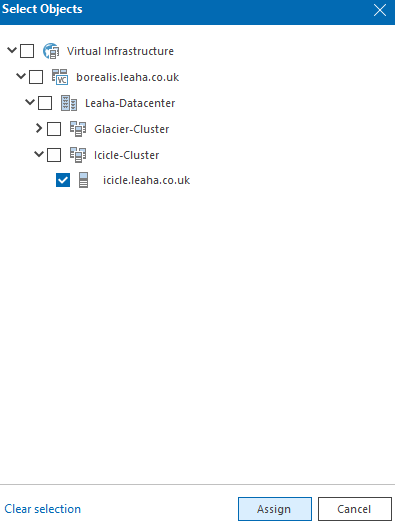
Then hit Save
We now have different alarms with different exclusions so we can monitor the NIC state, without false errors for hosts with different networking setups

3.8.2 – Suspicious Incremental Backup Size
This alarm is meant to help you identify potential ransomware in your backups by looking for incremental backups that are significantly larger
However, this alarm often trips constantly making it the largest spam alert by a massive margin
If you click the VBR server then go into the Alarms tab, you can see these crop up, if you right click any instance of it and click Edit alarm we can change the parameters

Under Rules, we can adjust the thresholds for the alarms to better fit your environment
There isnt really a once size fits all, so you’ll want to have a look at what your VMs are doing with how you want to adjust this
I did think the incremental backup being smaller than expected was a little pointless and you can remove it with the check box on the left, then click Remove, which would help remove the alert spam

Under General, you can disable the alert, which is what I did as I dont find it very helpful
3.8.3 – Backup Job State
By default Veeam ONE will alert you if jobs are in a warning or error state, for me, I am not too bothered about warning states, but do want alerts on errors
Select the VBR server
Right click the alarm and click Edit Alarm
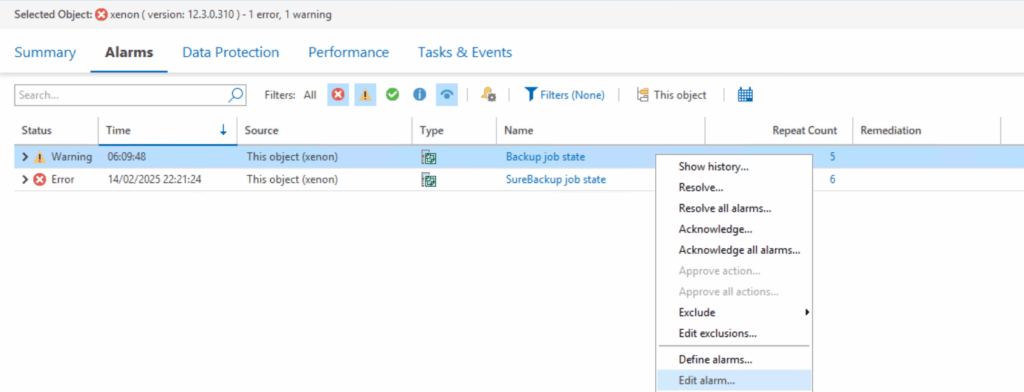
Under Rules, uncheck the Enabled box, for the top rule, for warnings, then click Save
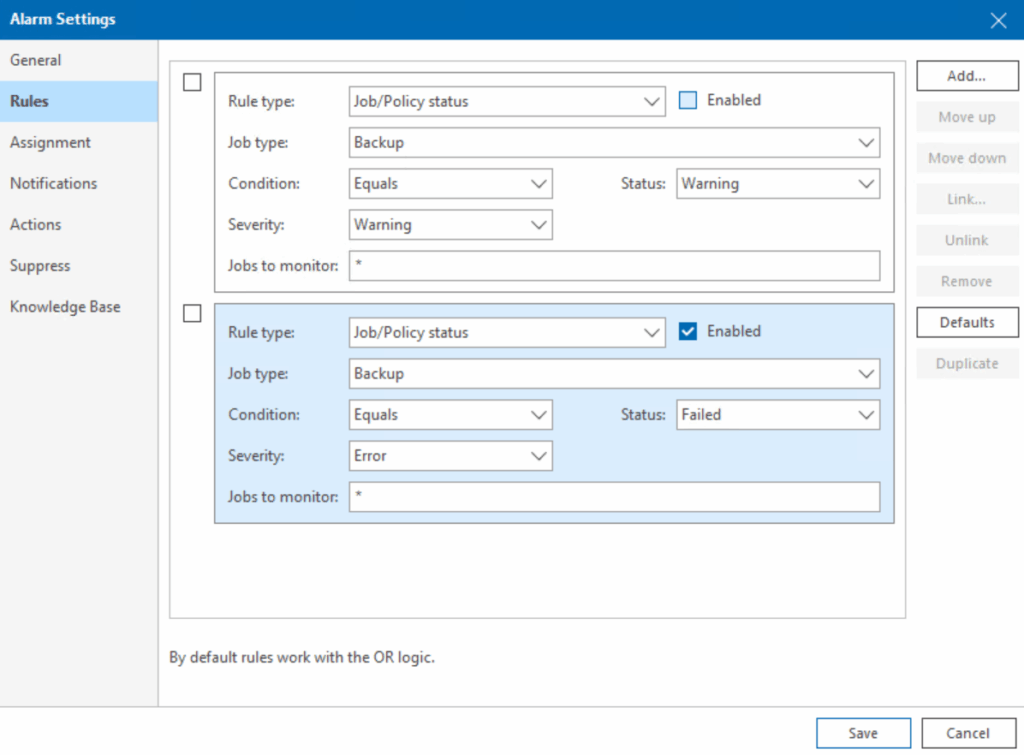
3.9 – Dashboards
To create and edit dashboards in Veeam ONE we need to sue the WebUI, to access it head to
https://fqdn:1239
And use a local administrator account in the form servername\username
The default Veeam ONE threat center will have a couple of widgets, the scorecard shows us our overall score, for me as I have two repositories, one of which is immutable, this has hurt my score here
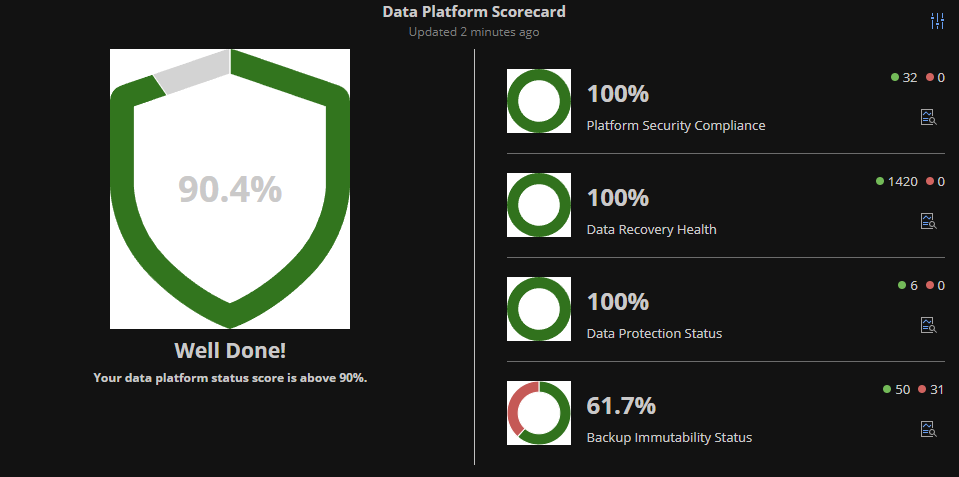
Under dashboards there are two default ones, one for VBR and a heatmap
VBR has the useful info in it showing a variety of info
Job duration is helpful for working out what RPO you can achieve, eg if a job takes two hours and you want an hour for RPO, then with the current setup, thats unachievable as the job takes too long
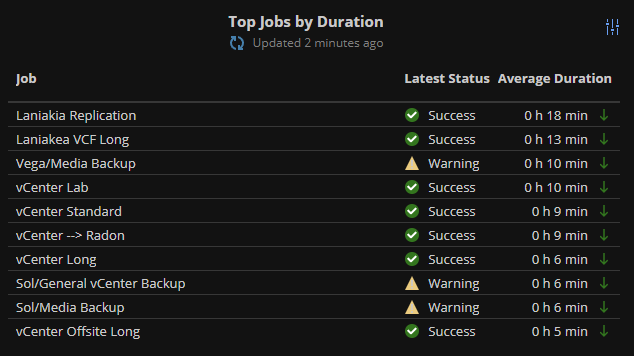
Protected VM overview gives a lot of info on backups
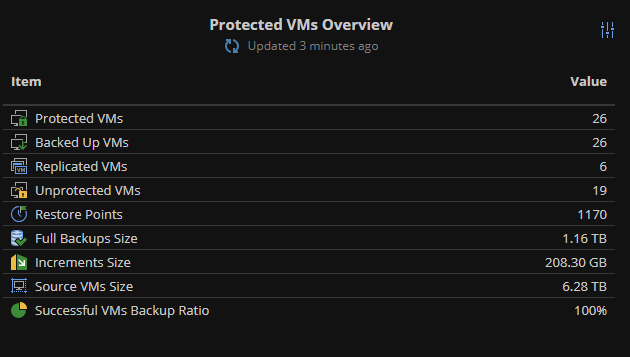
Backup Infrastructure gives a status overview on all your servers in Veeam
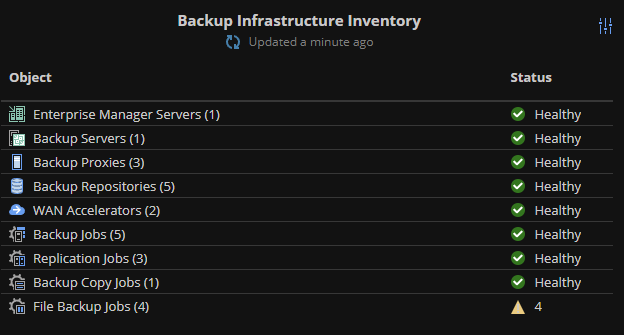
There is also other widgets for Backup Window, job status, though this does not seem to include SureBackup and repositories by used space
If you want people to be able to see the Dashboard without a login, click Share

Enable Direct Link Access and Public Link access, copy the link and click Close
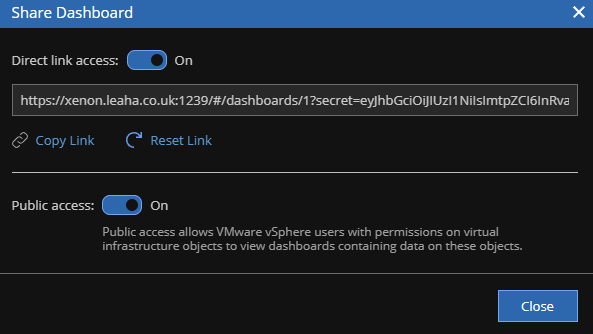
Now anyone with that link can view the dashboard
If you have a hypervisor, there will be additional dashboards, they are generally pretty basic
If you have Hyper-V it might be worth it as it doesnt natively have a tool that does the same, however most people in the VMware ecosystem will be on VVF/VCF with the new licensing model, which includes VCF Operations, formerly Aria Operations, which is significantly better, so you should use that over buying extra Veeam licenses for the VMware monitoring
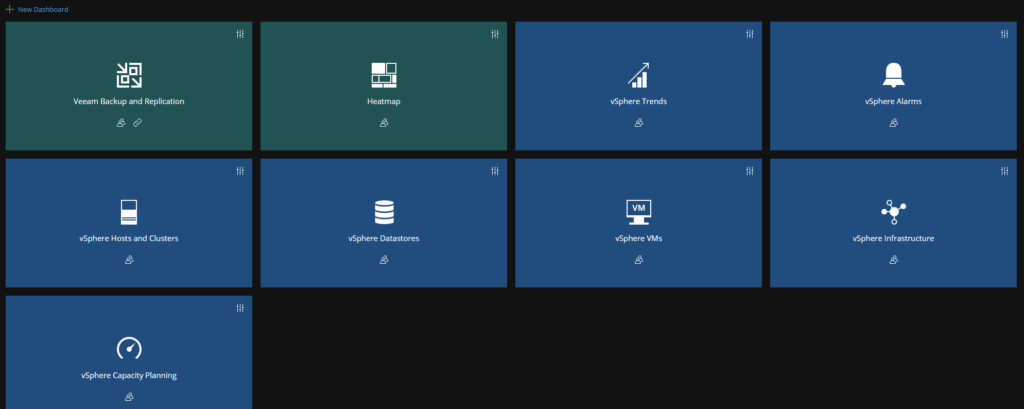
4 – Veeam Recovery Orchestrator
4.1 – Installation
For this VM we will need the following specs
- 4vCPU
- 16GB
- 150GB
Download and mount the Veeam Data Platform ISO and run the setup.exe application
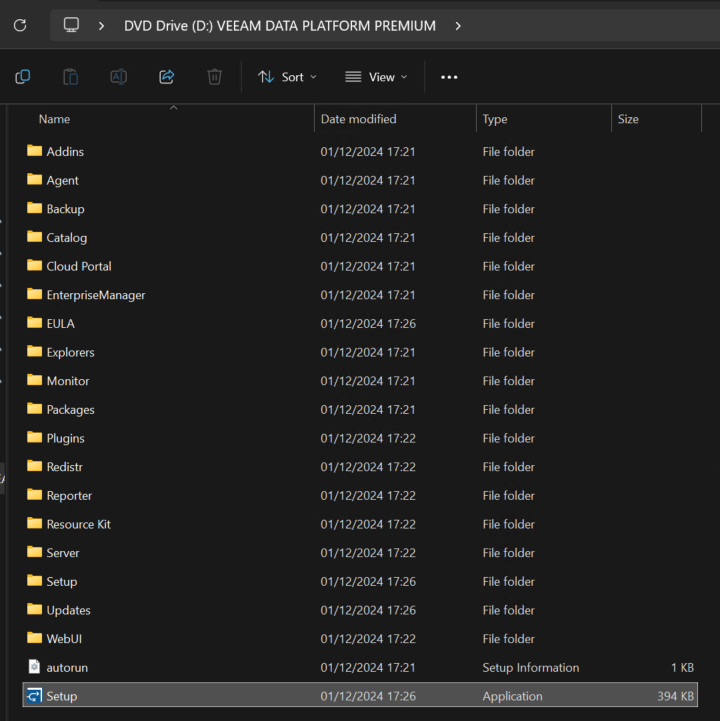
If you see this, click Run
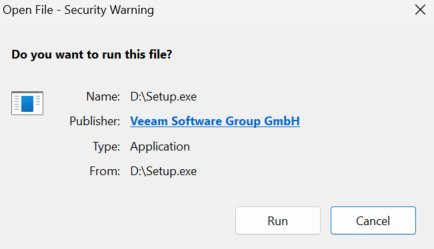
Click Install
Select Veeam Recovery Orchestrator
Agree to the EULA
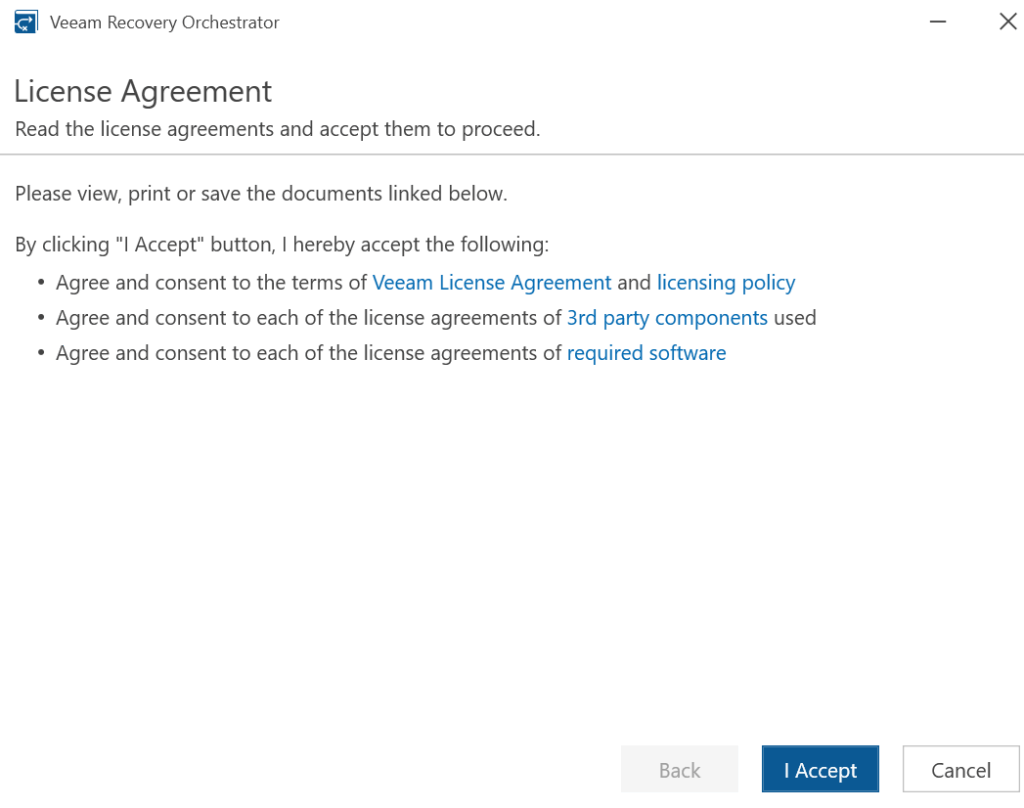
Click Next here
Add your license by browsing to the file, or signing in with Veeam
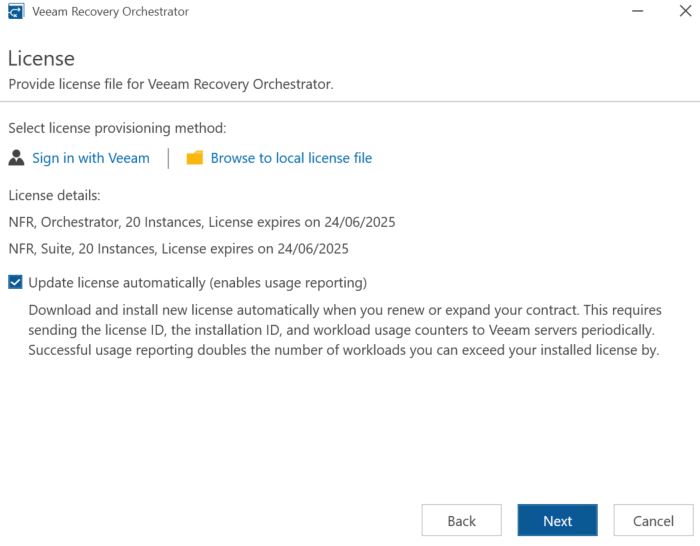
This machine should be off domain, add an account for the service account, it will be local, and wants a never expiring password, I am using the default administrator password, but a Veeam Service account is better in production, this account also needs local admin privileges
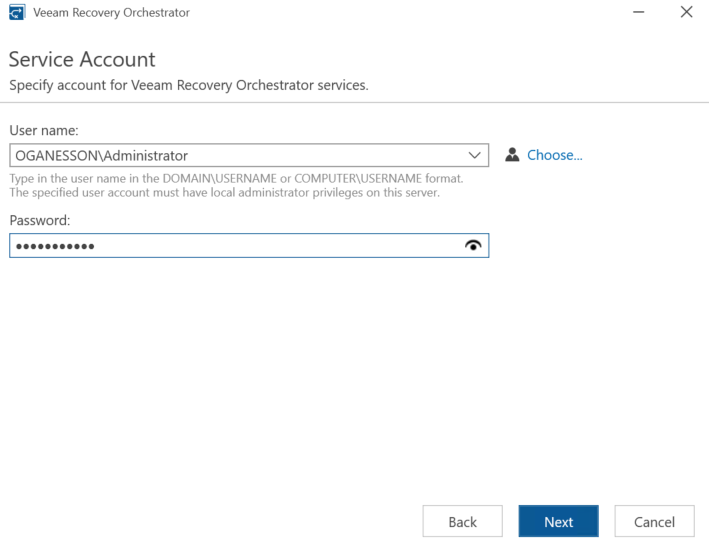
Specify an SQL location, even if you have an external SQL instance, you will want to use the default option to install one locally using the service account we added earlier
This is because, in a DR scenario, your SQL cluster may be unavailable, and this wont be any help to the server meant to orchestrate the recovery
So I am installing a new instance using the service account with the included SQL 2017 Express option as this is a small lab, however for larger environments, selecting an existing instance of SQL that you installed manually with the full version, may be better, still locally on the server
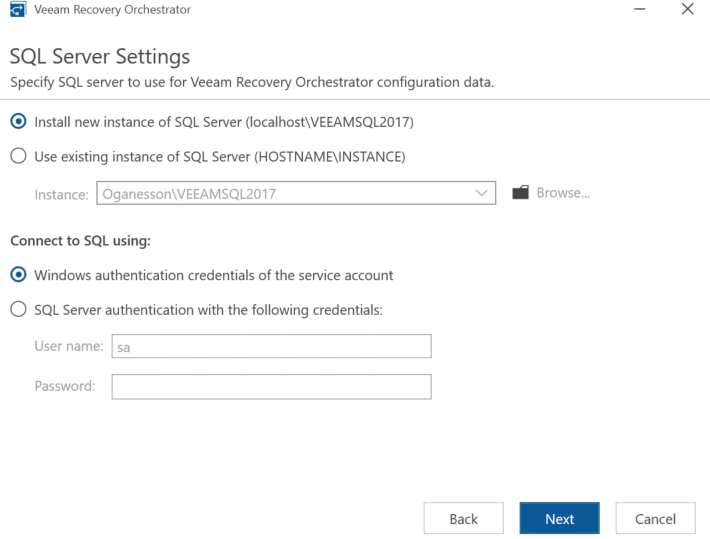
Click Next here
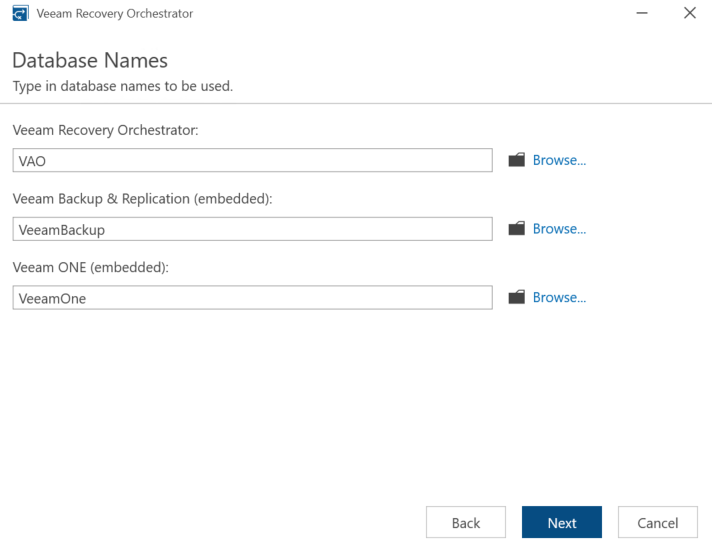
Next again
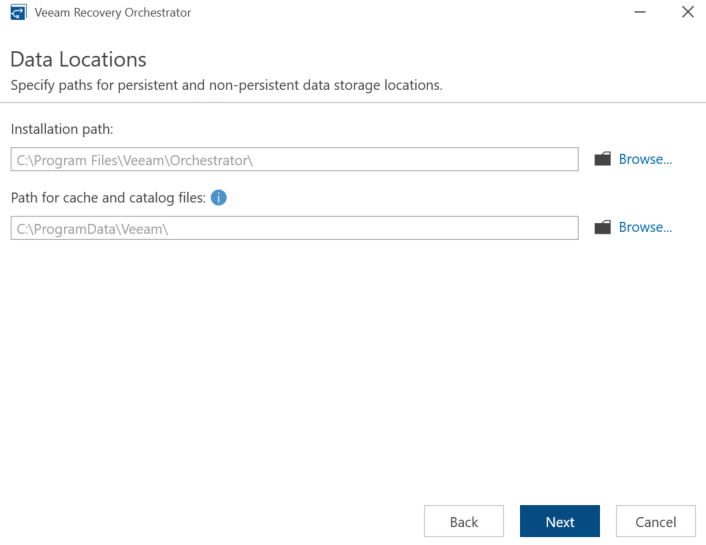
Leave the ports on the default and click Next
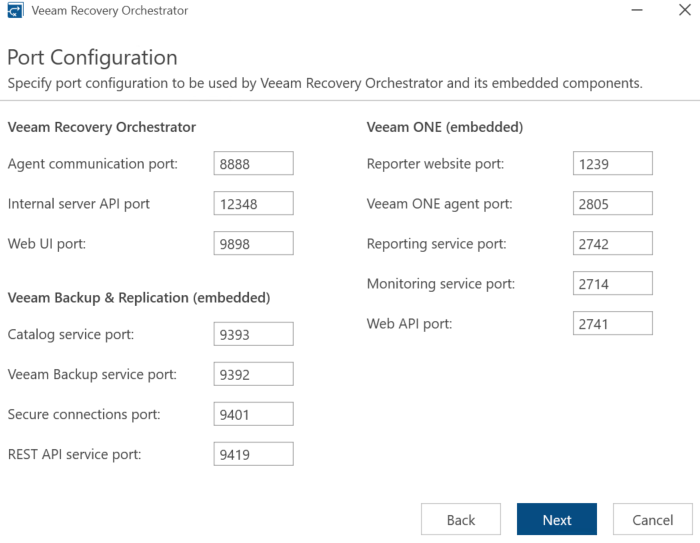
Click Next to generate a new self signed certificate

It may come back with components it cant install, like mind did for the OLE DB Driver for SQL, even installing it manually didnt help much, but installing Windows updates, removing the manually installed OLE DB Driver if you tried that, and rebooting always seems to fix it
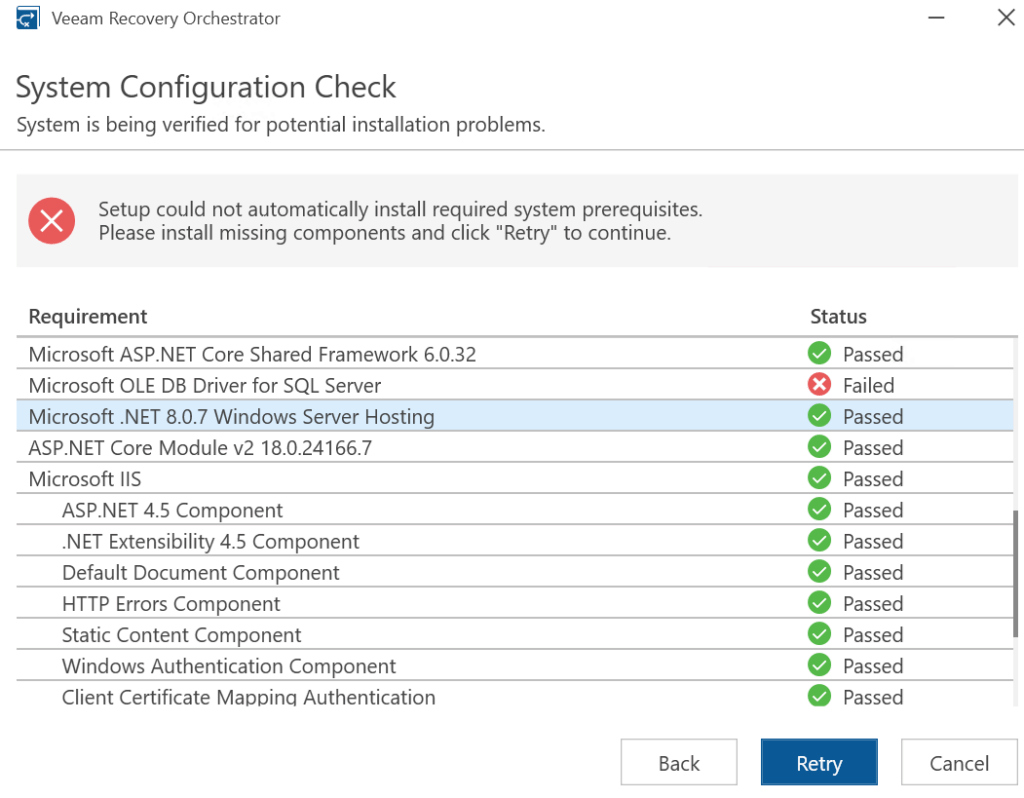
Once its happy it will move to the confirm stage, and click install
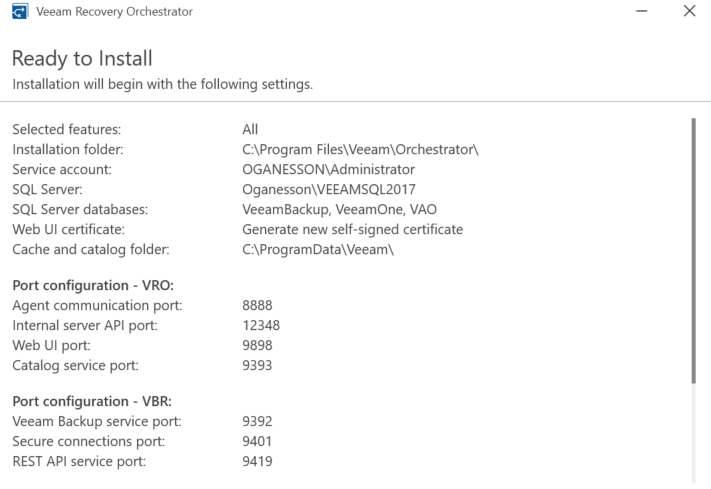
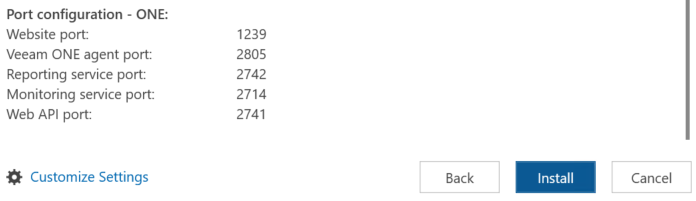
4.2 – Initial Setup
Once the deployment has done you can access the WebUI of the VRO appliance on
https://fqdn:9898
or
https://ip:9898
From there log in with your credentials, as this should have a local account, you’ll want the domain, which is the computer name
Eg
servername\administrator
We’ll need to configure the initial wizard, so click next at the bottom
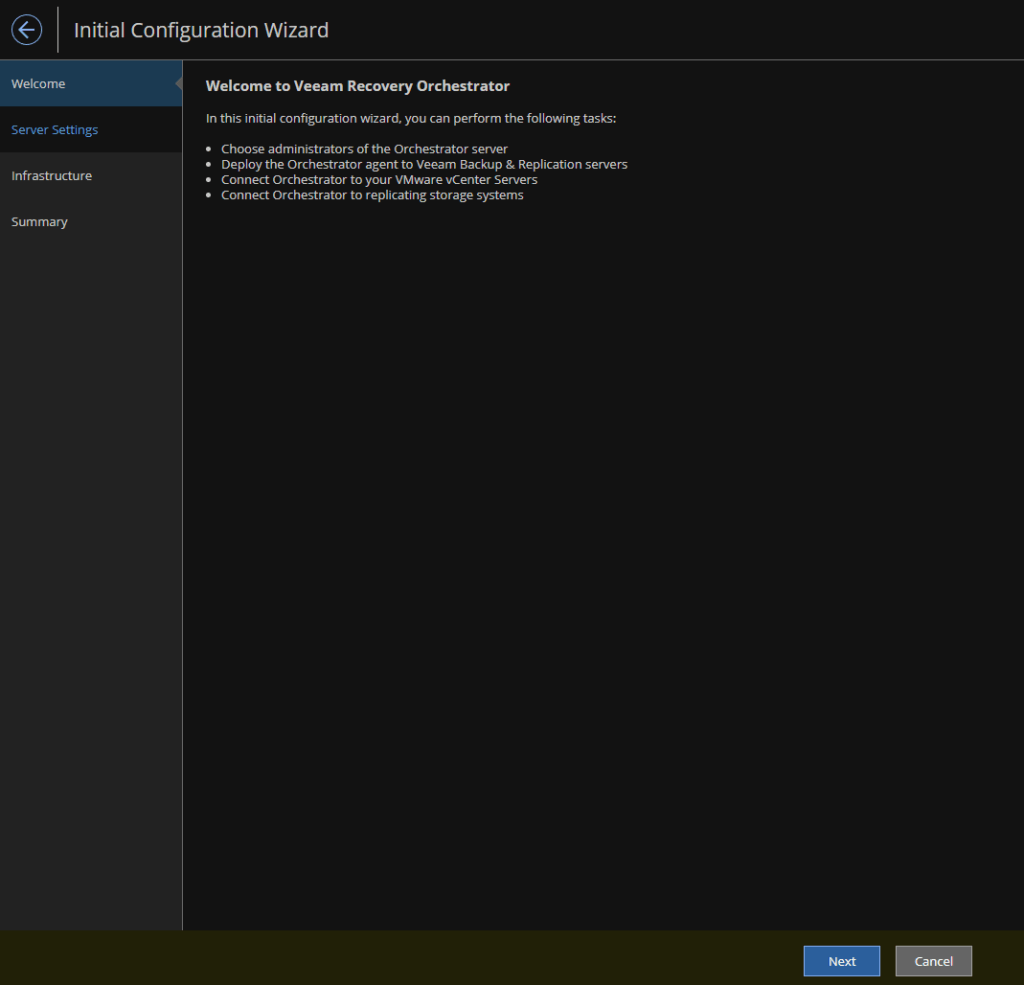
Now we need to assign the administrator role, so click the link to assign
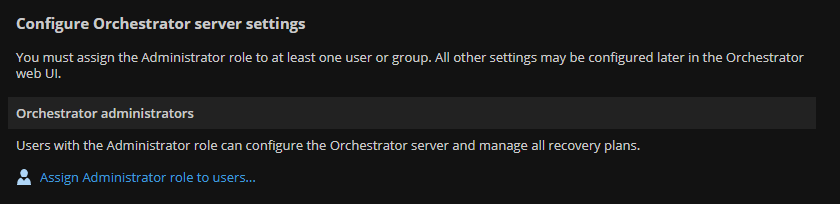
Add your user account or group, in my case as I have the local administrator account only for this at the moment, I am adding that, this can be added to later, and click Add
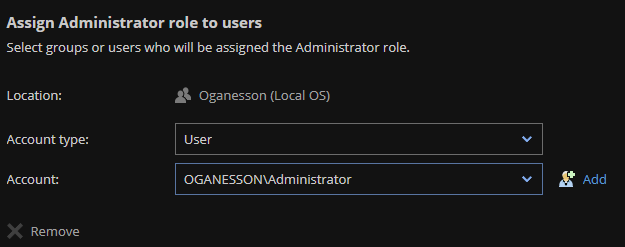
Then Apply
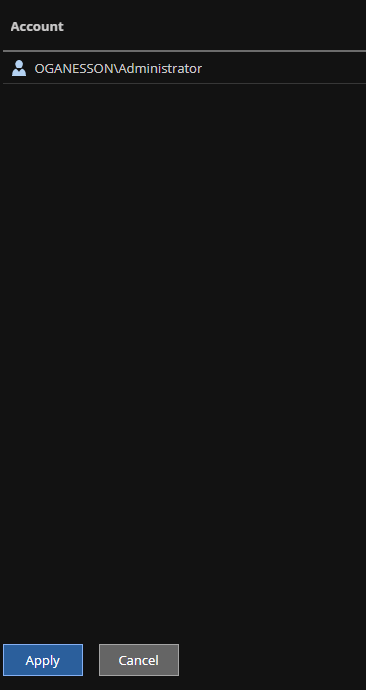
Lets click edit to add some server details

I am adding a friendly name and a description, but you can also add contact names, emails and phone numbers if you want to, then click apply
With that done, click next at the bottom middle
Next we need to add the Infrastructure, lets start with Add Credentials
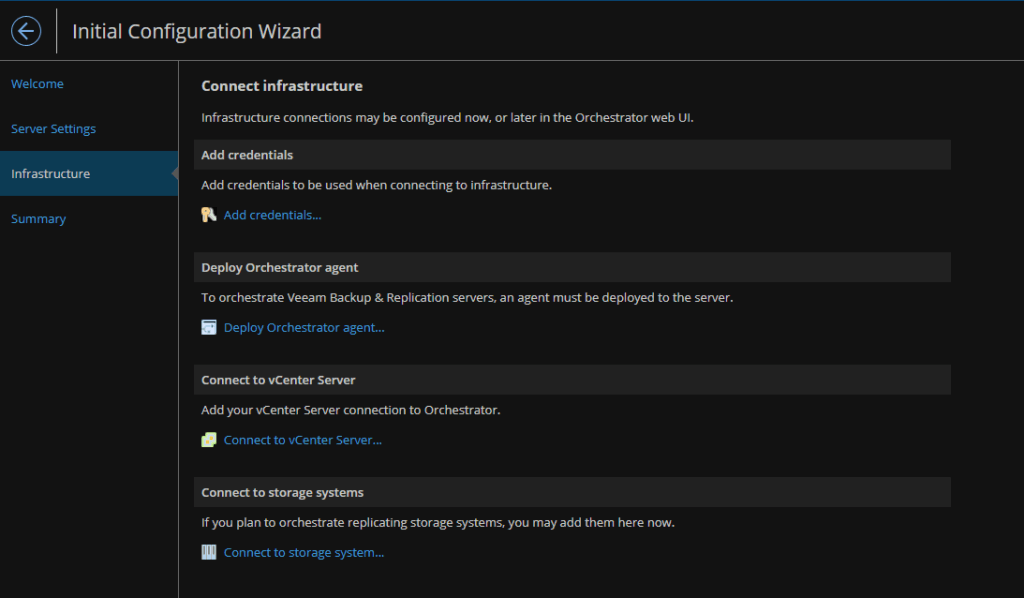
Lets click Add
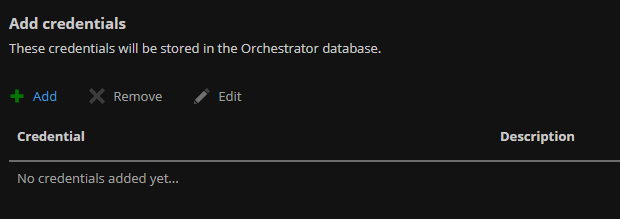
Lets add details for the lab VBR server we will be connecting this too, this should also be local accounts, so you’ll need the server name as the domain, then click add, and apply
We can always add more credentials later as we need them
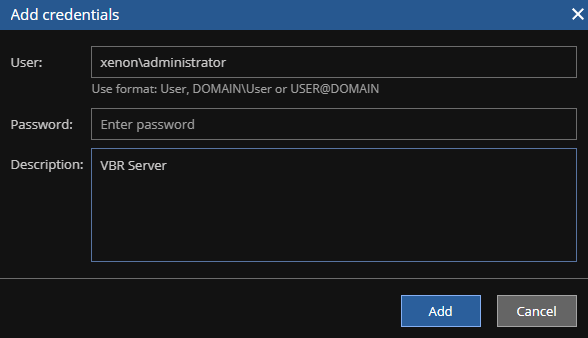
Lets deploy the VRO agent to the VBR server

Lets click Add
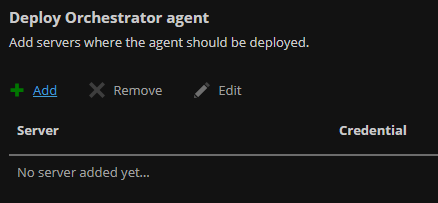
Select the server type, we will be using VEM here, as we set it up earlier
Add the server FQDN and the credential from before
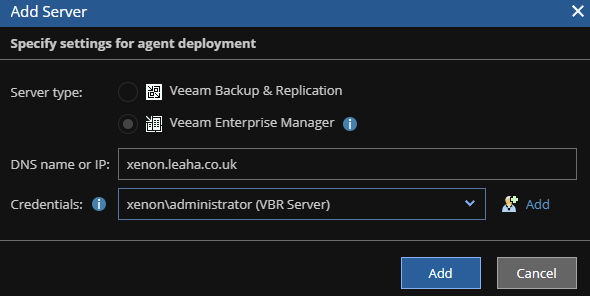
Once thats done click Apply
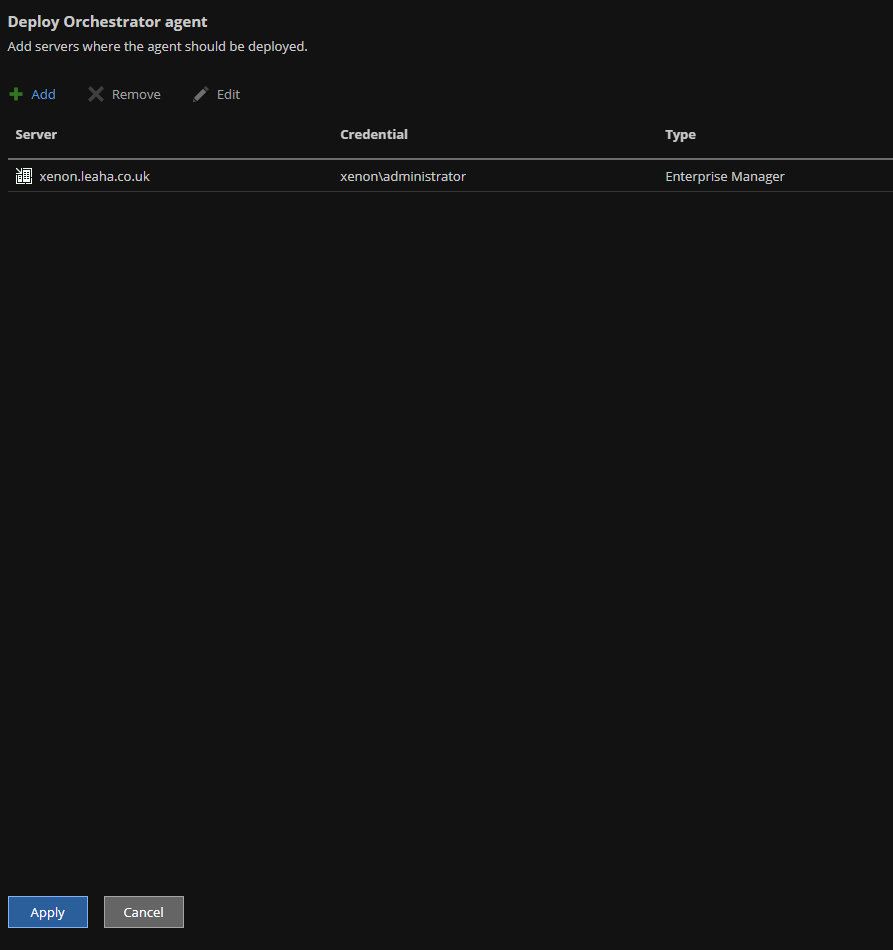
Now we can add our vCenters in, this really needs a Production and DR vCenter
Click Add
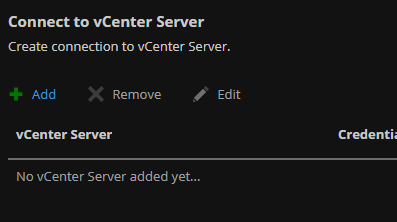
Enter your vCenter FQDN, and for this I am going to click the Add by the credentials to add the details for that
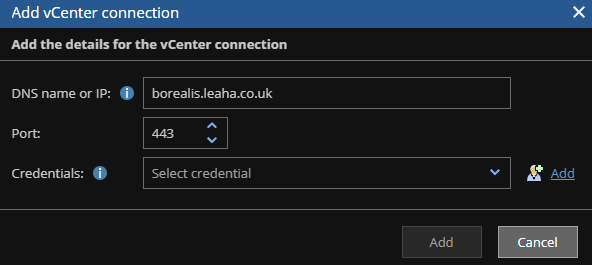
Like so, I recommend a service account, and it will need full administrator permissions, and click Add
For my vCenter, I changed the SSO domain name, so yours will likely be vsphere.local for the account
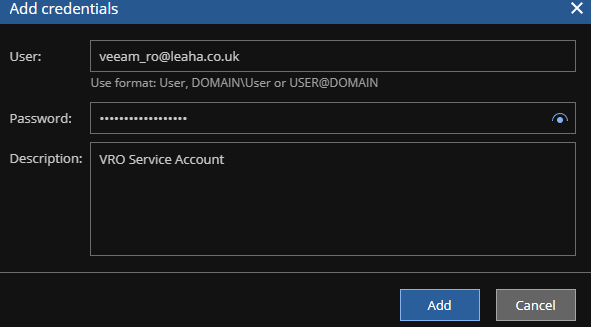
Then click Add again
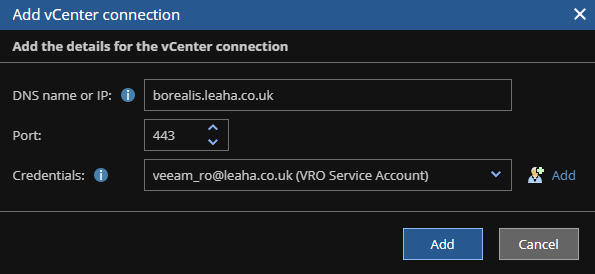
Remember the certificate
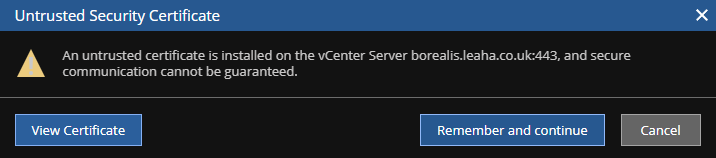
Ideally, your DR should have another vCenter which you can add, but you can use one
When you are done click Apply
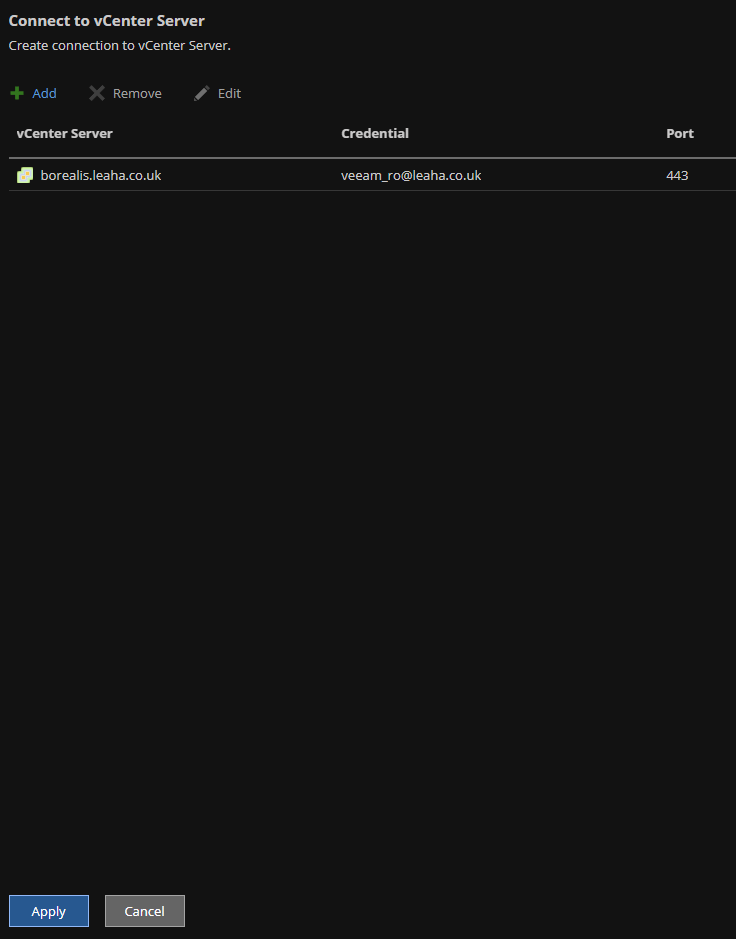
If you want to replicate storage systems, like NAS systems, you can add this here, as I am using this to replicate vSphere VMs within vSphere, I am leaving this blank

One you have everything, click Next
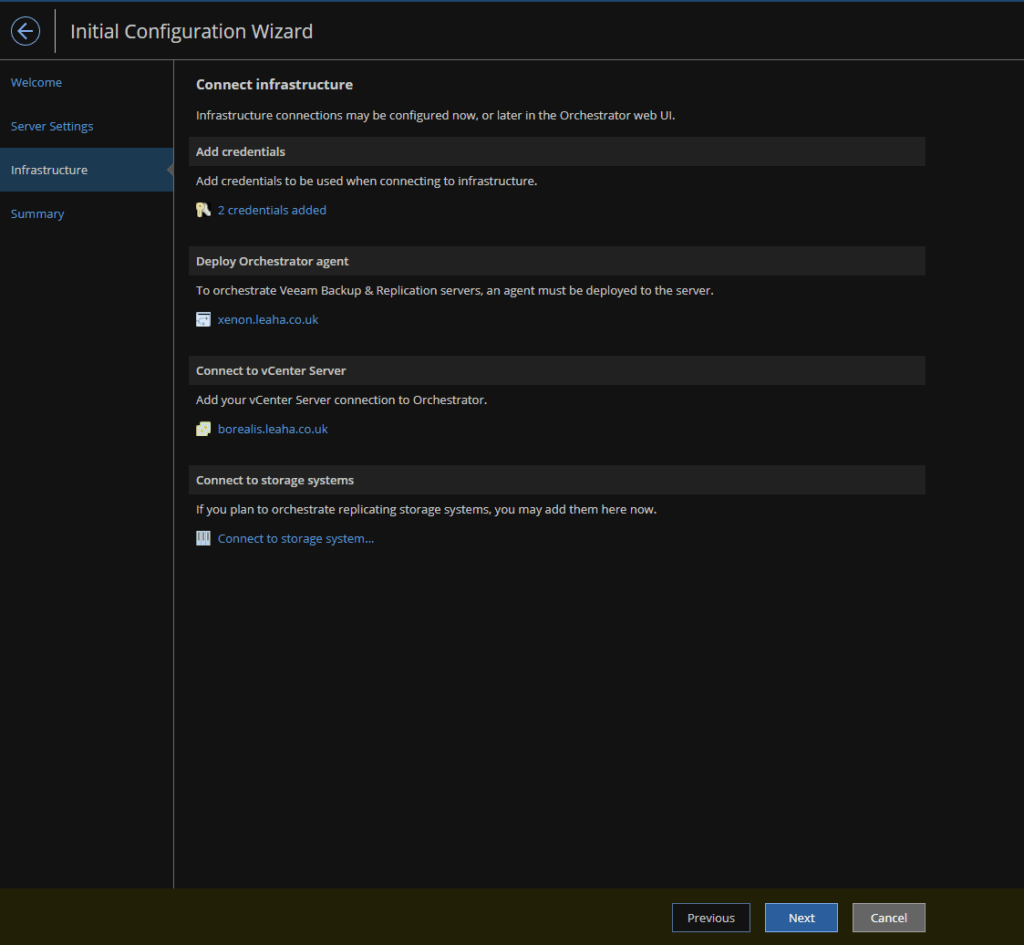
And then Finish
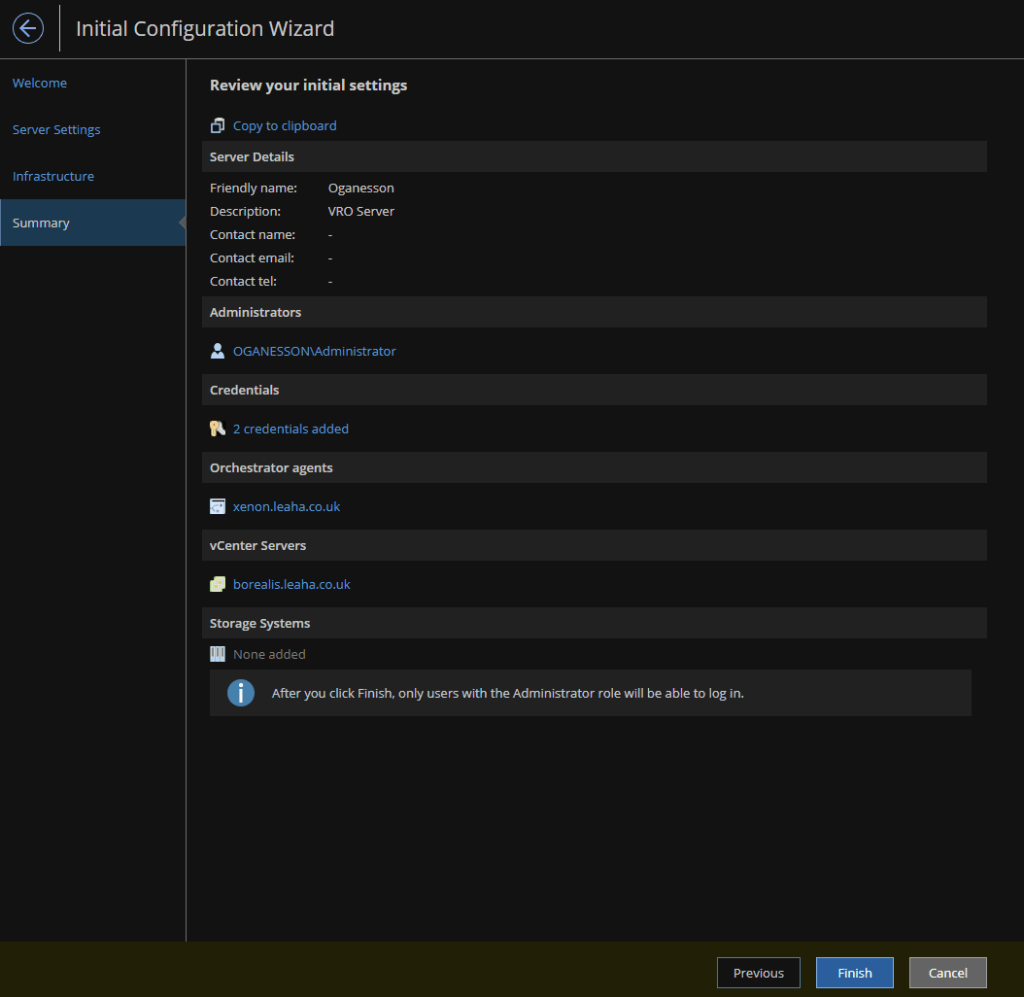
Once thats done, you’ll be taken to the dashboard
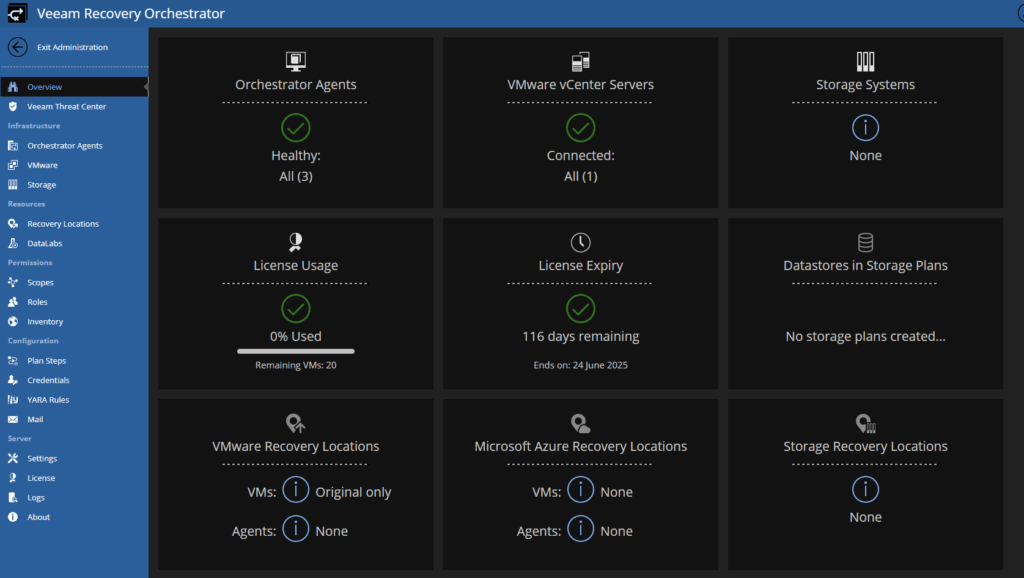
If you want to add another Managed server after the setup, click Administration in the top right

Under VMware, click Add
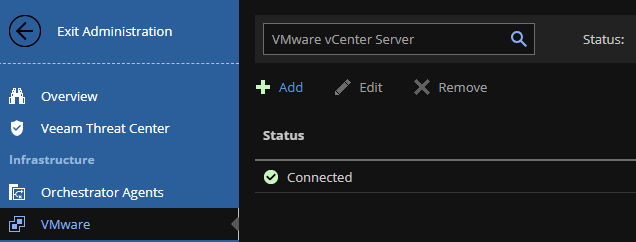
Enter the vSphere FQDN, and credentials and click Next
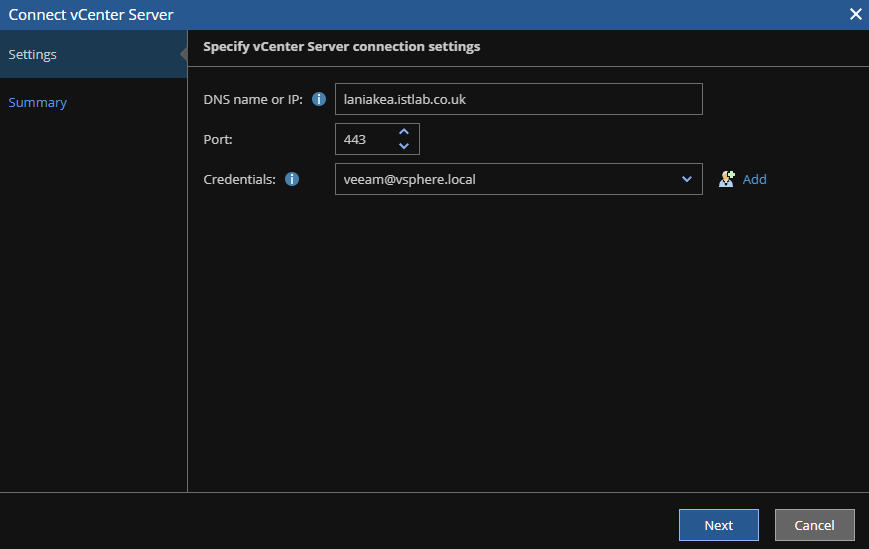
Accept the certificate
And click Finish

After a few mins it should be added

4.3 – Setting vSphere Up
For VRO to be properly used in VSphere you need tags setup to define your environments so VRO can understand things fully
Lets click ther three lines on the right of vSphere and click into Tages & Custom Attributes
Click into categories, and click New
And create a new category for VRO, it needs a name, then ensure all boxes are checked, and lastly, the lags per object is on Many Tags, this will allow us to assign multiple tags per object if we need, and cannot be changed later, then click Create
As I have two separate vCenters, that are not SSO joined, I’ll need to create a category on the other vCenter
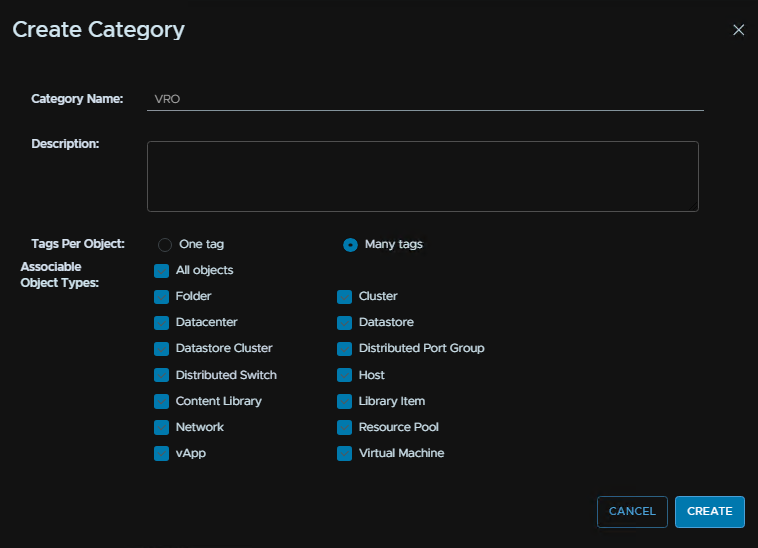
Under Tags, click New
We need a tag for the following, if your vCenters are mot SSO joined, then have the DR tags in DR and Prod tags in Production
- DR Hosts
- Prod Hosts
- DR Datastores
- Prod Datastores
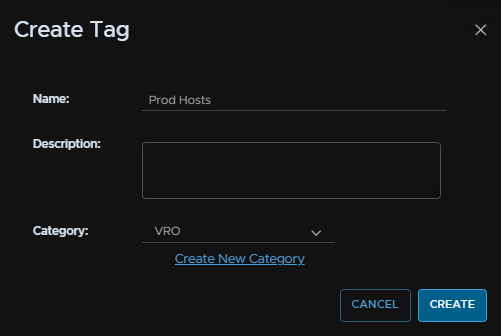
Now we have those tags, lets find our Prod cluster, right click it and click Tags & Custom Attributes/Assign Tag
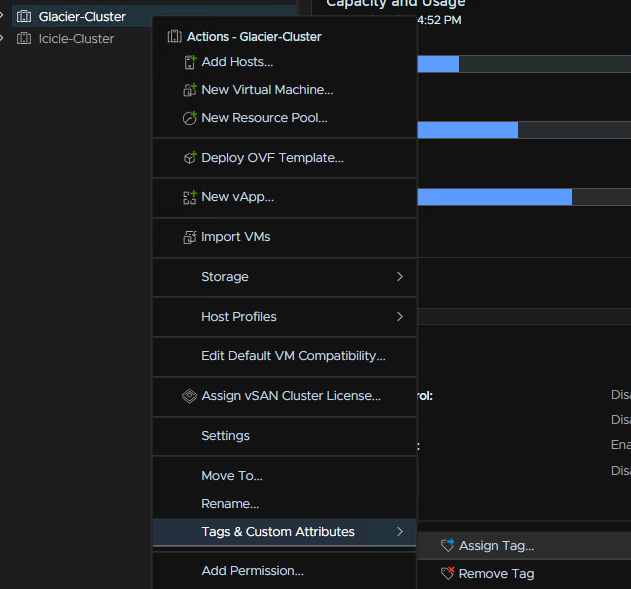
Repeat for all hosts and datastores, in Prod and DR
4.4 – Setting Up Tags For VRO
This needs to be done in the embedded Veeam One instance, it will pull tags from vSphere, but in order for VRO to be able to use them, it needs Veeam One configured for them
Open the embedded Veeam One Instance using the Veeam One Client icon on the desktop of the VRO server

Then login with the current user
When the client opens, click the three lines in the top right, then Settings/Server Settings
Click Business View, then Tags, ensuring the top option for vCenter is configured
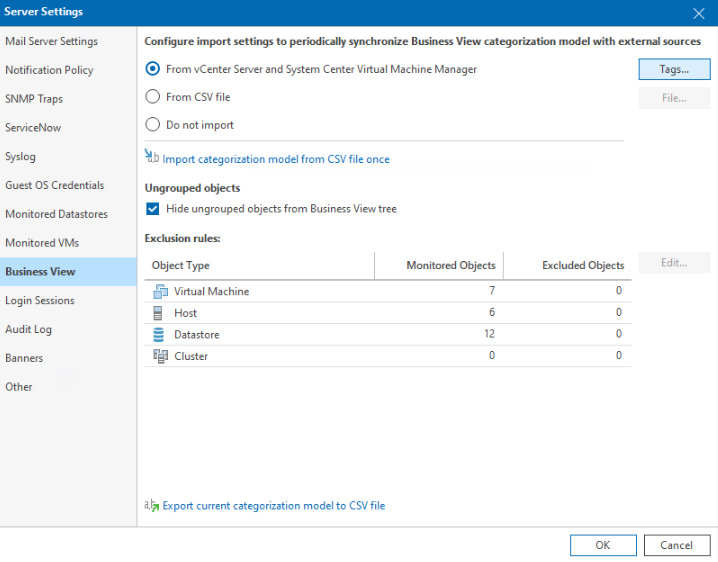
Ensure all your tags show up, here you can see the prod tags are located at Site A and DR at Site B, as thats where I have applied them. then click ok
If this is empty, it may need some time to sync
You can manually trigger a sync on the server by going to
https://localhost:1239
Logging in with
server-name\administrator
Click the gear on the top right

Click Data Collection, the Start
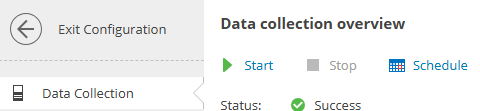
The tags should look something like this in the Veeam ONE Client, we want to ensure the VRO tags show up
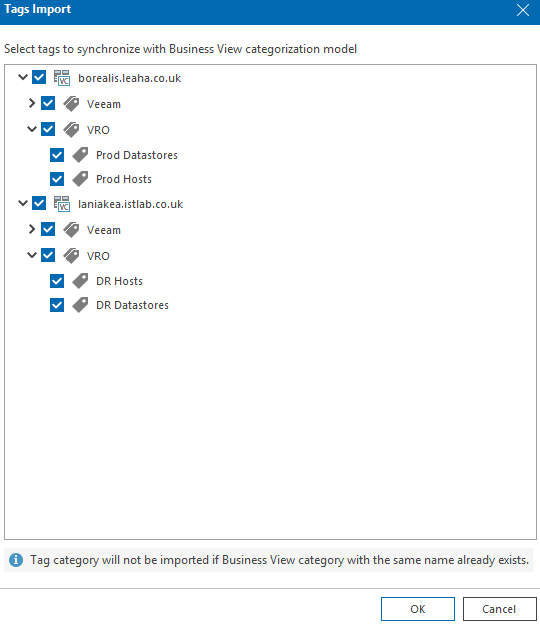
Then click ok again
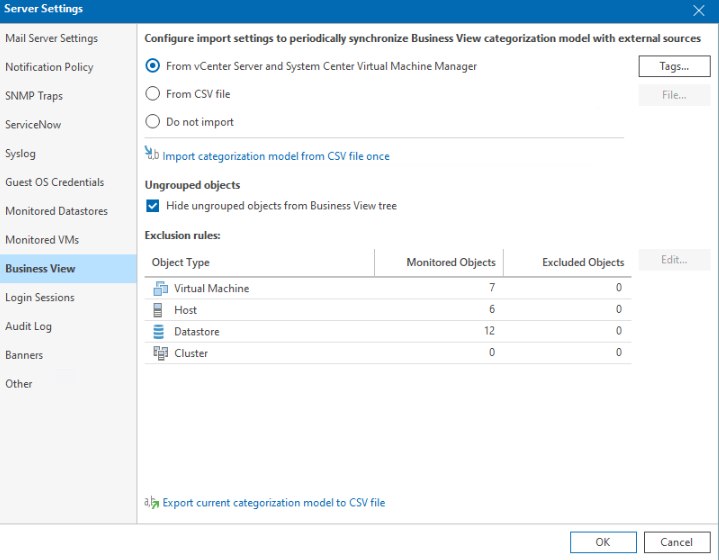
4.5 – Adding Recovery Locations
When you have logged into the VRO WebUI, you can click Administration in the top right

Then under Recovery Locations on the left, we can click Add
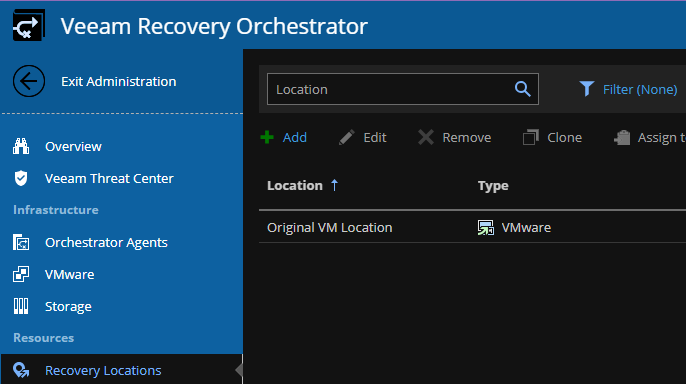
Lets click VMware to add our two sites, Site A and Site B
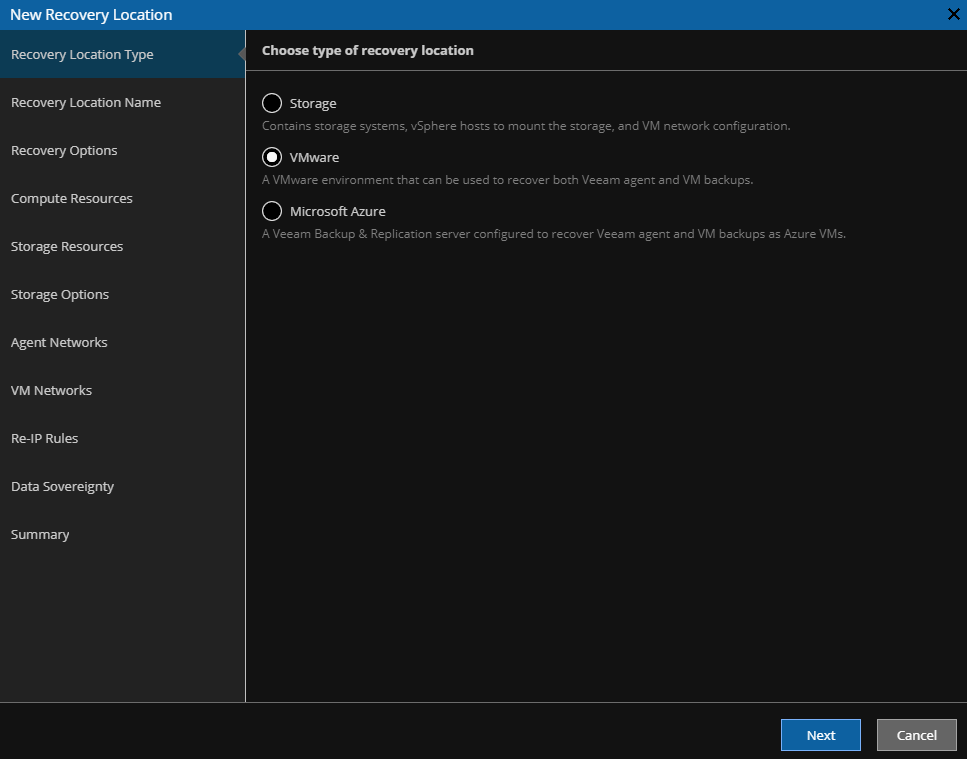
Give it a name
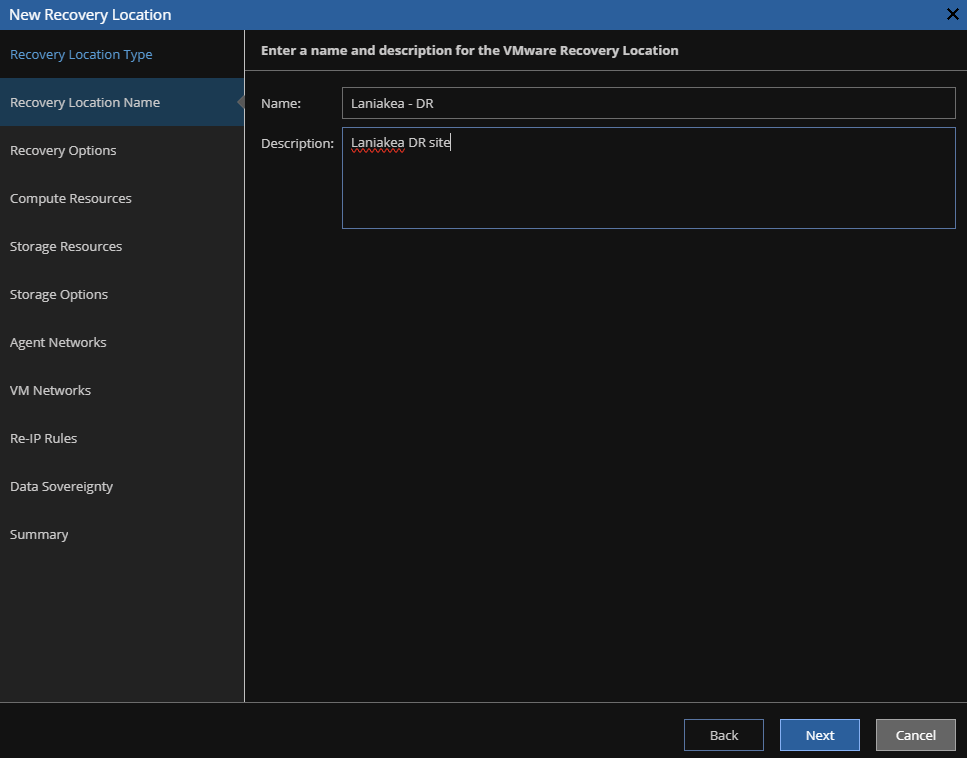
Uncheck Agent Recovery, and click Next
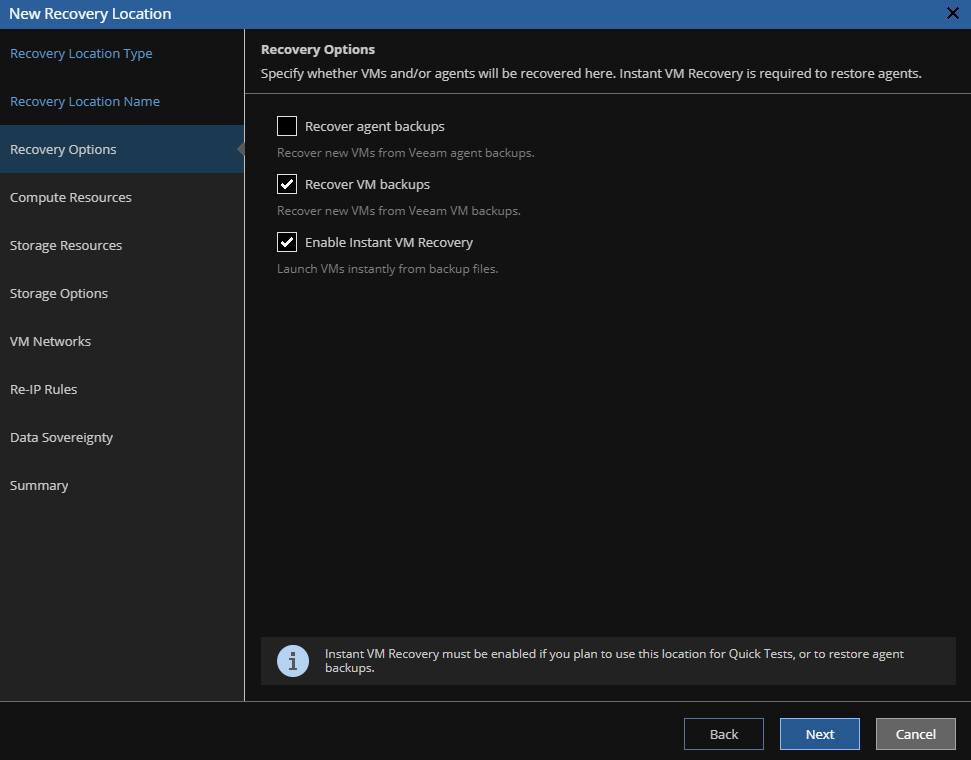
Add the group for the DR hosts by clicking the group and clicking Add
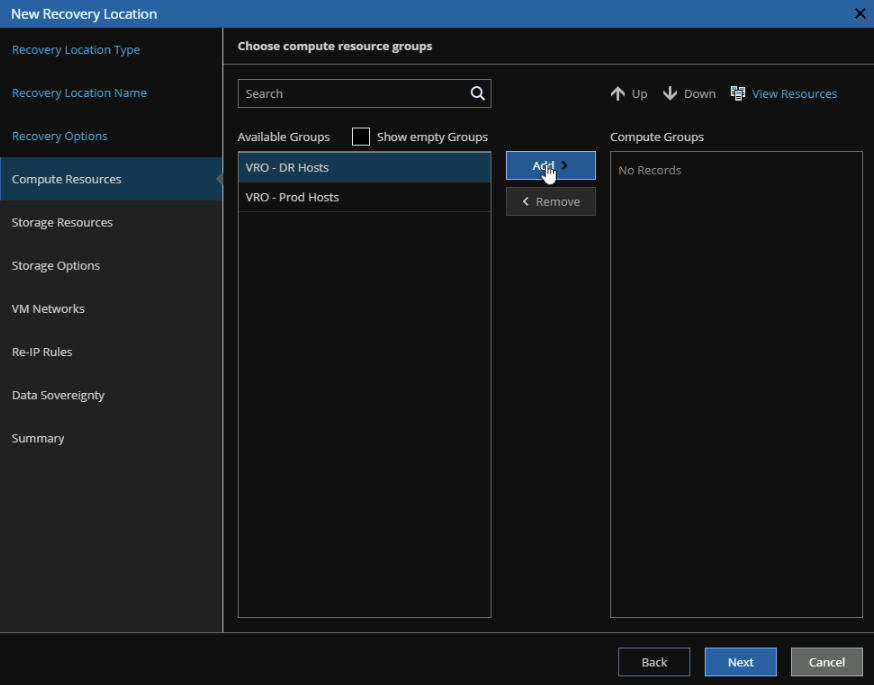
Then click Next
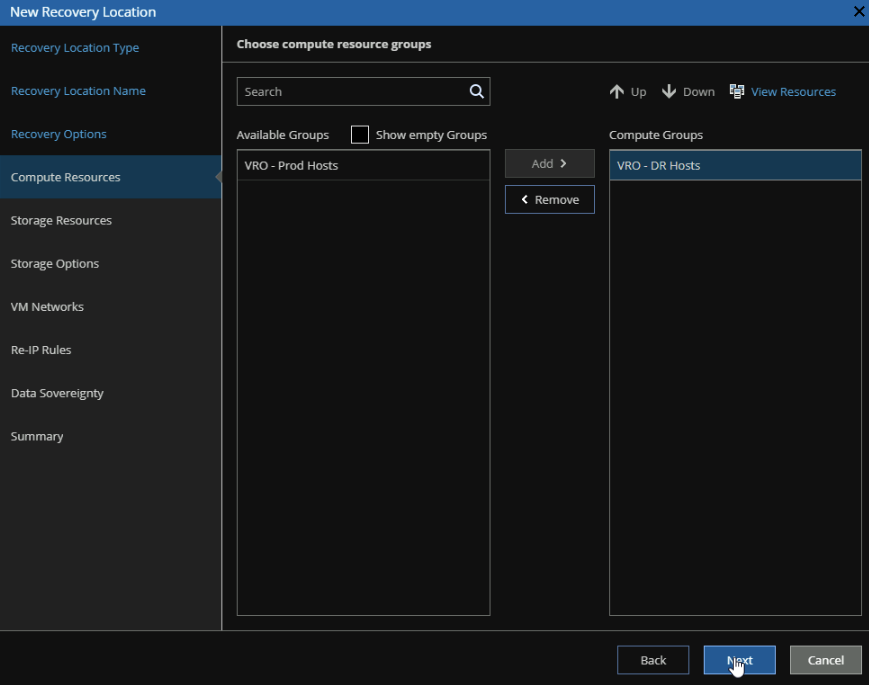
Select the datastore group for DR like before by clicking it, then clicking Add, it will only show datastore groups valid for the compute resource before
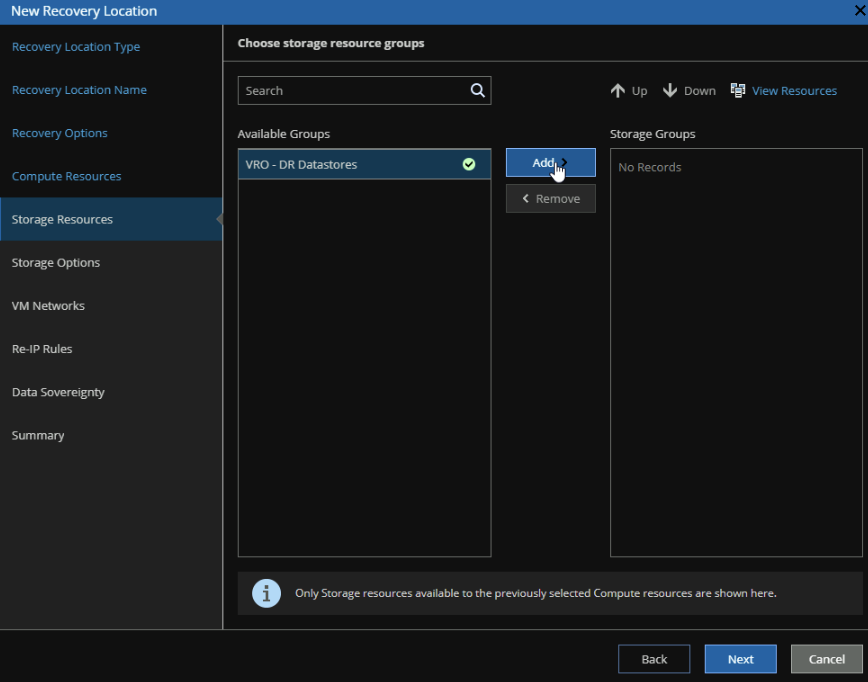
Then click Next
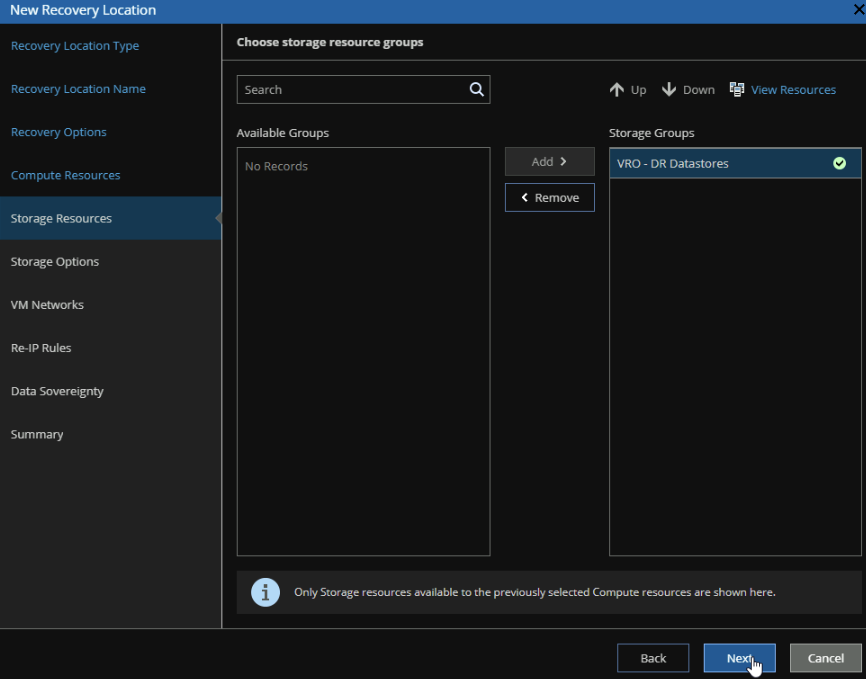
Enter the amount of datastore usage you want as the max, I changed the default from 80% to 90%, and check the Use Backup Copies box, then click Next
As we have two vCenters we will need to do some vSphere network mapping, click Add
Add in the source vCenter as the Production side, and the target as DR, for datacenters, keep all datacenters selected, then select the network in the production environment and the target network in DR, these networks will be your port groups, then click Save and repeat for all networks
When you have them all click Next
If your networks are stretched, you wont need anything, if not, like mine, we will need to add a rule
Its worth noting, this only works for Windows VMs
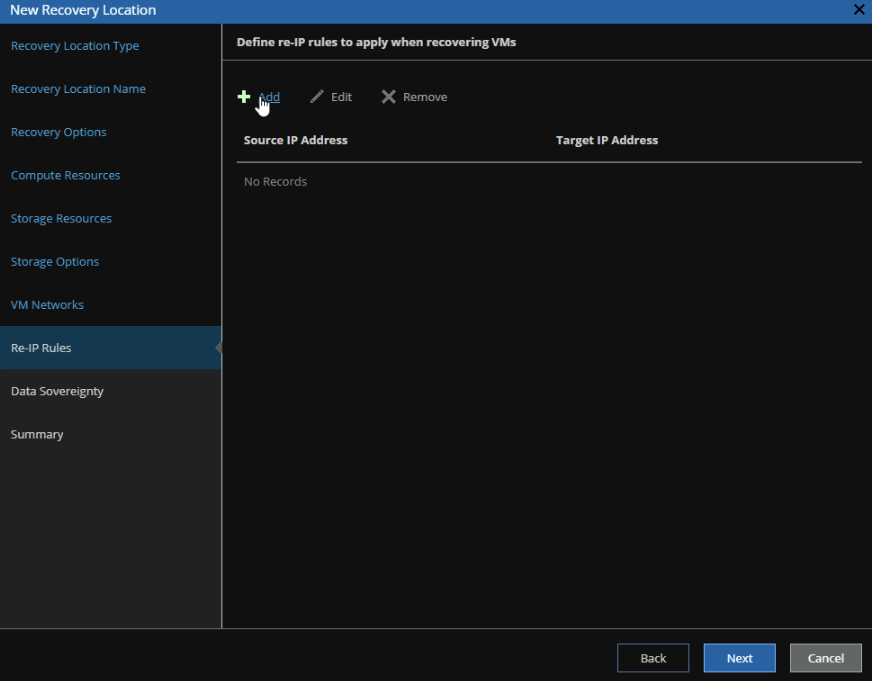
Add the source VM network, you can use a * for a range of IPs, and the target IP network, then subnets, target network gateway and the DNS servers, then click Add
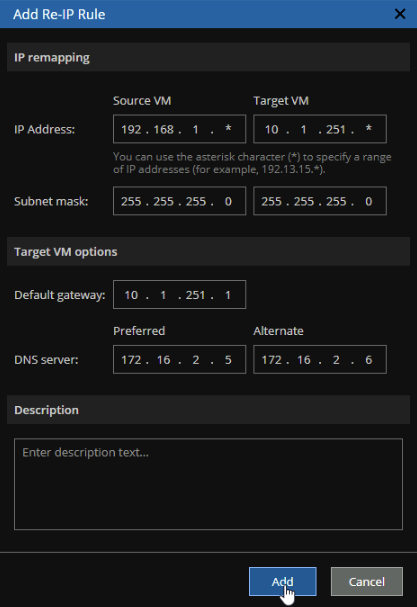
When you have all your mappings, click Next
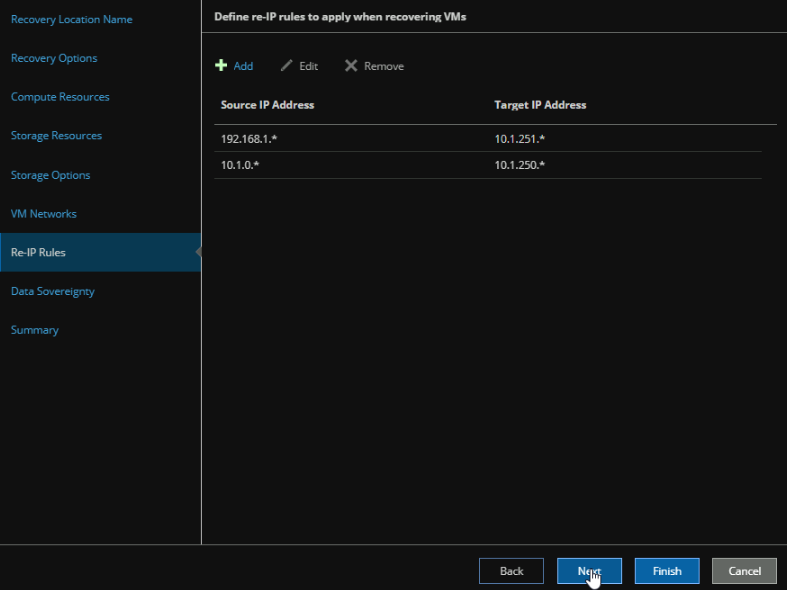
We can leave this unchecked and click Next
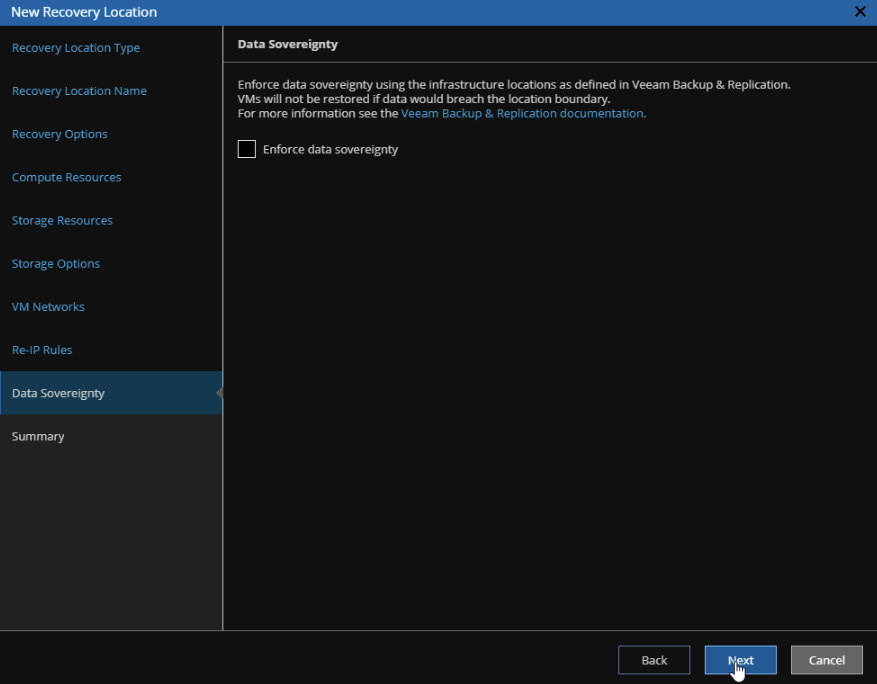
And click Finish

Then repeat for the Production side or leave the default Original VM Location
If anything changes you can always edit the recovery location, for example, I also needed my lab management network mapping for this testing
Head to Administration in the top right

Click Resources/Recovery Locations, select the location and click Edit
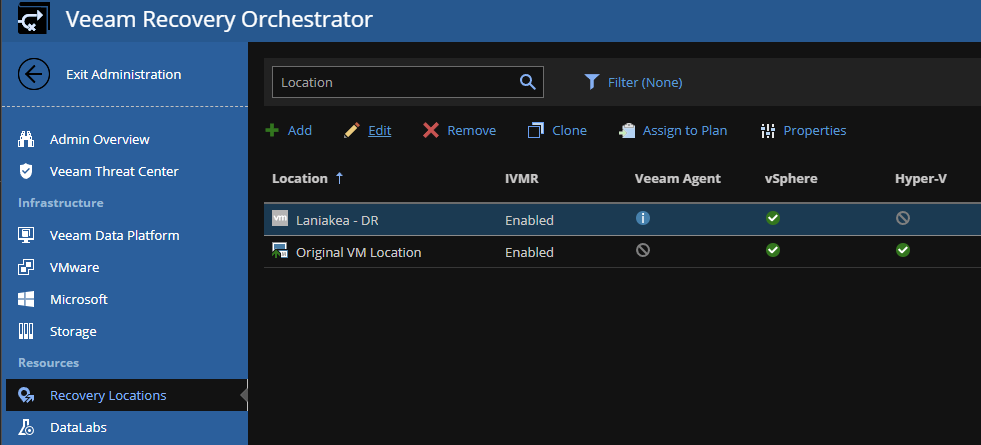
Under VM Networks I can add another mapping like so and click Finish
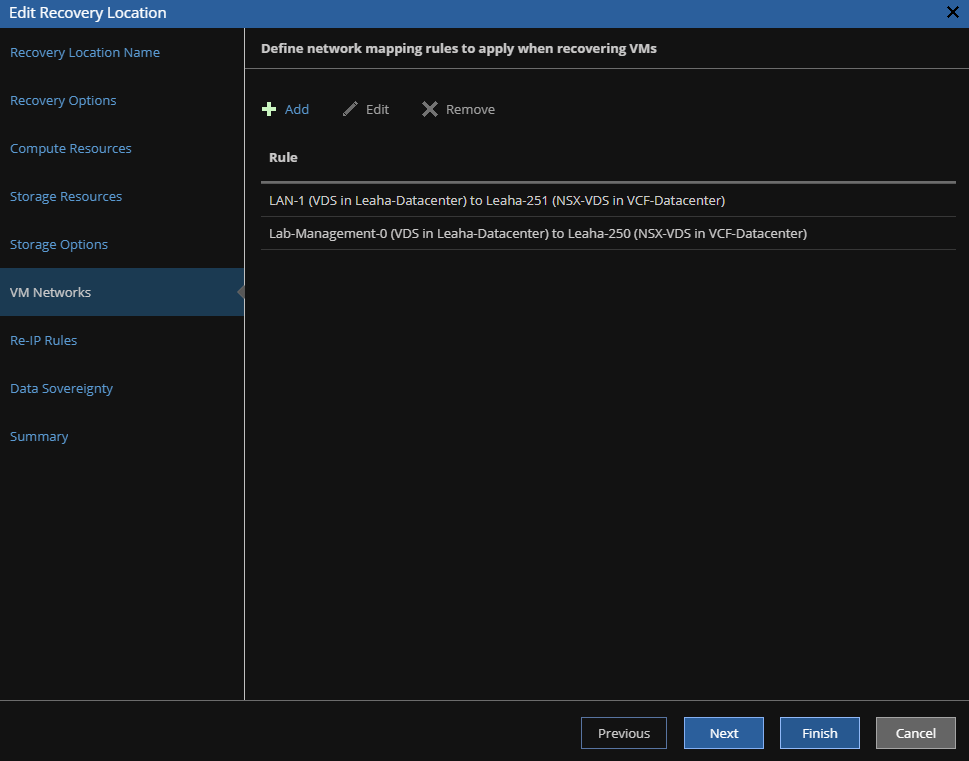
4.6 – Custom Sleep Timer
Now, there is one thing thats missing, the shutdown kicks off, then Veeam immediately starts replicating, there is no time to allow VMs to power down, but we can fix that with a script
Click Administration in the top right

Click Configuration/Plan Steps/Add
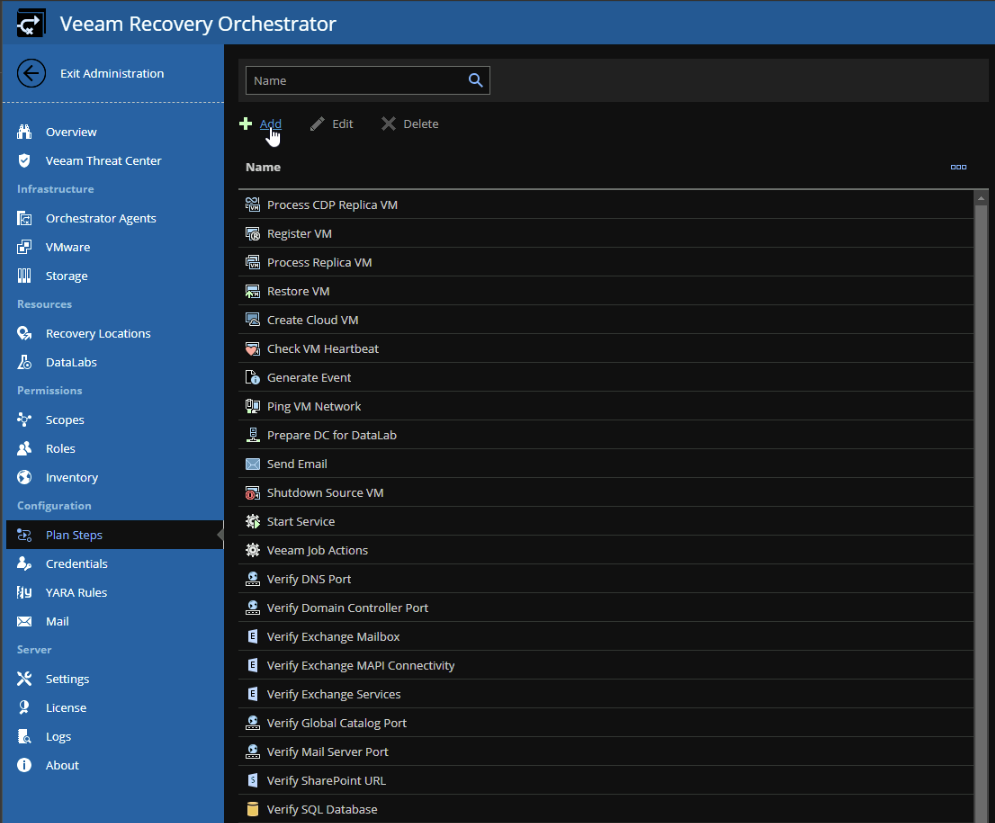
5 mins should be enough time, so lets give it a name and description and click Next
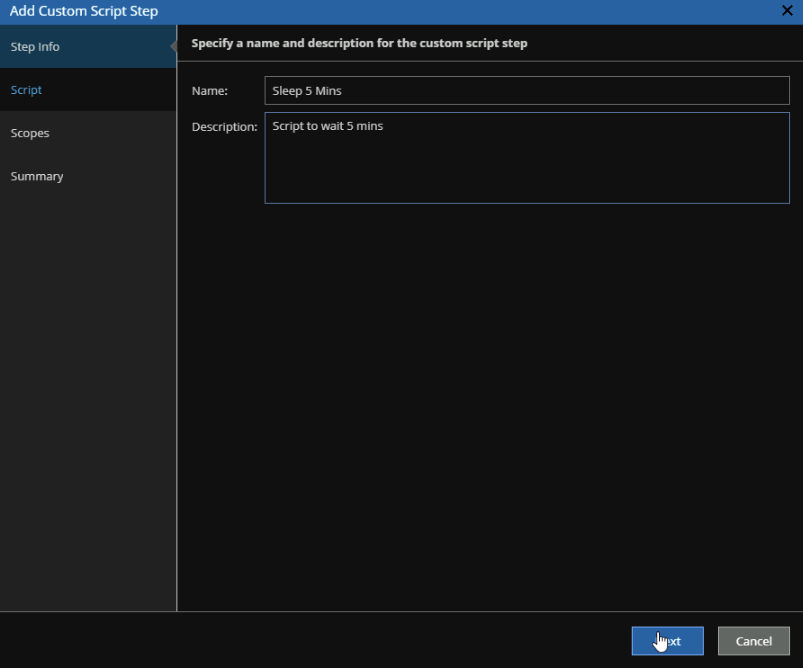
Now we need to upload a PowerShell script, the command for this is
Start-sleep -Seconds 300
So I added this in a notepad file
And save it as a .ps1 file

In VRO, click Browse
And double click the file

Then click Next
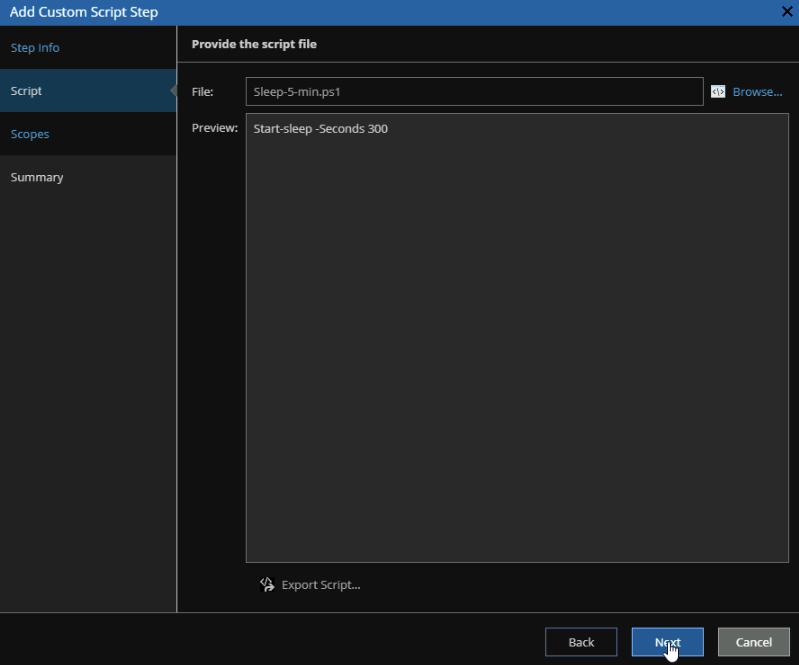
Click Next again
Then Finish
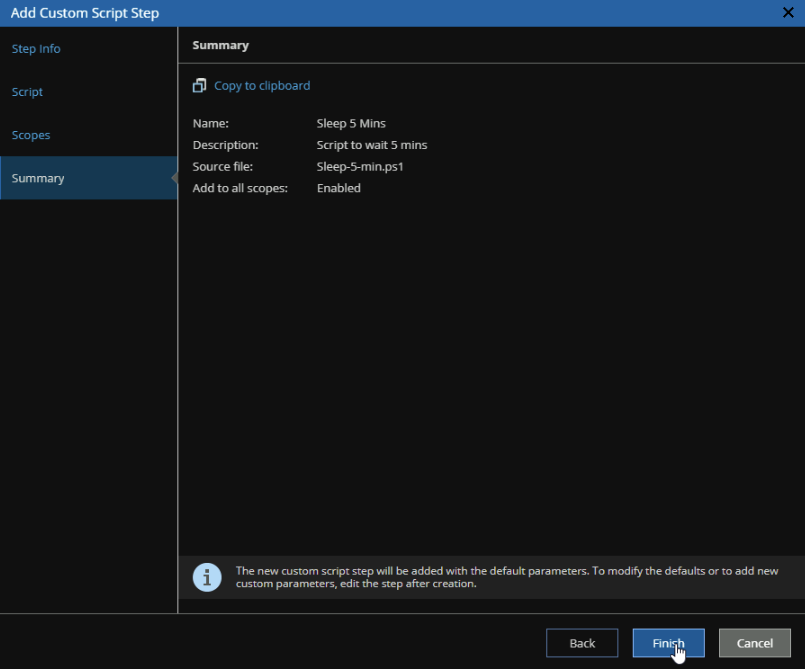
4.7 – Building A DR Failover Plan
For this recovery plan, we will be wanting to use this for a DR test on a group of VMs, so this will be a planned failover shutting down the source VM, replicating change, and powering our VMs back to Production
We can add a new Recovery Plan in the main menu, outside of the config menu, from Planning/Recovery Plans, then click Manage/New
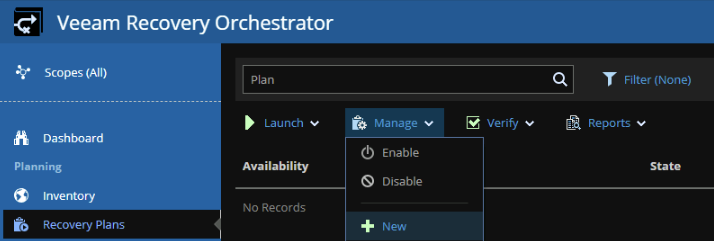
Add a plan name, description and click Next
For this testing I have a single replication job, so I will be using that but you can have any number of plans for servers and app groups to fit your needs
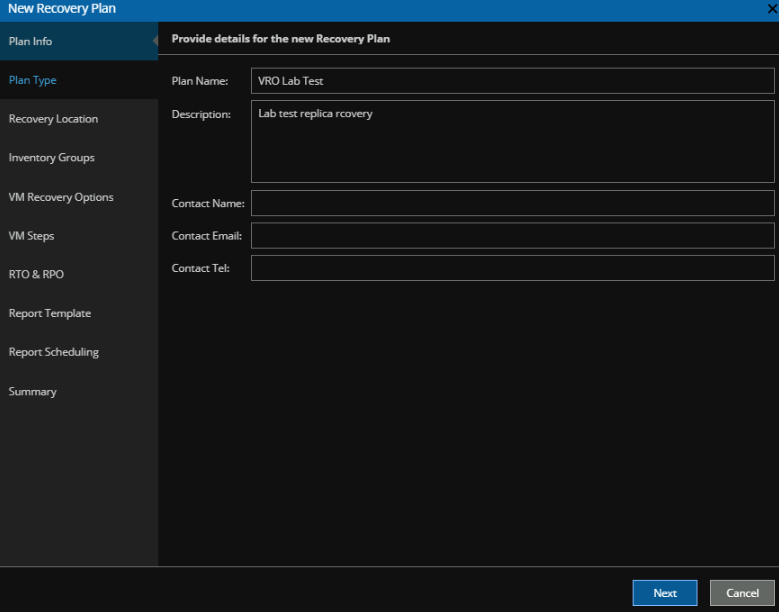
For Plan Type, we have a few options, though the main ones are Replica and Restore, using VM replicas or instant recovery, select the type you want, here we will be using replicas, then click Next

As for the VMs, you can add Veeam backup/replication jobs, vSphere tags or datastores, personally I recommend tags, so I have a replication tag for the replication job, but I could create a bunch of tags for VRO to use o define VM groups
An example of the group options
I am going to select my replication tag, which has my DR VMs in it, that are also replicas, you can select multiple by holding down Ctrl, and click Add
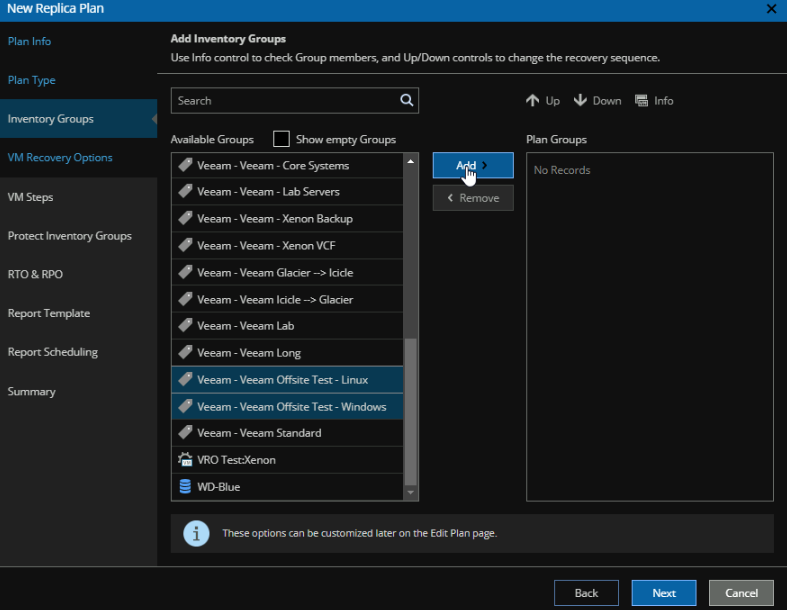
You can have multiple here as well, so you might want plans for testing using VM groups, you might want another plan for an entire production outage that kicks everything on in DR if you suddenly lost the main site for example, when you are done, click Next
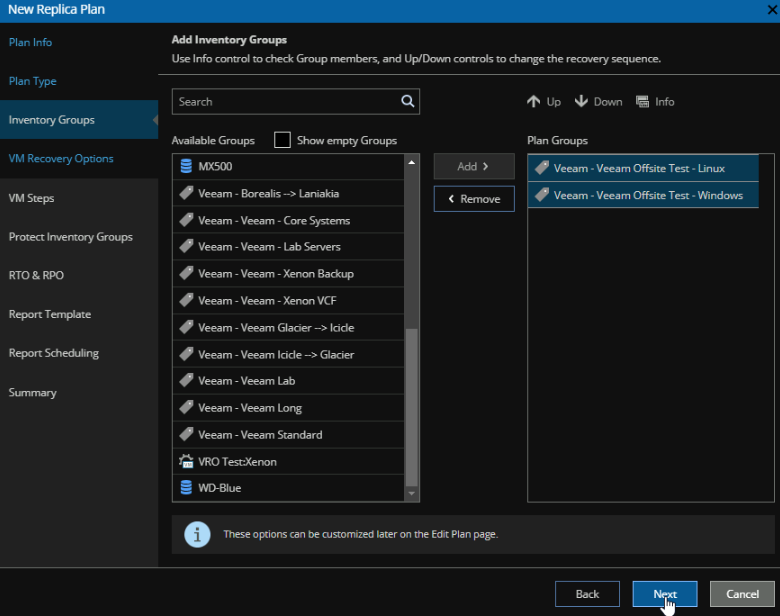
You can keep the plan going if it encounters an error, but I am having it halt, as it can cause things to go wrong depending on the error, and allow 10 VMs at the same time to be recovered, as I only have 2 VMs this is plenty, but if you have 100s you will want to increase this, then click Next
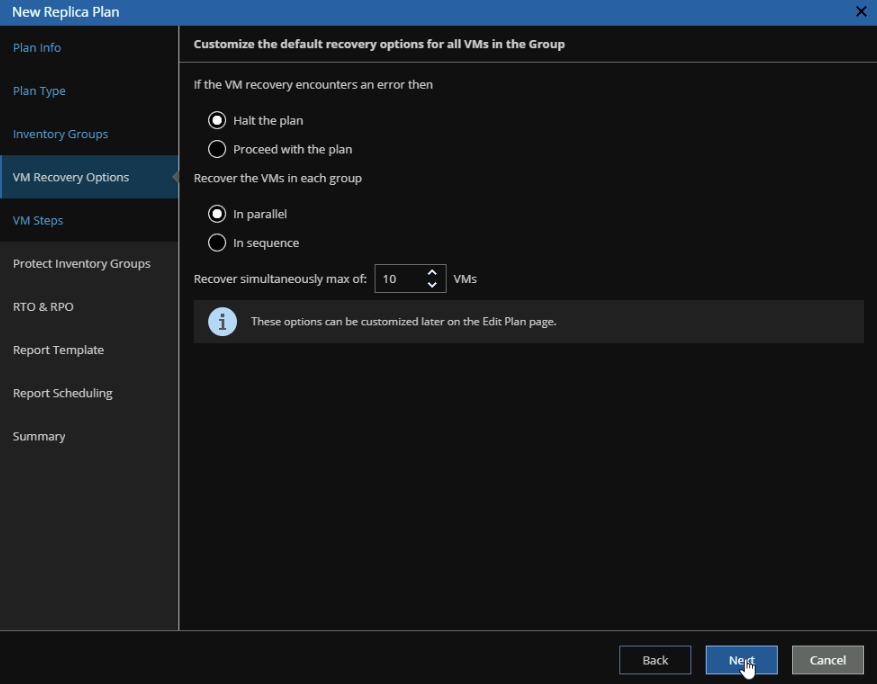
Now we need to define the plan steps
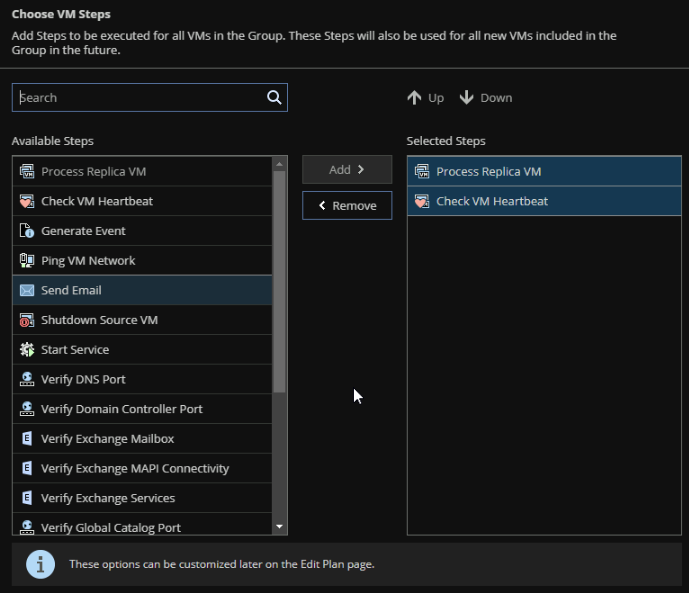
So, by default, it processes the replica VM by powering the replica on, for a DR test this isnt very useful as the production machines will be left on and any data since the last replication isnt passed over
For now we want to leave this at stock, some options need to be added later, so we will do everything there
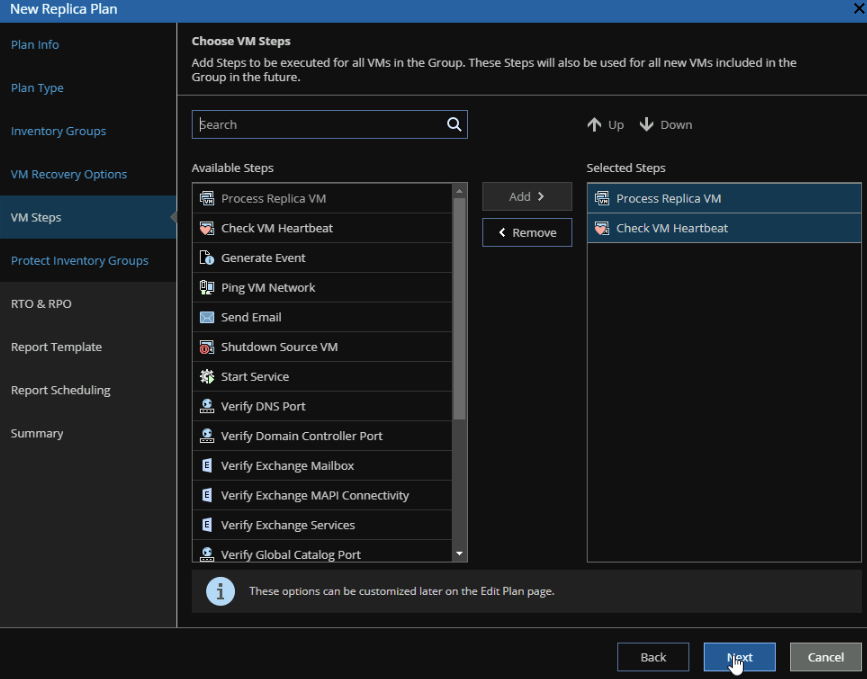
We can click Next here, we will not be using reprotection at the moment
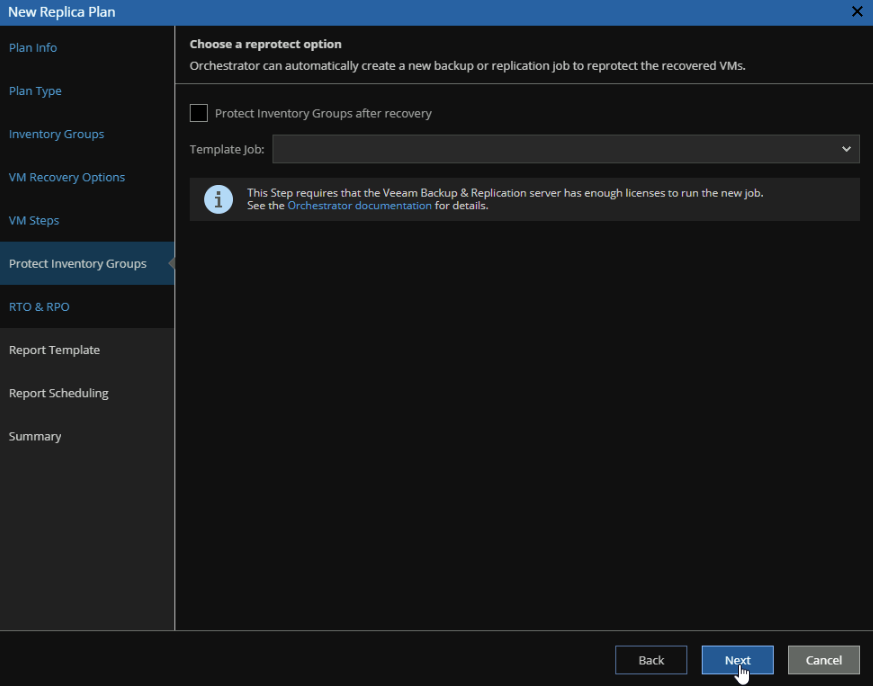
You can then set your business RPO and RTO and click Next
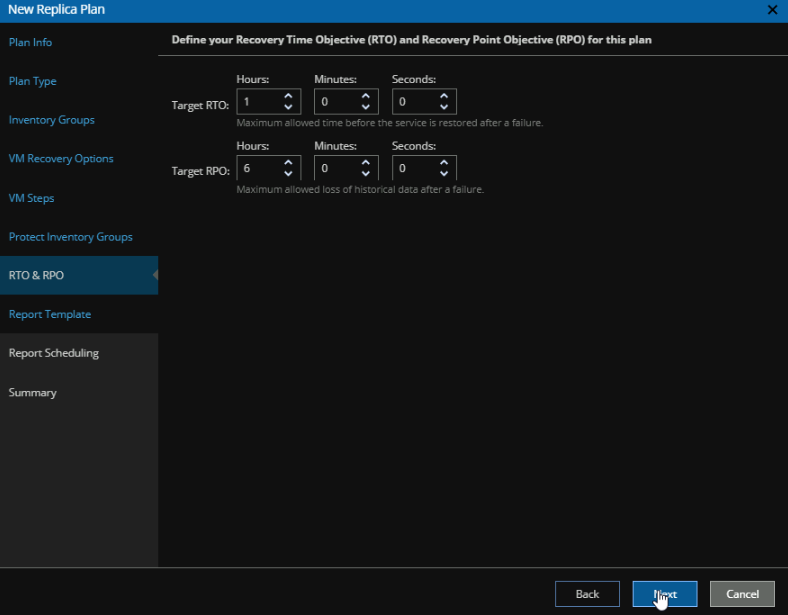
Click Next under Reporting
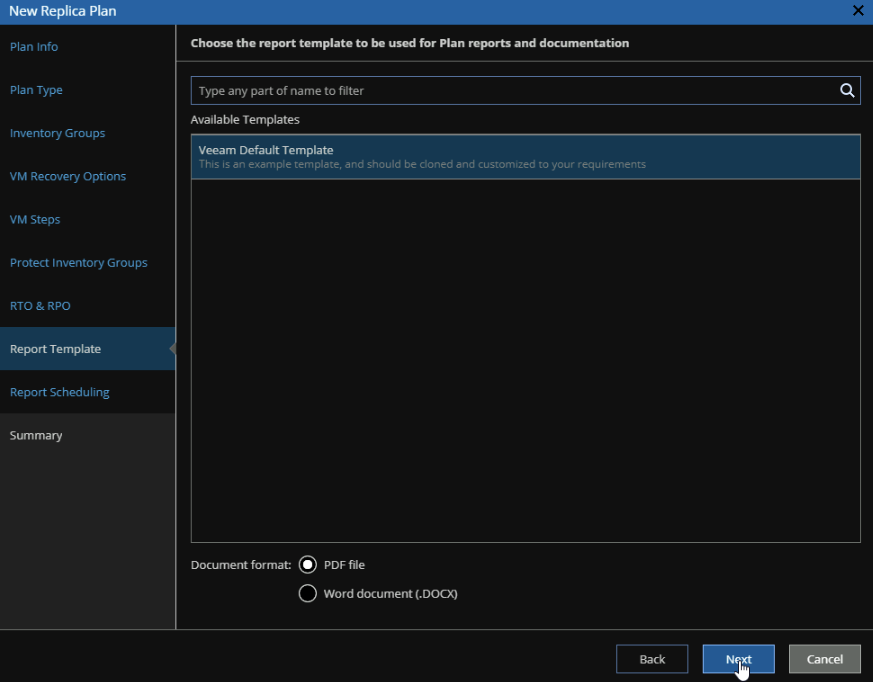
Click Next to leave the report schedule on the default
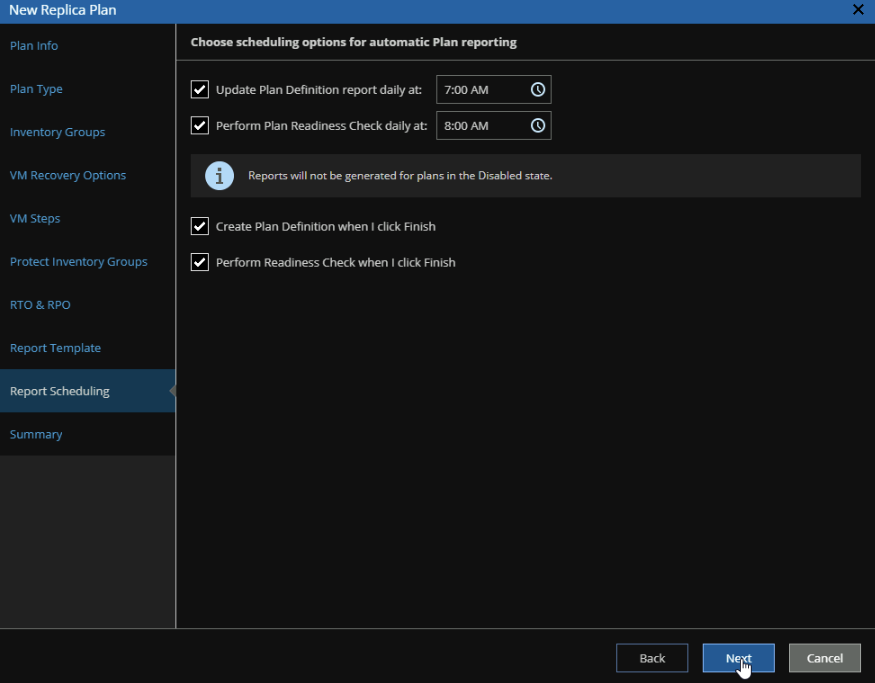
And then Finish
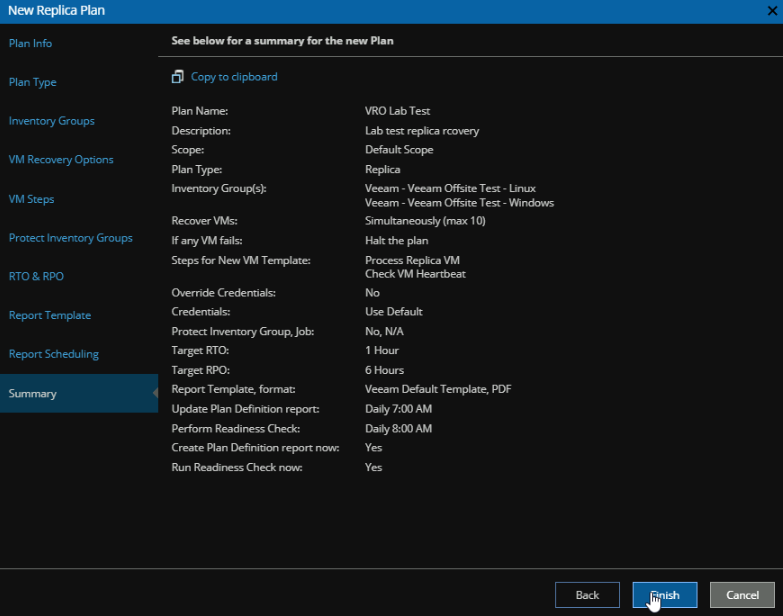
We can then right click our plan and click Edit
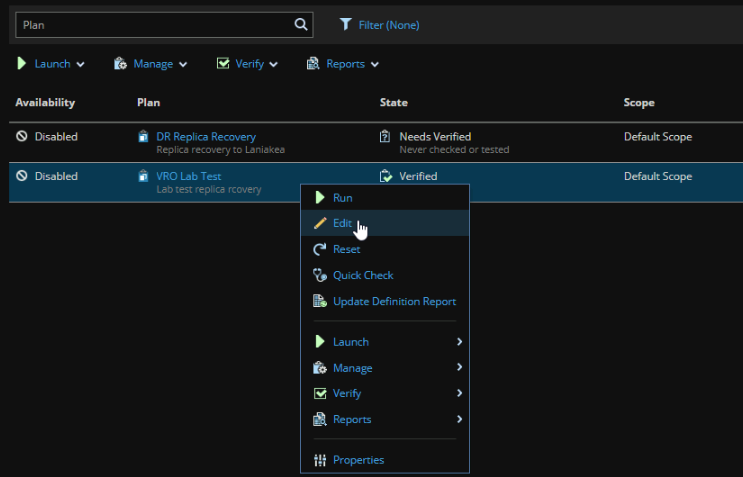
Interestingly, it has emptied the pre and post plan steps
So, we want to take the following steps
Power Source VM Off –> Replicate –> Power Target VM On –> Check Heart Beat
Click Add on Pre Plan Steps on the right
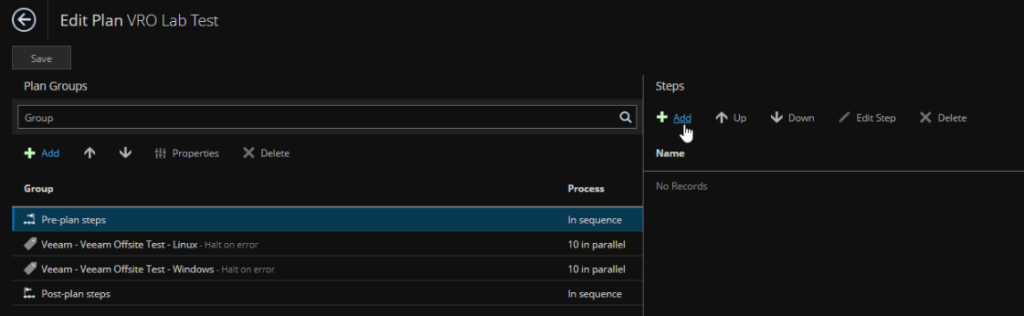
Add a VM Power Actions
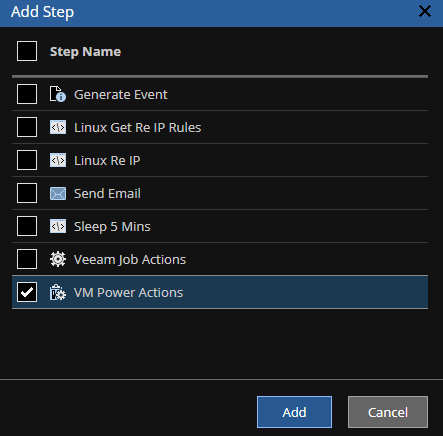
Select it and click Edit Step
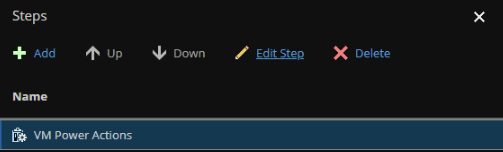
Leave Common Parameters on the default
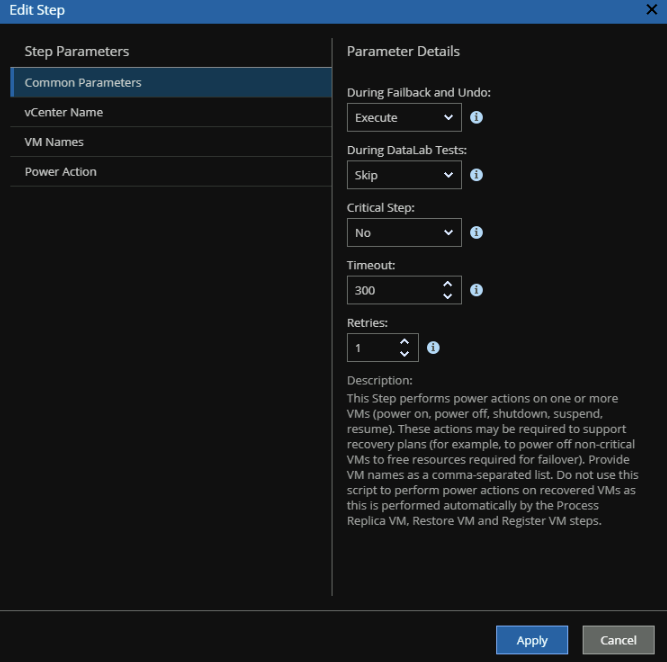
For vCenter Name, add the production side vCenter FQDN
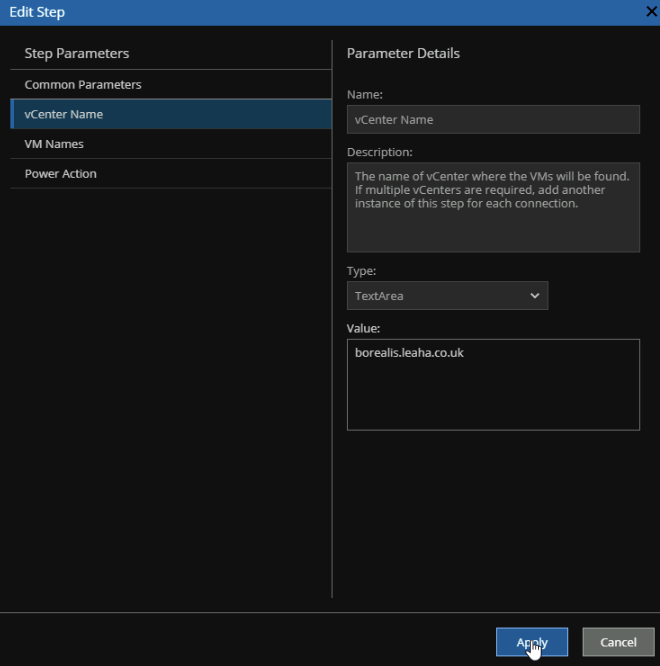
Under VM Names, click Edit
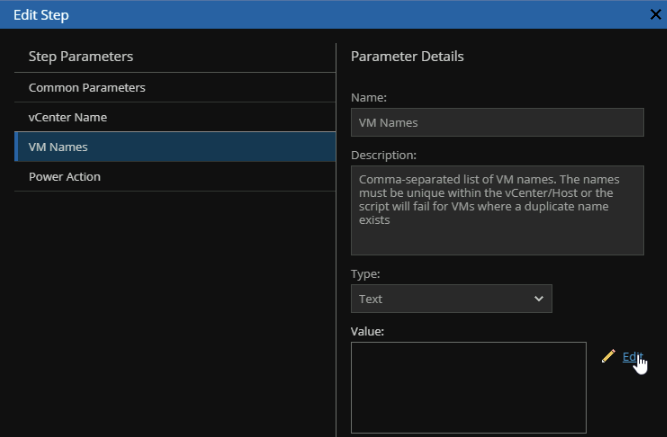
Find and double click %plan_vms%
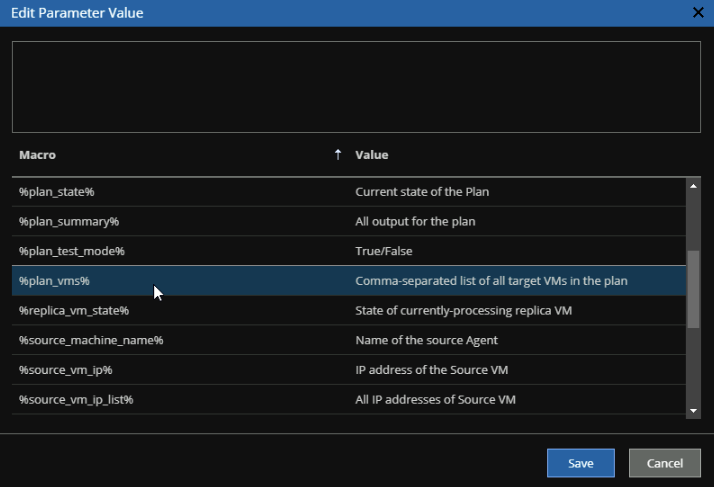
Then click Save
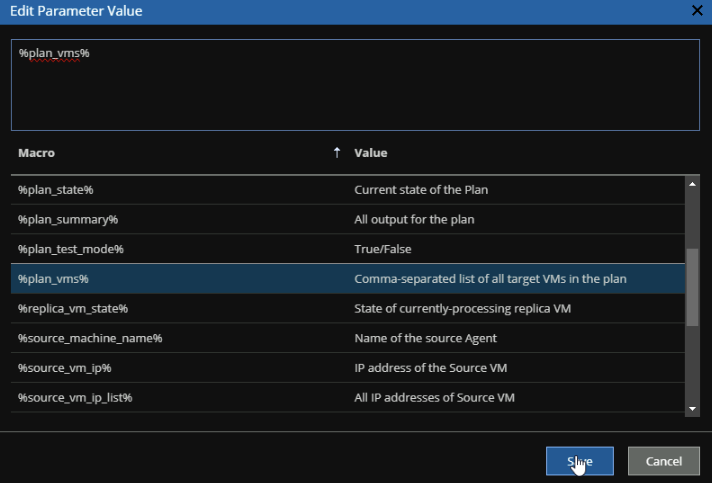
It should look like this
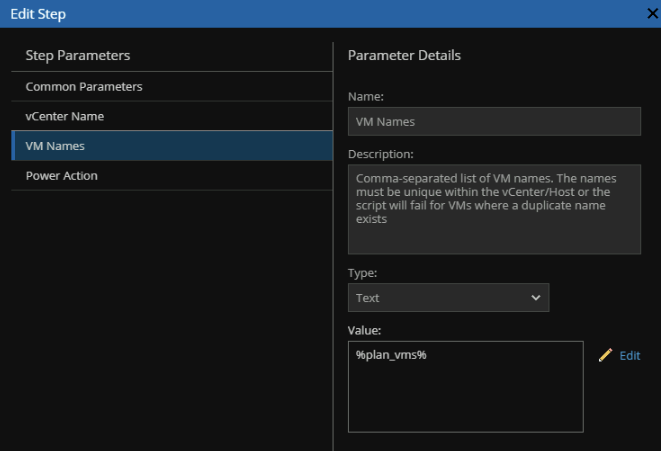
And for Power Actions, we want to change the Value to Shutdown Guest OS and click Apply
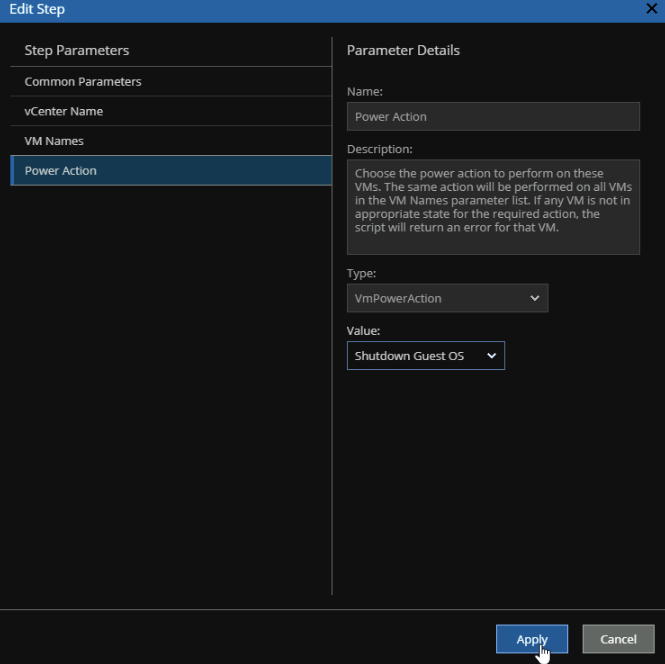
We then need to click Add, for another step

This time, for a Veeam Job Action
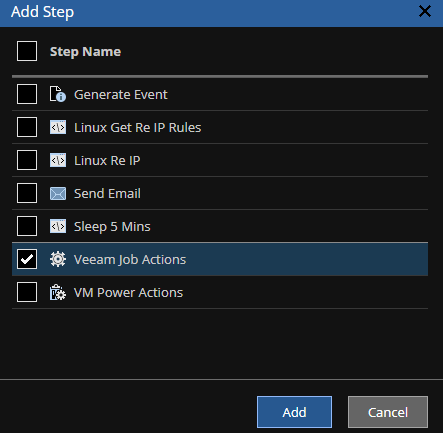
As my VMs are all in the same job it works very well, but if not, triggering a replication job containing these VMs also works, its hardly an issues to also replicate some other VMs if you have a large job and this plan is a subset, you could also split the replication into many jobs matching your plans, there are many ways to do this
Then click the new step and click Edit Step
I changed the default time out from 600 seconds to 2400, this needs to be longer than the replication job typically takes, else it will cause issues, and do set the During DataLab Tests to Skip
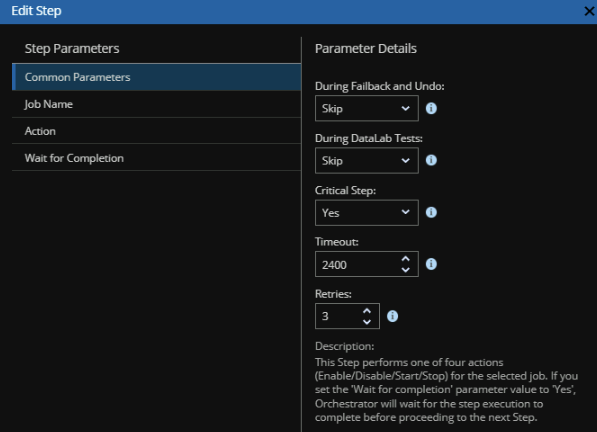
Under Job Name, click Value: NONE
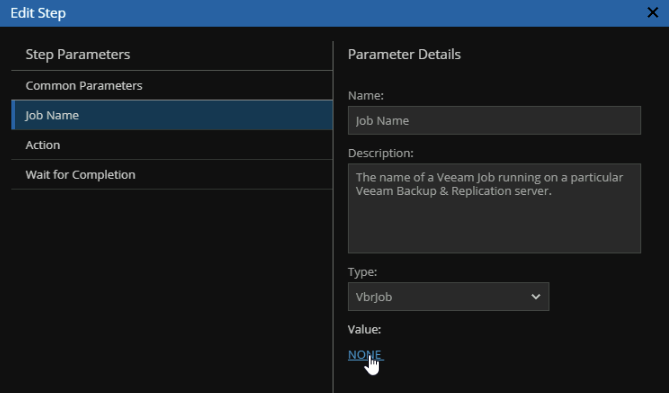
Select the replication job you want to run and click Save
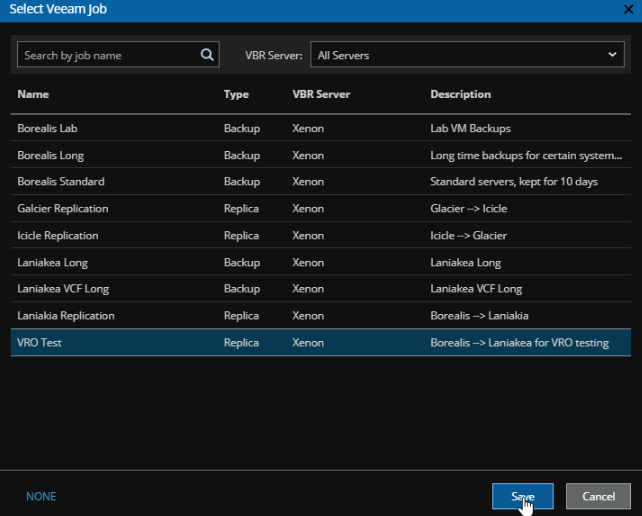
For Action, set the value to Start and click Apply
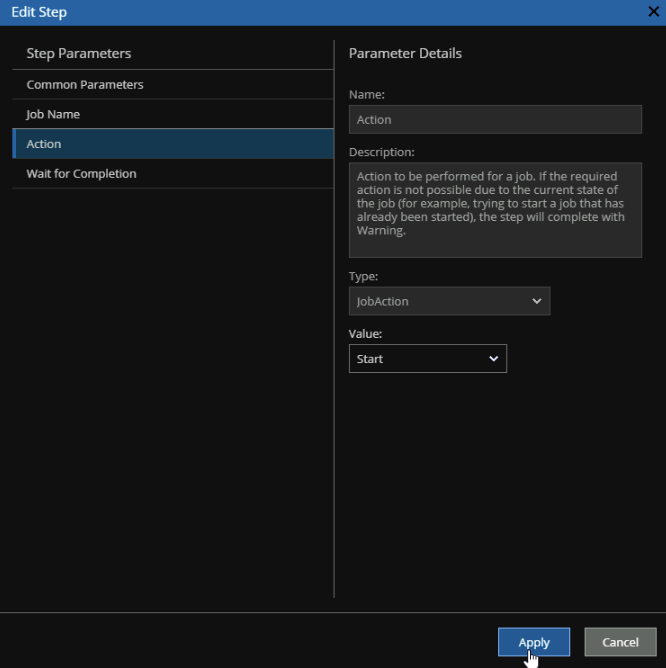
Add another step
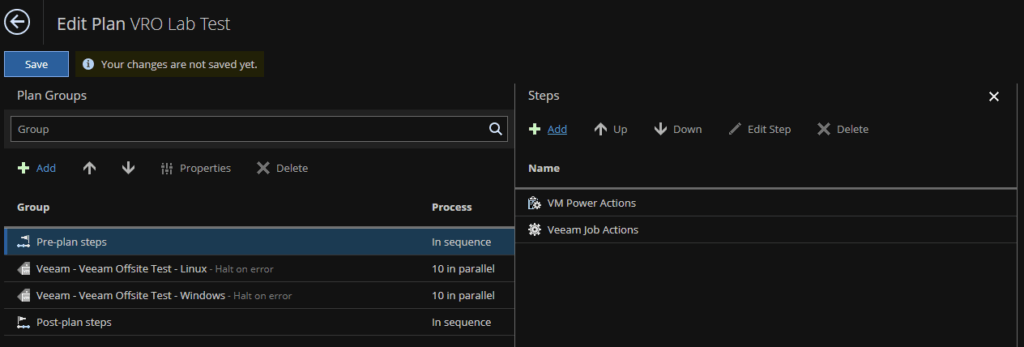
We can select our new wait script and click Add
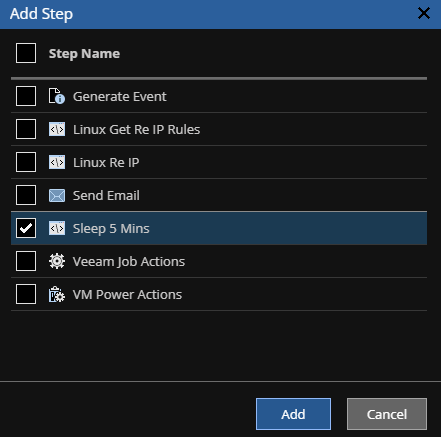
Then select it and click Up
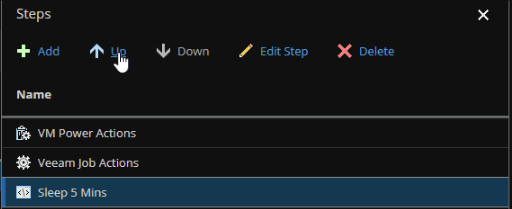
So its in-between the Power Off action and the Veeam Job
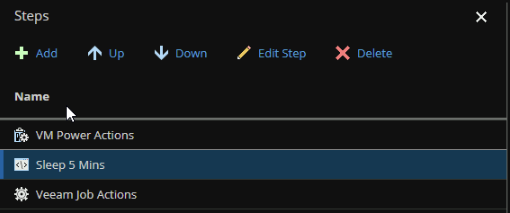
And click Save
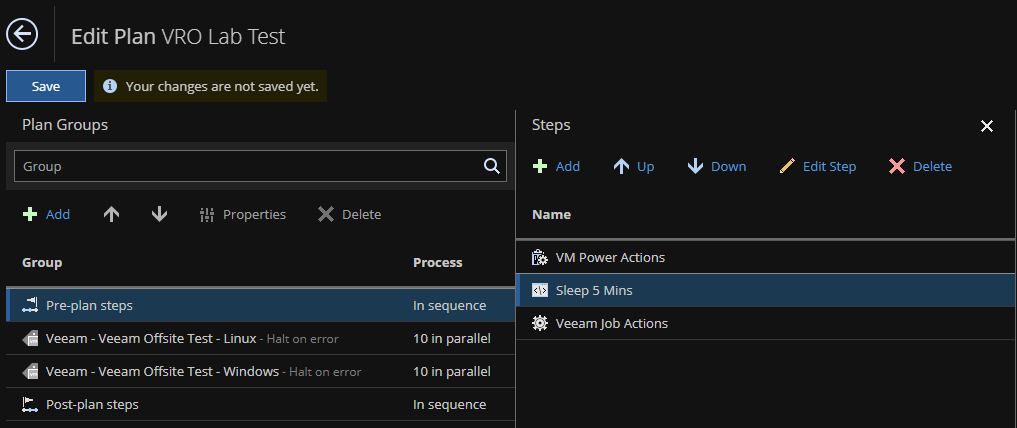
And Save again

Right click the plan and click Verify/Run Readiness Check

Mine has failed this, we can see why by right clicking it, the clicking Reports/Readiness Check
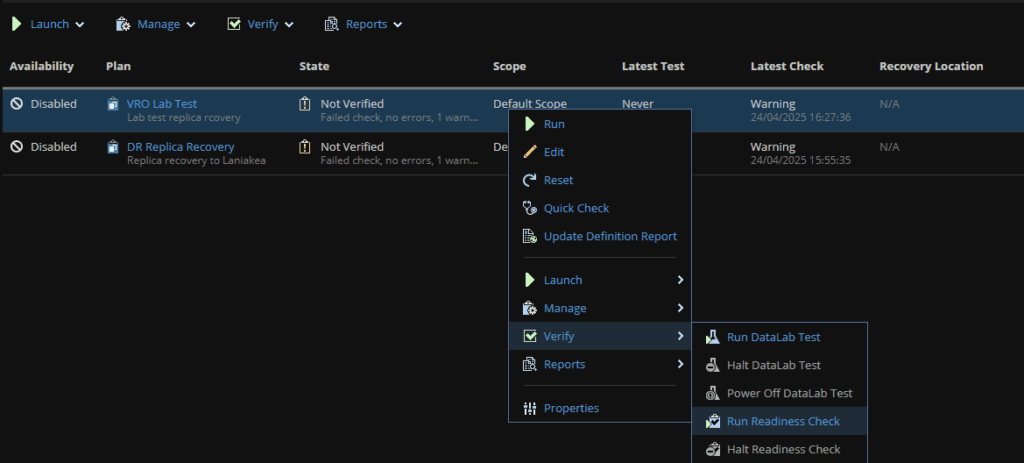
Click the report

And open the summary report
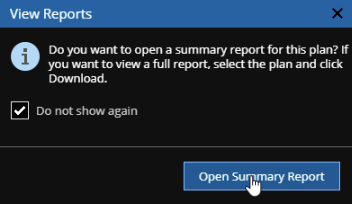
The warning, is from the VM power Actions, there 2 warnings with no more info, so I will check on how it runs when I test this plan
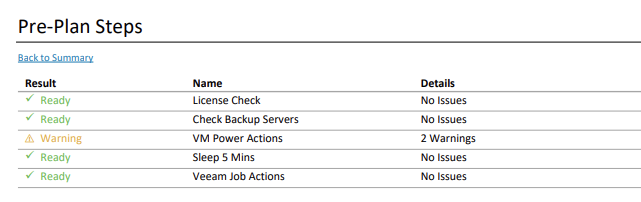
4.8 – Executing Our Recovery Plan
To now test our replicas, we need to right click the plan and click Manage/Enable
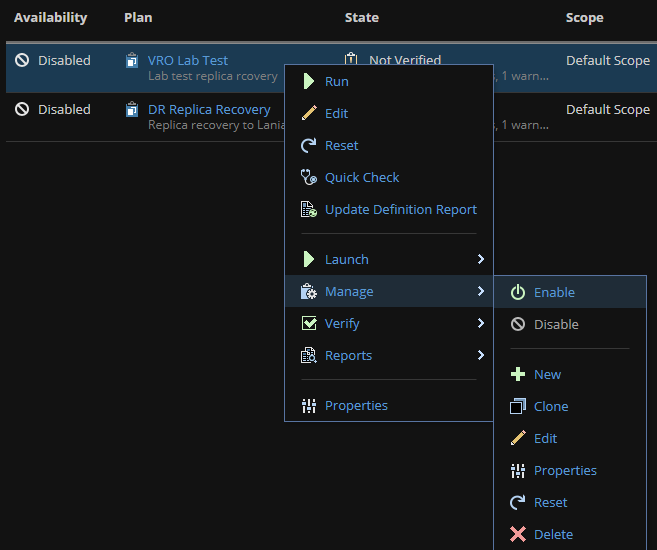
And now we can right click it and click Run

Enter the login credentials and click Next
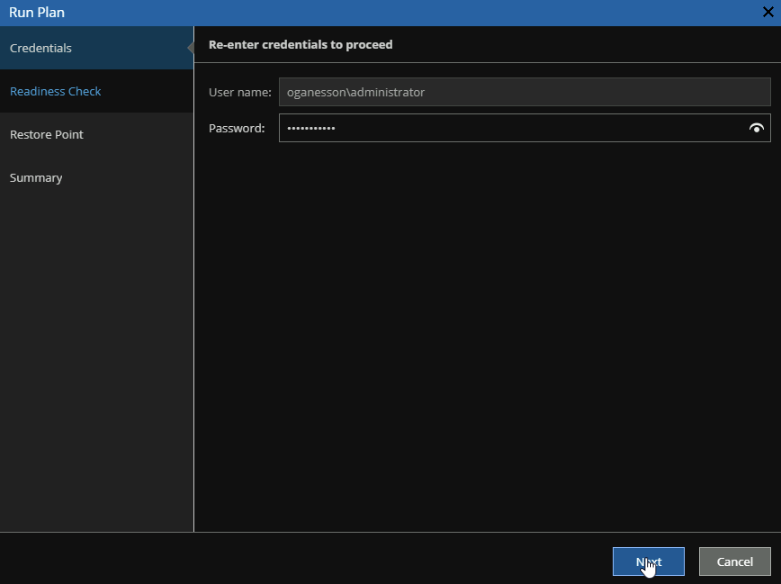
Click Next here
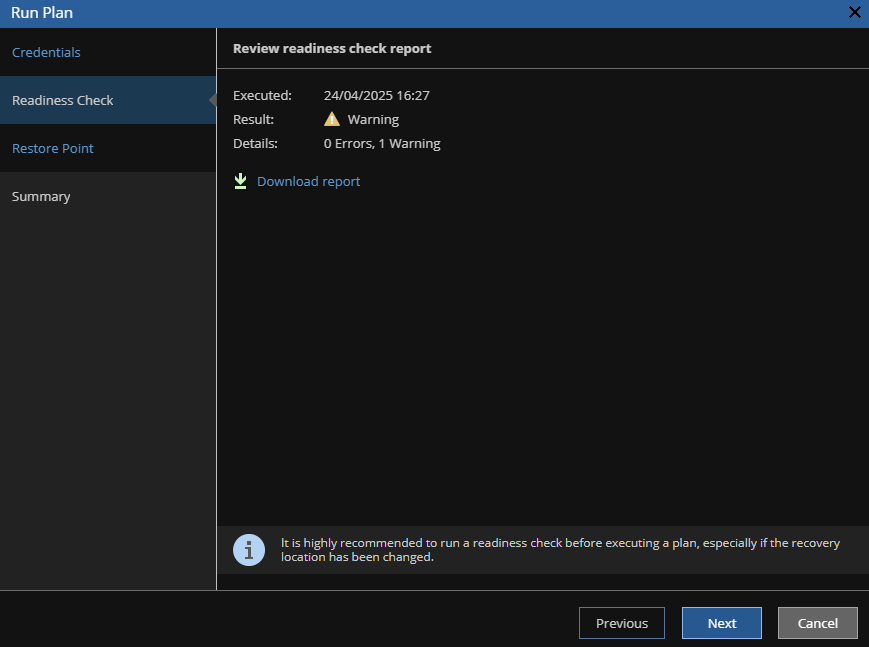
Click Next again

And Finish
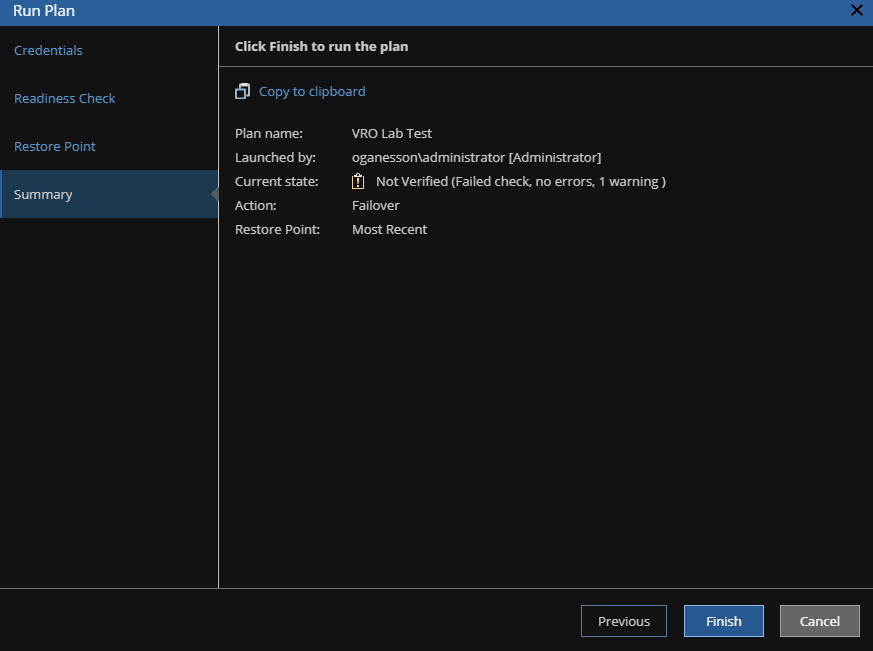
If we click the plan we can view the status

And then click any object to see what its doing
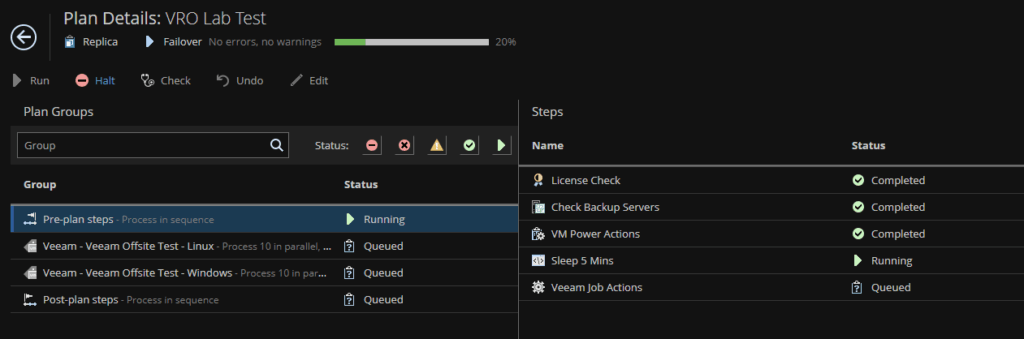
We can then see the VBR job running
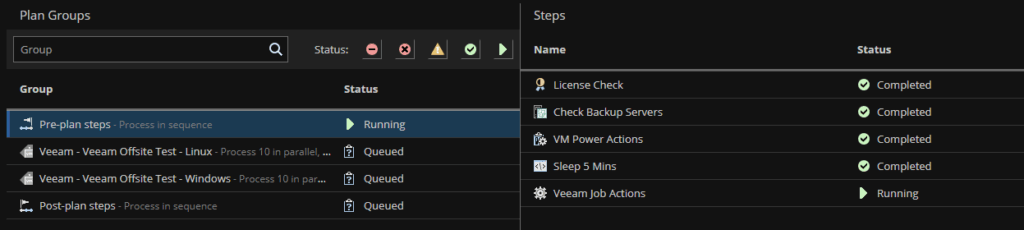
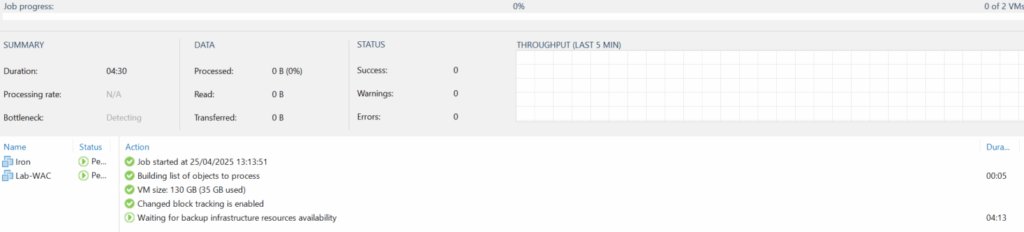
Once the VMS are replicated they are spun up, and we can see this has completed in VRO
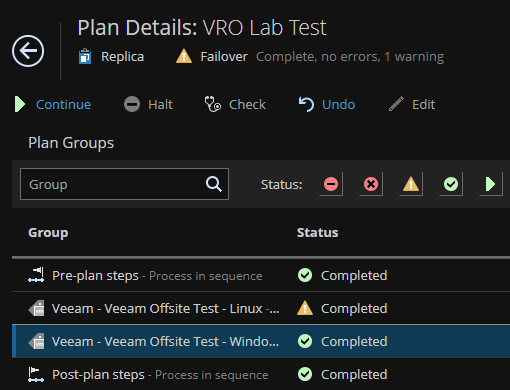
And the VMs are up
The warning here on the Linux tagged machines is due to the Re-IP rule not working
Here we see the IP address hasnt changed and will need to be manually edited
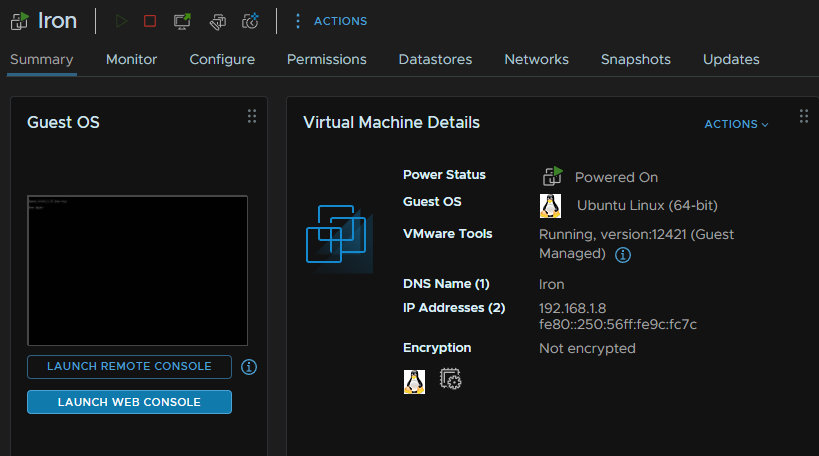
In Windows the machine has had the Re-IP rule applied successfully and is accessible on the DR site
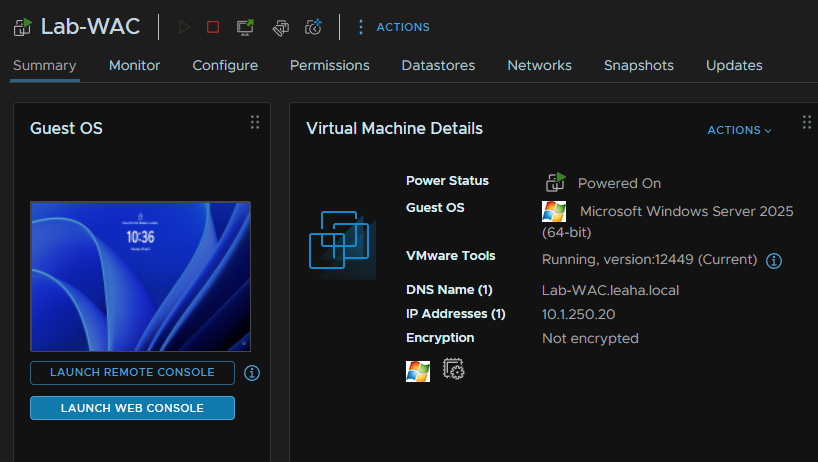
Ravatheodor has created a Linux Re-IP script for Linux, however I was unable to get this to work properly with PowerCLI issues
The article can be found here
5 – Post Deployment Bits
5.1 – SQL Updates
For my installs, as its a small environment, the embedded SQL 2017 instance is perfectly fine, and there actually doesnt seem to be a way to configure this at the deployment anyway, it does come with one major drawback, it comes with the release version of SQL 2017
This wont be an issue for VBR or VEM as they use postgres, but for Veeam ONE and VRO, if you didnt manually create a new DB on a local full SQL install, it will need patching immediately after deployment
Before upgrading the SQL 2017 instance, power the VM off and snapshot it in case anything goes wrong, when its back up, give it 10 mins for all the services to boot up
Now, the default SQL 2017 express install is the RTM package and needs to be updated to the latest update, which, as of April 2025, can be found here
And click Download
Double click the exe

Accept the EULA and click Next
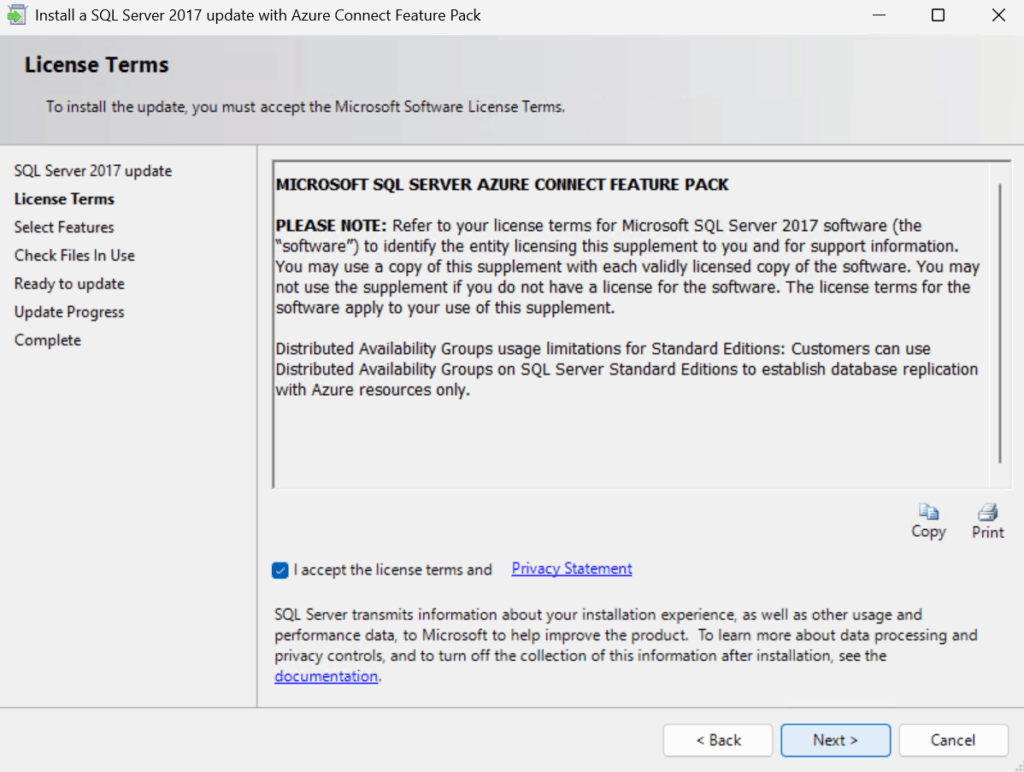
Click Next again
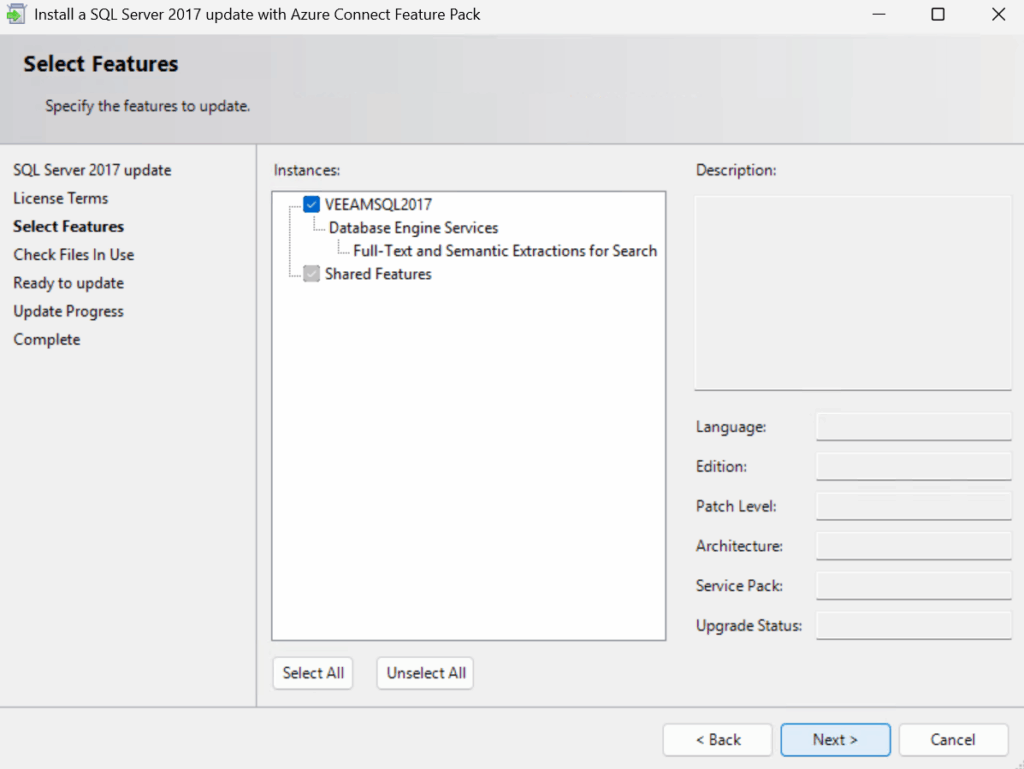
This may flag for WmiPrvSE.exe, we can ignore this, as the server isnt setup, so its fine if it reboots, click Next
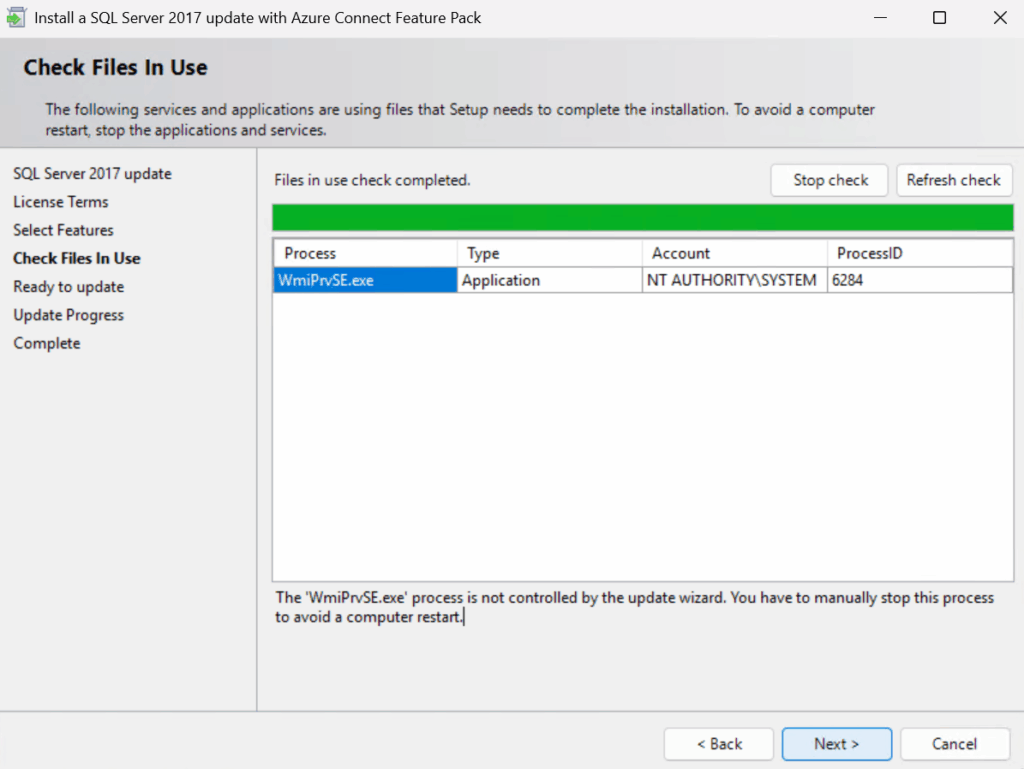
And click Update
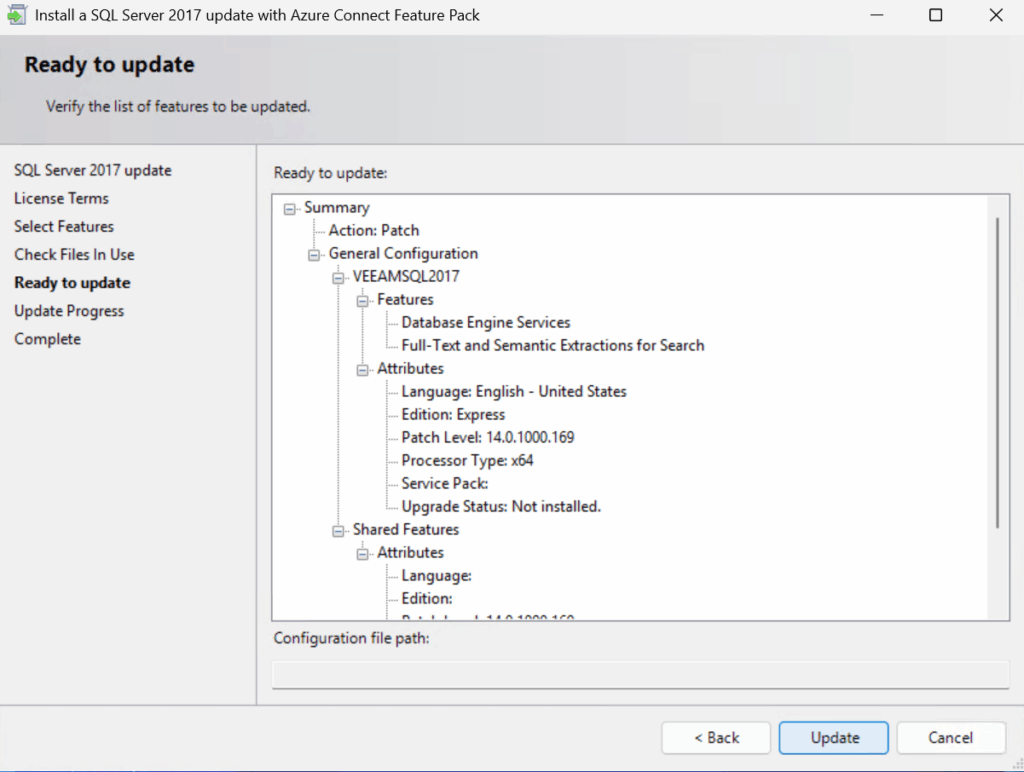
Then click Close
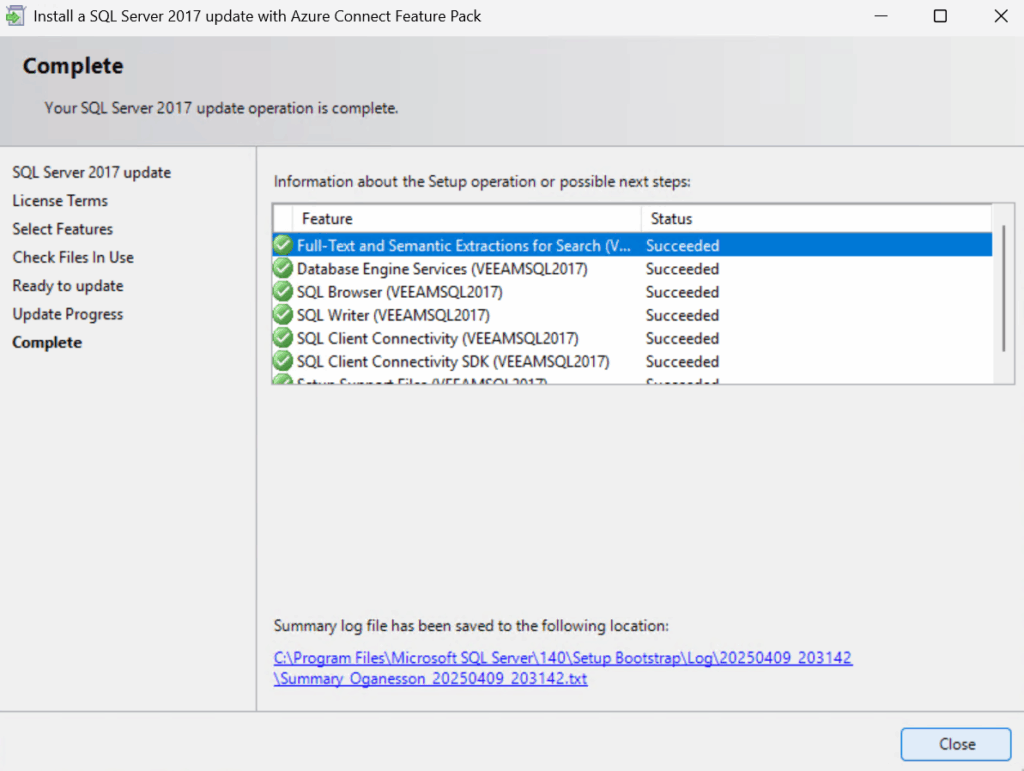
You will also want to grab the latest OLE v18 driver, which is 18.7.4 here
If you scroll down you will see this, we will want to download the x64 version
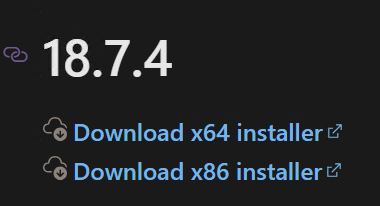
Now we need to stop the Veeam ONE service, open Services
Click the Veeam ONE Monitoring Service, and click Stop
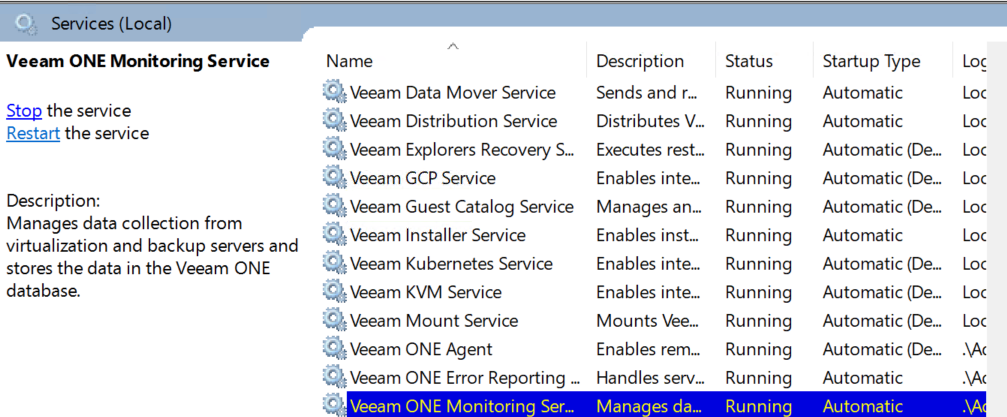
Double click the MSI

Click Yes to upgrade
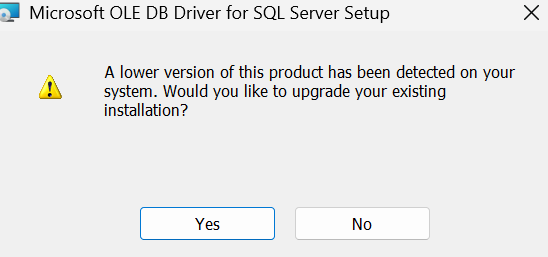
Click Next
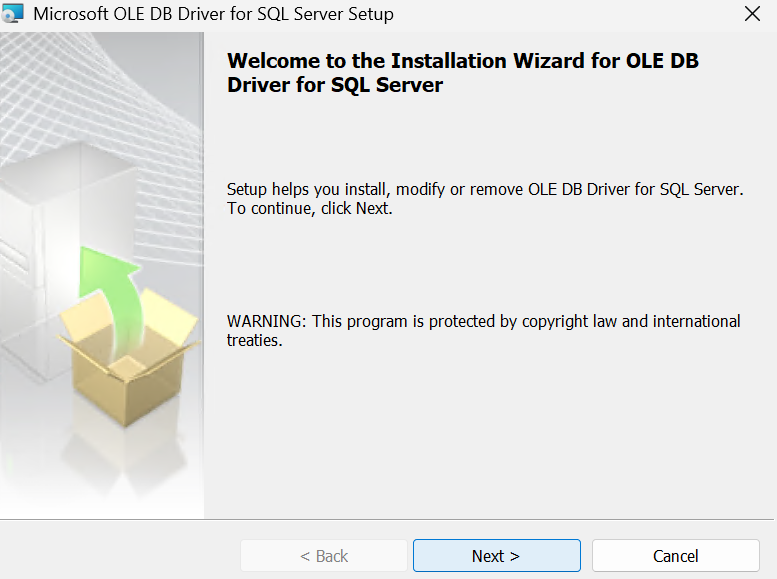
Accept the EULA and click Next
Click Next
And then Install
Once its done click Finish
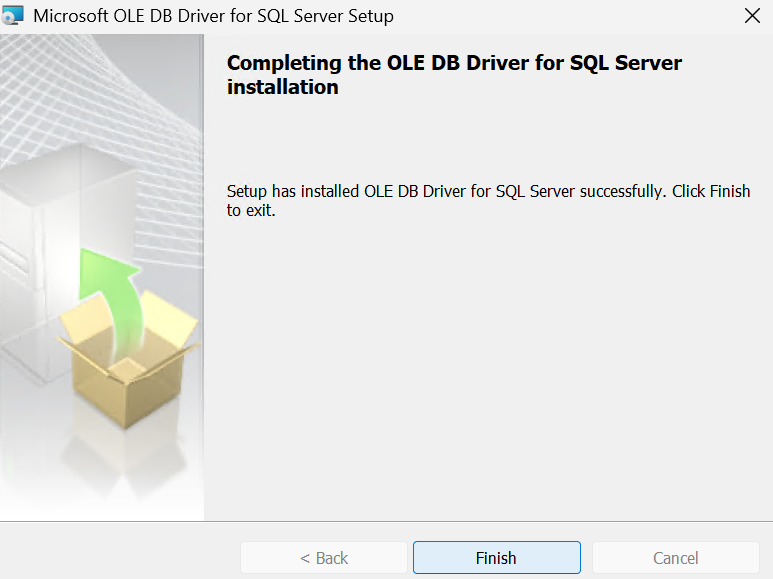
And start the service again

5.2 – SQL Explorers
5.2.1 – Postgres DB Explorer
By default, there isnt a GUI app installed for Postgres and while you shouldnt have to go through the database, but having one, like the SQL Server Management Studio, but for Postgres is very helpful
You can download this for Windows here
I grabbed the latest, 9.2, by clicking the link
And click the exe
Double click the exe

Click Install For All Users
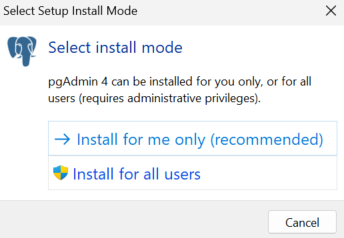
Click Next
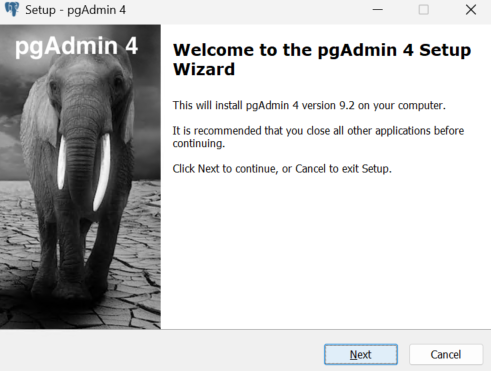
Accept the EULA and click Next
Click Next again
And Install
When thats done click Finish
We can then open it from Windows search
We can then right click the server, it should pickup the local install and click Connect
And the password should be the administrator account used to setup VBR and click ok
5.2.2 – MSSQL Management Studio
While you shouldnt need to go through the database, its nice to have a UI to explore it with if needed
We can find the latest version of the management studio here
We can scroll down and click this link
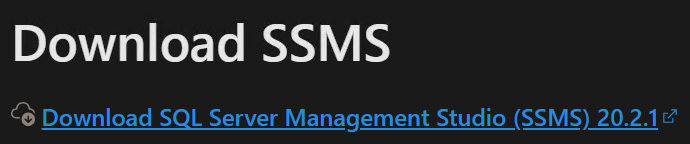
Double click the installer exe

Click Install
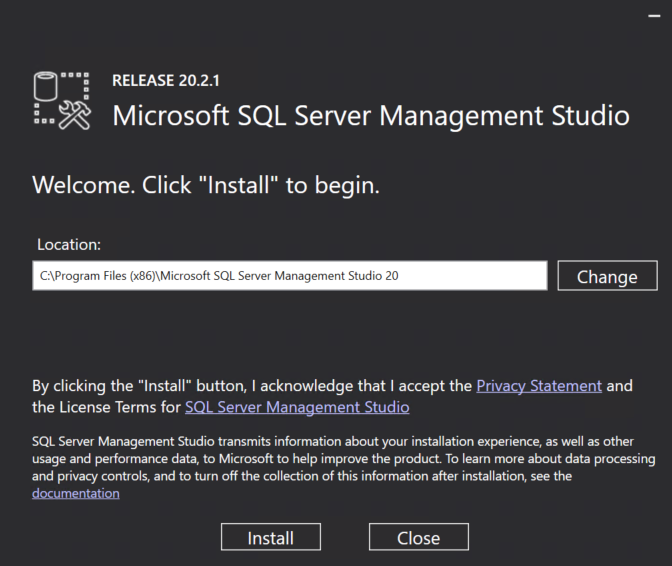
Once thats finished click Close

We can the open the Management Studio
And connect as the local admin account

Then we can see the SQL 2017 install

need to know how to restore physical server to difference physical server (linux)
thank you
You can use the physical server restore steps outlined in the article, hell you can even restore to a hypervisor