By Leaha
Last updated on January 26th, 2026 at 21:56
VCF/VVF 9 is finally out, so the big question is how do we upgrade our environment to take advantage of the new features
Its worth noting that the GA releases typically have a lot more bugs so you may not want to upgrade your environment until a couple of patches have come out
This guide will aim to include the two main scenarios you will be upgrading, one where you have vCenter, ESX and Aria Ops, and one where you just have vCenter and ESX, the process is a little different
Any other components dont effect the upgrade path and will be included in both upgrade scenarios as my lab aims to have all VVF components deployed in VVF 8, so if you dont have them you can just skip over those bits
There are some things to be aware of when upgrading, this list is not exhaustive but is the main points of concern, the full list can be found here
- vCenters in ELM wont be supported for long term running, vCenters must be split, this is easier to do in vCenter 9 so I would upgrade to 9 then split the vCenter – more info here for now, guides for that will be added later
- vCenter grouping replaces ELM giving the same functionality without all the ELM headaches, more info on setting that up can be found here for now with additional guides for that coming later
- VxRail is currently not supported for upgrade
- Clusters must be migrated to cluster images if using baselines, information can be found here, in section 8.1
- vCenter must be hosted internally, mine wasnt, so a way to fix this is addressed in the vCenter upgrade
- You will need to have your vCenter updated with the download token for your organisation, info on how to do this can be found here
- Aria has been rebranded to VCF Operations, so we have VCF Operations, and VCF Operations For Logs
Things of note with this release are
- vCenter ELM is deprecated and will be removed
- vCenter upgrade using the installer UI is deprecated
- vCLS is deprecated and will be put in retreat mode – covered in the Section x.9.2
- Aria Operations For Logs has no upgrade path to VCF Ops For Logs, a new appliance will need to be installed and the config migrated manually, you can run the old in parallel, for log retention, or migrate the logs to VCF Ops For Logs, and if you have agents point them to the new log server
- Aria LCM has no upgrade path and can be removed after the upgrade, there is currently no substitute either sadly
- VCF Operations Orchestrator is now available and managed on its own, you previously couldnt deploy Aria Automation orchestrator, so the upgrade isnt here
- Avi Essentials, used for the supervisor load balancer has been replaced with the Foundations Load Balancer, there is currently no migration path I can see, with Avi Essentials on 22.1.x still in support, I imagine this will come in time
- The Data Protection appliance, used for vSAN snapshots on the ESA architecture has been moved to the live recovery appliance, which is free, I am working on adding this documentation
Important – By continuing you are agreeing to the disclaimer here
1 – With VCF Operations
1.1 – Aria LCM
First we need to download the patch for LCM so we can get VCF Operations upgraded to version 9, you can find this here
And download the patch

We need to upload the patch to Aria LCM
Connect to it with the root account using WinSCP
Double click the bar here
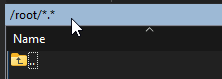
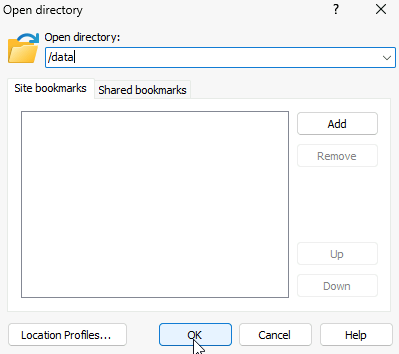
And navigate to /data and click ok
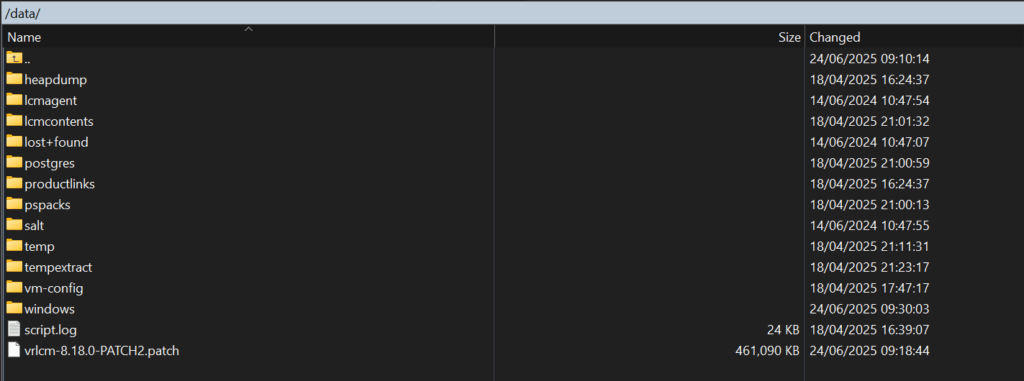
On the right panel head to where ever you have the patch downloaded and drag it over to the root of /data
It should look like this, the folders in /data may be different, the important thing is that the upgrade file is under /data
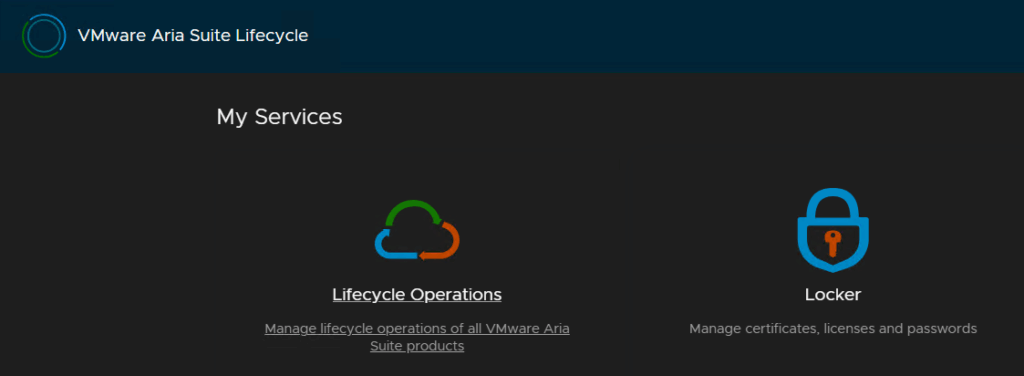
Now head to the Aria LCM WebUI on
https://fqdn
And log in with the admin@local credentials
We will want to ensure we have a valid vCenter SSO admin account added in here, eg a service account, I have had issues using the pre generated ones, so we will be adding a custom one
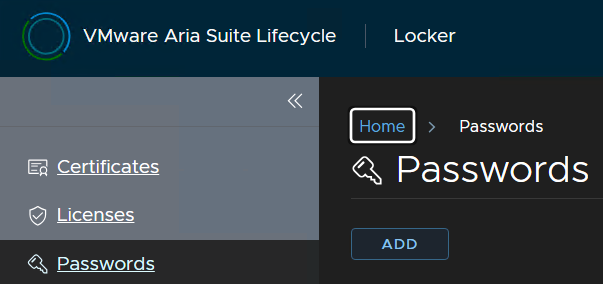
Click Locker
Click Passwords/Add
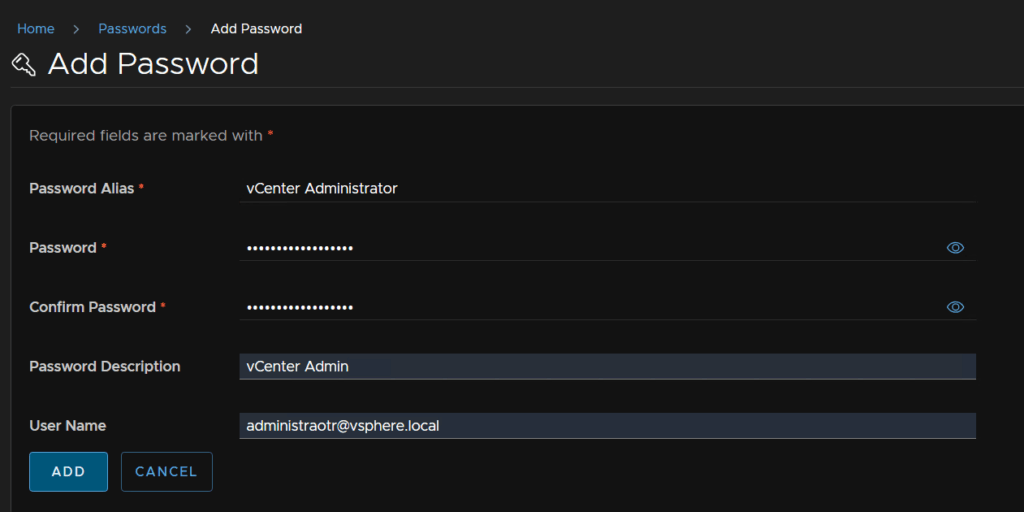
And add the credentials of a vCenter admin, this can be the administrator account, or a service account you added in vCenter and click Add
You may already have done this, and it can be skipped
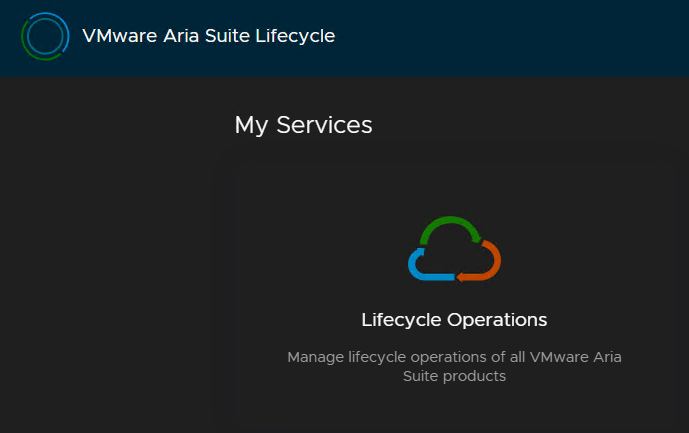
Click Aria Suite Lifecycle in the top left to return to the main menu

Then head to Lifecycle Operations
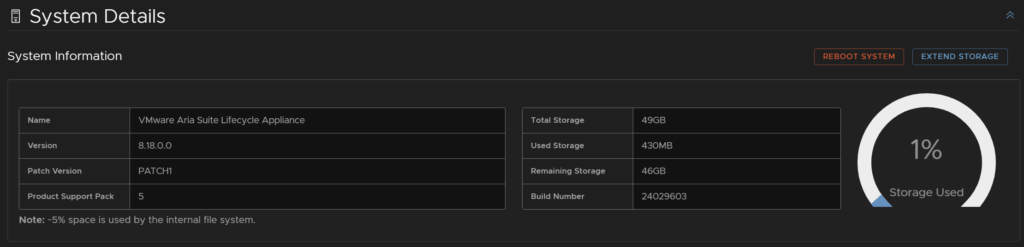
First lets ensure we have enough storage space, we will want ~30GB free
Click Settings/System Details
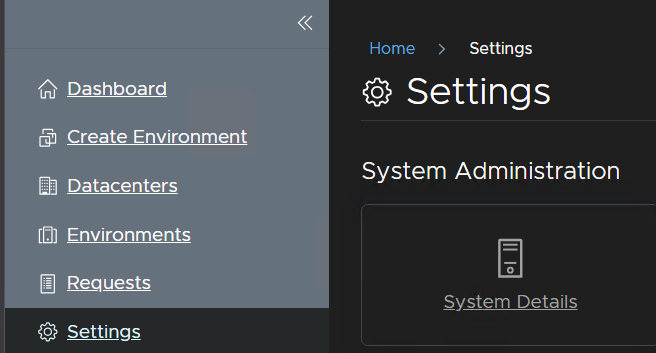
And wait for the to populate, I have plenty of storage, but you can extend it here if needed on the right
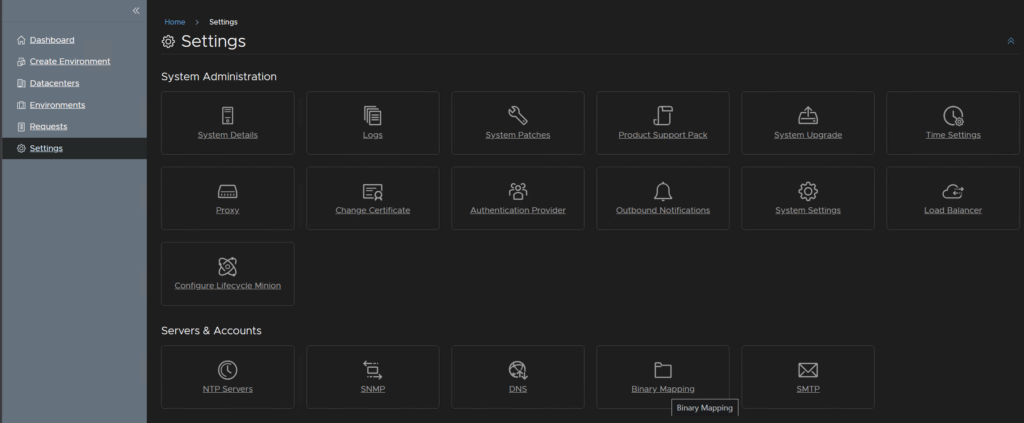
Now click into Settings/Binary Mapping
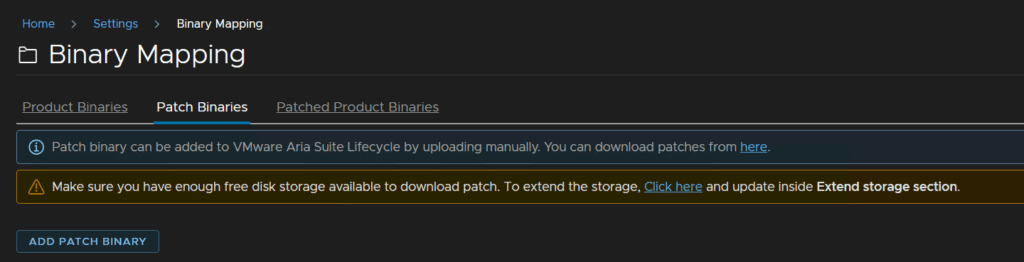
Click Patch Binaries/Add Patch Binary
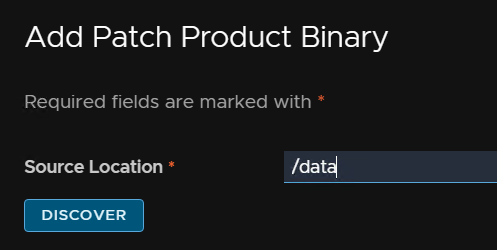
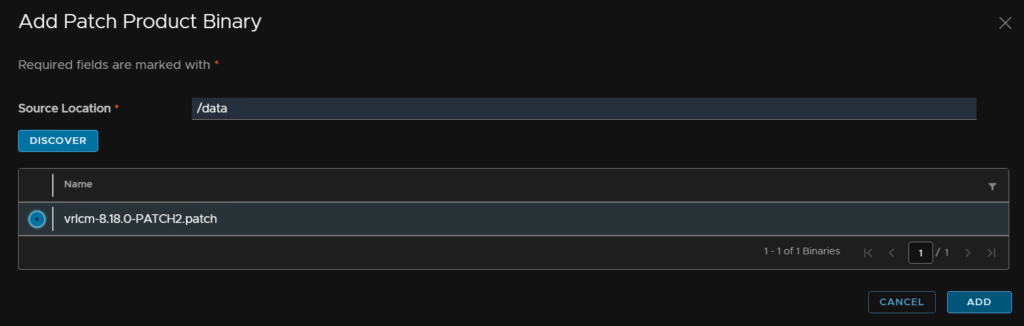
Enter /data for the base location and click Discover
Select the patch and click Add
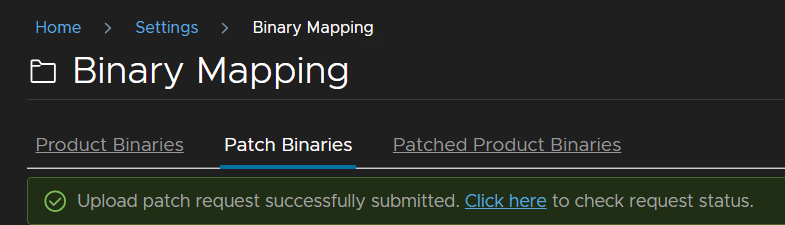
We can also track the request from the link here
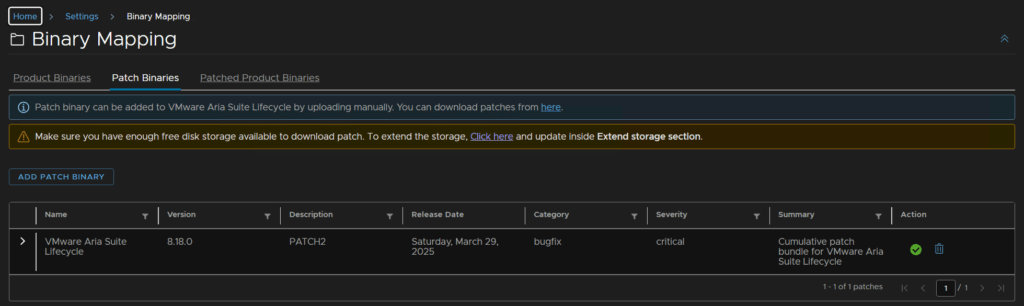
You’ll need to reload the web page, and it should appear when the request is done
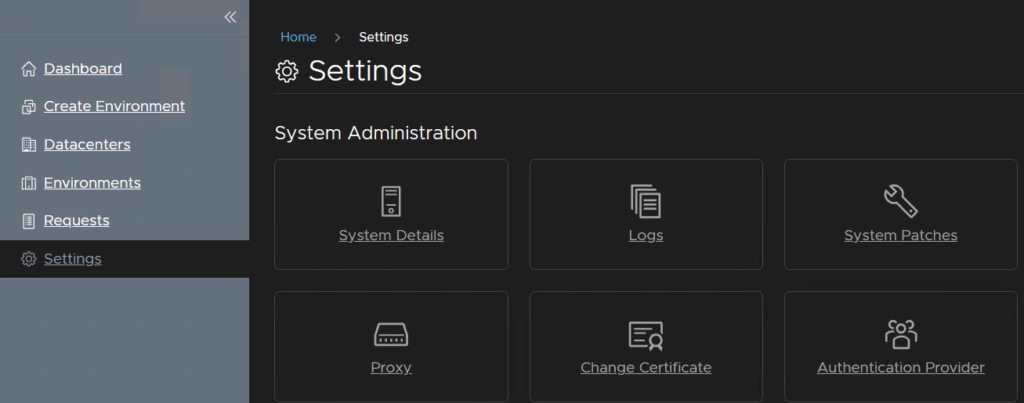
Click into Settings/System Patches
Click Create Snapshot

Now we should have vCenter credentials in here for the account we just added, enter the vCenter FQDN then click Select vCenter Credential
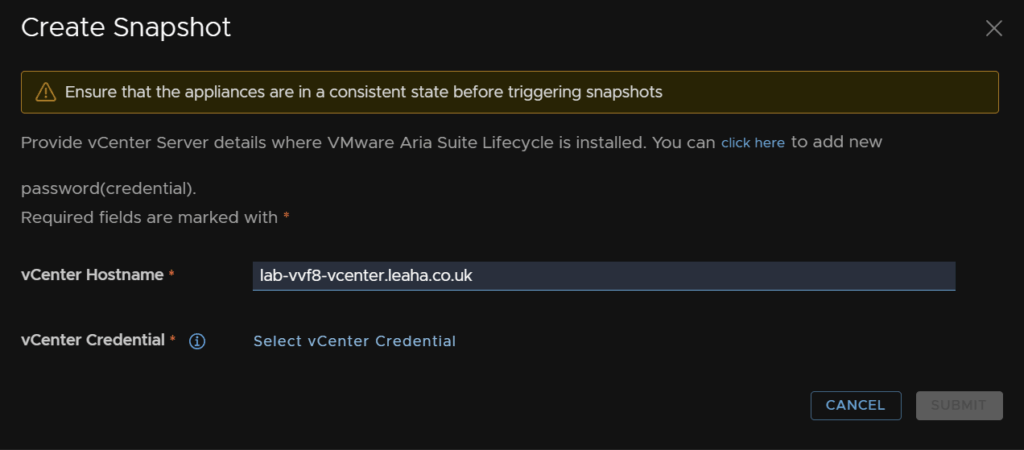
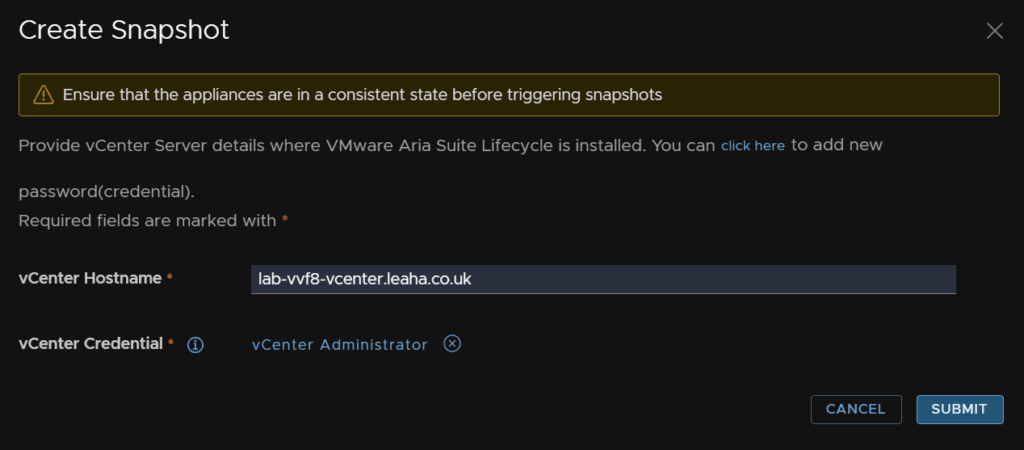
Then select the account we added earlier

And click Submit
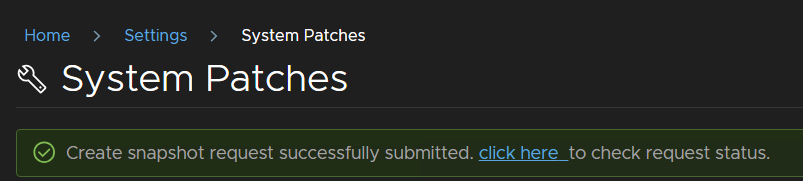
We can click the link to check the progress
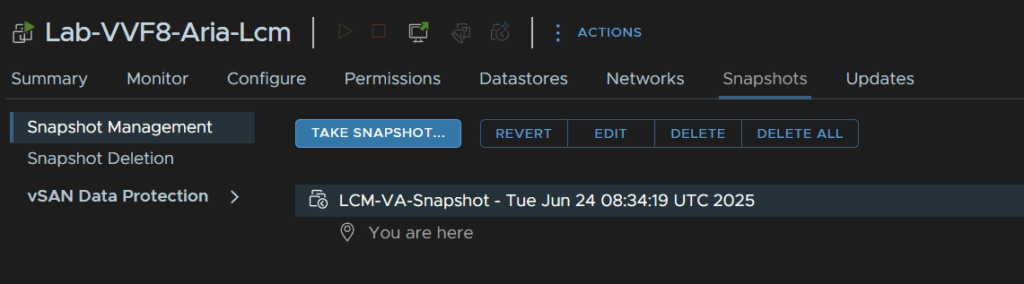
If we check the VM in vSphere we can see thats been applied too
Now in Aria LCM click New Patch

Select the patch and click Next
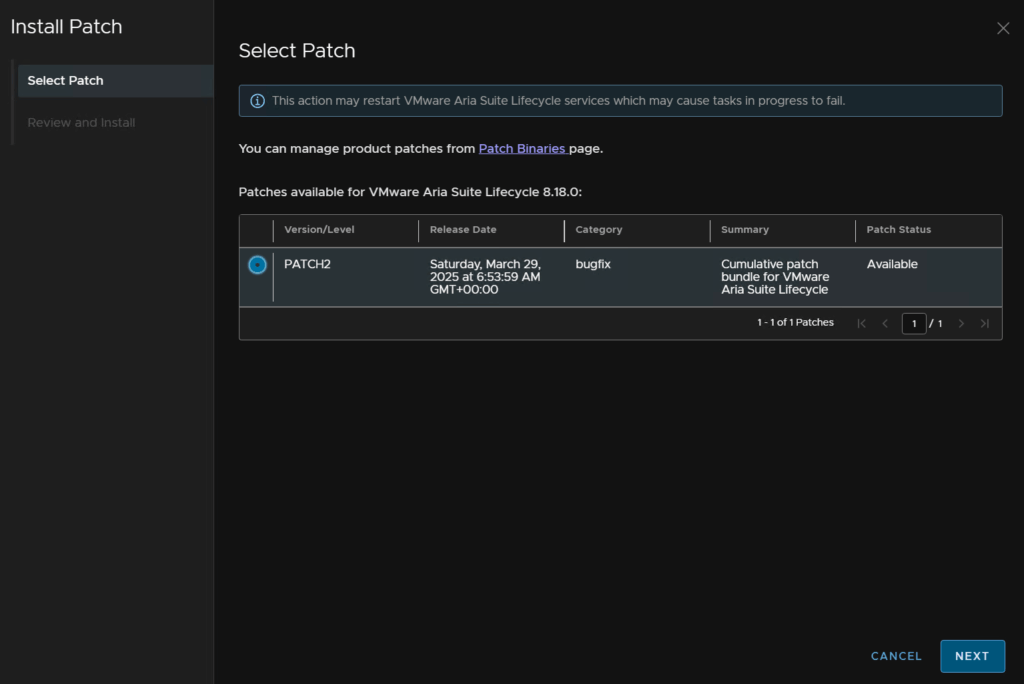
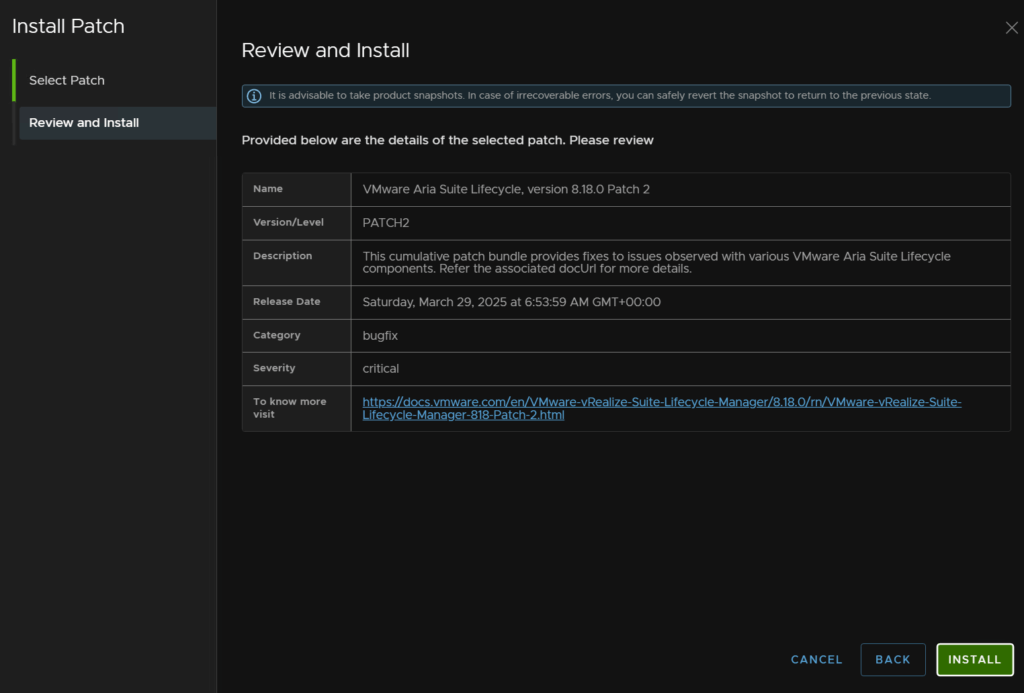
Then click Install
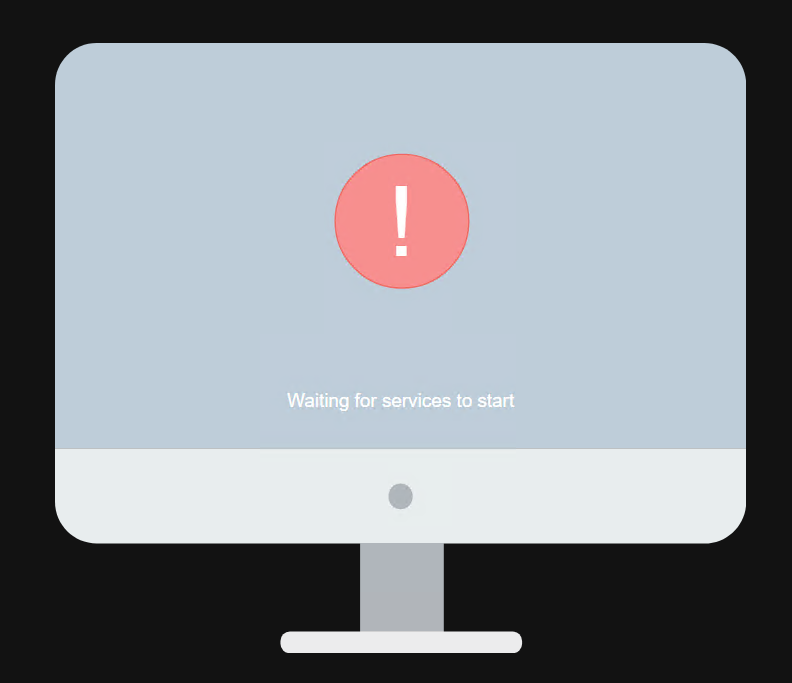
The WebUI will show this as services restart, this is expected
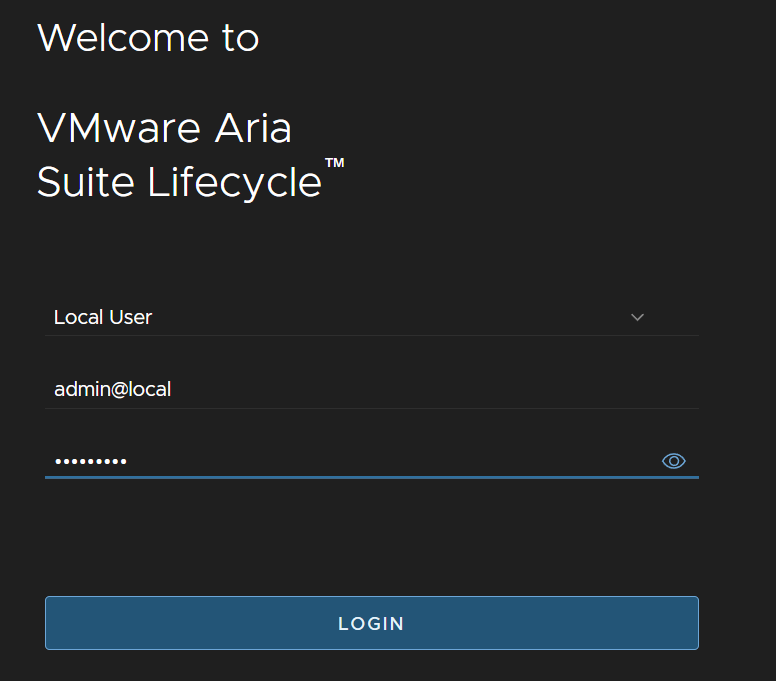
When thats applied log back in
1.2 – VCF Operations
We first need the upgrade pak file from the Broadcom portal
Click My Downloads/VMware vSphere Foundation
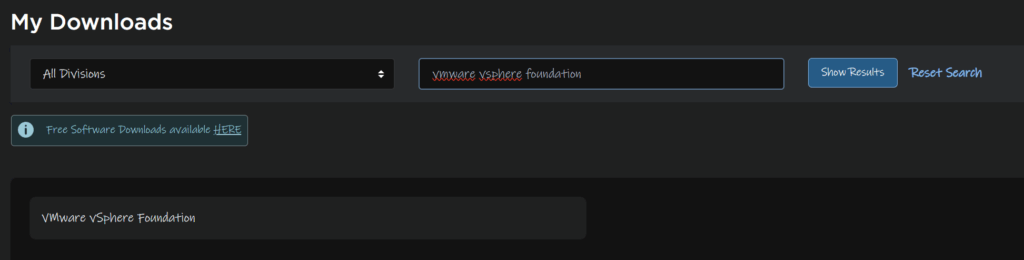
Expand VVF 9 and click the latest release

Find Cloud Foundations Operations and click View Group

And download the upgrade pak file download here

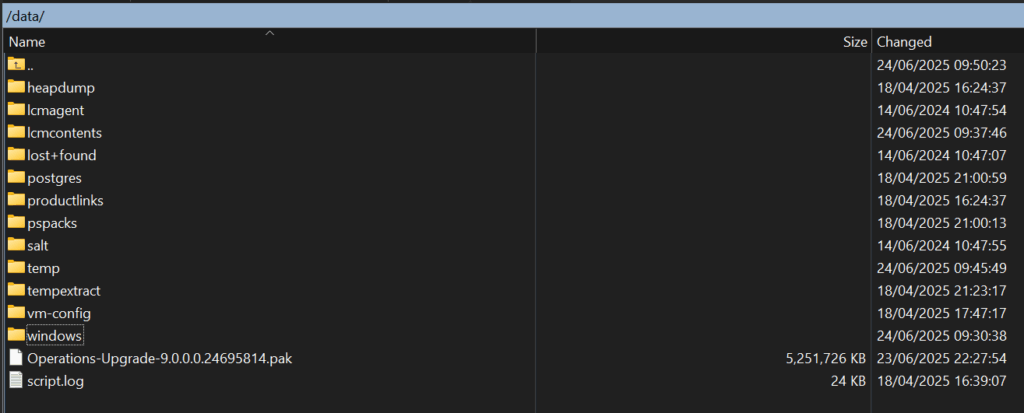
Heading back to our WinSCP session on Aria LCM in the /data directory, we need to drag the downloaded file over, it should look like this
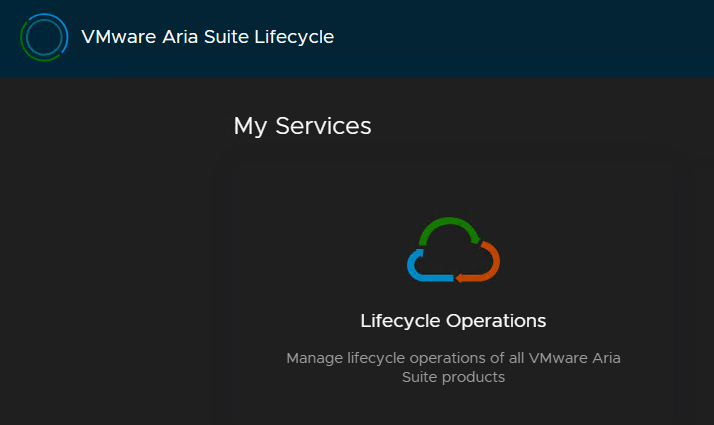
Logging back into Aria LCM, click LifeCycle Operations
Then click Settings/Binary Mapping
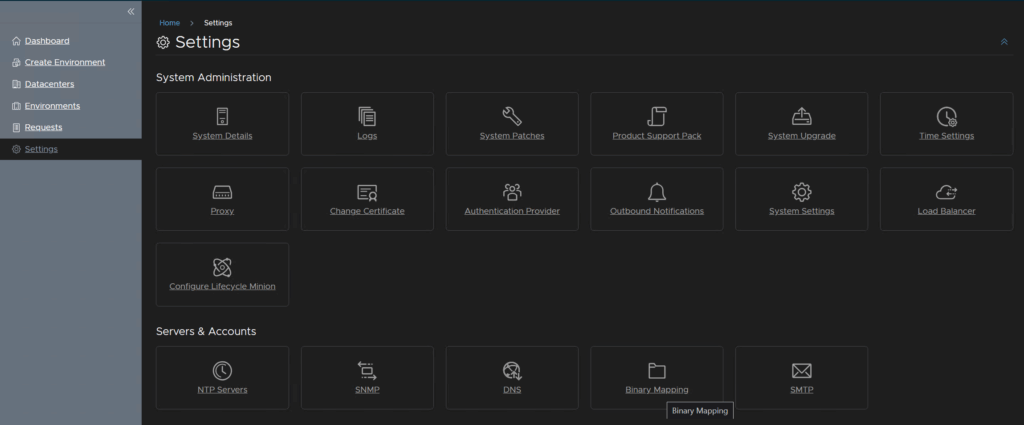
And click Add Binaries
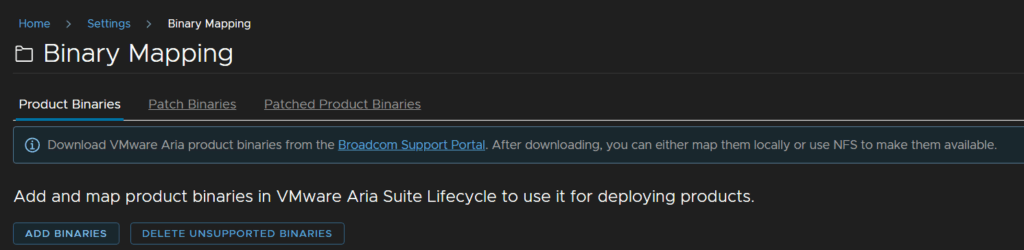
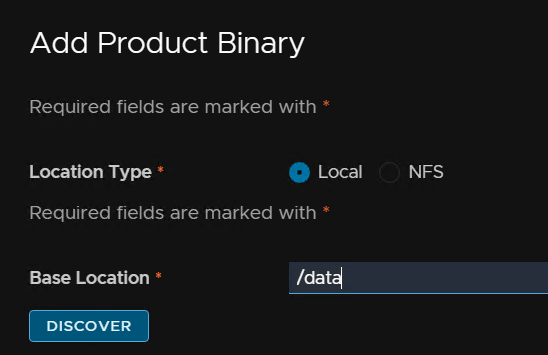
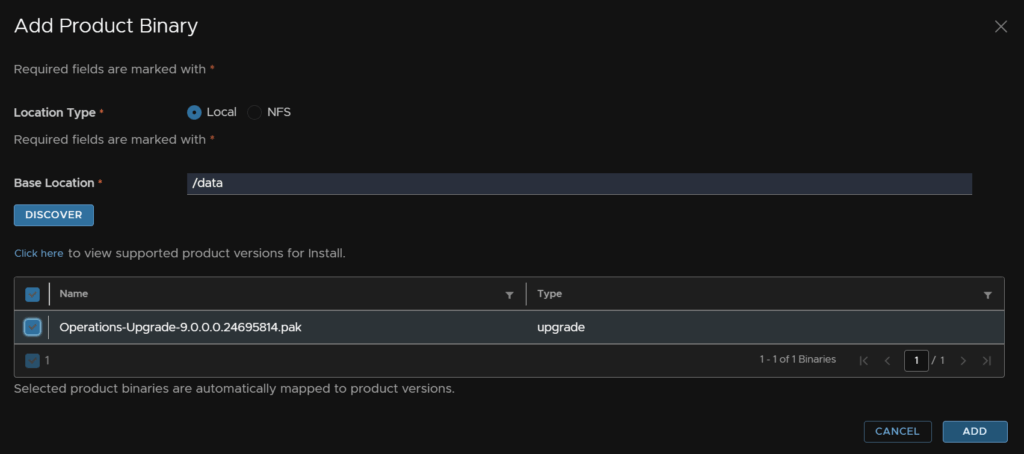
Fill /data in for the base location and click Discover
Check both of the new binaries and click Add
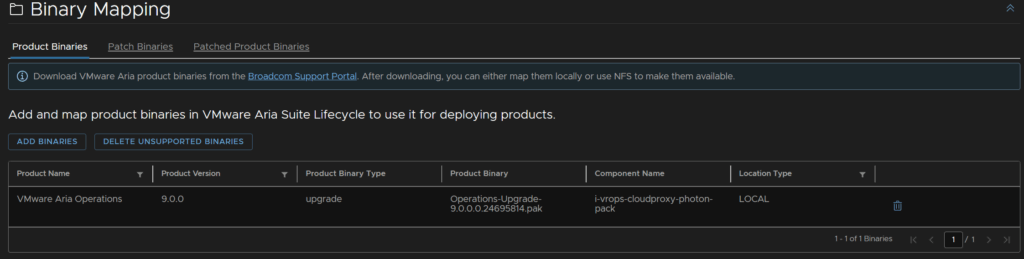
We can check the progress from this link

When thats done you will need to refresh the page on the Product Binaries and it should look like this
Now we can head to Environments and click View Details on the environment with Aria Operations listed
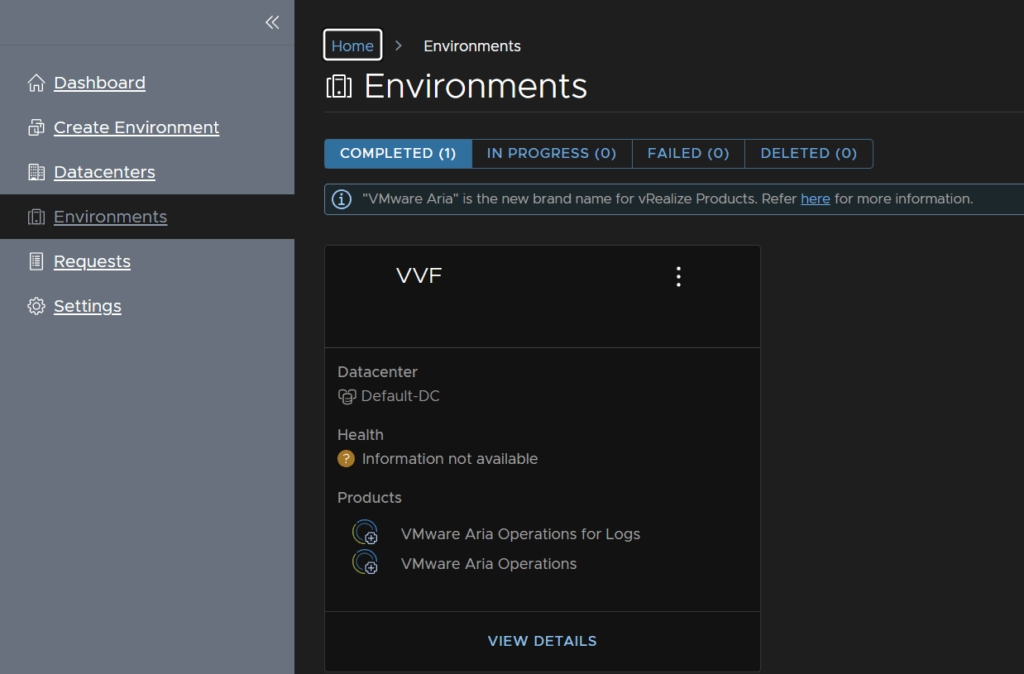
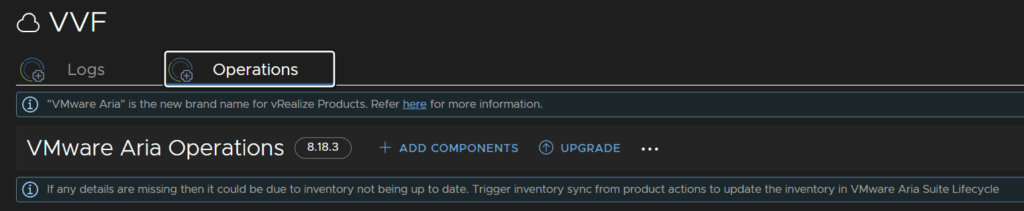
Click the Operations tab then click Upgrade
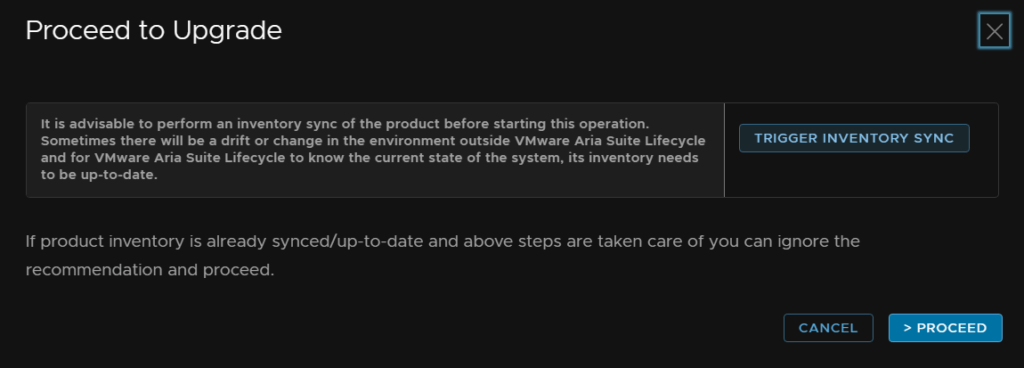
Now click trigger Inventory Sync
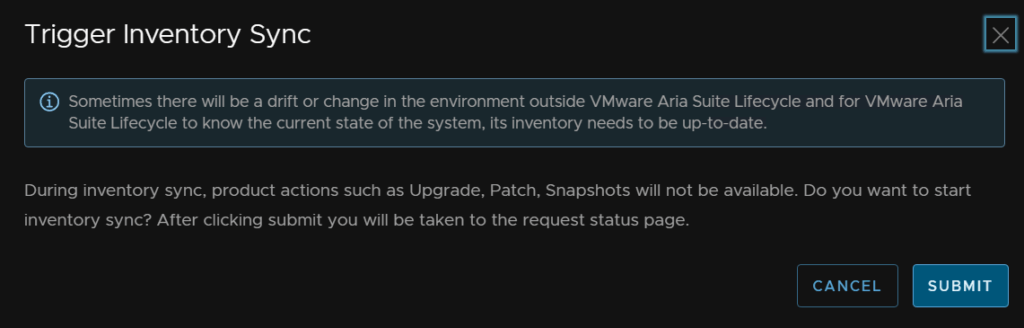
Then submit and wait for the request to finish
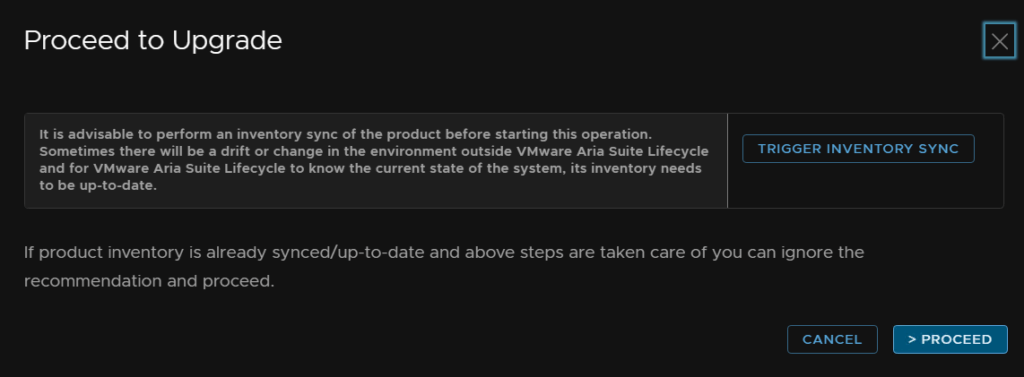
Then head back and click Upgrade again, but this time then click Proceed
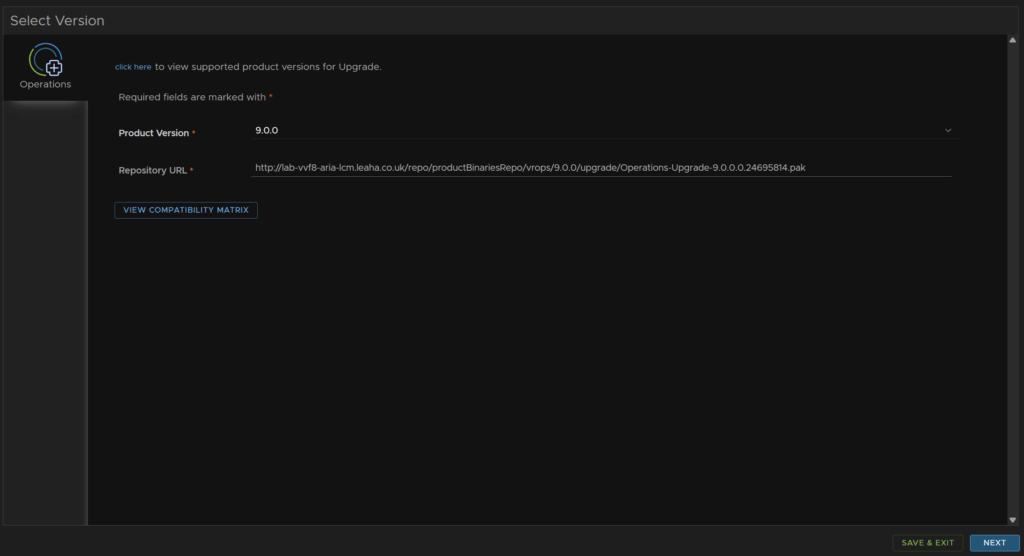
The version should be automatically populated, click Next
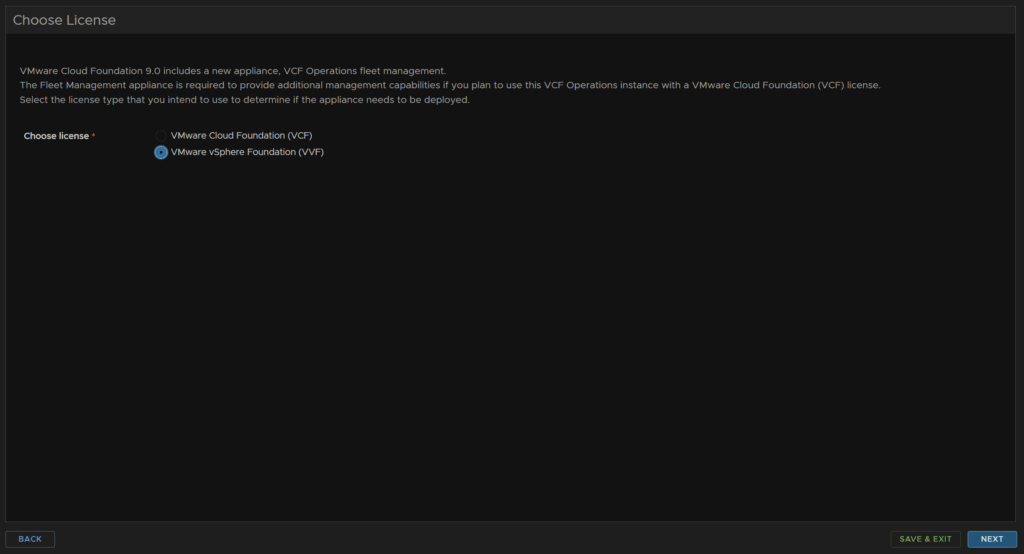
We are using VVF, so we will select that licensing type and click Next
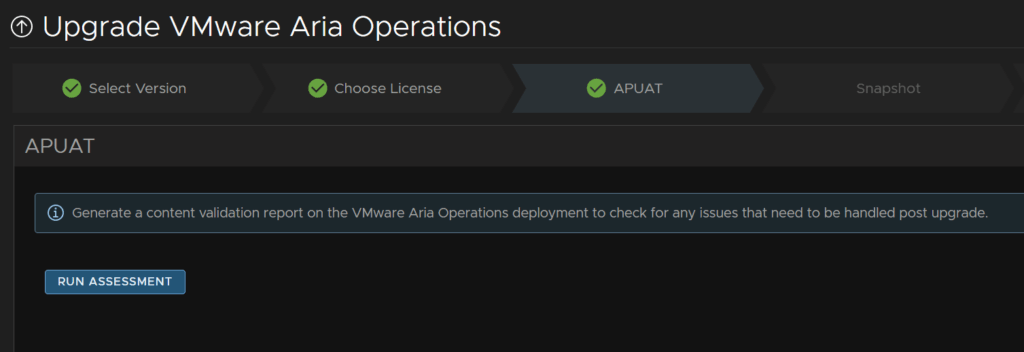
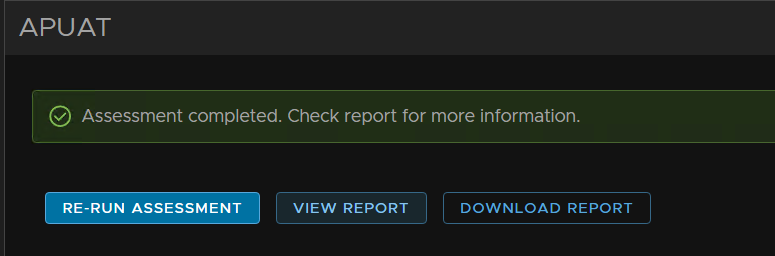
Click Run Assessment
Click View Report
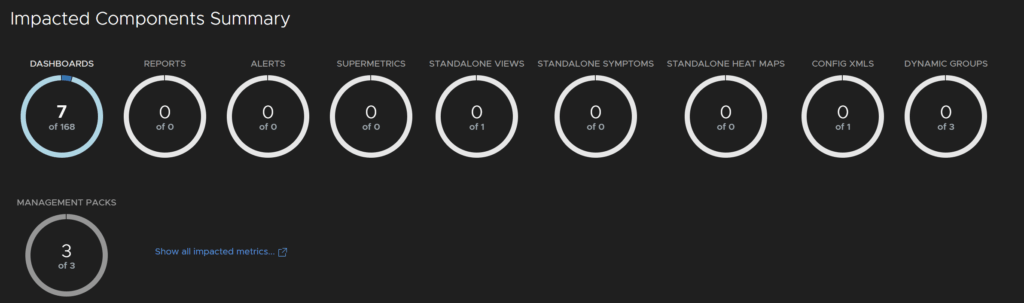
Seven of my dashboards are impacted and three management packs
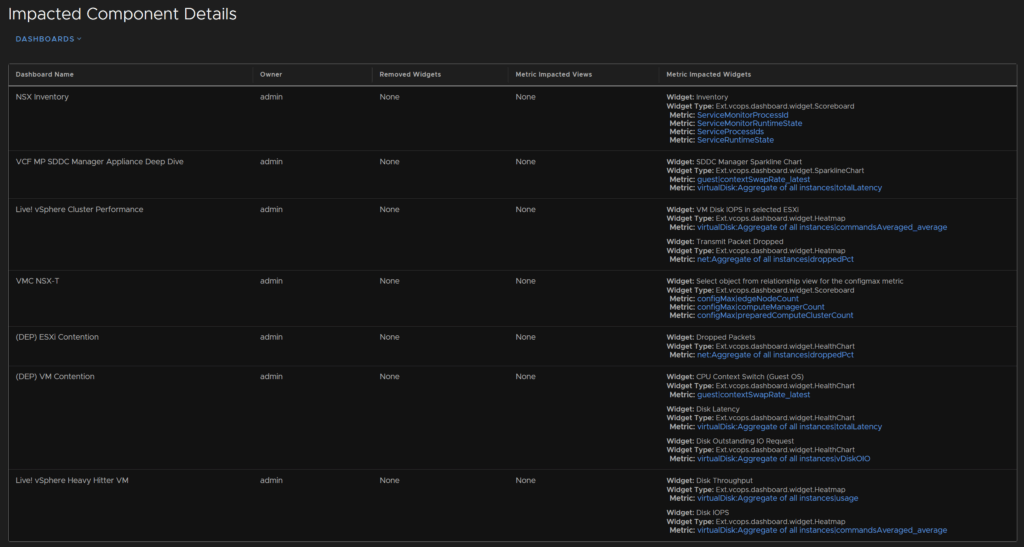
For the dashboards, none of these are my custom one, so thats fine
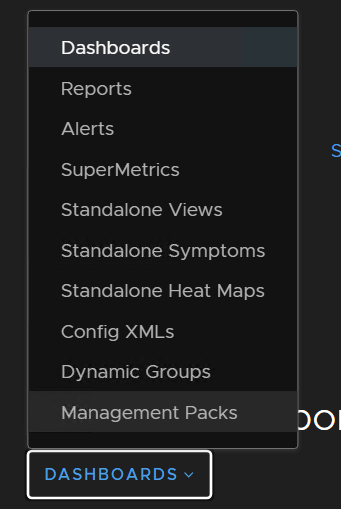
Using the Dashboards drop down selector I can change this to management packs
Which seems to be these, I am going to continue with the upgrade, these are VMware ones so they should be fine

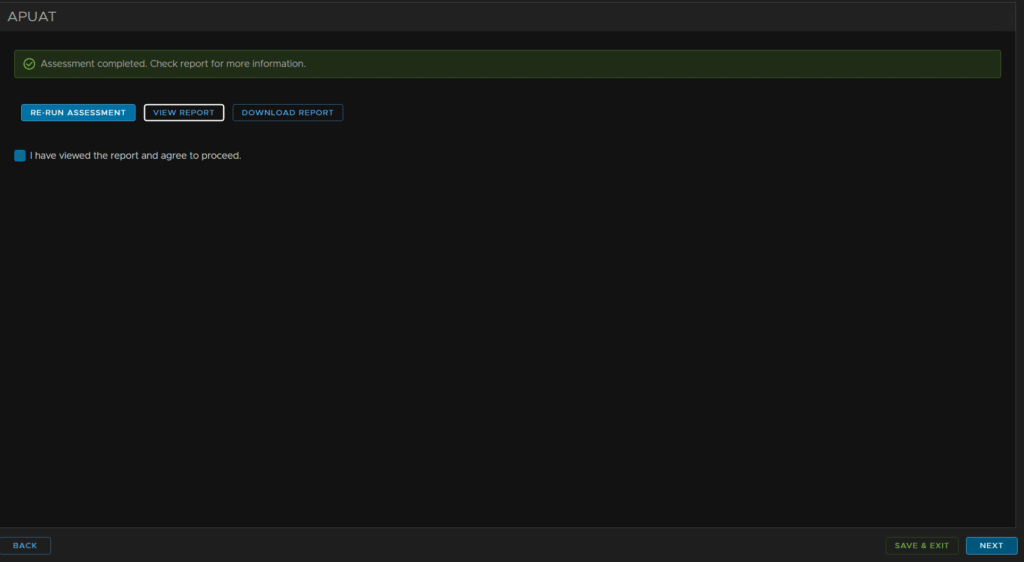
Now I am happy, I will check the box and click next back in Aria LCM
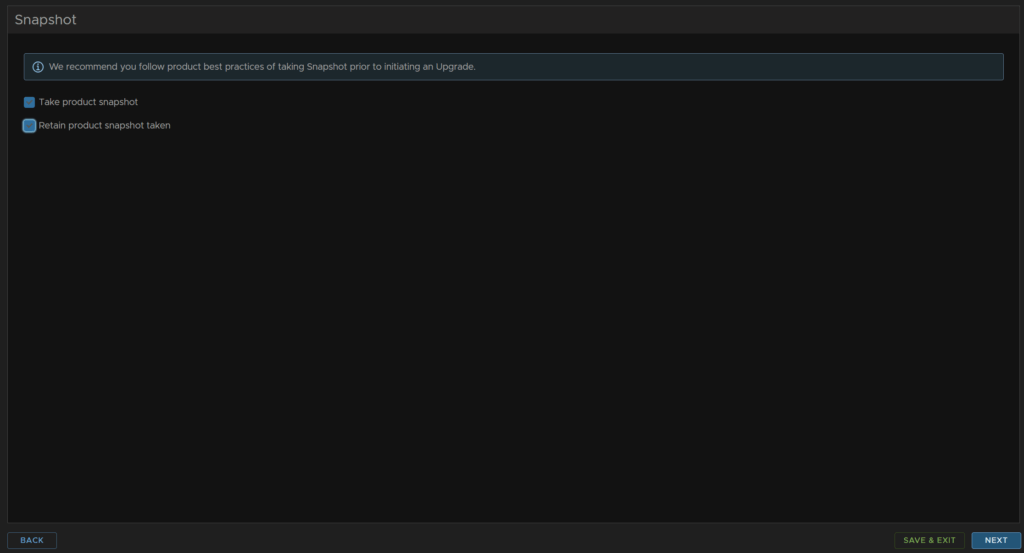
We will check both boxes to take and retain the product snapshots in case we need to roll back and click Next
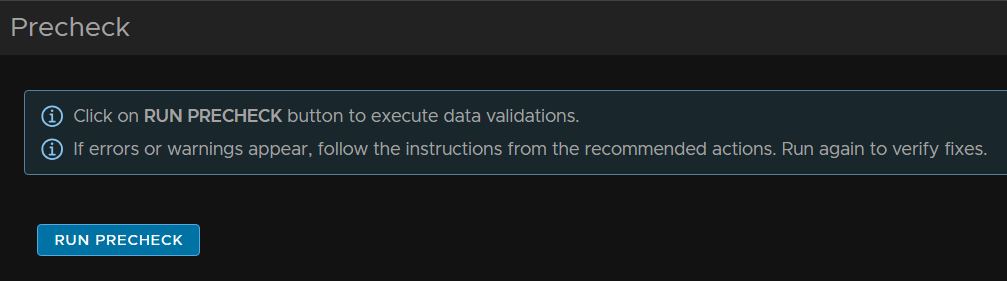
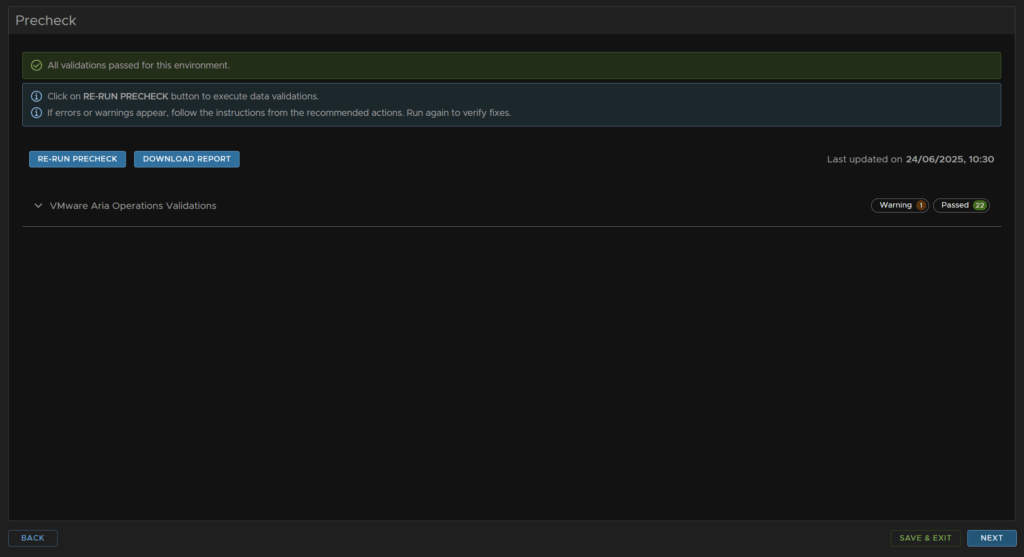
Now click Run Precheck
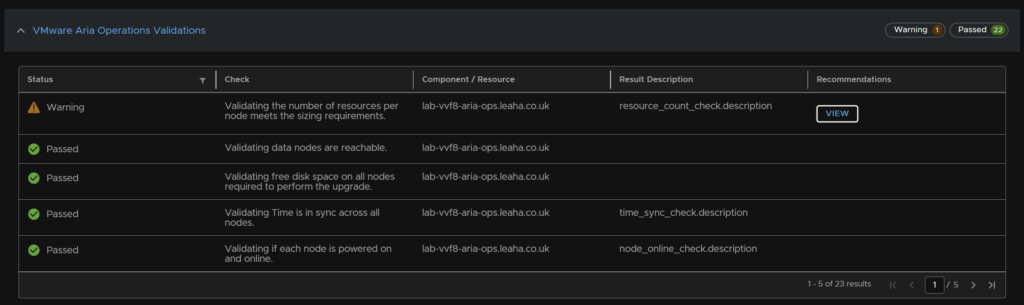
I only got one warning about the VCF Operations node size, but the 2vCPU and 8GB should be ok in my lab, production should be 4vCPU and 16GB, so I will ignore this
Once you are happy click Next
And then click Submit
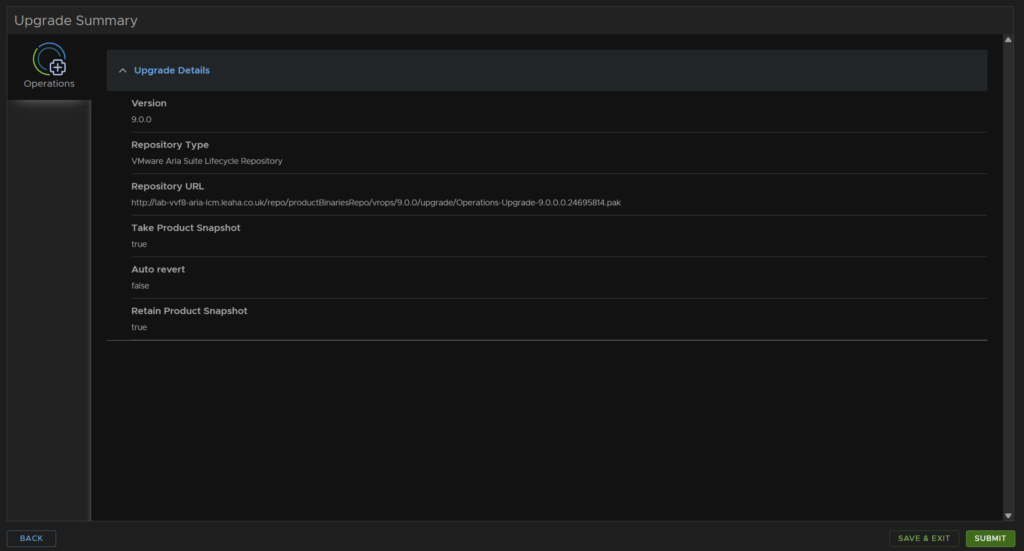
This took about an hour for my environment
1.3 – vCenter
Before we start, vCenter 9 only supports ESX 8 or higher, so ensure there are no ESX 7 hosts in your cluster
Now we need to upgrade the vCenter, for this we need the vCenter ISO
Click My Downloads/VMware vSphere Foundation
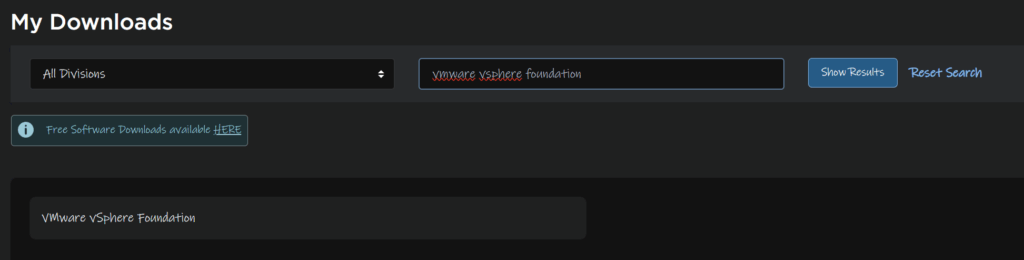
Expand VVF 9 and click the latest release

Click View Group on VMware vCenter

And download this

Then, log into the VAMI portal on
https://fqdn:5480
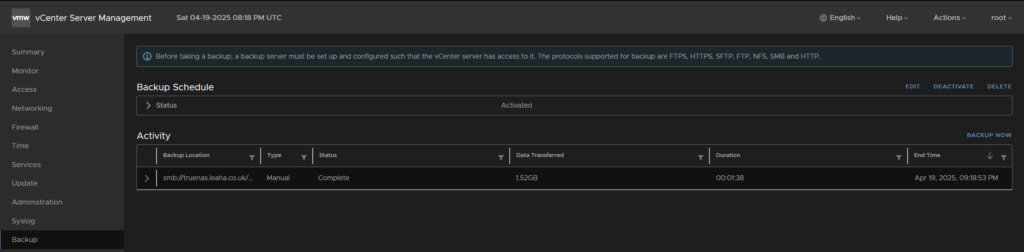
And check you have a config backup taken with the last 24 hours, you should have a schedule backing this up daily, if not take a manual backup to an SMB/NFS/SFTP server
You can find this under the Backup tab on the left
Next, find the VM, now for my lab, the vCenter is external, which makes this a little easier, but for most environments its not
In vSphere, find the vCenter VM, and note the ESXi host its running on
In related objects, it shows its on glacier.leaha.co.uk
Shut down the vCenter and log into the ESXi host directly
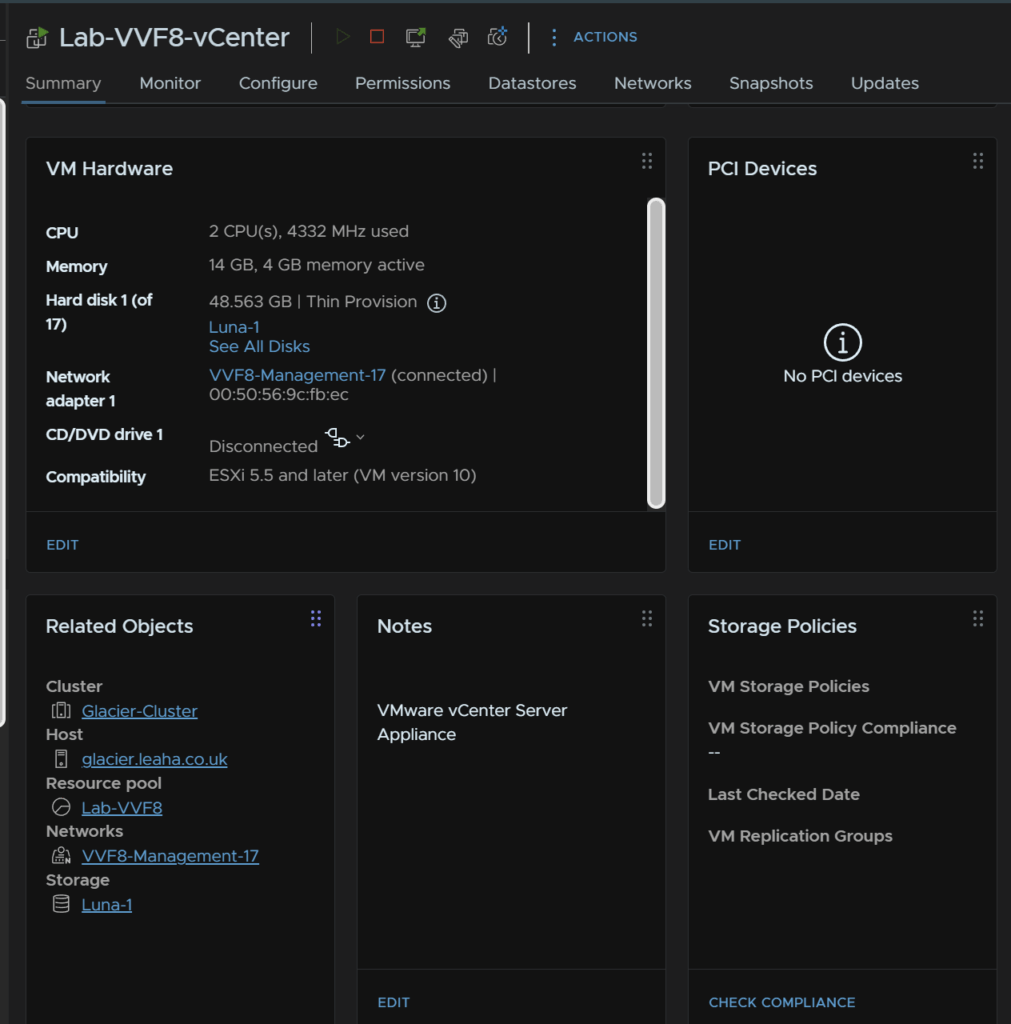
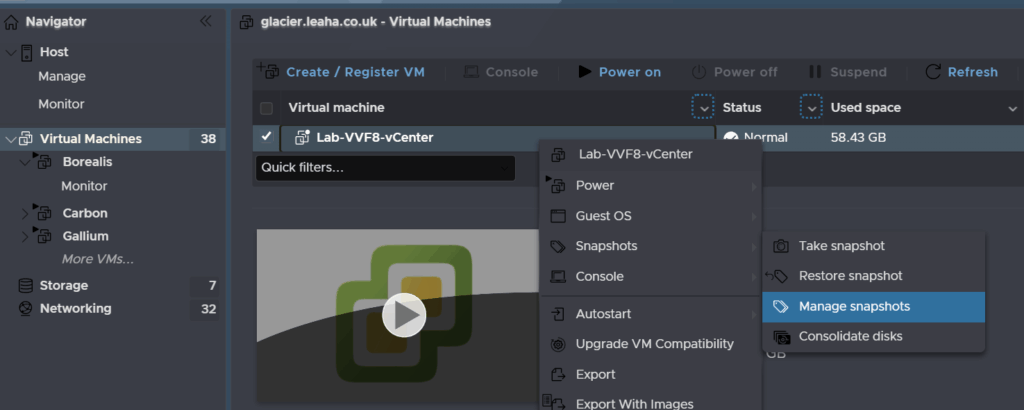
In ESXi, head to Virtual Machines, find the vCenter, right click it and click Snapshots/Manage Snapshots
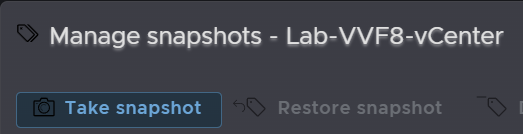
Click Take Snapshot
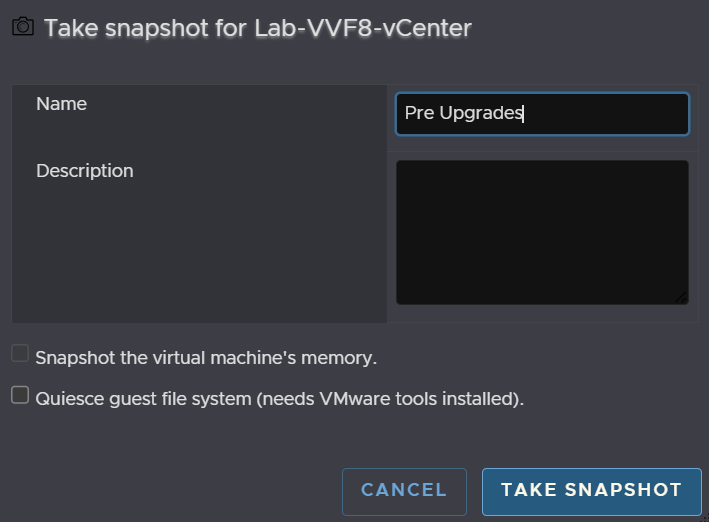
Give it a name and click Take Snapshot
Then click Close
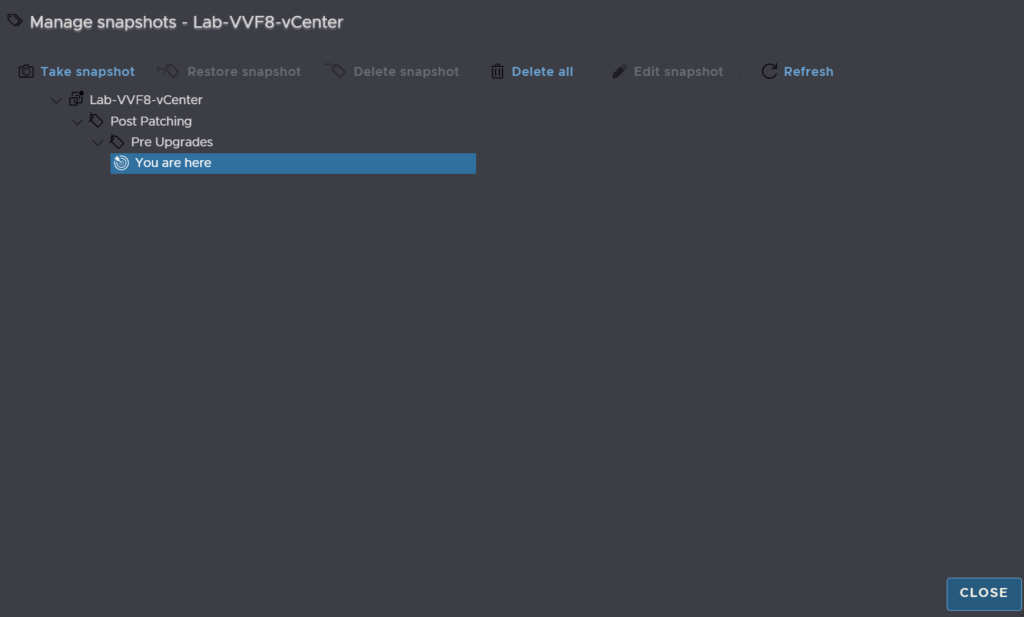
Then click Power On

Wait until the vCenter has booted and you can log into the UI before continuing
When you are back in, click the cluster hosting the vCenters, and click Configure/Services/vSphere DRS and click Edit
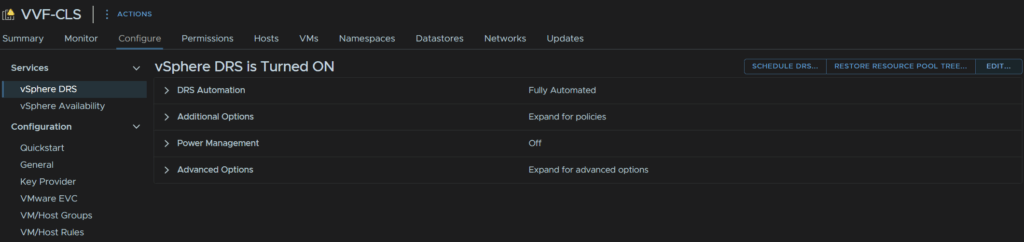
Change the automation level to Partially Automated, and click ok
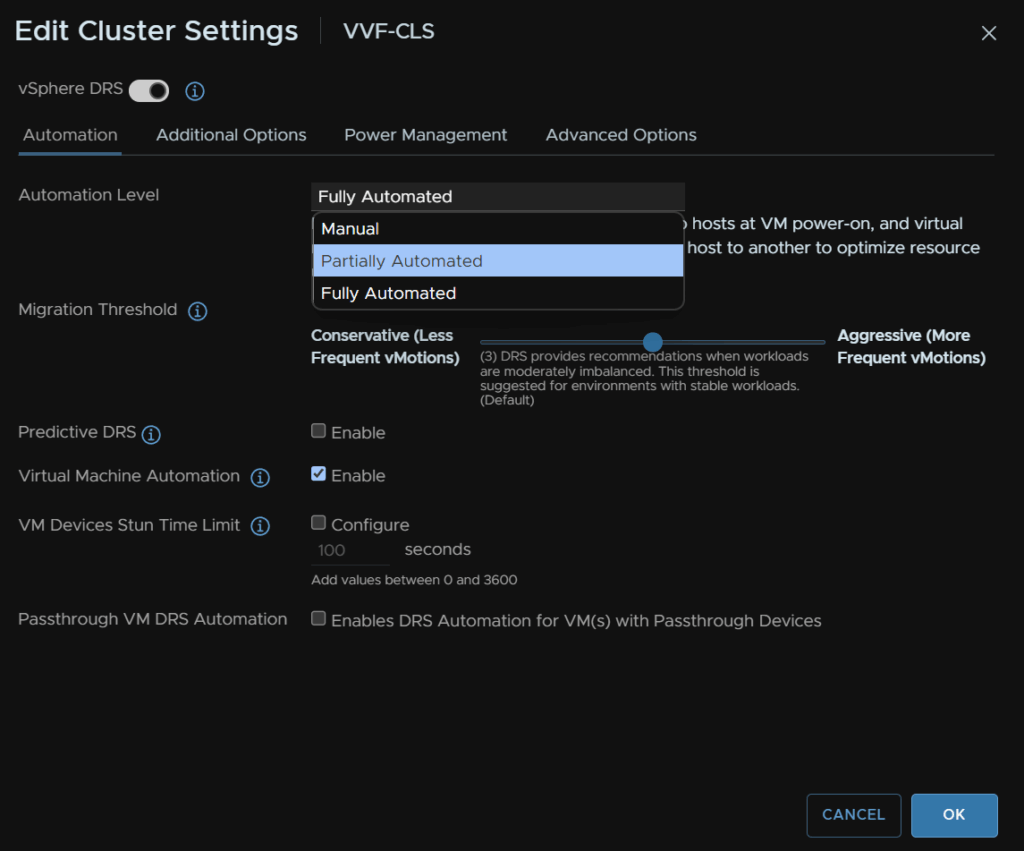
Its worth noting if your vCenter is external like mine this also needs to be done on the cluster housing the vCenter
Now we need to upload the ISO to the datastore, as my vCenter is currently externally to the cluster, I need to add the ISO to the vCenter thats managing it, we will move it into the cluster later, as this is a requirement. click the datastore tab, on the left, select the datastore and click New Folder
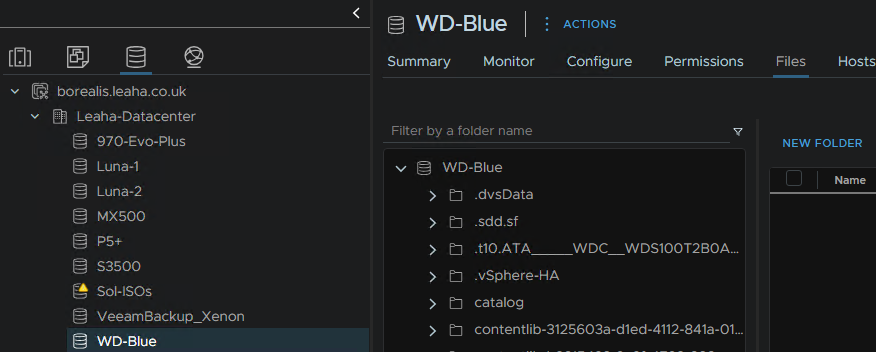
Give it a name and click ok
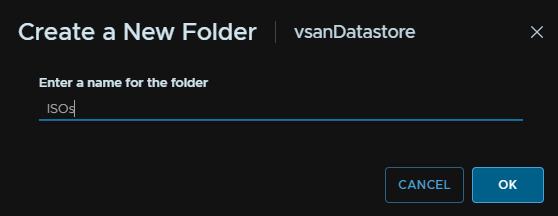
Select the new folder and click New Folder
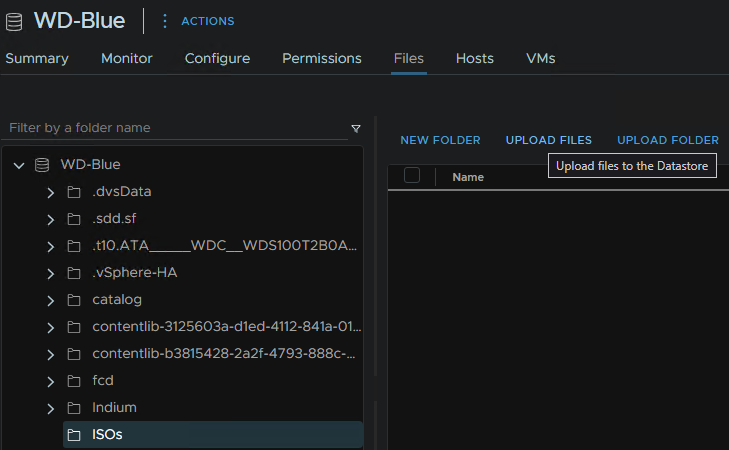
Then double click the ISO

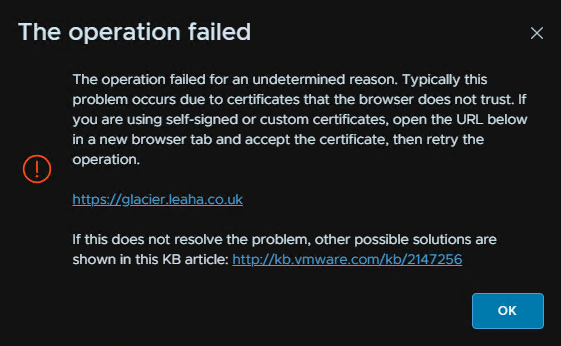
You will likely see this error, click Details

Click the host URL in the middle
Click Advanced and click proceed to dismiss the self signed certificate
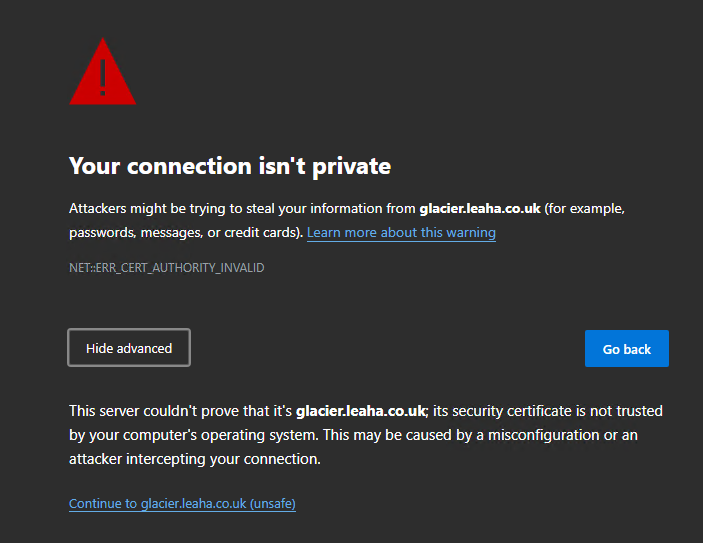
Then re upload the ISO

Once thats done edit the vCenter VM

Expand the DVD drive and click the drop down and select Datastore ISO file
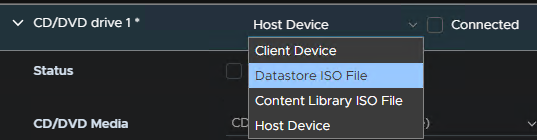
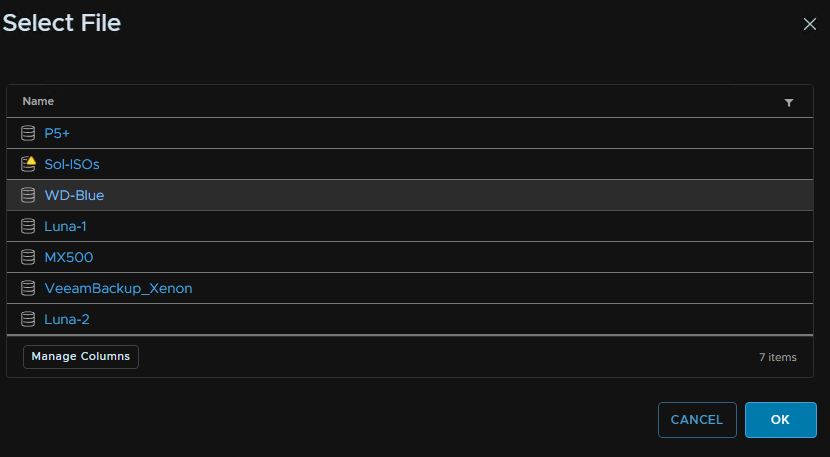
Click your datastore, mine is the WD-Blue
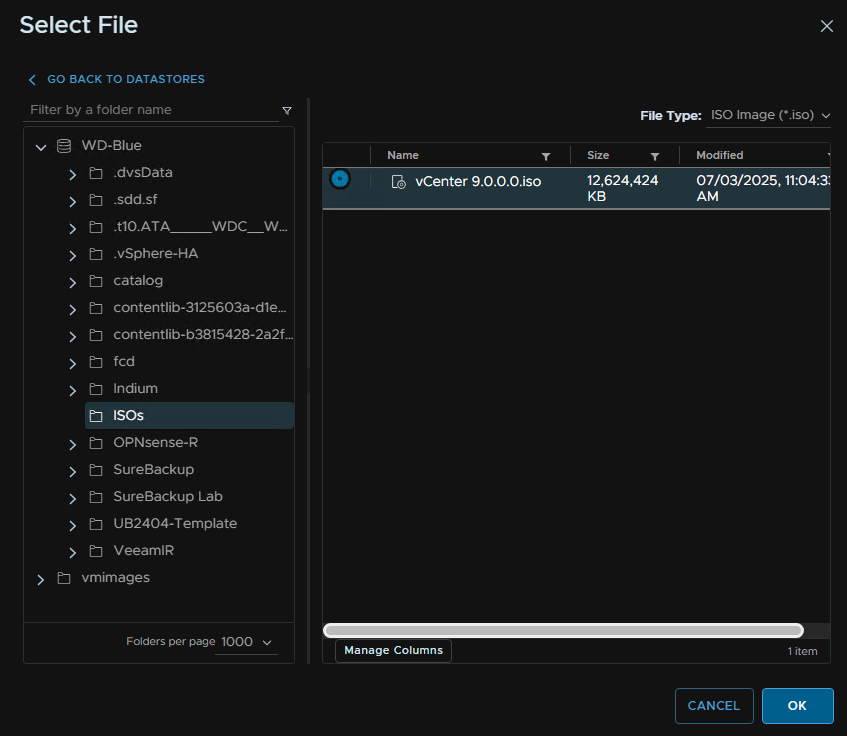
Click the folder, select the ISO and click ok
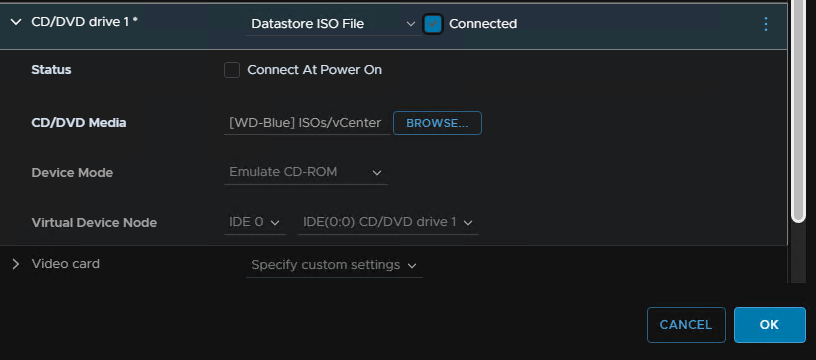
Click the Connected Check box and click ok
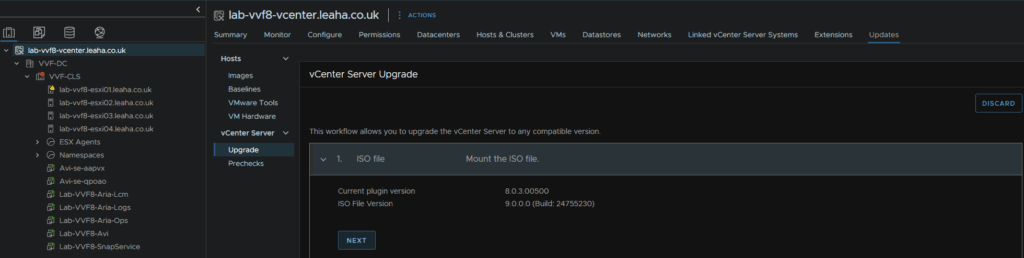
Back in the VCenter UI for the vCenter we want to upgrade, click the vCenter in the top left, then click Updates/vCenter Server/Upgrade and we can see the current plugin file and the ISO file version, click Next
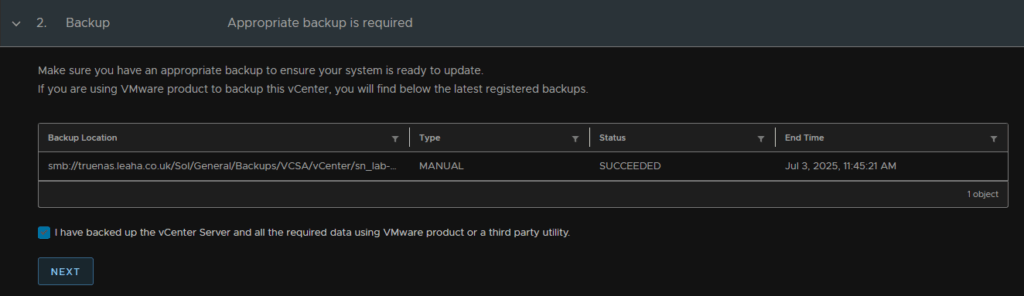
Next we need to check we have a config backup in the last 24 hours, this should be setup as a schedule, we are checking the end time on the right, when thats ok check the box to agree you have backed up the vCenter and click Next
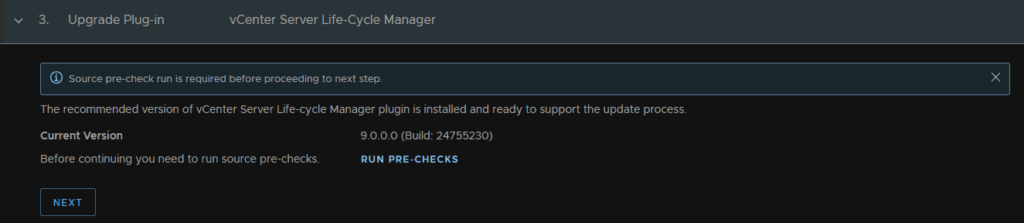
Then click Upgrade plugin

When thats installed refresh your webpage, now click Run Prechecks
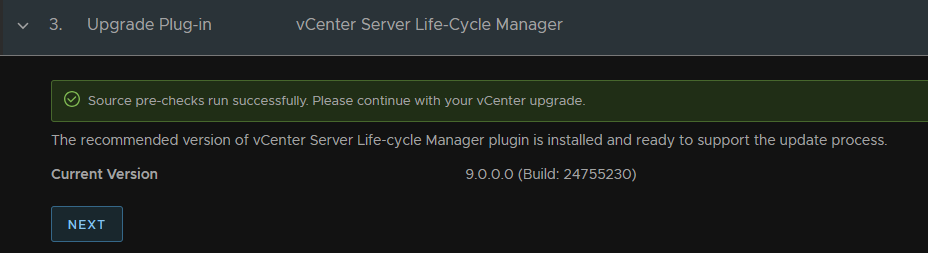
When thats green, click Next
Before we configure the target appliance, and we will configure this to be inside the cluster to deal with that issue, we do need a port group for this, we need a port group on the same VLAN as the vCenter with an ephemeral binding type
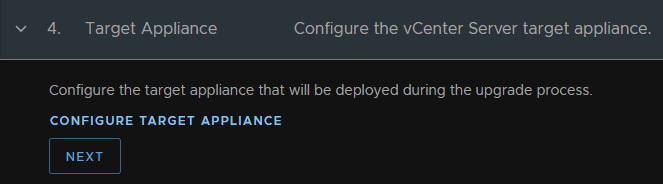
Click Configure Target Appliance
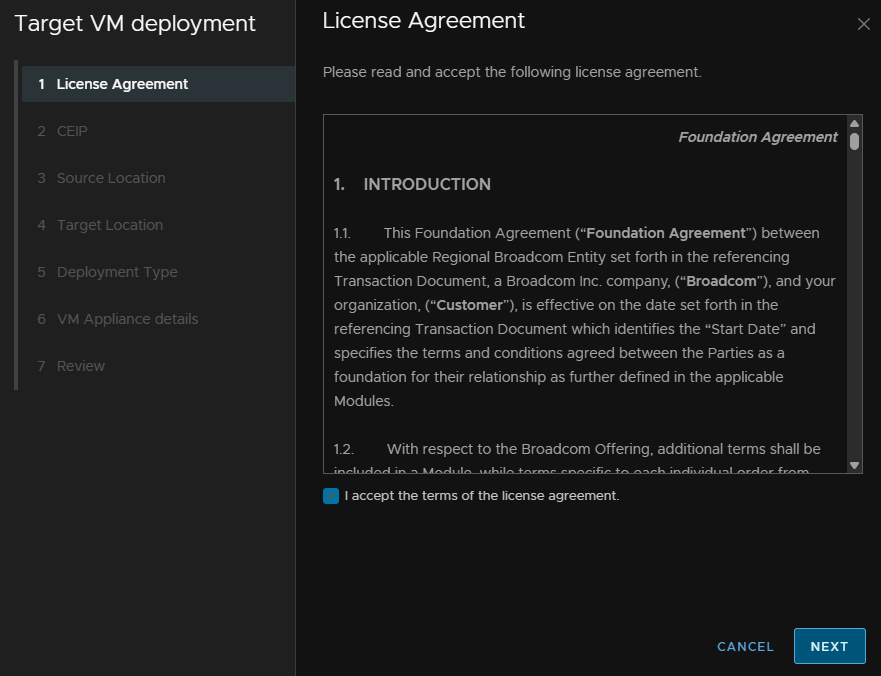
Accept the EULA and click Next
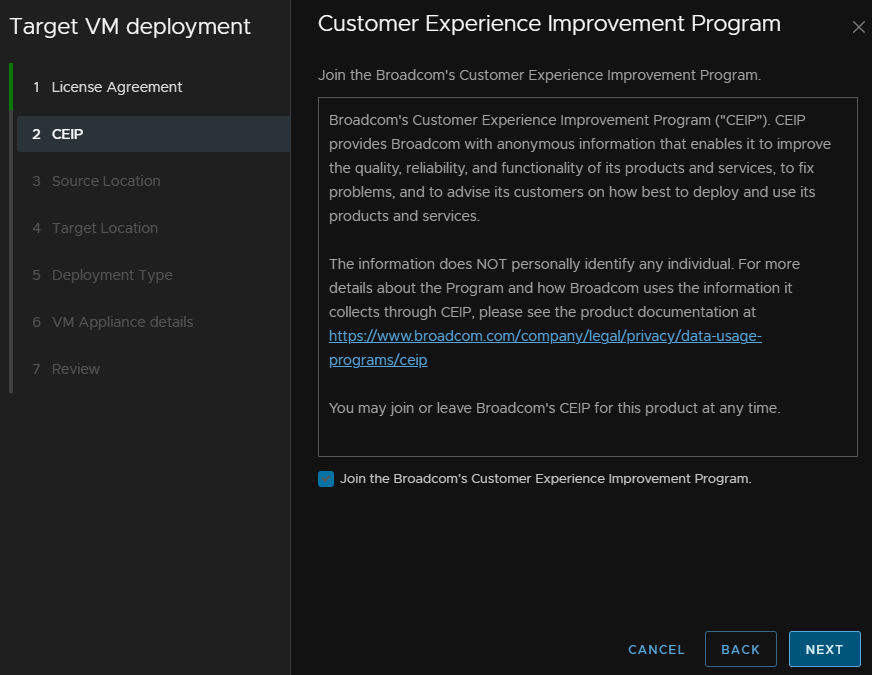
Opt in or out of the CEIP and click Next
Input the FQDN of the ESXi host managing the vCenter currently, and the root credentials then click View Certificate
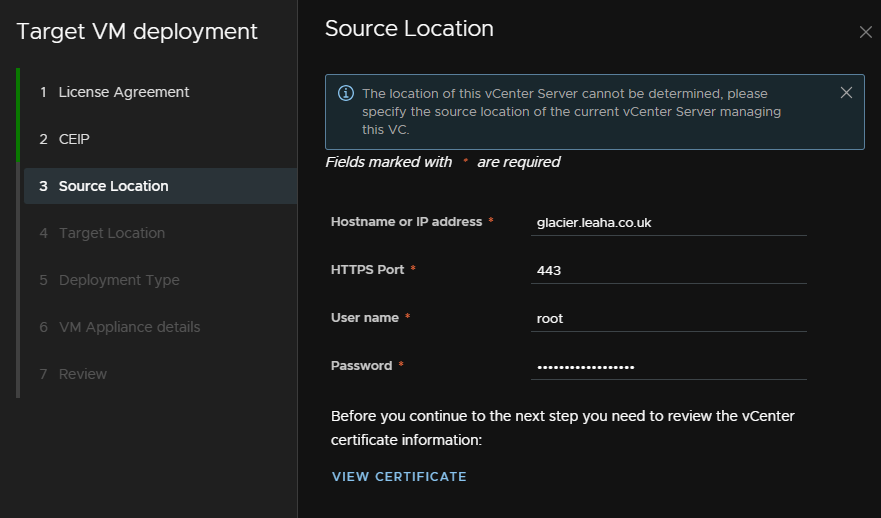
Scroll to the bottom, accept the certificate and click Next
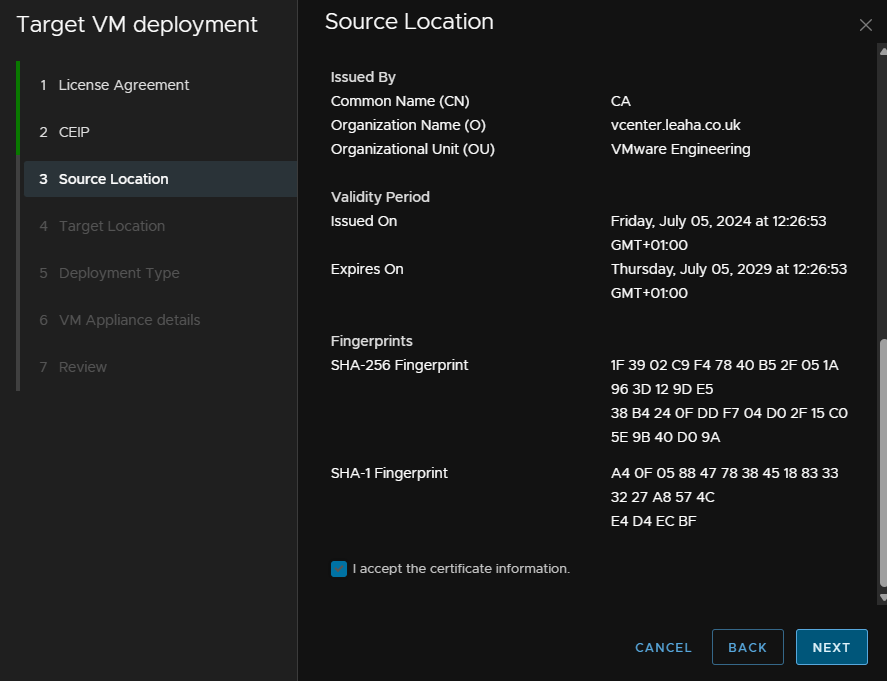
Now select the radio button to deploy the new vCenter to a new location, as we are moving the new vCenter inside the cluster, and enter the FQDN of an ESXi host in the cluster, add its root credentials and click View Certificate
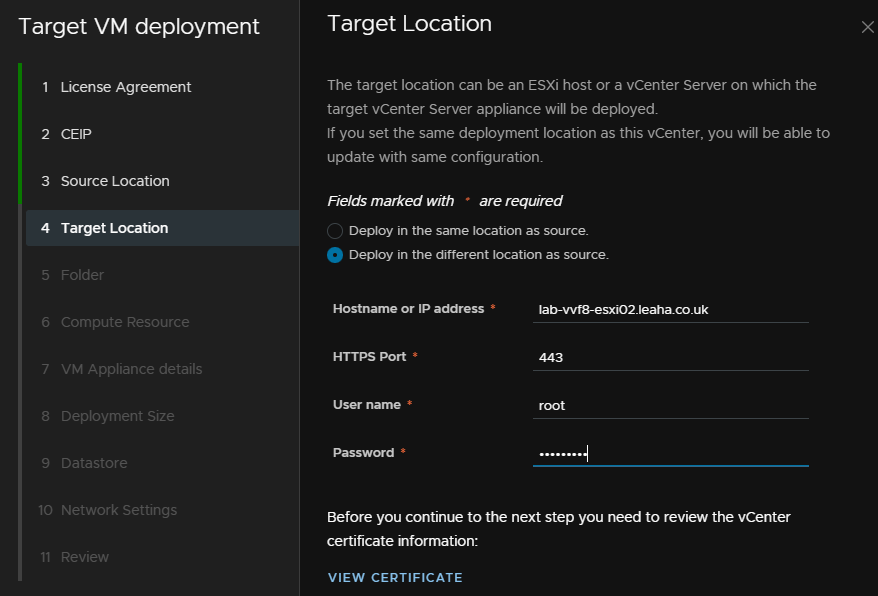
Accept the certificate and click Next
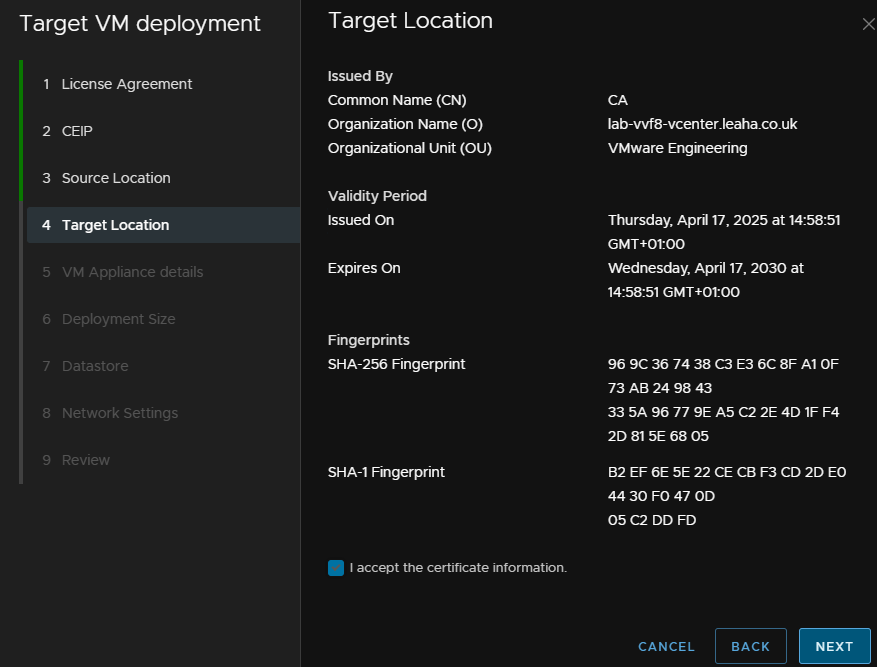
Enter the name of the VM for the new vCenter and assign it a temporary root password
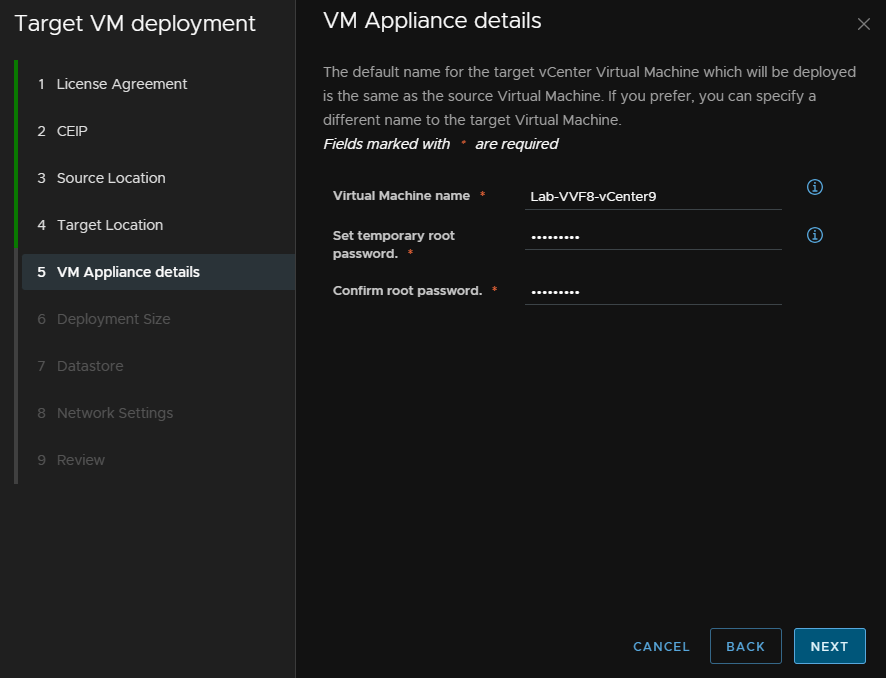
Select the size to match your current size, mine is Tiny so I used that
Tiny is fine for a lab, but small is the smallest that should be used for production, so if you happen to have a tiny one, select small
Then click Next
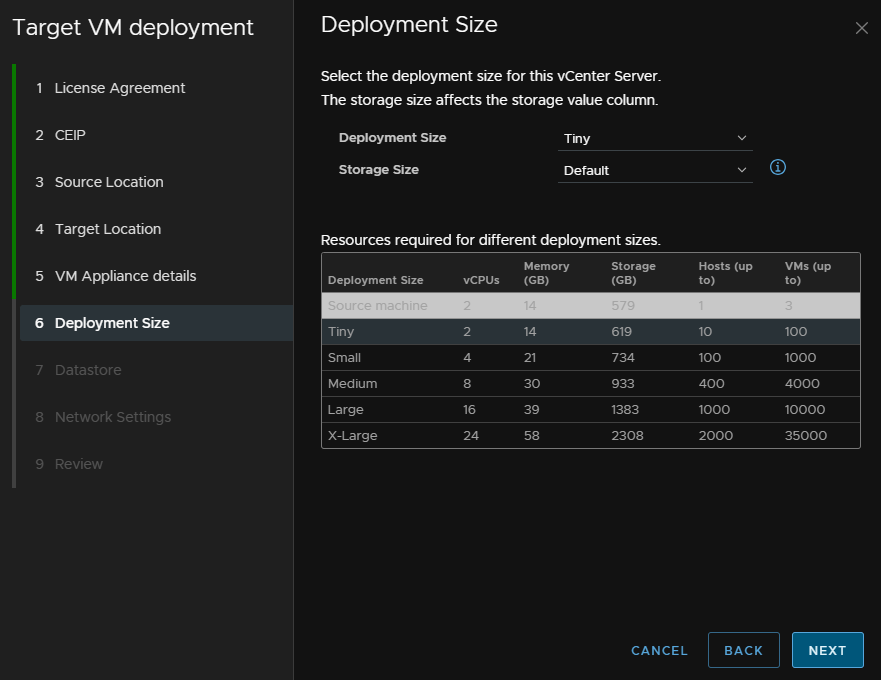
Select the datastore, check Enable Think Disk Mode and click Next
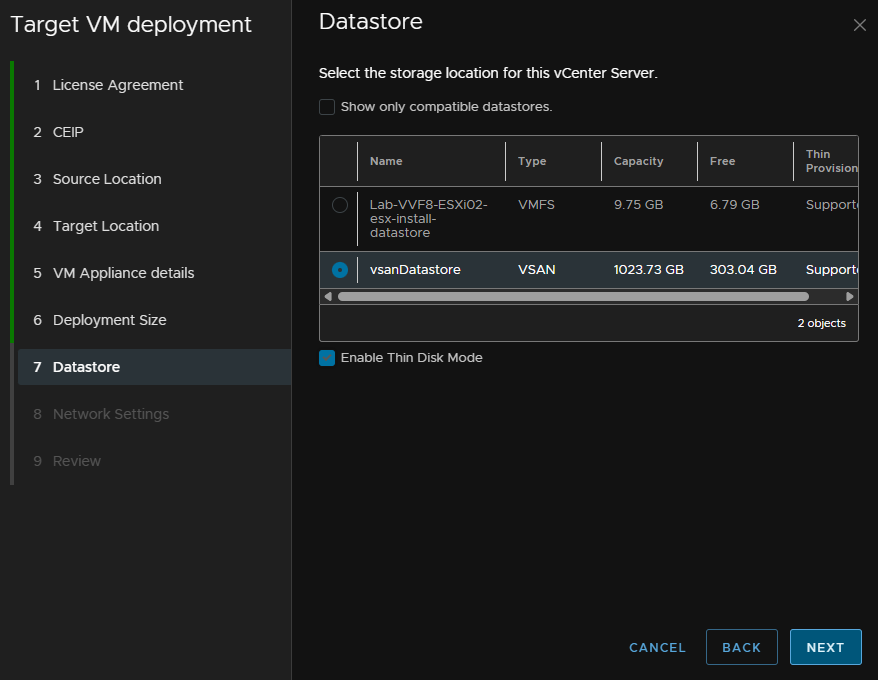
Change the network config to manual, select the ephemeral port group
It is worth noting, non ephemeral groups were listed, normally vCenter wont deploy to them so I am unsure if this is a change, but I couldnt see it on the release notes
Select the IP version, likely IPv4, IP assignment to static, leave FQDN blank, add a temp IP thats not in use, add the subnet prefix or mask, default gateway and comma separated DNS servers, then click Next
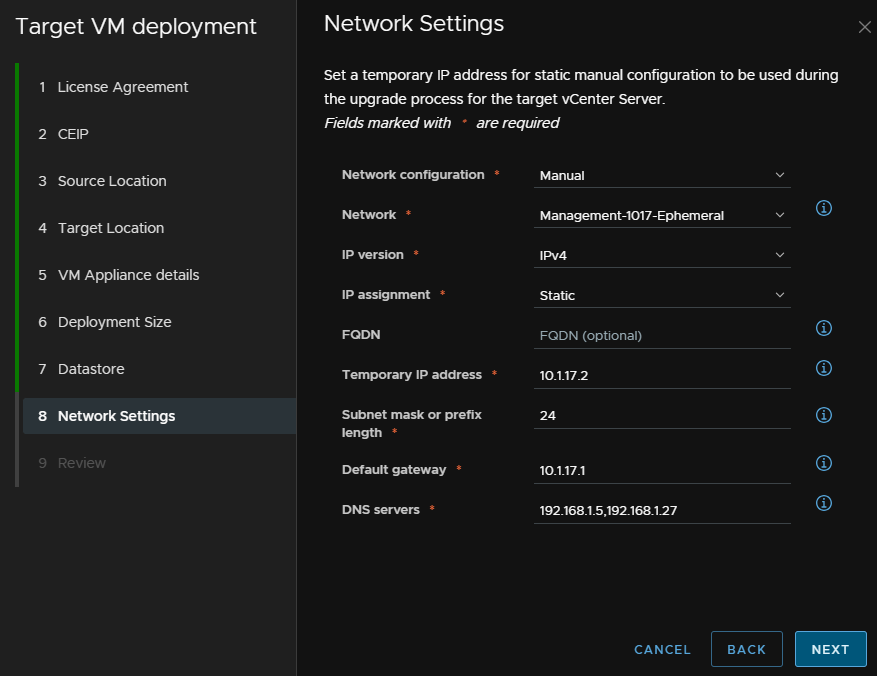
Once you are happy click Finish
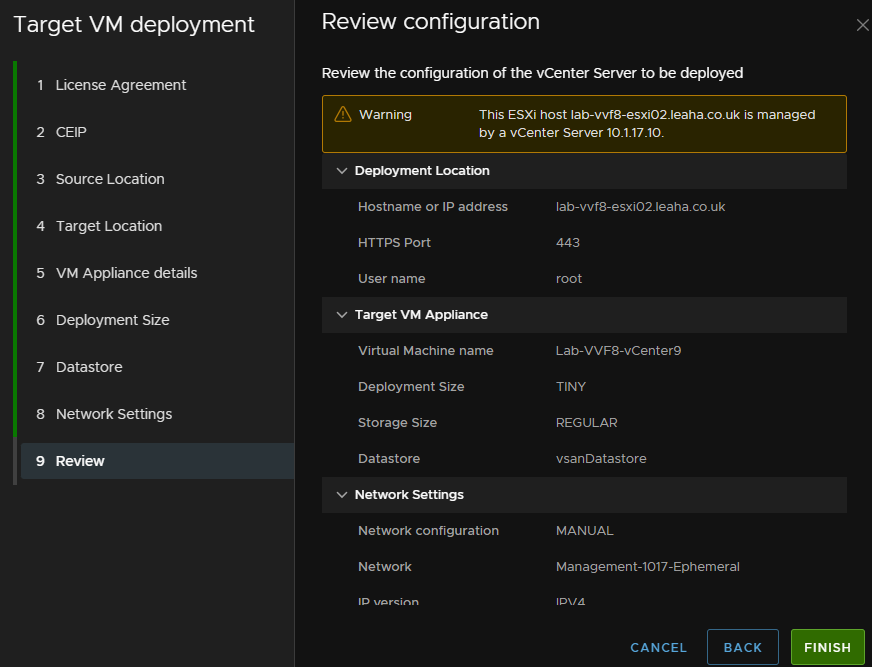
Then click Next
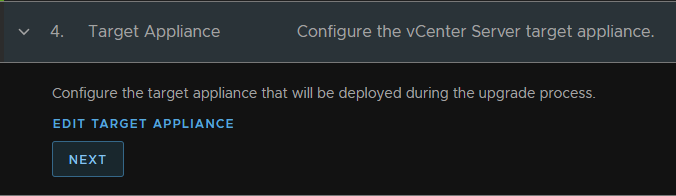
Now we need to click Start Upgrade
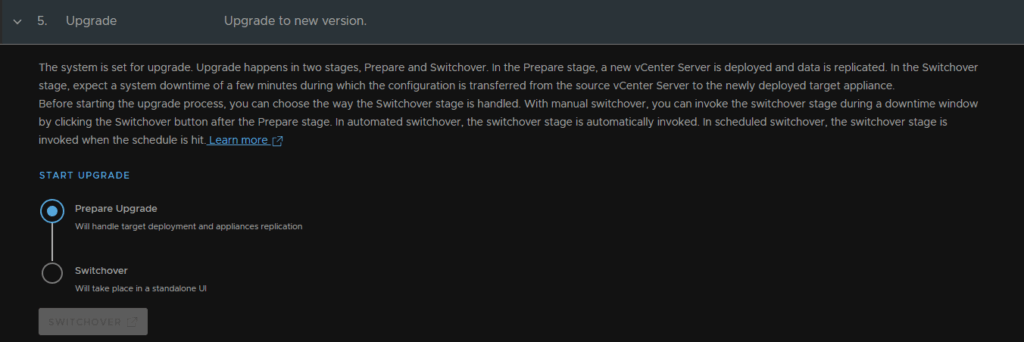
On the swich over drop down select Automated so it will just switch them over, you can schedule it over night if you needed as well
Its worth noting, automated switch over requires vCenter 8U3 or higher, so if you are on 8-8U2 use manual switch over
Then click Start Upgrade
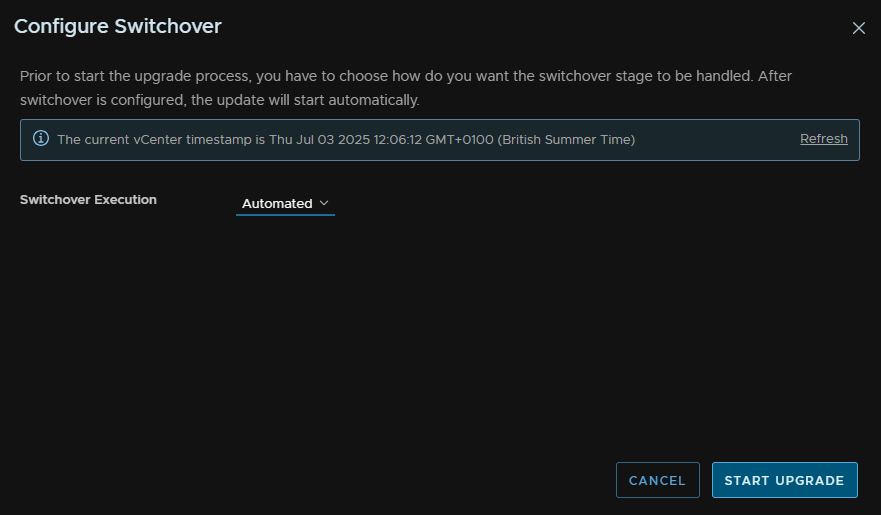
The Prepare Upgrade stage will take quite a while, but when it switches over you’ll then get this page
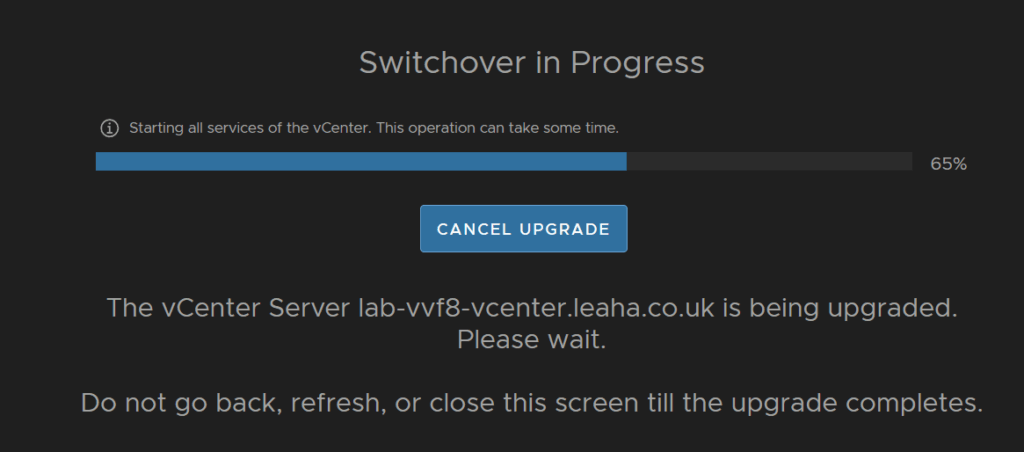
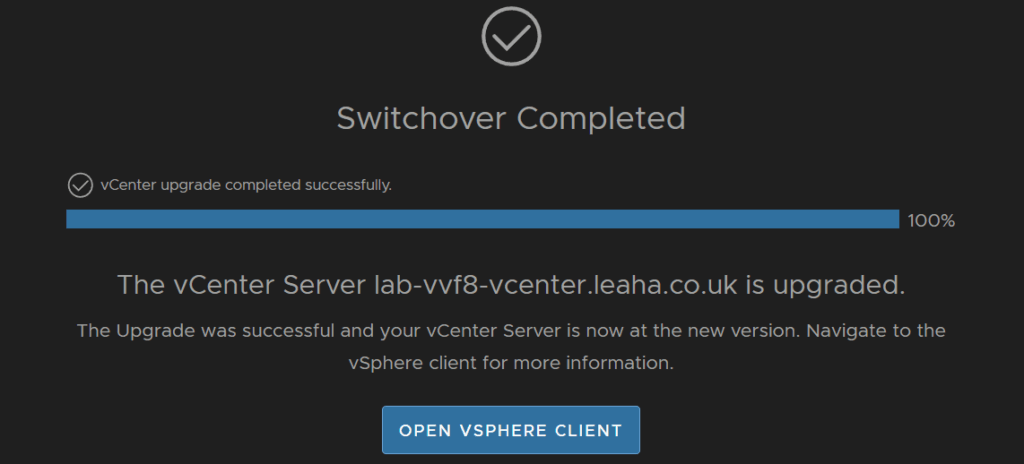
When its done click Open vSphere Client
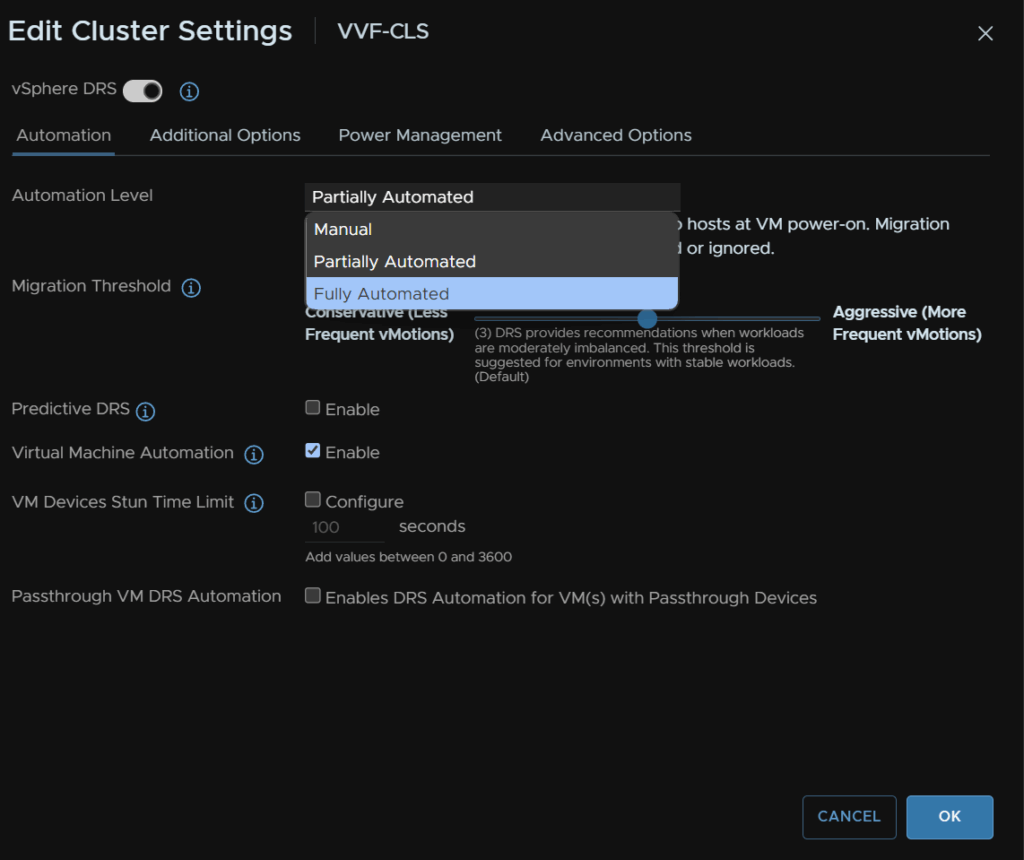
When you are done, click the Cluster then click Configure/Services/vSphere DRS and click Edit on the right

Change this to Fully Automated and click ok
1.4 – Firmware
1.4.1 – Preparation
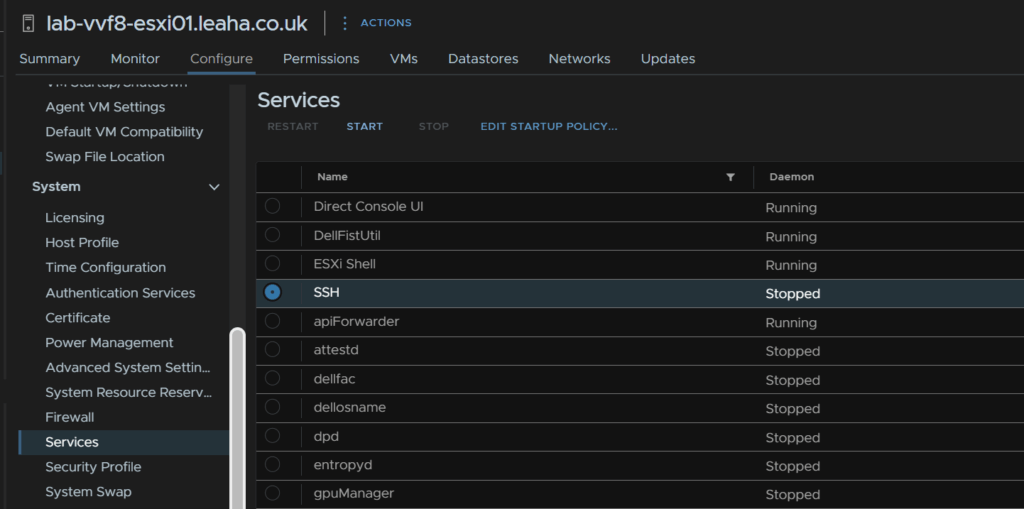
First, take a backup of ESXi, if the host is an ESXi host on the off chance something goes wrong, we’ll need SSH enabling for this
Select the host and head to Configure/System/Services, click SSH and then click Start, we can leave it enabled as when the host is rebooted, it will stay disabled on reboot
SSH into the host and run
vim-cmd hostsvc/firmware/sync_config
vim-cmd hostsvc/firmware/backup_config
This will give an out put of a URL like this

Take the link and edit the ‘*’ for the hostname/IP
So my URL would be
http://lab-vvf8-esxi01/downloads/52d067b1-1d69-2bd2-318b-b90ca6f0a521/configBundle-Lab-VVF8-ESXi01.leaha.co.uk.tgz
If you have an DRS rules that prevent hosts from being put into maintenance, then you may need to disable them
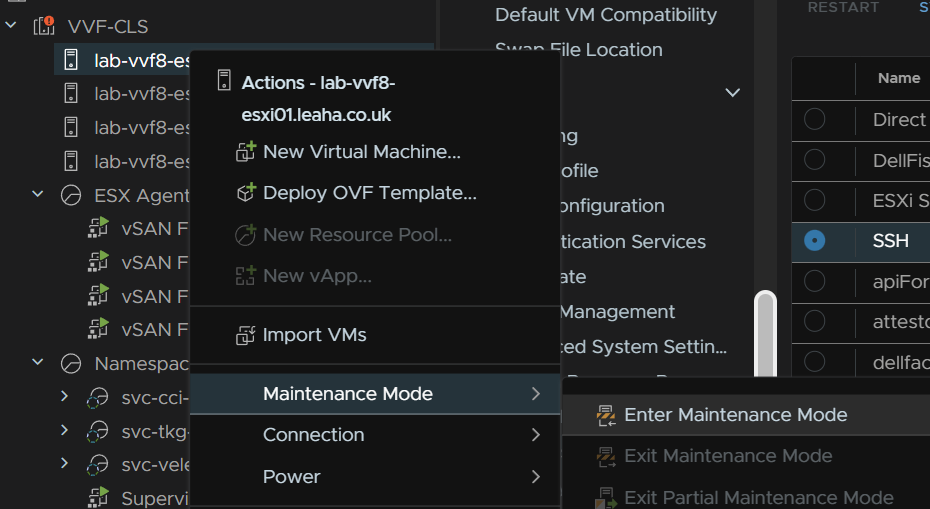
Then place the host thats having the firmware update in maintenance mode to do this right click the host and click Maintenance Mode/Enter Maintenance Mode
For vSAN click Go To Pre Check, this wont be available on a cluster with out vSAN
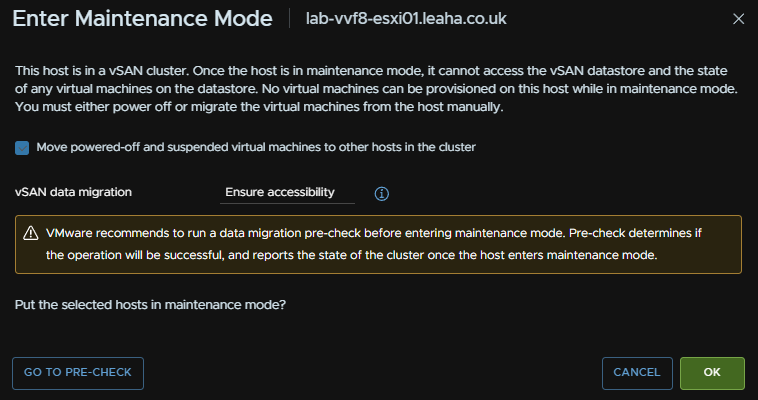
Then click Pre Check
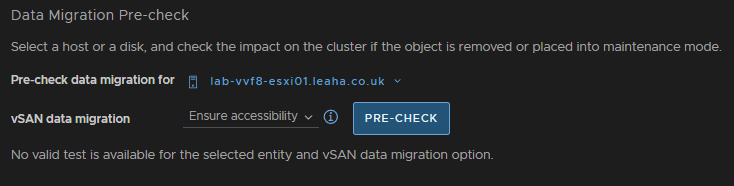
Ensure the check says the host can enter maintenance mode, there may be errors, but thats fine, then click Enter Maintenance Mode
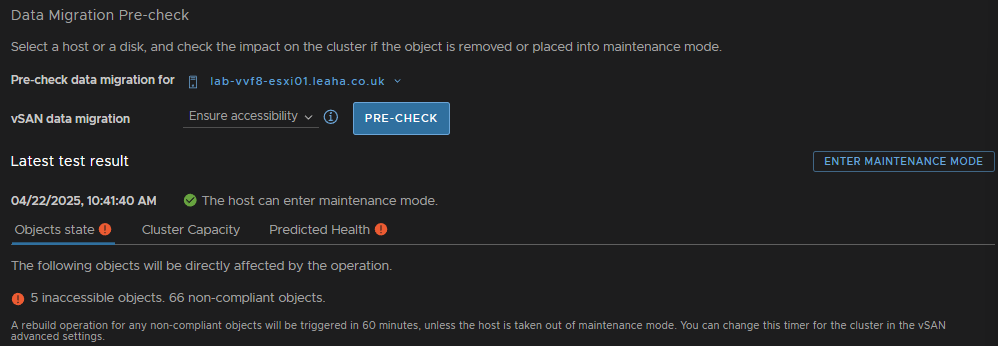
Ensure the box to migrate powered off and suspended VMs is checked and click ok
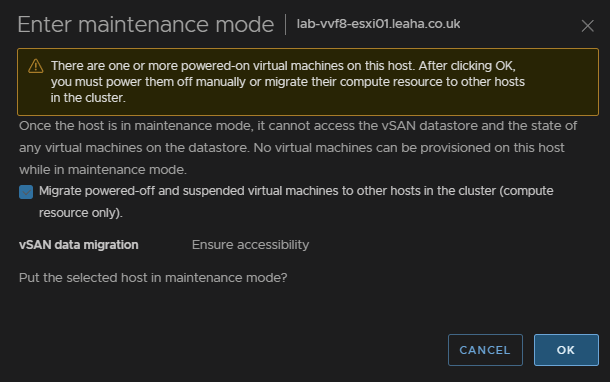
For Non vSAN it will just look like this, also ensure the box is checked and click ok
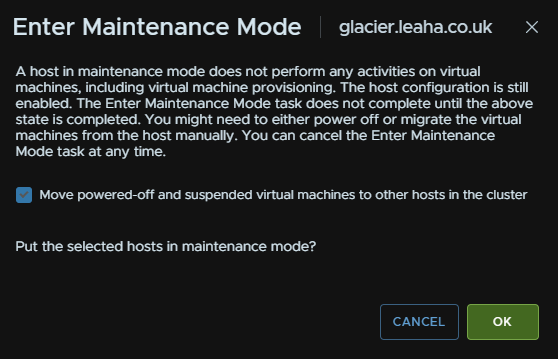
If you have Veeam replication jobs running to DR, this shouldnt cause any issues we powered off VMs are also moved, but you can always wait for running jobs to finish and disable them while patching
1.4.2 – Dell
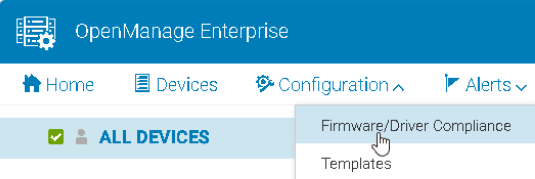
In OpenManage go to Configuration/Firmware/Driver Compliance
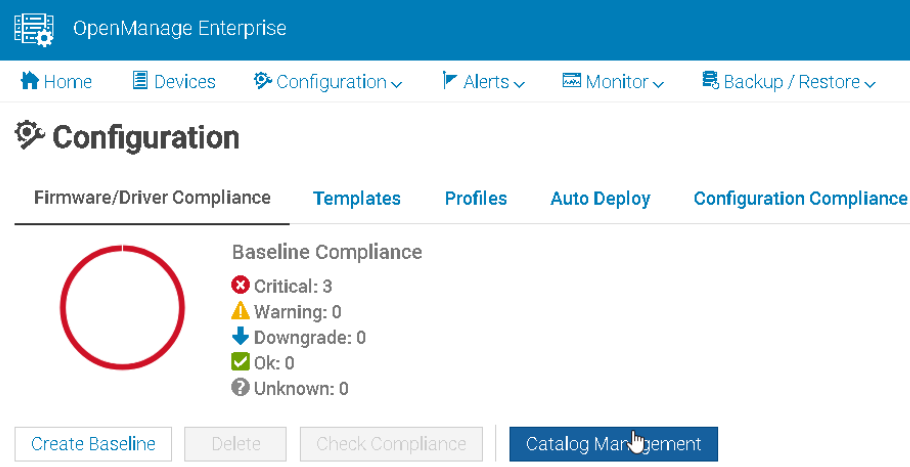
Click Catalog Management
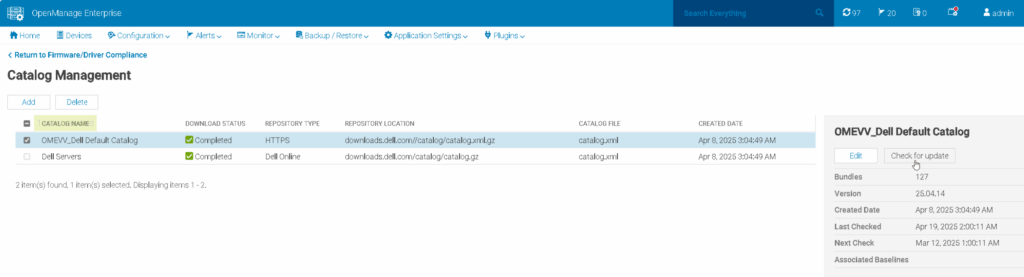
Select your catalog and Check For Update
Ensure any host being updated is in maintenance mode with no active VMs running as reboots are needed for most firmware updates from section 7.1
Go to Devices
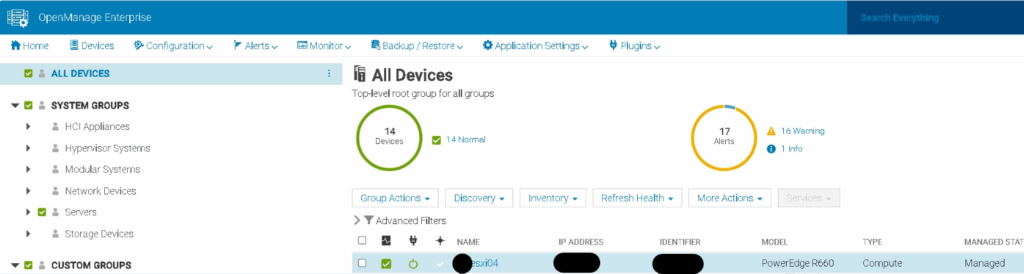
Find your host in the list and click it, the IPs are for the iDRAC not the host
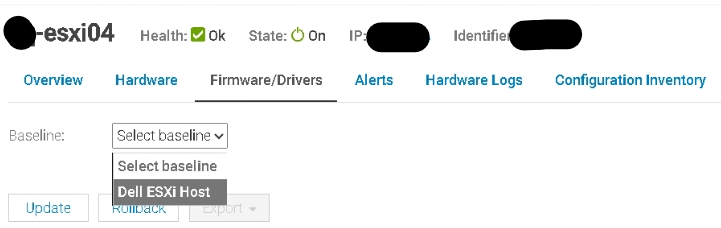
Going into Firmware/Drivers we can select the base line for this host using the drop down, ESXi01 and see whats available
Fist, we want to do the iDRAC, so make sure only that is selected and click update like this
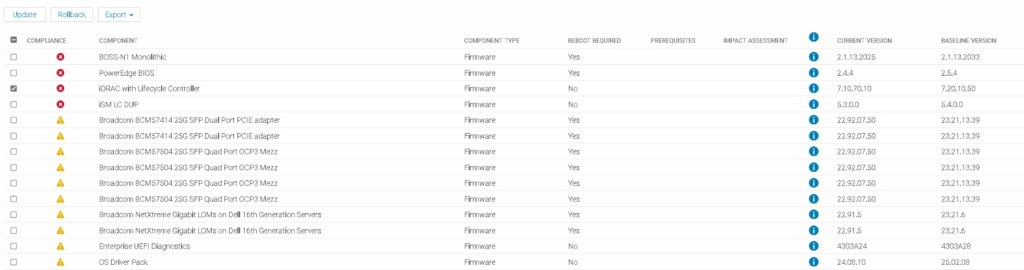
Then click Update
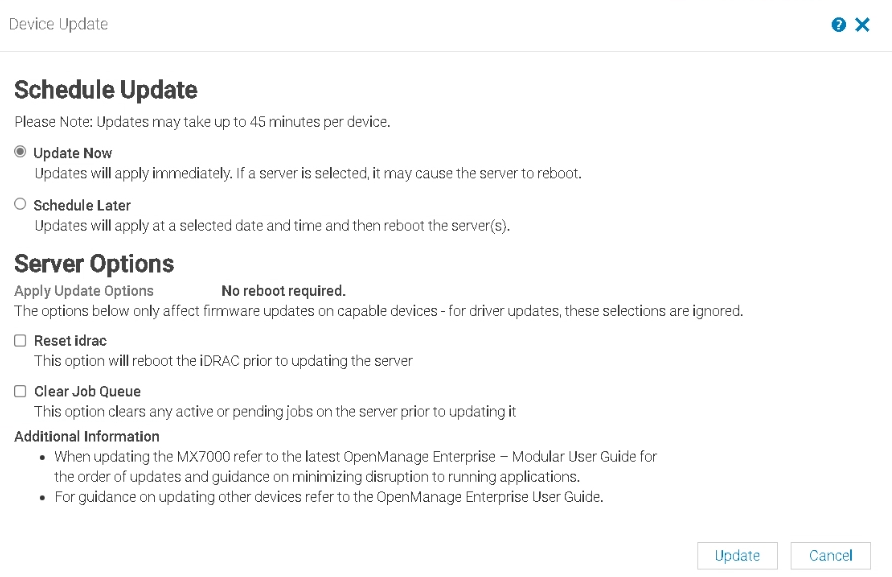
You can check running jobs from this icon in the right of OpenManage

This can take 15-20 mins to update, when its done
Then we want to check the CPLD version, OpenManage will not pick up any updates for this, but it will list the version at the bottom

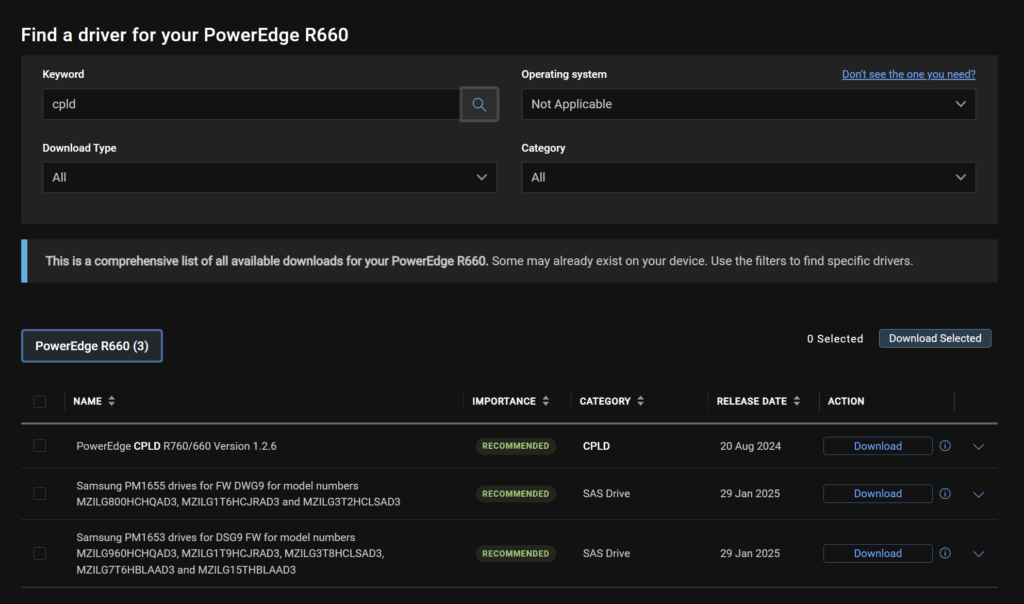
Here we can see my R660 has CPLD 1.2.6
To check the active version Google ‘Dell <Server-Name> Drivers’ and you should see the support page as the first link
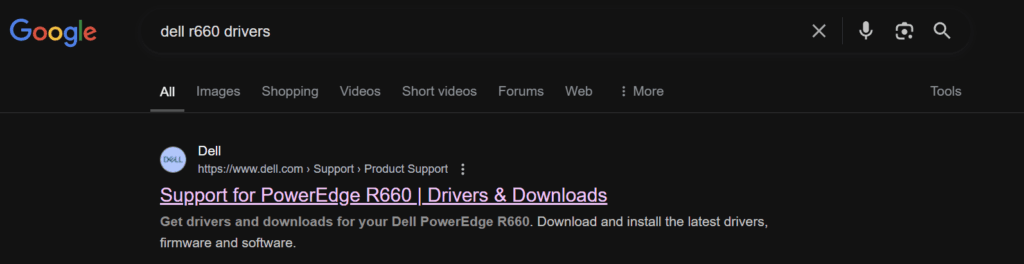
Change the OS to Not Applicable, and search for ‘CPLD’, here we can se the latest is 1.2.6, so we dont have one to do
However, if you did have a newer version, you need to log into the iDRAC
This is under Maintenance/System Update, you can upload the CPLD file here by clicking Choose File
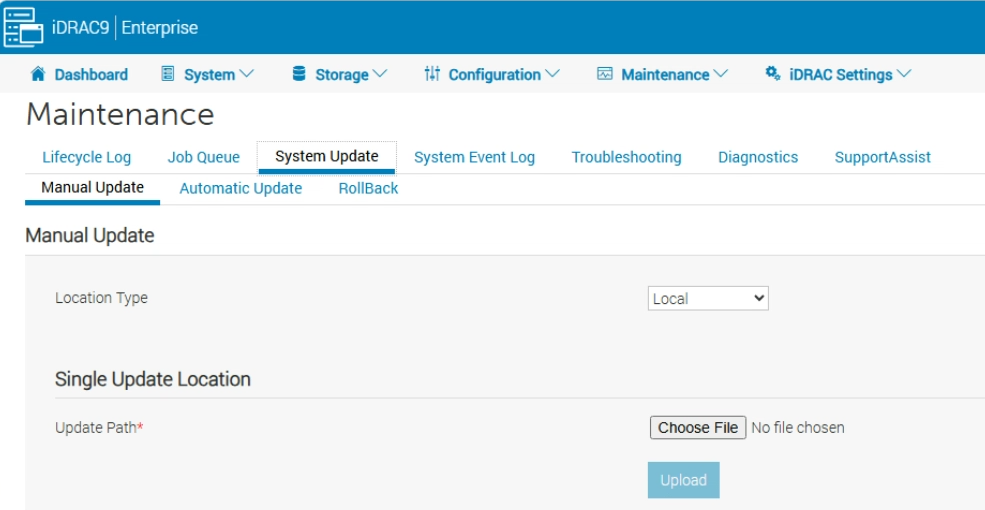
Then click Upload

Select the package and click Install And Reboot

In OME, we repeat for the BIOS and click Update
This will reboot the host

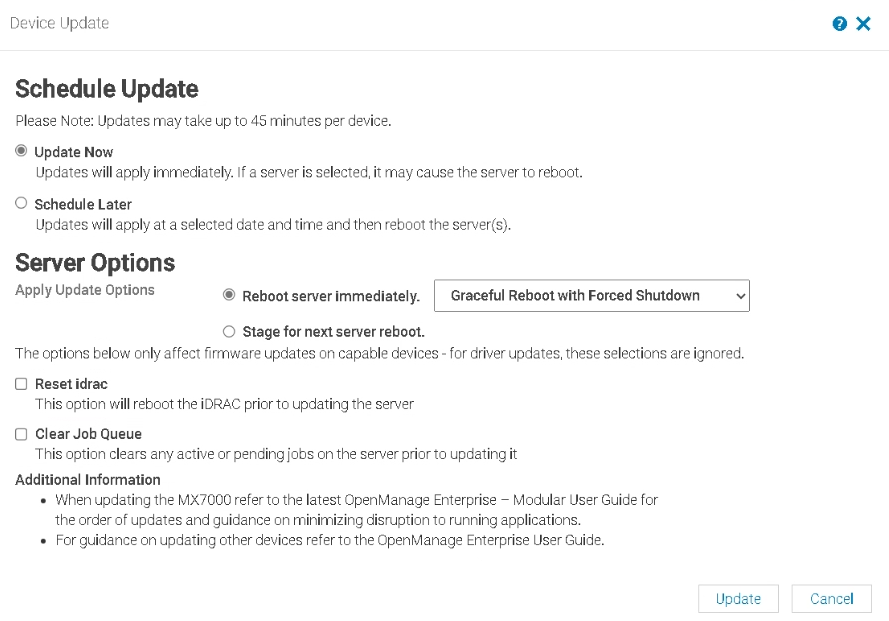
Then select the rest and click Update
1.4.3 – HPE
Ensure any host being updated is in maintenance mode with no active VMs running as reboots are needed for most firmware updates from section 7.1
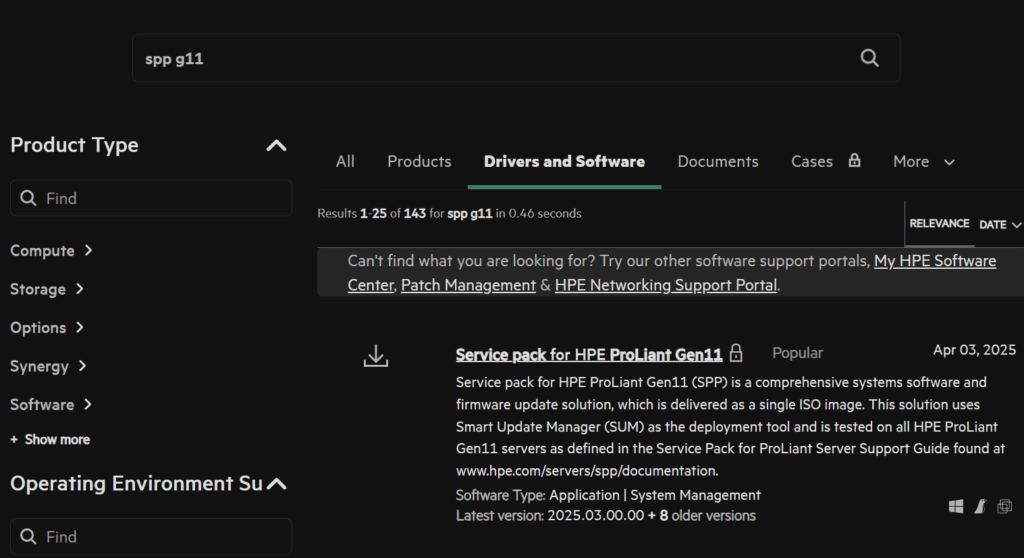
We then need the HPE SPP, we can find this here
We can also search for the server generation and click the link to it
Eg
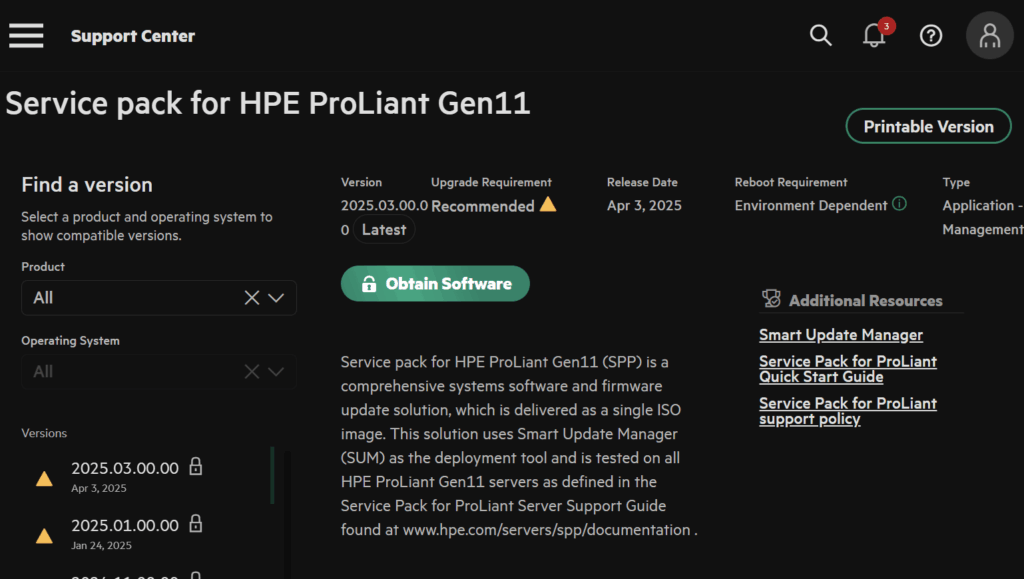
Click Obtain Software
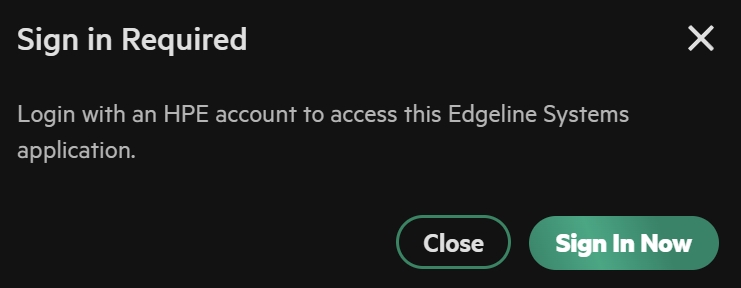
And sign in with your HPE account
Open the web console in iLO, click the CD icon then CD/DVD/Local *.iso File
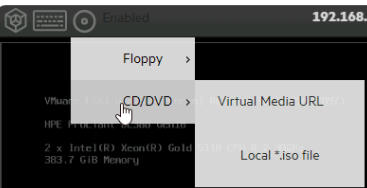
And double click the ISO file
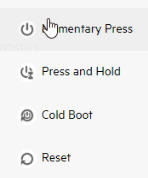
Reboot the host OS, momentary press will do this from the left mot icon in the web console, or you can reboot the server from the guest OS
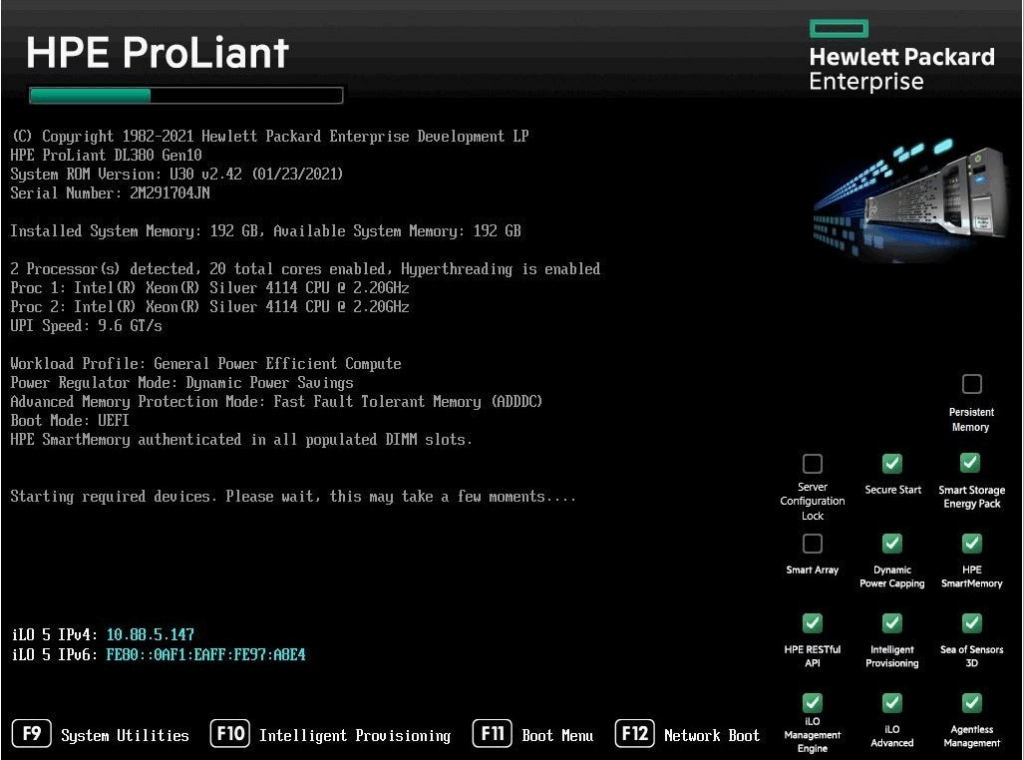
Press F11 here to enter the one time boot menu
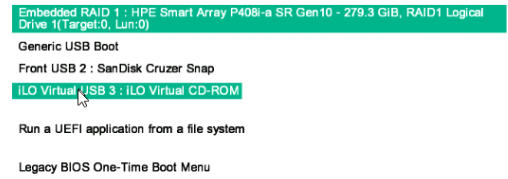
Select the iLO virtual Media
Then automatic updates

This can often take ~90 mins to complete and do not interrupt the server, when its done, your host OS will be booted
1.5 – ESX
For updating ESX, this assumes you have updated your vCenter with your download token using the script, and that you already have cluster images, you may need to re add the token URLs with the script post upgrade
I have an article on both the VMware depot changes, here, and migrating to cluster images, which is in the VVF 8 patching guide on the ESXi section here
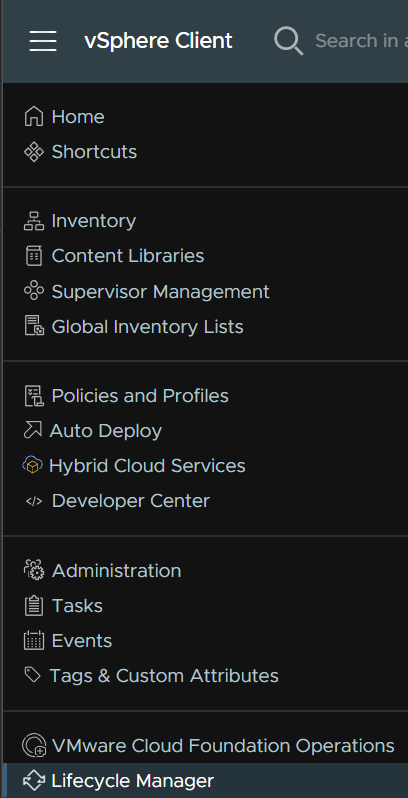
We’ll need to sync the image library, in vSphere, click the three lines in the top left and click Lifecycle Manager
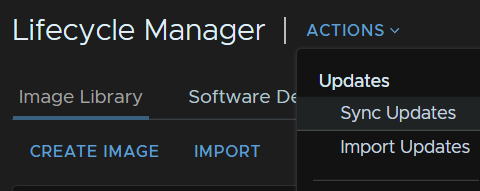
Click Actions/Sync Updates
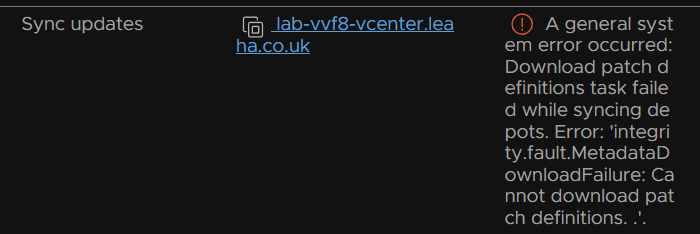
Now I encountered this error, this is a known issue with vCenter 9.0.0.0, the GA release when upgrading from vCenter 8, it should be fixed in a future patch, Broadcom have an article outlining it here
Download patch definitions task failed while syncing depots. Error: ‘integrity.fault.VcIntegrityFault: VMware vSphere Lifecycle Manager had an unknown error. Check the events and log files for details
If you do not get this then please skip down to the part where syncing lifecycle manager has pulled the ESXi 9 images, as this will be patched
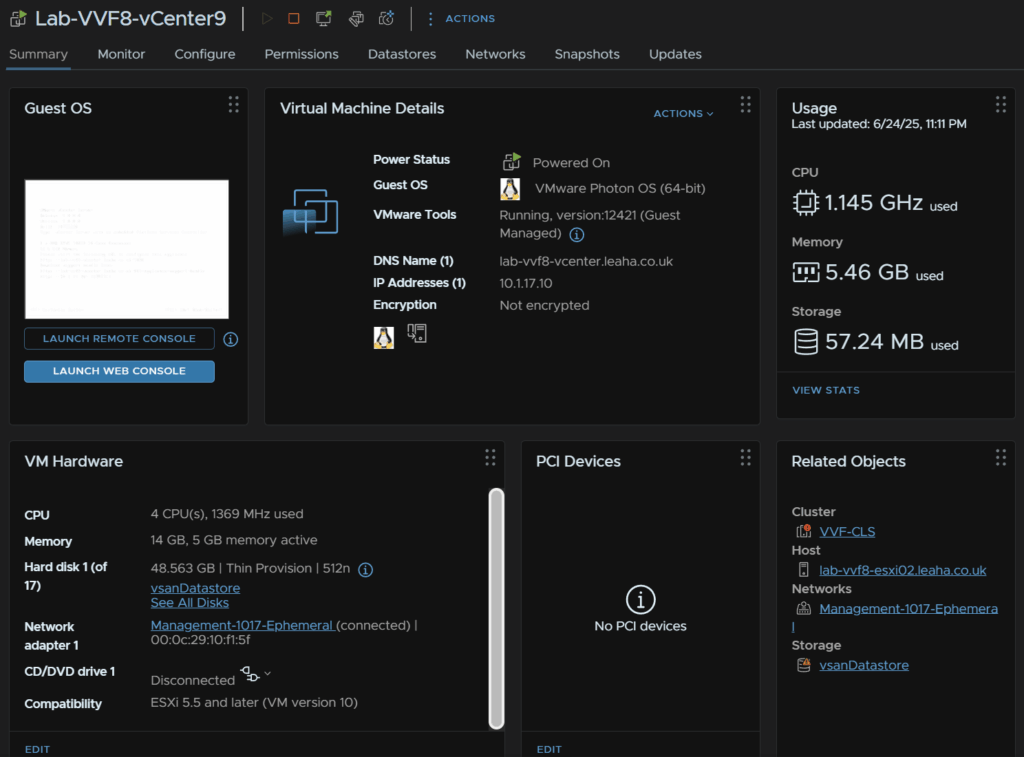
First check the host the vCenter is on, we can see this in the VM under the Related Objects box, mine is hist two, then shut it down with the red stop button
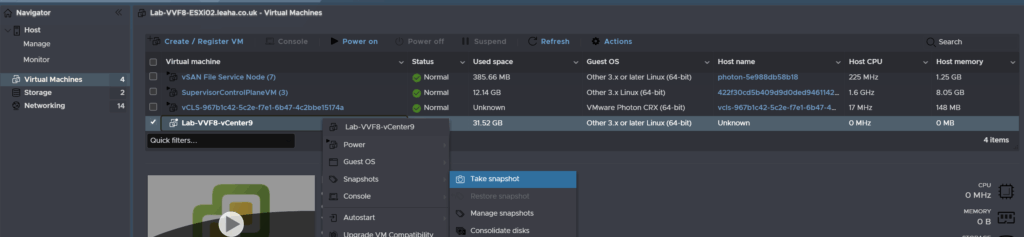
Log into that host, select the VM, right click it, and click Snapshots/Take Snapshot
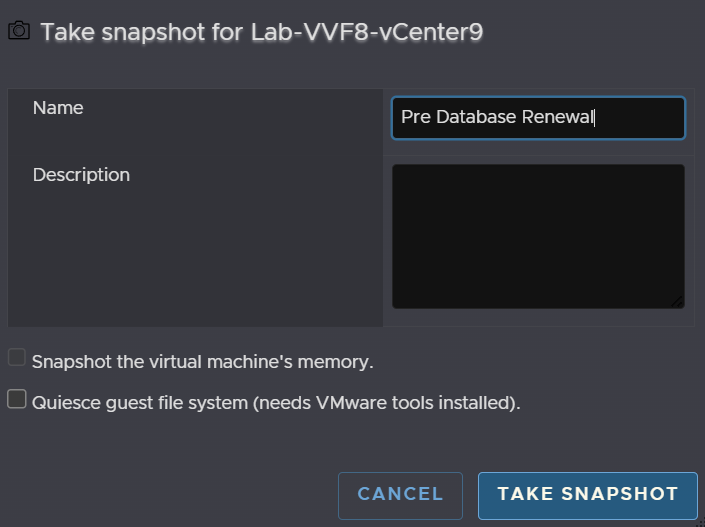
Name the snapshot and click Take Snapshot
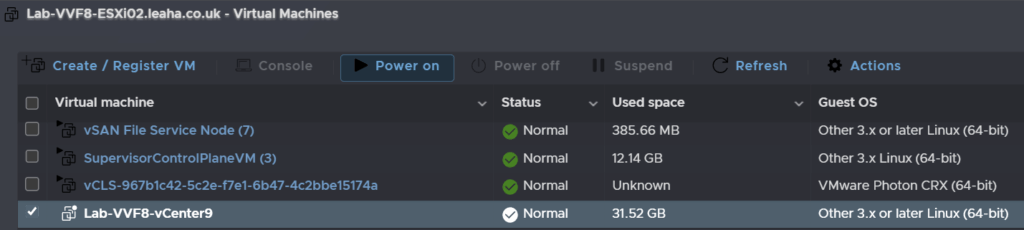
Now power the VM up
When the UI is available and all services have started SSH into the vCenter and use the following command to switch to the bash shell with
shell
Then run
service-control --stop updatemgrChange to the updatemgr user with
su updatemgr -s /bin/bashThen run
psql -U vumuser -d VCDB -c "UPDATE vci_updates set deleted = 0, hidden = 0 where meta_uid like 'ESXi7%' or meta_uid like 'esxi7%' or meta_uid like 'ESXi_7%' or meta_uid like 'esxi_7%'; DELETE FROM vci_updates where id not in (select update_id from vci_update_packages);"It will say permission denied, you can ignore this
It should look like this

Log out of the updatemgr user with
exitAnd restart the service with
service-control --start updatemgrThe service should generate a sync task, if not manually start one from lifecycle Manager like we did earlier

Once thats run and refreshed we can see ESX 9 now shows up
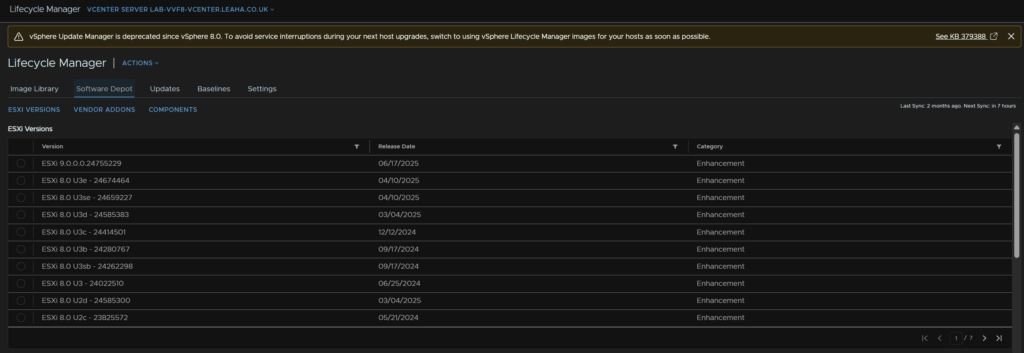
Now thats fixed we can select our cluster, then Updates/Hosts/Images and click Edit on the image
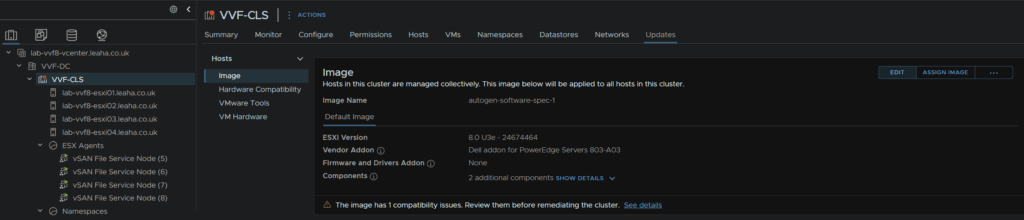
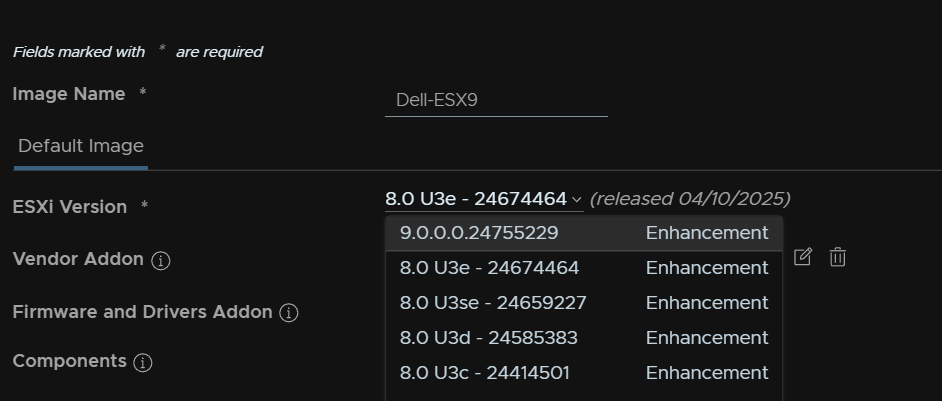
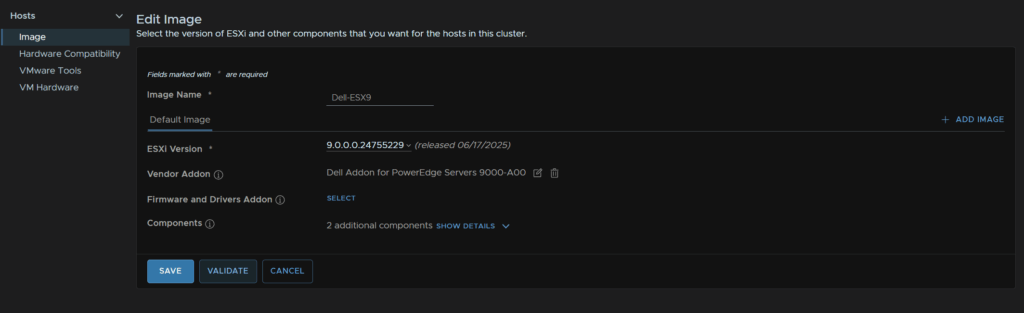
Give the image a name, click the ESX version from down and select ESX 9
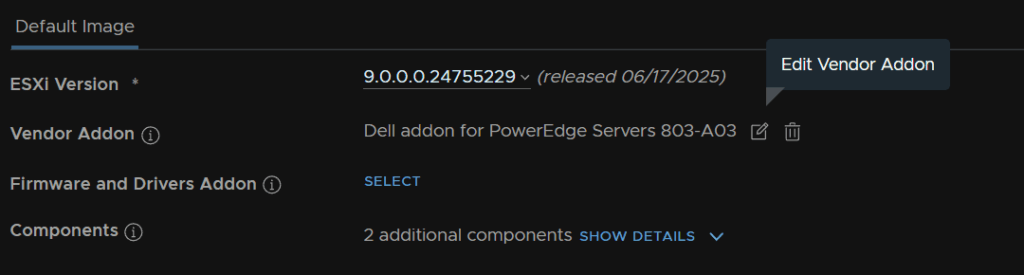
Click the Edit Vendor Addon button
And select your server addon and click Select, I am using Dell here
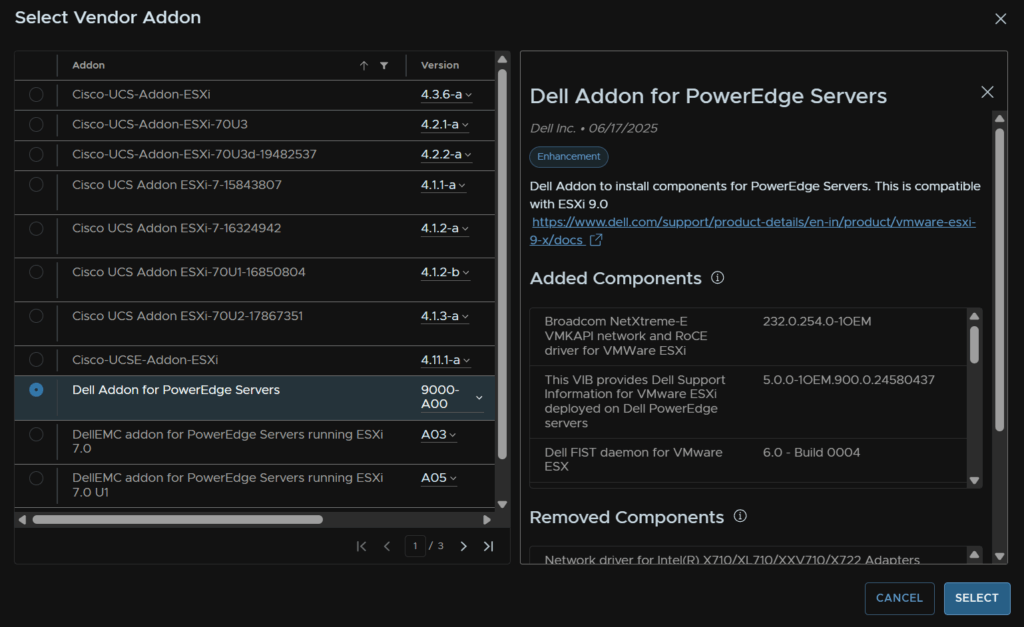
Eg for HPE
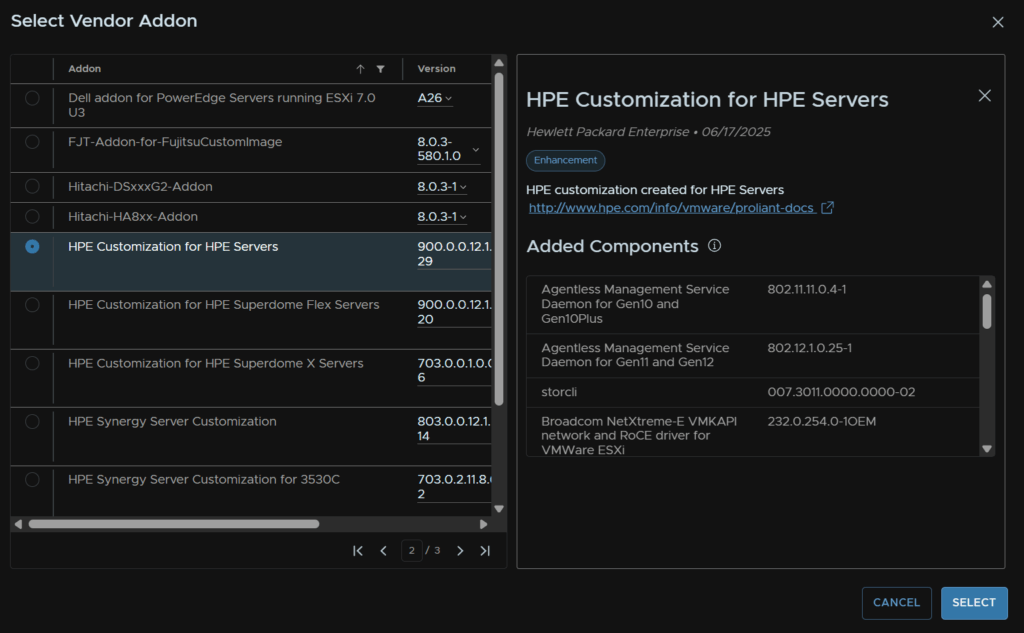
Then click Validate
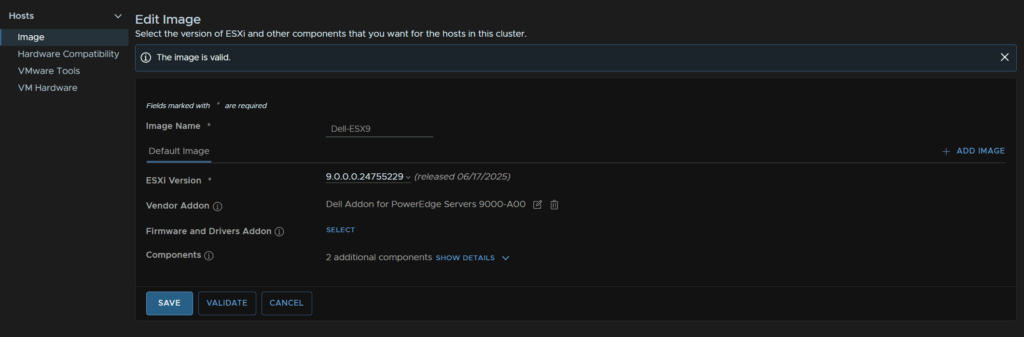
Once the image is valid click Save
Now click Run Pre Check at in the bottom box for Image Compliance
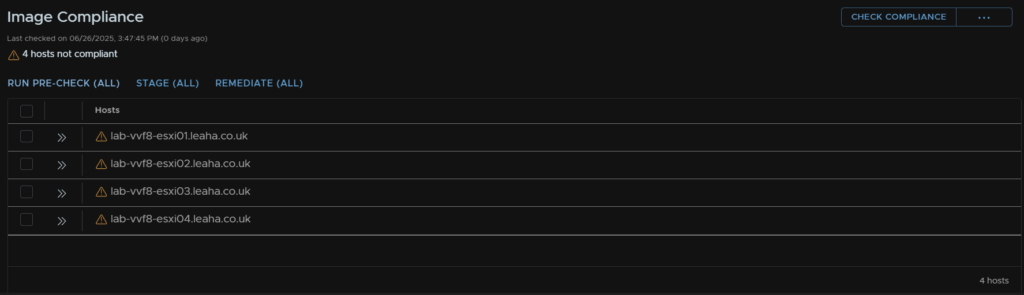
Check any issues you have, I have a hardware warning as its a virtual lab, so I will ignore that

When you are happy, click Remediate All
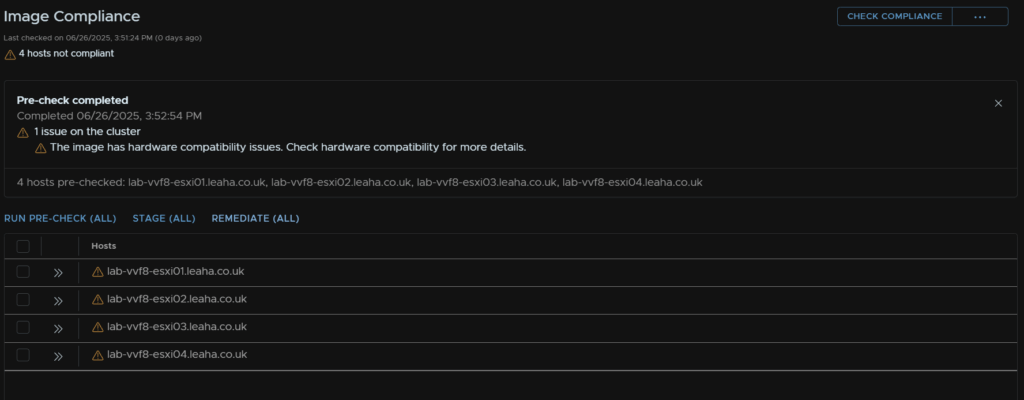
Then Start Remediation
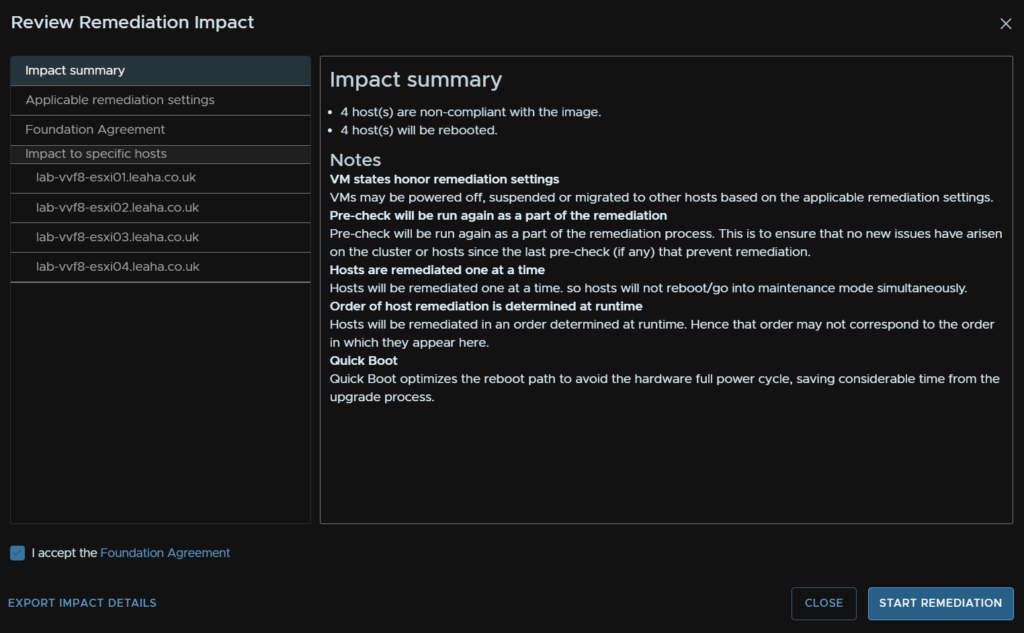
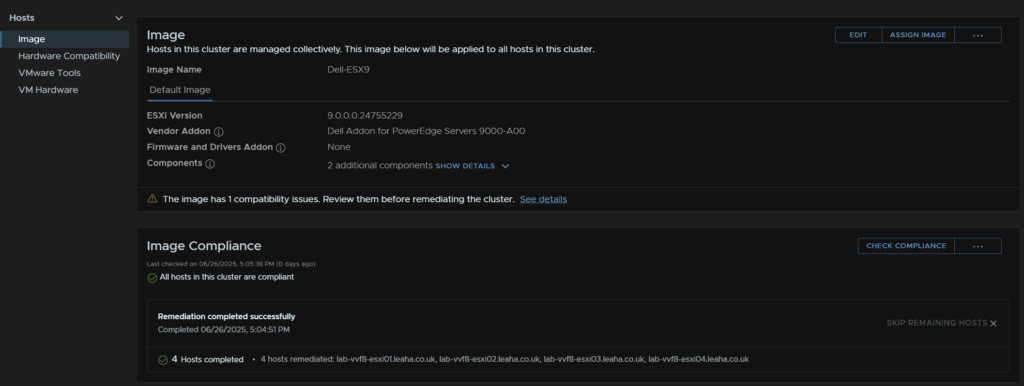
Then just wait for all the hosts to be remediated, it will place hosts into maintenance mode and move VMs onto other hosts for you
When its done, all hosts will show as compliant
1.6 – vSAN
1.6.1 – Disk Format
After the ESX upgrade the vSAN disk format will need upgrading, select the cluster then head to configure/vSAN/Services then in the top left, click Pre-Check Upgrade
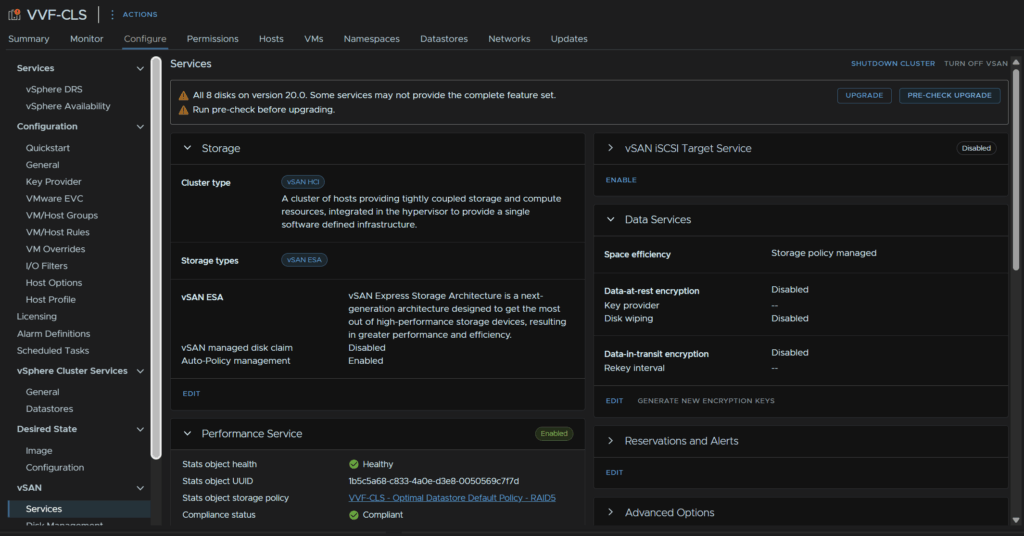
If it says Ready To Upgrade, click Upgrade

Then click Upgrade
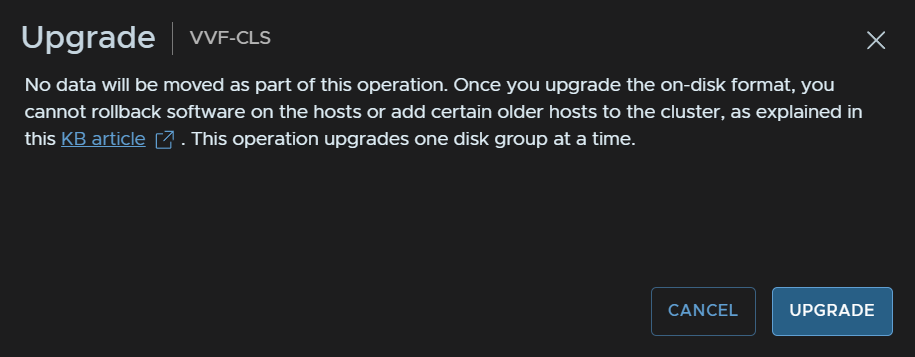
We’ll then get a progress bar we can monitor

When its done it will look like this

1.6.2 – File Services
Select the cluster and head to Configure/vSAN/Services then scroll down to the File Service tab and click Edit/Check Upgrade
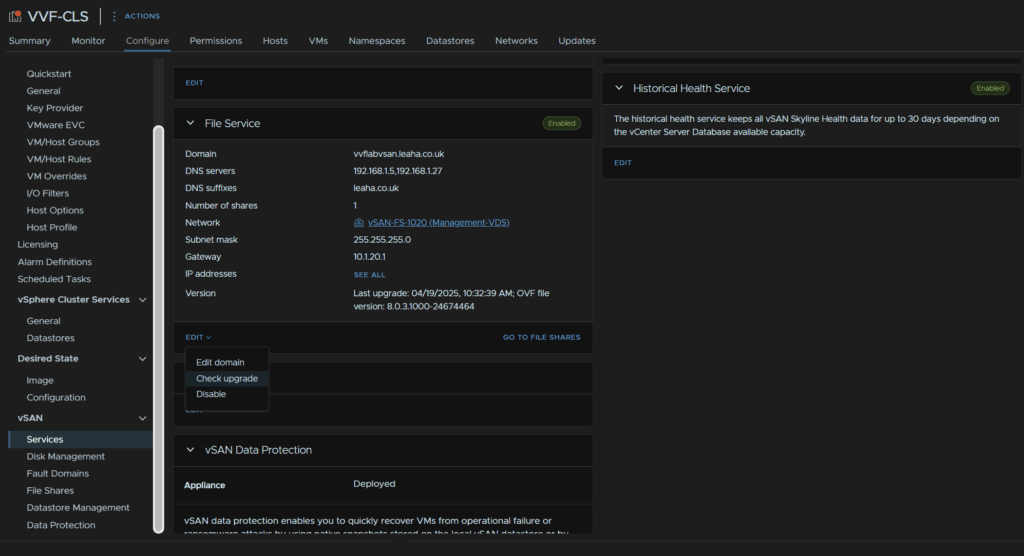
Now this should pick up the latest version from Broadcom’s website but oddly mine wouldnt, so we will be doing this manually from the Broadcom portal
Click My Downloads/VMware vSphere Foundation
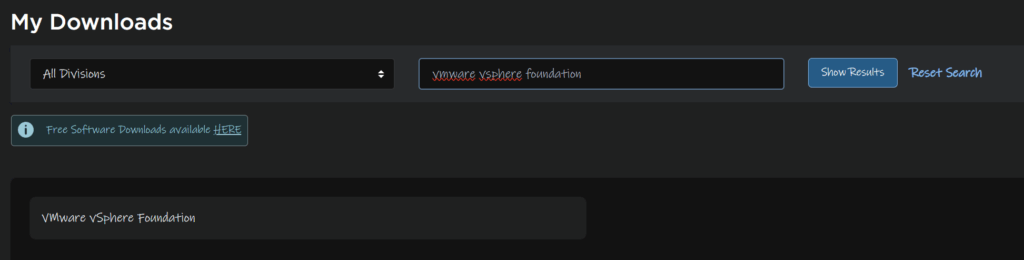
Expand VVF 9 and click the latest release

Under VMware vSAN, click View Group

Click Drivers And Tools

Then download all the files here
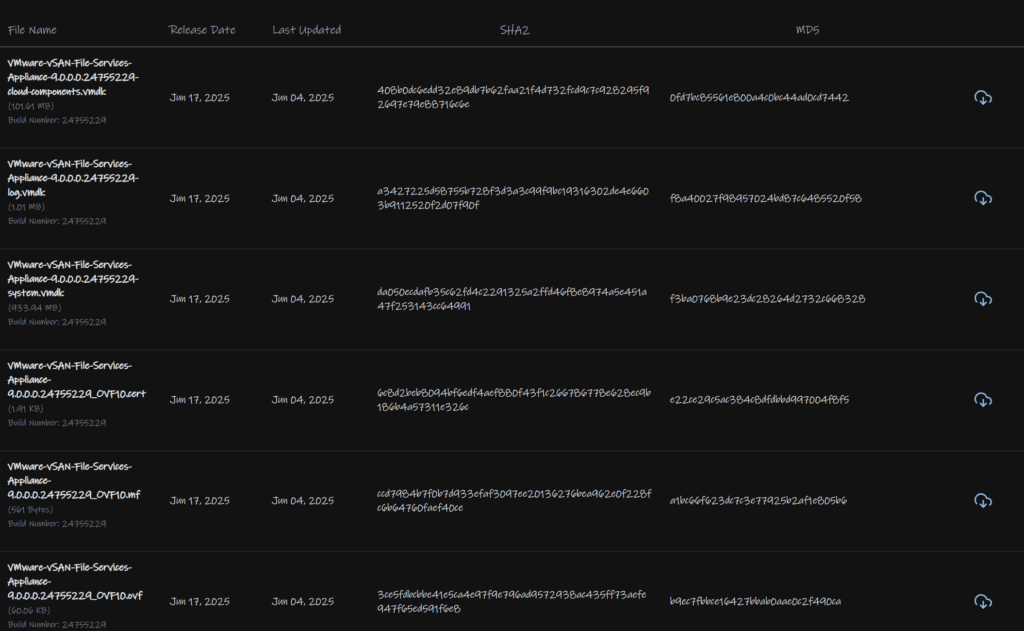
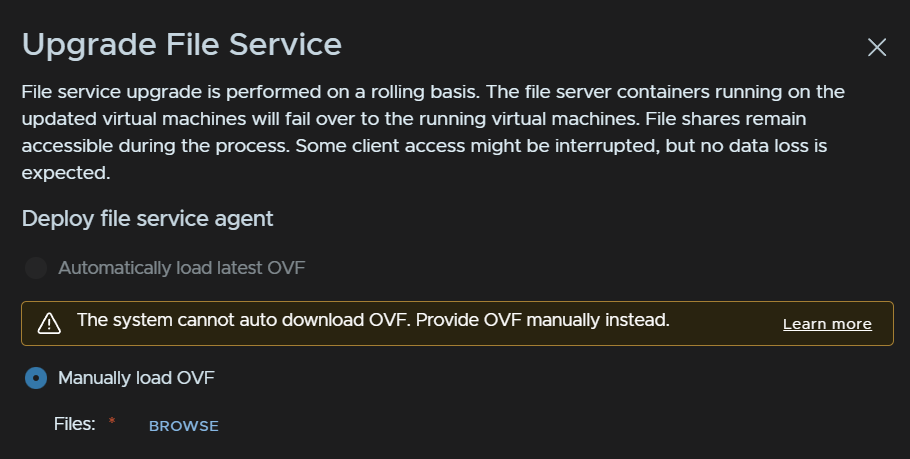
In the vSphere console, click Browse
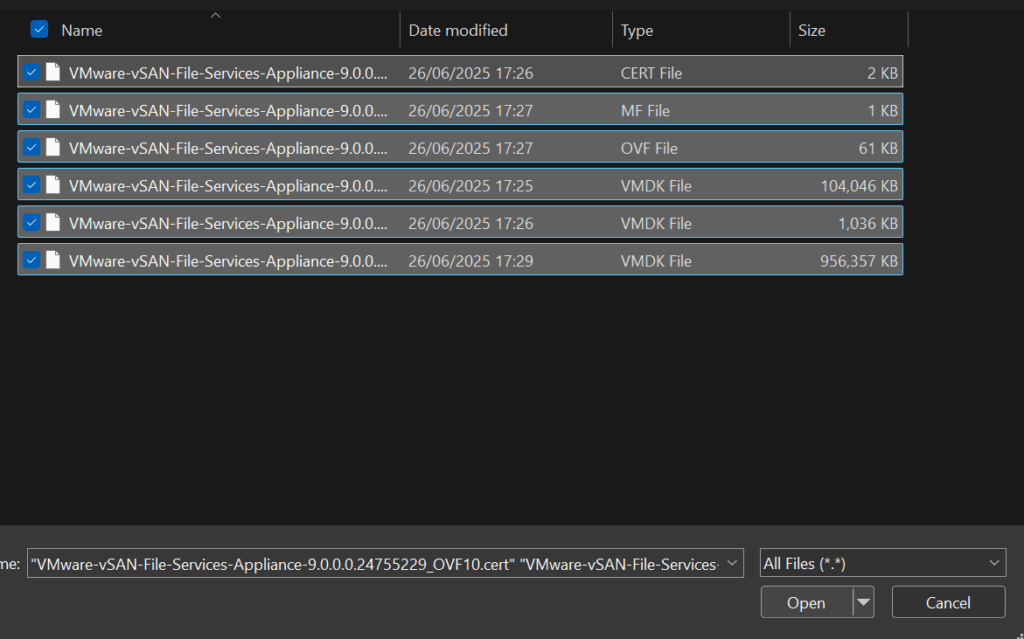
And select all the files you just downloaded, and click Open
Then click Upgrade
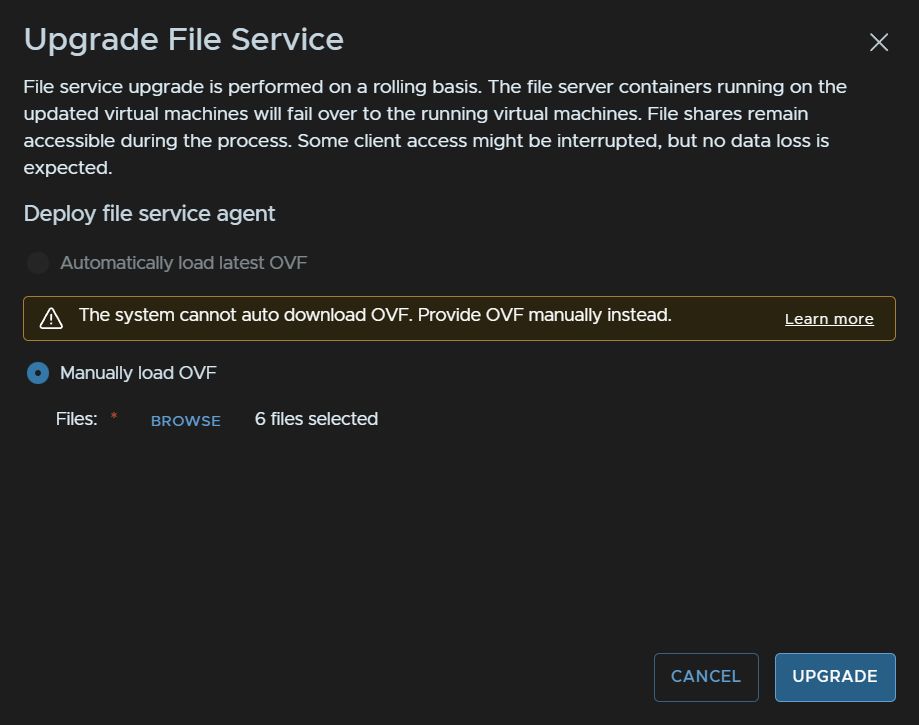
Wait for the progress bar to complete

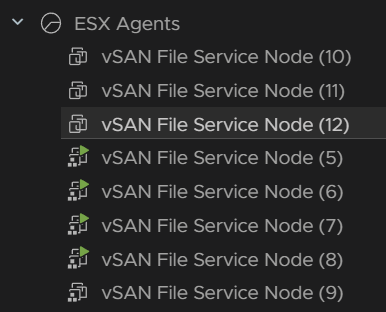
When thats done it will replace all the file service VMs
1.7 – Tanzu/Supervisor
1.7.1 – Namespaces/Supervisor
This is bundled with vCenter, the namespace will be updated automatically when vCenter is patched
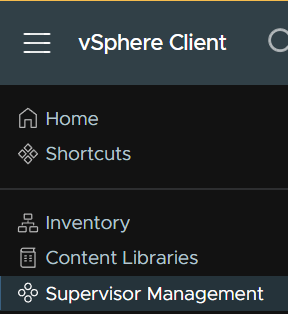
Now click the three lines in vSphere and click Supervisor Management
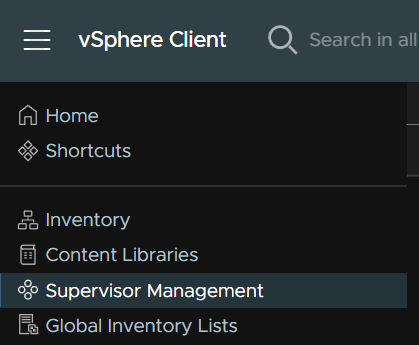
Click Updates

Here we can see the namespace update, I had 0.1.11, and since the vCenter update, the namespace is version 9.0.0.0
We can also see the Kubernetes release, with this namespace version we get 1.30.5
We had 1.29.7, the namespace supports the current version and two previous versions
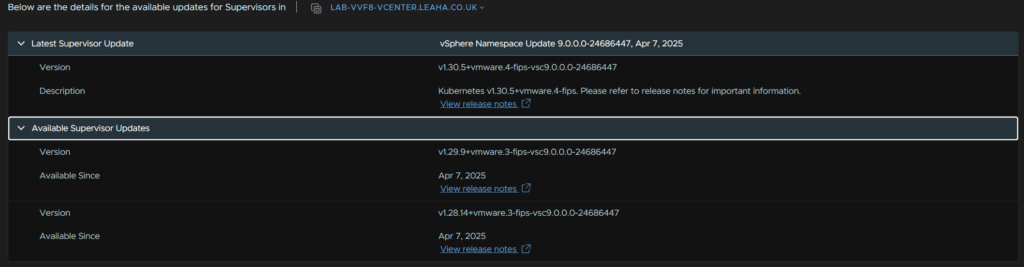
At the bottom we can see the supervisor, as this is now decoupled from vCenter we can update this independently
To apply the latest Kubernetes release, click the namespace and click Apply Updates
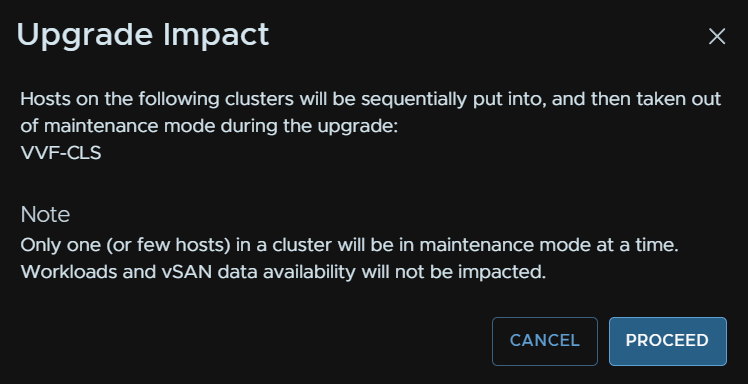
These will be applied to the hosts and the supervisor VMs

And click proceed
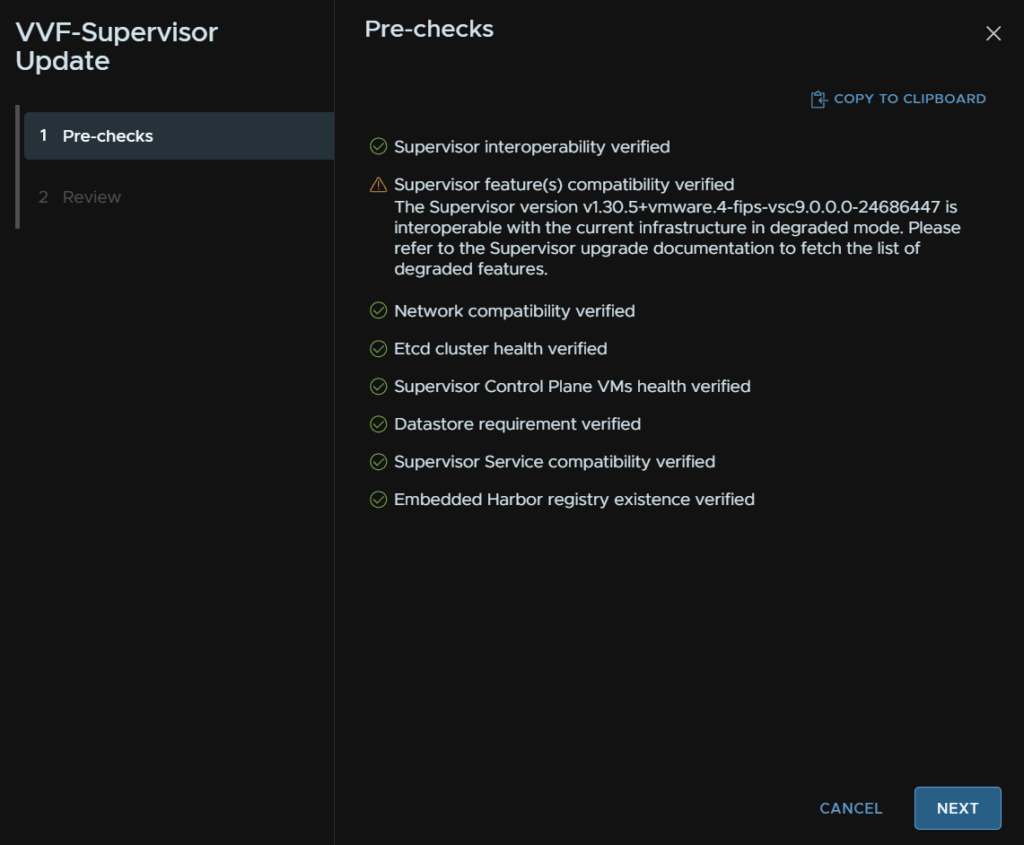
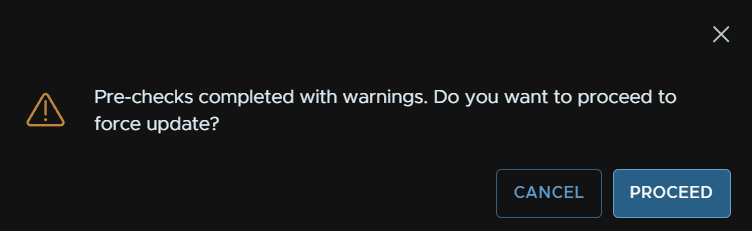
Ensure all the pre checks run fine, we will get a feature compatibility degraded waring, we have done ESXi, and in my lab I tested after vSAN but still got this, so I am not 100% whats degraded and the VCF 9 supervisor documentation doesnt seem to mention anything
As my lab has a couple of containers I will be upgrading, for production environments, I would suggest logging a call with Broadcom to clarify what this means to ensure production workloads arent effected
Click proceed
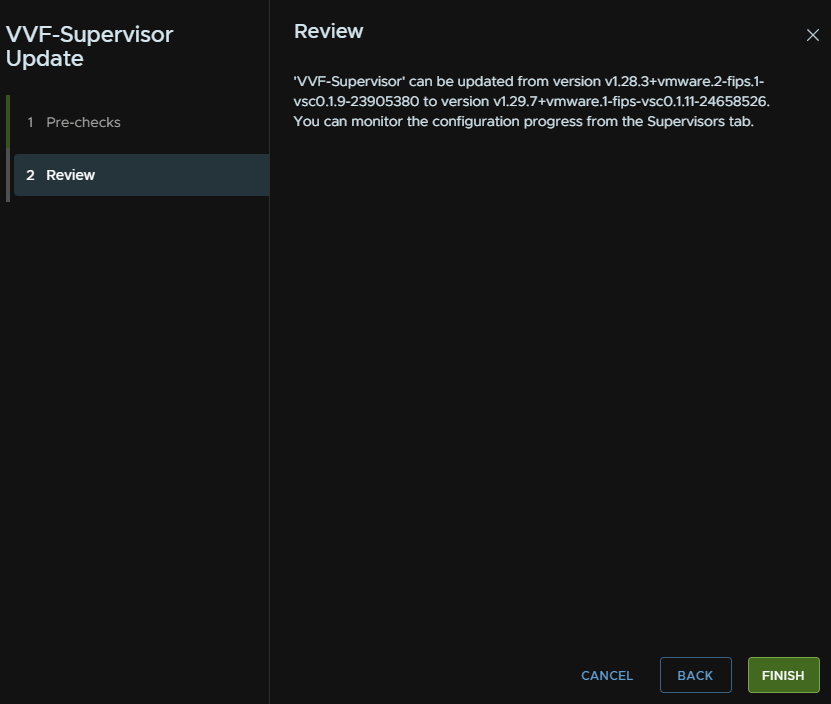
And Finish
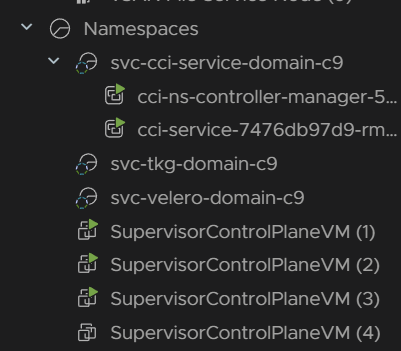
This will replace the Supervisor VMs as part of the update process, which we can see here
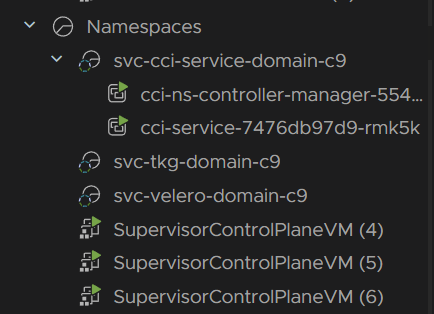
Plugin will then be redeployed, this may happen a few times as new supervisor control plane VMs are created


Once the control plane nodes are done, there will still be three, and they will likely have different numbers
Then all hosts are put into maintenance mode and the new Kubernetes release is installed to the host, once thats done the upgrade is finished
1.7.2 – Supervisor Services
Now we need to update the built in supervisor services, the stock ones are Tanzu Kubernetes Grid Service and Velero vSphere Operator
Any additional services that have updates will need to be applied separately
We can get to them by clicking the three lines in the top left of vSphere and clicking Supervisor Management
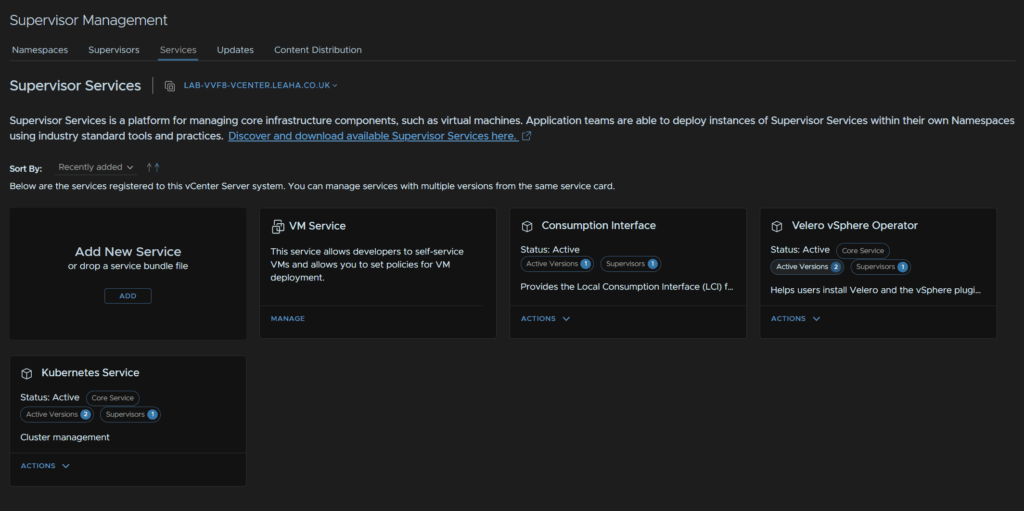
Then head to Services, we can click Active Versions within the service widget, where it says Active Versions 2, to see what versions we have, there are now two, as they new ones are added, but not activated with the supervisor update
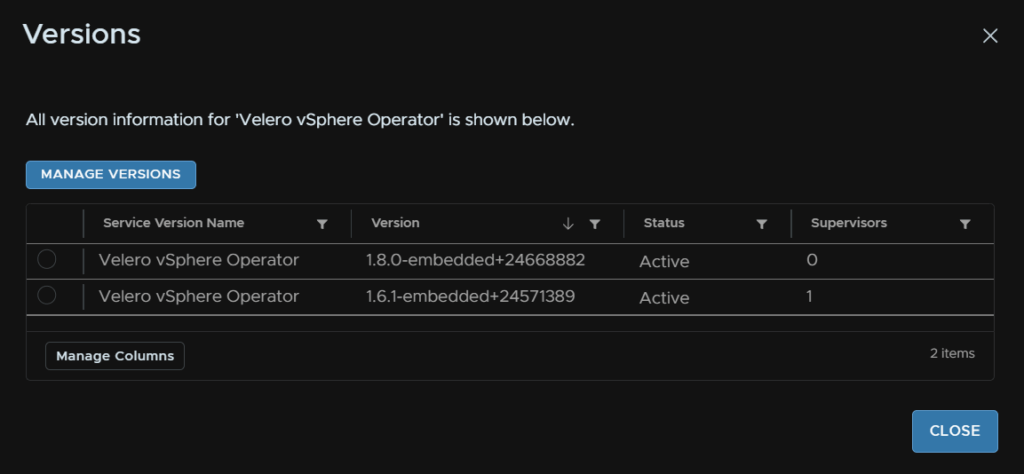
Looking at Velero, we can see 1.8 has been added but had no installed supervisors
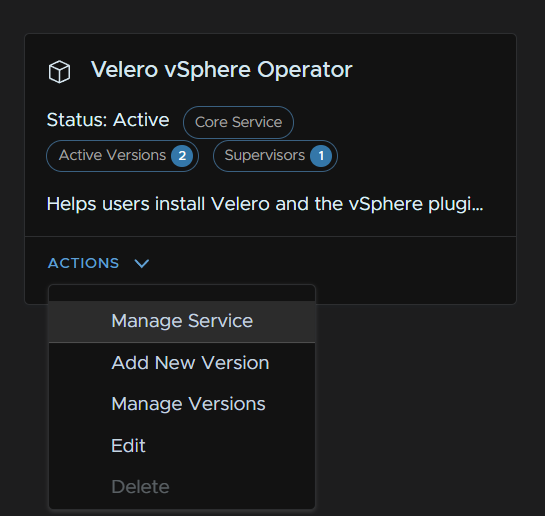
So, to upgrade the services click Actions on a service, then Manage Service
Select your supervisor, and make sure the Install Version is the latest, for me thats 1.8, and click Next
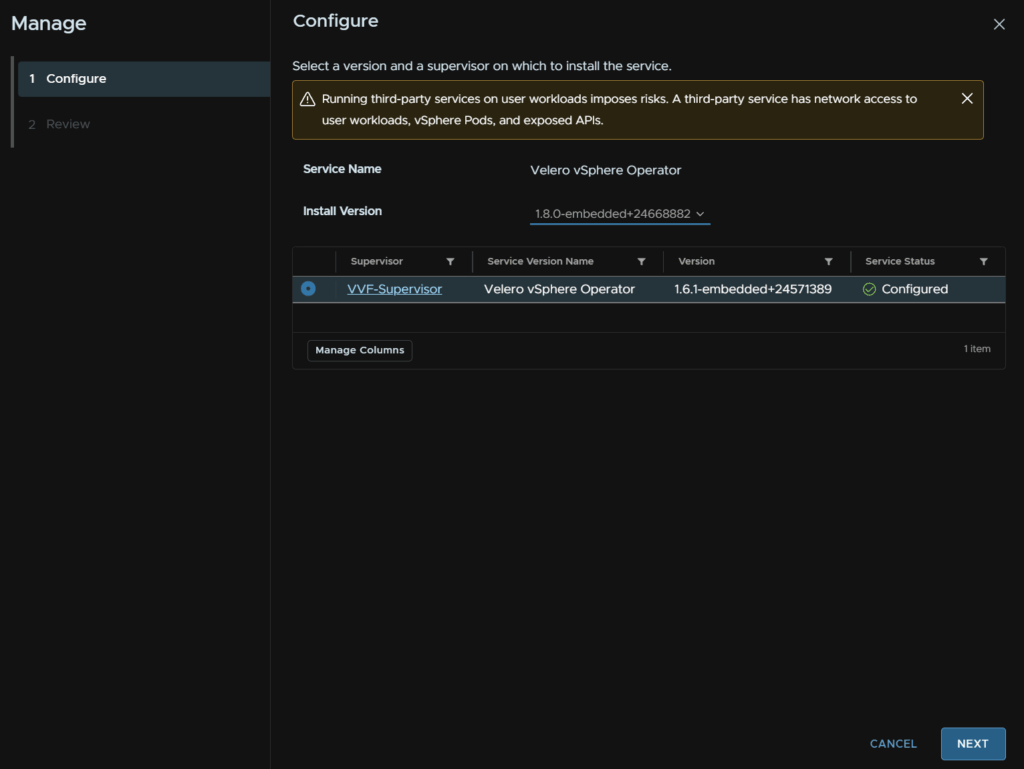
This will run a compatibility check
When thats run click Finish
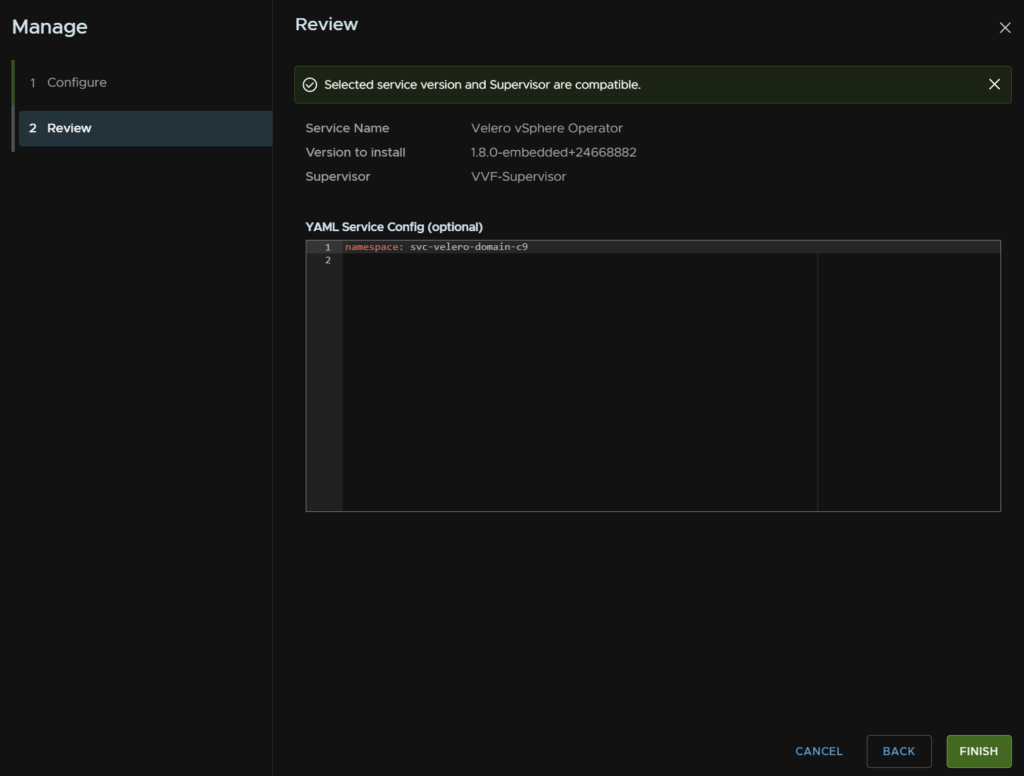
Give it 5-10 mins to start up all the new pods
We can see the pod status from the namespace on the left as well, so you may see some errors while pods are in pending
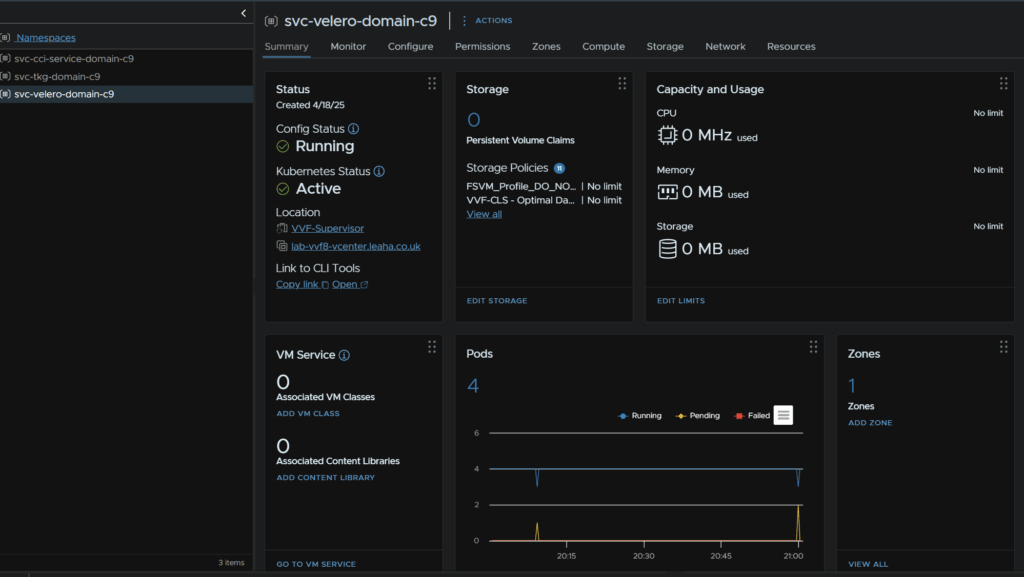
Now we can remove the old versions, this is optional, but you would want to use the new versions so we dont want someone accidentally using or configuring the old ones
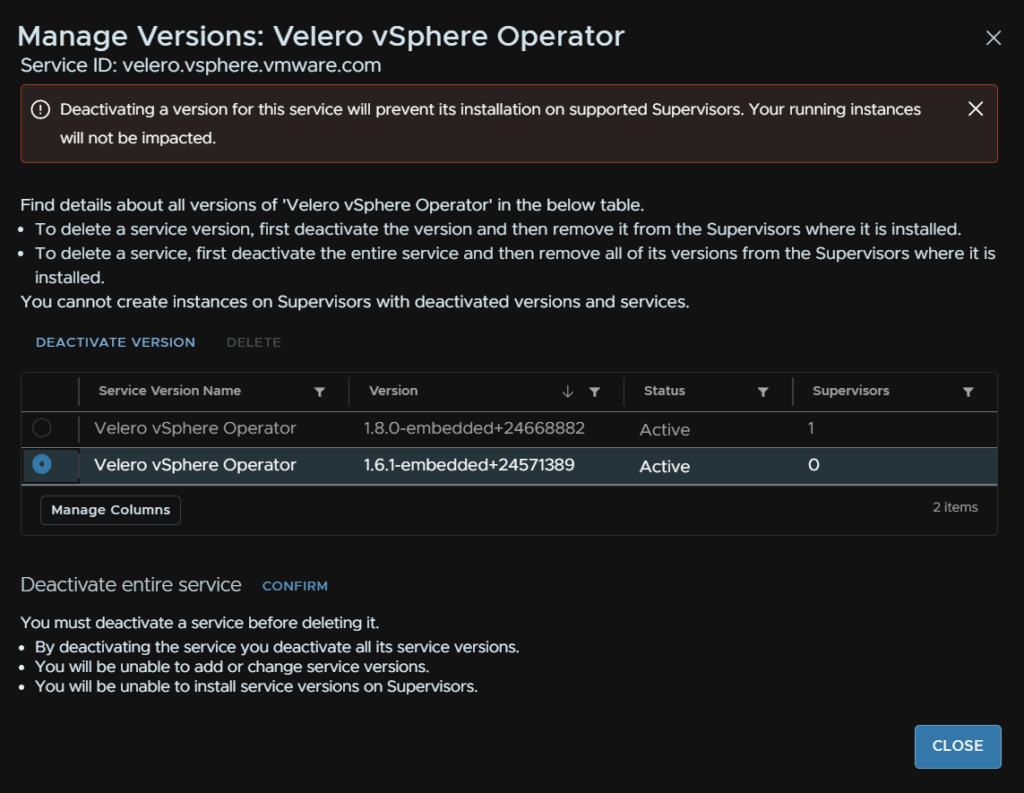
Back in workload Management/Services, on the service click Actions/Manage Versions
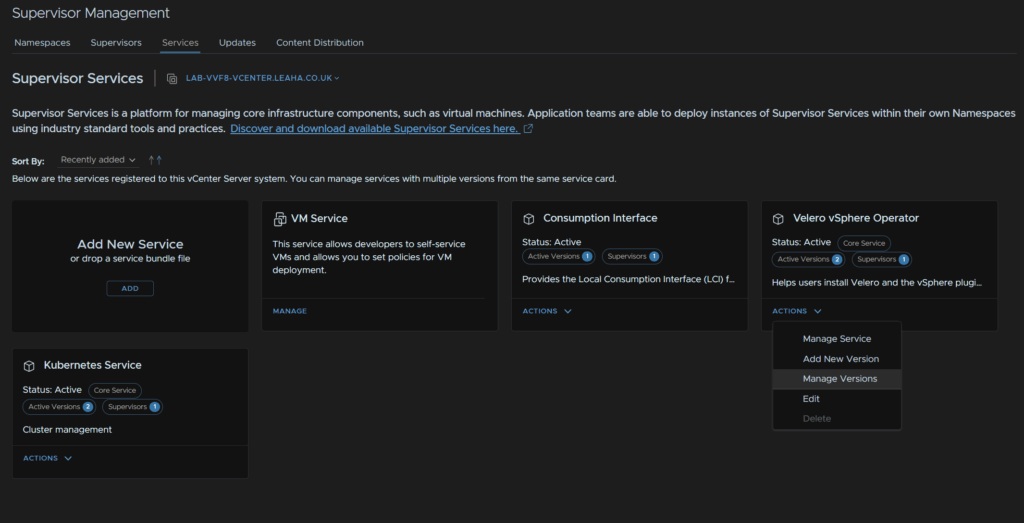
Select the old version and click Deactivate
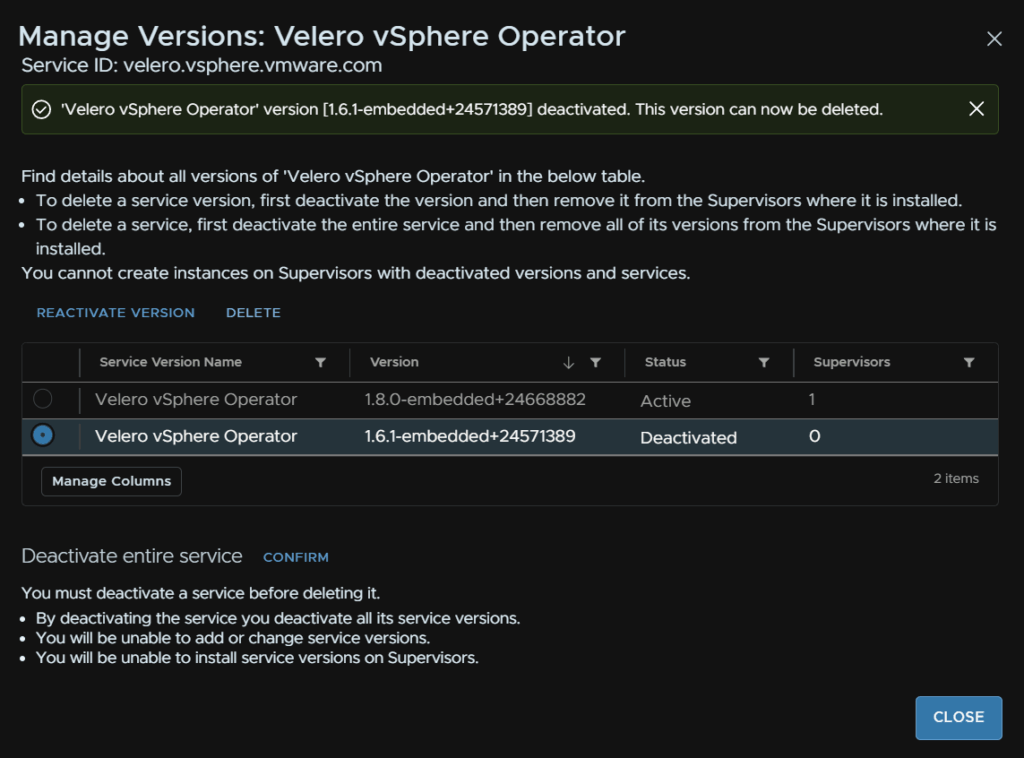
Then we can select it again and click Delete
Then click Close
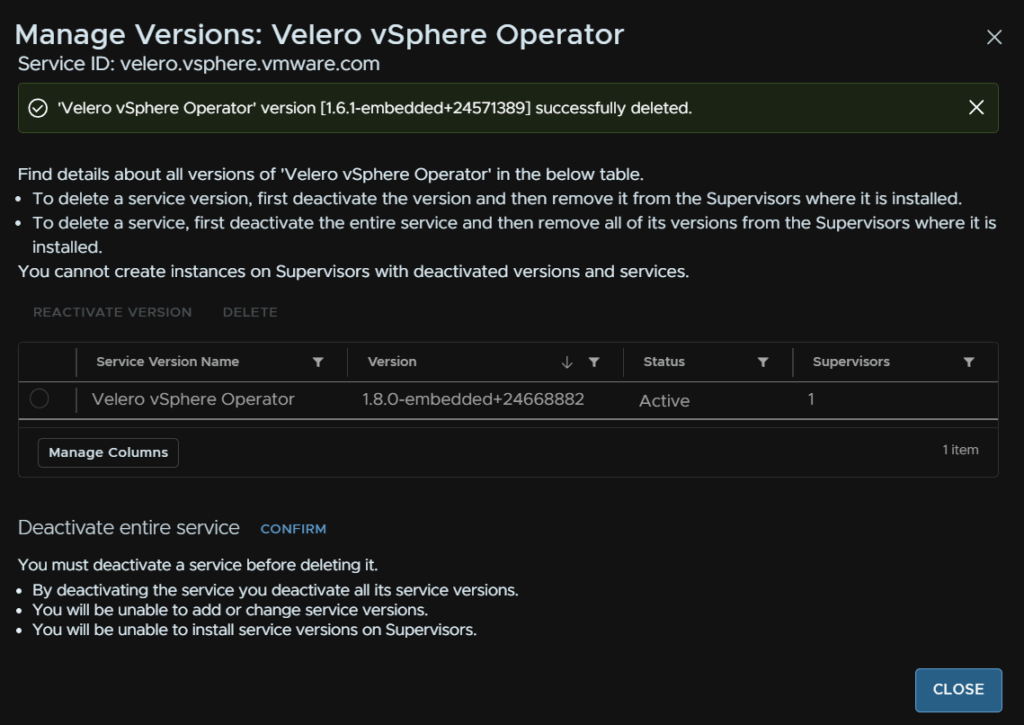
Velero 1.8 is automatically available but the consumption interface has version 9.0.0, from 1.0.2, and the vSphere Kubernetes Service at 3.4+v1.33 are not
These we can download from the Broadcom portal, and will be the new way to check and get updates to these services
To get them log into the Broadcom portal, click Downloads and there Here, where it says Free Software Downloads Available HERE
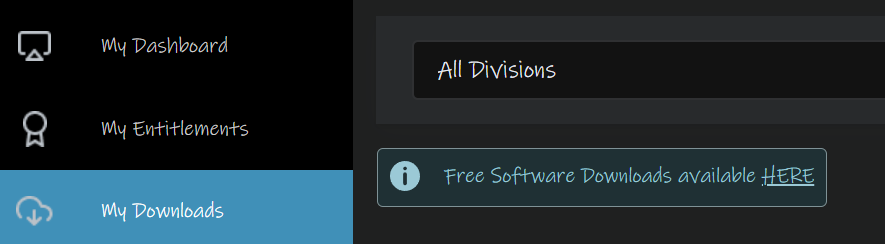
Scroll to the bottom and click vSphere Supervisor Services

Here we can select the latest VKS release, 3.4+v1.33
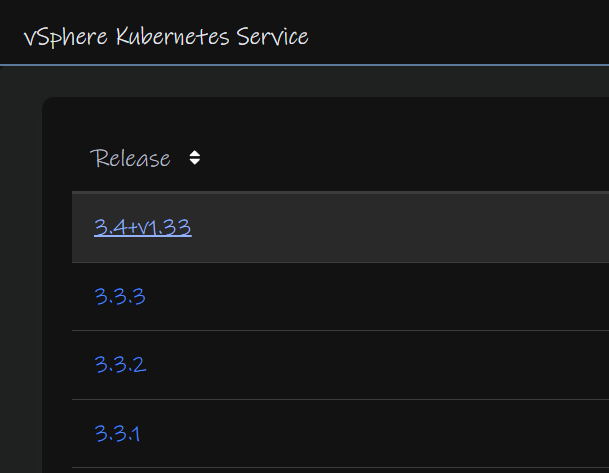
And download the Yaml

Repeat for the Local Consumption Interface
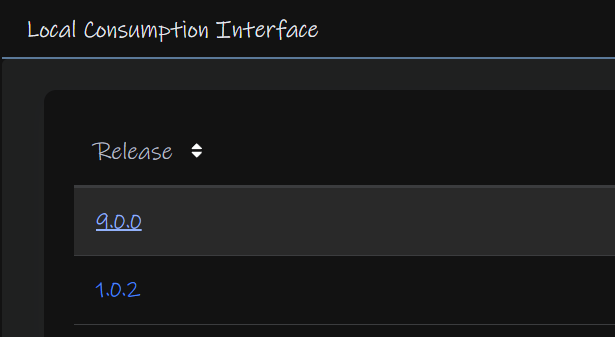
And download this Yaml

Now, for the consumption interface they have changed the identifier, so we cant add a new version, we need to deactivate it, remove the service and re set it up
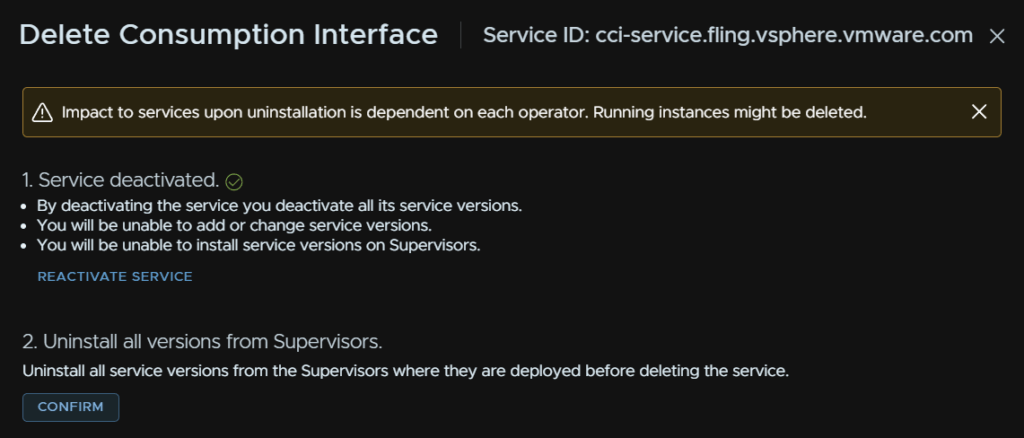
From Supervisor Management/Services, on the Consumption Interface widget click Actions/Delete
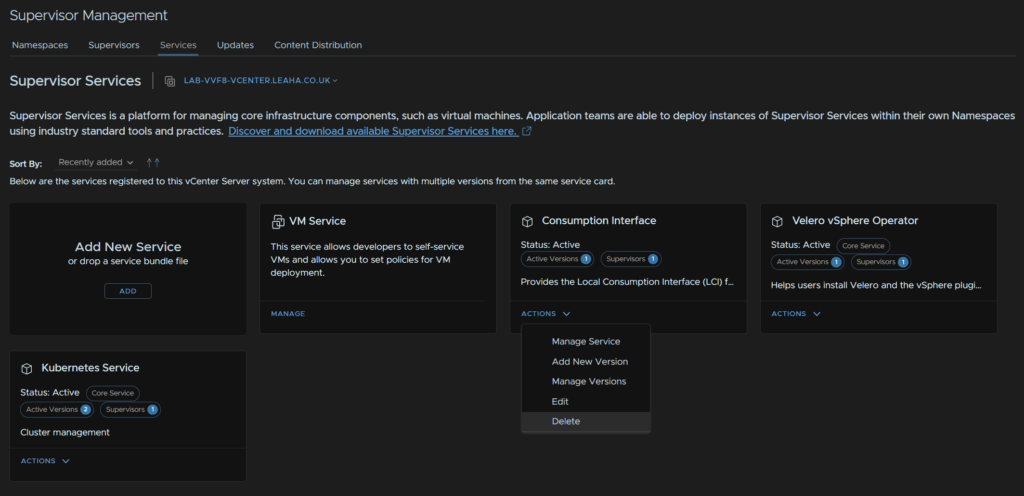
Click Confirm to deactivate it
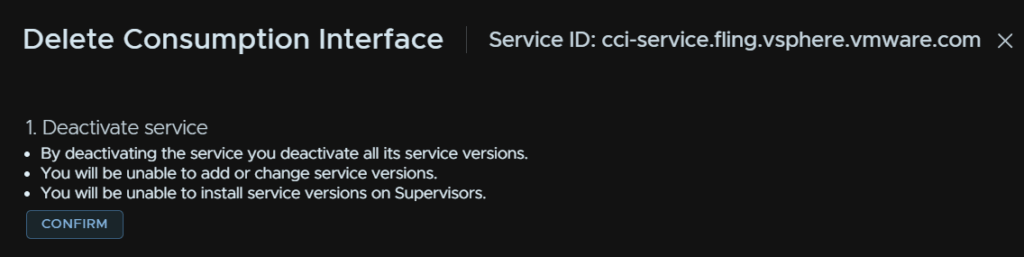
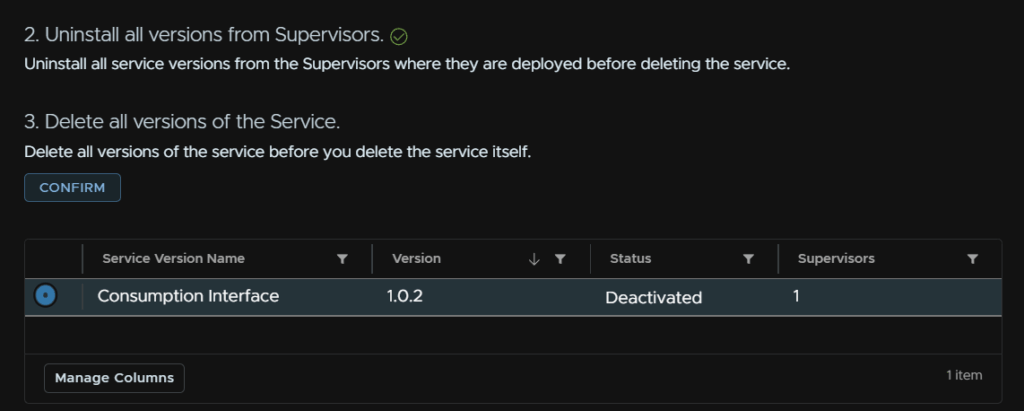
Then click Confirm, this will uninstall it from all supervisors
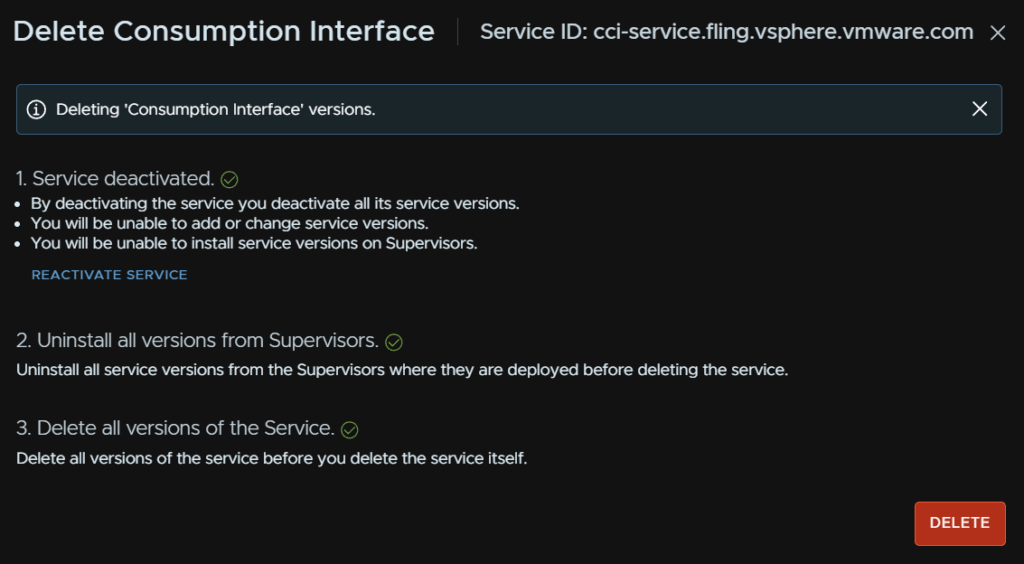
Select the supervisor and click Confirm to delete the service
Then click Delete
You’ll notice its now gone entirely
Then click Add in the Add New Service Widget

Click Upload
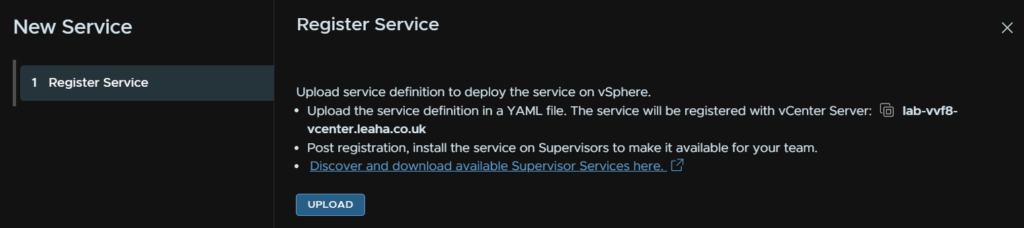
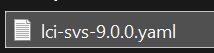
Select the new YAML
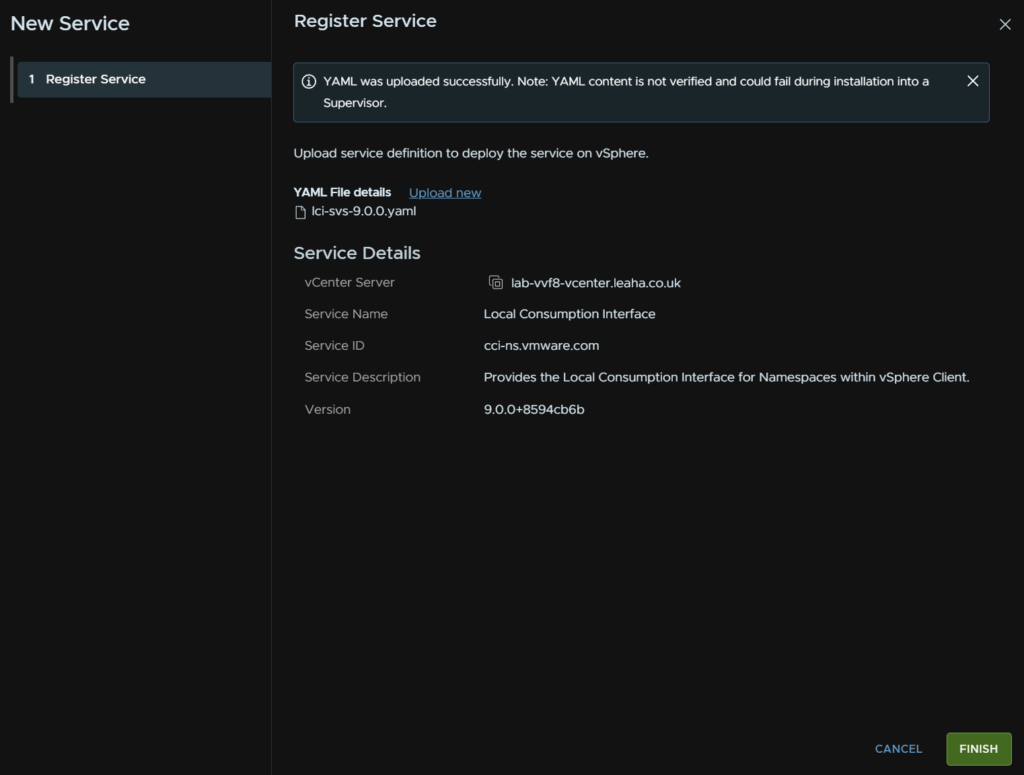
And click Finish
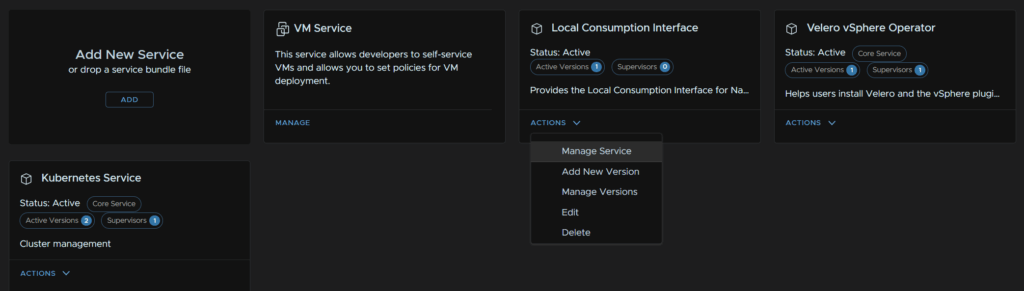
Now its back, on its widget click Actions/Manage Service
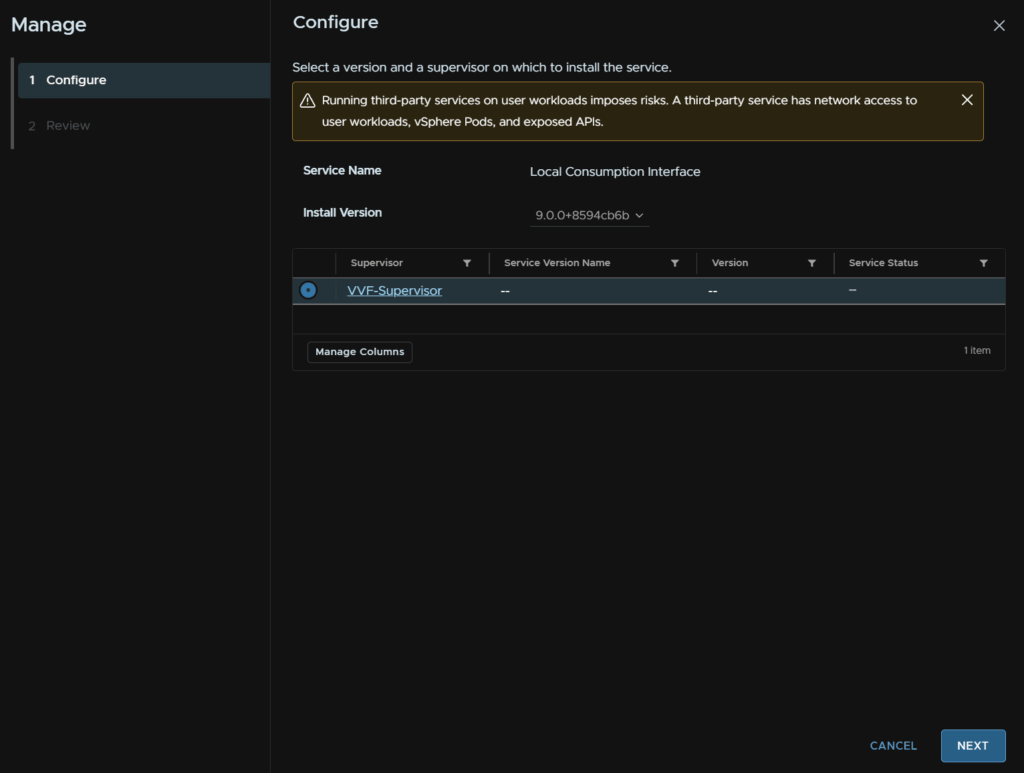
Select the supervisor and click Next
Then click Finish
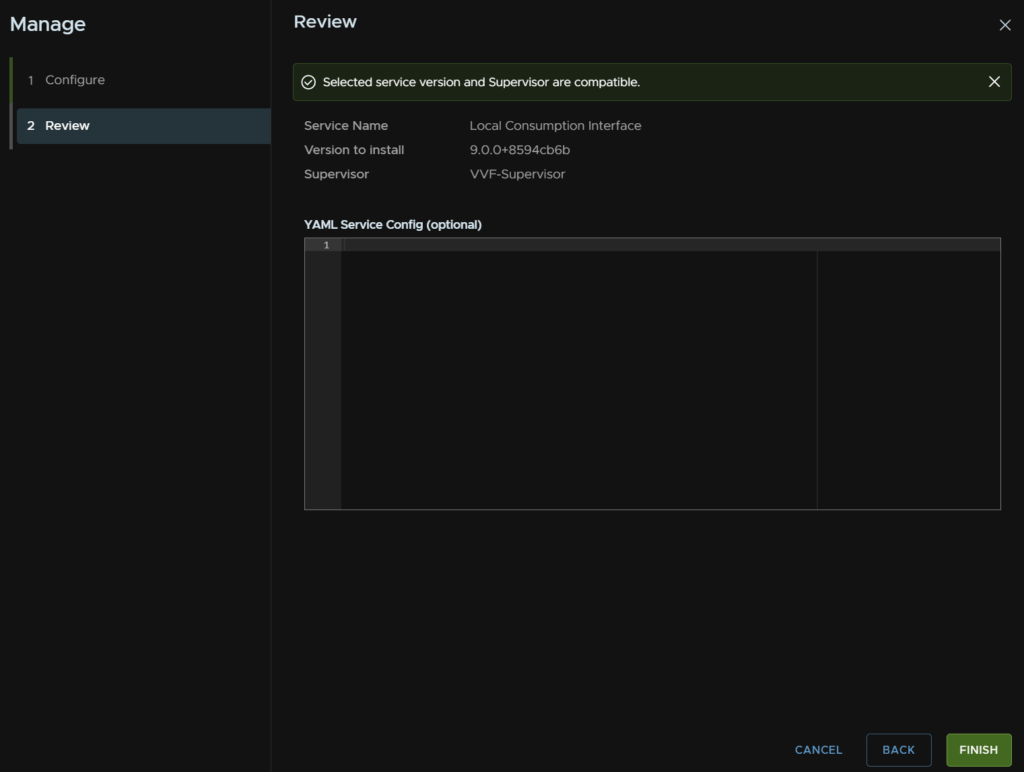
Click the namespace, svc-cci-ns, and wait for the pods to run, this will take a little while
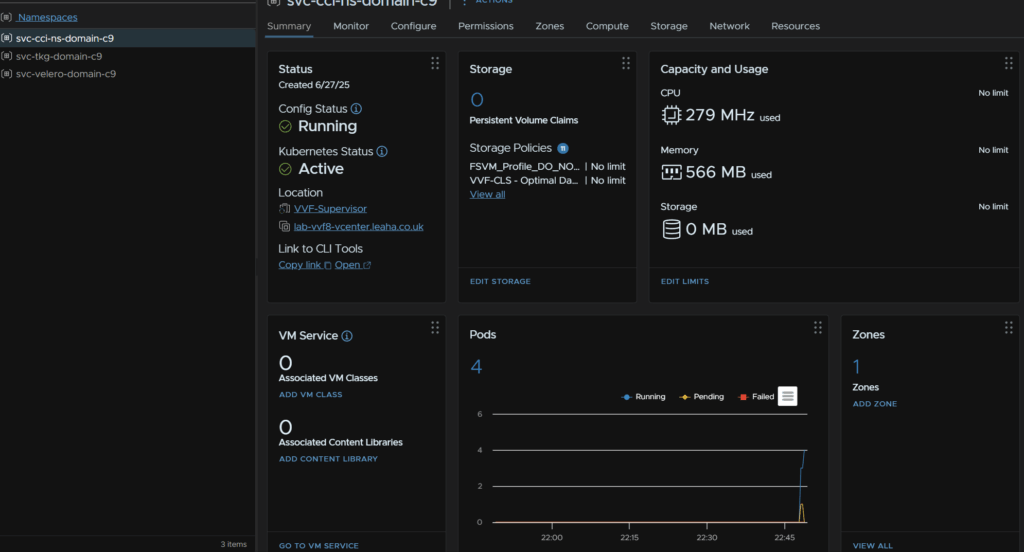
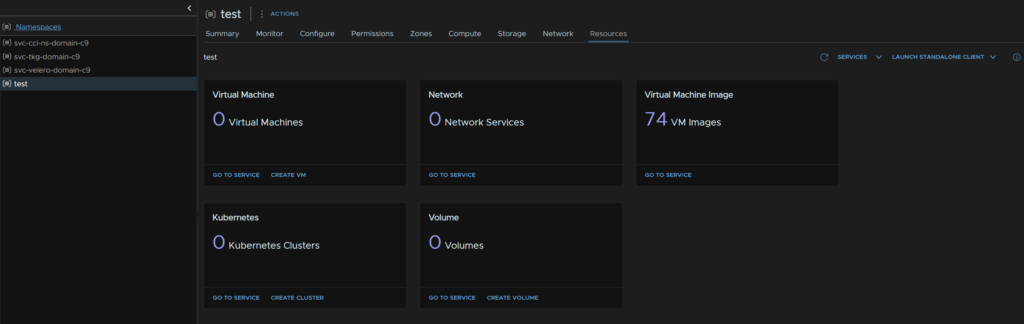
We should then see the plugin get deployed

And we can access this like before, though it now has its own UI, so you dont have to go through vSphere, its the same interface though
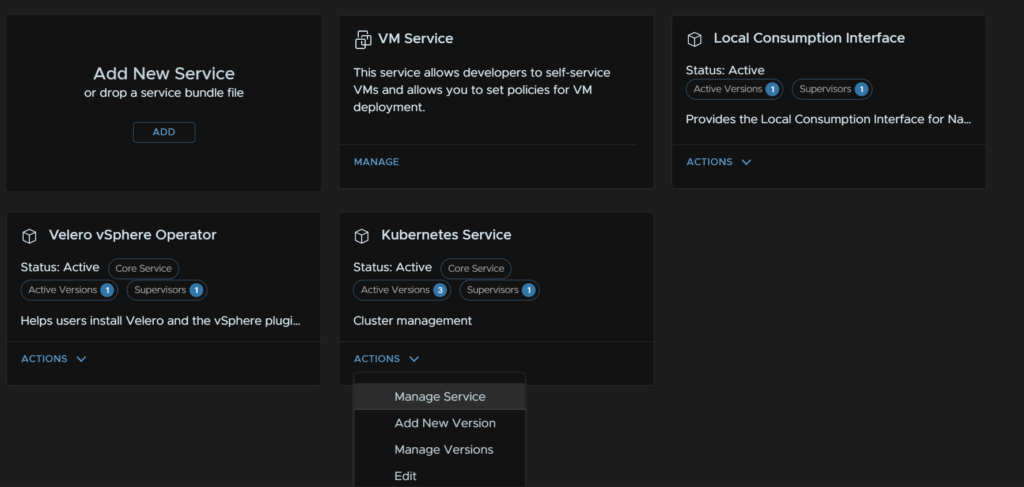
Back in supervisor management, on the Kubernetes Services widget click Actions/Add New Version
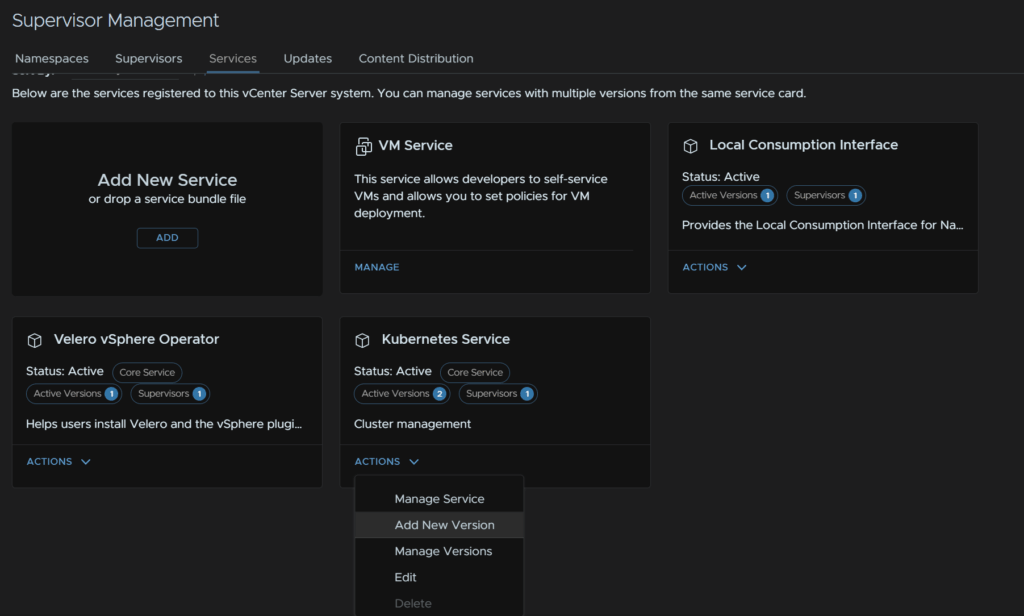
Click Upload
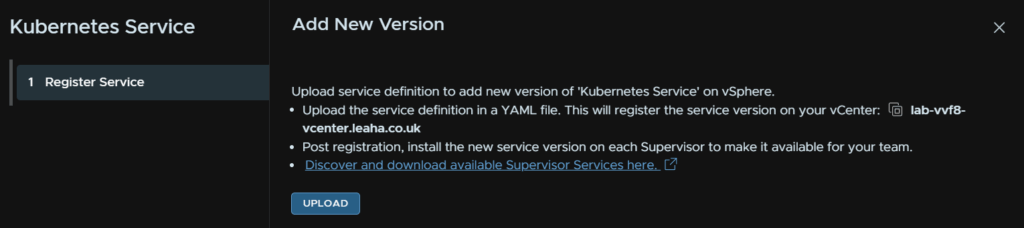
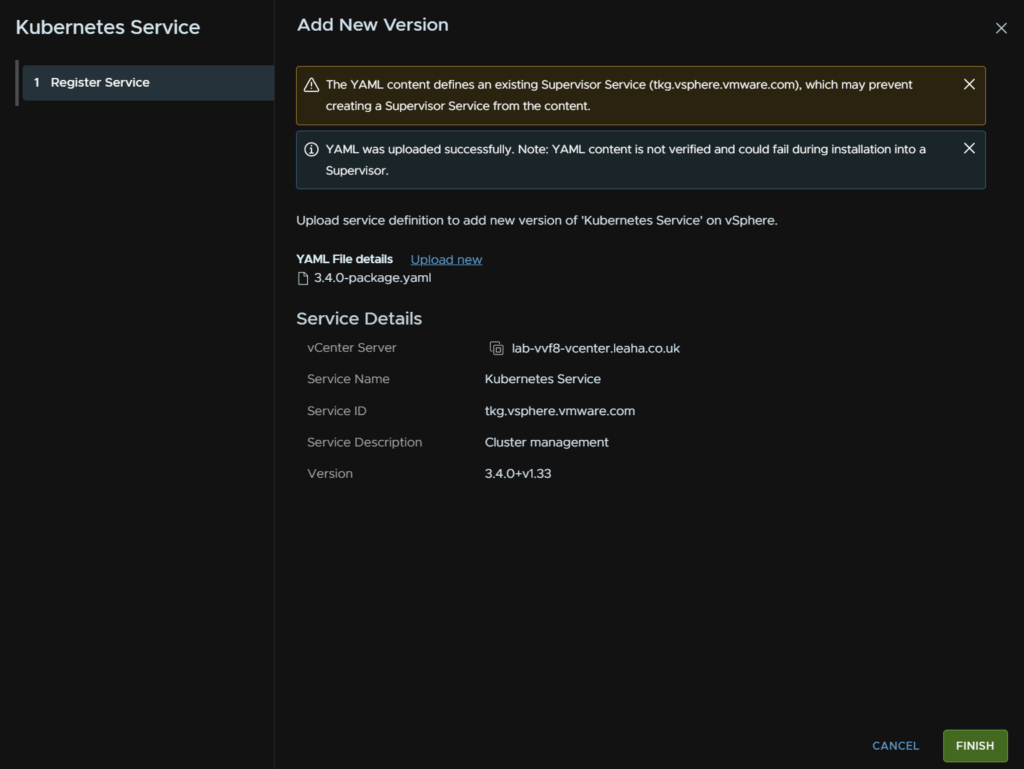
Double click the corresponding Yaml

Then click Finish
Now click Actions/Manage Service
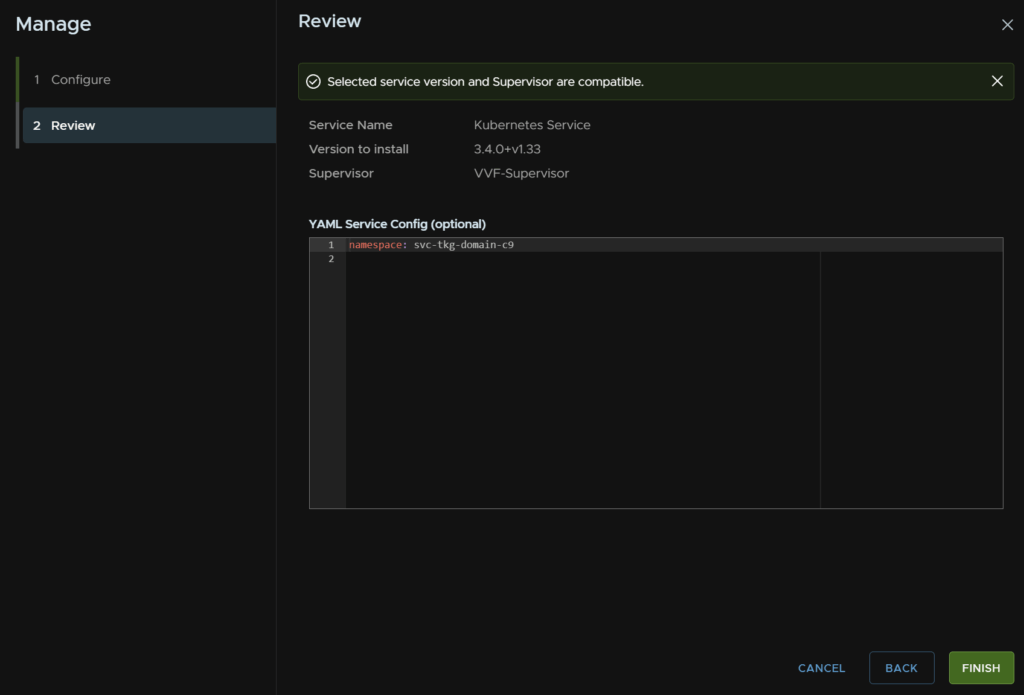
Select the supervisor, and make sure the install version is the new 3.4+v1.33 and click Next
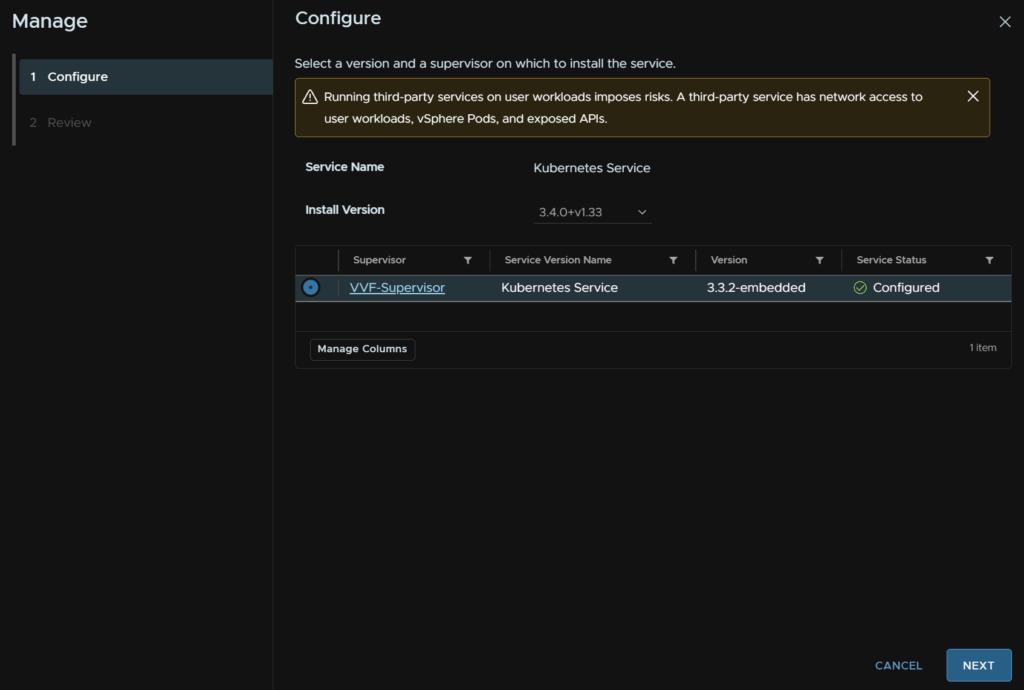
Then click Finish
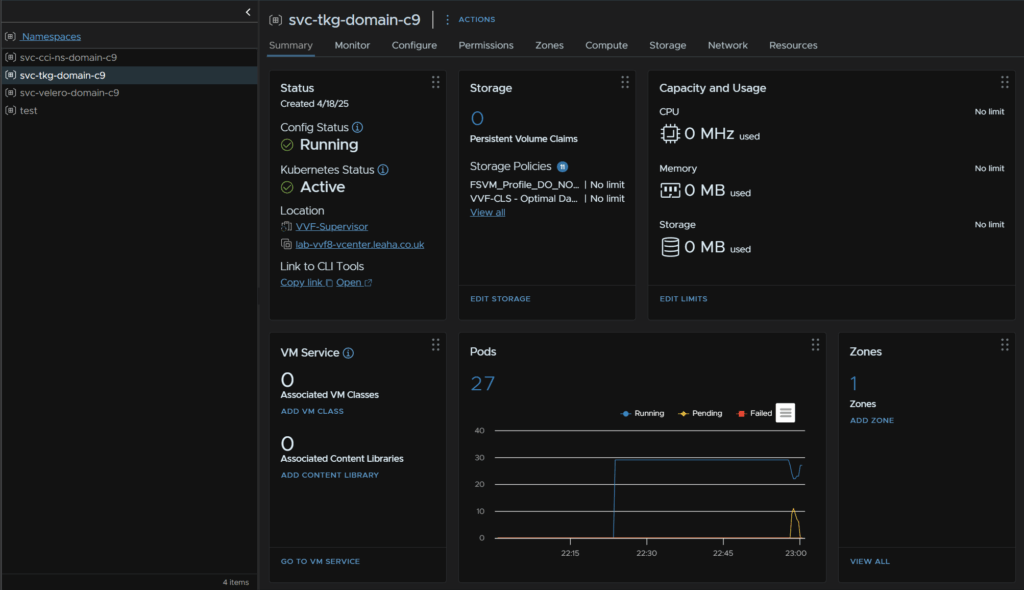
From the namespace you’ll see the pods go between running and pending, but when they are all running its been successful
We dont need to remove the old versions here as its managed by vCenter, so we cant
1.8 – VCF Ops For Logs
1.8.1 – Deployment
We first need the OVA file from the Broadcom portal
Click My Downloads/VMware vSphere Foundation
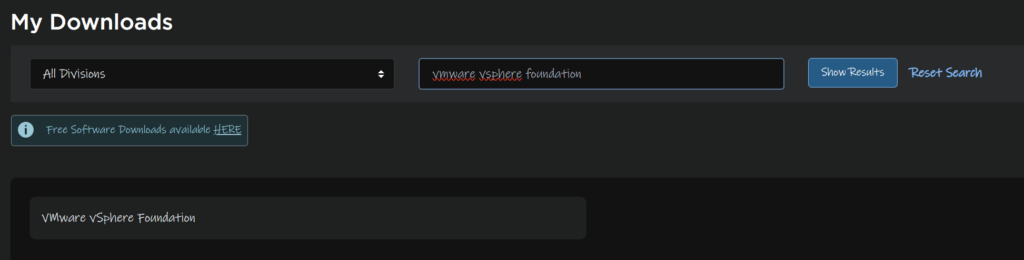
Expand VVF 9 and click the latest release

Click VMware Cloud Foundation Operations For Logs

And download the OVA file

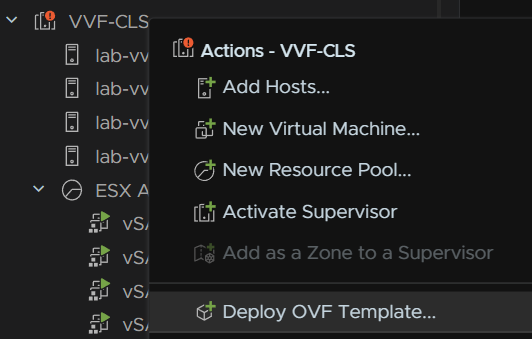
In vSphere, right click the cluster and click Deploy OVF Template
Select the Local File radio button and click Upload Files
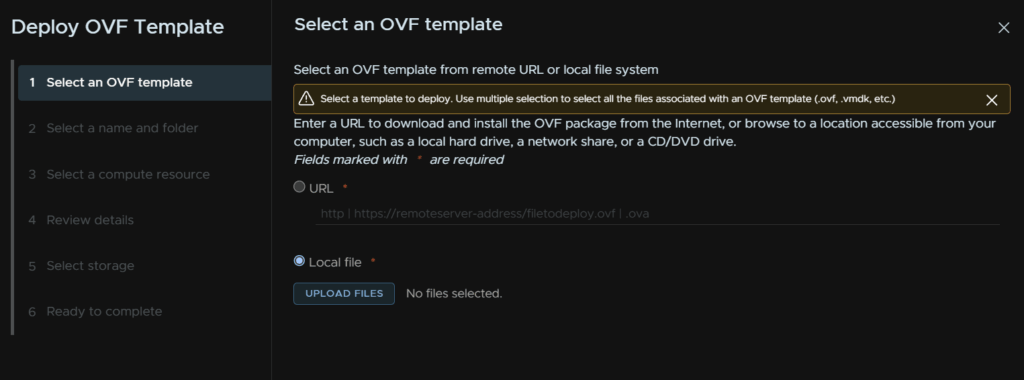
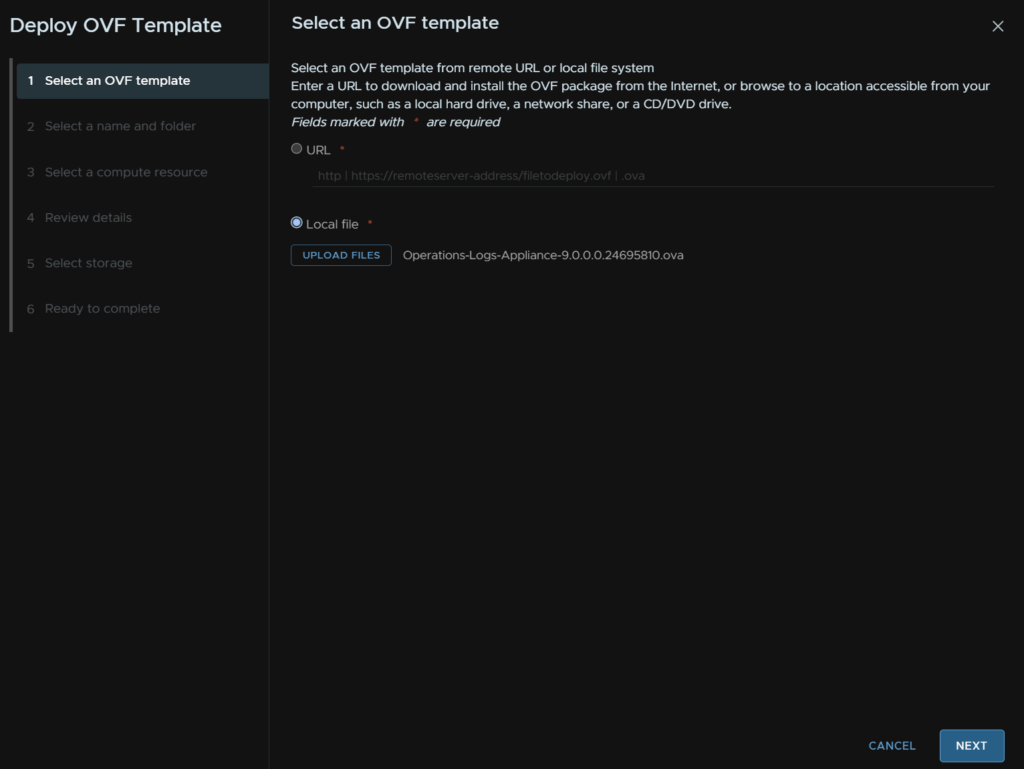
And double click the OVA

Then click Next
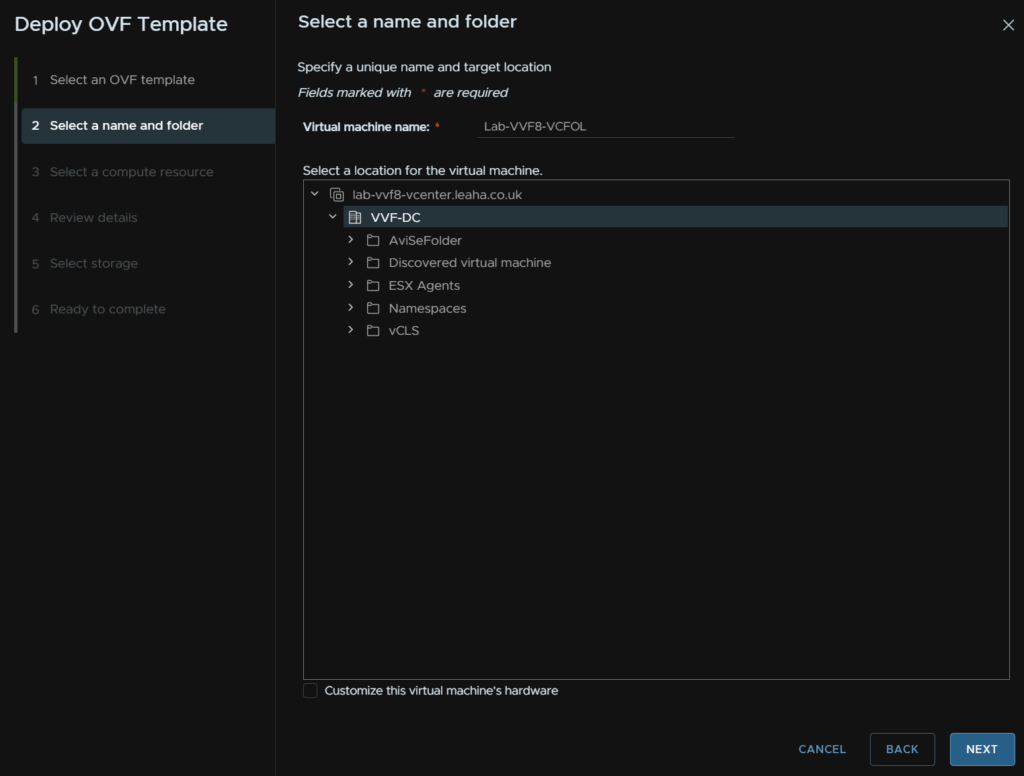
Give the VM and name, and optionally select a folder, then click Next
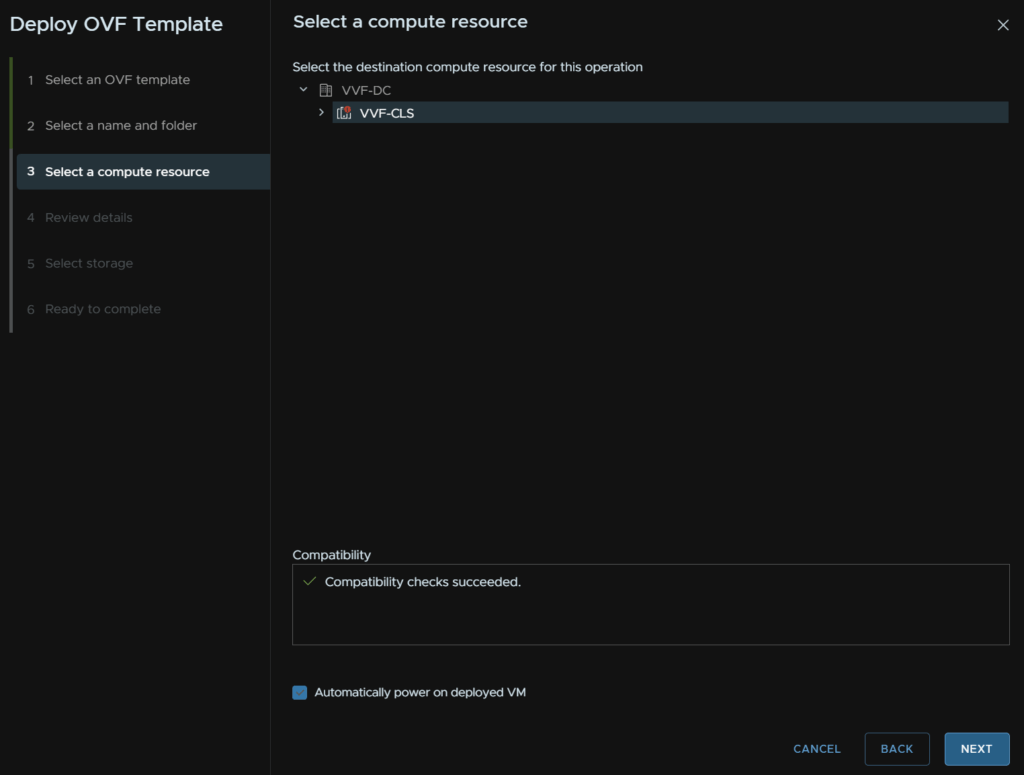
Select the cluster for compute and check the box to automatically power on the VM, then click Next
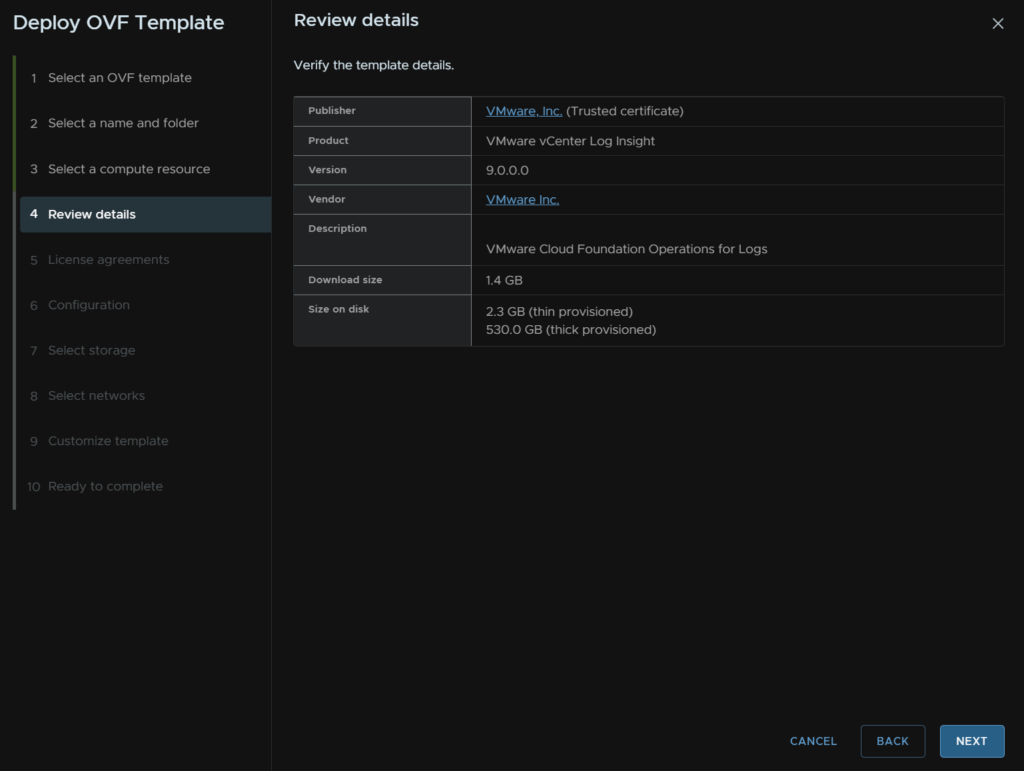
Click Next here
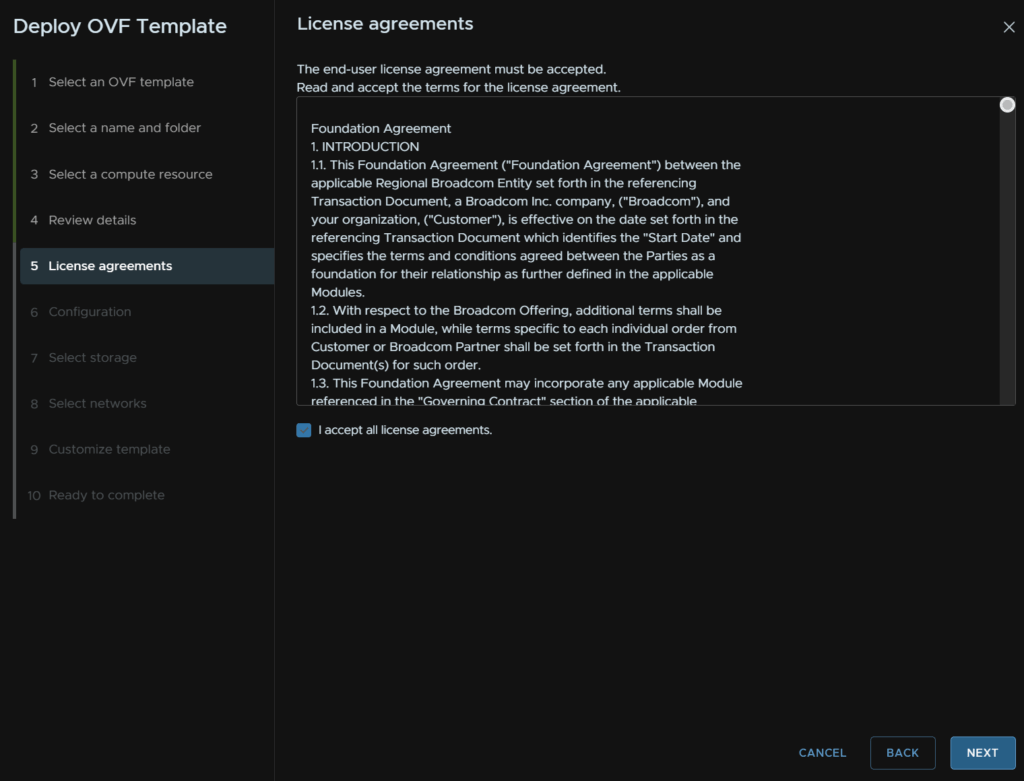
Accept the EULA and click Next
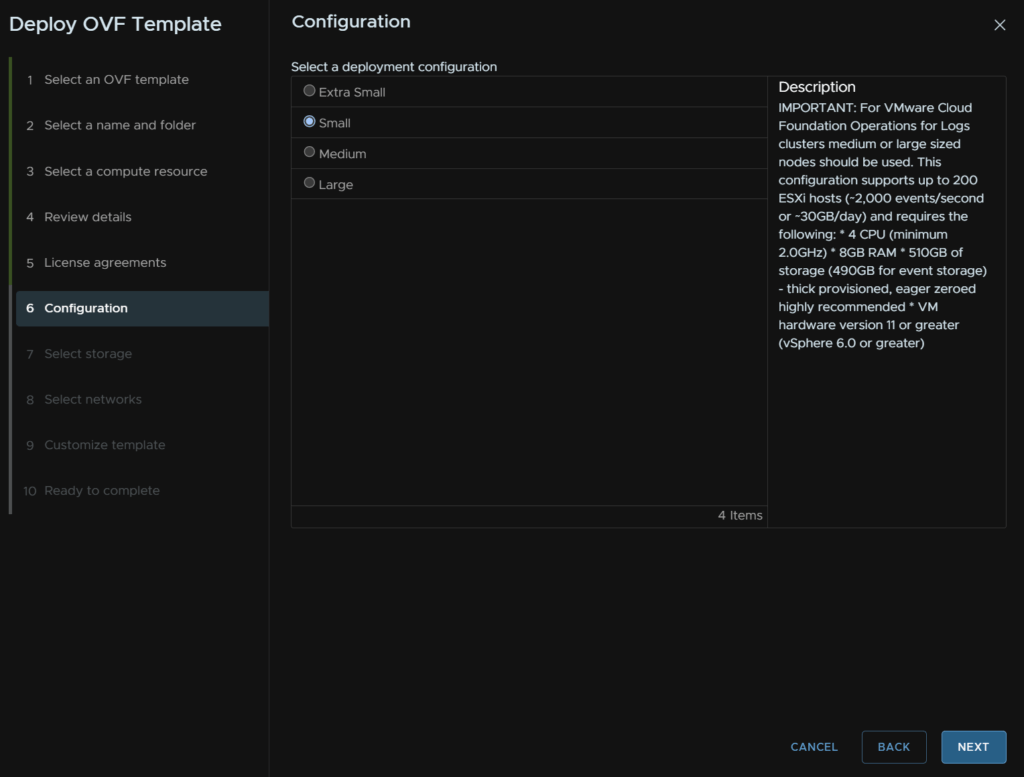
Select your size, info on its capabilities will be on the right, small is usually fine, extra small should only be used in labs, then click Next
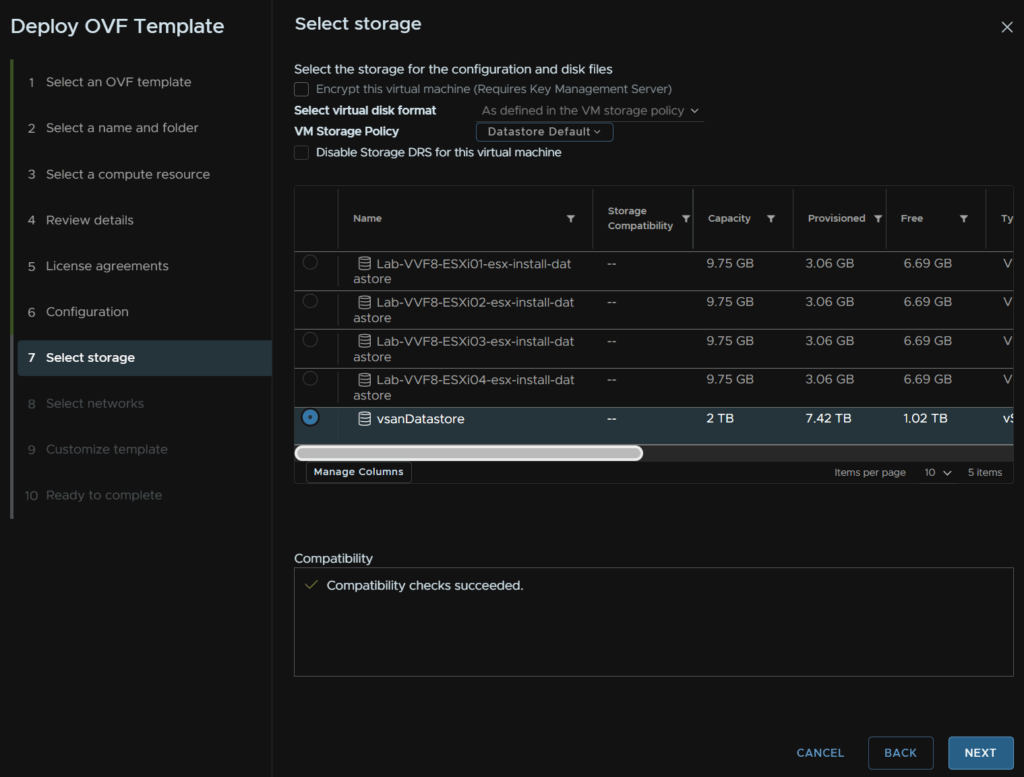
Select a datastore and click Next
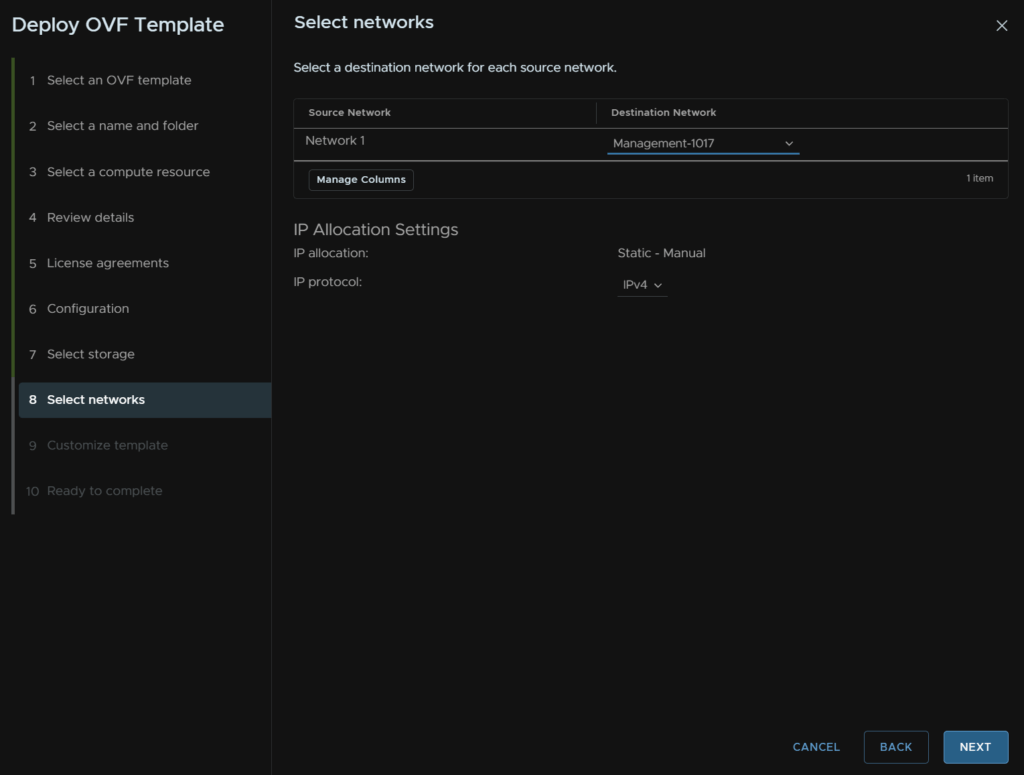
Select your network port group and click Next
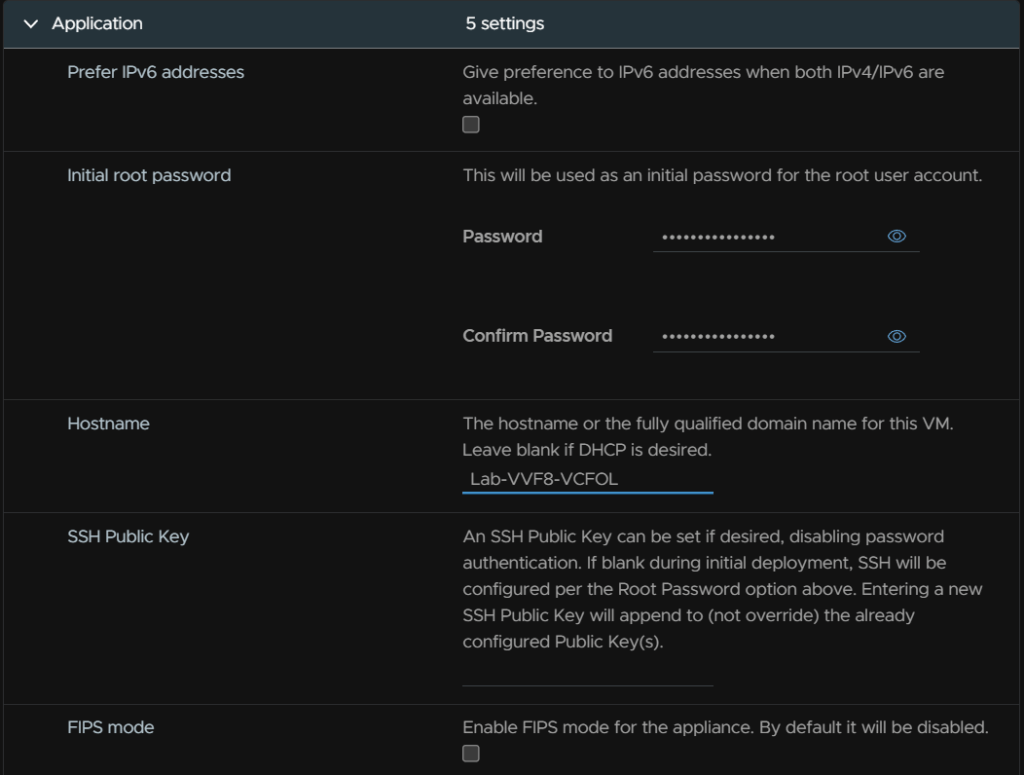
Add a complex 15 character password for the root account, and give it a hostname
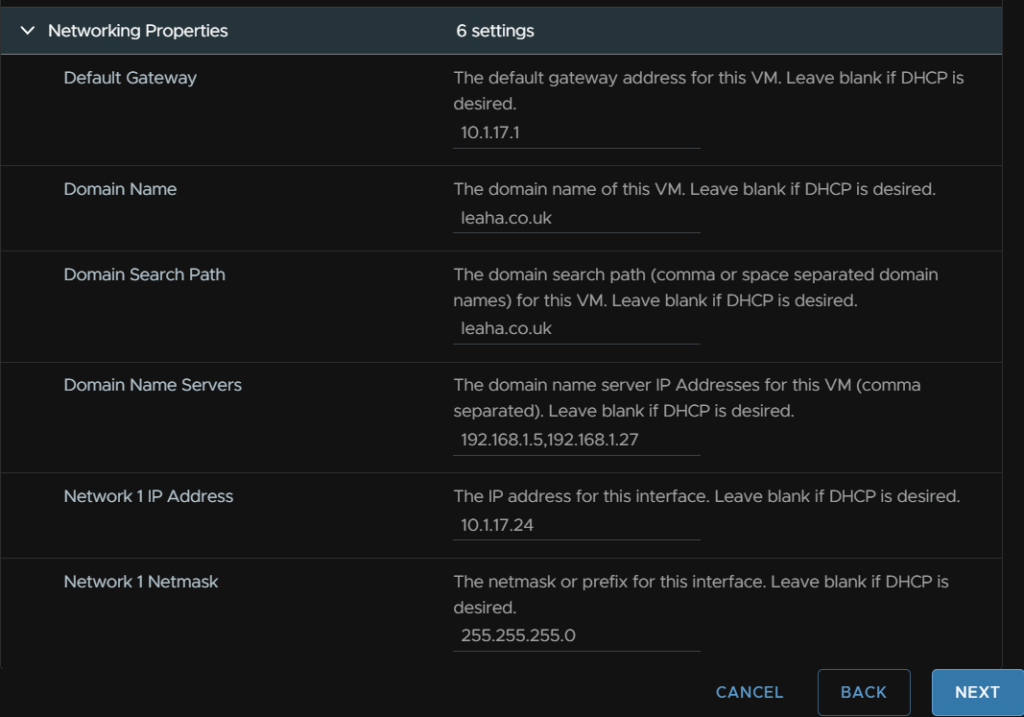
Add the gateway, domain name, DNS search domain, DNS servers, comma separated, IP address and netmask, then click Next
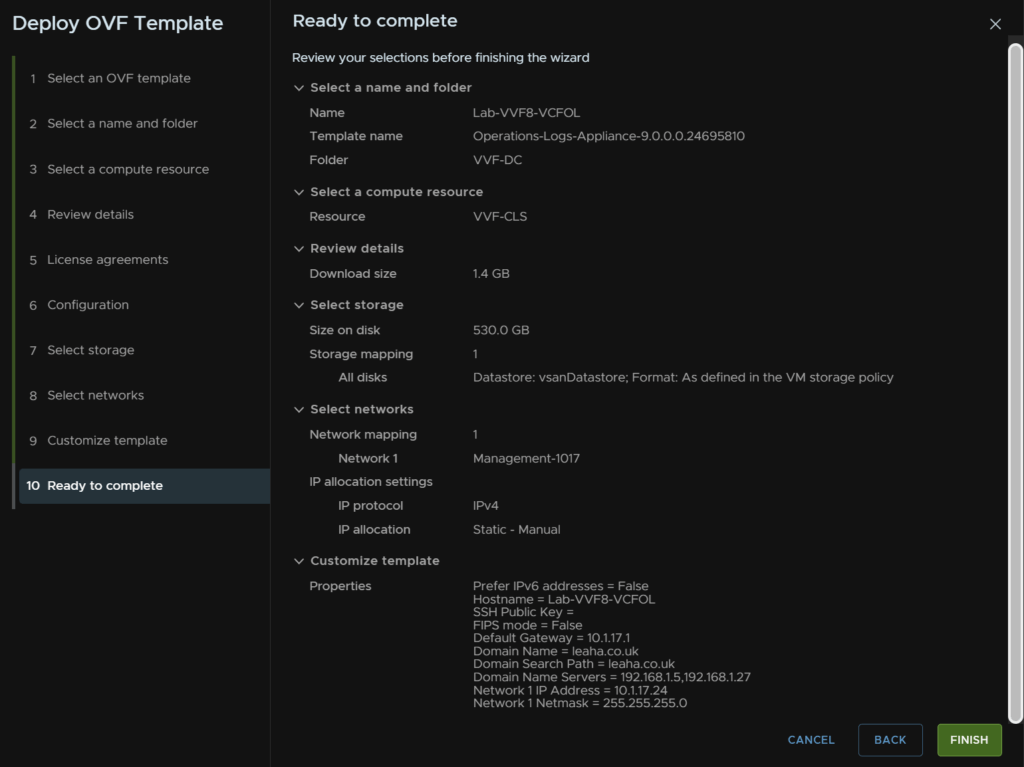
When you are happy click Next
1.8.2 – Post Deployment Setup
Head to the WebUI on
https://fqdn
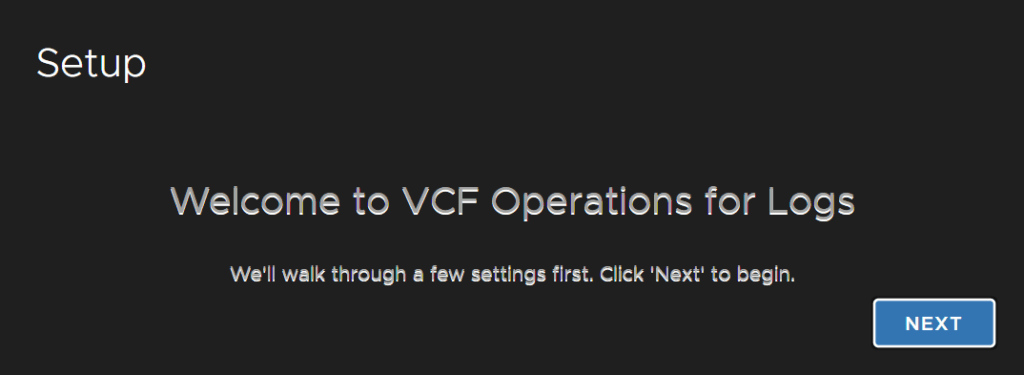
And click Next
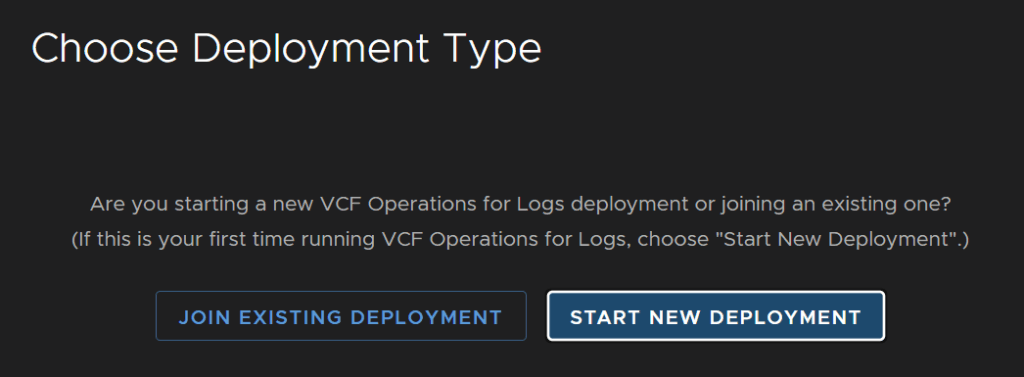
Click Start New Deployment, this may take a while to load
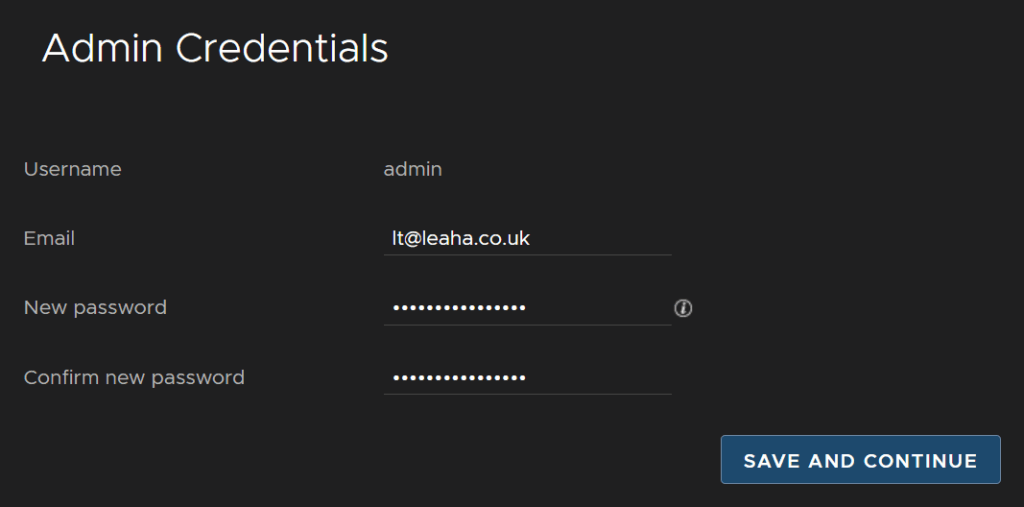
Add an email address and complex admin password then click Save And Continue
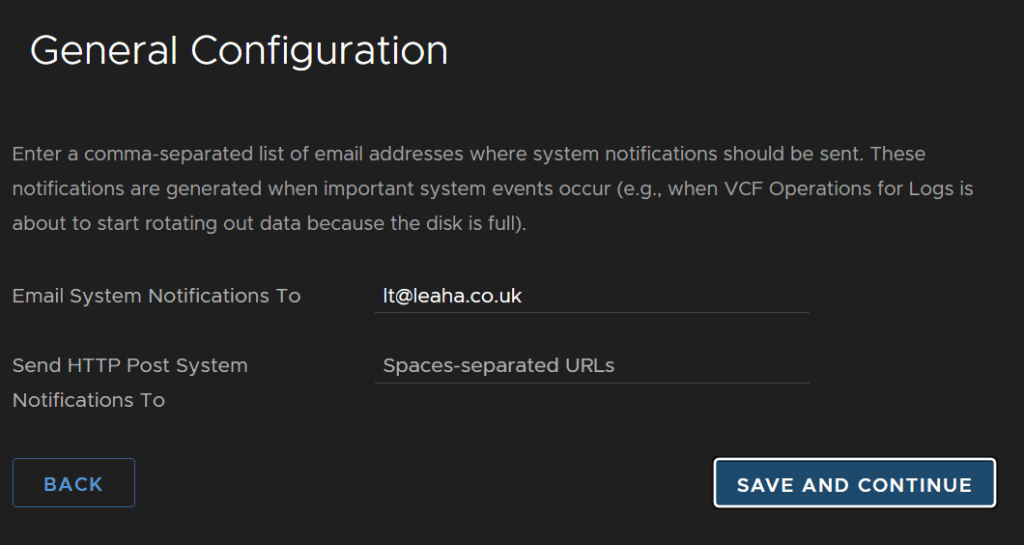
Add an email for alerts to go to and optionally you can add an address for HTTP notifications, but I left it blank, then click Save And Continue
Now we need to setup time, we can sync with the host, or point it to an NTP server, which I recommend, this can be external, like time.cloudflare.com or an internal one
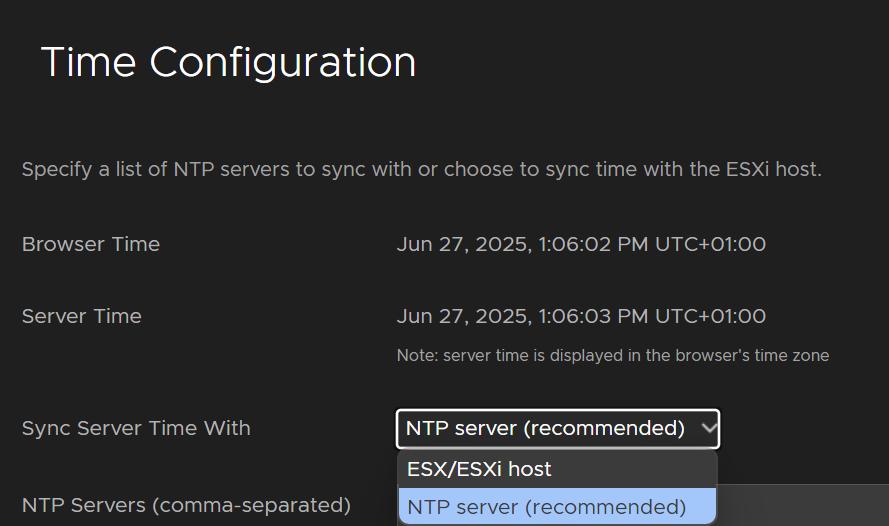
If you selected NTP server, enter the address and click Test
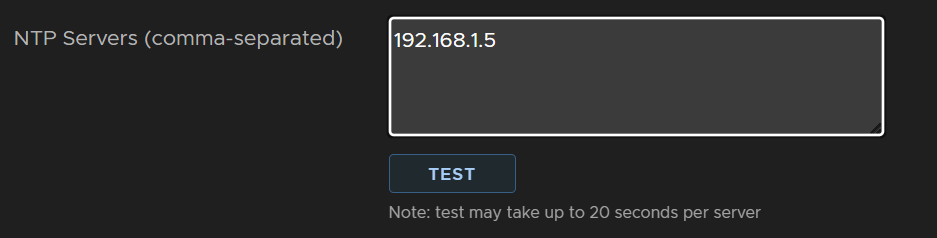
When it succeeds click Save And Continue

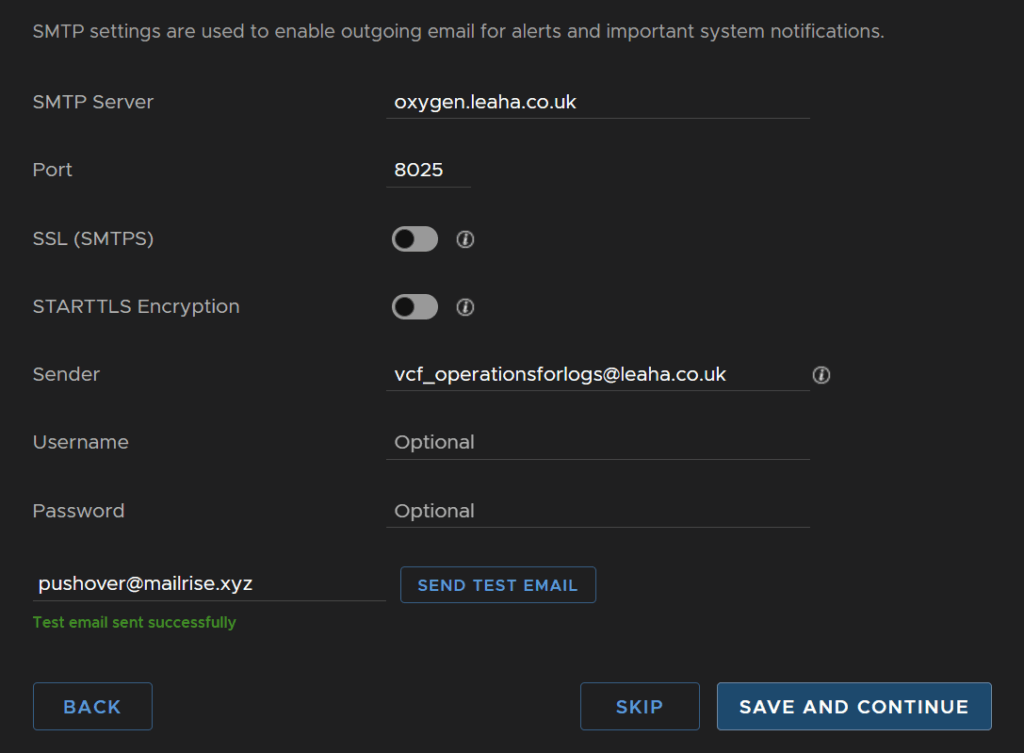
Next you can setup SMTP, this will vary on your setup, but add the SMTP server address, the port number, normally this is 587 for SSL, SSL will want enabling for production systems, add a sender address, and you may need a username/password, then you can add an address to send to and click Send Test Email
My lab doesnt use SSL or authentication as its just a home lab
When you are happy click Save And Continue, this should also be an optional step
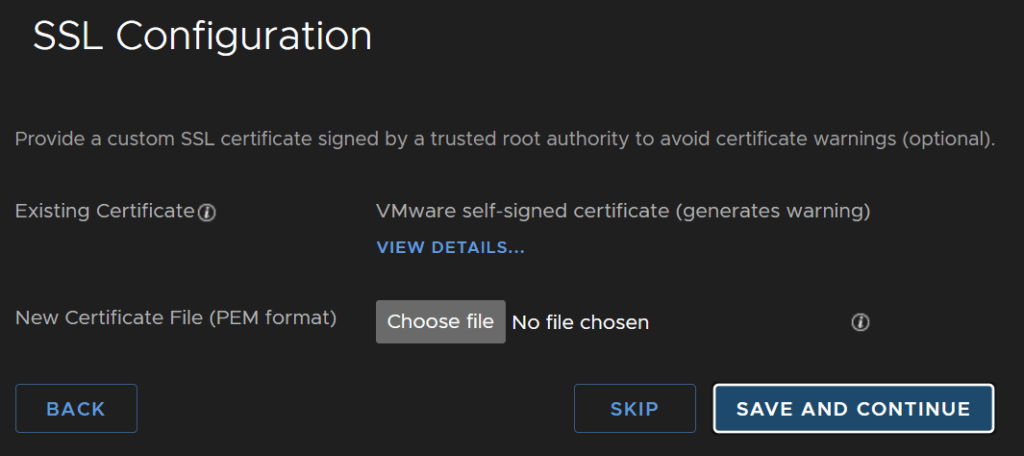
For SSL you can use the self signed certificate which I will be using and is fine for production, you can alternatively upload your own PEM format cert if you have CA, then click Save And Continue
Then click Finish
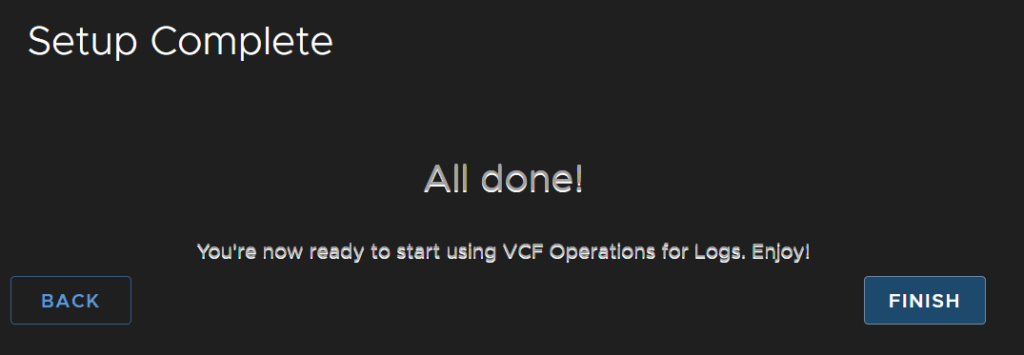
1.8.3 – Ingestion
As this appliance needs reconfiguring we wont be going over everything, just vSphere and VCF Ops integration
More info can be found in my VVF guide for Aria here
Logs can be received in a number of ways, like Aria Ops For Logs 8.18
We can integrate with vSphere, agents and syslog, click Configure vSphere Integration
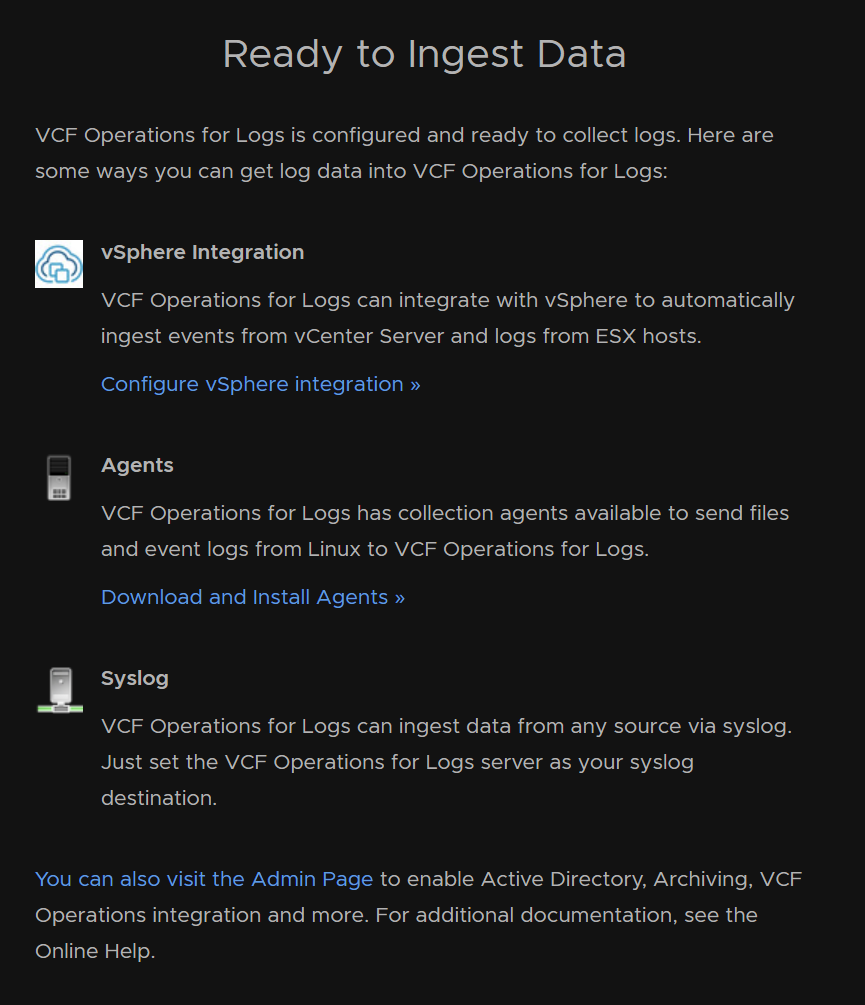
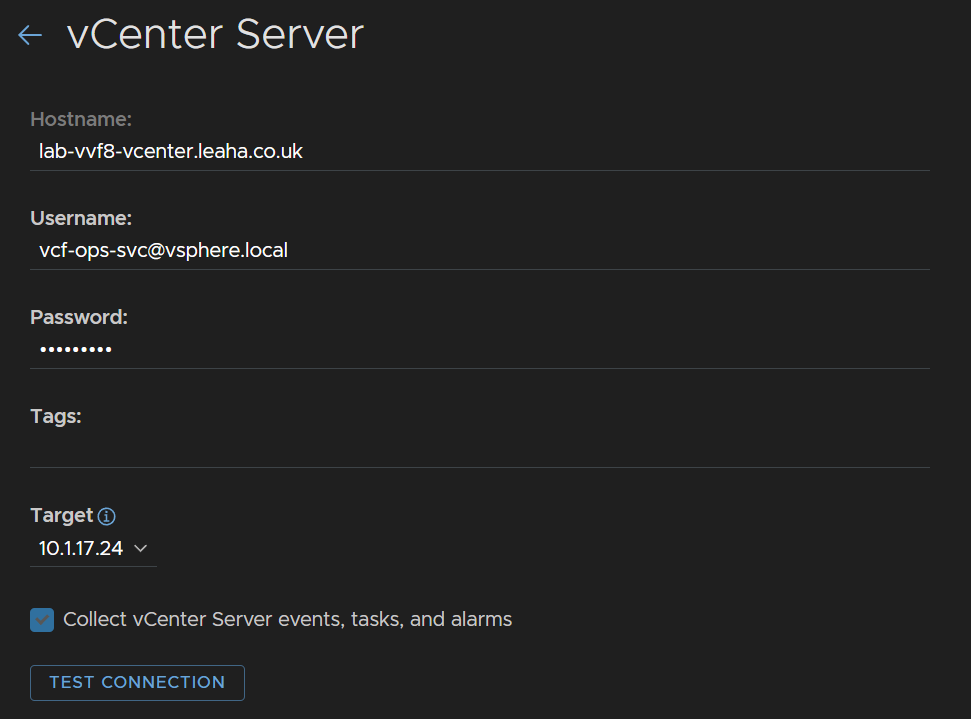
Then click Add vCenter Server

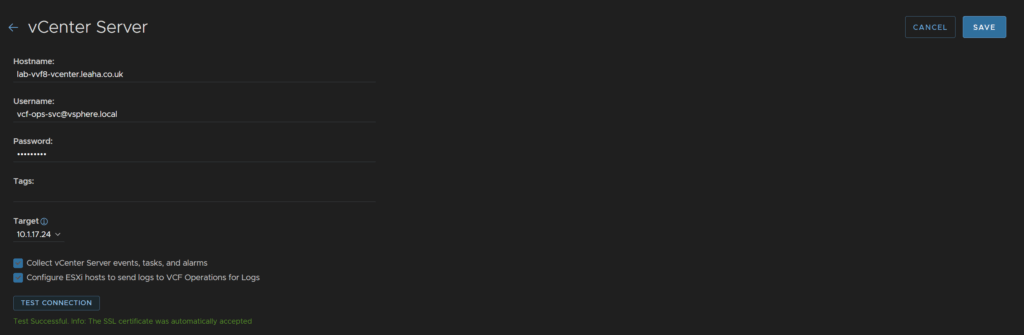
Add the vCenter FQDN, a vSphere admin account, its better to be a service account though, ensure both boxes are checked then click Test Connection
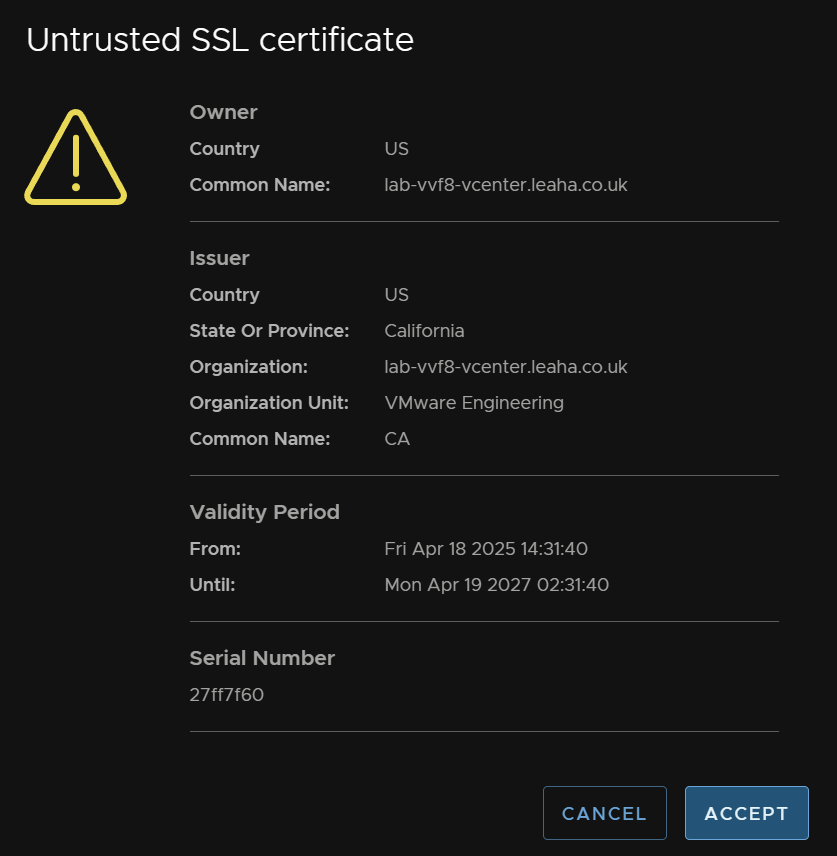
Click Accept on the SSL certificate
When thats successful, click Save in the top right
1.9 – Post Upgrade Steps
1.9.1 – VCF Ops Plugin
Now we have everything upgraded we need to make sur ethe plugin is added to vCenter properly
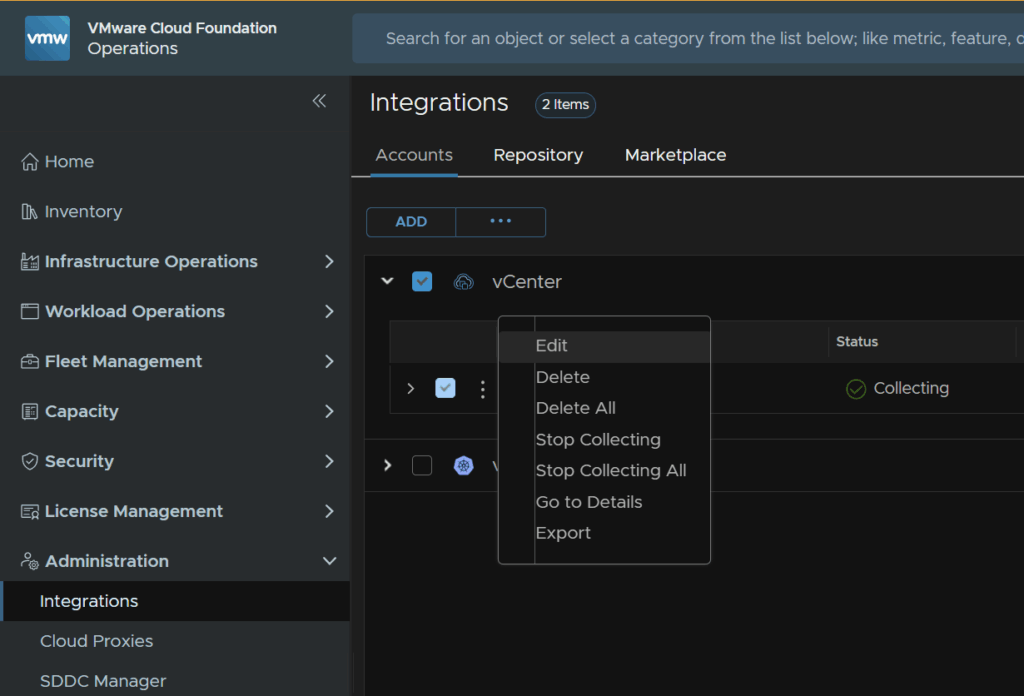
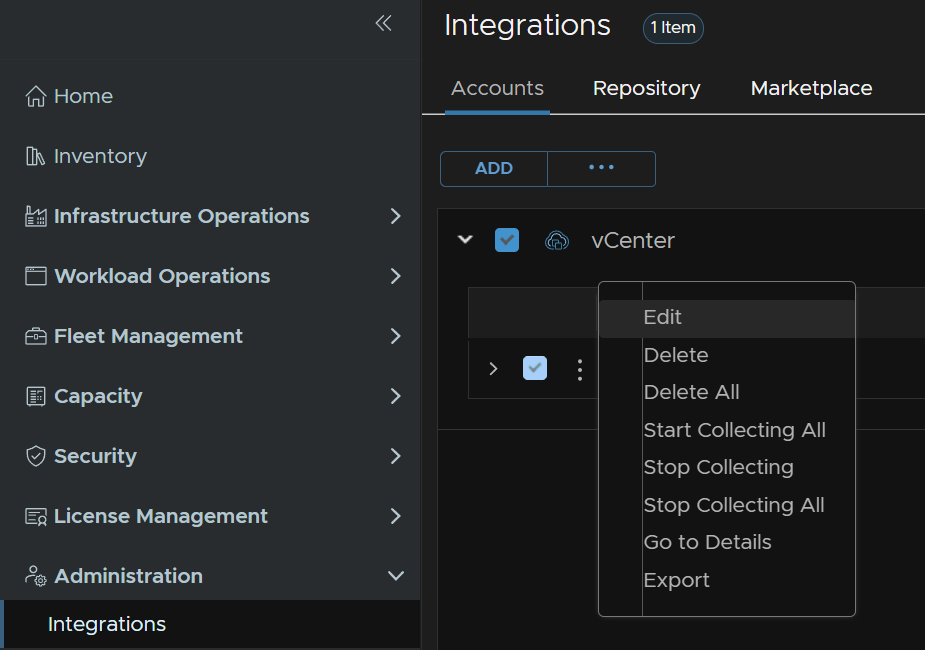
Head to Administration/Integrations, click the drop down on vCenter, click the three dots on your vCenter, as this should be setup from when Aria Operations was deployed, and click Edit
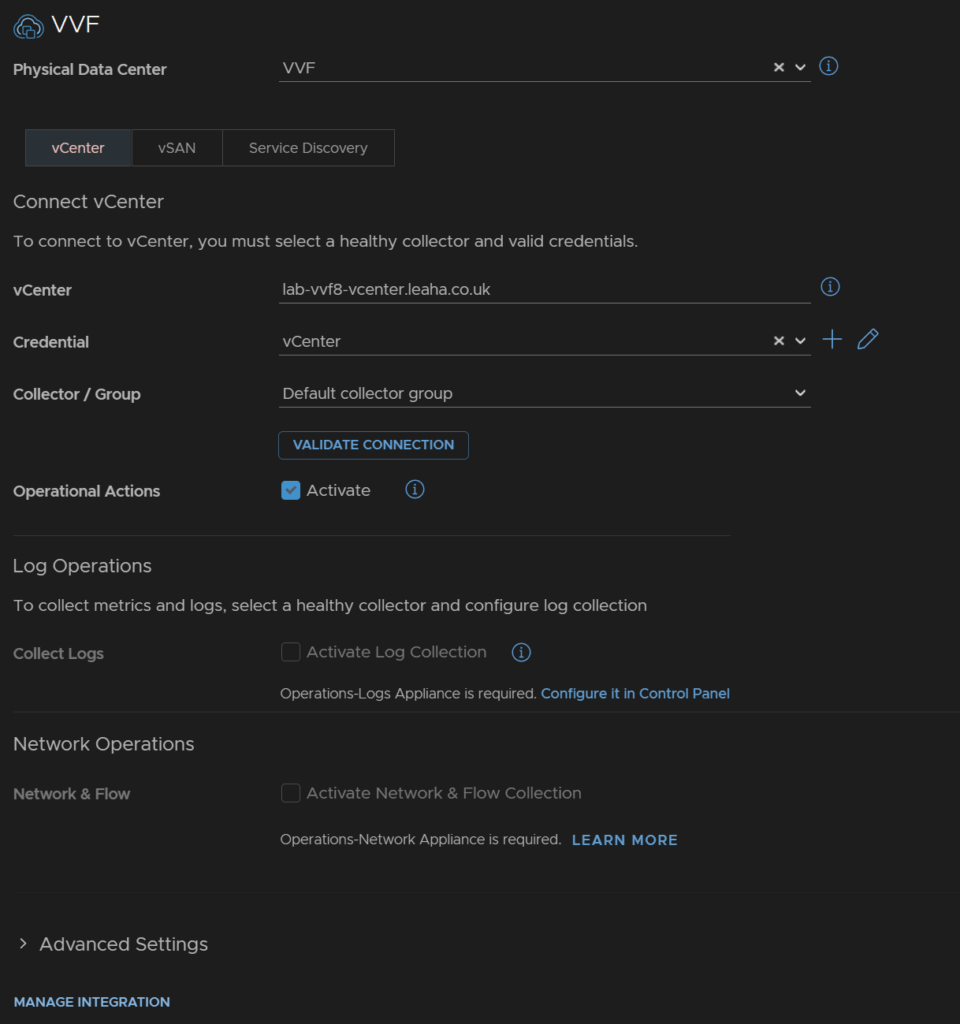
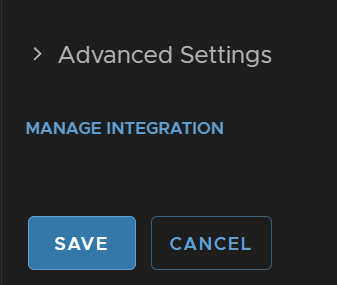
Scroll down to the bottom and click manage Integration
Make sure this toggle is enabled and click Save
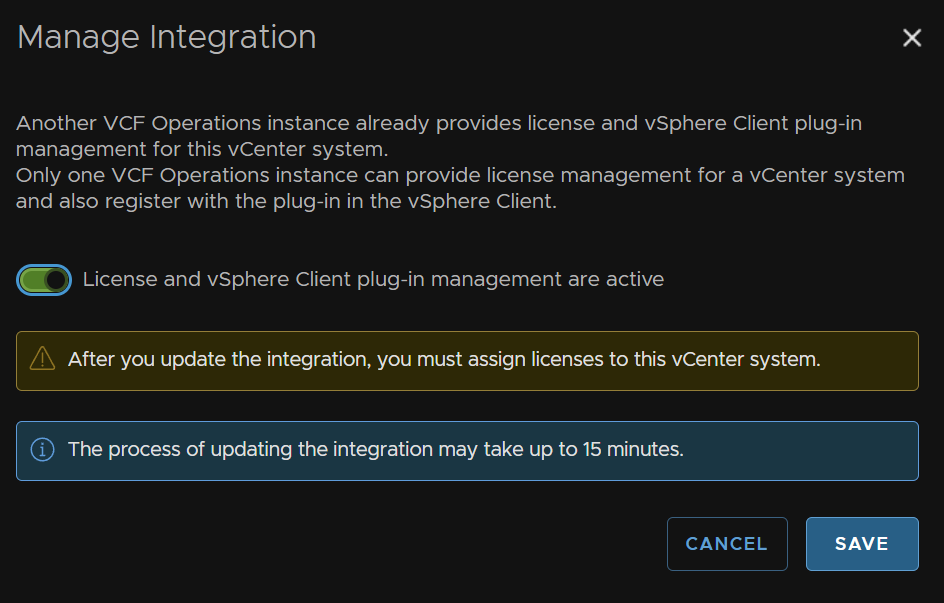
Then click Save again at the bottom
1.9.2 – vCLS Retreat Mode
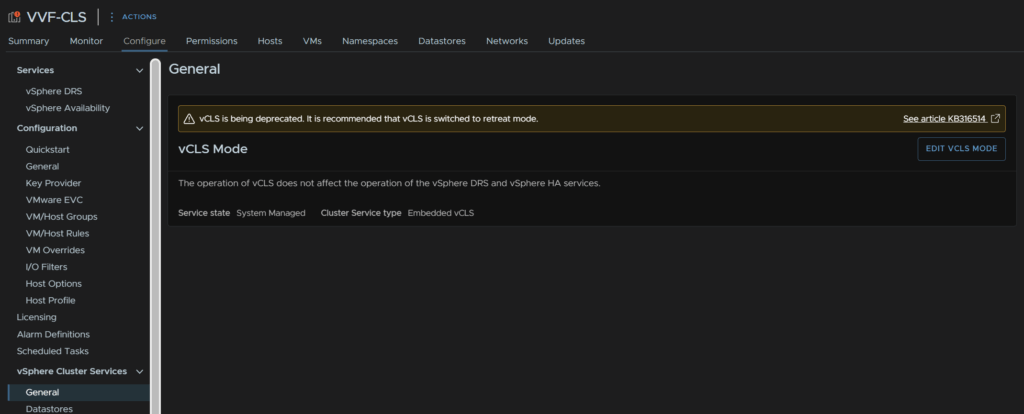
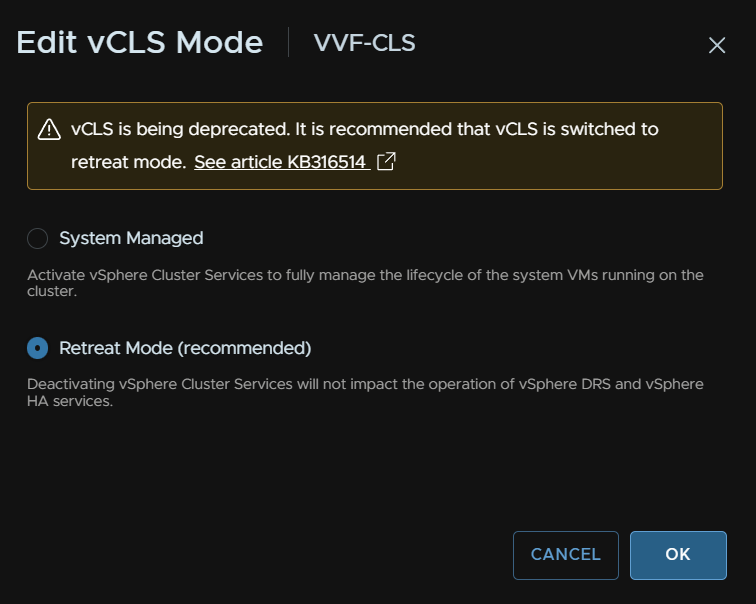
In vCenter 9 vCLS is deprecated and its recommended to put this into retreat mode, this will not effect DRS functionality which used to use this
To do this, click your cluster, then click configure/vSphere Cluster Services and click Edit vCLS Mode
Select Retreat Mode and click ok
1.9.3 – Adding VCF Logs To VCF Ops
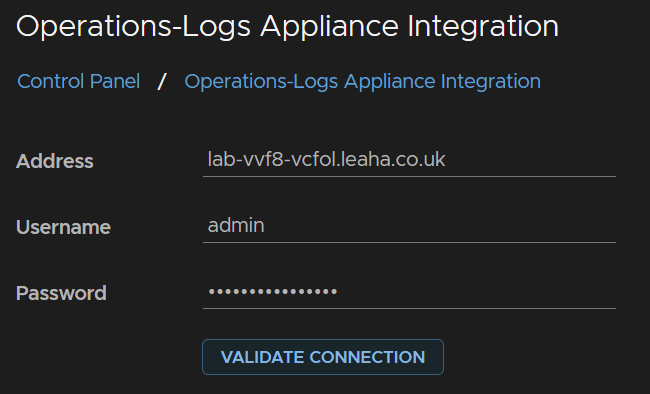
From VCF Ops click Administration/Control Panel/ Operations-Log Appliance Integration
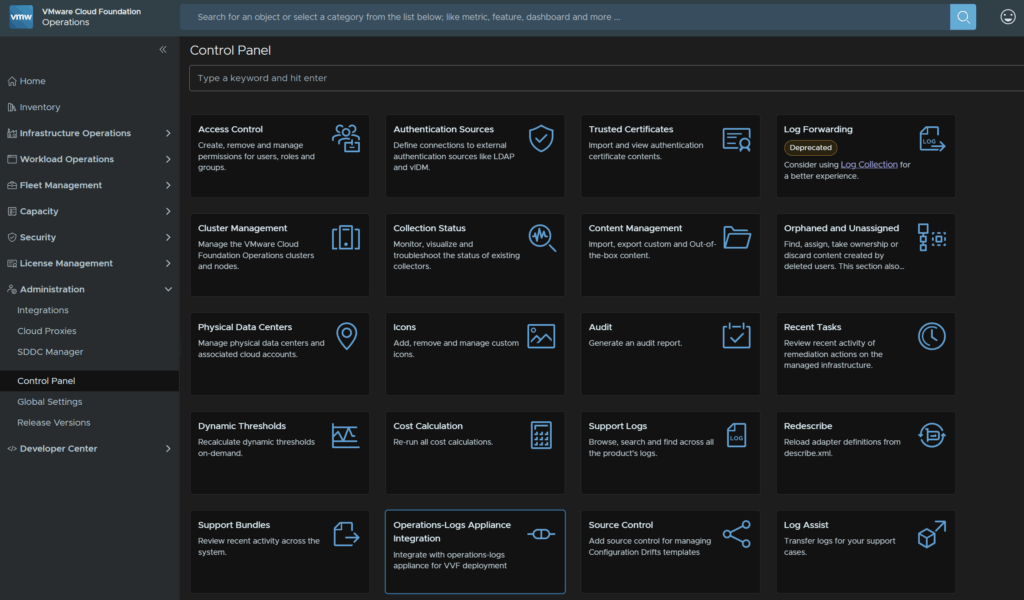
Add the VCF Ops For Logs FQDN and admin credentials then click Validate Connection
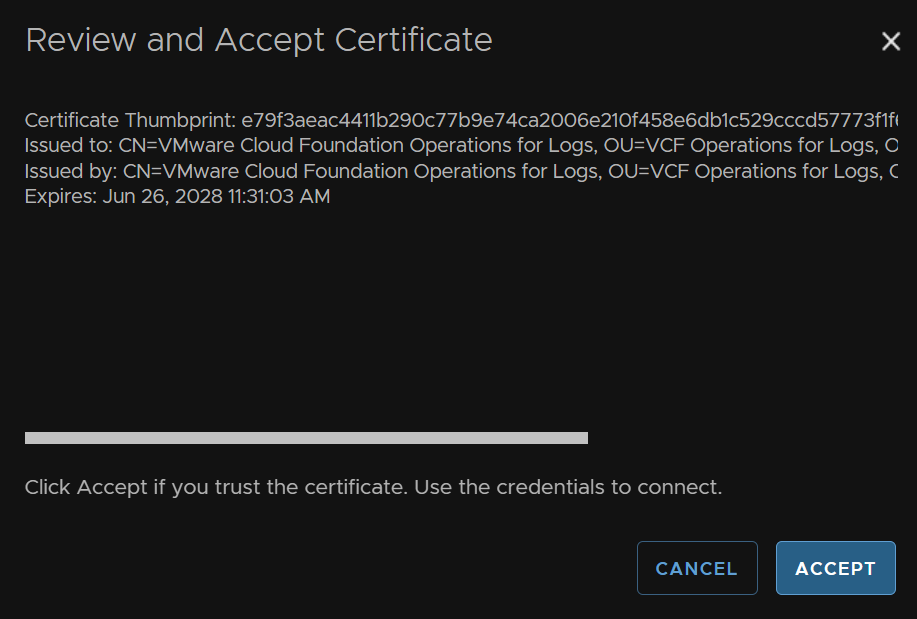
Click Accept on the certificate
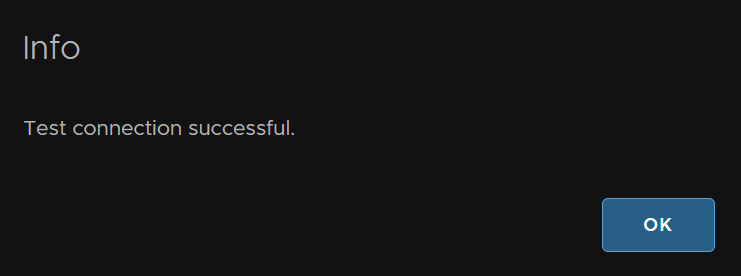
When thats successful click ok
Then Save in the bottom left

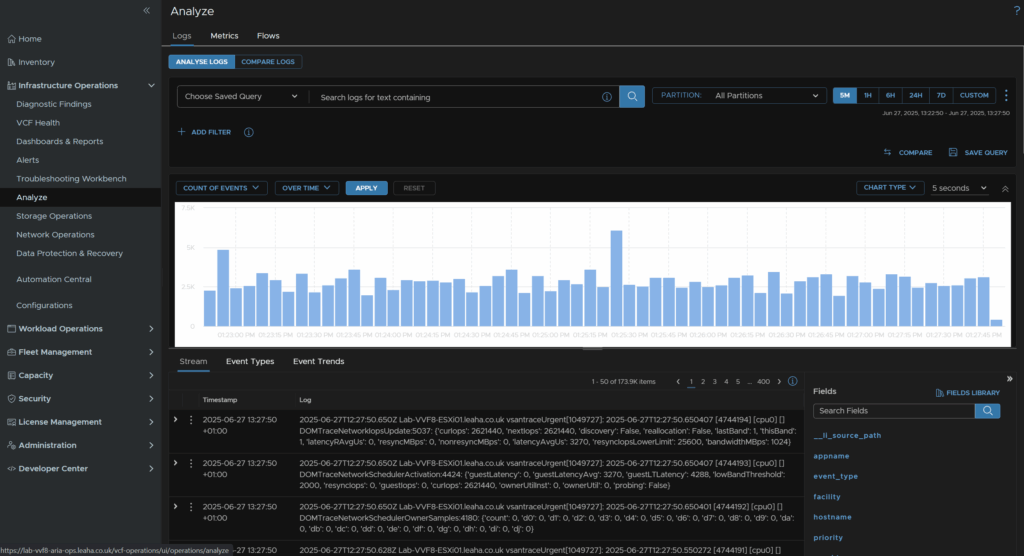
You will now notice Infrastructure Operations/Analyze is populated and we can search and view logs from VCF Ops
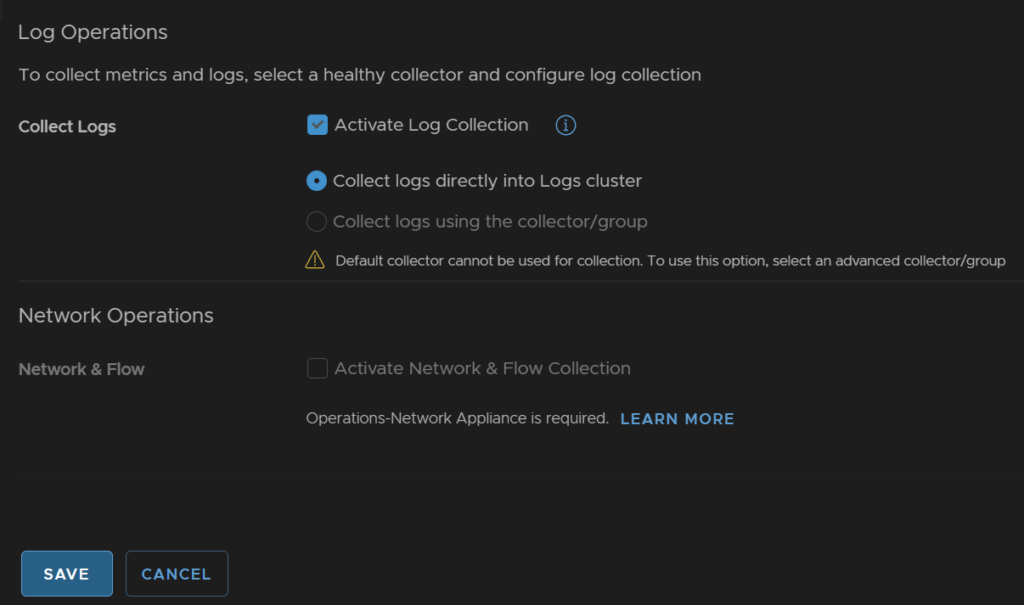
Lastly, to make sure we have all the logs, head to Administration/Integrations, expand vCenter, and click the three dots then Edit on your vCenter instance
Check Activate Log Collection, we can collect the direct to the logs collector, and click Save
1.9.4 – Licensing
Licensing is no longer handled by Keys in vCenter, rather through VCF Ops and the Broadcom Business Services
If you have an active subscription then youre licenses should show up here
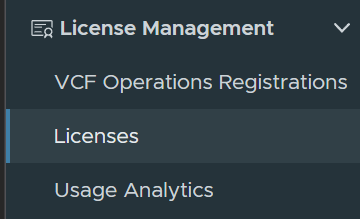
Under License Management/Licenses
To set this up click License Management/Registration
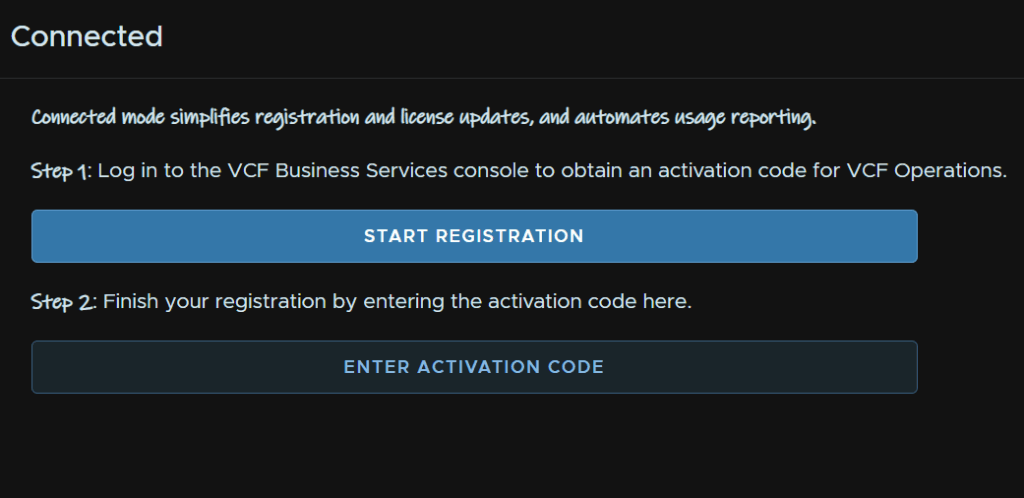
Now we will assume you have internet connectivity and will do a connected registration, on the Connected Widget, click Start Registration
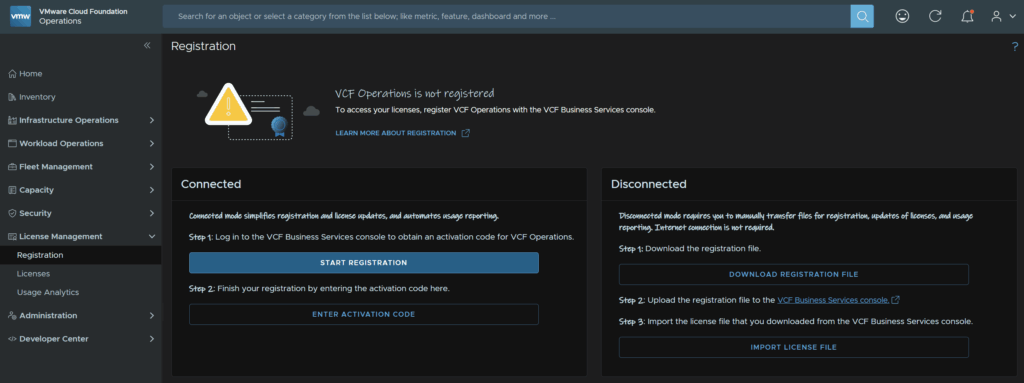
This will prompt you to log into the Broadcom portal, you will need licensing permissions in your Broadcom portal for your organisation
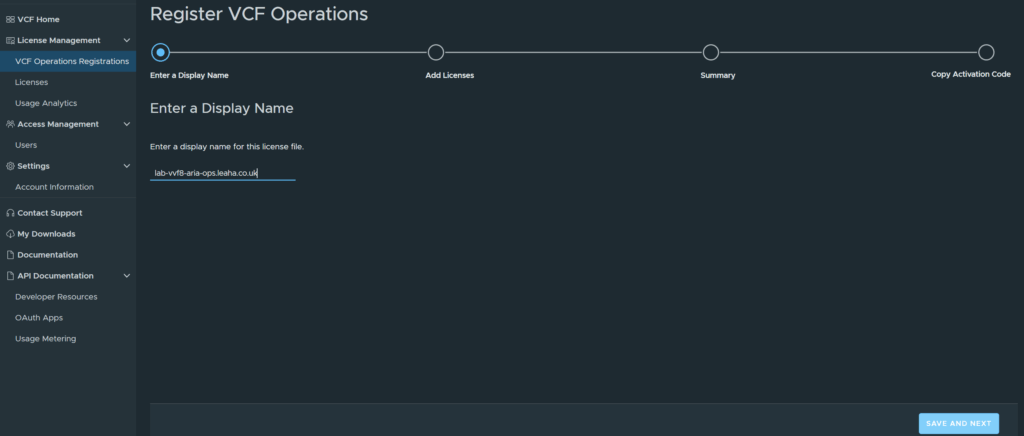
On the default loaded page, enter a display name for the license and click Save And Next in the bottom right
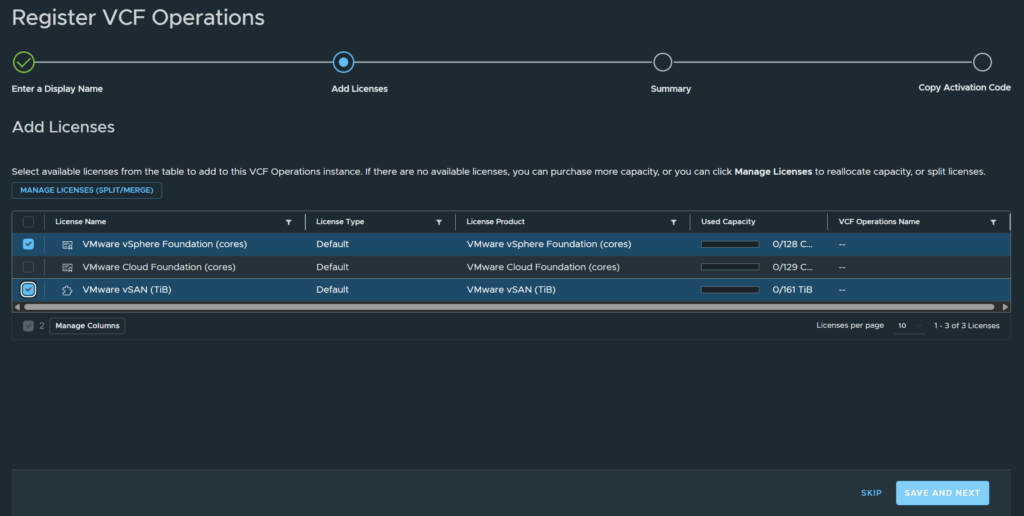
Select your license, as I have VCF and VVF licenses with my NFR I have both, but am selecting VVF for this deployment, then click Save And Next
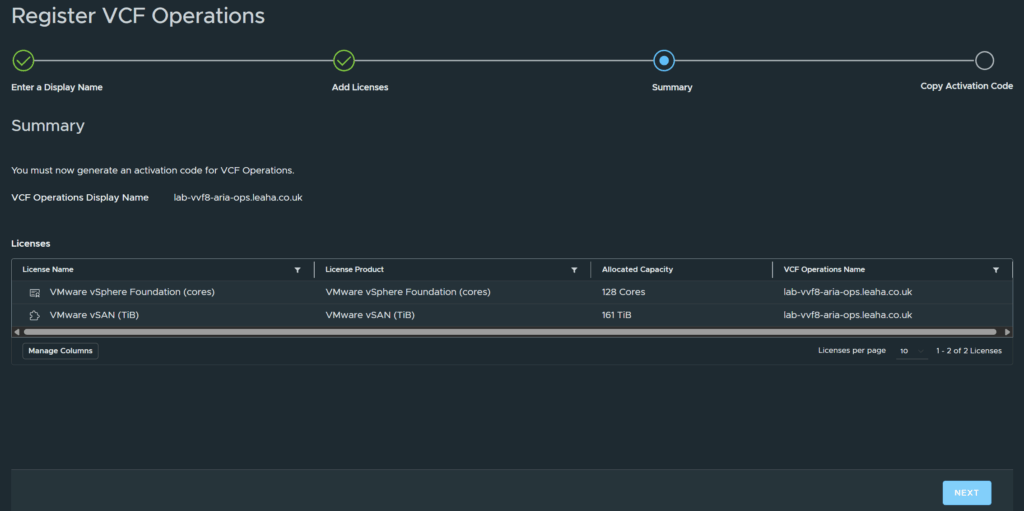
Then click Next
Click Copy next to the activation code
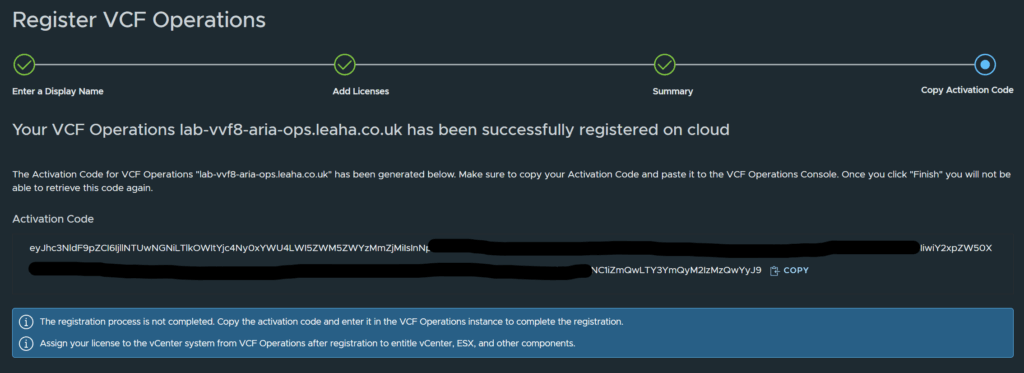
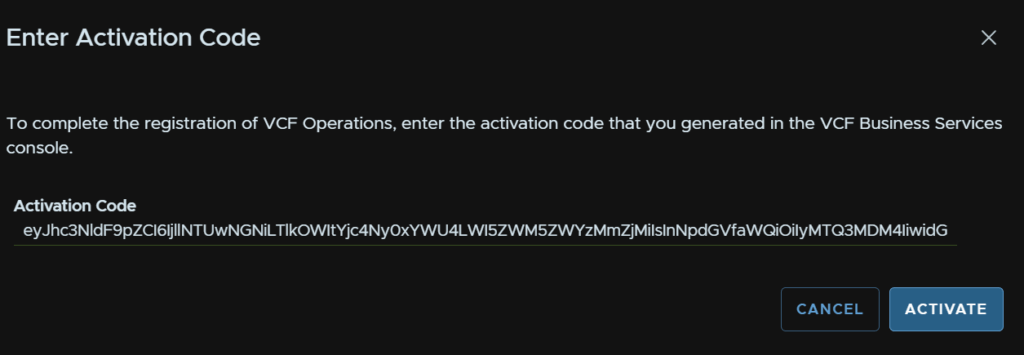
In VCF Ops click Enter Activation Code
Then click Activate
Now we can head to License Management/Licenses, click our vCenter in VCF Ops, mine is called VVF, and click Assign Primary License
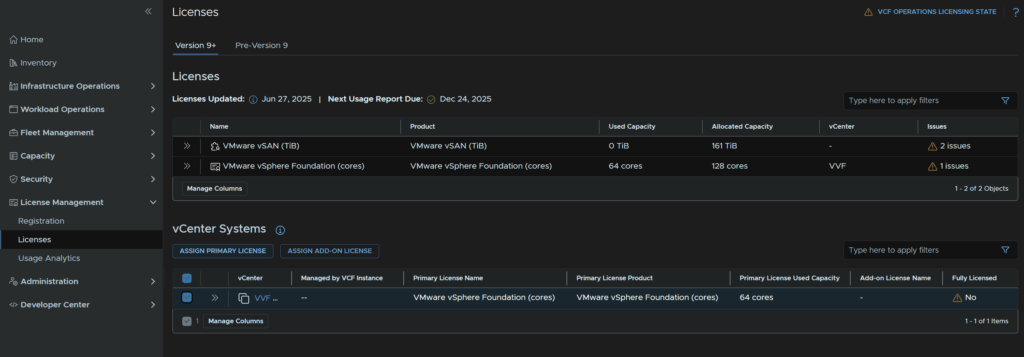
Select our license and click Assign

Wait for it to be applied

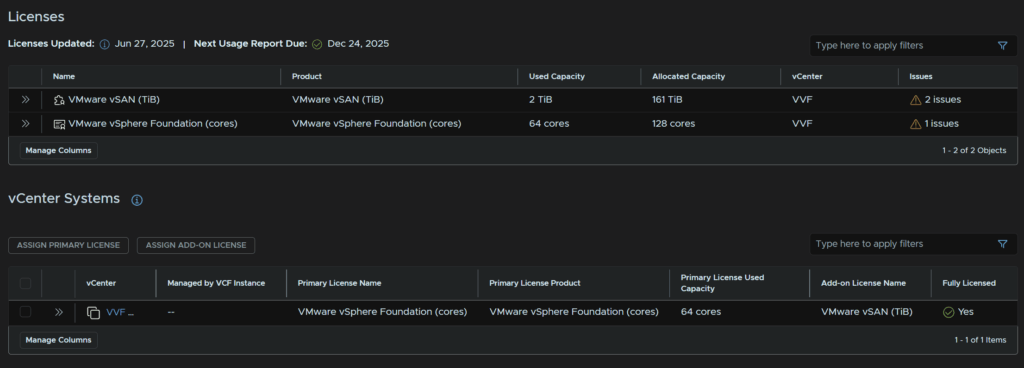
I also need to license vSAN, so repeat but click Assign Add-On License

Select vSAN and click Assign

We can then see our cluster is fully licensed and we can see the usage
2 – Without VCF Operations
2.1 – vCenter
Before we start, vCenter 9 only supports ESX 8 or higher, so ensure there are no ESX 7 hosts in your cluster
Now we need to upgrade the vCenter, for this we need the vCenter ISO
Click My Downloads/VMware vSphere Foundation
Expand VVF 9 and click the latest release
Click View Group on VMware vCenter
And download this
Then, log into the VAMI portal on
https://fqdn:5480
And check you have a config backup taken with the last 24 hours, you should have a schedule backing this up daily, if not take a manual backup to an SMB/NFS/SFTP server
You can find this under the Backup tab on the left
Next, find the VM, now for my lab, the vCenter is external, which makes this a little easier, but for most environments its not
In vSphere, find the vCenter VM, and note the ESXi host its running on
In related objects, it shows its on glacier.leaha.co.uk
Shut down the vCenter and log into the ESXi host directly
In ESXi, head to Virtual Machines, find the vCenter, right click it and click Snapshots/Manage Snapshots
Click Take Snapshot
Give it a name and click Take Snapshot
Then click Close
Then click Power On
Wait until the vCenter has booted and you can log into the UI before continuing
When you are back in, click the cluster hosting the vCenters, and click Configure/Services/vSphere DRS and click Edit
Change the automation level to Partially Automated, and click ok
Its worth noting if your vCenter is external like mine this also needs to be done on the cluster housing the vCenter
Now we need to upload the ISO to the datastore, as my vCenter is currently externally to the cluster, I need to add the ISO to the vCenter thats managing it, we will move it into the cluster later, as this is a requirement. click the datastore tab, on the left, select the datastore and click New Folder
Give it a name and click ok
Select the new folder and click New Folder
Then double click the ISO
You will likely see this error, click Details
Click the host URL in the middle
Click Advanced and click proceed to dismiss the self signed certificate
Then re upload the ISO
Once thats done edit the vCenter VM
Expand the DVD drive and click the drop down and select Datastore ISO file
Click your datastore, mine is the WD-Blue
Click the folder, select the ISO and click ok
Click the Connected Check box and click ok
Back in the VCenter UI for the vCenter we want to upgrade, click the vCenter in the top left, then click Updates/vCenter Server/Upgrade and we can see the current plugin file and the ISO file version, click Next
Next we need to check we have a config backup in the last 24 hours, this should be setup as a schedule, we are checking the end time on the right, when thats ok check the box to agree you have backed up the vCenter and click Next
Then click Upgrade plugin
When thats installed refresh your webpage, now click Run Prechecks
When thats green, click Next
Before we configure the target appliance, and we will configure this to be inside the cluster to deal with that issue, we do need a port group for this, we need a port group on the same VLAN as the vCenter with an ephemeral binding type
Click Configure Target Appliance
Accept the EULA and click Next
Opt in or out of the CEIP and click Next
Input the FQDN of the ESXi host managing the vCenter currently, and the root credentials then click View Certificate
Scroll to the bottom, accept the certificate and click Next
Now select the radio button to deploy the new vCenter to a new location, as we are moving the new vCenter inside the cluster, and enter the FQDN of an ESXi host in the cluster, add its root credentials and click View Certificate
Accept the certificate and click Next
Enter the name of the VM for the new vCenter and assign it a temporary root password
Select the size to match your current size, mine is Tiny so I used that
Tiny is fine for a lab, but small is the smallest that should be used for production, so if you happen to have a tiny one, select small
Then click Next
Select the datastore, check Enable Think Disk Mode and click Next
Change the network config to manual, select the ephemeral port group
It is worth noting, non ephemeral groups were listed, normally vCenter wont deploy to them so I am unsure if this is a change, but I couldnt see it on the release notes
Select the IP version, likely IPv4, IP assignment to static, leave FQDN blank, add a temp IP thats not in use, add the subnet prefix or mask, default gateway and comma separated DNS servers, then click Next
Once you are happy click Finish
Then click Next
Now we need to click Start Upgrade
On the swich over drop down select Automated so it will just switch them over, you can schedule it over night if you needed as well
Its worth noting, automated switch over requires vCenter 8U3 or higher, so if you are on 8-8U2 use manual switch over
Then click Start Upgrade
The Prepare Upgrade stage will take quite a while, but when it switches over you’ll then get this page
When its done click Open vSphere Client
When you are done, click the Cluster then click Configure/Services/vSphere DRS and click Edit on the right
Change this to Fully Automated and click ok
2.2 – Firmware
2.2.1 – Preparation
First, take a backup of ESXi, if the host is an ESXi host on the off chance something goes wrong, we’ll need SSH enabling for this
Select the host and head to Configure/System/Services, click SSH and then click Start, we can leave it enabled as when the host is rebooted, it will stay disabled on reboot
SSH into the host and run
vim-cmd hostsvc/firmware/sync_config
vim-cmd hostsvc/firmware/backup_config
This will give an out put of a URL like this
Take the link and edit the ‘*’ for the hostname/IP
So my URL would be
http://lab-vvf8-esxi01/downloads/52d067b1-1d69-2bd2-318b-b90ca6f0a521/configBundle-Lab-VVF8-ESXi01.leaha.co.uk.tgz
If you have an DRS rules that prevent hosts from being put into maintenance, then you may need to disable them
Then place the host thats having the firmware update in maintenance mode to do this right click the host and click Maintenance Mode/Enter Maintenance Mode
For vSAN click Go To Pre Check, this wont be available on a cluster with out vSAN
Then click Pre Check
Ensure the check says the host can enter maintenance mode, there may be errors, but thats fine, then click Enter Maintenance Mode
Ensure the box to migrate powered off and suspended VMs is checked and click ok
For Non vSAN it will just look like this, also ensure the box is checked and click ok
If you have Veeam replication jobs running to DR, this shouldnt cause any issues we powered off VMs are also moved, but you can always wait for running jobs to finish and disable them while patching
2.2.2 – Dell
In OpenManage go to Configuration/Firmware/Driver Compliance
Click Catalog Management
Select your catalog and Check For Update
Ensure any host being updated is in maintenance mode with no active VMs running as reboots are needed for most firmware updates from section 7.1
Go to Devices
Find your host in the list and click it, the IPs are for the iDRAC not the host
Going into Firmware/Drivers we can select the base line for this host using the drop down, ESXi01 and see whats available
Fist, we want to do the iDRAC, so make sure only that is selected and click update like this
Then click Update
You can check running jobs from this icon in the right of OpenManage
This can take 15-20 mins to update, when its done
Then we want to check the CPLD version, OpenManage will not pick up any updates for this, but it will list the version at the bottom
Here we can see my R660 has CPLD 1.2.6
To check the active version Google ‘Dell <Server-Name> Drivers’ and you should see the support page as the first link
Change the OS to Not Applicable, and search for ‘CPLD’, here we can se the latest is 1.2.6, so we dont have one to do
However, if you did have a newer version, you need to log into the iDRAC
This is under Maintenance/System Update, you can upload the CPLD file here by clicking Choose File
Then click Upload
Select the package and click Install And Reboot
In OME, we repeat for the BIOS and click Update
This will reboot the host
Then select the rest and click Update
2.2.3 – HPE
Ensure any host being updated is in maintenance mode with no active VMs running as reboots are needed for most firmware updates from section 7.1
We then need the HPE SPP, we can find this here
We can also search for the server generation and click the link to it
Eg
Click Obtain Software
And sign in with your HPE account
Open the web console in iLO, click the CD icon then CD/DVD/Local *.iso File
And double click the ISO file
Reboot the host OS, momentary press will do this from the left mot icon in the web console, or you can reboot the server from the guest OS
Press F11 here to enter the one time boot menu
Select the iLO virtual Media
Then automatic updates
This can often take ~90 mins to complete and do not interrupt the server, when its done, your host OS will be booted
2.3 – ESX
For updating ESX, this assumes you have updated your vCenter with your download token using the script, and that you already have cluster images, you may need to re add the token URLs with the script post upgrade
I have an article on both the VMware depot changes, here, and migrating to cluster images, which is in the VVF 8 patching guide on the ESXi section here
We’ll need to sync the image library, in vSphere, click the three lines in the top left and click Lifecycle Manager
Click Actions/Sync Updates
Now I encountered this error, this is a known issue with vCenter 9.0.0.0, the GA release when upgrading from vCenter 8, it should be fixed in a future patch, Broadcom have an article outlining it here
Download patch definitions task failed while syncing depots. Error: ‘integrity.fault.VcIntegrityFault: VMware vSphere Lifecycle Manager had an unknown error. Check the events and log files for details
If you do not get this then please skip down to the part where syncing lifecycle manager has pulled the ESXi 9 images, as this will be patched
First check the host the vCenter is on, we can see this in the VM under the Related Objects box, mine is hist two, then shut it down with the red stop button
Log into that host, select the VM, right click it, and click Snapshots/Take Snapshot
Name the snapshot and click Take Snapshot
Now power the VM up
When the UI is available and all services have started SSH into the vCenter and use the following command to switch to the bash shell with
shell
Then run
service-control --stop updatemgrChange to the updatemgr user with
su updatemgr -s /bin/bashThen run
psql -U vumuser -d VCDB -c "UPDATE vci_updates set deleted = 0, hidden = 0 where meta_uid like 'ESXi7%' or meta_uid like 'esxi7%' or meta_uid like 'ESXi_7%' or meta_uid like 'esxi_7%'; DELETE FROM vci_updates where id not in (select update_id from vci_update_packages);"It will say permission denied, you can ignore this
It should look like this
Log out of the updatemgr user with
exitAnd restart the service with
service-control --start updatemgrThe service should generate a sync task, if not manually start one from lifecycle Manager like we did earlier
Once thats run and refreshed we can see ESX 9 now shows up
Now thats fixed we can select our cluster, then Updates/Hosts/Images and click Edit on the image
Give the image a name, click the ESX version from down and select ESX 9
Click the Edit Vendor Addon button
And select your server addon and click Select, I am using Dell here
Eg for HPE
Then click Validate
Once the image is valid click Save
Now click Run Pre Check at in the bottom box for Image Compliance
Check any issues you have, I have a hardware warning as its a virtual lab, so I will ignore that
When you are happy, click Remediate All
Then Start Remediation
Then just wait for all the hosts to be remediated, it will place hosts into maintenance mode and move VMs onto other hosts for you
When its done, all hosts will show as compliant
2.4 – vSAN
2.4.1 – Disk Format
After the ESX upgrade the vSAN disk format will need upgrading, select the cluster then head to configure/vSAN/Services then in the top left, click Pre-Check Upgrade
If it says Ready To Upgrade, click Upgrade
Then click Upgrade
We’ll then get a progress bar we can monitor
When its done it will look like this
2.4.2 – File Services
Select the cluster and head to Configure/vSAN/Services then scroll down to the File Service tab and click Edit/Check Upgrade
Now this should pick up the latest version from Broadcom’s website but oddly mine wouldnt, so we will be doing this manually from the Broadcom portal
Click My Downloads/VMware vSphere Foundation
Expand VVF 9 and click the latest release
Under VMware vSAN, click View Group
Click Drivers And Tools
Then download all the files here
In the vSphere console, click Browse
And select all the files you just downloaded, and click Open
Then click Upgrade
Wait for the progress bar to complete
When thats done it will replace all the file service VMs
2.5 – Tanzu/Supervisor
2.5.1 – Namespaces/Supervisor
This is bundled with vCenter, the namespace will be updated automatically when vCenter is patched
Now click the three lines in vSphere and click Supervisor Management
Click Updates
Here we can see the namespace update, I had 0.1.11, and since the vCenter update, the namespace is version 9.0.0.0
We can also see the Kubernetes release, with this namespace version we get 1.30.5
We had 1.29.7, the namespace supports the current version and two previous versions
At the bottom we can see the supervisor, as this is now decoupled from vCenter we can update this independently
To apply the latest Kubernetes release, click the namespace and click Apply Updates
These will be applied to the hosts and the supervisor VMs
And click proceed
Ensure all the pre checks run fine, we will get a feature compatibility degraded waring, we have done ESXi, and in my lab I tested after vSAN but still got this, so I am not 100% whats degraded and the VCF 9 supervisor documentation doesnt seem to mention anything
As my lab has a couple of containers I will be upgrading, for production environments, I would suggest logging a call with Broadcom to clarify what this means to ensure production workloads arent effected
Click proceed
And Finish
This will replace the Supervisor VMs as part of the update process, which we can see here
Plugin will then be redeployed, this may happen a few times as new supervisor control plane VMs are created
Once the control plane nodes are done, there will still be three, and they will likely have different numbers
Then all hosts are put into maintenance mode and the new Kubernetes release is installed to the host, once thats done the upgrade is finished
2.5.2 – Supervisor Services
Now we need to update the built in supervisor services, the stock ones are Tanzu Kubernetes Grid Service and Velero vSphere Operator
Any additional services that have updates will need to be applied separately
We can get to them by clicking the three lines in the top left of vSphere and clicking Supervisor Management
Then head to Services, we can click Active Versions within the service widget, where it says Active Versions 2, to see what versions we have, there are now two, as they new ones are added, but not activated with the supervisor update
Looking at Velero, we can see 1.8 has been added but had no installed supervisors
So, to upgrade the services click Actions on a service, then Manage Service
Select your supervisor, and make sure the Install Version is the latest, for me thats 1.8, and click Next
This will run a compatibility check
When thats run click Finish
Give it 5-10 mins to start up all the new pods
We can see the pod status from the namespace on the left as well, so you may see some errors while pods are in pending
Now we can remove the old versions, this is optional, but you would want to use the new versions so we dont want someone accidentally using or configuring the old ones
Back in workload Management/Services, on the service click Actions/Manage Versions
Select the old version and click Deactivate
Then we can select it again and click Delete
Then click Close
Velero 1.8 is automatically available but the consumption interface has version 9.0.0, from 1.0.2, and the vSphere Kubernetes Service at 3.4+v1.33 are not
These we can download from the Broadcom portal, and will be the new way to check and get updates to these services
To get them log into the Broadcom portal, click Downloads and there Here, where it says Free Software Downloads Available HERE
Scroll to the bottom and click vSphere Supervisor Services
Here we can select the latest VKS release, 3.4+v1.33
And download the Yaml
Repeat for the Local Consumption Interface
And download this Yaml
Now, for the consumption interface they have changed the identifier, so we cant add a new version, we need to deactivate it, remove the service and re set it up
From Supervisor Management/Services, on the Consumption Interface widget click Actions/Delete
Click Confirm to deactivate it
Then click Confirm, this will uninstall it from all supervisors
Select the supervisor and click Confirm to delete the service
Then click Delete
You’ll notice its now gone entirely
Then click Add in the Add New Service Widget
Click Upload
Select the new YAML
And click Finish
Now its back, on its widget click Actions/Manage Service
Select the supervisor and click Next
Then click Finish
Click the namespace, svc-cci-ns, and wait for the pods to run, this will take a little while
We should then see the plugin get deployed
And we can access this like before, though it now has its own UI, so you dont have to go through vSphere, its the same interface though
Back in supervisor management, on the Kubernetes Services widget click Actions/Add New Version
Click Upload
Double click the corresponding Yaml
Then click Finish
Now click Actions/Manage Service
Select the supervisor, and make sure the install version is the new 3.4+v1.33 and click Next
Then click Finish
From the namespace you’ll see the pods go between running and pending, but when they are all running its been successful
We dont need to remove the old versions here as its managed by vCenter, so we cant
2.6 – VVF Builder
2.6.1 – Deployment
Now we have the core systems upgraded we can deploy the SDDC Manager into the environment as this is new
First, lets download it from the Broadcom portal
Click My Downloads/VMware vSphere Foundation
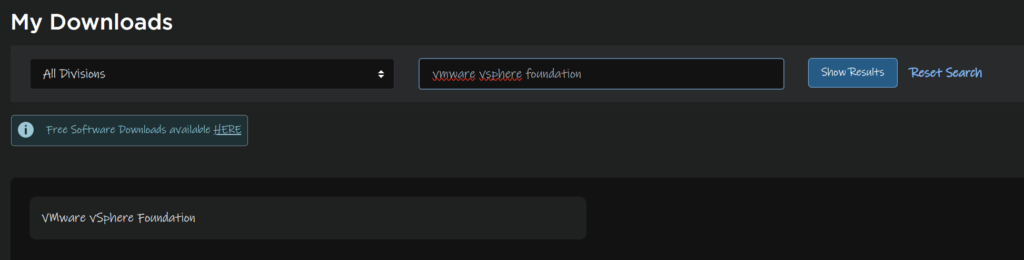
Expand VVF 9 and click the latest release

Click on the Cloud Foundation Installer and click View Group

And download the appliance

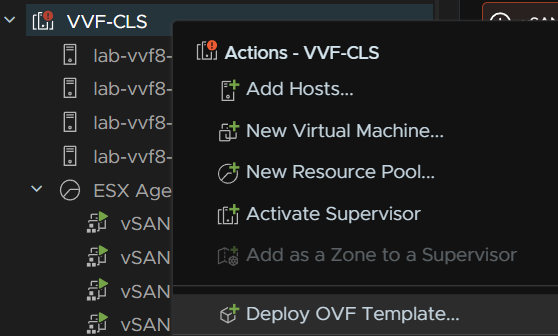
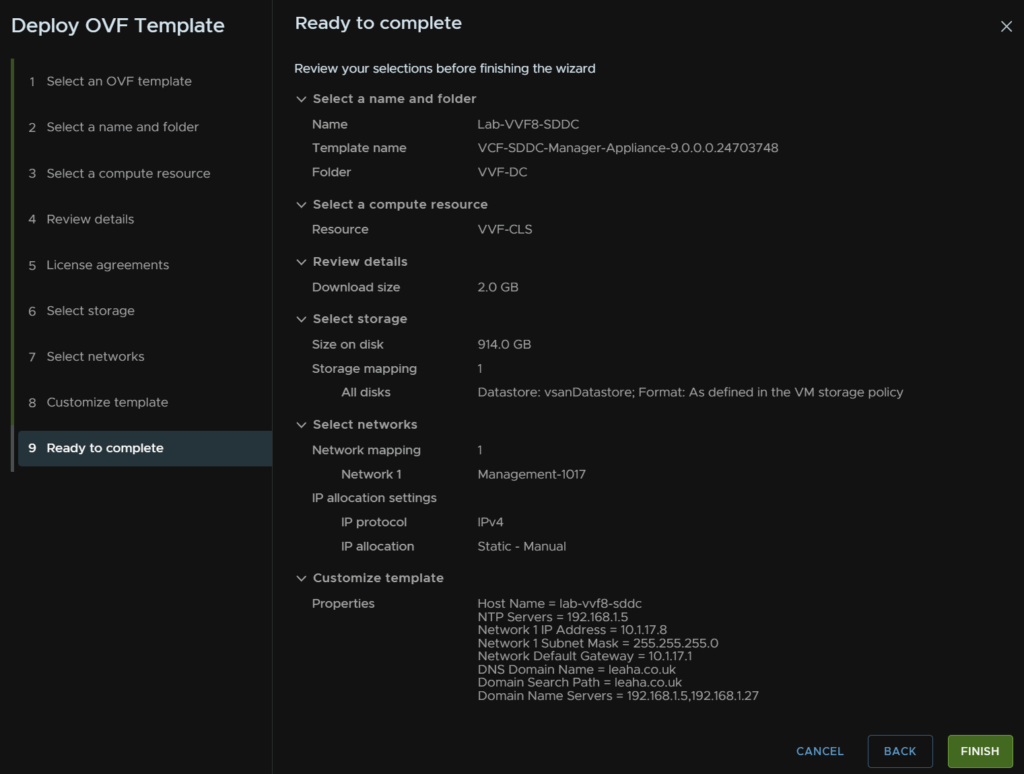
To deploy it, right click the cluster in vSphere, and click Deploy OVF Template
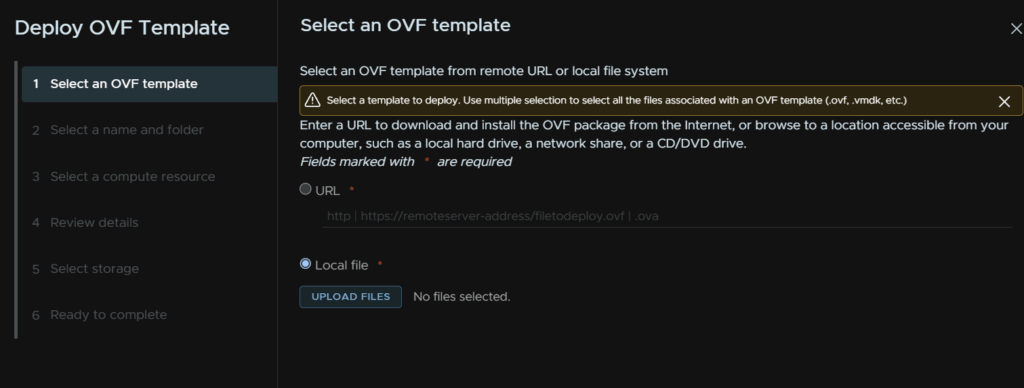
Click the radio button for local files and click Upload Files
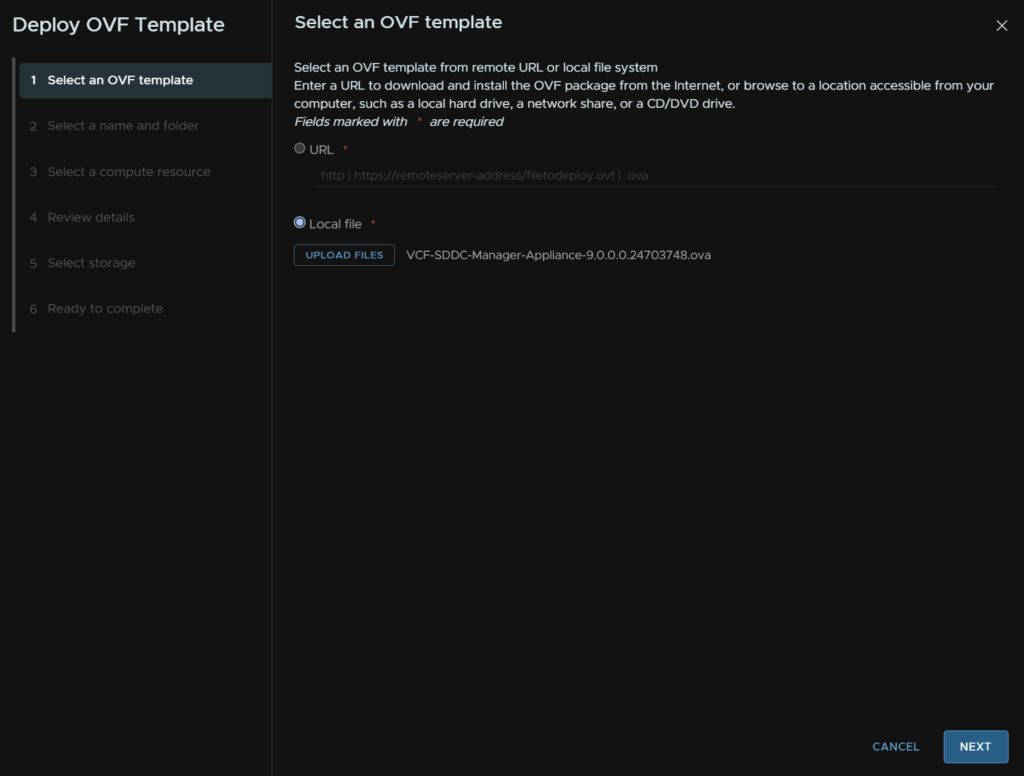
And double click the appliance we downloaded

Then click Next
Give the VM a name and optionally select a folder, then click Next
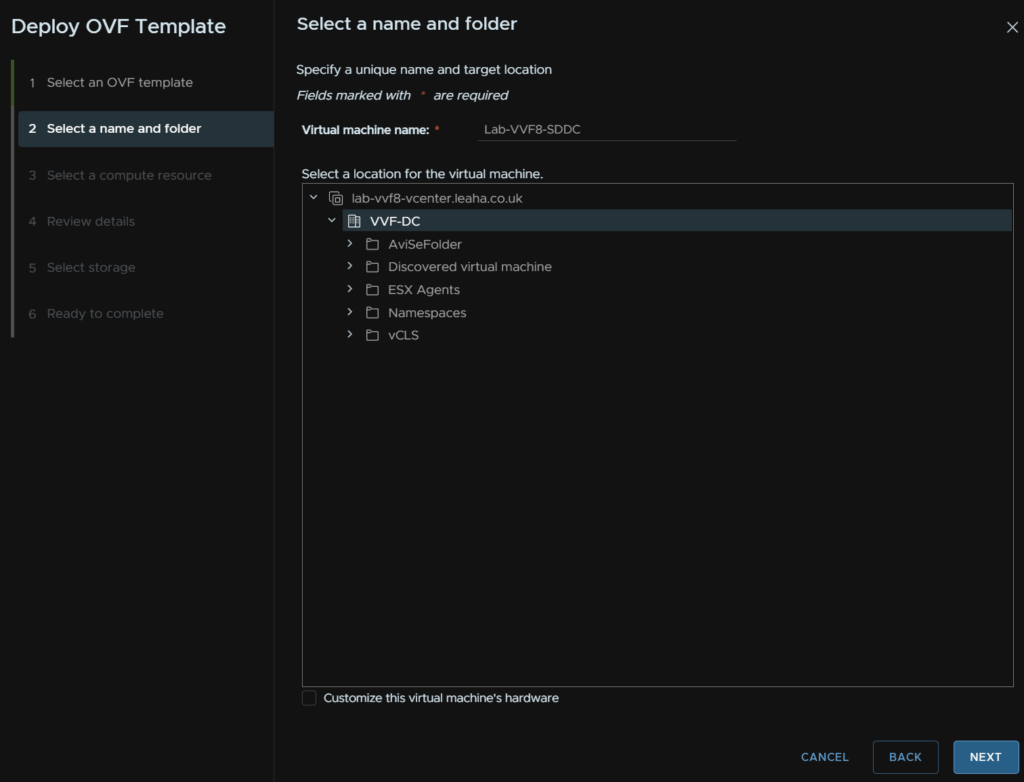
Select the cluster for the compute resource and check the box to automatically power the VM on and click Next
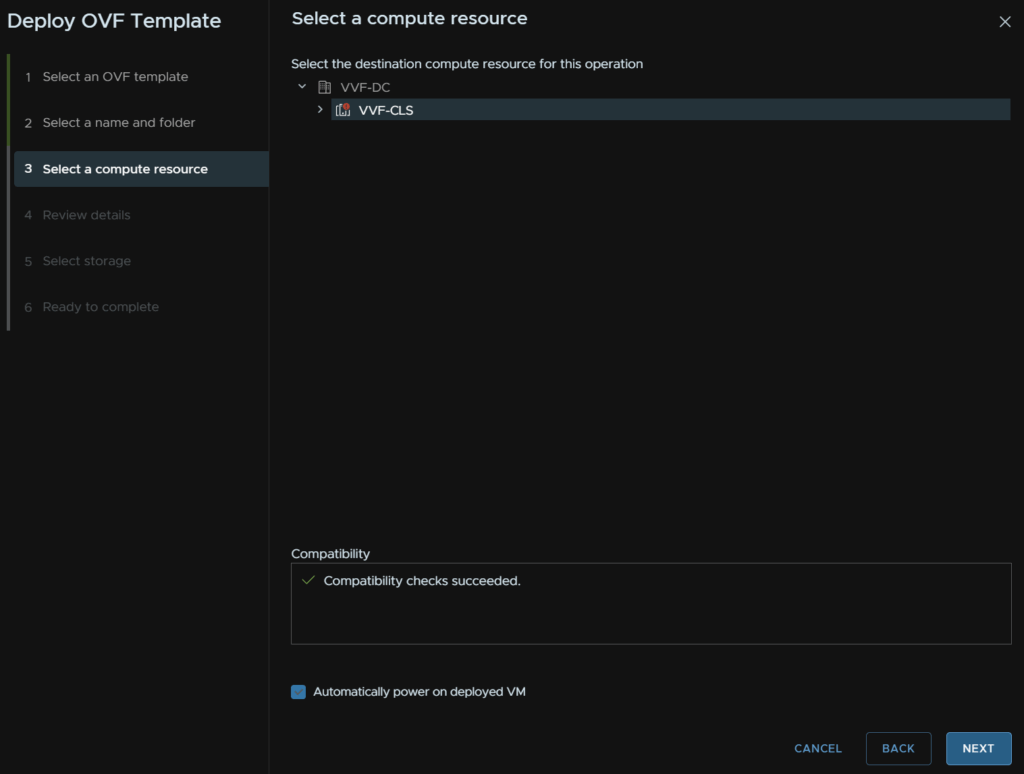
Click Next again
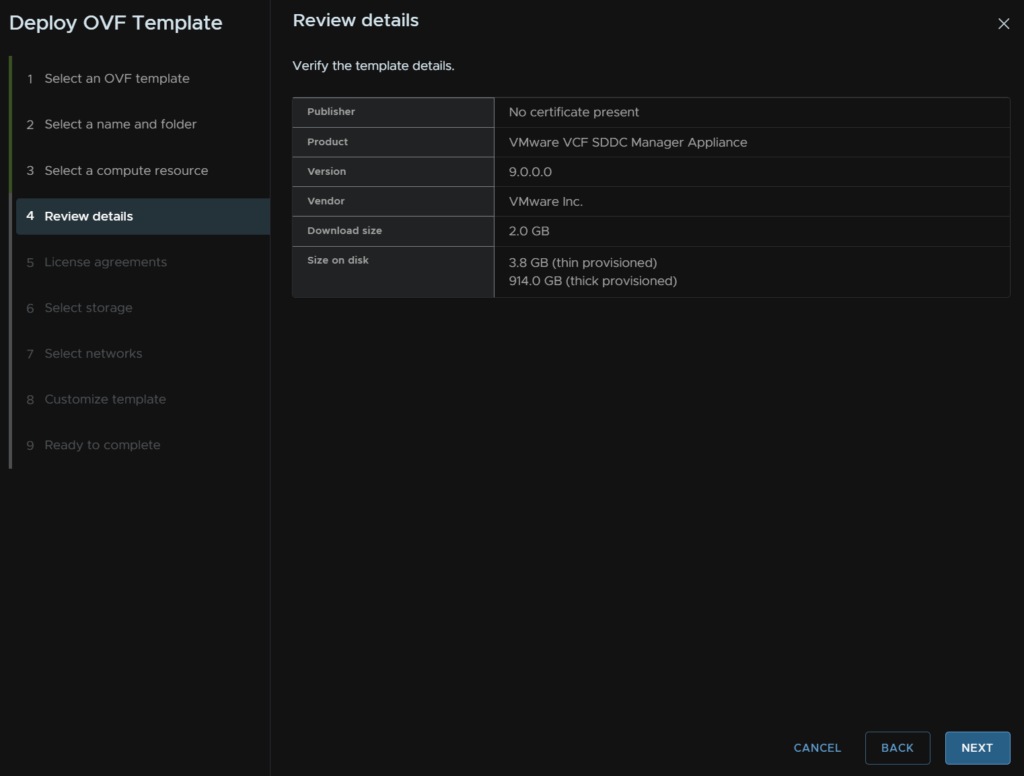
Accept the EULA and click Next
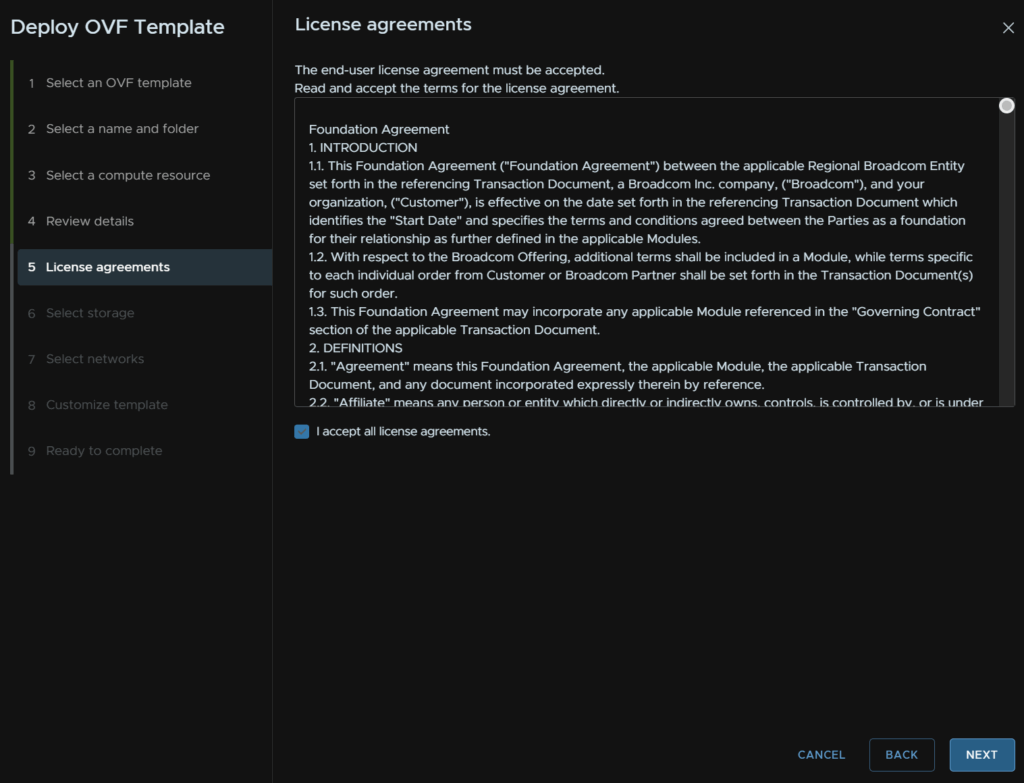
Select the datastore you want the VM to be on and click Next
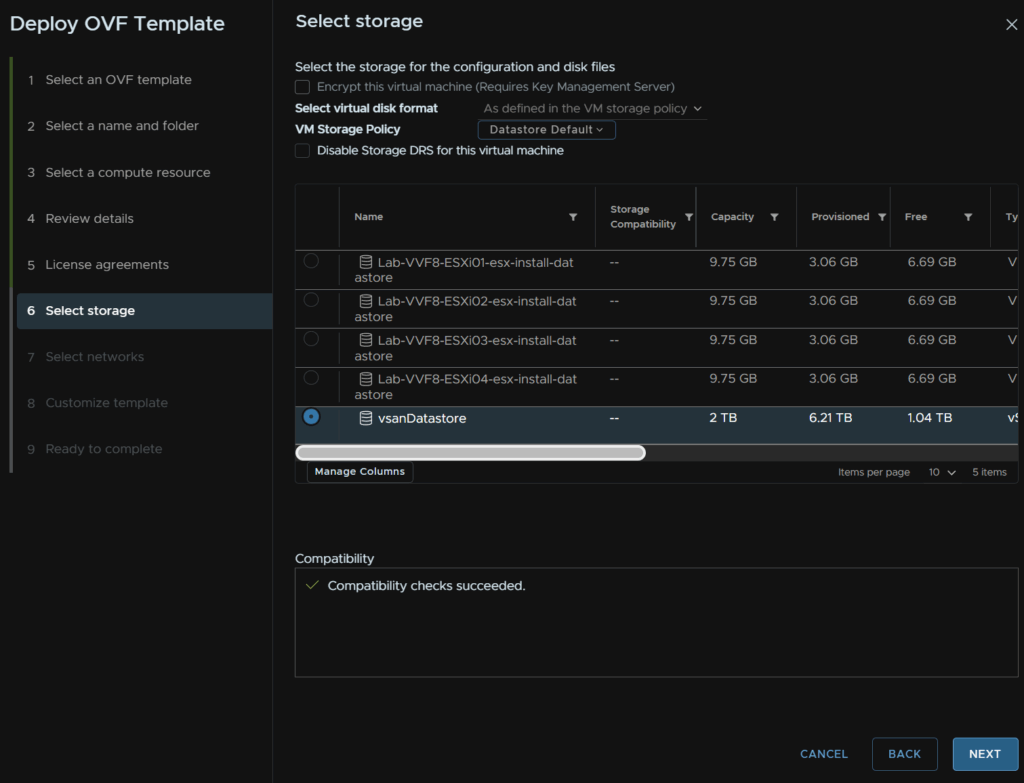
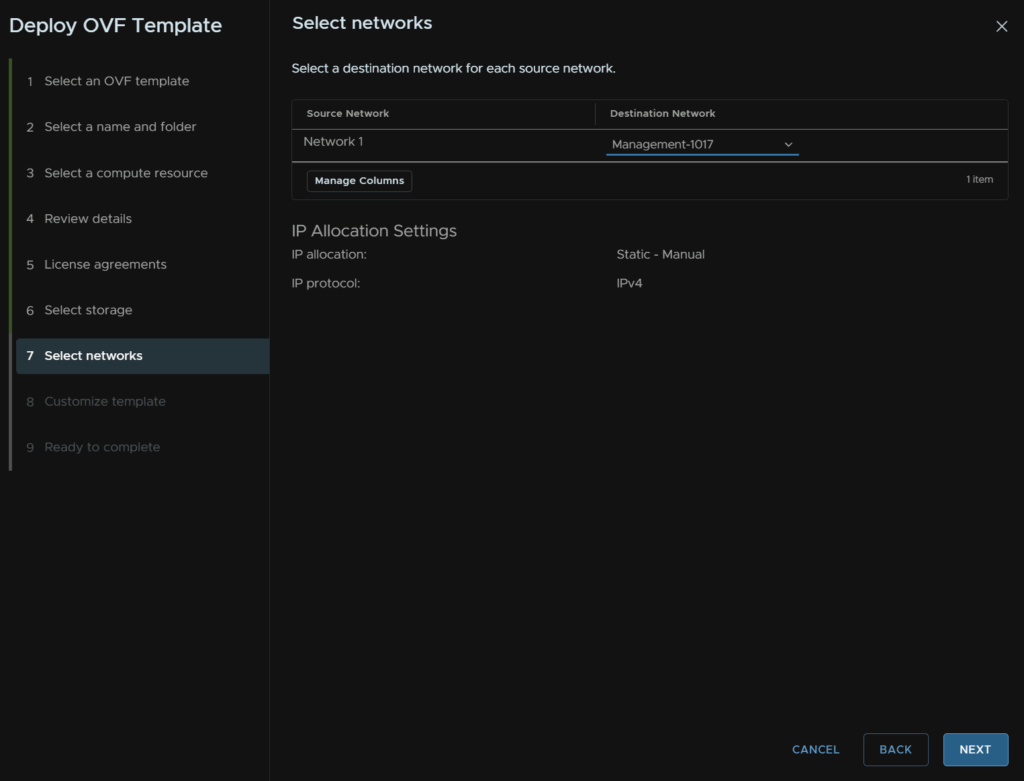
Select the network and click Next
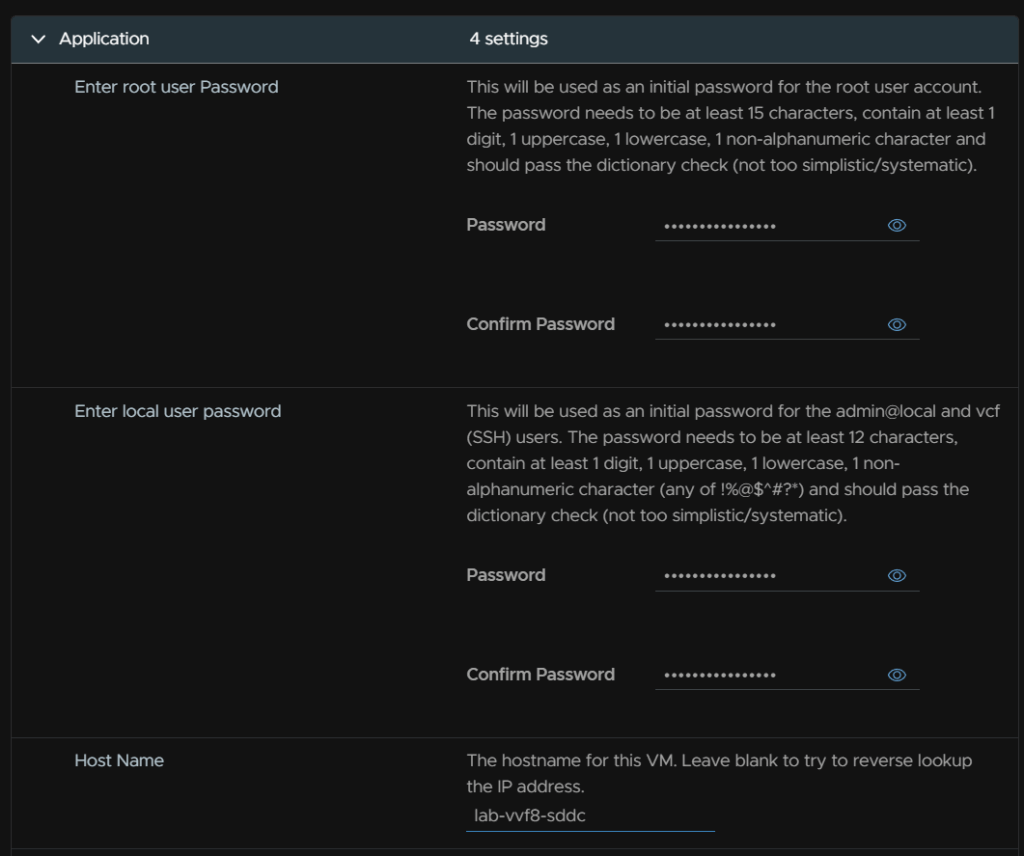
Add a complex root and admin passwords meeting the requirements and a hostname
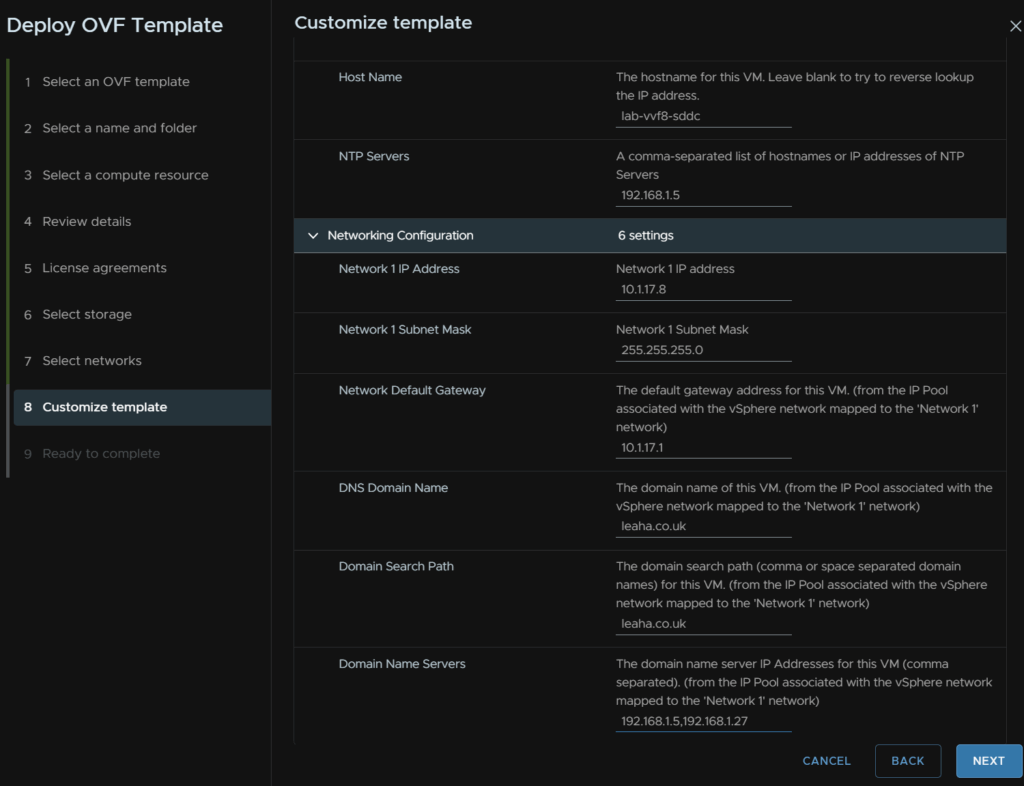
Then add an NTP server, IP address, subnet mask, gateway, DNS domain, search domain and DNS server list, comma separated, then click Next
And when you are happy click Finish
2.6.2 – Setup
Head to the WebUI on
https://fqdn
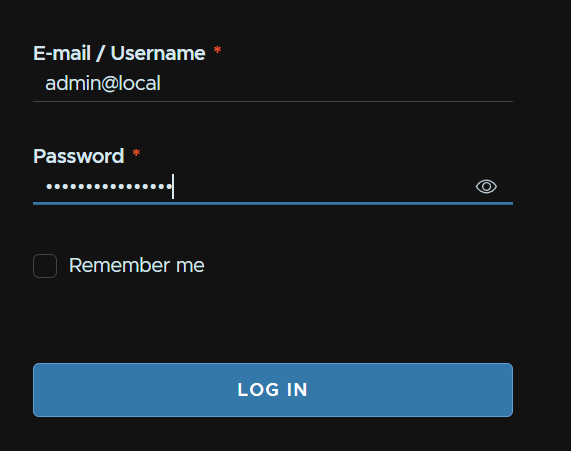
Login with the admin@local credentials, the password is what you put in the local user box during the deployment
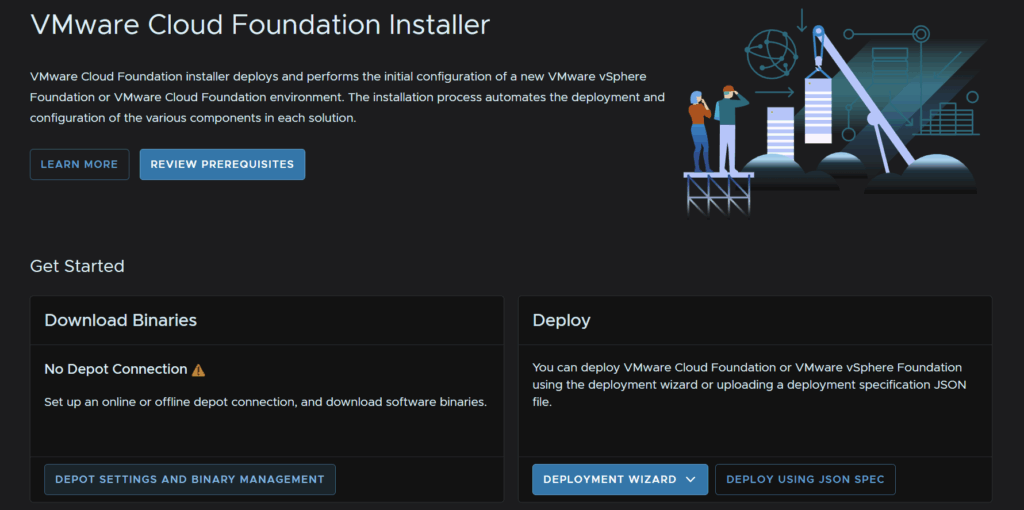
Under Download Binaries click Depot Settings And Binary Management
Click Configure for the online depot
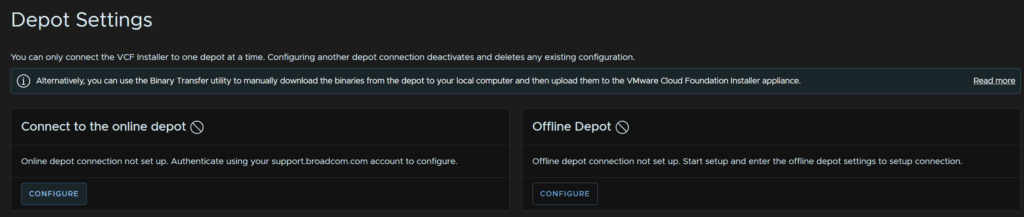
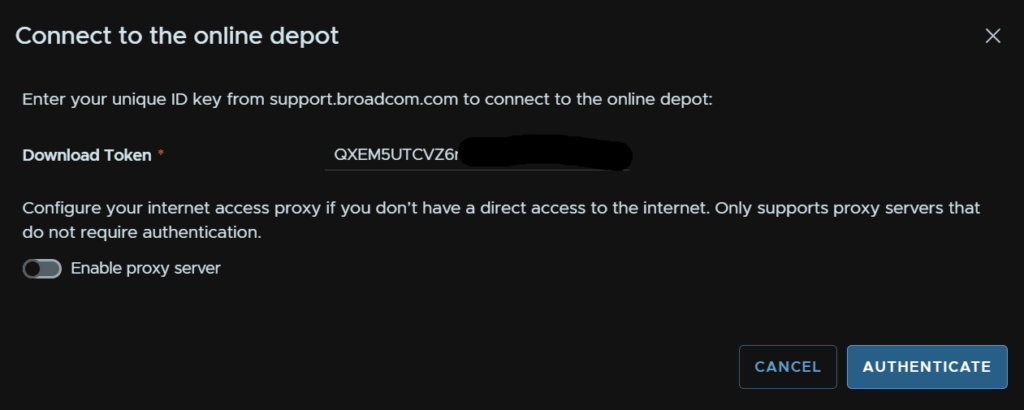
Enter your depot token and click Authenticate, you can enable a prixy if you have one in your environment
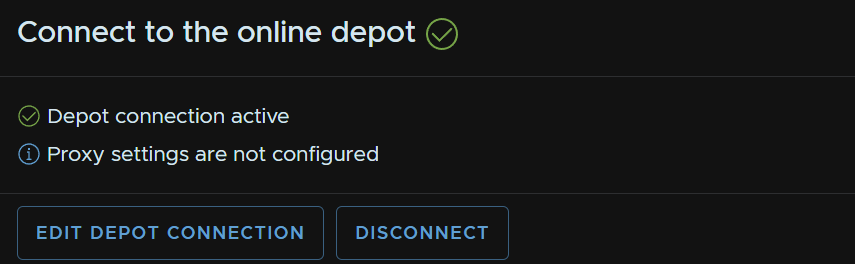
This should show up green
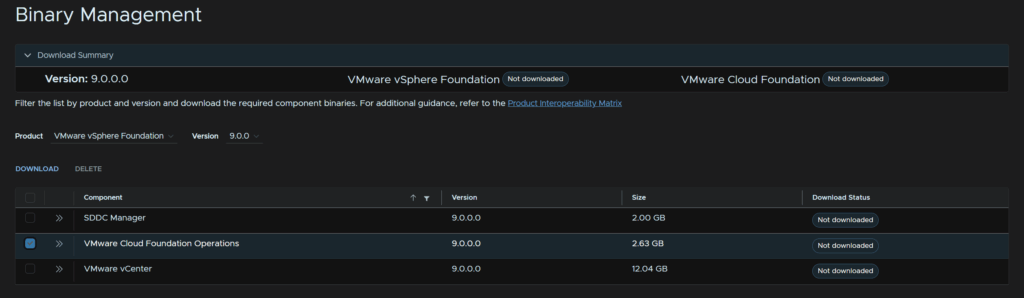
At the bottom use the drop down select the product for VMware vSphere Foundations, then select VMware cloud Foundation Operations and click Download
When its done it should say success

In the top left, click Return Home
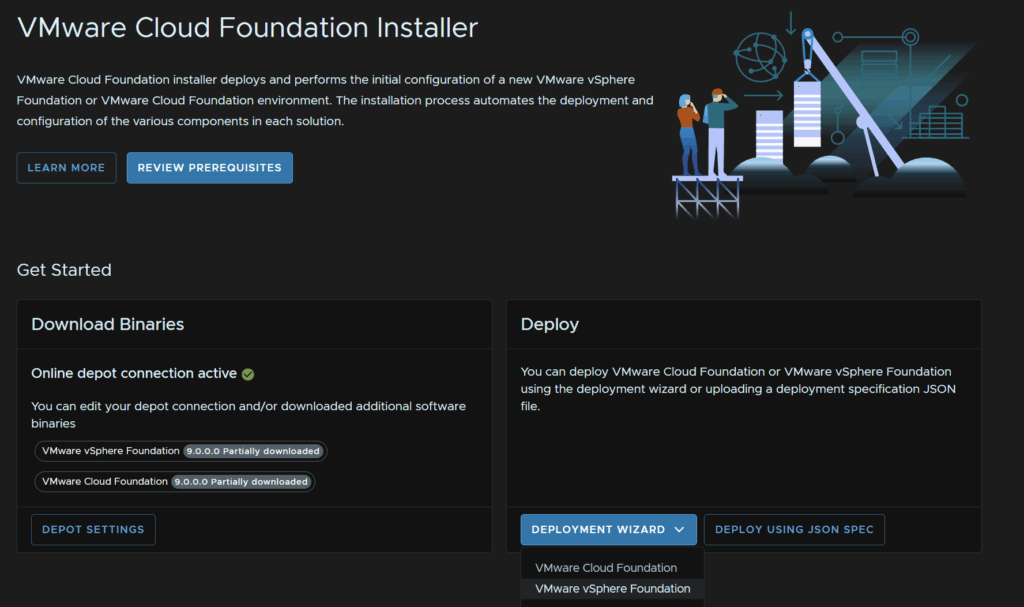
Under the Deploy Widget click Deployment Wizard/VMware vSphere Foundation
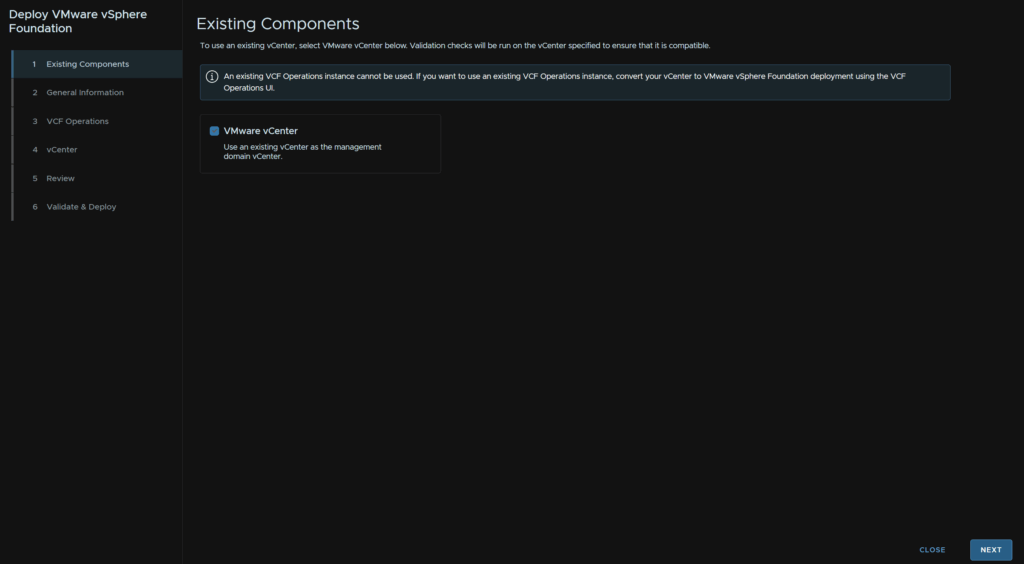
Check the box for our existing vCenter and click Next
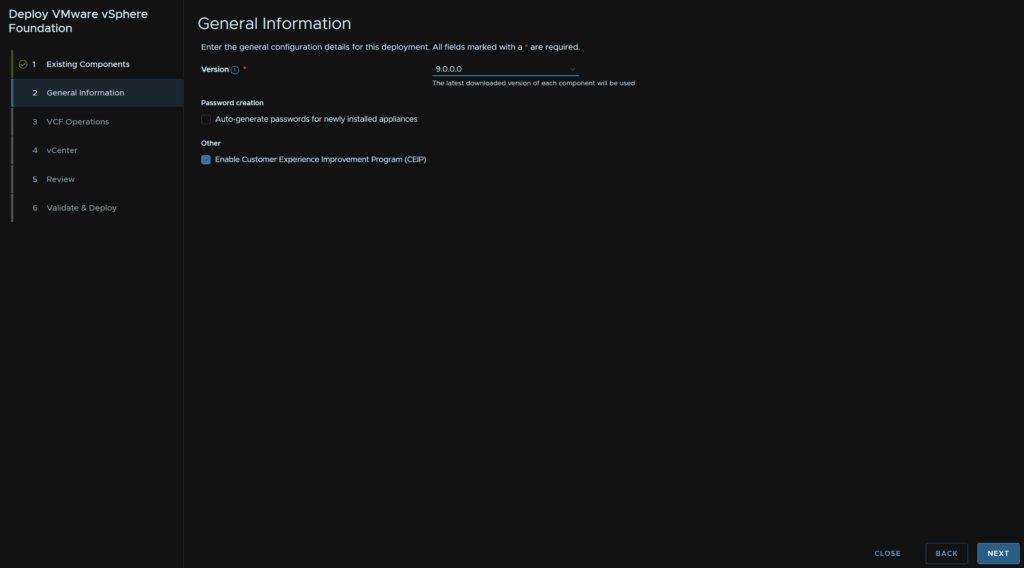
Click Next here
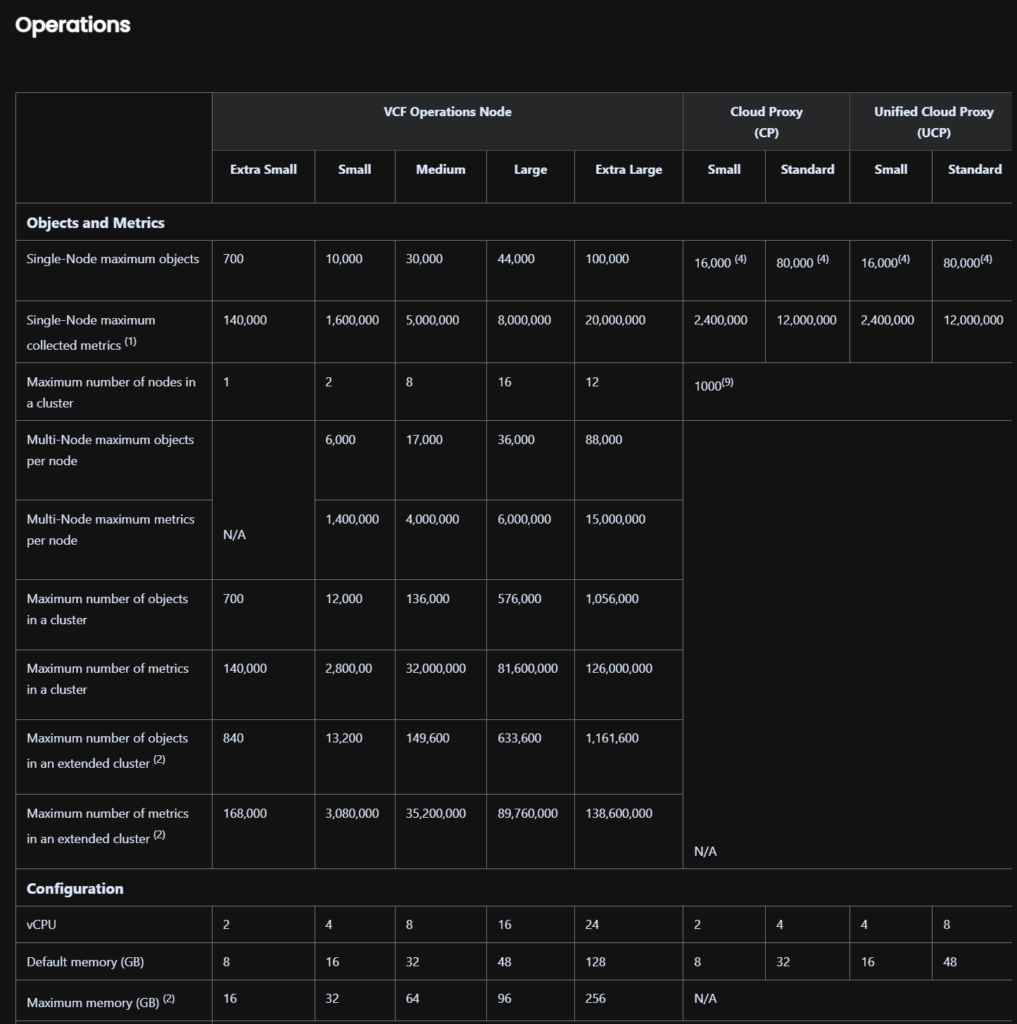
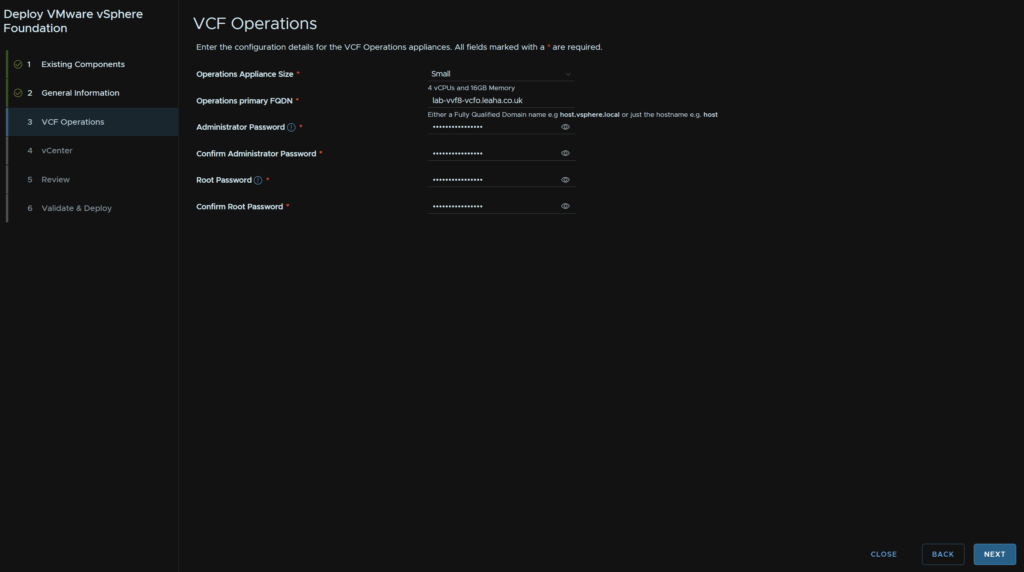
Select the size for VCF Ops, small is the smallest that should be used in production and is suitable for most environments
The sizing configuration from Broadcom can be found here, but here is a the general info
Enter the FQDN registered in DNS, and enter a strong complex admin and root password, then click Next
Its worth noting the password can only use these symbols, else the validation will fail, @!#$%?^
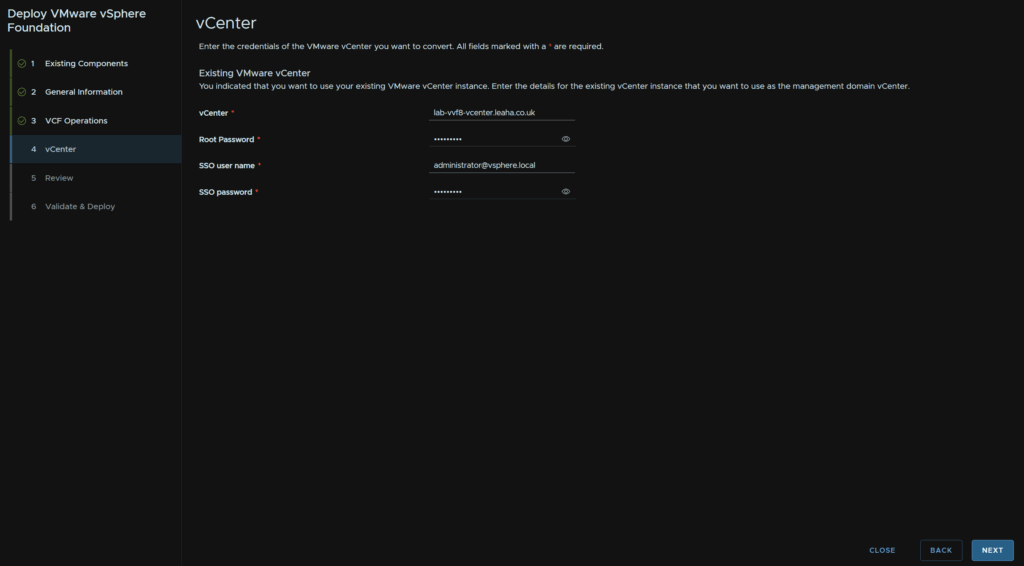
Enter the vCenter details, we need the FQDN, root password, SSO username for an administrator account, and the password for it, then click Next
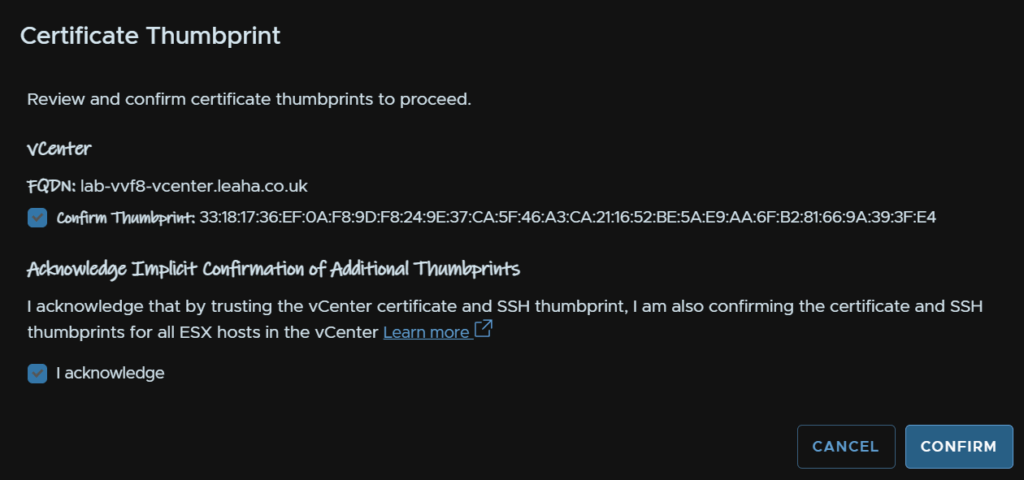
Check both the boxes and click Confirm to accept the certificates
Review the config, once you are happy click Next
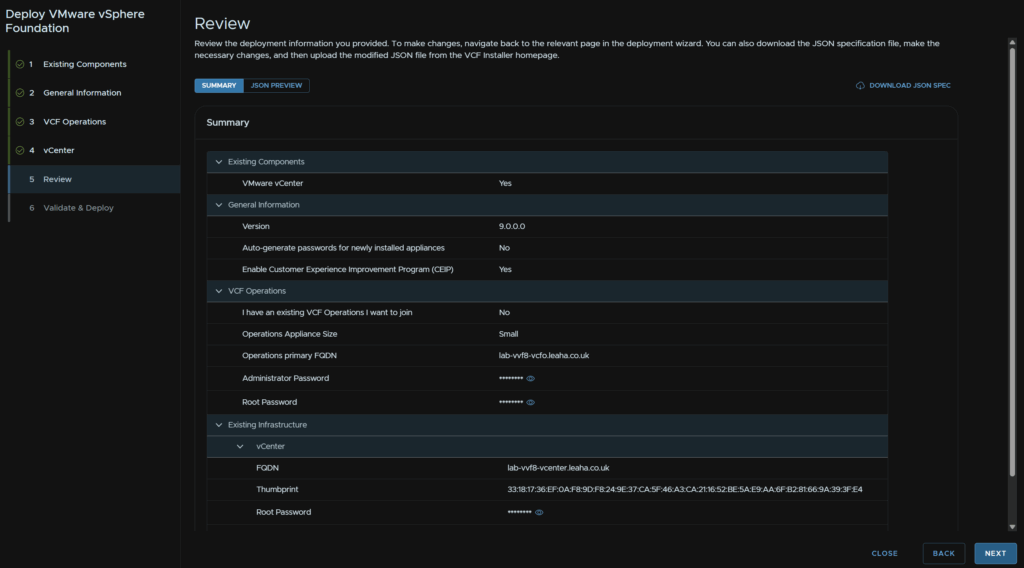
It will then validate the setup
I got this error

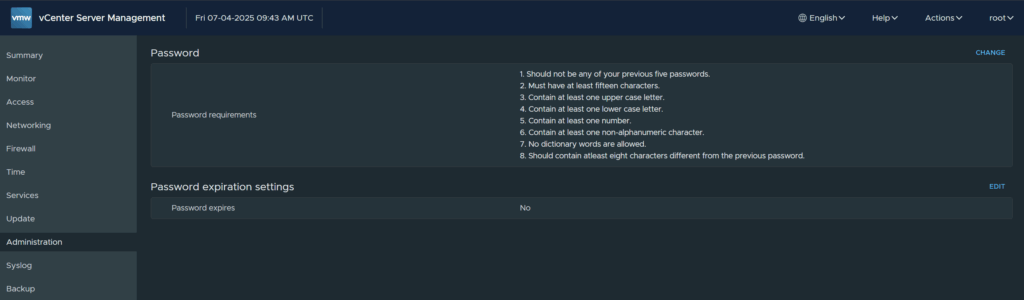
This was caused by my vCenter root password being a short easy one, as its a lab, so you can fix this by resetting it in the VAMI portal
VAMI can be found at
https://<vcenter-fqdn>:5480
Log in as root, and under Administration it can be changed
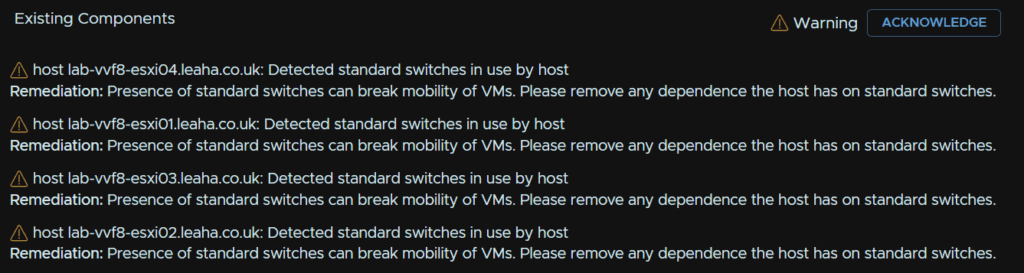
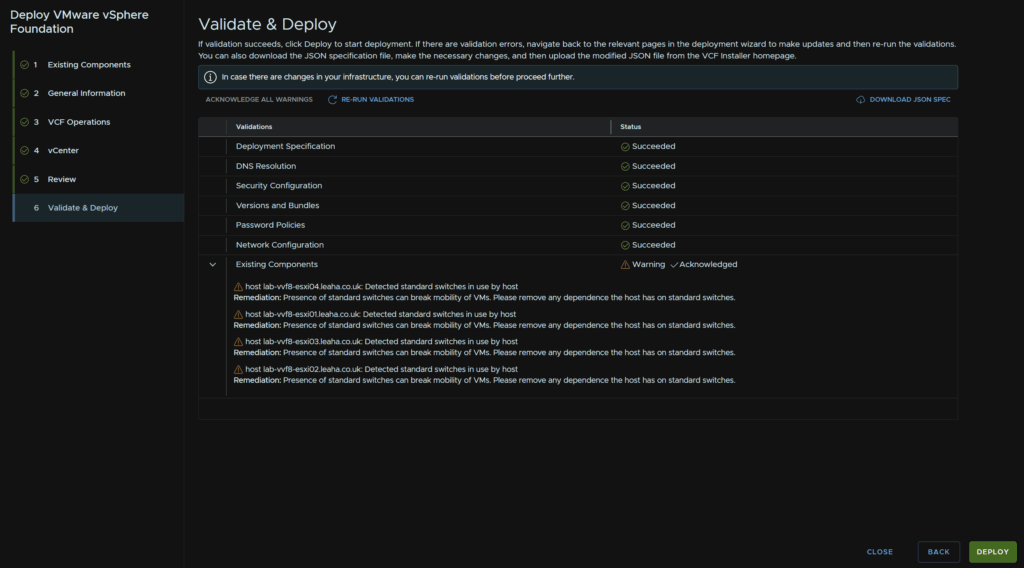
You may see warnings for standard switches if you have them, I will ignore these as I have no uplinks on them and they arent in use, I do recommend switching to distributed switches, but as long as the config is identical across all hosts it should be fine
You may also see this warning

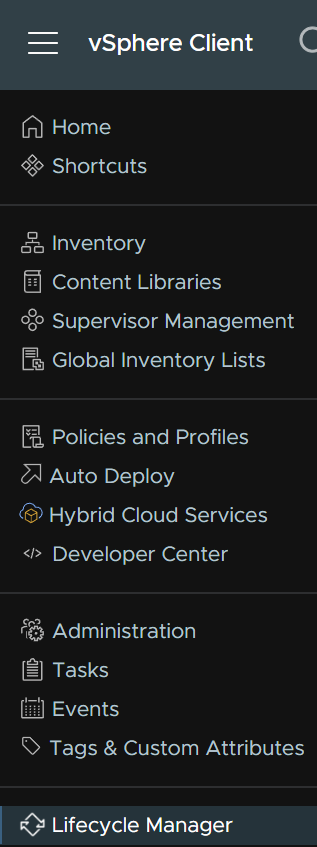
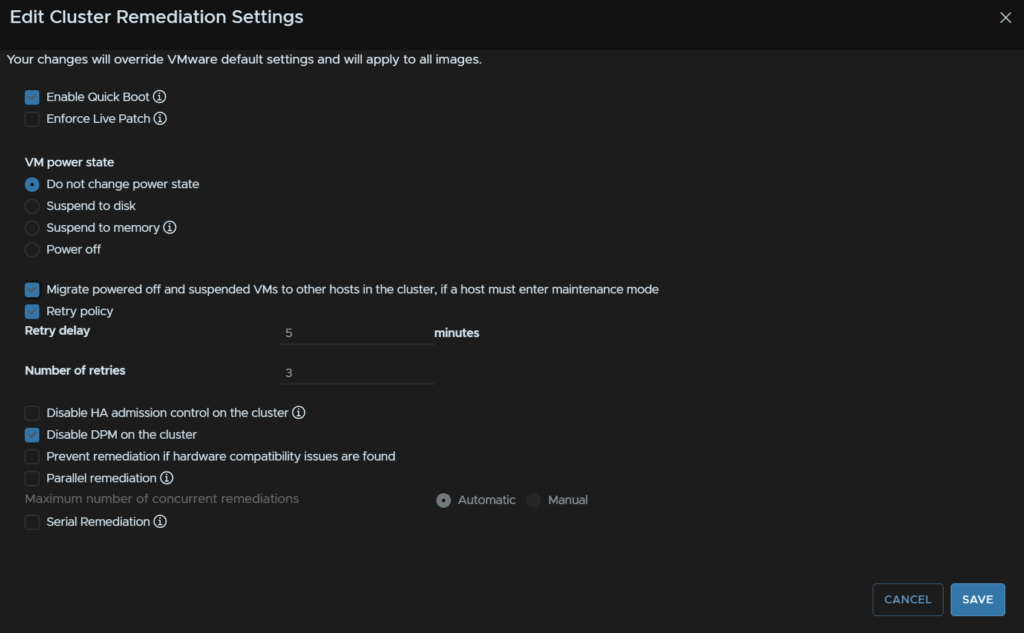
To fix this, click the three lines in the top left in vCenter and click Lifecycle Manager
Click Settings/Cluster Lifecycle/Images then click Edit on the right
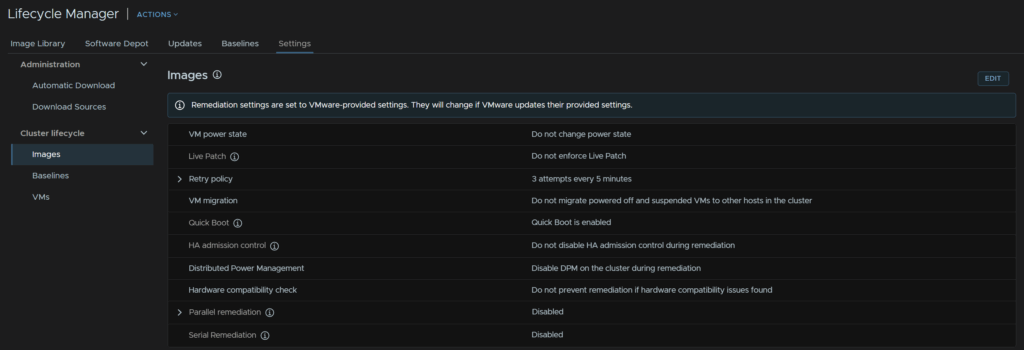
Check the box that says
Migrate powered off and suspended VMs to other hosts in the cluster if a host must enter maintenance mode
Then click Save
As I am happy with these warnings, I will click Acknowledge
Then click Deploy
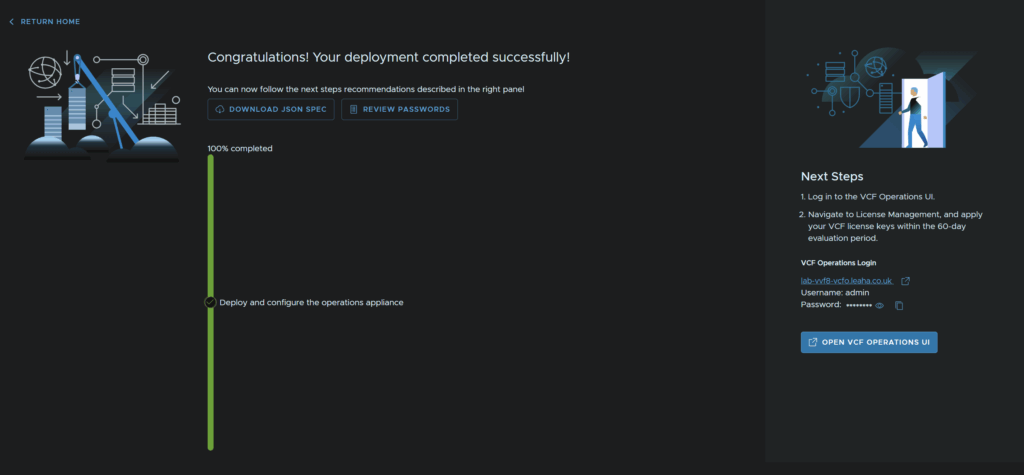
Once thats done we can launch the operations UI
We can then shut down the VVF deployment server as its no longer needed
2.7 – VCF Operations
2.7.1 – Initial Setup
Login with the admin account setup in the VVF installer
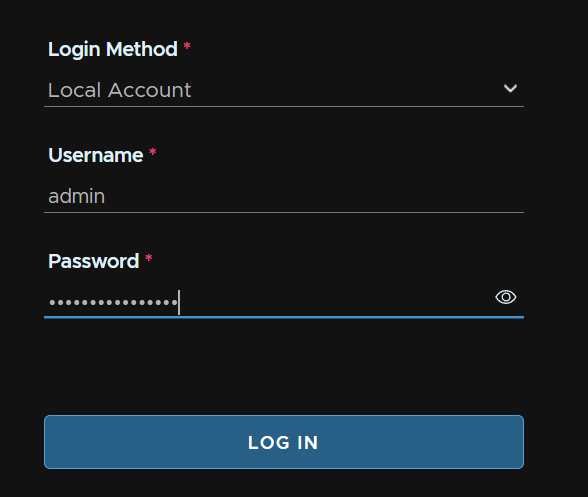
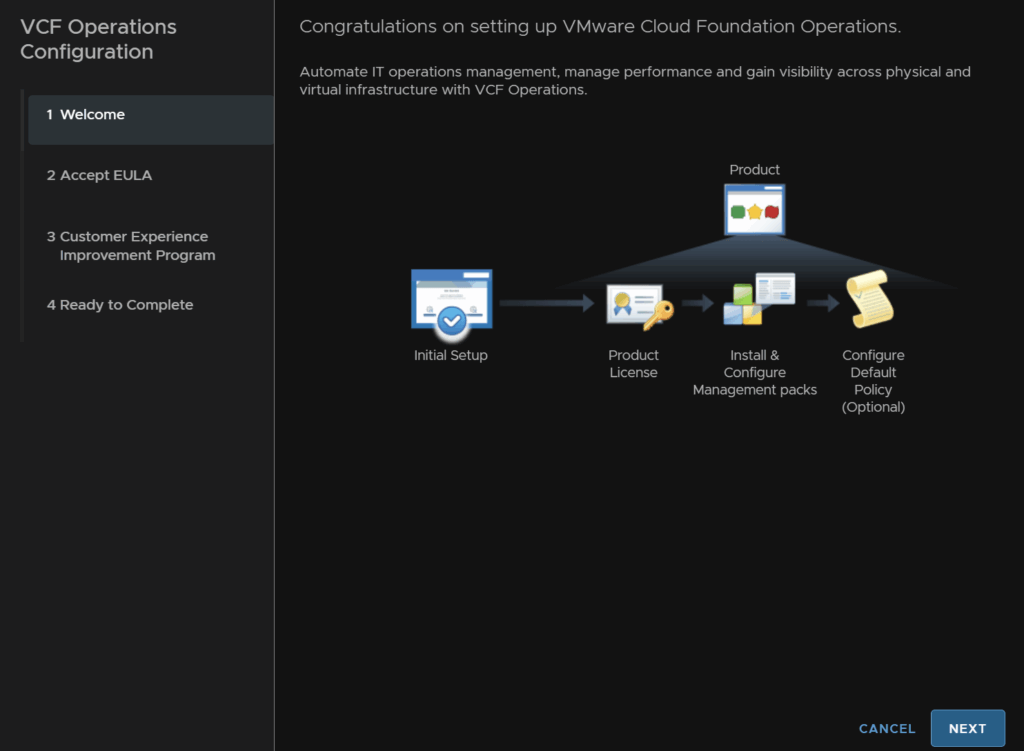
Click Next
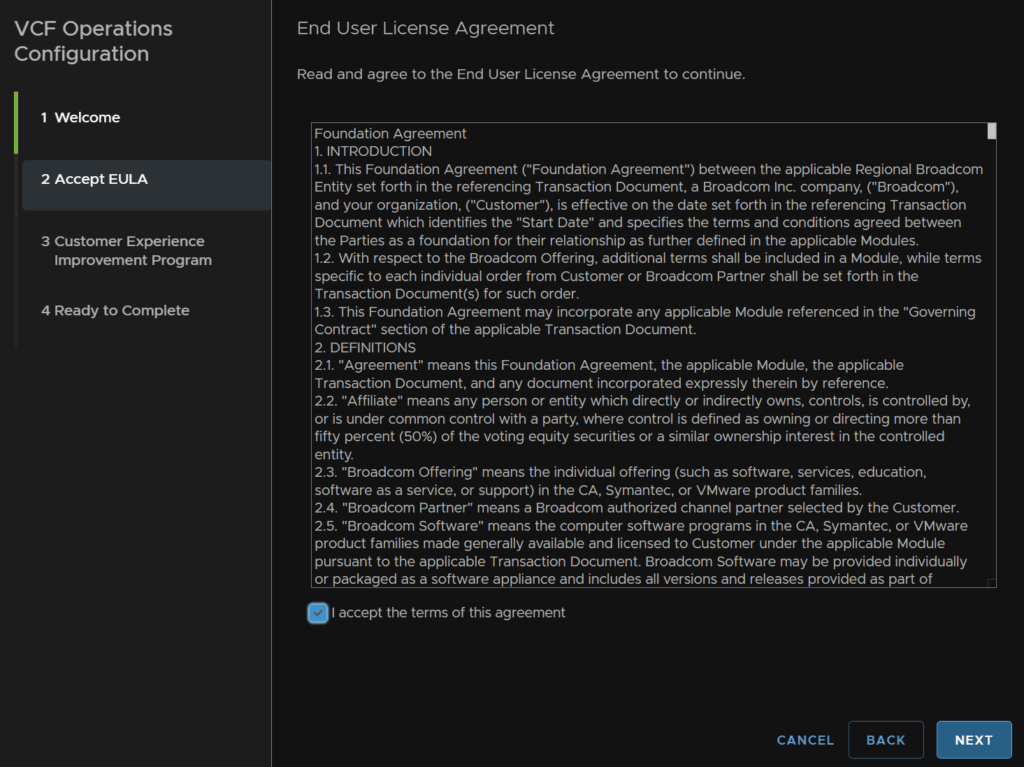
Accept the EULA and click Next
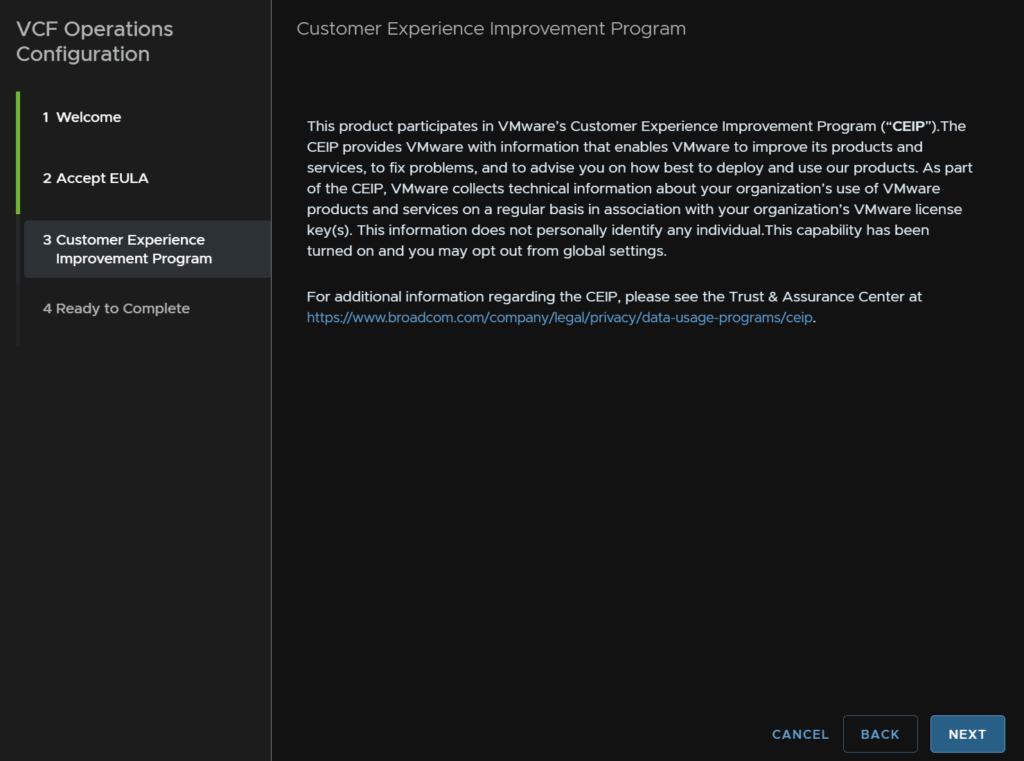
Click Next again, there is no CEIP opt out this time
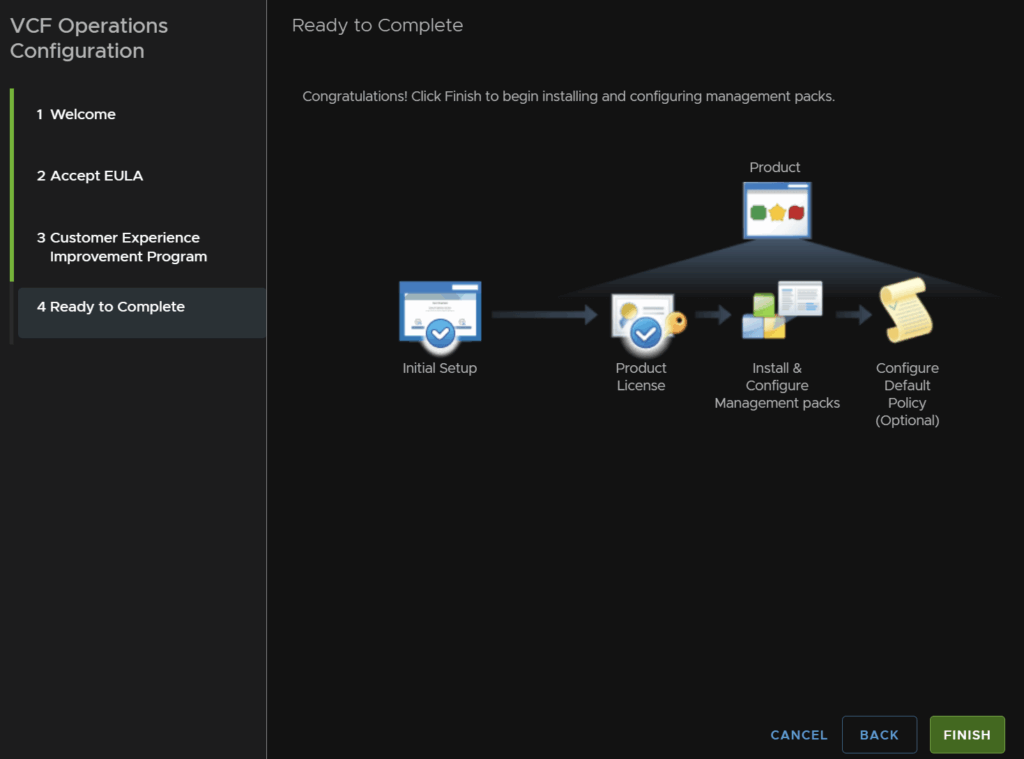
And click Finish
2.7.2 – Adding vCenter
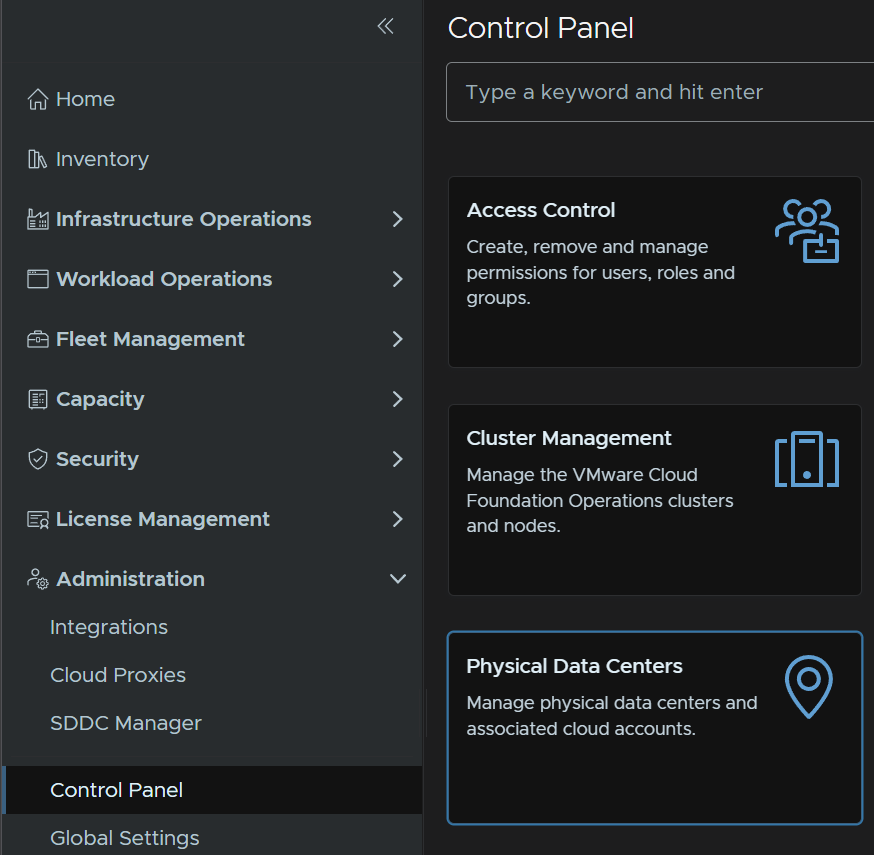
First we need a physical data center, click Administration/Control Panel/Physical Data Centers
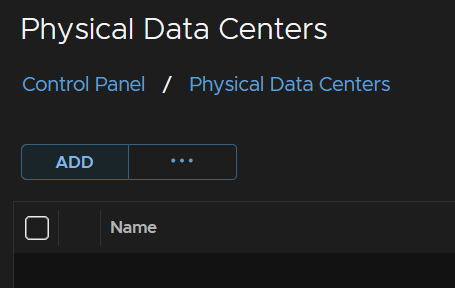
Click Add
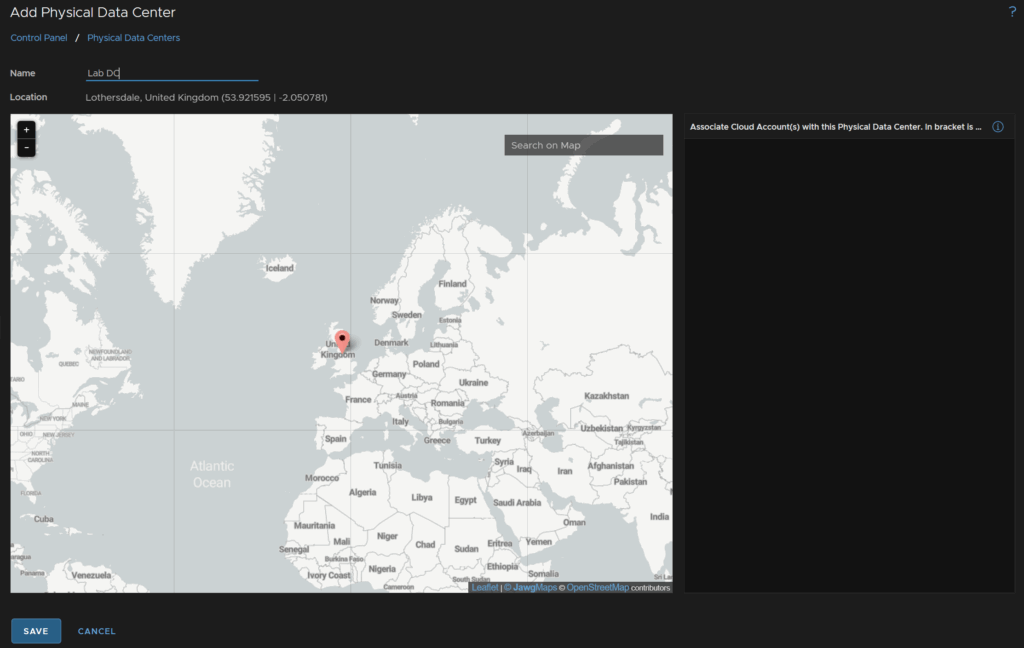
Double click the map where ever you want it, I chose the middle of the UK, give it a name, then click Save
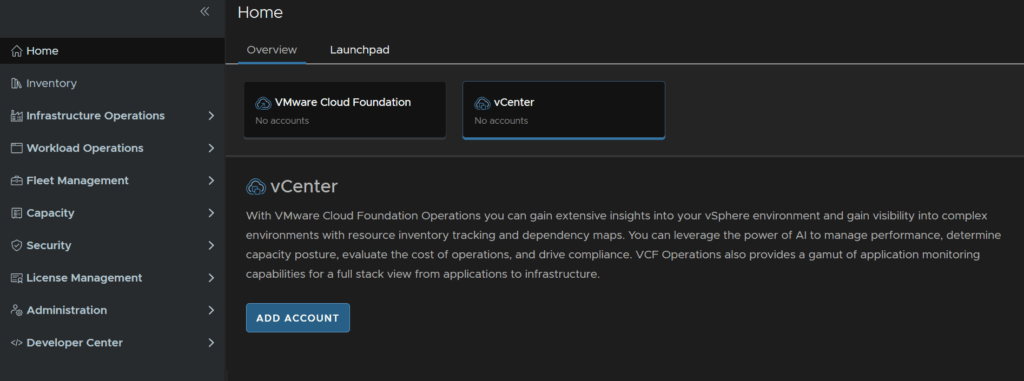
Click Home/Overview/vCenter vCenter and click Add Account
Click vCenter here
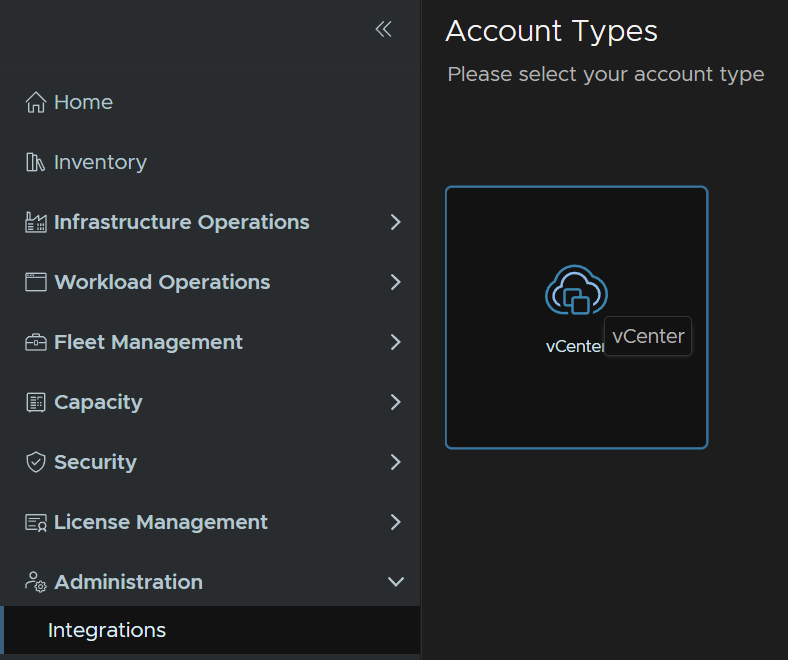
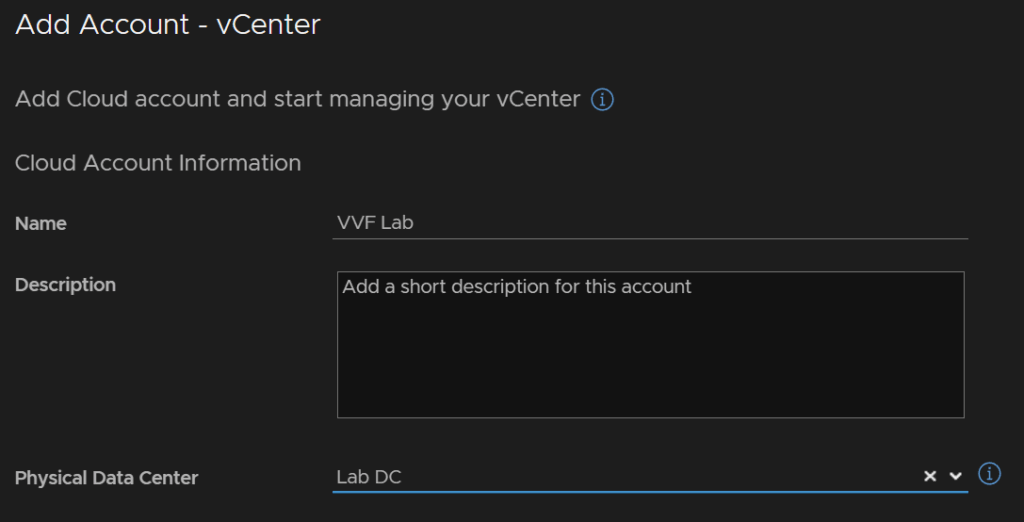
Give it a name and select the physical data center
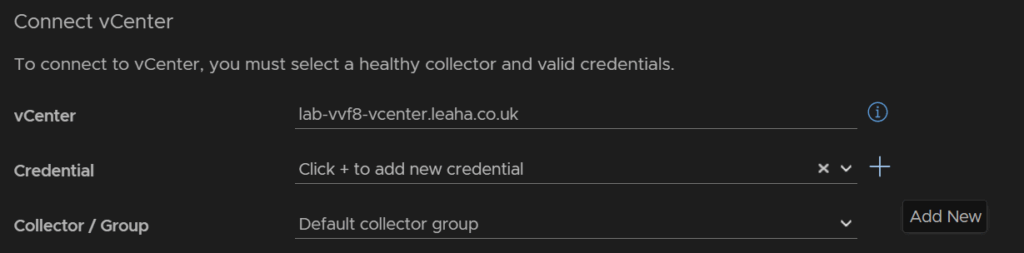
For the vCenter, enter the FQDN and click the + to add a new credential
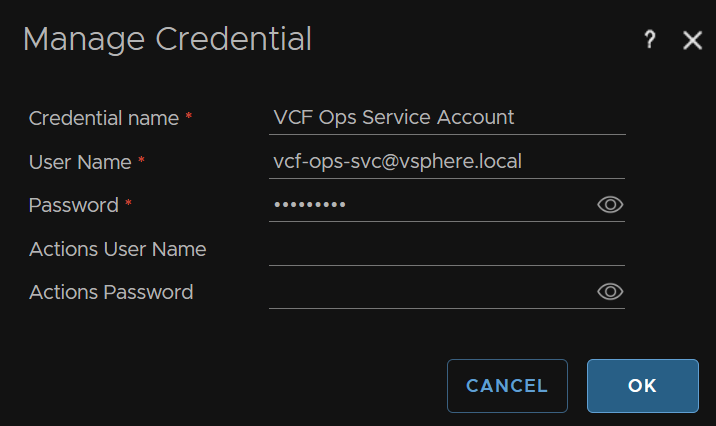
Give the credential a name, and add a username/password, I this needs to be a vSphere admin, I recommend a service account, then click ok
Make sure operational actions is checked and click Validate Connection
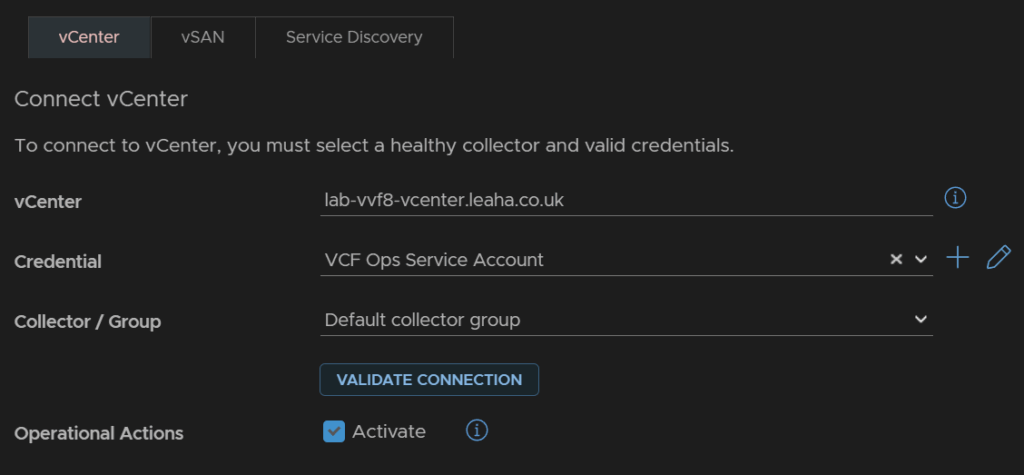
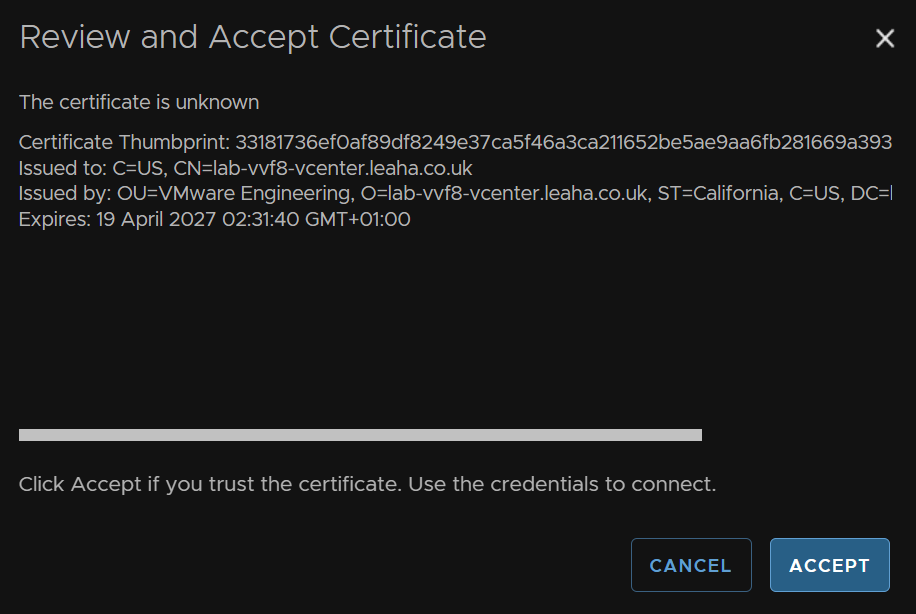
Accept the certificate
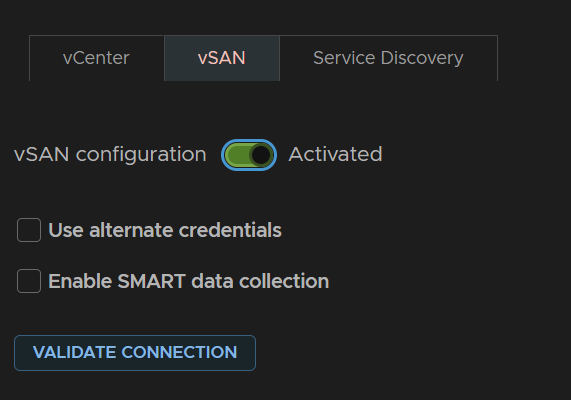
On the vSAN tab, if you have vSAN, click the toggle to activate the vSAN configuration and click Validate Connection and make sure thats ok
Now click Add at the bottom

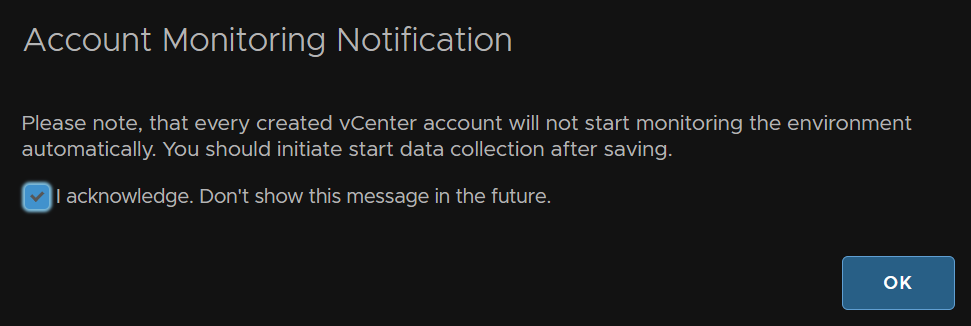
Acknowledge this and click ok
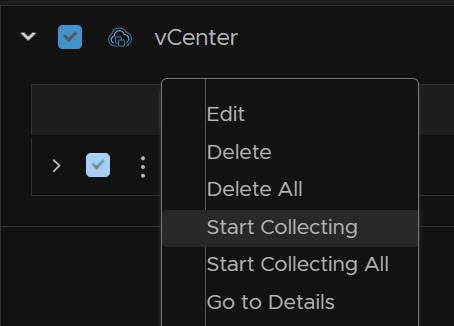
Now expand vCenter, click the three dots and click Start Collecting
2.8 – VCF Ops For Logs
2.8.1 – Deployment
We first need the OVA file from the Broadcom portal
Click My Downloads/VMware vSphere Foundation
Expand VVF 9 and click the latest release
Click VMware Cloud Foundation Operations For Logs
And download the OVA file
In vSphere, right click the cluster and click Deploy OVF Template
Select the Local File radio button and click Upload Files
And double click the OVA
Then click Next
Give the VM and name, and optionally select a folder, then click Next
Select the cluster for compute and check the box to automatically power on the VM, then click Next
Click Next here
Accept the EULA and click Next
Select your size, info on its capabilities will be on the right, small is usually fine, extra small should only be used in labs, then click Next
Select a datastore and click Next
Select your network port group and click Next
Add a complex 15 character password for the root account, and give it a hostname
Add the gateway, domain name, DNS search domain, DNS servers, comma separated, IP address and netmask, then click Next
When you are happy click Next
2.8.2 – Post Deployment Setup
Head to the WebUI on
https://fqdn
And click Next
Click Start New Deployment, this may take a while to load
Add an email address and complex admin password then click Save And Continue
Add an email for alerts to go to and optionally you can add an address for HTTP notifications, but I left it blank, then click Save And Continue
Now we need to setup time, we can sync with the host, or point it to an NTP server, which I recommend, this can be external, like time.cloudflare.com or an internal one
If you selected NTP server, enter the address and click Test
When it succeeds click Save And Continue
Next you can setup SMTP, this will vary on your setup, but add the SMTP server address, the port number, normally this is 587 for SSL, SSL will want enabling for production systems, add a sender address, and you may need a username/password, then you can add an address to send to and click Send Test Email
My lab doesnt use SSL or authentication as its just a home lab
When you are happy click Save And Continue, this should also be an optional step
For SSL you can use the self signed certificate which I will be using and is fine for production, you can alternatively upload your own PEM format cert if you have CA, then click Save And Continue
Then click Finish
2.8.3 – Ingestion
As this appliance needs reconfiguring we wont be going over everything, just vSphere and VCF Ops integration
More info can be found in my VVF guide for Aria here
Logs can be received in a number of ways, like Aria Ops For Logs 8.18
We can integrate with vSphere, agents and syslog, click Configure vSphere Integration
Then click Add vCenter Server
Add the vCenter FQDN, a vSphere admin account, its better to be a service account though, ensure both boxes are checked then click Test Connection
Click Accept on the SSL certificate
When thats successful, click Save in the top right
2.9 – Post Upgrade Steps
2.9.1 – VCF Ops Plugin
Now we have everything upgraded we need to make sur ethe plugin is added to vCenter properly
Head to Administration/Integrations, click the drop down on vCenter, click the three dots on your vCenter, as this should be setup from when Aria Operations was deployed, and click Edit
Scroll down to the bottom and click manage Integration
Make sure this toggle is enabled and click Save
Then click Save again at the bottom
2.9.2 – vCLS Retreat Mode
In vCenter 9 vCLS is deprecated and its recommended to put this into retreat mode, this will not effect DRS functionality which used to use this
To do this, click your cluster, then click configure/vSphere Cluster Services and click Edit vCLS Mode
Select Retreat Mode and click ok
2.9.3 – Adding VCF Logs To VCF Ops
From VCF Ops click Administration/Control Panel/ Operations-Log Appliance Integration
Add the VCF Ops For Logs FQDN and admin credentials then click Validate Connection
Click Accept on the certificate
When thats successful click ok
Then Save in the bottom left
You will now notice Infrastructure Operations/Analyze is populated and we can search and view logs from VCF Ops
Lastly, to make sure we have all the logs, head to Administration/Integrations, expand vCenter, and click the three dots then Edit on your vCenter instance
Check Activate Log Collection, we can collect the direct to the logs collector, and click Save
2.9.4 – Licensing
Licensing is no longer handled by Keys in vCenter, rather through VCF Ops and the Broadcom Business Services
If you have an active subscription then youre licenses should show up here
Under License Management/Licenses
To set this up click License Management/Registration
Now we will assume you have internet connectivity and will do a connected registration, on the Connected Widget, click Start Registration
This will prompt you to log into the Broadcom portal, you will need licensing permissions in your Broadcom portal for your organisation
On the default loaded page, enter a display name for the license and click Save And Next in the bottom right
Select your license, as I have VCF and VVF licenses with my NFR I have both, but am selecting VVF for this deployment, then click Save And Next
Then click Next
Click Copy next to the activation code
In VCF Ops click Enter Activation Code
Then click Activate
Now we can head to License Management/Licenses, click our vCenter in VCF Ops, mine is called VVF, and click Assign Primary License
Select our license and click Assign
Wait for it to be applied
I also need to license vSAN, so repeat but click Assign Add-On License
Select vSAN and click Assign
We can then see our cluster is fully licensed and we can see the usage