Last updated on March 31st, 2026 at 16:16
In this article we will go through patching the base VCF 9 product stack and all its products ensuring you are kept all up to date and dont have issues doing it
There is a best practices order to all of this, and everything needs to be done within VCF Operations to avoid issues, but we will cover everything in here
If you have VDI solutions using a workload domain, you will want to ensure any desktop provisioning is disabled during the vCenter patching
For my 4 node physical vSAN lab, here is the full version list and order
- Fleet Management 9.0.1 –> 9.0.2
- VCF Operarions For Logs 9.0.1 –> 9.0.2
- VCF Operations 9.0.1 –> 9.0.2
- VCF Operations For Networks 9.0.1 –> 9.0.2
- VCF Automation 9.0.1 –> 9.0.2
- SDDC Manager 9.0.1 –> 9.0.2
- NSX 9.0.1 –> 9.0.2
- Supervisor 9.0.1 –> 9.0.2
- Host Firmware
- ESX 9.0.1 –> 9.0.2
- vSAN File Services 9.0.1 –> 9.0.2
All passwords used for the entire guide need to be at least 15 characters with the only allowed special characters being !@#$%^&*, this will be correct for existing passwords from the upgrade/deployment
Any new/changed passwords must meet these requirements
This guide assumes you have SDDC Manager backups, Automation backups and vCenter backups configured
Updates for NSX, vCenter, Supervisor, Firmware and ESX are all part of management/workload domains, the correct order is to start with the management domain, then subsequent workload domains in whatever order you like
Any errors I found are within the section for the product with error codes, if they had them, and the solutions I used
Important – By continuing you are agreeing to the disclaimer here
1 – Fleet Management
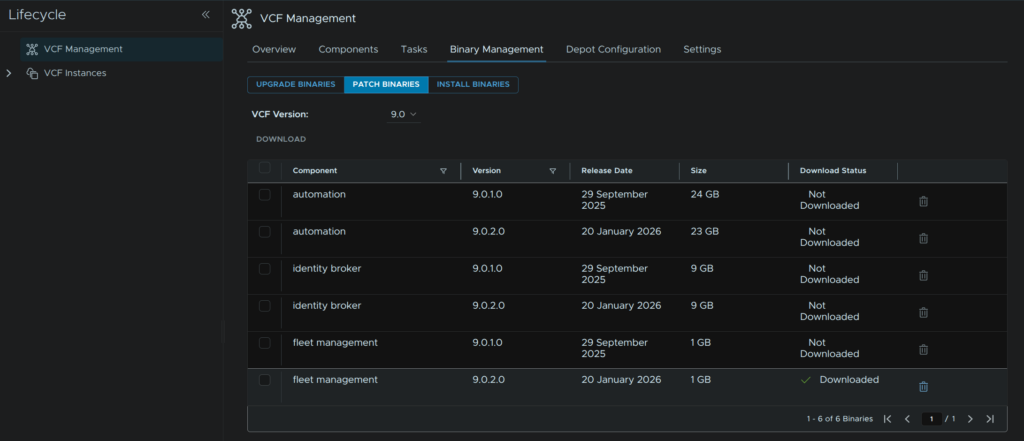
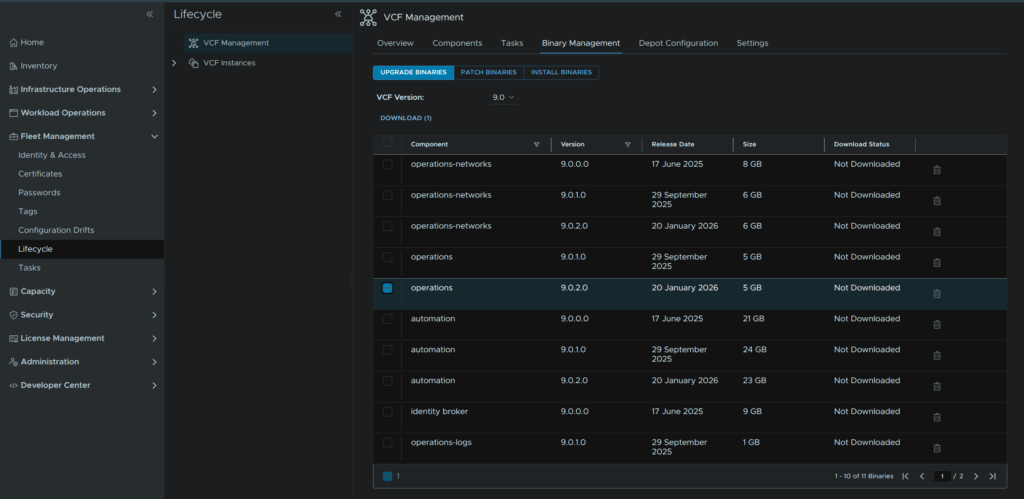
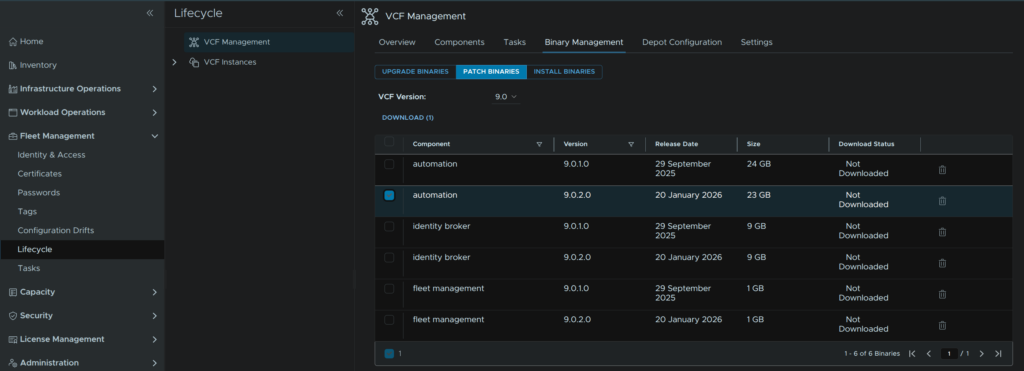
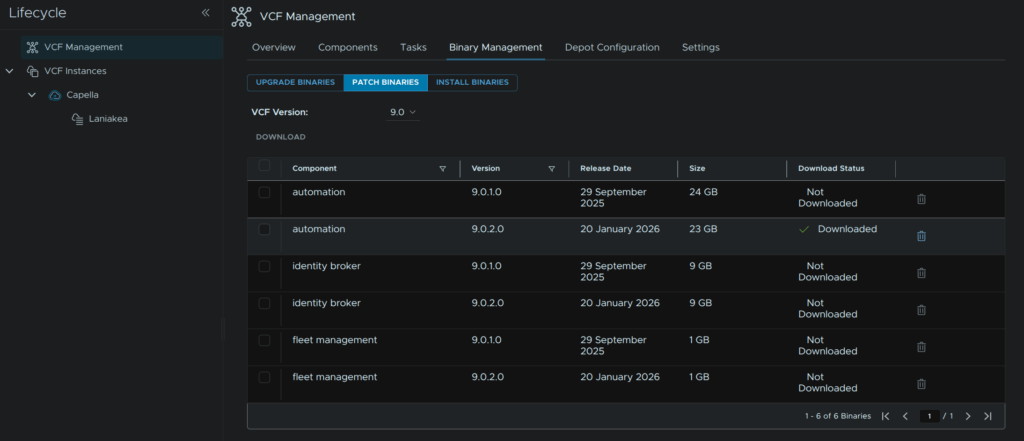
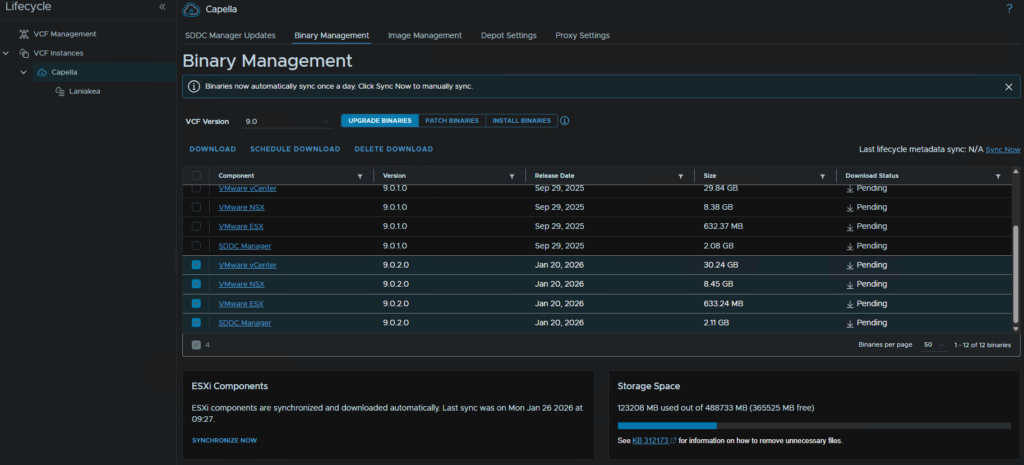
Log into VCF Operations and head to Fleet Management/Lifecycle/VCF Management/Binary Management/Patch Binaries, click the Fleet Management component and click Download
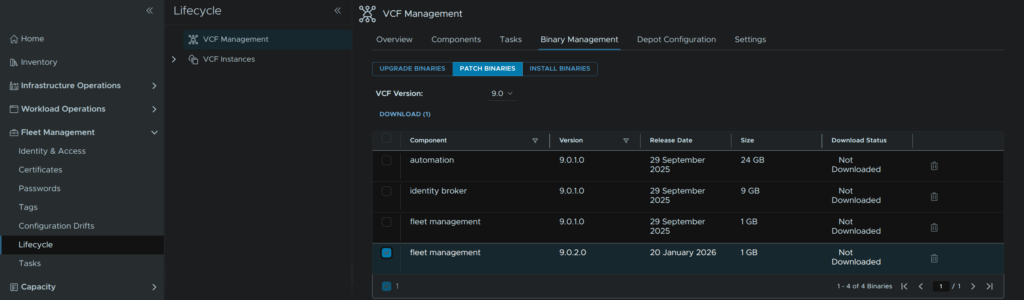
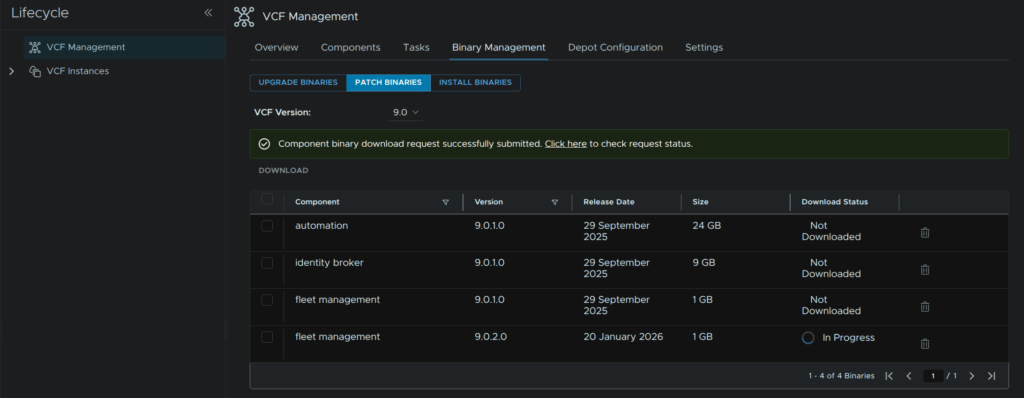
You can use the Click Here link to see the progress, it also shows its downloading on the status section
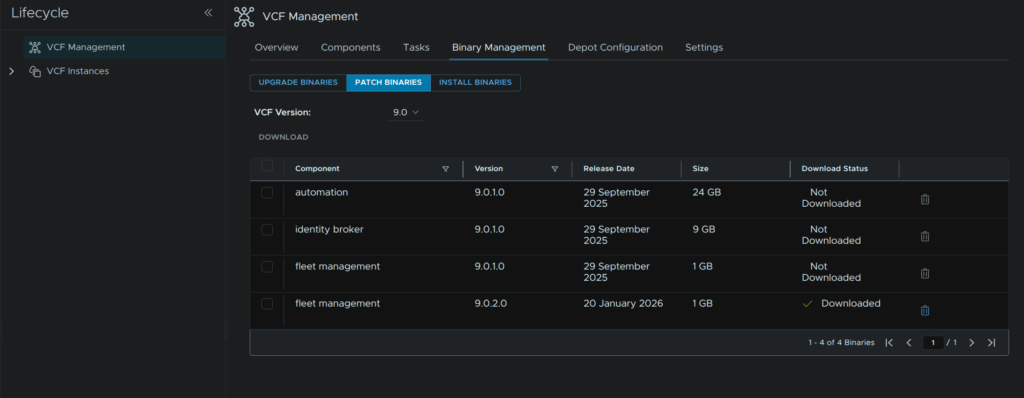
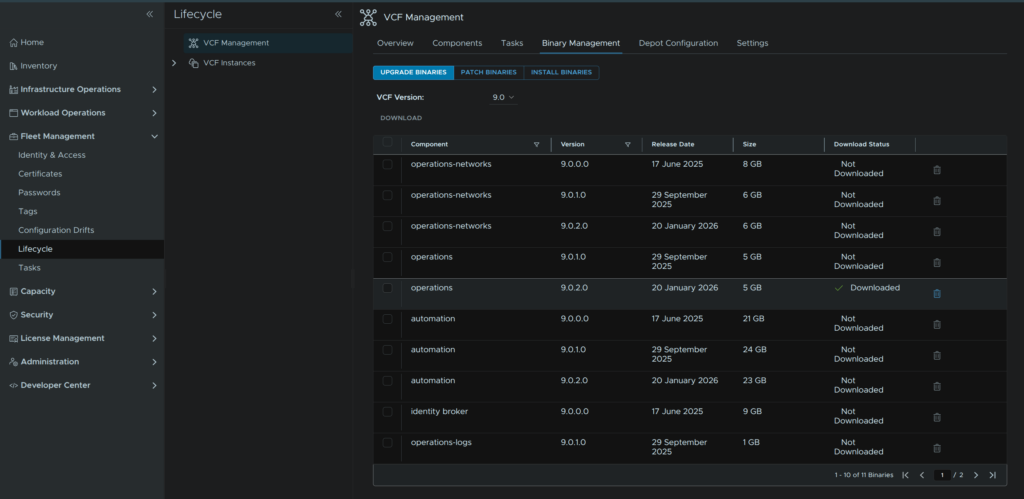
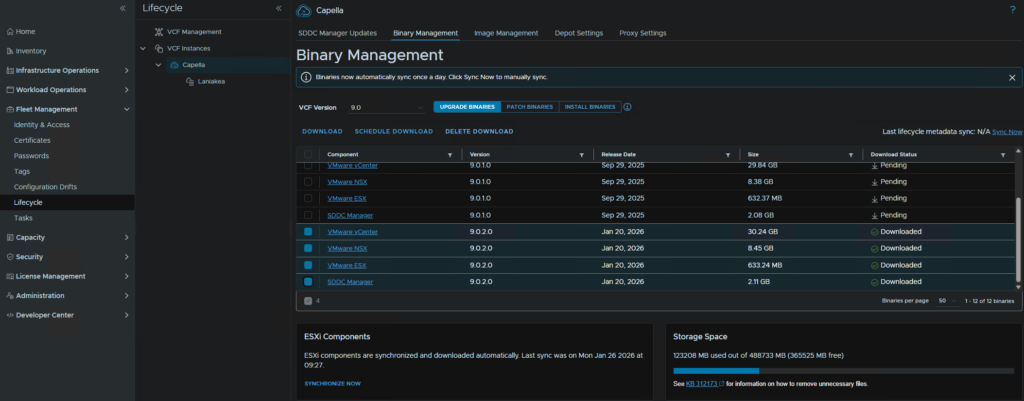
When its done it will look like this
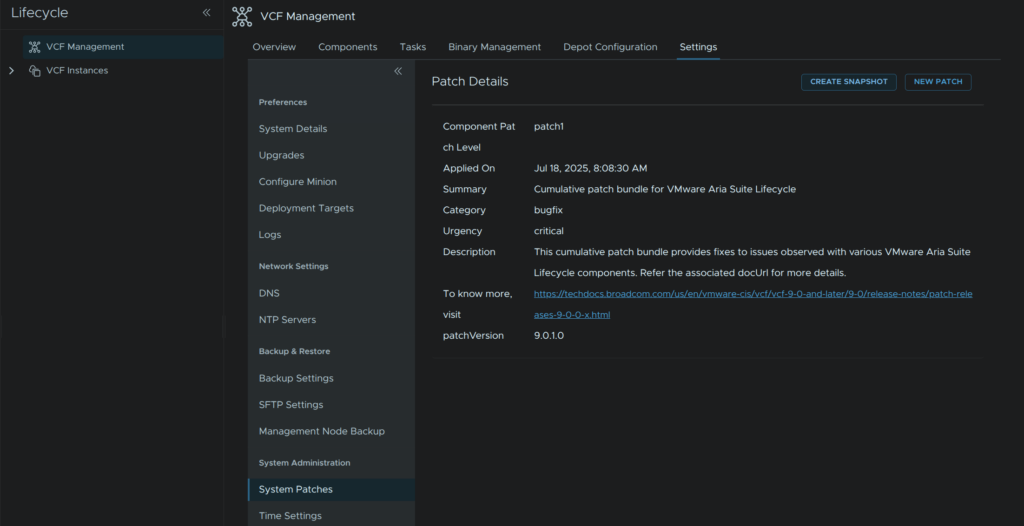
In VCF Management click Settings/System Administration/System Patches and click Create Snapshot
Enter the vCenter name, and click Select vCenter Credential
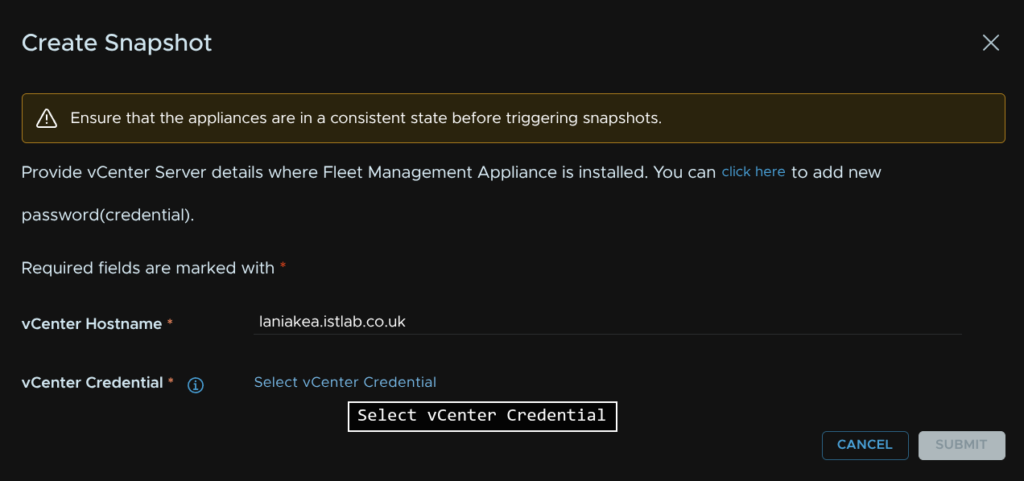
And select the credential that has vSphere administrator permissions

If you dont have one, you can close that page off and use the Click here link to add one
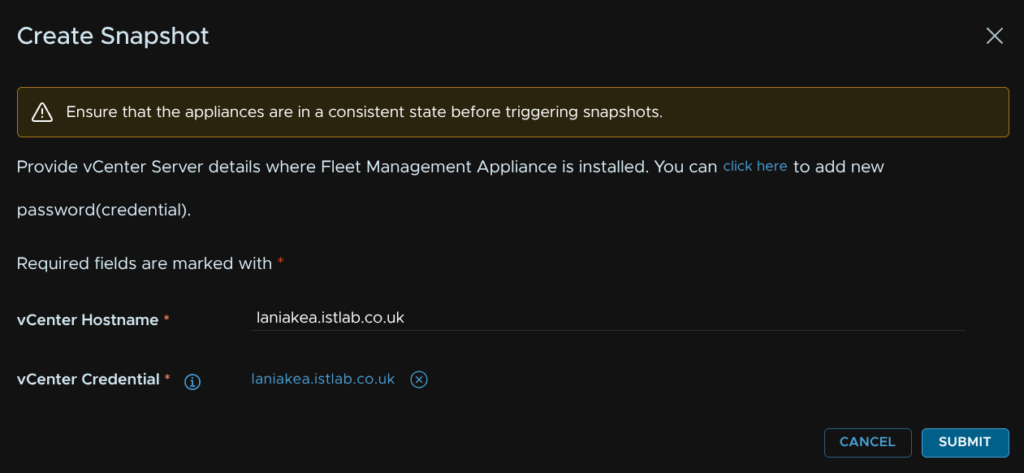
Once you have your credential it will look like this, click Submit
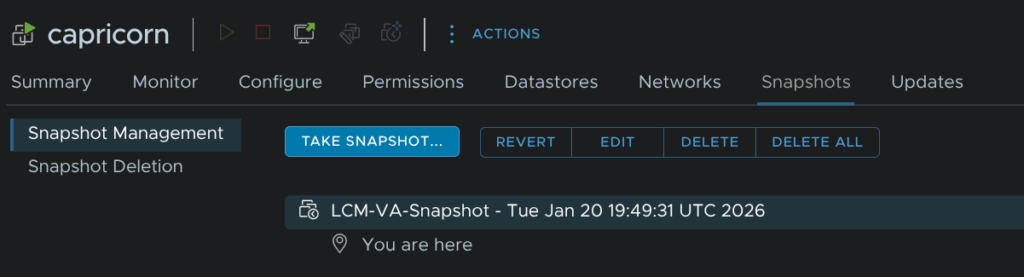
If we check the VM in vSphere we can see thats been taken
Back in VCF Ops we need to check the free space, ensure there is ~50GB free on the fleet management server, we can see this under System Details

Click back to System Patches, then click New Patch
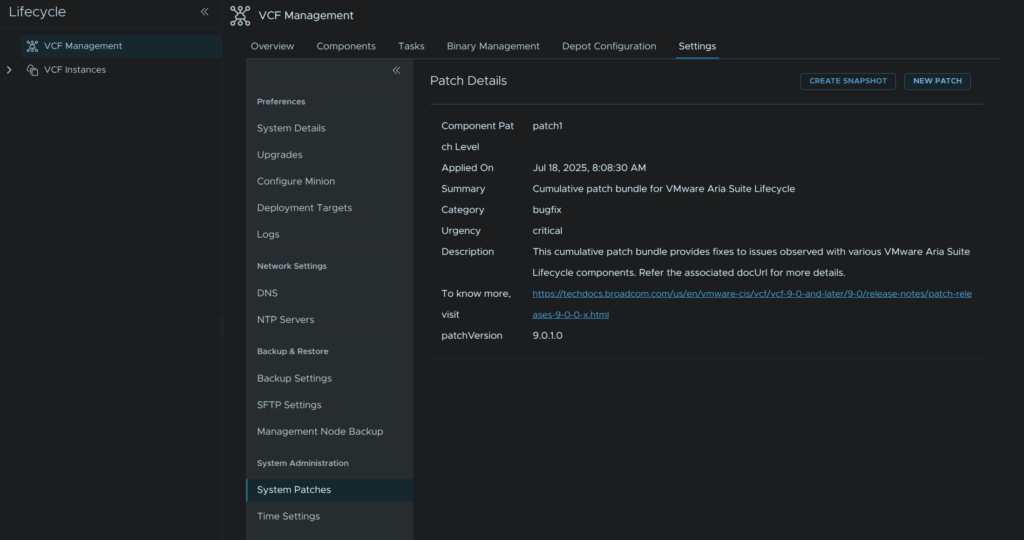
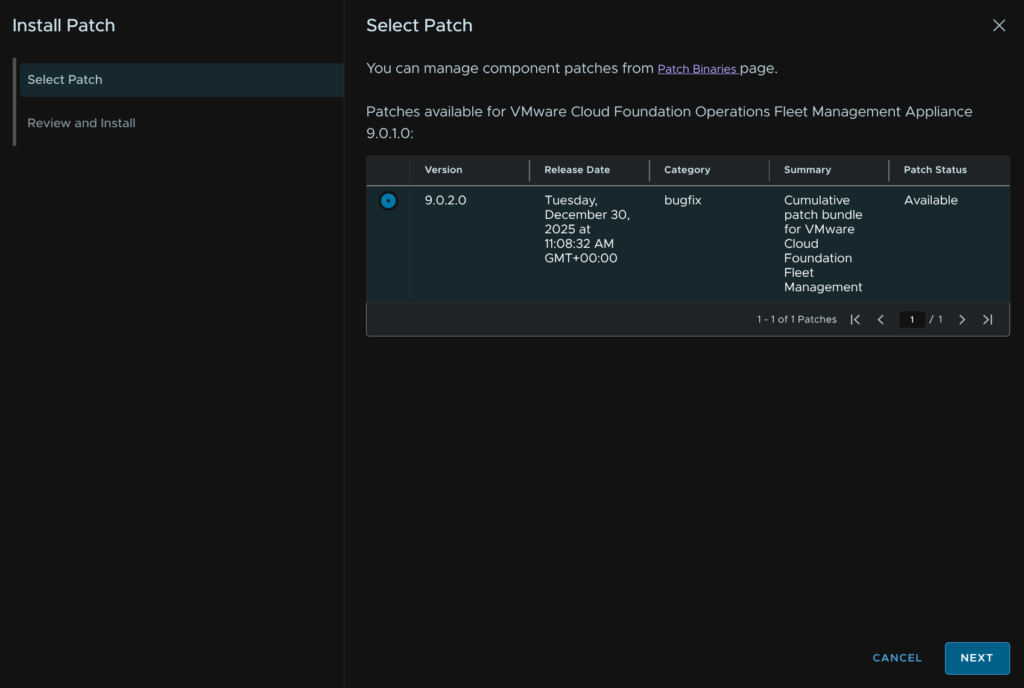
Select the version we downloaded, in my case this is 9.0.2, then click Next
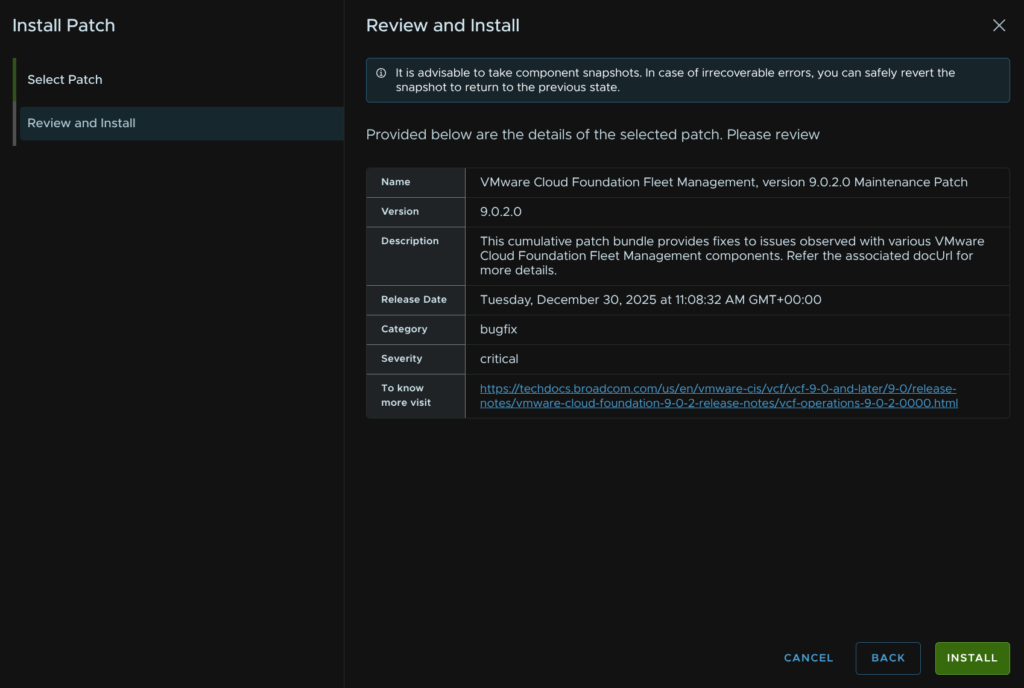
And click Install
Now the task will run in ~60 seconds, it takes longer to apply the patch, this will reboot the fleet management appliance and will take ~20-30 mins
When its done you will need to refresh your page and head to VCF Management/Settings/Preferences/System Details and the new version will show here

Lastly, head back to Binary Management/Patch Management and click the trashcan icon to remove the binary
2 – Creating A Patch Plan
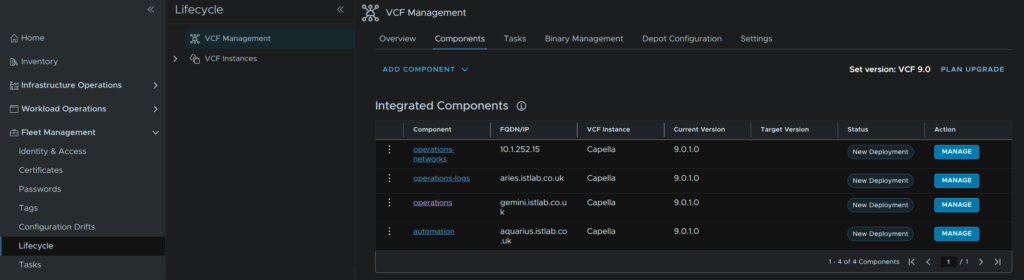
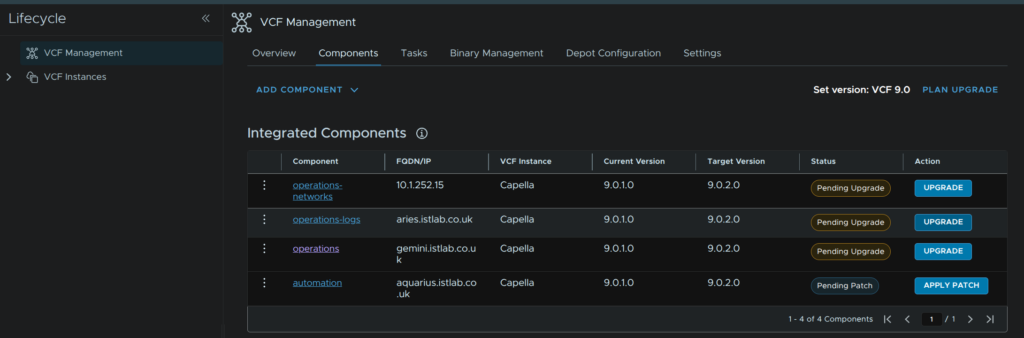
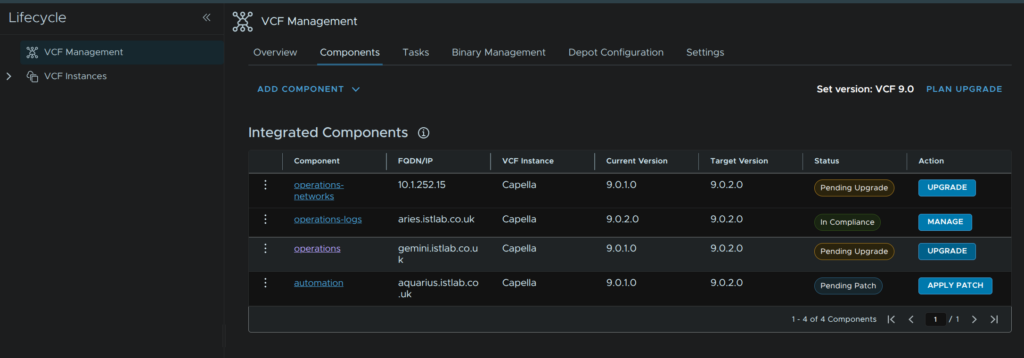
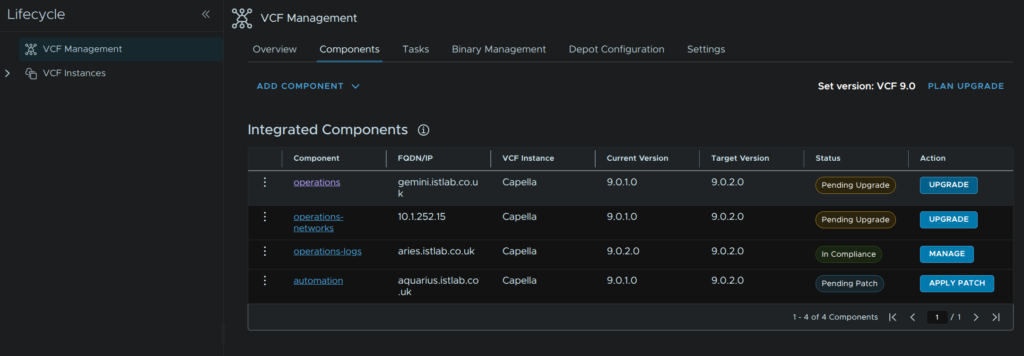
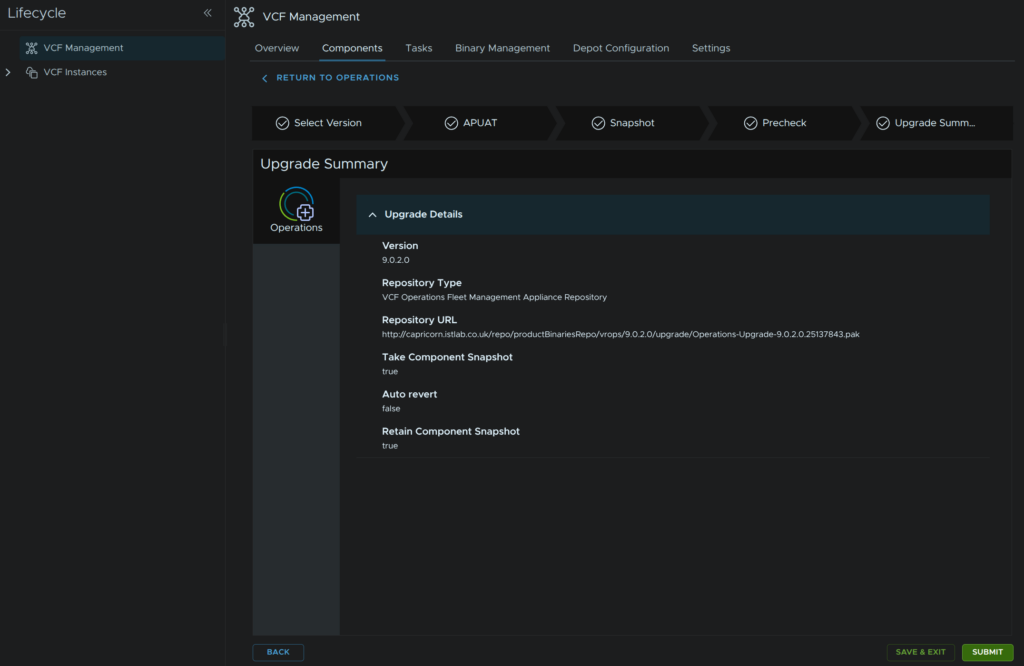
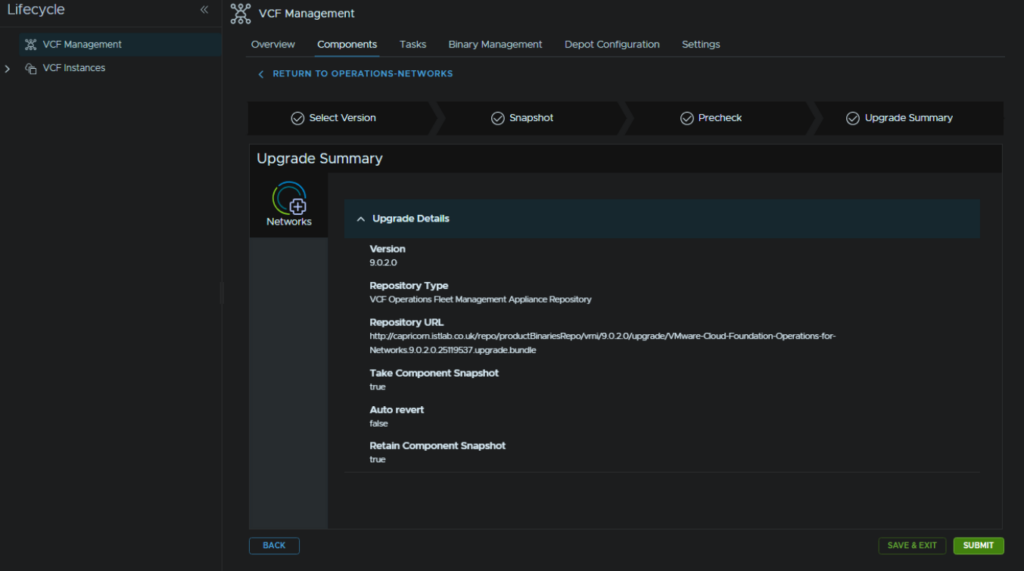
In VCF Ops, head to Fleet Management/Lifecycle/VCF Management/Components and click Plan Upgrade on the right
Select the target version for all installed appliances, in my case 9.0.2 and click Create Plan
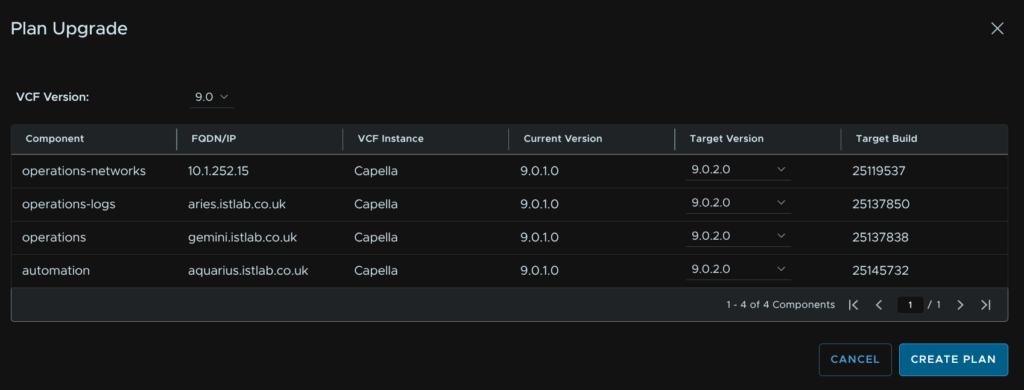
It will then look like this
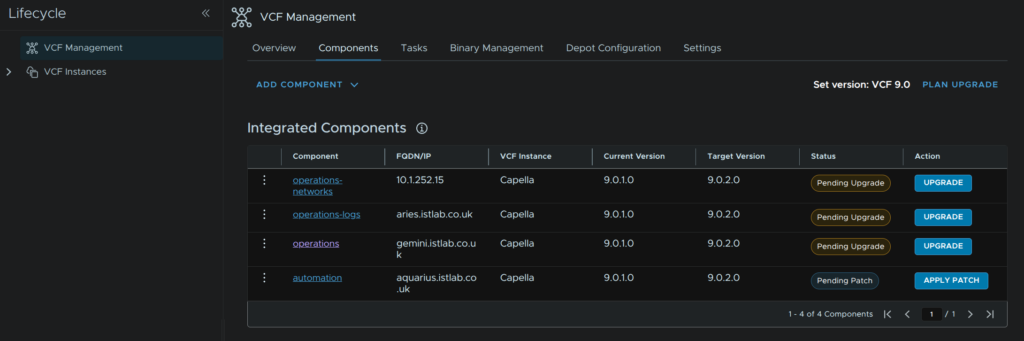
Its important to node here what the action is, if the action is upgrade, when you download the binaries later, ensure its from the upgrade binaries section, if it says patch, ensure its from the patch binaries section, this is very important as this must match, while for 9.0.1 –> 9.0.2 has this layout of upgrades and patches, future versions may not
3 – VCF Operations For Logs
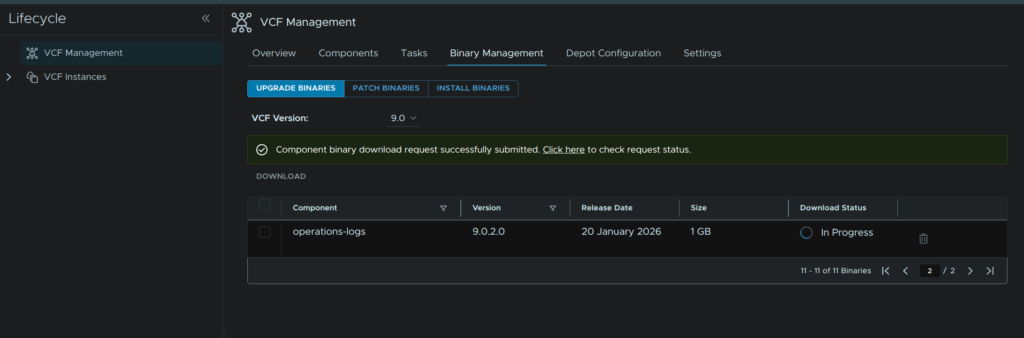
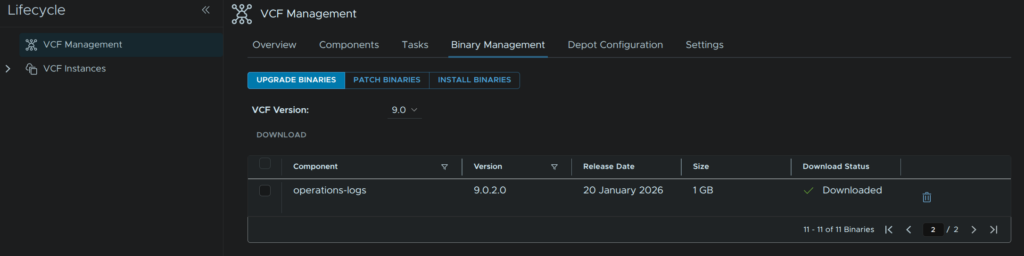
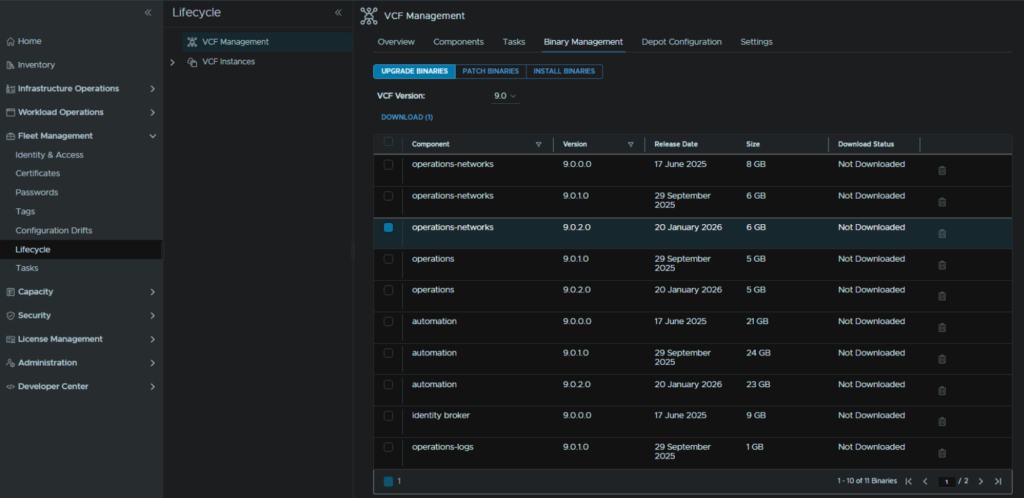
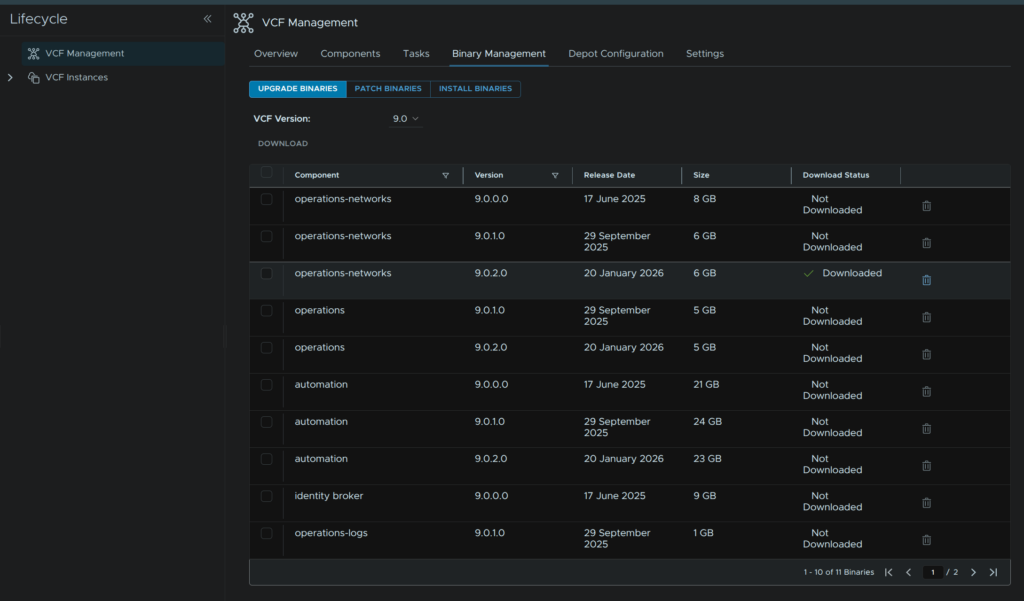
In VCF Operations go to Fleet Management/Lifecycle/VCF Management/Binary Management/Upgrade Binaries, check operations-logs and click Download
Your binary may be on a second page if there are a lot of upgrade files
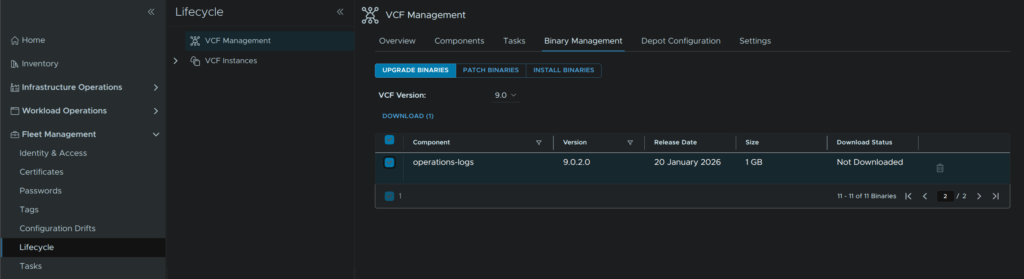
It will show as Downloading on the status section, you can also use the Click Here link for the task list
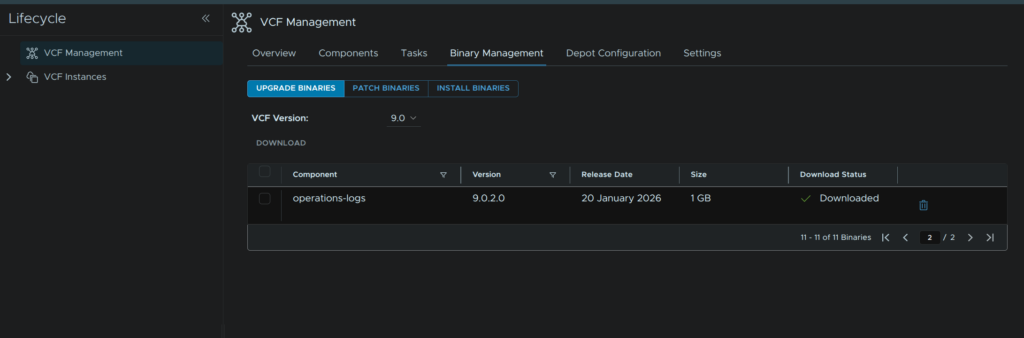
When its done it should look like this
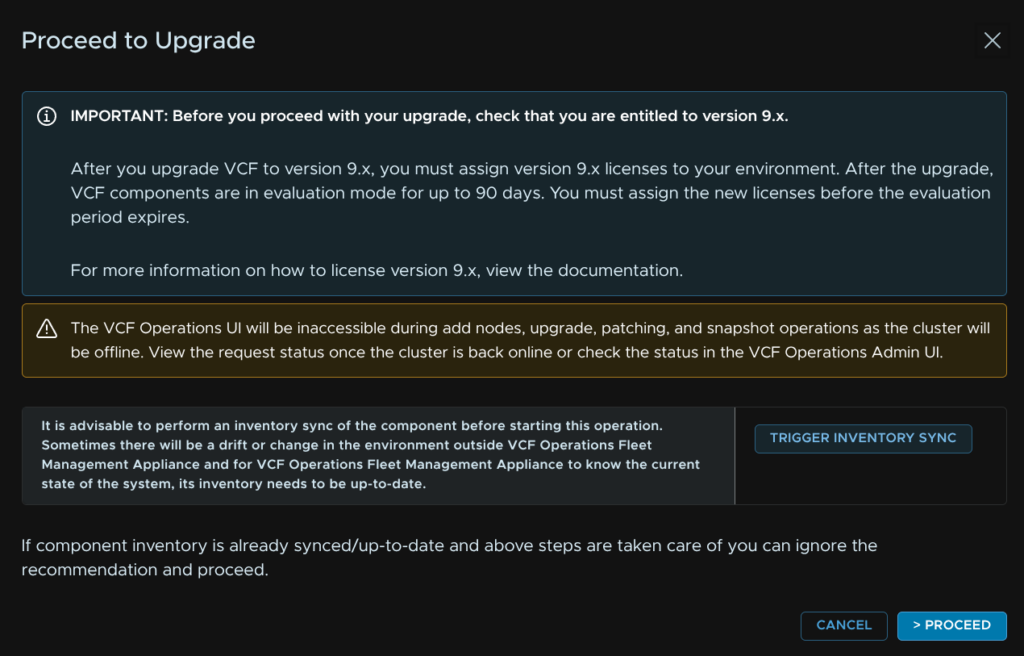
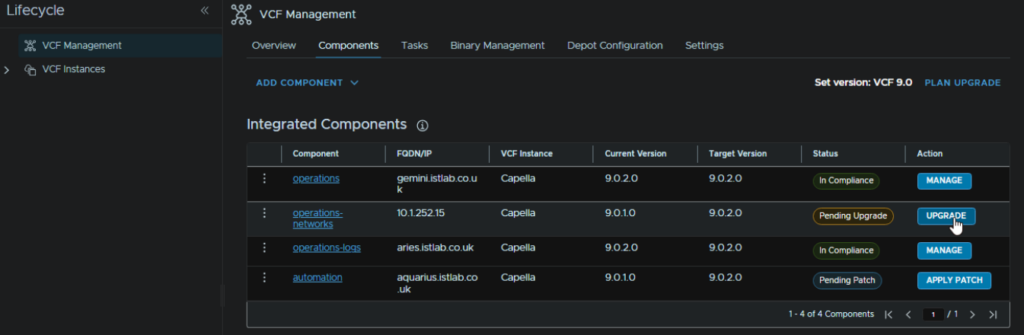
Head back to Components and under operations-logs click Upgrade
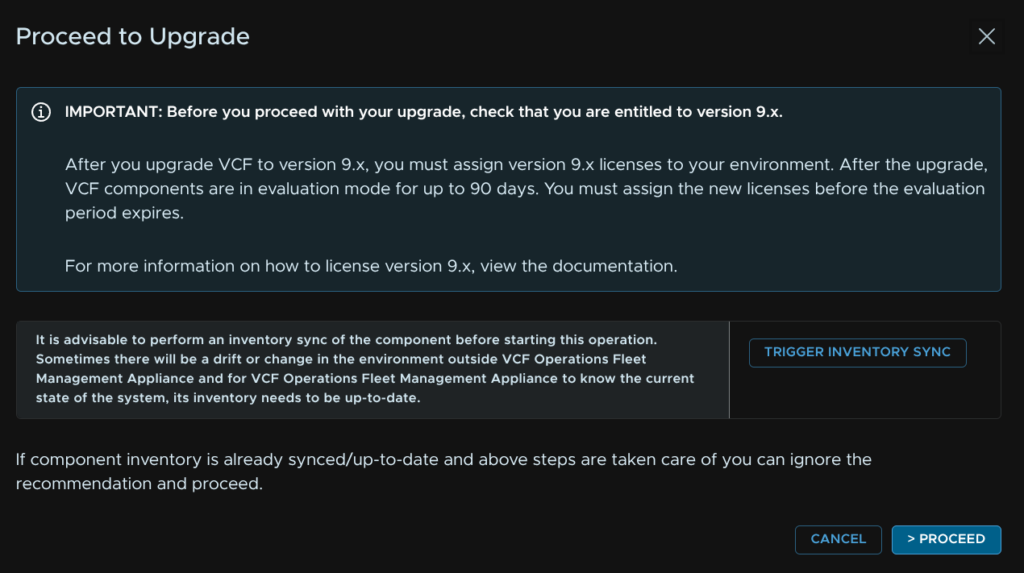
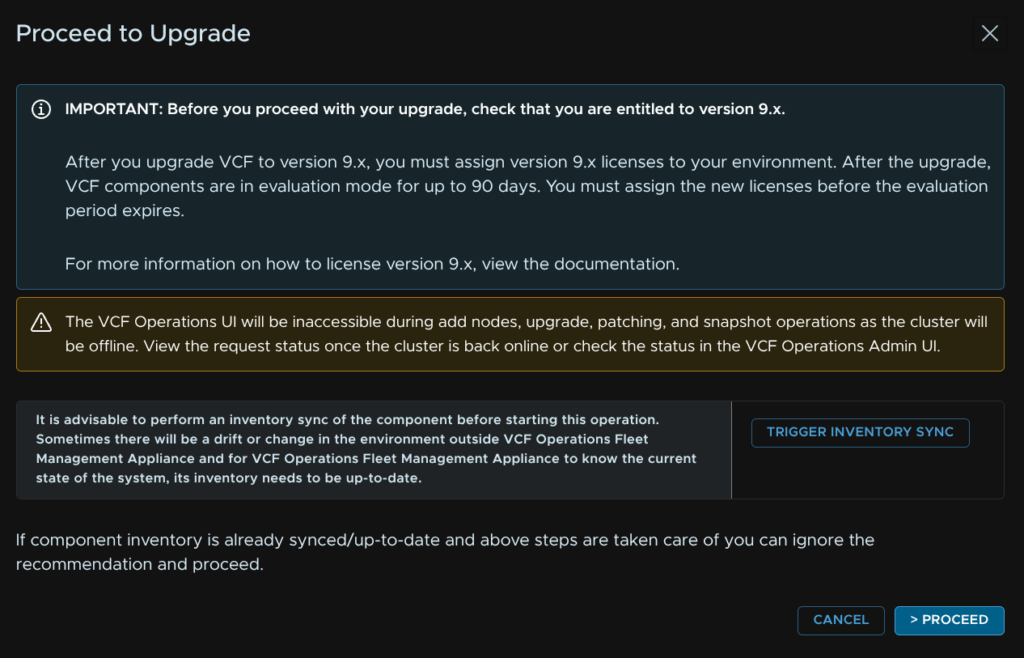
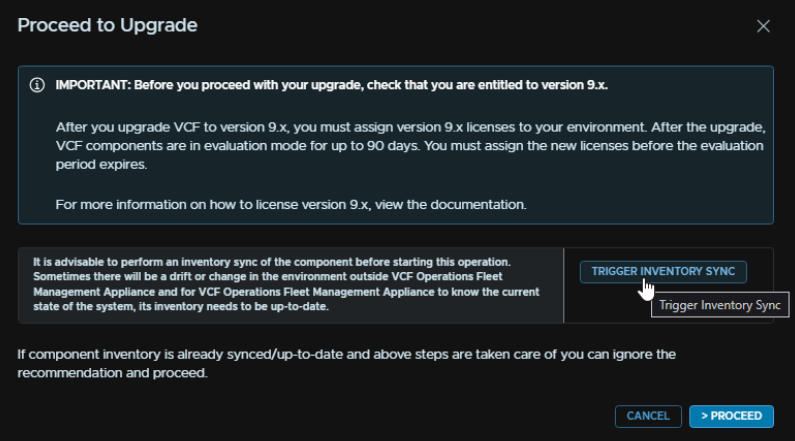
Click Trigger Inventory Sync

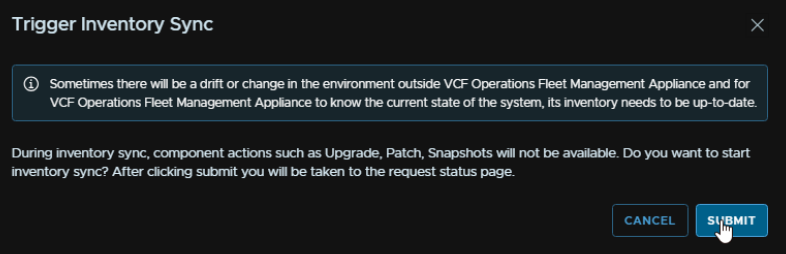
Then click Submit
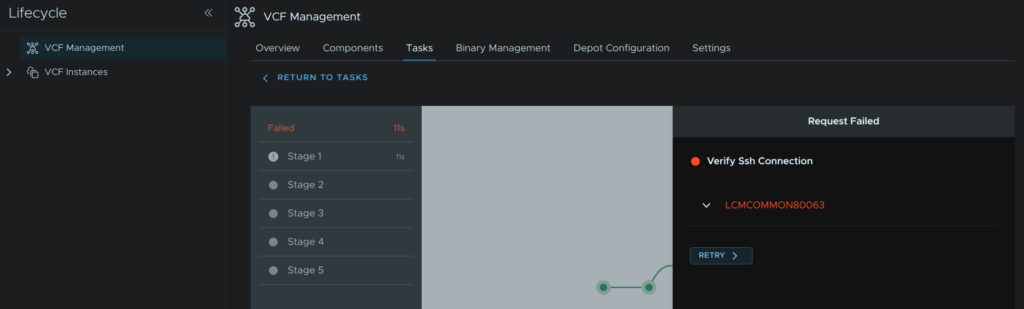
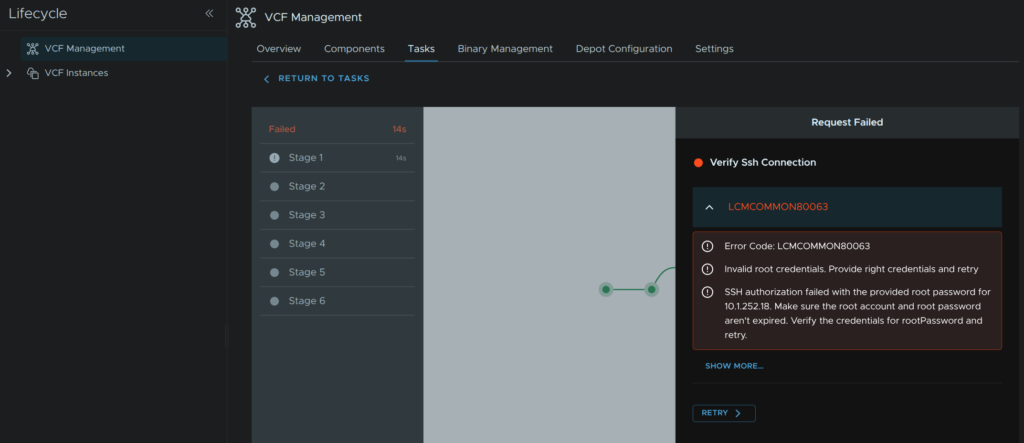
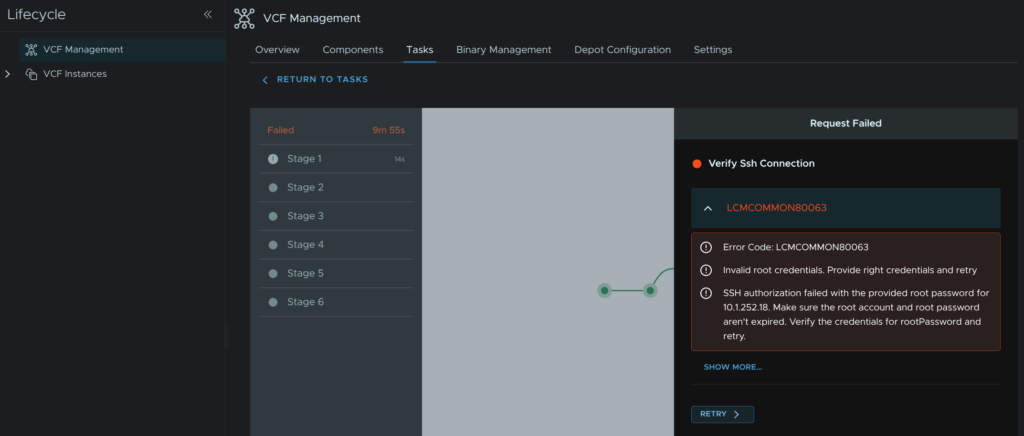
3.1 – Error LCMCOMMON80063
I did get this error for invalid credentials, click Retry
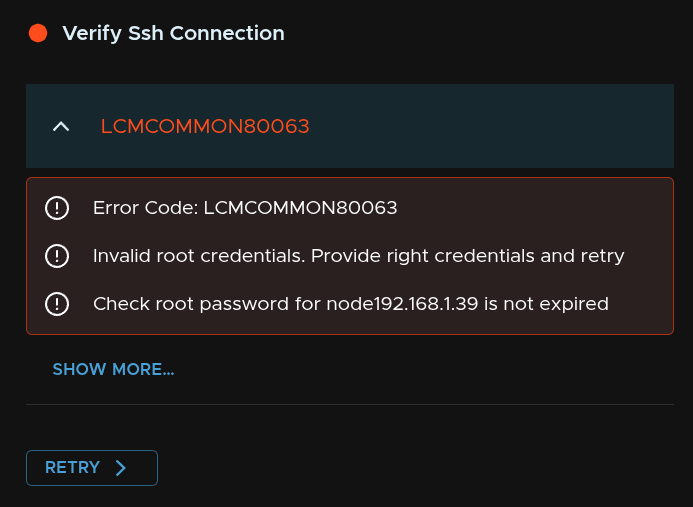
This is usually caused by an expired root password, we can ssh to the logs server and see if thats the case, for me it prompts me it needs changing, edit this in the node SSH session
You can also set the root password expiry time in the SSH console with
passwd -x <days> rootI opted for this to remove the expiry due to the 90 day password expiry by default, is entirely unnecessary and makes management a massive pain
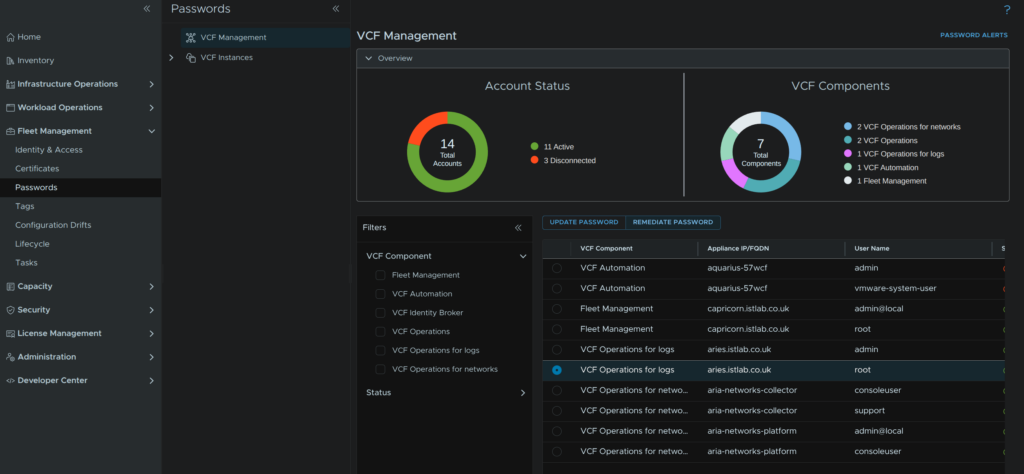
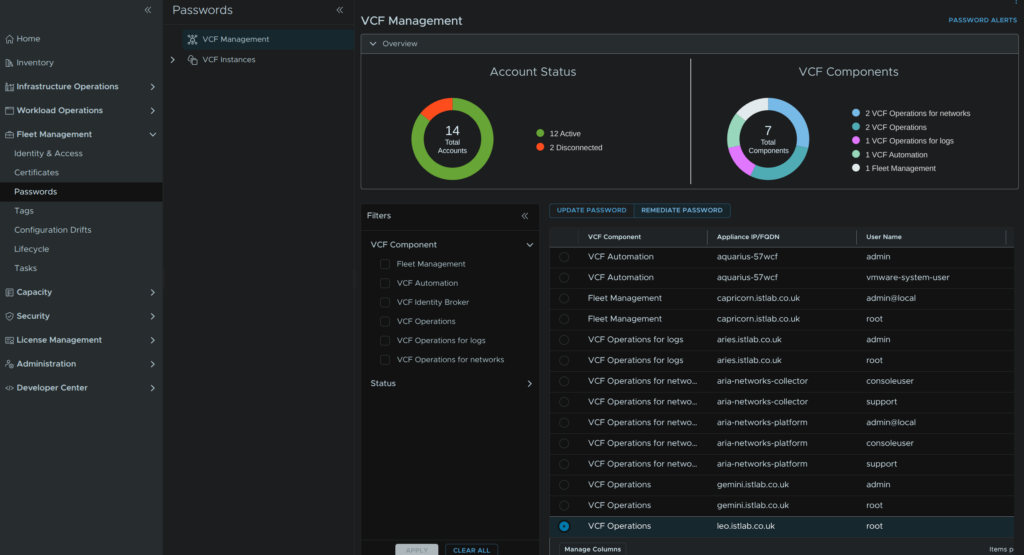
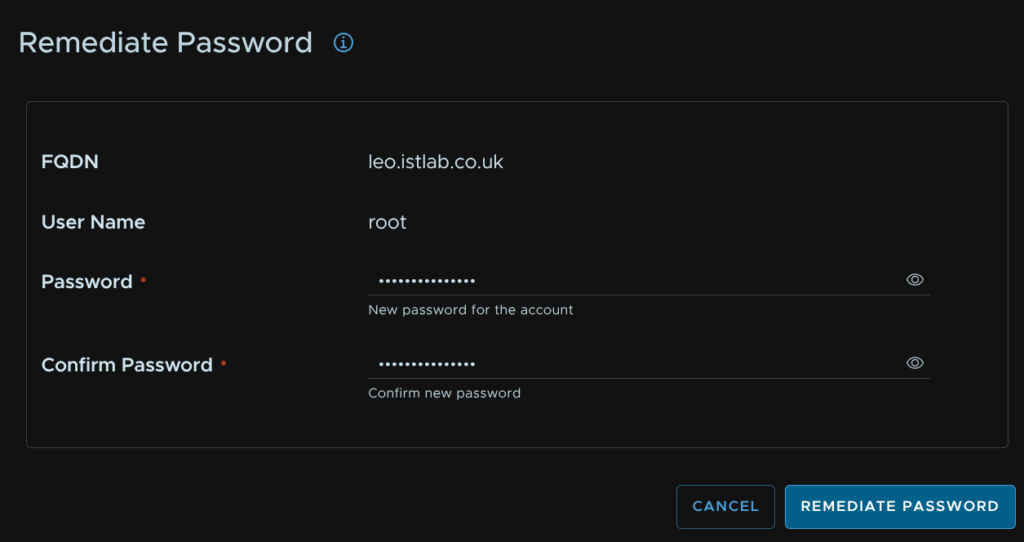
passwd -x 9999 rootNow that we have set a new password we must tell the Fleet Management server what it is, head to Fleet Management/Passwords/VCF Management, select the VCF Operations For Logs root credential and click Remediate Password
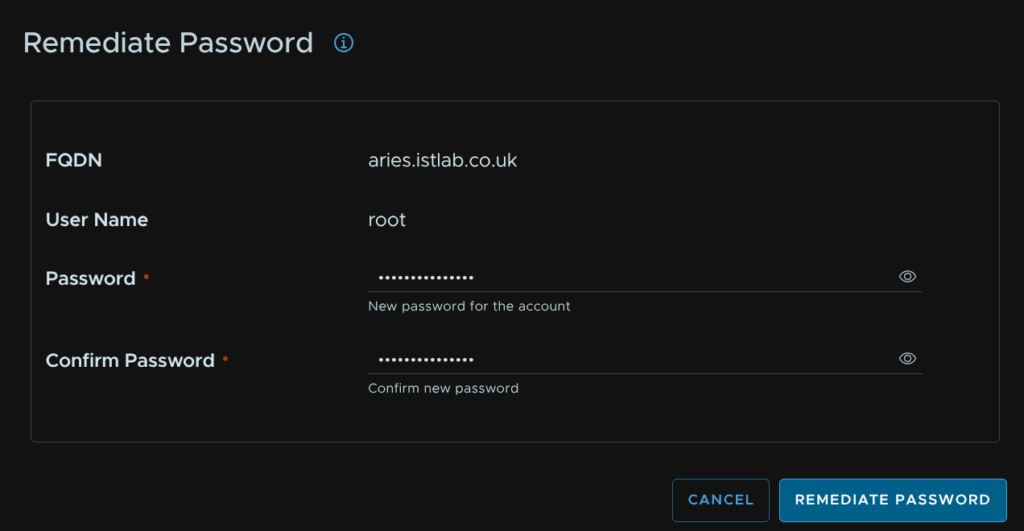
Enter a new password and click Remediate Password
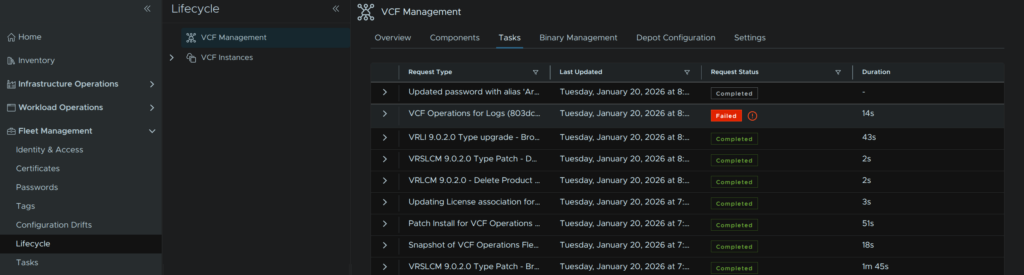
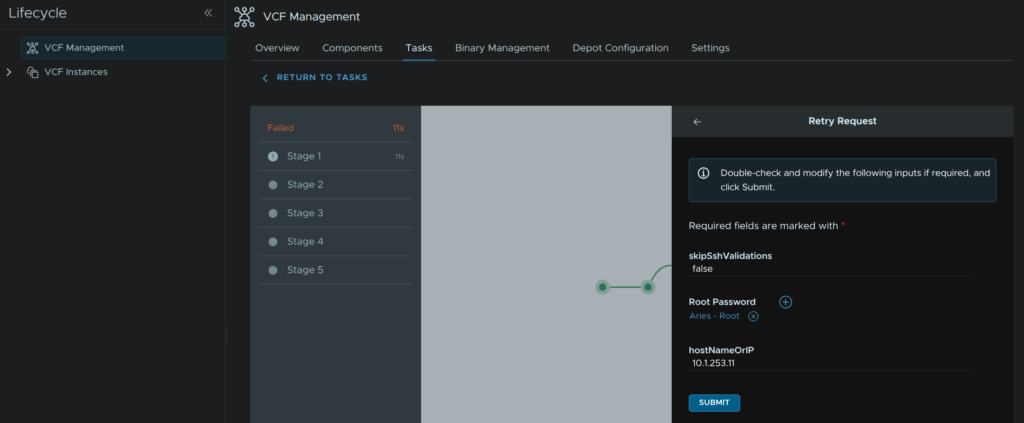
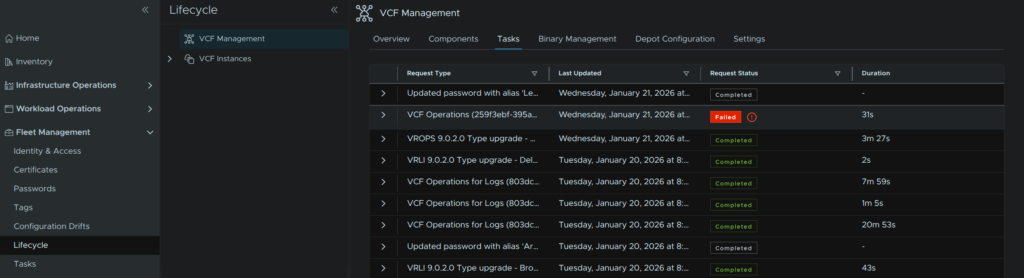
Heading back to Fleet Management/Lifecycle/VCF Management/Tasks we can click on the failed task
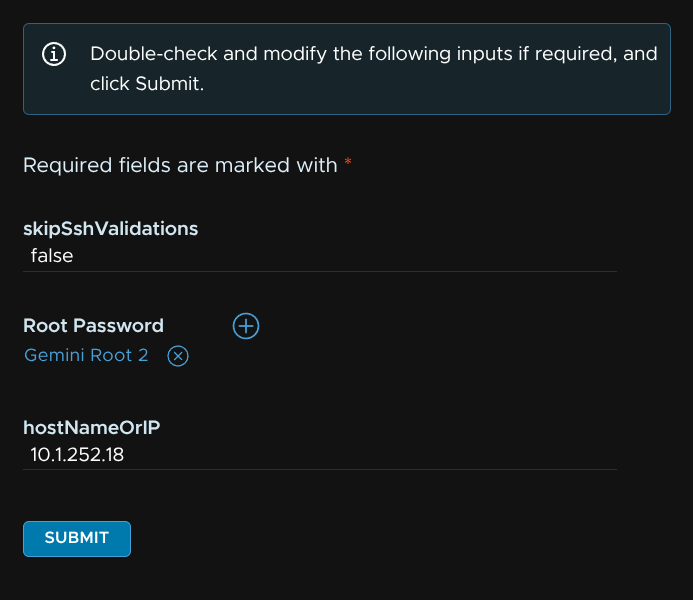
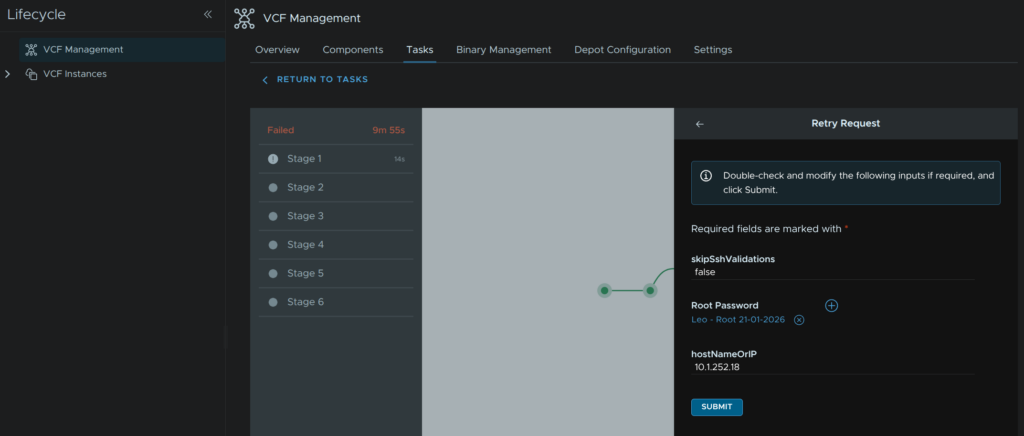
Click Retry
Then click Submit
Your pre populated password should be correct, if not you can click the + and manually add it
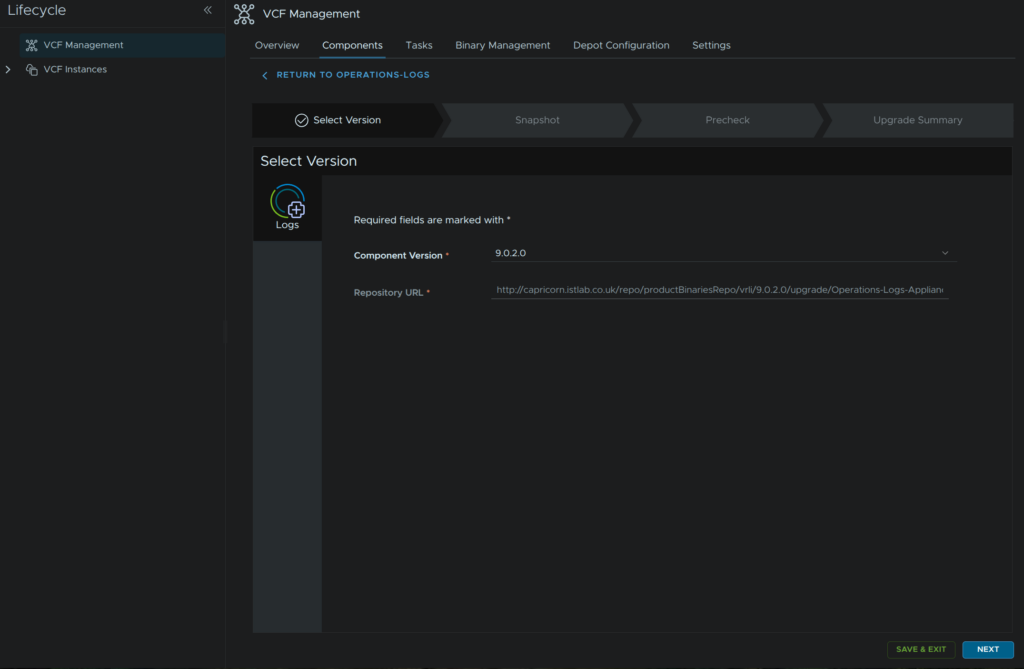
Now we have the inventory sync done, click back to components and under operations-logs click Upgrade

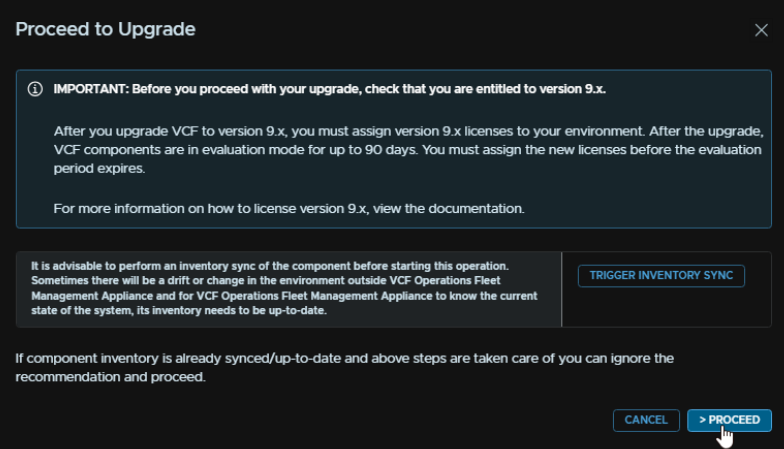
Click Proceed
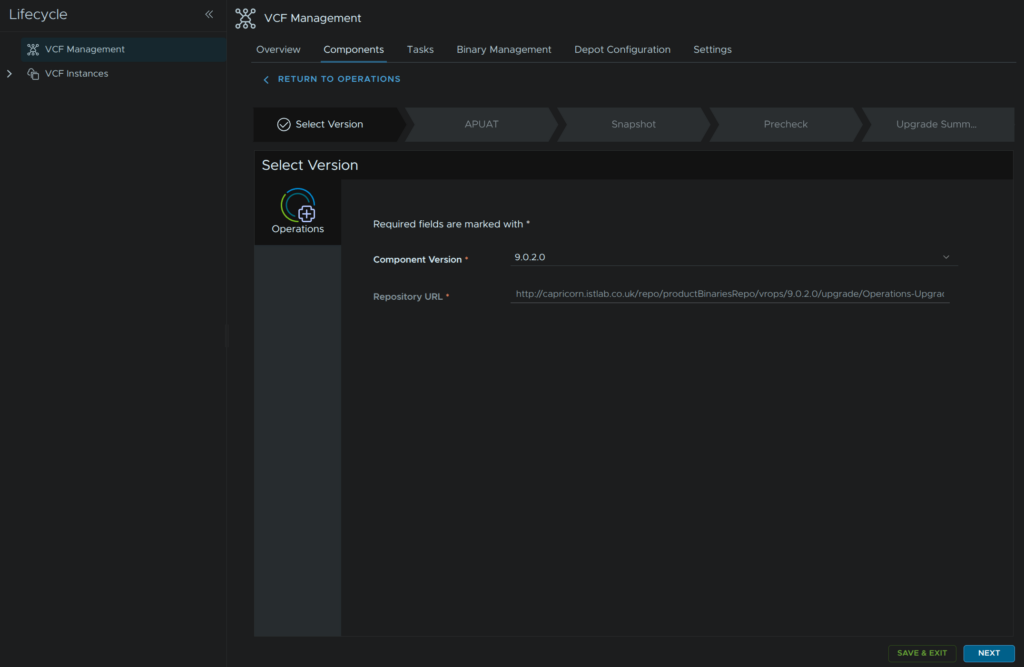
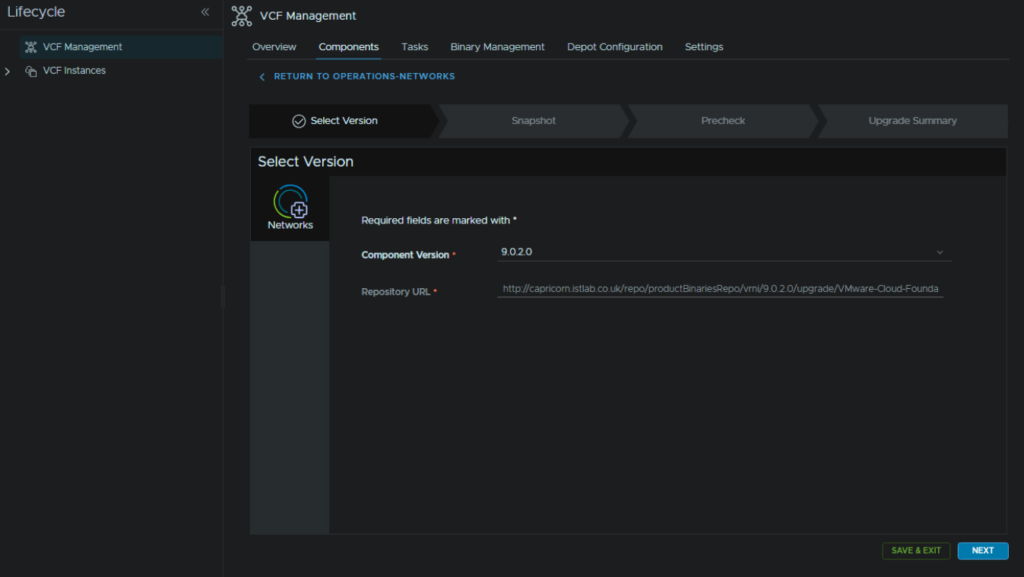
This should be auto populated and click Next
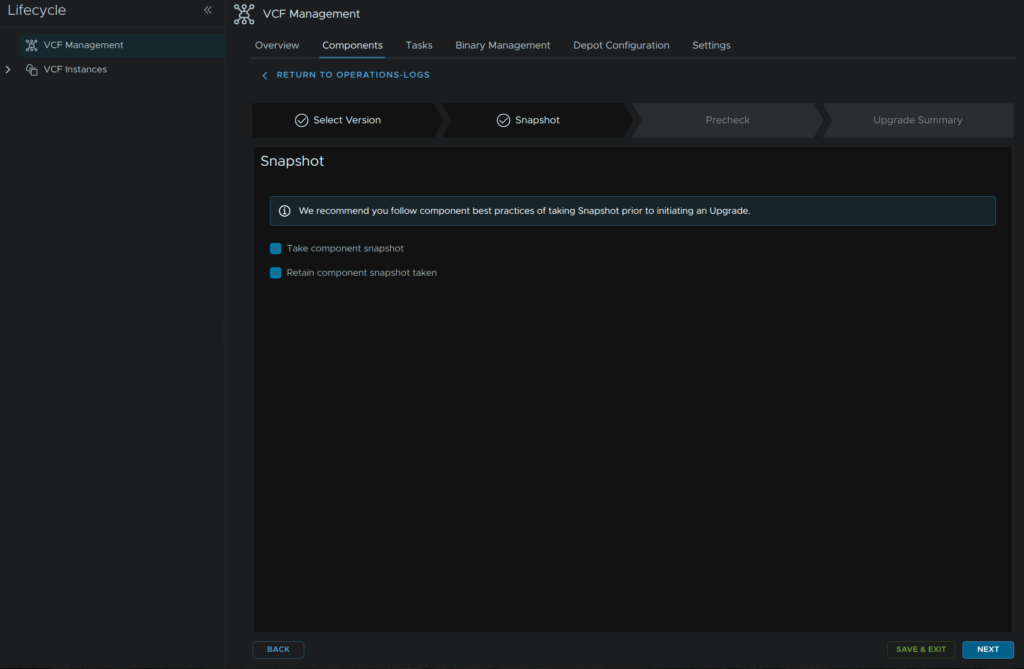
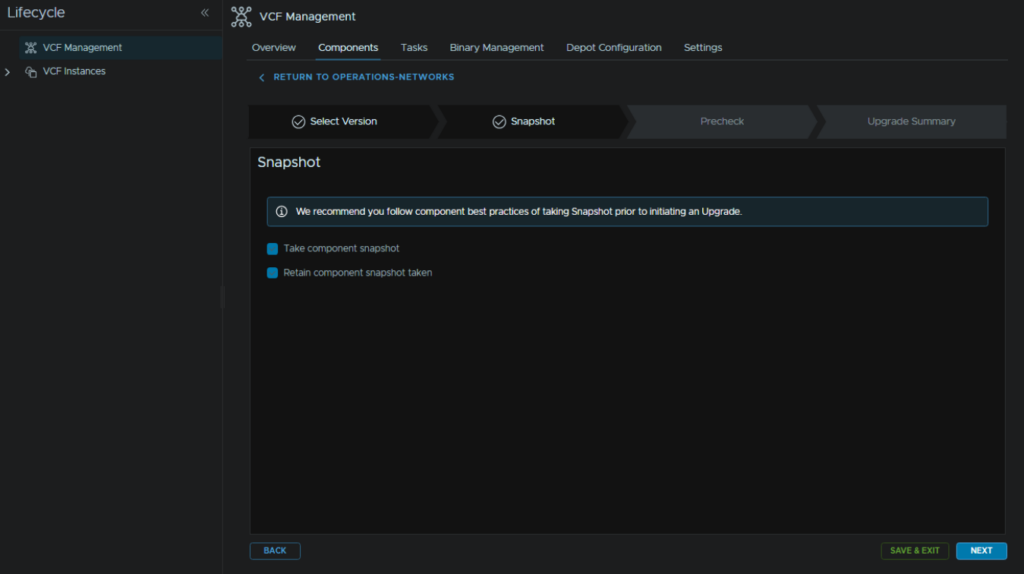
Check both boxes, this will keep our snapshot, and click and click Next
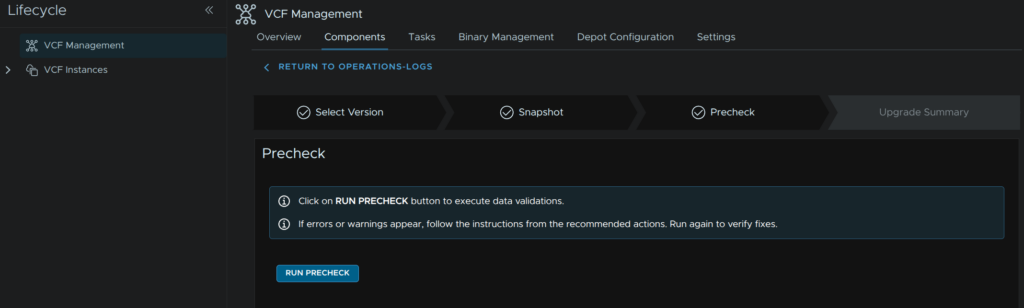
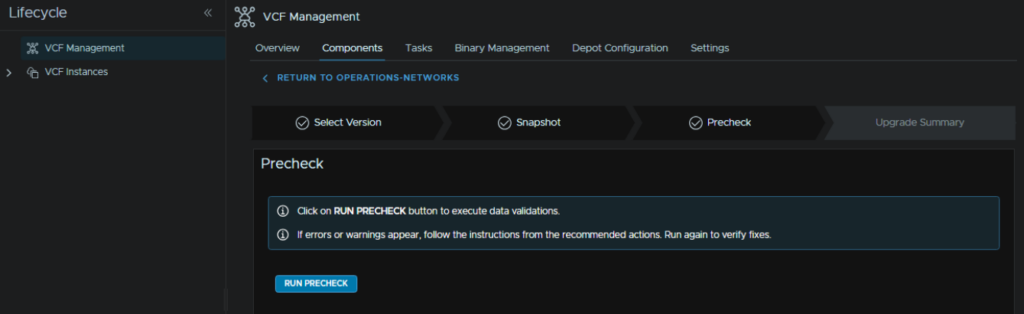
Click Run Pre Check
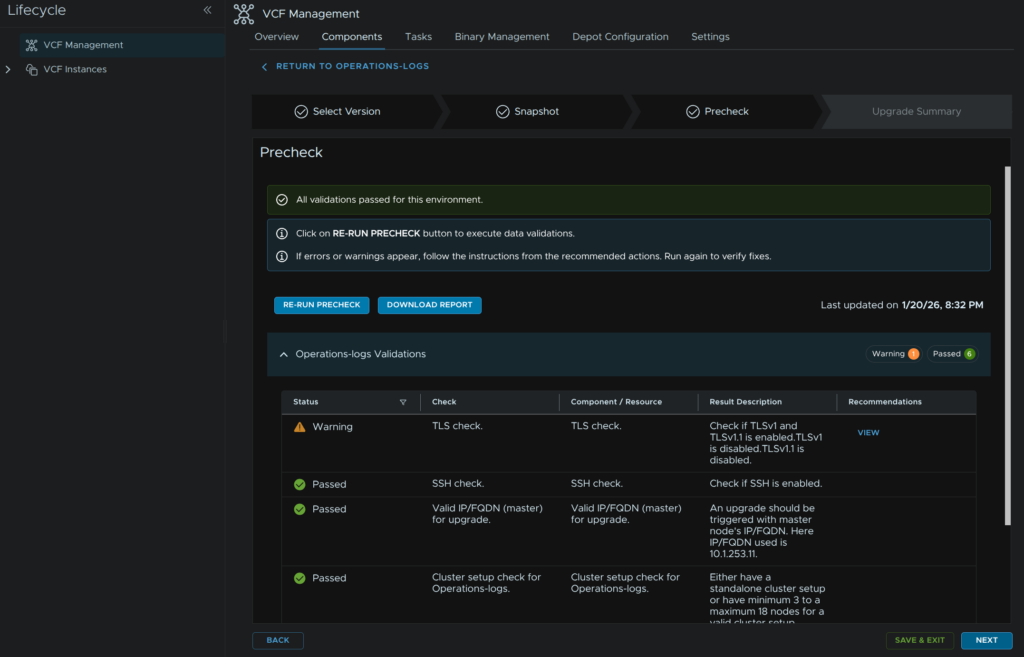
You may see a TLS warning, ignore this and click Next
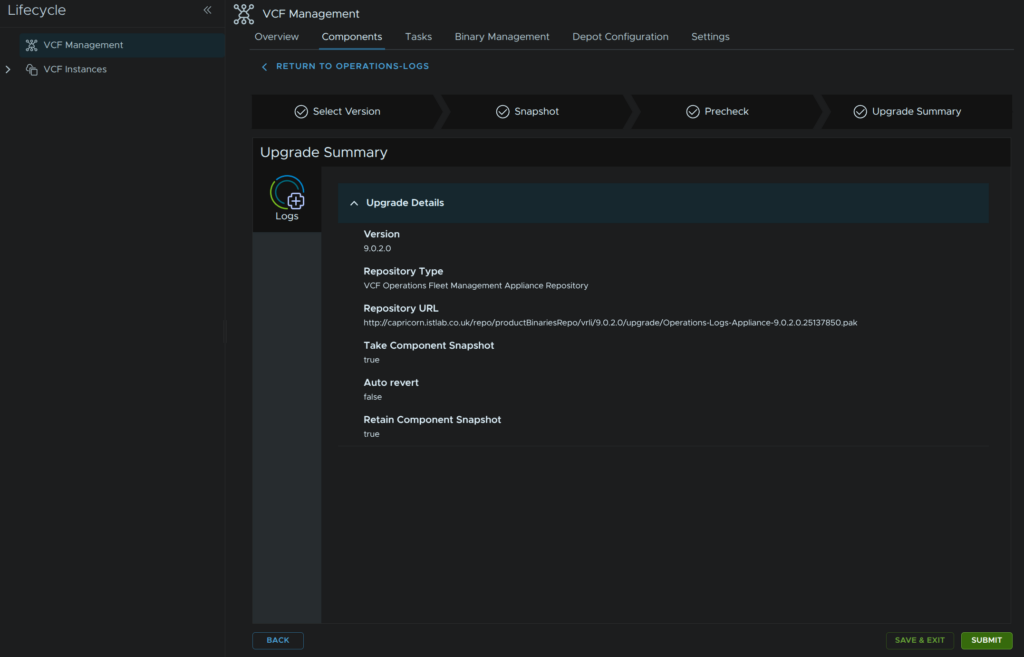
Then click Submit
For me this took ~10 mins and is very quick
Lastly, head back to Binary Management/Upgrade Binaries and click the trash can on operations-logs
4 – VCF Operations
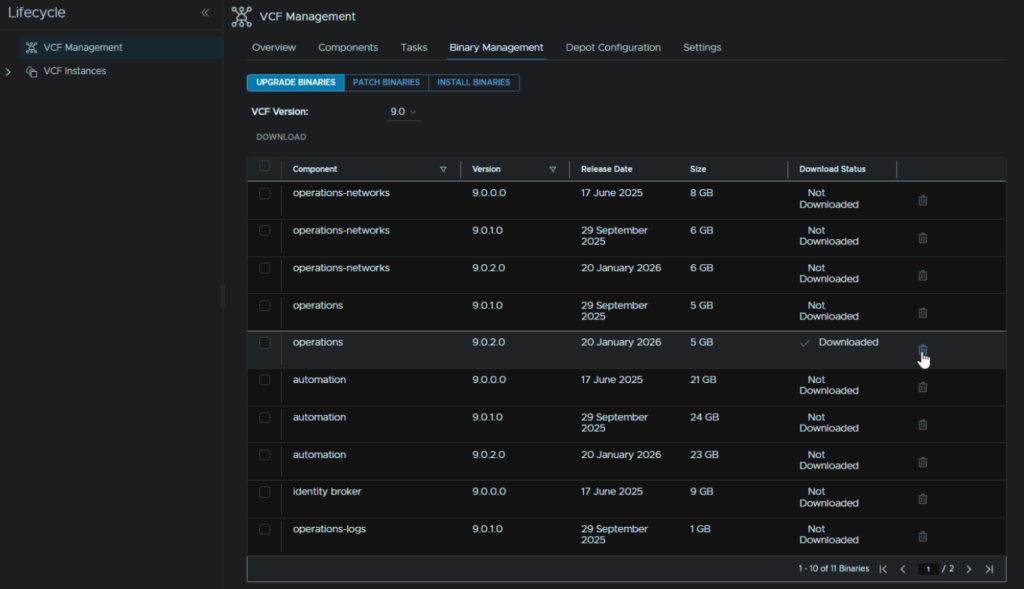
In VCF Operations go to Fleet Management/Lifecycle/VCF Management/Binary Management/Upgrade Binaries, check operations and click Download
When its done it should look like this
Then head to Components and on the operations component, click Upgrade
Click Trigger Inventory Sync
And click Submit

4.1 – Error LCMCOMMON80063
If you see this error, where the IP relates to your operations collector, its likely using the wrong credentials, click Retry
This is usually caused by an expired root password, we can ssh to the collector and see if thats the case, for me it prompts me it needs changing, edit this in the node SSH session
You can also set the root password expiry time in the SSH console with
passwd -x <days> rootI opted for this to remove the expiry due to the 90 day password expiry by default, is entirely unnecessary and makes management a massive pain
passwd -x 9999 rootNow that we have set a new password we must tell the Fleet Management server what it is, head to Fleet Management/Passwords/VCF Management, select the VCF Operations Collector root credential and click Remediate Password
Enter the new password we set and click Remediate Password
We can then head back to Lifecycle/VCF Management/Tasks and click the failed task from the inventory sync
Then click Retry
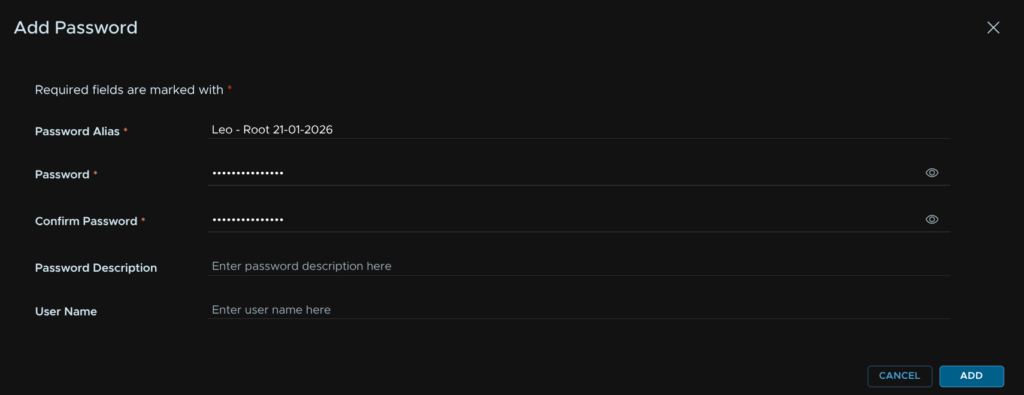
Then click the Plus
Enter an alias, I recommend a date as I havent figured out how to remove these yet, add the password and click Add
Click x

Then click Select Root Password

And select the new password

Then click Submit
When the inventory sync has finished, head back to Components and click Upgrade on the operations appliance again
Click Proceed
Click Next, this should be pre populated
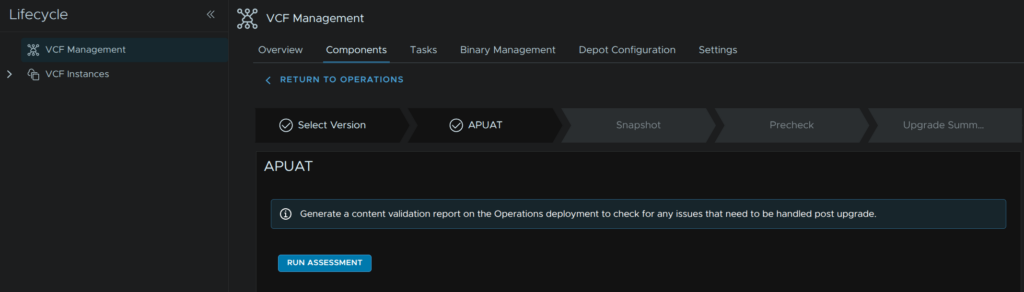
Click Run Assessment
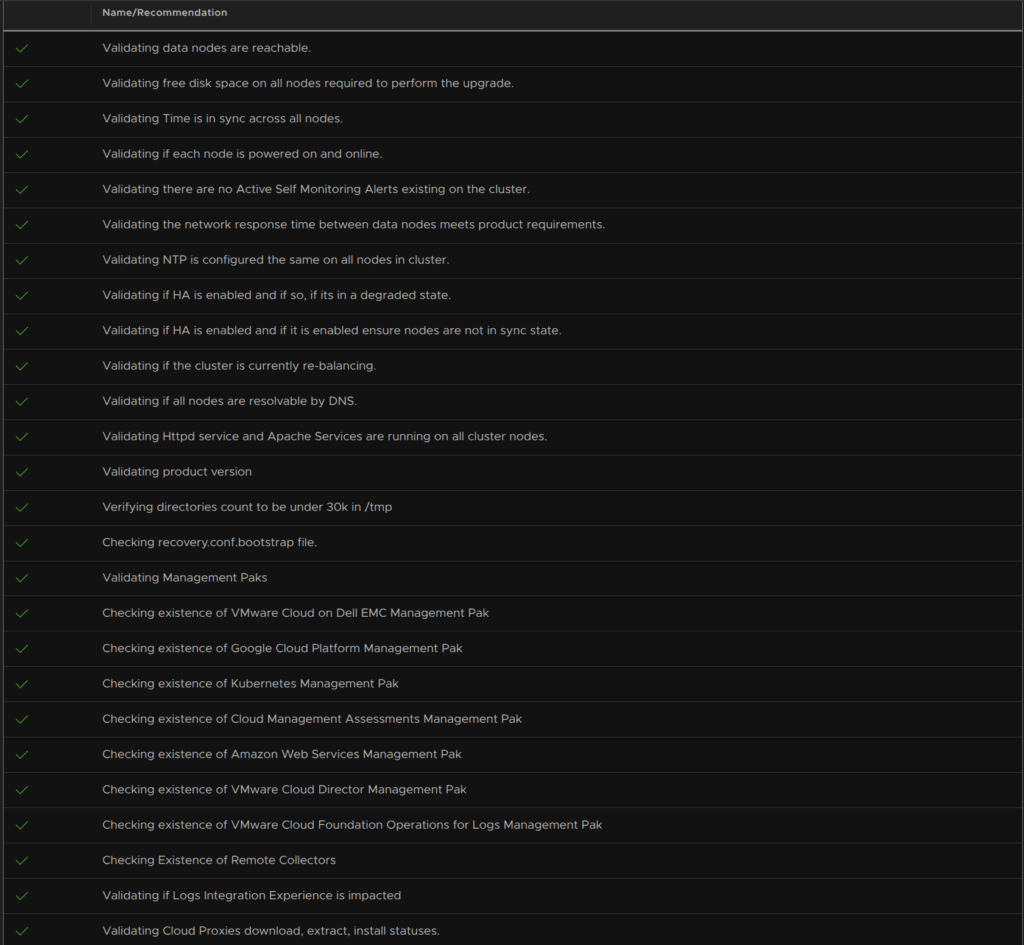
Click View Report
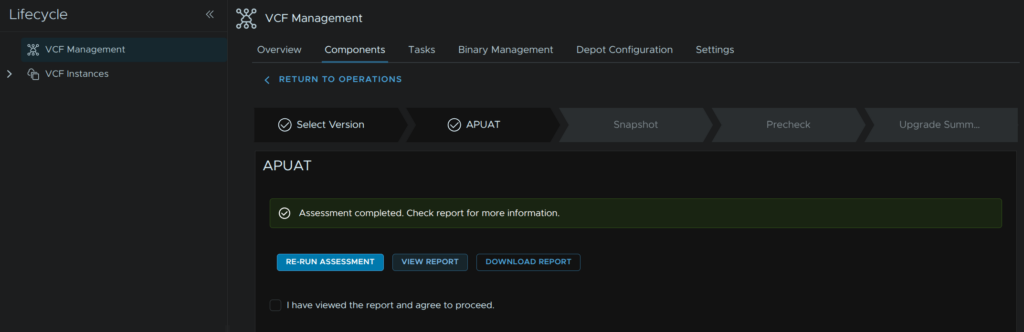
And check everything is green
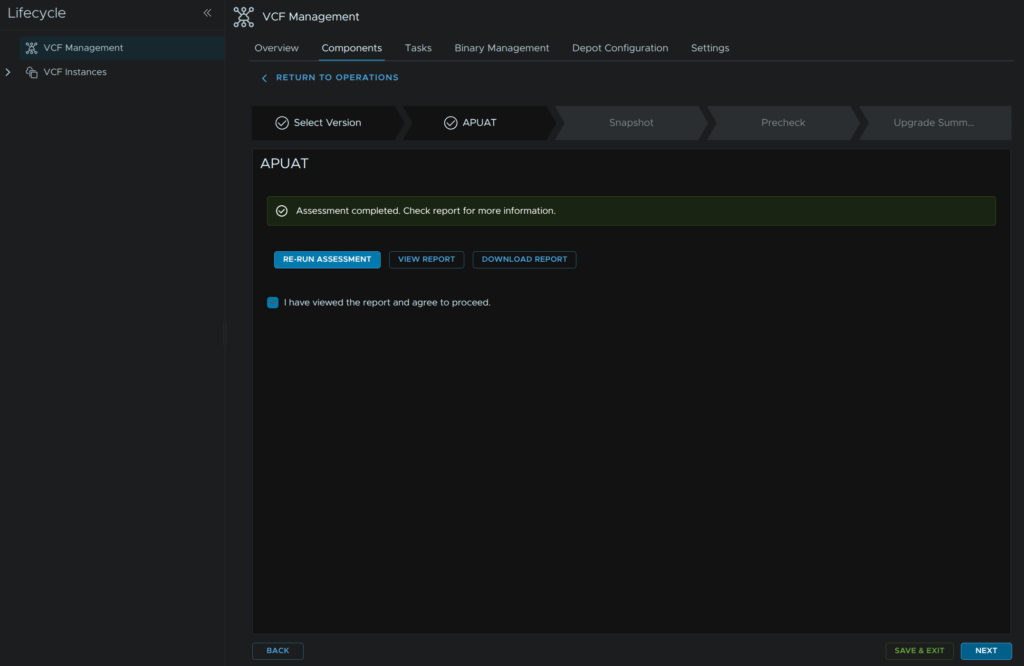
When you are happy, check the box and click Next
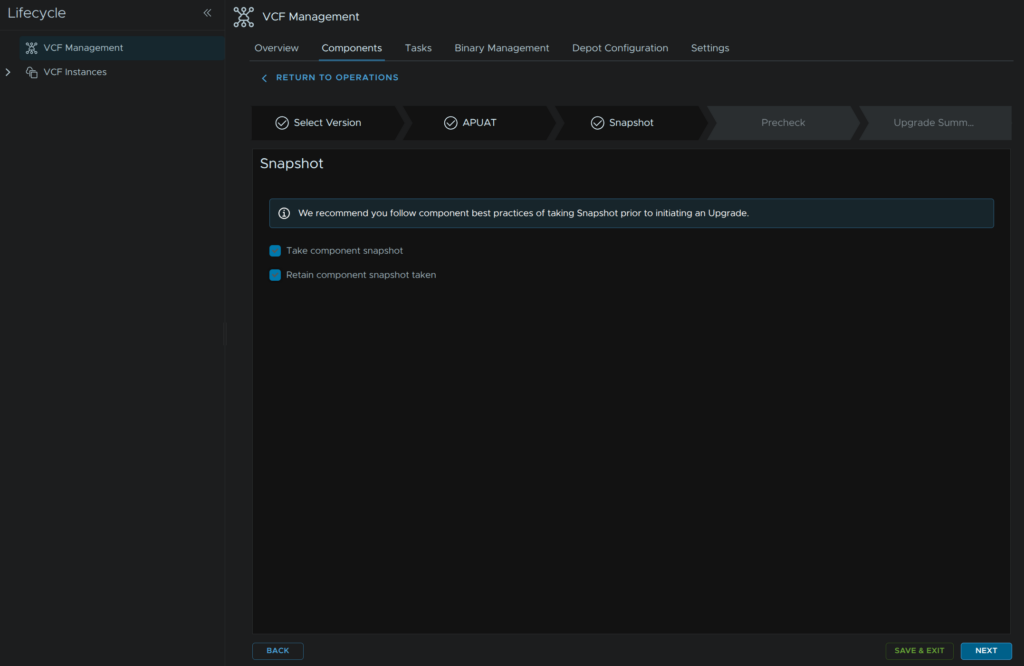
Check both boxes to take and keep a snapshot and click Next
Click Run Pre Check

Ensure checks all have passed and click Next

Then click Submit
This will take ~1 hour
When its done, head back to Fleet Management/Lifecycle/ VCF Management/Binary Management/Upgrade Binaries and click the trashcan icon on the operations section to remove the download
5 – VCF Operations For Networks
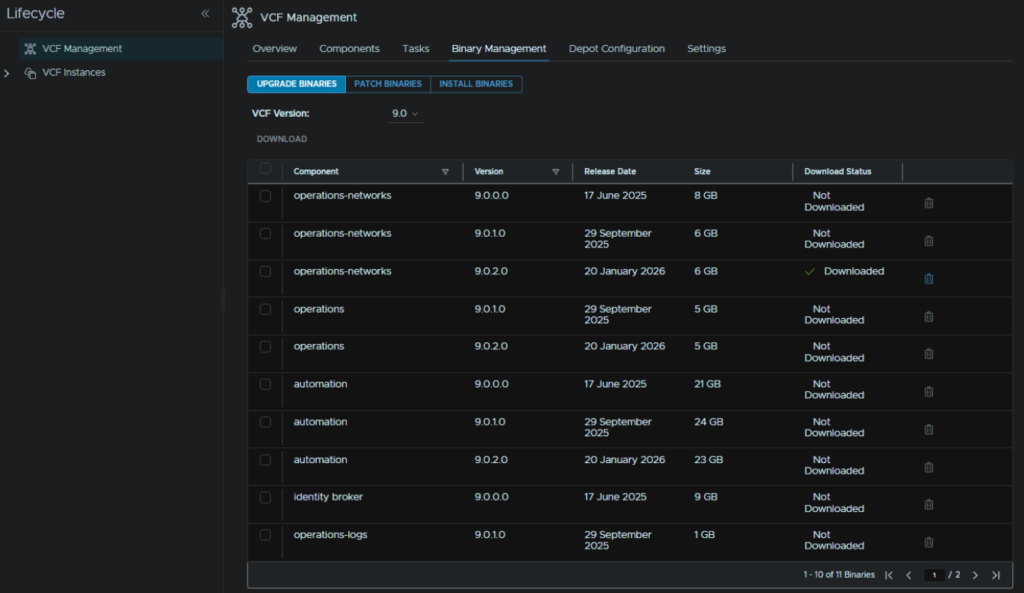
In VCF Operations go to Fleet Management/Lifecycle/VCF Management/Binary Management/Upgrade Binaries, check operations-networks and click Download
When its done it should look like this
Head to Components and on the operations-networks component, click Upgrade
Click Trigger Inventory Sync
And click Submit
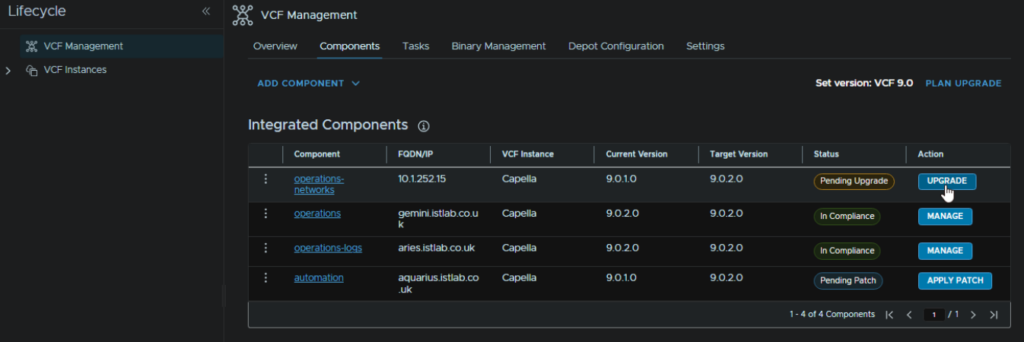
When thats run come back to the Components section and click Upgrade again
And click Proceed
Click Next, this will be auto populated
Check both boxes to take and keep a snapshot, then click Next
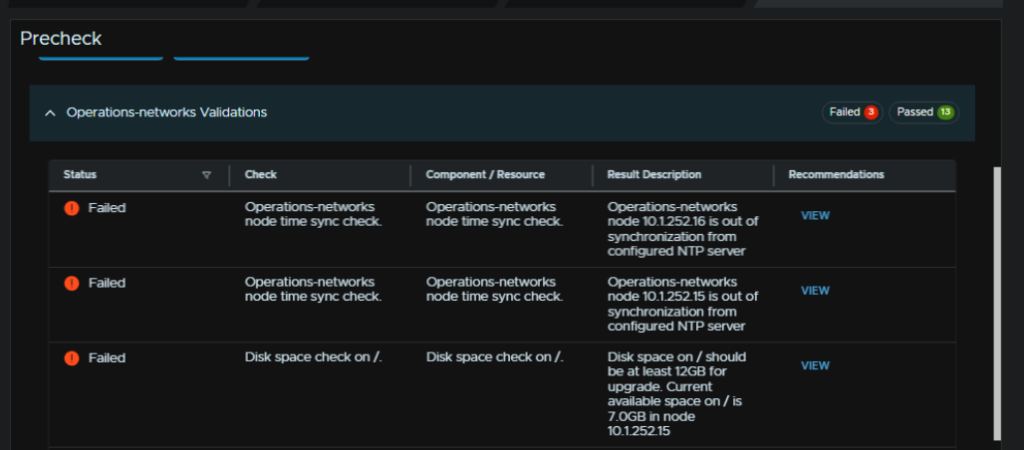
Click Run Precheck
Now I got a couple of errors, two for NTP and another for / disk space
5.1 – NTP Check Failed
This will often crop up as an error on an upgrade, to address this, in VCF Operations, head to Fleet Management/Lifecycle/VCF Management/Components and select the operations-networks component
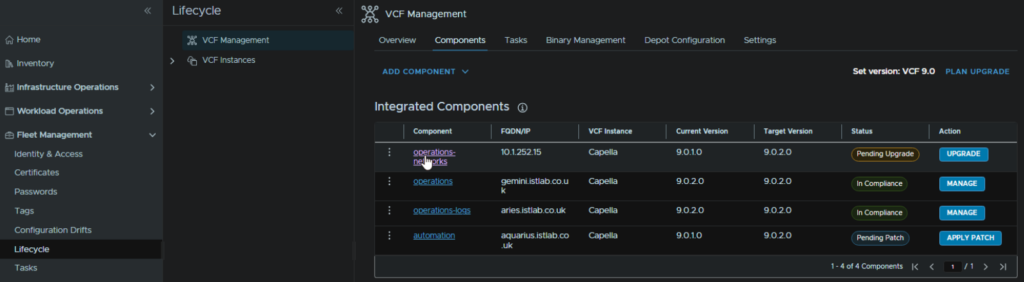
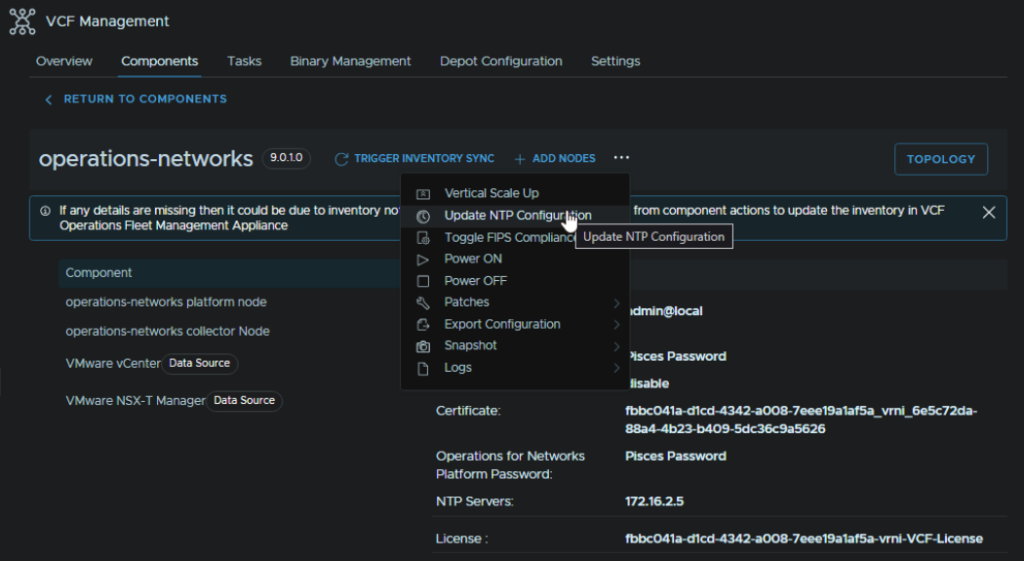
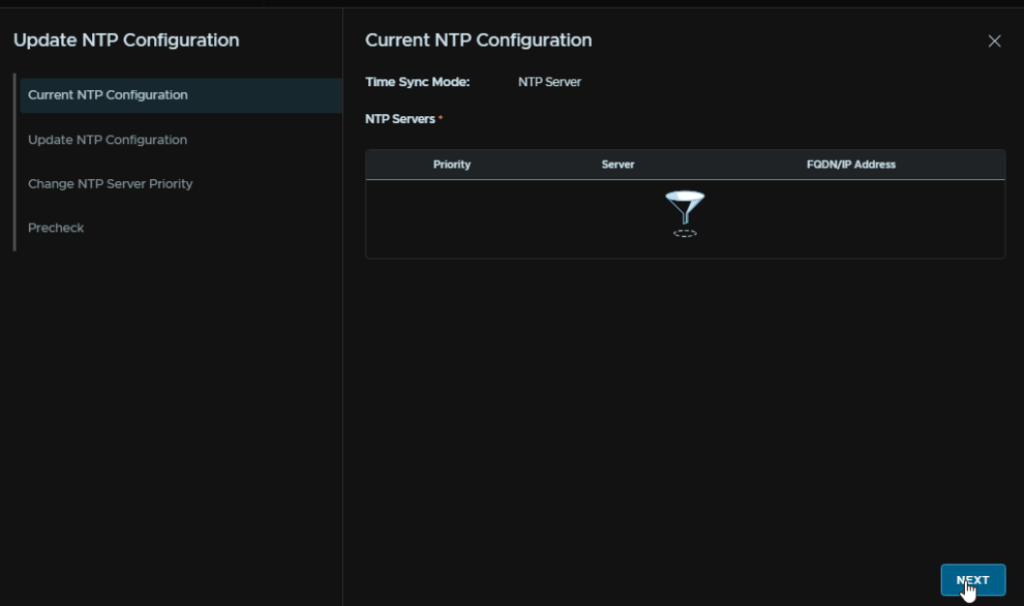
We can see the NTP server, which for me, is incorrect as I have changed mine, which explains the error, to change this, click the three dots then click Update NTP Configuration
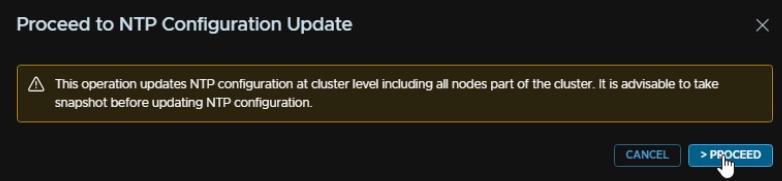
Click proceed
Click next
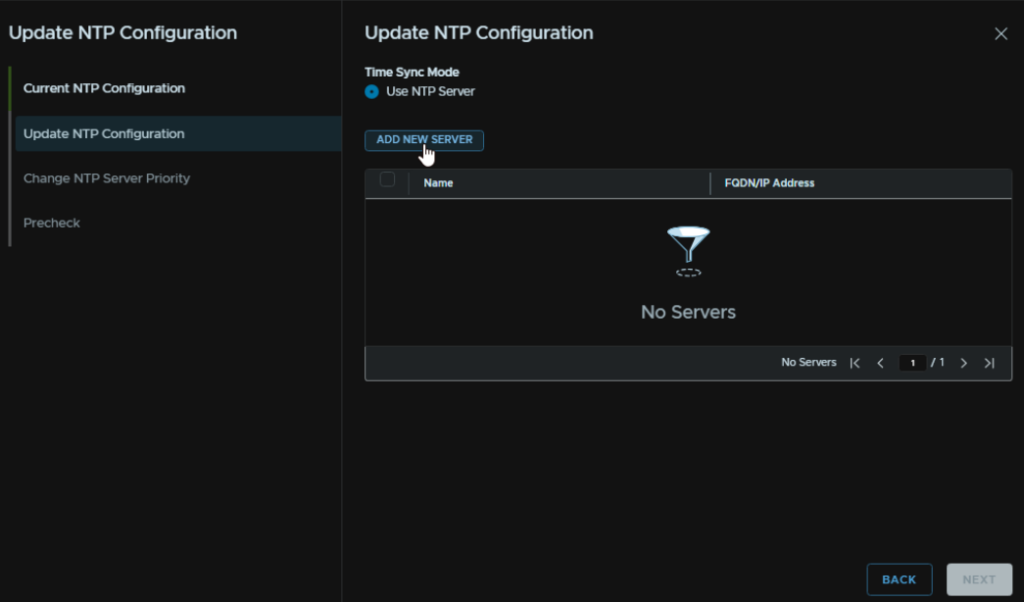
Select an NTP server, as I had to redeploy my Fleet Management server, I dont have any, so I will click Add Server
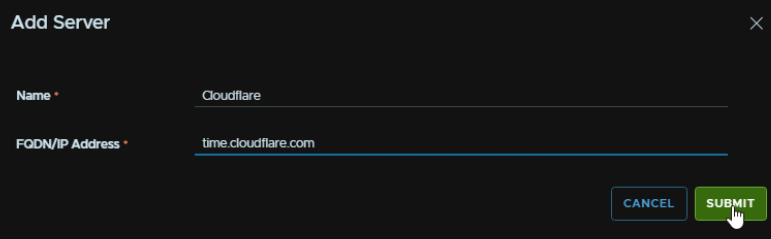
Enter the same NTP server that was used in all other appliances and click Submit
Select the server and click Next
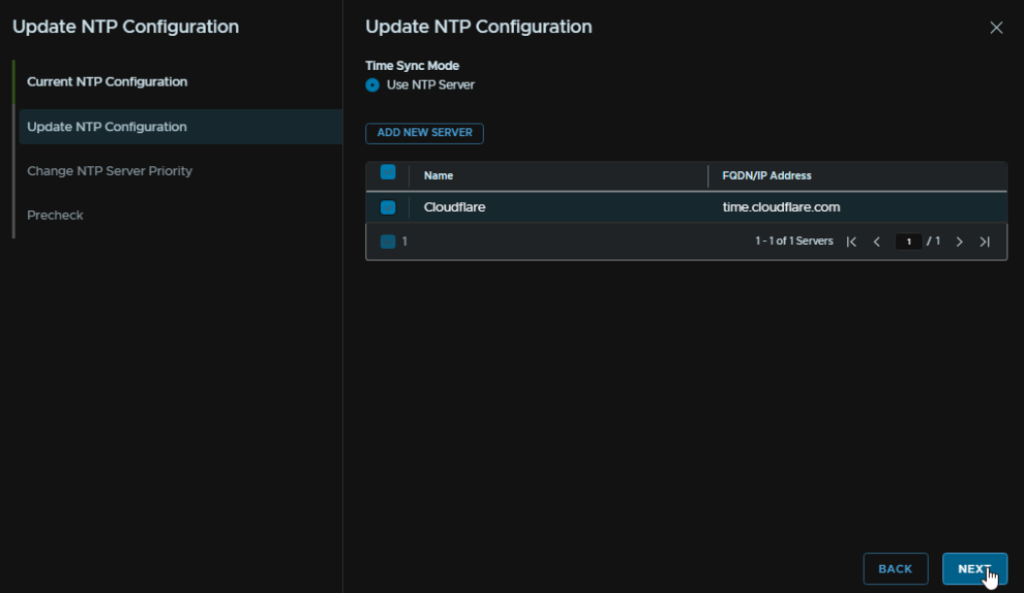
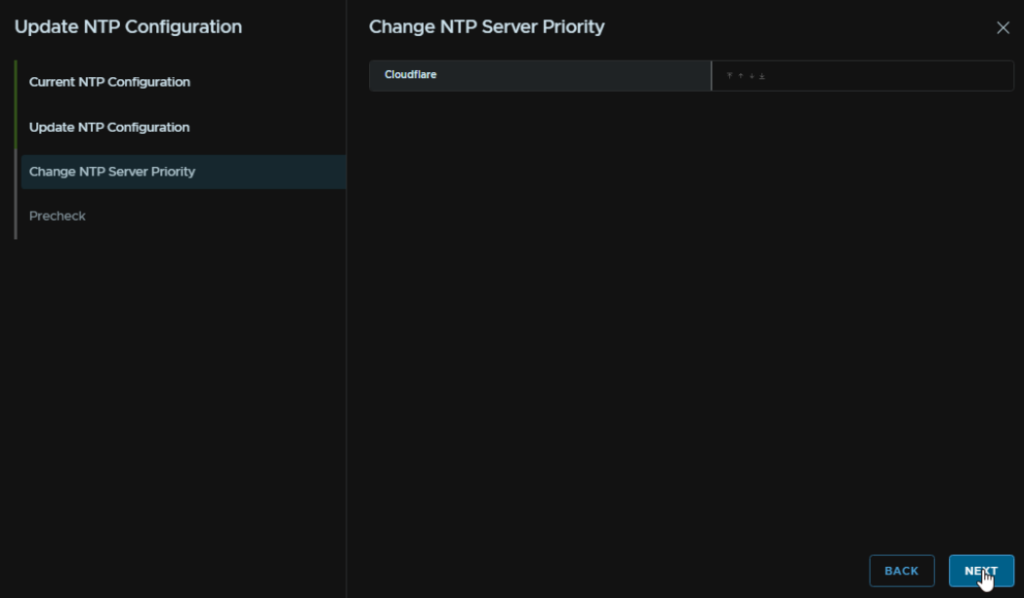
We can optionally edit the priority if we have multiple, when you are happy, click Next
Now click Run Precheck
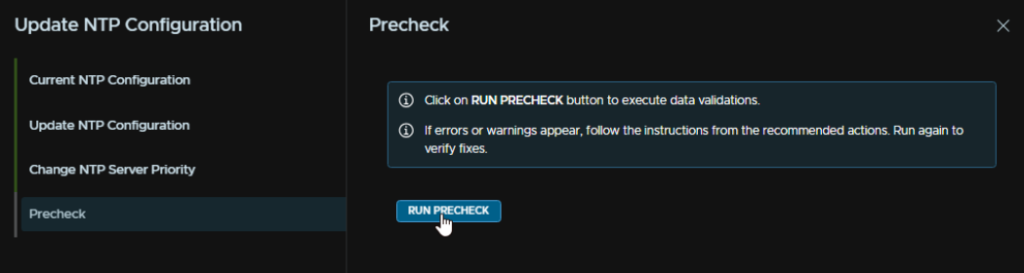
This should pass with no issues, then click Finish

5.2 – Disk Space Check On /
We need to first log into the server using the support account, this password should be the same as the root password during deployment
Switch to the Ubuntu account with
ub
Then we can check the disk with
df -h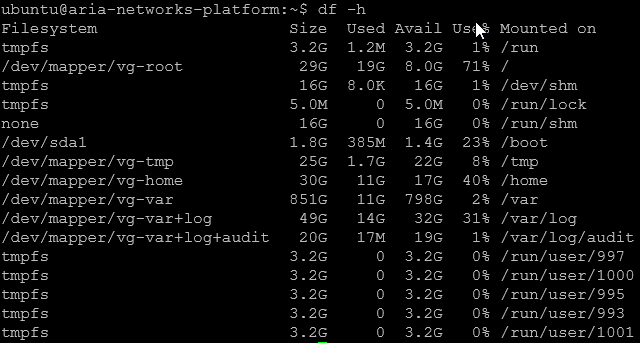
We can see that / is pretty full at ~71%
This is usually caused by an old version from the previous upgrade, we can check this by running
ls -l /usr/share/nginx/upgradebundleAnd here we see the old bundle

We then need to remove this with
sudo rm -rf /usr/share/nginx/upgradebundle/<directory-name>In my case I ran
sudo rm -rf /usr/share/nginx/upgradebundle/9.0.1.24950933If we re run this command, it should return nothing
ls -l /usr/share/nginx/upgradebundle
When thats all passed click Next
If you have issues you may need to go back from Components and click Upgrade and start again
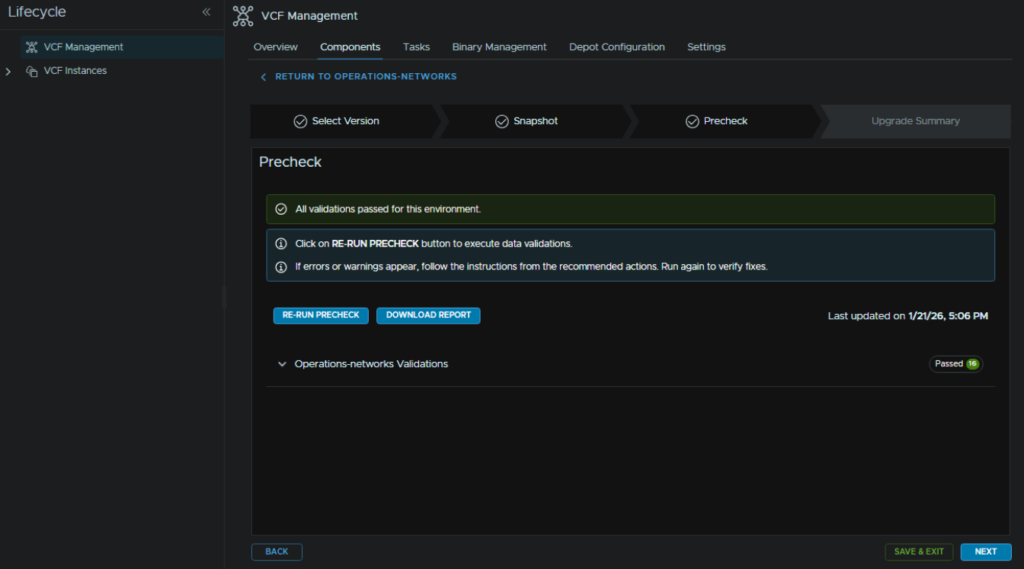
Then click Submit
This took ~90 mins for me
When thats done head back over to Binary Management and click the trash can icon on the operations-networks component to remove it
6 – VCF Automation
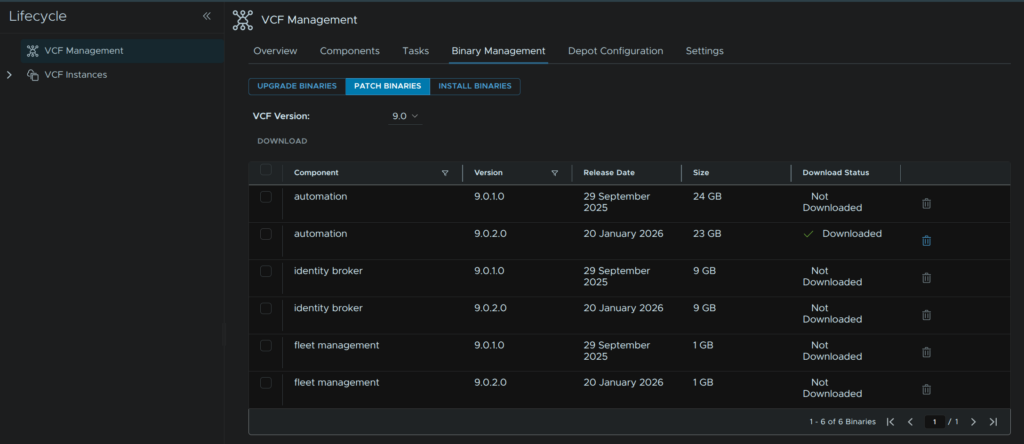
In VCF Operations go to Fleet Management/Lifecycle/VCF Management/Binary Management/Patch Binaries, check automation and click Download
When thats done it should look like this
Head to the Components tab and on the automation component, click Apply Patch
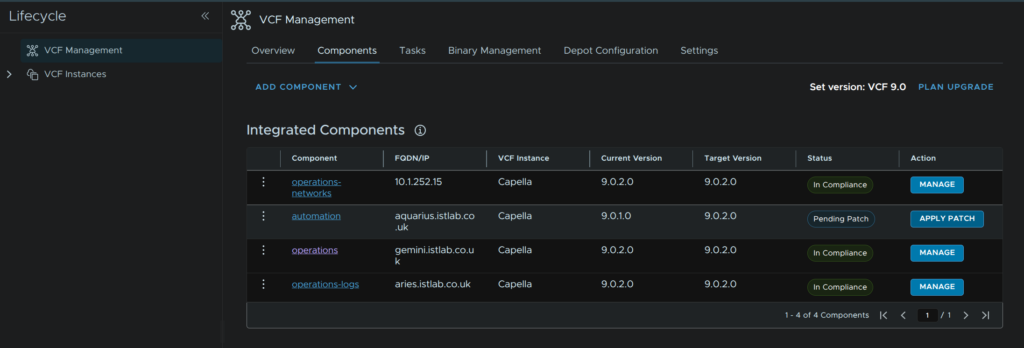
This does assume you have setup SFTP backups which was covered in both my upgrade and deployment guides, so if you havent set this up, you’ll need to do that
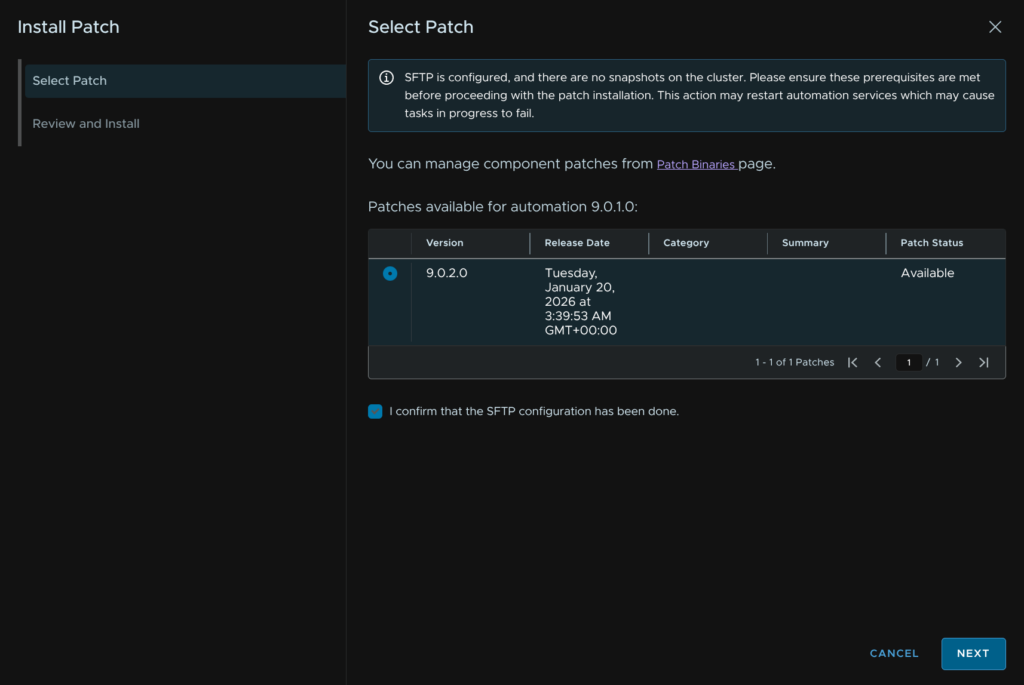
Select the patch and check the box to say SFTP configuration is setup and click Next
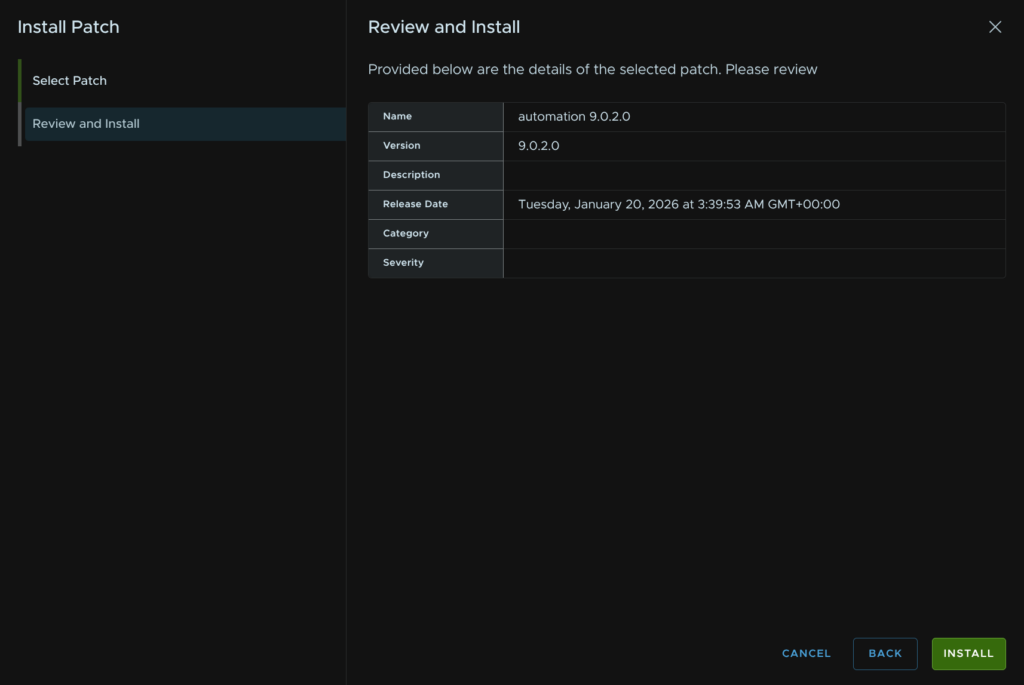
Then click Install
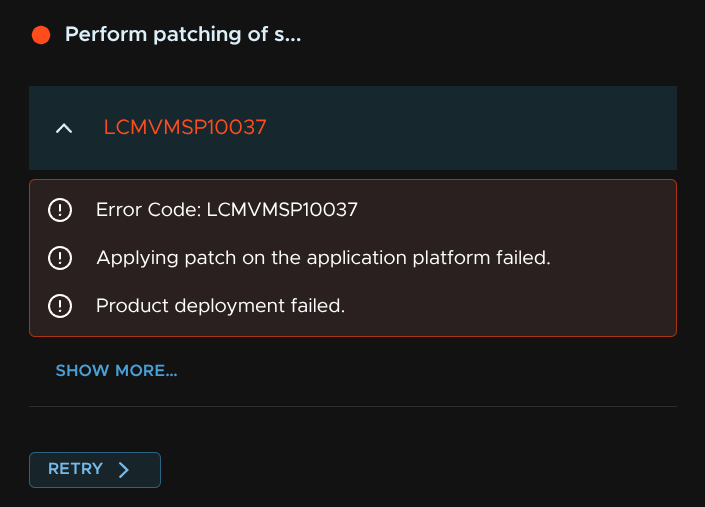
6.1 – Error LCMVMSP10037
I did find this to fail a bit due to this error
This was in another environment and likely isnt your issue, but I have included it for some important troubleshooting steps for determining the root cause, and on the off chance this exact issue is what someone else is having
Opening an SSH session to automation as the vmware-system-user, using the same password as the deployment, we can head to the root user with
sudo -iAnd then run
kubectl get bundle -AWe can see this is failing due to my cluster name cant be found, now I renamed this a while back, so I had to change this back to the labelled name

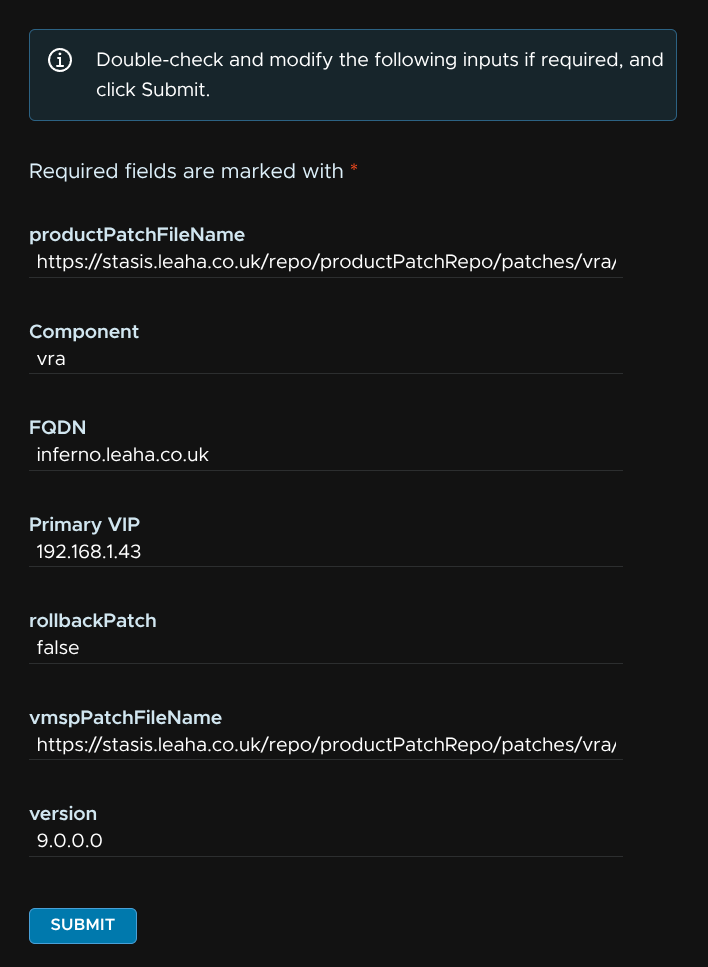
In VCF Ops, leave all values at the default and click Submit
When thats done, head to Binary Management/Patch Binaries and click the trash can by the automation component to remove the download
This took me ~2 hours in total
7 – SDDC Manager
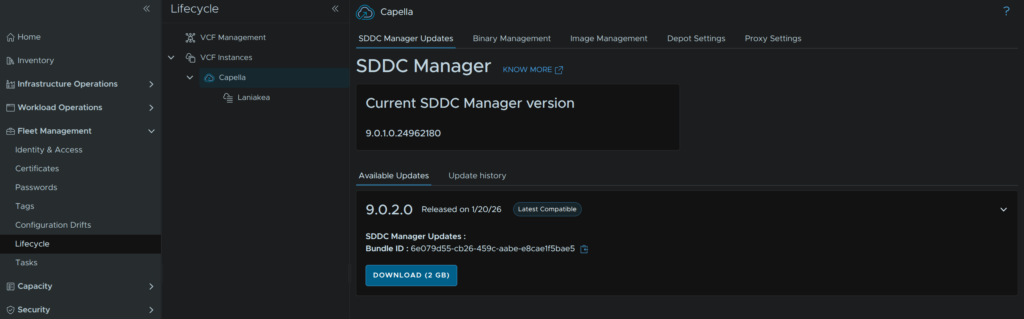
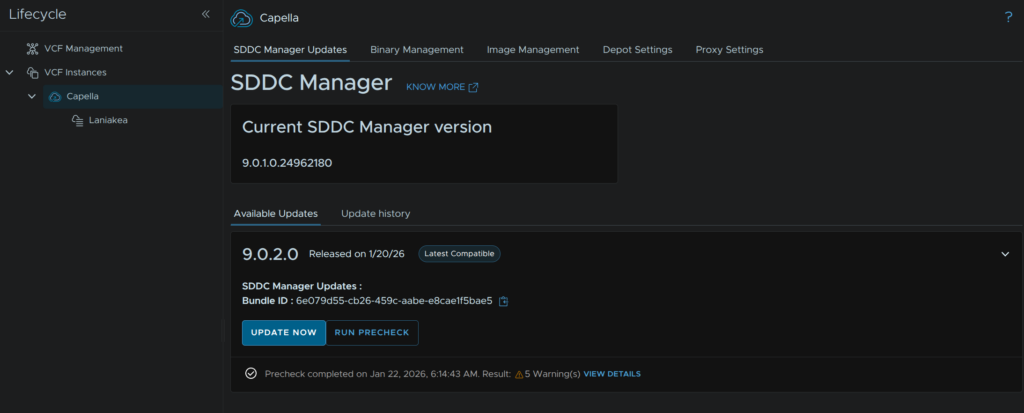
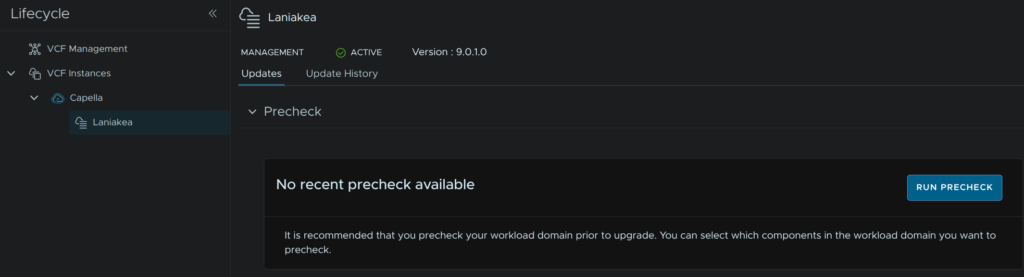
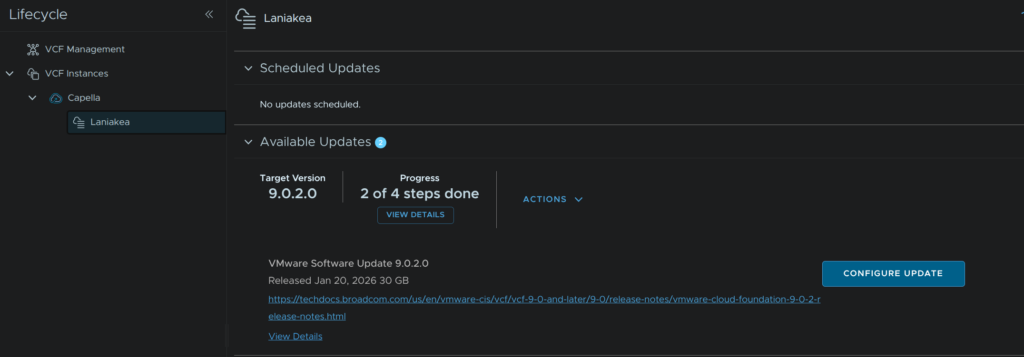
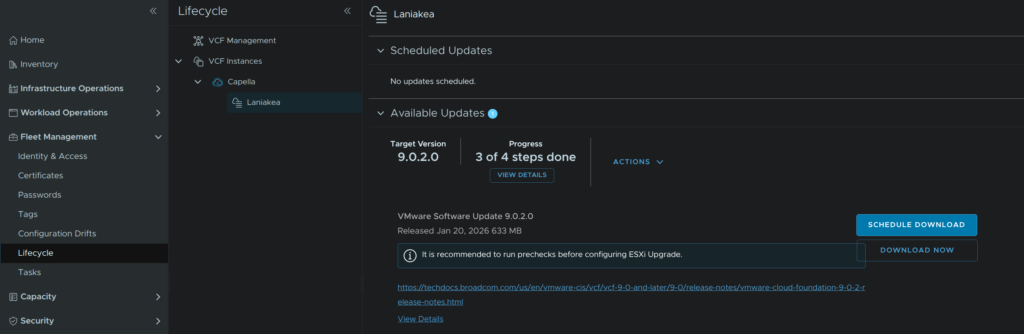
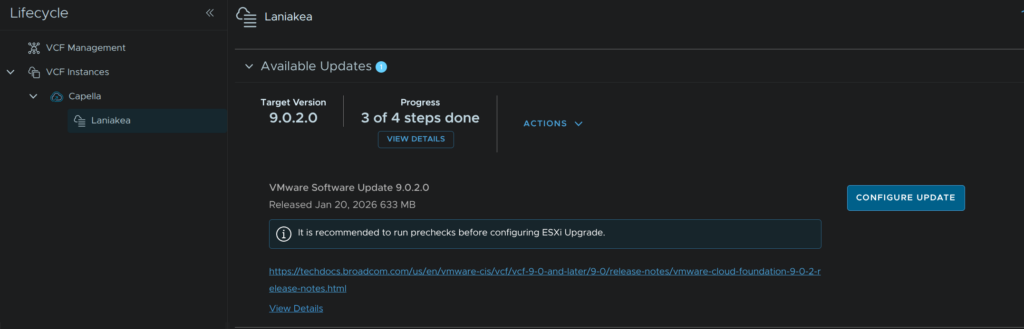
In VCF Operations head to Fleet Management/Lifecycle, expand VCF Instances and select the VCF Instance, click the Download button under Available Updates
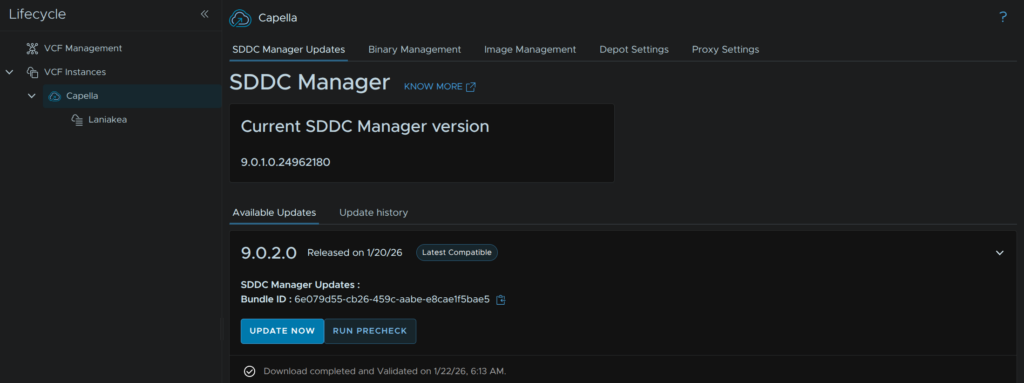
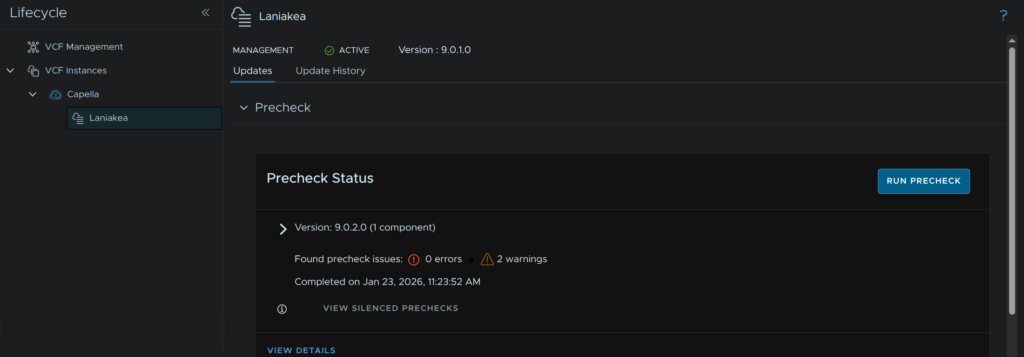
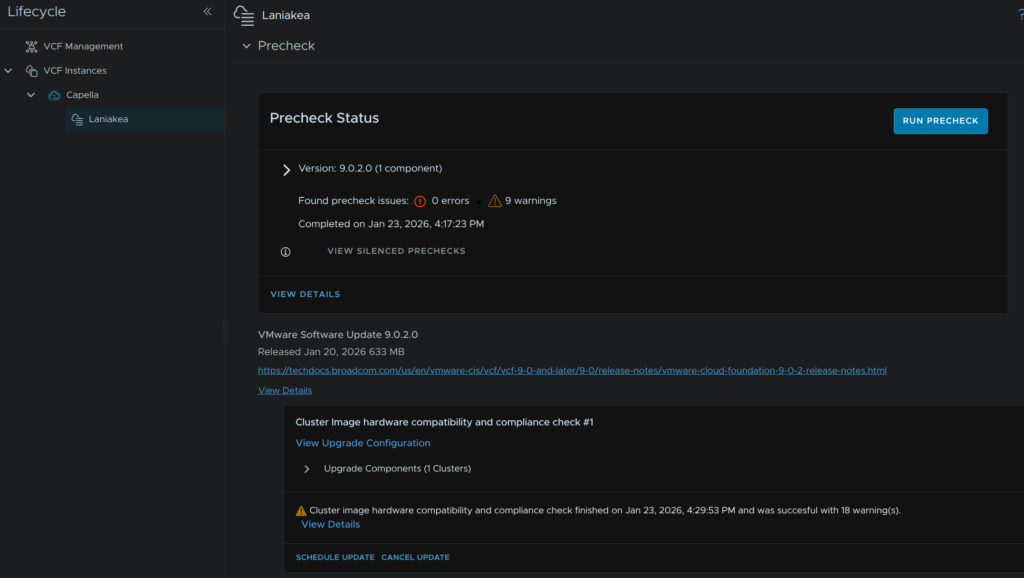
When thats done click Run Precheck
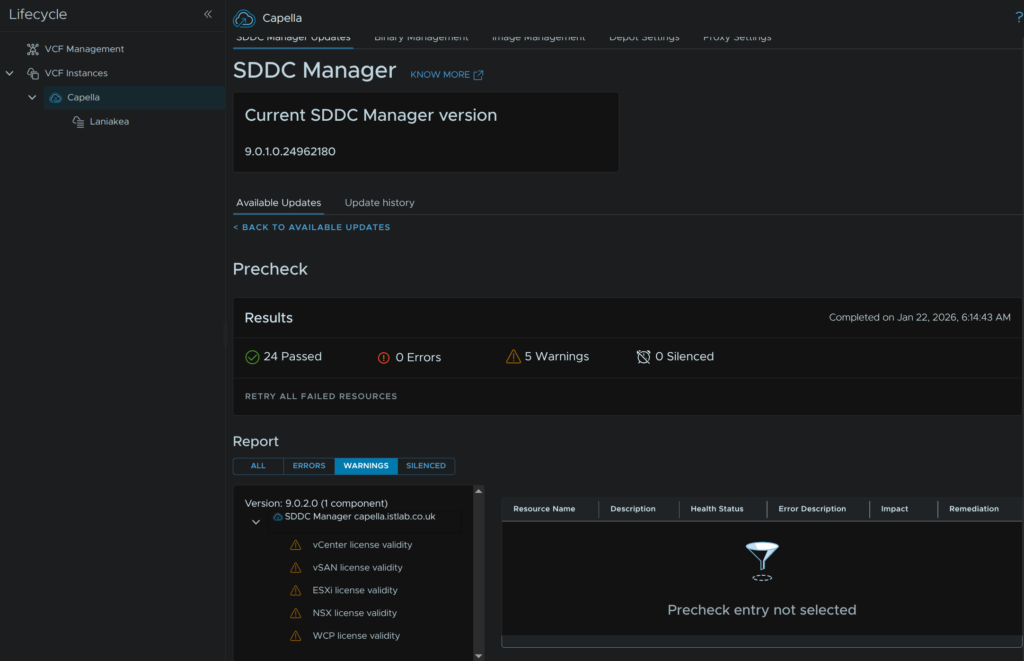
If you have any warnings, click View Details, I had a few

We can see this under the warnings tab, this is just for licenses, which I know are valid, so I can ignore this
When you are happy, click Back To Available Updates
Then click Update Now
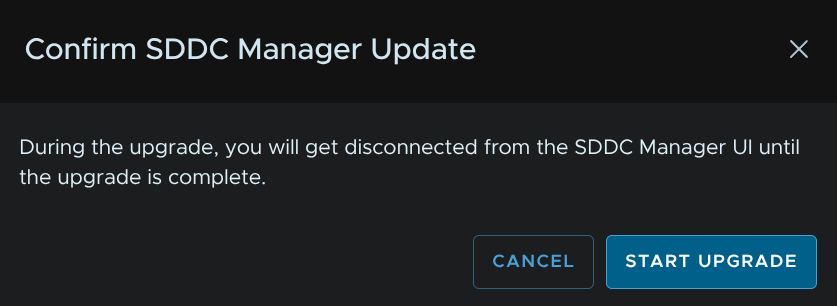
And click Start Upgrade
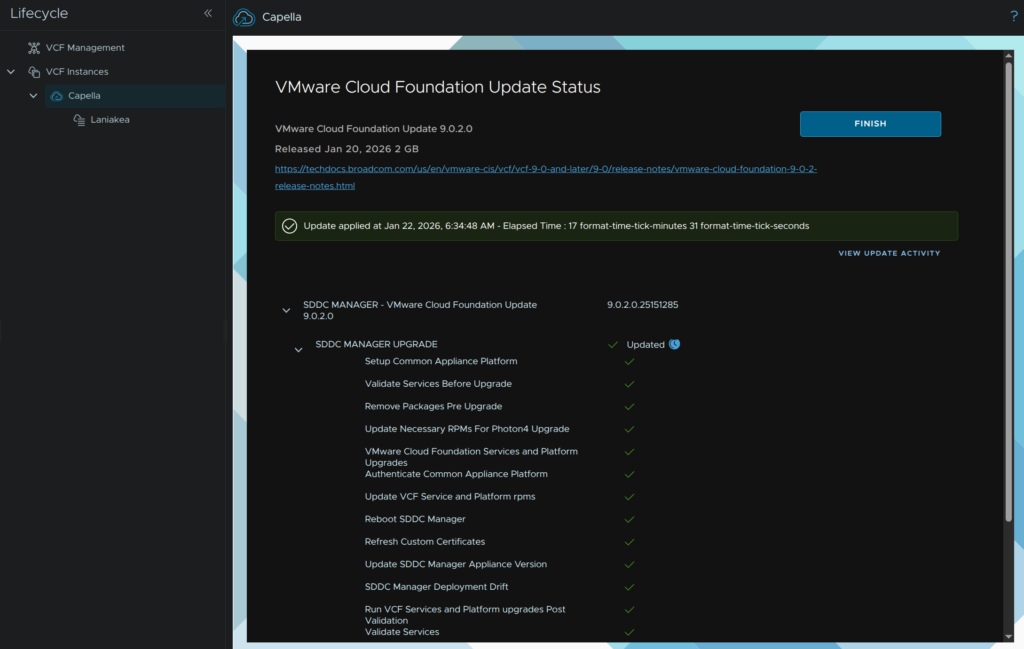
We will then see this splash screen
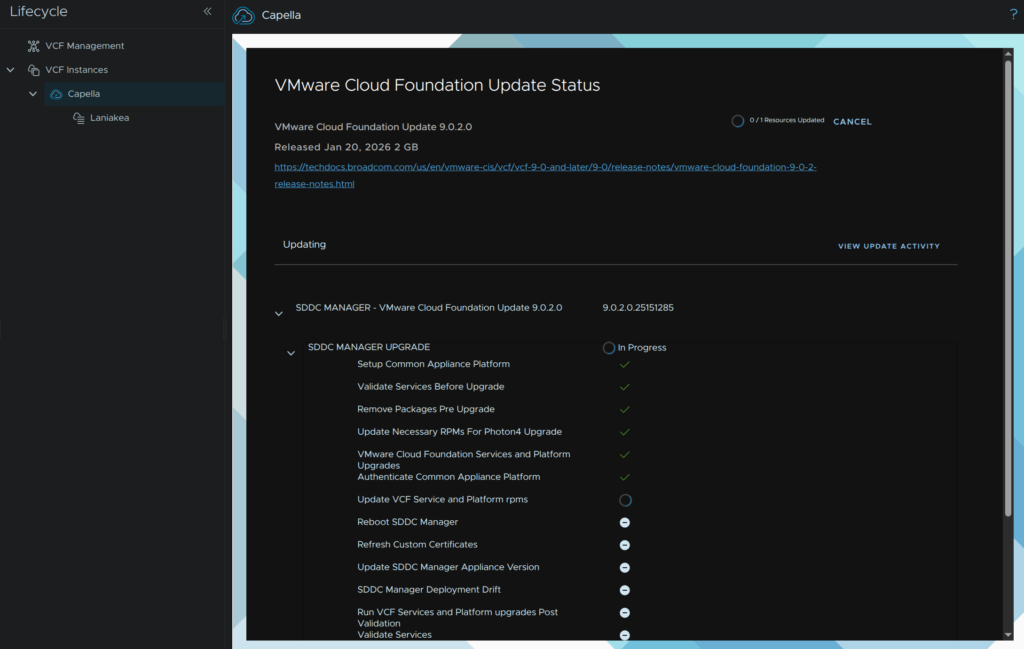
During the upgrade you will see errors like this, this is expected as the SDDC manager services and VM restart

When its done, it should look like this, then click Finish
You will also want to refresh your page
8 – Creating A Domain Upgrade Plan
We then need to create an upgrade plan for our VCF domains, you must start with the management domain
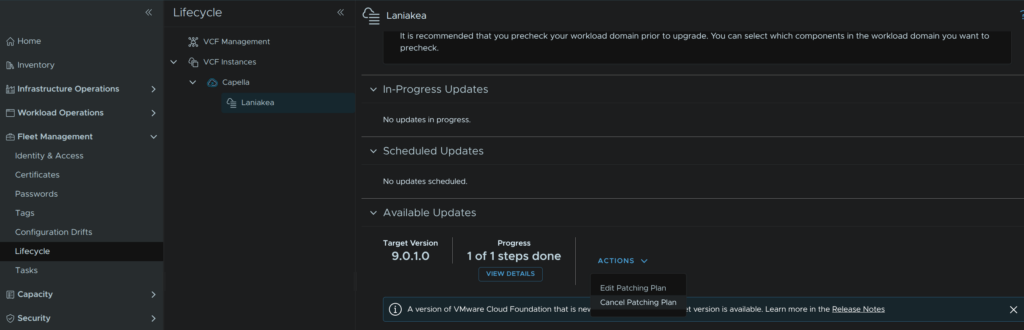
In VCF Operations, click Fleet Management/Lifecycle, expand the VCF Instances and your VCF Instance, in my case Capella, then select your VCF domain, in my case Laniakea
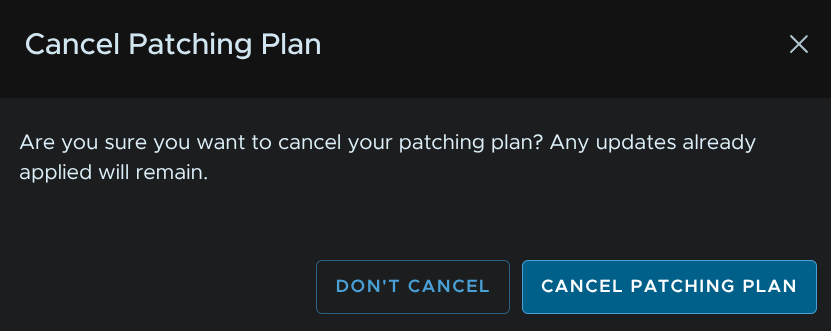
For your management domain there will be something in progress from the SDDC Manager upgrade, click Actions/Cancel Patching Plan
Then click Cancel Patching Plan
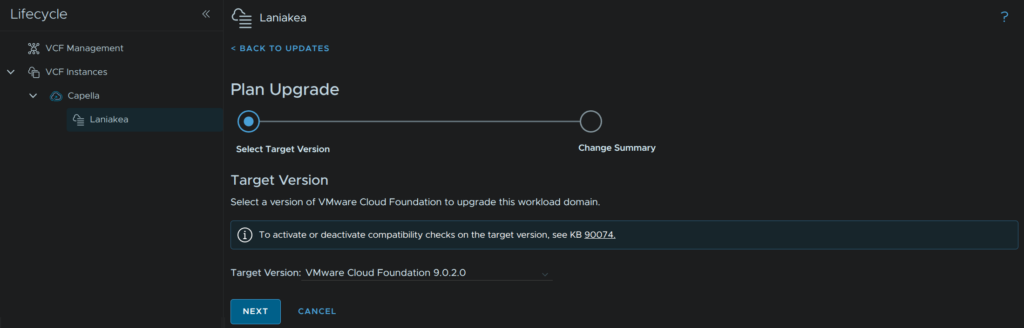
It should look like this now, this will be the default for workload domains, click Plan Upgrade
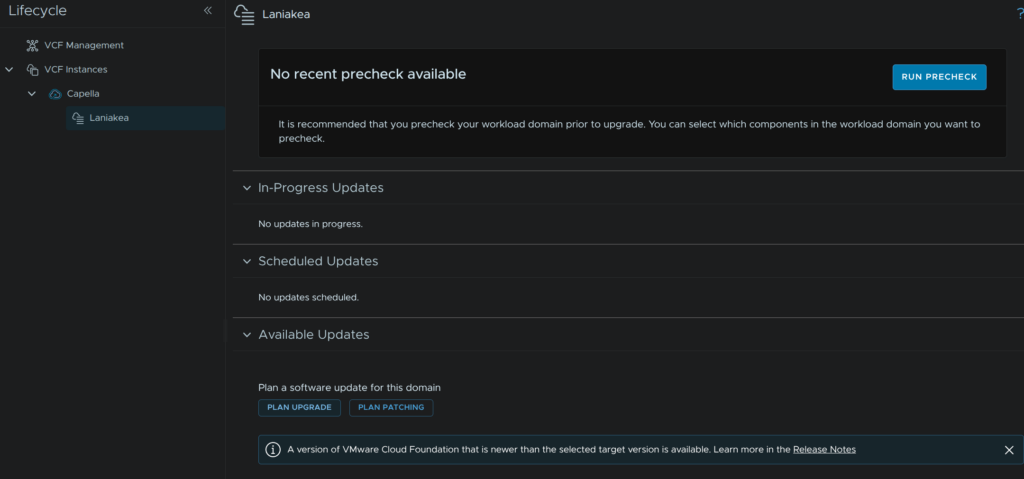
Use the drop down to select your target version, in my case 9.0.2, then click Next
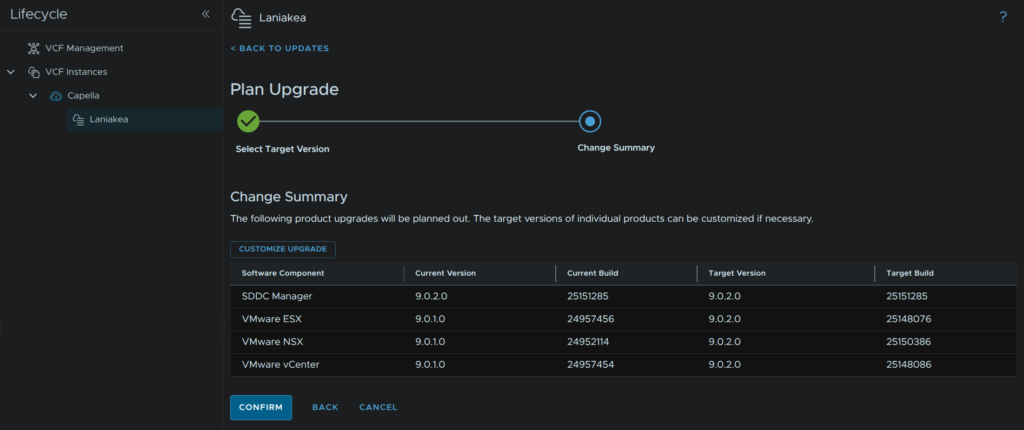
We will then see the change summary and the target versions and current versions, click Confirm
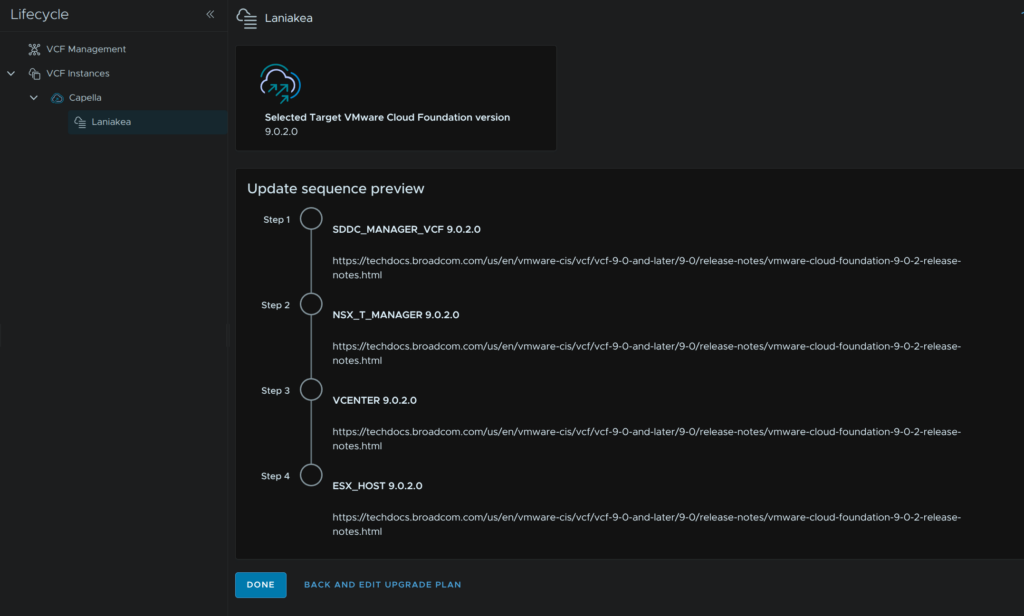
We will then see the plan and component order, click Done at the bottom
9 – NSX
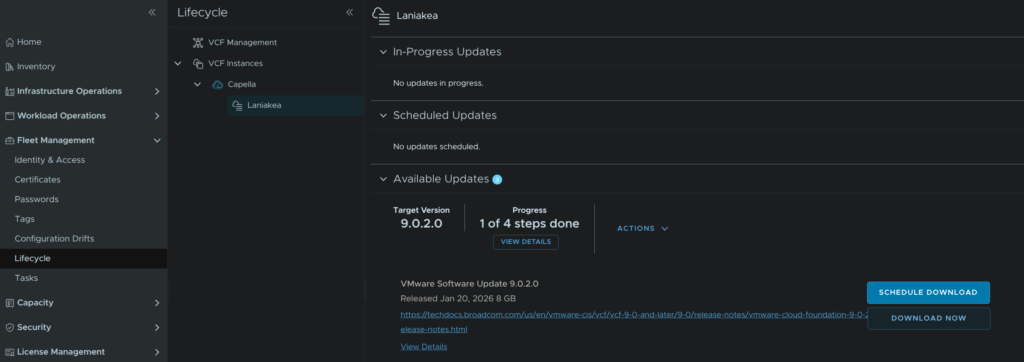
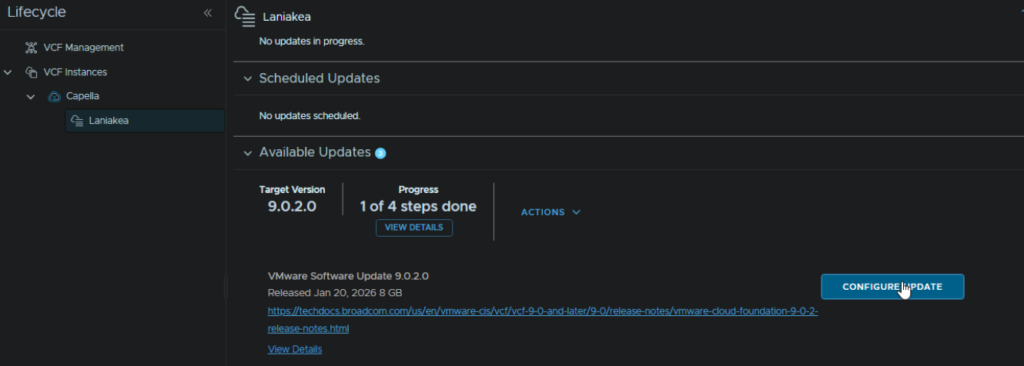
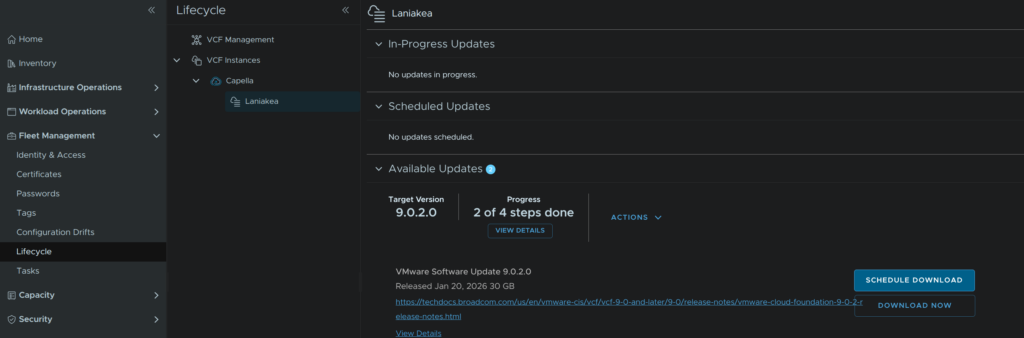
In VCF Ops click Fleet Management/Lifecycle, expand VCF Instances and the VCF Instance, in my case Capella, and select the workload domain to be upgraded, in my case Laniakea, on the Updates tab scroll down to Available Updates and click Download Now for the NSX package
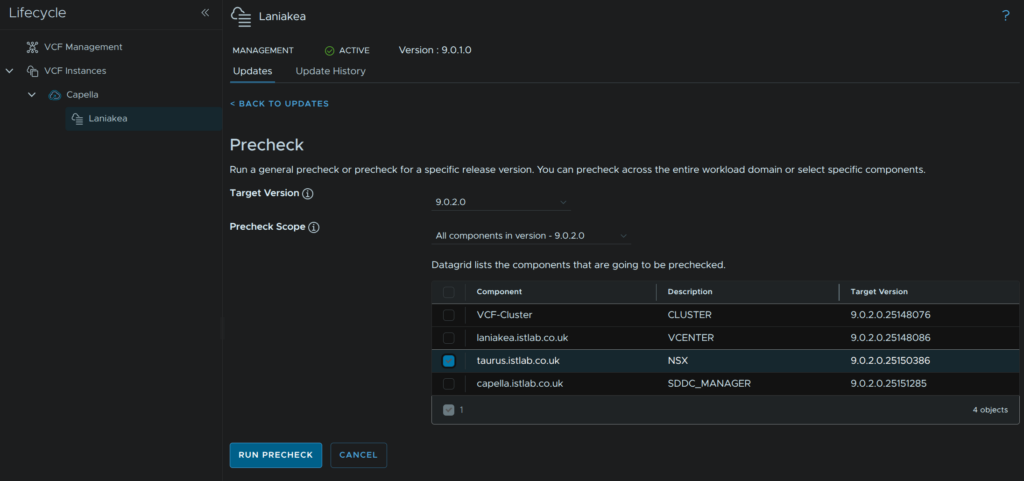
When thats downloaded, click Run Pre Check

Use the drop down to select our upgrade version, in my case 9.0.2, select the NSX component, and click Run Precheck
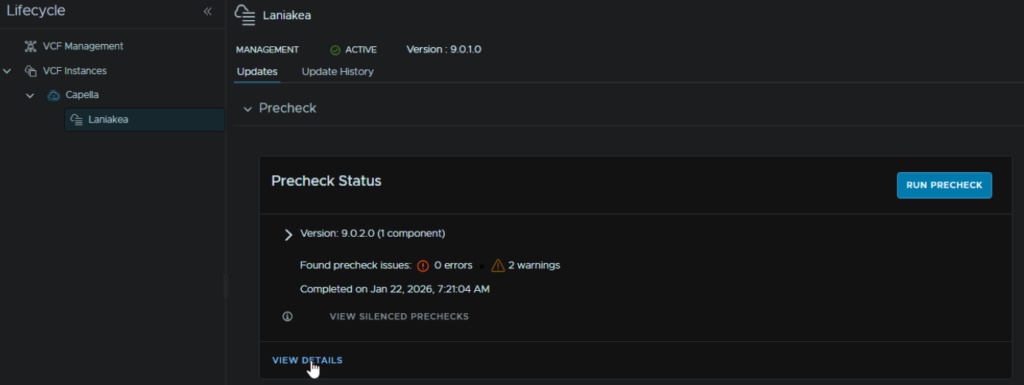
When thats run, click View Details to see any errors/warnings
My warnings were for some Edge alarms, so lets log into the NSX GUI and see what they are
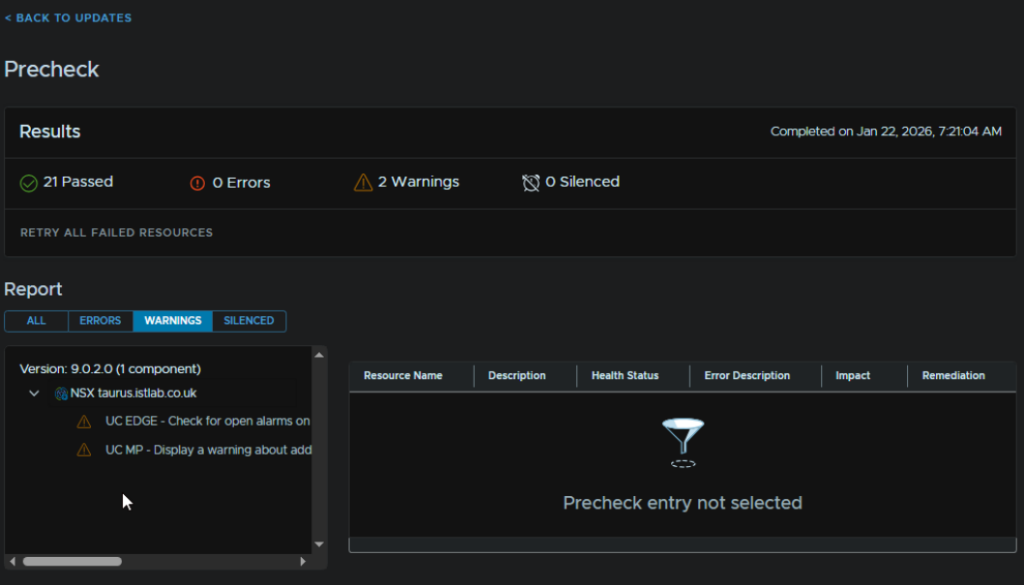
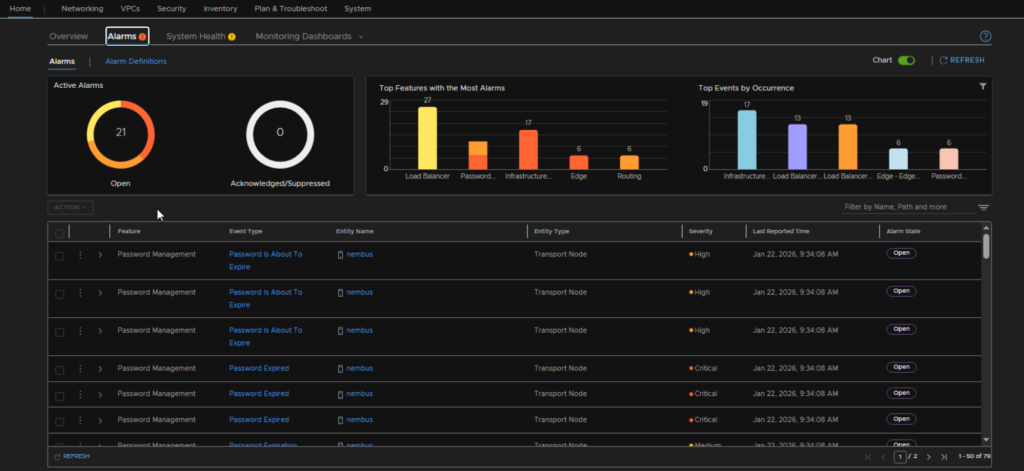
Looking at the alarms, it seems the passwords have expired on the Edges
9.1 – Password Expired Errors
This must be corrected else the upgrade will fail due to the NSX Edge cluster being in an error state in the SDDC Manager database
We can change the admin password, by opening an SSH session to the Edge with the admin users old credentials, which will prompt us to change it
We can change the root/audit password when logged in as the admin user with
set user <username> password <new-password>set user root password <new-password>set user audit password <new-password>As the default 90 day password expiry is rather unnecessary and makes management much more difficult, we can remove it for all accounts by running
set user root password-expiration 9999set user audit password-expiration 9999set user admin password-expiration 9999We do then need to update everything in VCF Operations with the new passwords that we have set
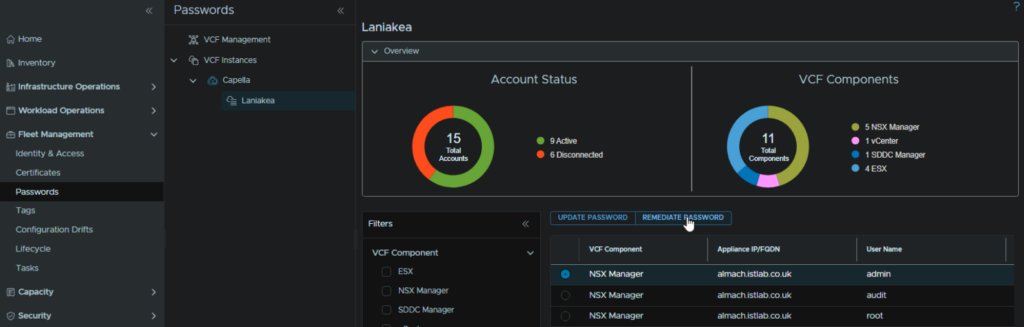
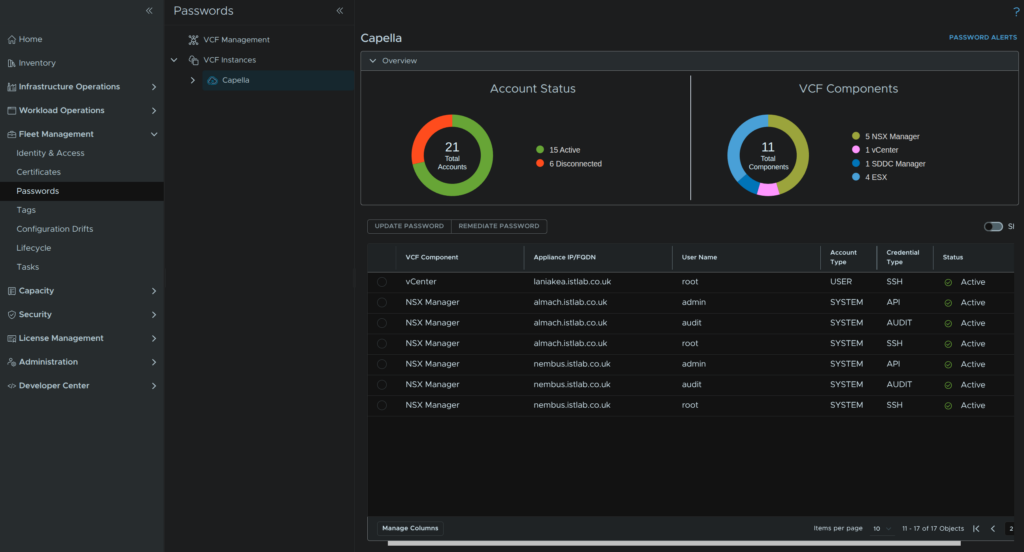
Head to Fleet Management/Passwords/VCF Instances, expand the VCF Instance, and select the workload domain, in my case Laniakea
Select the credential and click Remediate Password, then enter the password we set the Edge nodes too, in my case I have 2 Edge nodes, each with a root/admin/audit credential which I need to do this for
his will take a few mins for the changes to be completed, but it shouldnt error out
Mine however, did error out, checking the SDDC Manager tasks, the Edge node is not in an active state
At this point, an Inventory Sync with Edge Node import may work, but mine kept erroring out
It turns out, this was also erroring, when checking the database on the SDDC Manager, due to the Edge cluster being in an error state, this was caused by the passwords, but I also cant remediate or correct them on the SDDC Manager, now that I have already changed the NSX Edge node passwords, resetting them again, back to their old value, the one that expired, pulled the cluster into an active state, and for good measure allowed my to remediate the passwords just to be sure the SDDC Manager has the correct details
Needless to say, this is yet another reason to remove the password expiry, the systems ability to deal with them expiring is awful
You will know the Edge cluster is in an active state in the SDDC Manager database, or at least it absolutely should be, when in the passwords section of VCF Operations, all Edge node credentials are in the active state
Once all passwords are reset, we can continue
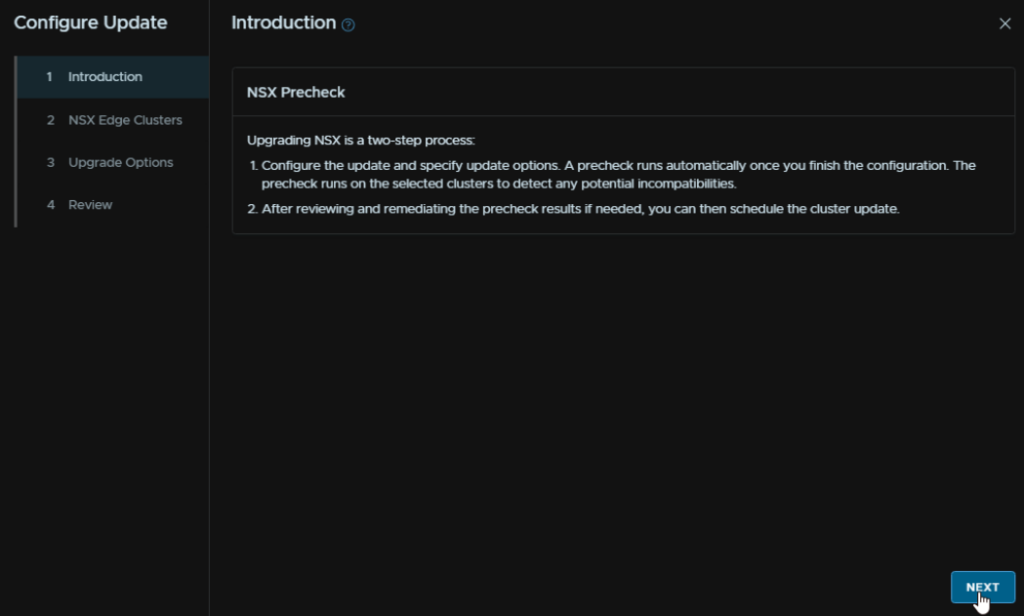
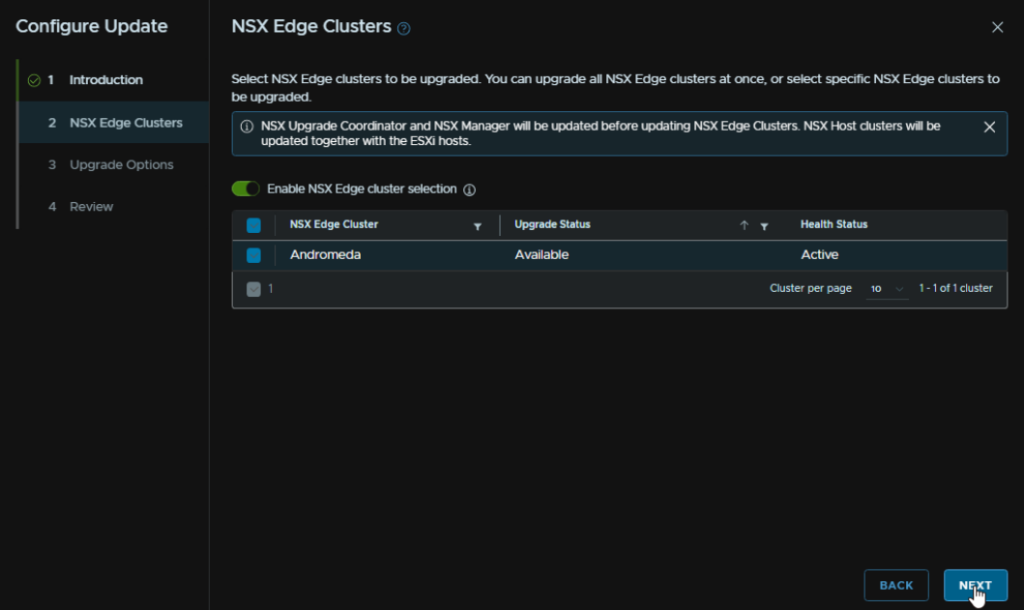
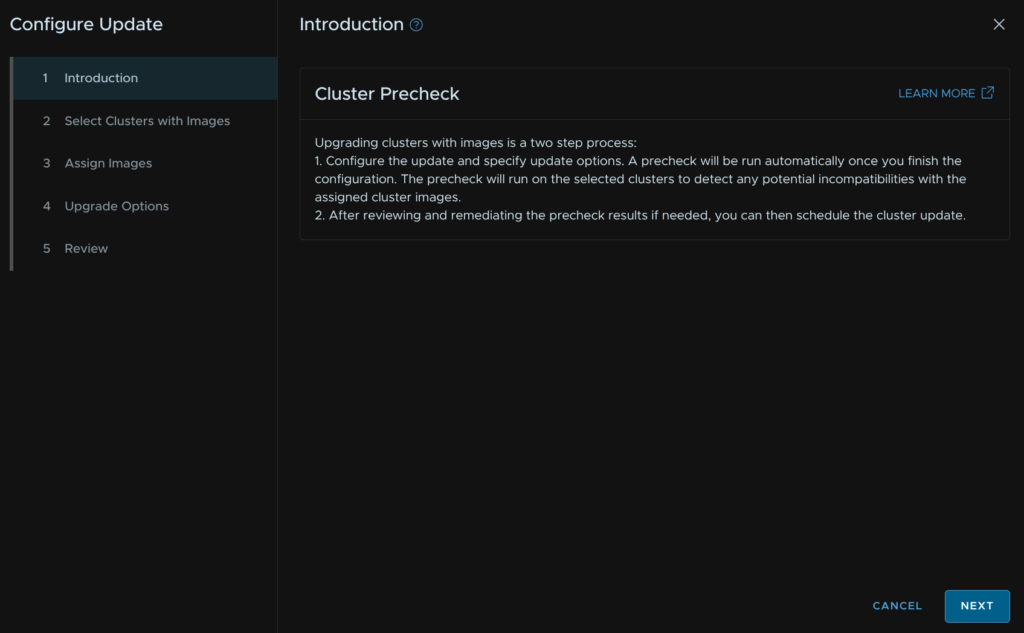
Click Configure Update
Click Next
Enable the toggle to include NSX Edge nodes, and select all clusters, then click Next
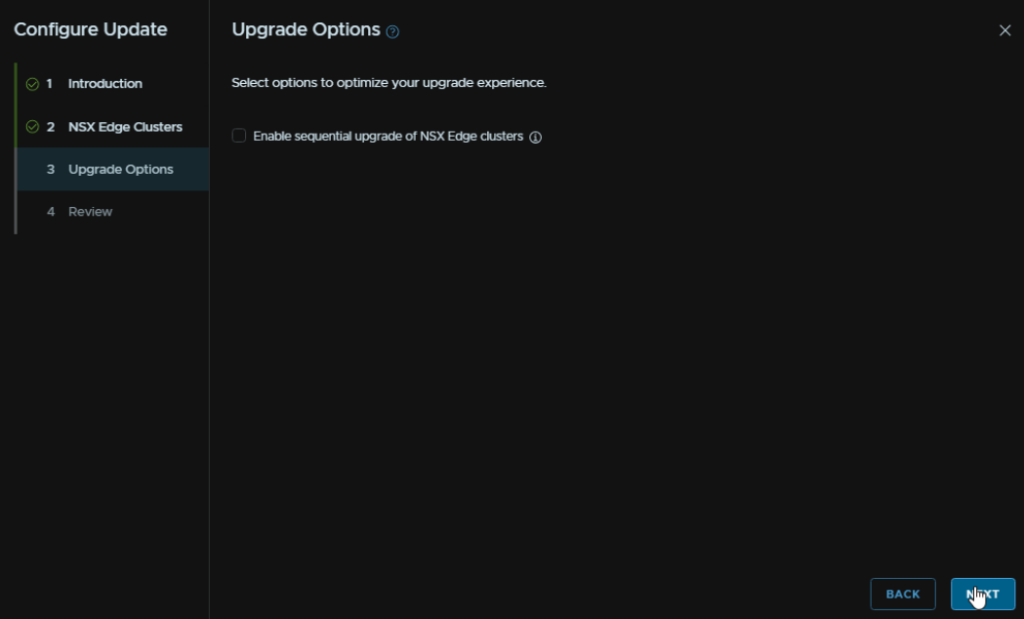
Click Next here, the check box for sequential Edge cluster upgrade isnt really needed, all clusters can be done in parallel, for nodes within a cluster, its always done sequentially
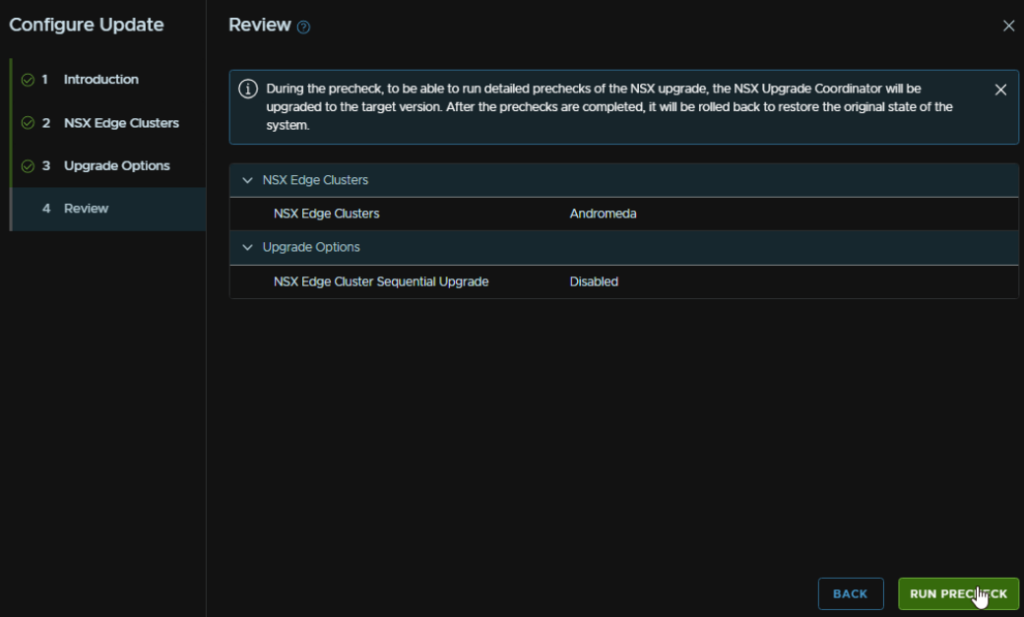
Then click Run Precheck
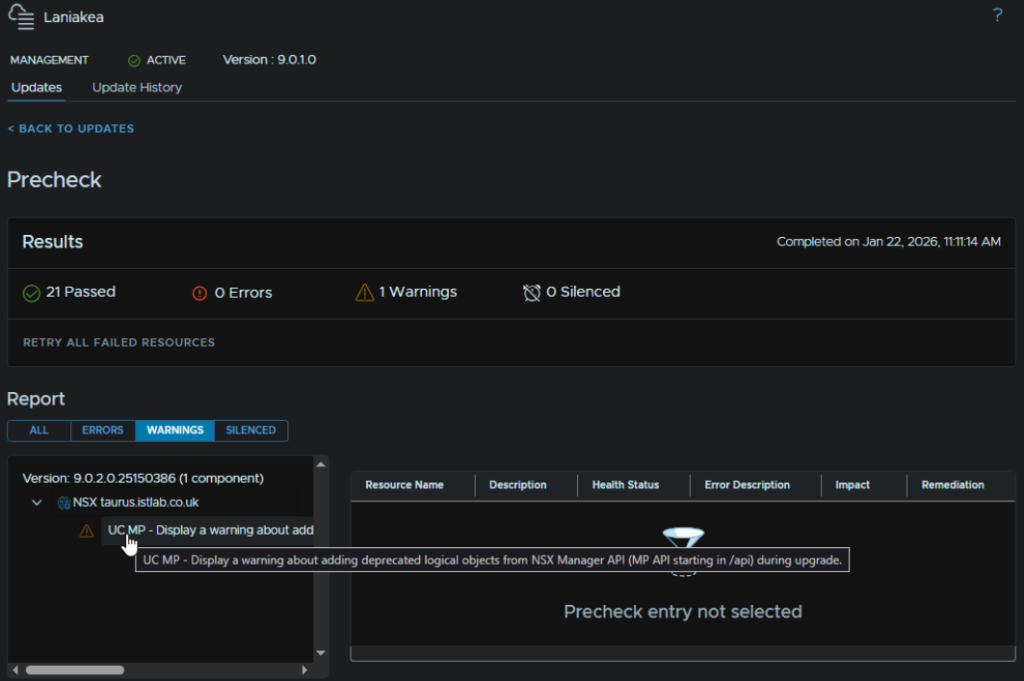
Click View Details if you have any errors/warnings
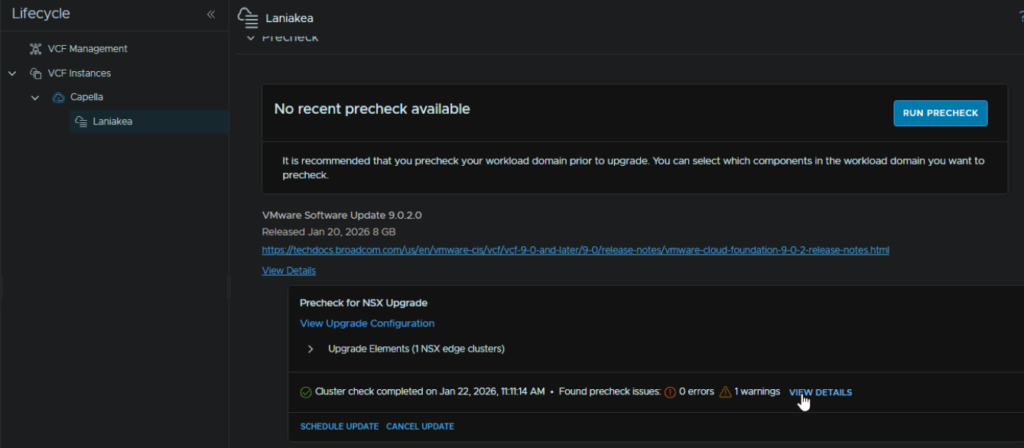
Mine is about API bits being deprecated, so I can ignore that and click Back To Updates
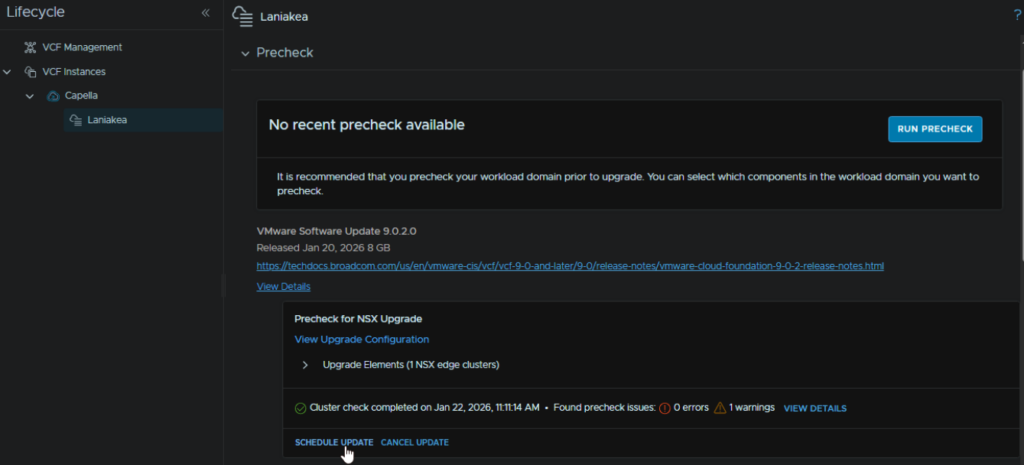
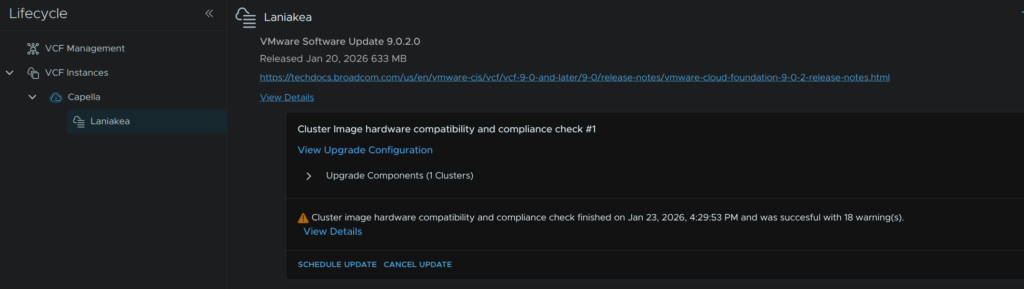
Now click click Schedule Update
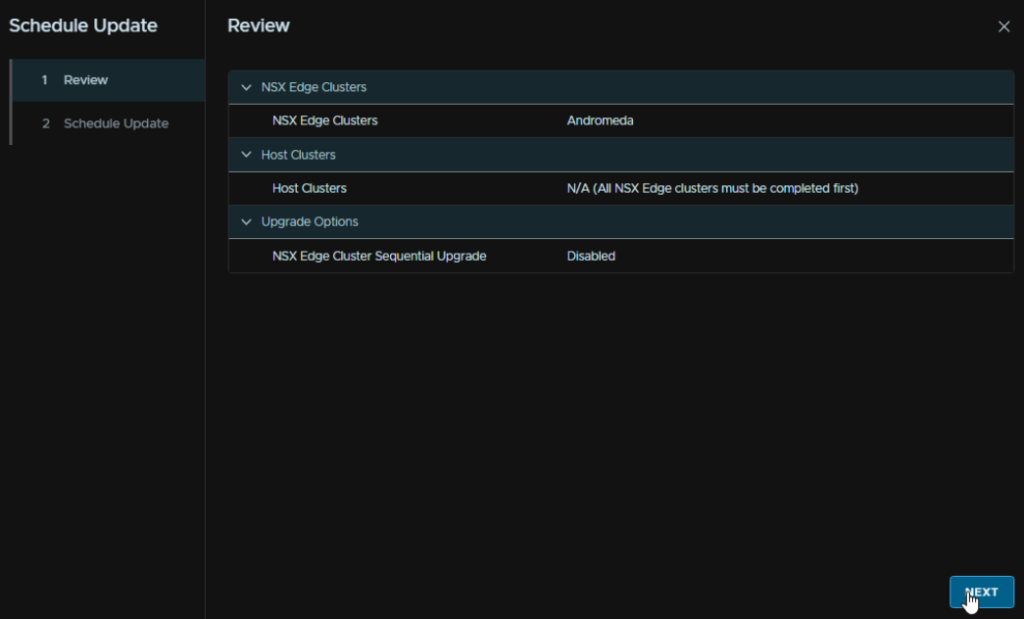
Click Next
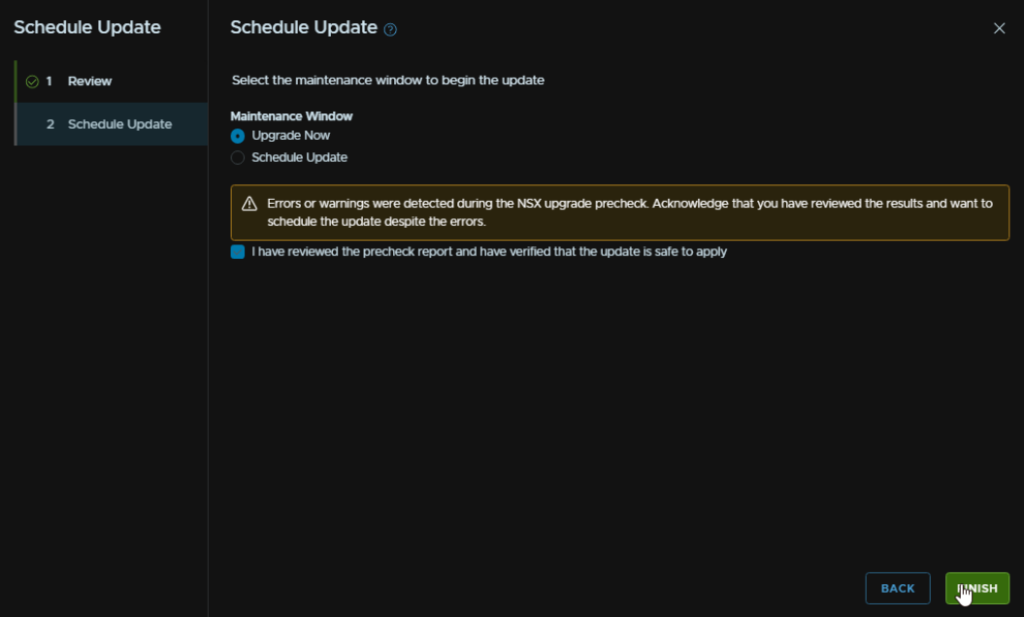
Click Upgrade Now, or Schedule Upgrade if you want it to run later, check the box to acknowledge the warning, and click Finish
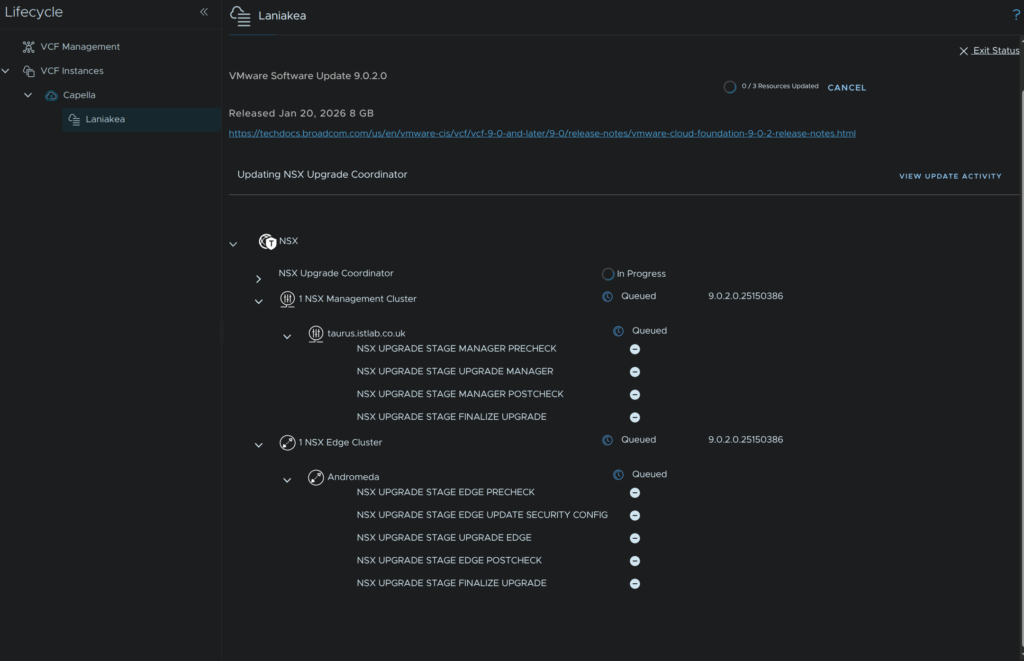
When thats started, we can view the status from the In-Progress updates section and click View Status
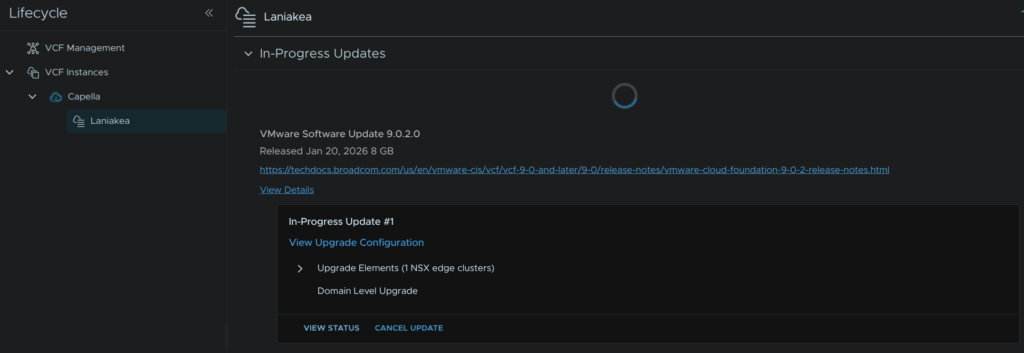
Which will look like this
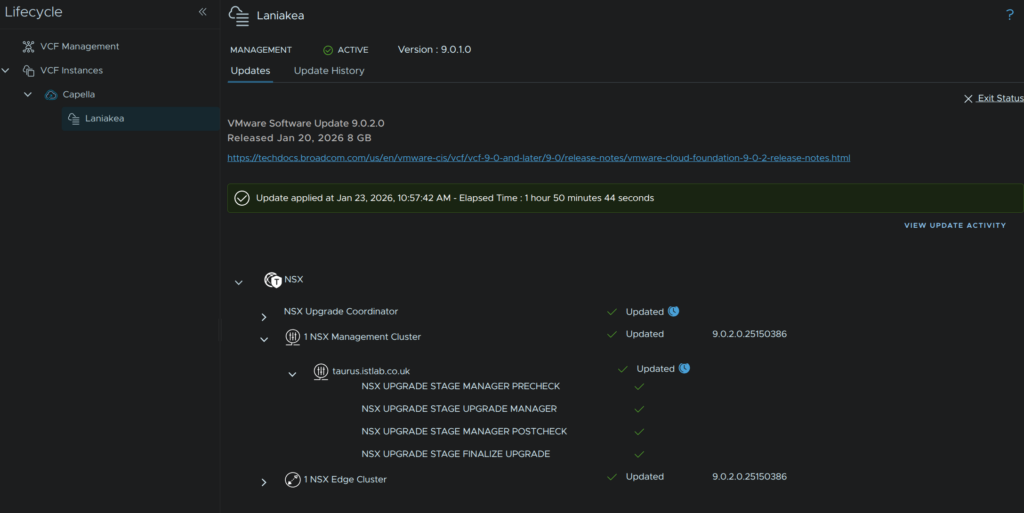
When its done it will look like this
10 – vCenter
Lets head back, in VCF Operations, to Fleet Management/Lifecycle, expanding our VCF instance then click our domain to continue upgrading, click Download Now for the vCenter files
When thats done, click Run Precheck
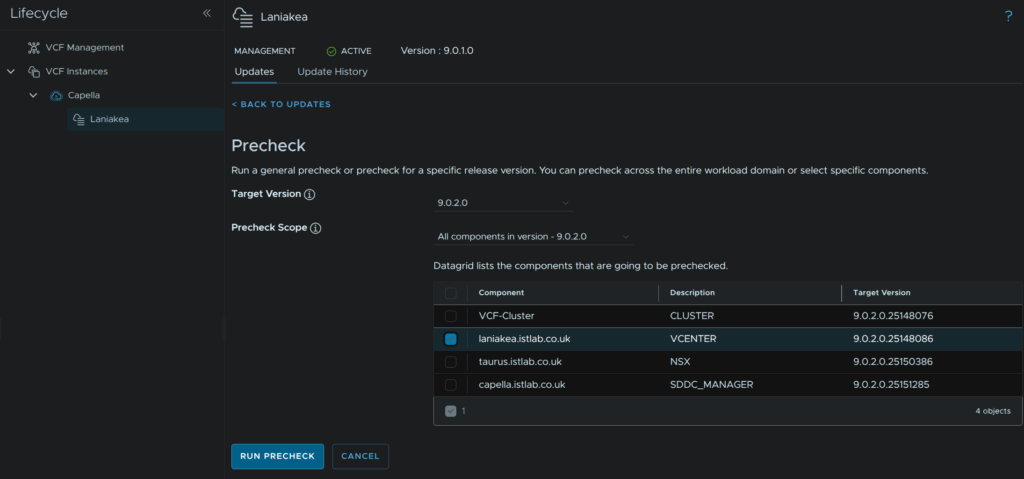
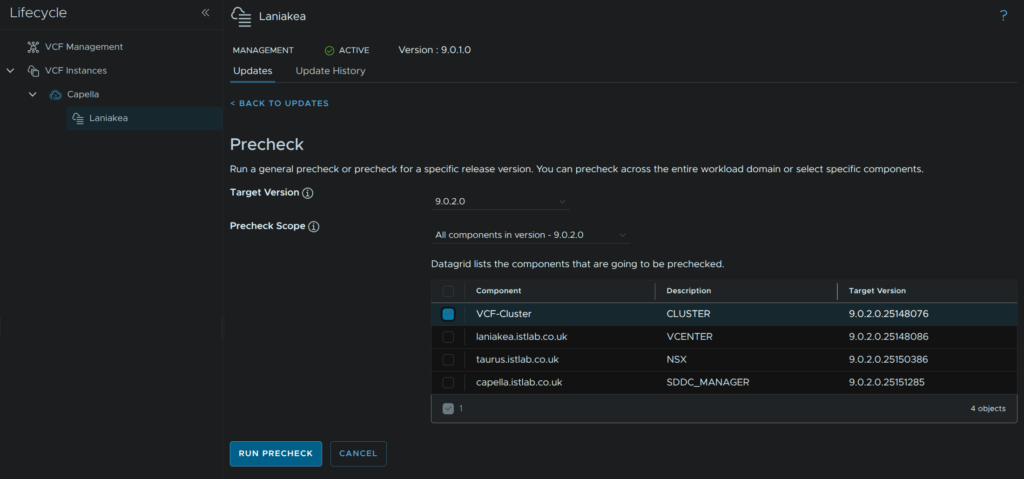
Use the drop down to select the target version, for me thats 9.0.2, and select the vCenter component, then click Run Precheck
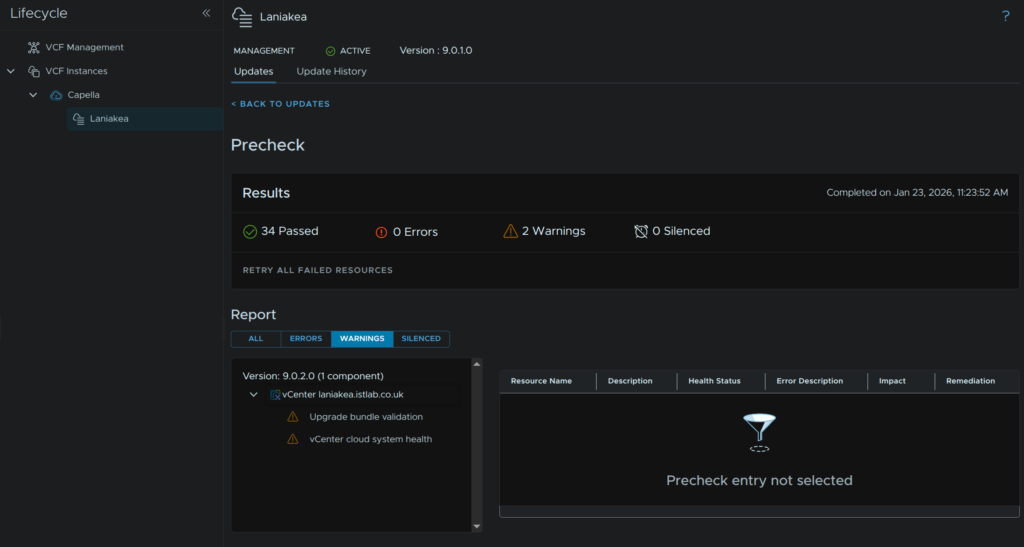
I have a couple of warnings here, the health one is something to look into
What I did fine digging through VCF health, is my vCenter has a RAM warning, its correctly sized, so I will ignore that, but the archive disk is full
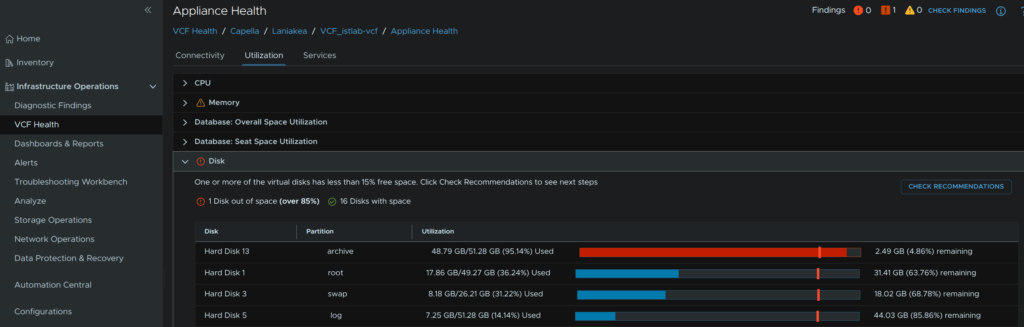
Which according to Broadcom is fine and expected from this article here
Now that we are happy with our warnings we can proceed, in Lifecycle, click Configure Update
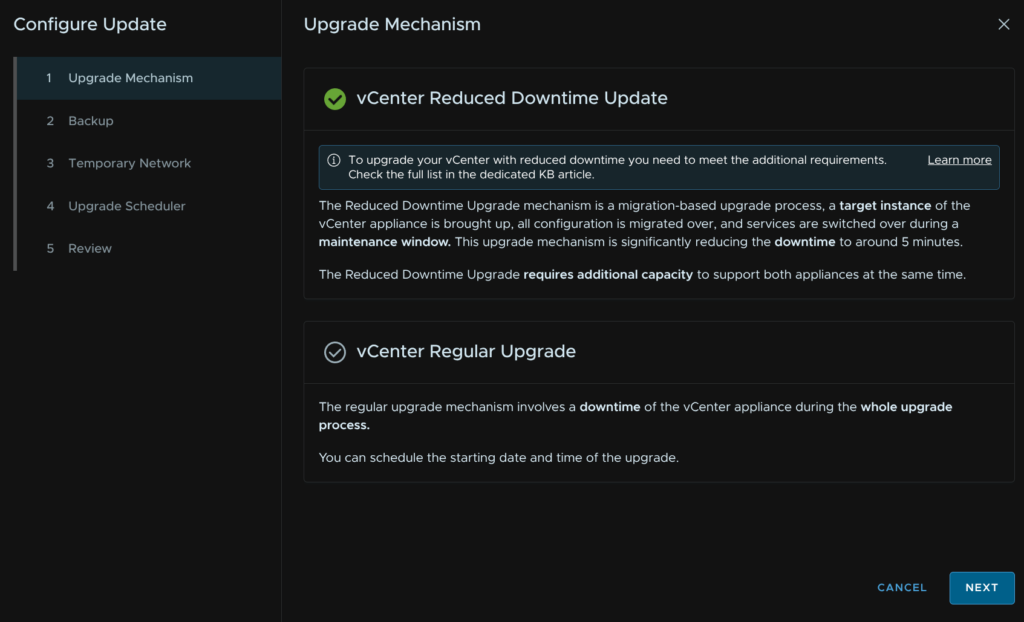
We will be using the vCenter reduced downtime upgrade, so click next
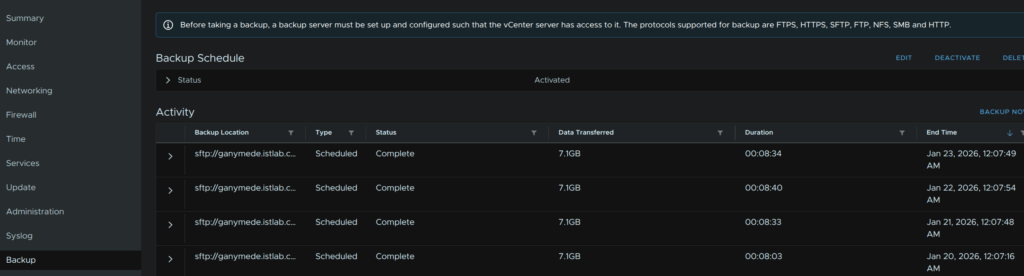
We do need to check we have a config backup taken in the last 24 hours
Which from the VAMI porta, https://:5480, we can see we do
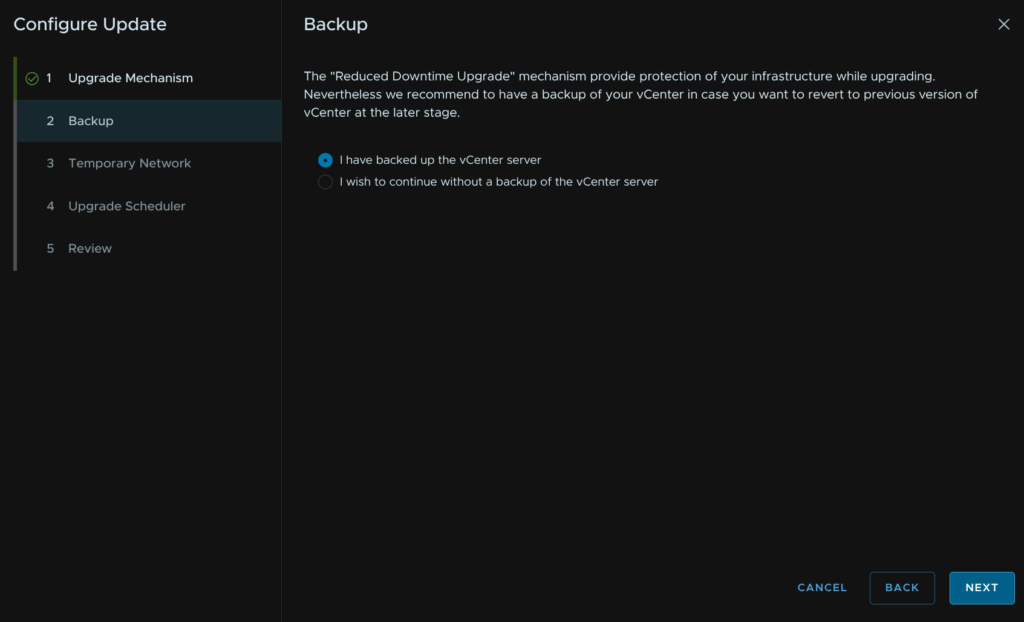
When you are happy, select the radio button to confirm we have backed up vCenter and click Next
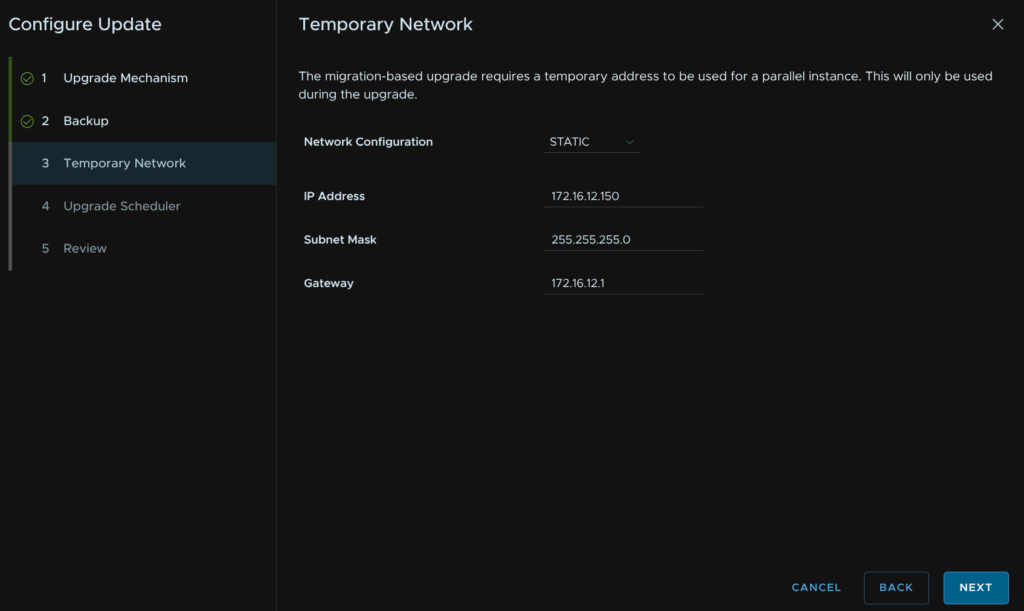
Use the drop down and set the temporary network as static, then add a spare IP on the same VLAN as the vCenter is on, with its subnet mask and gateway, then click Next
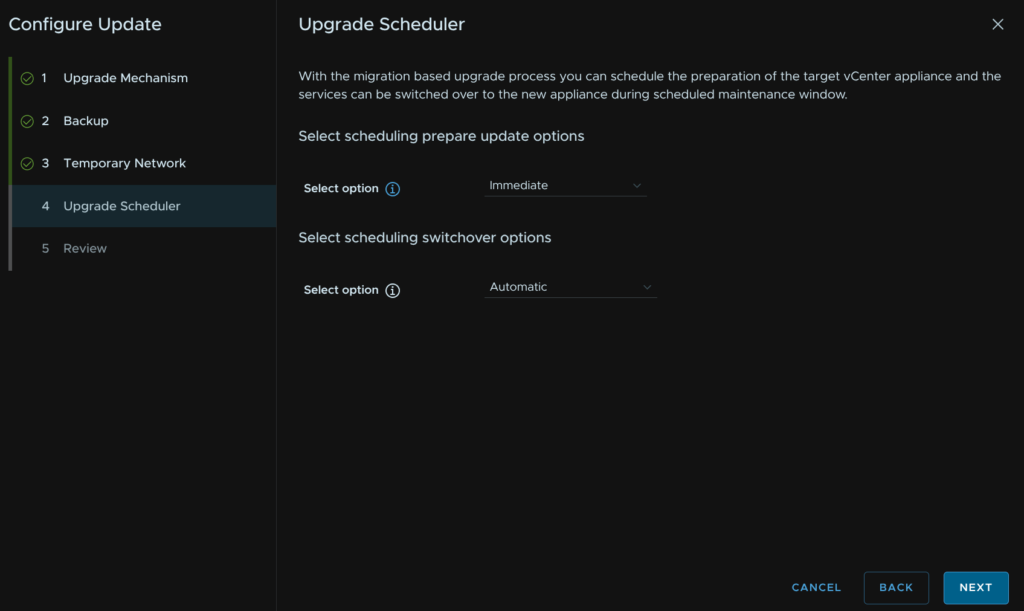
I want this upgrade to happen immediately, so I am using the immediate update and automatic switchover, but you can schedule both of these, when you are happy, click Next
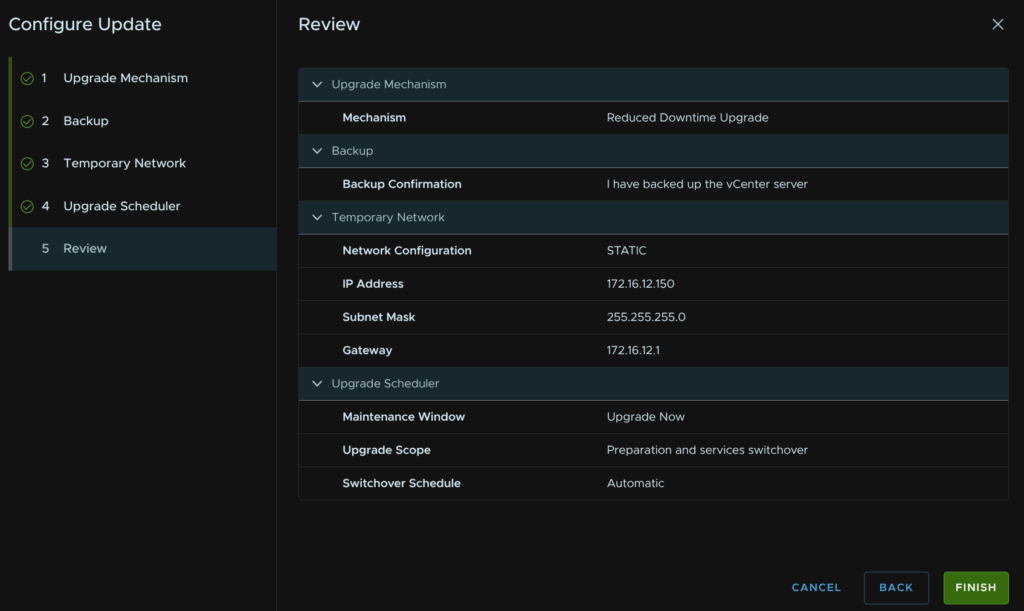
Then click Finish
If we want to see the progress, we can click View Status from the In-Progress Updates section
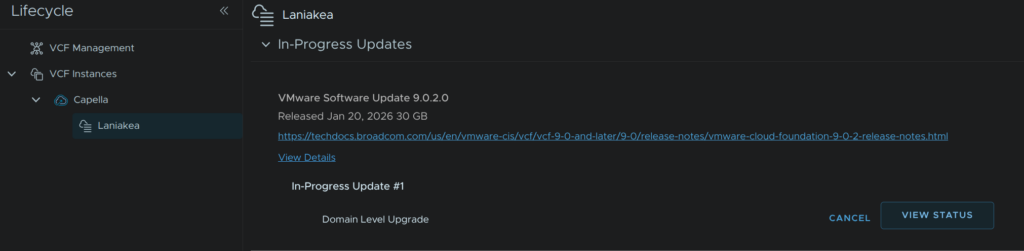
And the vCenter will generate a list of jobs its doing after a little bit
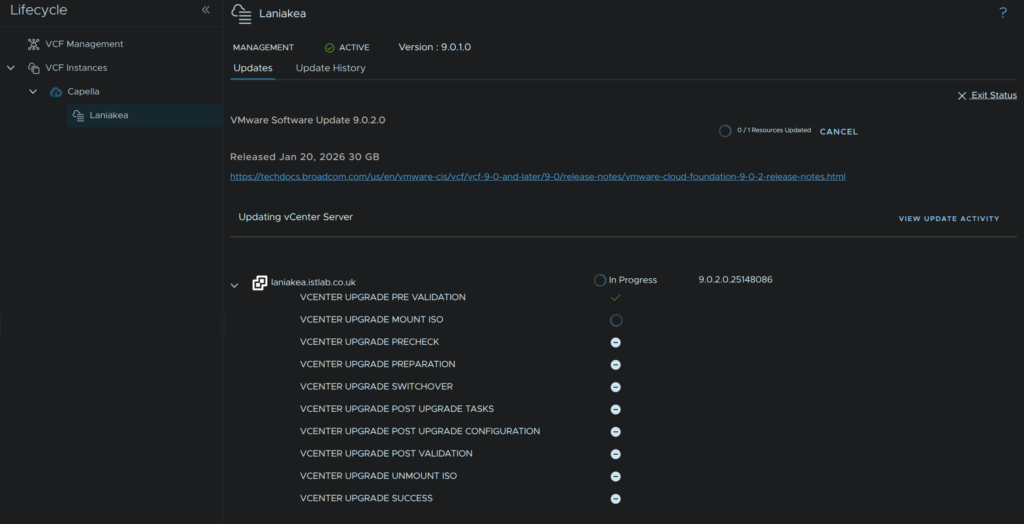
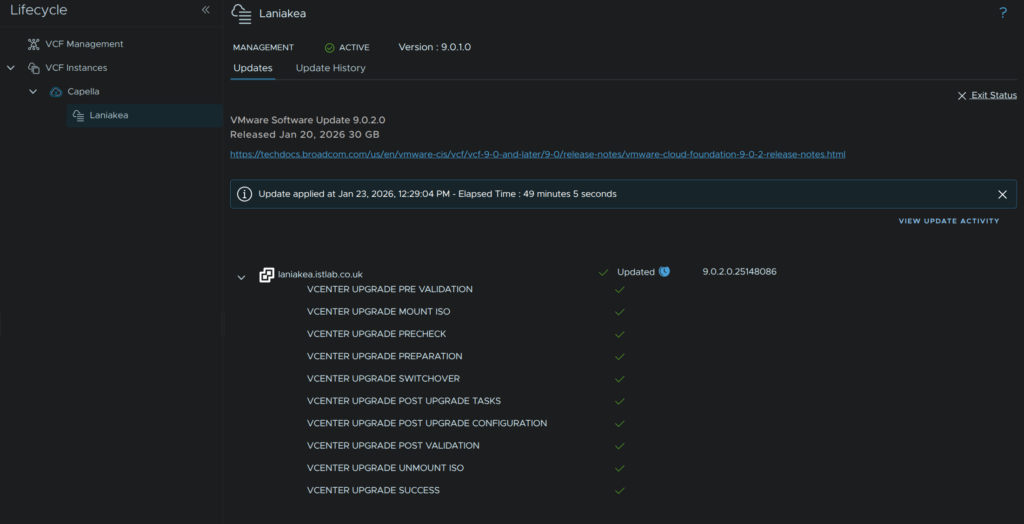
This will take ~1 hour, and when its done it will look like this
11 – Firmware
11.1 – Preparation
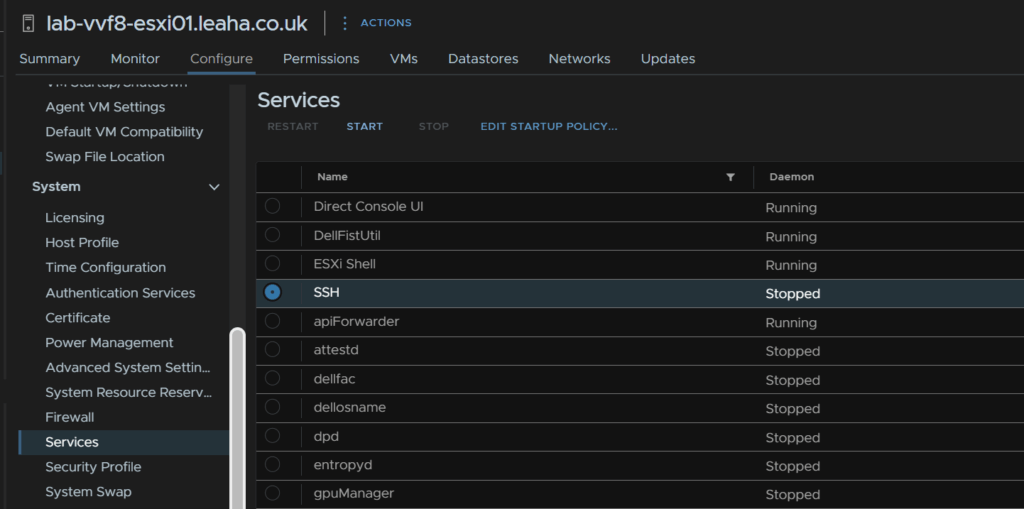
First, take a backup of ESXi, if the host is an ESXi host on the off chance something goes wrong, we’ll need SSH enabling for this
Select the host and head to Configure/System/Services, click SSH and then click Start, we can leave it enabled as when the host is rebooted, it will stay disabled on reboot
SSH into the host and run
vim-cmd hostsvc/firmware/sync_config
vim-cmd hostsvc/firmware/backup_config
This will give an out put of a URL like this

Take the link and edit the ‘*’ for the hostname/IP
So my URL would be
http://lab-vvf8-esxi01/downloads/52d067b1-1d69-2bd2-318b-b90ca6f0a521/configBundle-Lab-VVF8-ESXi01.leaha.co.uk.tgz
If you have an DRS rules that prevent hosts from being put into maintenance, then you may need to disable them
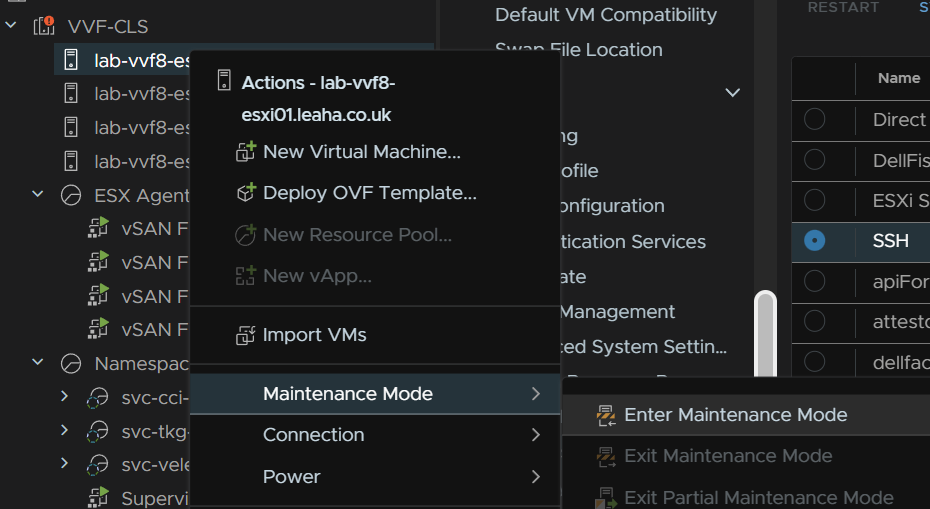
Then place the host thats having the firmware update in maintenance mode to do this right click the host and click Maintenance Mode/Enter Maintenance Mode
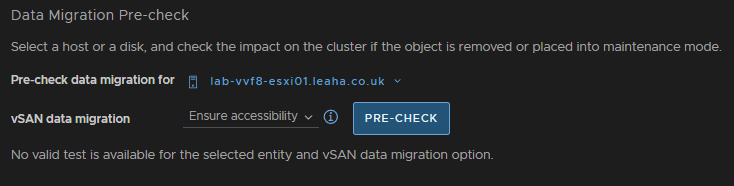
For vSAN click Go To Pre Check, this wont be available on a cluster with out vSAN
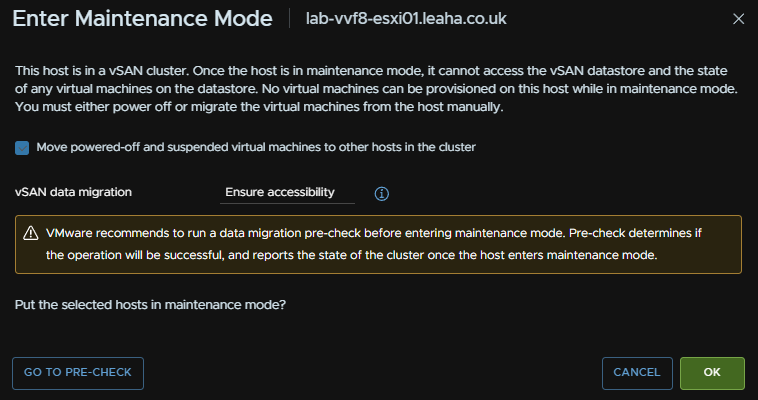
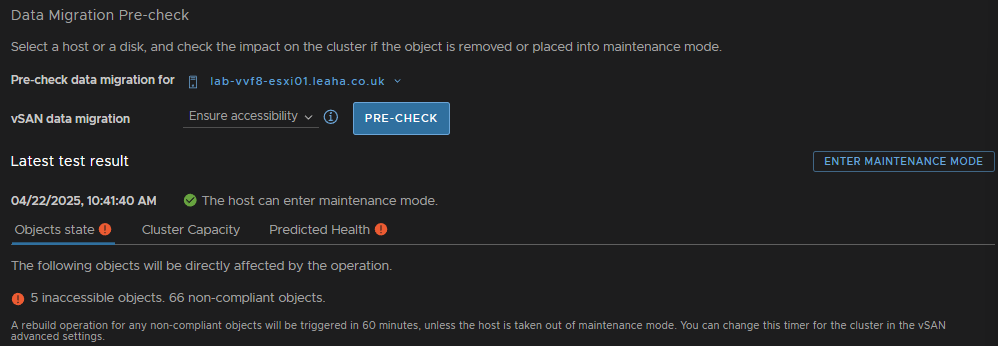
Then click Pre Check
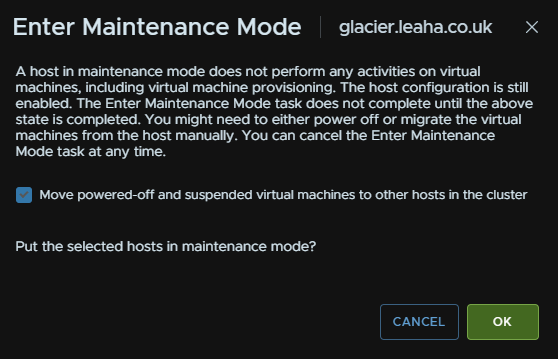
Ensure the check says the host can enter maintenance mode, there may be errors, but thats fine, then click Enter Maintenance Mode
Ensure the box to migrate powered off and suspended VMs is checked and click ok
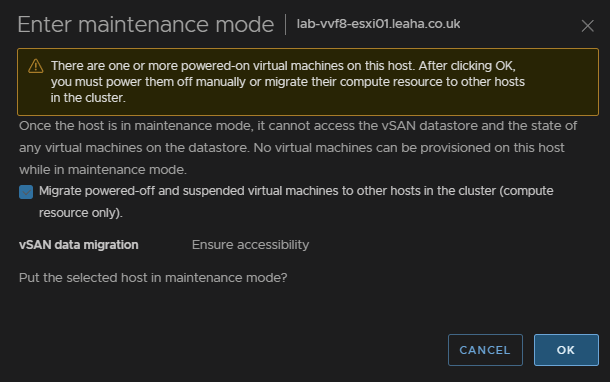
For Non vSAN it will just look like this, also ensure the box is checked and click ok
If you have Veeam replication jobs running to DR, this shouldnt cause any issues we powered off VMs are also moved, but you can always wait for running jobs to finish and disable them while patching
11.2 – Dell
Its important Dell patches are applied in the right order
- iDRAC
- CPLD – (If Available)
- BIOS
- Everything Else
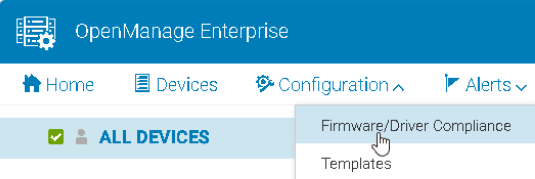
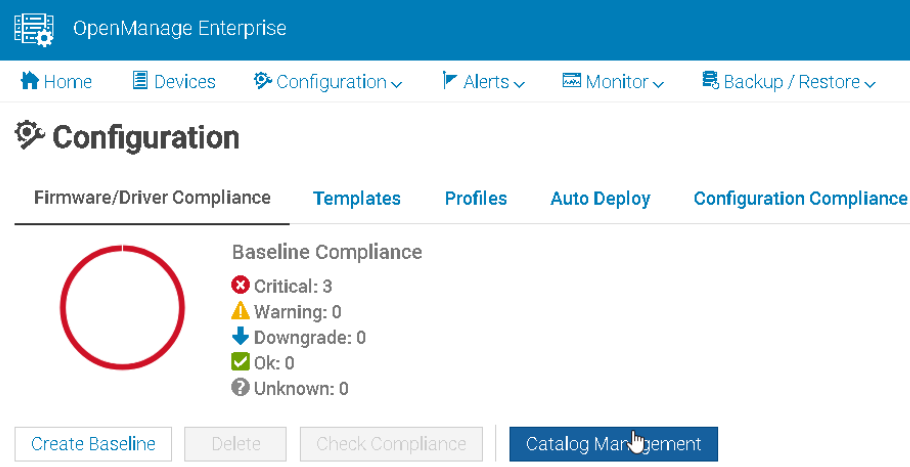
In OpenManage go to Configuration/Firmware/Driver Compliance
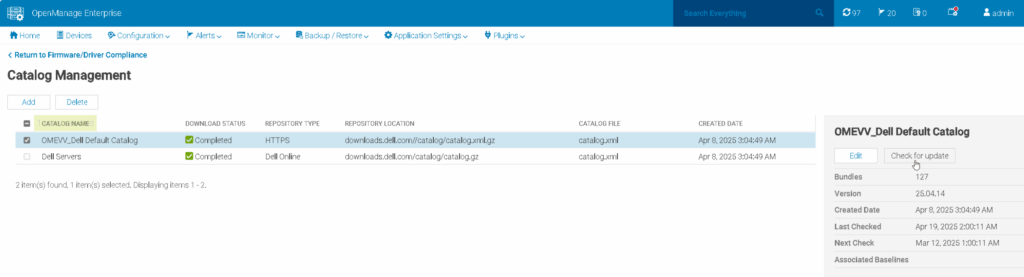
Click Catalog Management
Select your catalog and Check For Update
Ensure any host being updated is in maintenance mode with no active VMs running as reboots are needed for most firmware updates from section 7.1
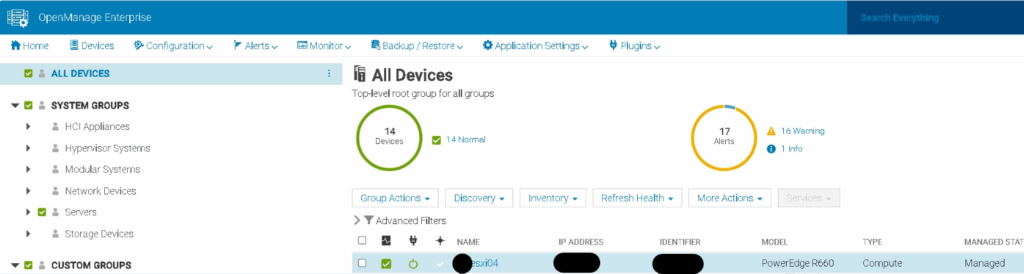
Go to Devices
Find your host in the list and click it, the IPs are for the iDRAC not the host
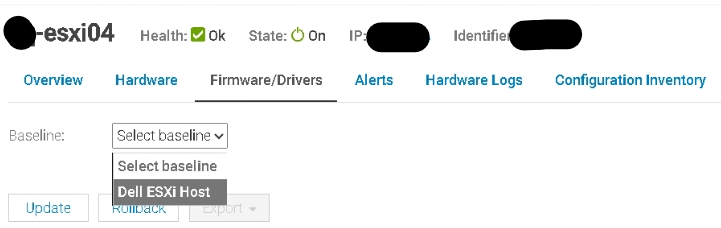
Going into Firmware/Drivers we can select the base line for this host using the drop down, ESXi01 and see whats available
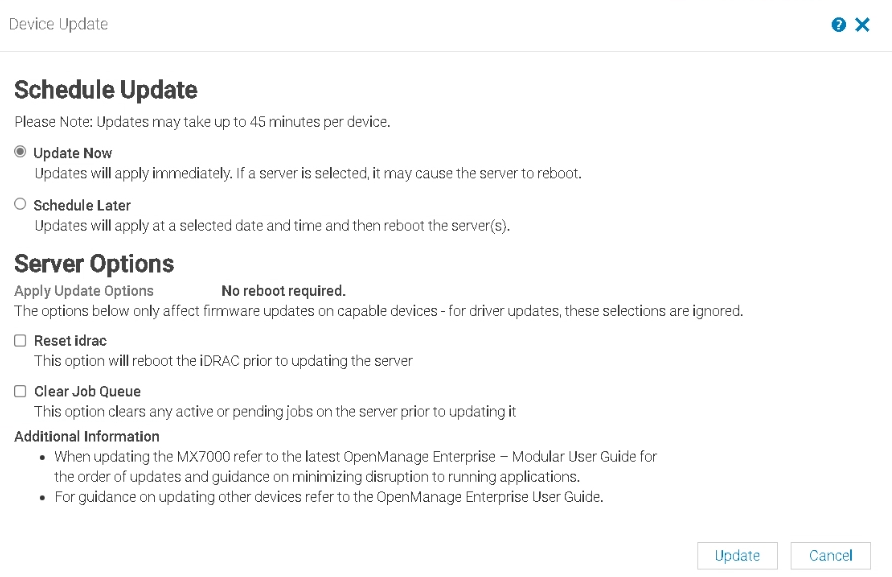
Fist, we want to do the iDRAC, so make sure only that is selected and click update like this
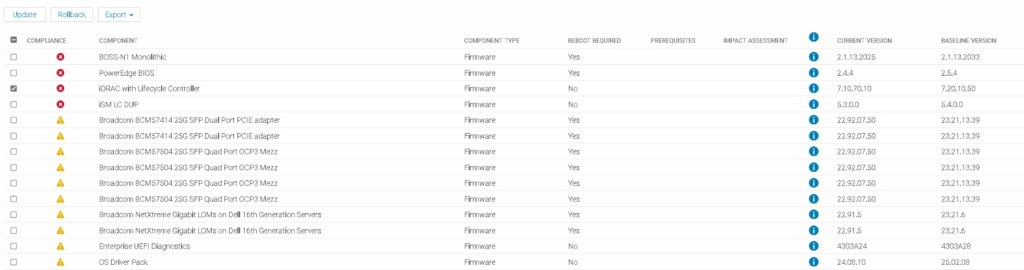
Then click Update
You can check running jobs from this icon in the right of OpenManage

This can take 15-20 mins to update, when its done
Then we want to check the CPLD version, OpenManage will not pick up any updates for this, but it will list the version at the bottom

Here we can see my R660 has CPLD 1.2.6
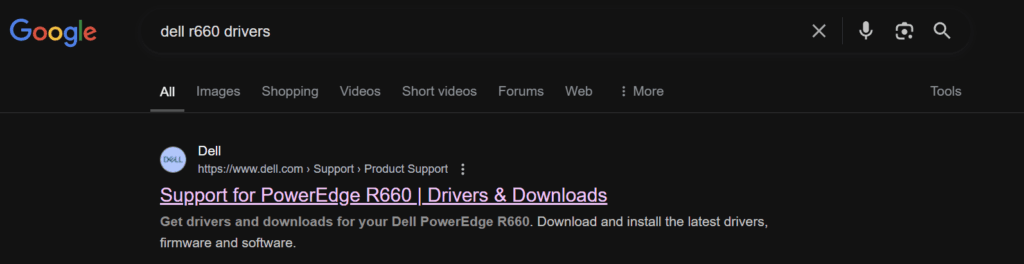
To check the active version Google ‘Dell <Server-Name> Drivers’ and you should see the support page as the first link
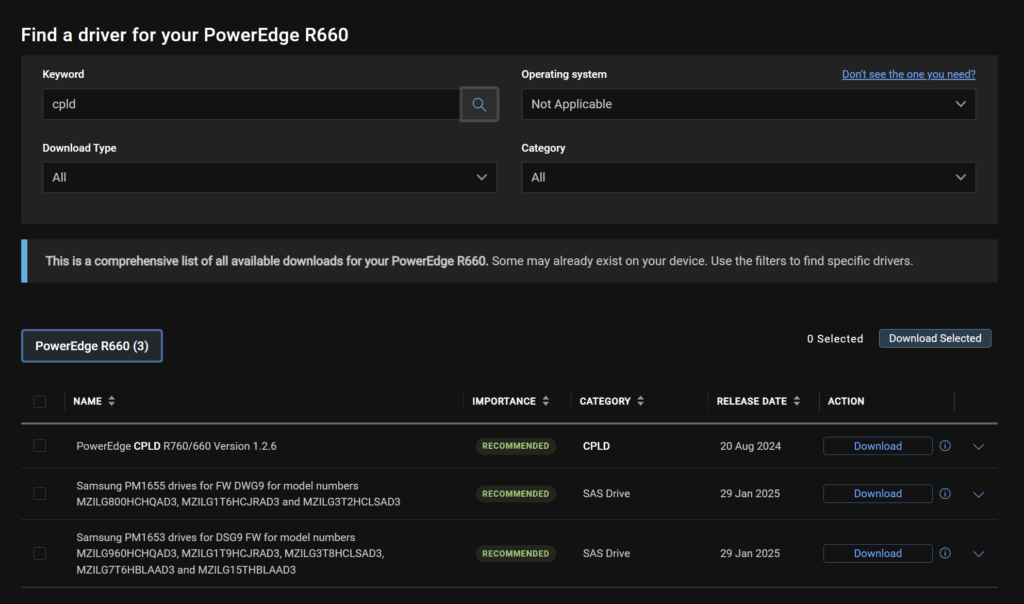
Change the OS to Not Applicable, and search for ‘CPLD’, here we can se the latest is 1.2.6, so we dont have one to do
However, if you did have a newer version, you need to log into the iDRAC
This is under Maintenance/System Update, you can upload the CPLD file here by clicking Choose File

Then click Upload

Select the package and click Install And Reboot

In OME, we repeat for the BIOS and click Update
This will reboot the host

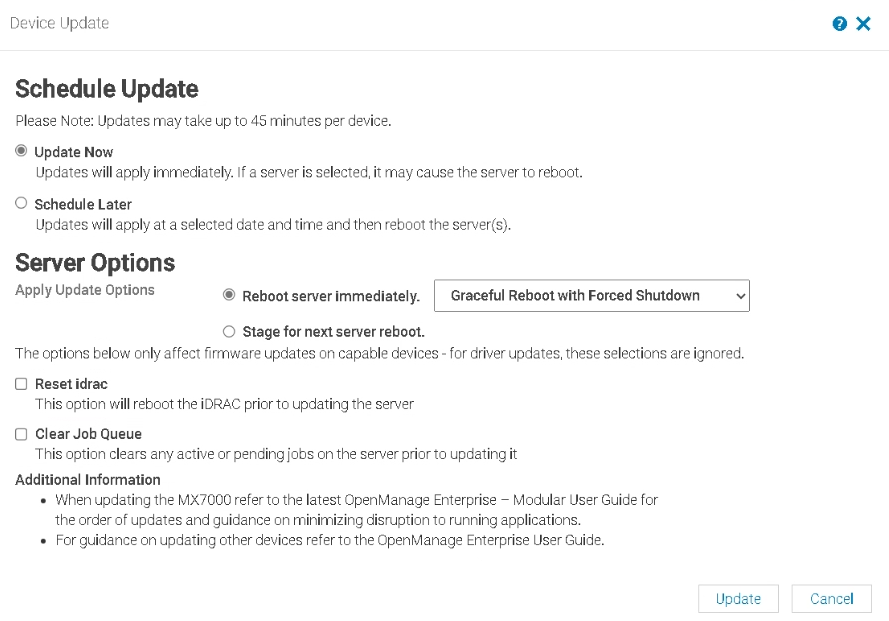
Then select the rest and click Update
11.3 – HPE
Ensure any host being updated is in maintenance mode with no active VMs running as reboots are needed for most firmware updates from section 7.1
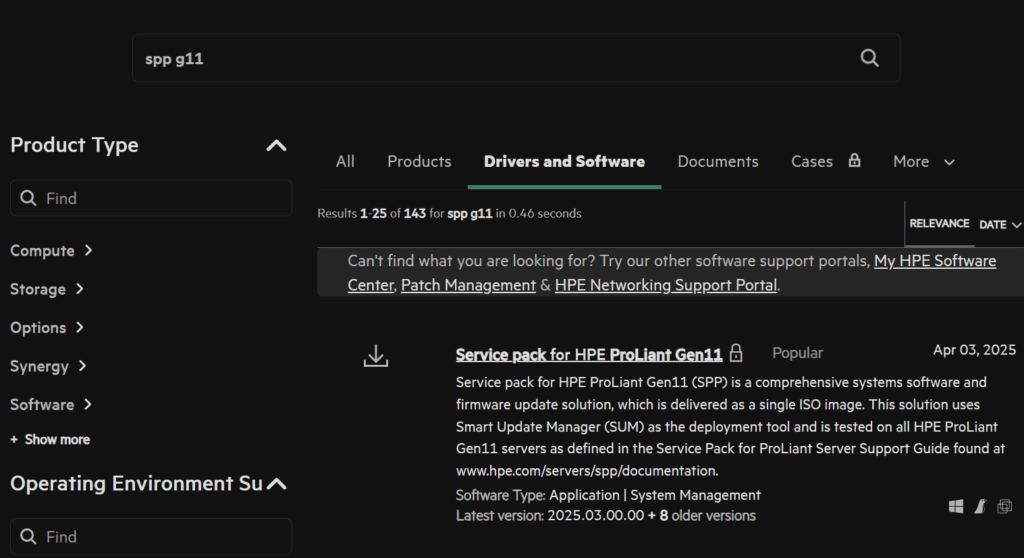
We then need the HPE SPP, we can find this here
We can also search for the server generation and click the link to it
Eg
Click Obtain Software
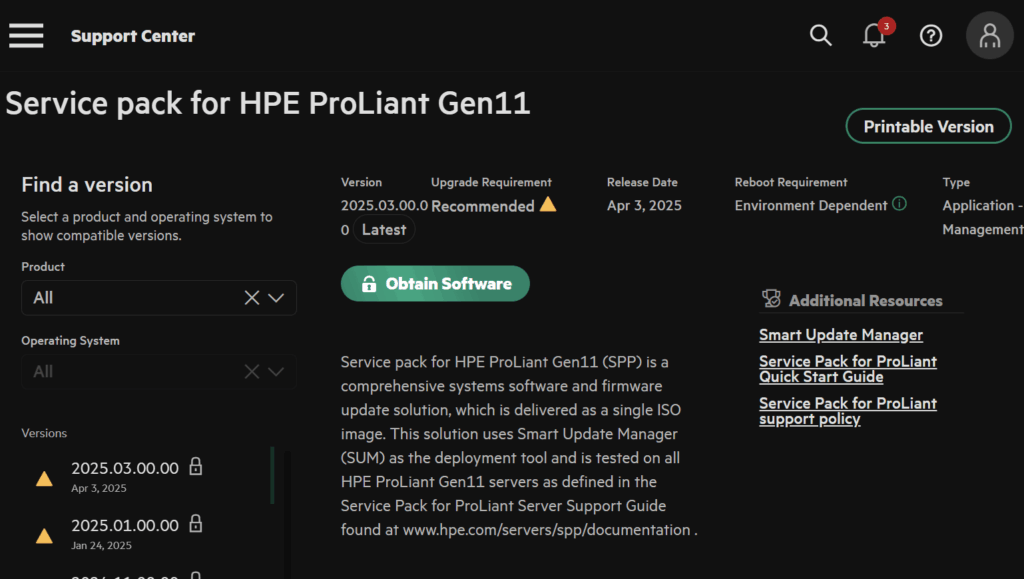
And sign in with your HPE account

Open the web console in iLO, click the CD icon then CD/DVD/Local *.iso File
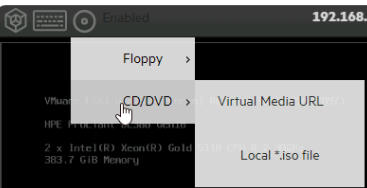
And double click the ISO file
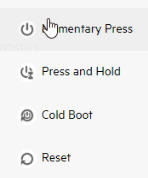
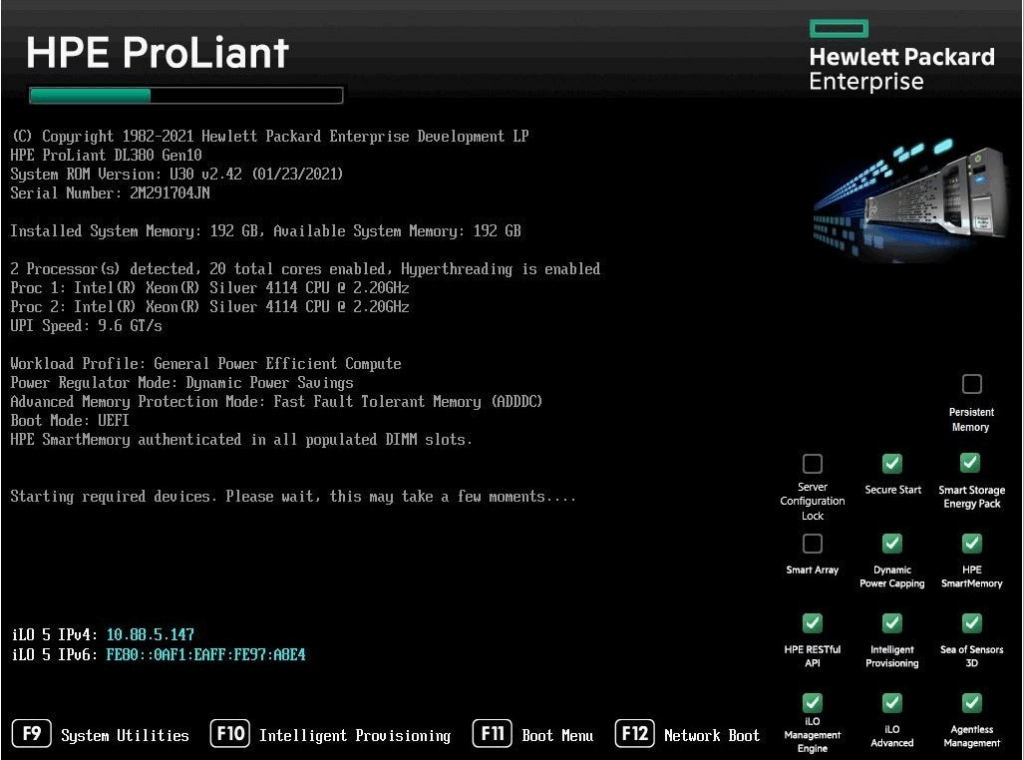
Reboot the host OS, momentary press will do this from the left mot icon in the web console, or you can reboot the server from the guest OS
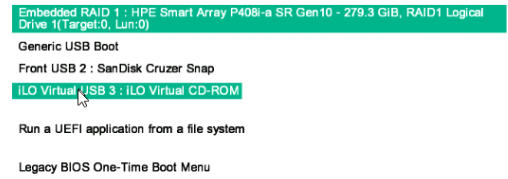
Press F11 here to enter the one time boot menu
Select the iLO virtual Media
Then automatic updates

This can often take ~90 mins to complete and do not interrupt the server, when its done, your host OS will be booted
12 – Supervisor/Services
12.1 – Supervisor
You will want to give this about a good 20-30 mins after the vCenter has been upgraded for the ESX agent to be upgraded
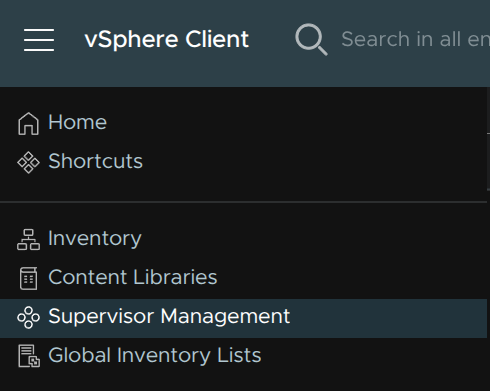
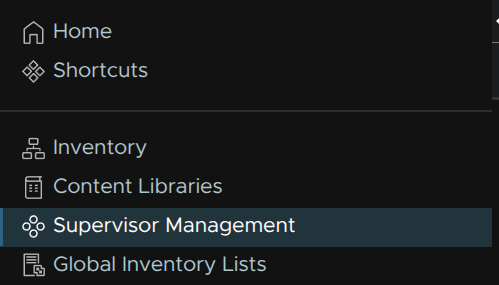
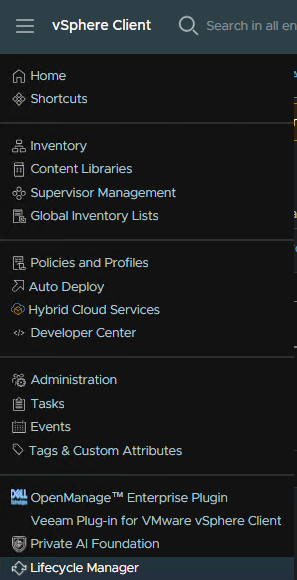
In vSphere, click the three lines in the top right, then click Supervisor Management
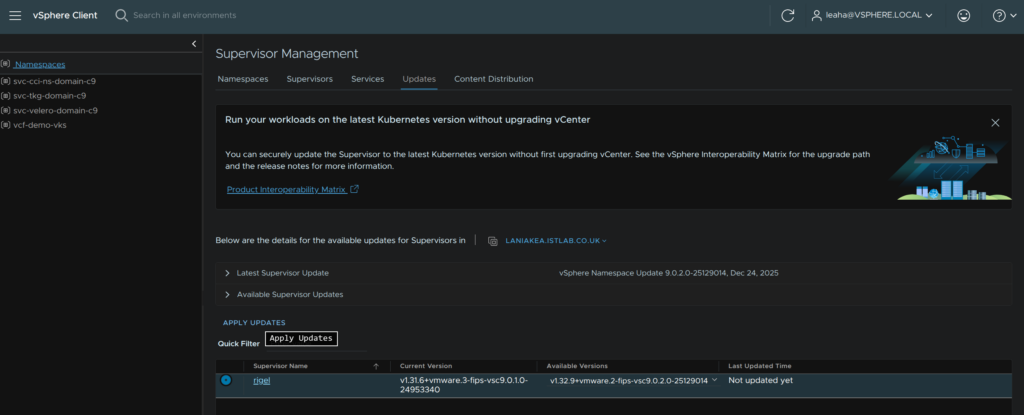
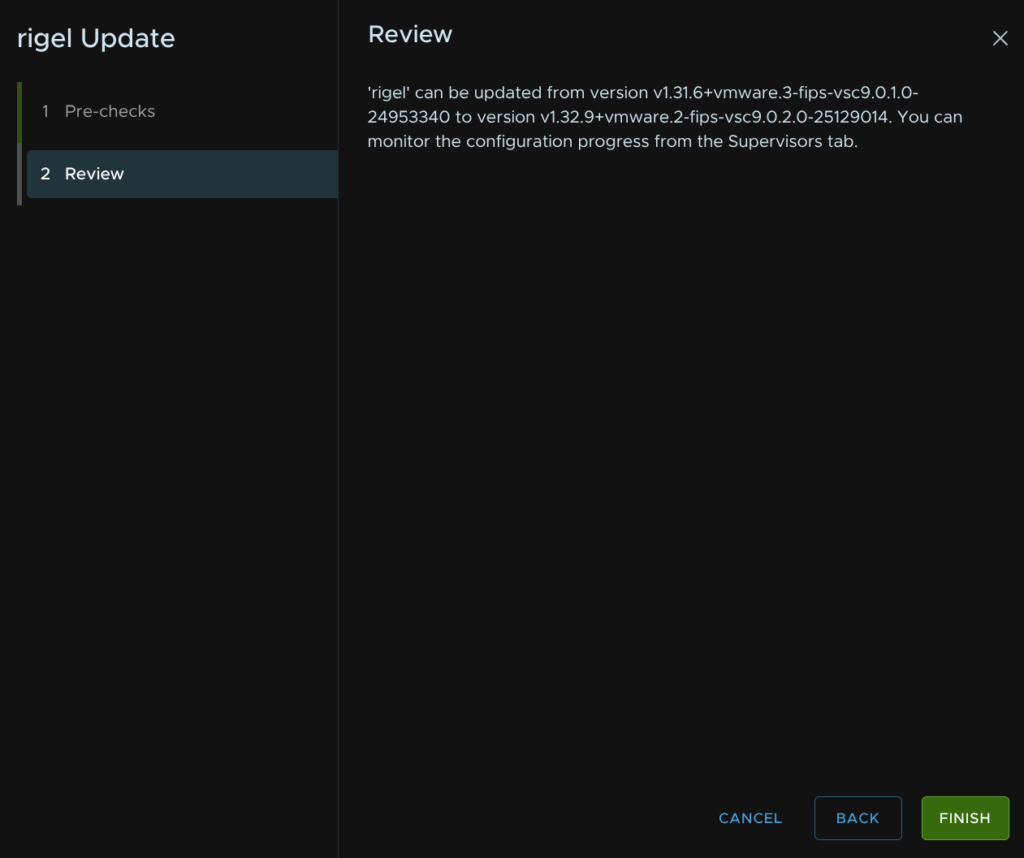
Click Updates and here we can see all updates, we can select a newer versions of the current K8S stream, in my case v1.31.x, but I am going to upgrade to the latest release, which I normally recommend anyway, which is 1.32.9
Select the supervisor with the radio button, ensure the right version is selected with the drop down and click Apply Updates
Then click Proceed
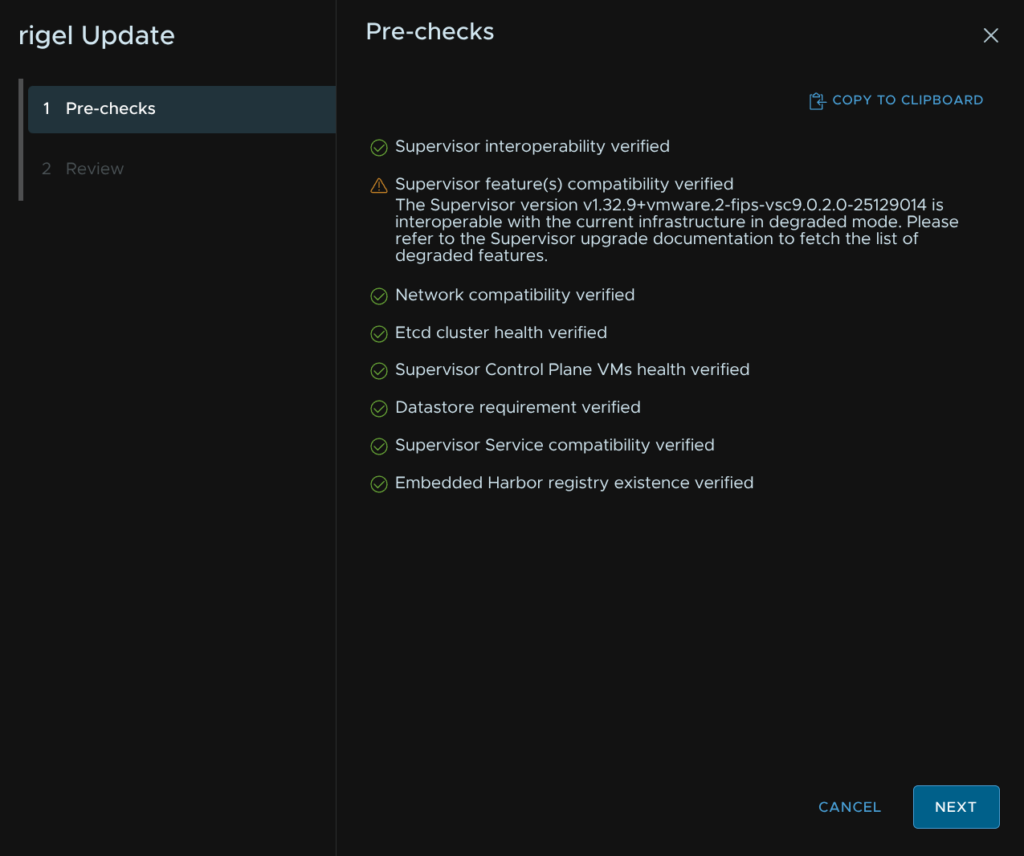
The supervisor features always warns here, and I have never seen it cause an issue, but in production environments asking Broadcom support if in doubt is a good idea
When you are happy, click Next
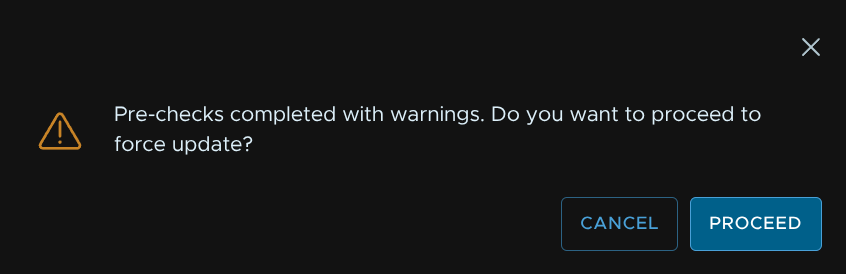
Click proceed
Then click Finish
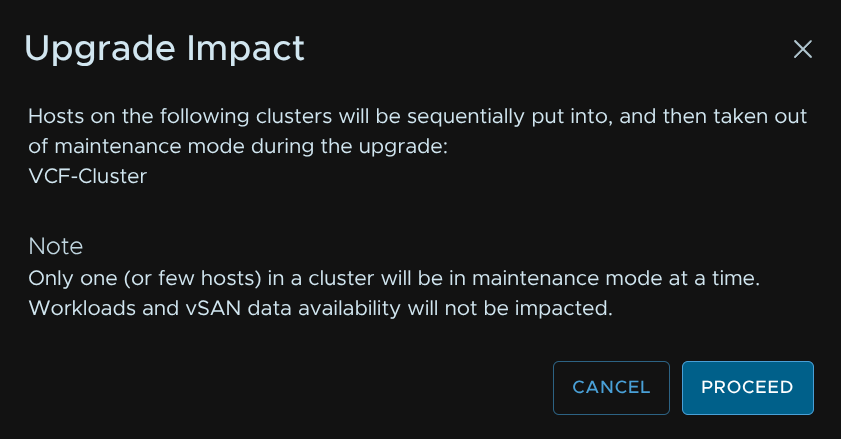
This will iteratively replace all the supervisor control plane nodes with new ones as it upgrades the cluster, then place the hosts into maintenance mode and install the new VIBs, this can take a couple of hours, especially depending on the number of hosts in the cluster
12.2 – Local Consumption Interface
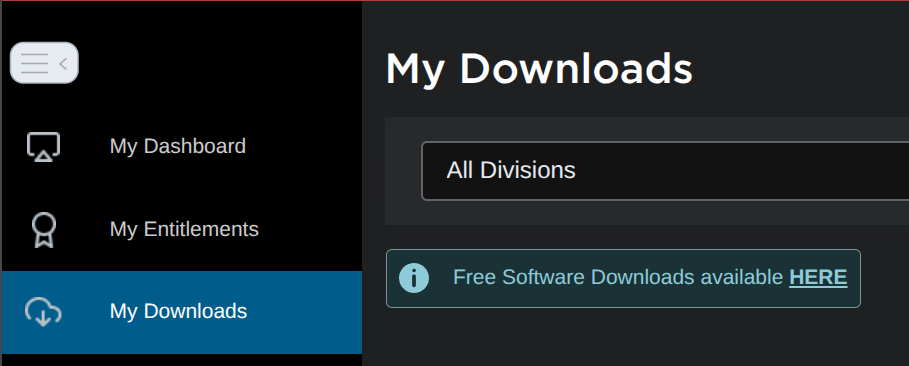
We need to get the latest version from the Broadcom portal, on My Downloads, click the HERE link on free downloads

Scroll down and click the vSphere Supervisor Services

Expand the Local Consumption Interface and click the latest release, in my case 9.0.2
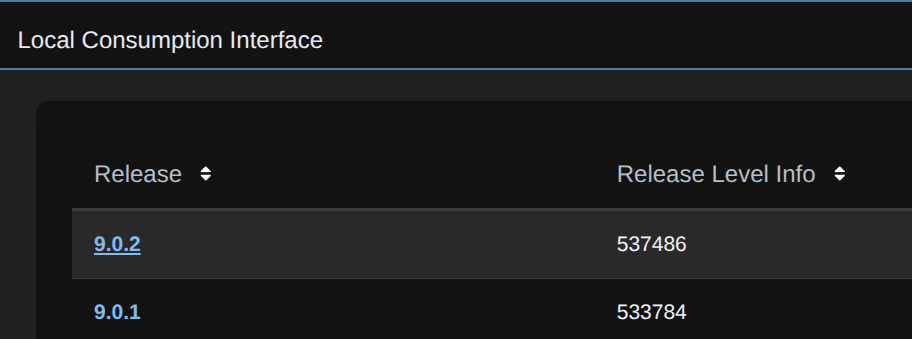
And download the YAML

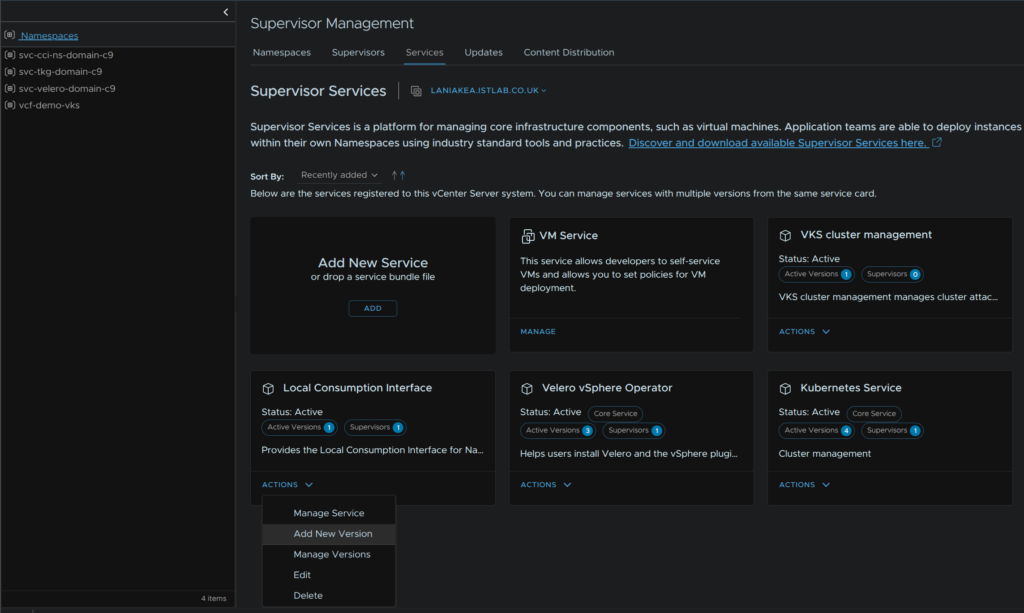
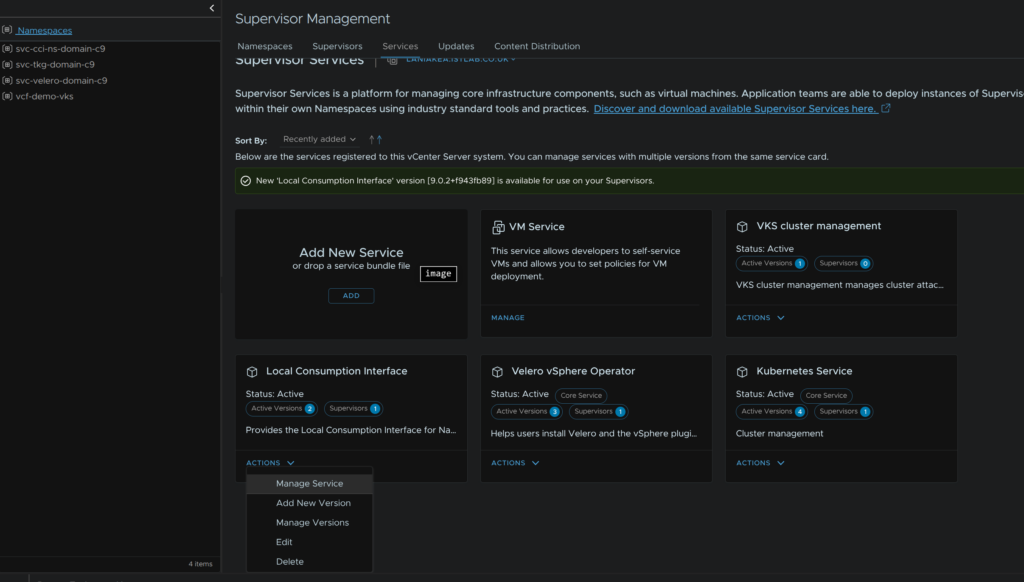
In vSphere click the three lines and click Supervisor Management

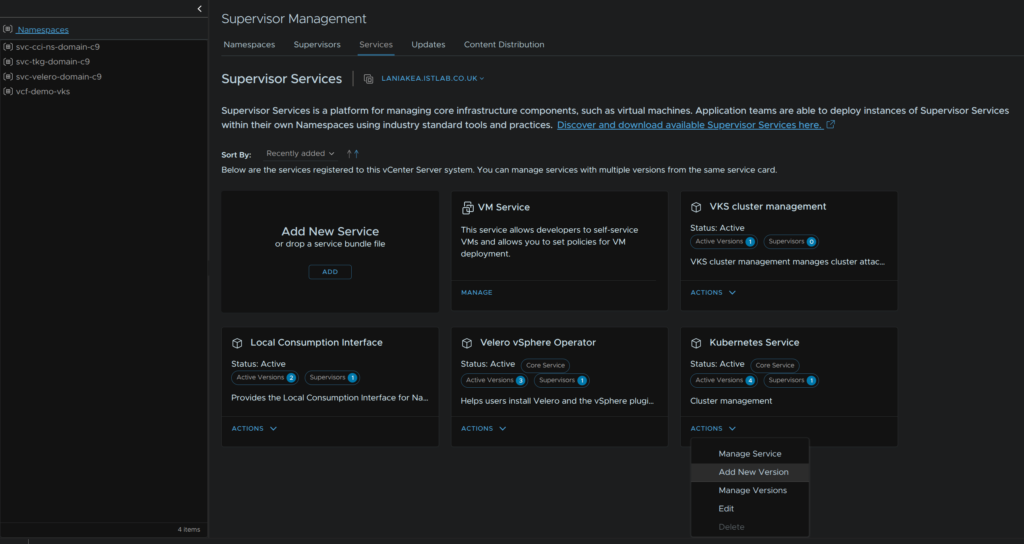
Click Services, and on the Local Consumption Interface click Actions/Add New Versions
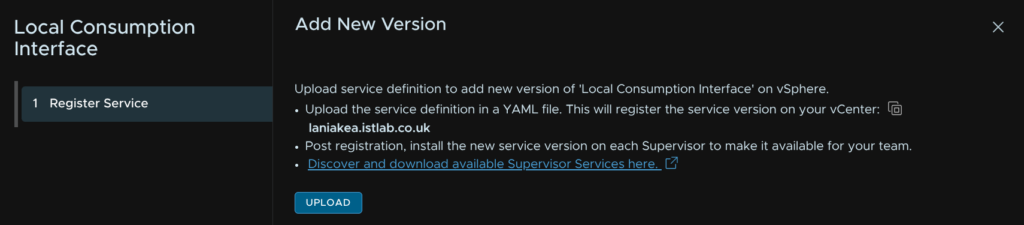
Click Upload
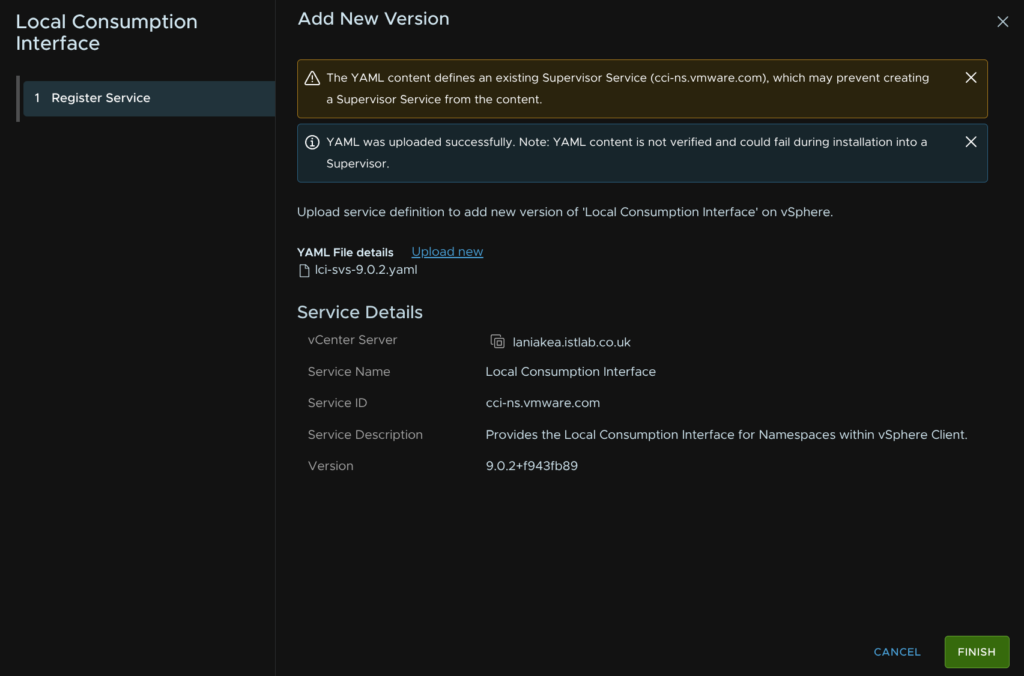
Then double click the YAML

Then click Finish
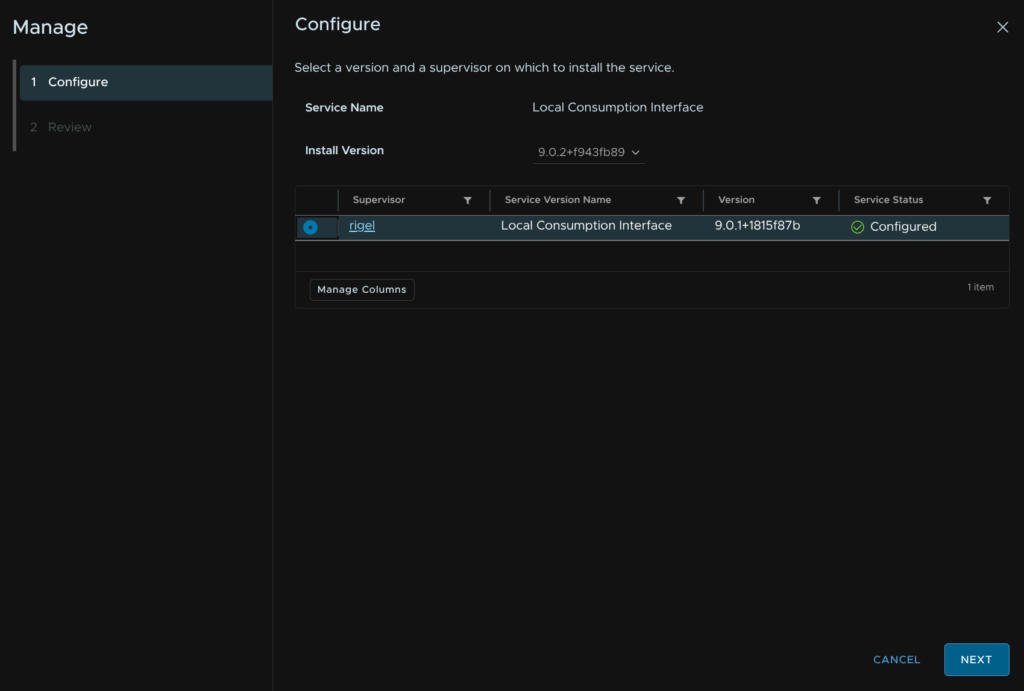
Now on the Local Consumption Widget, click Actions/Manage Service
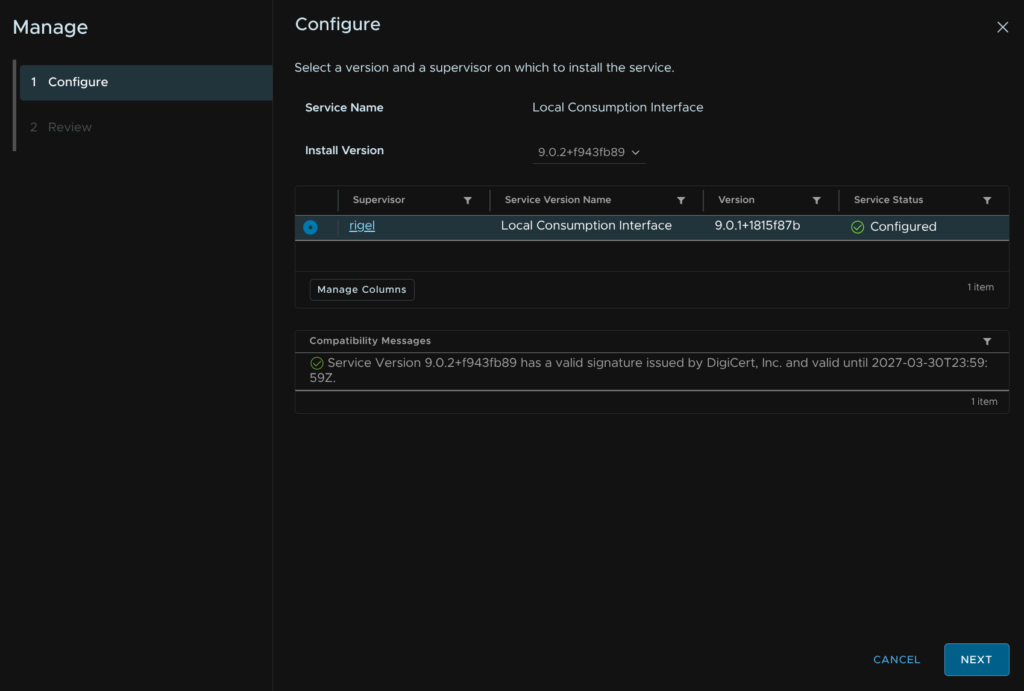
Select your supervisor and make sure the new version is selected from the drop down, in my case 9.0.2, and click Next for the pre checks to complete
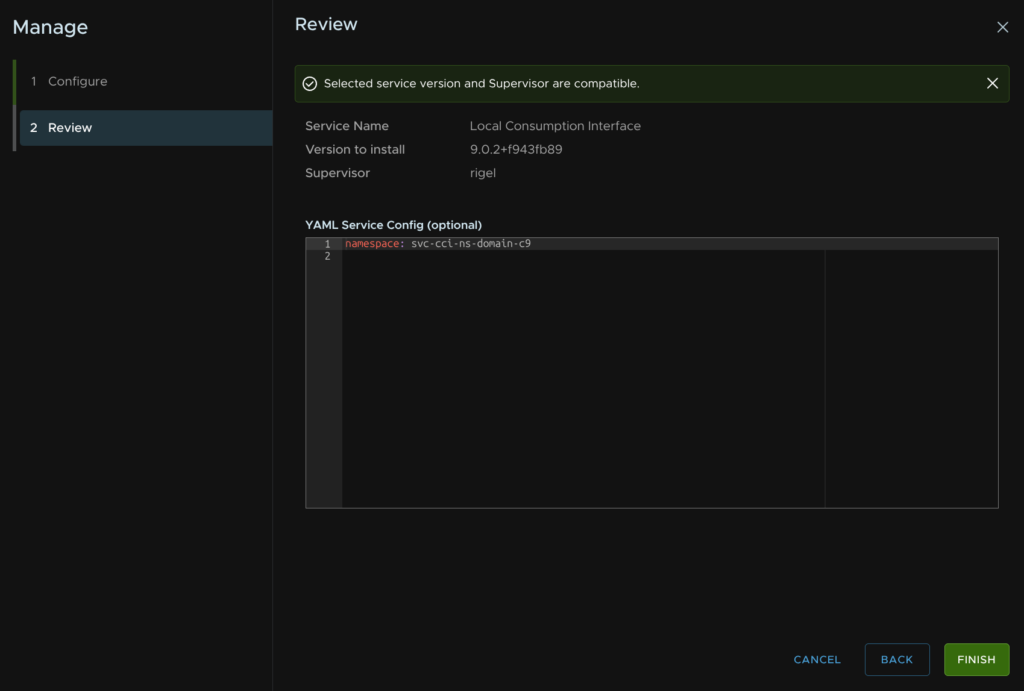
When they are finished, like this, click Next
Then click Finish
12.3 – Kubernetes Service
We need to get the latest version from the Broadcom portal, on My Downloads, click the HERE link on free downloads
Scroll down and click the vSphere Supervisor Services

Expand the vSphere Kubernetes Service and select the latest release
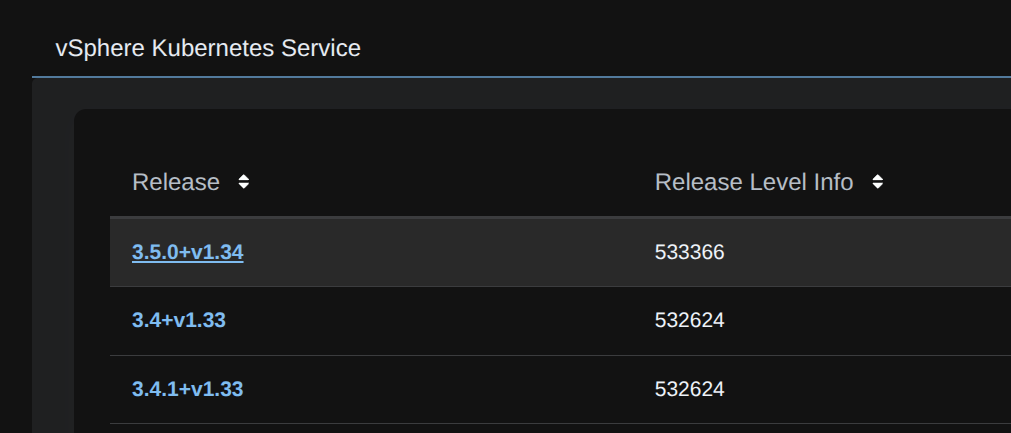
And download the YAML

In vSphere click the three lines and click Supervisor Management
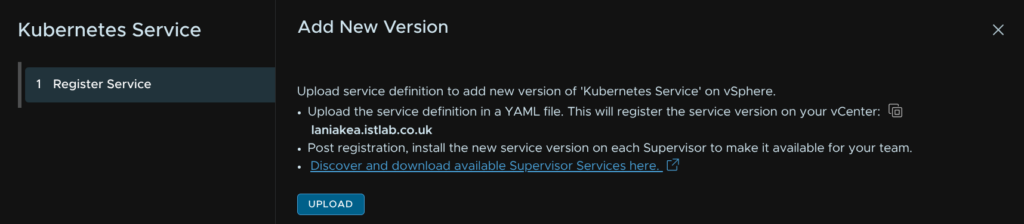
Click Services, and on the Kubernetes Service click Actions/Add New Version
Click Upload
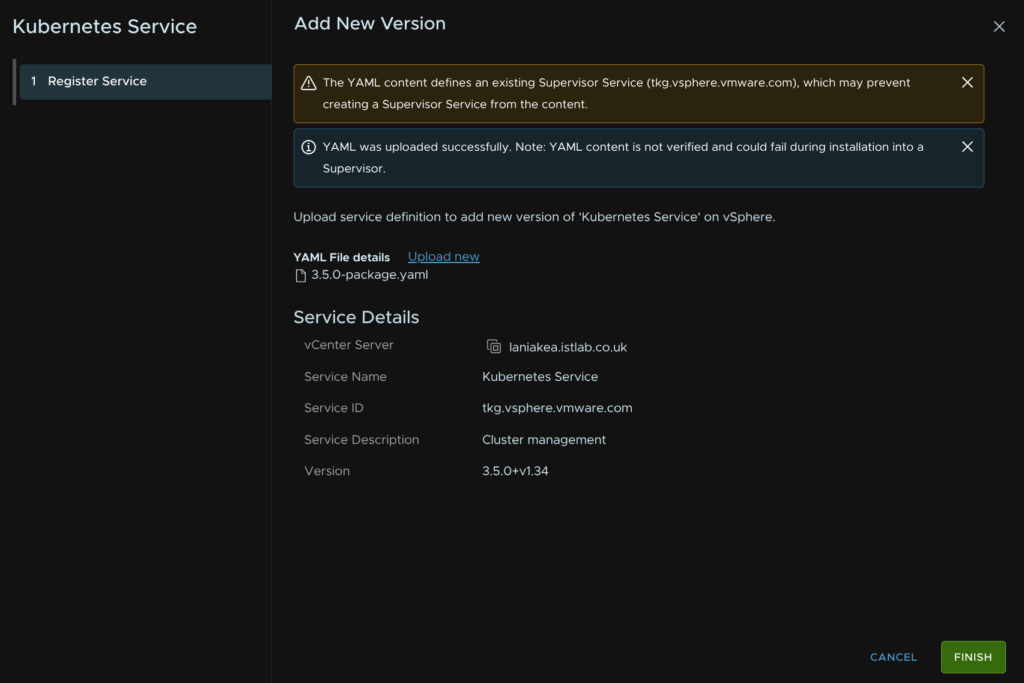
And double click the YAML
Then click Finish
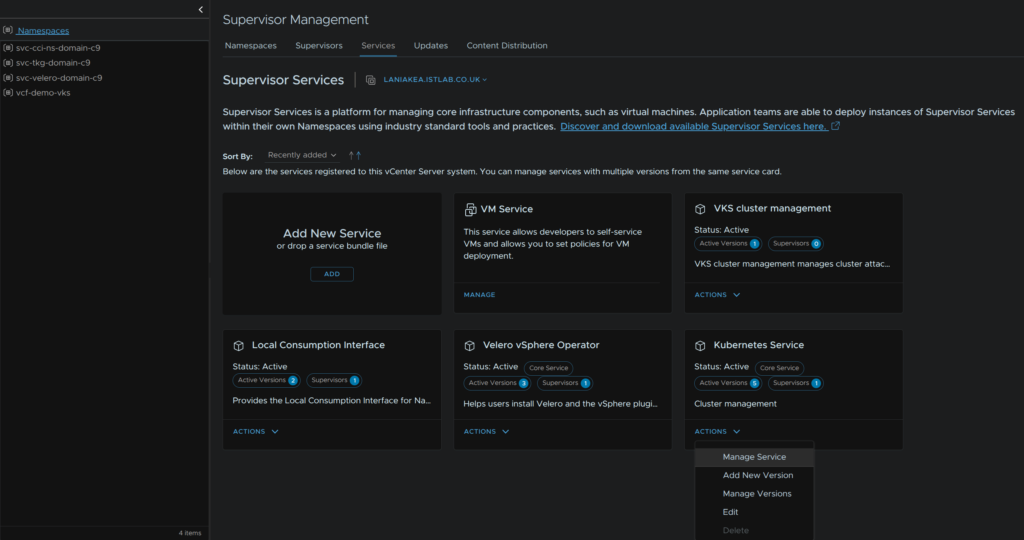
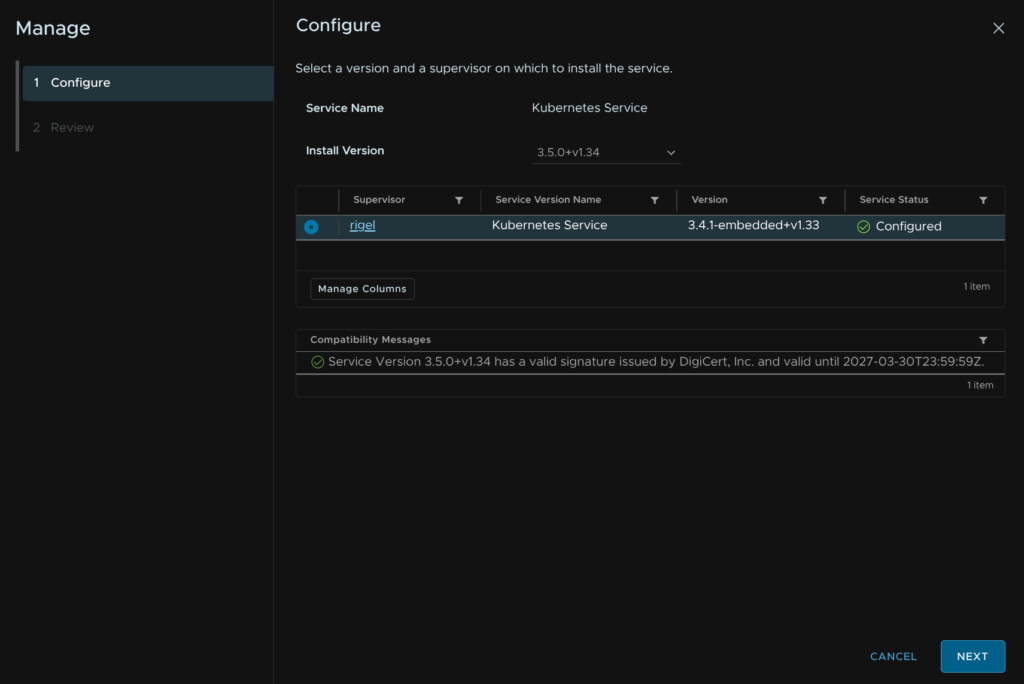
Then on the Kubernetes Service widget, click Actions/Manage Service
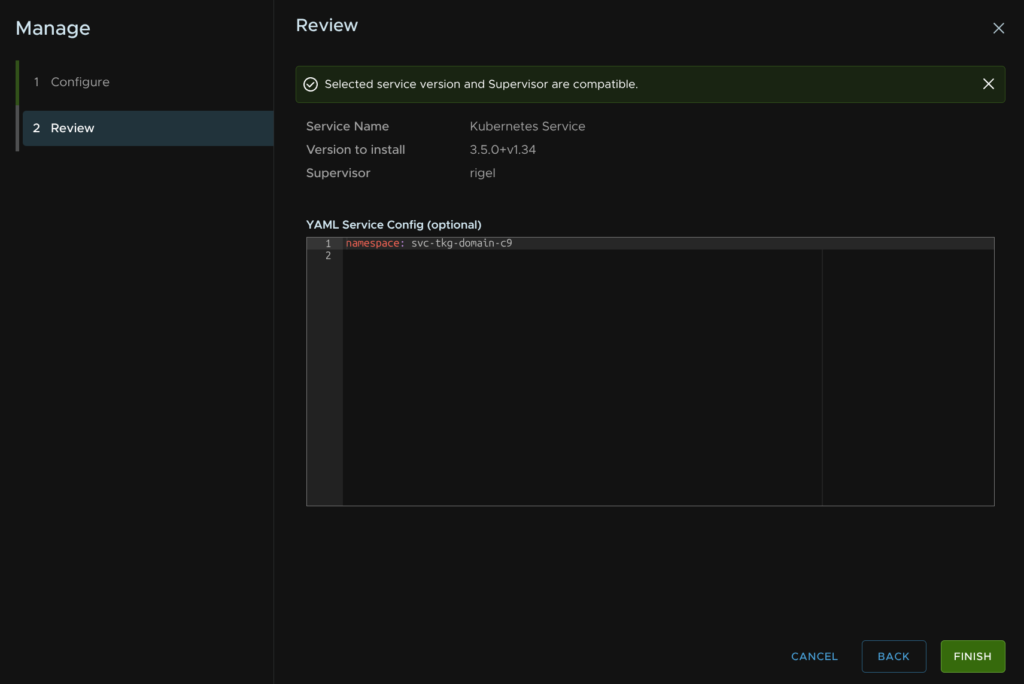
Select the supervisor using the radio button, and ensure the drop down has the latest version, then click Next for the pre checks

When thats run fine, click Next
Then click Finish
13 – ESX
Back in VCF Operations, click Fleet Management/Lifecycle, expand your VCF Instance and select your domain, then under Available Updates click Download Now for the ESX updates
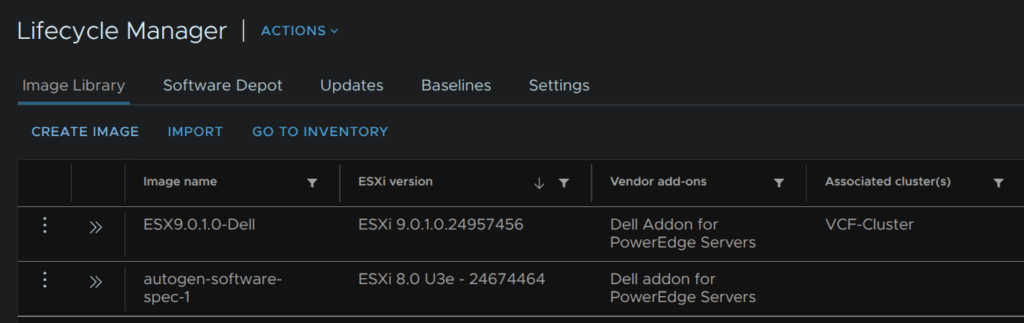
While thats downloading we need to create a cluster image, in vSphere, click the three lines in the top left and click LifeCycle Manager
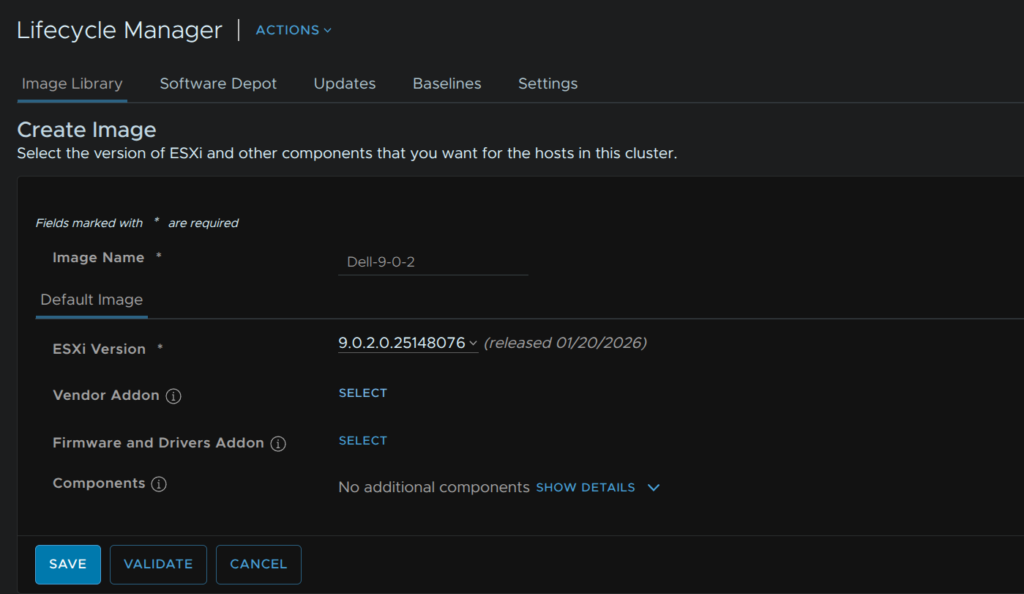
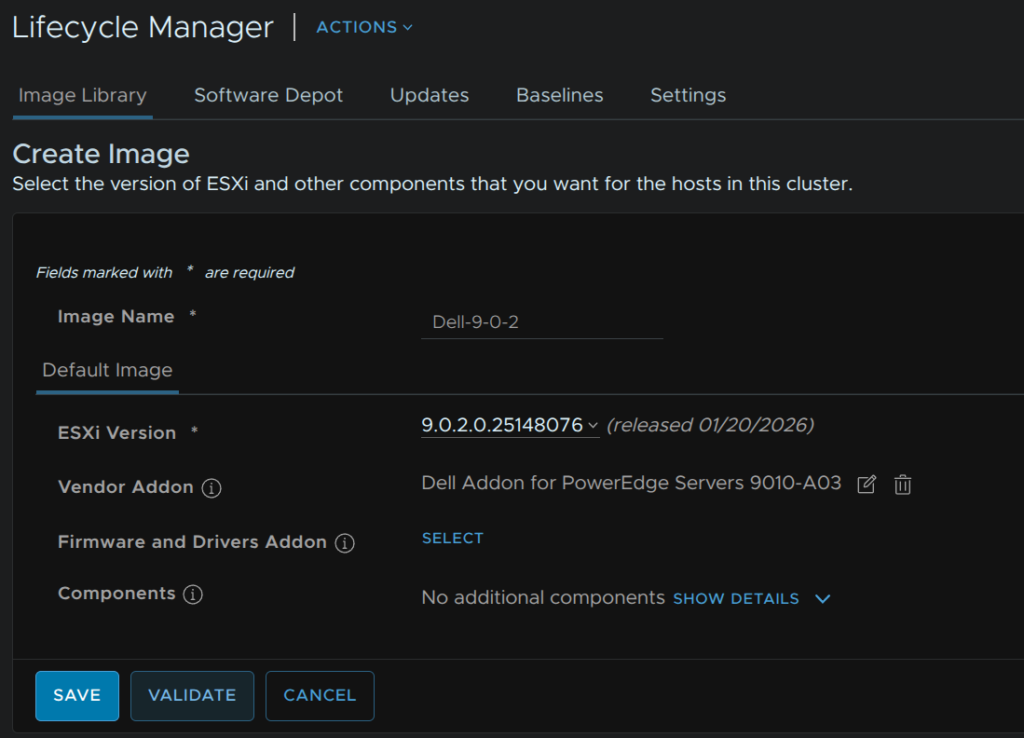
Under Image Library, click Create Image
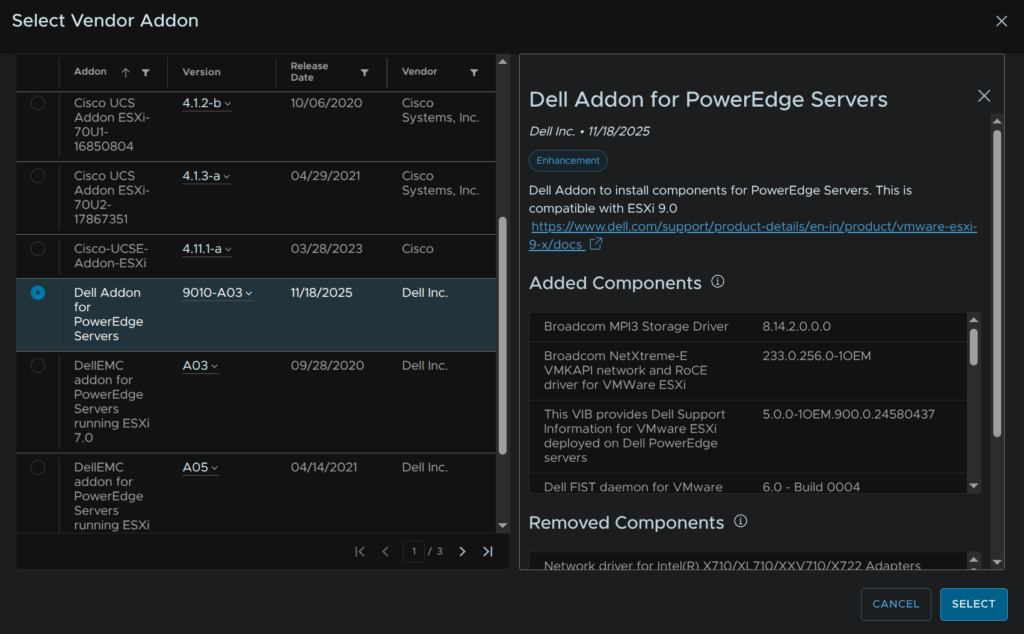
Give the image a name, and select the target ESX version from the drop down, in my case, 9.0.2, then click Select on the vendor addon
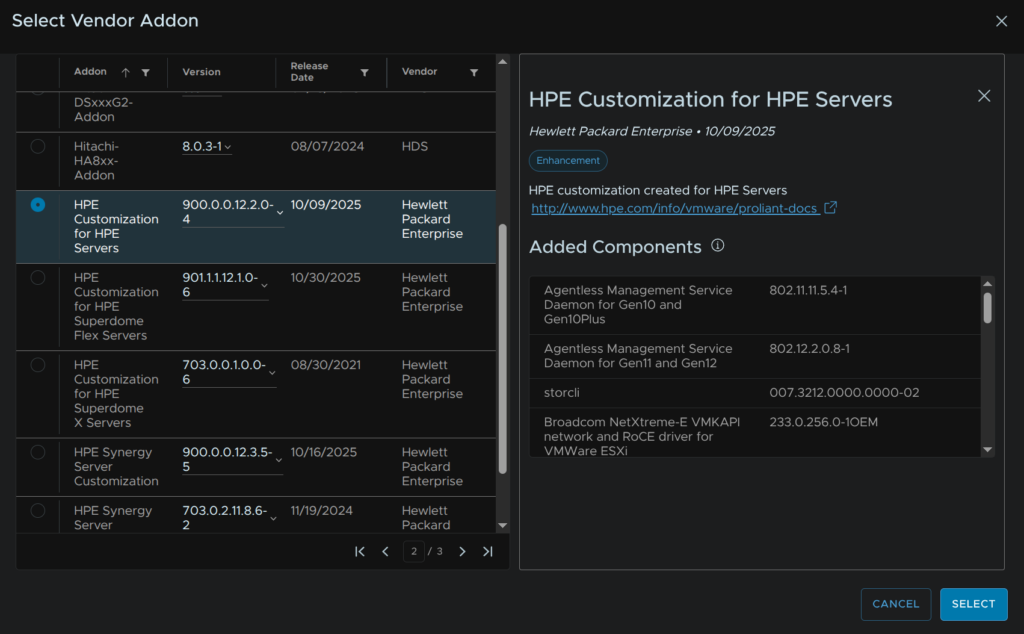
Select your vendor addon, in my case Dell and click Select
For HPE Proliant its this one
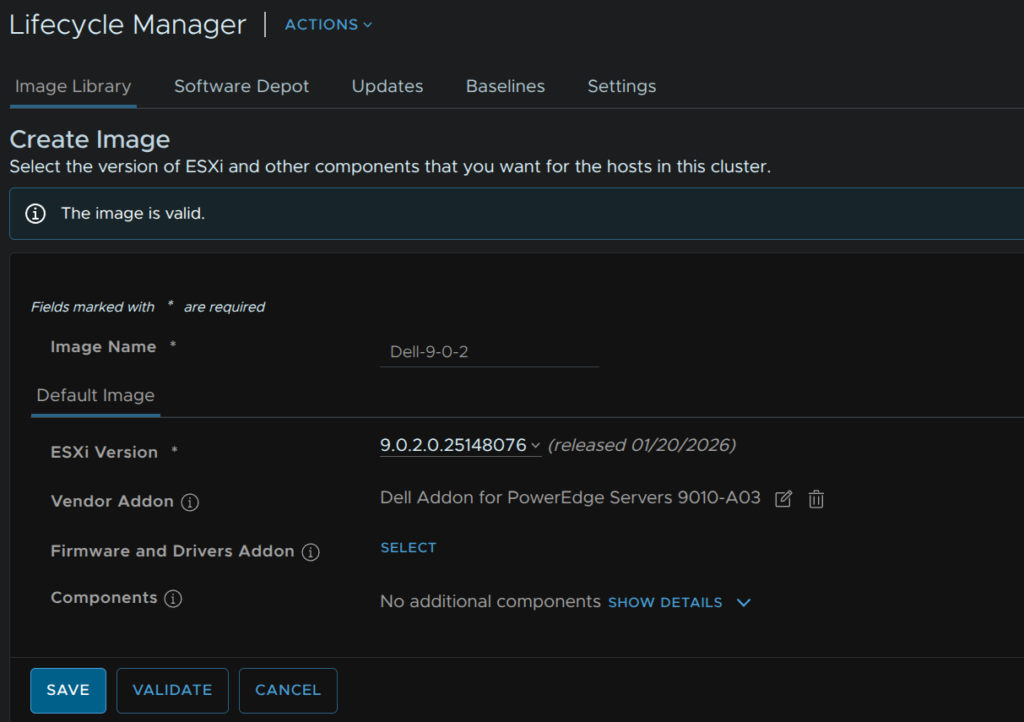
You may have additional components, when you have everything, click Validate
When its valid click Save
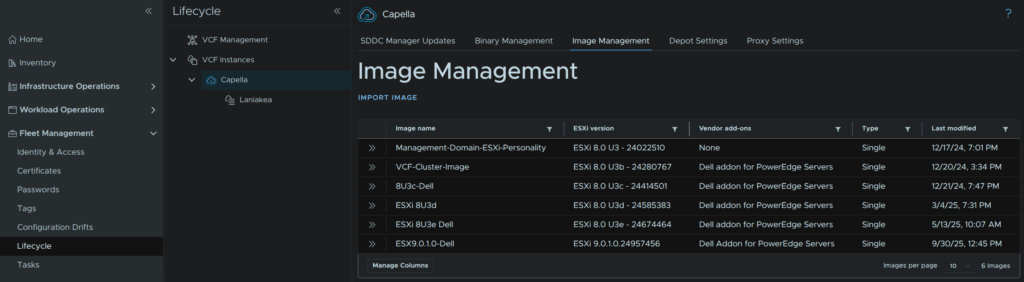
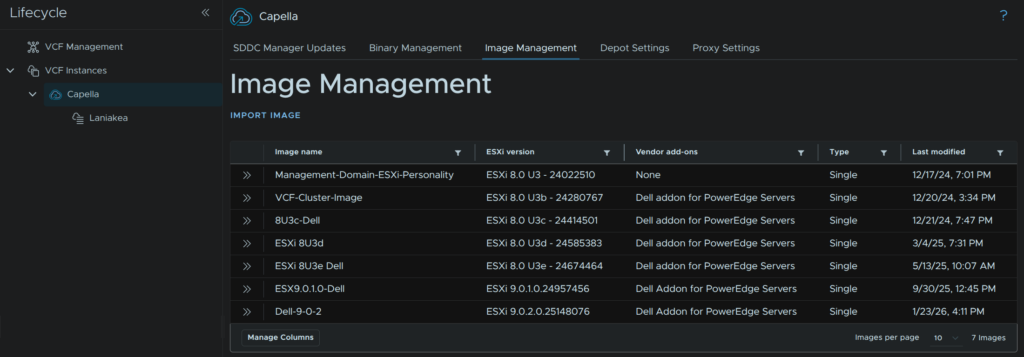
We then need to import this into the SDDC Manager, in VCF Operations, click Fleet Management/Lifecycle, expand VCF Instances and click the VCF Instance, in my case Capella, then click Image Management and click Import Image
The management domain should be the default selected, in the vCenter entry, but you can change this if needed, then select our new image and click Import
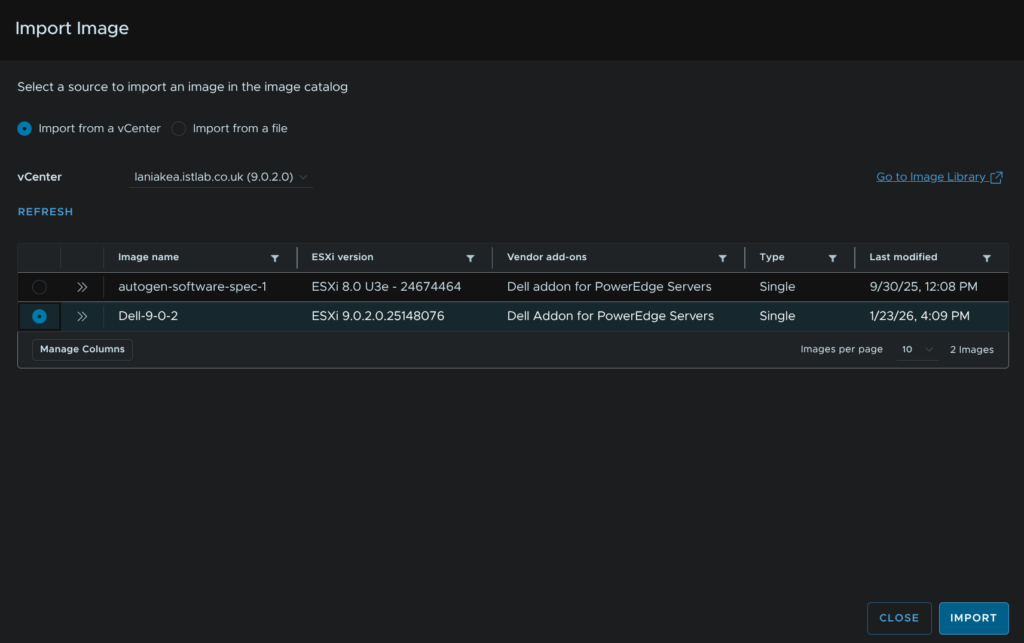
This will then take ~5-10 mins to import, when its done you will need to refresh the page and it should be in the image list
Back in our workload domain, click Run Precheck
Use the drop down to select the target version, for me thats 9.0.2, and select any clusters in the management domain, then click Run Precheck
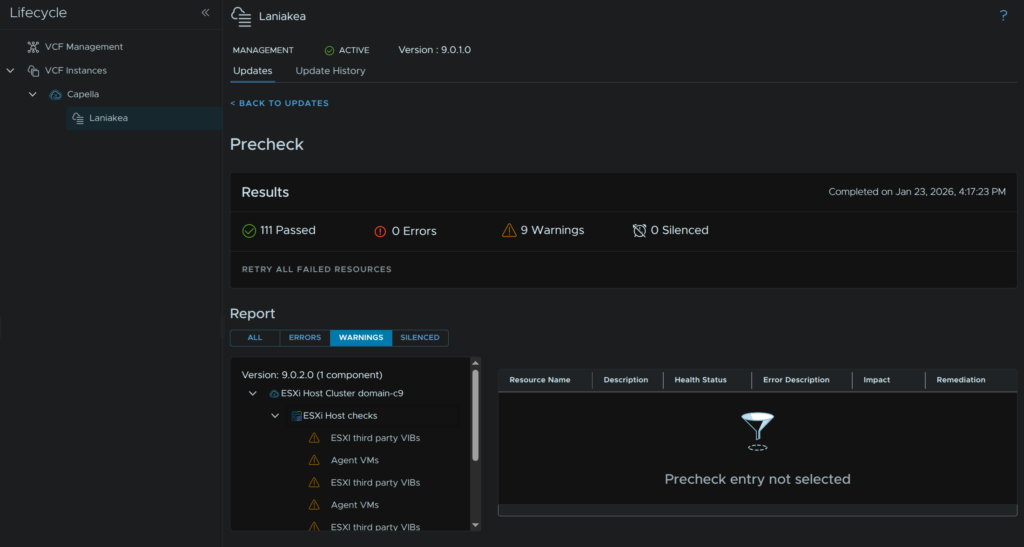
My warnings are just for the bundle and then per host, for the OEM VIBs and Agent VMs, this is fine and I can ignore these and click Back To Updates
In Available Updates click Configure Update
Click Next
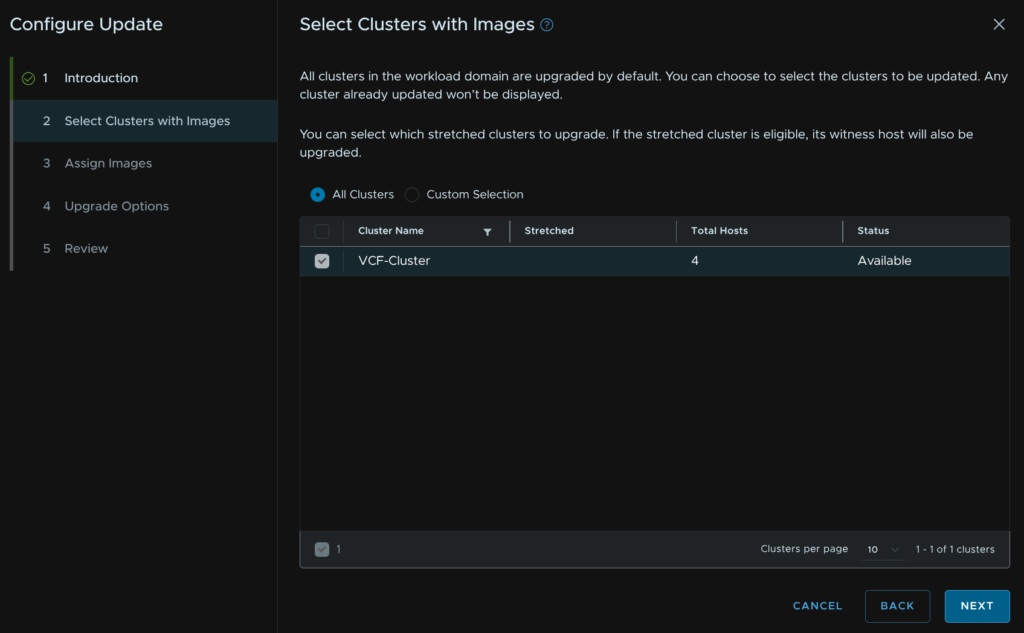
Click Next again, all clusters should be selected
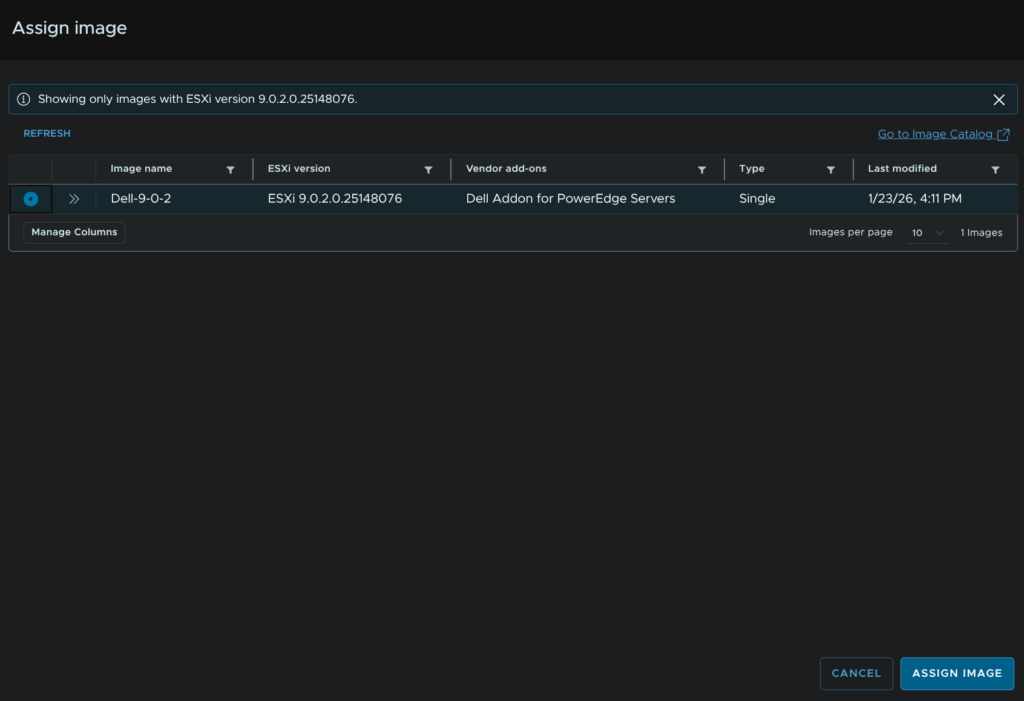
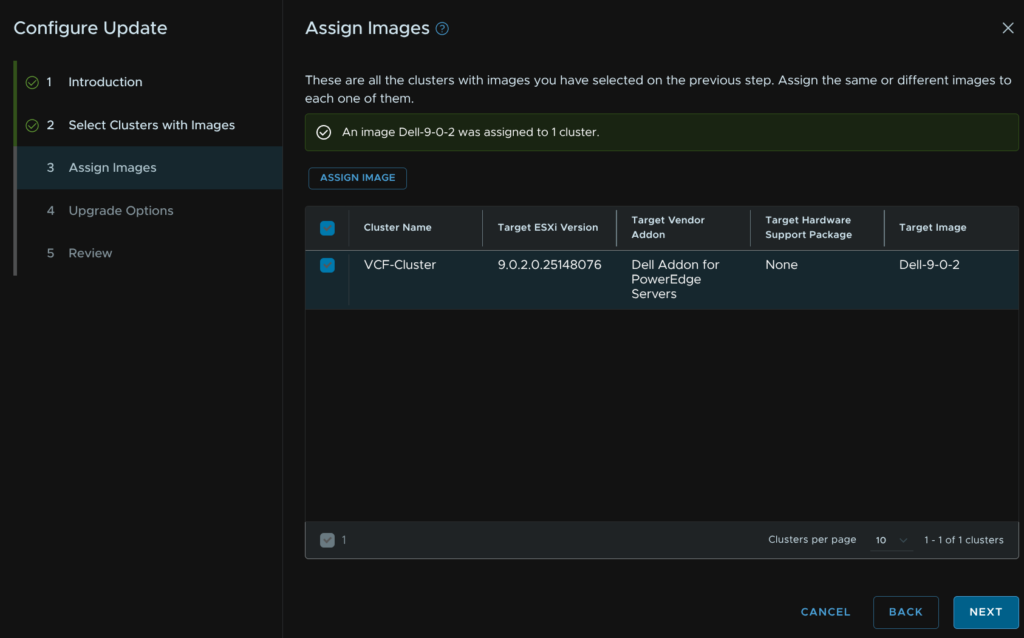
Select the cluster and click Assign Image
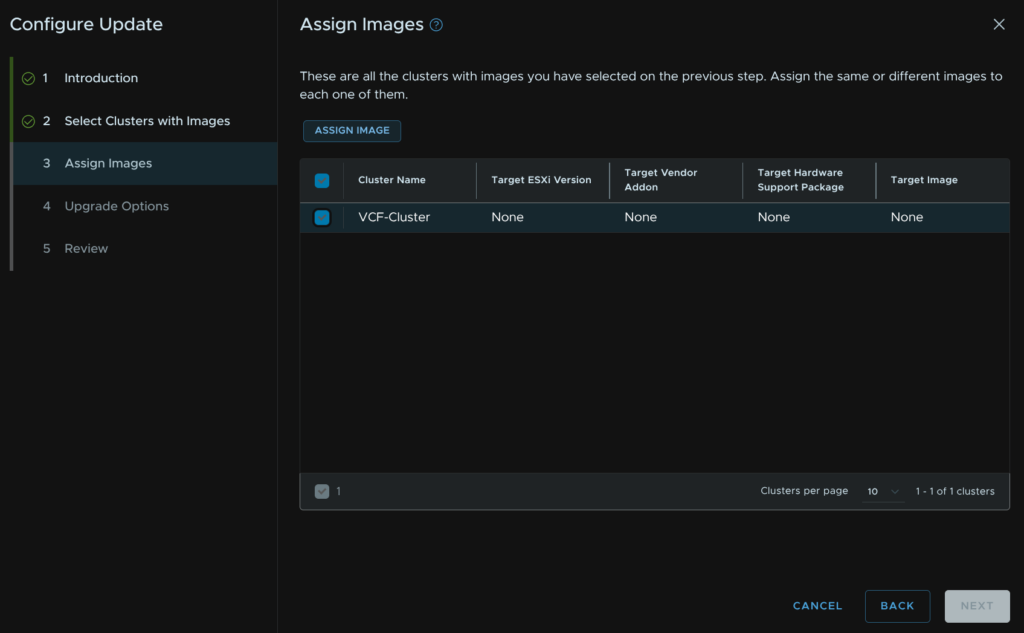
Select our new image and click Assign Image
Then click Next
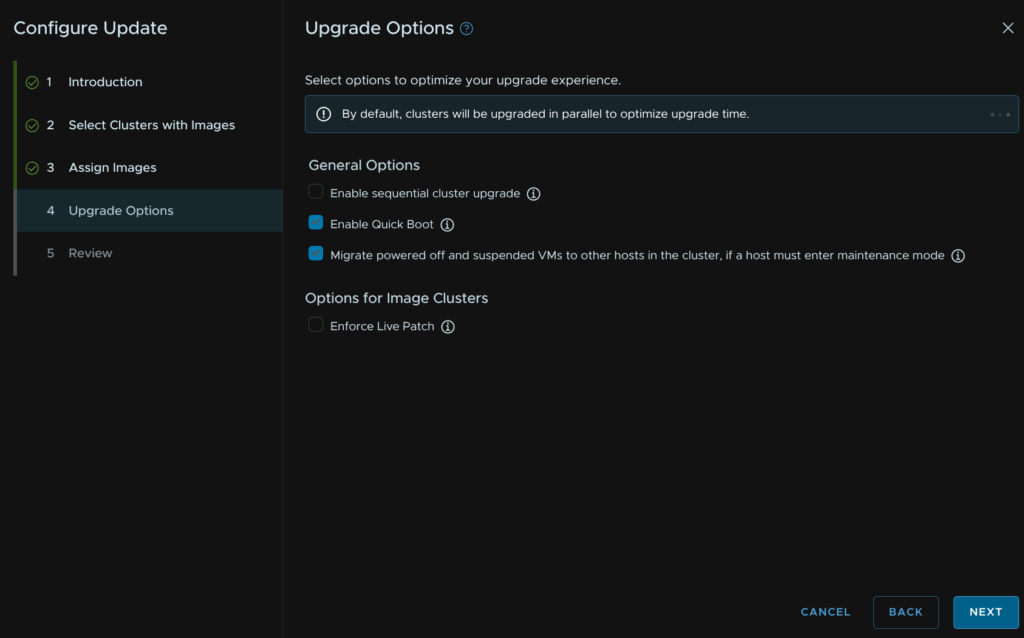
We dont need to change anything here, we may want to enable Live Patch, but this must only be used for patches that are live patch enabled, from your current version, in reality, this is very few updates and so I wouldnt enable it, that and it can cause issues with supervisor enabled clusters which mine is
When you are happy, click Next
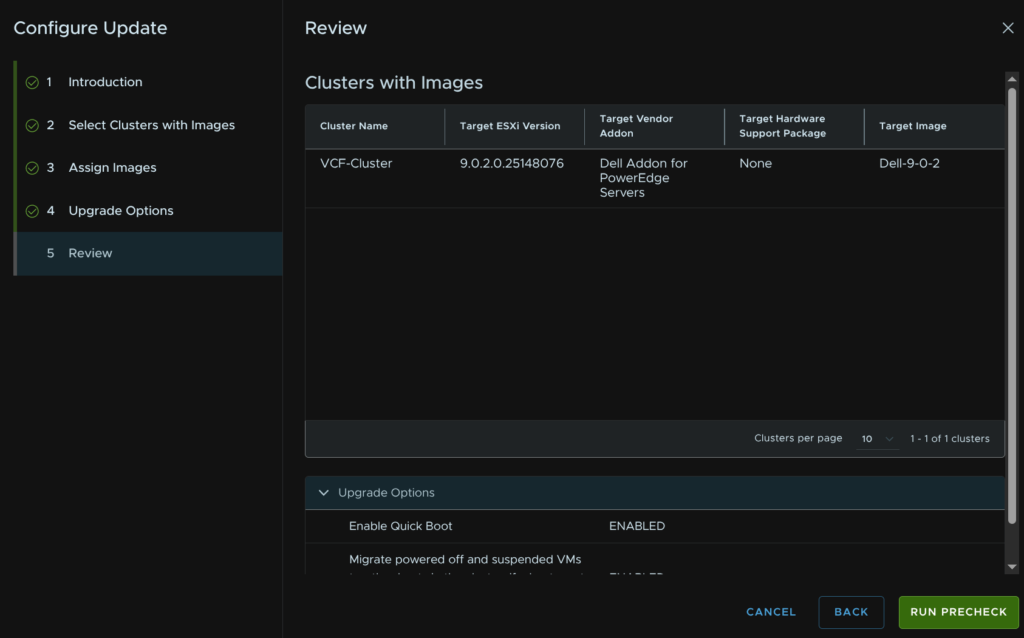
Then click Run Precheck
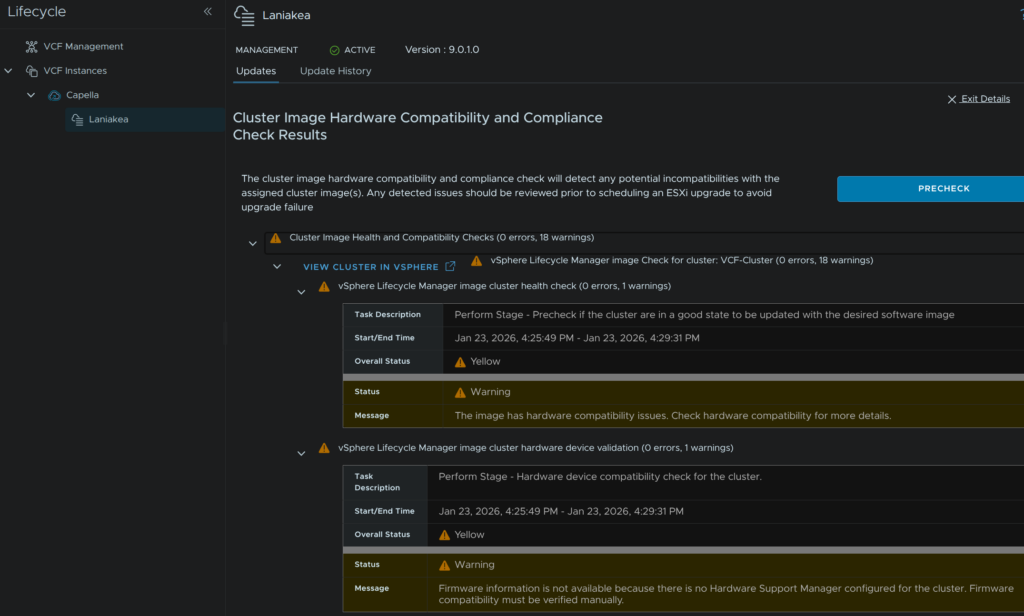
We need to view any warnings, click View Details
I have two warnings for compatibility and firmware, as my hosts are R640s and not officially supported this is fine, firmware wise, I dont have a firmware manager so this is expected
Of course, for a production environment, you should always be using officially supported hardware that is HCL certified
We then get some warnings for CPU support, this is expected as I am on officially unsupported hardware, the current base image always flags and can be ignored as upgrading from 9.0.1 to 9.0.2 is supported
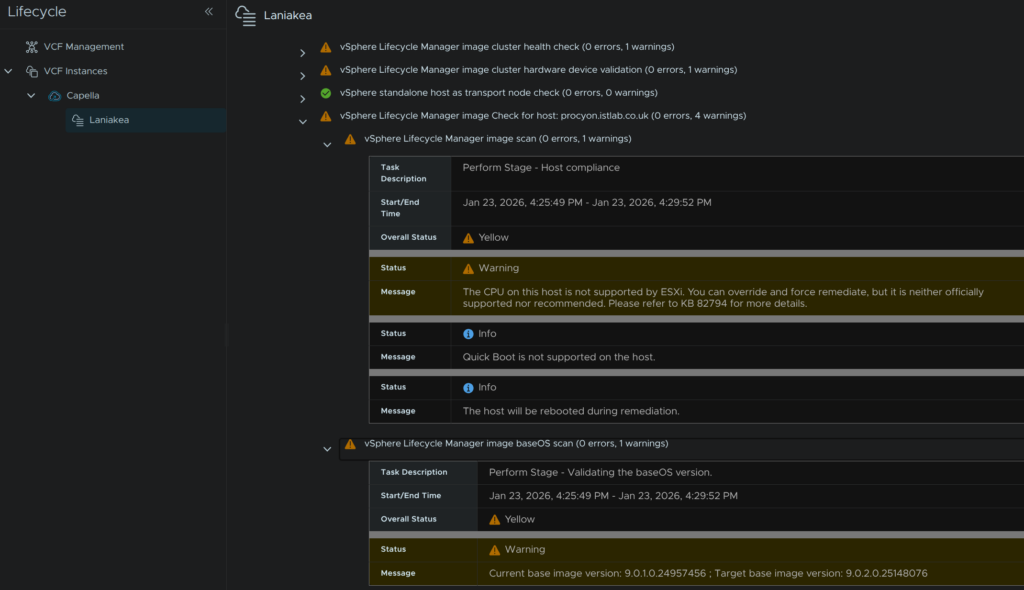
I then have the vendor addon, which I can ignore, and lastly the H330 Mini, the device will work with the image, but this is almost certainly flagging on my hardware due to the R640 hardware not being officially unsupported

Now that I have looked at all the warnings, which I am happy with, I can proceed, when you are happy, click Exit Details
Now click Schedule update
Click Next
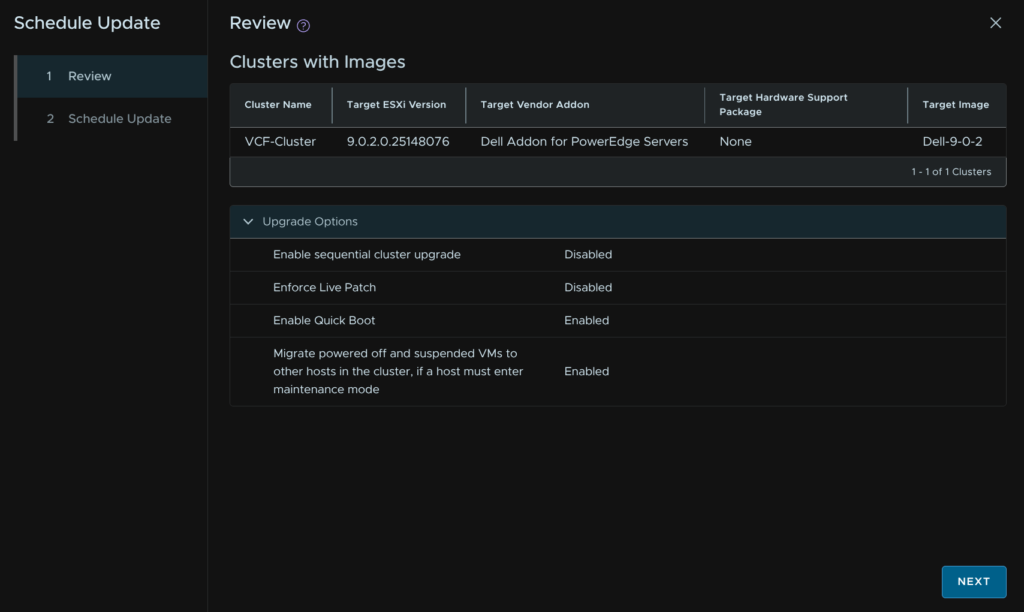
Set the maintenance window, in my case Upgrade Now, and as I have warnings I need to acknowledge them and click Finish
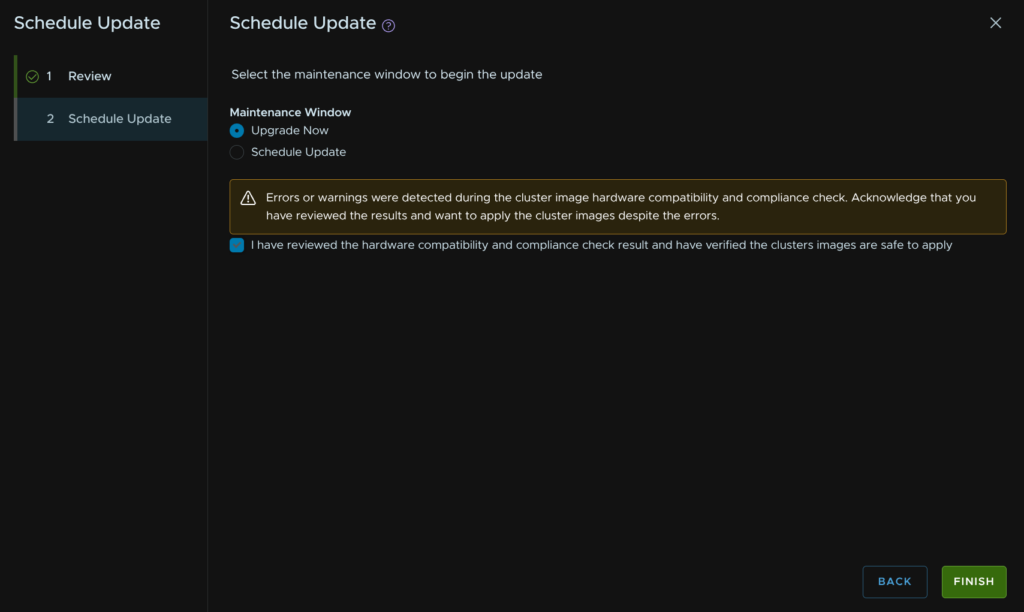
We can click View Status to see the progress
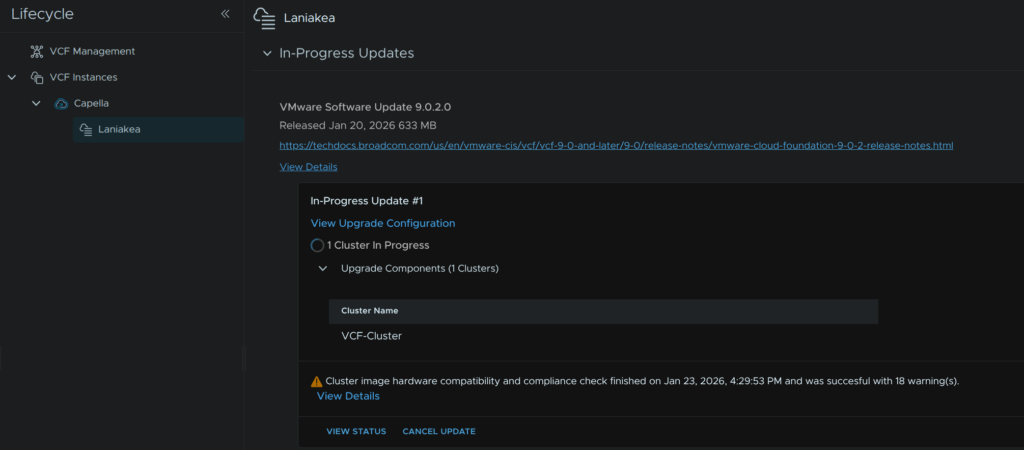
Or check the cluster in vSphere
14 – Cleaning Up SDDC Manager Binaries
In VCF Operations, head to Fleet Management/Lifecycle, expand your VCF Instances and select the VCF Instance you have been upgrading, when you are finished with all workload domains, in my case Capella
Then click Binary Management, to remove binaries, select all that have been downloaded, then click Delete Download
This will immediately remove them and it will look like this
15 – vSAN File Services
When I try to automatically grab the latest version it seems to always fail ever since the token system was added, so we will be getting the files manually
In the Broadcom Portal downloads section, find and click VMware Cloud Foundation
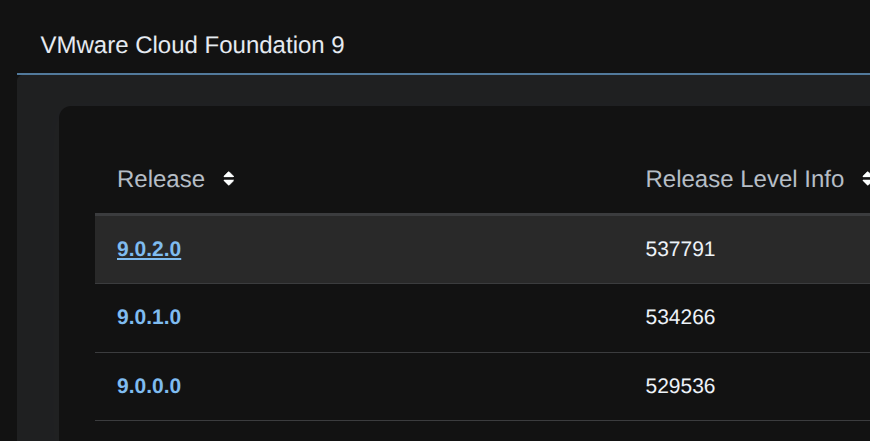
Expand VMware Cloud Foundation 9 and select the target release, in my case 9.0.2
On vSAN, click View Group

Click the Drivers And Tools tab, and expand vSAN File Services
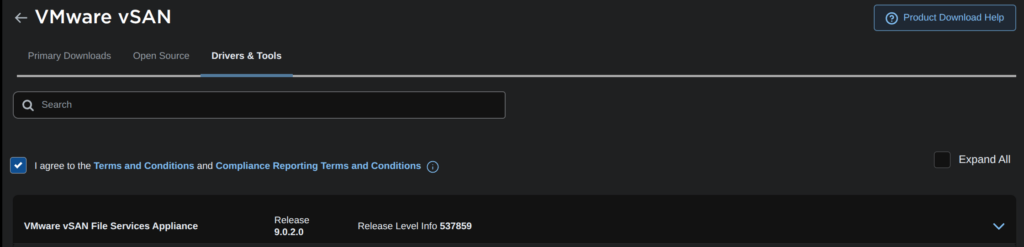
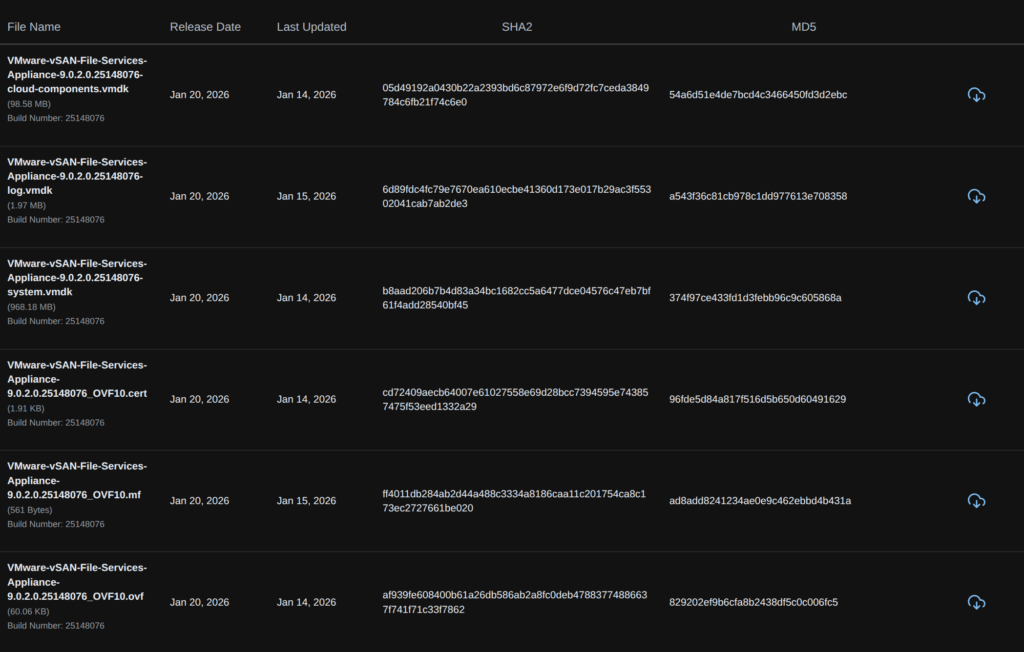
Then download all files
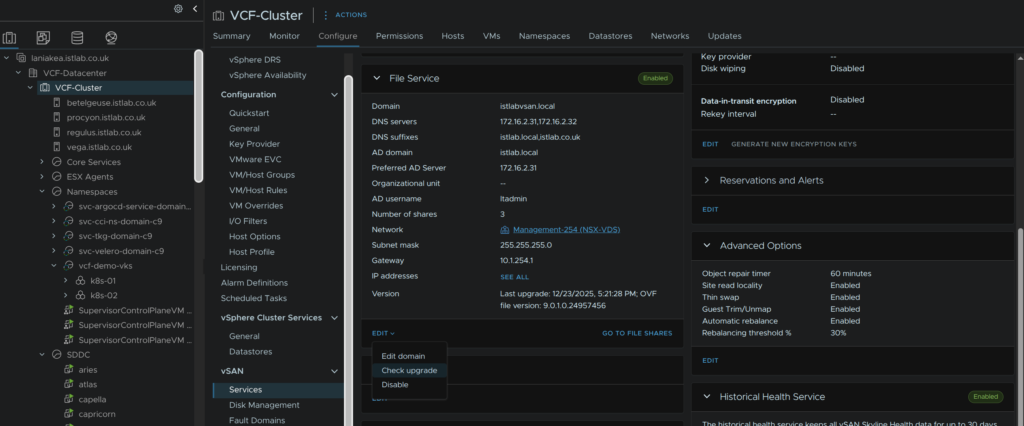
Then, click the cluster and then head to Configure/vSAN/Services and on the File Services widget, click Edge/Check Upgrade
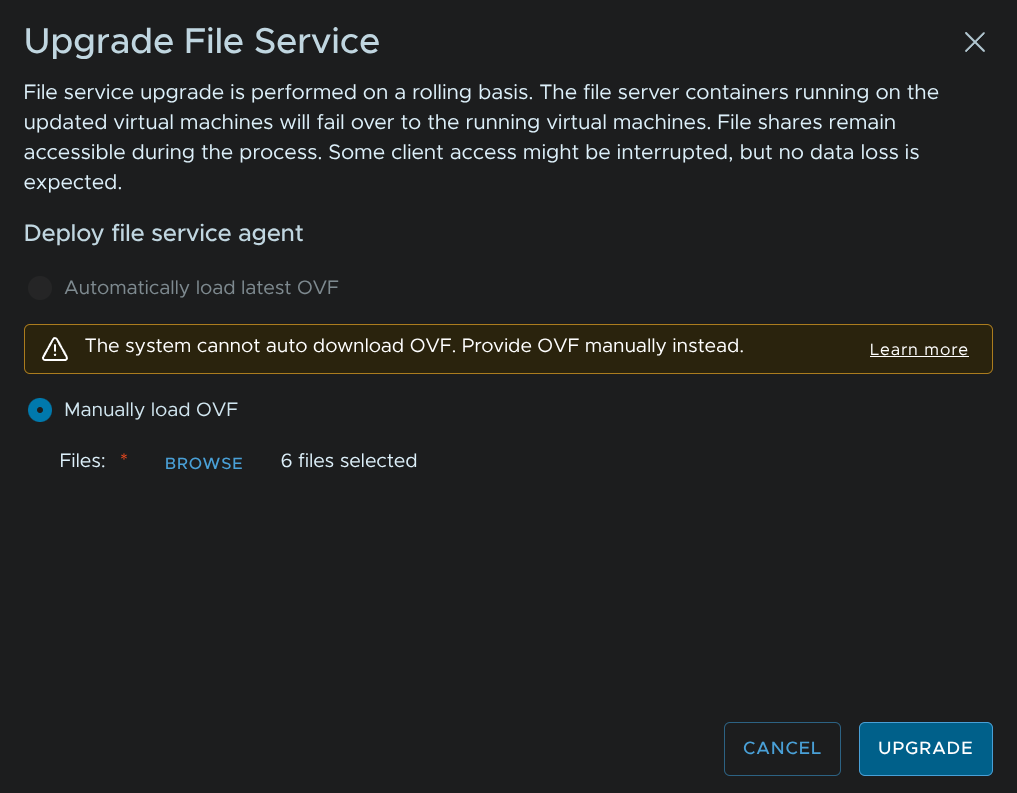
Now wait for the automatic upgrade to time out, this will prompt us to select files manually, click Browse
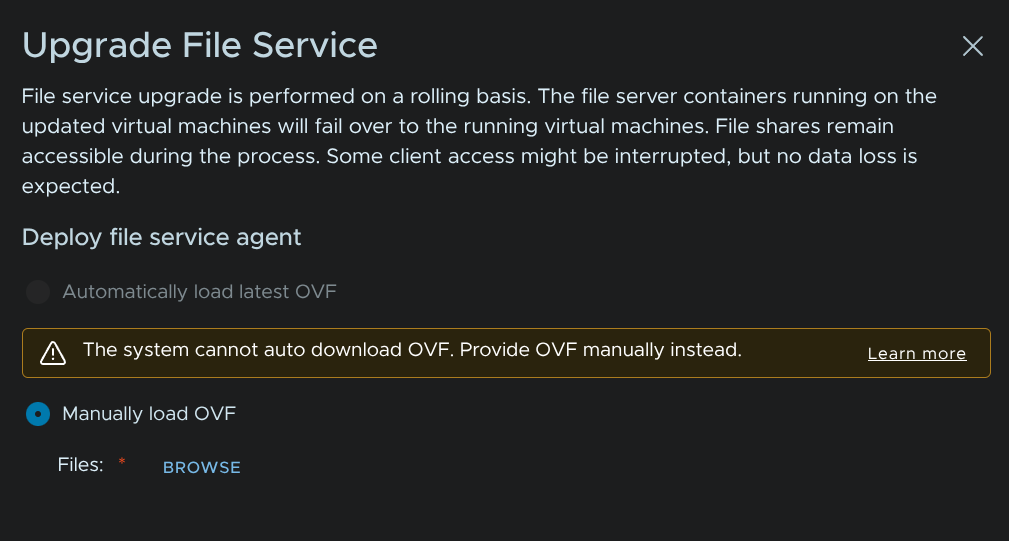
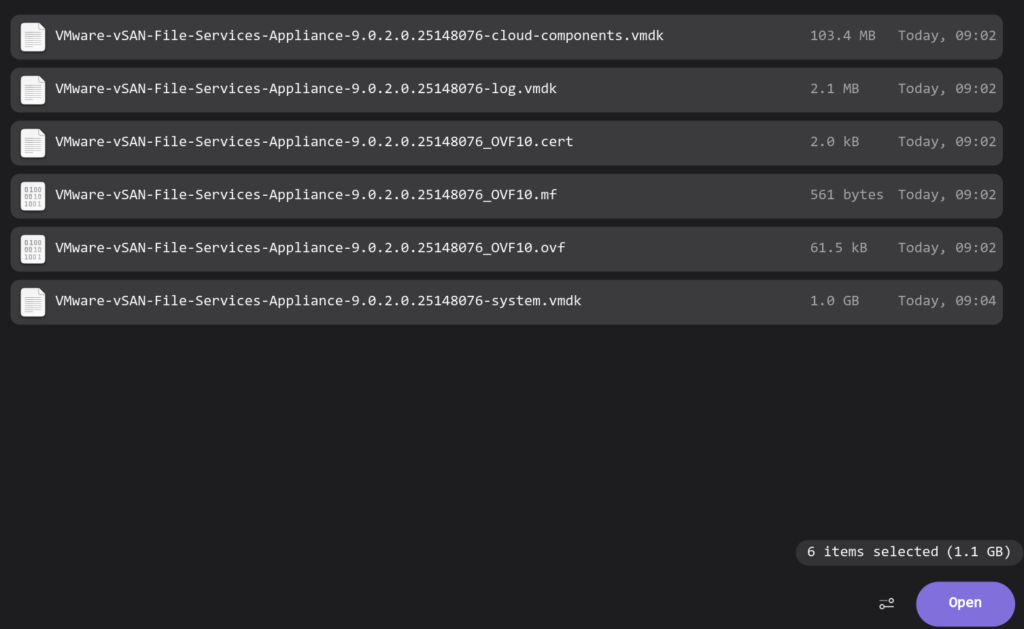
Select all the items and click Open in your file browser
Then click Upgrade
Then will then replace the file services VMs one by one, this shouldnt cause any outages, but shares may disconnect for a few seconds as nodes are failed over
i am the new user please guide or share to implement VCF to setup a new data center in details or lab
I have a deployment guide for a new setup, I would recommend looking at that