In this article we will go through how to patch the full VVF 8 suite and all its products to ensure you are kept up to date
There is a best practices order to this, and the article will be arranged in this order
This doesnt include anything for Horizon, but its worth noting for the vCenter section, desktop pool provisioning will need to be disabled during the update
For my lab environment, here is the full version list
- Aria LCM – 8.16 –> 8.18.0 pspack5
- Aria Logs – 8.16 –> 8.18.3
- Aria Ops – 8.16 –> 8.18.3
- vCenter – 8U3 –> 8U3e
- Supervisor – 0.1.9 –> 0.1.11
- TKG Service – 3.0.0 –> 3.3.2
- Avi – 22.1.6 –> 22.1.7 Patch 2p6
- ESXi – 8U3 –> 8U3e
- vSAN – 8U3 – Included With ESXi
- File Services 8U3-24022510 –> 8U3.1-24674464
- SnapService 8U3 – No Updates
Make sure you have applied the Broadcom depot changes before proceeding, as this guide uses the inbuilt VMware updates for several of the systems
You can find my article on this here
Important – By continuing you are agreeing to the disclaimer here
1 – Aria LCM
1.1 – Appliance Update
First we will need the patch ISO for this, now while you can get the downloads online from LCM, with the Broadcom Depot changes we will be using the ISO as that change is likely to break the online method and there is no given workaround
Log into the Broadcom Portal, for Downloads we are looking for Aria Suite

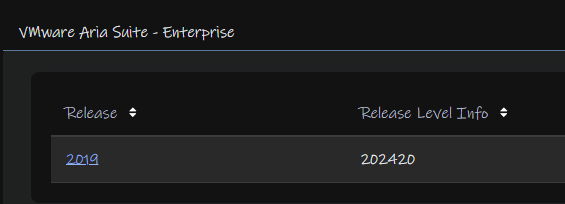
Select your release of Aria, if you have VVF this will be Aria Standard, not Enterprise, and click the 2019 link
Click View Group on Aria Suite Lifecycle

And download the Update Repository Archive

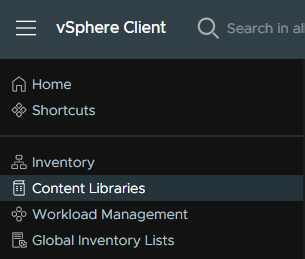
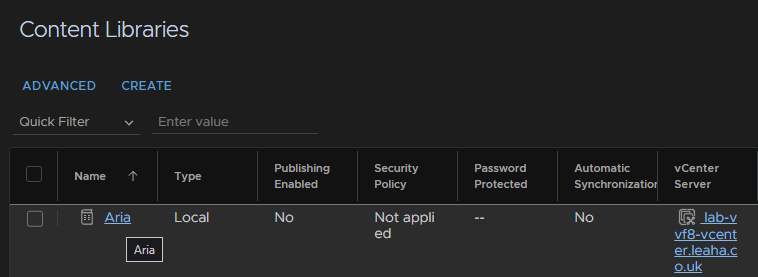
Now, you should have a content library for all your templates, if not we can create on, in vSphere, click the three lines in the top left then click Content Libraries
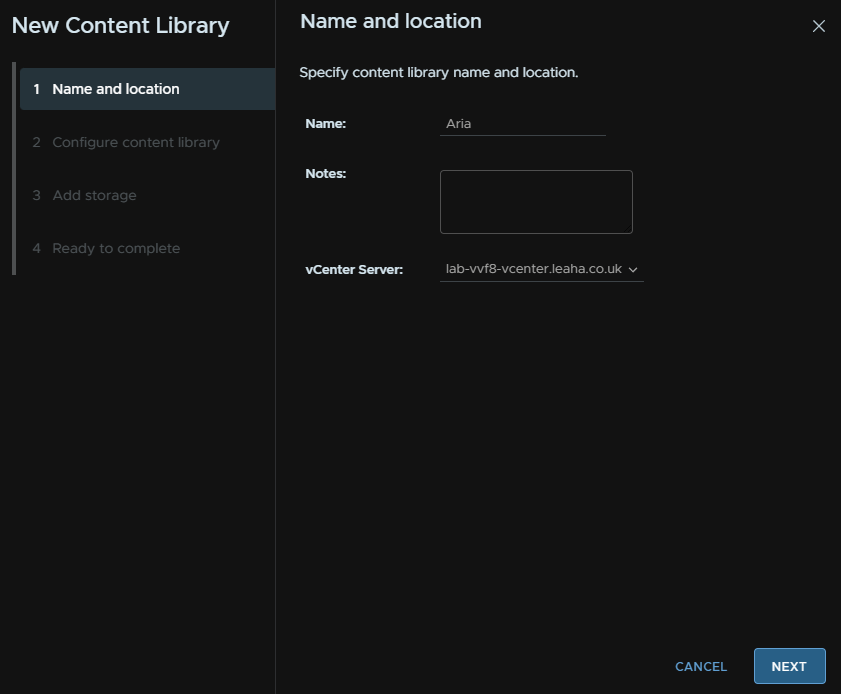
Lets assume we dont have one, click Create
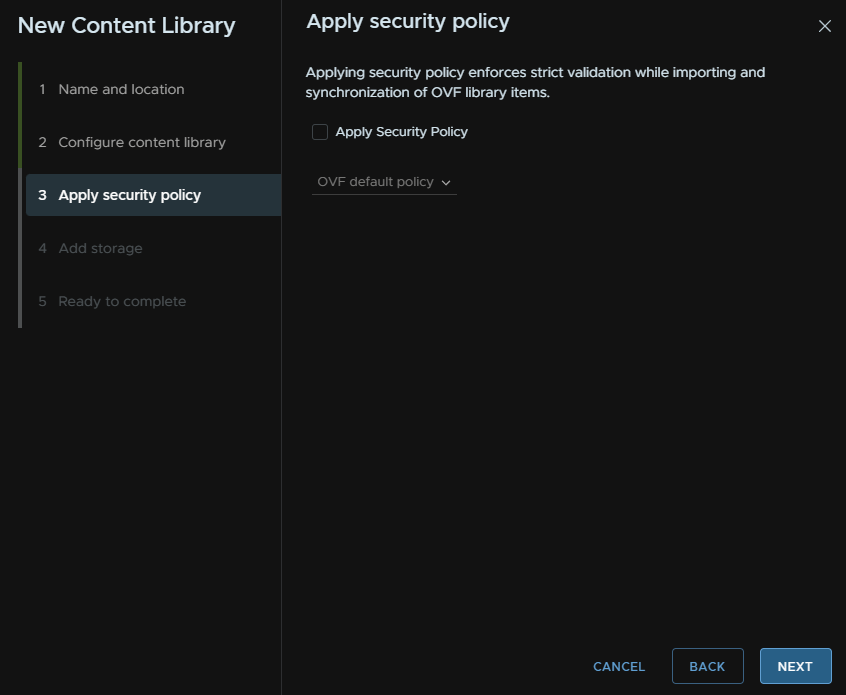
Click Next again
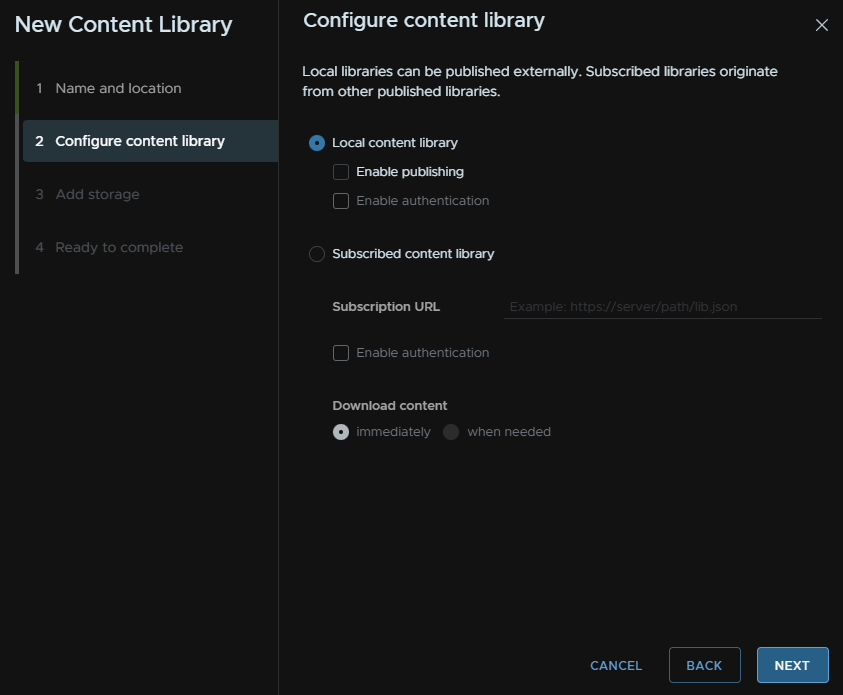
Next again
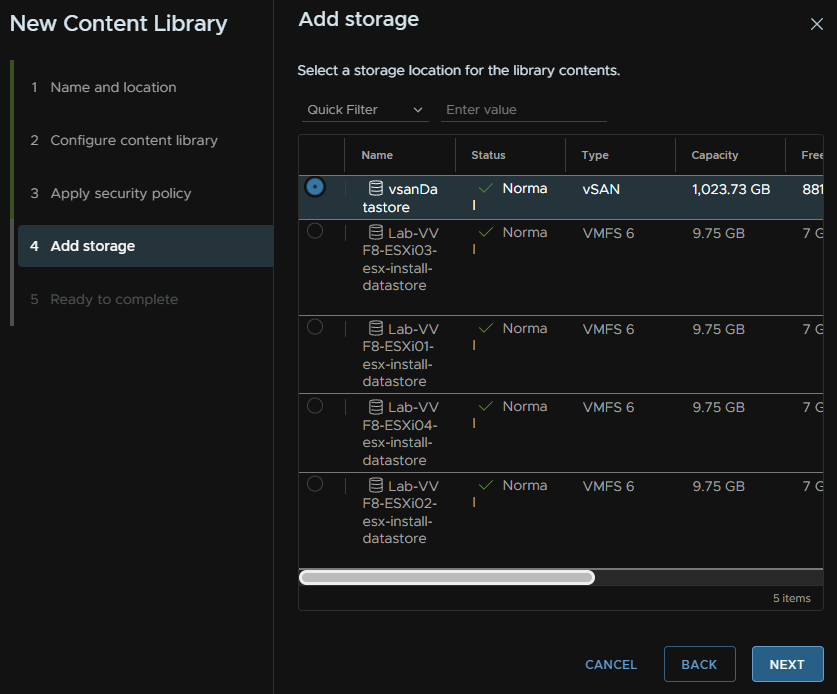
Select storage, as my VVF setup has vSAN, I am using that datastore, then click Next
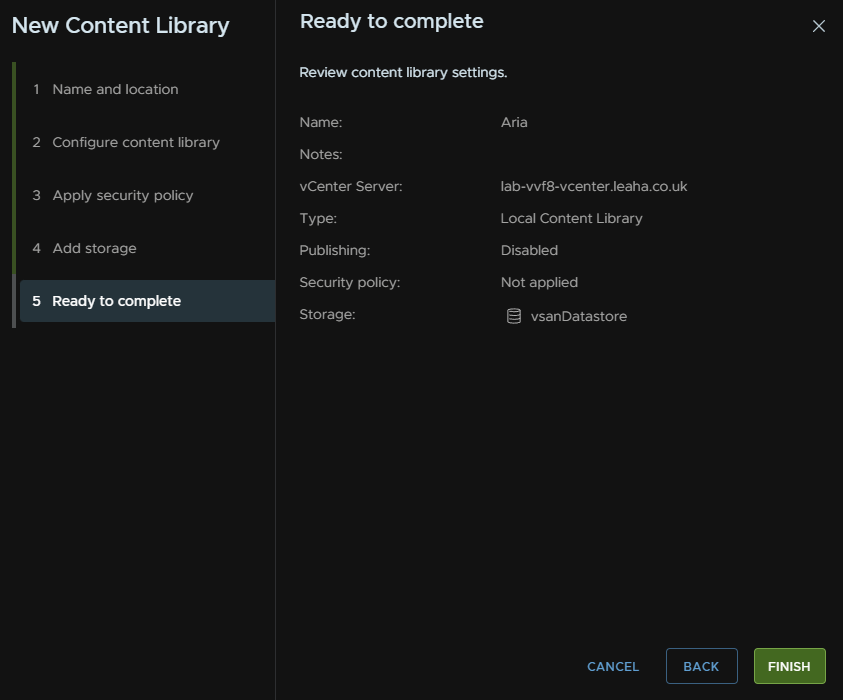
And Finish
Now we can click into our content library
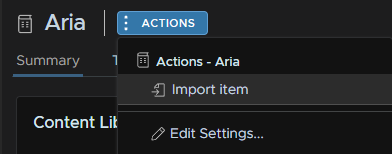
Click Action/Import Item
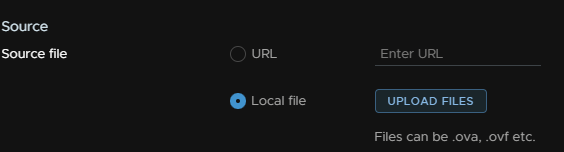
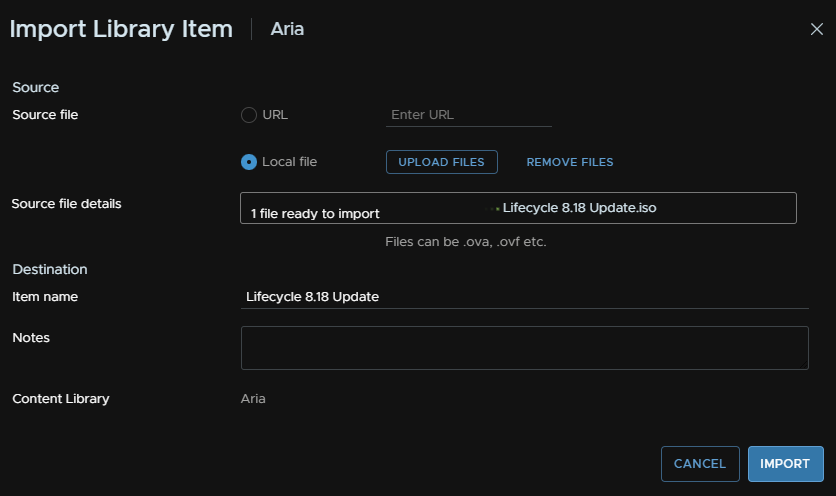
Toggle the radio button for Local File and then click Upload Files
Find and double click the upgrade ISO we downloaded and click Import
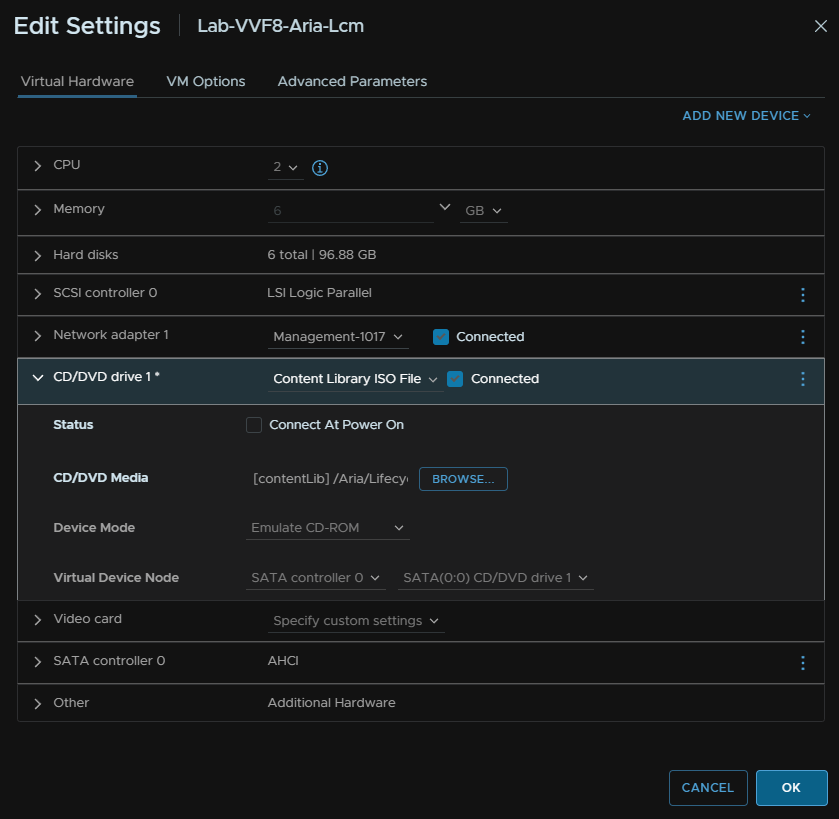
We then need to mount this to the LCM VM, select the VM and click Edit Settings

On the DVD drive, change the drop down to Content Library Item
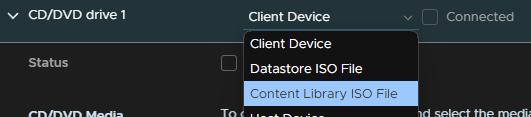
Select the ISO and click ok
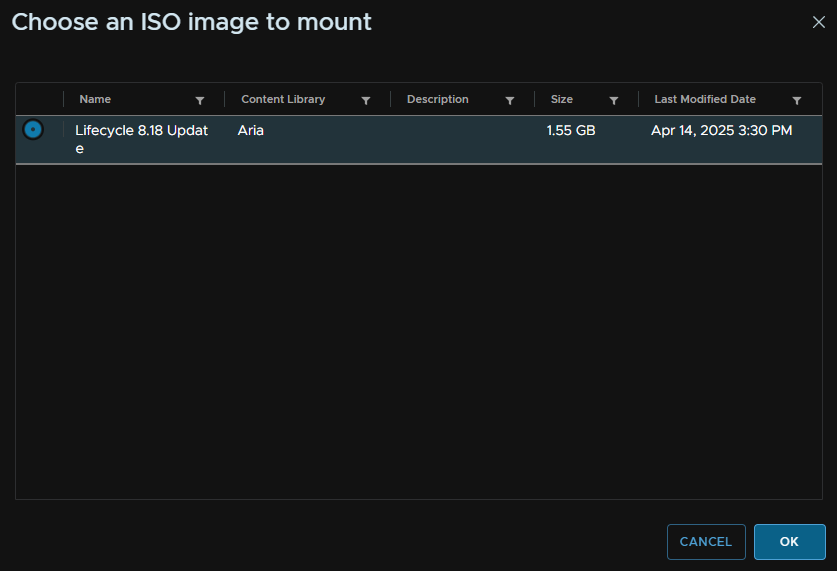
Check Connected

Then ok to save
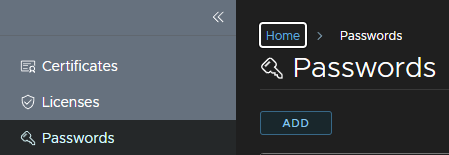
In the Aria LCM WebUi click Locker, we will need to add credentials for the vCenter, you may already have this
Under passwords click Add

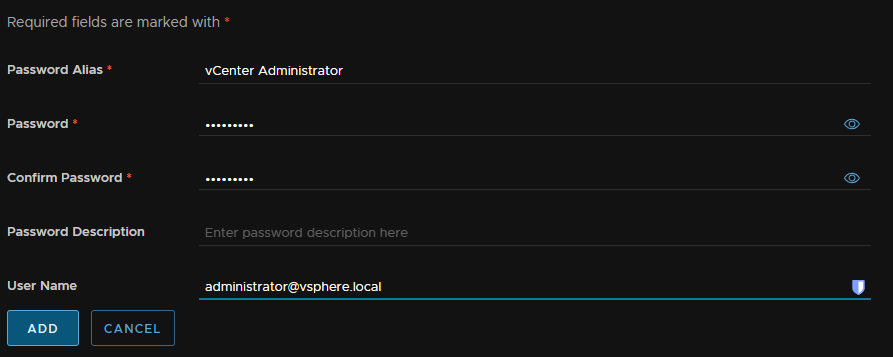
Add an alias, a name, the password and the username, this wants to be the administrator account, or a service account with administrator privileges and click Add

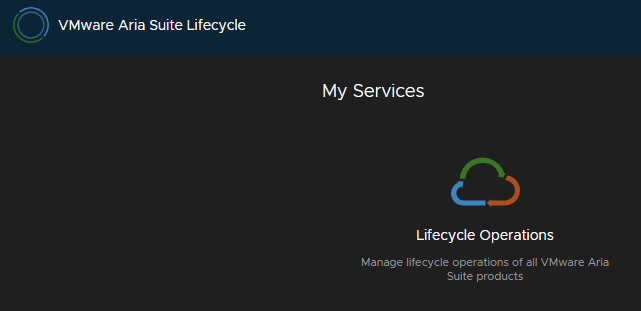
Now click Aria Suite Lifecycle in the top left to return to the main menu

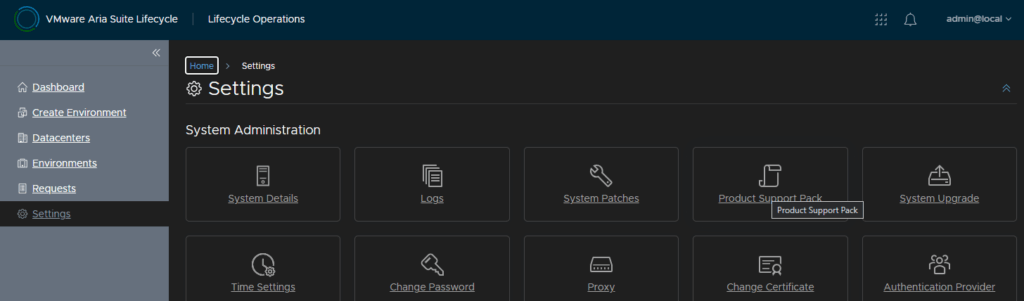
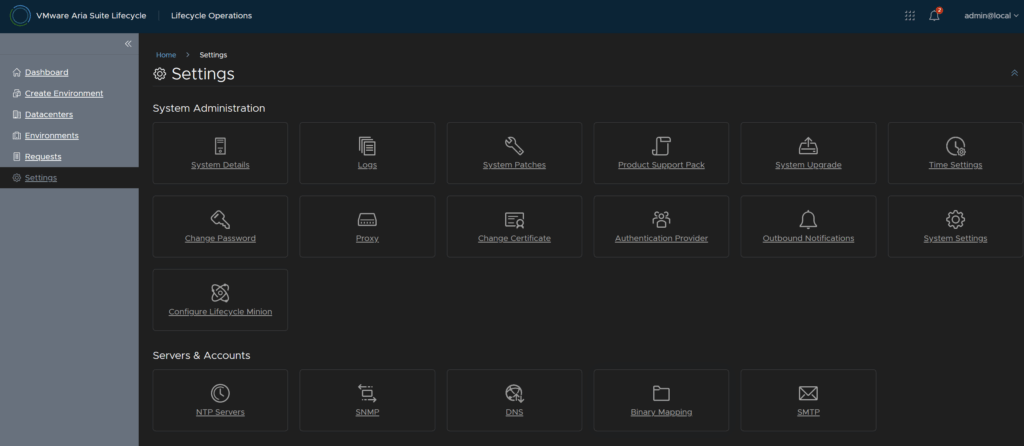
Click Lifecycle Operations
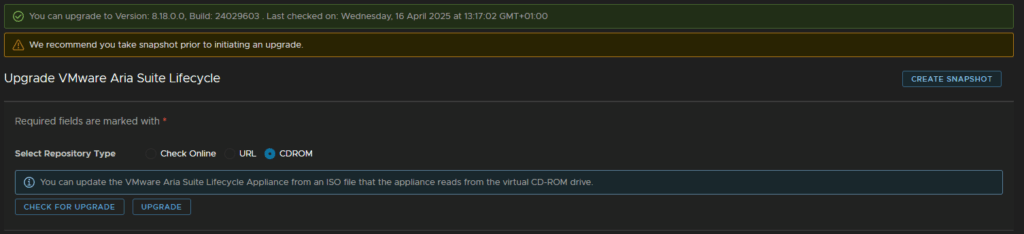
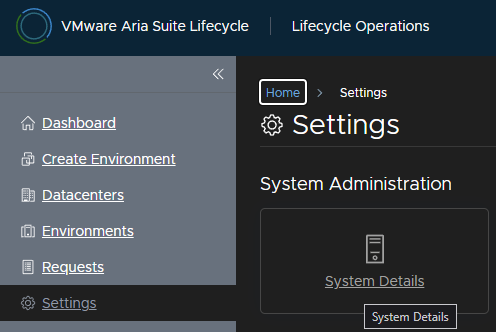
Click Settings/System Upgrade

Check CDROM and click Check For Upgrade

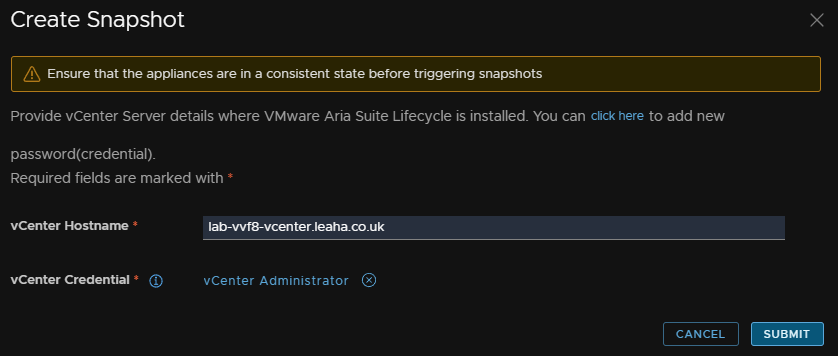
The system should identify this at the top in green, then click Create Snapshot
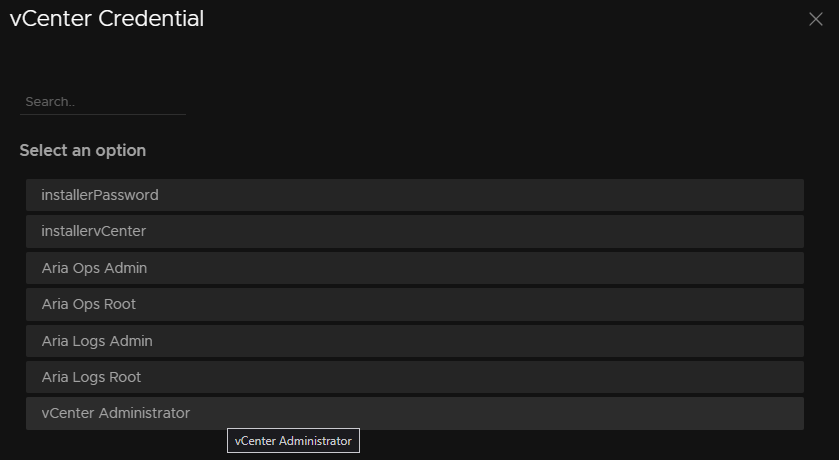
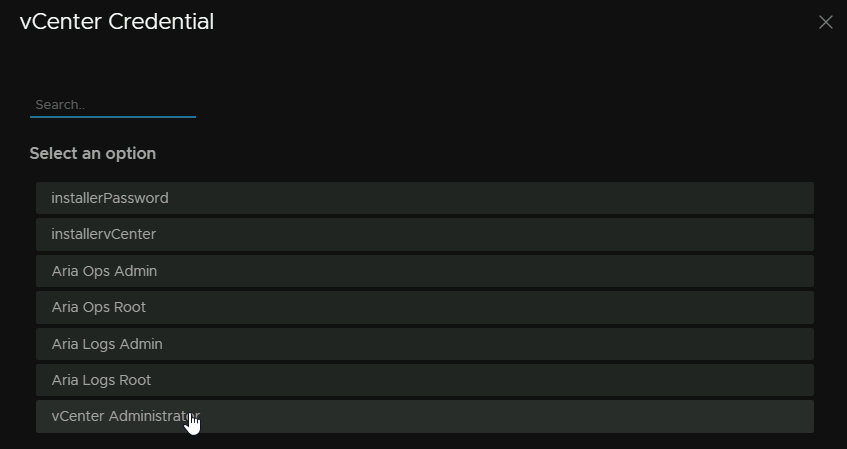
Enter your vCenter FQDN and click Select vCenter Credential
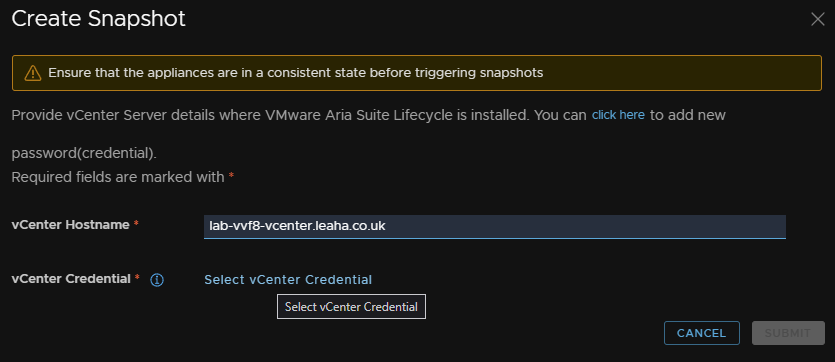
Click the vCenter administrator, or service account we added earlier
Then click submit
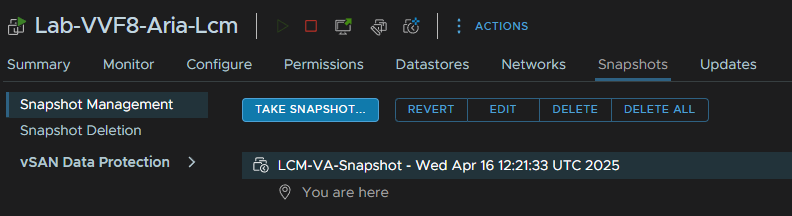
In vSphere we will see a snapshot get created

When this is done, return to Aria LCM
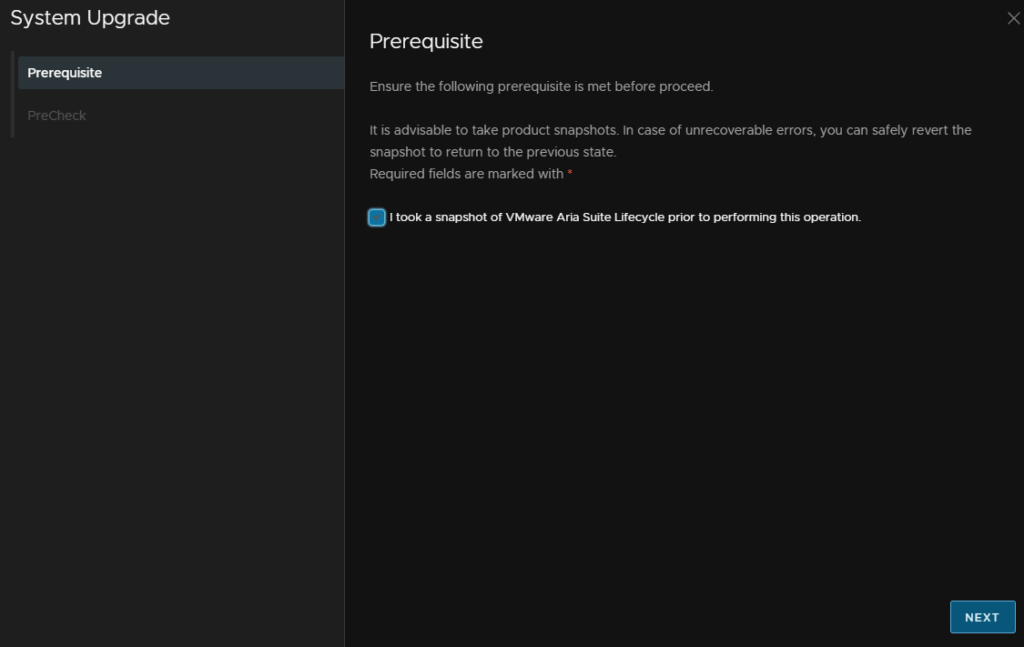
Then click Upgrade

Check the box to say we took a snapshot
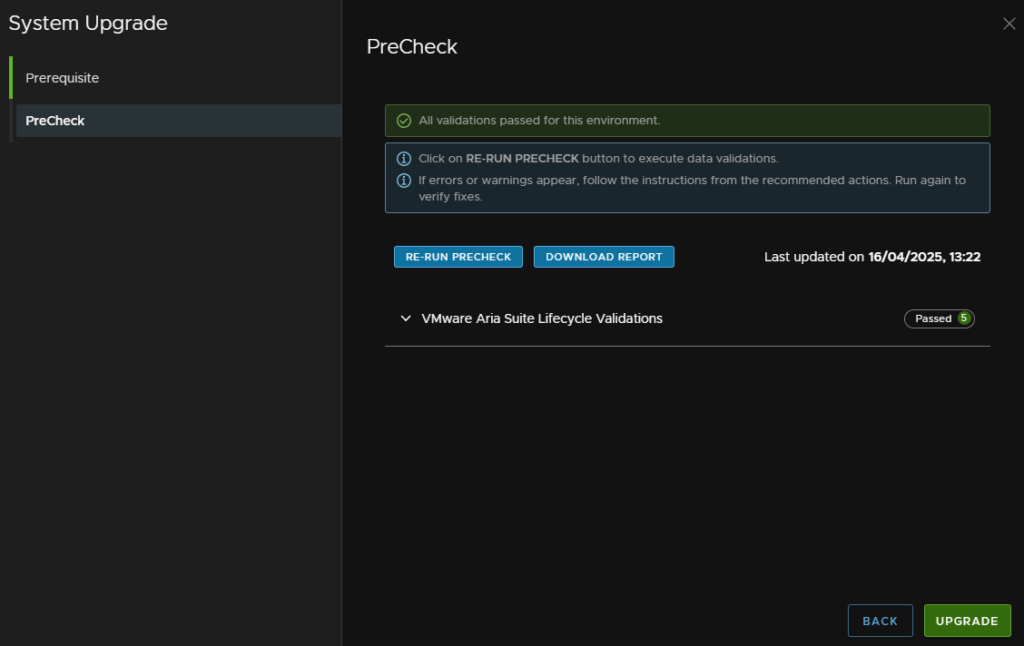
Click Run Precheck
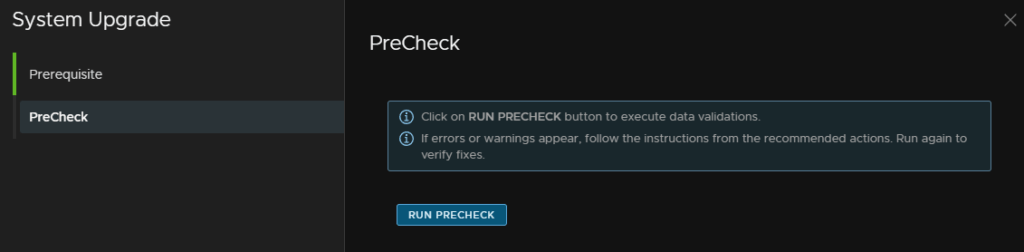
When it has passed click Upgrade, if there are any errors you’ll need to address them
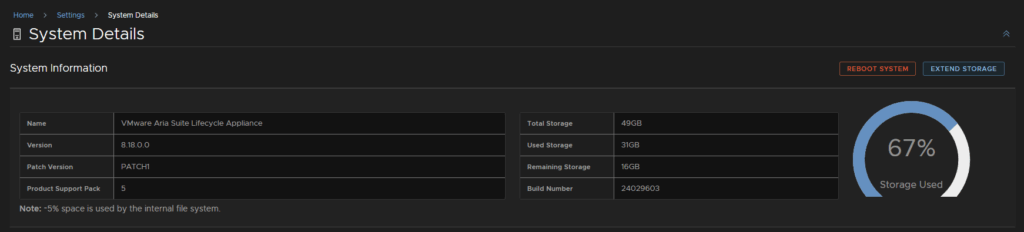
When its done, we can log back in, and we can see its done from Settings/System Details
1.2 – Pspack Update
To upgrade the connected appliances you’ll first want to ensure Aria Suite Lifecycle is on the latest version, then you’ll need to get the latest service pack containing the latest versions of the latest software, the pack doesnt contain the upgrade files though, just an inventory for the lifecycle manager
You can get this here
So on the Broadcom link, I will grab this
There will then be the download article, you will need to be signed in

You’ll want to log into your Aria Suite Lifecyle instance on
https://fqdn
Or
https://ip-address
The default admin username is admin@local
And then head to Lifecycle Operations
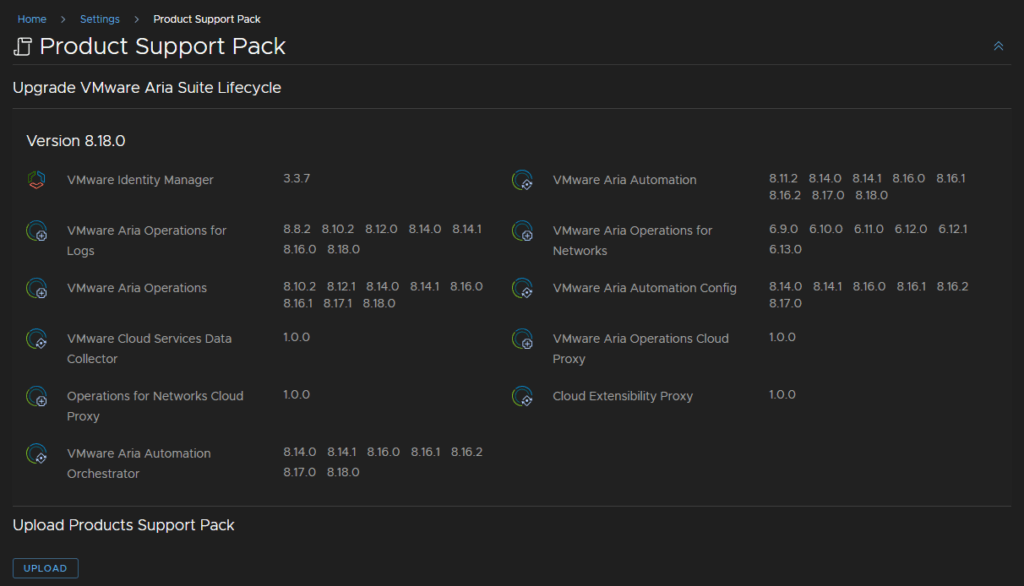
Then head to Settings/Product Support Pack
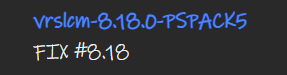
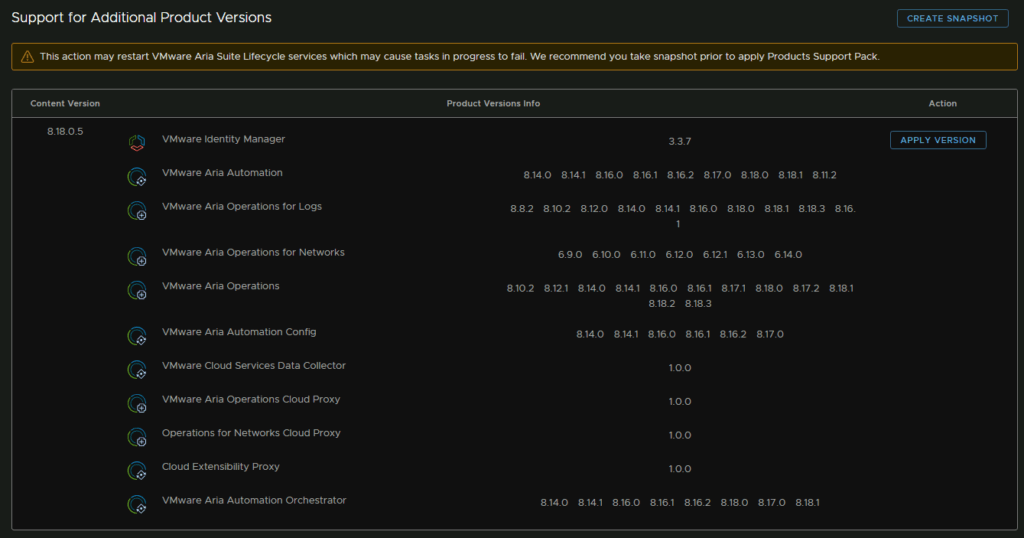
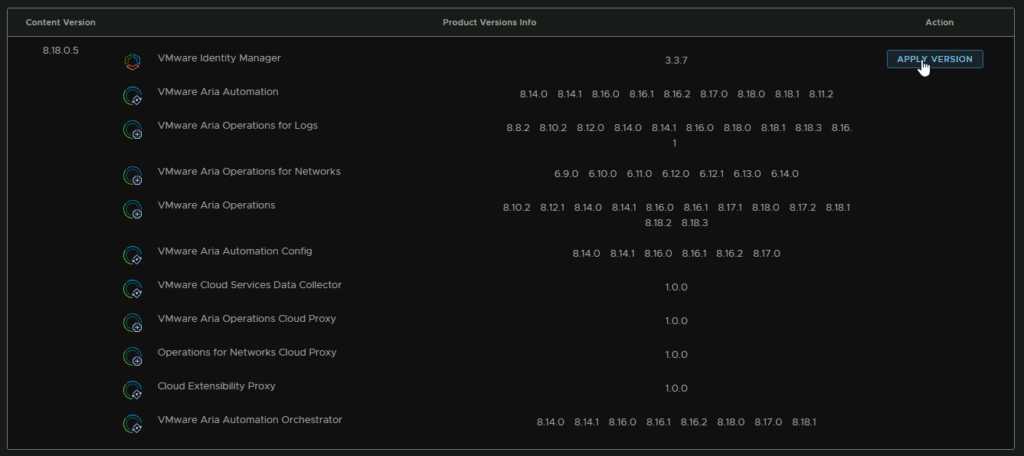
Here is where re can see all the versions, in this example, I have 8.18.0 for everything, Aria Suite LifeCycle hasnt got an update, but Aria Ops and Aria Logs both have 8.18.3 updates I want to apply
So this is what we grabbed that service pack for, so Aria Suite Lifecycle will pick these up, as it doesnt at the moment
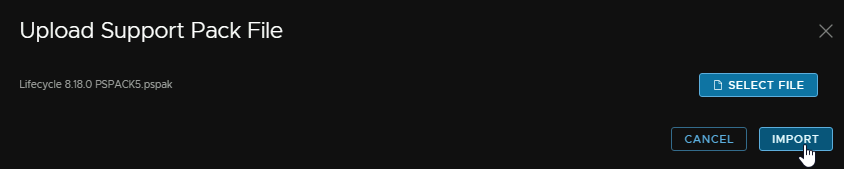
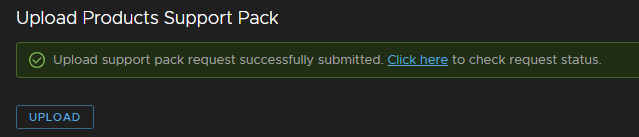
Click Upload
Click select file

Click the Service Pack you downloaded earlier, then click import
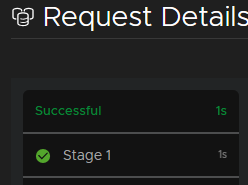
Then Click Here to see the request status
Once the request has gone ok, return to the Settings/Product Support Pack section
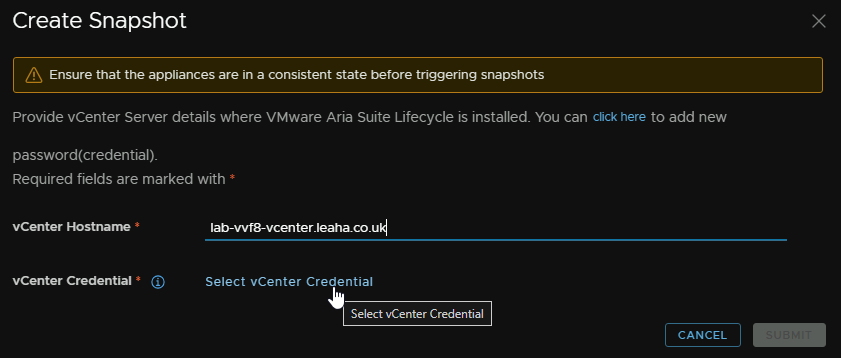
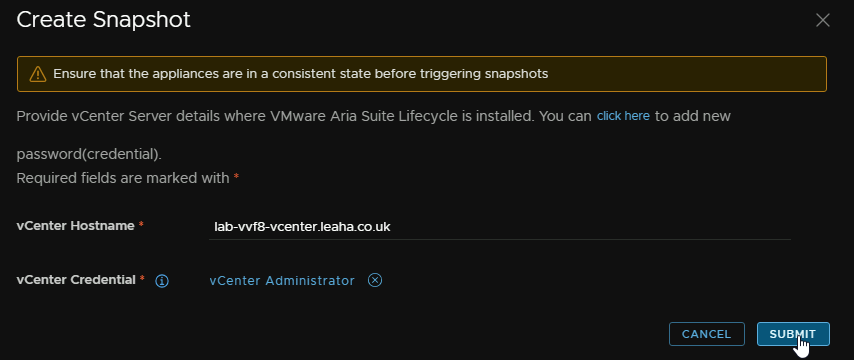
Now we can see the new version at the bottom which we can apply, but first, click on the Create Snapshot button, this snapshots the Aria Lifecycle appliance
You’ll need to provide vCenter details, enter the vCenter FQDN and click Select vCenter Credential
If its not in the list, click Cancel and click the Aria Logo in the top left

Head to locker
Under passwords click Add
Add an alias, a name, the password and the username, this wants to be the administrator account, or a service account with administrator privileges and click Add
Now click Aria Suite Lifecycle in the top left to return to the main menu
And head back to Lifecycle Management and go back to Settings/Product Support Pack and click the password thats now added
And click Submit
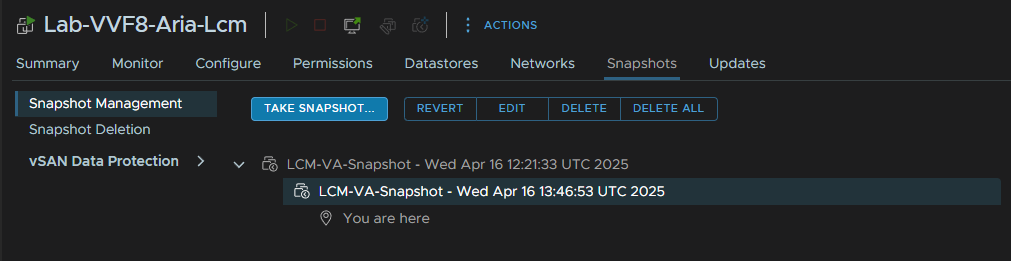
Looking at the VM, in vSphere, you can see its created the snapshot
Now click Apply Version from Aria Suite Lifecycle
Tick the box to say we have created a snapshot of the lifecycle appliance and click submit
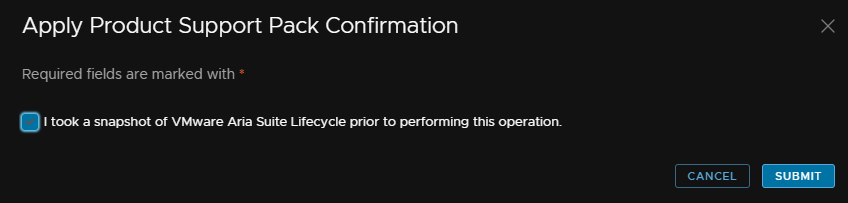
This will take a little bit and reboot the appliance
Once its back up and you log back in, you can check its all been applied from the Lifecycle Operations/Settings/Product Support Pack section

1.3 – Disk Space Check
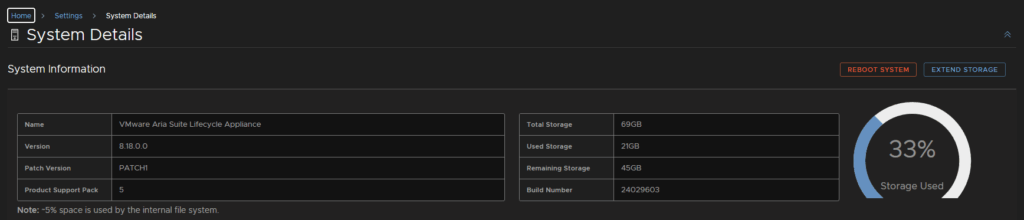
Before doing any appliance updates, its important to check you have enough data to store all your patches
Typically, allow for a little over double the binary size
Or as a rule of thumb, for VVF, allow ~30GB to be free on the appliance
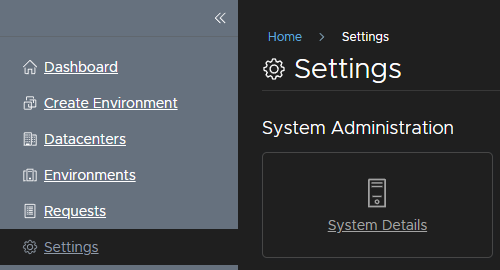
If you log into the LCM WebUI and head to lifecycle Operations
Then head to Settings/System Details
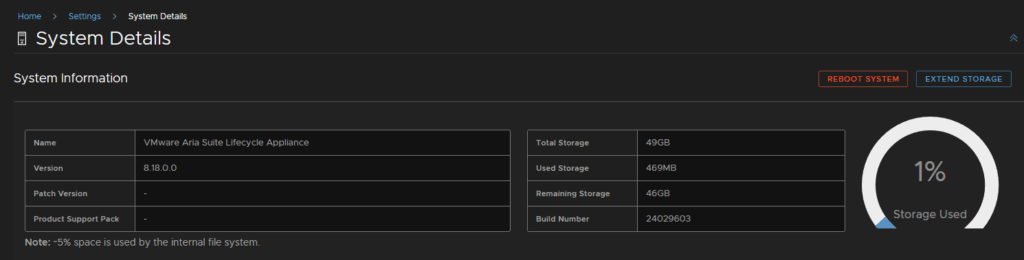
In my VVF environment, there is only 16GB free, so I will want to extend this, click Extend Storage
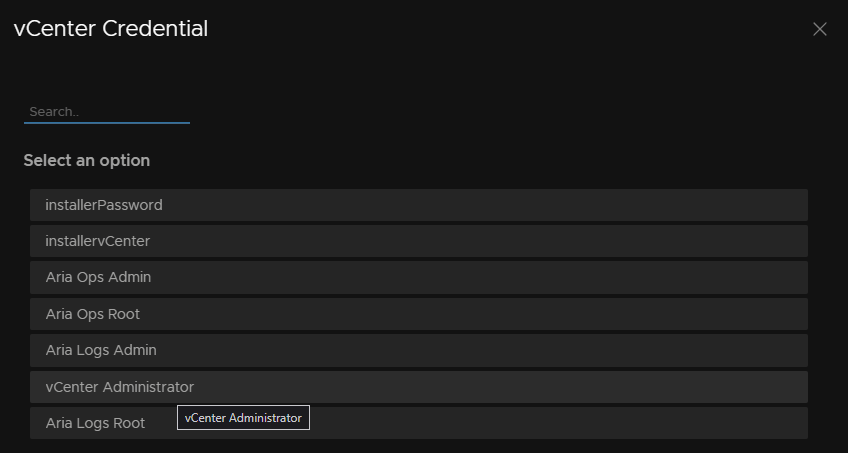
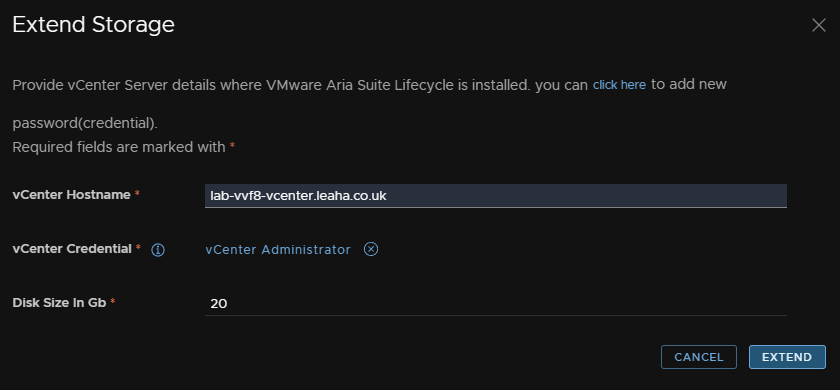
Enter the vCenter FQDN and the size the extend the storage by, I am going to add 20GB, then click Select vCenter Credential
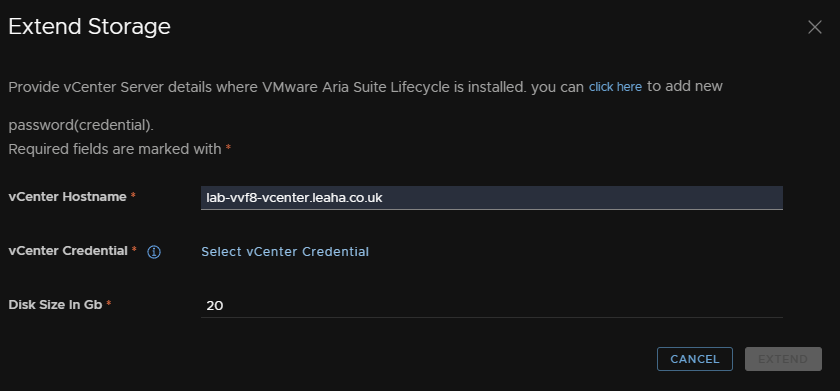
Select the vCenter admin/service account which we setup during the appliance upgrade as a password in Locker
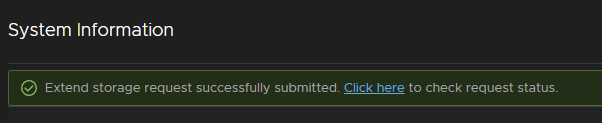
Then click Extend
We can view the status here
If the appliance already has a snapshot, you will get this, as you cant extend a vDisk that has a snapshot, to fix this remove the snapshot and click Retry
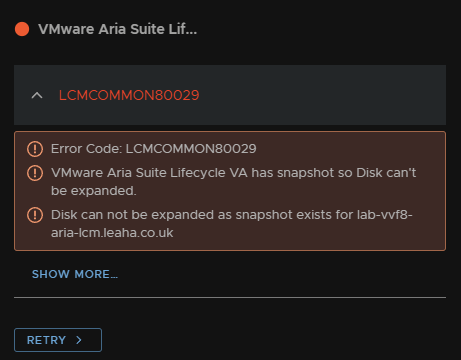
If we then head back to Settings/System Settings, we can see the disk has increased, it can take about 10-15 mins to show here though
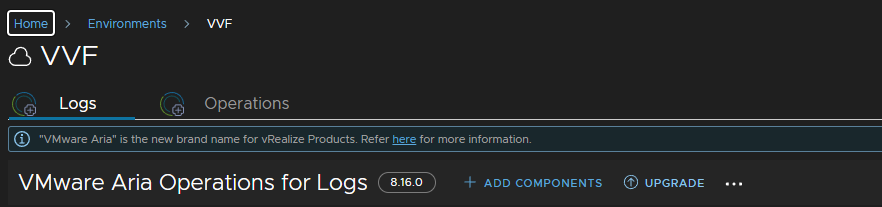
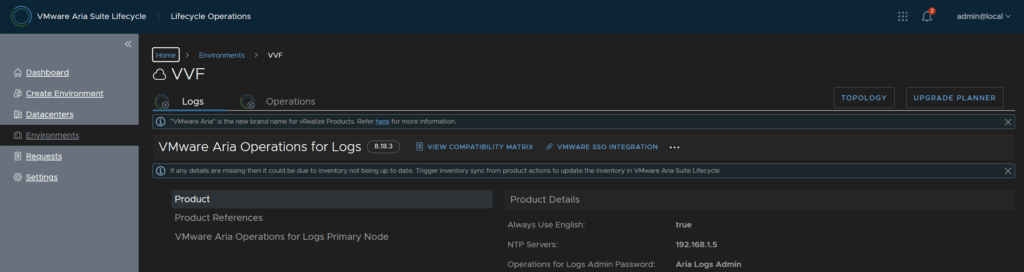
2 – Aria Logs
We need the patch binary to map to Aria LCM
You can find these under Aria Suite

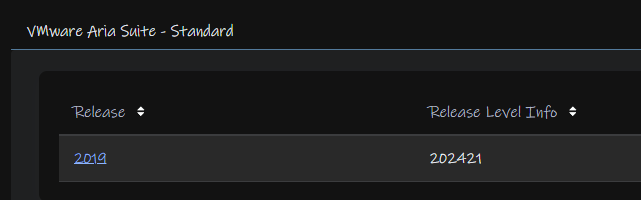
Expanding your subscription, for VVF this is standard and click the version, which will be 2019

Clicking view group for what you need, we need Aria Operations

We then this upgrade file

We then need to upload the patch to Aria LCM
Connect to it with the root account using WinSCP
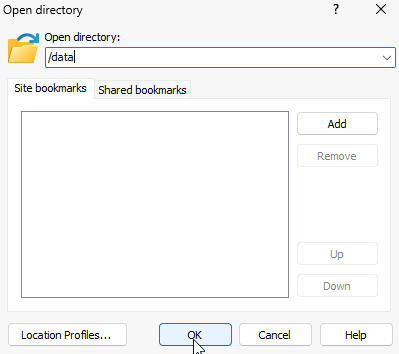
Double click the bar here
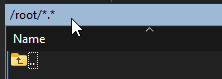
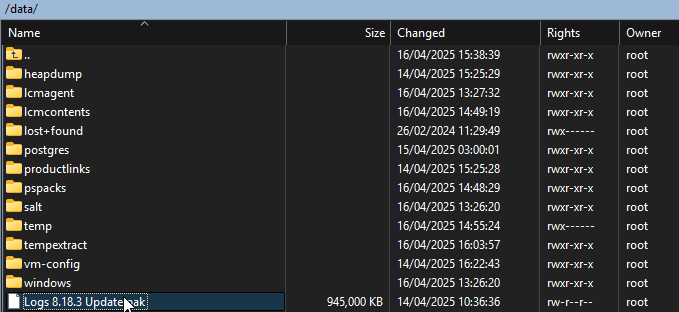
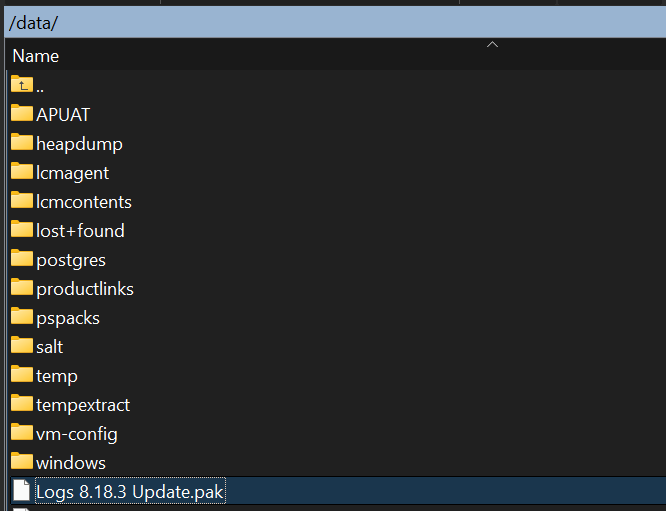
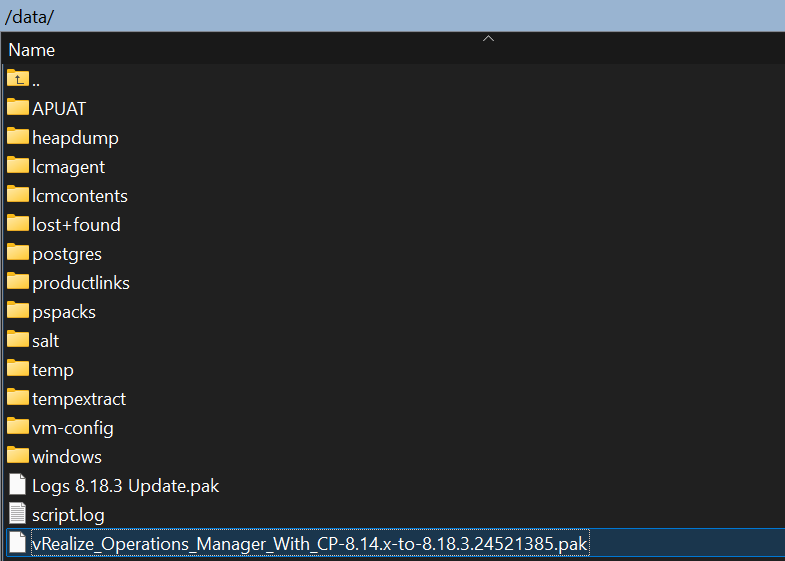
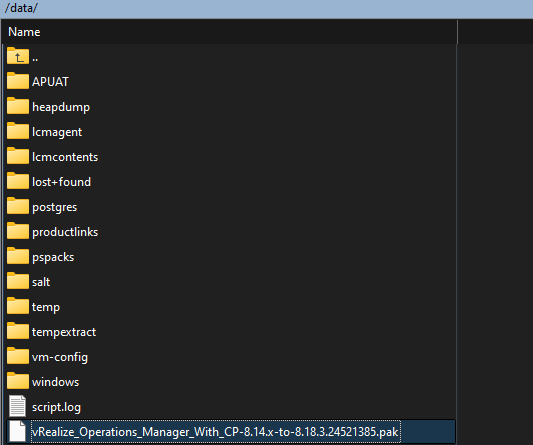
And navigate to /data and click ok
On the right panel head to where ever you have the upgrade pak downloaded and drag it over to the root of /data
It should look like this, the folders in /data may be different, the important thing is that the upgrade file is under /data
In LCM head to Lifecycle Operations

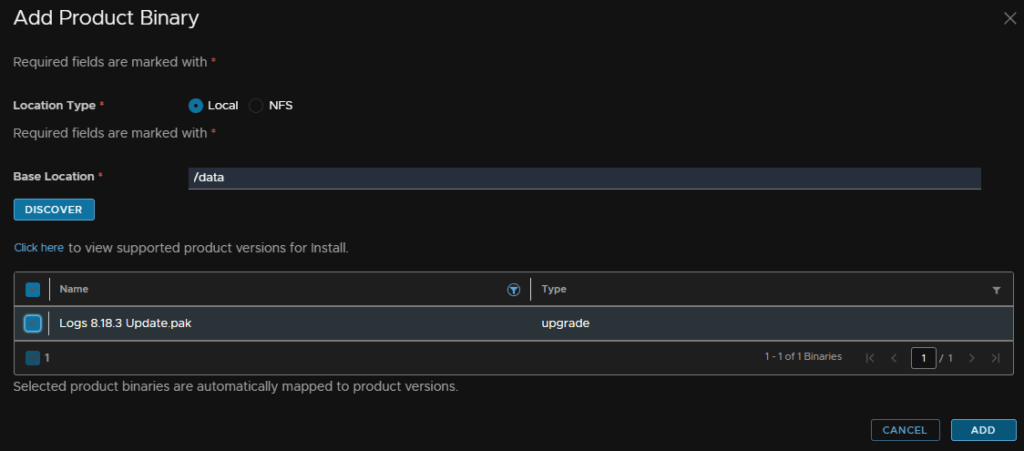
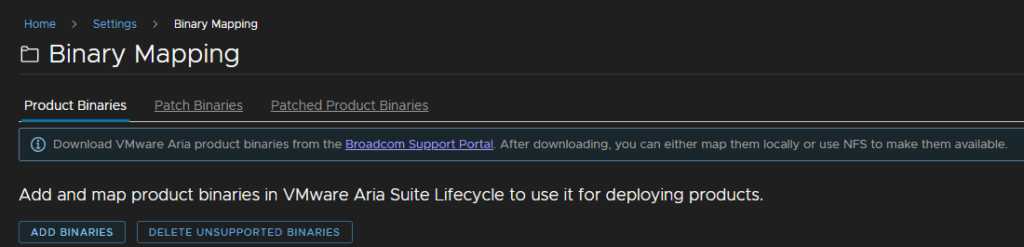
Then head to Settings/Binary Mapping

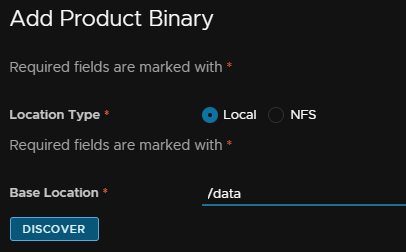
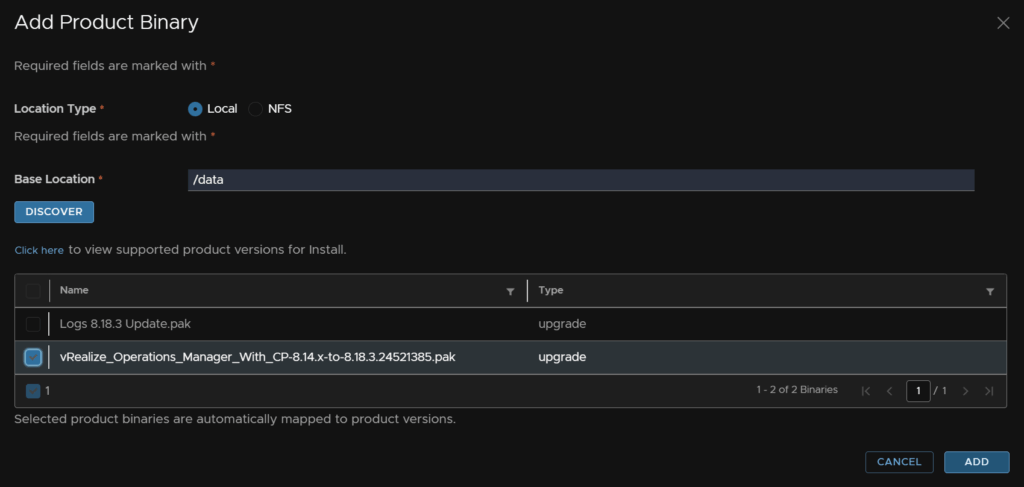
Click Add Binaries

Keep the location type on local, and put /data in the Base Location, then click Discover

Select the upgrade pak file and click Add
We can monitor the onboarding here if needed

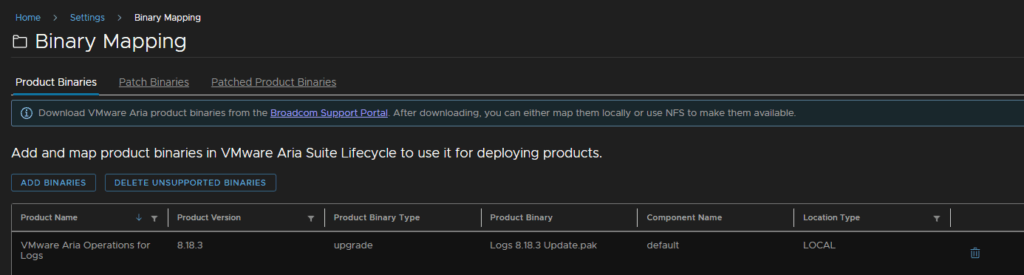
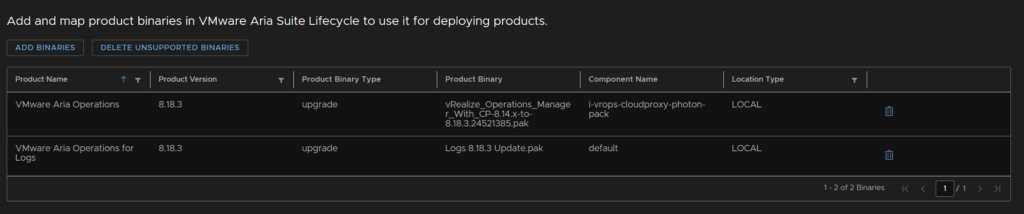
When thats run, head back to Binary Mappings

We should see it listed
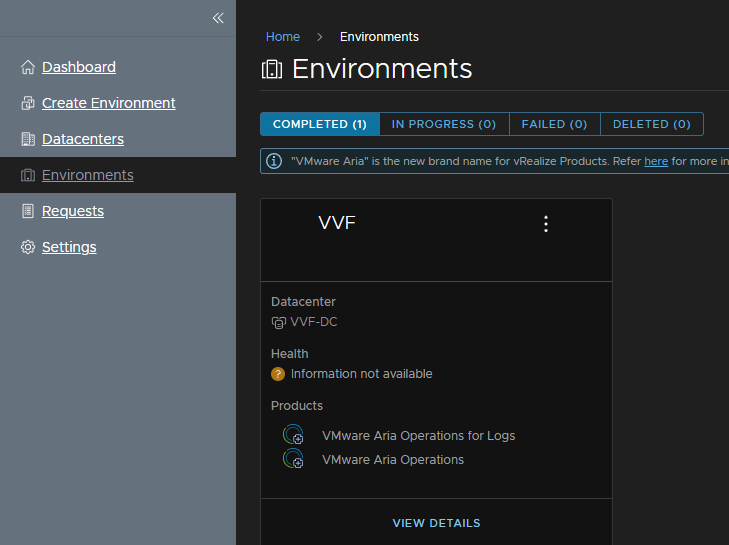
Head to Environments and click view details on youre environment, and click view details
We will leave the Upgrade Planner, as with 8.18 it doesnt work, and we have the right order anyway
Click the Logs tab, and click Upgrade
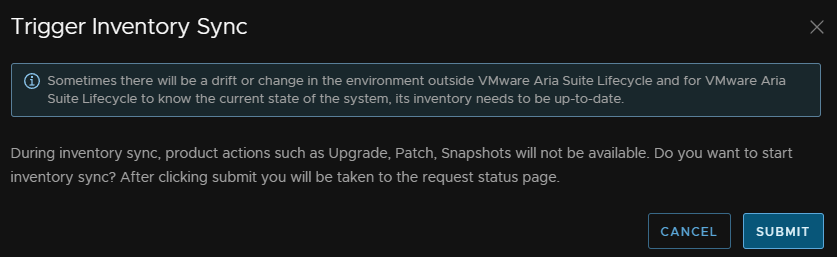
Click Trigger Inventory Sync

And then submit and wait for it to finish
It should look like this in Requests

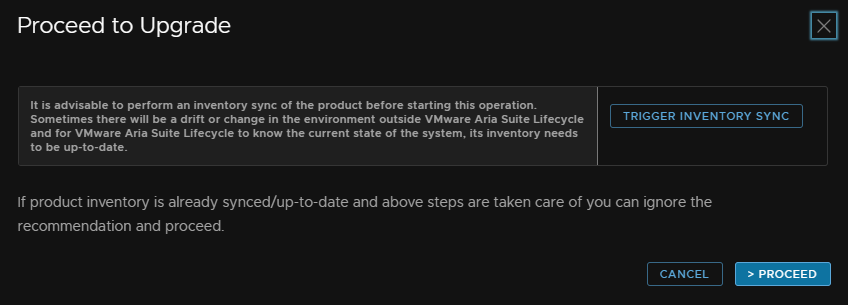
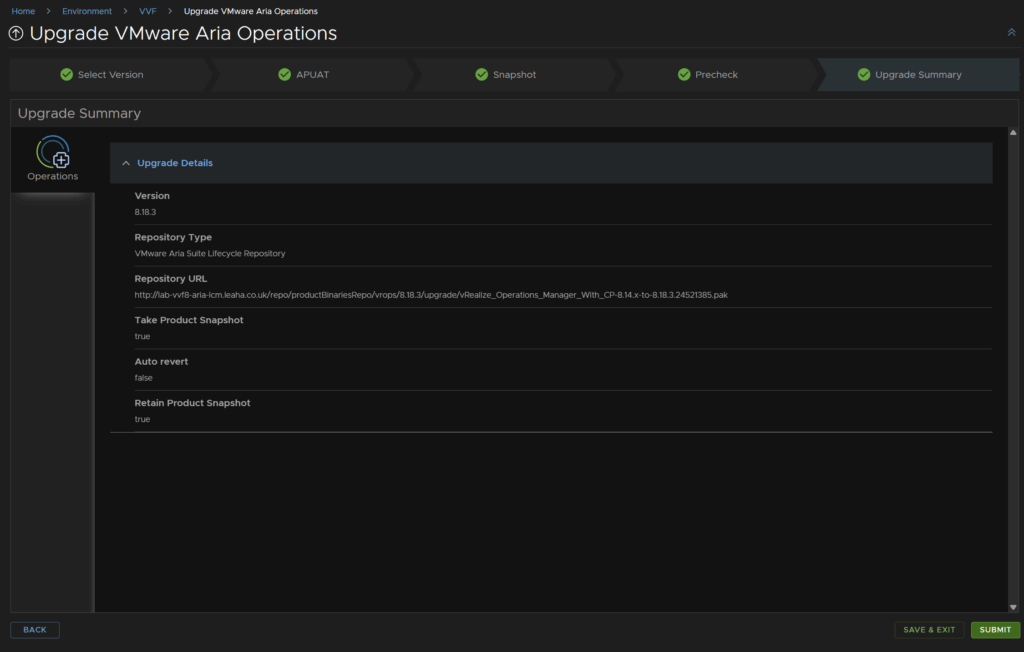
Re click Upgrade, then Proceed
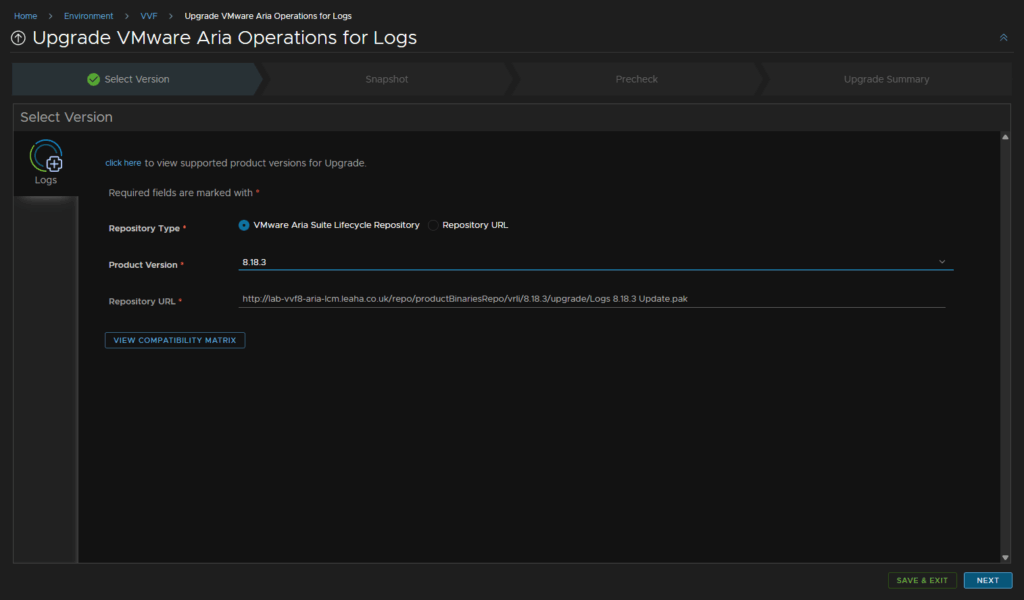
The version should be auto populated, click Next
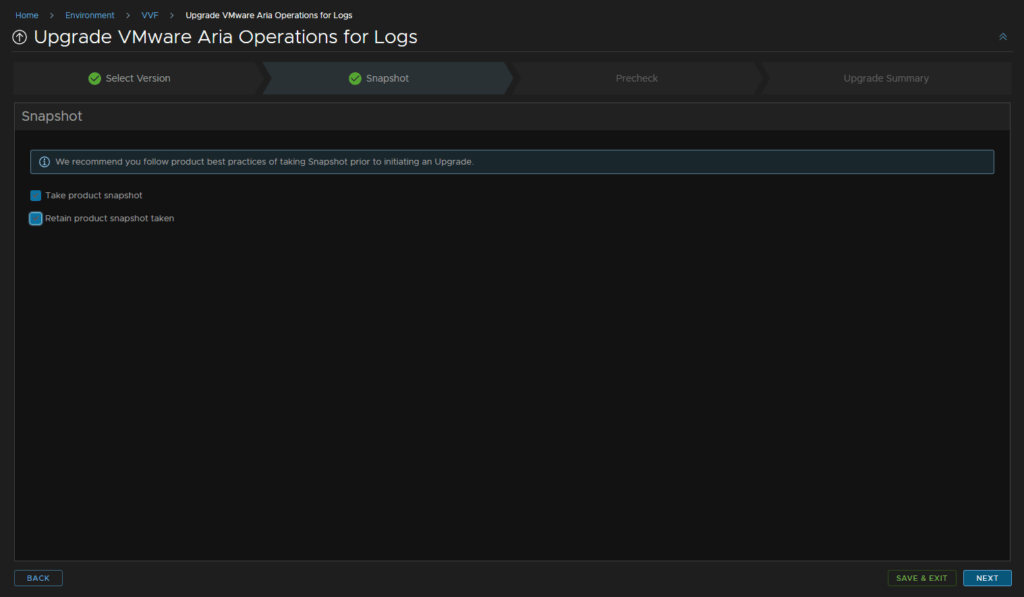
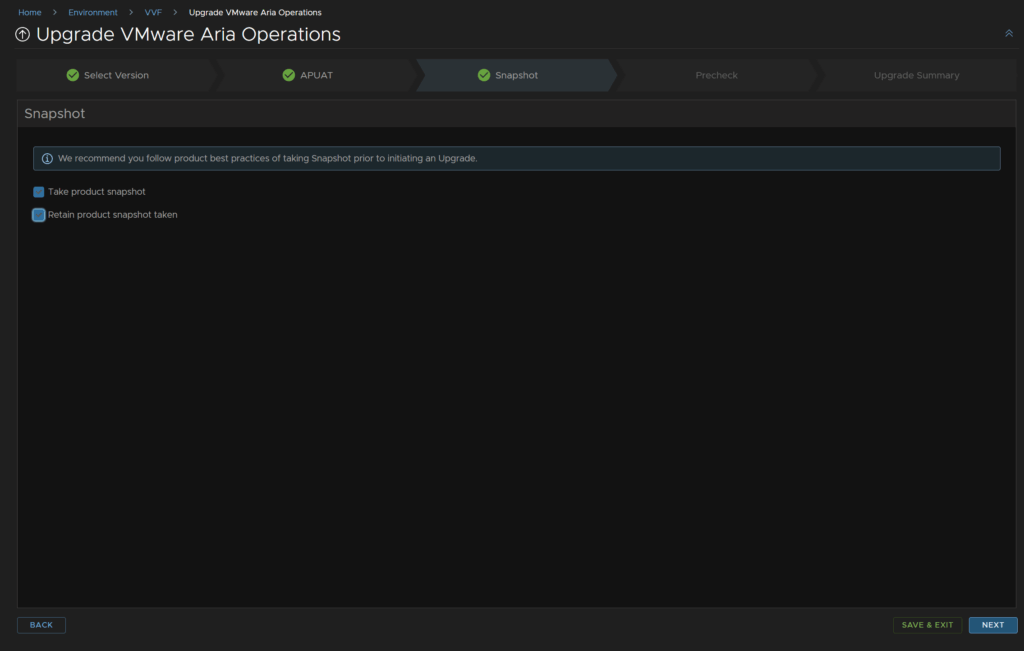
Check Retain Product Snapshot, and click Next
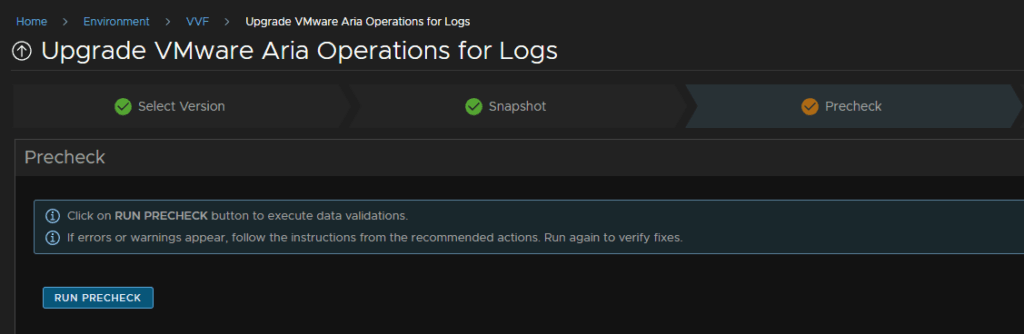
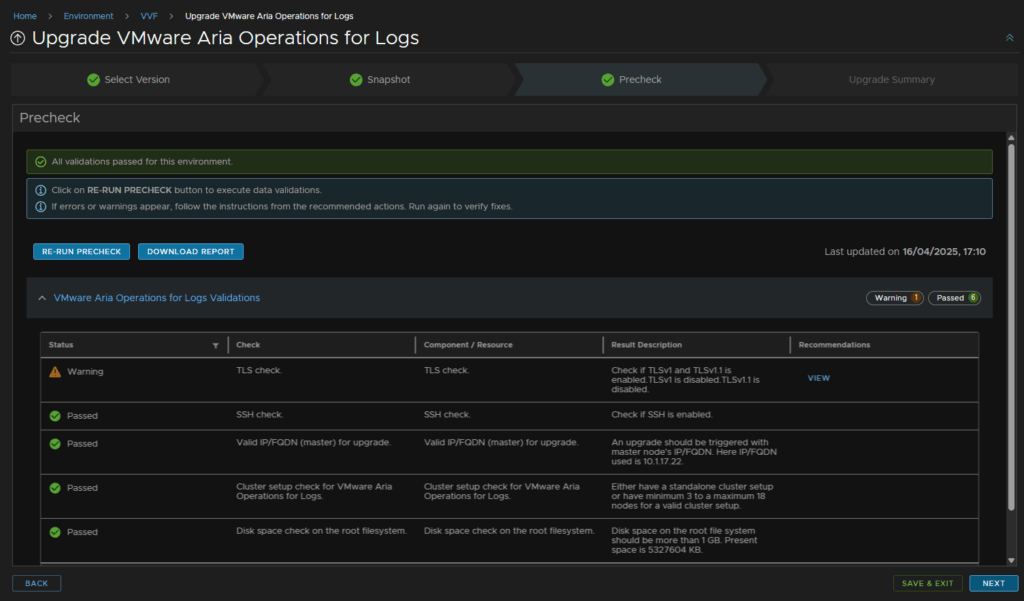
Click Run Pre Check
If you have an errors they will need fixing, I got a warn for TLS, which is fine, click Next
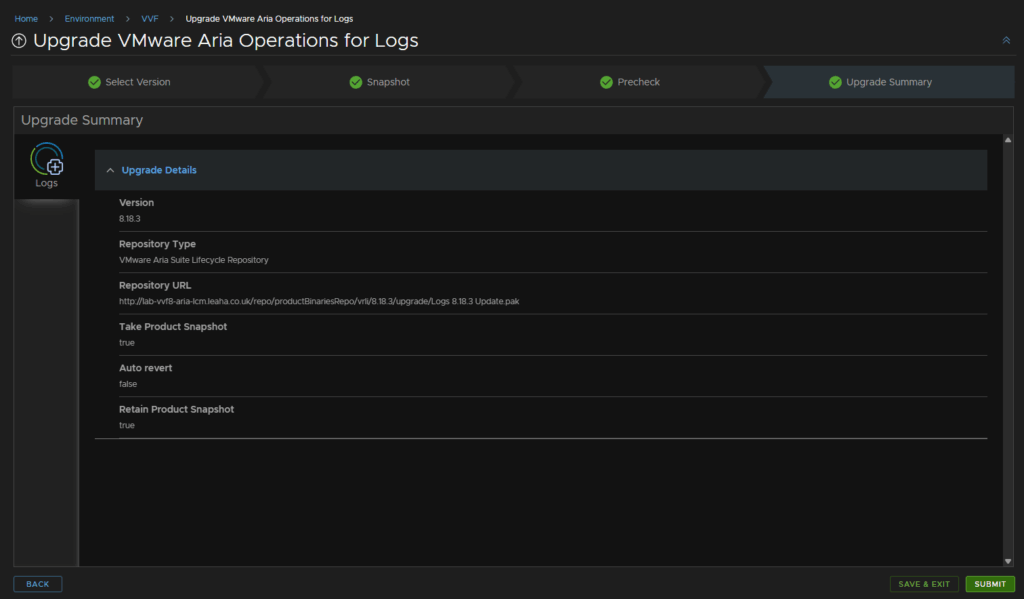
Then Submit
This took ~12 mins for my environment
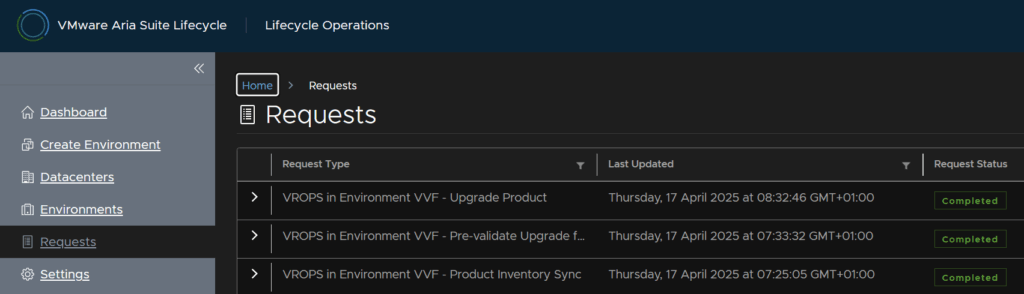
And we can see and track this from Requests

If we go back into the environment, we can see its been upgraded without issue
Lastly, head back to Settings/Binary Mappings

Click the Trash Can to remove the binary

We can see the status here

And then delete the file from WinSCP
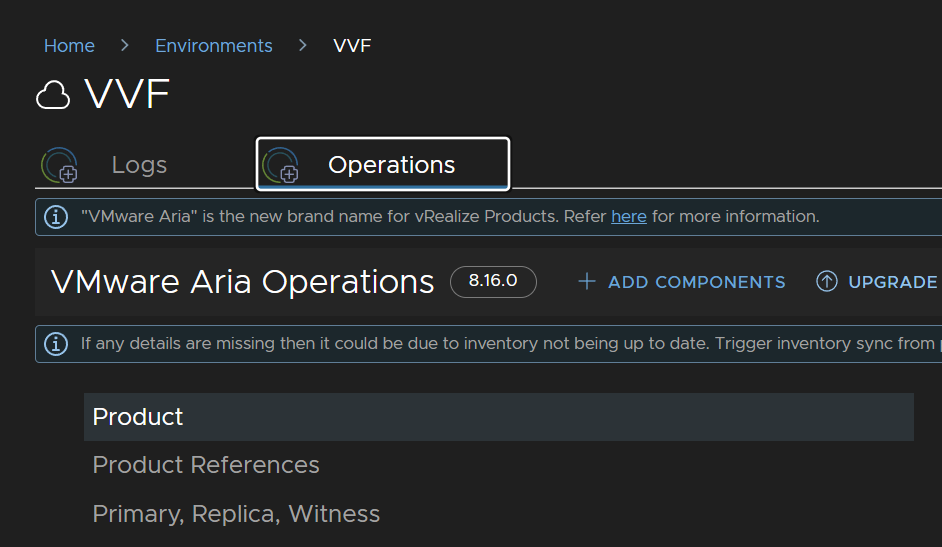
3 – Aria Operations
We need the patch binary to map to Aria LCM
You can find these under Aria Suite

Expanding your subscription, for VVF this is standard and click the version, which will be 2019
Clicking view group for what you need, we need Aria Operations

We then this upgrade file

Dont rename any of these as it causes issues with upgrades
We then need to upload the patch to Aria LCM
Connect to it with the root account using WinSCP
Double click the bar here

And navigate to /data and click ok

On the right panel head to where ever you have the upgrade pak downloaded and drag it over to the root of /data
It should look like this, the folders in /data may be different, the important thing is that the upgrade file is under /data
In LCM head to Lifecycle Operations
Then head to Settings/Binary Mapping
Click Add Binaries
Keep the location type on local, and put /data in the Base Location, then click Discover
Select the upgrade pak file and click Add
We can monitor the onboarding here if needed

When thats run, head back to Binary Mappings

We should then see it listed
Before starting we will need SSH enabling on the appliance, head to the admin URL on
https://fqdn/admin
Login with the admin account
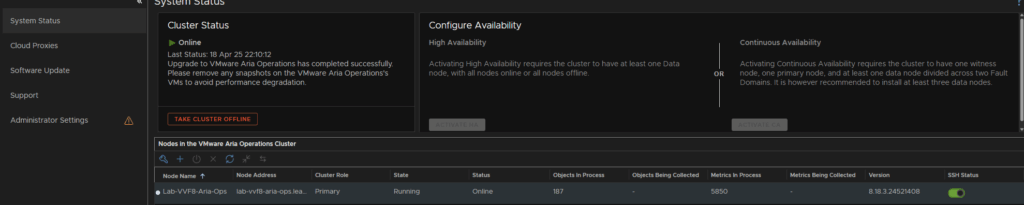
Head to System Status on the left and toggle the SSH Status on the right to Enabled
Head to Environments and click view details on youre environment then view details

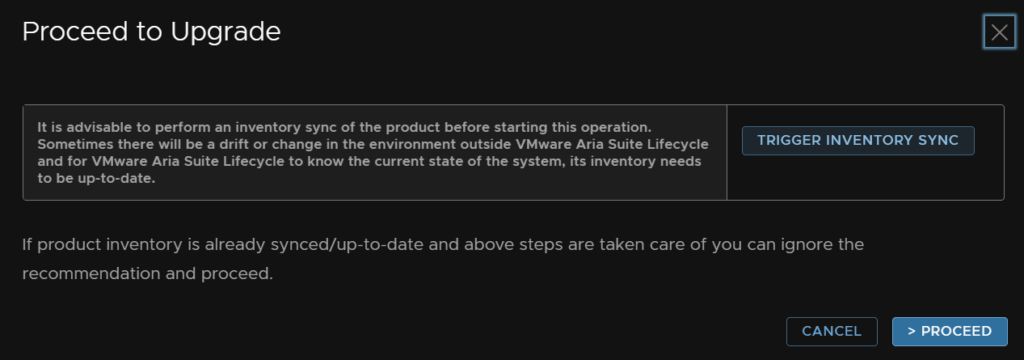
Click the Aria Ops tab and click Upgrade
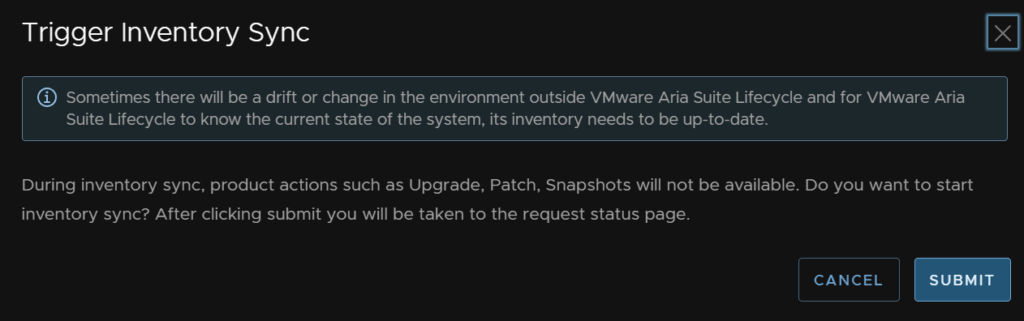
Then click Trigger Inventory Sync
And submit, then wait for it to finish
It should look like this in requests

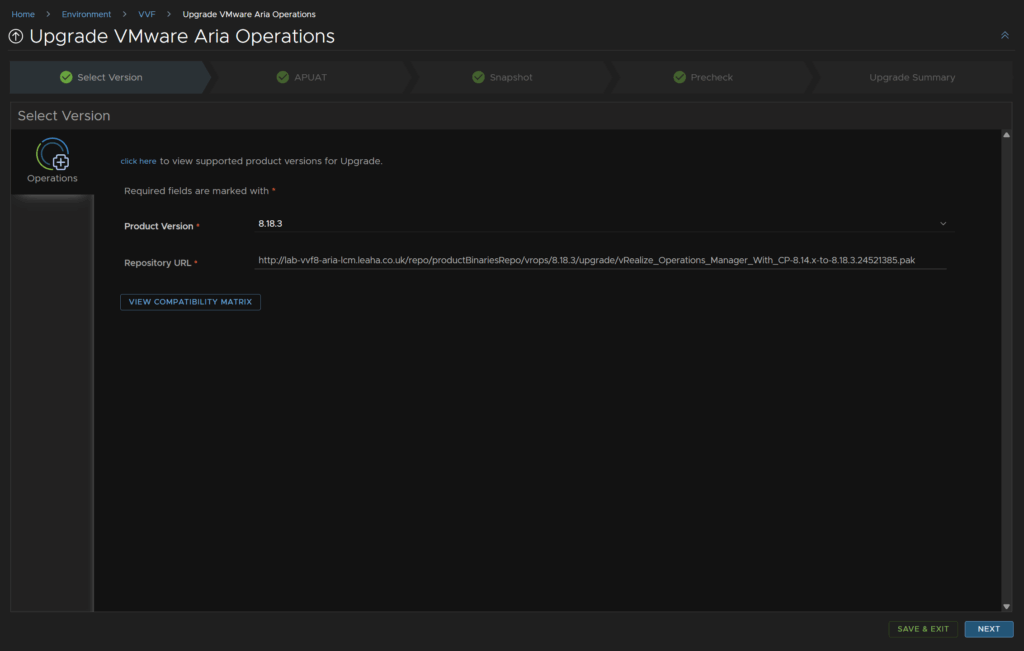
Back on Upgrade, this time click Proceed

Click Next, it should automatically pull up the correct version
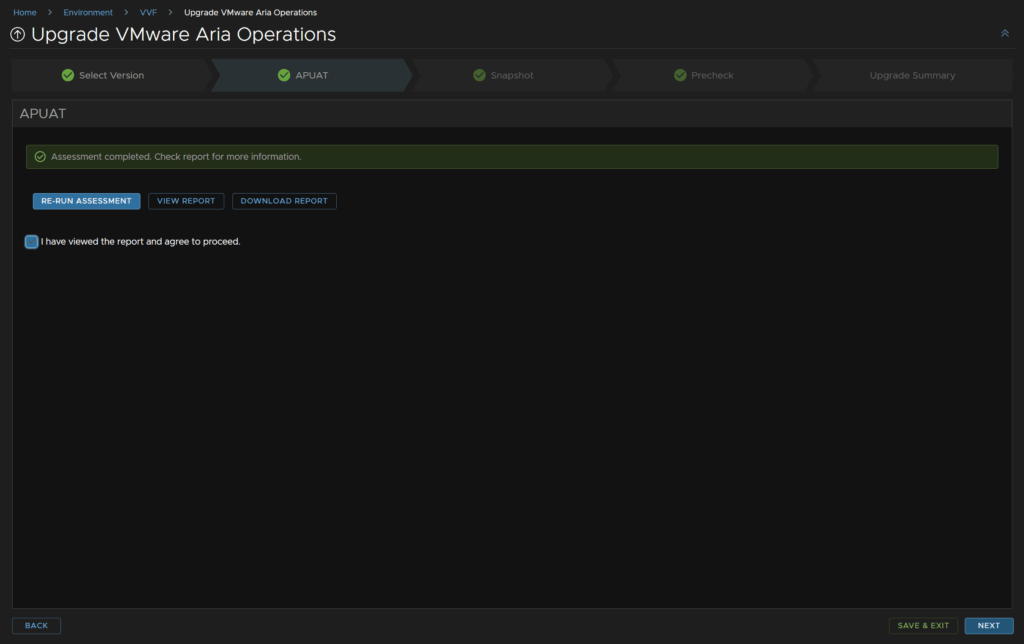
Click Run Assessment

When thats run fine, check the box to agree to proceed and click Next
Check Retain Product Snapshot Taken and click Next
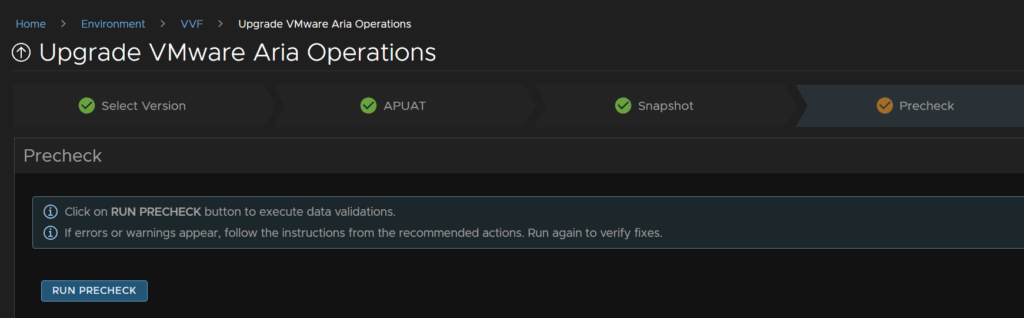
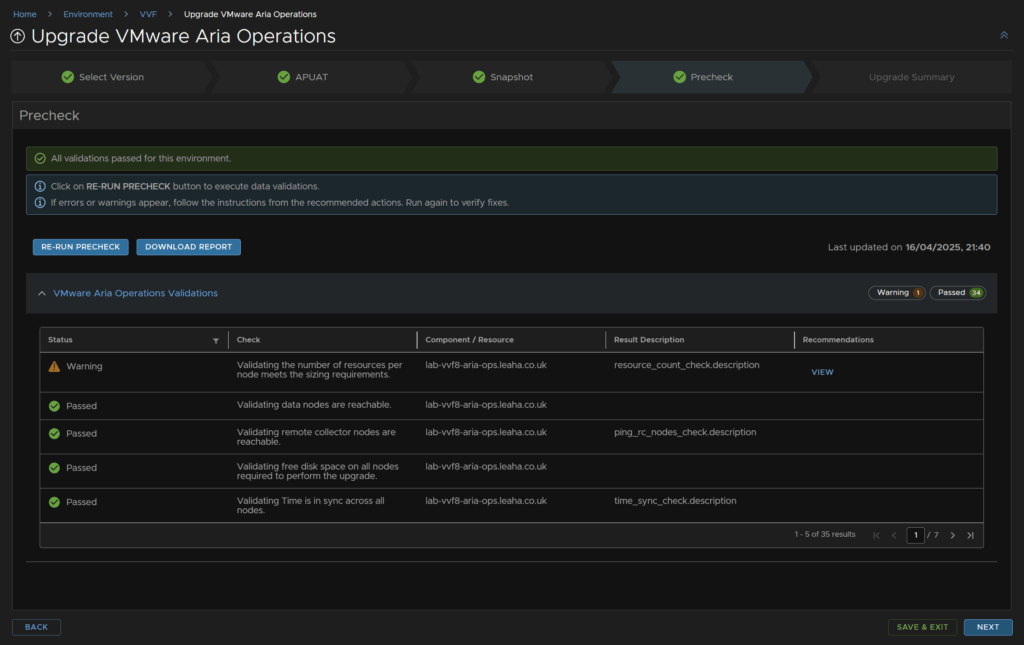
Click Run Pre Check
Check any warnings, mine was about sizing, however I have checked the 8.18.3 sizing and the sizes match, so I will continue and click Next
Then click Submit
This took ~50 mins for my environment
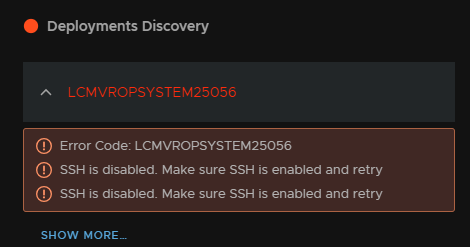
You may see Aria Operations error out on SSH like this, as the appliance rebooted SSH was not enabled on boot, to fix this log back into the admin portal and re enabled it like before
We can see and track this from Requests
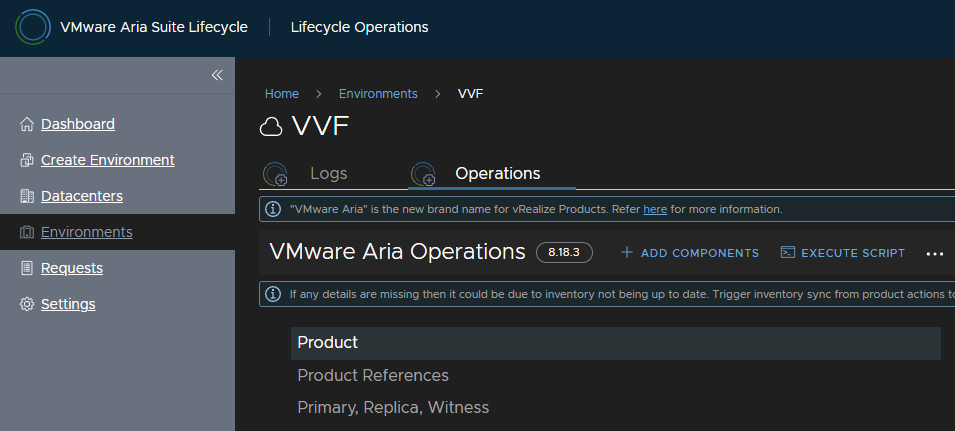
And if we head back to the Environment, we can see its been updated
Lastly, head back to Settings/Binary Mappings
Click the Trash Can to remove the binary

We can see the status here

And then delete the file from WinSCP
4 – vCenter
If you have any backups or replication jobs running during the patch, these will also need disabling
Eg with Veeam, let any running jobs finish, then disable them before patching vCenter, and re enable them when the patching is done
Open the appliance management
https://fqdn:5480
Or
https://ip:5480
You can login with root or a vSphere administrator
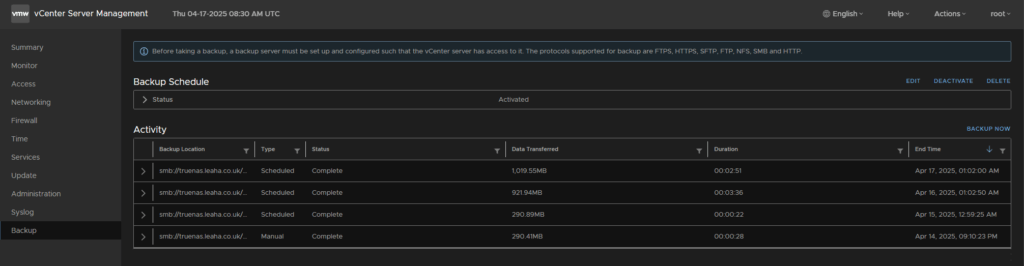
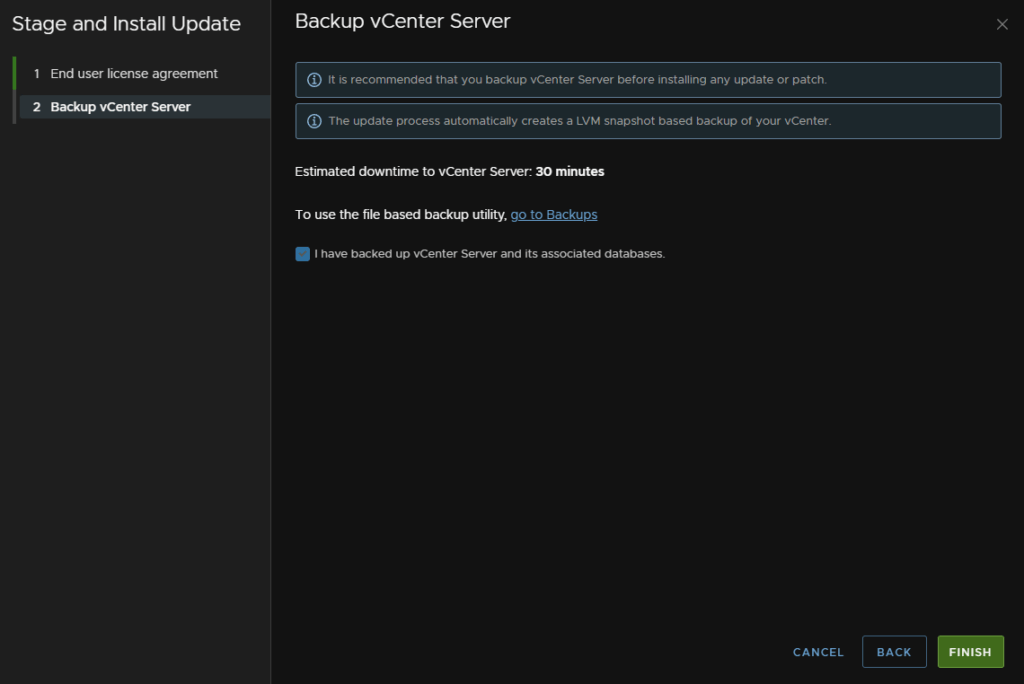
You’ll want to make sure you have a backup taken in the last 24 hours, as if you need to do a restore you’ll need a recent backup
To check this go to the backups page, there should be a daily schedule setup which means you’ll have a backup already, but if not, you should setup the schedule and take a manual backup before updating
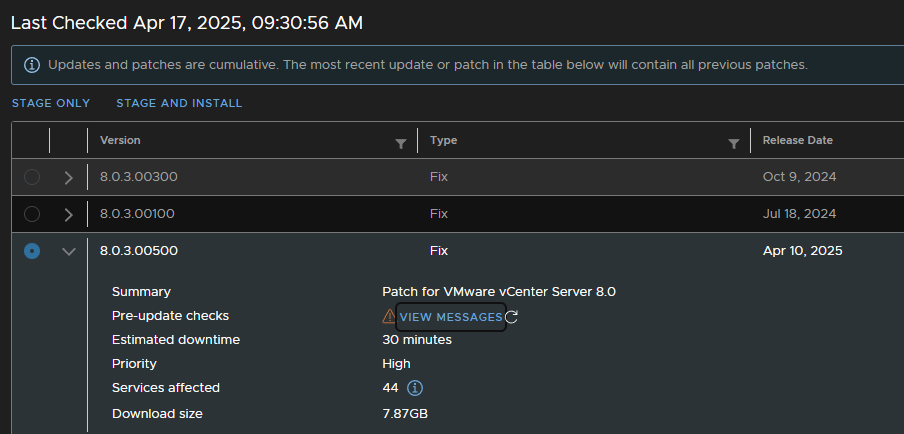
From the appliance go to Updates on the left and select the newest update, they are cumulative, click the drop down arrow and run a check
If this passed, stage and install, if not, check the errors and fix any issues it highlights

This will always flag a warning, click View Messages
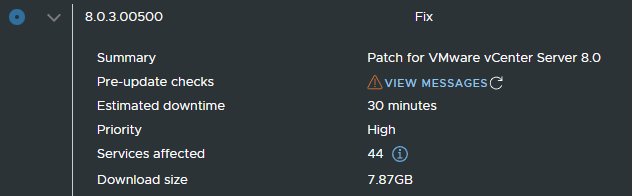
One will be for the config backup, this is less than 24 hours, and another for ESXi 6.5 files not being carried over, vCenter 8U3 doesnt support ESXi 6.5 so this is fine
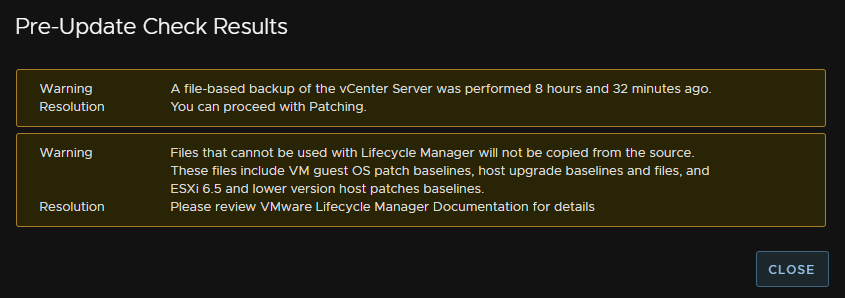
You may also see warning for plugs, if so check with the third party that the current version supports the target patch, if you are going from vCenter 8, 8U1 or 8U2, compatibility is important, if you are patching within a release, like me, from 8U3 to 8U3e, then it more than likely will be compatible
If your plugin isnt compatible with the target patch make sure you upgrade that first
With that checked, click Stage And Install
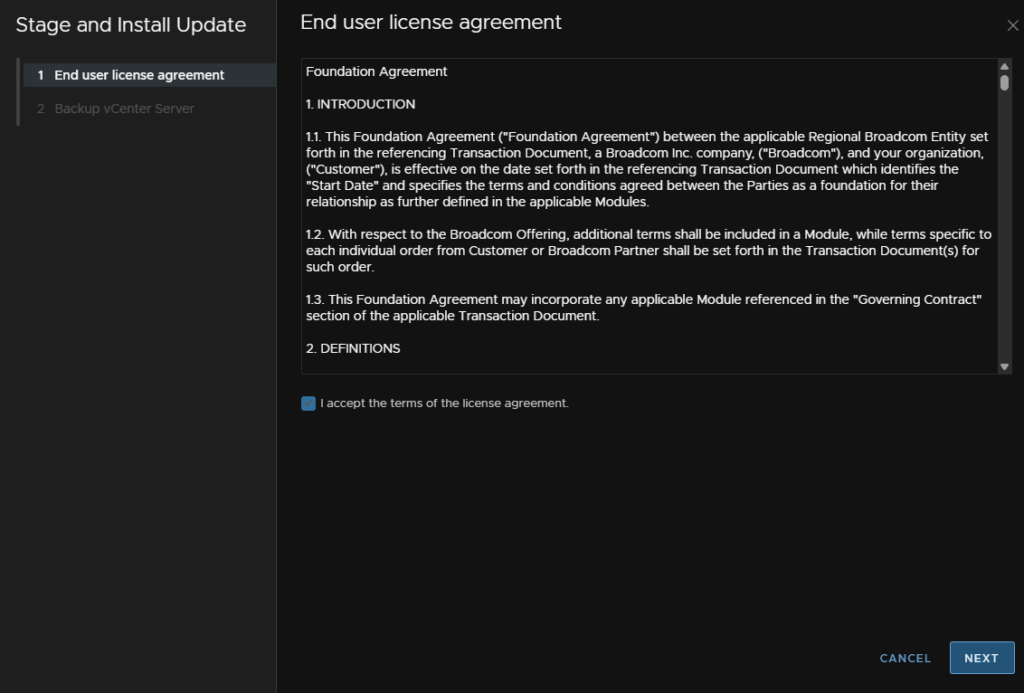
Accept the EULA and click Next
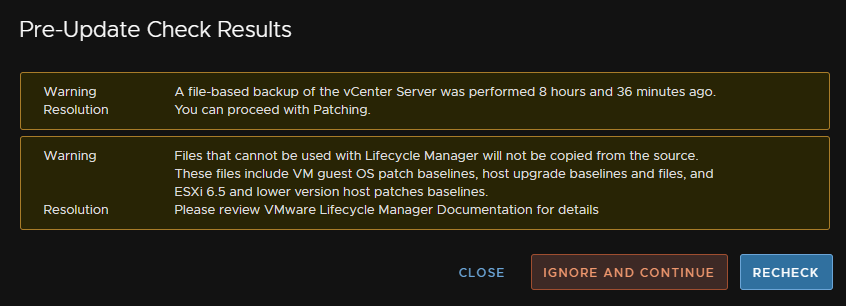
It will re run the pre checks, I just prefer having the list available before, so thats why we ran it already, and we have prepared for all the warnings
As mine is the usual two warnings, I will click Ignore And Continue
Check the box to acknowledge we have backed up vCenter, and click Finish
Downtime here refers to the vCenter UI, all VMs will be unaffected
5 – Tanzu
5.1 – Namespaces/Supervisor
This is bundled with vCenter 8U3, the namespace will be updated automatically when vCenter is patched
You can check this by clicking the three lines in vSphere and clicking Workload Management
Here we can see the namespace update, I had 0.1.9, and since the vCenter update, the namespace is version 0.1.11
We can also see the Kubernetes release, with this namespace version we get 1.29.7
We had 1.28.3, the namespace supports the current version and two previous versions
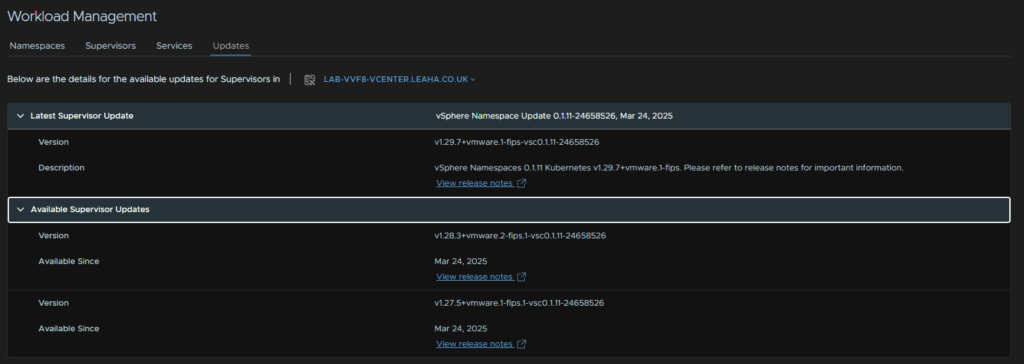
At the bottom we can see the supervisor, as this is now decoupled from vCenter we can update this independently
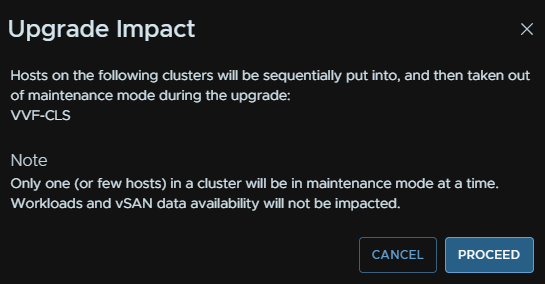
To apply the latest Kubernetes release, click the namespace and click Apply Updates
These will be applied to the hosts and the supervisor VMs

And click proceed
Ensure all the pre checks run fine, then click Next
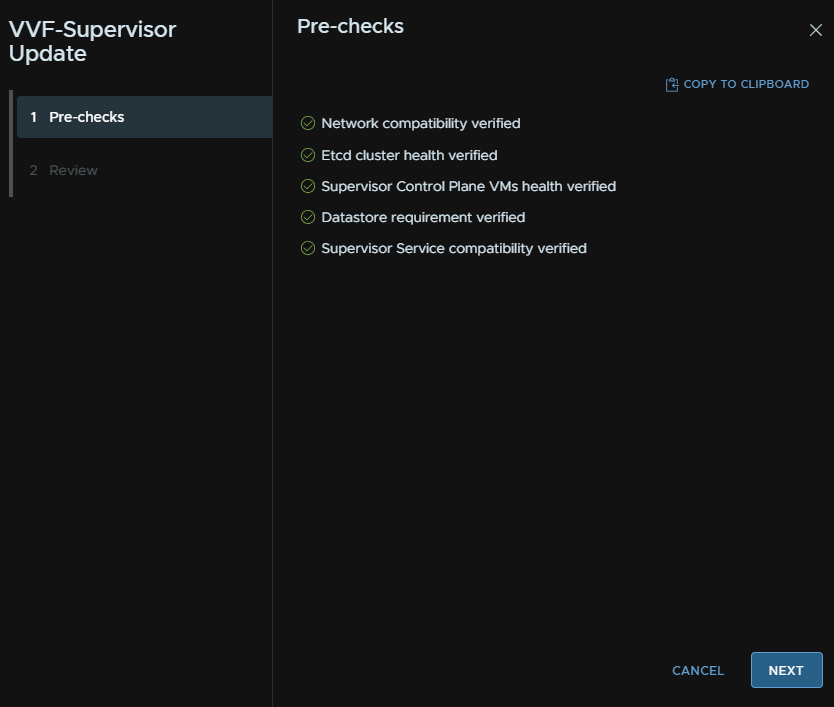
And Finish
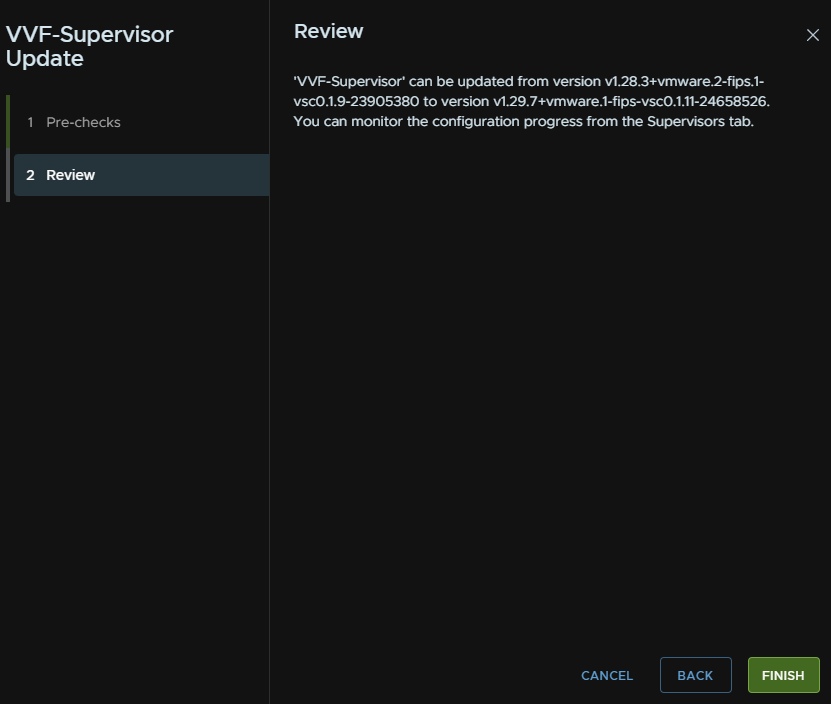
This will replace the Supervisor VMs as part of the update process, which we can see here
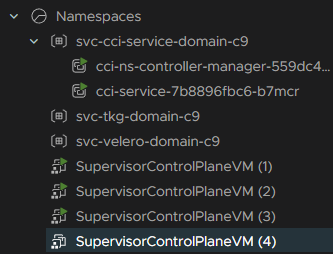
Plugin will then be redeployed, this may happen a few times as new supervisor control plane VMs are created


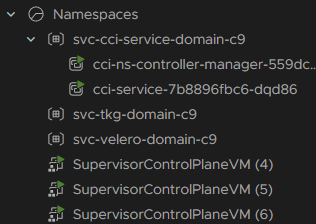
Once the control plane nodes are done, there will still be three, and they will likely have different numbers
Then all hosts are put into maintenance mode and the new Kubernetes release is installed to the host
5.2 – Supervisor Services
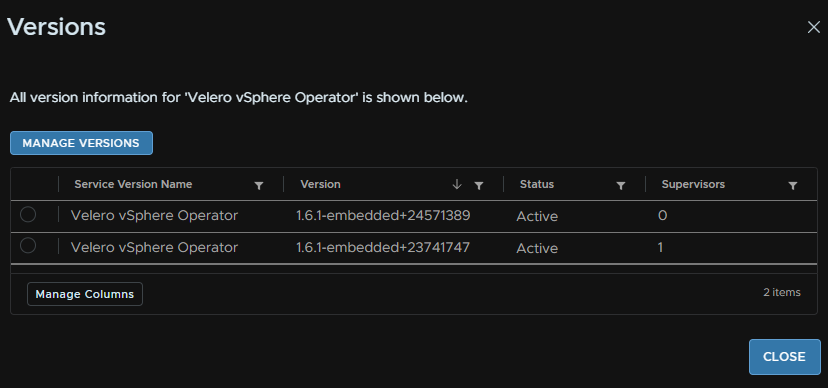
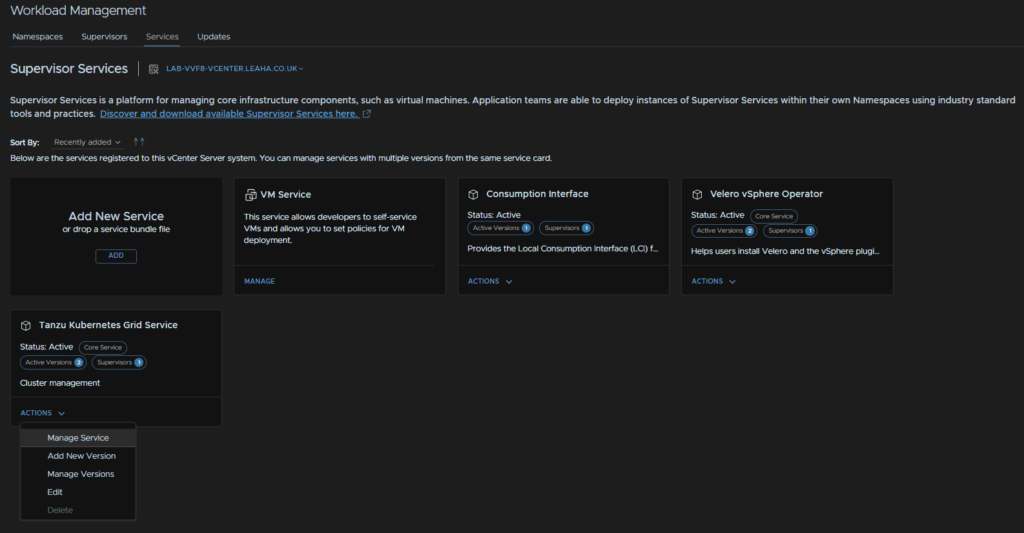
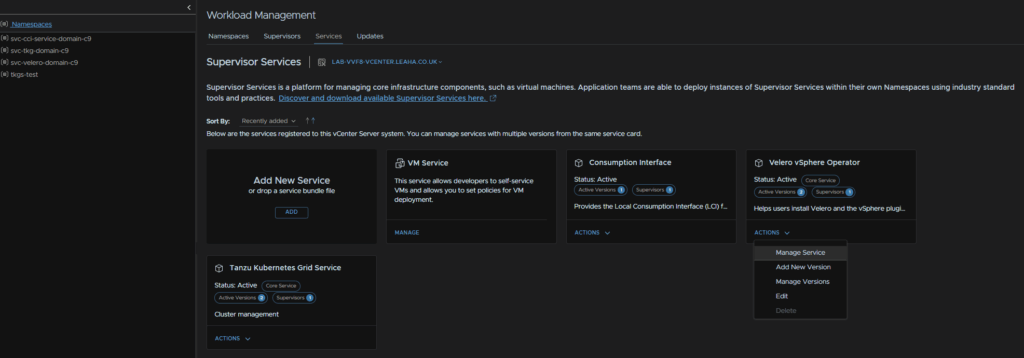
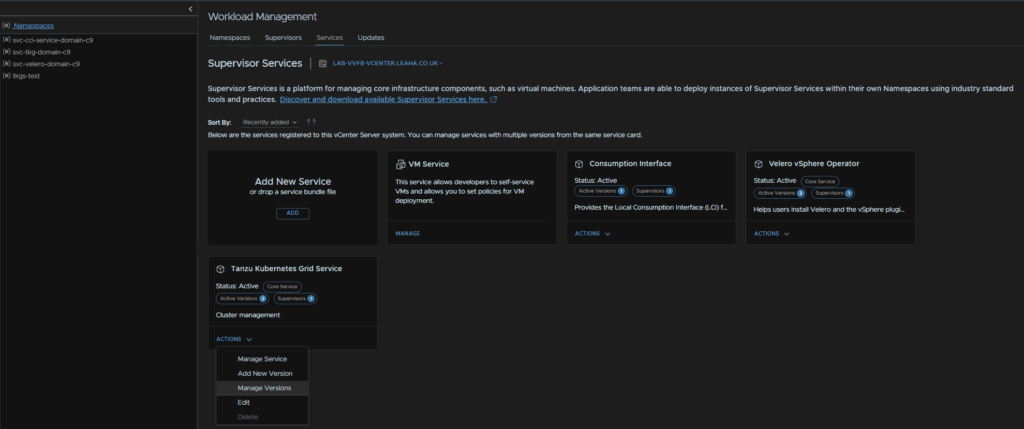
Now we need to update the built in supervisor services, the stock ones are Tanzu Kubernetes Grid Service and Velero vSphere Operator
Any additional services that have updates will need to be applied separately
We can get to them by clicking the three lines in the top left of vSphere and clicking Workload Management

Then head to Services, we can click Active Versions within the service widget, where it says Active Versions 2, to see what versions we have, there are now two, as they new ones are added, but not activated with the supervisor update

Here we can see the newer 3.3.2 has been added but had no installed supervisors
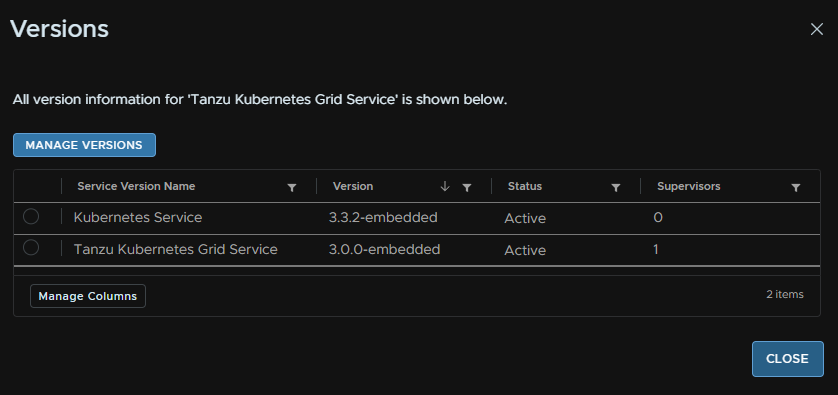
And the same for Velero
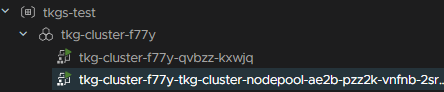
To test this a little more I added a TKGS test namespace with a TKG cluster with one manager and one worker
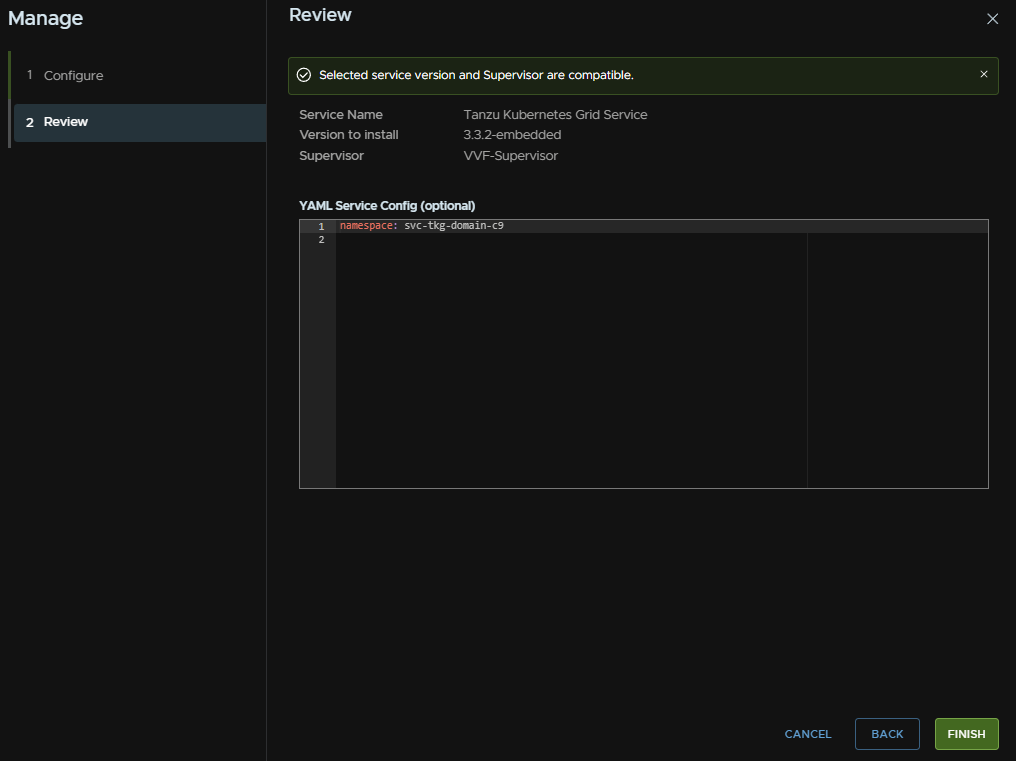
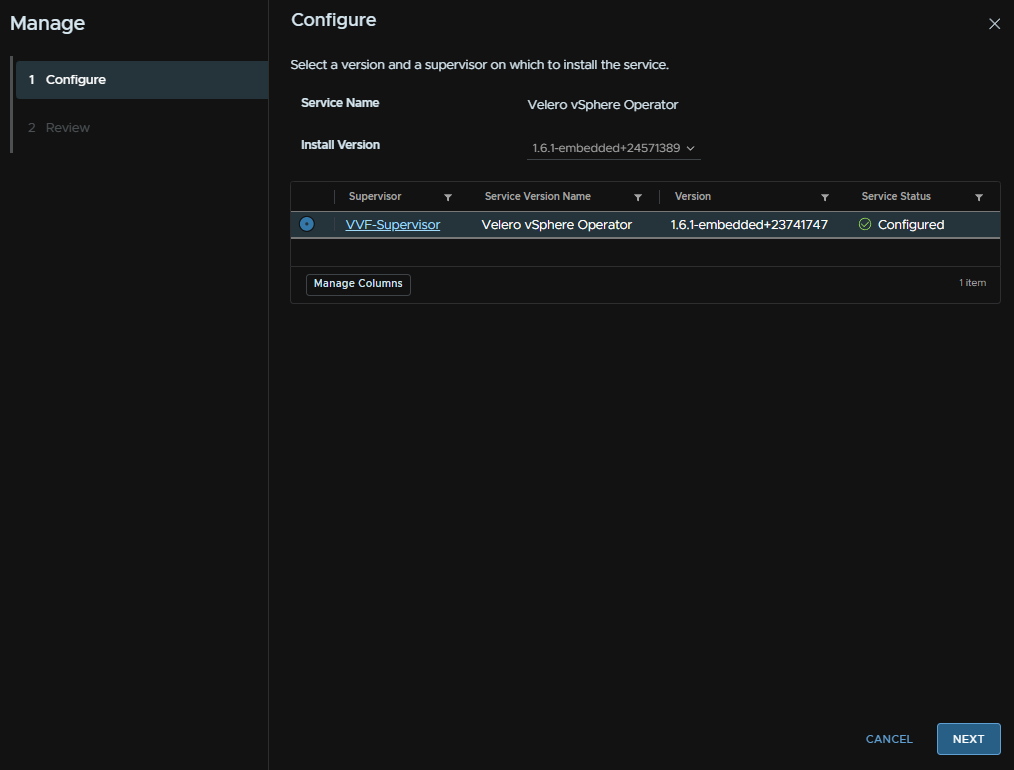
So, to upgrade the services click Actions on a service, then Manage Service
Select your supervisor, and make sure the Install Version is the latest, for me thats 3.3.2, and click Next
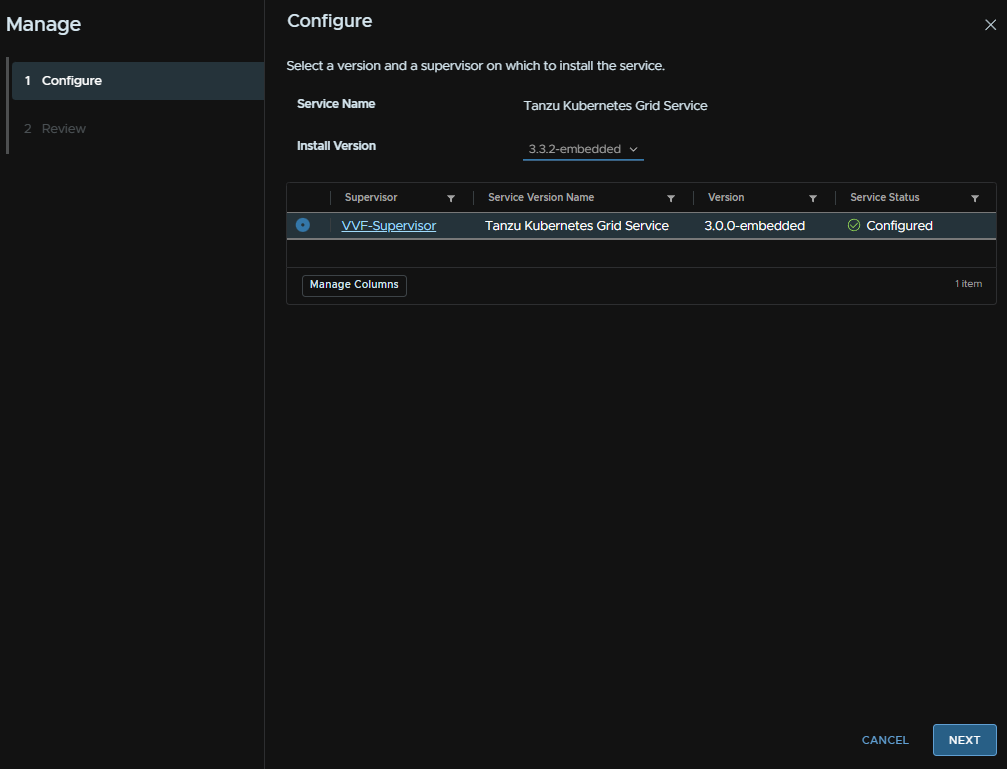
This will run a compatibility check
When thats run click Finish
The plugin will be undeployed

And redeployed

Give it 5-10 mins to start up all the new pods
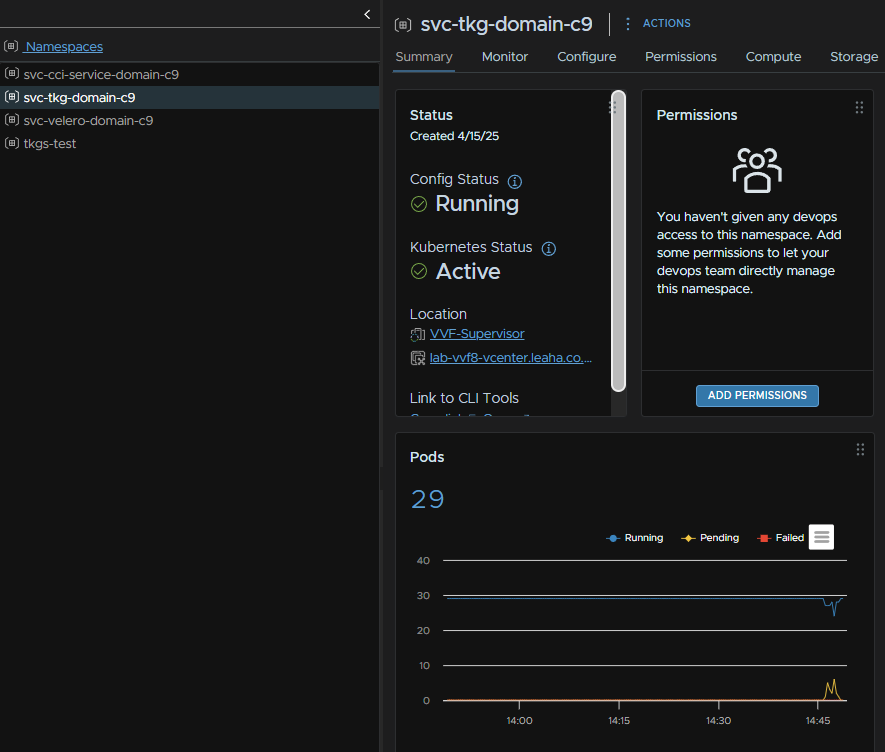
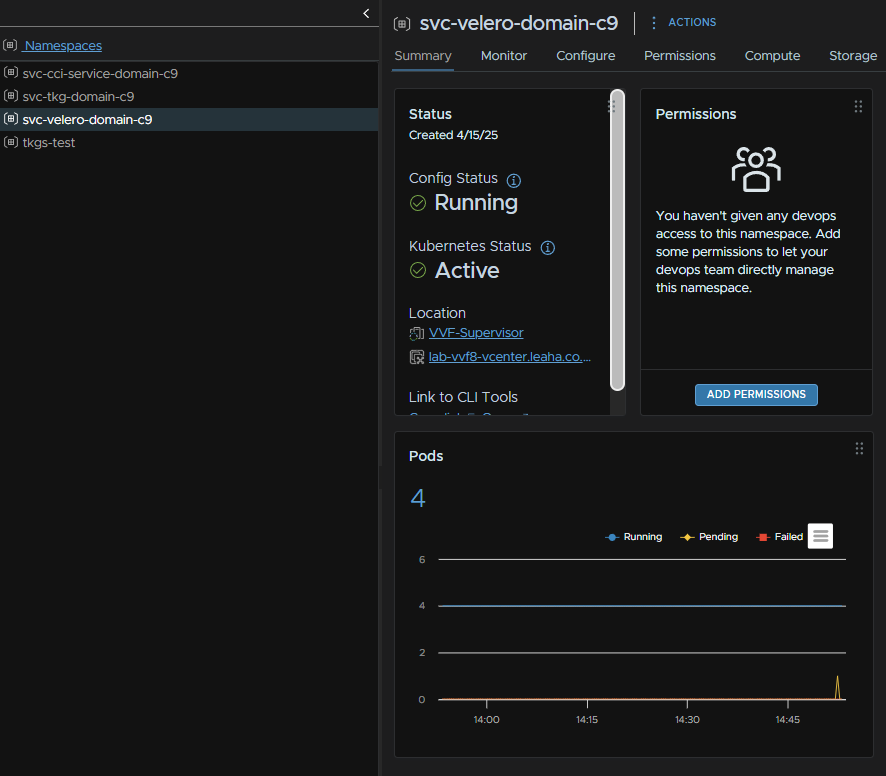
We can see the pod status from the namespace on the left as well, so you may see some errors while pods are in pending
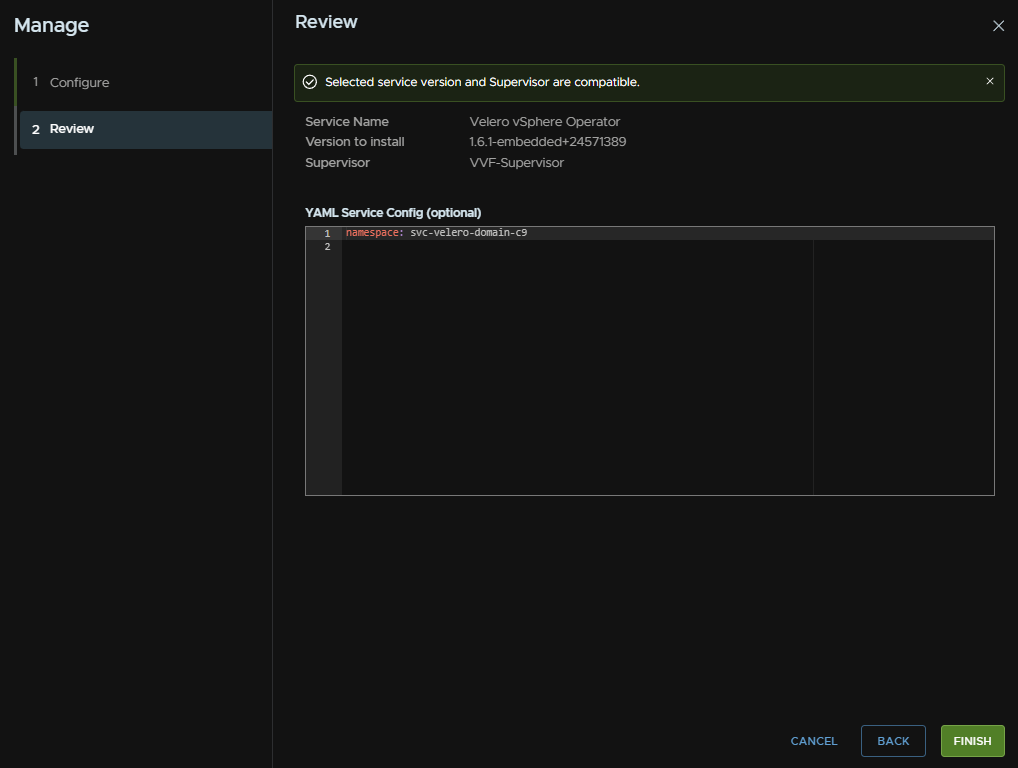
Heading back to Workload Management/Services, we can click Actions/Manage Service on the Velero service
And again, select the latest version from the Install Version drop down, then select our supervisor and click Next
A pre check will run, when its all clear, click Finish
Again, give it 5-10 mins, and we can check the pod status in the same place, clicking the velero namespace instead
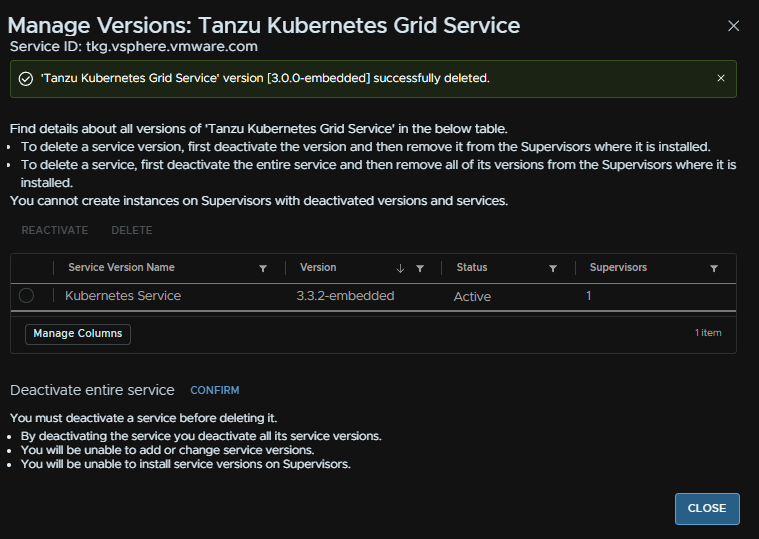
Now we can remove the old versions, this is optional, but you would want to use the new versions so we dont want someone accidentally using or configuring the old ones
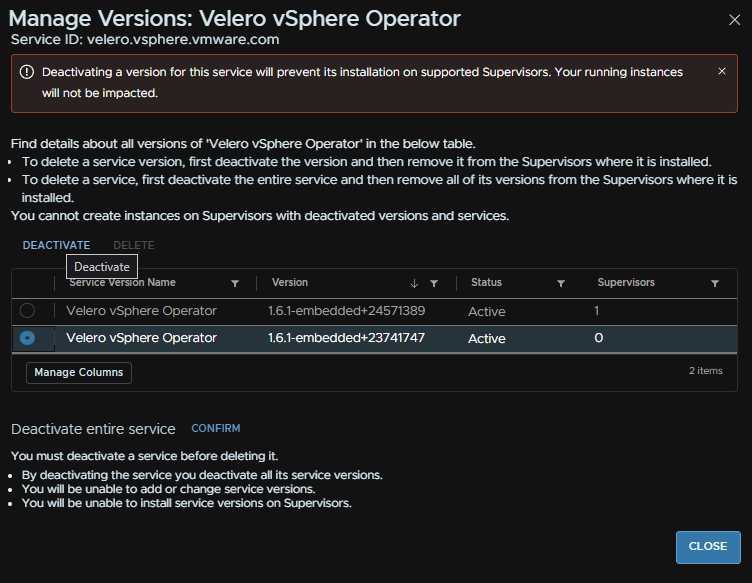
Back in workload Management/Services, on the service click Actions/Manage Versions
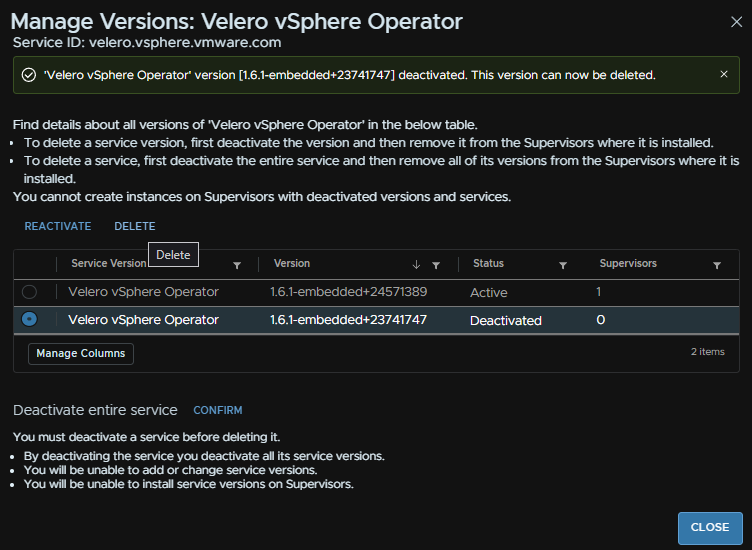
Select the old version and click Deactivate
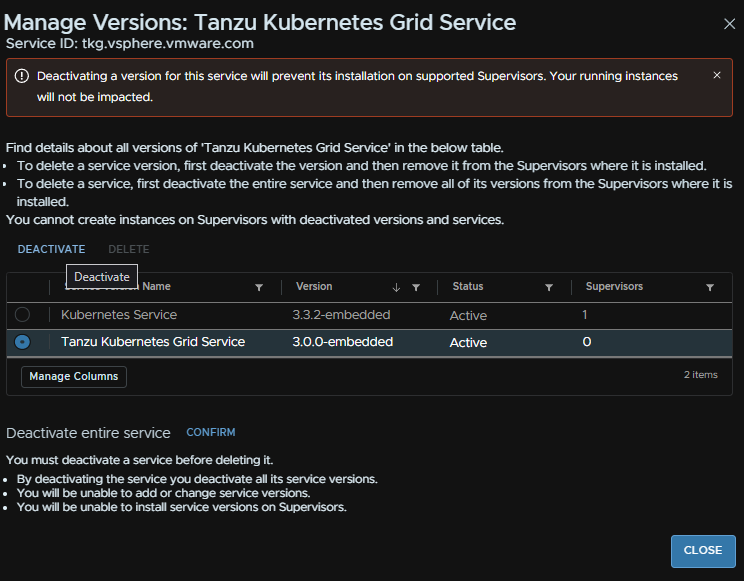
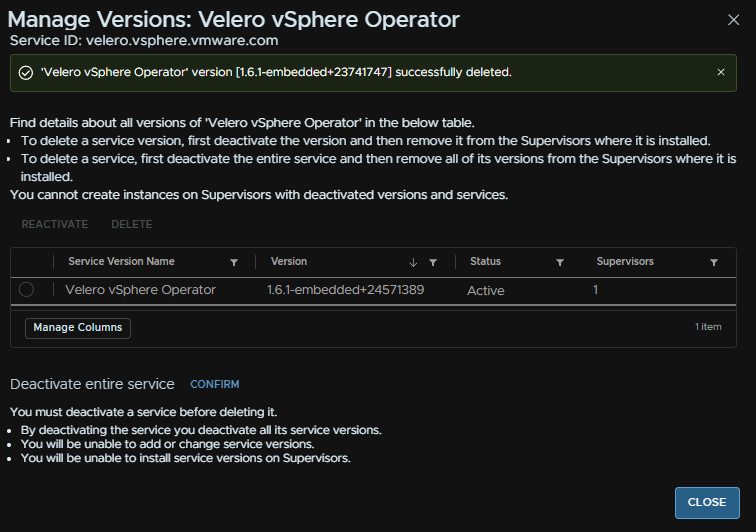
Then we can select it again and click Delete
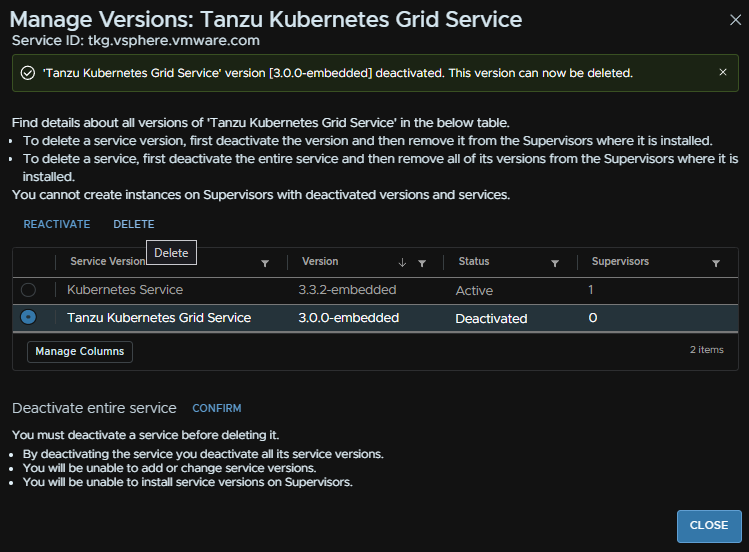
Then click Close
Repeat for velero from Actions/Manage Versions
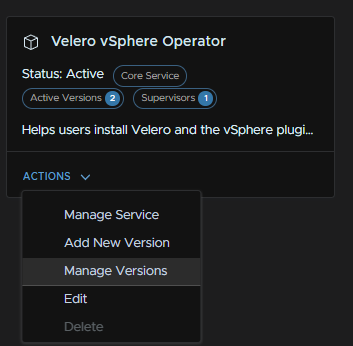
Select the old version and click Deactivate
Select it again and click Delete
And click Close
Our test cluster has also been running fine this time, and this isnt a service affecting update
6 – Avi
6.1 – Version Upgrades
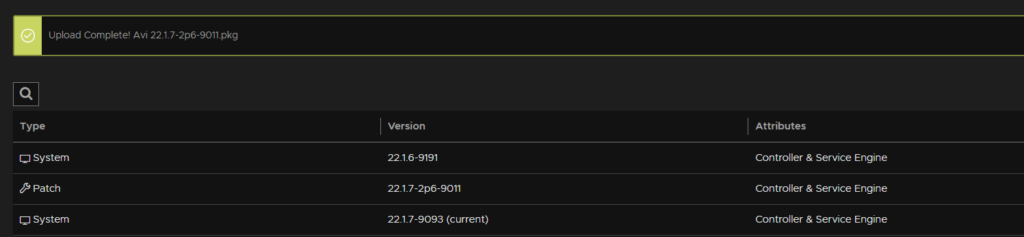
These updates go from one version to another, eg 22.1.6 –> 22.1.7
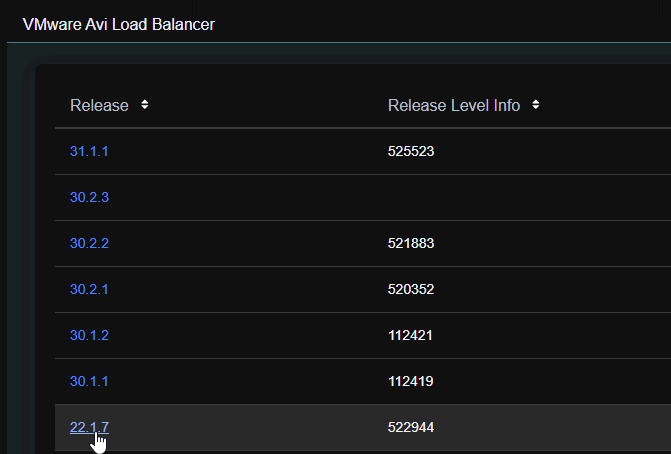
You can find these under VMware Avi Load Balancer in the Broadcom Portal

Select your release, eg 22.1.7
And you can grab this controller upgrade

Then open the WebUI and head to Administration/Controller/Software and click Upload From Computer
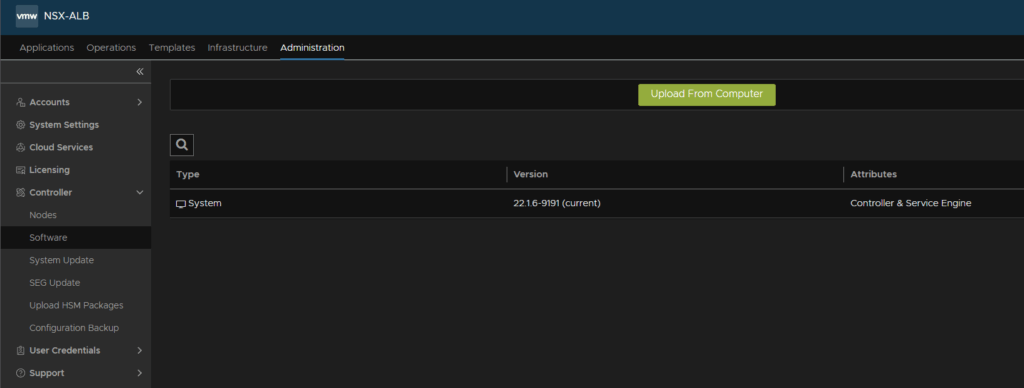
Double click the Controller package

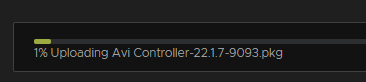
And wait for it to upload
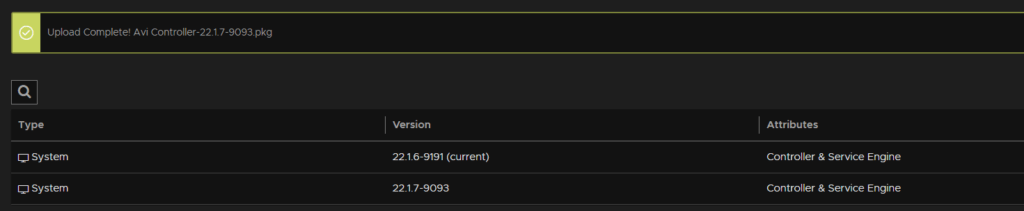
When its done it will show up below
Now head to Administration/Controller/Configuration backup and check when the last backup was, it should be within 24 hours, and we can use this
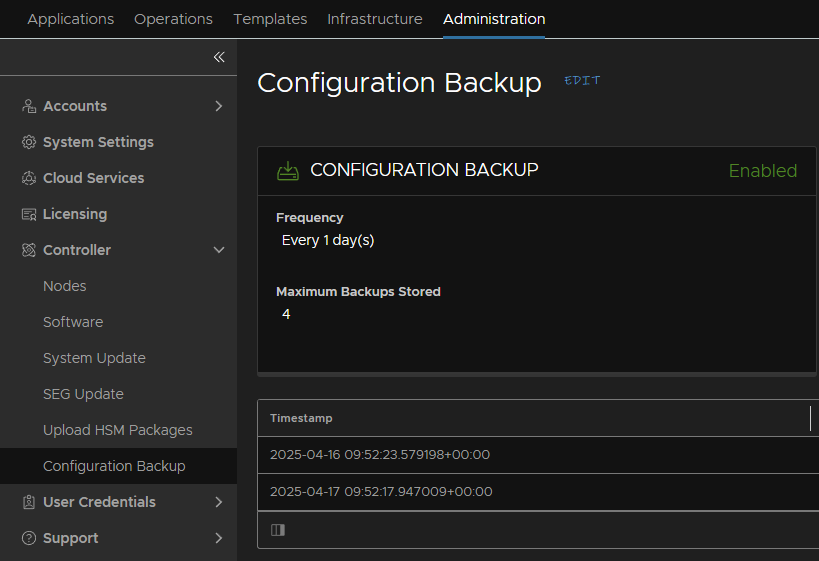
Remote backups are not supported in Avi Essentials, so we can only use the controller local backup
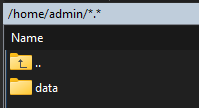
Open WinSCP and connect to the controller with the admin account
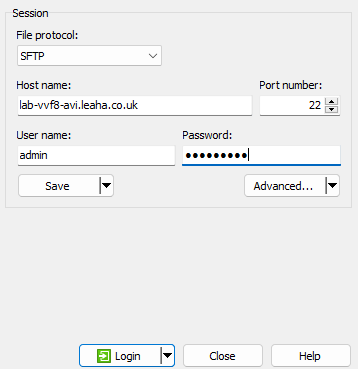
Double click the bar here, with the /home/admin path

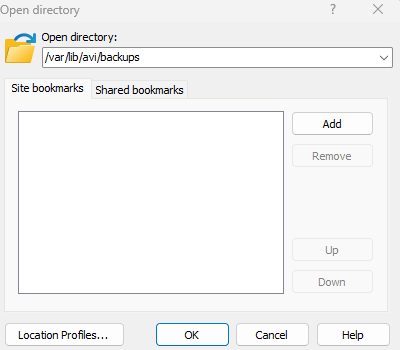
And enter the backup location
/var/lib/avi/backups
Then click ok
And copy the latest backup to your machine by dragging it to the left panel, you can also change where on your machine by double clicking the path bar and changing it
Eg, I will drag this over

Take a snapshot including system memory before proceeding
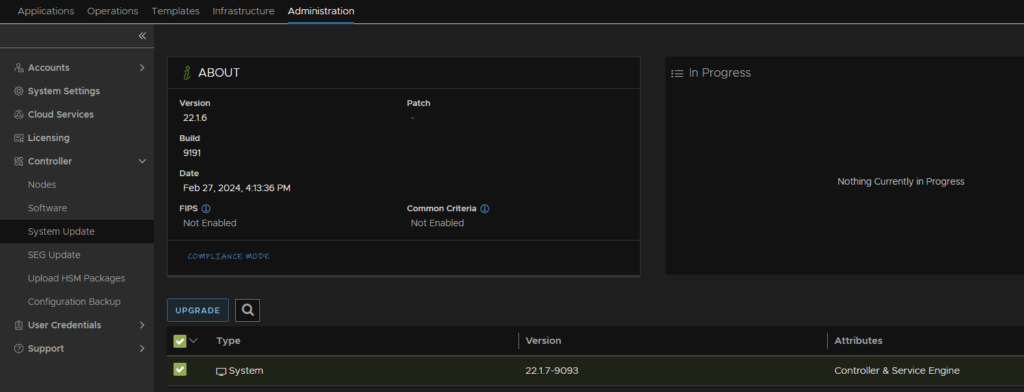
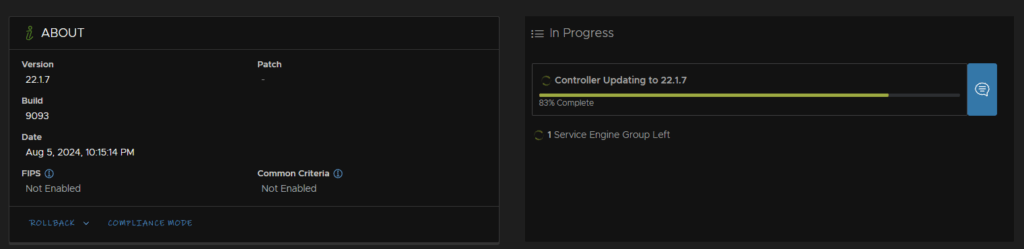
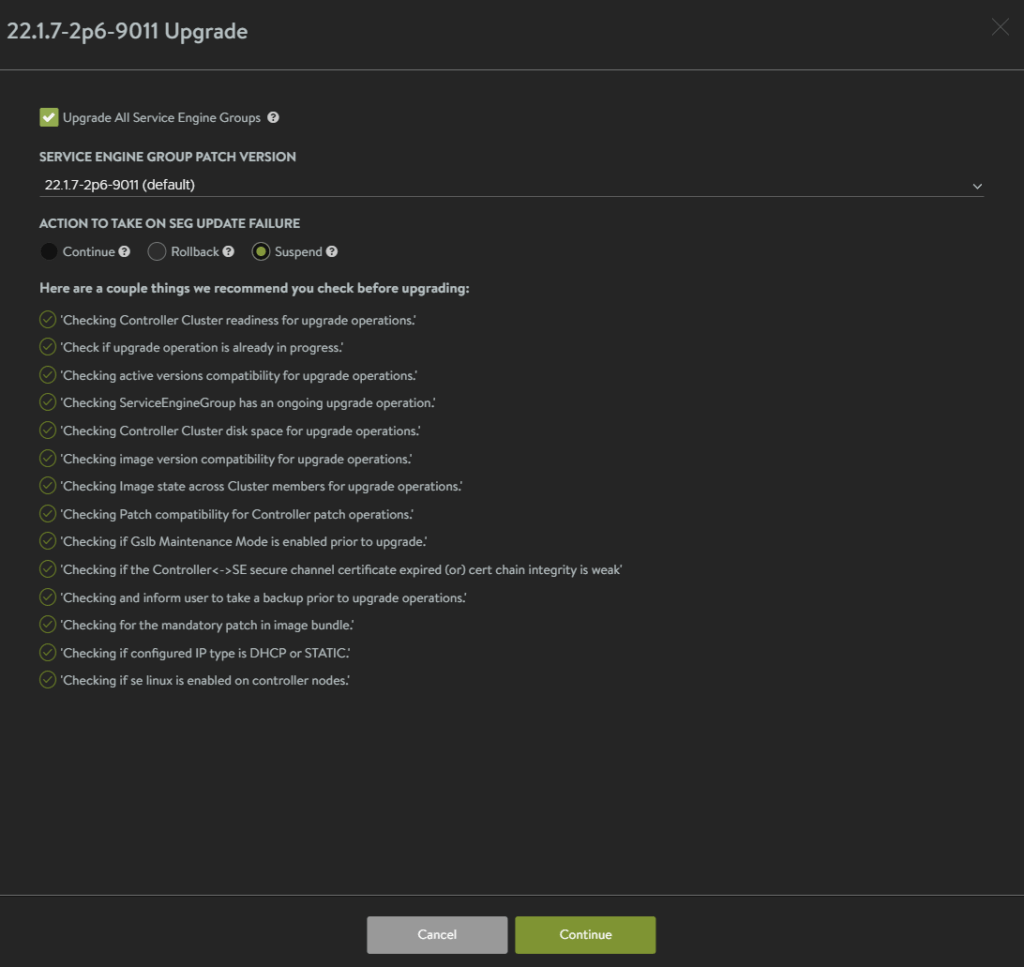
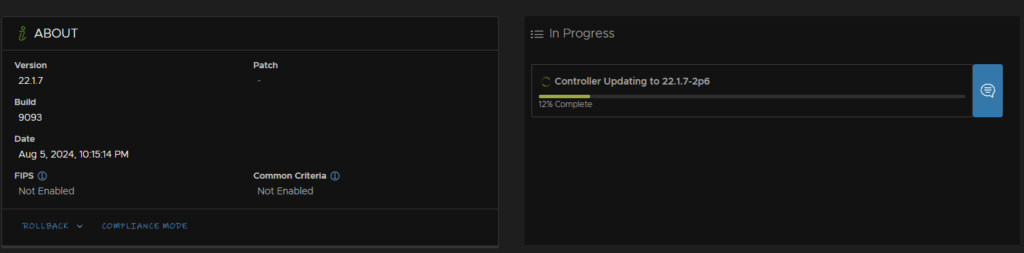
In Avi head to Administration/Controller/System Update, click the system update at the bottom and click Upgrade
Click Continue at the bottom ensuring the box to upgrade all service engine groups is enabled
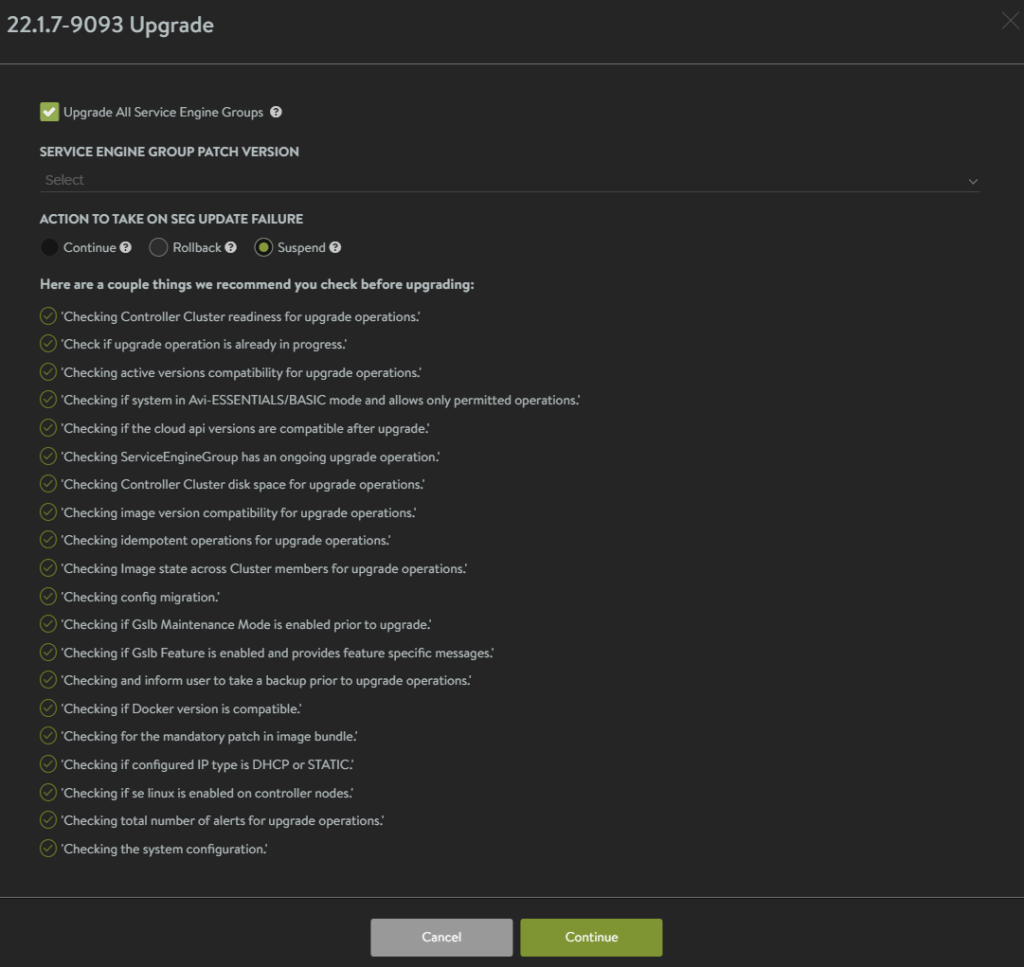
This will then run a pre check
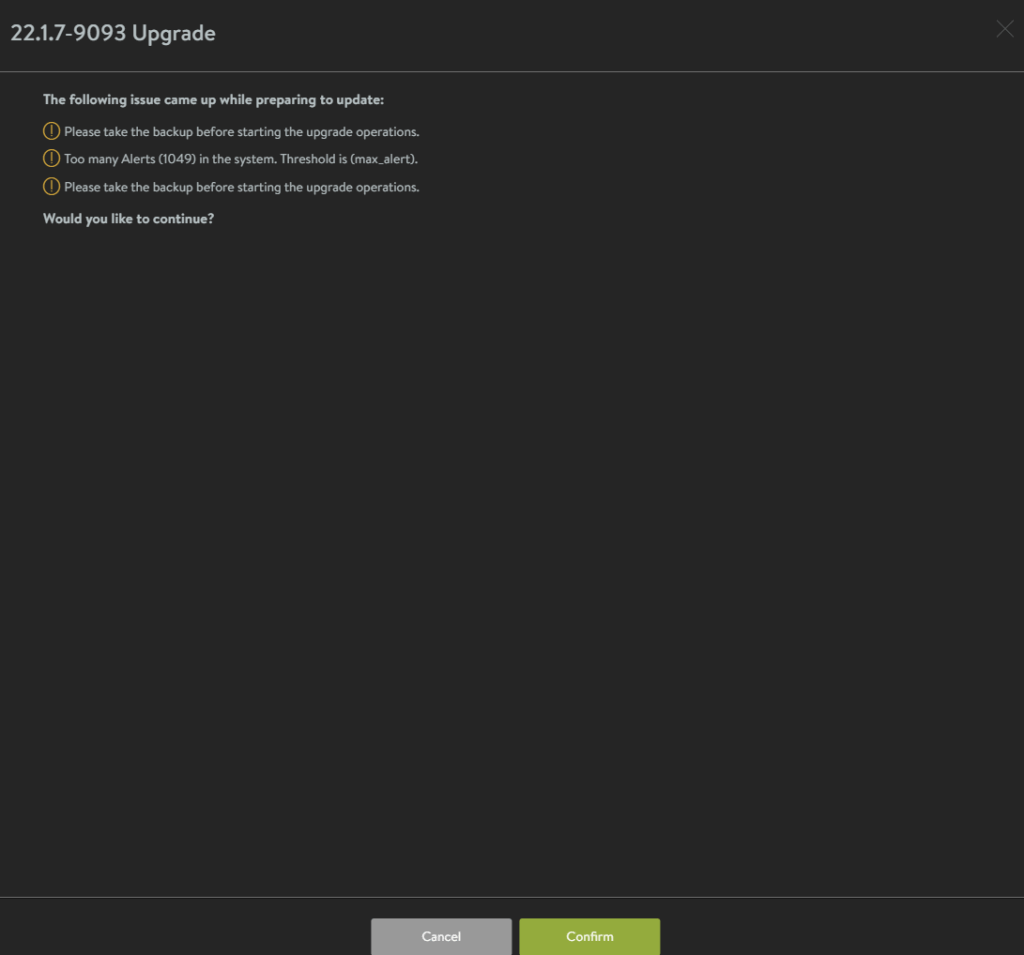
The only thing here of concern, is the large number of alerts, so lets click Cancel and have a look
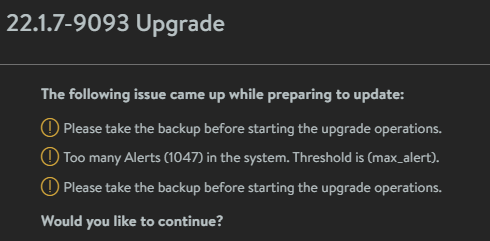
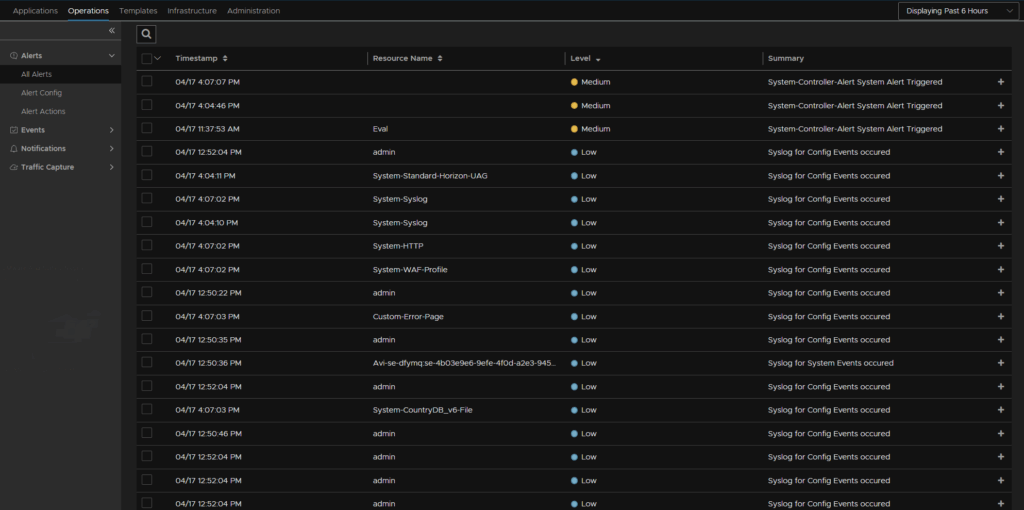
Operations/Alerts/All Alerts has nothing major when ordering by severity, so I will go back through the upgrade
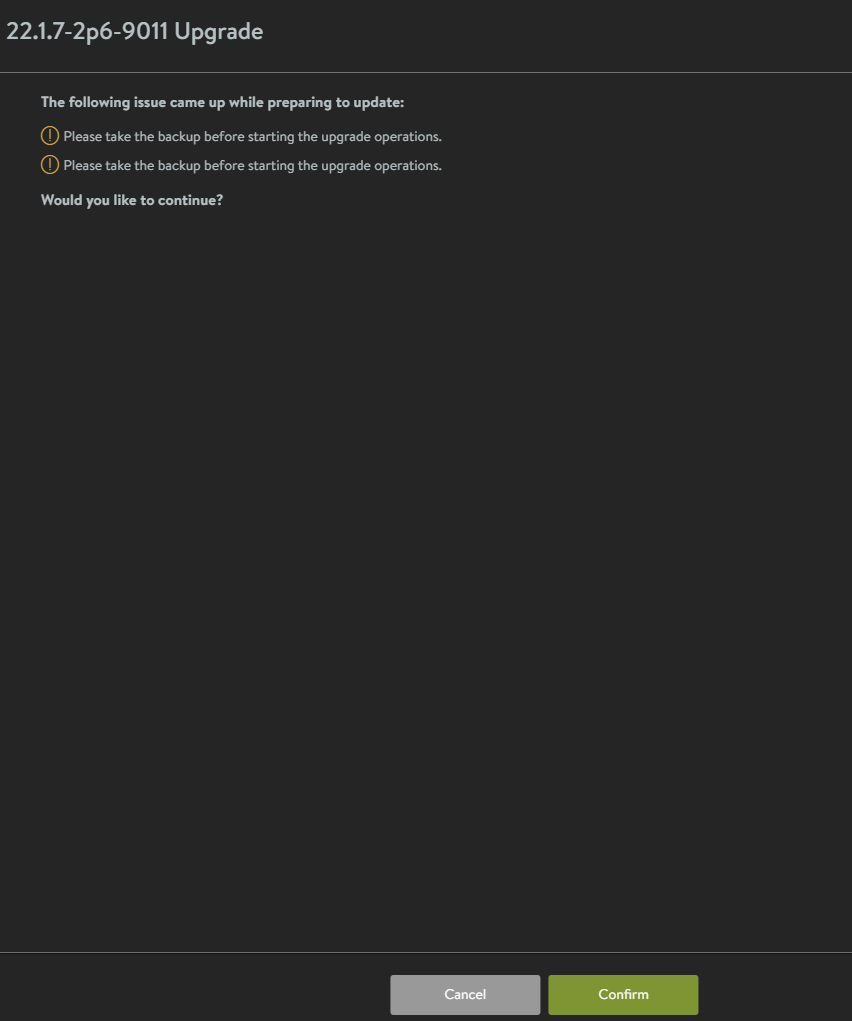
And click Confirm
It will bring us back to the upgrade menu and we can see the progress

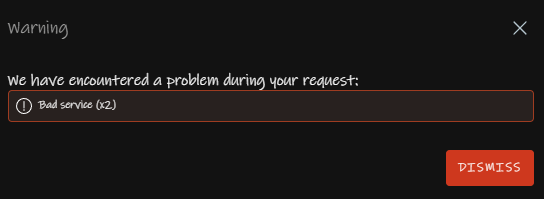
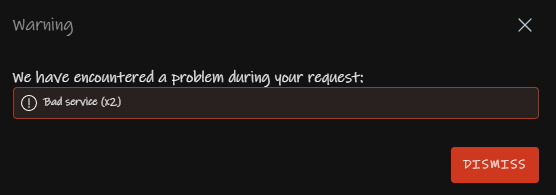
This warning will likely pop up, ignore this, as the controller is rebooting and applying updates
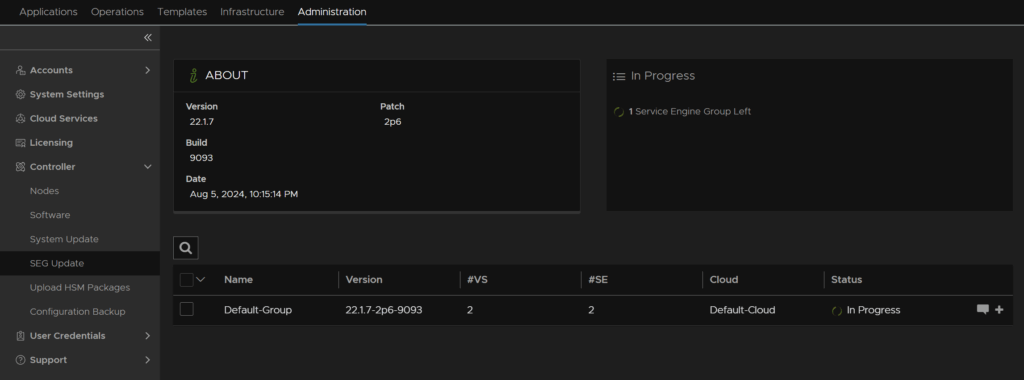
It will take 20-30 mins to come back up, when it does we can login and see the service engine group being updated
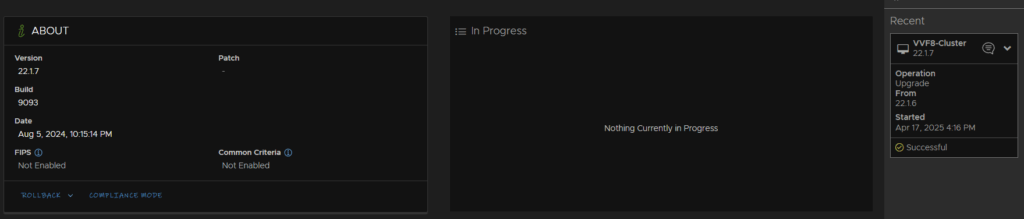
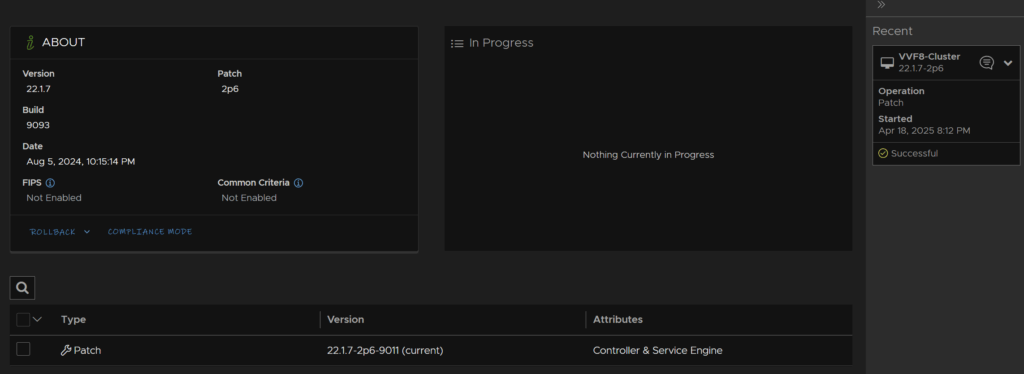
When its done we will see it in the Recent tab on the right
6.2 – Patch Updates
These updates are mean to apply patches to a release version, eg 22.1.7
You can find these under VMware Avi Load Balancer in the Broadcom Portal

Make sure you select Solutions at the top, then your release you want to patch, eg 22.1.7

Then we can select our patch, I am grabbing the latest
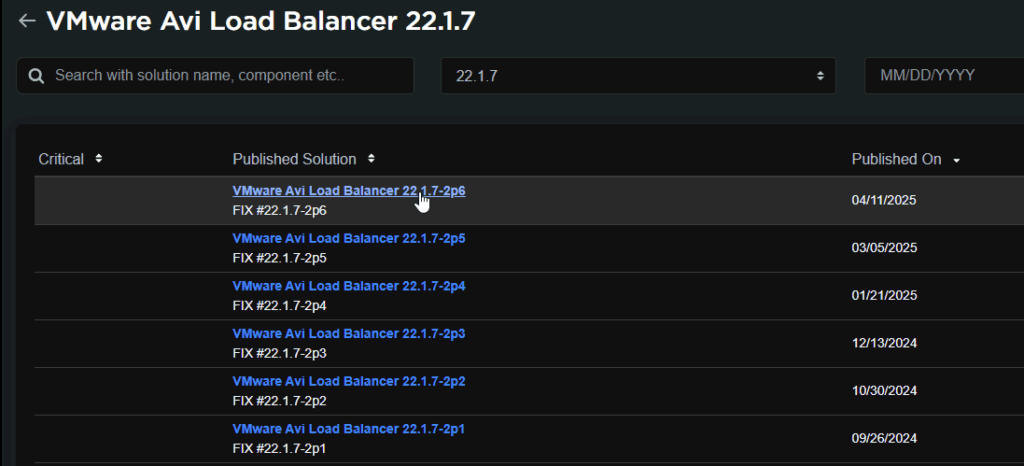
Then download the patch

Then open the WebUI and head to Administration/Controller/Software and click Upload From Computer

Double click the Controller package

And wait for it to upload
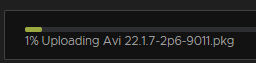
When its done it will show up below
Now head to Administration/Controller/Configuration backup and check when the last backup was, it should be within 24 hours, and we can use this

Remote backups are not supported in Avi Essentials, so we can only use the controller local backup
Open WinSCP and connect to the controller with the admin account

Double click the bar here, with the /home/admin path
And enter the backup location
/var/lib/avi/backups
Then click ok

And copy the latest backup to your machine by dragging it to the left panel, you can also change where on your machine by double clicking the path bar and changing it
Eg, I will drag this over

Take a snapshot including system memory before proceeding
Head to Administration/Controll.er/System Update, select the patch and click Upgrade

Click Continue, it will run a precheck
And click Confirm
It will then return you to the System Update screen and we can see the progress
You may see this error, this is expected as the controller is rebooted during the upgrade
When the UI comes back up we can see the progress
And after ~30 mins total, the update should be done, and we can see this on the right
7 – Firmware
7.1 – Preparation
First, take a backup of ESXi, if the host is an ESXi host on the off chance something goes wrong, we’ll need SSH enabling for this
Select the host and head to Configure/System/Services, click SSH and then click Start, we can leave it enabled as when the host is rebooted, it will stay disabled on reboot
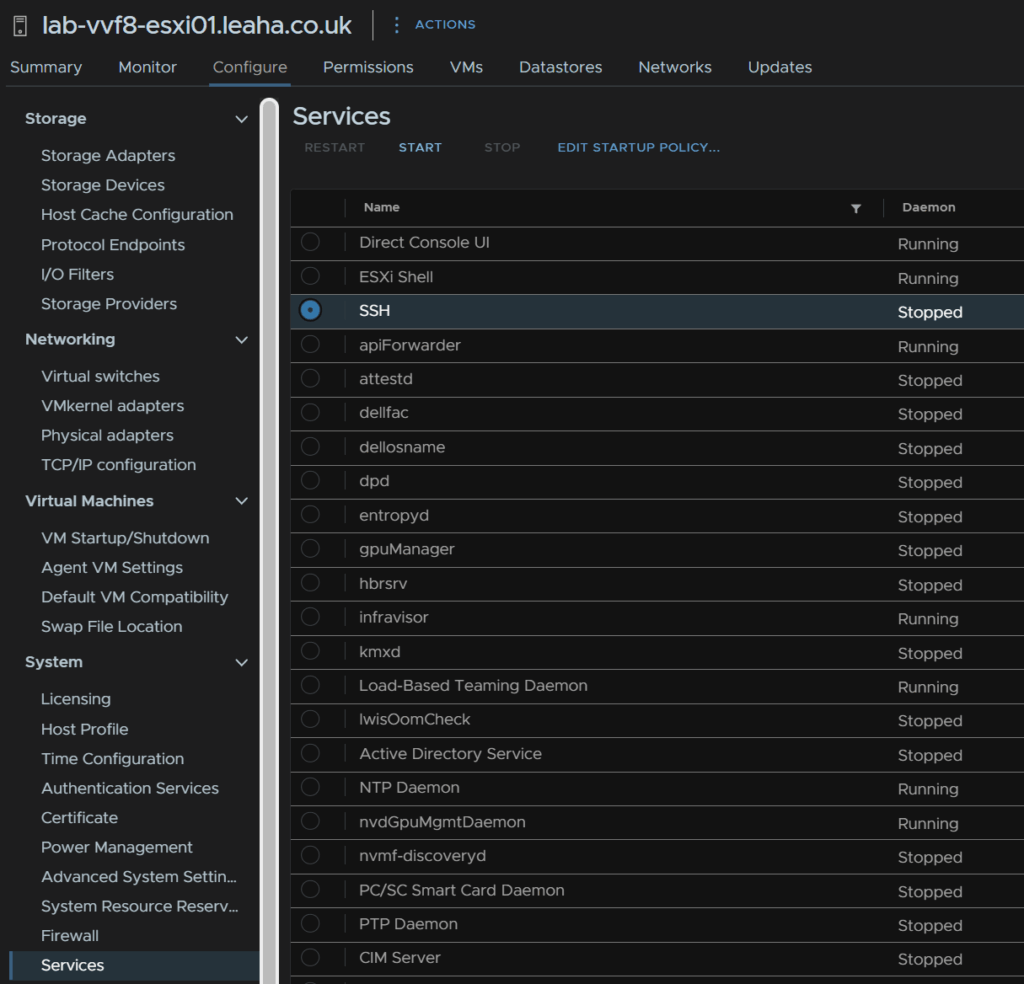
SSH into the host and run
vim-cmd hostsvc/firmware/sync_config
vim-cmd hostsvc/firmware/backup_config
This will give an out put of a URL like this

Take the link and edit the ‘*’ for the hostname/IP
So my URL would be
http://lab-vvf8-esxi01/downloads/52d067b1-1d69-2bd2-318b-b90ca6f0a521/configBundle-Lab-VVF8-ESXi01.leaha.co.uk.tgz
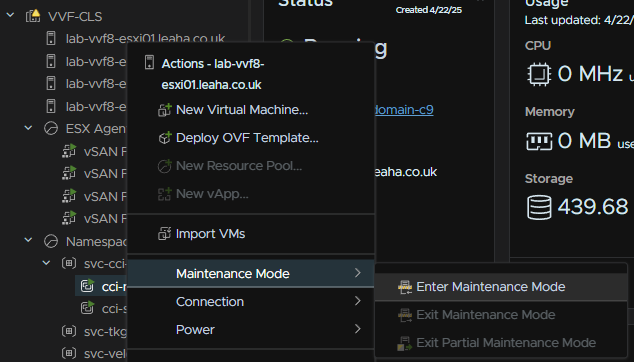
If you have an DRS rules that prevent hosts from being put into maintenance, then you may need to disable them
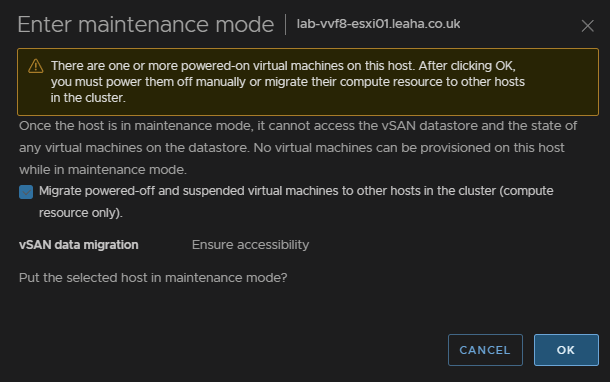
Then place the host thats having the firmware update in maintenance mode to do this right click the host and click Maintenance Mode/Enter Maintenance Mode
For vSAN click Go To Pre Check, this wont be available on a cluster with out vSAN
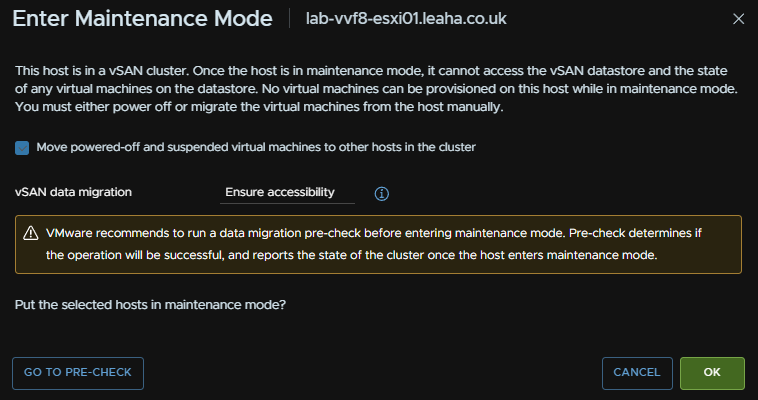
Then click Pre Check
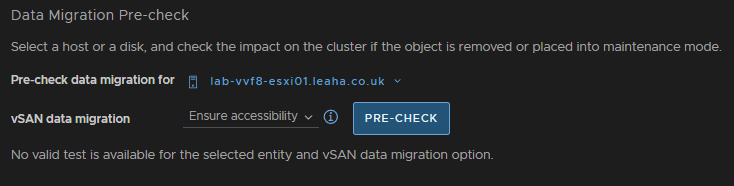
Ensure the check says the host can enter maintenance mode, there may be errors, but thats fine, then click Enter Maintenance Mode
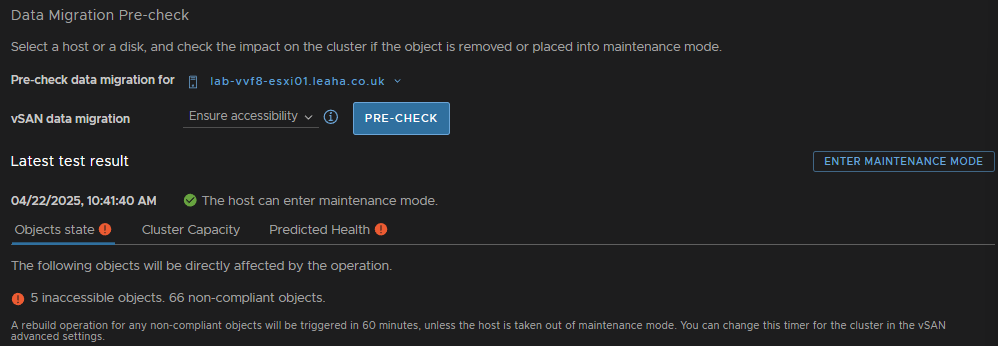
Ensure the box to migrate powered off and suspended VMs is checked and click ok
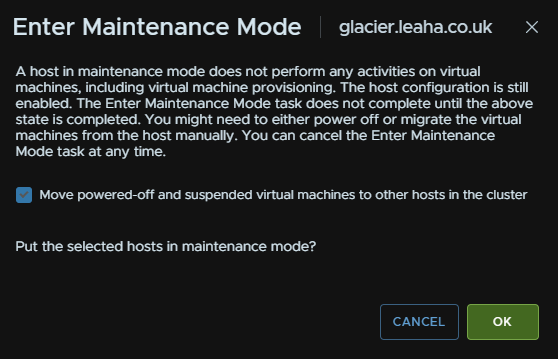
For Non vSAN it will just look like this, also ensure the box is checked and click ok
If you have Veeam replication jobs running to DR, this shouldnt cause any issues we powered off VMs are also moved, but you can always wait for running jobs to finish and disable them while patching
7.2 – Dell
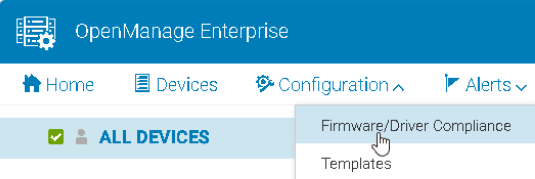
In OpenManage go to Configuration/Firmware/Driver Compliance
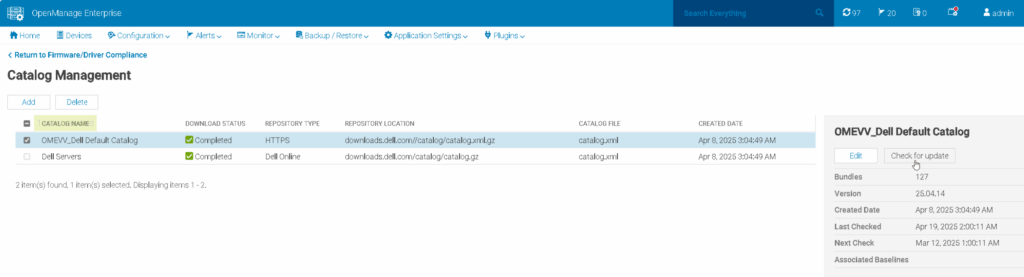
Click Catalog Management
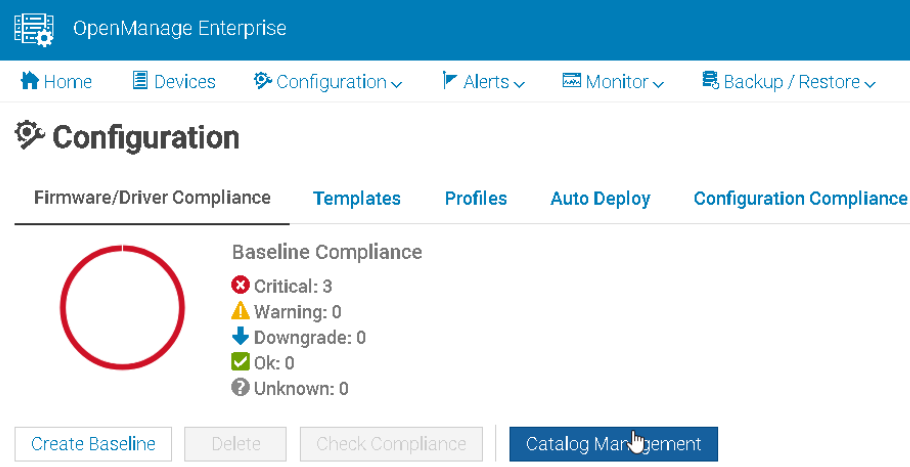
Select your catalog and Check For Update
Ensure any host being updated is in maintenance mode with no active VMs running as reboots are needed for most firmware updates from section 7.1
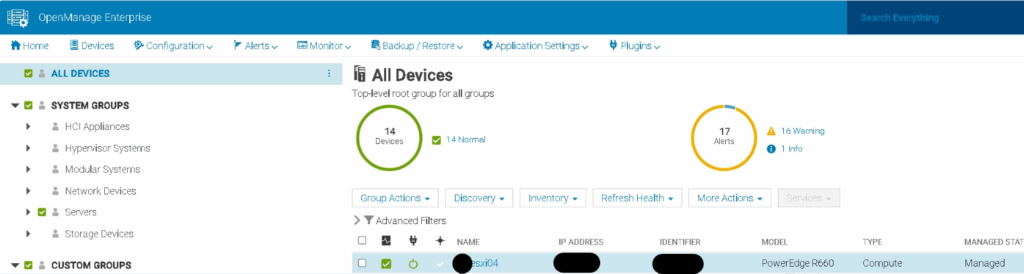
Go to Devices
Find your host in the list and click it, the IPs are for the iDRAC not the host
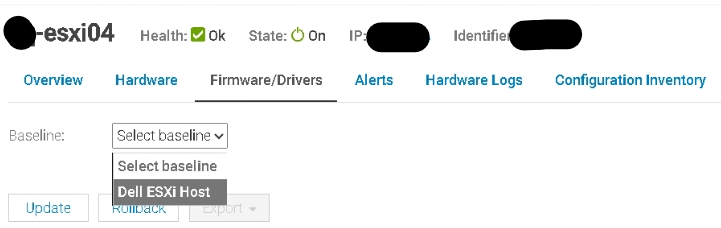
Going into Firmware/Drivers we can select the base line for this host using the drop down, ESXi01 and see whats available
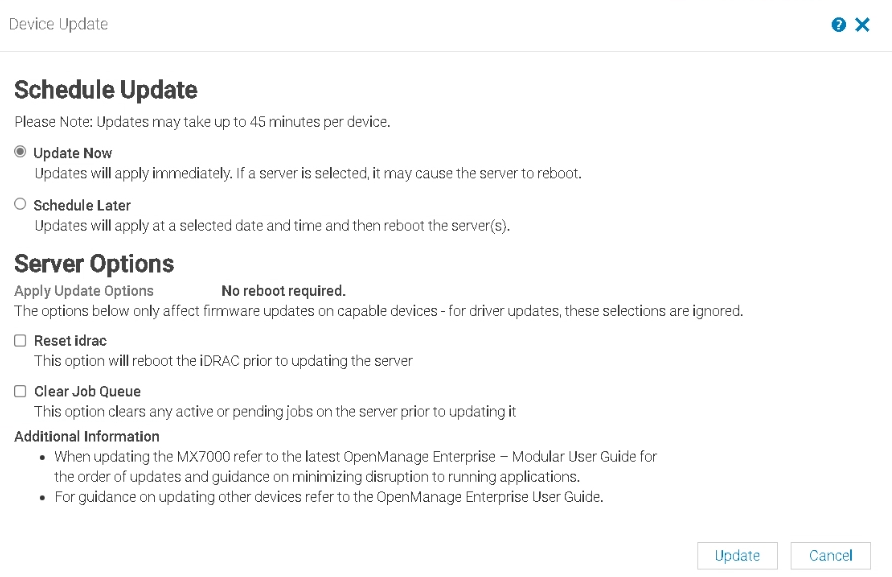
Fist, we want to do the iDRAC, so make sure only that is selected and click update like this
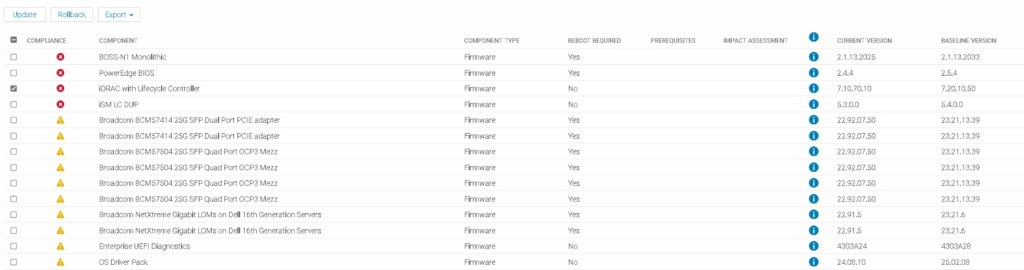
Then click Update
You can check running jobs from this icon in the right of OpenManage

This can take 15-20 mins to update, when its done
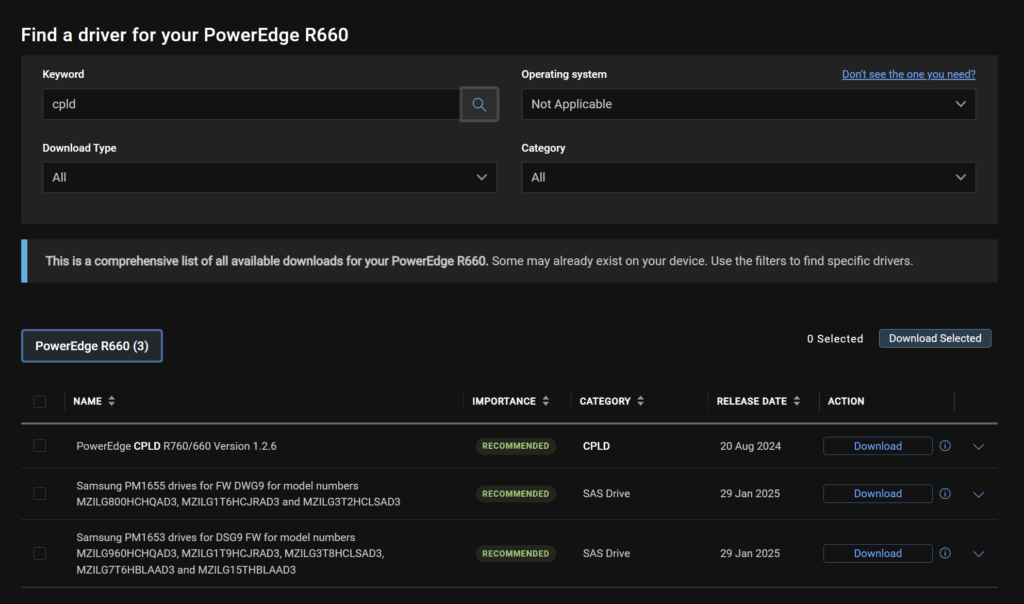
Then we want to check the CPLD version, OpenManage will not pick up any updates for this, but it will list the version at the bottom

Here we can see my R660 has CPLD 1.2.6
To check the active version Google ‘Dell <Server-Name> Drivers’ and you should see the support page as the first link
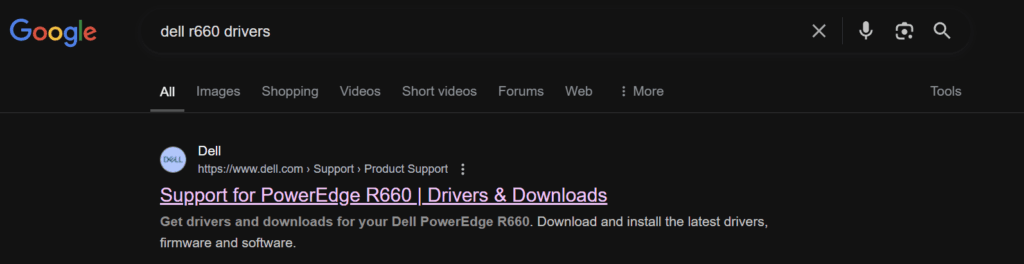
Change the OS to Not Applicable, and search for ‘CPLD’, here we can se the latest is 1.2.6, so we dont have one to do
However, if you did have a newer version, you need to log into the iDRAC
This is under Maintenance/System Update, you can upload the CPLD file here by clicking Choose File

Then click Upload

Select the package and click Install And Reboot

In OME, we repeat for the BIOS and click Update
This will reboot the host

Then select the rest and click Update
7.3 – HPE
Ensure any host being updated is in maintenance mode with no active VMs running as reboots are needed for most firmware updates from section 7.1
We then need the HPE SPP, we can find this here
We can also search for the server generation and click the link to it
Eg
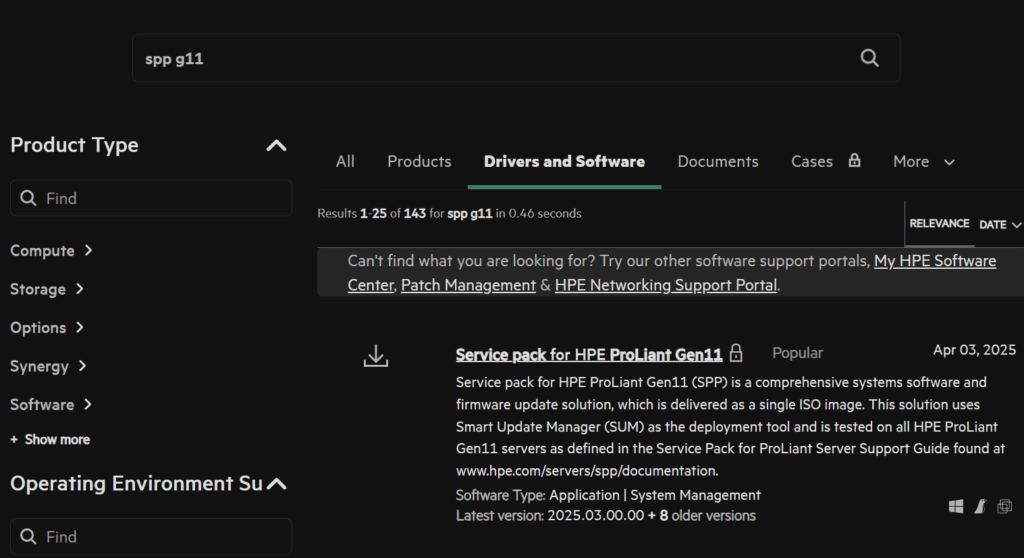
Click Obtain Software
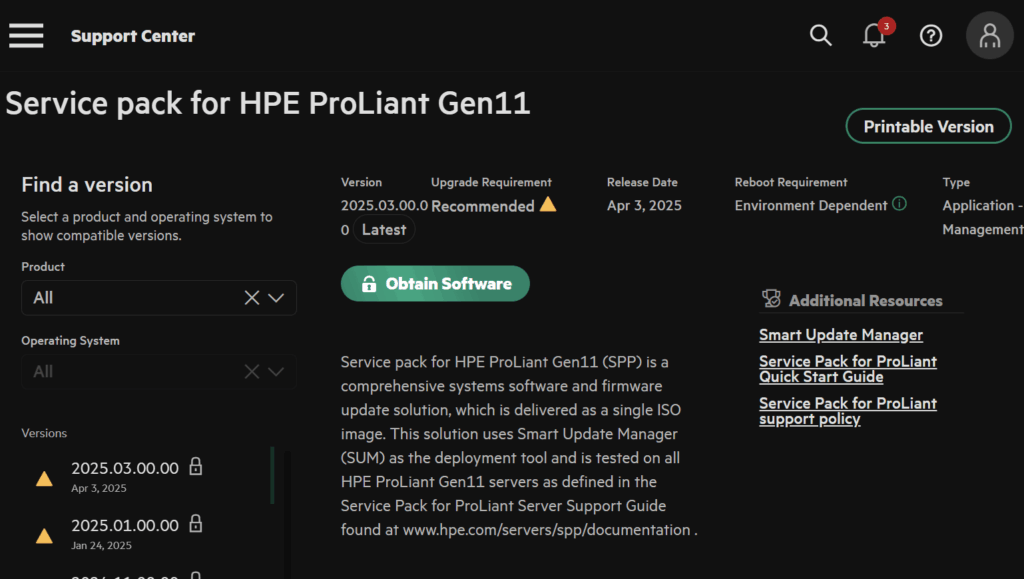
And sign in with your HPE account

Open the web console in iLO, click the CD icon then CD/DVD/Local *.iso File
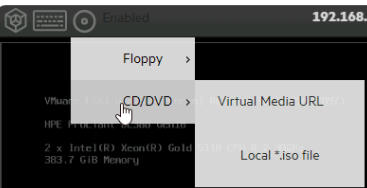
And double click the ISO file
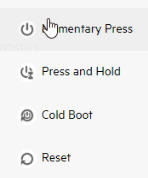
Reboot the host OS, momentary press will do this from the left mot icon in the web console, or you can reboot the server from the guest OS
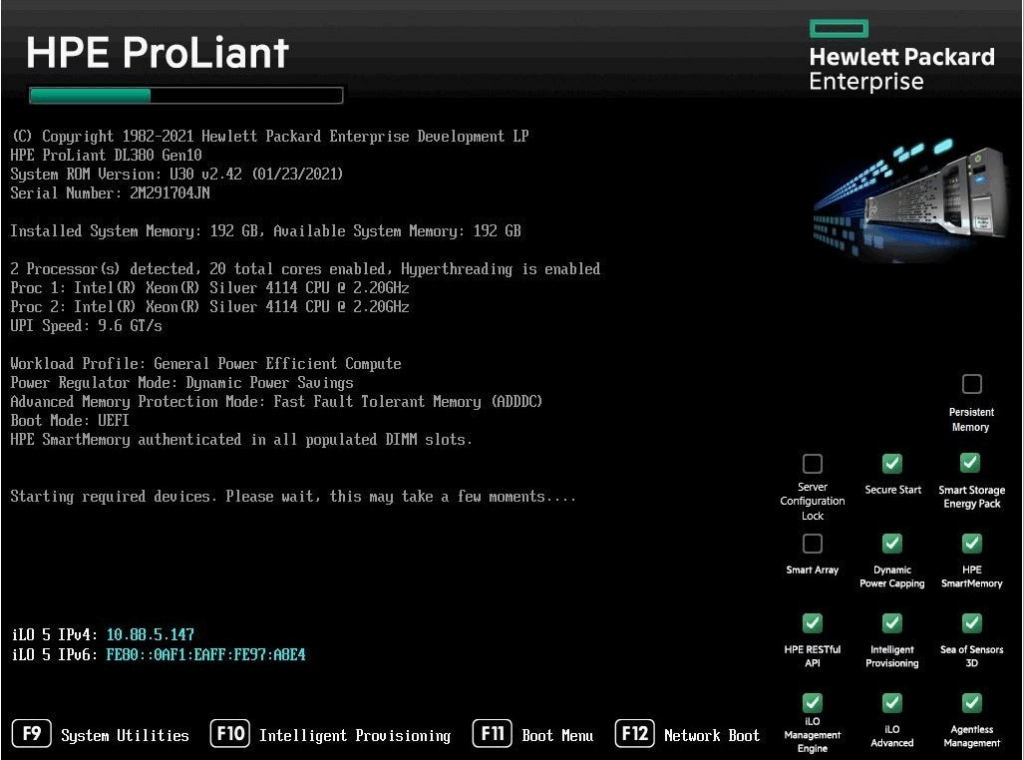
Press F11 here to enter the one time boot menu
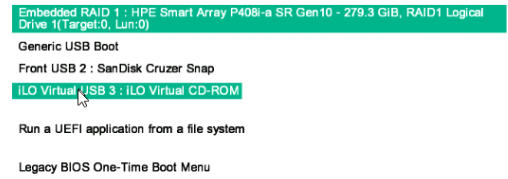
Select the iLO virtual Media
Then automatic updates

This can often take ~90 mins to complete and do not interrupt the server, when its done, your host OS will be booted
8 – ESXi
8.1 – Converting To Cluster Images
In my lab, I am doing this on a new build, so all hosts are in maintenance mode, this isnt required to create the image
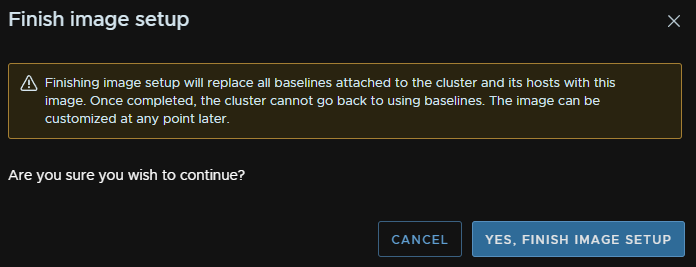
This is also a one way process, you cannot convert the host back to baselines after
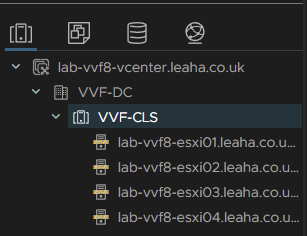
Click the Cluster
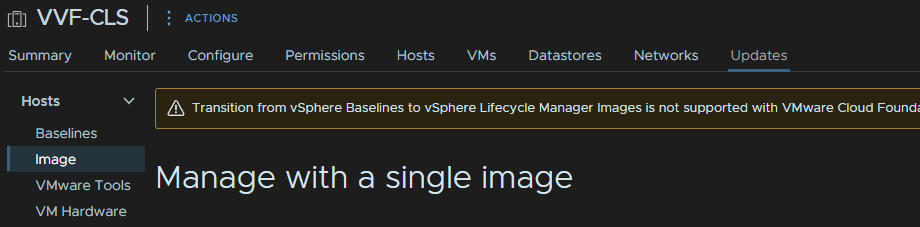
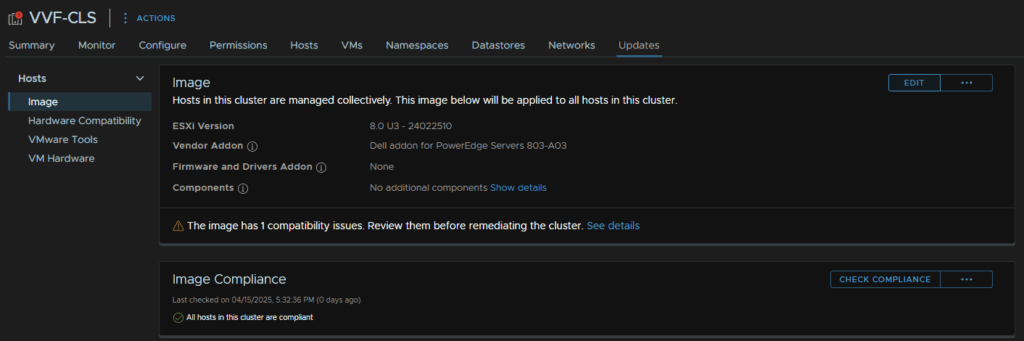
Click Updates/Hosts/Image
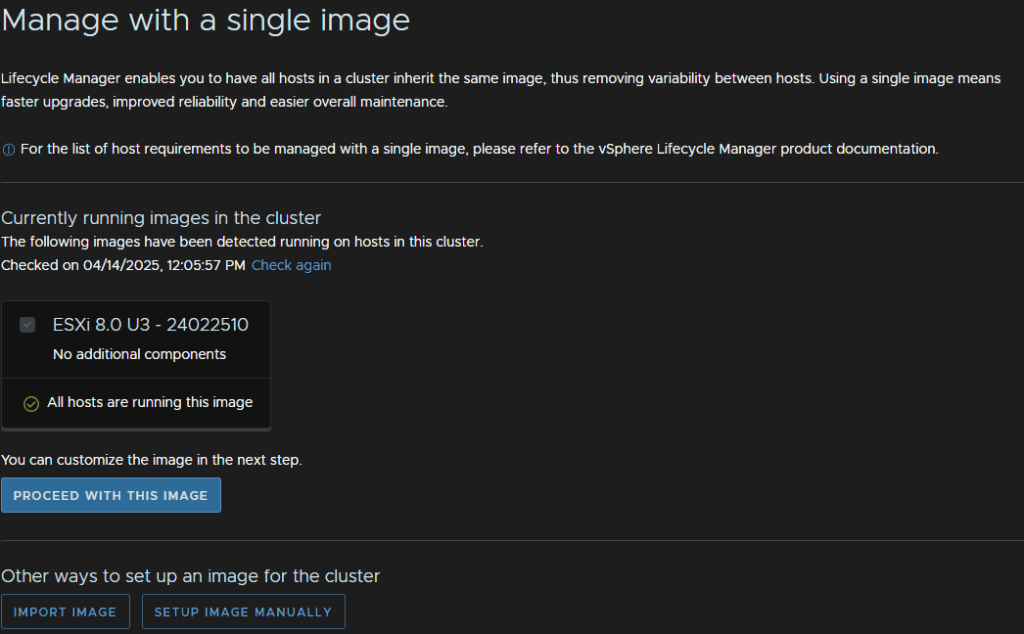
We will then click Proceed with This Image
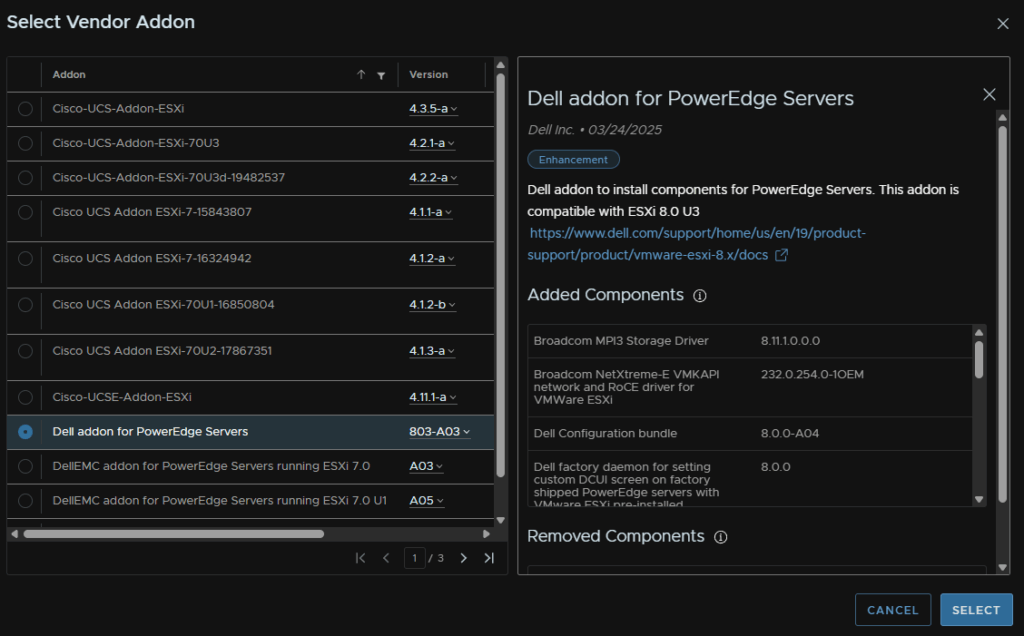
We can then click Select on Vendor Addon
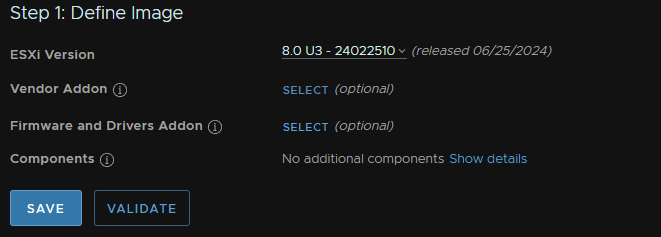
And select the addon for your Vendor and click Select
As I have Dell servers, thats what I selected
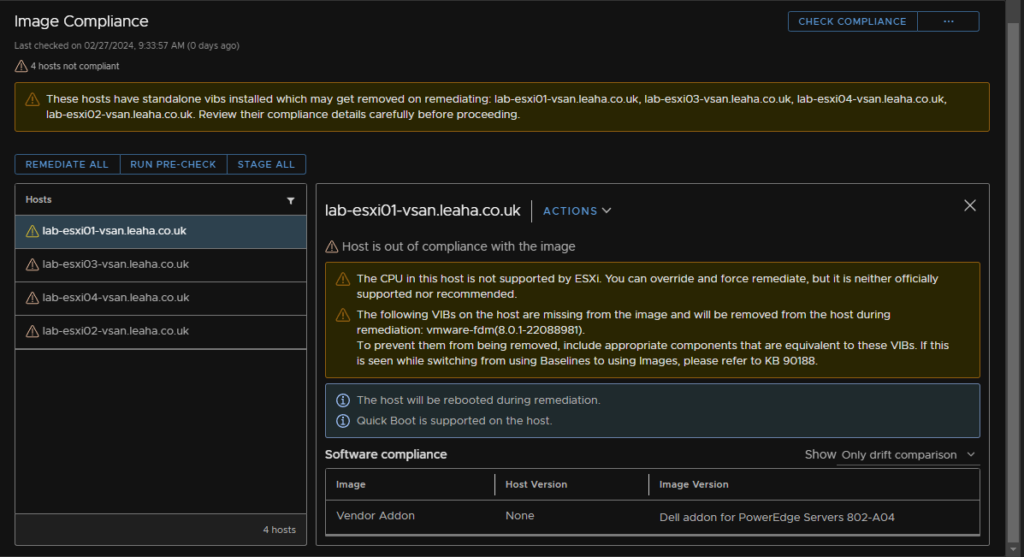
We can leave firmware and drivers blank, as my hosts dont have anything special, but its important to note, if you have extra VIBs, like Nvidia GPU drivers, they will need to be added as if they arent, remediating the image will remove those VIBs, it will not auoptmatically remediate
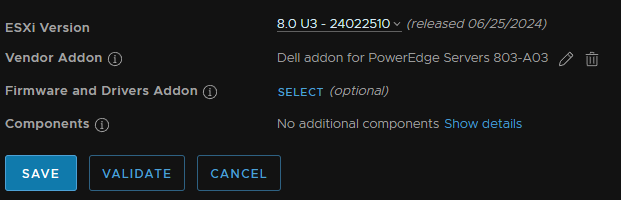
Click Validate
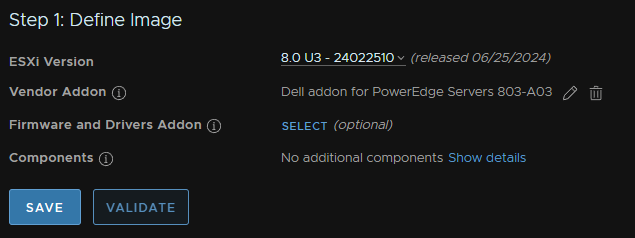
If its Valid, click Save
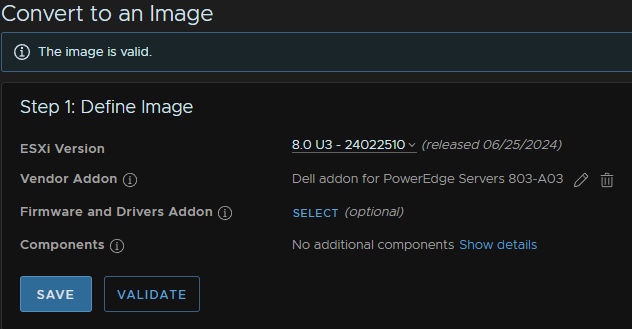
The cluster compliance will then be checked
It will warn you about missing VIBs, this example from an older lab shows the vmware-fdm driver is missing, now this is just the vSphere HA VIB and can be ignored, but if you have custom VIBs it will tell you
And then click Finish Image Setup

And click Finish again
8.2 – Adding Custom Vibs To Images
Download the .zip folder of the Vib you want to add
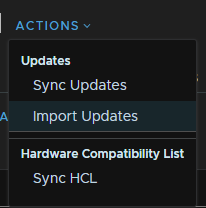
Go to the Lifecycle Manager

From there you can import an update
You want the .zip folder which has the vib in it
For the Nvidia grid drivers for ESXi, this is NOT the whole .zip from Nvidia’s website, this is just the ESXi .zip folders
This is in Host Drivers

And is then both of these .zip files

Click Browse
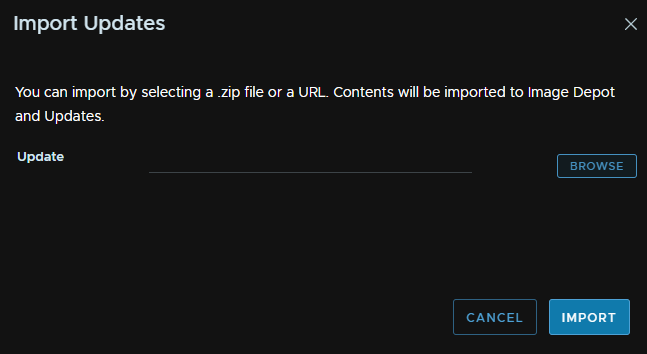
Then select the Zip file, we will need to repeat for the other, as you can only do one at a time

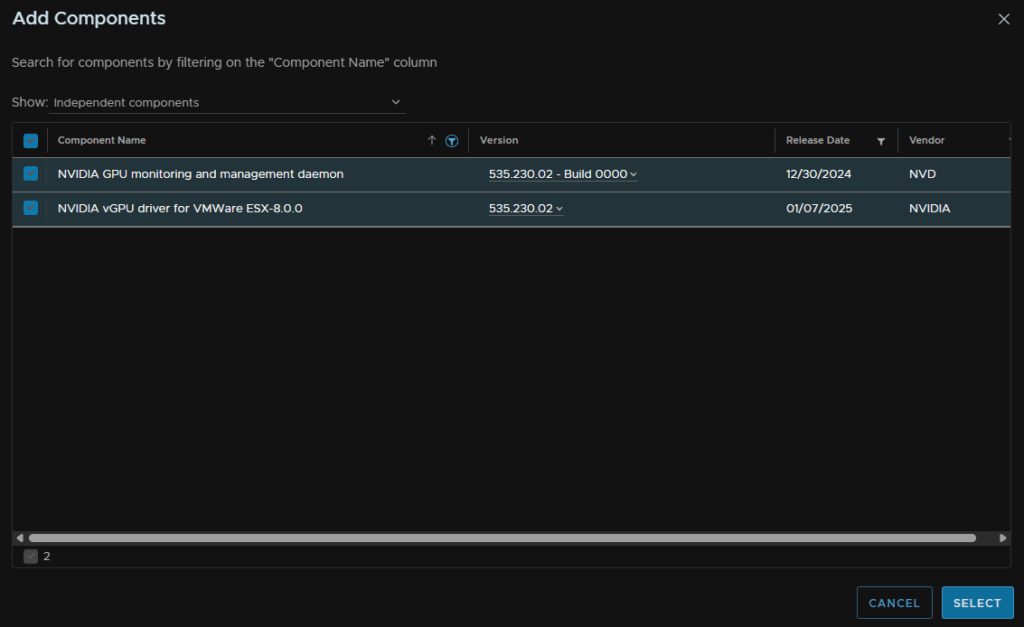
We will then see these show at the bottom, I also filtered for Nvidia
Once that’s been added you can add the component to the image by clicking the cluster, the Updates/Hosts/Images and clicking Edit
Click Show Details on Components
Click Add Components
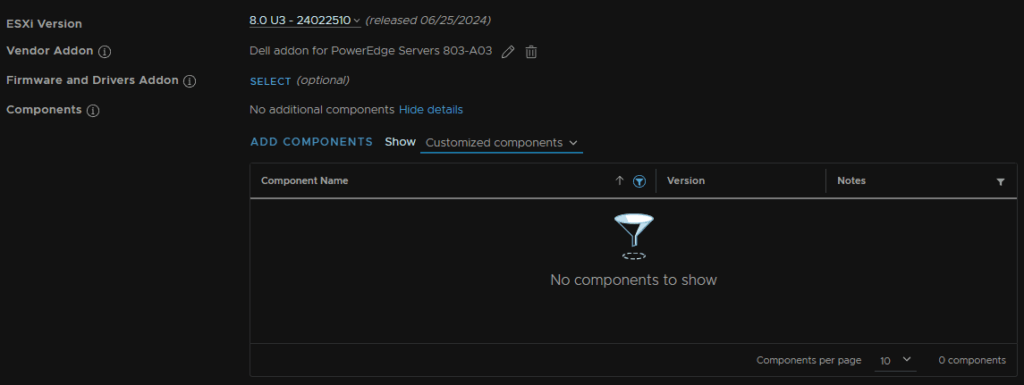
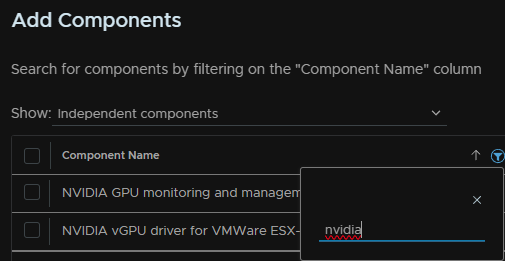
Click the funnel on Component Name and type ‘Nvidia’ to search for it
Select the vibs we added, in my case the Nvidia drivers and click Select
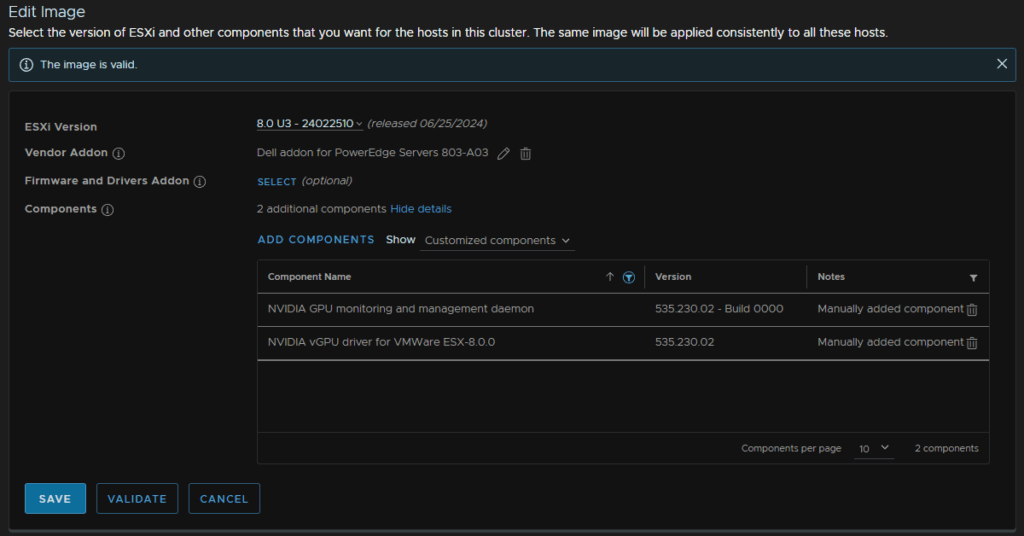
Then click Validate
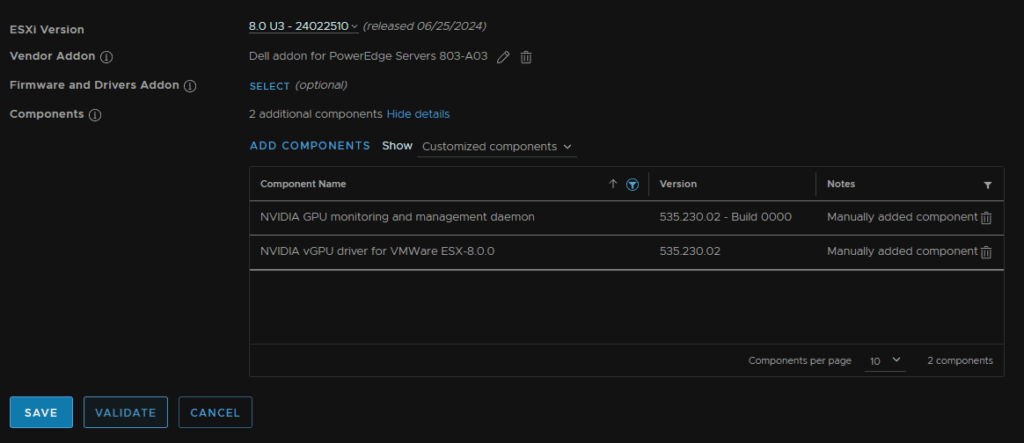
If the image is then valid, click Save
8.3 – Patching With The Image
Before proceeding, if you are just patching ESXi and not the host firmware, you wont have a config back, ensure you take one from section 7.1 first, if you have one from the firmware you dont need to take another
Hosts do not need to be in maintenance mode, have all hosts active, remediating the image takes care of all this automatically
To update with the image, click the cluster, then click Updates/Hosts/Images and click Edit on the right

Select the ESXi Version drop down and select the latest release
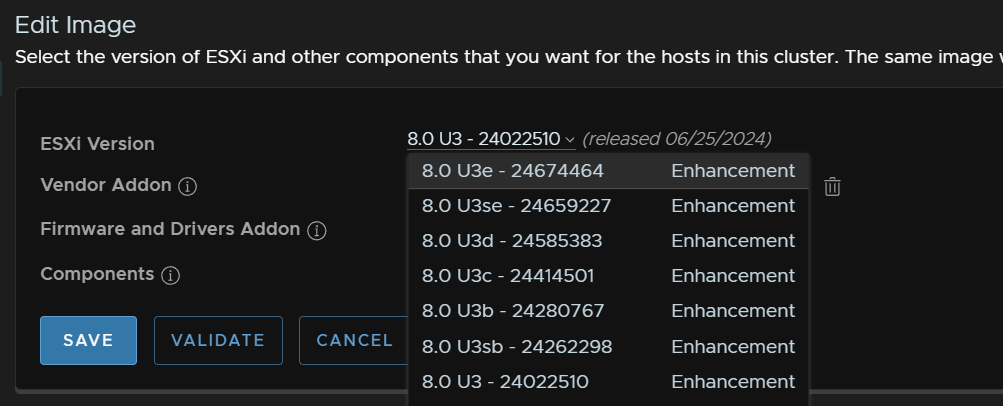
Click Validate
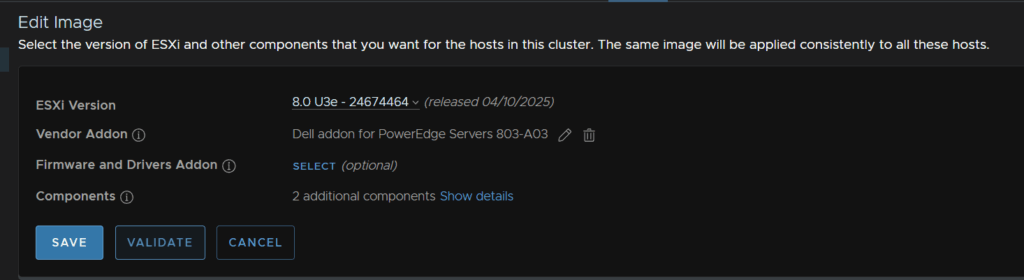
When the image is valid, click Save
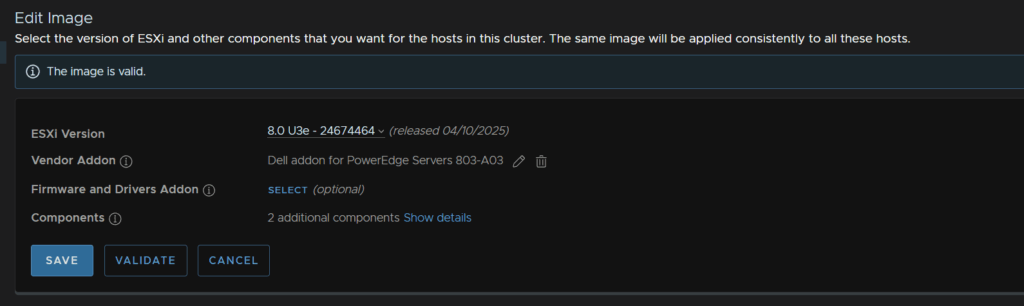
It will will run a HCL and compliance report, HCL is mainly for vSAN ESA
Your image shouldnt have compatibility issues, mine is due to my disks not being certified
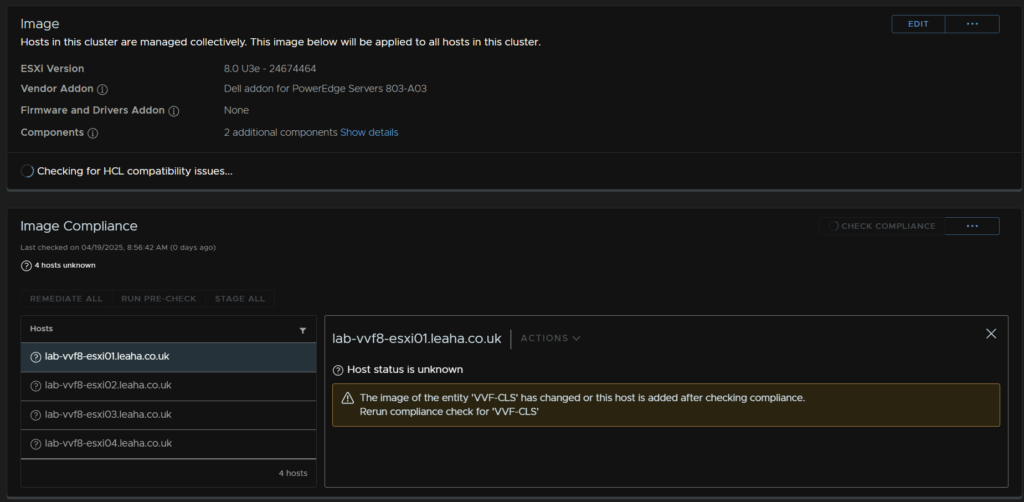
On the lower right, you will see the host vs image version for whats going to be installed, I have the 8U3e update, Dell addons and the Nvidia drivers I added earlier
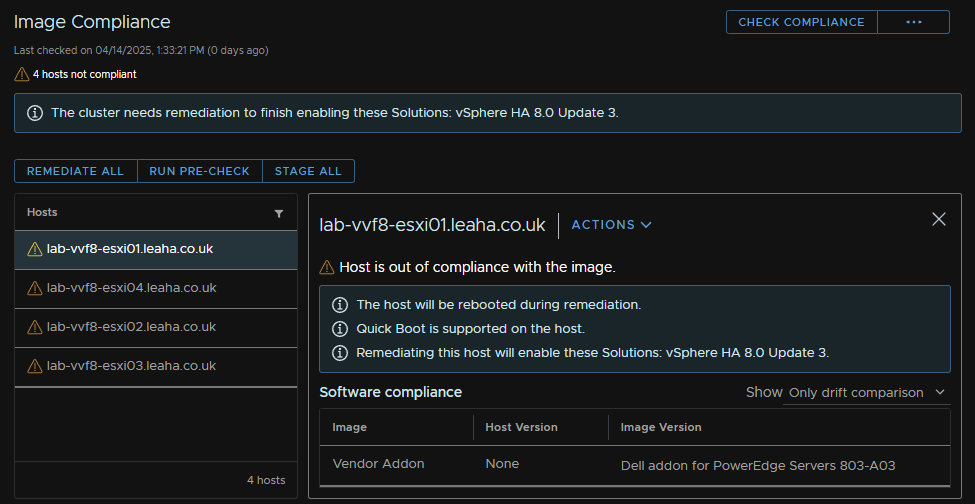
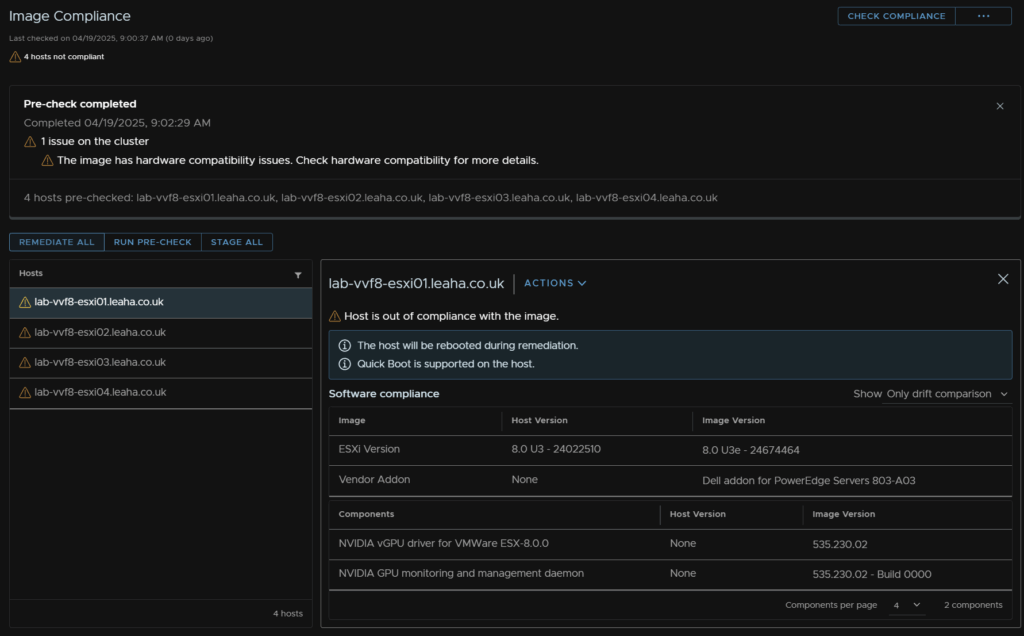
Click Run Pre Check
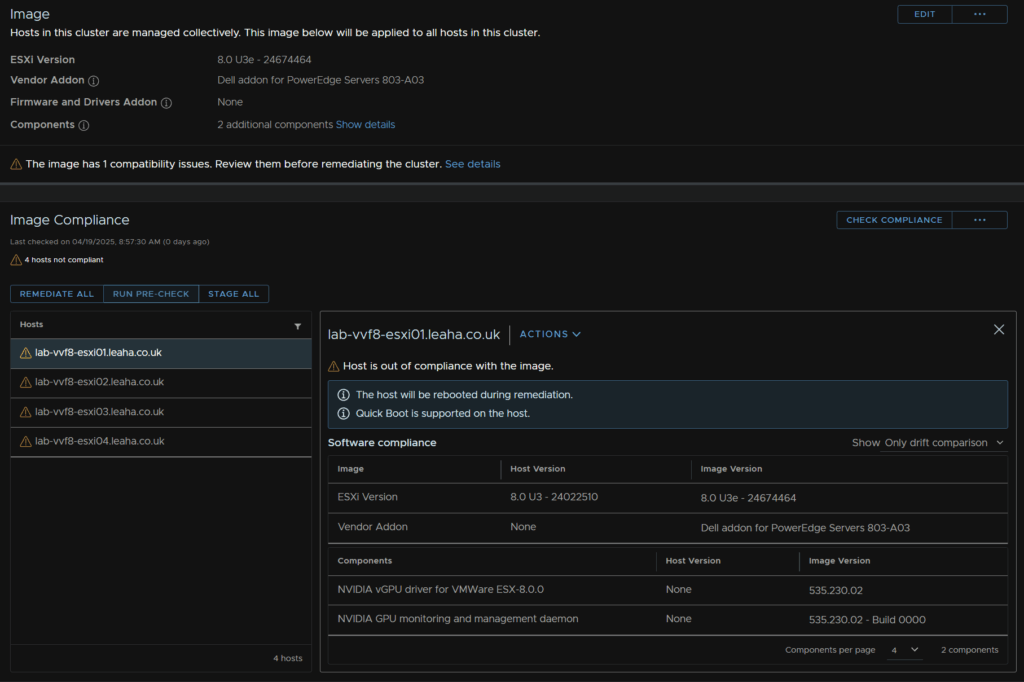
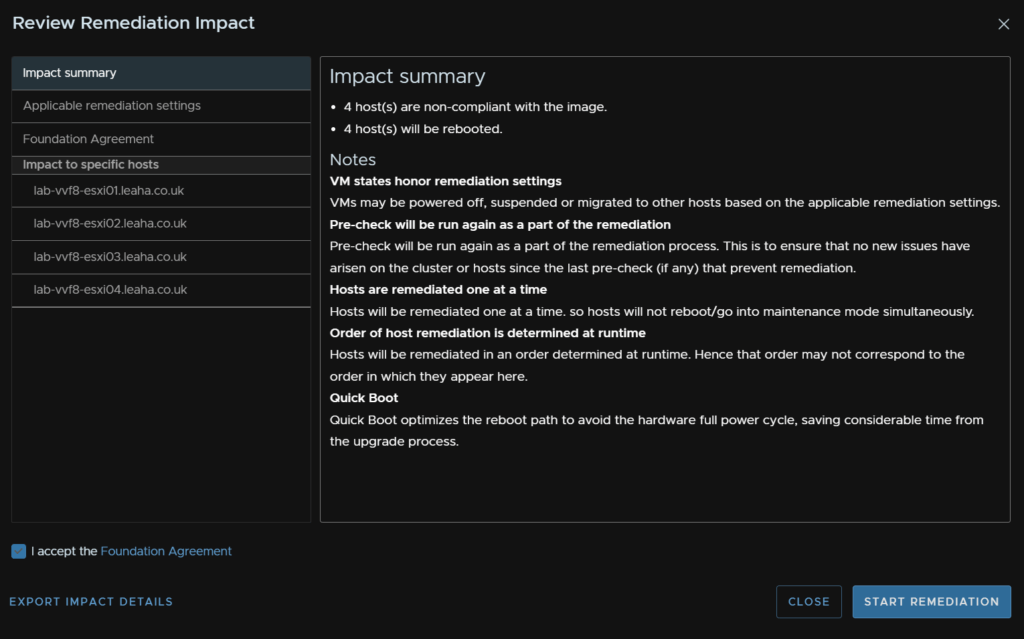
This should show as having run ok, my 1 issue is from my disks not being certified, this wouldnt be an issue in a production environment, click Remediate All
And click Start Remediation
This will place each host into maintenance mode and update the cost in a non disruptive way
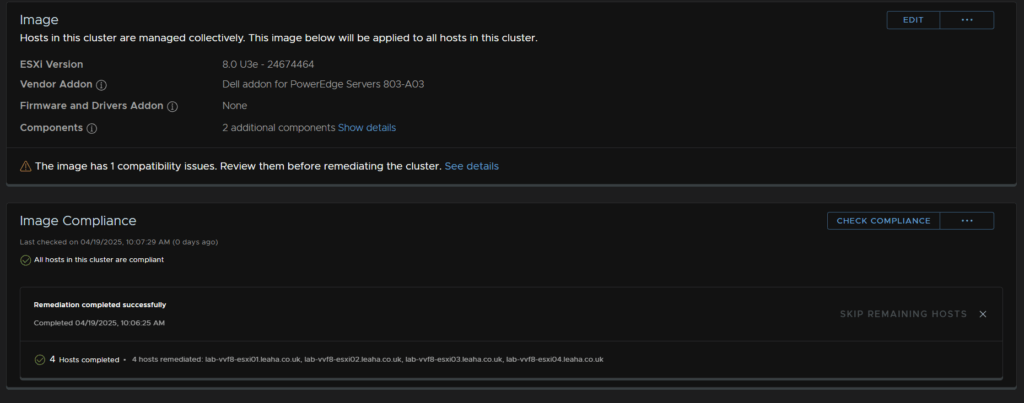
When its done all hosts will show as compatible
9 – vSAN
9.1 – File Services
To update the vSAN FS click the cluster and head to Configure/vSAN/Service, and click Edit/Check Upgrade on the File Services widget
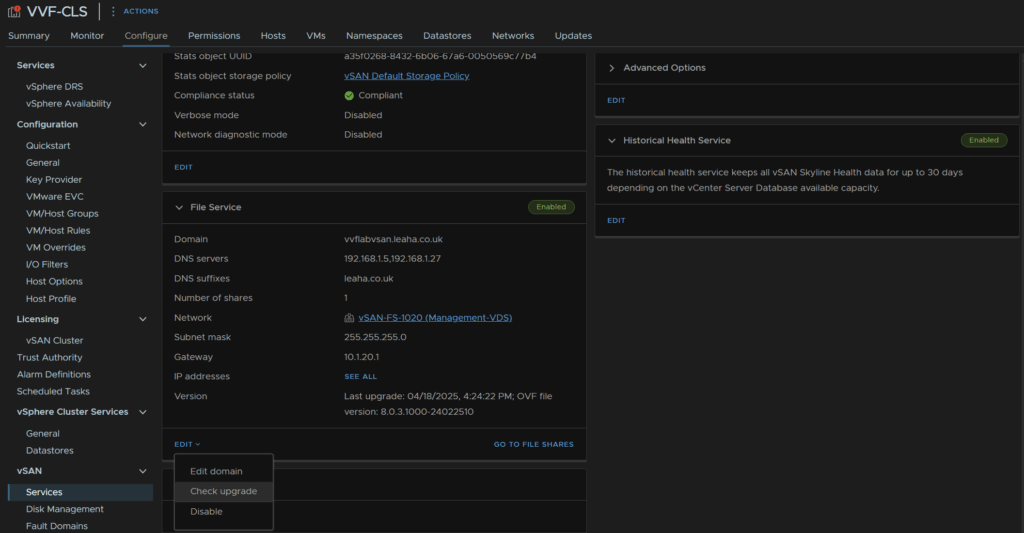
We can then see this has picked up a new update, looking at the build in the ovf url, 24674464 is newer than our current one, which is 24022510
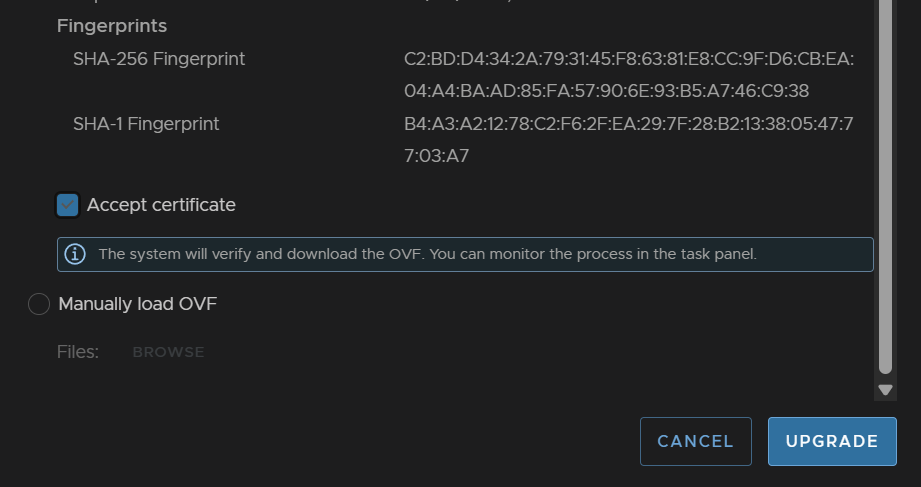
Scroll down and accept the SSL certificate and click Upgrade
We can see it grabbing the OVF
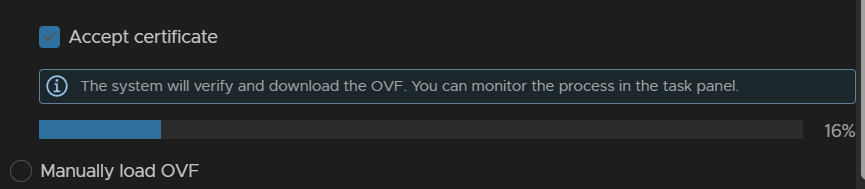
And when its downloaded that, all file services will be upgraded
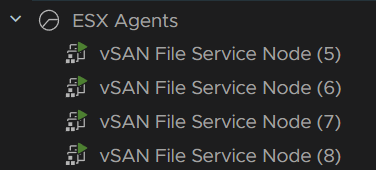
The file servers will be done serially and active shared migrated to another file server, you may notice people get kicked out of their share momentarily, but it should be non disruptive
Eg, a new node is deployed
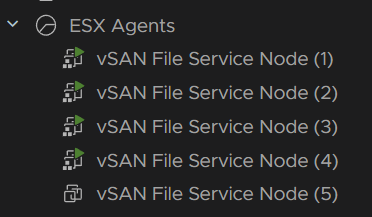
Then the remaining three are clones from the first
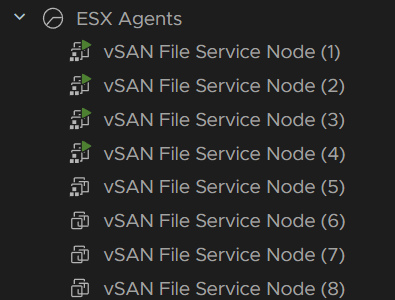
And when its done just the new VMs are left and the task is finished