This content has been archived. It may no longer be relevant
Please see the article replacing it here
This guide will walk you through patching the core components of vSphere in a simplified setup, this can be with or without vSAN, but is not inclusive of Horizon
When patching a vSphere environment including on vCenter/ESXi, its important to do it in the right order
- vCenter
- Host Firmware
- ESXi
Important – By continuing you are agreeing to the disclaimer here
vCenter
Firstly, you’ll want to update your vCenter, you don’t want any backup jobs running during the patch, as these will error out, so make sure none are due to run or you pause them
Open the appliance management
https://servername:5480
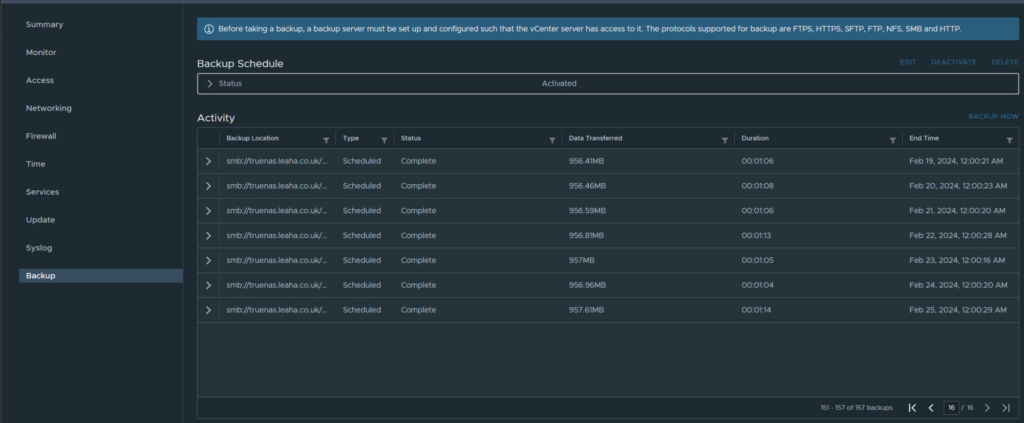
You’ll want to make sure you have a backup taken in the last 24 hours, as if you need to do a restore you’ll need a recent backup
To check this go to the backups page, there should be a daily schedule setup which means you’ll have a backup already, but if not, you should setup the schedule and take a manual backup before updating
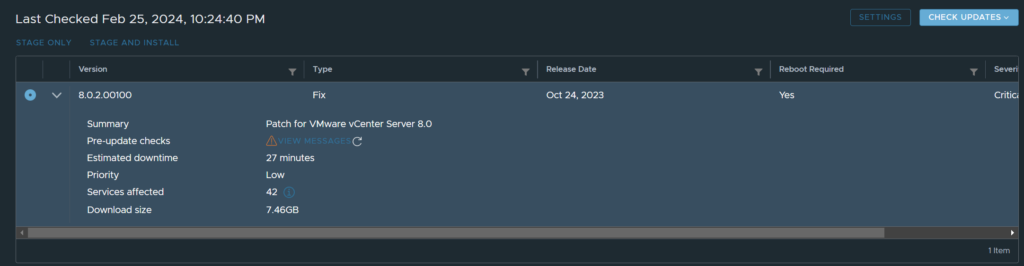
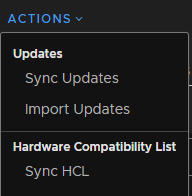
From the appliance go to Updates on the left and select the newest update, they are cumulative, click the drop down arrow and run a check
If this passed, stage and install, if not, check the errors and fix any issues it highlights
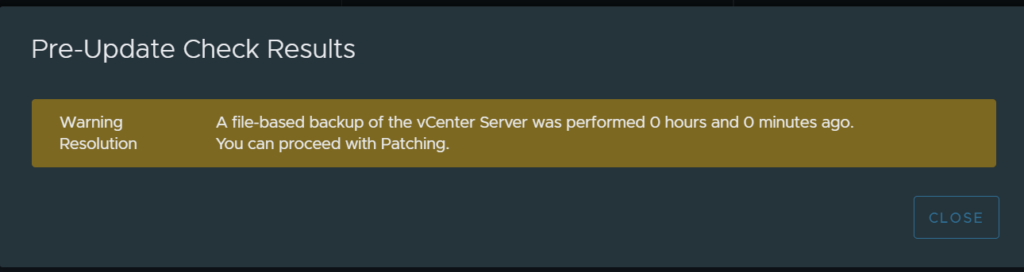
With vSphere 8, you may see a warning like this if you have just taken a backup, you can proceed here as its with 24 hours
Once your vCenter is back up and patched you will want to do your host patches, the method depends on your hardware, Eg, Dell/HPE
Host Firmware
First, take a backup of ESXi, on the off chance something goes wrong
SSH into the host and run
vim-cmd hostsvc/firmware/sync_config
vim-cmd hostsvc/firmware/backup_config
And save the link from the last command, editing the ‘*’ for the hostname/IP
Note – Write down the build number you have, if you need to restore the backup, you’ll need that to make sure you have the right version
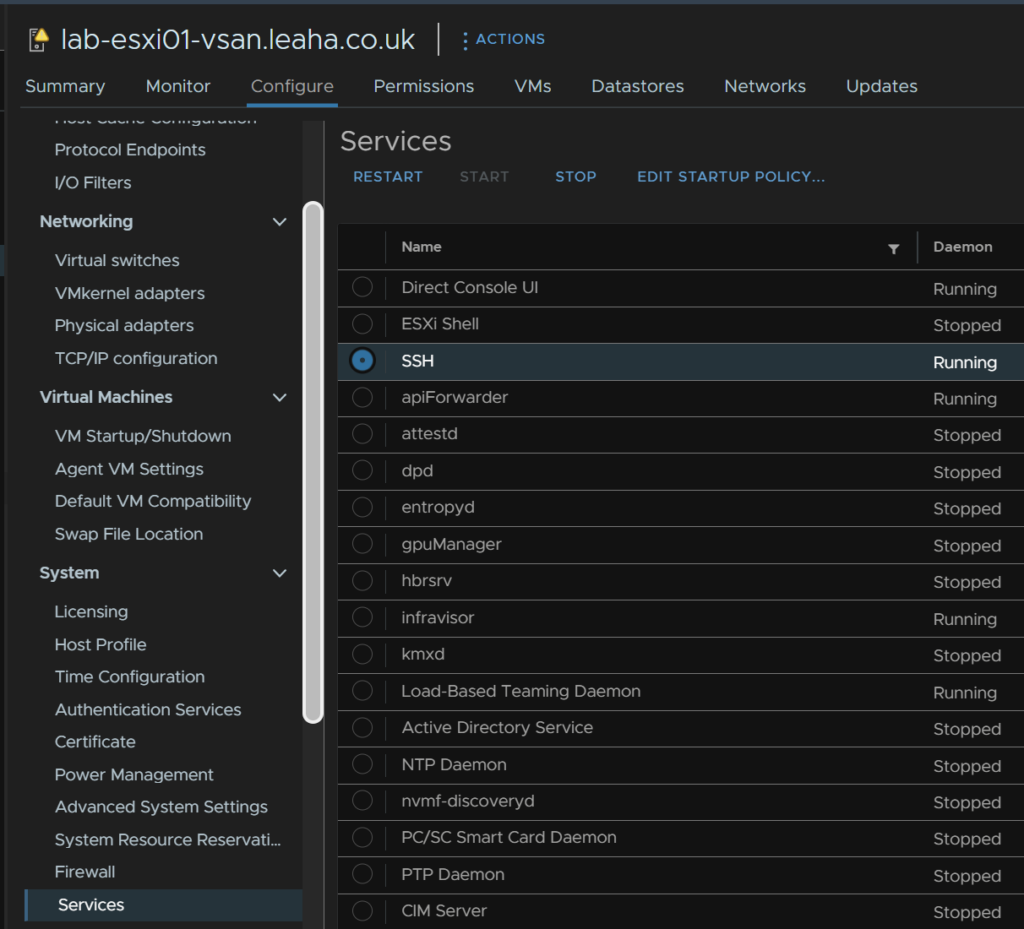
If SSH is disabled, you can enable it from vSphere under Host/Configure/Services, then select and enable SSH
Before continuing, ensure your host is in maintenance before applying any patches
Dell
Its important Dell patches are applied in the right order
- iDRAC
- CPLD – (If Available)
- BIOS
- Everything Else
Often you will have OpenManage installed and setup, this makes patching a lot easier overall, if you don’t have it, its an easy VM to deploy and setup
v4 can be downloaded and deployed as an OVF here
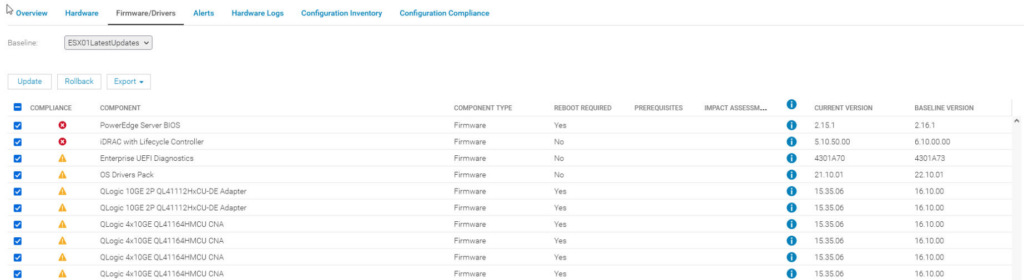
Following on from a setup OpenManage, you should have a catalog, this will need updating first, go to Firmware/Driver Compliance

Click Catalog Management

Select your catalog and check for update

Next, put the host into maintenance mode, then select the host from OpenManage, from the Devices menu
Note – IP addresses are for the iDRAC, not the host

Going into Firmware/Drivers we can select the base line for this host, ESXi01 and see whats available
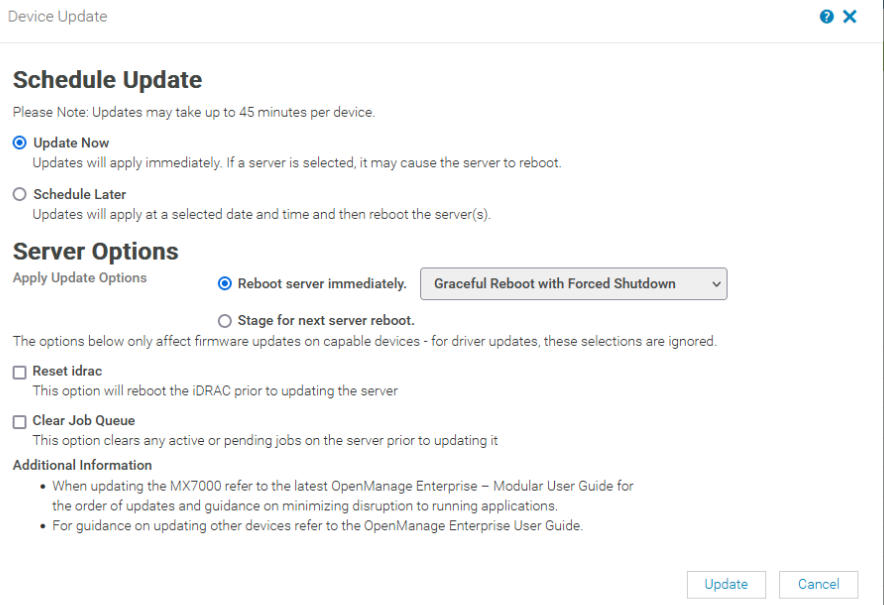
Fist, we want to do the iDRAC, so make sure only that is selected and click update like this
You can check running jobs from this icon in the right of OpenManage

Then we want to check the CPLD version, OpenManage will not pick up any updates for this, but usually lists the version, so check on Dell’s support page, and with iDRAC if OpenManage doesn’t list the version
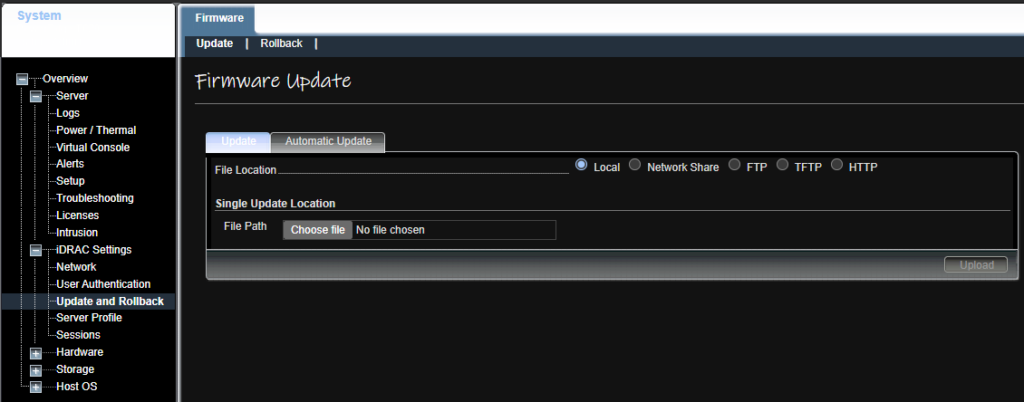
If there is an update it will need to be done via iDRAC, EG iDRAC7/8, you can manually upload and update the CPLD here
Then we do the BIOS, then everything else
HPE (Proliant)
With HPE the firmware order doesnt matter, the HPE SPP automatically handles this for you
For HPE, you might have OneView, but often not as unlike Dell’s OpenManage, this is a paid addon
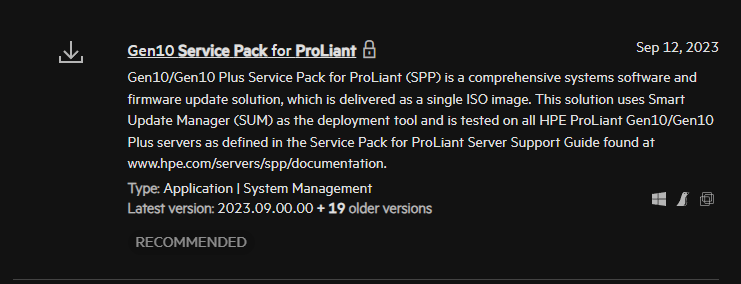
So you will need to download the latest SPP for your HPE server, Eg, Gen10/Gen11, they can be downloaded here
Note – You need an active HPE warranty with a valid account to get these SPPs, MSPs may be able to get some, as of 02/2024 this is Gen10/11, for Gen9 you must have an active warranty
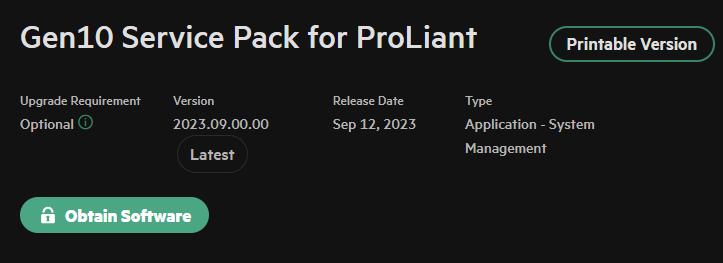
The download will look like this
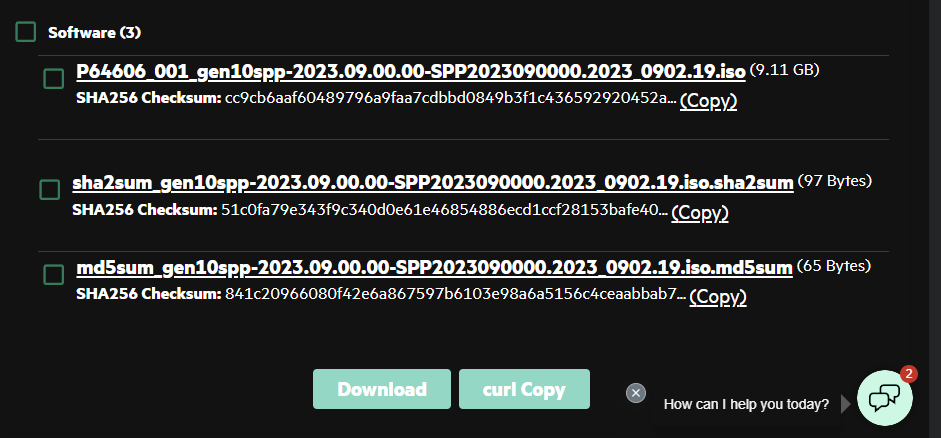
You can then obtain software to download it, this requires you to sign in with your HPW account
Once you have signed in you will be able to download the SPP
Now browse to the iLO, log in, and open the virtual HTML5 console in the bottom right, and mount a virtual ISO with the SPP you just downloaded
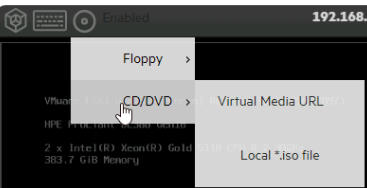
Reboot the host OS, and press F11 when prompted to enter the boot menu
Select the iLO virtual Media
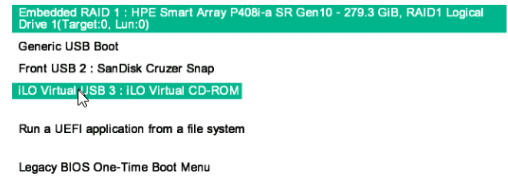
Then automatic updates

Come back in about an about 1-1.5 hours and the firmware should be updated, it may prompt you to reboot the server from the GUI after its finished
Note – Do NOT reboot the server while its applying patches, especially BIOS updates
ESXi
All online VMs need to be migrated off the host you are patching, if you have DRS on fully automated, pop the host in maintenance mode, this will drain the VMs onto other hosts assuming you are using shared storage
If you don’t have DRS on fully automated or are using local storage, you’ll need to manually migrate all powered on VMs off the host first, then pop it in maintenance mode
You already have a backup of the config from the firmware updates, so you don’t need to take another unless you have made any config changes
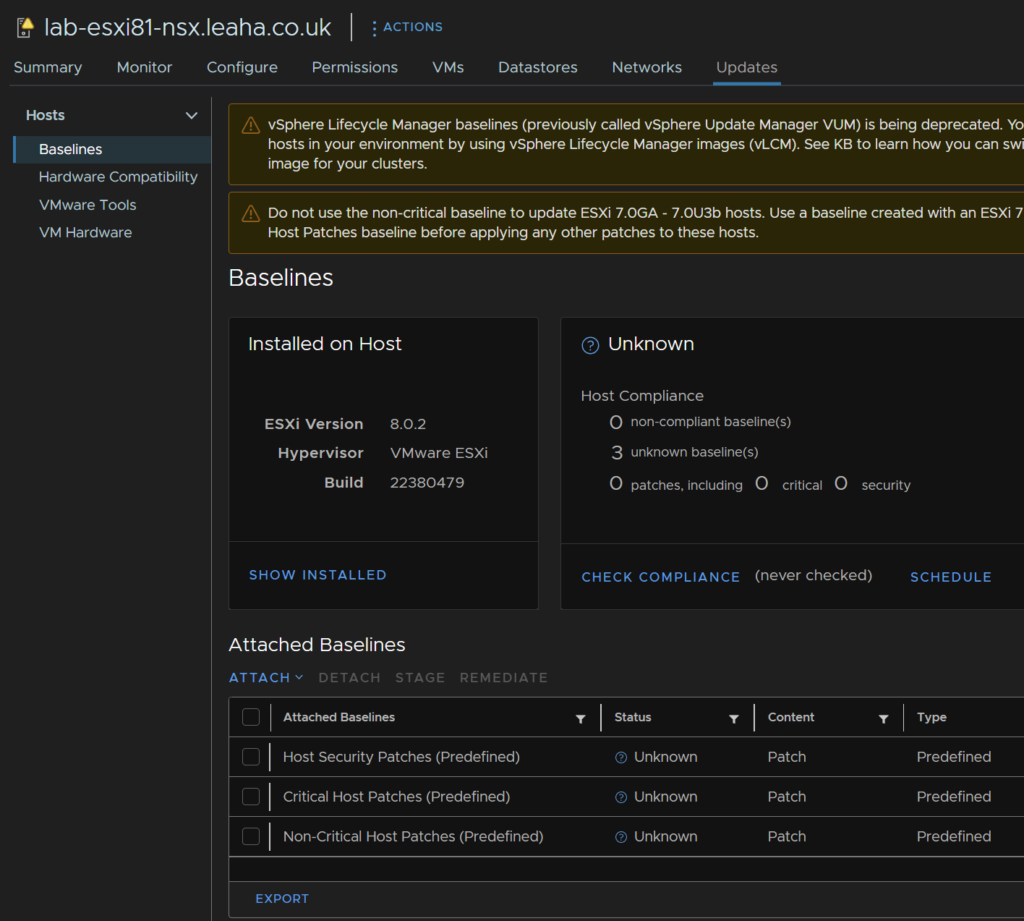
With patches for ESXi there are a few options, in vSphere 8 baselines are going to be deprecated, they can still be used as of 8U2
Your environment will either have baselines, which is currently the default, or a cluster image, the new way
Note – If you have an image, or set one up, you cannot use baselines
Take a backup of ESXi, on the off chance something goes wrong, if you didnt during the host updates
SSH into the host and run
vim-cmd hostsvc/firmware/sync_config
vim-cmd hostsvc/firmware/backup_config
And save the link from the last command, editing the ‘*’ for the hostname/IP
Note – Write down the build number you have, if you need to restore the backup, you’ll need that to make sure you have the right version
If SSH is disabled, you can enable it from vSphere under Host/Configure/Services, then select and enable SSH
Ensure your host is in maintenance mode before patching
Baseline
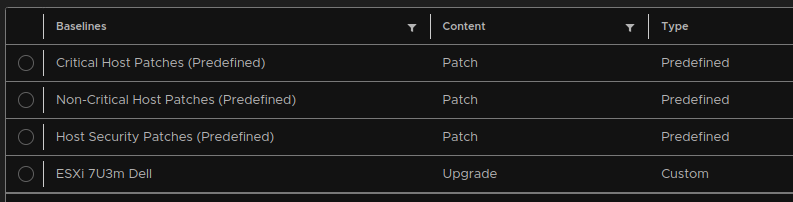
Predefined
vSphere has a few predefined baselines you can use to remediate hosts to the latest version, to patch these, select all three, the stage them, and remediate
It will run pre checks, so if there is likely to be any issues it will catch them and advise
Custom
You can also use a manual baseline with the latest customised ISO for server vendor, Eg Dell/HPE/Lenovo, which can be downloaded from VMware’s website
To deploy the baseline, go to Lifecycle Manager at the bottom
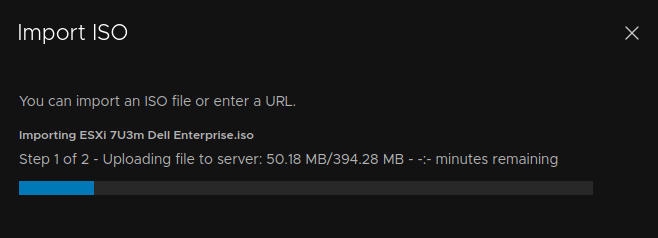
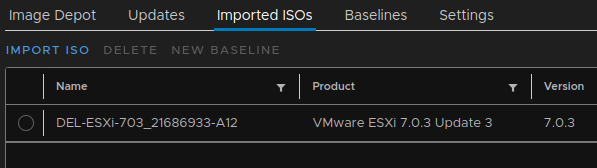
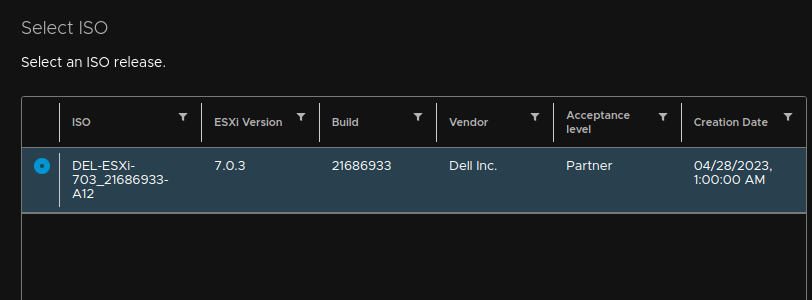
Head over to imported ISOs and import a new ISO that you downloaded for ESXi, you want the vendor customised ISO
Browse for your local ISO
Wait for it to upload
It will then get added to the repository
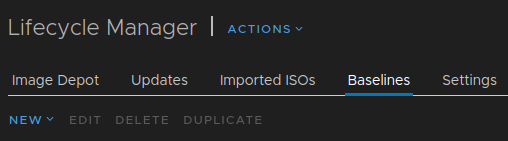
Now the ISO is in the repository you need to create a custom baseline
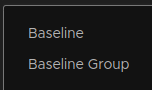
Click new here
Name your Baseline and pick upgrade
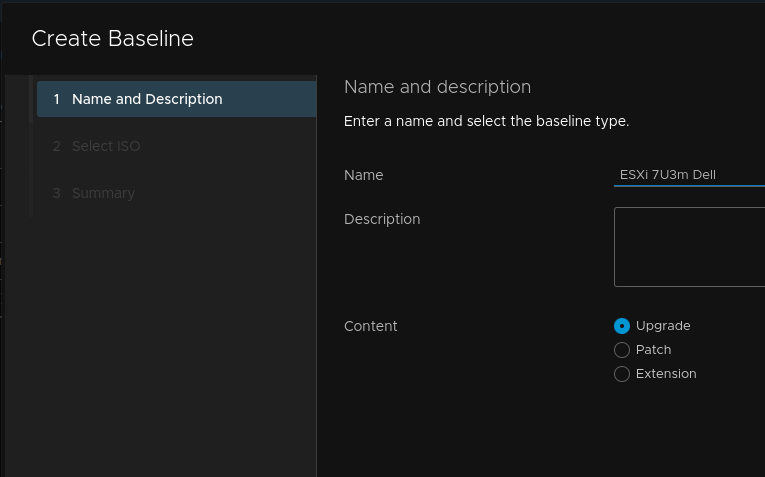
Select an ISO, thats going to be the one you just uploaded
This new Baseline is now available in the list of all Baselines, and can be attached
Image
When updating via an image, you will need to setup one if you dont already have one, or edit an existing image for the newest update
Note – Setting up an image is a one way process, the image is standard and does not contain any custom VIBs you might have
Creating A New Image
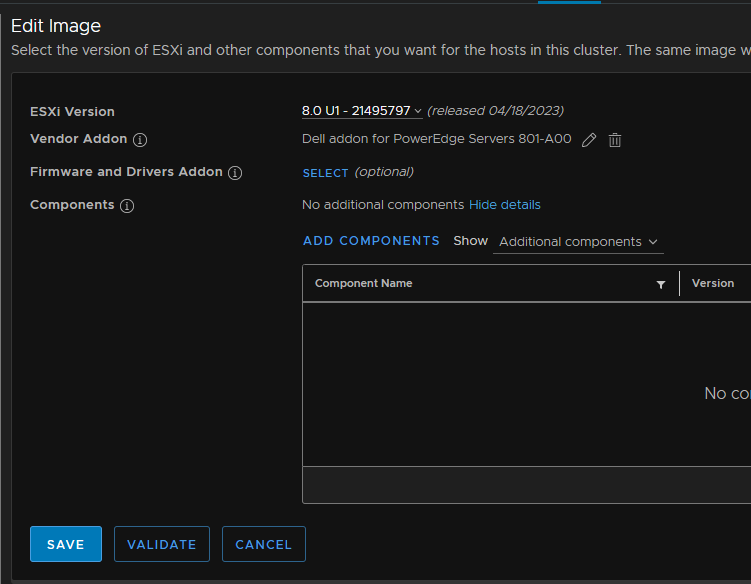
You can go to the updates tab under the cluster and setup an image to be deployed across all hosts

I am deploying 8.0 U1, which has all updates for 8 Update 1, for Dell servers, as I have a Dell server

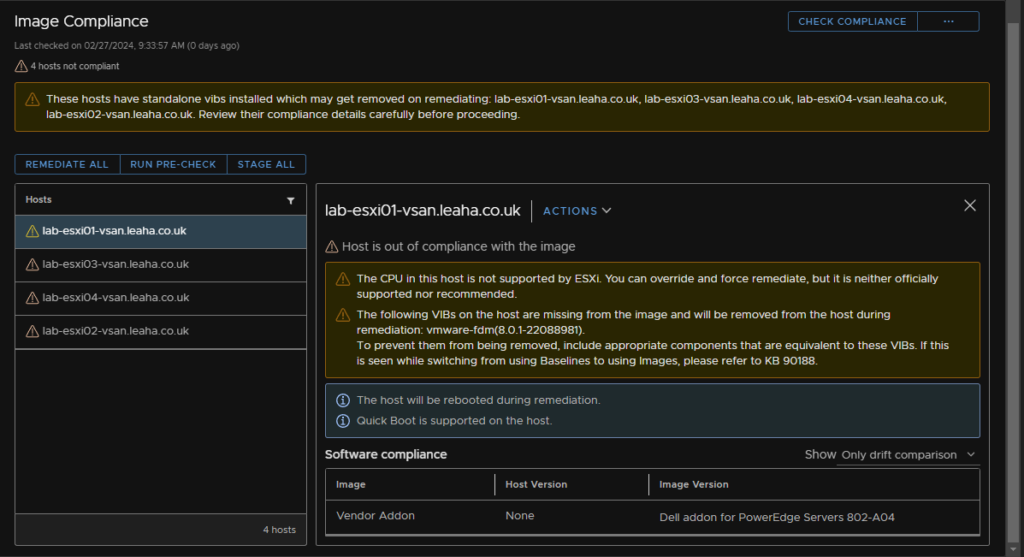
We can then check compliance across that image and save it

If this comes back with standalone vib issues, you may need to import them
This VIB for VMware-fdm is fine, this is the HA VIB and will be pushed down by the vCenter
Adding A Custom VIB
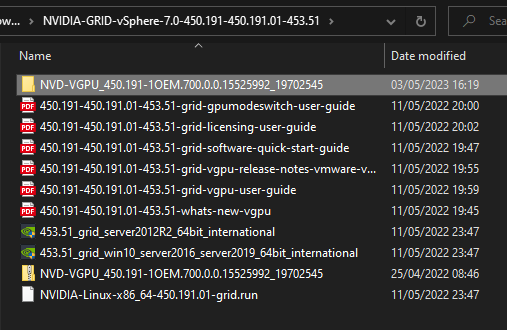
To add a custom VIB, you will first need to download it, this example will run through the Nvidia GPU Drivers
From the Lifecycle Manager import an update
You want the .zip folder which has the vib in it
For the Nvidia grid drivers for ESXi, this is NOT the whole .zip from Nvidia’s website, this is just the ESXi .zip folder
So that’s the bottom NVD-VGPU
Once that’s been added you can add the component to the image
Select and add the newly imported vib
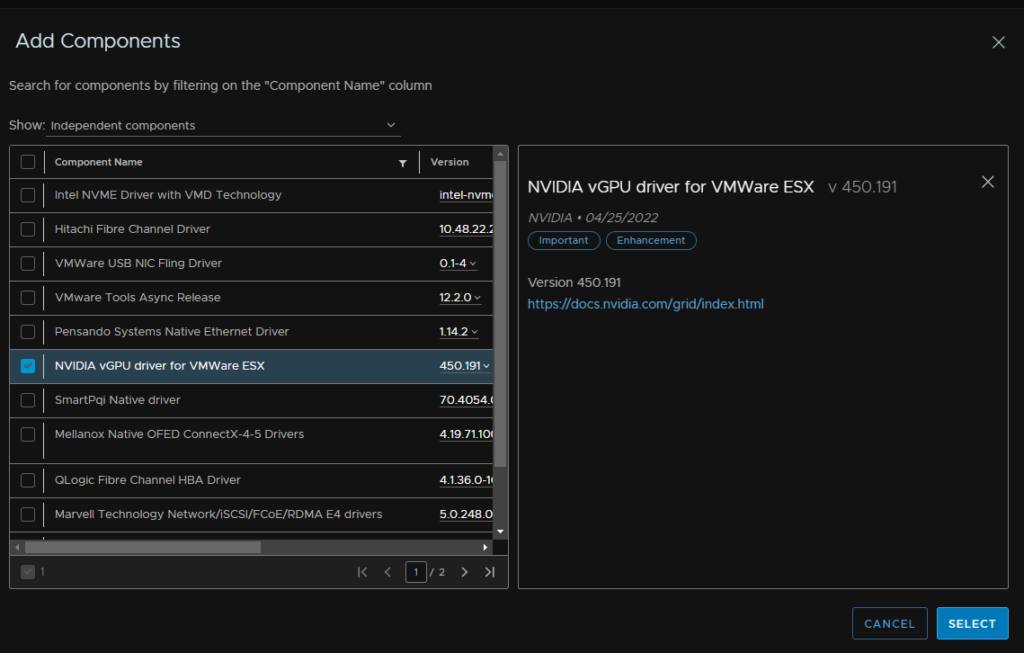
Save the image config
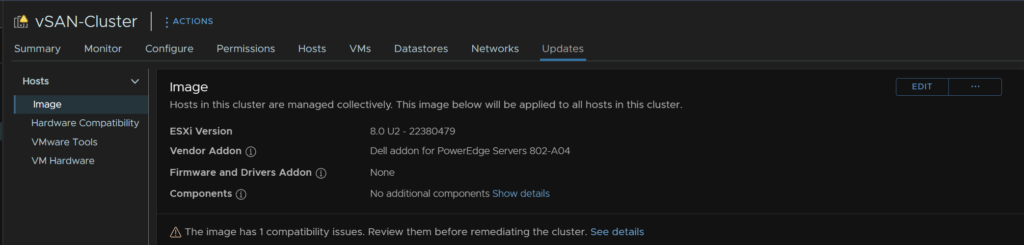
Updating An Existing Image
If you already have an image and a new release of ESXi comes out, you’ll want to update the image to include the new ESXi release
To do this navigate to the cluster image and edit it
Select the drop down on the version and select the new one, here I am taking my image from 8U2 to 8U2b
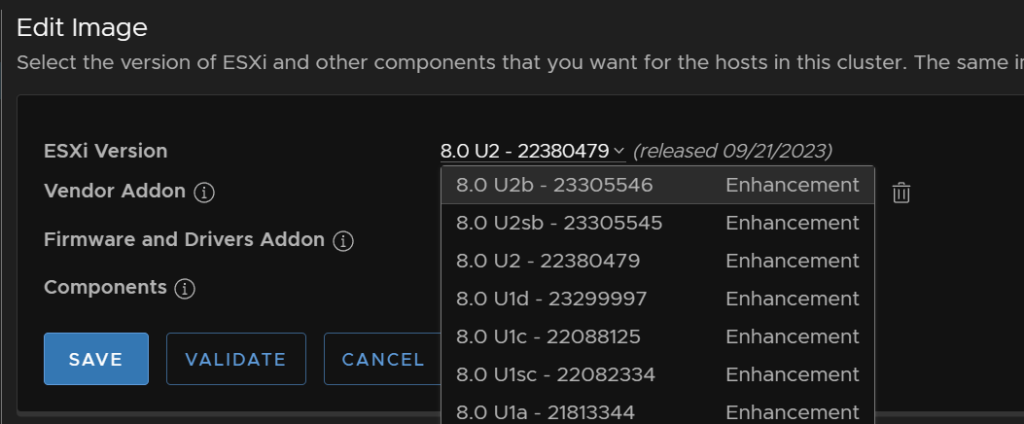
Then hit save, and this will change the image to use the new base
Dont forget to check for any custom VIBs each time to ensure they are not removed as this can have a big effect and break some system components, the only exception is the vmware-fdn, this is the vSphere HA VIB and will be pushed down by the vCenter, and is expected to flag on the image
Once you are happy with the image from the above, run a precheck first to check for any issues
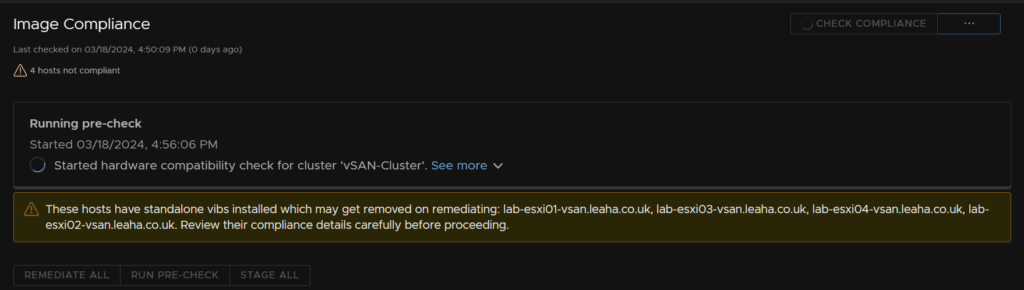
If it comes back clear, you can remediate the cluster, with remediate all, this will automatically remediate them all placing the first into maintenance mode, updating and rebooting it, checking compliance, removing maintenance mode and repeating on the rest
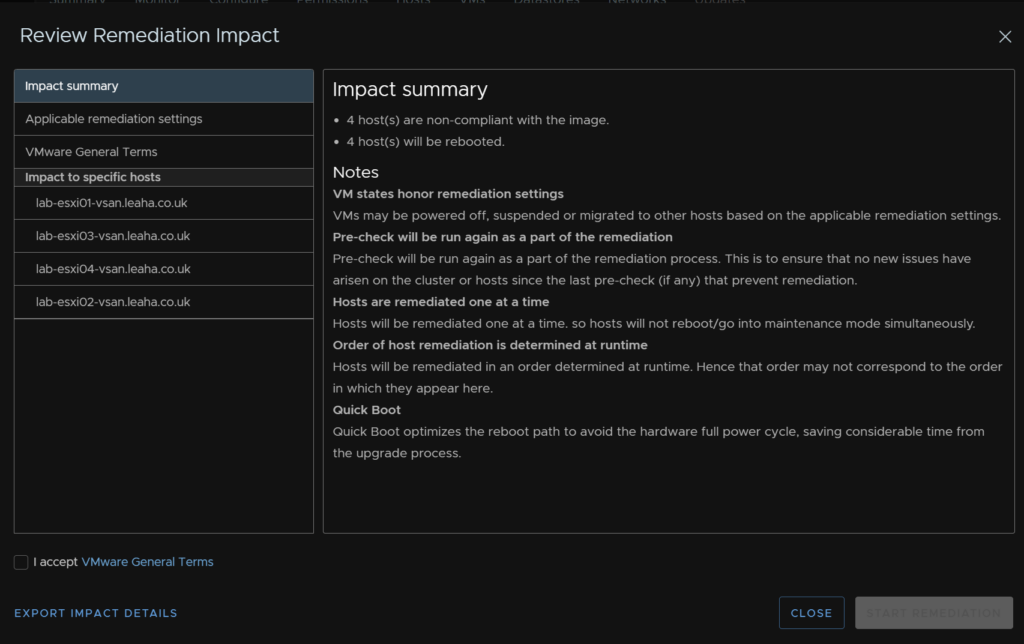
This will run you through any potential impact with a summary
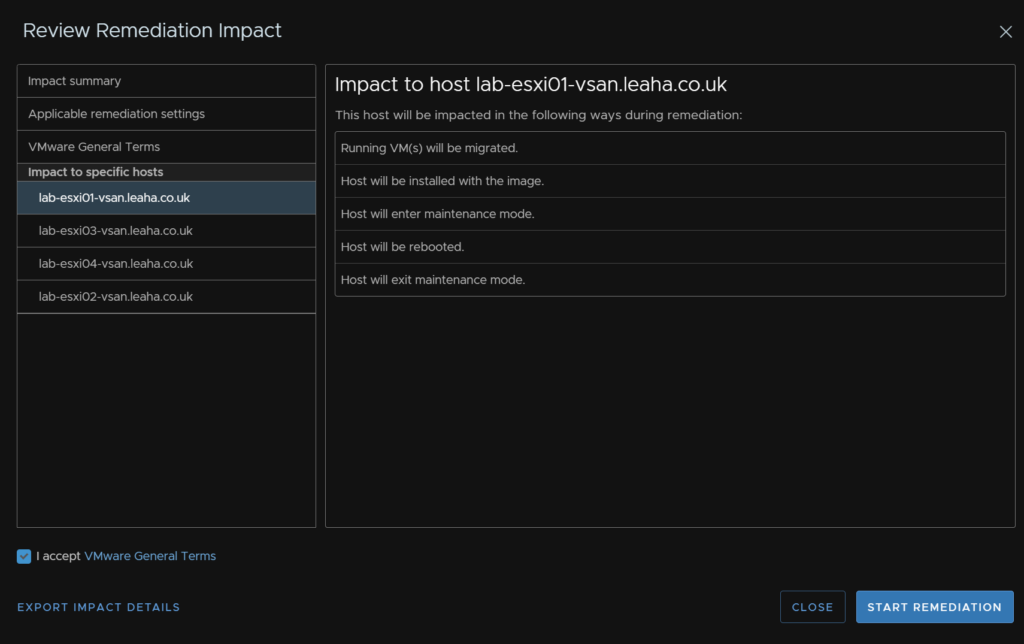
You can also see what will happen to each host
Manually (Without vCenter)
All of the above process involve having a vCenter, but what if you have a standalone host not managed by a vCenter?
Here you will want to download the ISO for the version you want to patch/upgrade to from VMware’s website
Pop the host into maintenance mode, login into your IPMI, iDRAC/iLO, and mount the ESXi ISO you want to upgrade too in the virtual media
Reboot the server and boot into the ISO
When you get to the menu to select a disk, select the disk you already have ESXi on for an upgrade, mine the is Intel 167GB SSD
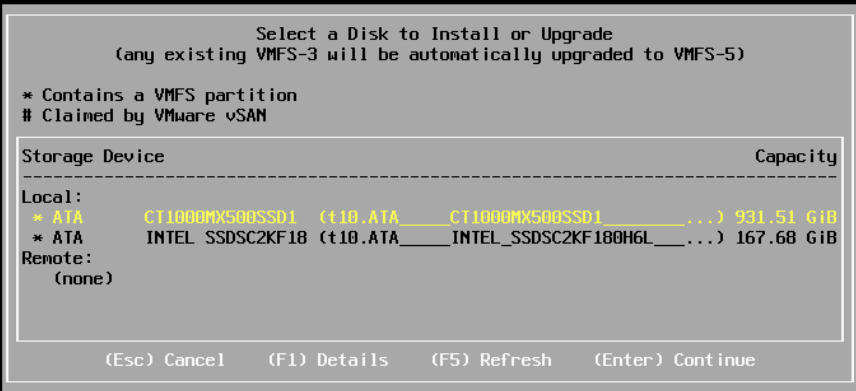
This will scan the device, which will detect the ESXi install and give an upgrade option
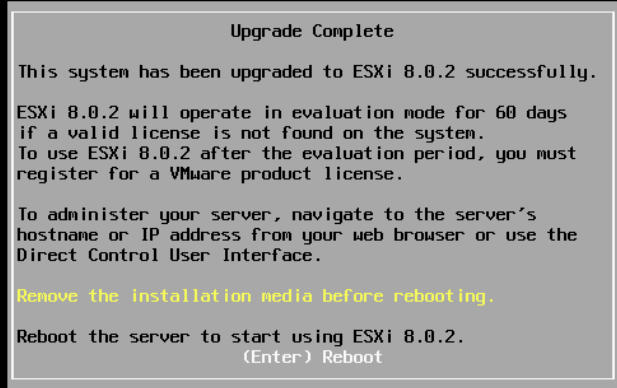
Select upgrade and press enter

Then press F11 to upgrade and wait for the upgrade to complete
Remove the installation media and reboot