In this article we will be taking a look at how to repurpose a HPE Nimble, in particular we will be looking at HPE’s newer models like the HF20/HF40 series which are a little more complicated, and I struggled to find any articles covering this
Its worth noting, this should only be done on a broken HPE Nimble which wont boot or function with the Nimble OS, this is absolutely not supported by HPE and is irreversible as the Nimble OS is unobtainable and seems rather complex, and should not under any circumstances be used in a production environment for a business
The ideal use case for this is you want some storage for a lab, and the production Nimble failed and is unusable with the Nimble OS, or you want something easily fixable for the lab, if the Nimble OS goes wrong, with no HPE support there is often not a lot you can do
The biggest drawback you will get vs the Nimble software, assuming it was working, is the loss of HA, you cannot change the blade disk access, so both blades will always have access to all the disks meaning something like a 2 node vSAN is out of the question, storage spaces in Windows might be able to work, however I havent used it, so your milage may vary
Another setup idea is to have both nodes on ESXi, and configure a TrueNas VM with PCIe passthrough for the disks, and another VM on the other node with an identical config, powered off, this may allow you to shutdown and power up the VMs to get better availability across nodes, and with some good Xeon Golds and 256-512GB RAM they would make a power hypervisor cluster
Even with a single TrueNas VM on one node, the advantage here is using both blades and better use of the full power of the 32 DIMMs and 4 Sockets across both blades, since 16-20 core Xeon Golds can be had for a reasonable price
We will be showing two configurations, one with TrueNas using a single blade, this is simpler and you can keep the second blade for parts, as getting replacement anything will be difficult
And a configuration using ESXi and PCIe passthrough for a TrueNas VM to get all the storage benefits and better leverage the compute power the chassis offers, if you dont have VMware licenses, with the VMUG changes you can swap the Hypervisor for Proxmox as the best alternative, the process is the same general idea
It is worth noting, the internal supplied 16GB M.2 SATA SSD wont be enough for ESXi and will need changing, it may work with Proxmox, but you’d want something a little larger, its fine for TrueNas only
The hardware pictures below will run you through the internals of the blades, but it supports NVMe as well, but only 2242, I would recommend a 128-256GB drive for this as the boot for a hypervisor
From what some people say online the way the Nimble OS is configured, there is a boot loader on the 16GB internal SSD, this loads the Nimble OS which is striped across all the front bay drives, this is why, from all the arrays I have seen running the Nimble OS, its always fully populated, usually with 21x HDDs and 6x SSDs for a hybrid array
I did find by looking at the 16GB SSD there was a ~1.5GB Linux RAID partition, this is certainly not enough for the Nimble OS, and it was odd it was Linux RAID making me wonder if there is any interconnection between the blades via the chassis midplane, though I feel this is unlikely
As its not enough space to contain the Nimble OS, and there are no other system drives, this just leaves the OS on the array disks
This also explains why trying to get my hands on the software was next to impossible, HPE dont provide it, and anyone I could find who did have a copy was very reluctant to give me a copy with one person who does a lot of repairs giving me the break down on how the OS is supposed to be installed
They did also mention it needed a full array with HPE disks, of course I cant verify this, but it was very interesting to see how this works
Important – By continuing you are agreeing to the disclaimer here
Hardware Overview/Disassembly
The Nimble HF20/HF40 is comprised on two 2U blades based on Xeon Scalable, taking Skylake/Cascade lake CPUs
The HF40 is the same but has higher end CPUs, more RAM and more NICs, depending on your config
It is worth noting, that while, compared to the OEM Intel model, there is no VGA for display, this would take up the 16x PCIe slot, so you could optionally add a GPU which should work, but with the BMC iKVM its not too bad, once we enable it
This will based on the HF20 as thats what I have, hardware wise, it has the following per blade
- Intel S2600BPB motherboard
- 1x Xeon 3104
- 8 DIMMs/CPU – 6 for optimal performance, blue DIMMs
- 1x32GB RAM Module
- 1x8GB NVMRAM Module connected to the battery
- 1x 2U heatsink
- 1x PCIe 16x low profile slot – bifurcation 4x4x4x4 or 8x4x4 supported
- 2x PCIe 8x low profile slot – bifurcation 4×4 supported
- 2x PCIe 3×4 NVMe slots on the riser
- 1x PCIe 3×4 NVMe/SATA 2242 slot on the mainboard
- 2x external SAS ports
- 3x USB 3.0 ports – 1x internal
- 1xGb BMC NIC – default disabled
- 2x10Gb NICs, this may be RJ45 or SFP+ – RJ45s are Intel X550 NICs
- 1x 3.5mm jack for serial – will need the included adapter for a serial connection
- 1x LSI 3008 HBA
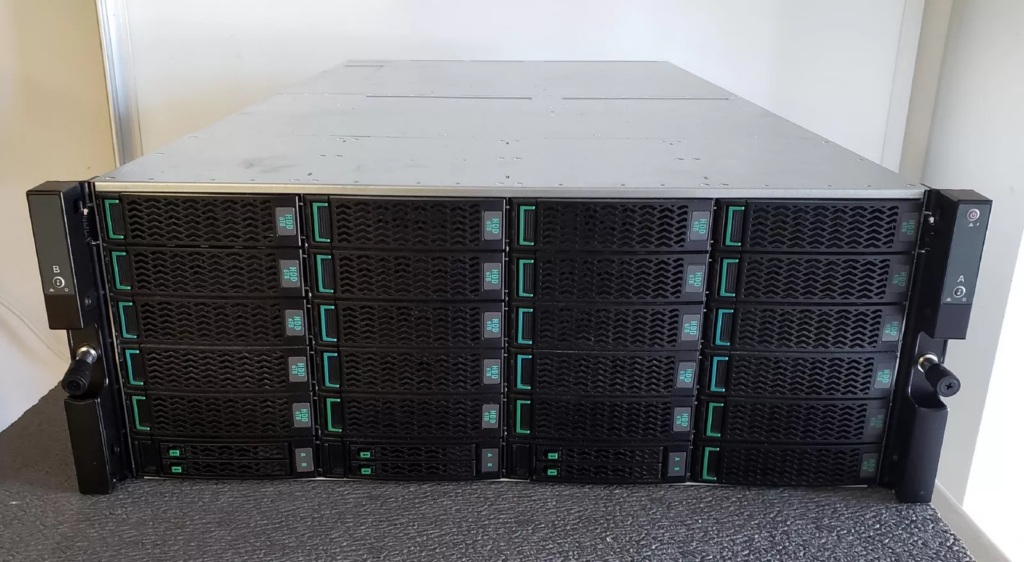
The chassis then had a total of 24 3.5″ bays, mine came with a hybrid setup with 21x 3.5″ HDDs bays and 3x 3.5″ dual 2.5″ bays
The 3.5″ inch bays only support SAS, SATA disks dont show up in any OS, and they are fully hot swap supported within TrueNas
The dual 2.5″ bays are not hot swap and only support SATA, disk support wise, both drives in the bay will show up ok in TrueNas, though it seems a little picky with the disks, two random SATA HDDs worked with no issues after a host reboot, but my Intel Pro 5400s SATA SSD just wouldnt work even with a format do your milage may vary
The chassis has a single power button on the right rack ear, if held this will power off the blades, but its very useful as it cant power a single blade off
There is also a button on each ear for the chassis indicator LED
The blades, when inserted into the back will power on and the power button isnt needed
For the blades, we have the rear I/O, mine has 2x 10Gb RJ45 with no PCIe cards, the slot covers are missing from mine but are included by default
We can also see the BMC port on the left, the two USB ports, over on the right we have the 10Gb ports, the 3.5mm jack for serial, and the SAS ports for an external JBOD
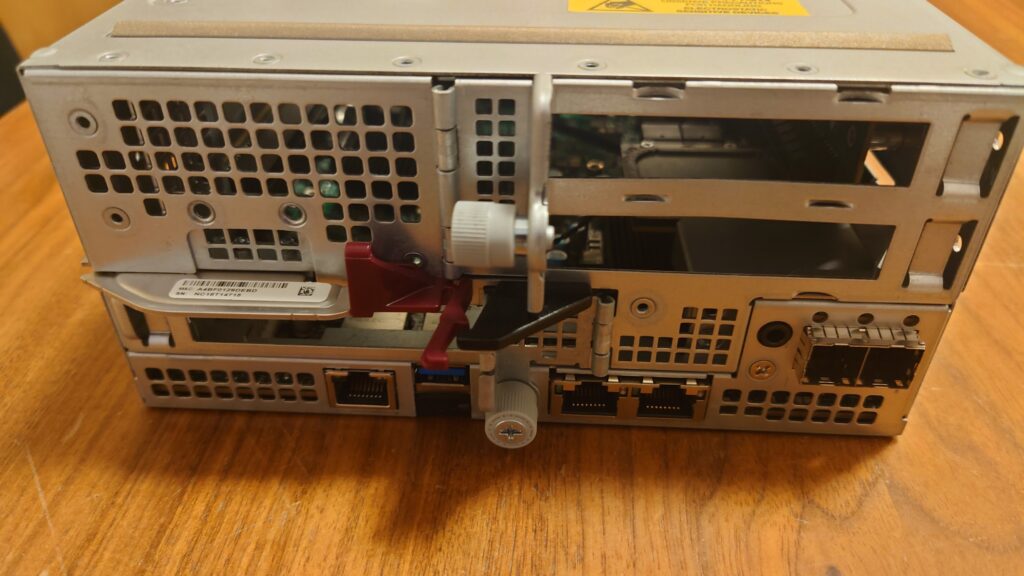
The blade can be removed by pushing the red/maroon tab to the left to release it, then it can be pulled out to release the blade
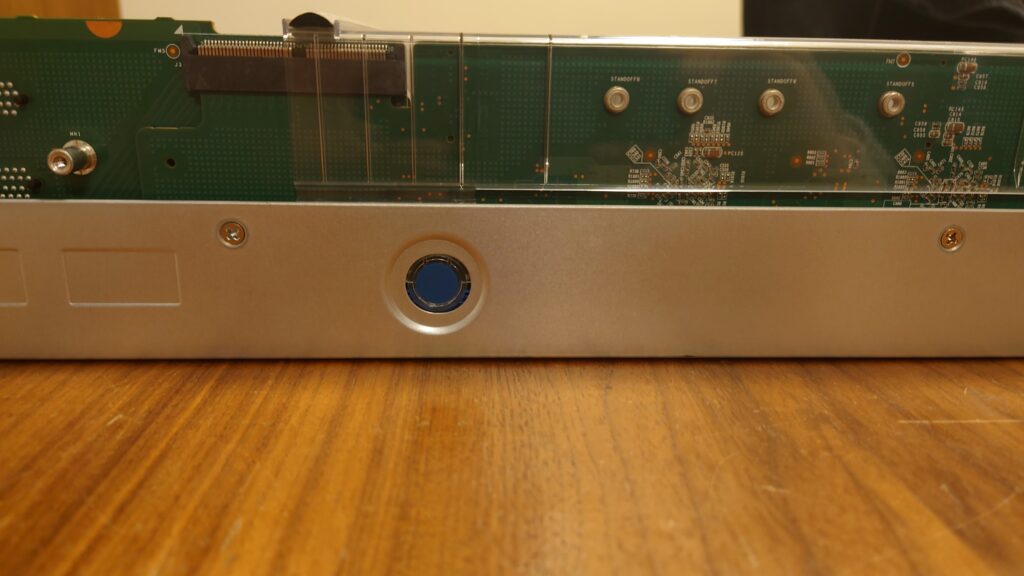
To add PCIe cards and begin getting inside the blade we can undo the thumb screw at the bottom, it doesnt come off though, then on the right face of the blade, from this angle we have two screws, the upper two
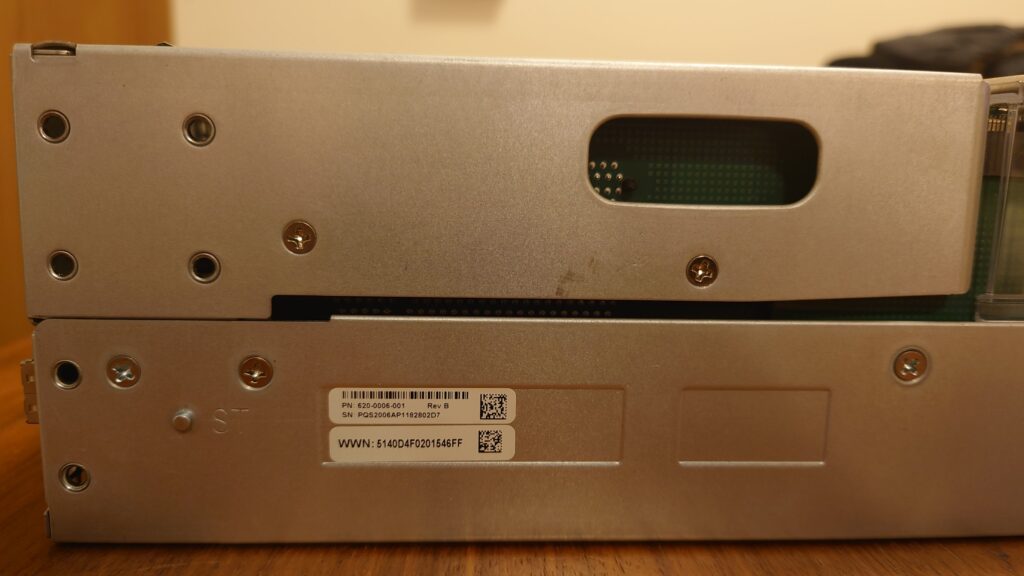
This will then allow the lid part with the PCIe 16x slot to lift up
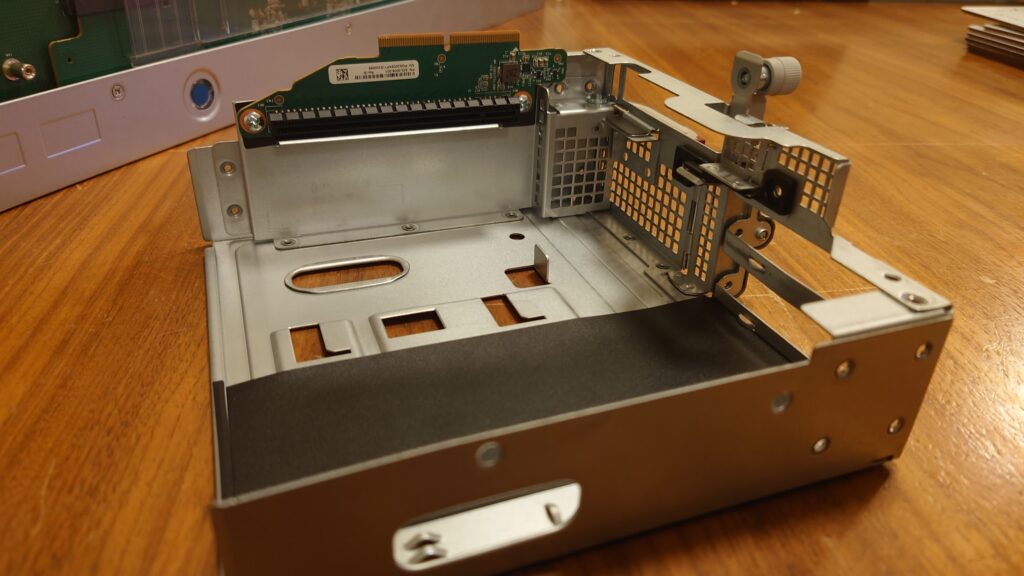
Underneath we can see the back of the card that has the serial and SAS ports that run to the front, to the left of that we can see the NVMe/SATA 2242 slot, a connector for the riser part on the lid we took off, and a SAS connector for internal SAS drives, not that there is anywhere to put them
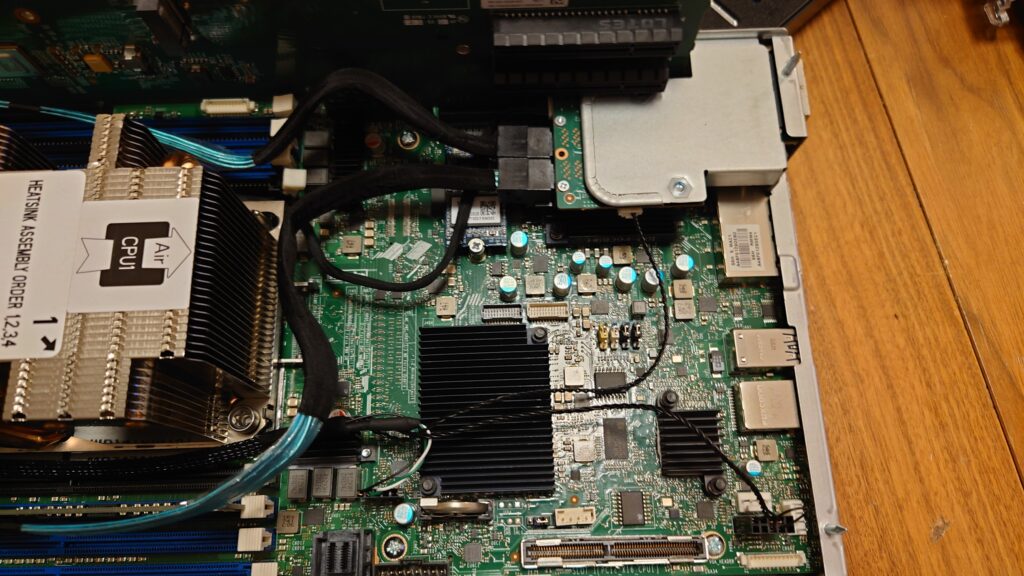
We can also see the riser with the 2x PCIe 8x slots, you can also better see the NVMe/SATA 2242 slot with the default 16GB SSD
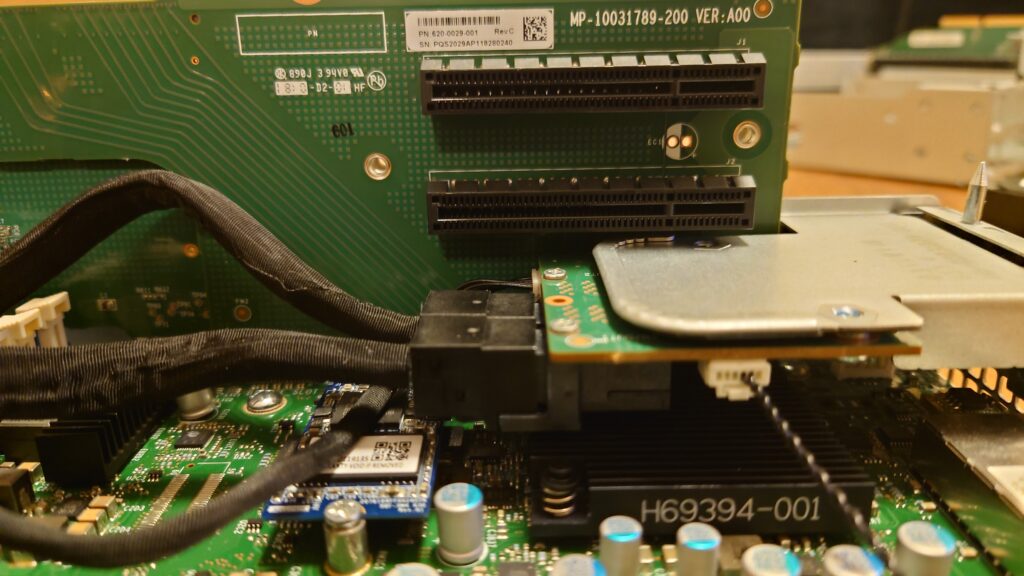
We can then remove the plastic fan baffle with the blue push tabs on either side of the blade, it will then just lift up and off
We can also see the PCIe 16x riser connects to the main riser directly, as well as the mainboard
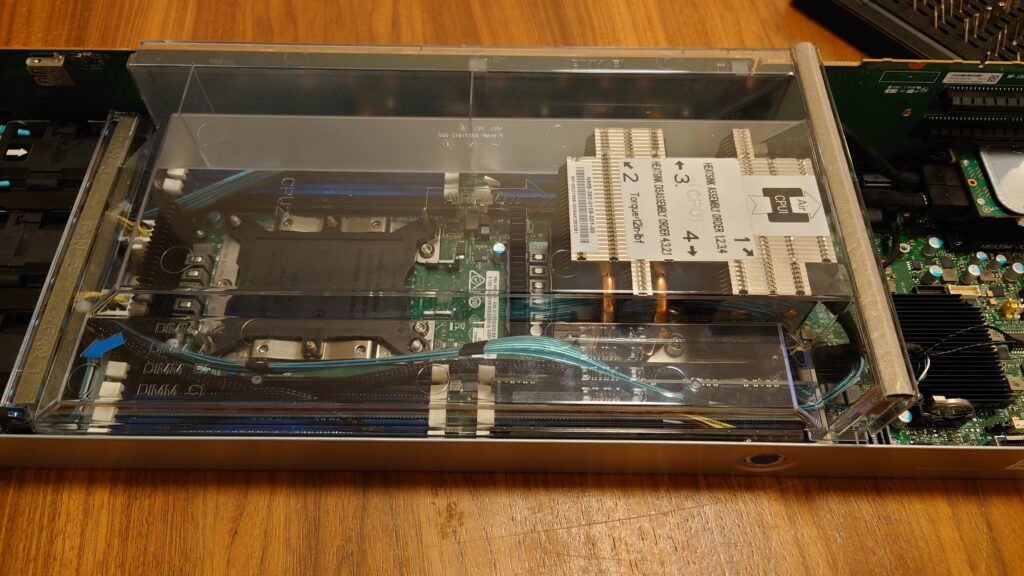
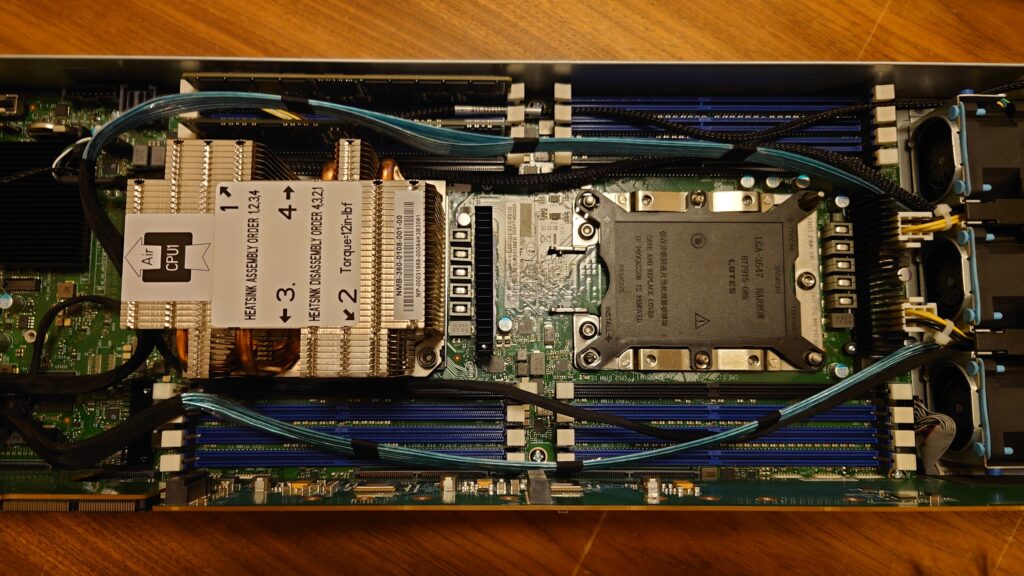
Now we can get a good look at the middle of the blade with the CPUs and DIMMs
Each socket gets 8 DIMMs, though Skylake/Cascade Lake have 6 memory channels, the blue DIMMs are for each channel, and the two black ones are for DIMM 2 on channel 1/2
Populating the black DIMMs will leave to less memory performance in exchange for more memory capacity due to an imbalanced DIMM configuration
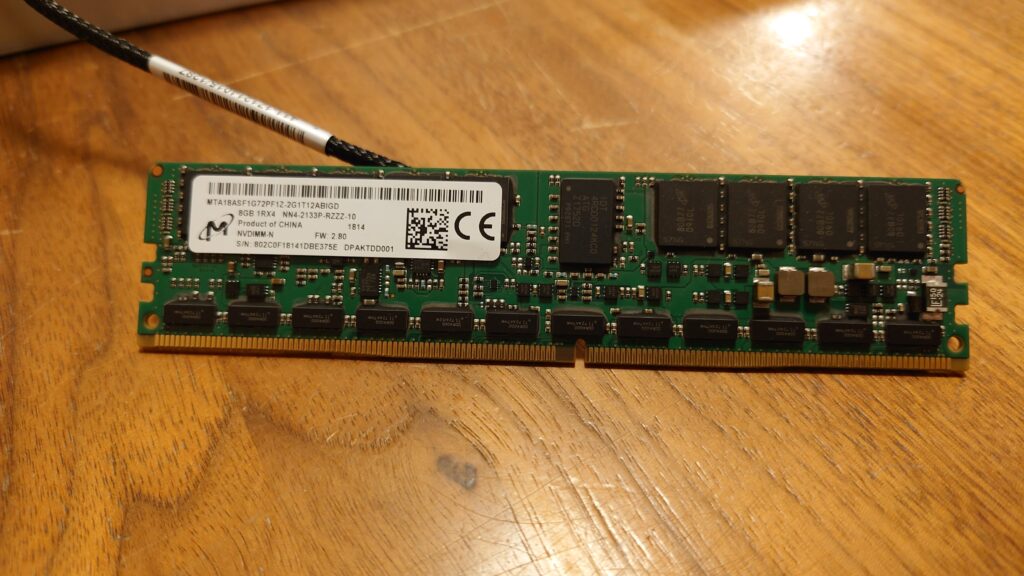
The default the HF20 seems to come with is the one 32GB DIMM and an 8GB NVDIMM, which will be for acceleration and caching in the Nimble OS, this is also connected to the battery at the front of the blade to protect the data on volatile DRAM if the power was to go out
Here we can see the NVDIMM and the connected power cable
On the side we can see the riser board with the 2x PCIe 3×4 NVMe slots supporting up to 22110 drives, though you will need somewhat long M.2 screws for this, thankfully they dont need to be as small as on desktops and they seem to screw into the slots ok, but there isnt any included, but you can pinch some screws from the blade if you want to get creative
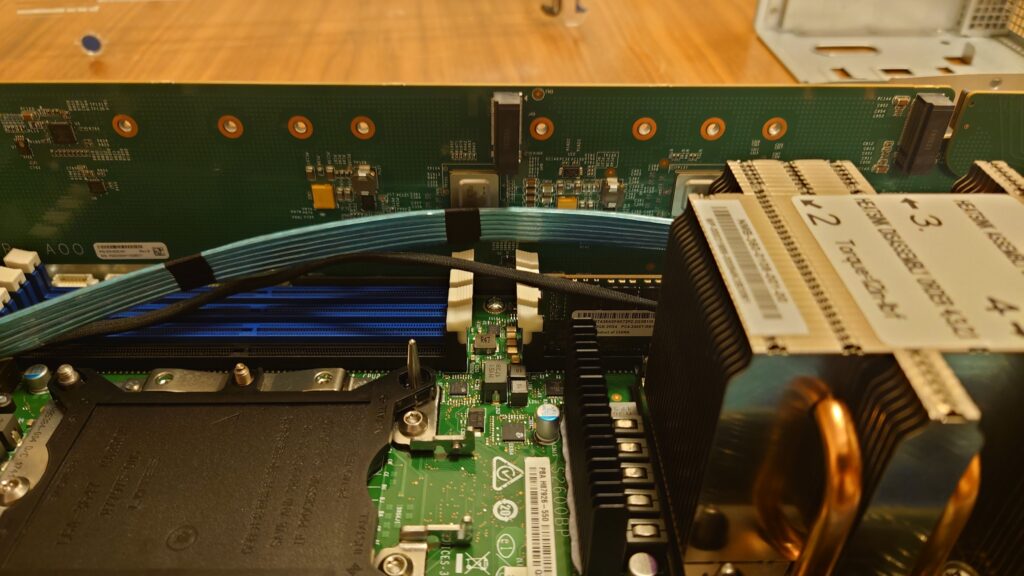
To the left you can see the internal USB 3 port
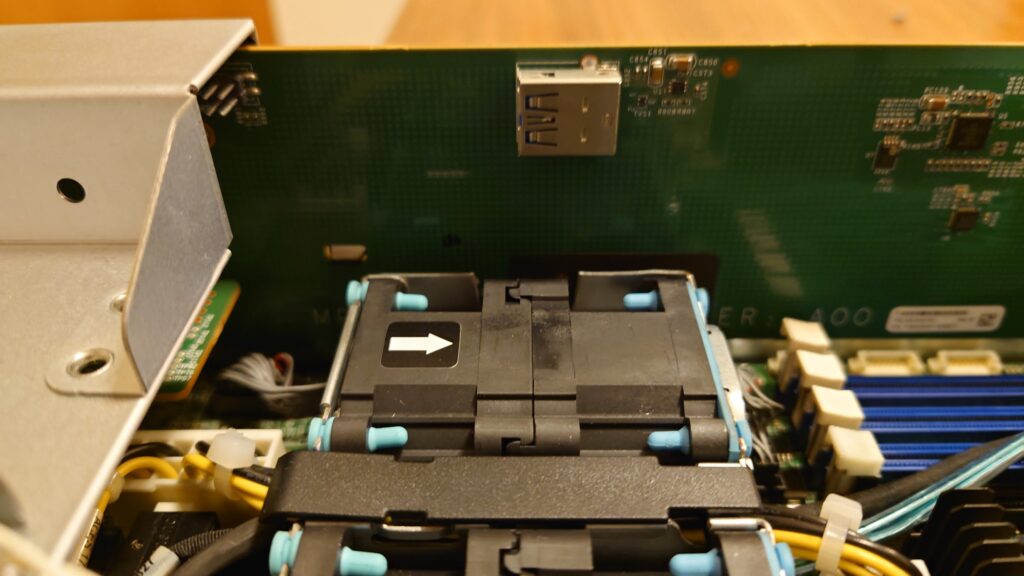
At the front we have the 3 dual stacked fans, and the 6 pin power connectors taking power from the midplane to the blade motherboard
The battery unit is also at the top connecting the daughterboard underneath which seems to have the LSI3008 HBA supporting HBA mode only and no hardware RAID
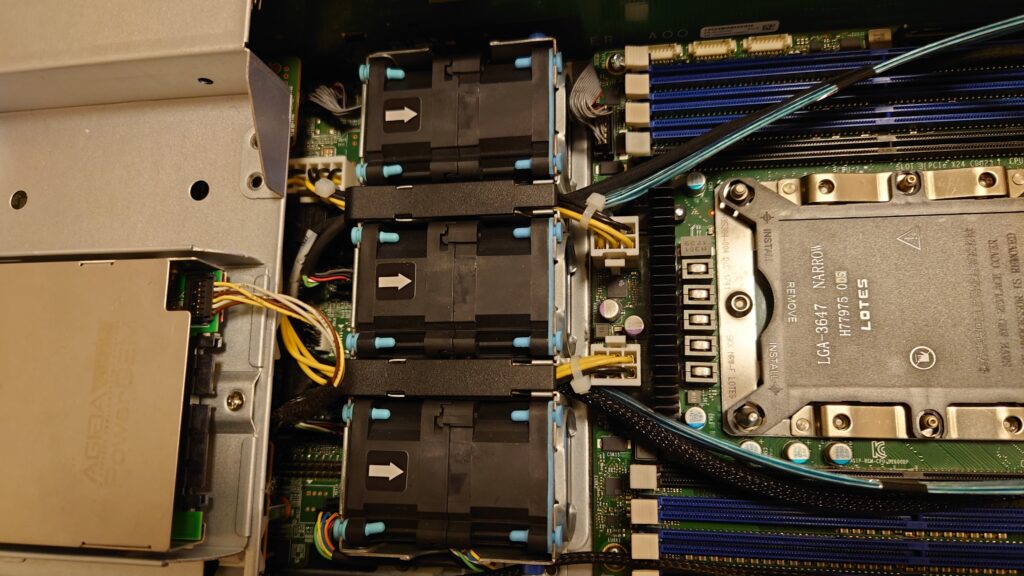
At the front of the blade we have the power connectors on the left, and the large IO connector that connects the midplane to the blade passing all the disks through
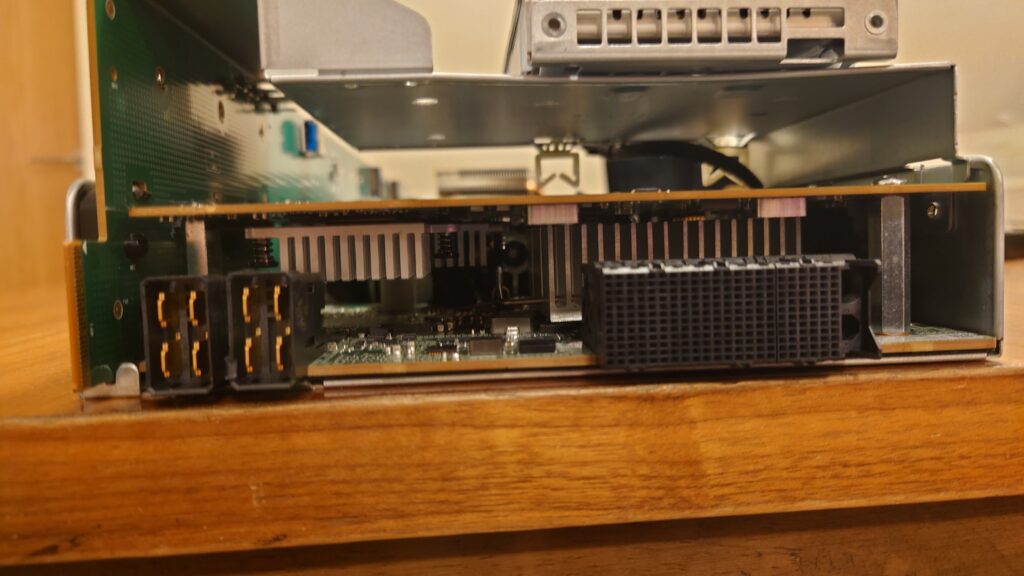
On the chassis, if we pop the middle plate off the top, we can see inside, though there isnt much to see
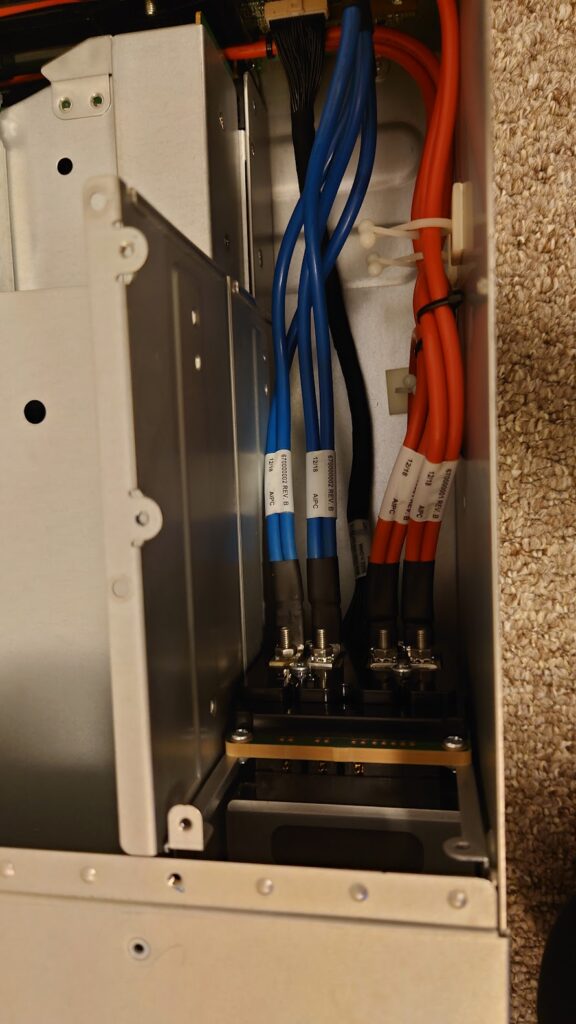
There is the PSU connection wires over on the lower left and the backplane on the right
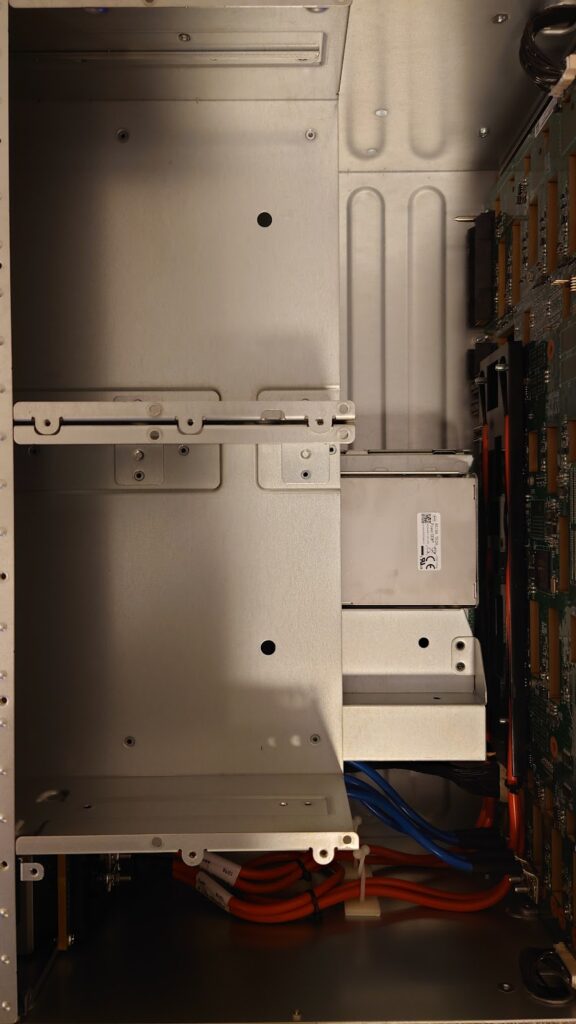
Here is a close up of the PSU connections, its not really a connector but bare wire bolted over, so I really wouldnt touch this at all
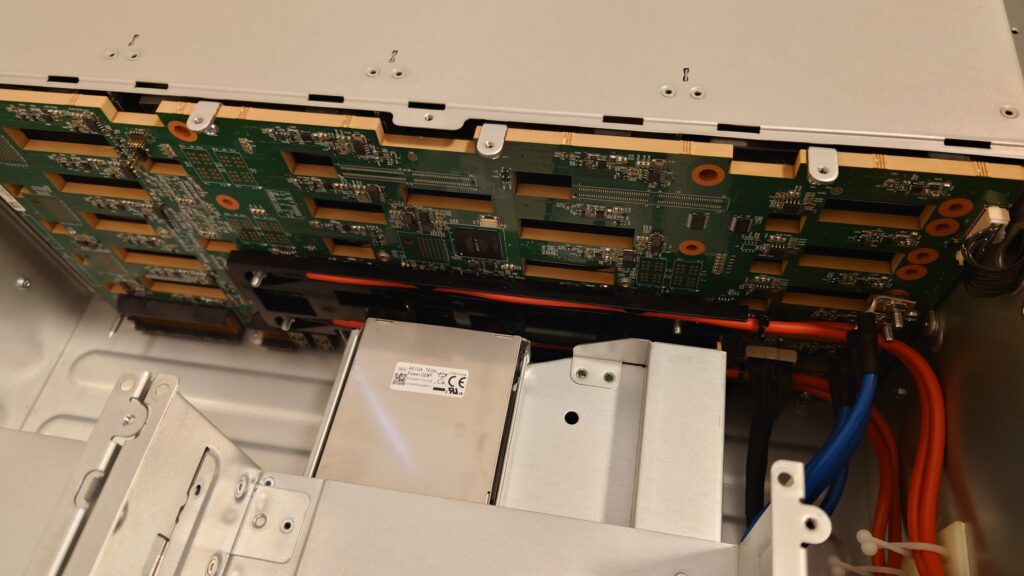
Looking at the backplane, there isnt much, at the bottom we can see the blade connectors for power and data, it seems all power runs through the backplane
Now we have the hardware disassembly done we can have a look at removing the Nimble config and getting it ready to be used like a normal server, we will be going over
- Enabling the serial port
- Accessing the BIOS and enabling the BMC
- Updating the BMC/firmware – this allows the HTML5 iKVM to work
- Various BIOS configurations that needs to be made
- OS installation
Getting Serial To Work
Off the bat I found that HPE have configured the server to output serial only for the Nimble OS and it seems the BIOS will not load at all
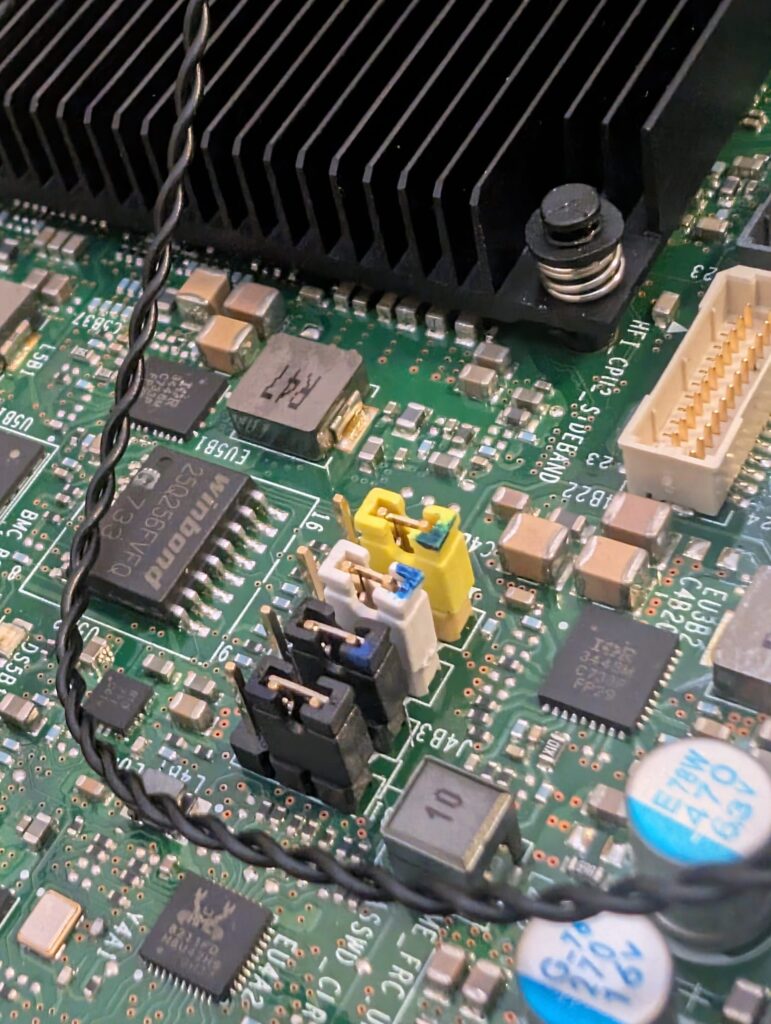
I managed to fixed the serial by resetting the BIOS with a jumper cable, they yellow cable at the top, and powering the blade up, it rebooted its self after a while
The serial Baud rate for connection in the BIOS is 115200
Wait past this bit

Now, to get into the BIOS, which very briefly pops up is F2, but via serial, using the Nimble 3.5mm to serial cable, didnt do anything
Oddly, keyboard input over serial doesnt work here

I also tried the BIOS recovery to help, the second jump down, the white one, and I was able to connect a keyboard on the rear USB to enter the BIOS, again the server booted, and then restarted
I did notice the second blade when doing this had the fans going at 100% with the jumper set to remove the password and in the BIOS, so they dont always seem to behave the same
This allows the keyboard to work, however when getting to the BIOS it needs a password

Thats where I needed to power the blade off again and boot it up with the third jumper enabled, the top black one, to clear the password, then it will work, and on next boot you can put the jumper back and the BIOS password will stay removed
Now thats all sorted I can access the BIOS with the serial connection for display and a USB keyboard for input
Accessing The BMC
When you are in the BIOS head to Server Management

Then press the up arrow to go to the last entry and select BMC LAN Configuration

The default should look something like this with the Baseboard LAN on Static

Set to dynamic for now

We also need to set the BMC IP, you can use Dynamic like I am, or set a static IP, this will be how we access the BMC WebUI

This enables the network,. but we need a user account, click into User Configuration

Under User2, make sure the username is Admin and the Privilege is Administrator, then click enter on the User Password and User Name box to set the details

And set the password so you can login

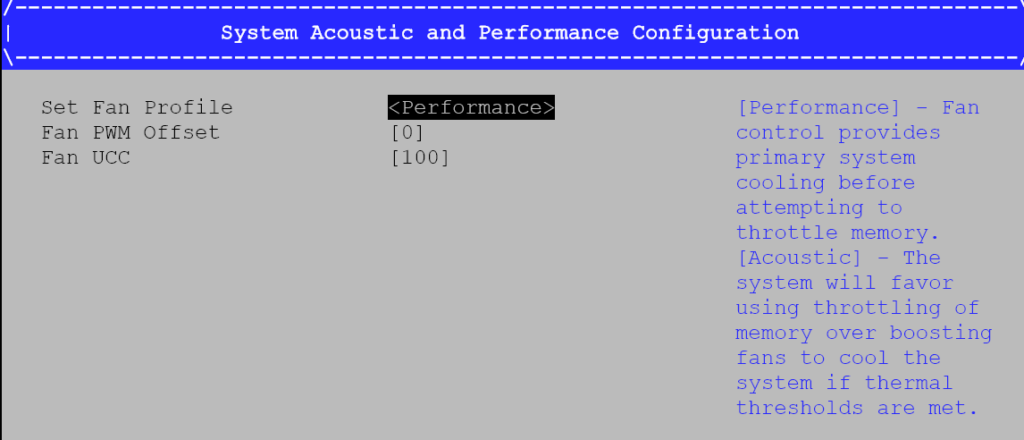
For the noise issues with the second blade, it seems the cooling on that was in Performance Mode, no Acoustic like the first blade, this can make it louder, but the drives will run cooler as the blade fans are all the system has
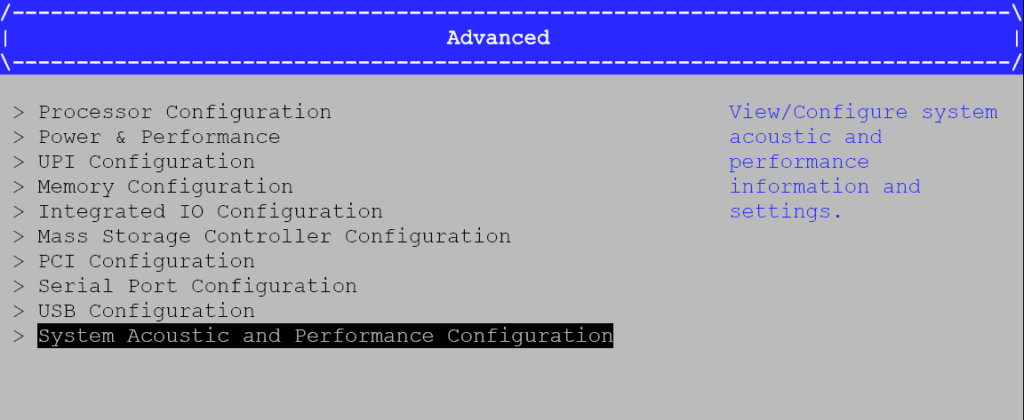
So to help this you can go to Advanced
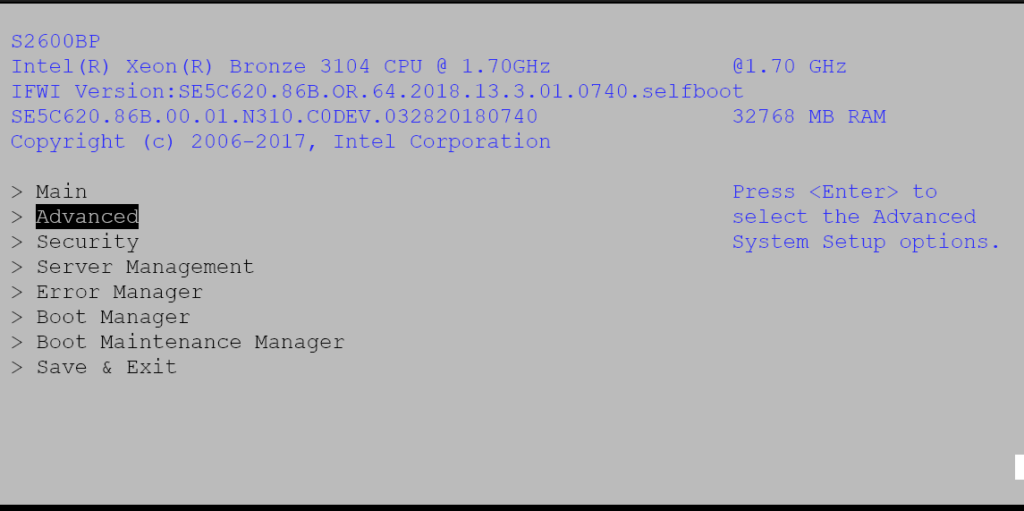
Then System Acoustic And Performance Configuration
Then System Fan Profile can be changed, the default for the very loud blade was Performance
The press Escape and head to Power And Performance
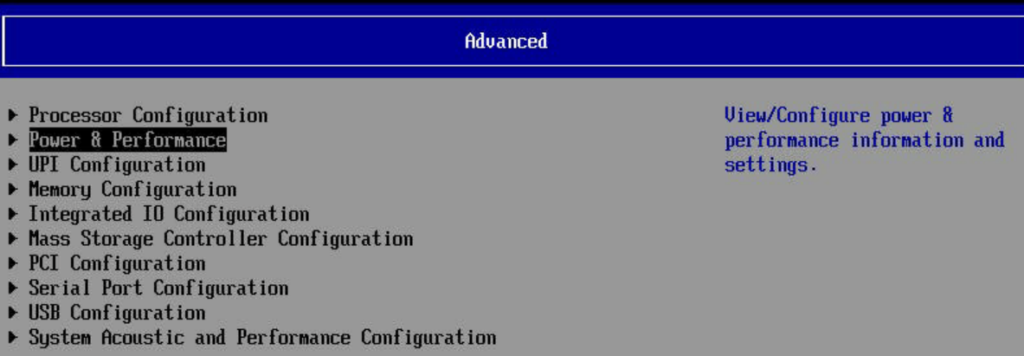
The loud blade had the CPU Power And Performance Policy on Balanced Performance

Changing this to Power to match the quieter blade helped, but on Acoustic And Performance you can also set the Fan UCC to 70, the minimum to help cap the max fan speed

Then press F10 + Y to save and exit

Now you can head to the IPMI on the URL on
https://ip
And enter your credentials

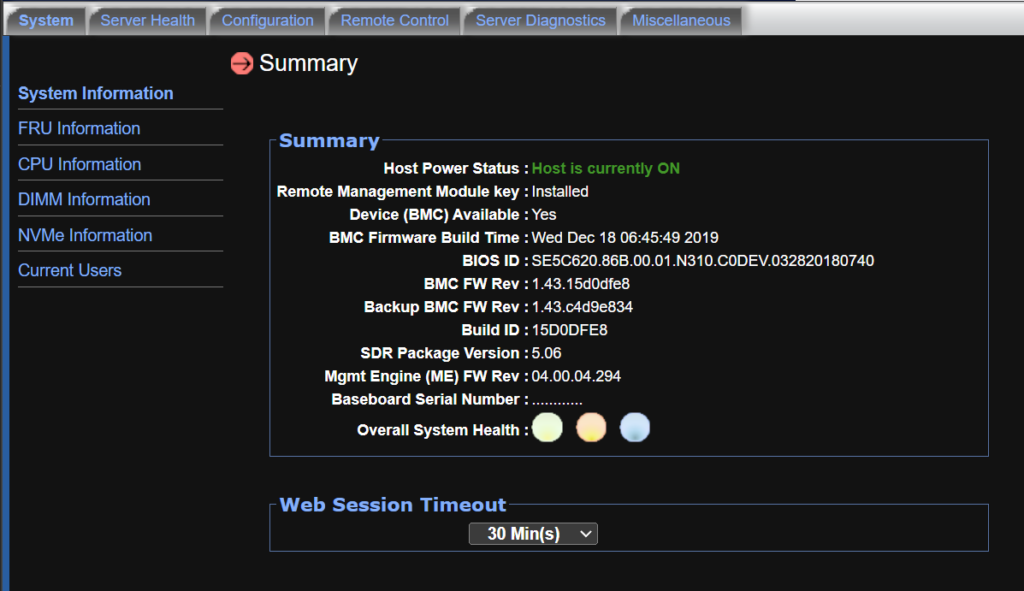
From the IPMI we can see the version, I have one on 1.43 from 2019, this only have Java for remote console
Patching The BMC/Firmware
We can get a copy of the BCM from Intel here
Then click Download here

And unzip the folder
Within that there will be a folder with all the files, it should look like this

Copy everything to the root of a blank USB and pop it in the back of the server, it will need to be an MBR, since the BIOS will be set to legacy BIOS boot from the Nimble, if its not, download and open Rufus and set it as non bootable and MBR, this will erase the disk, and click start, then copy all the files

Then power the blade on if its off, or reset it if its on
Wait for it to boot and dont press anything, it will load the EFI shell and run the startup.nsh script

Then it will will automatically load the drivers from the USB

The BCM will be auto updated

And you will see a progress %

You may see the screen go blank at various points, do NOT turn the server off
Then it will do the ME

Then the BIOS will be done

Then press 5, do not update these bits, the Nimble isnt read properly

Once its all done and rebooted it will say its finished and boot normally, do not power it off
It will then come back up and say its finished, you can now remove the USB and reboot from the BMC

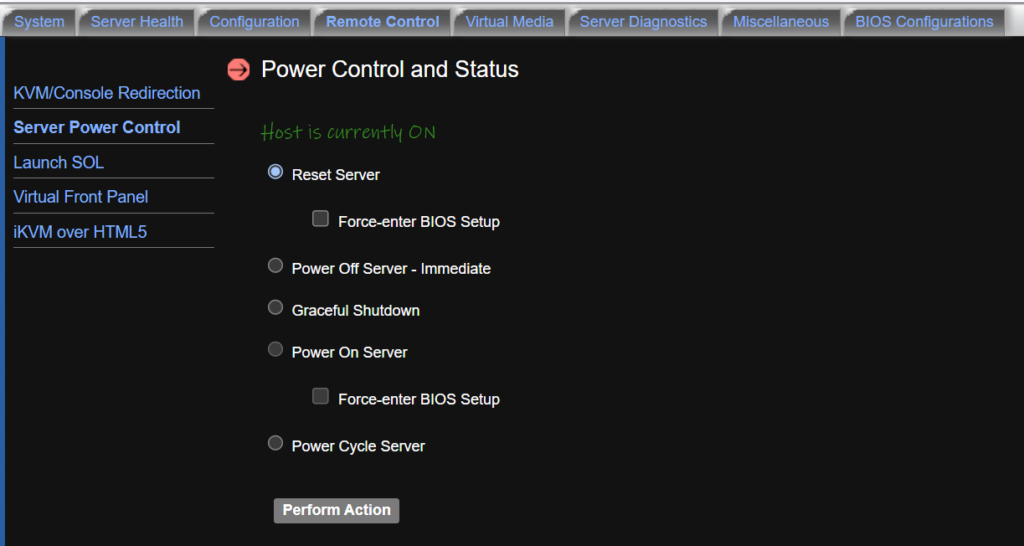
You can reboot the BMC from Remote Control/Server Power Control, checking Reset Server and then Perform Action
We can see under System/System Information everything has been updated
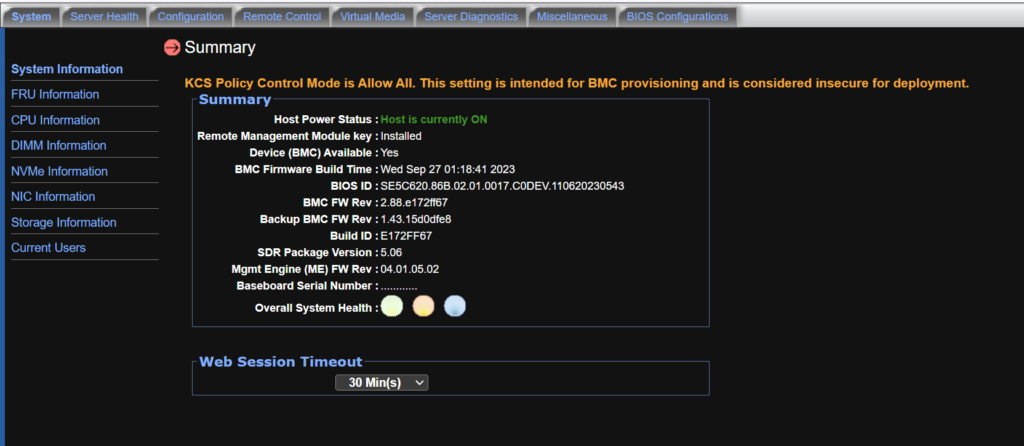
The key bit we want here is under Remote Control, iKVM over HTML5 is now available for remote access

Pre OS Setup
Before we look to put any OS on it we need to make a few changes, there are some settings in the BIOS that will cause the server to power off if the OS doesnt boot, now I assume this is for the Nimble OS, so we are going to disable these so they dont cause any issues
We can do this via the newly accessible HTML5 iKVM
Open the BIOS and head to Server Management

Scroll towards the bottom and disable the OS Boot Watchdog Timer, this will, by default, reset the system if the OS doesnt bot, as its likely looking for the Nimble OS, this is better off being disabled

Head to Server Maintenance Manager from the main menu

Then Advanced Boot Options

And change boot mode to UEFI

From the menu up, you will need to head to Change Boot Order once the OS is installed to set the internal disk your OS is on
Since we have set everything to UEFI this can cause a lot of PXE boot options, we can disable this from the main menu then Advanced

No PCIe Configuration

Then UEFI Network Stack

Then set UEFI Network Stack to Disabled

A hypervisor is the better option for the chassis with both blades being used, you will want PCIe passthrough enabled in the BIOS for that to pass the storage through to a VM like TrueNas
Go up a level and into Integrated IO Configuration

The set Intel VT for Direct I/O to Enabled, if you get a warning about an invalid option, just click enter

Then F10 and Y to exit and confirm, the server will then reboot

Installing An OS
Now everything else is setup we are ready to get an OS installed
This guide isnt going to cover how to install the OS you want but go over getting any OS setup on the system
For the OS you want to choose the right drive size for this, and it shouldnt use drives in the front bays
The 2242 bay in the mainboard is the best place, where the default 16GB SATA M.2 is, this will power fine for TrueNas, its a little small, but will get the job done
For ESXi you will have to replace it, I used a 256GB NVMe 2242 drive in the same slot and it worked perfectly, if you wanted more local hypervisor storage you can get a larger drive or user additional NVMe bays or the PCIe slots, I would also take the same approach for Proxmox
Now we have the system prepped, we can use the IPMI HTML5 iKVM to enter to boot menu pressing F6 here

And select our bootable USB, mine is the LQH Tech

Then install the OS like you would on any other system, I did run a few tests on the blades including TrueNas 24.04 and ESXi 8U3
Once your OS is installed, we will then want to get back into the BIOS with F2 while booting and head to Boot Maintenance Manager/Boot Order

Press Enter here

Select the drive you installed your OS too, and click +

It should then be at the top

Press Enter

Then F10 and Y to save and exit

This should allow the new OS to always boot when the server powers up
If you opt for TrueNas I wouldnt recommend enabling serial as this will disable the serial output for bits when the server boots making it harder to use if anything crops up
With it disabled in TrueNas, the output ends here

ESXi was the OS I would use, ESXi 8U3 installed fine after replacing the 16GB SSD and the LSI 3008 is fully recognised with front bay disks, though I wouldnt recommend this as both blades have full access
To get the front bays ready for PCIe passthrough we need to select the host
Then head to Configure/Hardware/PCIe Devices, towards the back of the list we will see the LSI SAS3008 card, if we click it and select Toggle Passthrough
It will error as ESXi cant unmap the disks, now we need to reboot the host

Right click the Host, and click power/Reboot

Put anything in the box and click Reboot

When the host has rebooted, the device will be enabled
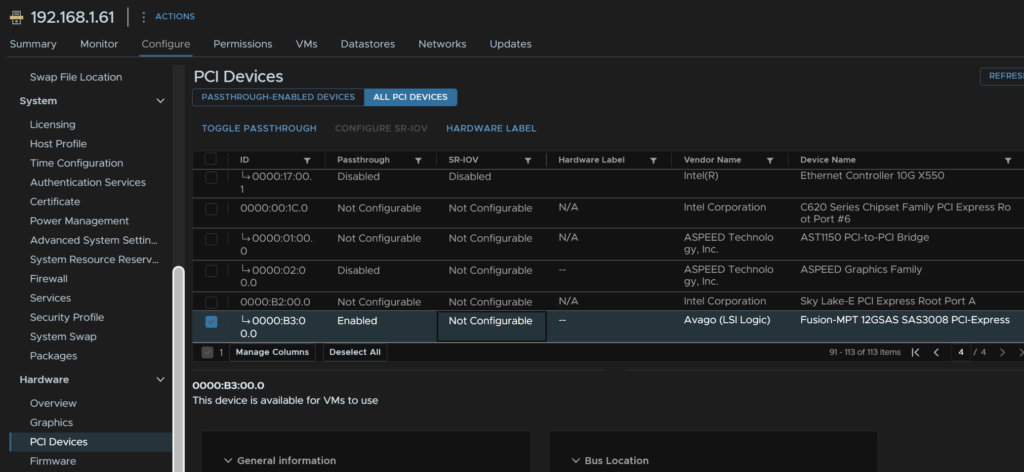
For storage I then setup a TrueNas VM with the HBA passed through
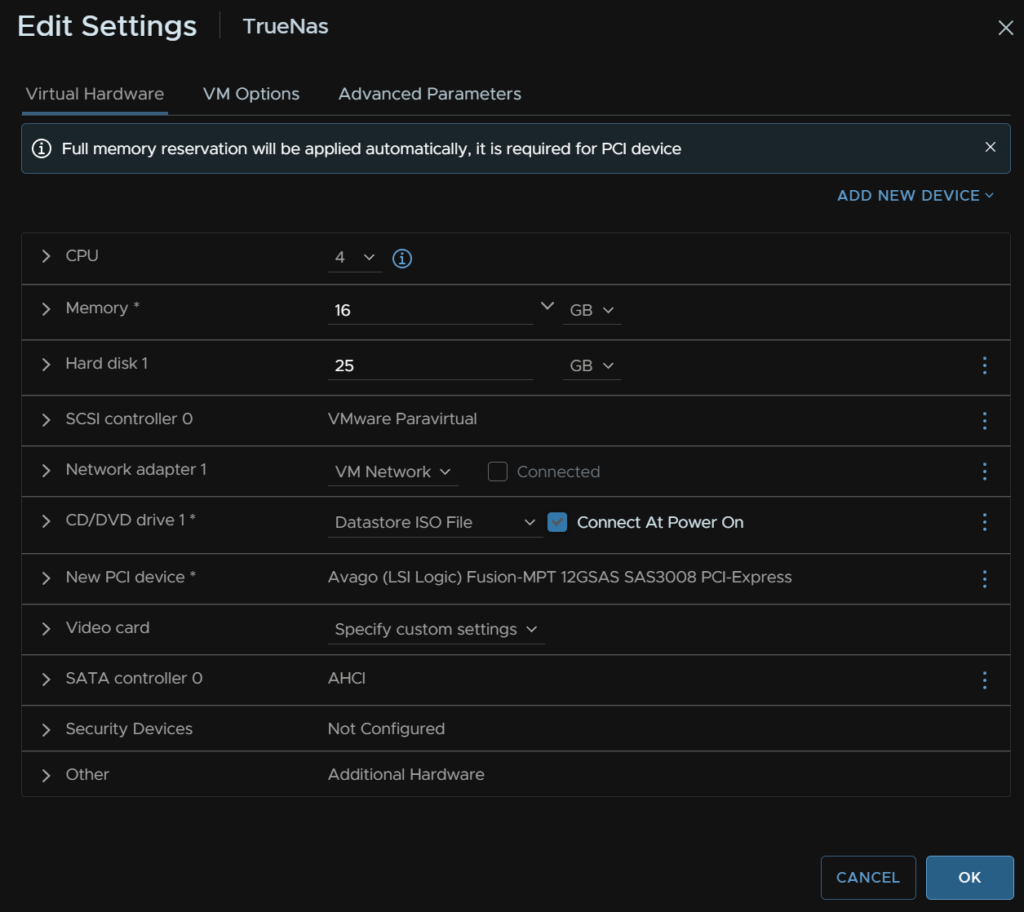
We will want to ensure the VM has the LSI card attached by Dynamic I/O PCIe passthrough, to add a card to a VM edit the VM and click Add New Device, then PCIe Device
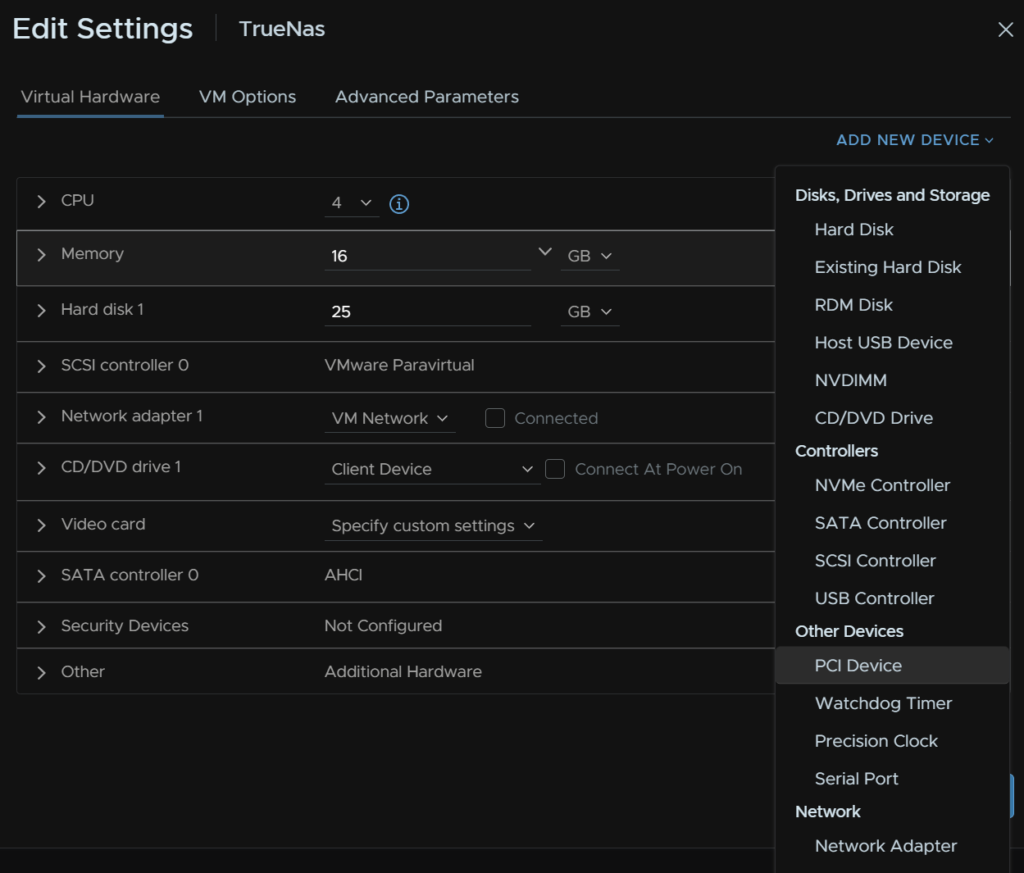
Then select the device with Dynamic Path IO, the click Select and Save
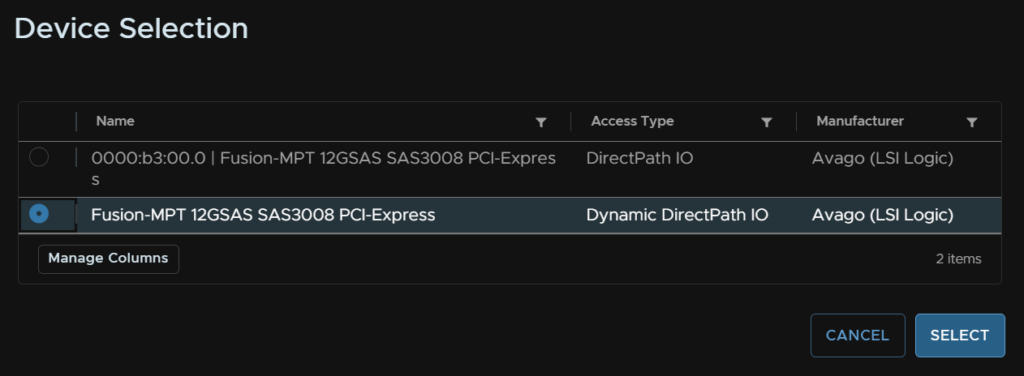
This will cause the VM to reserve all RAM allocated
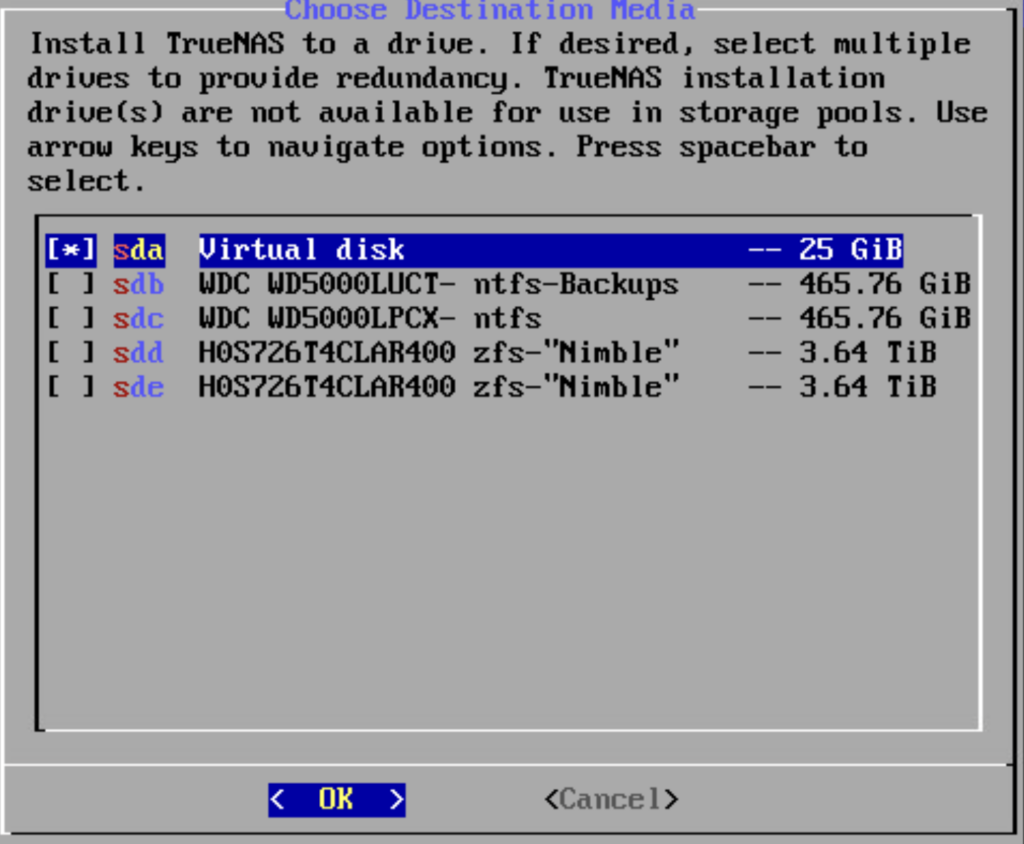
For the Install, ensure you select the Virtual Disk
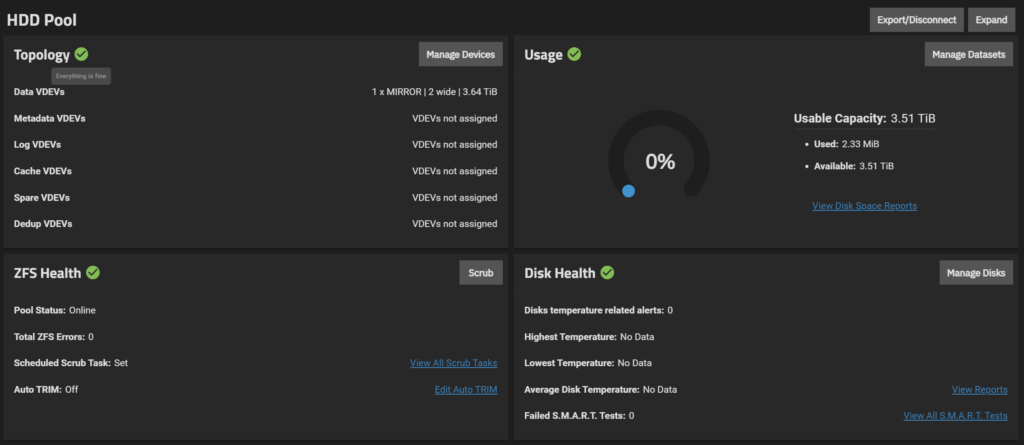
One in the UI all disks show up like they would if the system was running TrueNas natively, and I can create a mirror on the 2 SAS HDDs I put in for testing
