Last updated on January 17th, 2026 at 17:57
In this guide we will be taking a look through the deployment of the full VVF 8 suite
So whats included with VVF 8
- ESX
- vCenter
- Aria LCM
- VCF Operations (Aria) – Standard
- VCF Operations For Logs (Aria)
- VKS – vSphere Kubernetes Solution/Tanzu/vSphere IaaS
- vSAN – 250GiB/Core
Its worth noting Aria Operations and Aria Operations For Logs have been rebranded to VCF Operations and VCF Operations For Logs, this is mainly in version 9, but the terms are interchangeable
Going further back this used to be called the vRealize Suite
This deployment was done virtually, but the same applies to physical servers, for a vSAN cluster I recommend a minimum of 4 nodes
We will also need a few VLANs for this, here are the required ones and what I used for reference
- Management – VLAN 1017
- vMotion – VLAN 1018
- vSAN – VLAN 1019
- Server – VLAN 1020
- VKS Frontend – VLAN 1021
- VKS Workload – VLAN 2022
This guide also uses a 6 NIC/host configuration split out like this
- Management/vMotion vSwitch
- VM Traffic VDS
- vSAN VDS
For a 4 NIC/host configuration you could split it could split it out like this
- Management/vMotion/VM VDS
- vSAN VDS
The VM requirements for all the services are
- vCenter – 4vCPU 21GB
- vSAN ~32GB in RAM Cache
- 4x vSAN File Nodes – 4vCPU 8GB
- 3x Control Plane VKS Nodes – 4vCPU 16GB
- Aria Lifecycle – 2vCPU 6GB
- VCF Operations – 4vCPU 16GB
- VCF Operations For Logs – 8vCPU 16GB
Generally, I have tried to keep everything in my VVF 8 lab, however a couple of bits will be using my VCF lab as its better setup for certain features, anything using this will have different IP ranges, and while it is part of a VCF environment, everything in here can be used with VVF licensing
Important – By continuing you are agreeing to the disclaimer here
1 – ESX
1.1 – Installation
In order to install ESXi you’ll need the ESXi ISO from Broadcom, you can find this under VMware vSphere Foundations

Expanding which ever section you are licensed for, I have enterprise plus and clicking the version, this should be 8.0

Click View Group on the vSphere Hypervisor

And Download the ISO Image

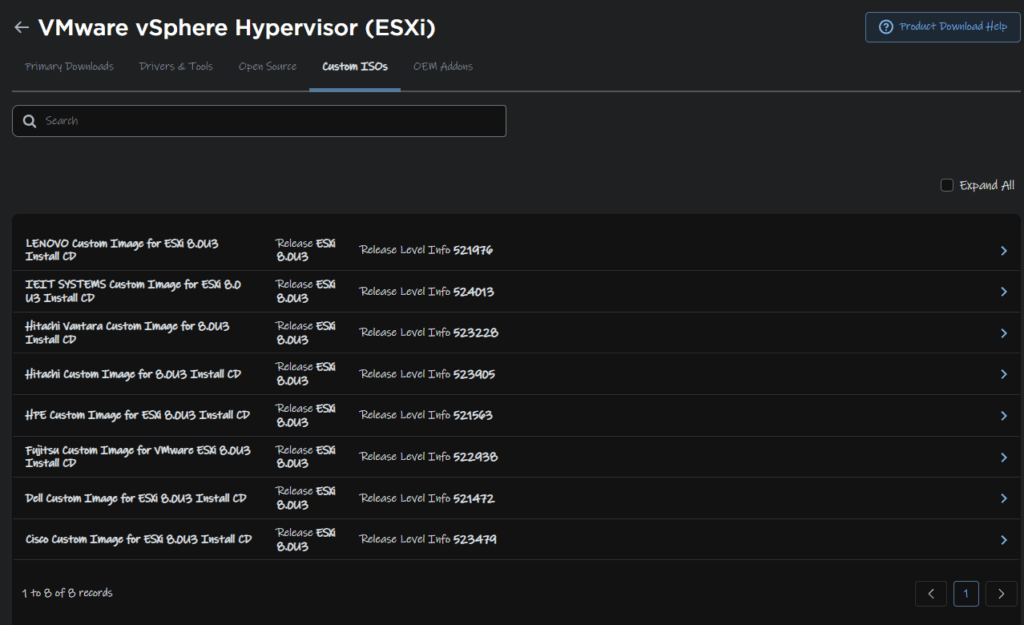
I am using the standard one, however there are Vendor customised ISOs that you will want to use, for your vendor, this is located at the top under Custom ISOs
Mount this to the server, by using rufus to create a bootable USB, or by mounting it to your servers virtual CD ROM in the IPMI, iDRAC for Dell and iLO for HPE
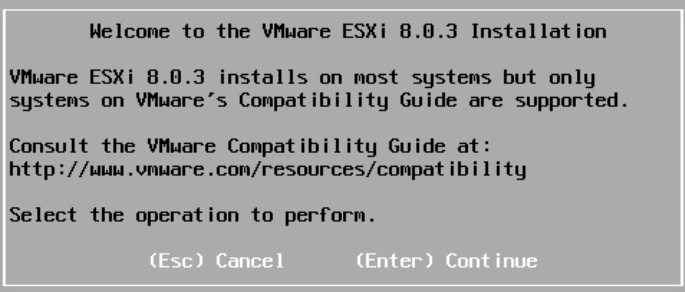
Once the server has booted ESXi, you’ll have this screen, select enter to continue
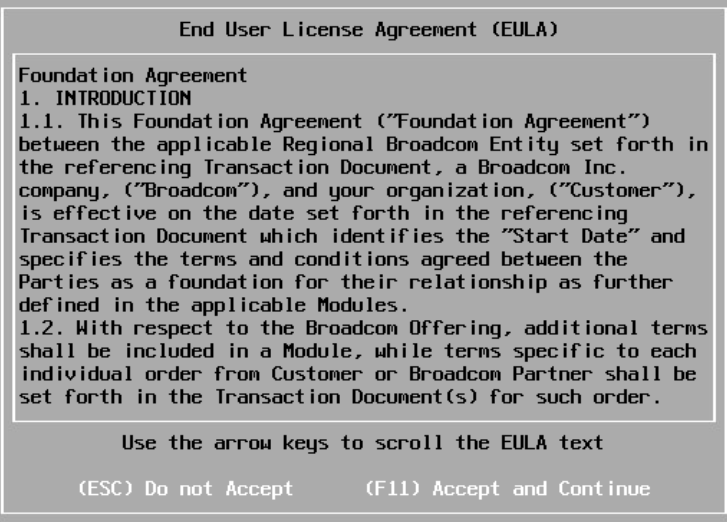
Accept the EULA with F11
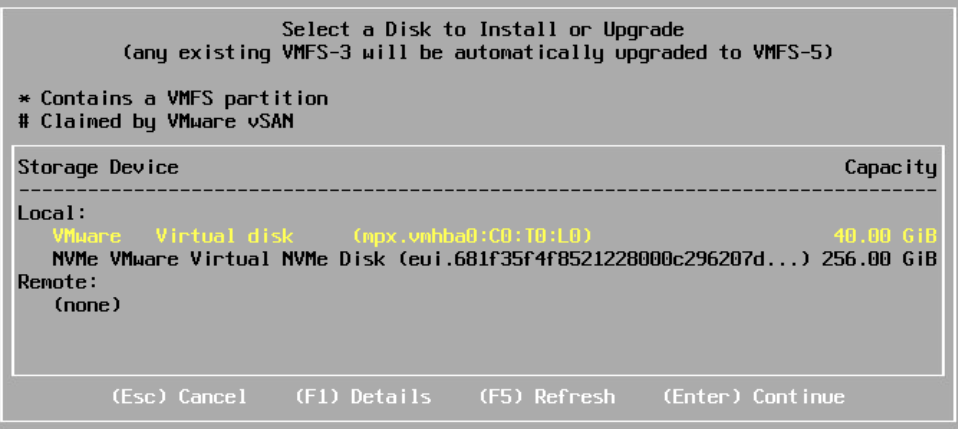
It will then scan for bootable devices, for a production system this should be something in RAID 1
Examples are Dell’s BOSS card
For HPE G11 you should have the NS204i-U, or for G10 systems the NS204i-P, which is a PCIe card
As this is a lab, I have a virtual disk, and will be using the 40GB one by making sure its highlighted in Yellow and clicking Enter to Continue
Select your keyboard layout and hit Enter
Set a root password, use something easy to use, we can set a secure random one later
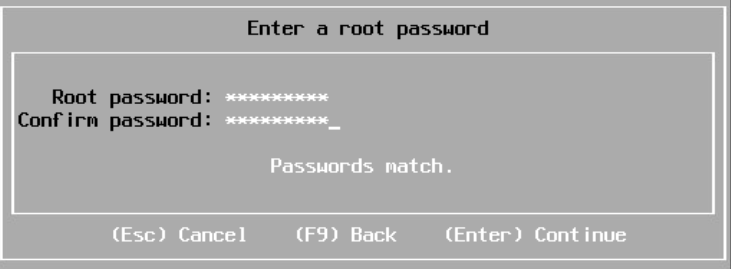
Then click F11 to install
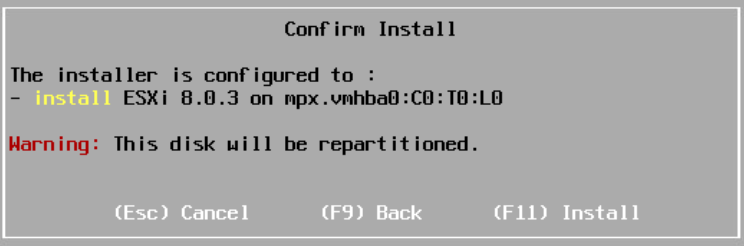
Once thats done, reboot the server when prompted
1.2 – Network Config
Once ESXi has installed, we’ll need to set the networking up, when its booted backup, your screen should look something like this
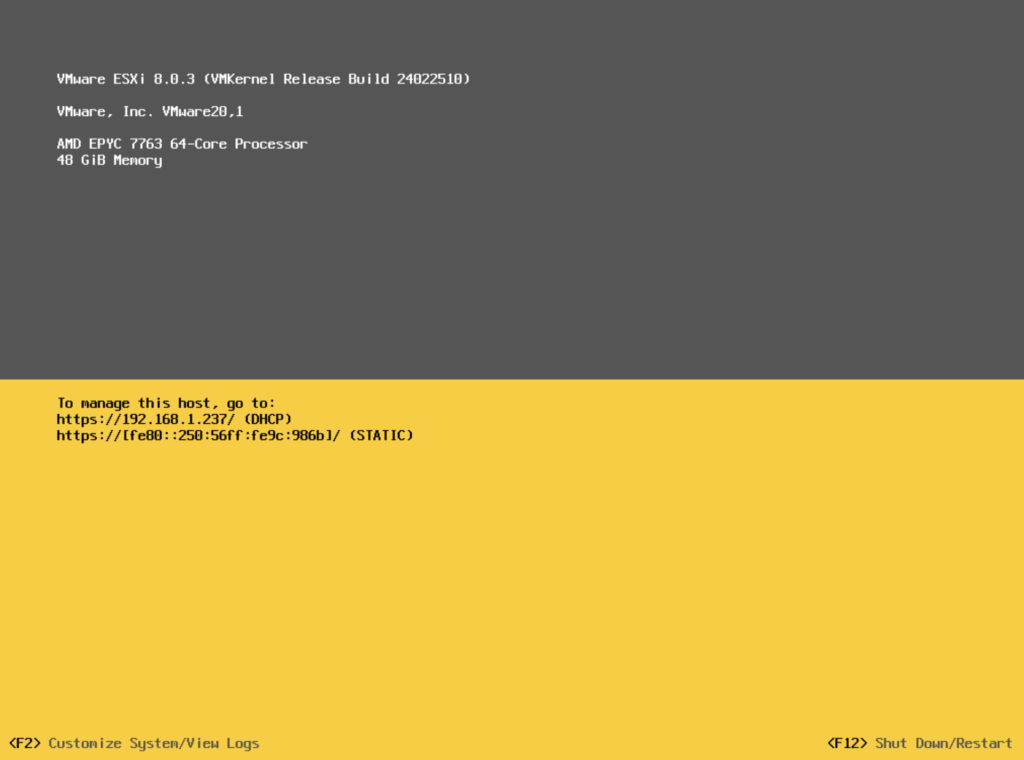
Press F2 to login and enter the root password
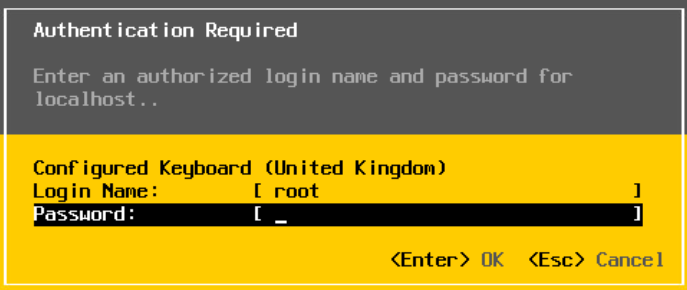
The use the down arrow key to scroll to Configure Management Network and hit enter
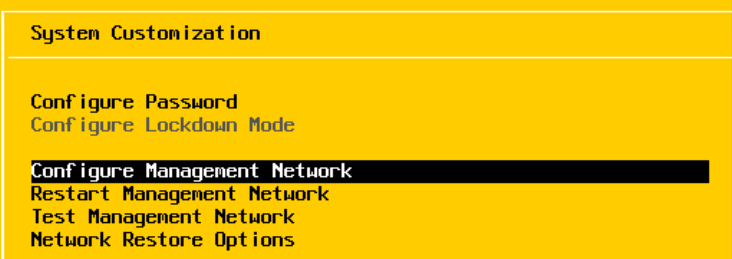
Under network adapters, make sure the adapter you want to use for management is selected, this should be set at the switch level as access or tagged for your management VLAN ideally

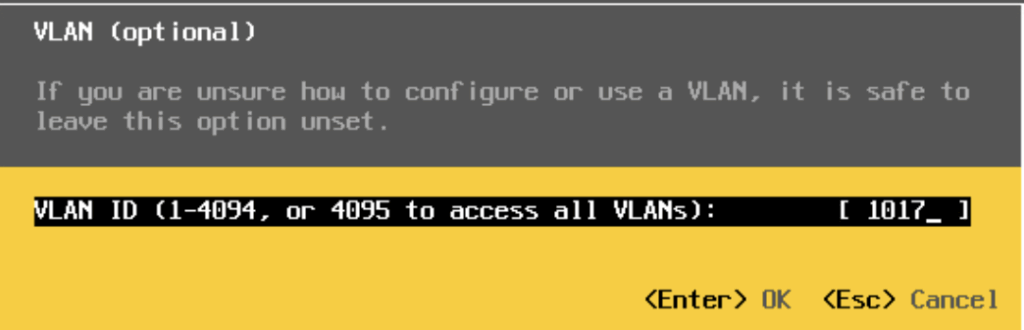
You can select VLAN to add a tagged VLAN, or leave blank if the management network is set as the access VLAN on the port
Mine is trunked so I added my management VLAN tag and pressed Enter
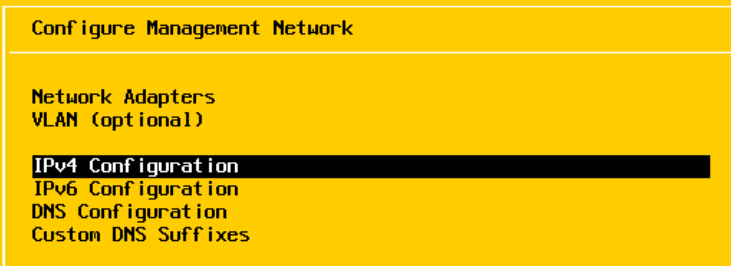
Press Enter on IPv4 to edit this setting
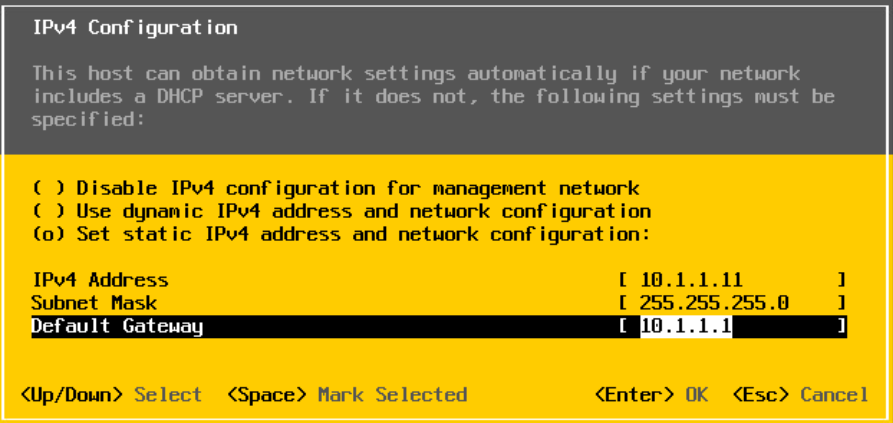
Set the hot as static by scrolling down to the third option at the top and hitting Space, and then adding your IP, subnet mask, and gateway, once you are done, press enter
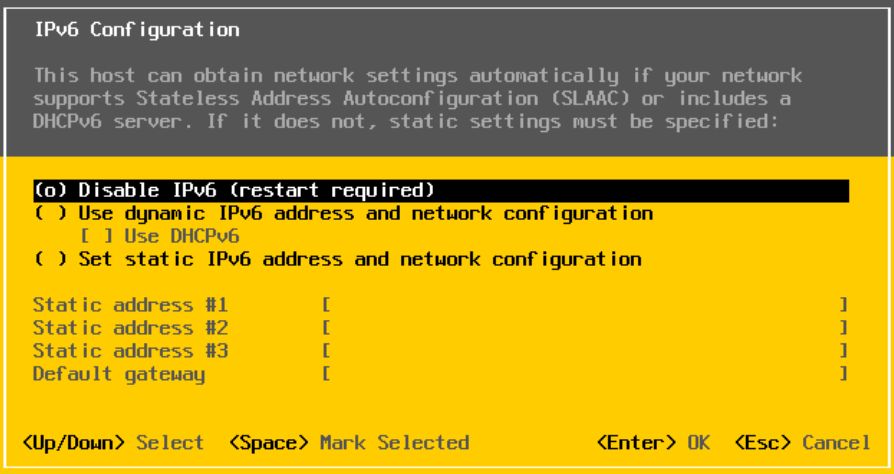
For IPv6, use Space to select disable, unless you are using it and press Enter
For DNS, use space to select the second option and add your DNS servers and a hostname, then press Enter

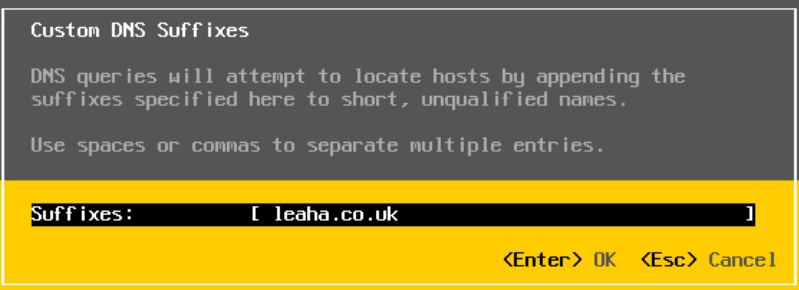
Under DNS Suffixes, add your Domain, the press Enter
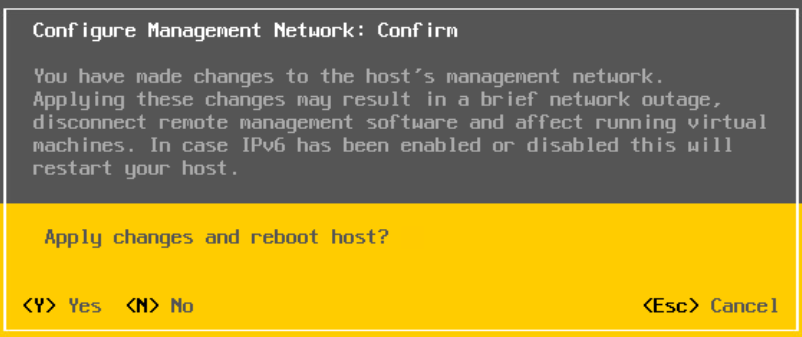
Now press escape to back and press Y when prompted to apply changes, disabling IPv6 requires a reboot
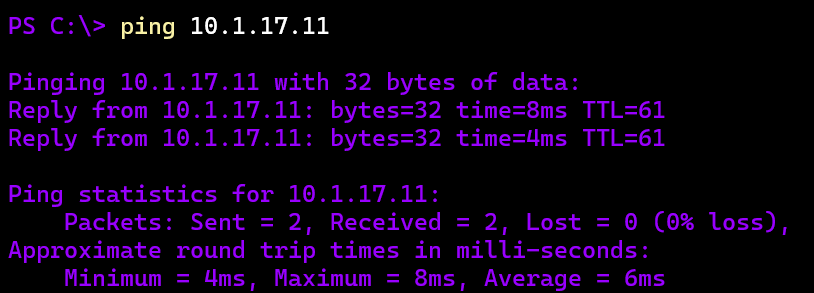
We can test this is working by pinging the management address
If you disabled IPv6 like I did, the host will reboot
1.3 – Post Deployment Tasks
Now ESXi is deployed and the networking is setup, we can get to the Web UI on
https://fqdn/uo
Or
https://ip/ui
Login with the root password
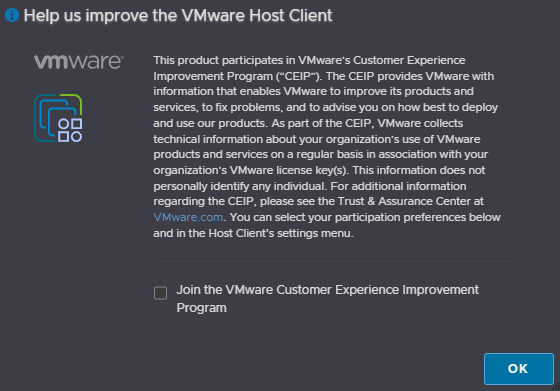
Uncheck the CEIP box and click ok
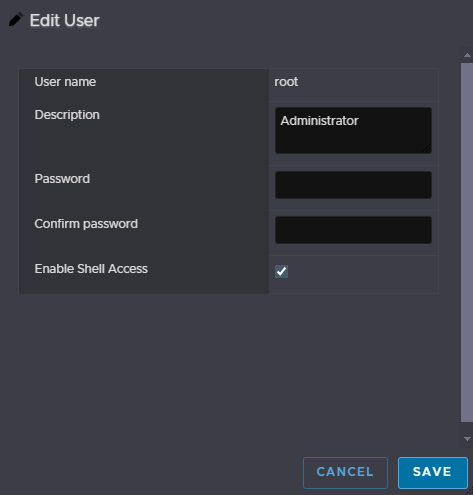
Then head to Manage on the left, Security & Users at the top, Users to the left, click the root account and click Edit User

Here, you can set the root password too something more secure
Now, we need somewhere to put the vCenter networking wise, this may vary depending on your networking, but most deployments have a Management network, ESXi and vCenter will usually be on the same network
If the physical switch port the management NIC was set on, VMNIC0 for me, is set with this management VLAN as the access VLAN, meaning all untagged traffic is tagged with the access VLAN, then you dont need to do anything, if this VLAN is tagged, it needs setting in ESXi like the management port was in the network setup
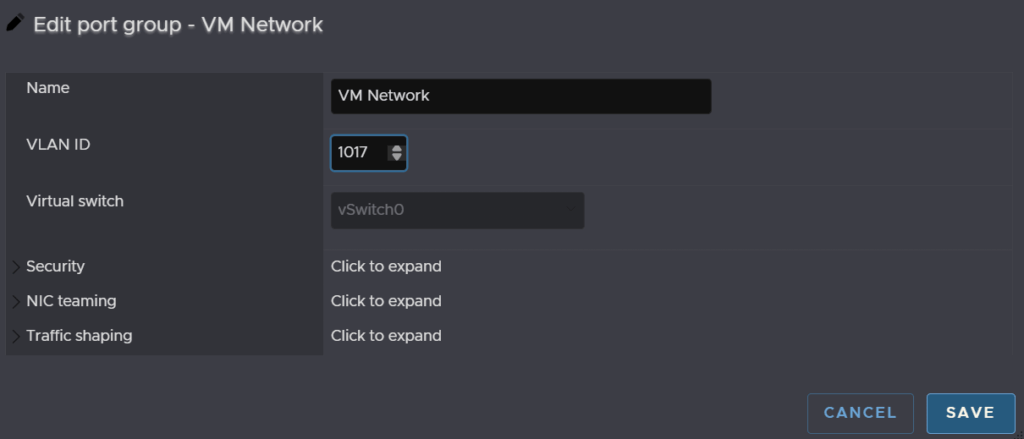
For the tagged part, we need to go to Networking on the left, Port Groups at the top, select the VM Network, and click Edit Settings

Then set the VLAN ID, and click Save, the vCenter will be deployed here, this is usually the same VLAN as ESXi, and set to 0 to use the access VLAN on the switch, in my case its 1017
Lastly, we will want to configure NTP, this is a more important if you are using vSAN
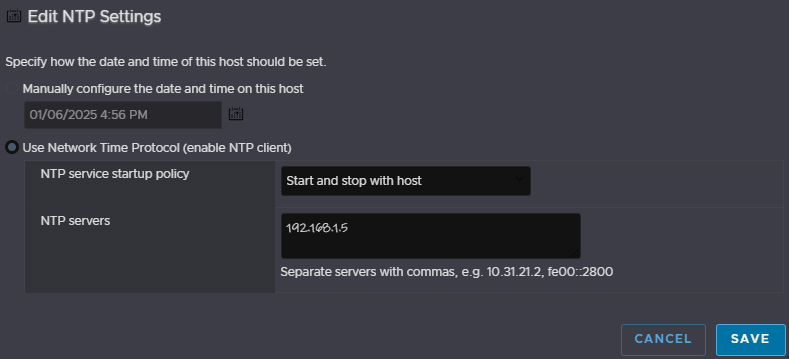
Head to Manage/System/Time & Date and click Edit NTP Settings
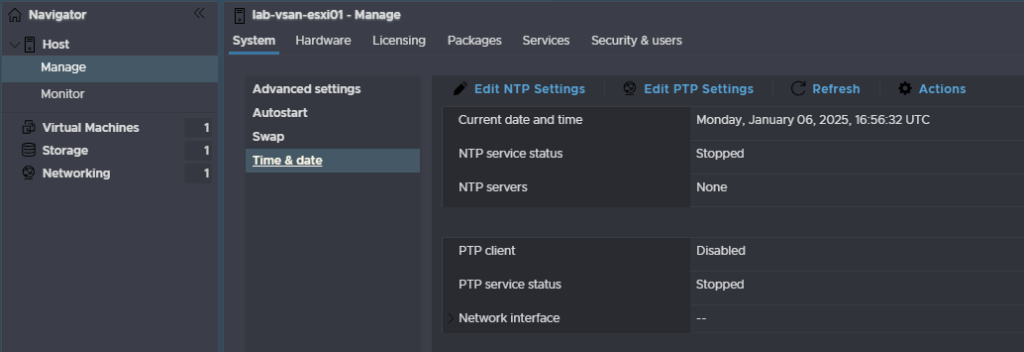
Check the radio button to use NTP and set the service to start and stop with the host, then add your NTP server and click Save, this doesnt have to be a local NTP server
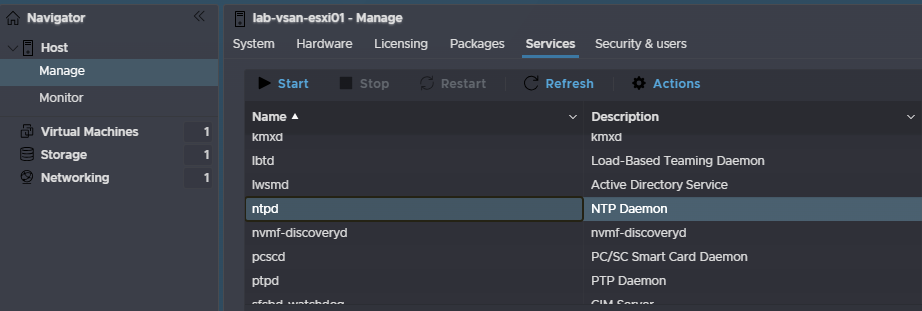
Then head to Manage/Services and find ntpd, click and and then click Start
2 – vCenter/vSAN
2.1 – Stage 1
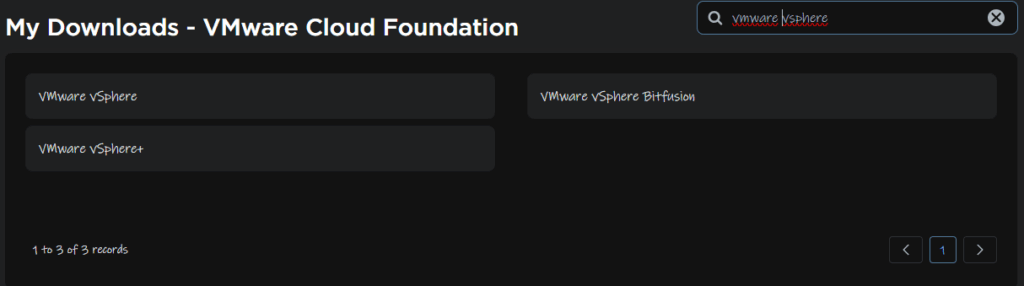
We will need to download the vCenter ISO from the Broadcom portal, you can get it from the Broadcom downloads page by Searching and selecting ‘VMware vSphere’
Expand what you have an entitlement too, as I have VCF, enterprise is available for me, but its the same for VVF, and select release 8
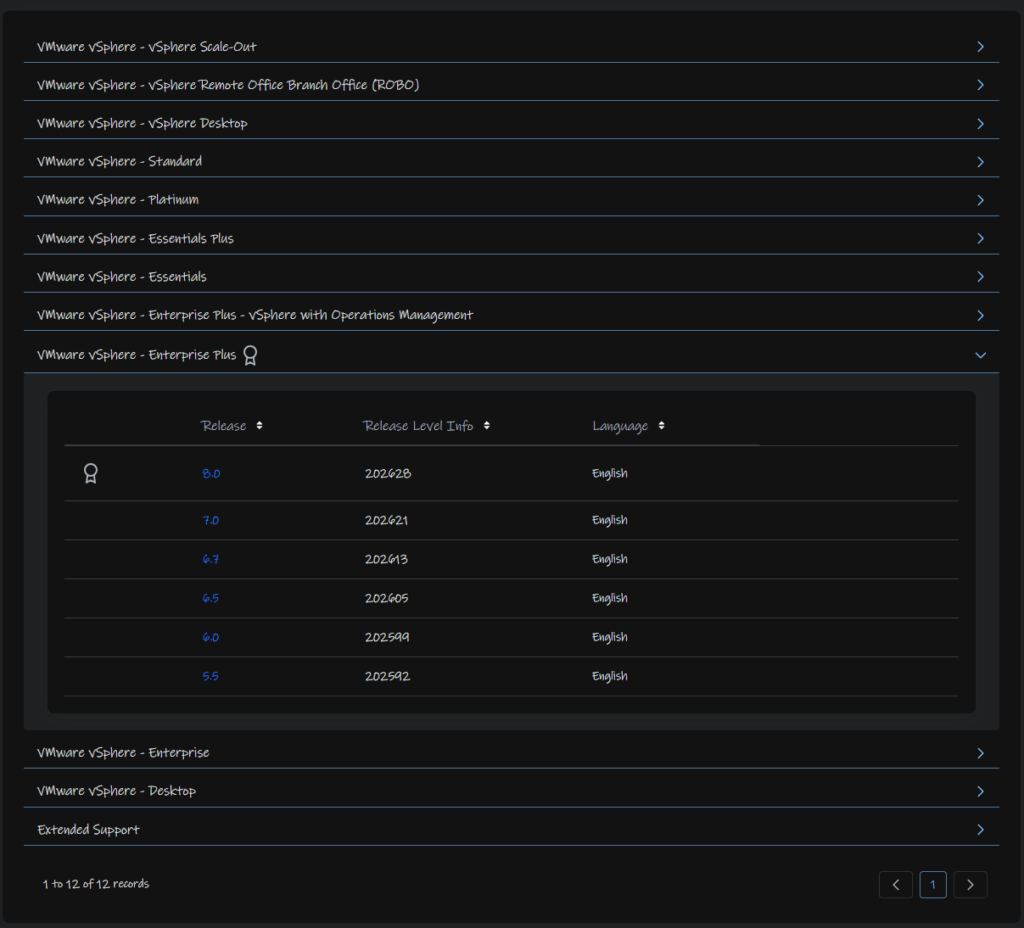
Click View Group on vCenter Server

Then downloads the ISO file

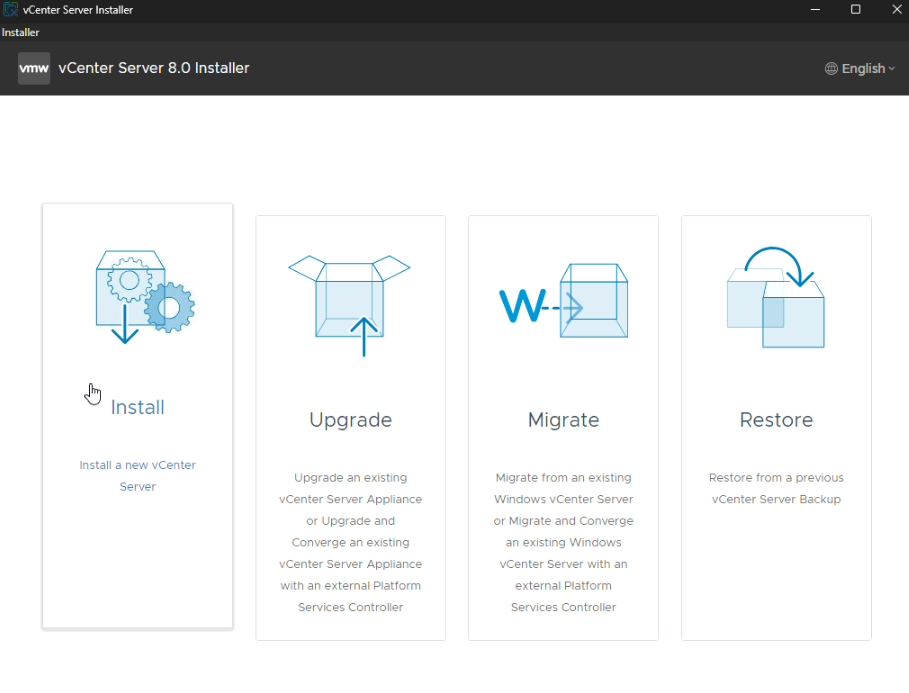
Double click the ISO to mount it, then head to vsca-ui-installer/win32 and double click the Installer.exe file

Click Install
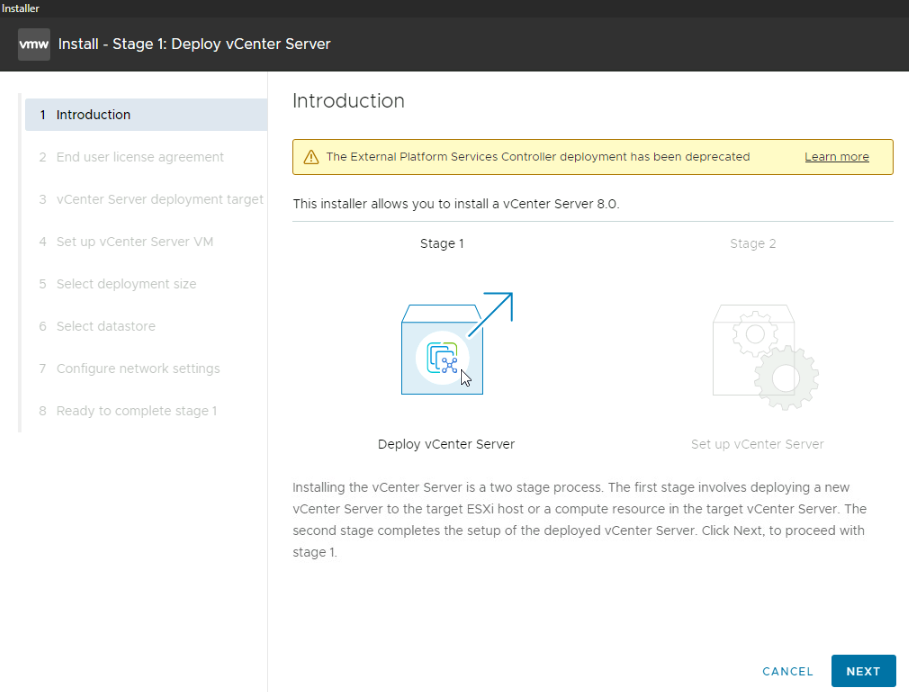
Click Next
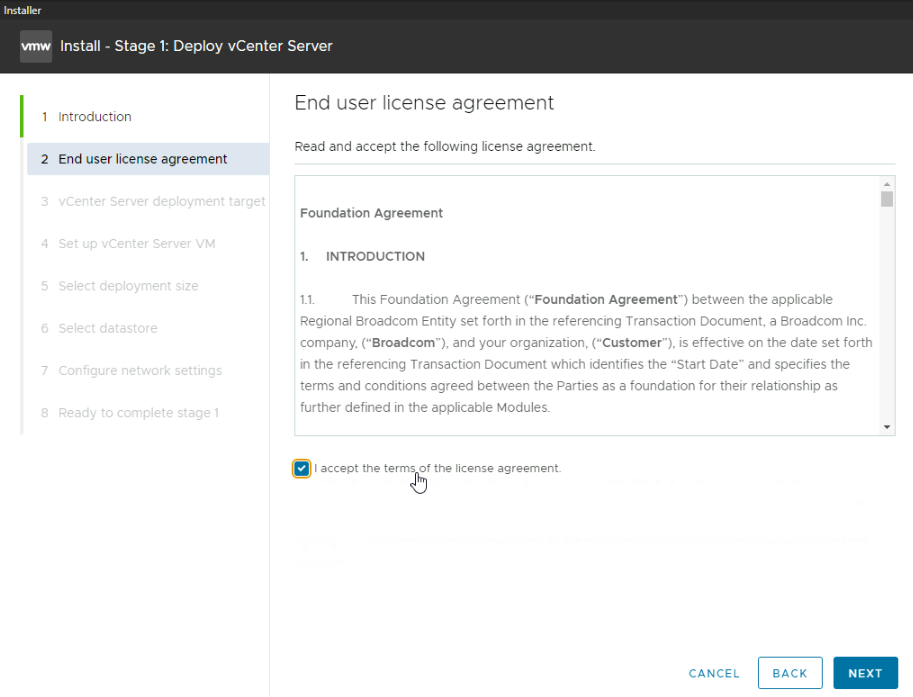
Accept the EULA and click Next
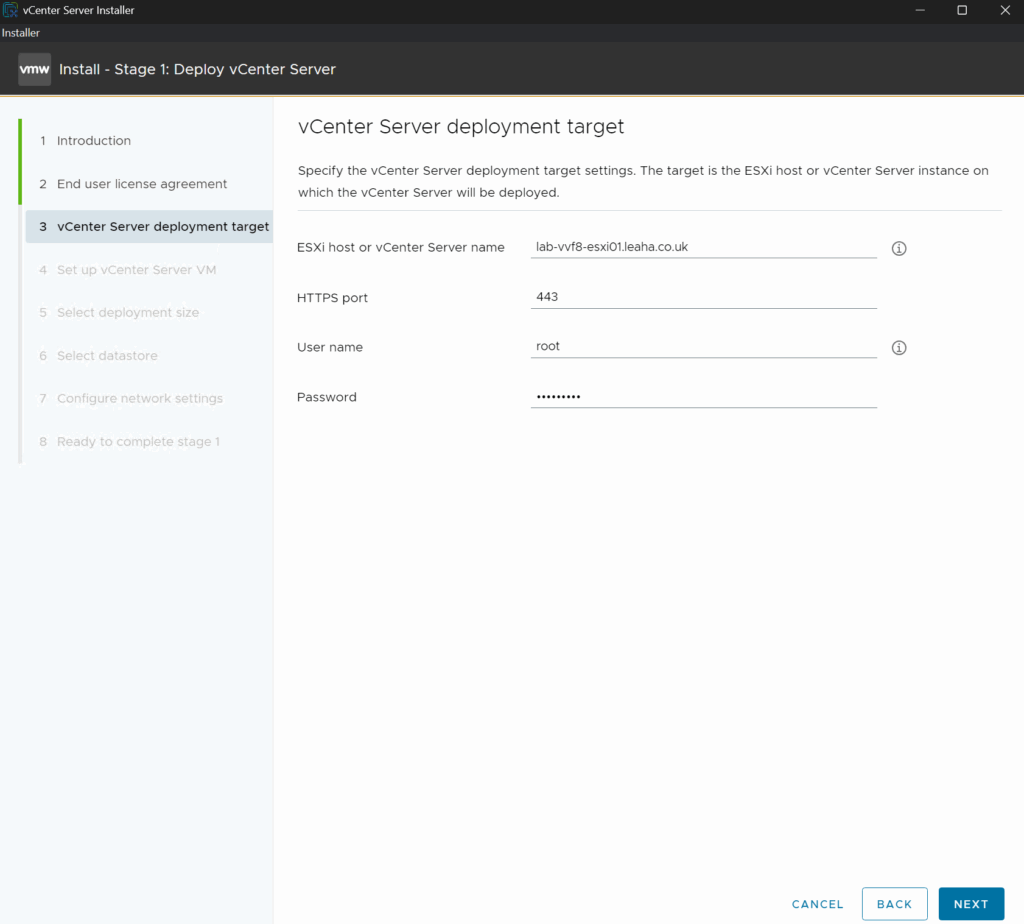
Add the ESX nodes FQDN, leave HTTPS port on 443, and add the root user credentials, then click Next
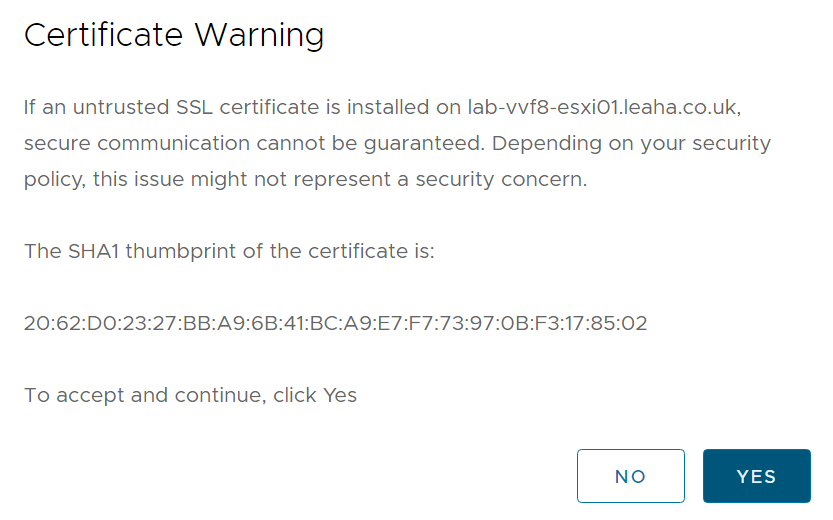
Accept the SSL certificate
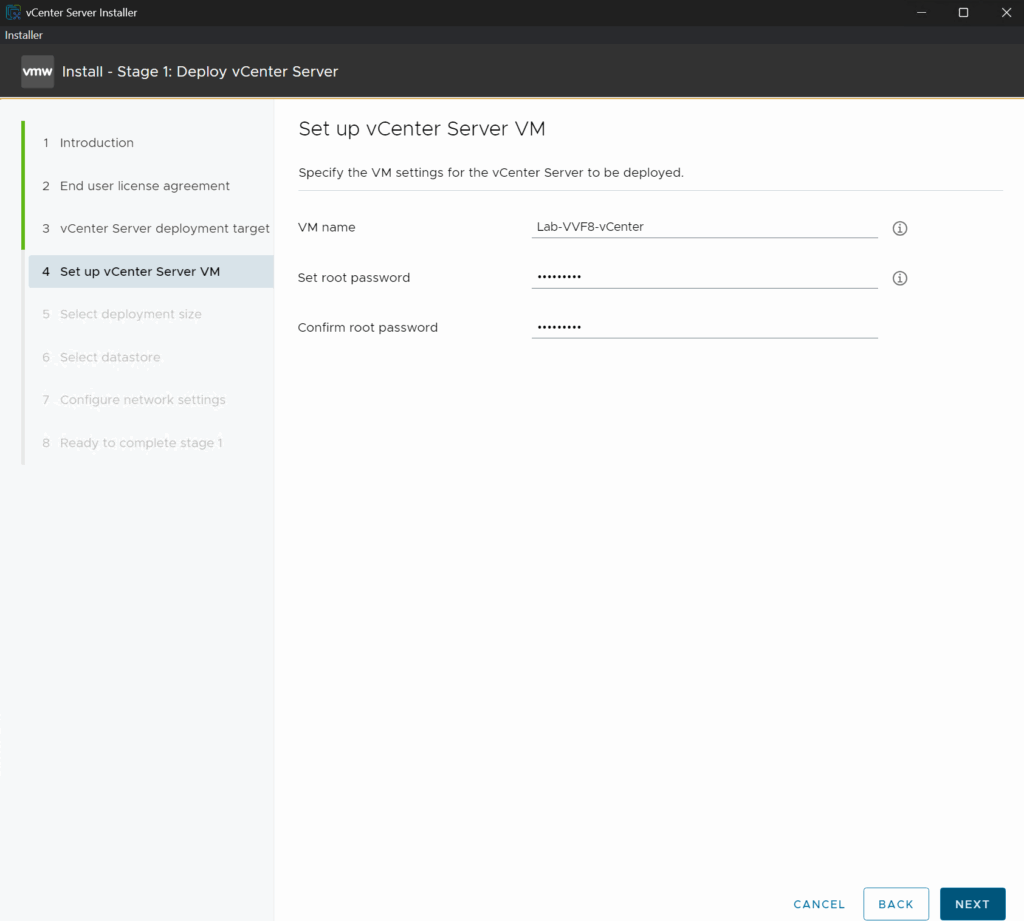
Then add a name for the VM, this isnt the machine name or FQDN, and set a root password and click Next
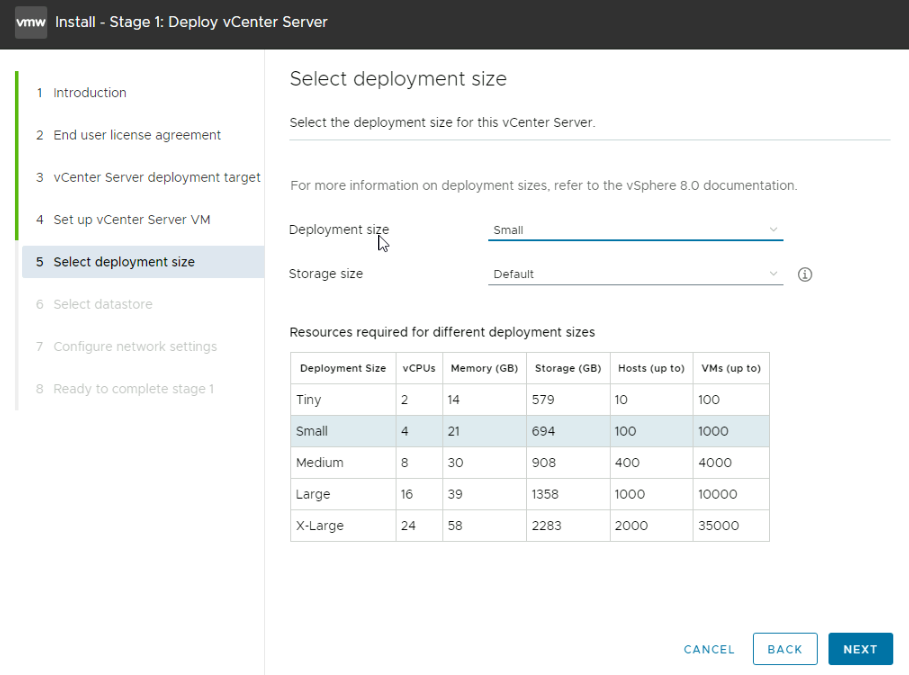
Then select the deployment size, for production Small should be the smallest you deploy, Tiny is only suitable for proof of concept labs, otherwise base the size on the chart of VMs and ESXi hosts
Eg if you have 110 hosts and 500 VMs, you would want medium
Then click Next
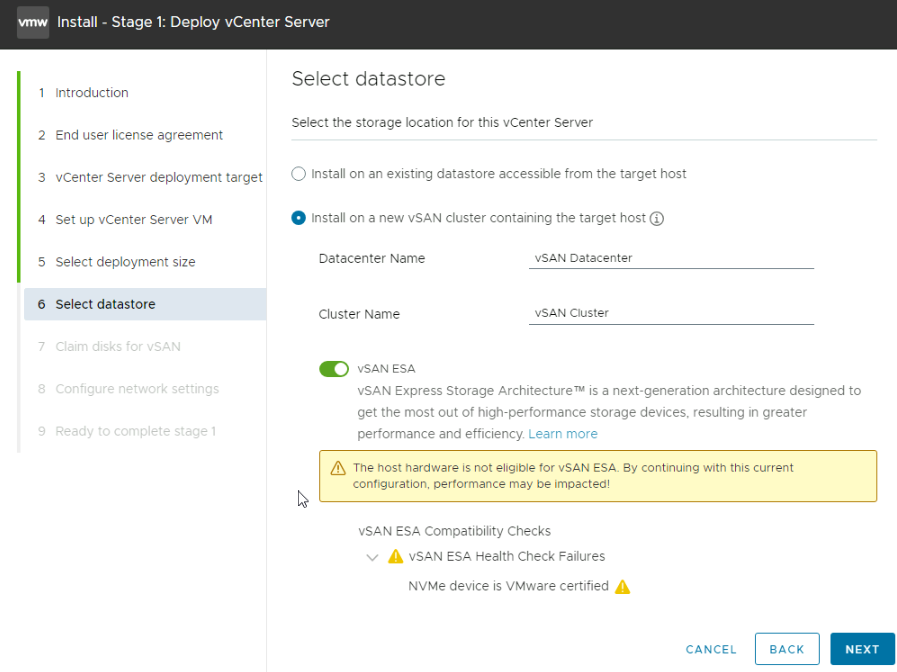
We then need to select the option to install on a new vSAN cluster, give a datacenter and cluster names, I am using the default for this lab, and in 2025 we should be using NVMe disks, so enable vSAN ESA
Now this must be HCL certified disks, and when you bought the servers this should be stated, or the node will be marked as vSAN Ready, VMware will not support you if vSAN doesnt work or has issues and the disks and firmware are not in the HCL
For me I am using a virtual lab, so it fails here and tells me they arent certified, so you shouldnt see this error
Once you are done, click Next
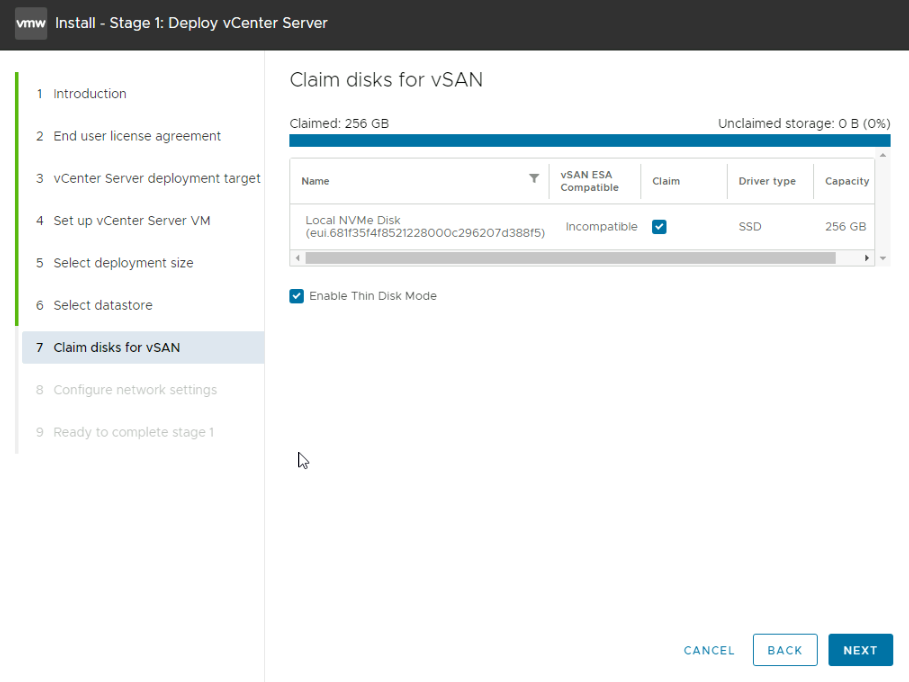
Select the disks to add to vSAN, your hosts likely has more than one disk, using the check box under the Claim column
And then enable thin disk mode for the vCenter
Again, your disks should be compatible, as mine are virtual, they are listed as incompatible
For the network, we prepped the VM Network earlier, so we will be using that for the vCenter for the moment, it will be moved later
IP version wants to be IPv4 and IP assignment needs to be static
Ad the server FQDN, this needs to match the IP we will use and be added to all DNS server before we move on else the deployment will fail
Then we need the IP address and subnet mask or prefix
And lastly the default gateway and DNS servers comma separated, everything else below we can leave, then hit Next
And click Next and Finish
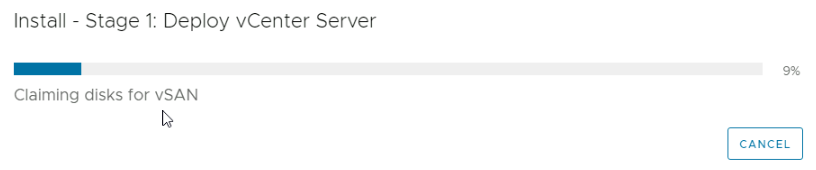
You will see it go through the install and claim the disks for vSAN
Then initialise
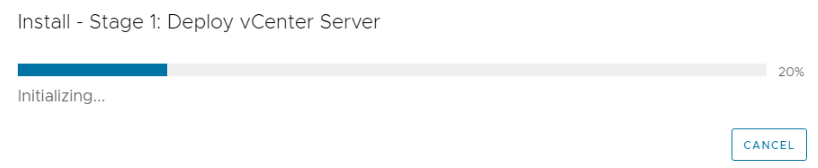
Then Deploy
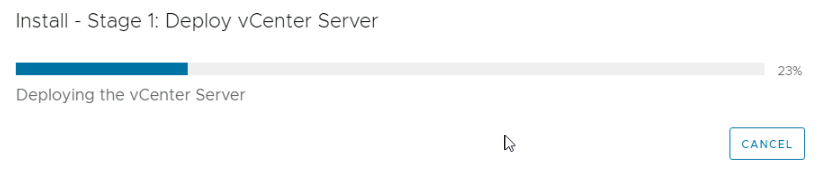
Once thats deployed, the RPM will initialise, this is when it begins powering on
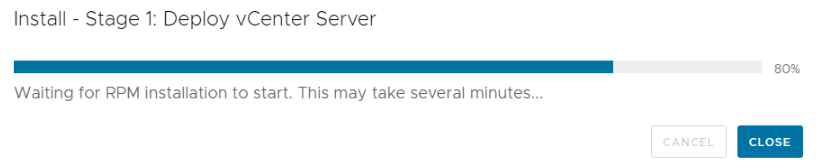
Then several RPM files will be installed and initialised as well as some containers
Once thats done we can head to Stage 2
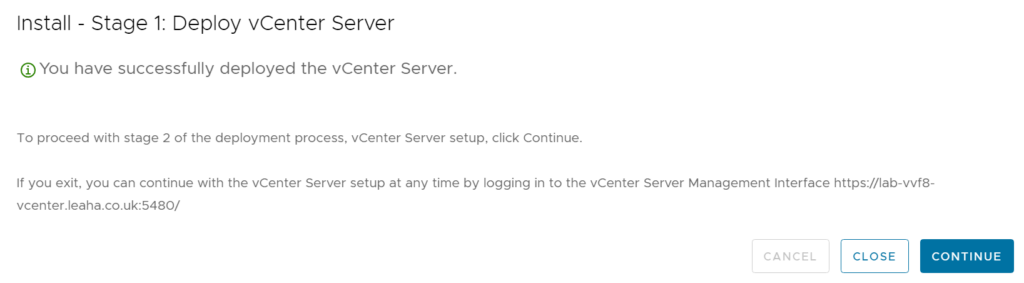
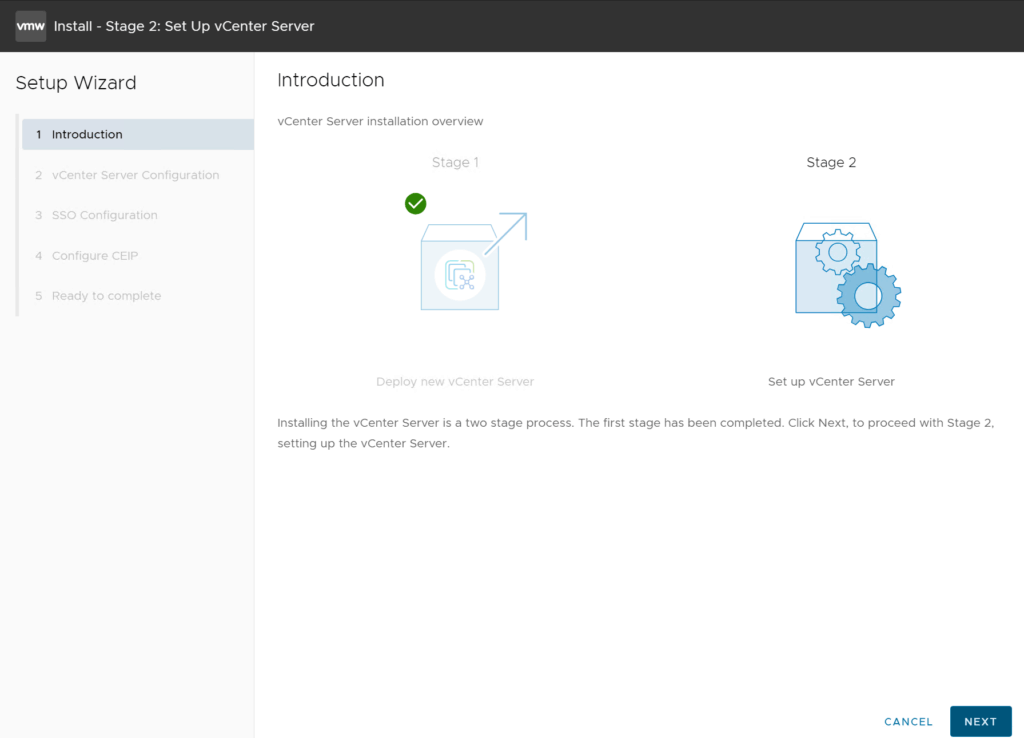
2.2 – Stage 2
When you clicked continue the UI from the ISO will take you through the next stage, however mine closed as I left it a while when I clicked continue, if this happens navigate to
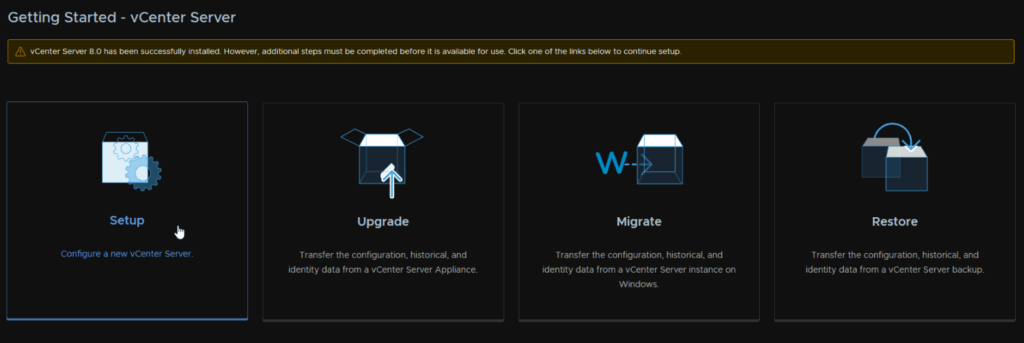
https://fqdn:5480 and login with the root password, we can continue from here
Click Setup
Back on the installer UI
Click Next
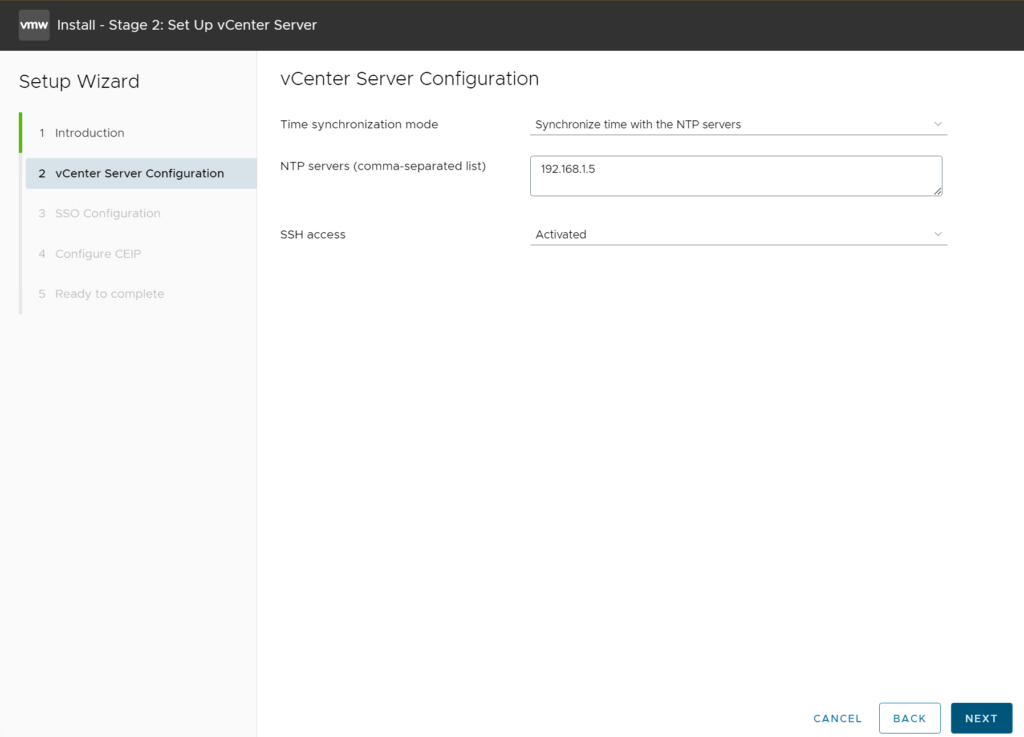
Enter your NTP server and optionally enable SSH, as mine is a lab, I have enabled it, then click Next
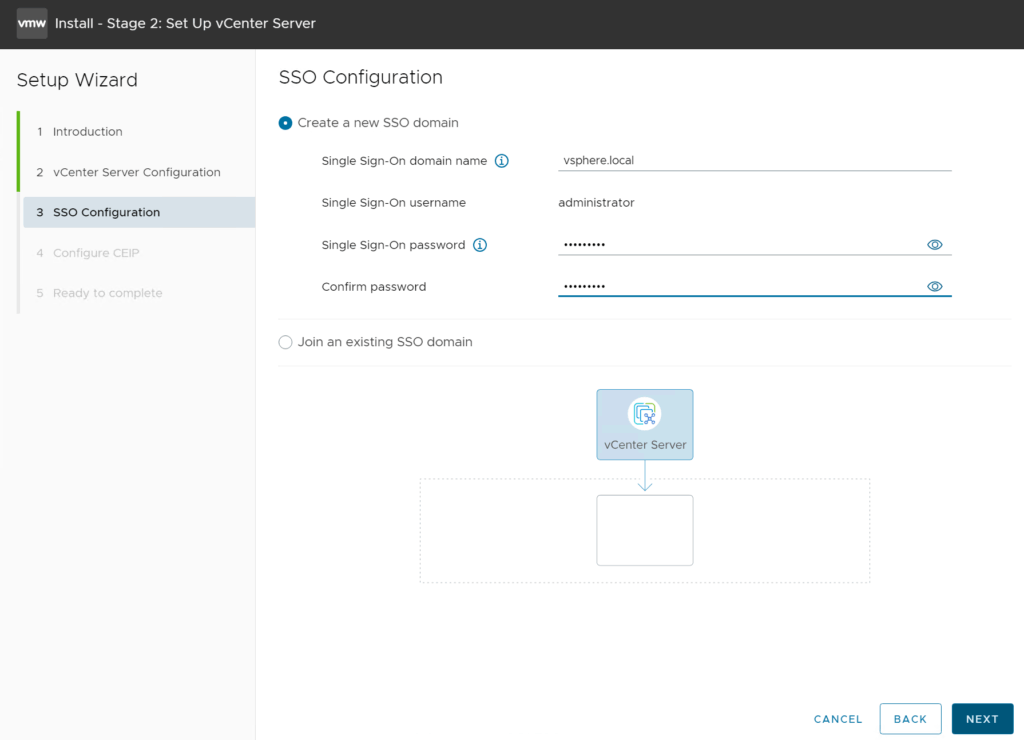
For the SSO domain, I would recommend vsphere.local, but it can be anything, this cannot be changed later
And add a password for the [email protected] account, then click Next
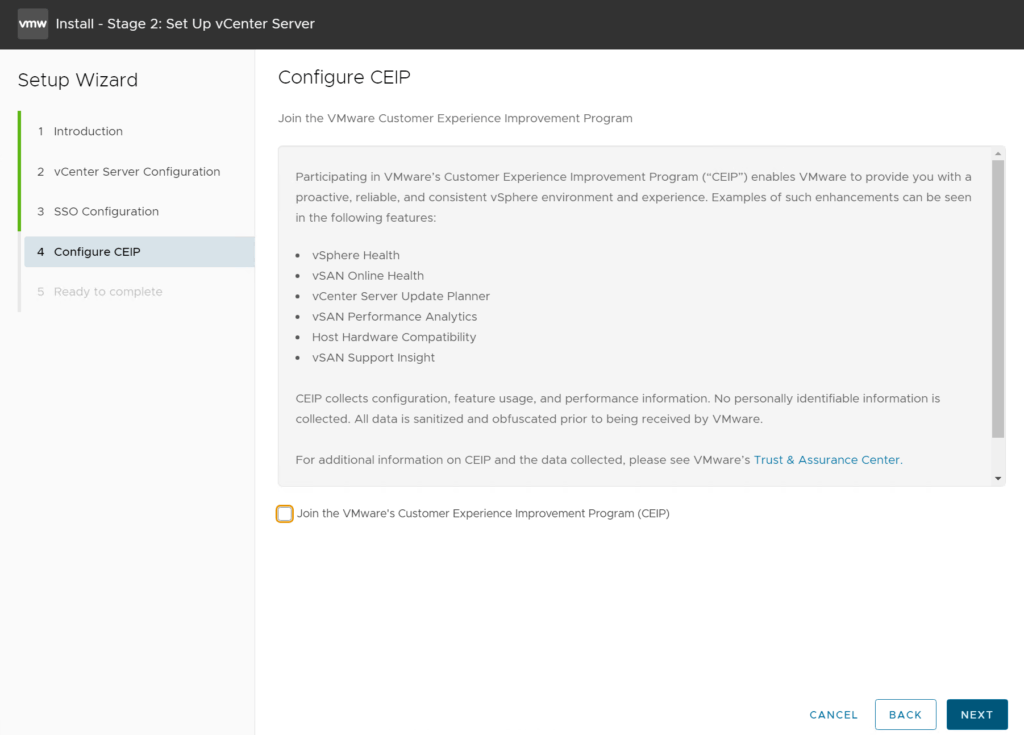
Opt in/out of the CEIP as you like and click Next
Then review and finish
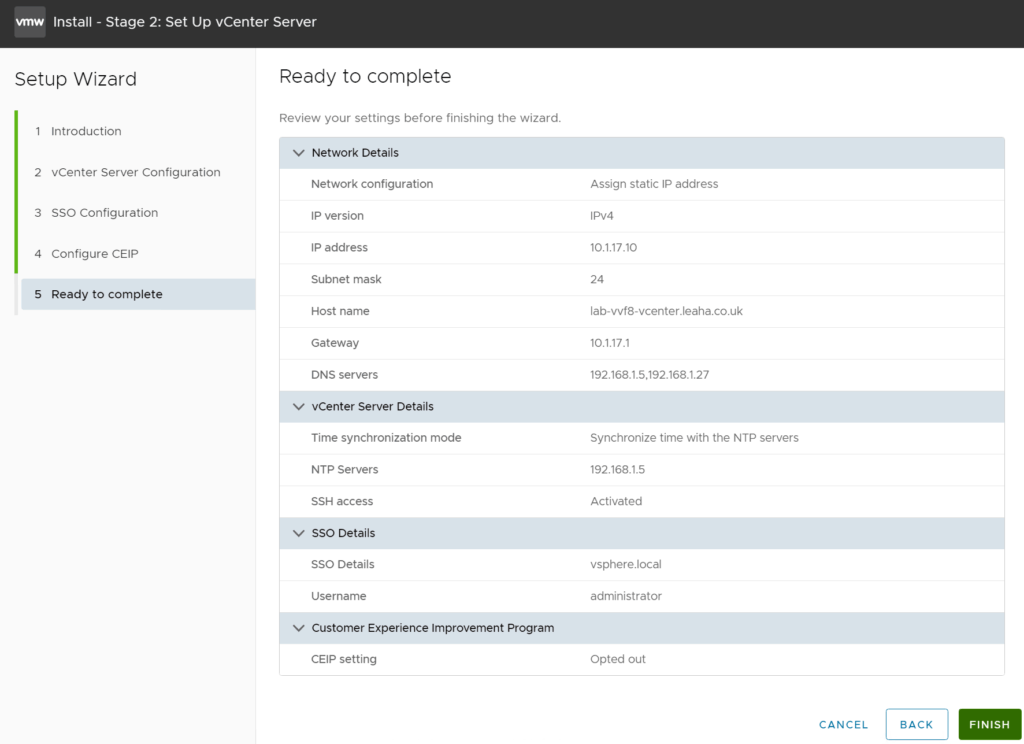
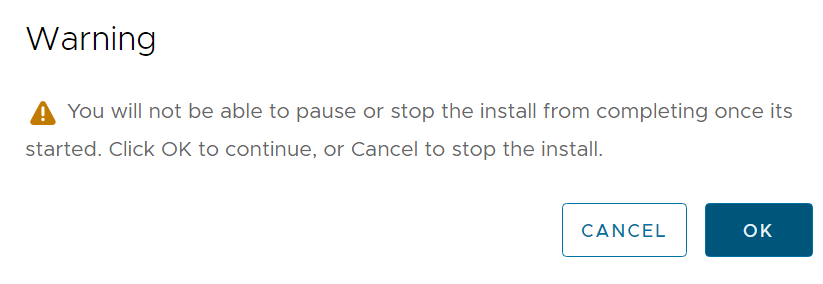
This cannot be stopped once started, so click ok here when you are 100% happy
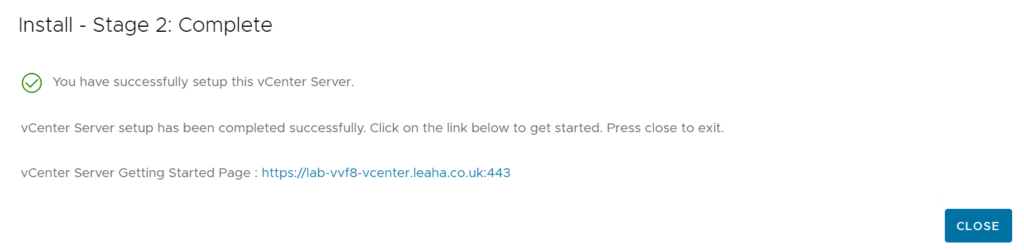
Once its done you can click Close and login at
https://fqdn/ui
2.3 – Adding Hosts
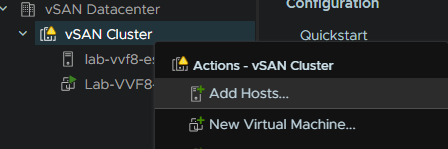
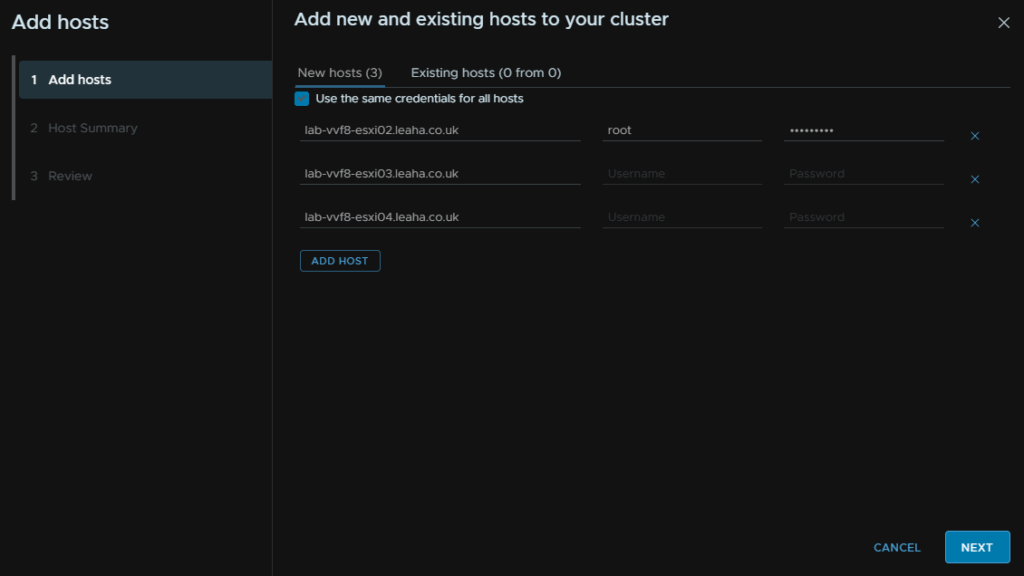
Now we need to add our remaining 3 hosts, right click the cluster and click Add Hosts
Add the FQDN of the remaining hosts, if they all have the same root password, you can use the check box to use the top credential entry for all hosts and click Next
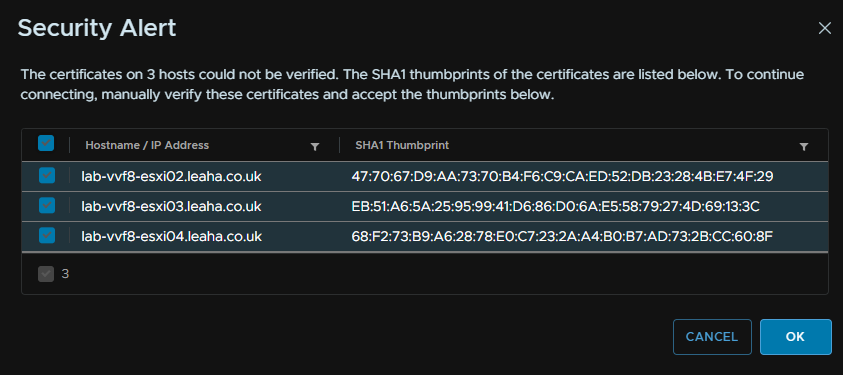
Accept any SSL warnings that pop up and click ok
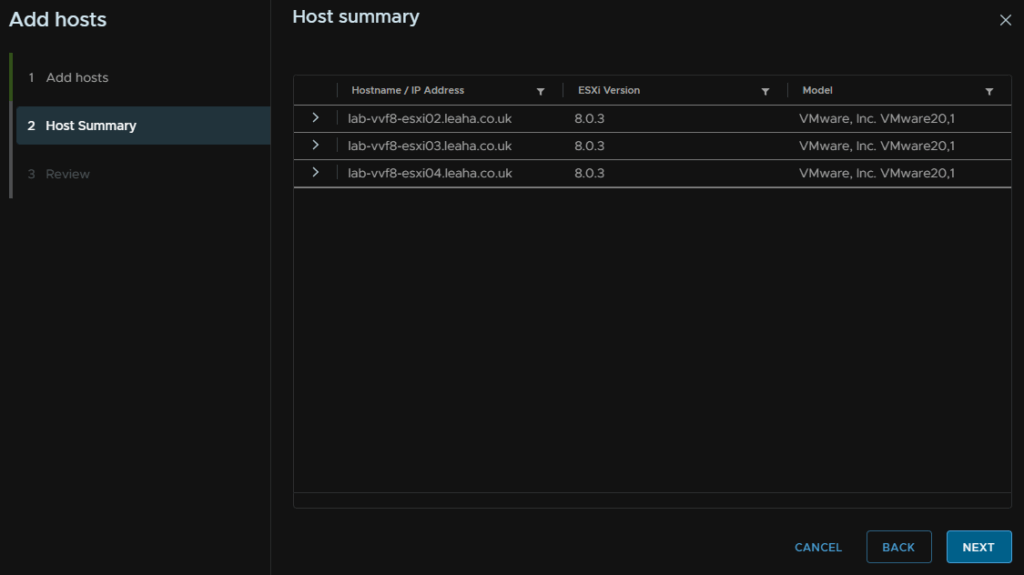
Check the host summary and click Next
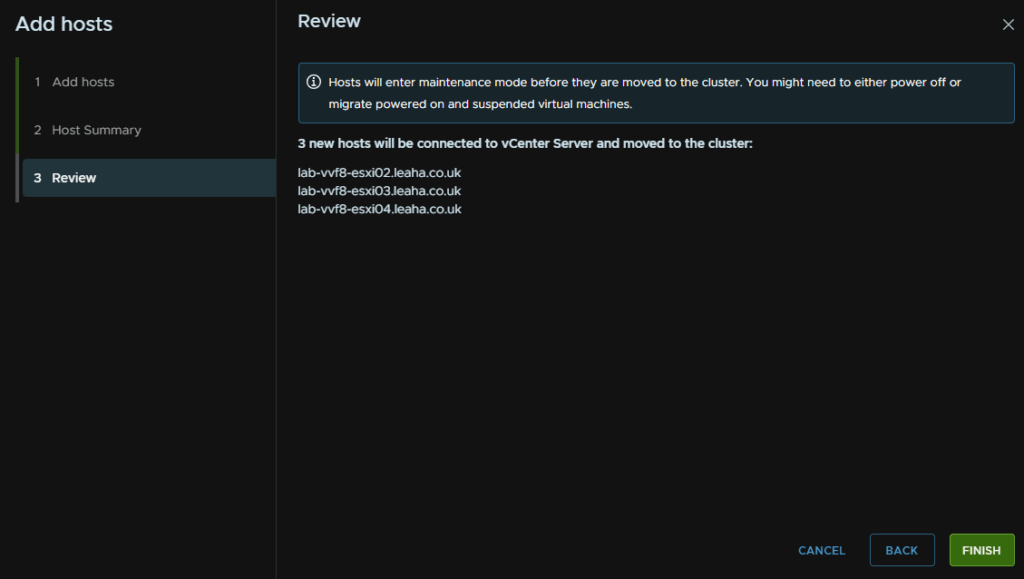
And click Finish
2.4 – Configuring Management Switch
When we setup the initial install, we only added one NIC for the management switch
Changing these bits from vCenter has one key advantage, if we were to incorrectly set something and management connectivity is lost, vCenter will revert it, rather than loosing connection to the host, compared to changing this in the ESXi UI
We will keep the same standard switch, and not move management to a VDS, as a VDS cant be managed from ESXi, so keep management on a standard switch gives us the best flexibility and the ability to connect to the host and fix issues in some circumstances
And we will be setting it and leaving it, so we wont need to be making changes frequently
Click the host and head to Configure/Networking/Virtual Switches

Then click the three dots on the management port group and click Edit Settings
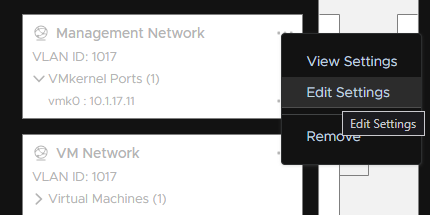
And uncheck all the override boxes here, as this will cause issues when we add the second NIC to the switch

It should look like this, then click ok
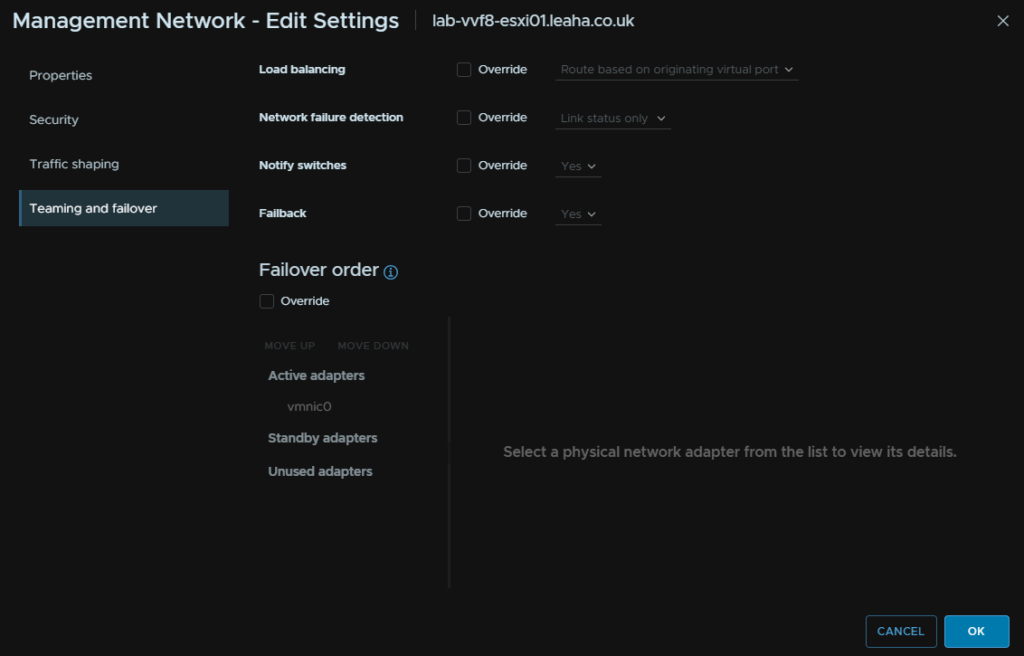
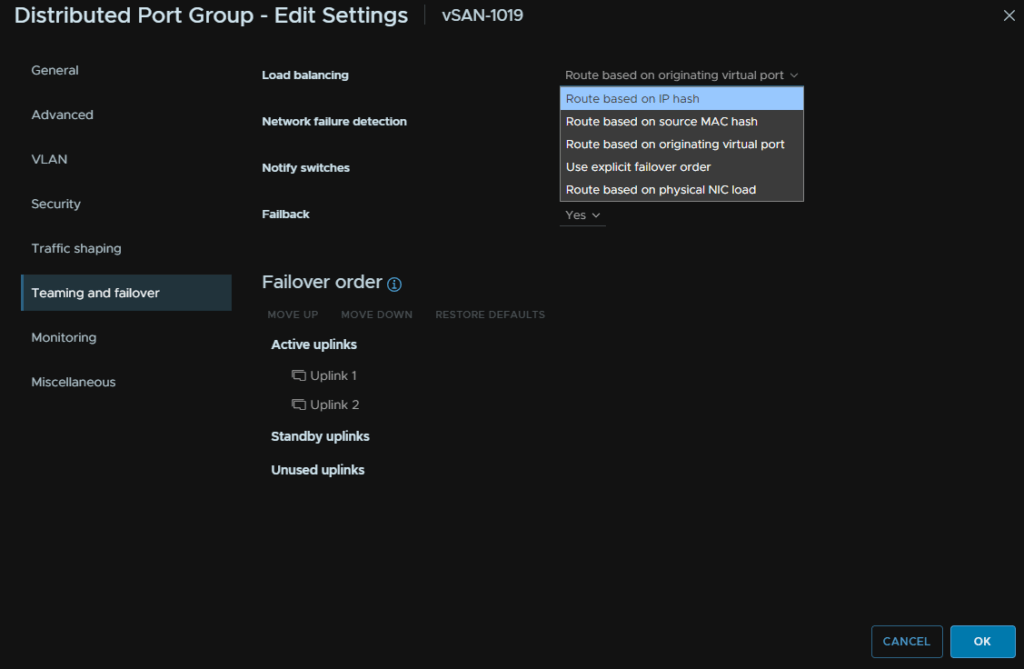
Its worth noting, your core switches likely have MC-LAG, Dells VLT or HPEs VSX, you will want to also go to Teaming And Failover and ensure you change load balancing to “Route On IP Hash” else the connectivity wont work
For this sort of set up, click Edit

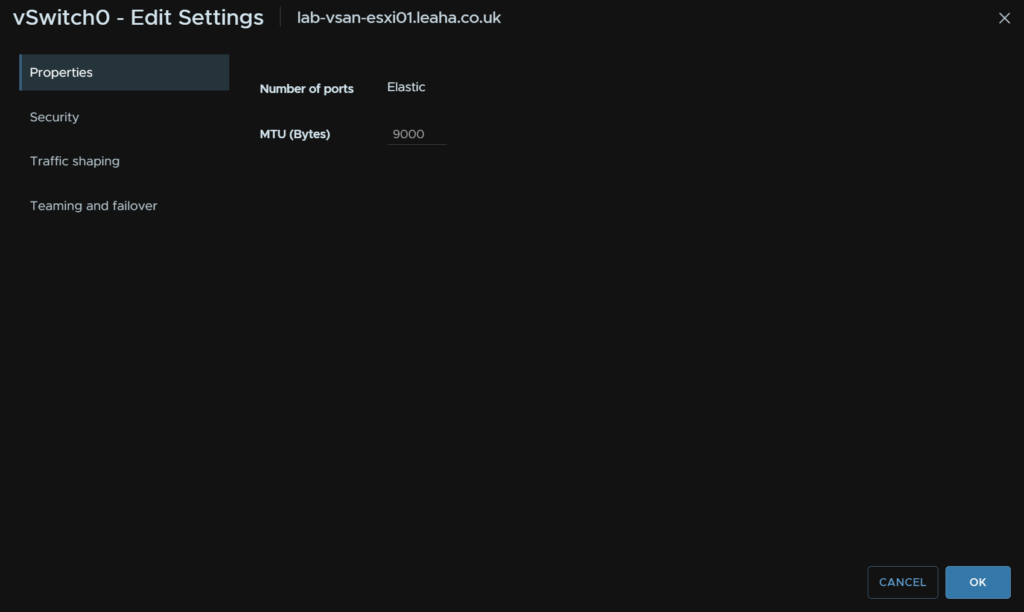
While we are here, ideally you want to have your switch MTU, at the physical level, all switch ports and port channels the management NICs interact with should have an MTU of 9216, usually the max of the switch
If you are unsure, leave it at the stock 1500, MTU inconsistencies can cause all sorts of issues that you dont want
Set the MTU to 9000 and click Next
Under Teaming And Failover click the drop down under Load Balancing and select “Route Based On IP Hash”
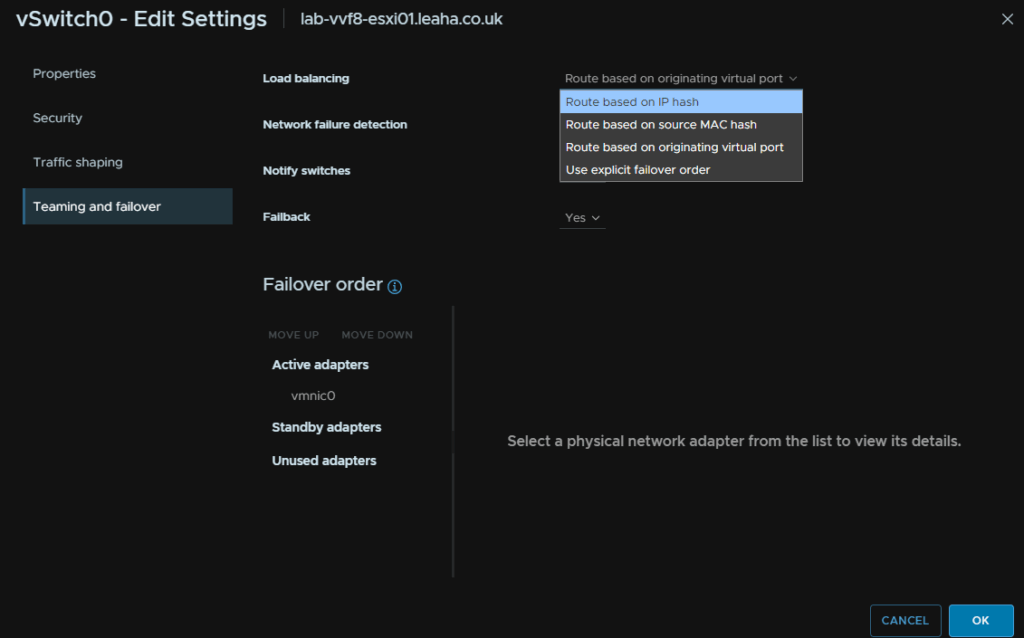
If you do set this and dont have the above sort of switch setup, it shouldnt cause any issues
Now we need to add the second NIC, select Manage Physical Adapters

For me, NIC1 is the other management NIC, this may be different for you, a lot of servers with six NICs have a quad port Mezz card and a dual port card, in this case, put two ports from the quad port card for management
While yes, you want ASIC redundancy, by having NICs from different cards, if you only have two cards, management is what you want to have with both NICs on one card
Keep storage and VM switches with one NIC on each card, if these go down, it will trigger a P1 incident, management dropping out wont impact production workloads
To add the second NIC, click it and click Move Down until its under Active Adapters
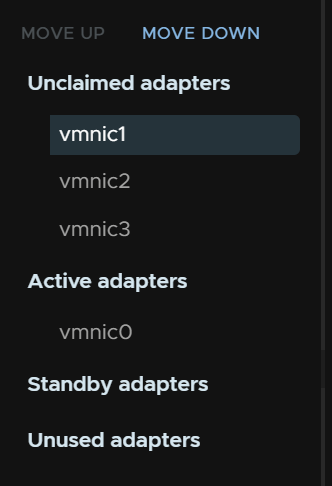
It should look like this
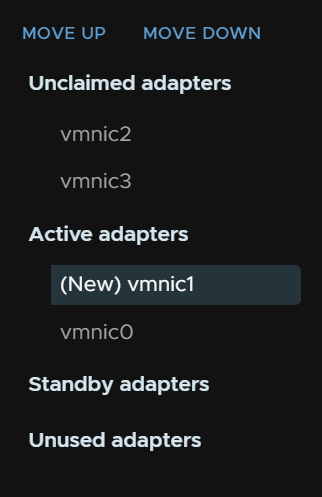
Then click ok and repeat on the remaining hosts
2.5 – Adding The Remaining Hosts To vSAN
Now we have the hosts we need a networking switch to setup the vSAN networking before we can expand the vSAN cluster to use the storage from all servers
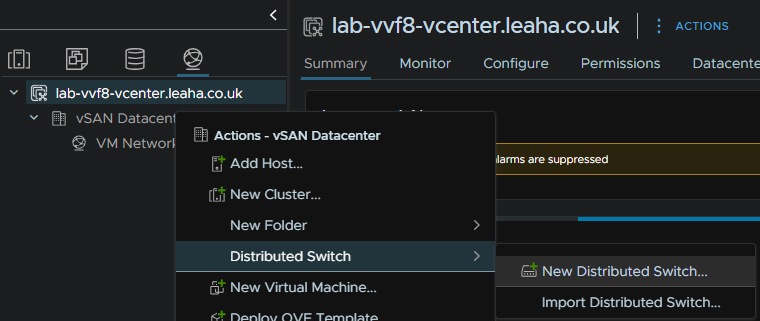
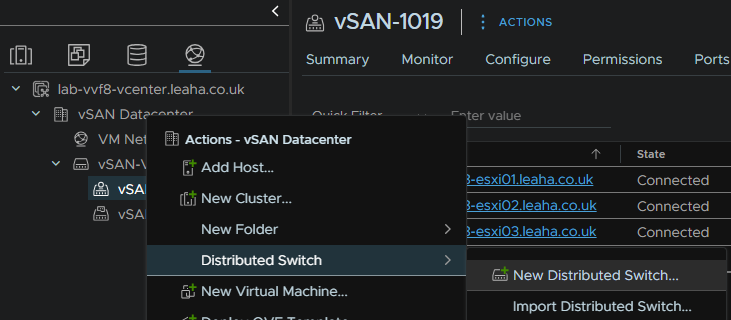
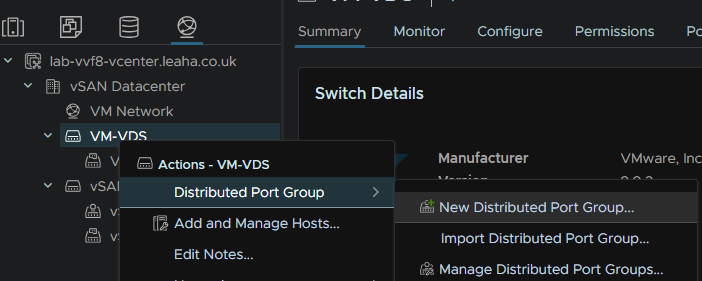
Head to the networking tab, then right click the Datacenter, and click Distribution Switch/New Distributed Switch
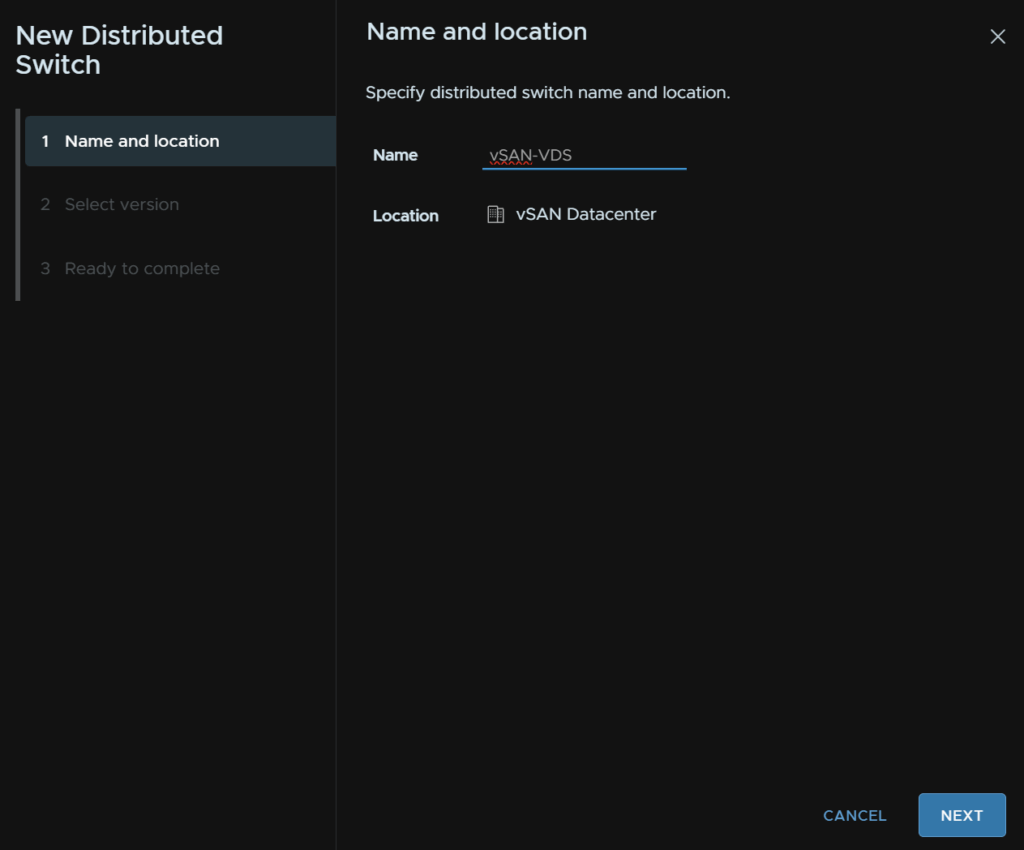
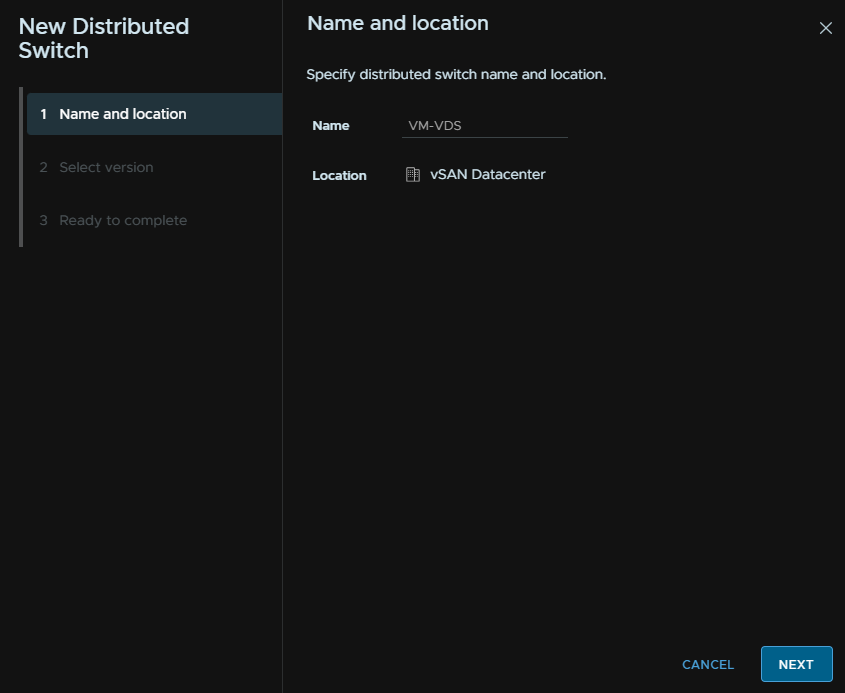
Give the VDS a name
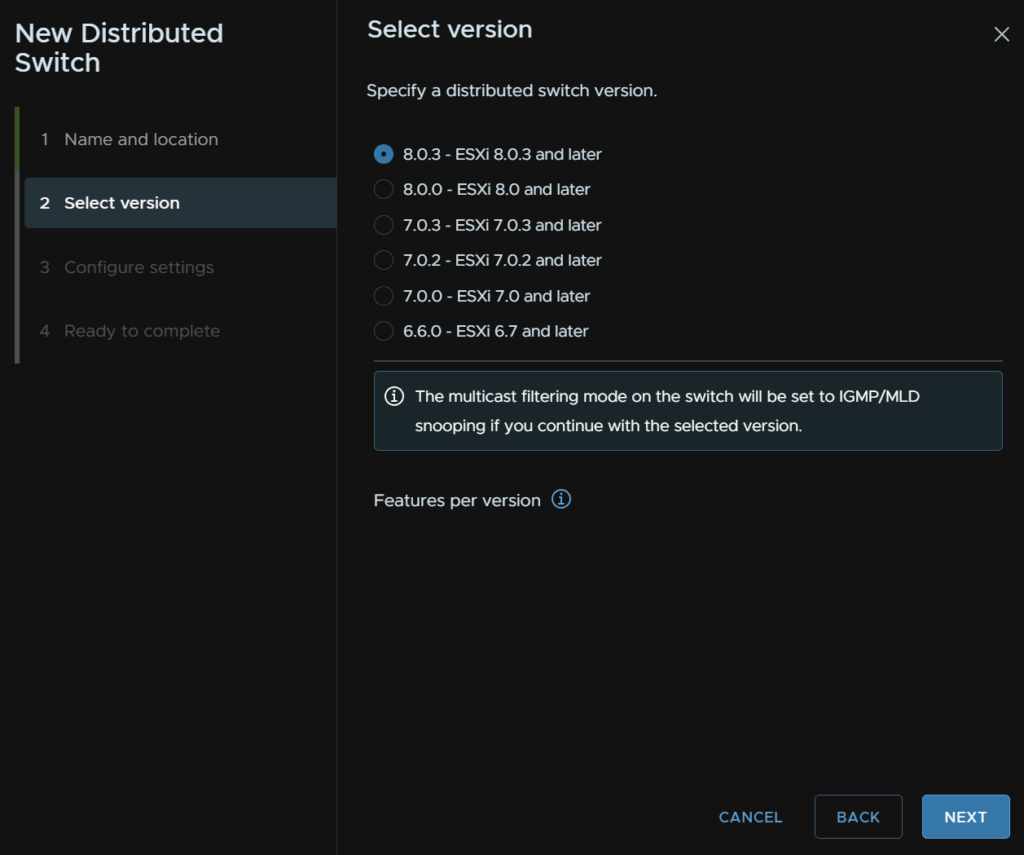
Select the version, I would suggest the latest, assuming the datacenter will have ESXi hosts of the same version, otherwise, opt for the version for the lowest version ESXi host, unless you need features on a newer version, if you do, multiple VDS will be needed
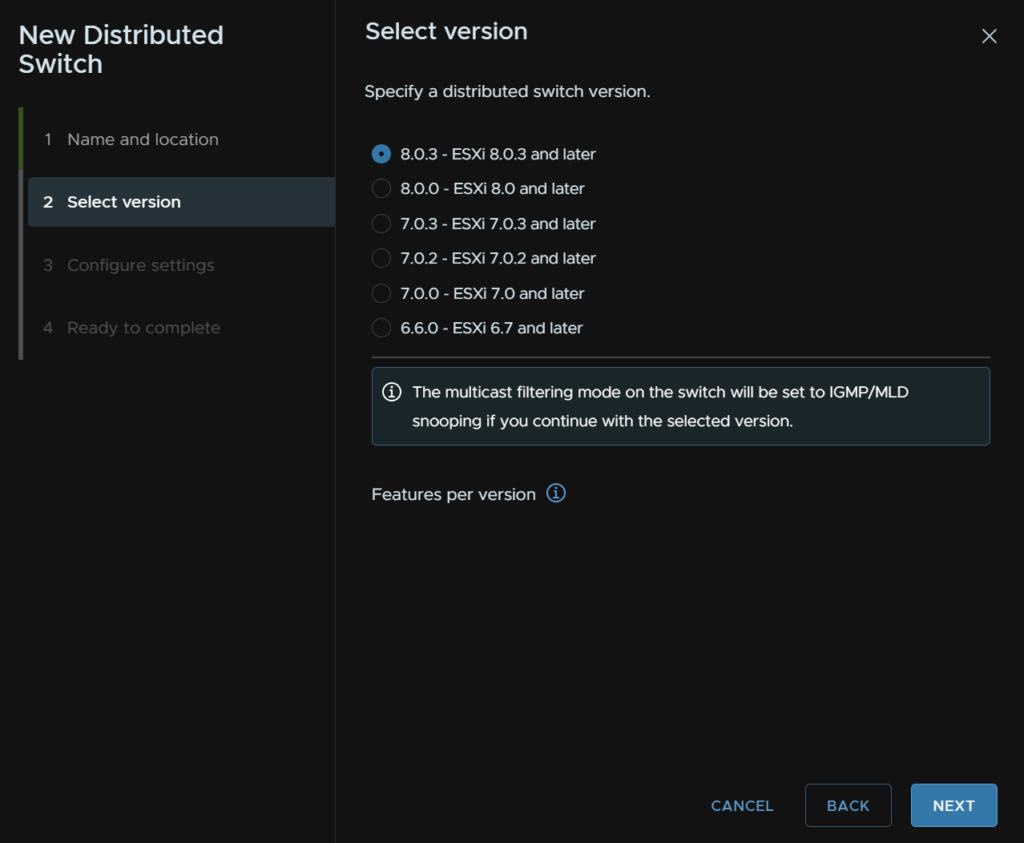
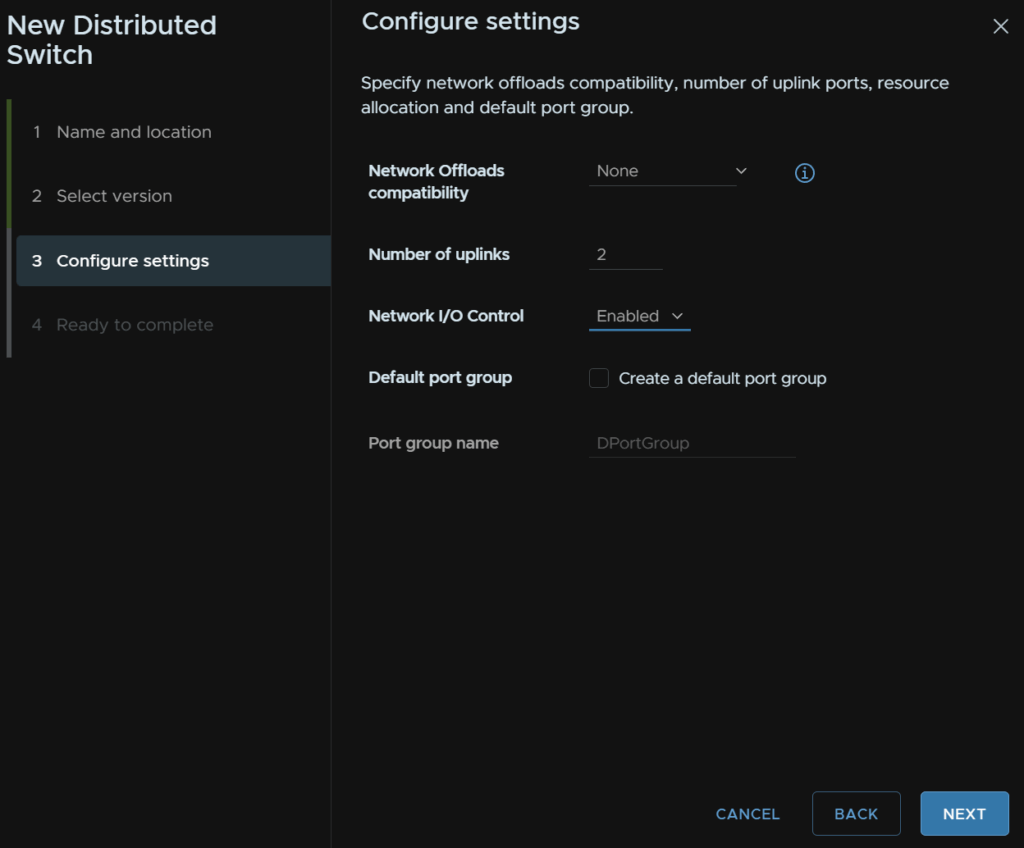
You can select a network offload, but unless you have a DPU, which for VVF you likely wont, you can leave this as none
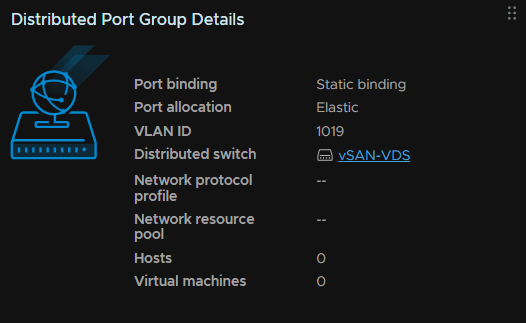
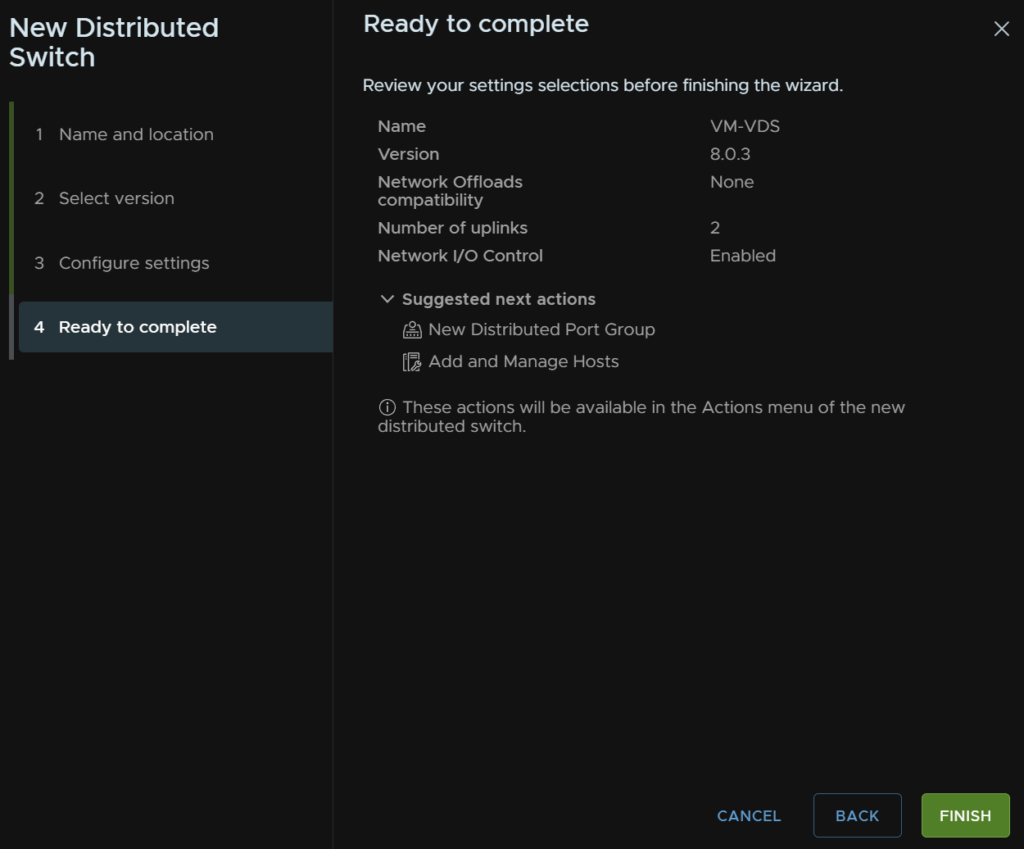
We need 2 uplinks, enable I/O control, and add a Default Port Group, then give it a name, the vSAN should be on a dedicated network, that is also non routable
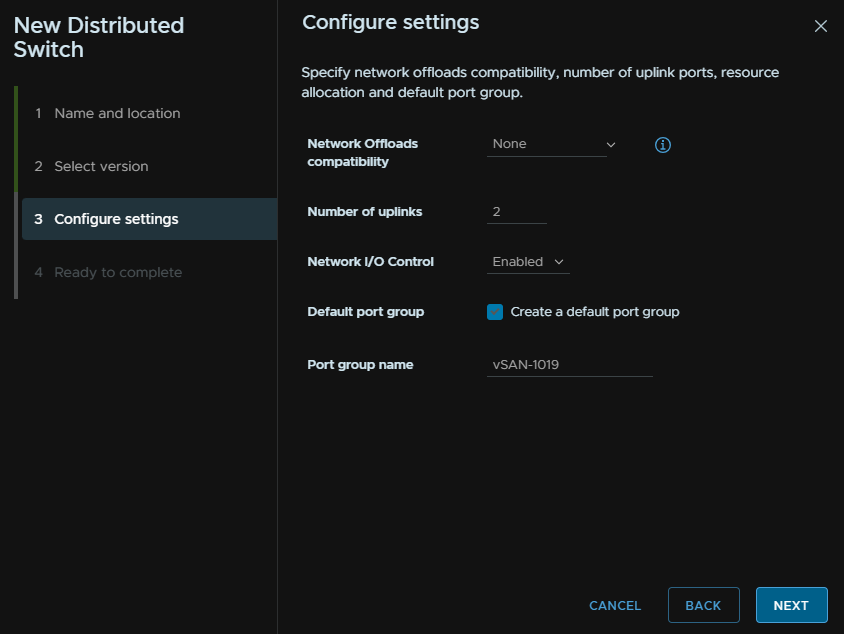
Then click Finish

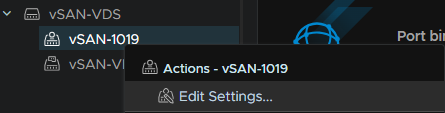
Right click the port group and click Edit Settings
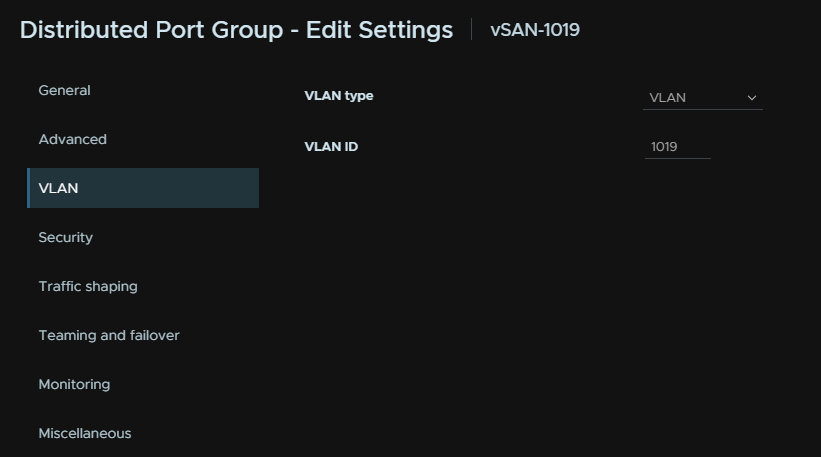
Click Next till you get to VLAN and set the VLAN tag to match the vSAN tag, this assumes you have the VLAN tagged at the switch level, if, for example, vSAN is on VLAN 30, and you have the switch port native VLAN, or access VLAN, as VLAN 30, this isnt needed
As I have my switch trunked, I am setting the VLAN
Its worth noting, your core switches likely have MC-LAG, Dells VLT or HPEs VSX, you will want to also go to Teaming And Failover and ensure you change load balancing to “Route On IP Hash” else the connectivity wont work
Then Click Next and eventually Finish
We can see this in the summary tab
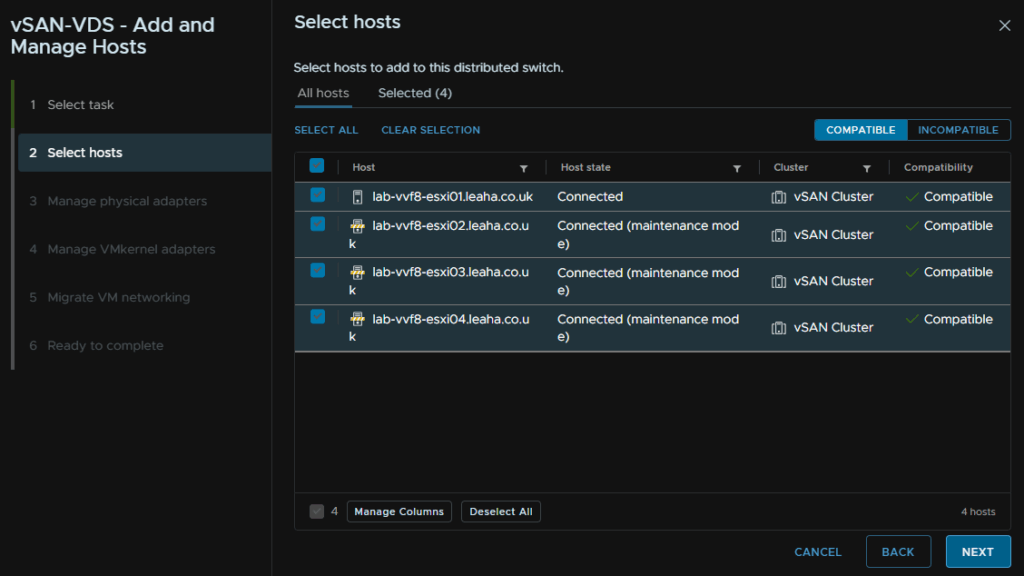
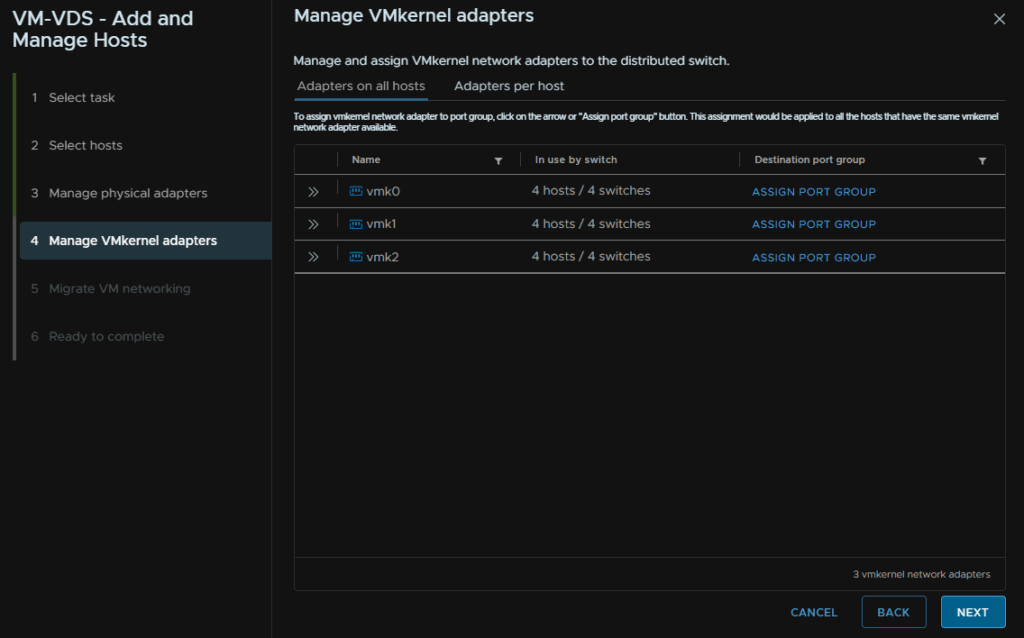
Now we need to add the hosts to the VDS right click the VDS and click Add And Mange Hosts
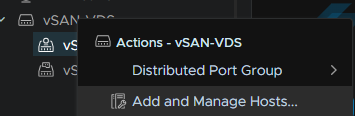
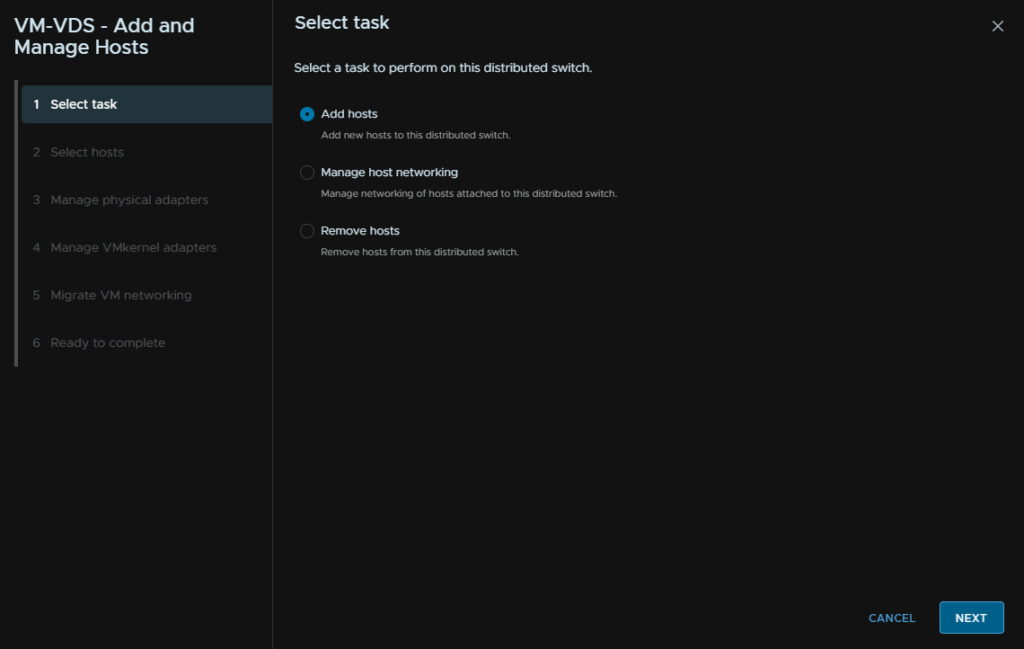
Select Add hosts, and click Next
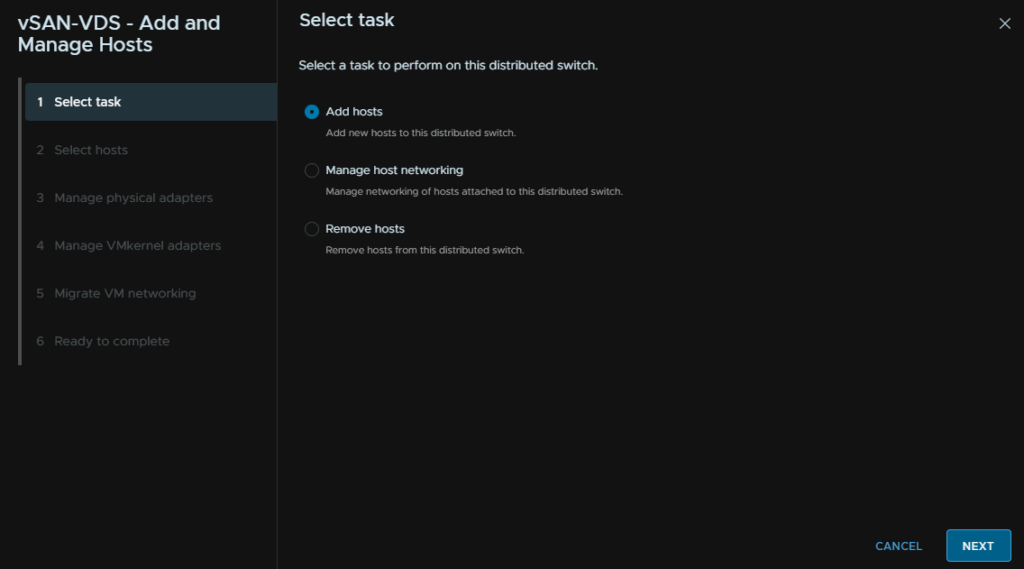
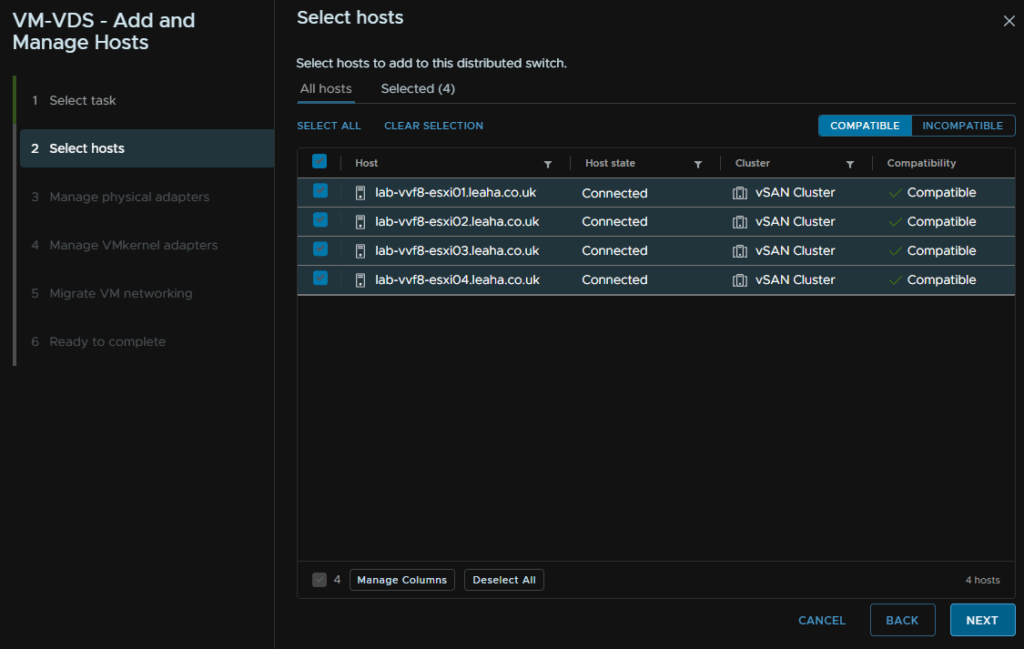
Select all the hosts and click Next
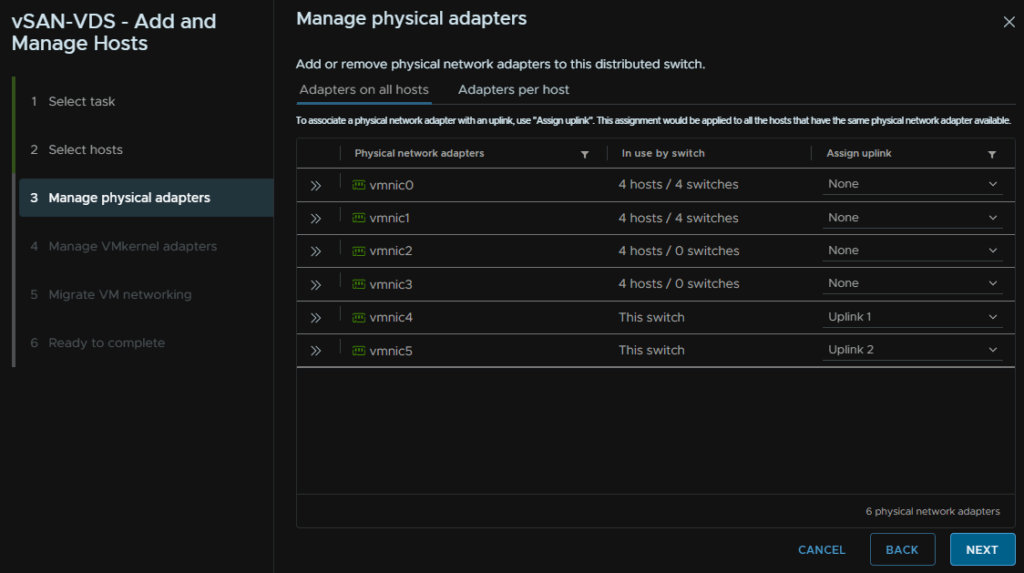
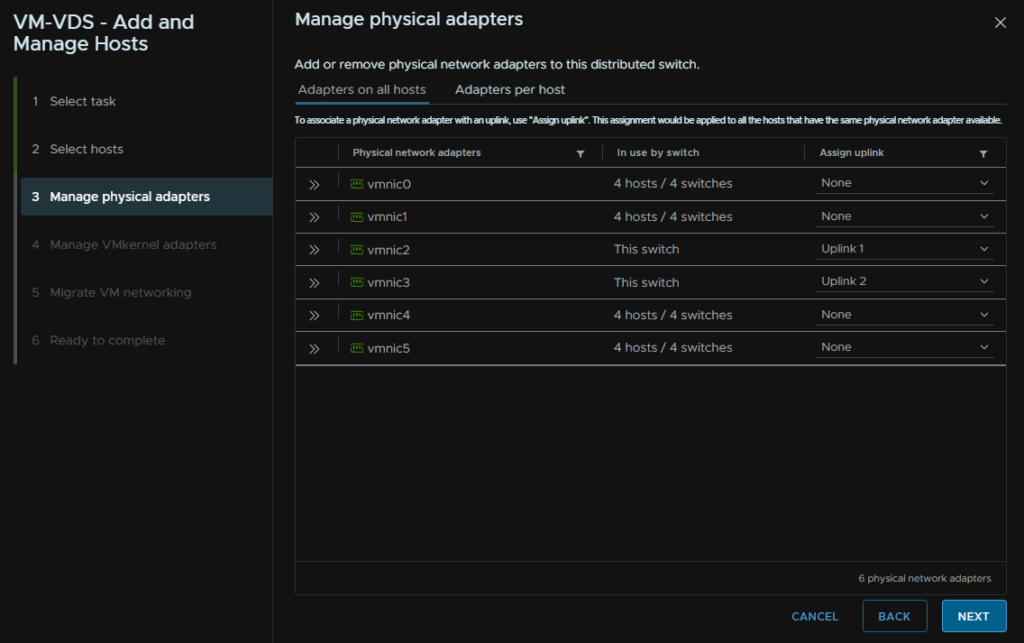
Select the physical adapters that correspond to the NICs you have assigned for vSAN storage, in my case VMNIC5/6
For a production system these should be spread across two physical NIC cards in a server, this gives ASIC redundancy meaning if a physical card fails, your storage remains up, and this is very important
Then click Next
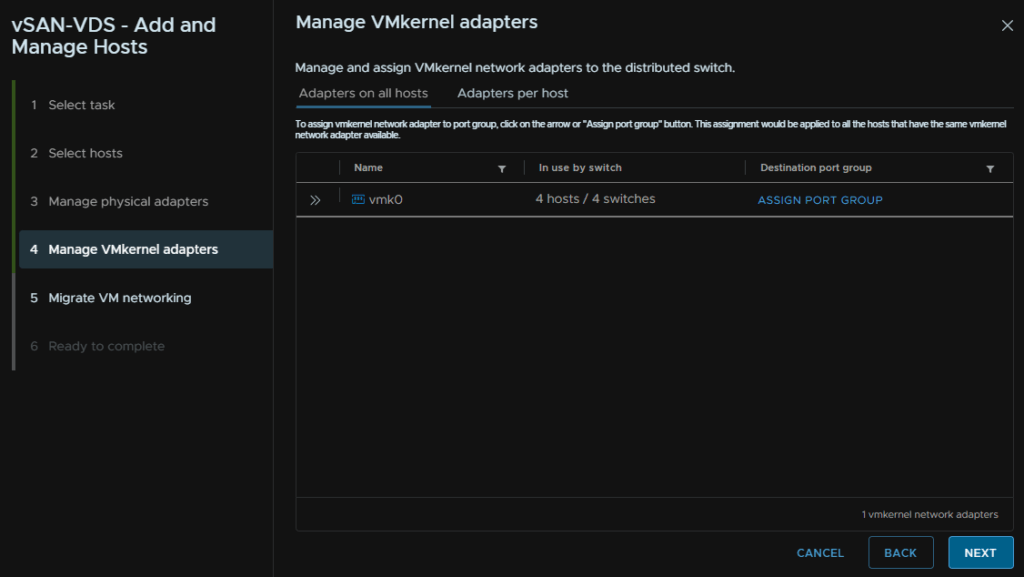
Click Next here
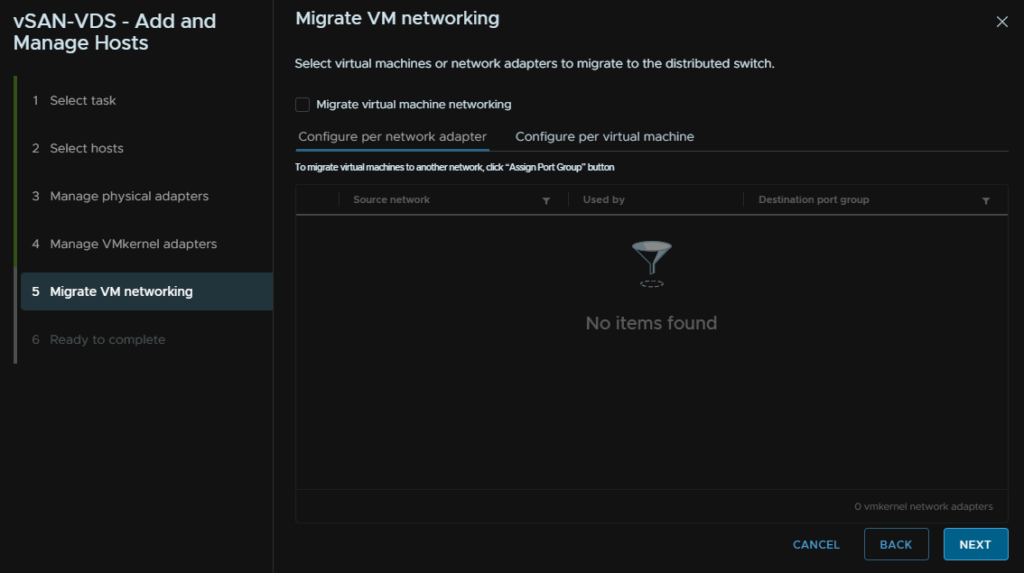
Next again
Then click Finish

Lastly, for the VDS, it would be ideal to use a MTU of 9000, though you do want to be careful with this, as MTU changes can easily cause networking issues if not done properly
The important bit is that all ports, port channels and switches that connect the hosts should have an MTU of over 9000, switches normally max out at 9216, so I would set the ports and port channels to that
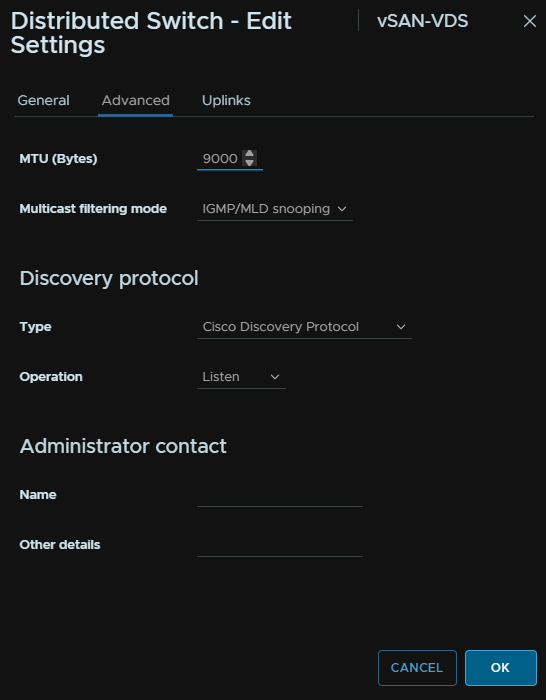
Then the VDS needs updating to that, right click the VDS, and head to Settings/Edit Settings
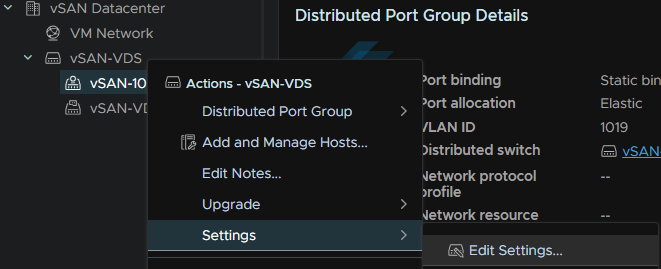
Then head Advanced and set the MTU to 9000 and click ok
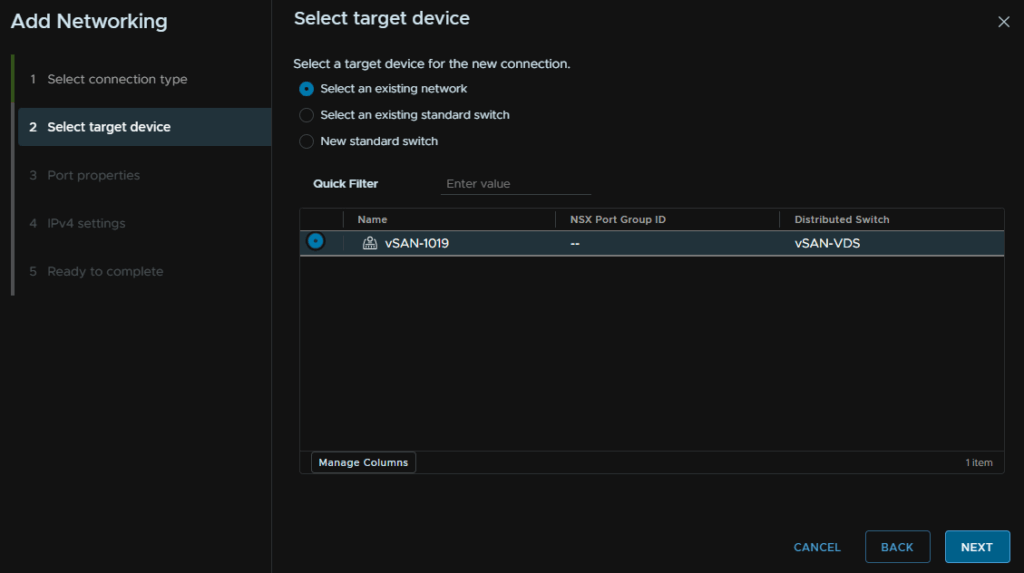
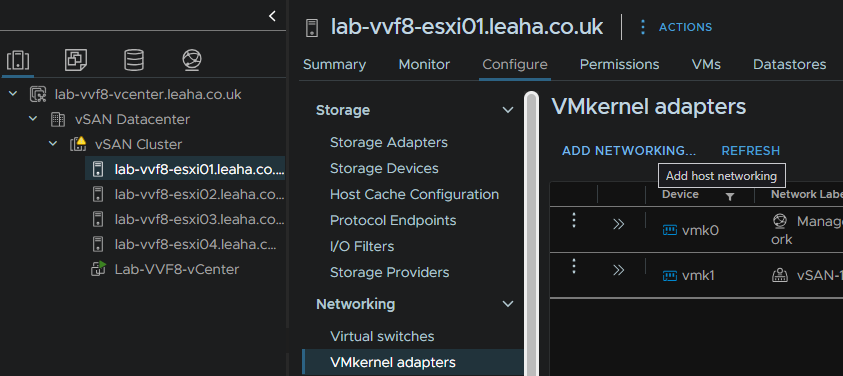
Now, we need a dedicated VMK for vSAN, click the host and head to Configure/Networking/VMkernel Adapters and click Add Networking
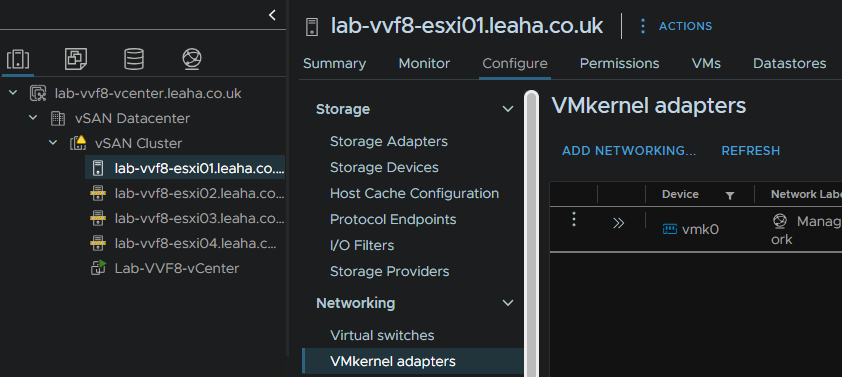
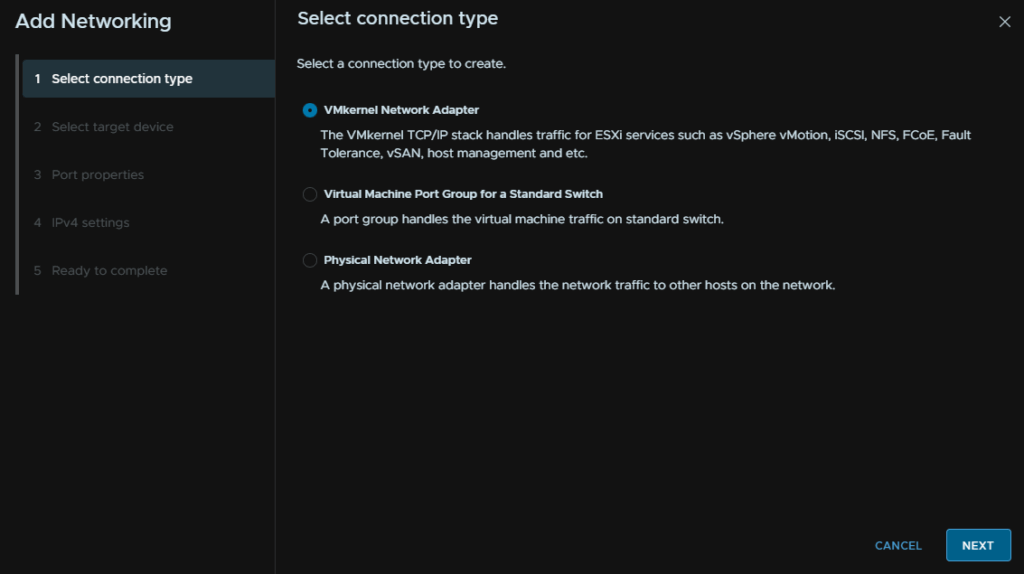
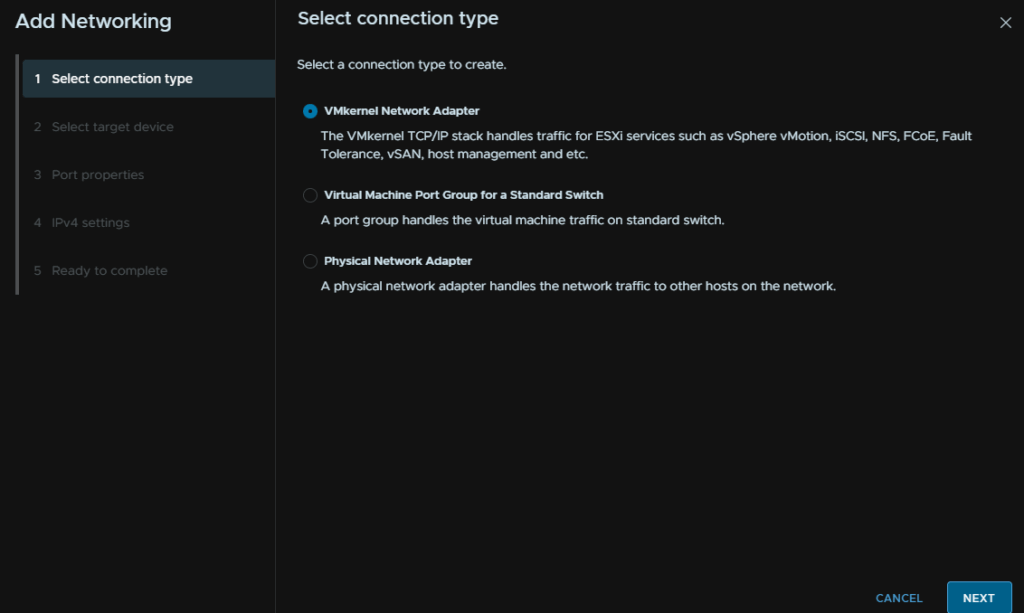
Select VMkernel Network Adapter and click Next
Select the vSAN port group and click Next
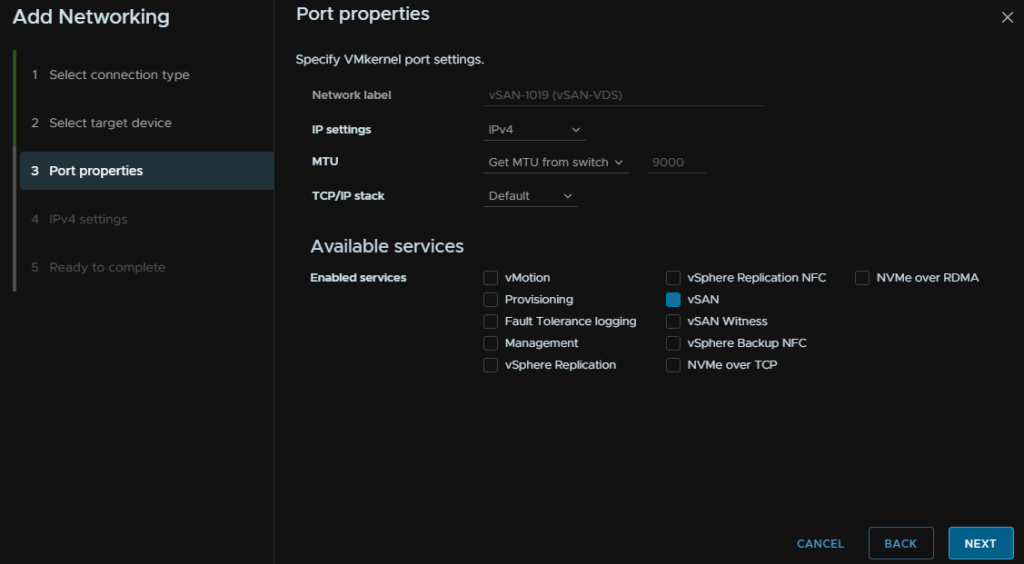
Under services, check vSAN and click Next
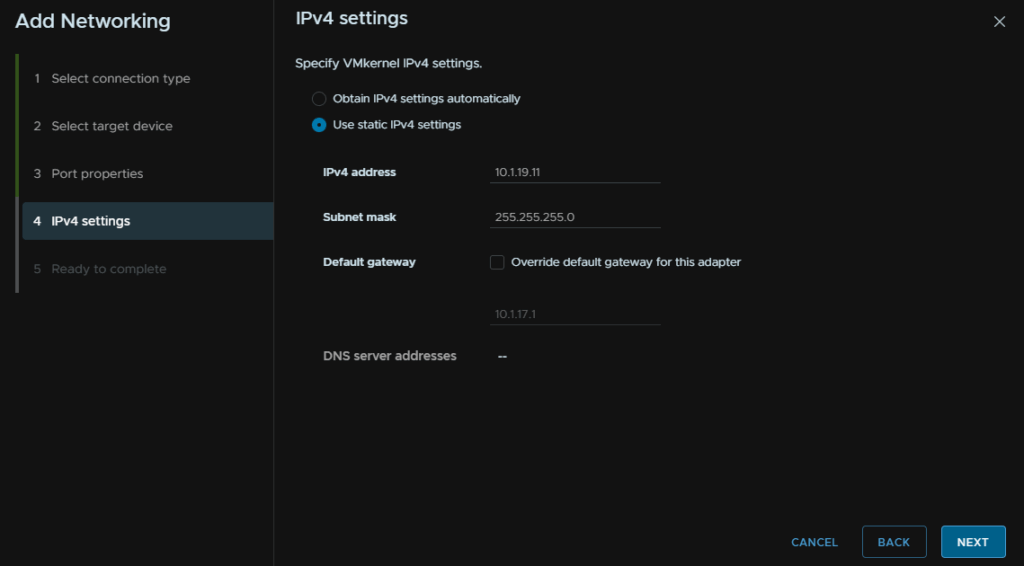
Add an IP Address and subnet mask for the VLAN you have for vSAN and click Next
Dont worry about DNS or the gateway, as its a non routable network, this only needs to communicate with the other hosts at L2
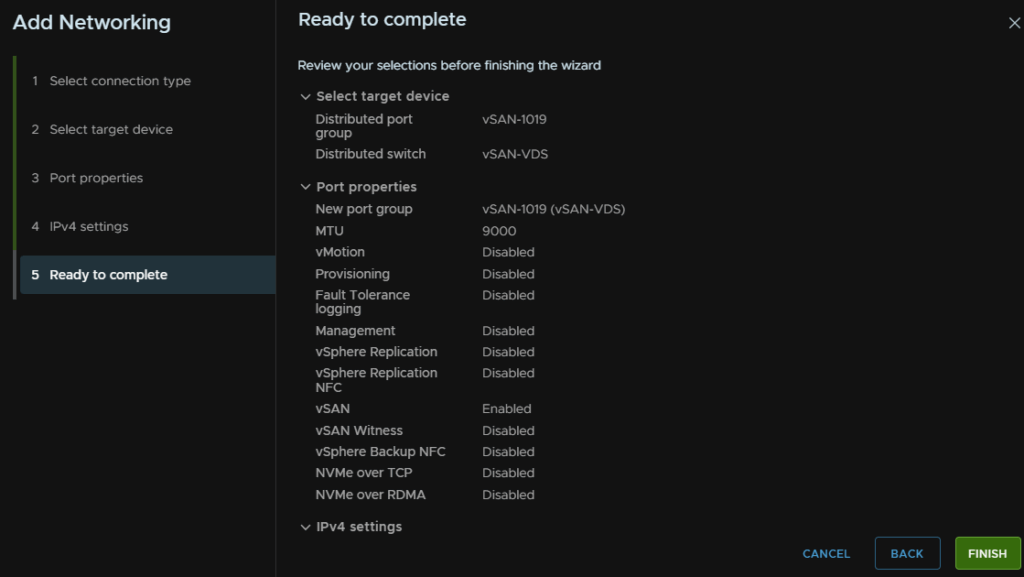
Then click Finish, and repeat on the remaining hosts
Now, on the three newly added hosts, vSphere will have configured the management VMkernel for vSAN and vMotion, which we dont want
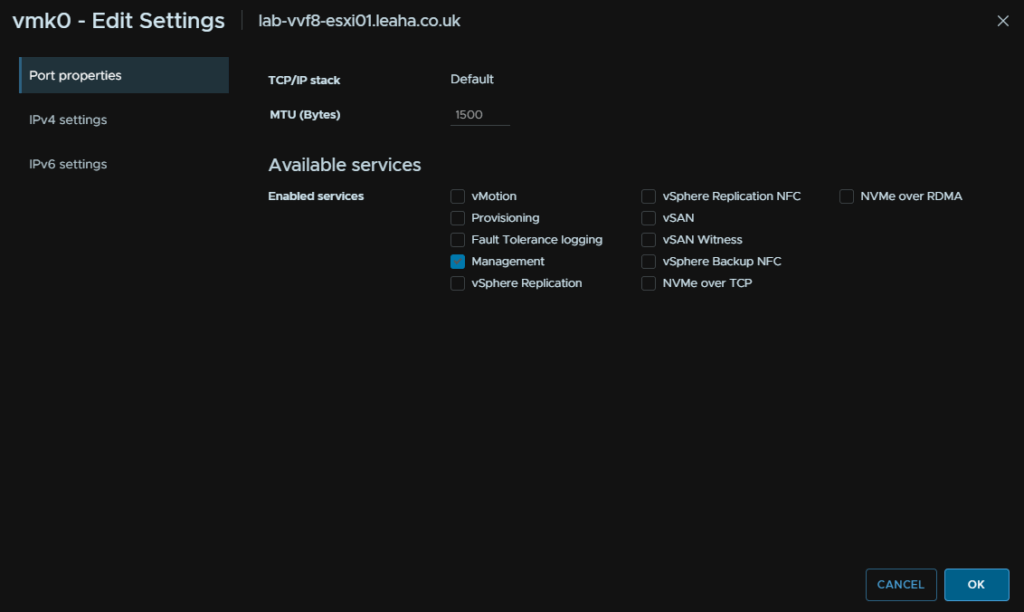
We can see this under enabled services

To remove these, click the three dots on vmk0 and click Edit
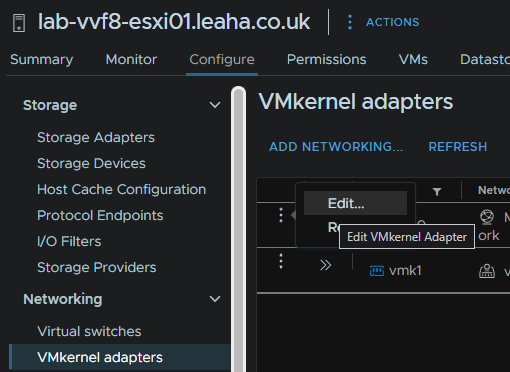
And remove vMotion and vSAN, then click ok
Now we need to add the remaining cluster disks to the vSAN pool
Select the cluster and head to Configure/vSAN/Disk Management then click Claim Unused Disks

Expand any drop downs and select all disks and click Create
As mine are virtual disks, they are incompatible, but for a production system, they should be on the HCL
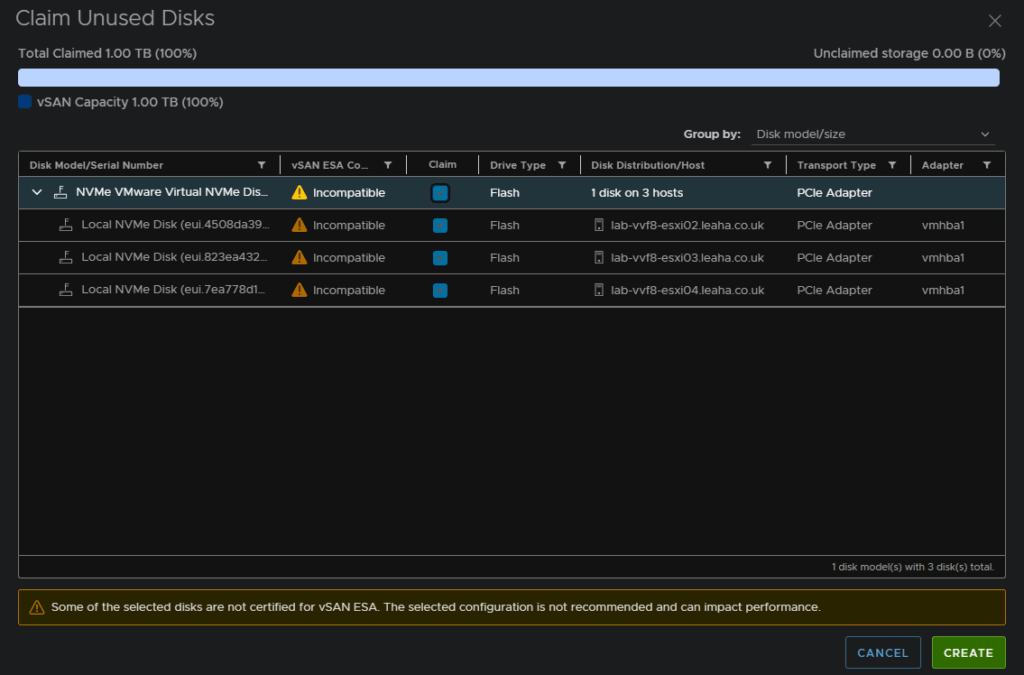
Now we can see after a min or two, they have been added

We can now right click the newer three hosts and remove them from maintenance mode by right clicking the host, then Maintenance Mode, and Exit Maintenance Mode
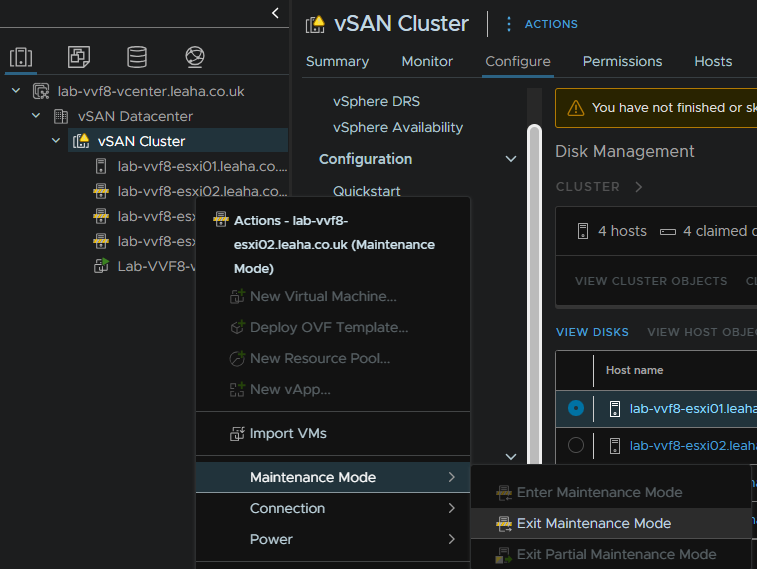
From the cluster view, we can see its added the storage totally all four hosts
2.6 – Setting Up vMotion
vMotion ideally wants to be on the Management vSwitch, assuming all NICs are 10Gb, and this should remain a standard switch
Click the host, and head to Configure/networking/VMkernal Adapters then click Add Networking
Then select Add VMkernel Networking and click Next
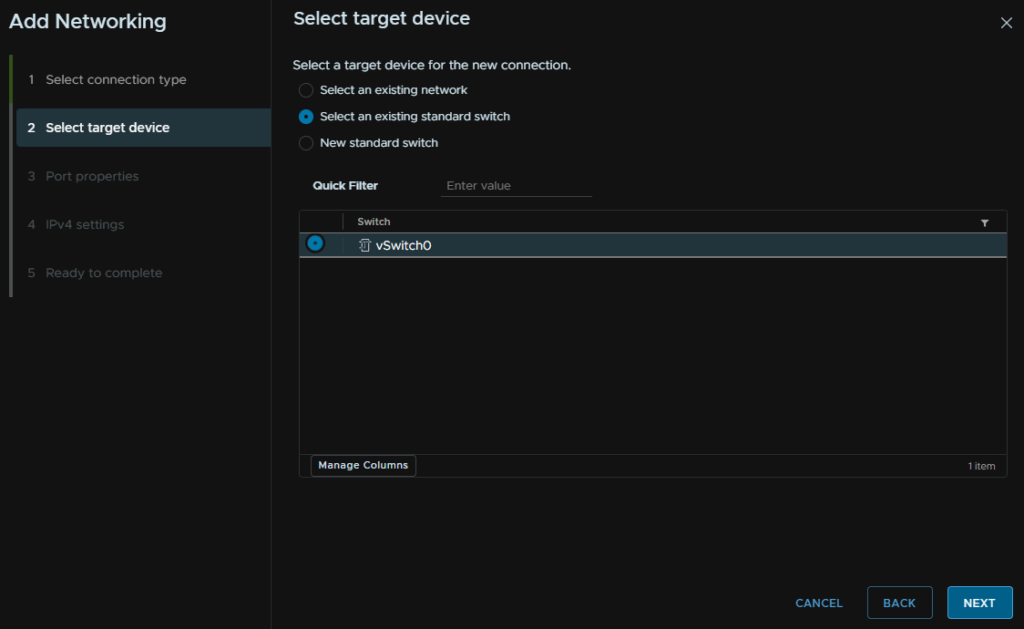
Click Select An Existing Switch and select vSwitch0, then click Next
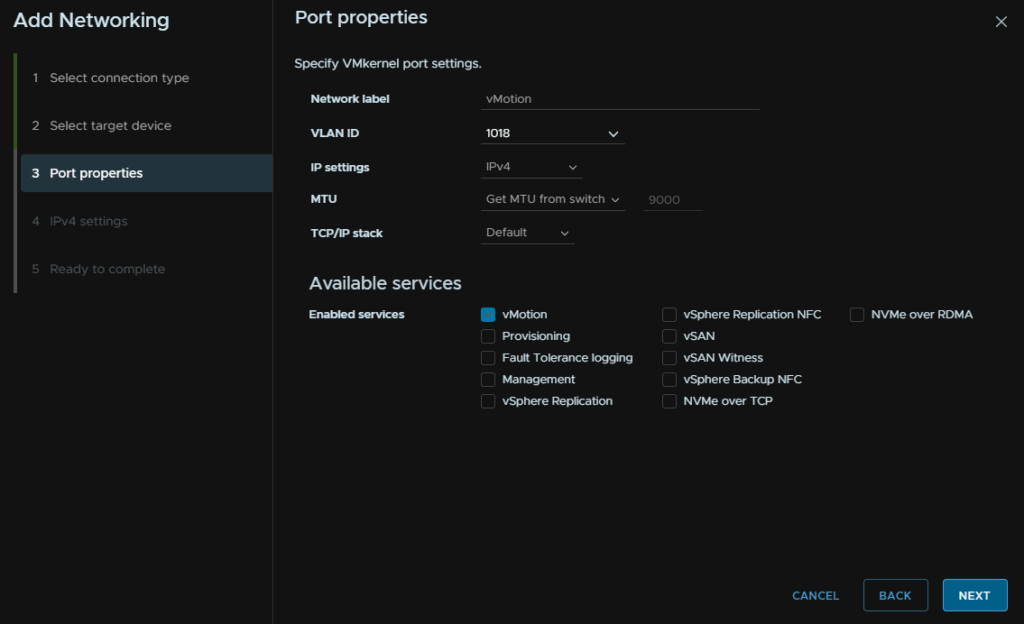
Name it by filling out the network label, select the VLAN, this should be a dedicated non routable VLAN, and check vMotion
As these ports have the management set as a VLAN access, or native VLAN, we need to tag the vMotion network
Here, an MTU of 9000 is ideal, but your switches much be set for it, else its going to cause issues, if you are unsure, leave it at 1500, then click Next
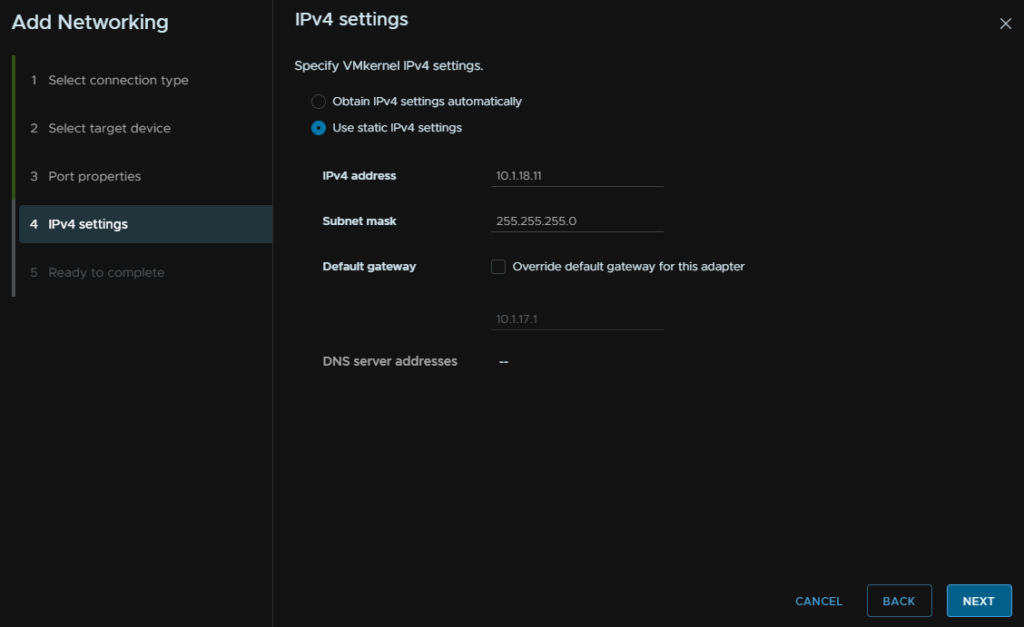
Then add an IP and subnet for that VLAN, the gateway/DNS is also irrelevant here, it should be a non routable network, and click Next, then Finish
Then repeat on the remaining hosts
2.7 – Adding The VM VDS
For VMs we want to create another VDS, head to the networking tab, right click the Datacenter, click Distributed Switch/New Distributed Switch
Give it a name
Select a version, the same idea applies from the vSAN VDS
Pick the highest compatible with all hosts
Drop the uplinks to 2, keep I/O control enabled, and uncheck create default port group and click Next
Then click Finish
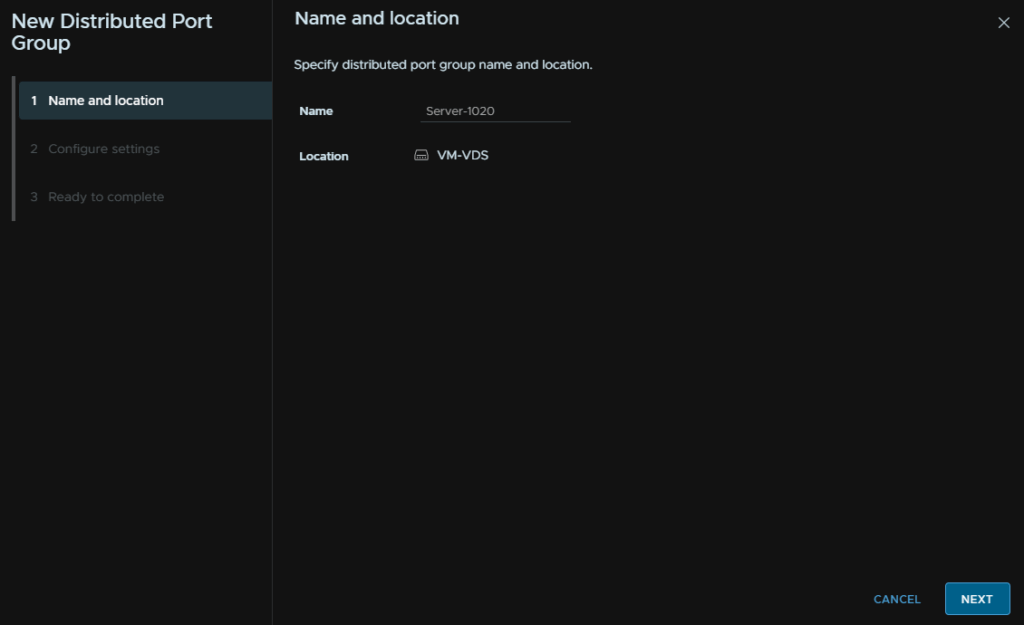
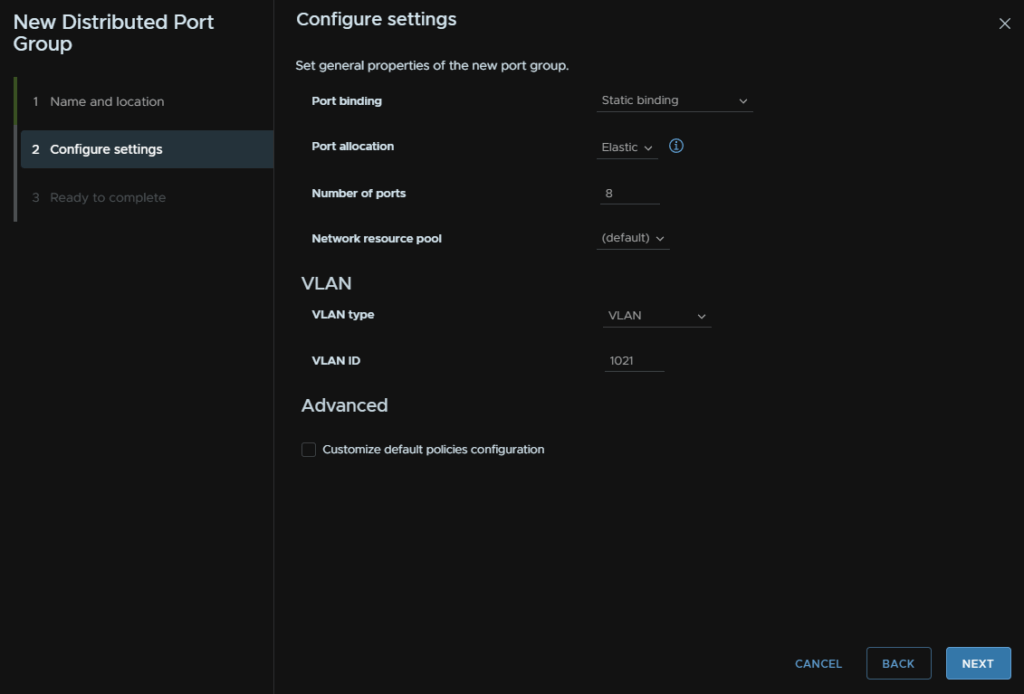
Then right click the VDS click Distributed port Group/New Distributed Port Group
Give it a name and click Next
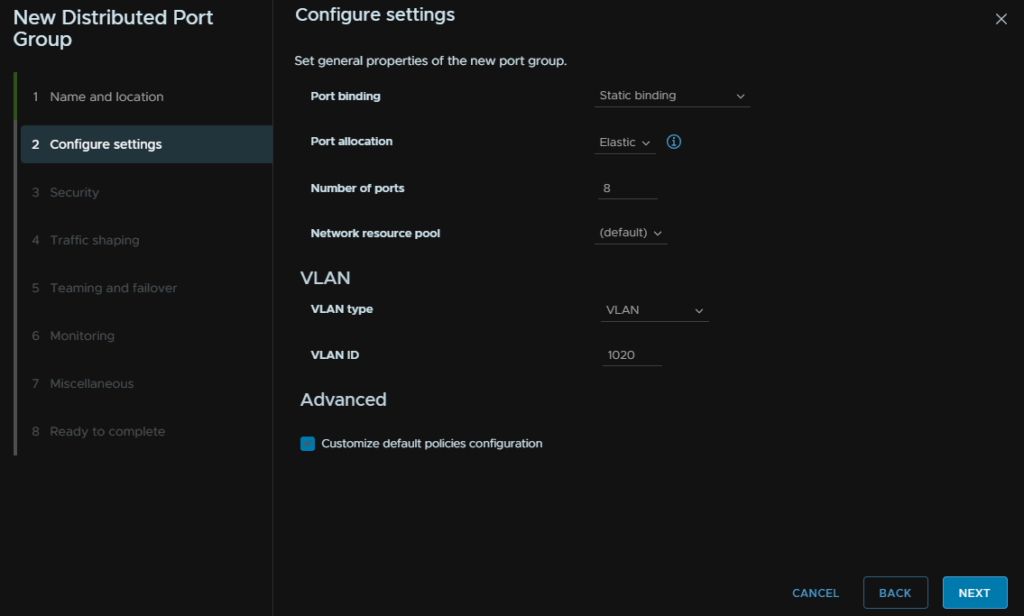
Keep the top four bits the same for port binding, allocation, number and resource pools
Under VLAN make sure the type is set to VLAN and the ID is what you want for this network and check the box to Customise Default Policies Configuration, then click Next
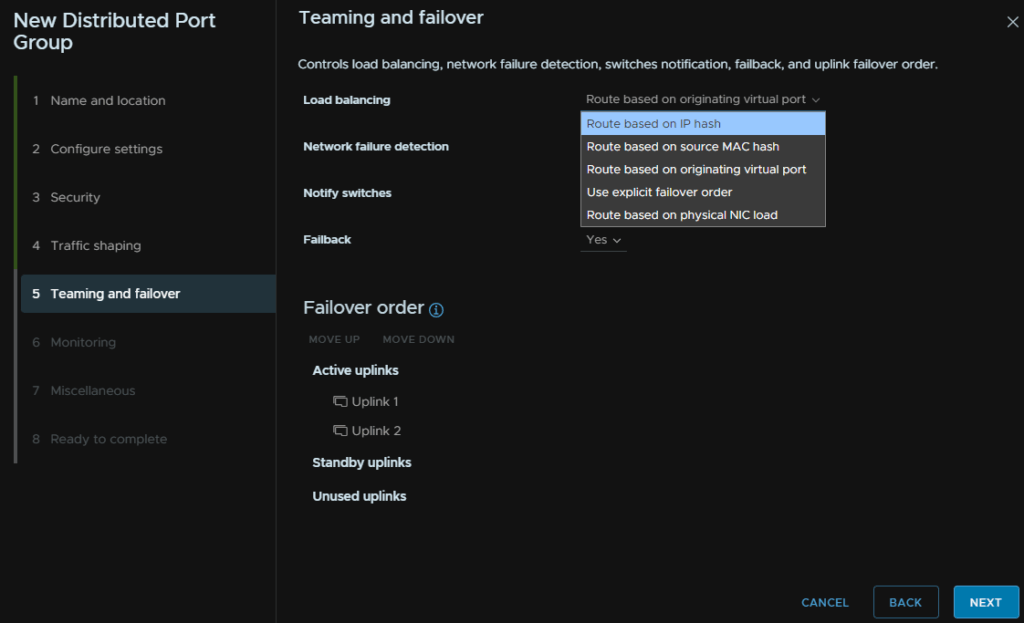
Like the rest of the switches and port groups, if you have Dell VLT, MC-LAG or HPE VSX you want to have Load Balancing under Teaming And Failover set to “Route On IP Hash”
Then click Next until it reaches the end and Finish
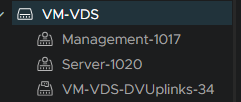
We can repeat this for a management server network on VLAN 1017 for an additional port group
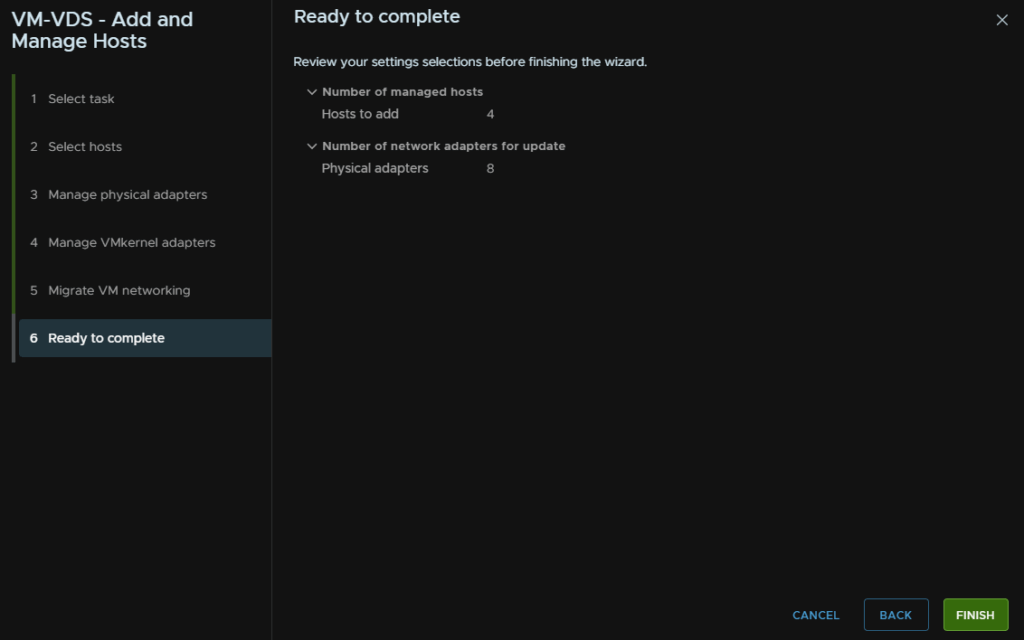
Then right click the VDS and click Add And Manage Hosts
Click Add Hosts and then click Next
Select all hosts and click Next
Select the last two VMNICs for uplinks and click Next
Click Next here
Click Next again

Then Finish
2.8 – Licensing Your Servers
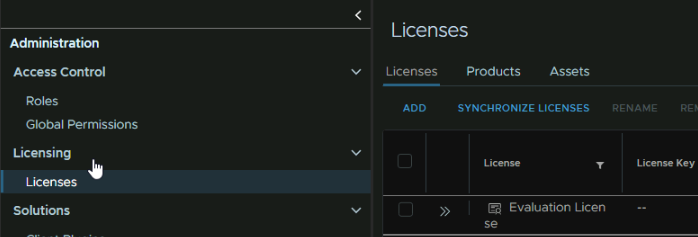
Now we have everything setup, we want to license our hosts, to do this, click the three lines in the top left and click Administration

Head to Licensing/Licenses and click Add
Add the keys for vCenter, ESXi and vSAN, one per line, or if you have a solution license, add that on one line and click Next
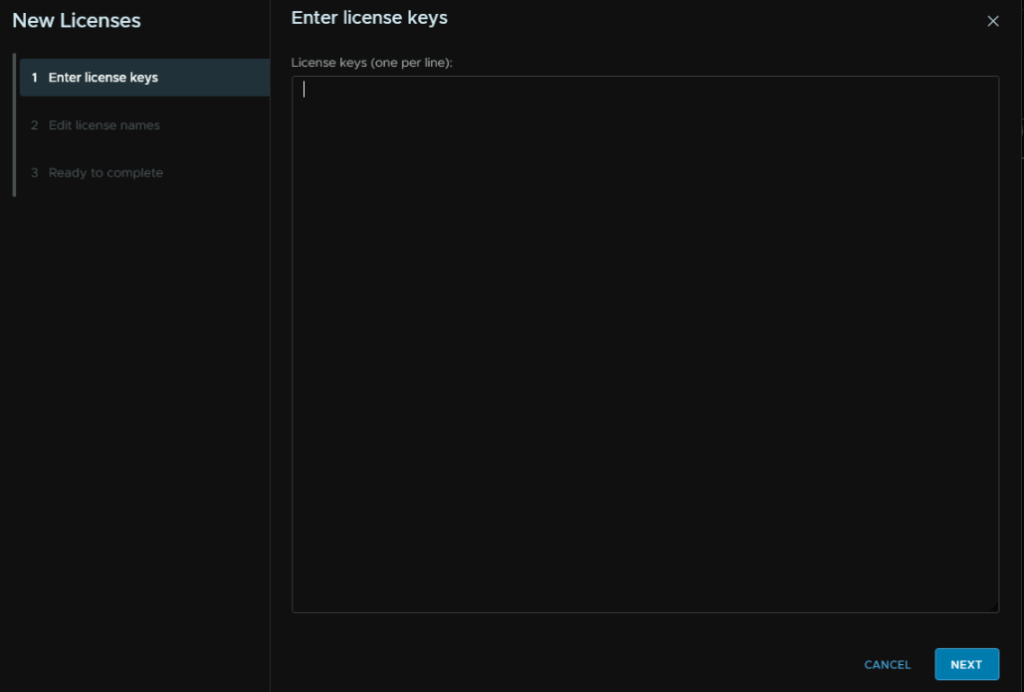
Then name the licenses then click Next and Finish
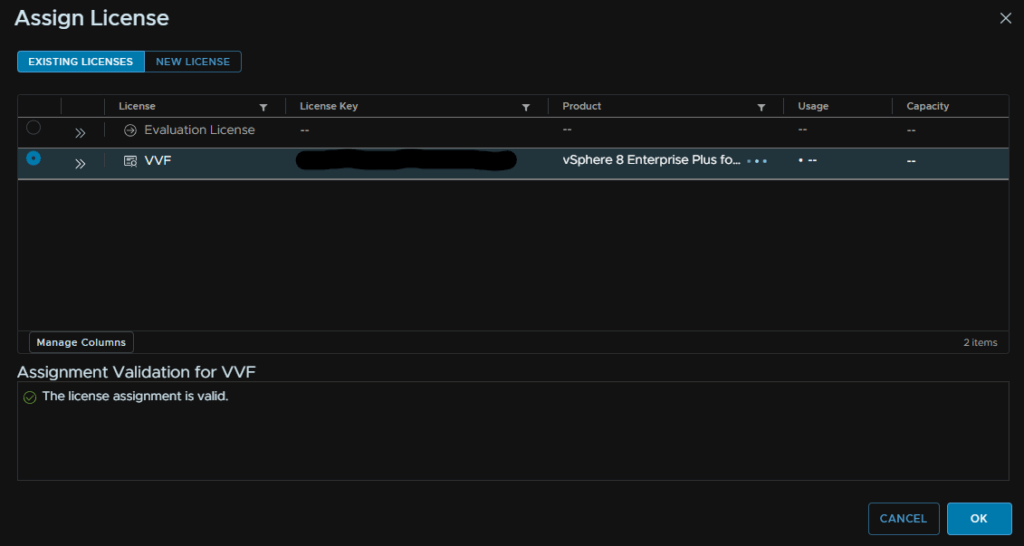
Now we can apply these license, Head to Assets, still under Licenses, click vCenter Server Systems and select the vCenter, and click Assign License
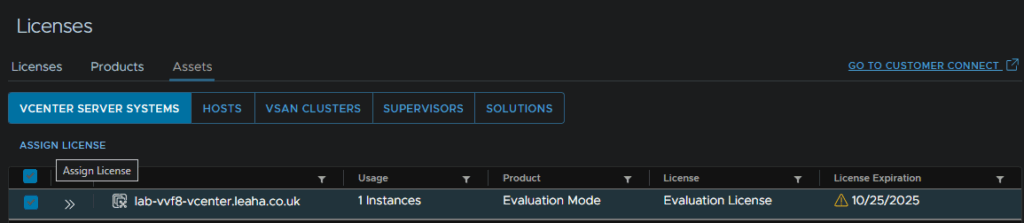
Select your license and Click ok
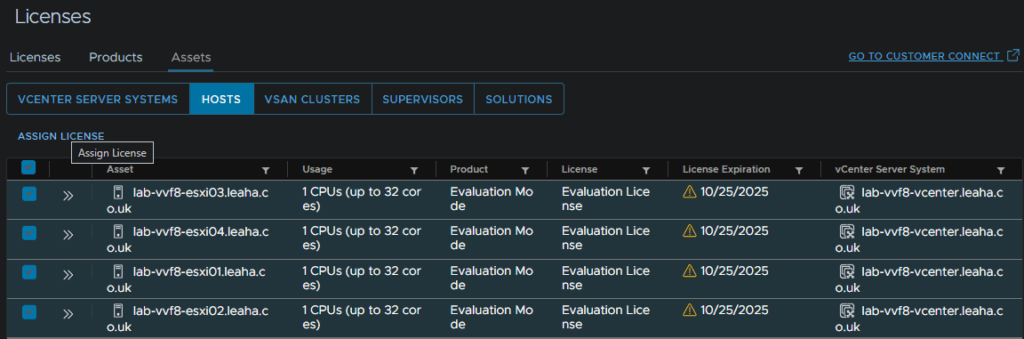
Repeat under hosts for the ESXi license
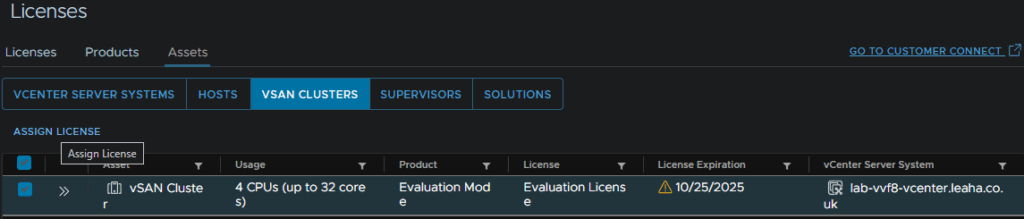
And again for the vSAN Cluster
2.9 – Changing Account Expiry
By default, if vCenter root account will expire every 90 days, this should be something complex and random when we deployed the vCenter, so it would be better to disable this, as if its needed you dont want to be changing it
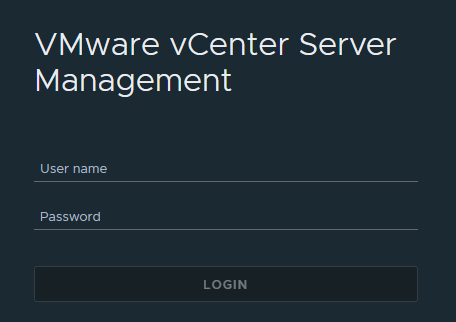
To do this head to the appliance management page on
https://fqdn:5480
Login with the root account
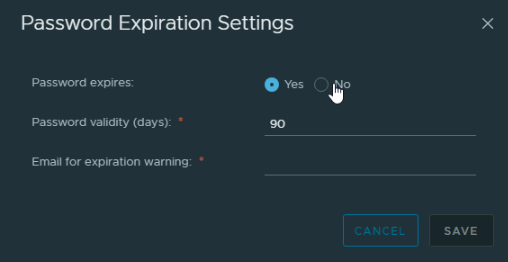
Head to Administration and click Edit
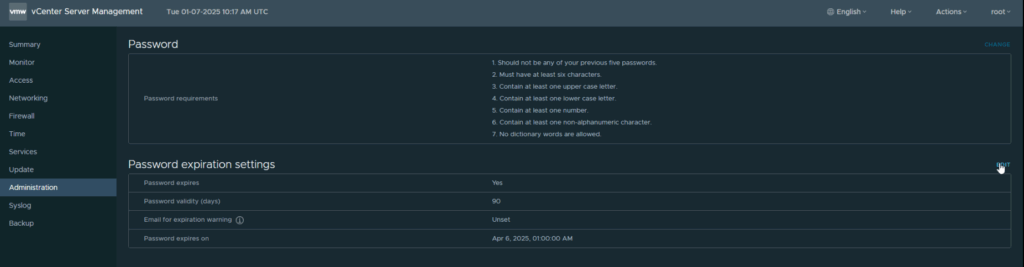
Here you can set the password not to expire, or change the expiry date from the default 90 days
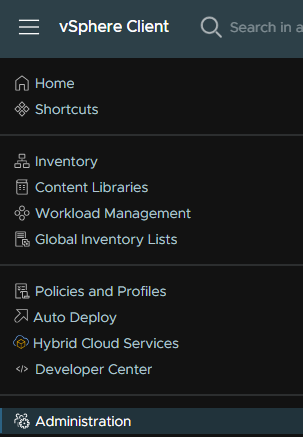
The same rule applies to the SSO accounts, like the [email protected] accounts, we can change this from the UI menu, not the admin portal and clicking the three lines in the top left and then Administration
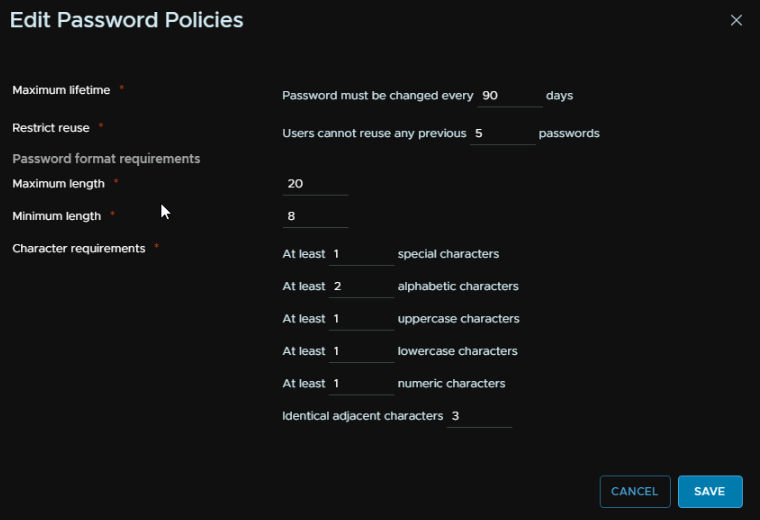
Then head to Single Sign On/Configuration/Local Accounts, from there you can click Edit under password policy
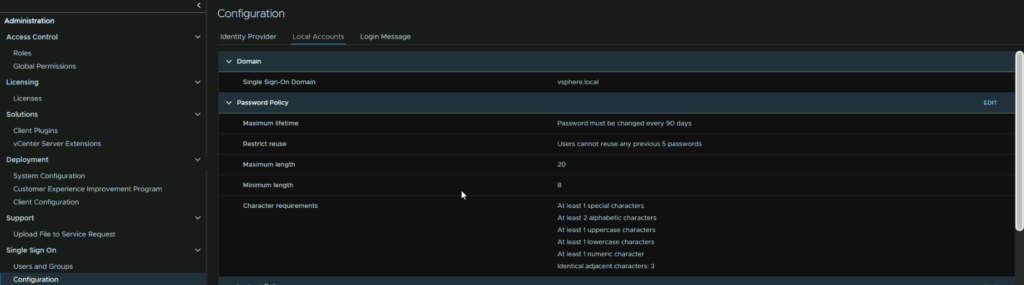
This then comes with several options you can tweak to suite your environment
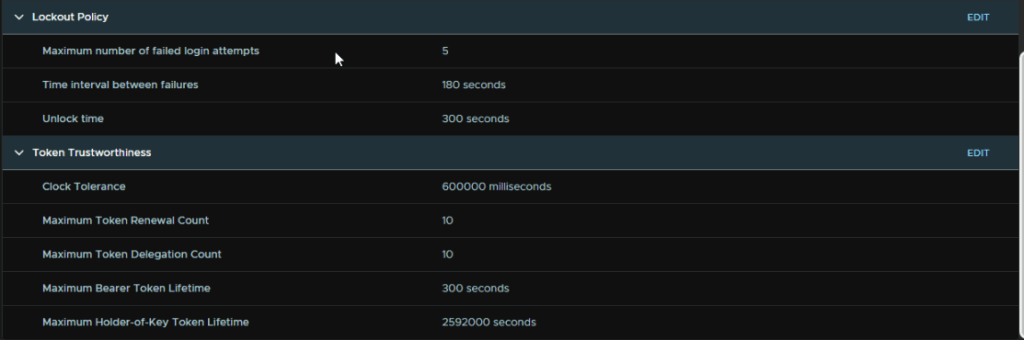
You can also configure the lockout policy
Its worth noting that while you can add AD into vCenter, I would strongly recommend against it, your admins, with the domain accounts, will have admin permissions to areas of the AD environment, and vSphere, and this poses a massive security risk, if one of those accounts gets breached, an attacker has a lot of power over the AD environment, and if they are a vSphere admin, full access to the vSphere environment without having to get access to another account
2.10 – vCenter Backups
The best practices method to backup a vCenter is to use the config backups in VAMI
To access VAMI go to the following link substituting fqdn for your vCenters FQDN
https://fqdn:5480
You can log in here with the local root account, or an SSO admin login
Now head to the backups tab at the bottom on the left, from here you can click ‘Configure’ on the right to setup a schedule
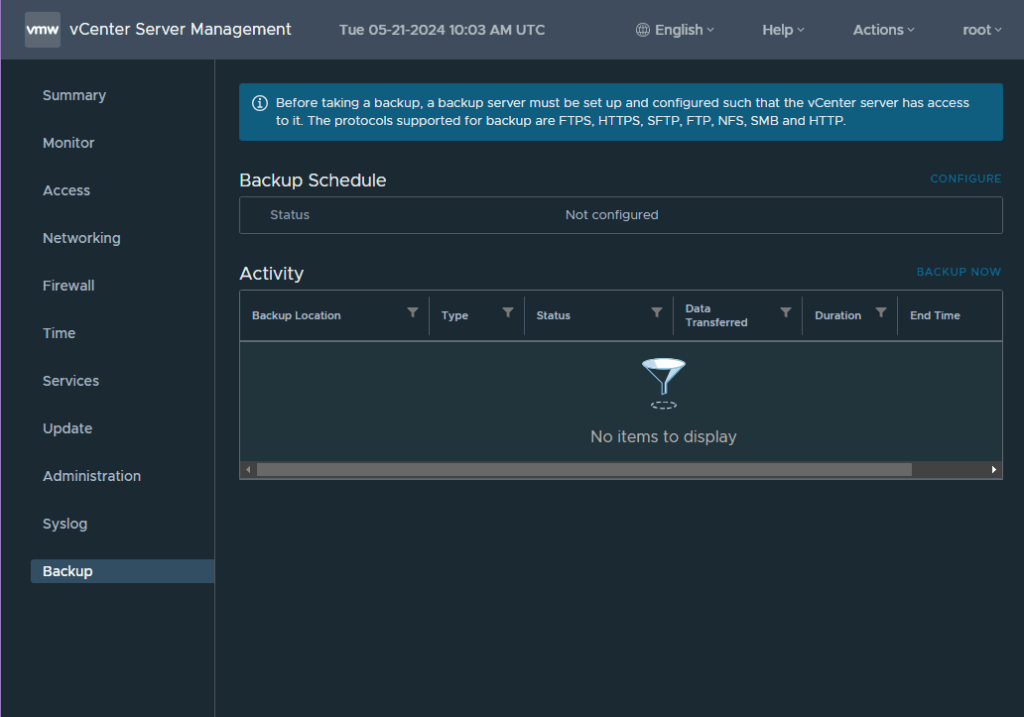
You’ll need a valid backup location to store them, an SMB, NFS or FTP server work best but you can also use HTTPS and FTPS
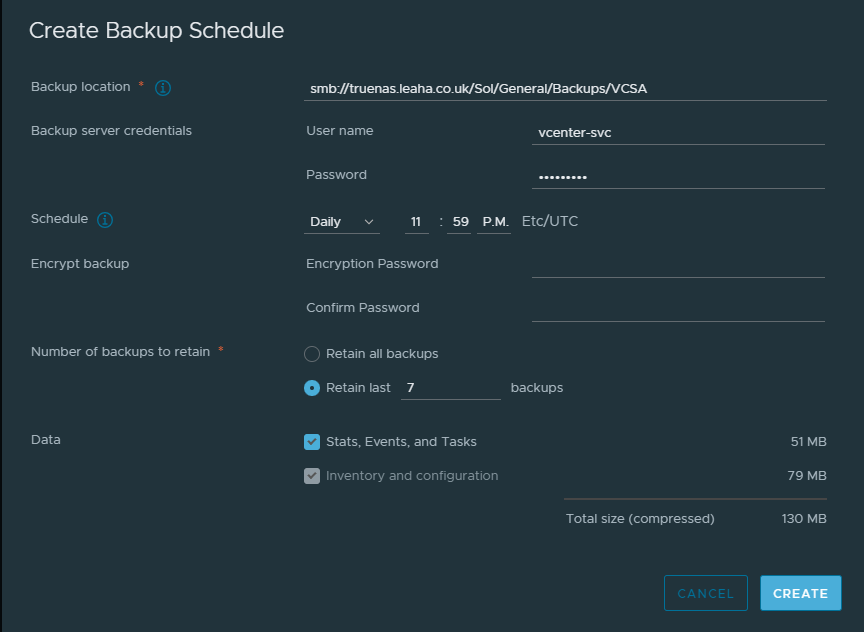
The backup schedule will give you a format for the backup location

We want to setup out location, here I am using an SMB server, but for NFS/SFTP the process is the same you just change the protocol at the start to NFS or SFTP respectively
We can also add in an account with read/write permissions to the share, I recommend a service account with a password that wont expire, as if it expires and you forget, the backups will stop working
You’ll want it to run daily, ideally if you need to restore you dont want a backup older than 24 hours
And retain the last 7 backups, this will remove older backups and maintain its self
Then hit create
To test this works, run a manual backup by clicking backup now on the right
Click use backup location and username at the top of the pop up, this will pull the settings from the schedule, you’ll just need to enter the account password
Then click start
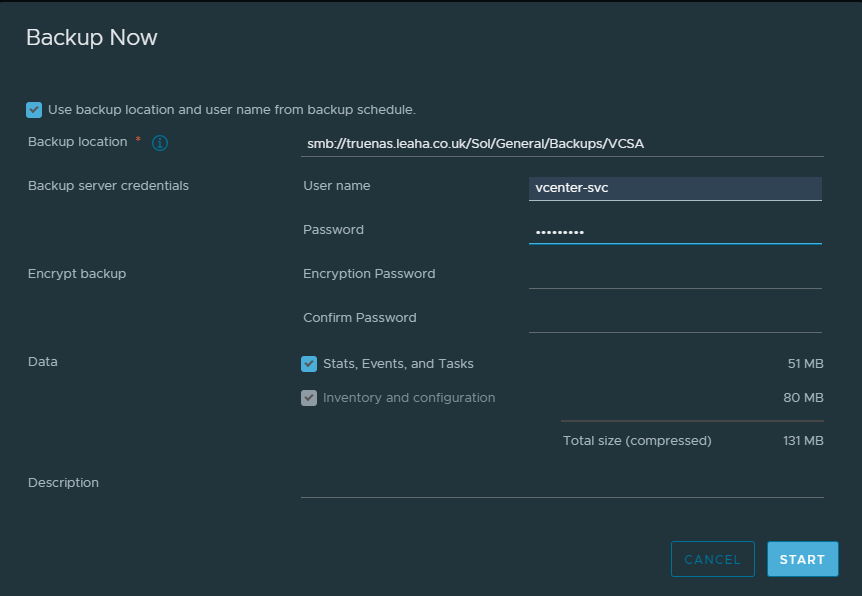
That will create a manual backup task

If all is working, this should complete with no errors

Now your vCenter is backed up and will automatically back its self up everyday for you, so if something goes wrong you have a way to restore it
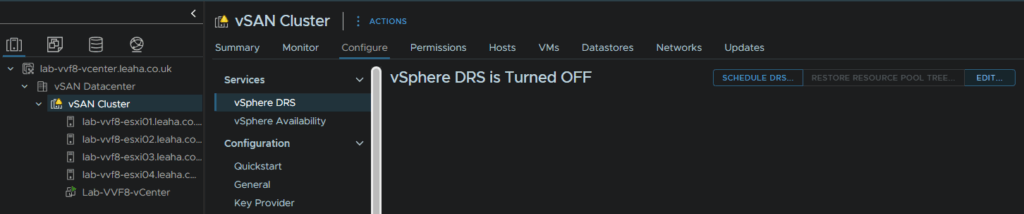
2.11 – Cluster DRS/vSphere HA
What we now need for our cluster is the load balancing of resources across the cluster and automatic restarts of servers if a host dies or if a VM stops responding with VMware Tools
DRS is for the cluster load balancing, it will ensure VMs are on the hosts where they can best get the resources they, it will also allow VMs to other hosts when one is put into maintenance mode
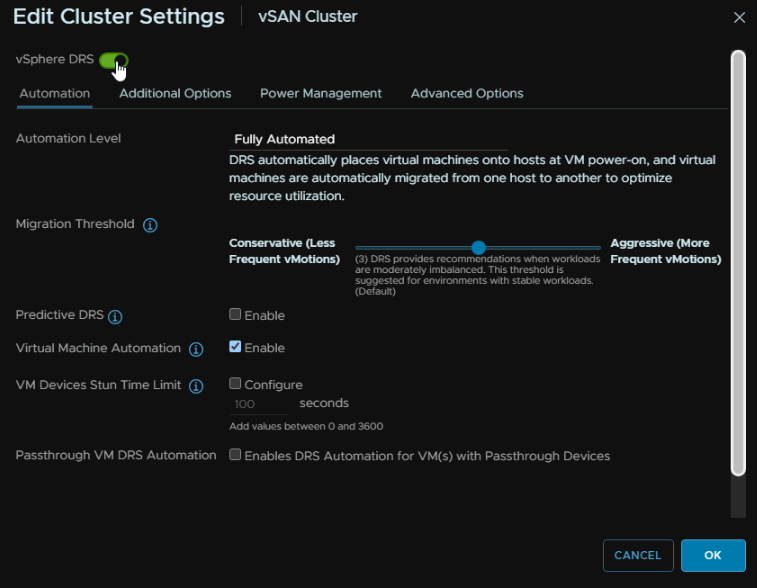
To enable this, click the cluster and head to Configure/Services/vSphere DRS and click Edit on the right
Click the enable toggle at the top and leave the rest as is and click ok
For vSphere HA click the Cluster and head to Configure/Services/vSphere Availability and click Edit in the top right
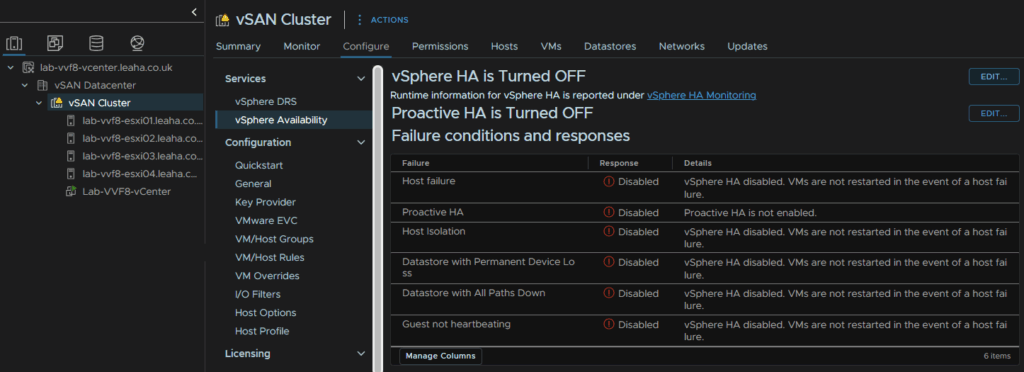
Click the toggle at the top to enable it
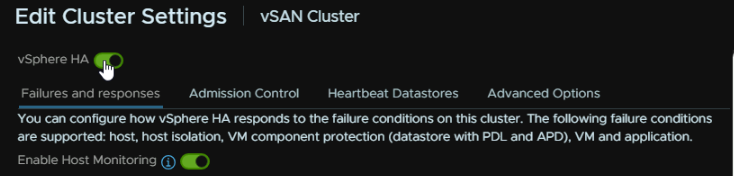
Expand VM Monitoring and click the radio button for VM monitoring Only, then click ok
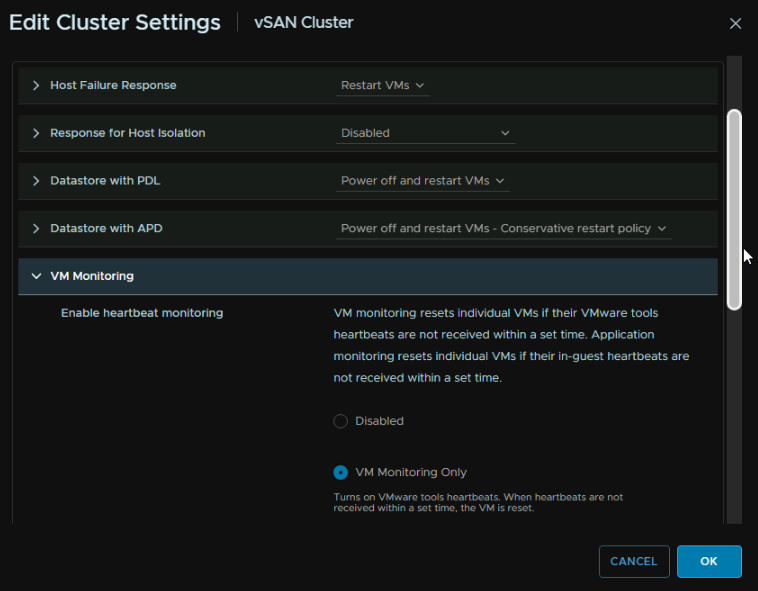
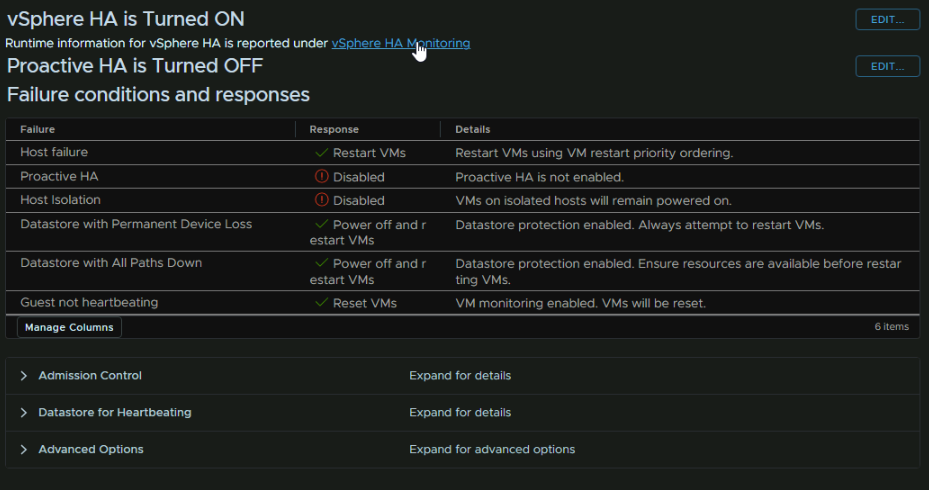
It should now look like this
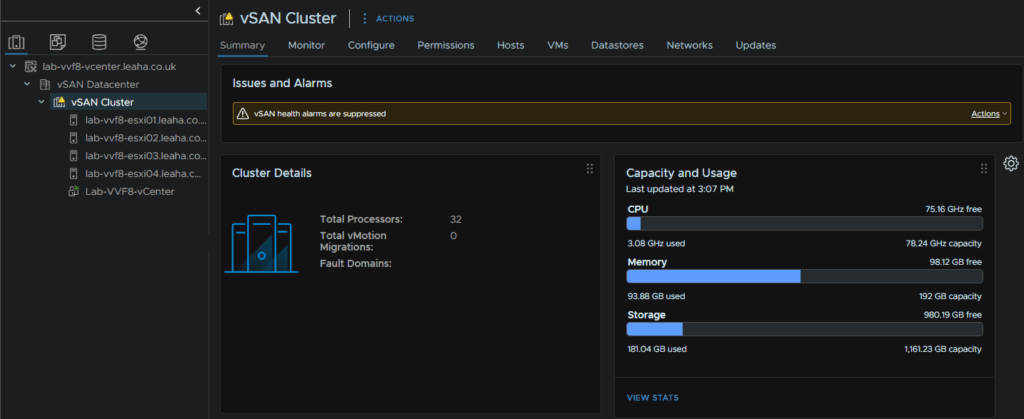
2.12 – vSAN Alarms
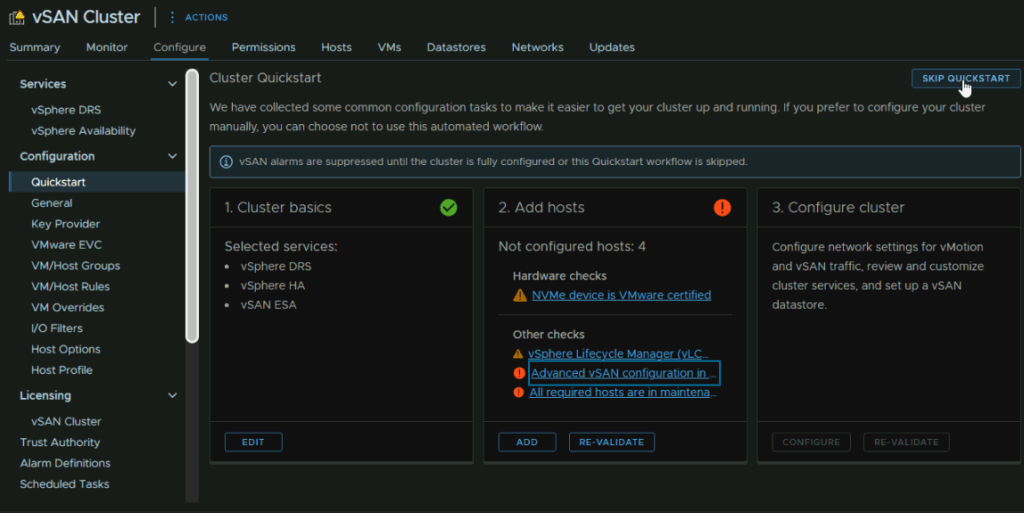
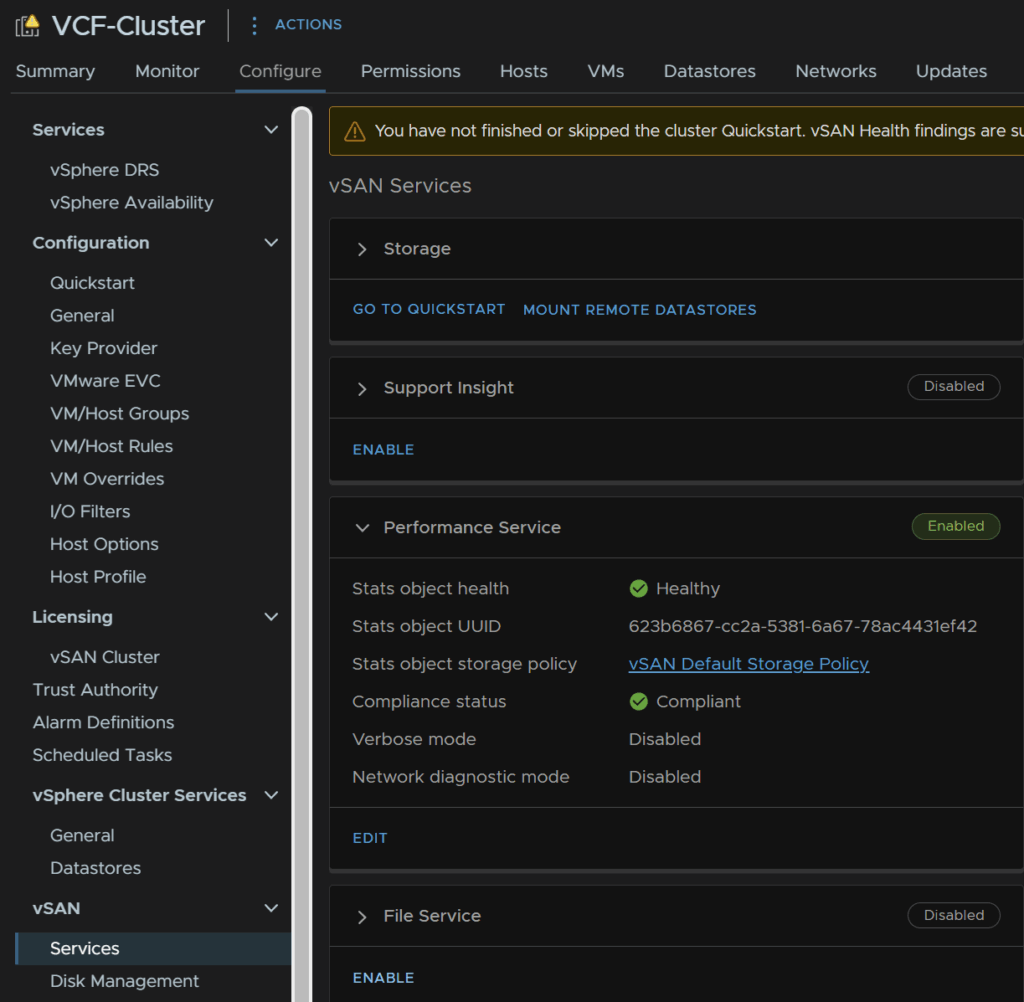
By default, the vSAN health alarms are suppressed, and you will see a warning for it on the cluster

This is due to the quick start not being done, but we can sort everything manually, I find it can be a little difficult to get this working, and manually we end up with a slightly better result, and the workflows it would have you do, we have already done
For example, in the screenshot below shows hosts are not configured when they are
What we want to do is click the cluster, and go to Configure/Configuration/QuickStart and click Skip QuickStart in the top right
Then click Continue

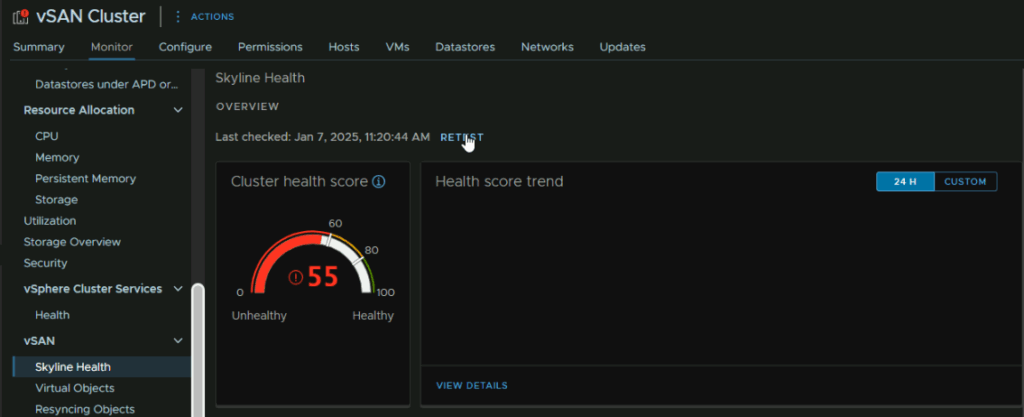
Now the health alarms are not suppressed we can see bits we need to address
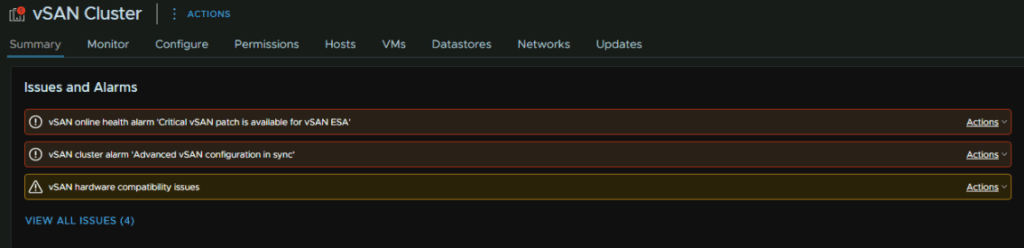
To check these, click the cluster and go to Monitor/vSAN/Skyline Health
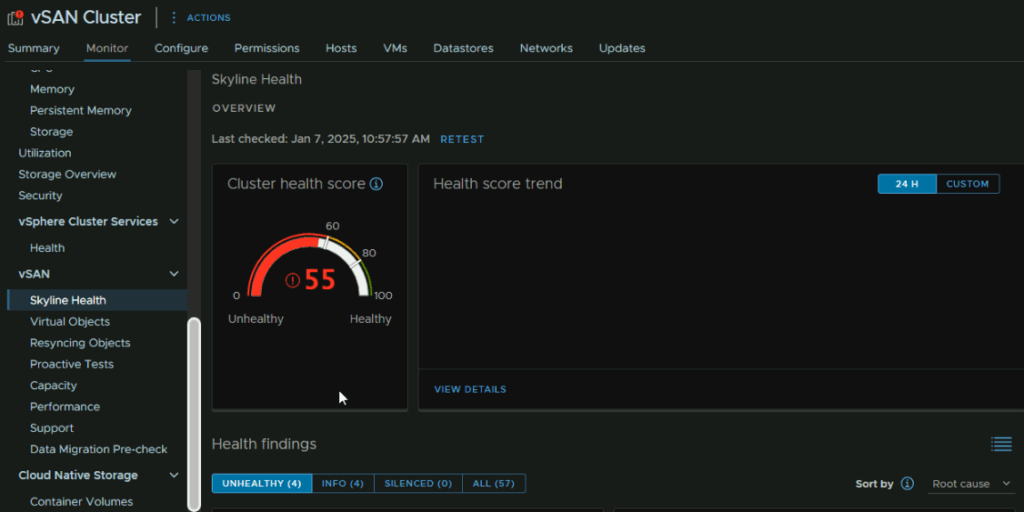
We can see the primary reason the health is so low is due to my lab running an older version, 40 of the 45 points lost are from a patch to ESXi needing to be applied, though vCenter would need doing first
For the bit on the right we can click Troubleshoot to see whats up and how to fix it
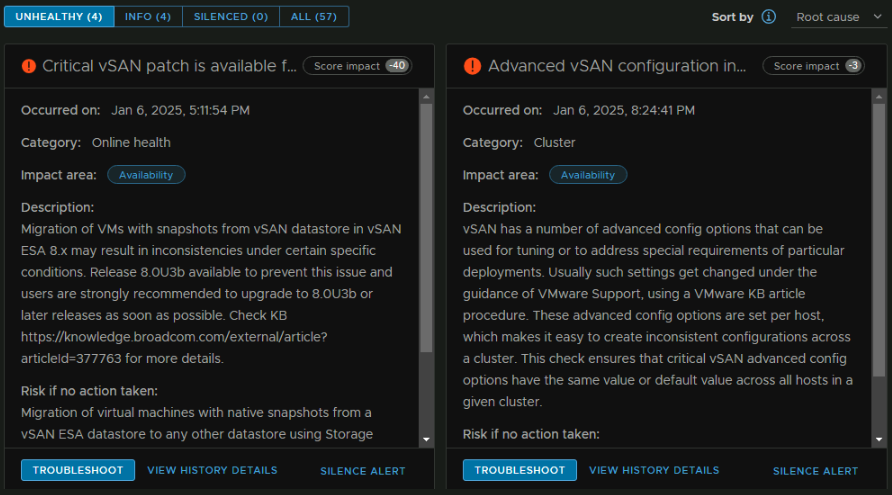
Here it says some advanced configuration isnt set for the original additional host we started with
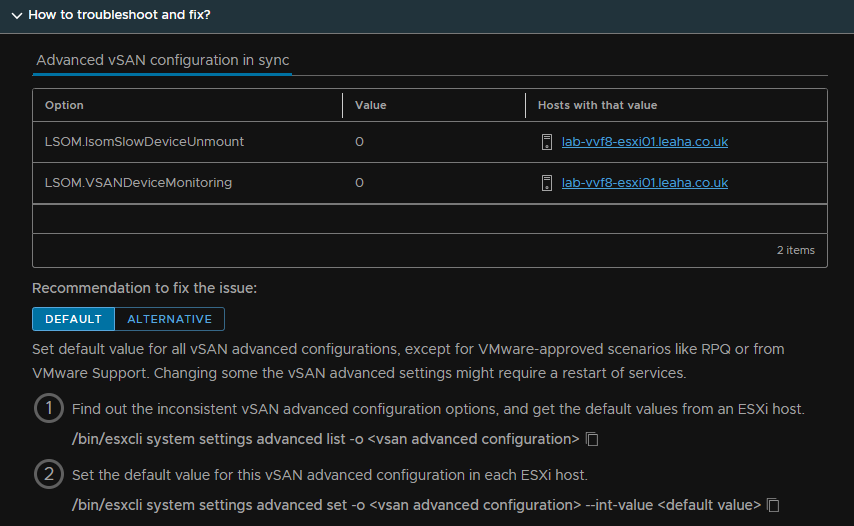
The command here is a little bit of a red herring and doesnt actually work oddly
The default value is 1, and this needs setting on the three hosts we added after, so the other three, to do this we need the CLI, and we need to enable SSH
Click the host, and head to Configure/System/Services, then click the radio button on SSH and click Start
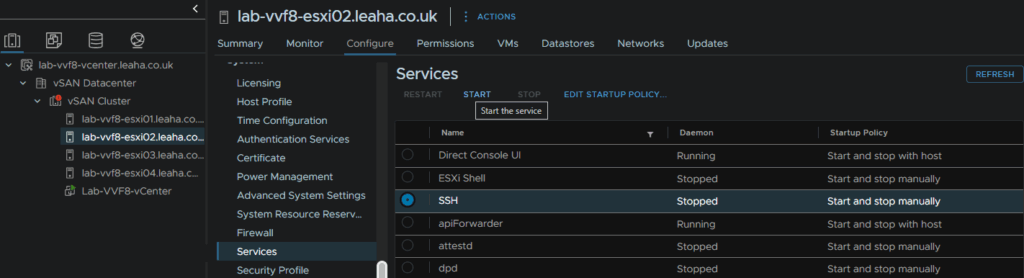
Now we can SSH into the host, you can use Putty, or from PowerShell you can run
ssh root@hostnameThen run
esxcli system settings advanced set -o /LSOM/lsomSlowDeviceUnmount -i 1And run
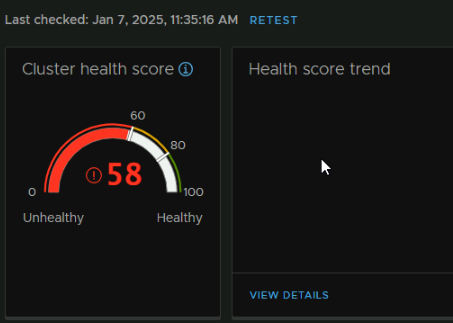
esxcli system settings advanced set -o /LSOM/VSANDeviceMonitoring -i 1To test this worked, I did this on Host 2, we can click the Cluster, and head to Monitor/vSAN/Skyline Health and click Retest
Apply this to all three hosts will resolve the issue and all four will have the same, correct config
After that and another retest, our score has gone up by three points
I also have an alert for the NVMe devices being uncertified, I will silence it, as its a lab, but a production setup should not have this

The big bit we want to deal with is is the patch alert impacting our score by 40 points
2.13 – vSAN Cluster Image
Before we get to setting up cluster images, we need to setup a Broadcom token, a guide on this can be found here
This should kick off a sync of the lifecycle manager, if you give it 15 mins before proceeding
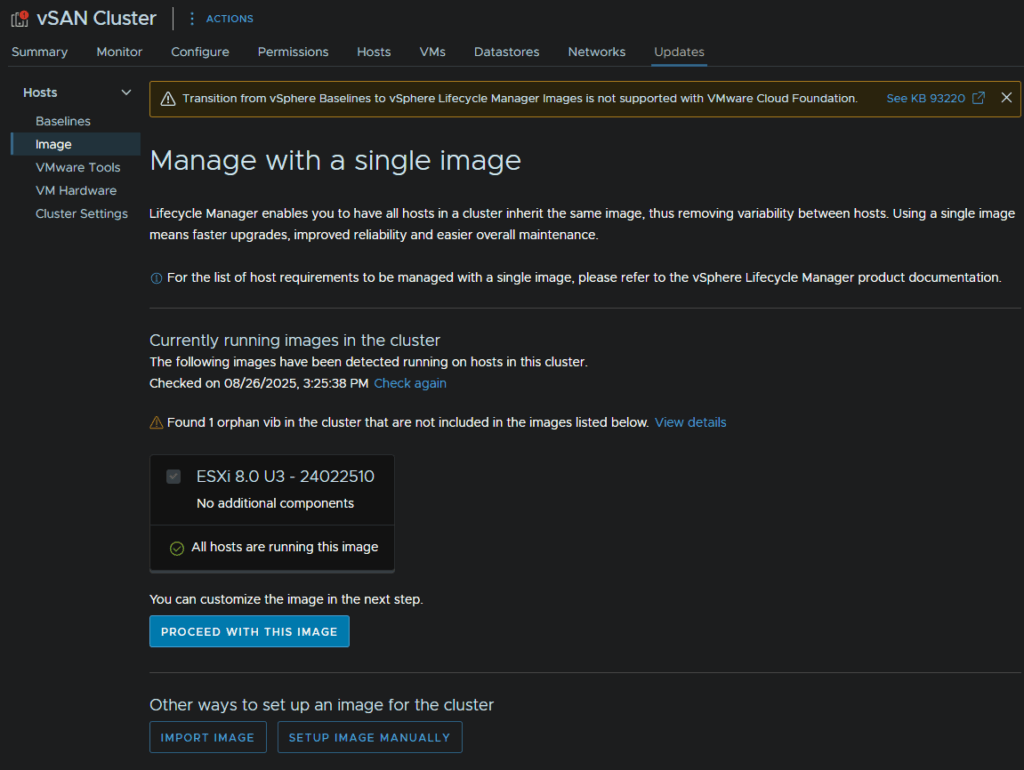
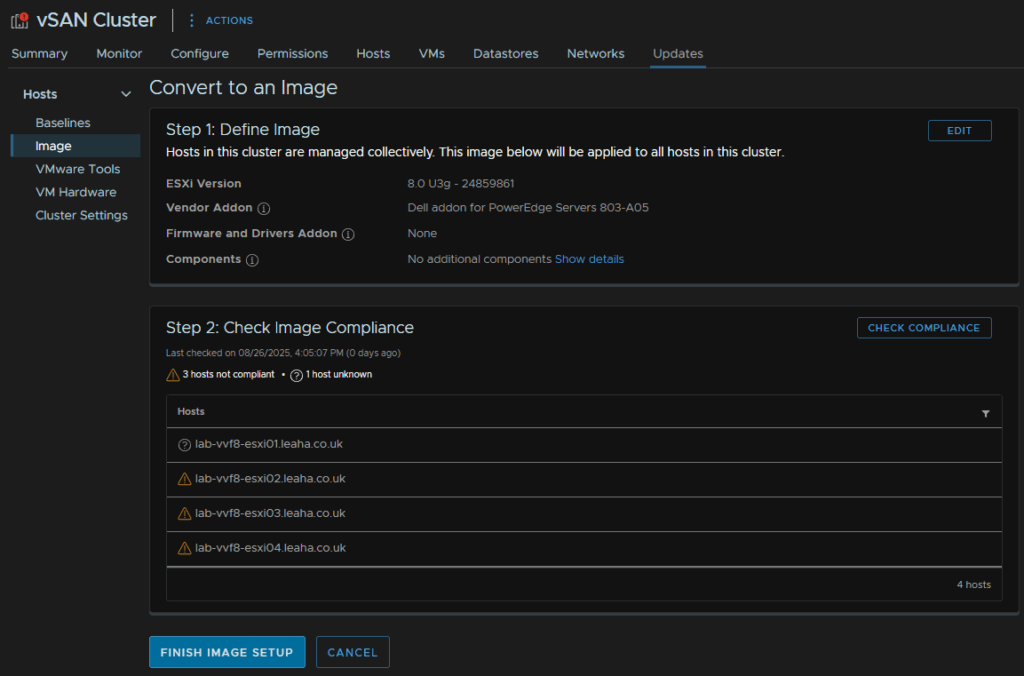
To setup the cluster image to prepare us for patching, we need to click the cluster, then head to Updates/Hosts/Image and click Setup Image manually at the bottom
Click the drop down under ESX version and select the latest, which for me was ESX 8U3g
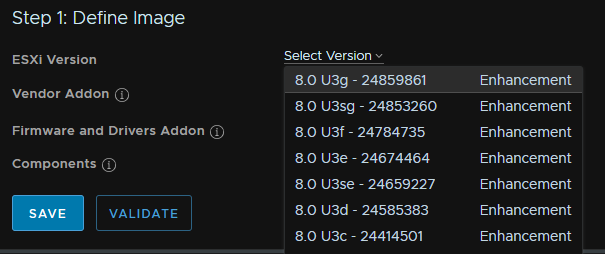
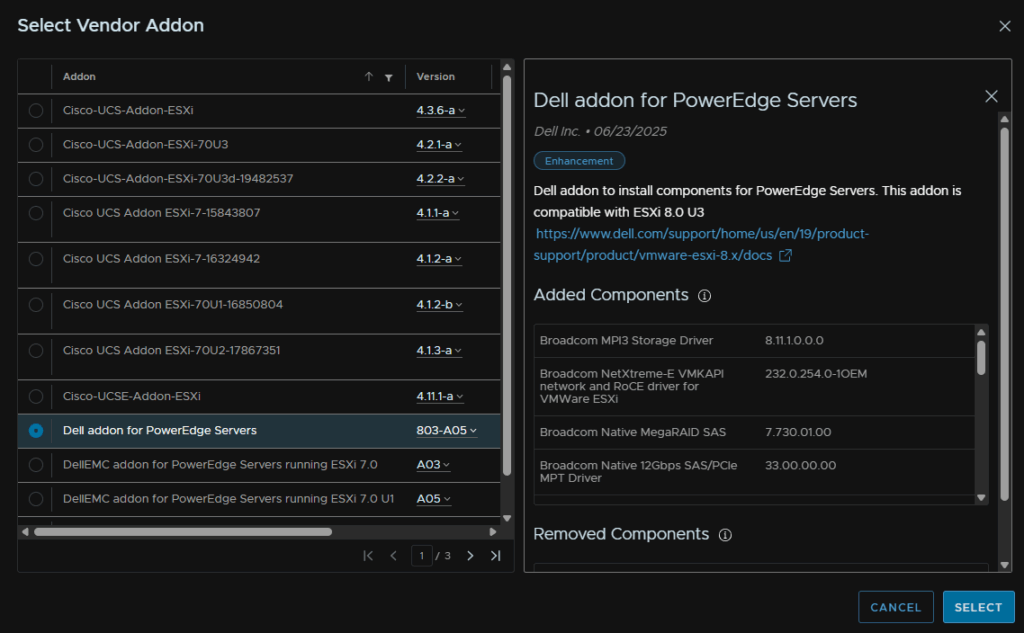
Click Select on Vendor Addon

And select the addon for whatever vendor you have, for example, if you have Dell PowerEdge servers you would want this, I’ll add this for demo purposes in this lab, as adding it to the virtual ESXi hosts isnt going to cause an issue
And the last two are if you have any special components, this can include the iDRAC service module for ESXi, or GPU drivers for Nvidia cards, but for now we will leave this
Click Validate

When it says its valid, click Save
You might notice a warning about the vmware-fdm VIB, this is the vSphere HA VIB pushed by the vCenter and is normal

It will check the cluster compliance, which as this is a higher ESXi version will have our hosts out of compliance, but we can now Click Finish Image Setup
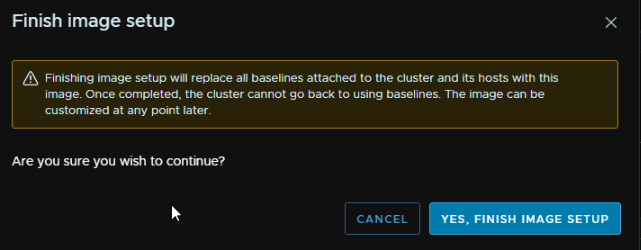
Then click Yes, Finish Image Setup, this will remove Baseline updates permanently from the cluster
Now our hosts are ready to be patched via an image
2.14 – vSAN File Services
To setup the file services, you’ll need some IP addresses on the network you want to use it on, and this will deploy one VM per ESXi host
You’ll also need a dedicated port group for this on a VDS, this is because it will lessen the security, so even if its the same VLAN as a port group you already have, it needs it own group
To be able to use SMB shared you’ll need to connect this to an AD server which is also manage RBAC for the shares
To enable it, click the cluster, then head to Configure/vSAN/Services, and at the bottom, click Enable under the file services tab
Click the Select drop down on the network section, and select the network port group you want to use
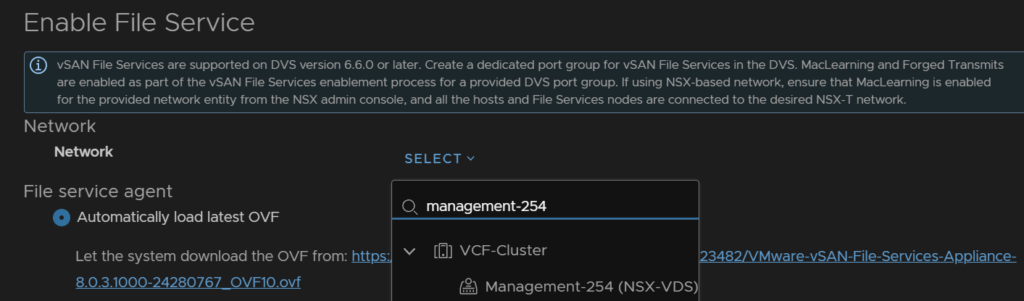
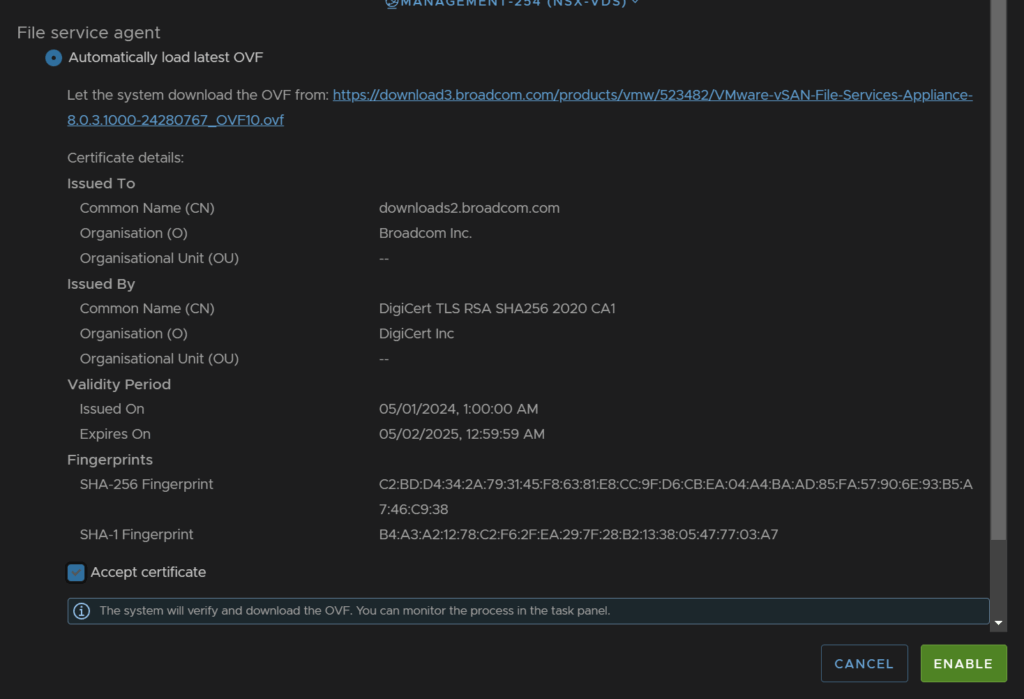
Keep the top option of automatically loading the latest OVF and accept the certificate at the bottom, then click enable
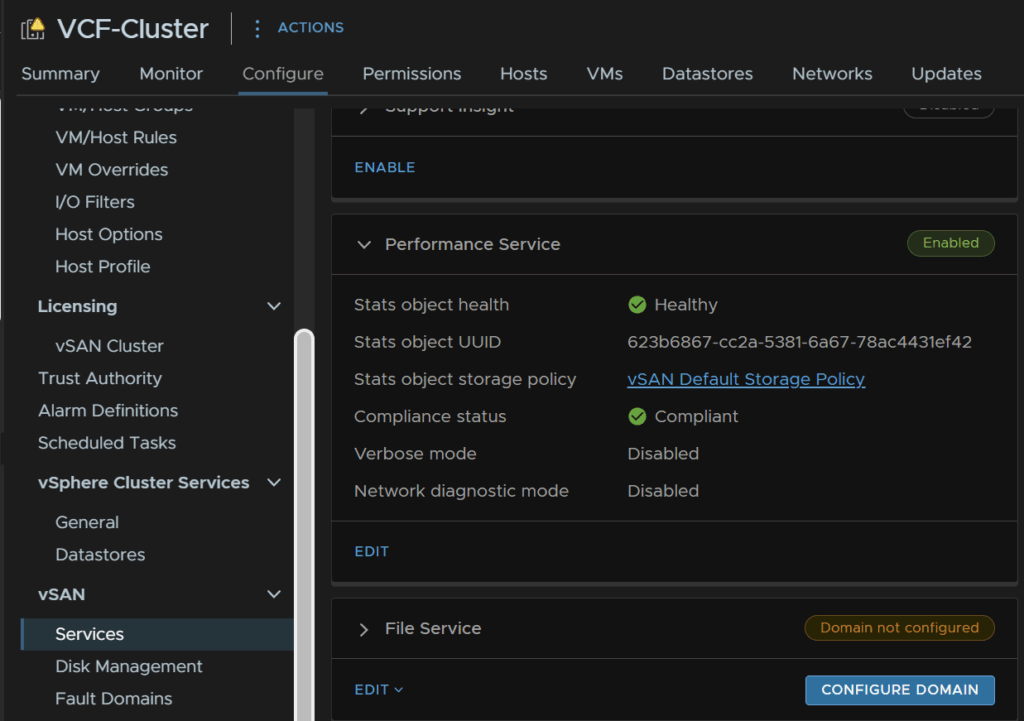
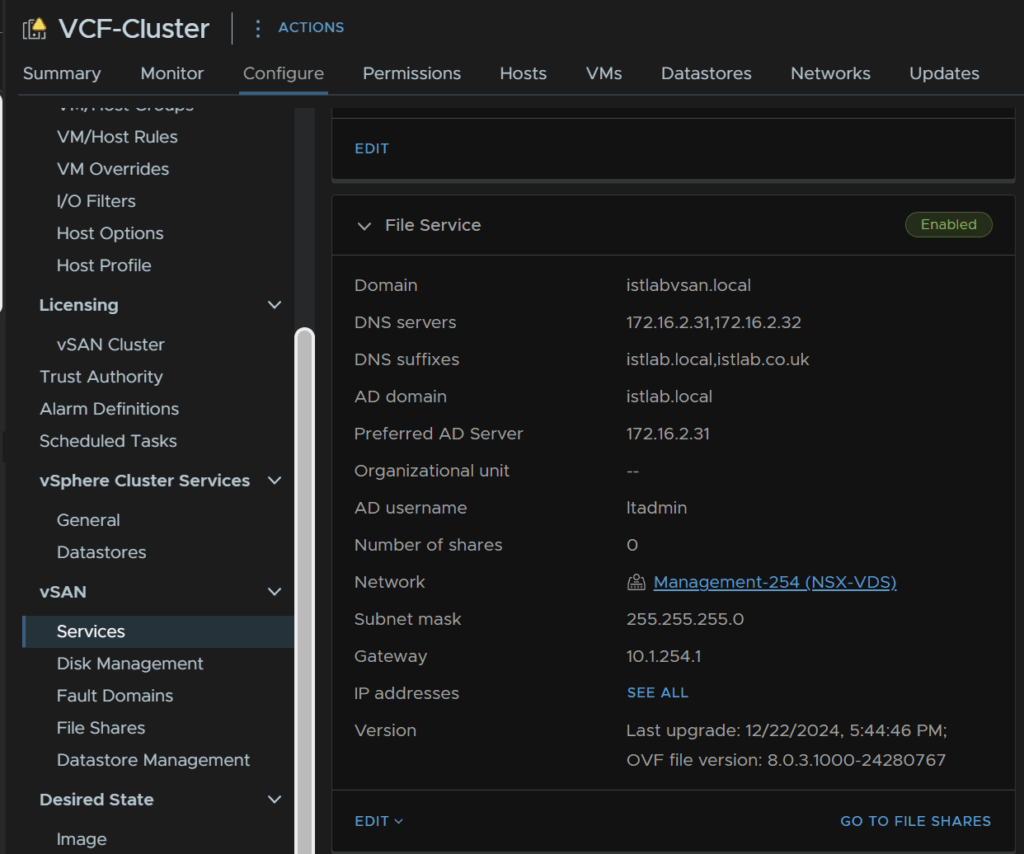
Now when we head back to our cluster and go to Configure/vSAN/Services, we have the option to configure the domain, if we click the Configure Domain button we can continue
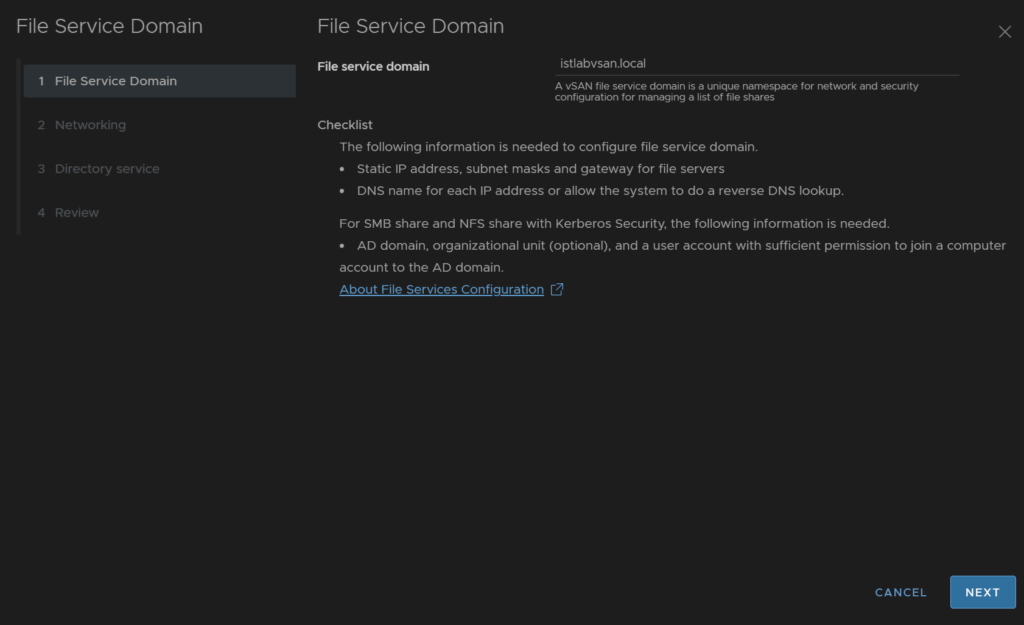
We need a unique domain name for the vSAN file service
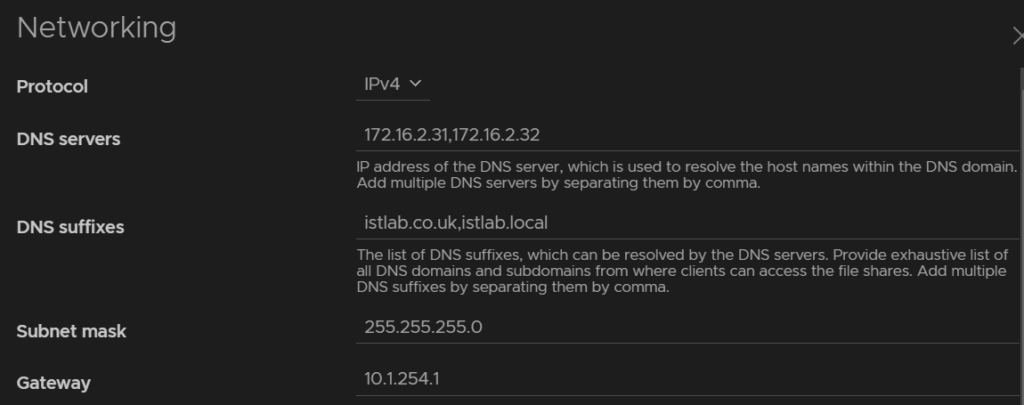
Now enter the IP Protocol, I am using IPv4
Then add your DNS servers, this should be able to resolve the AD Domain, which is normally your AD servers, add any DNS suffixes, I have two, istlab.co.uk which is the main name, and istlab.local, the AD domain suffix, the subnet mask and gateway for the network, this will be for the port group we selected earlier
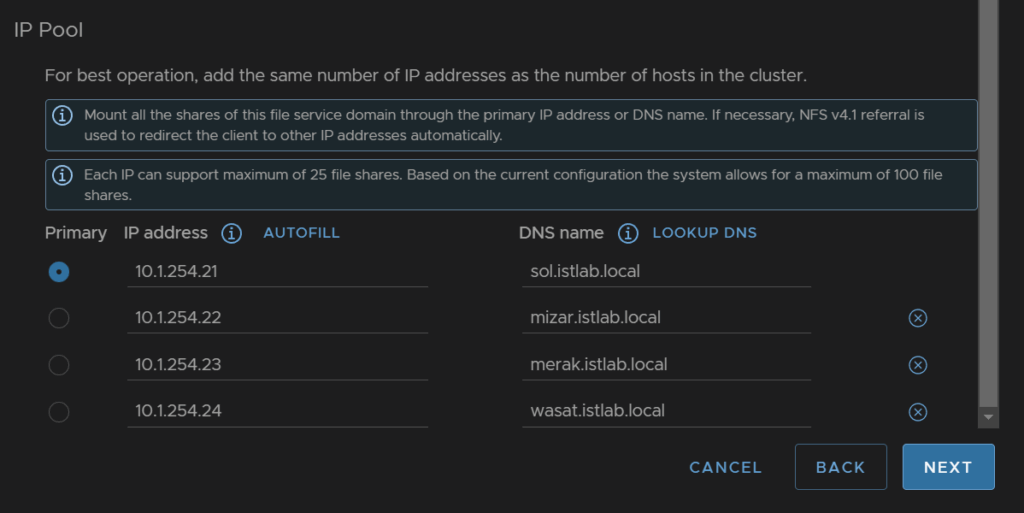
Now we need the IPs and DNS names, everything by default will run off the primary IP, these IPs will also be on the network on the port group we set, and the DNS names need to be resolvable, and be the same domain as AD
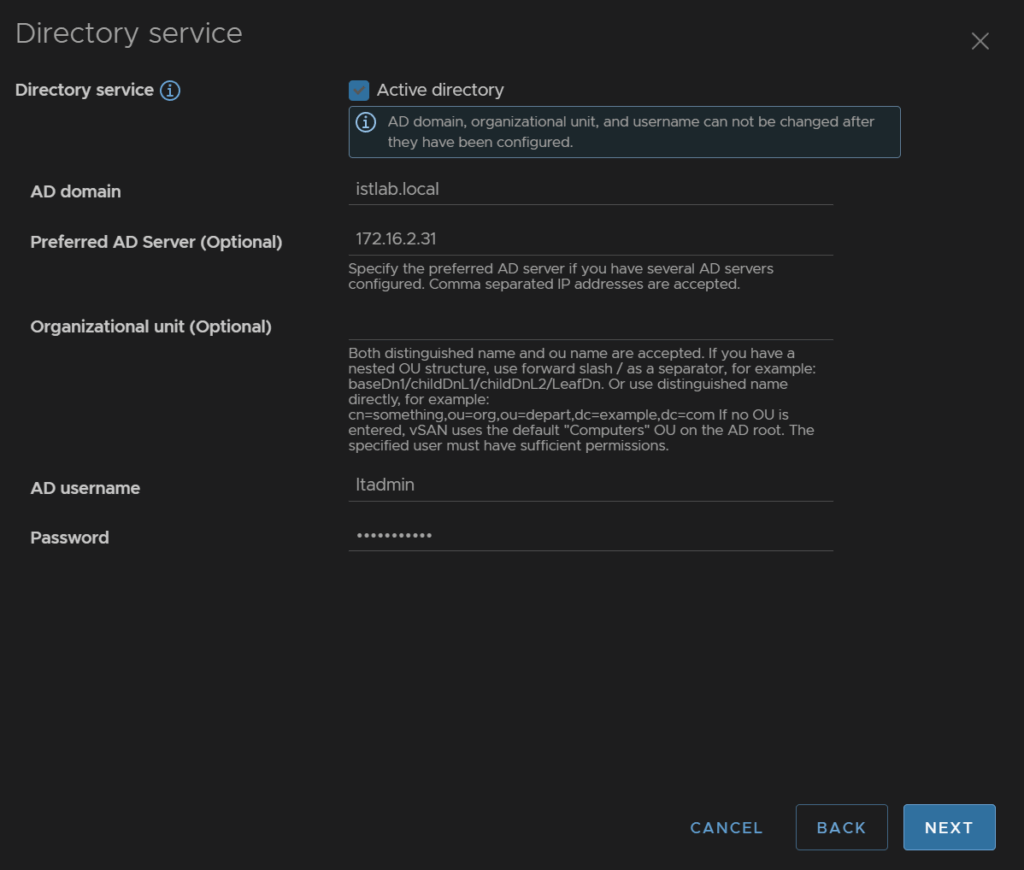
Enable AD, enter the domain, you can select the preferred AD server if needed, I added my primary DC, then a domain admin user account
Then review and finish
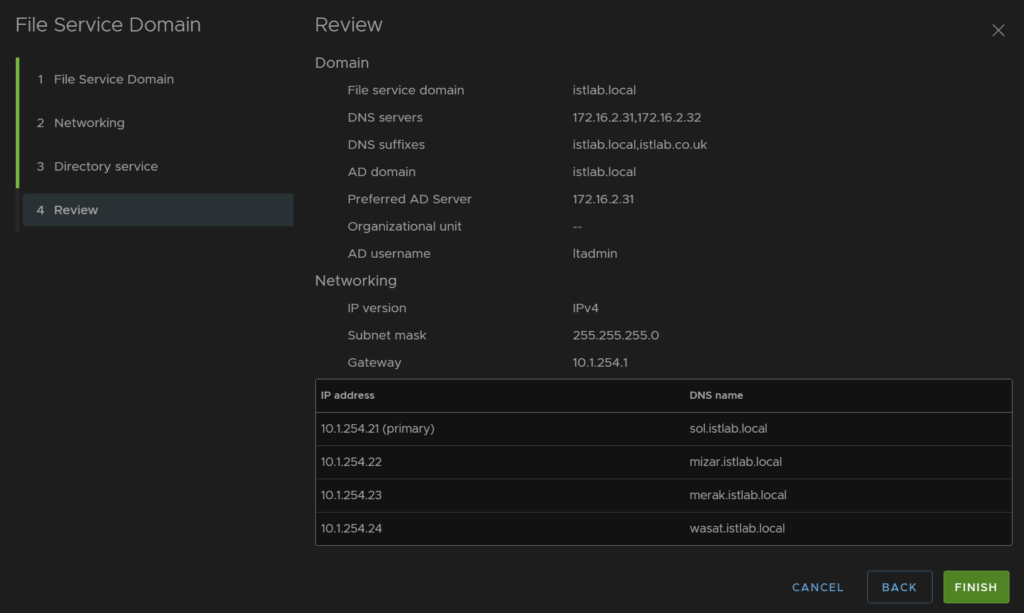
We can see the widget has populated, and under the cluster we have Configure/vSAN/File Shares we can access
3 – Aria LCM
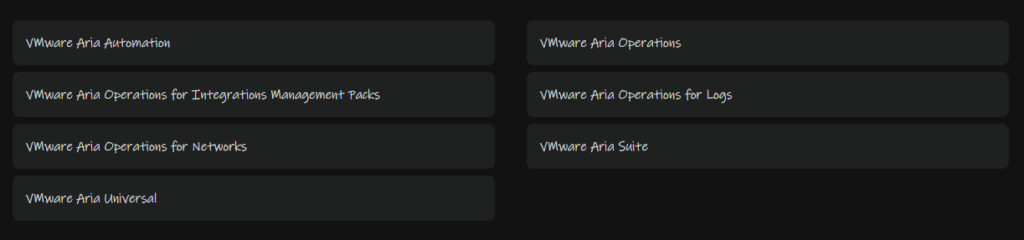
First you’ll need the ISO from the Broadcom portal, this can be found under Aria Suite, or the Aria Suite depending on your entitlement

For Aria Suite
Select the version for your entitlement, I’ll use standard as an example, then click the latest, 2019
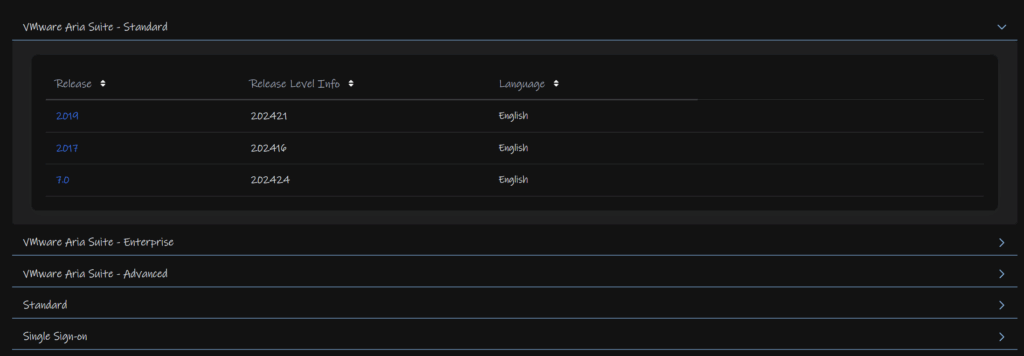
Click view group under Aria Suite Lifecycle

Click I agree at the top and download the easy installer

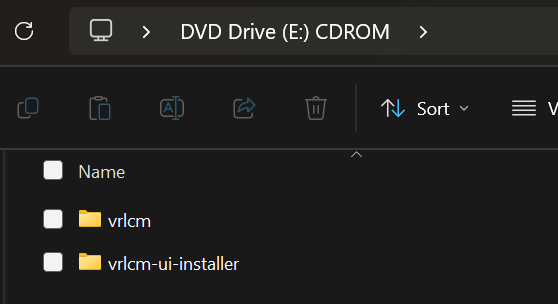
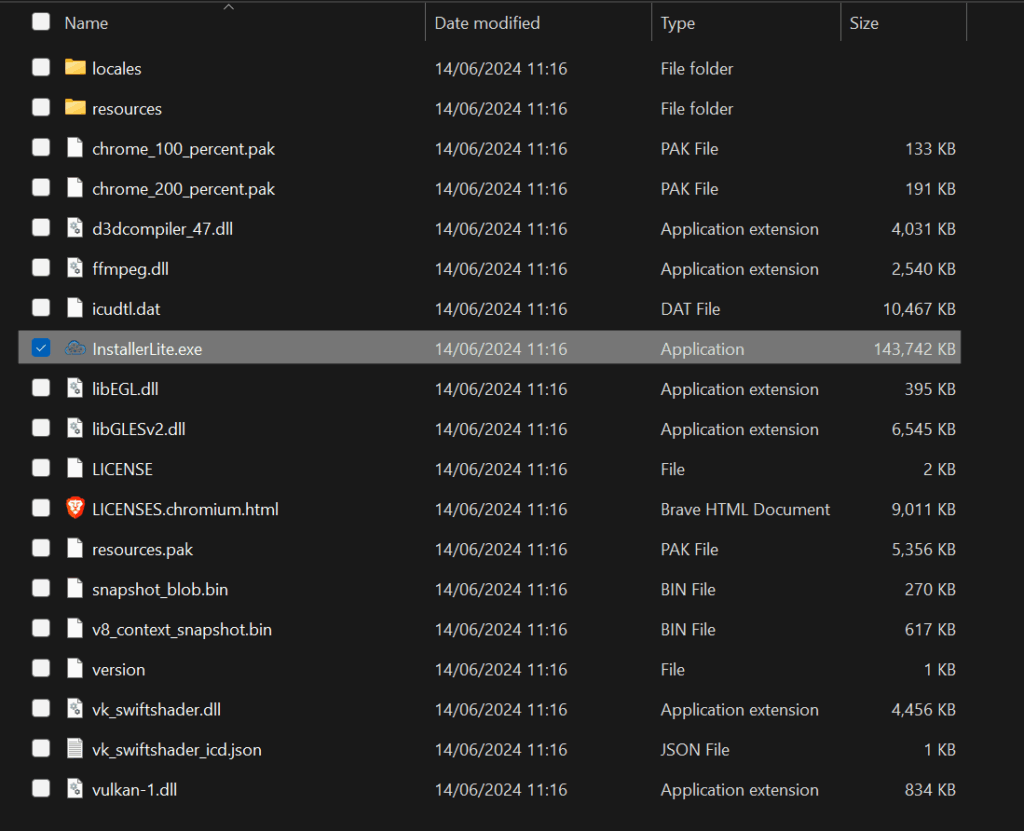
Mount the ISO and open the UI installer folder
Then win32-lite
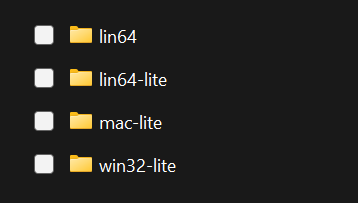
Then run the installer
Click install
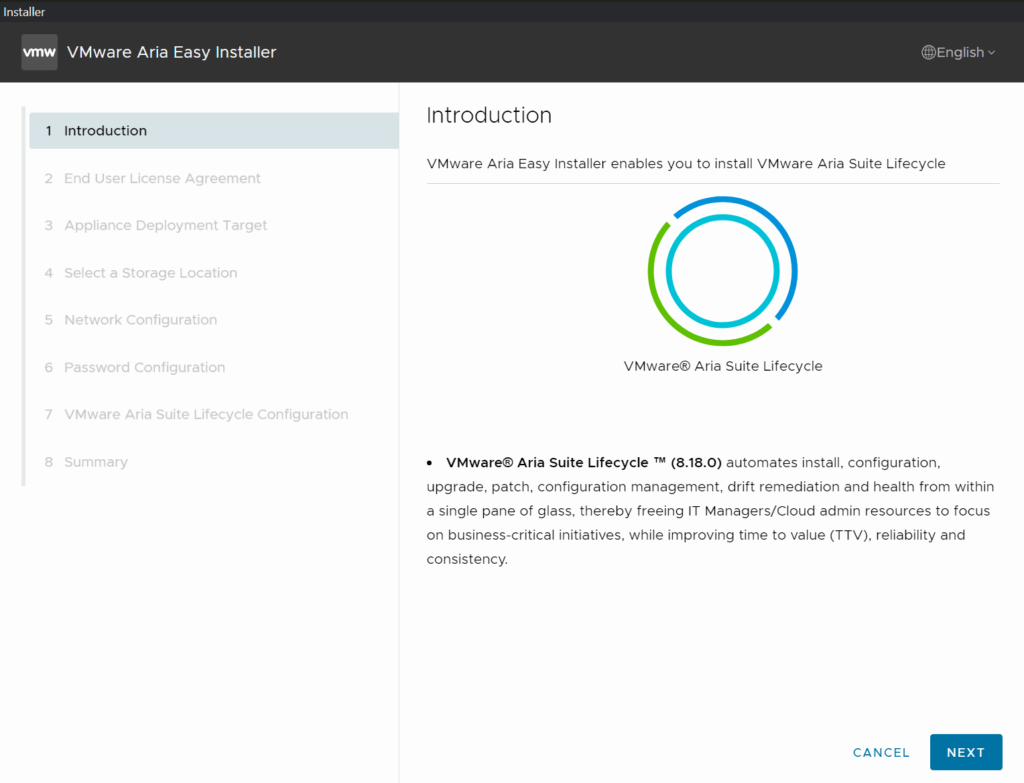
Click next
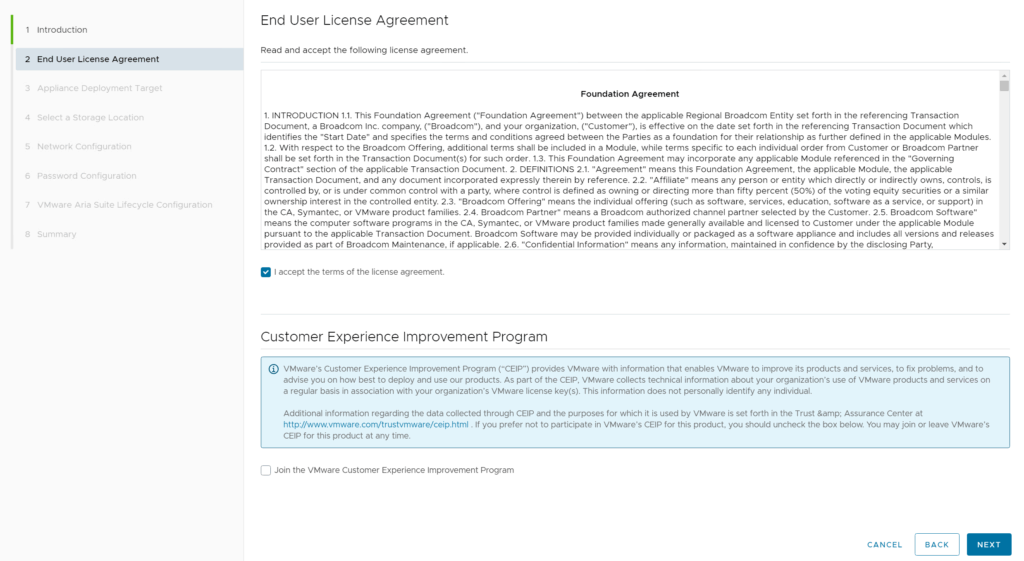
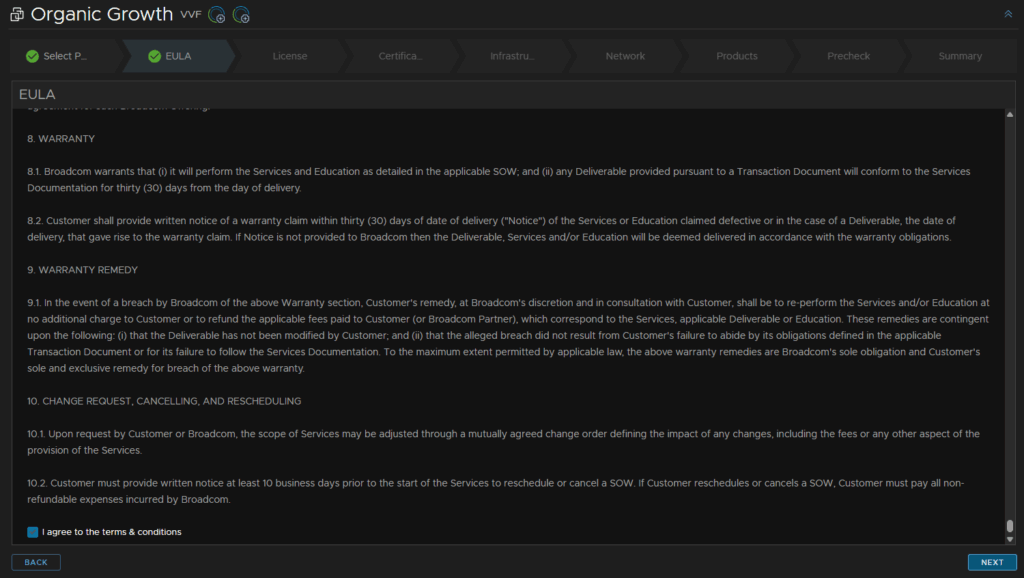
Accept the EULA and opt in or out of the CEIP and click Next
Put your vSphere FQDN and admin credentials in and click Next

Accept the SSL warning
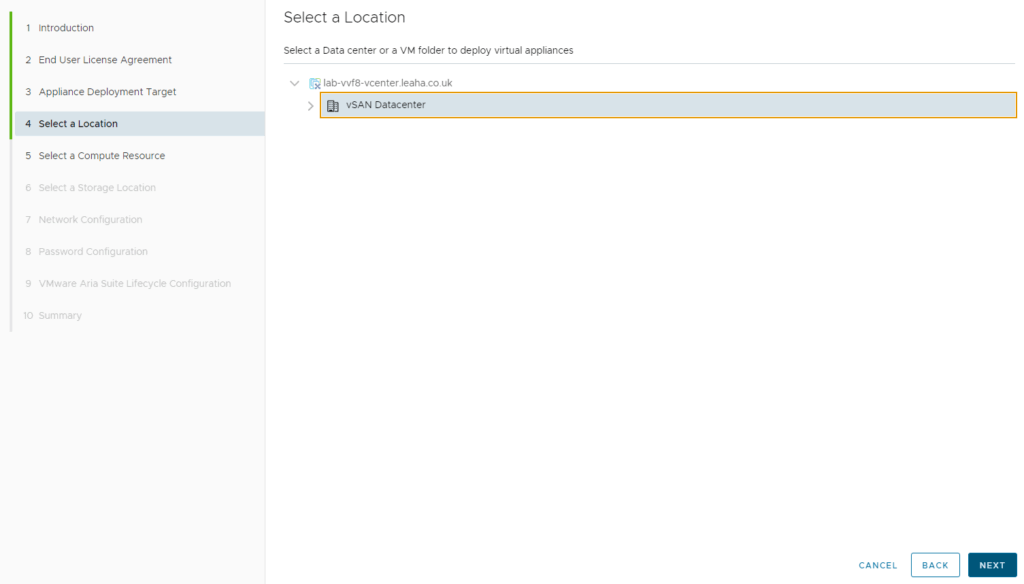
Select a folder, I am just popping this on the datacenter, then click Next
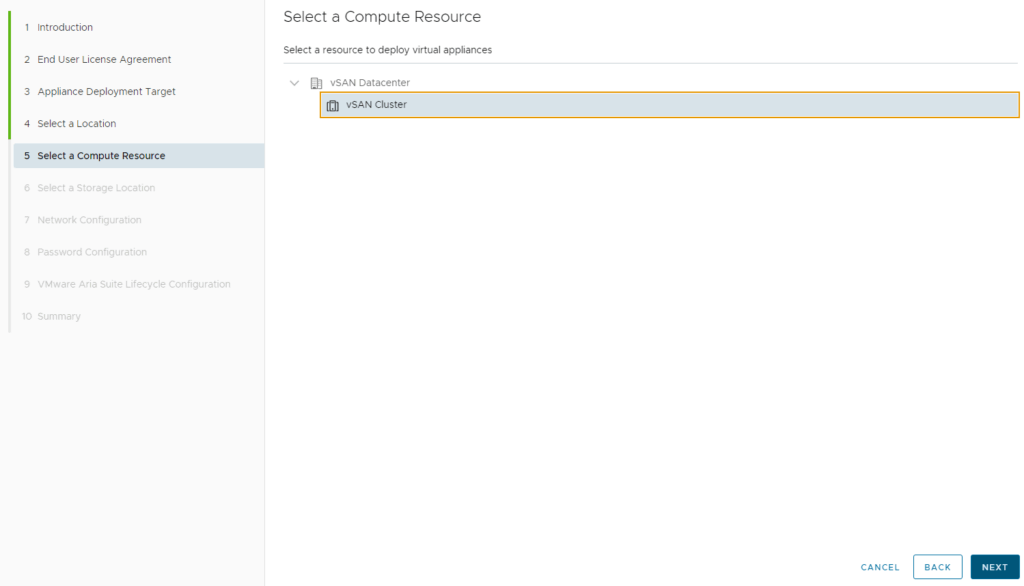
Select the cluster for compute and click Next
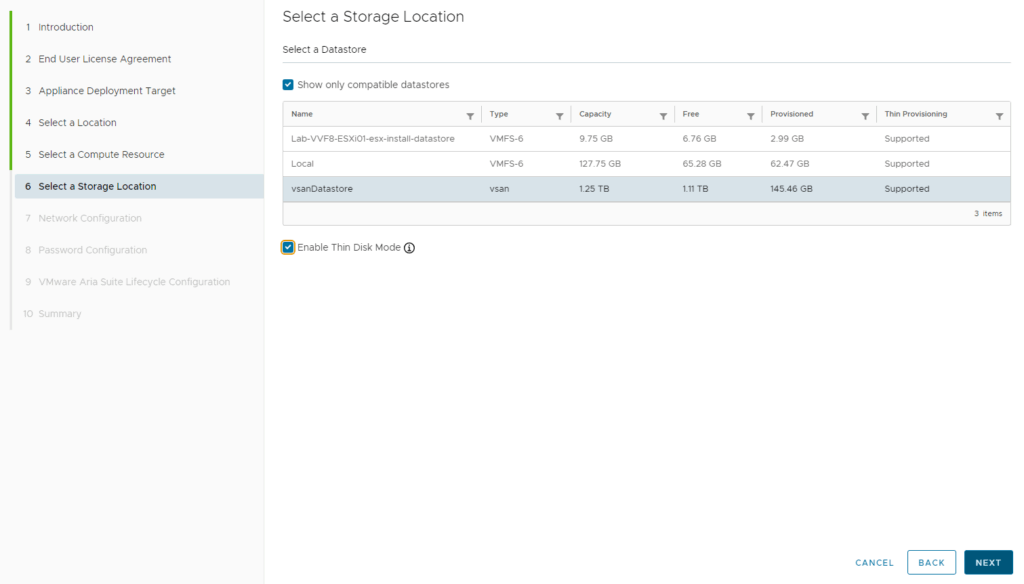
Select a datastore, ideally your vSAN datastore, you can enable thin mode unless you need thick mode for the disk and click Next
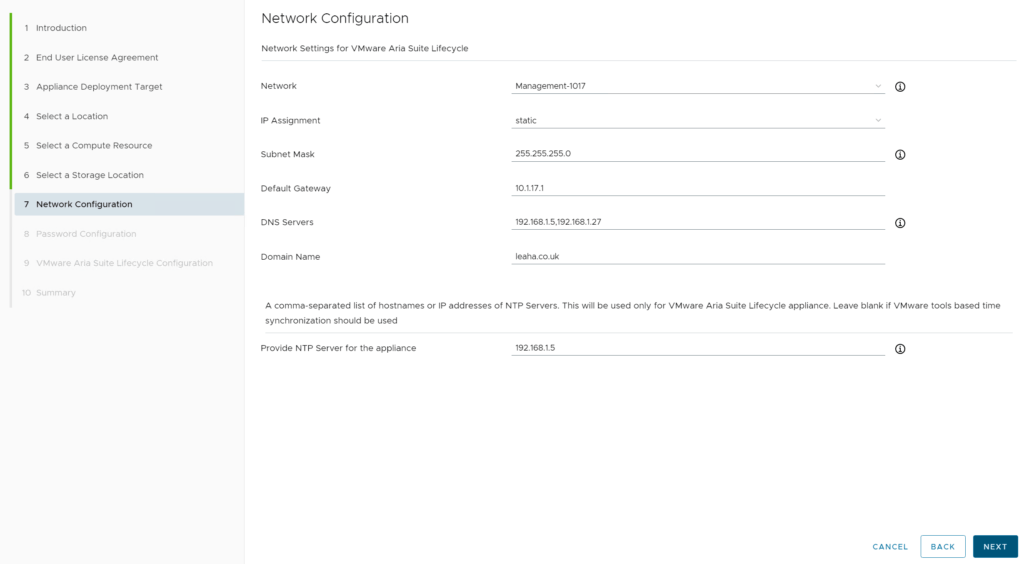
Set the management network, subnet mask, gateway, DNS servers, domain name and NTP server, this doesnt have to be a local one, then click Next
Add a password for root/admin and click Next
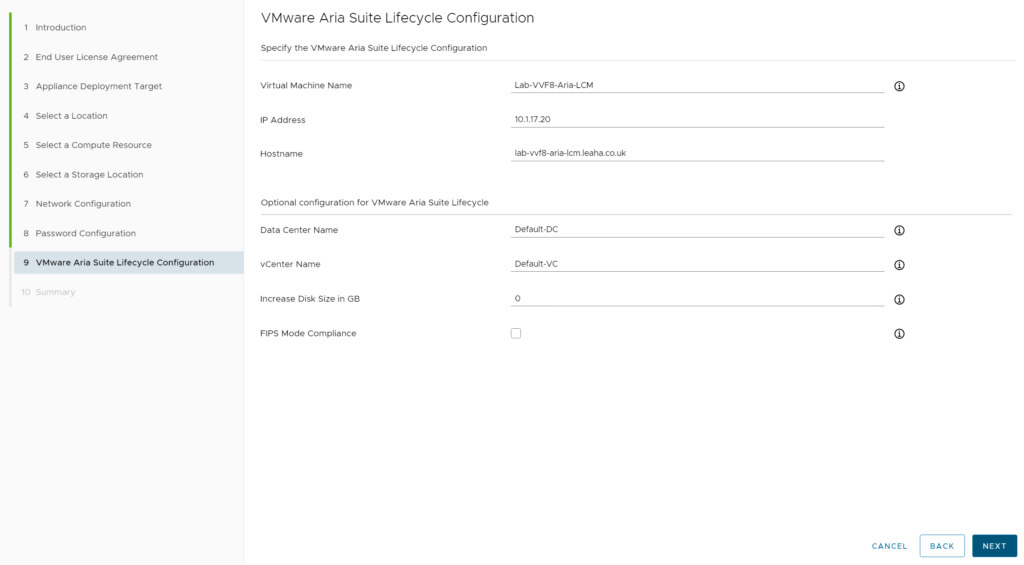
Add a VM name, IP address, and fqdn, the optional parts at the bottom you can leave unless you need to change them, then click Next
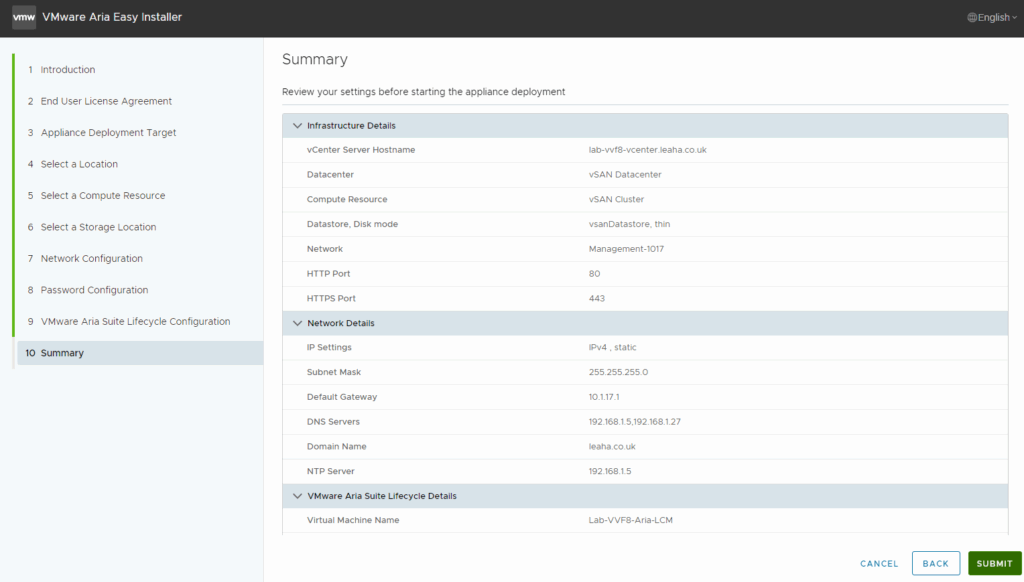
Then hit submit
You can access the appliance once the installer says its all setup on
https://fqdn
4 – VCF Operations
4.1 – Adding The Binary
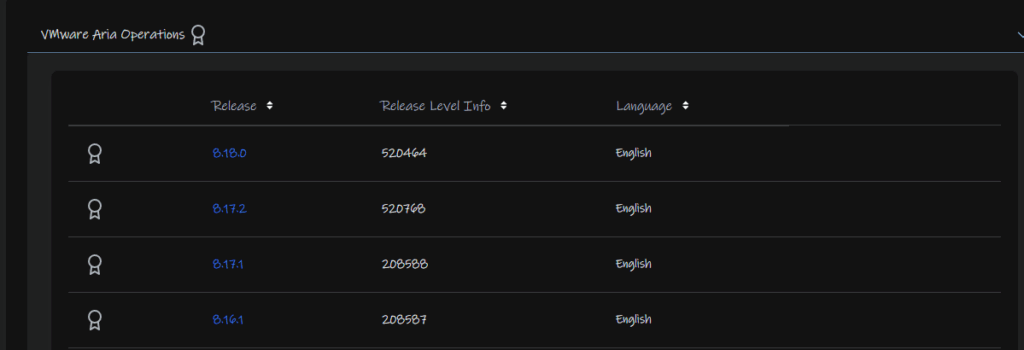
First you’ll need to download the Operations Manager from the Broadcom portal, you want Aria Operations
From there select your release, eg 8.18
You then want the appliance installation

We then need to upload the patch to Aria LCM
Connect to it with the root account using WinSCP
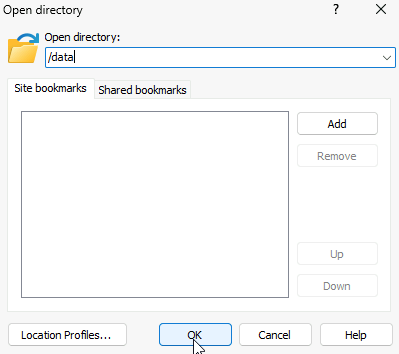
Double click the bar here

And navigate to /data and click ok
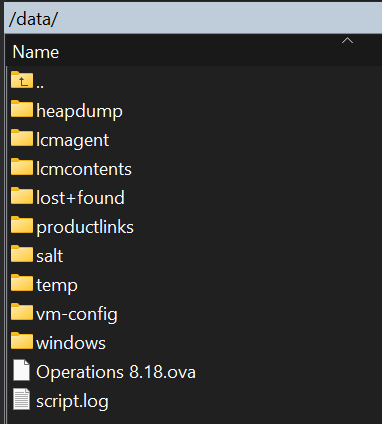
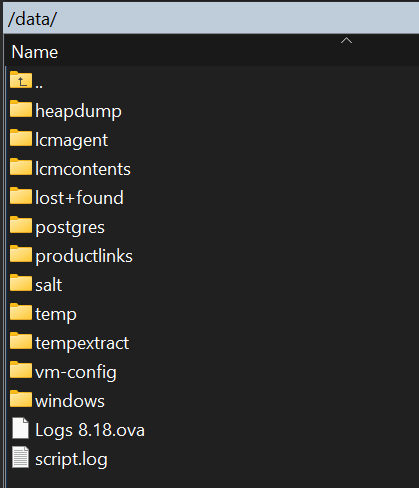
On the right panel head to where ever you have the OVA downloaded and drag it over to the root of /data
It should look like this, the folders in /data may be different, the important thing is that the file is under /data
From the Aria LCM UI click Lifecycle Operations

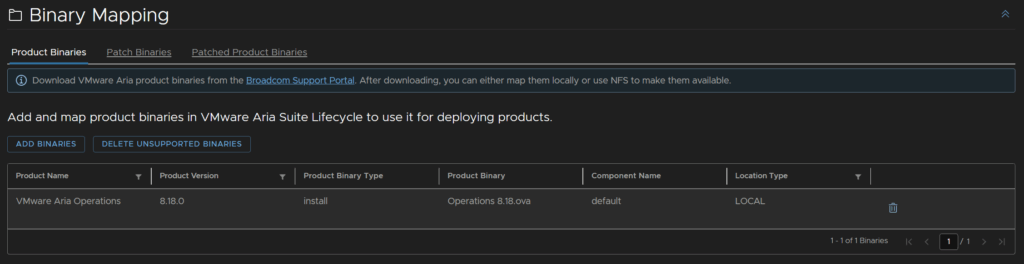
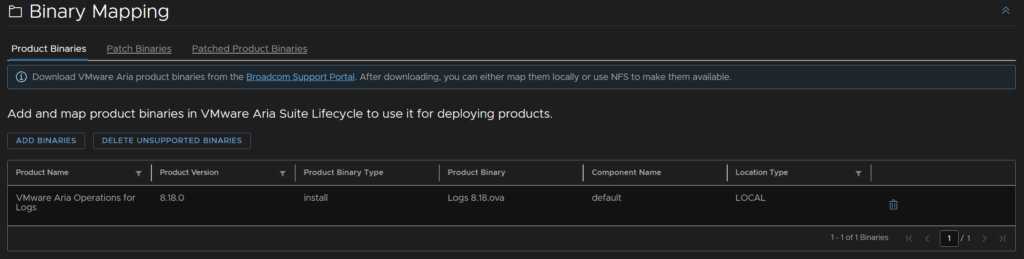
Click Settings/Binary Mappings
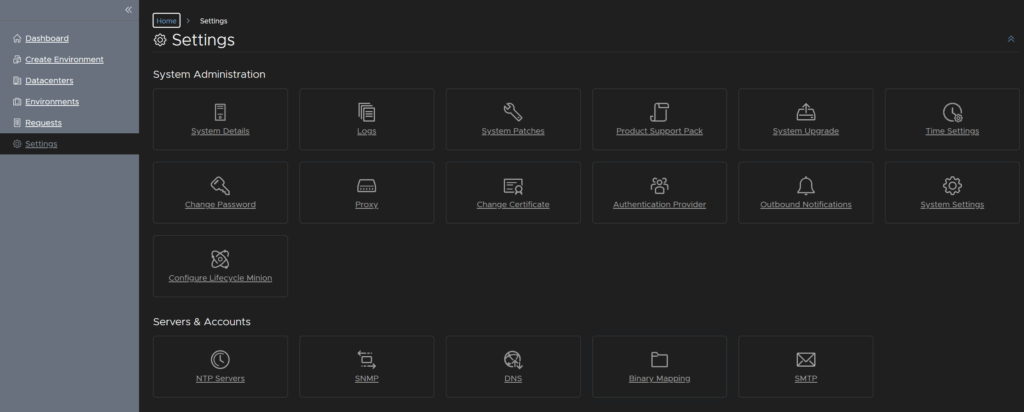
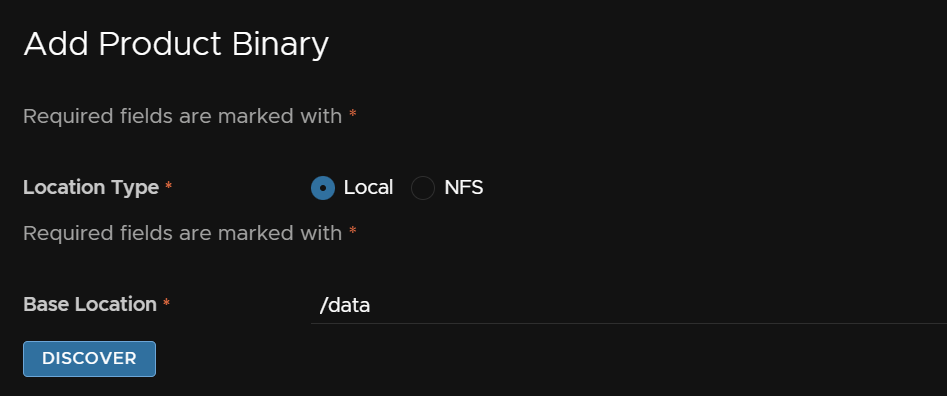
Click Add Binaries
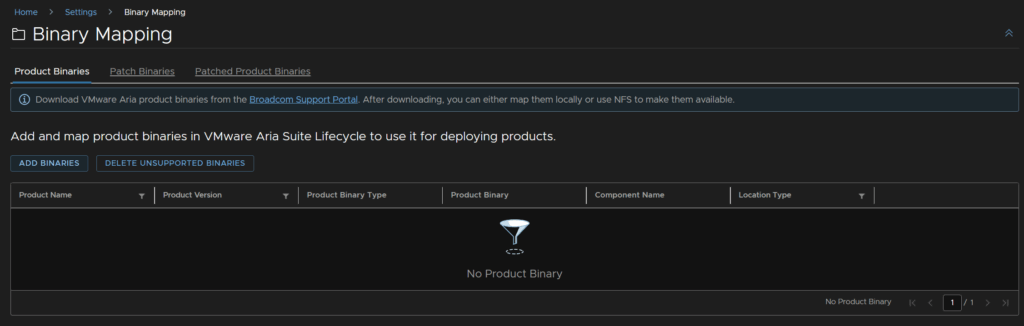
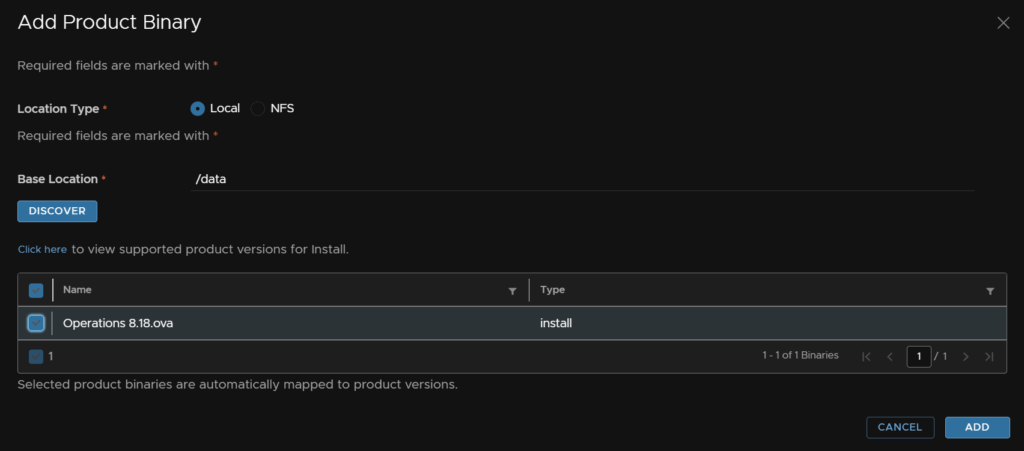
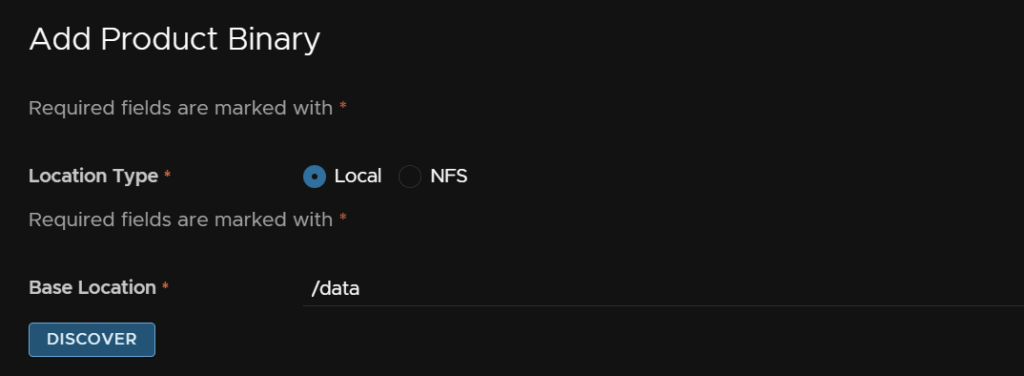
Enter /data and click Discover
Click the Operations OVA and click Add
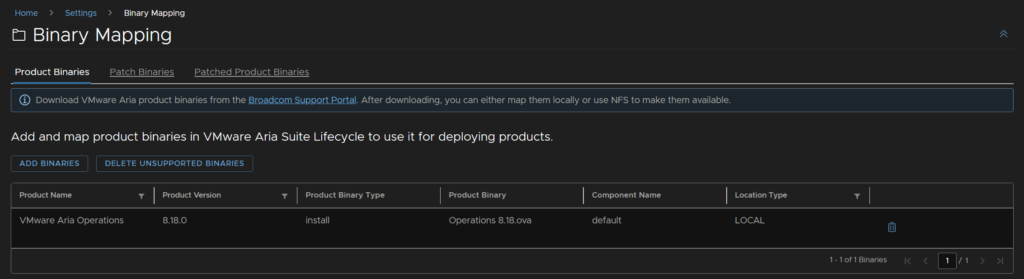
If you refresh the page in 5-10 mins the binary should be showing
4.2 – Deploying The Appliance
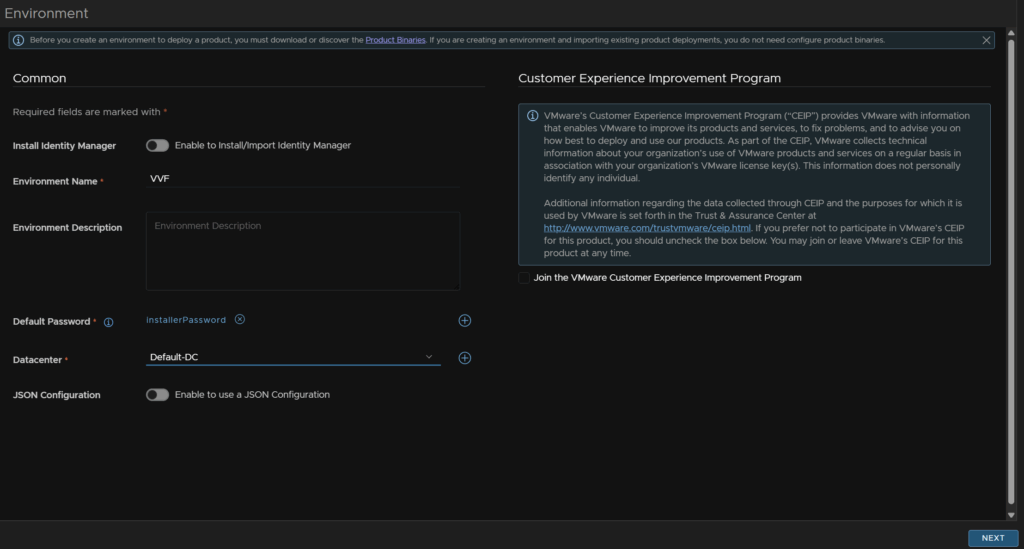
Click Create Environment, enter a name for the environment then click Select Default Password
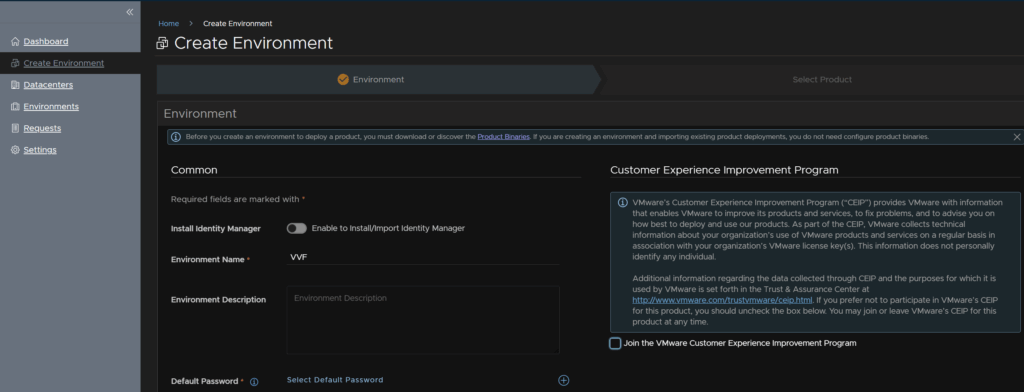
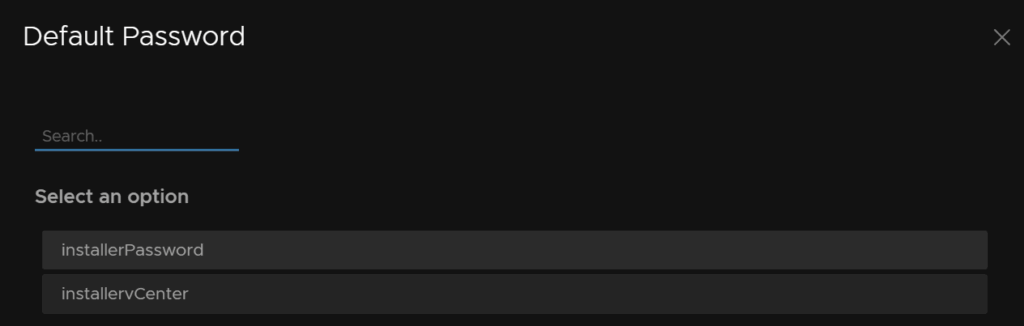
Click Installer Password, we wont be using this, we’ll be setting different credentials during the product install
Select the Default-DC from the installation and click Next
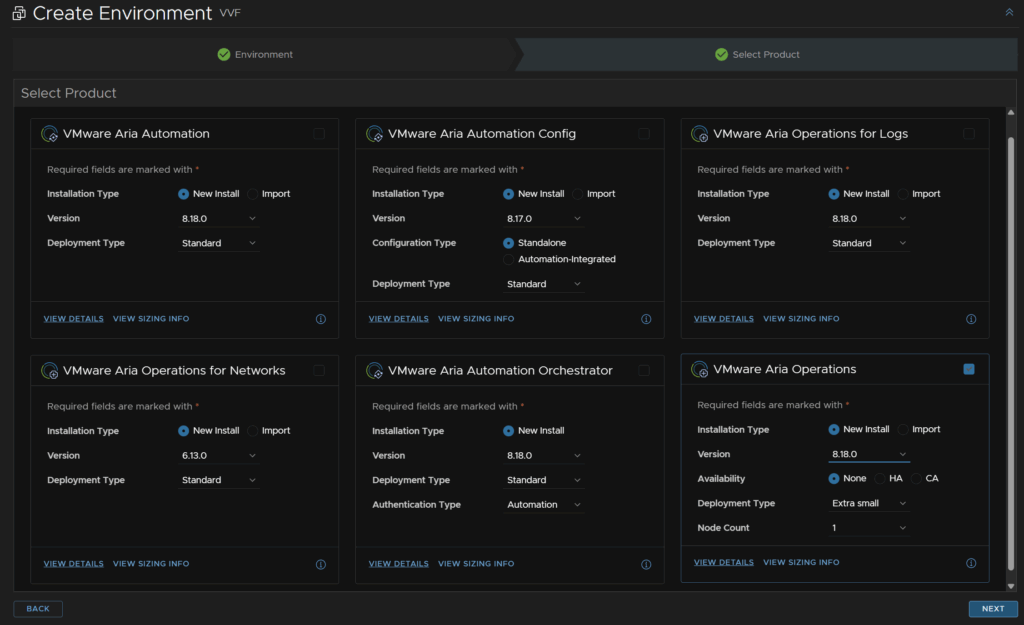
For the VM sizes you can see what specs we need and for what environment
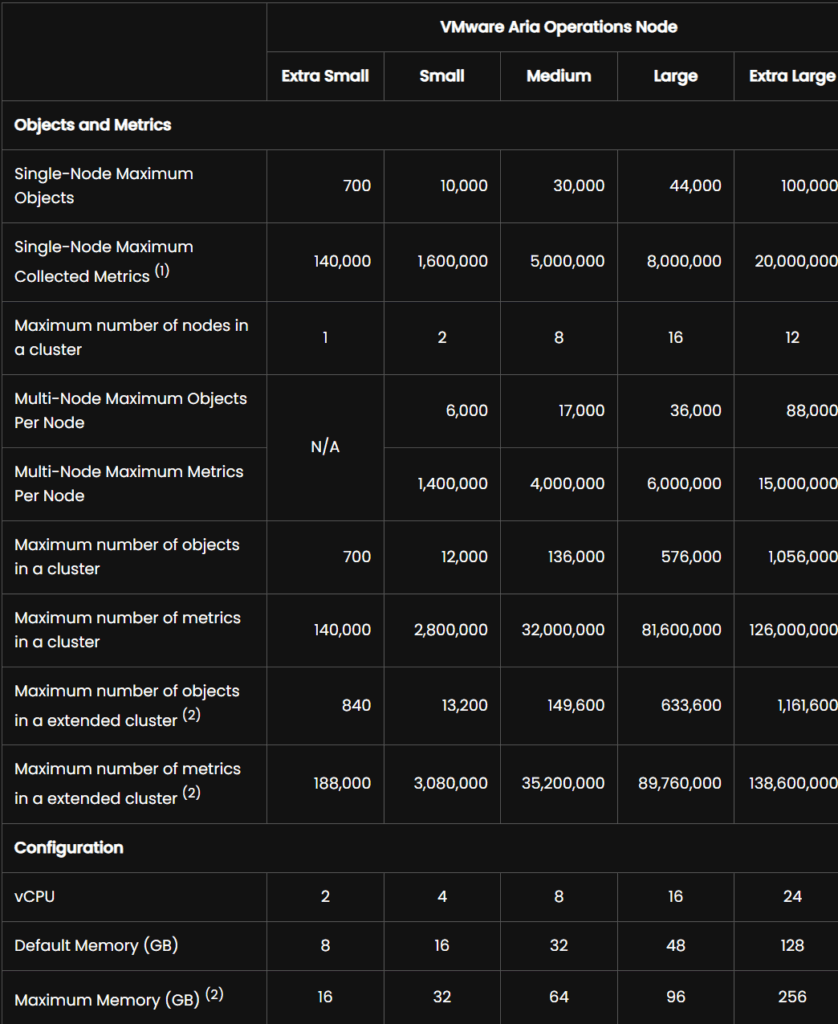
Check Aria Operations and click New Install, the size and then click Next
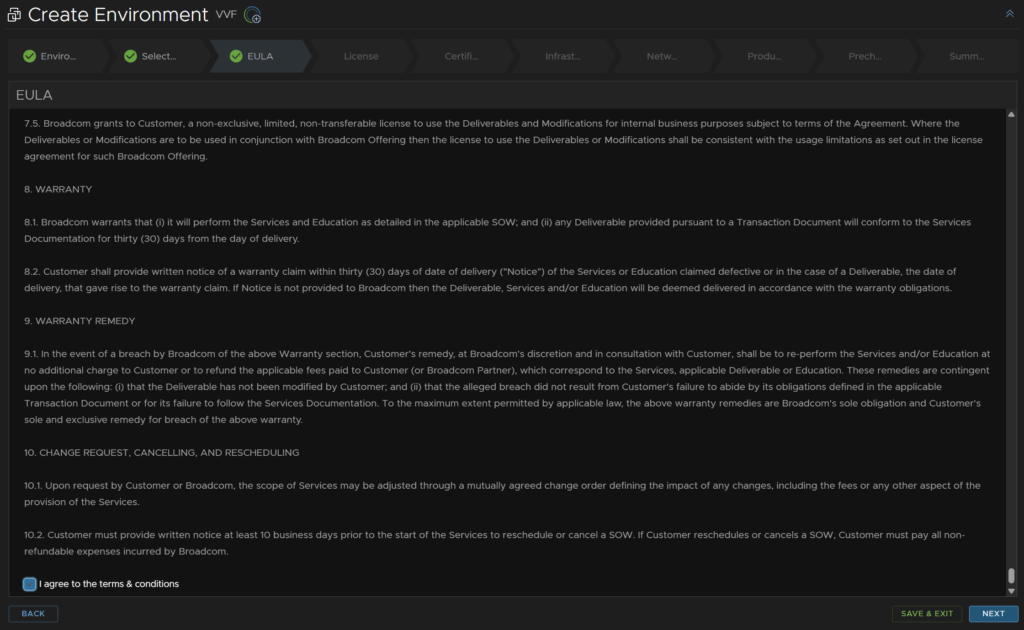
Accept the EULA and click Next
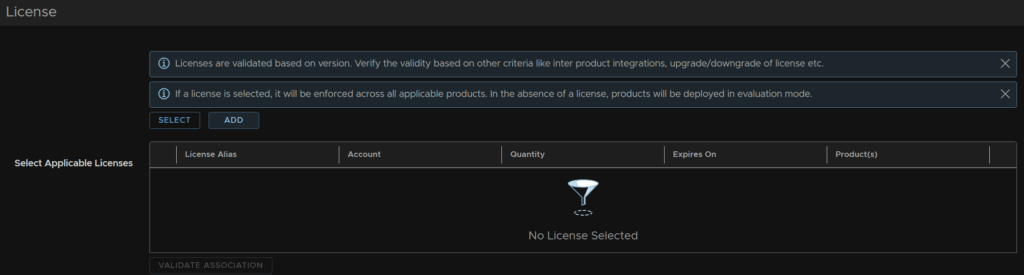
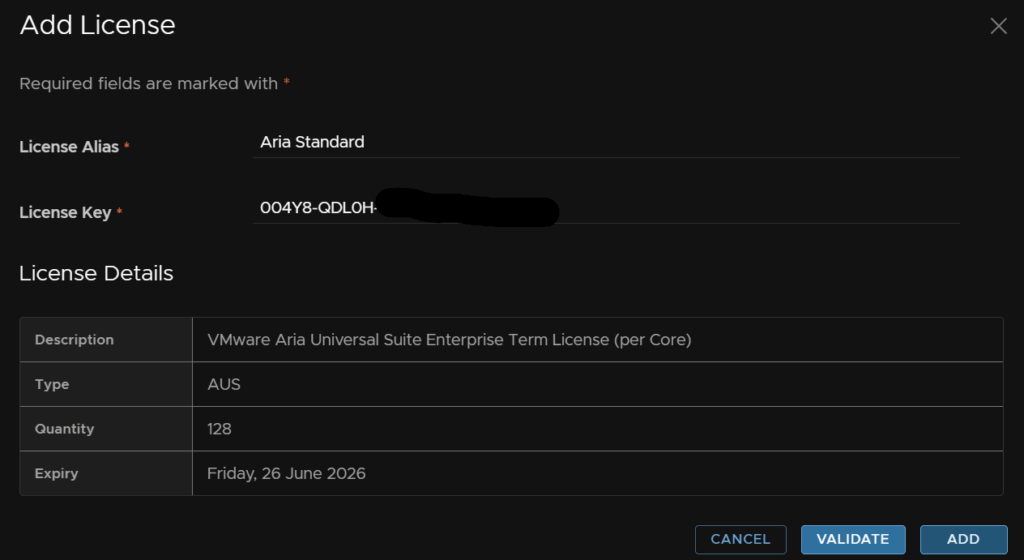
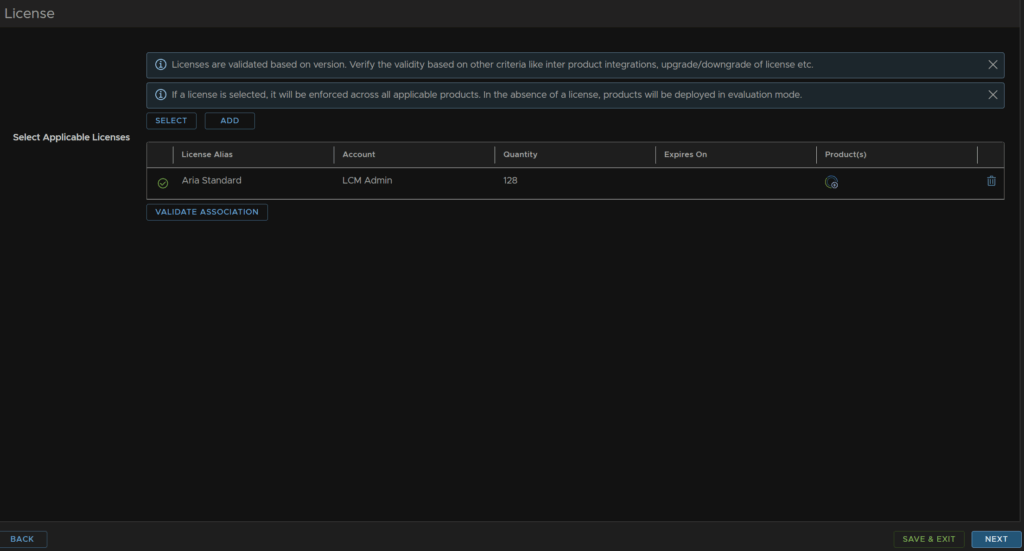
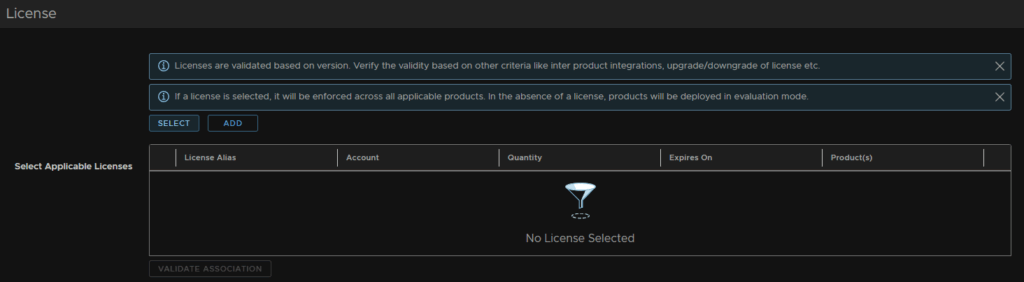
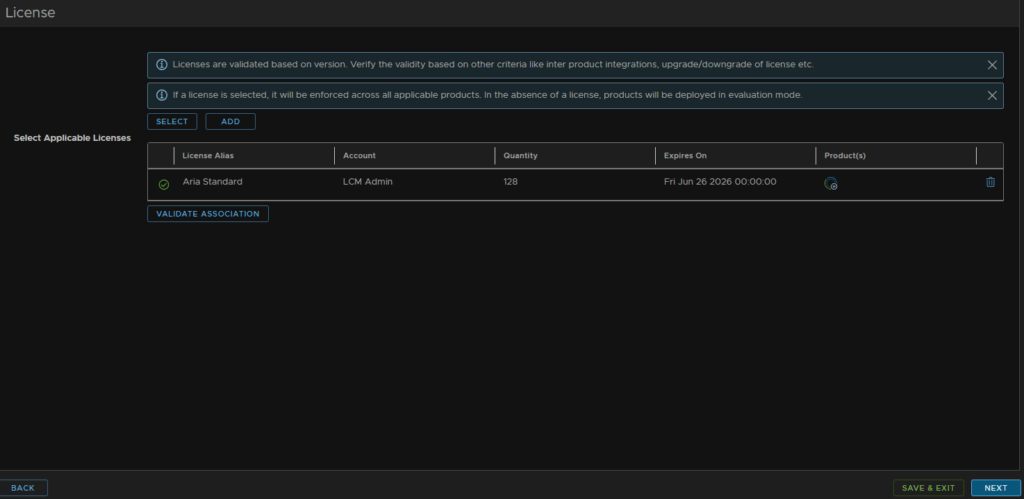
Click Add for a license
Add your license and click Validate, this will take a while
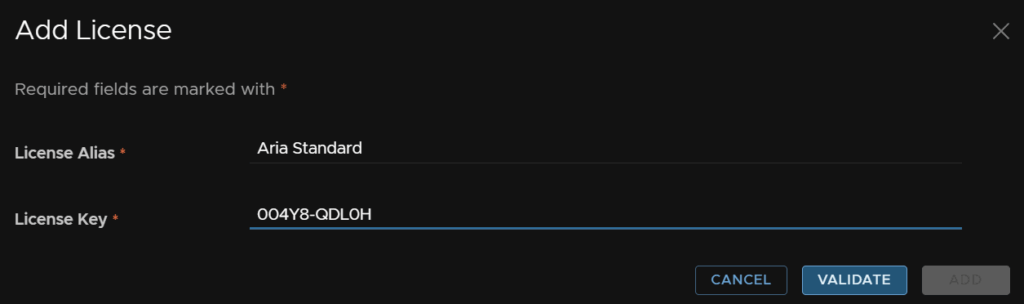
Then click Add
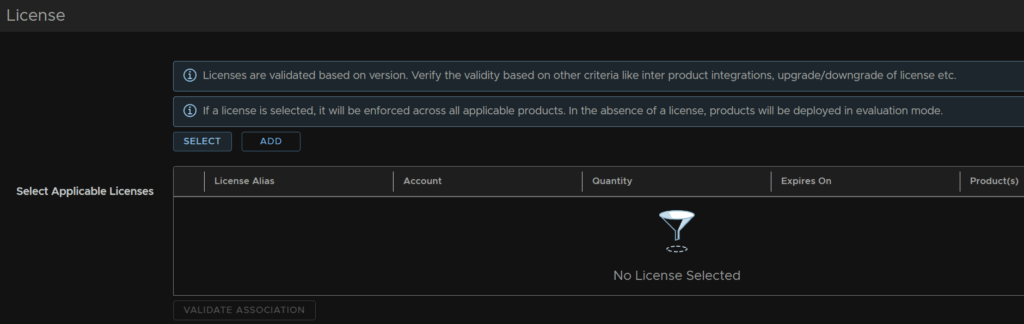
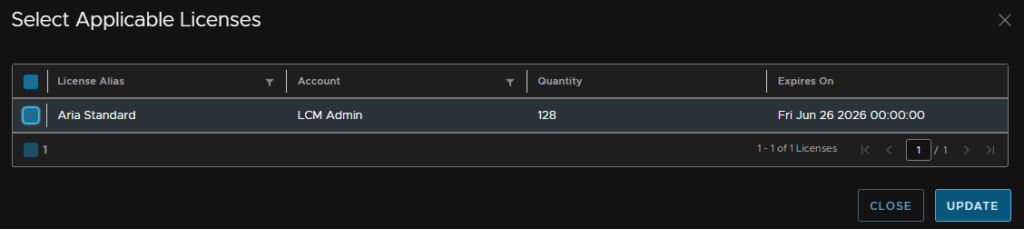
Then click Select
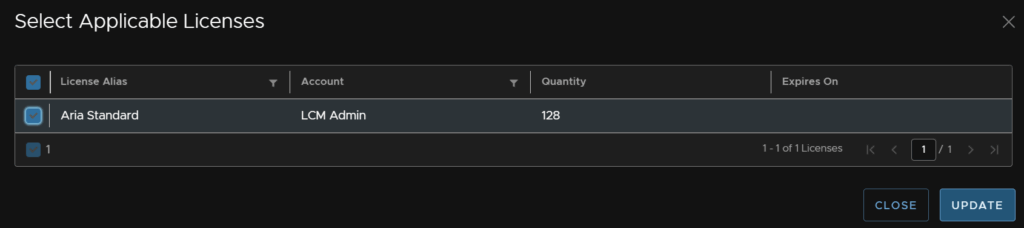
Select the license and click Update
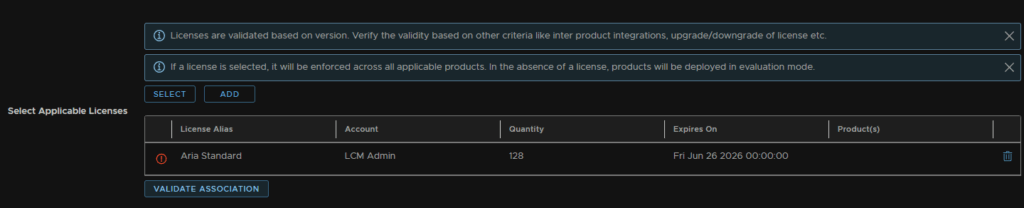
Then click Validate Association
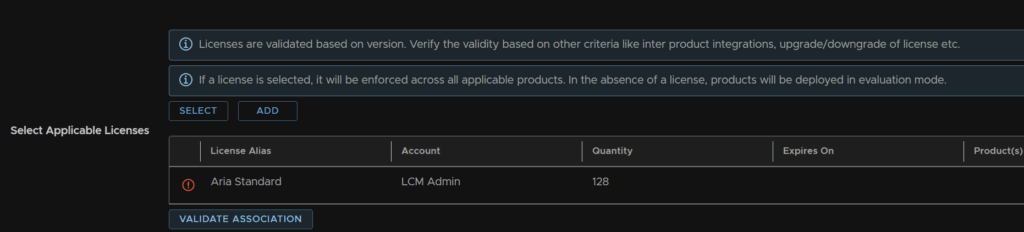
Then click Next
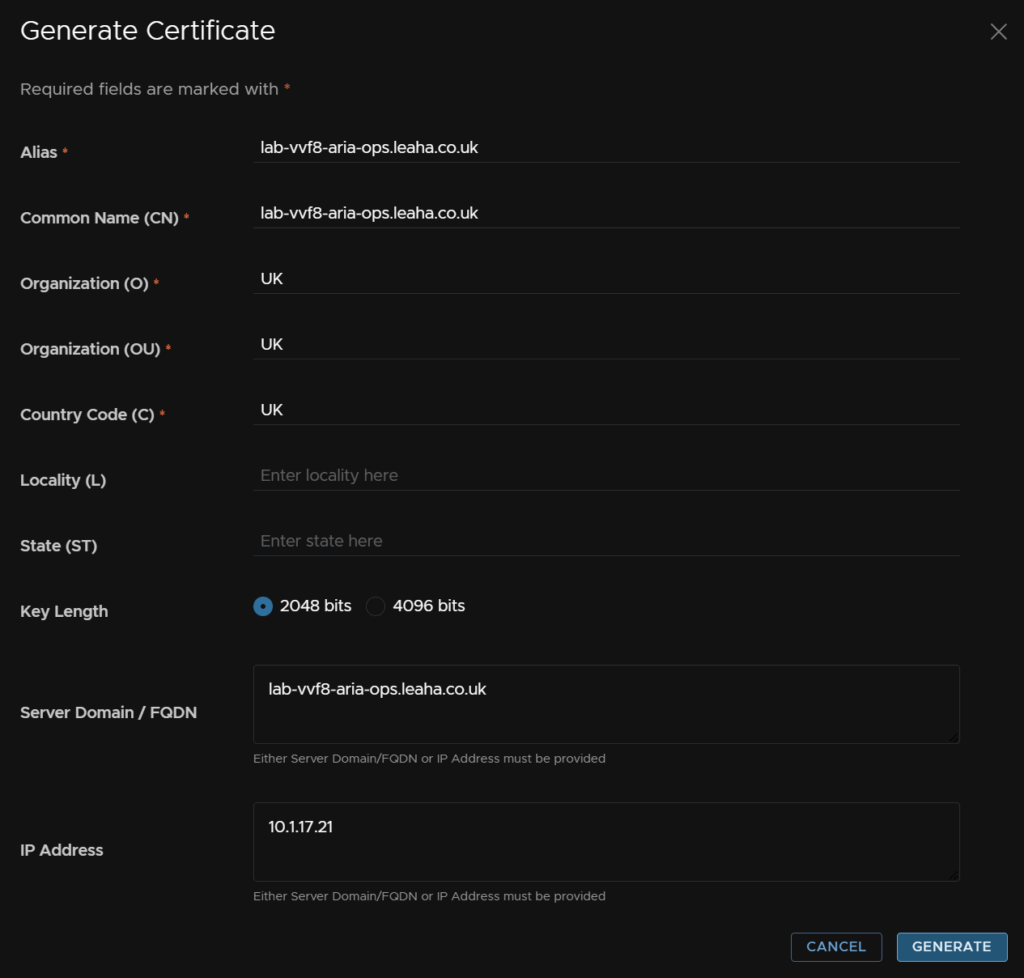
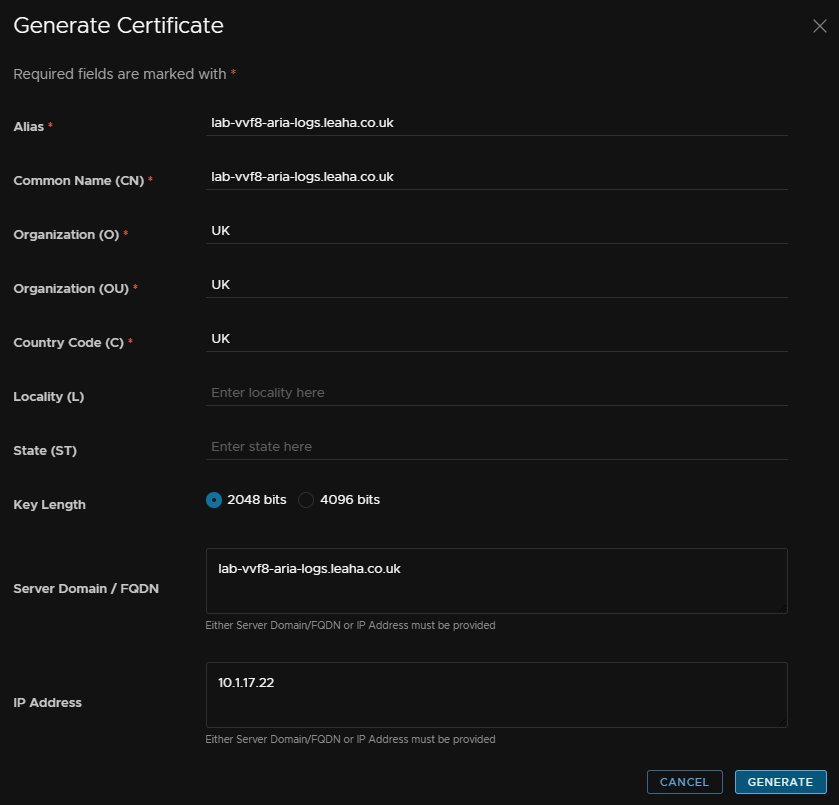
Click the + and then Generate Certificate

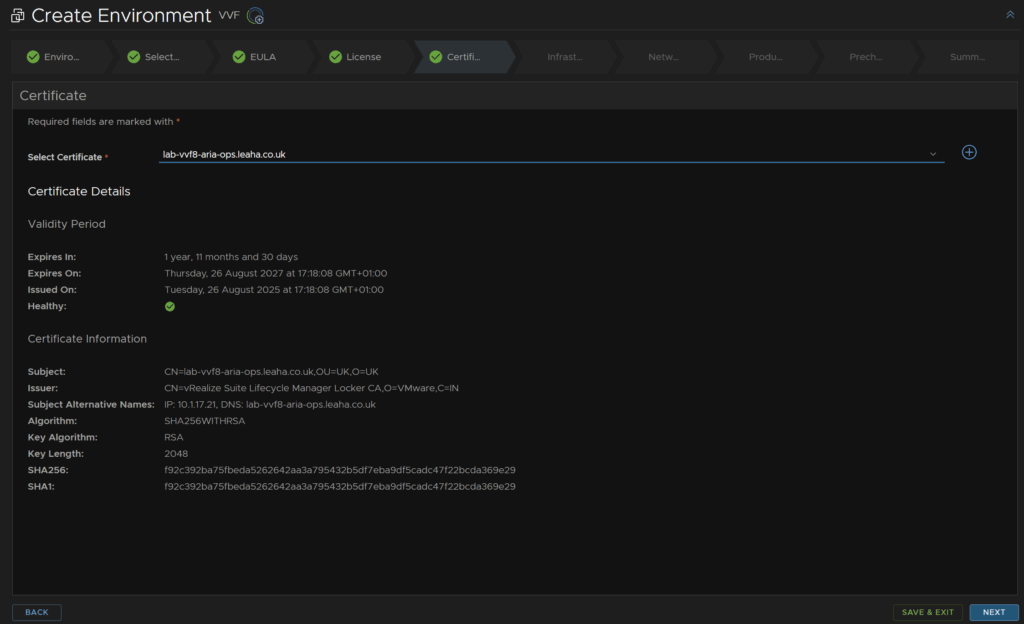
Fill in the Alias and CN as the FQDN, then for O, OU and C add anything, enter thw FQDN in the FQDN box and the IP in the IP box, then click Generate
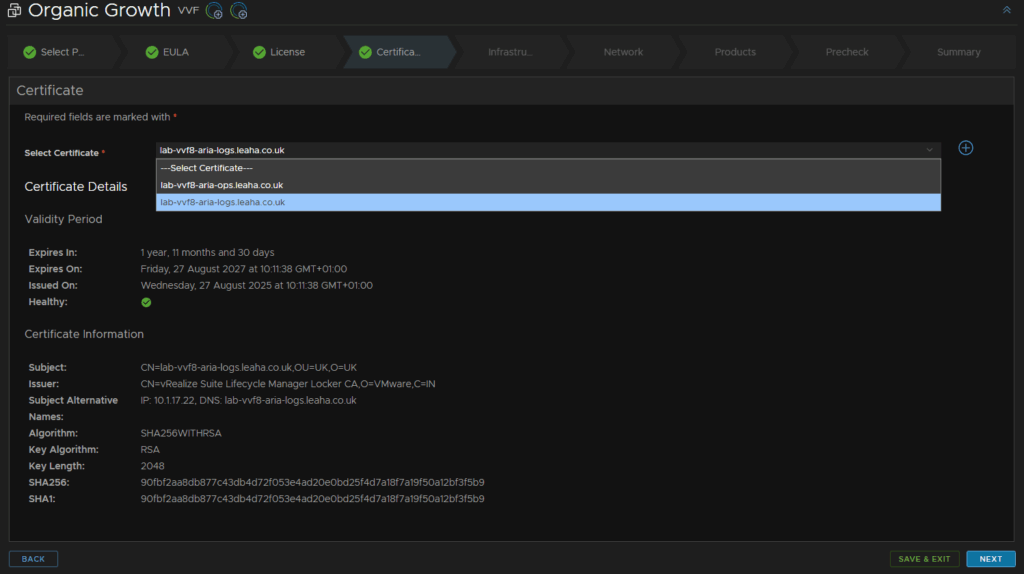
Select the certificate from the drop down and click Next
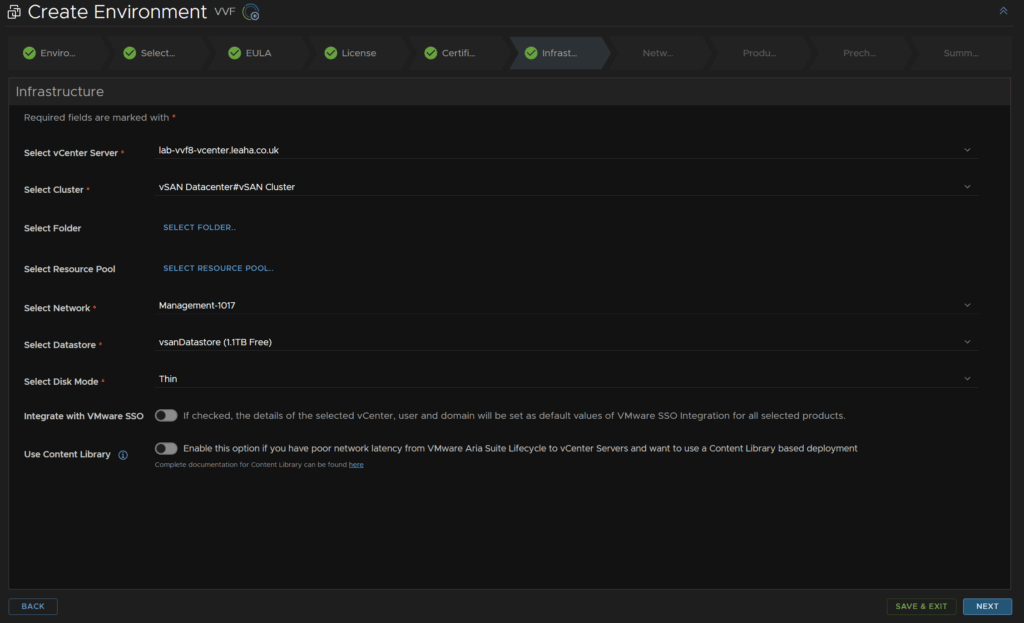
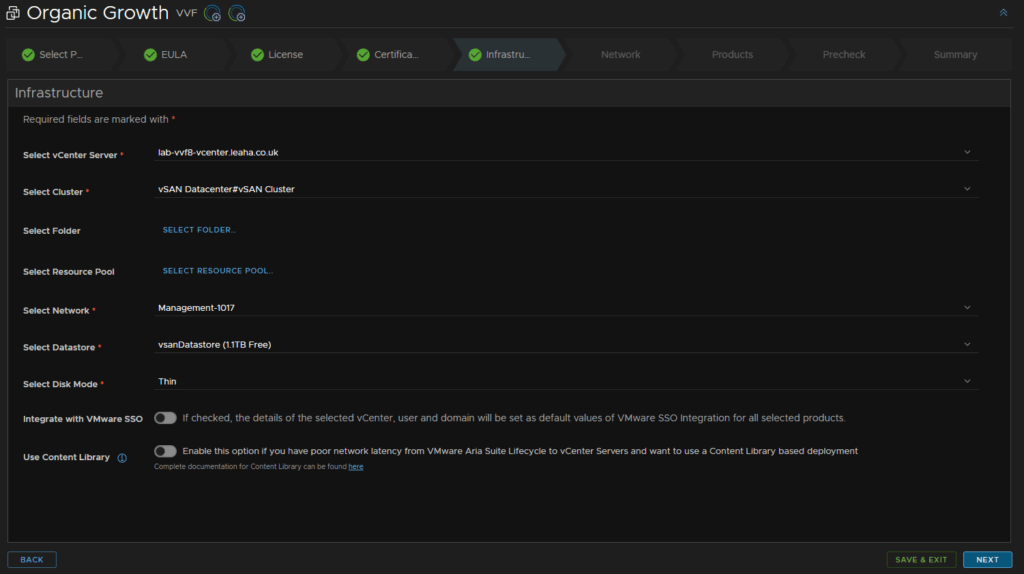
Select your vCenter, cluster, optionally select a folder and resource pool, then select the network, datastore and disk mode, then click Next
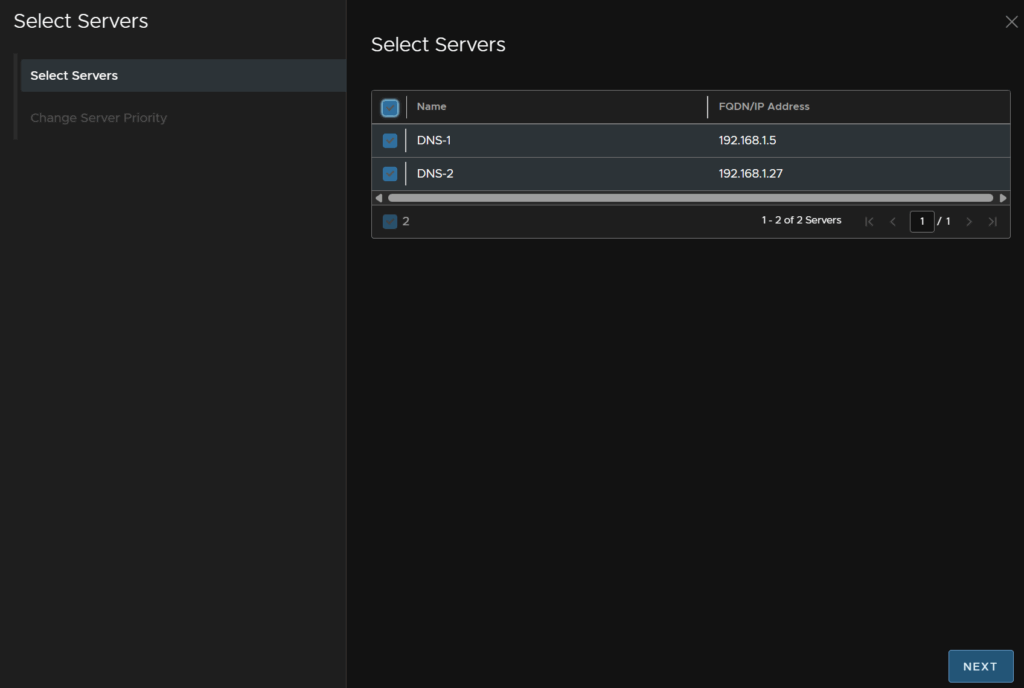
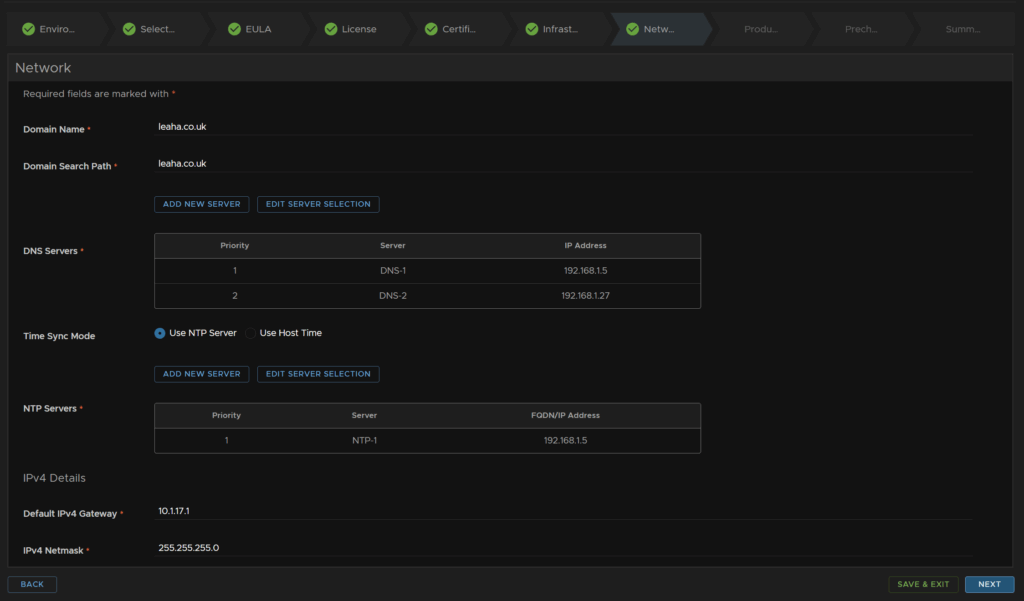
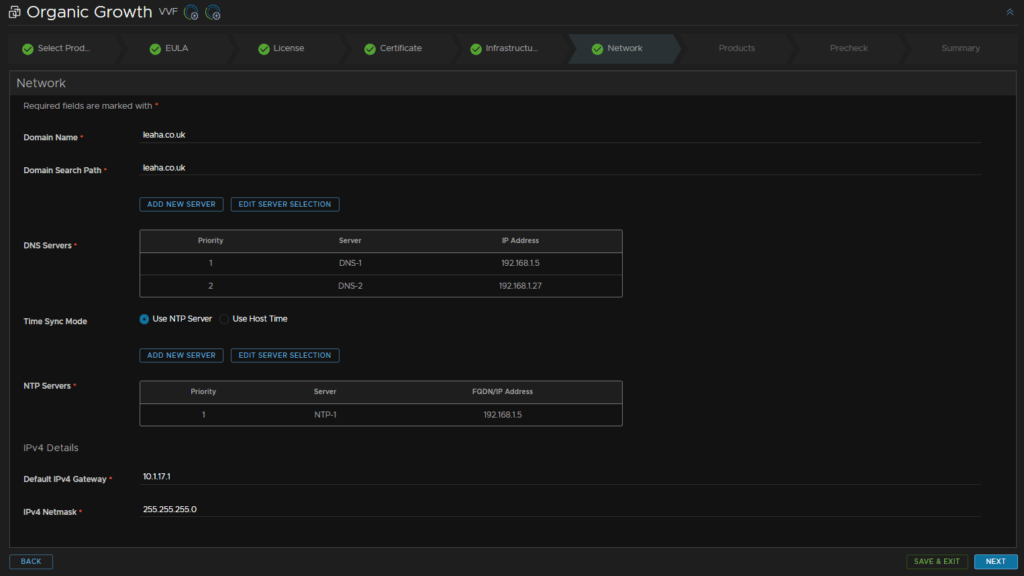
Enter your domain and search domain then click Edit Server Selection for your DNS servers
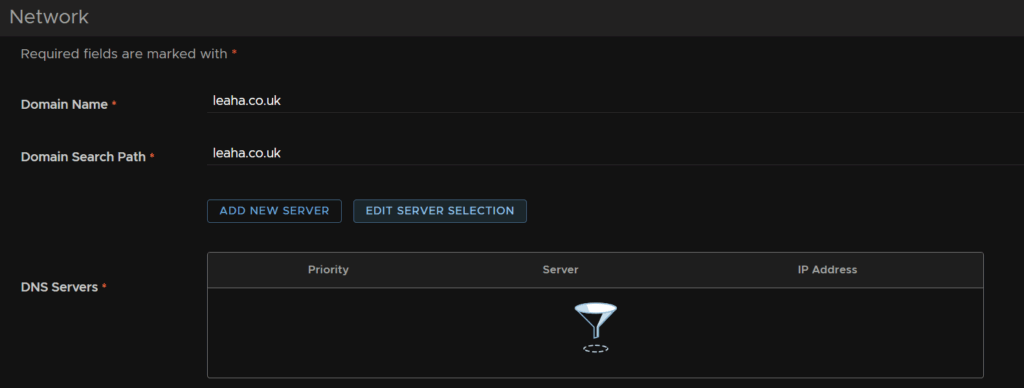
Select both DNS servers and click Next
Then click Finish

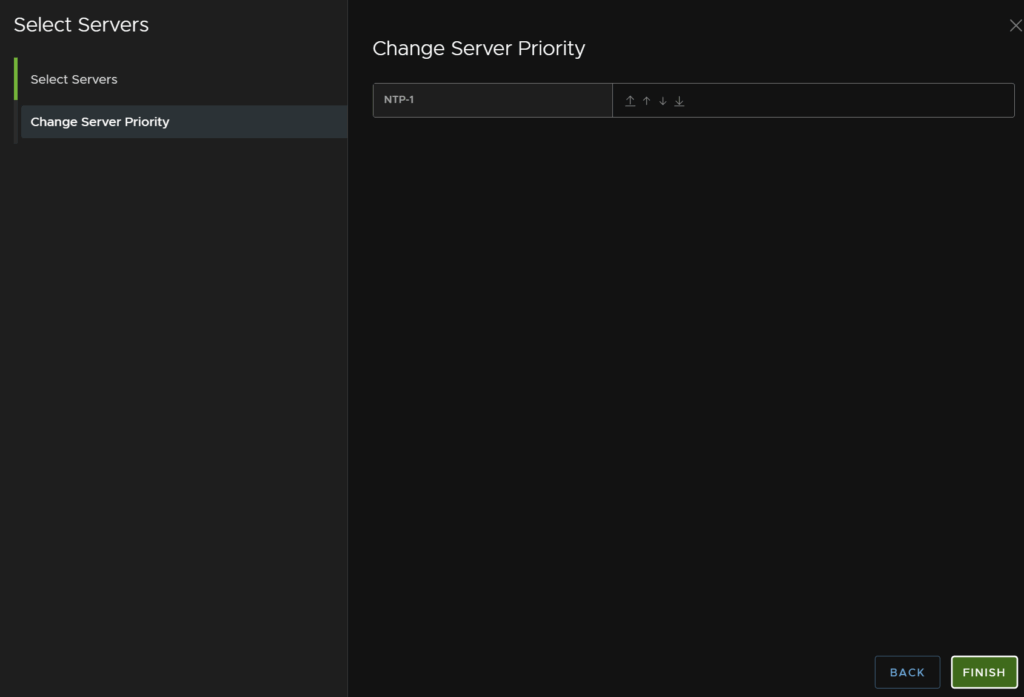
Click Use NTP server and then Edit NTP Server
You can also use host time
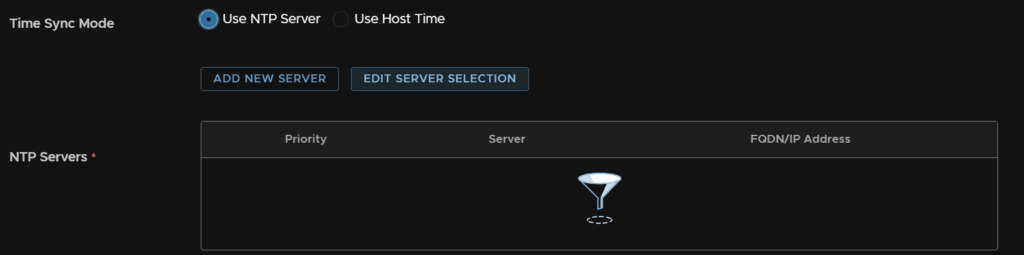
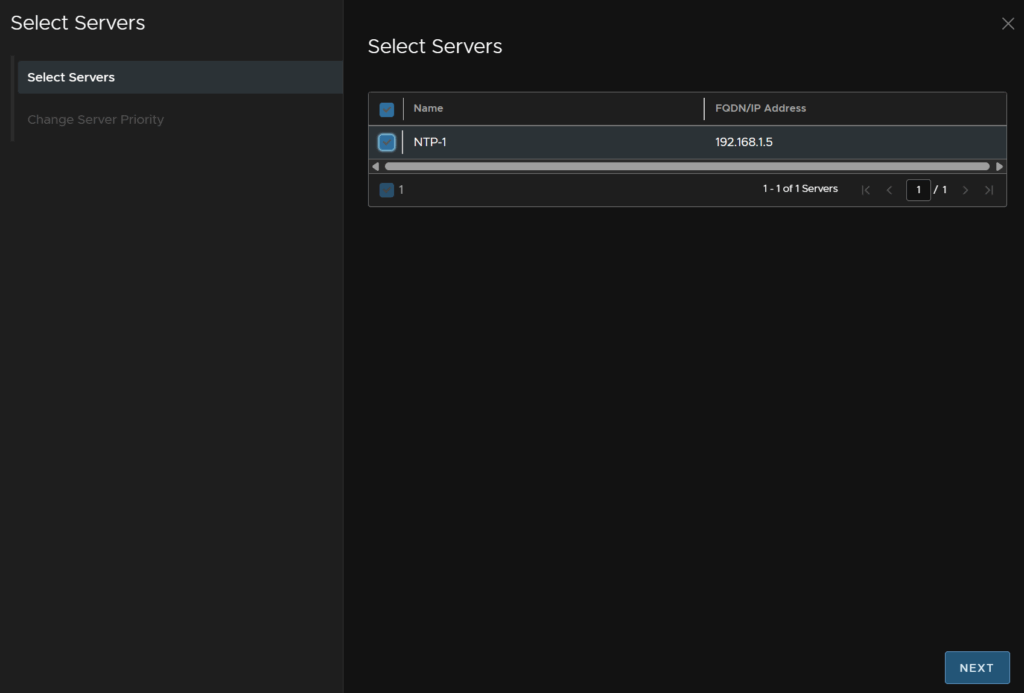
Select your NTP server and click Next
Then click Finish
Enter the IPv4 gateway and subnet mask, then click Next
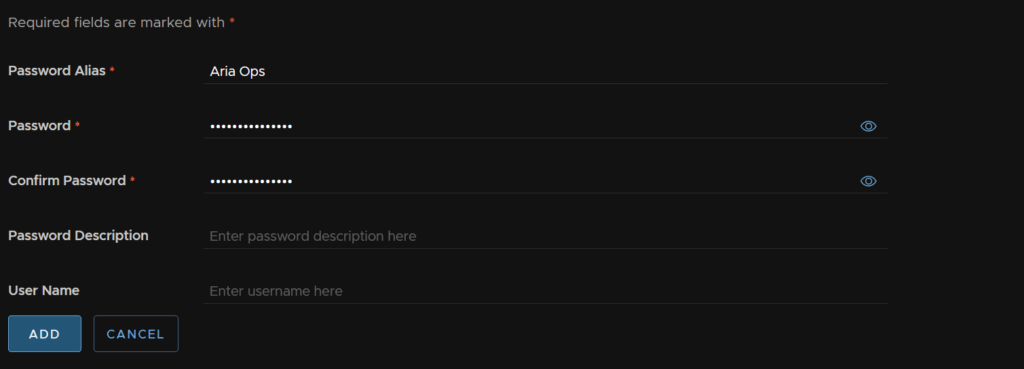
Then click Add Password

Click Save
Add an alias and a password, this needs to be 15 characters long, the only allowed special characters are !@#$%^&*, then click Add
This will be both the root and admin password
Deactivate TLS1 and TLS 1.1 from the drop down, optionally enable FIPS compliance, the certificate should be pre populated, then click the x on the product password
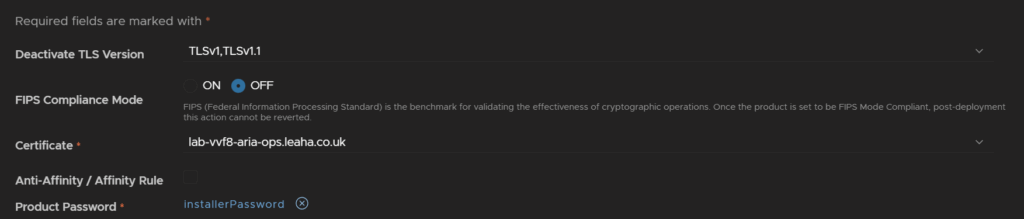
Then click Select Product Password

And select the password we just set

Keep Auth provider blank, NTP should also be correct
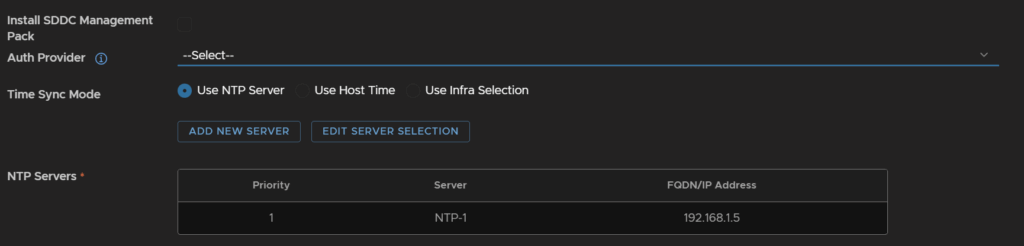
At the bottom, enter the VM name, FQDN and IP, then click Next
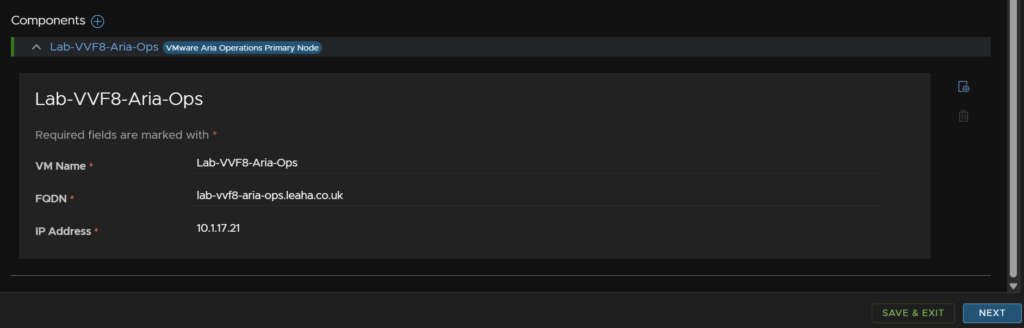
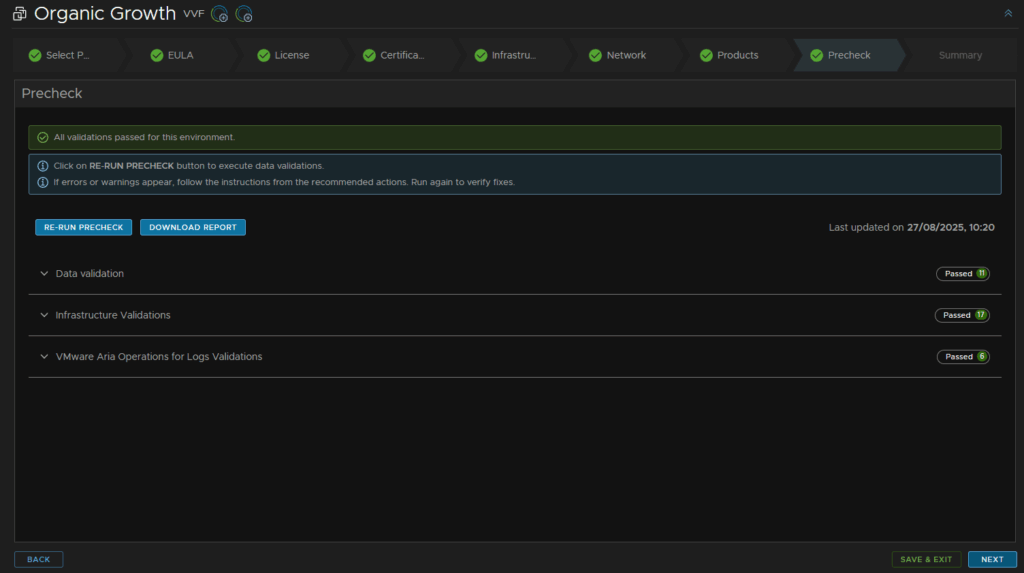
Click Run Precheck
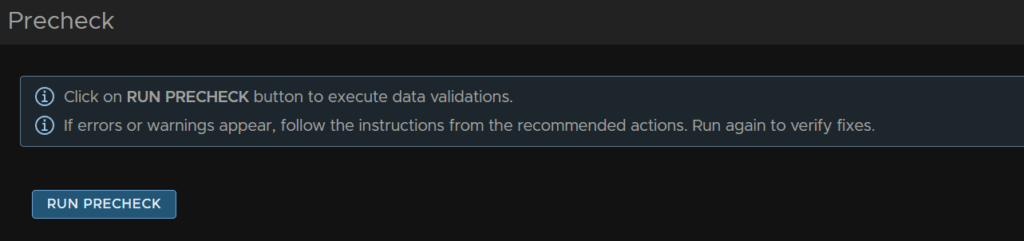
When thats clear click Next
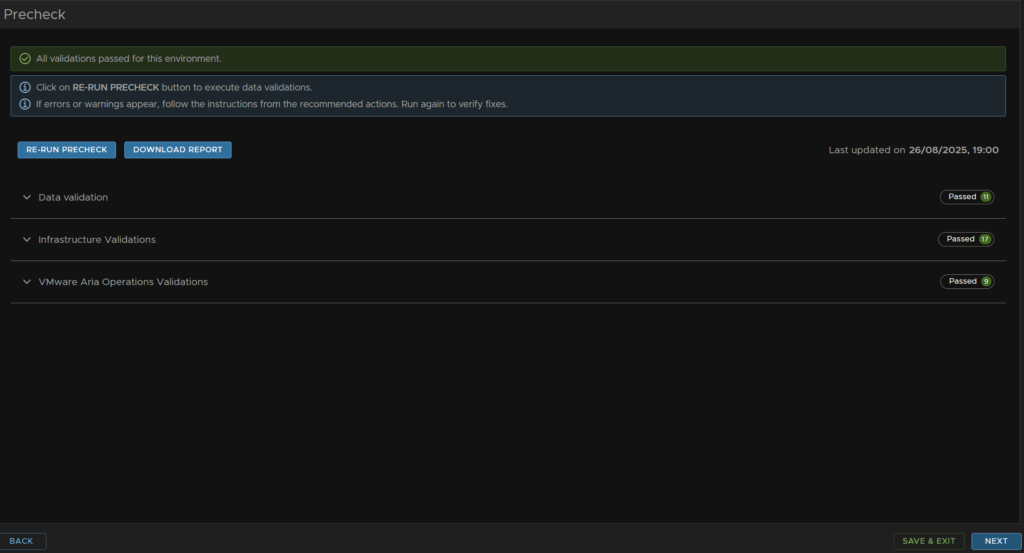
Then click Submit
We can then access the UI when its done, this takes ~30-45 mins, on
https://fqdn
You can also delete the OVA from the /data directory as it wont be automatically removed
4.3 – Deploying A Cloud Proxy
We will want this adding as collecting data into VCF Operations for a supervisor is only allowed through a proxy and not through the Operations embedded collector
We first need the OVA file from the Broadcom portal
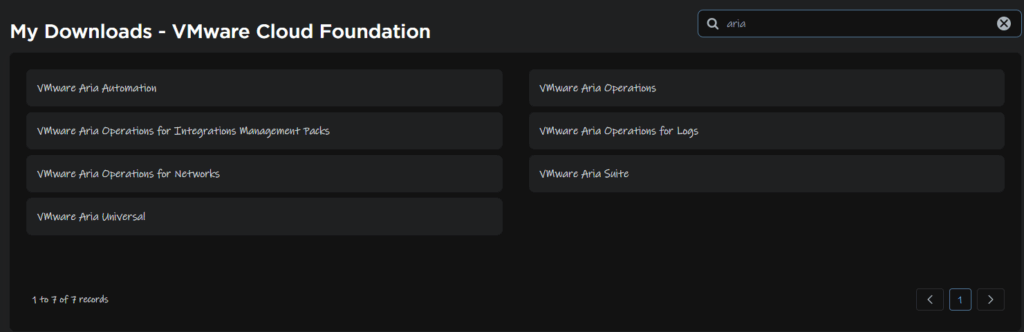
Click My Downloads/VMware Aria Suite

Expand your subscription and click 2019
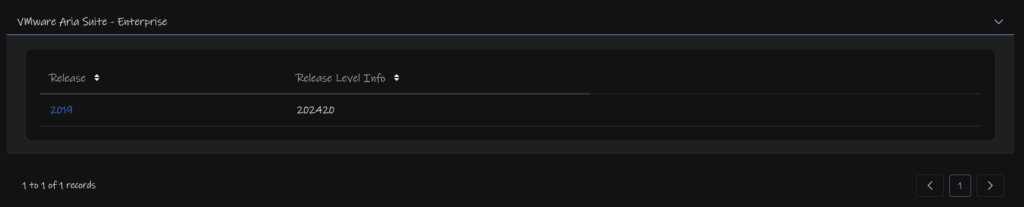
Click View Group on VMware Aria Operations

And download the appliance

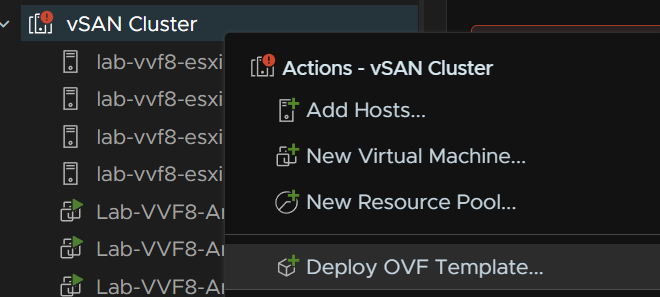
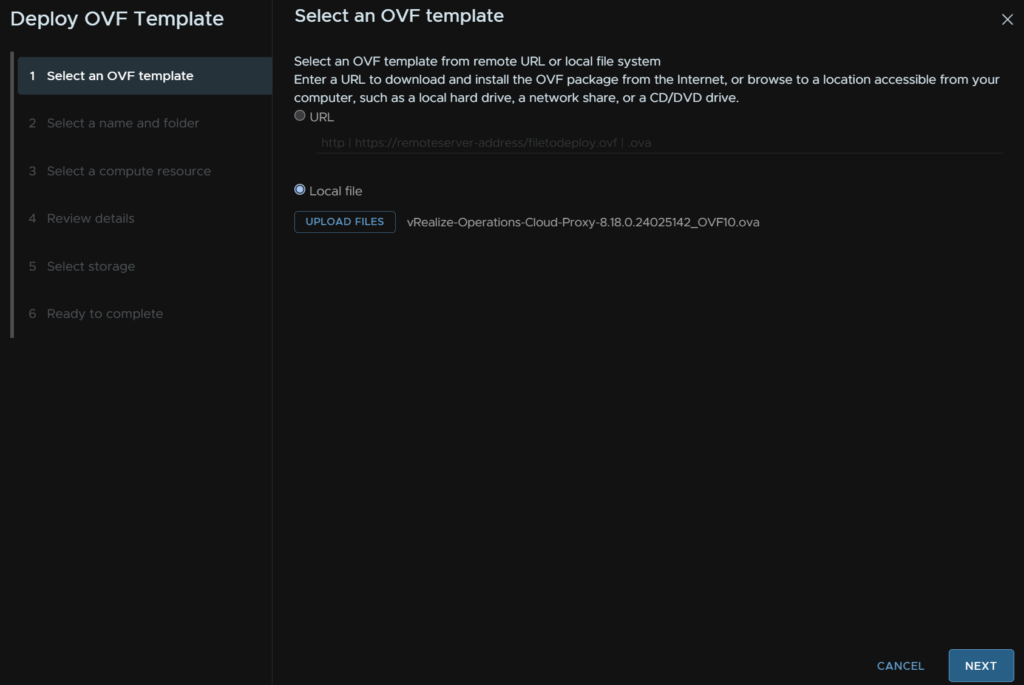
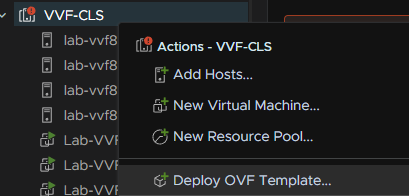
Right click the cluster and click Deploy OVF Template
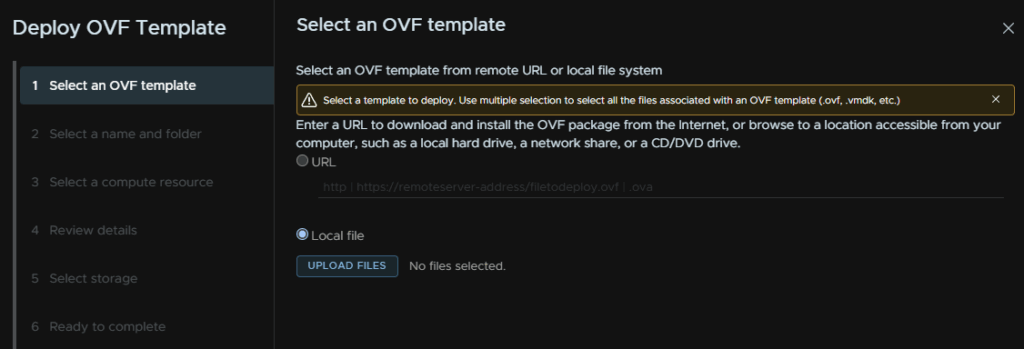
Click the Local File radio button and click Upload Files
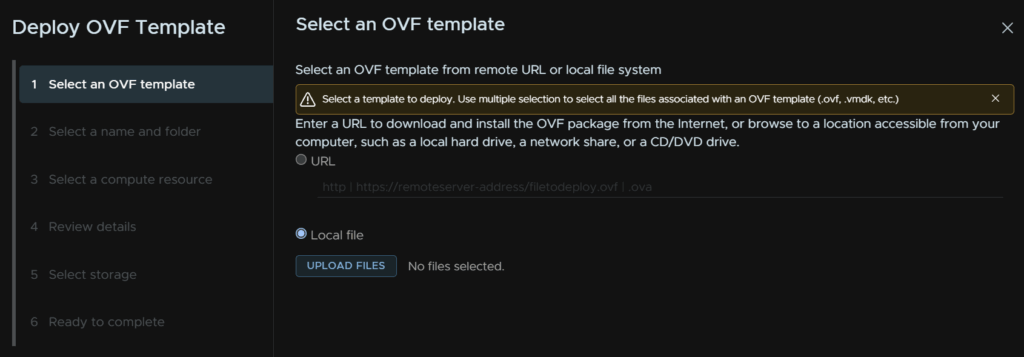
Double click the cloud proxy ova file

Then click Next
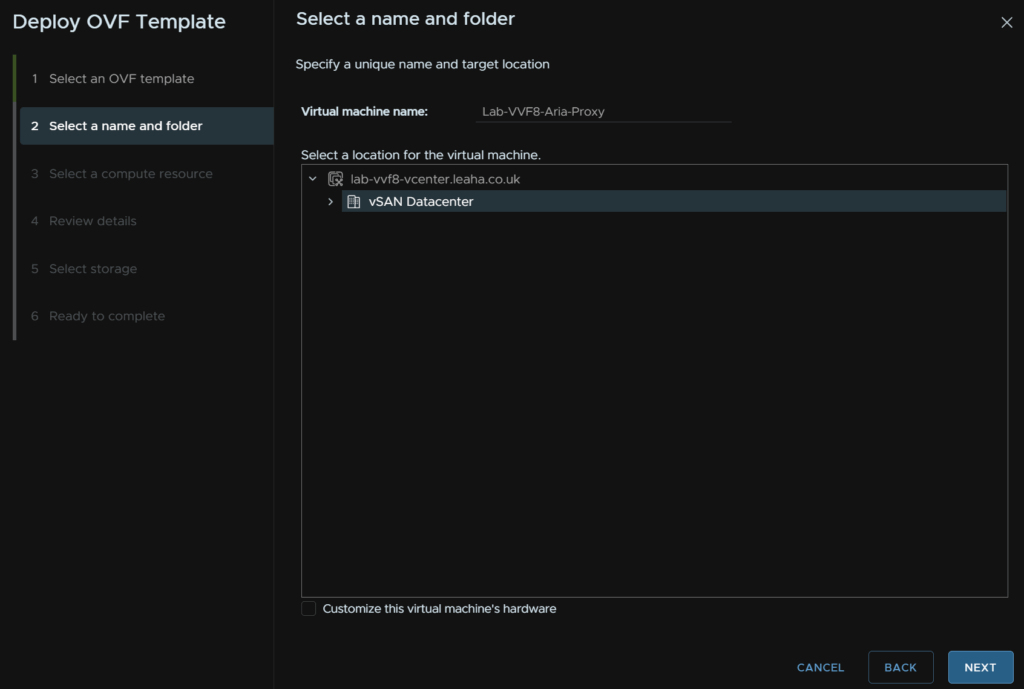
Give it a name and optionally select a folder, then click Next
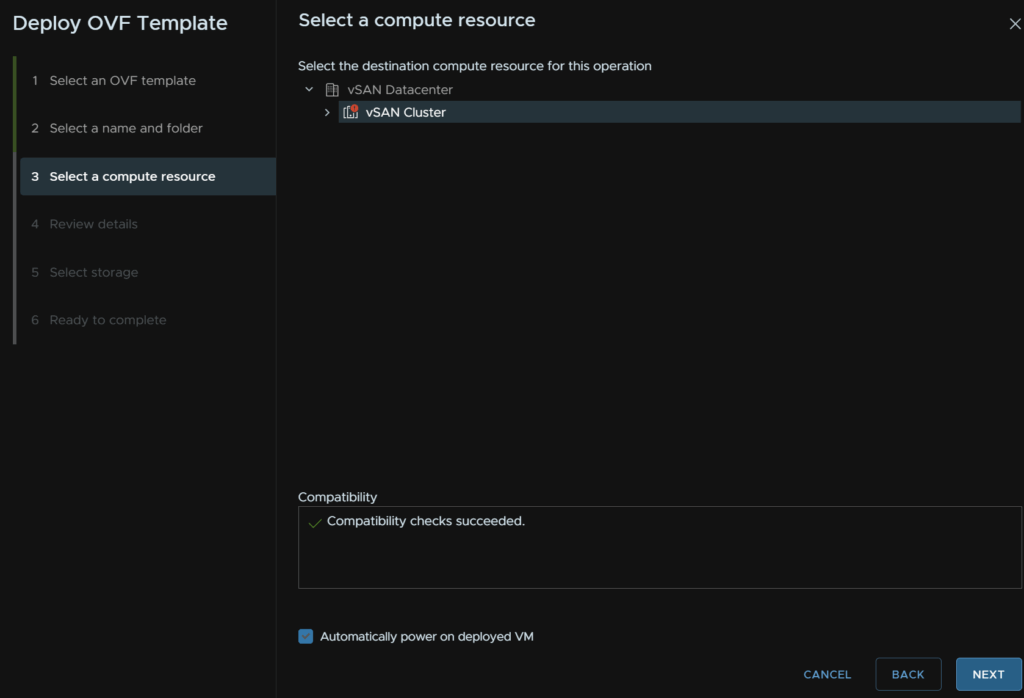
Select the cluster for compute, check the box to automatically power the VM on and click Next
Click Next again
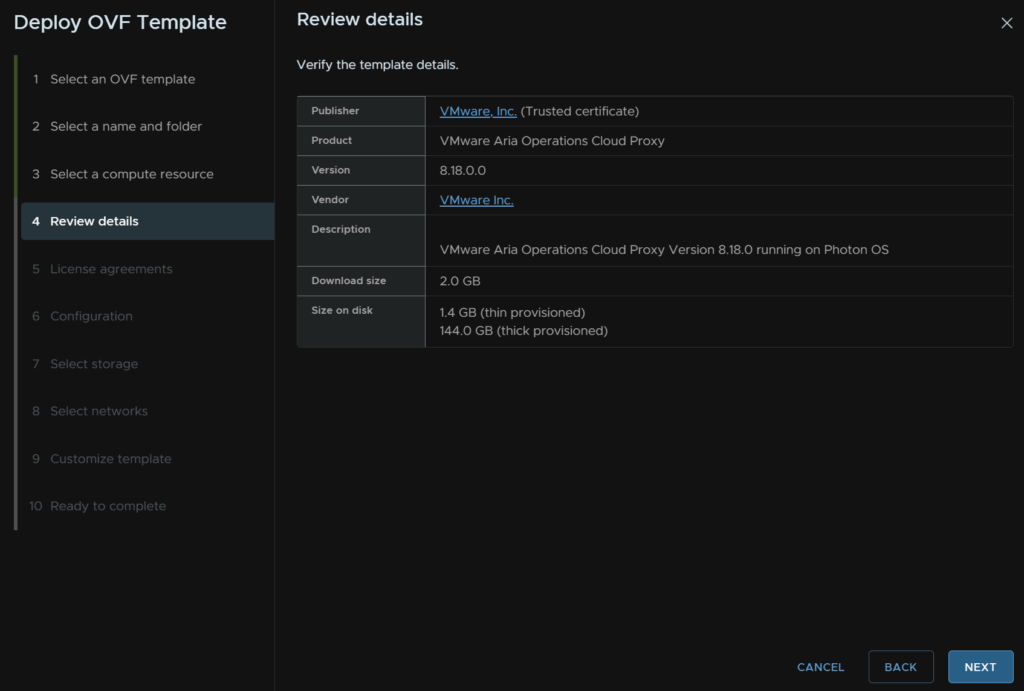
Accept the EULA and click Next
Sizing can be found here
We can see the sizing requirements from this snippet
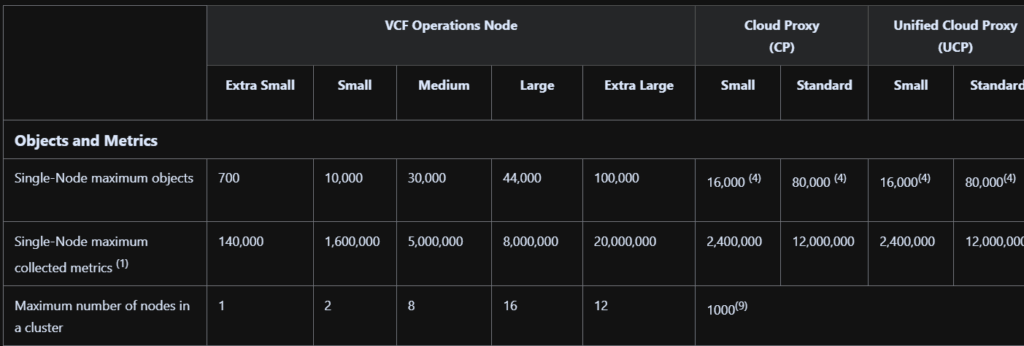
And the vCPU/RAM sizing

Select your size and click Next, I went with small

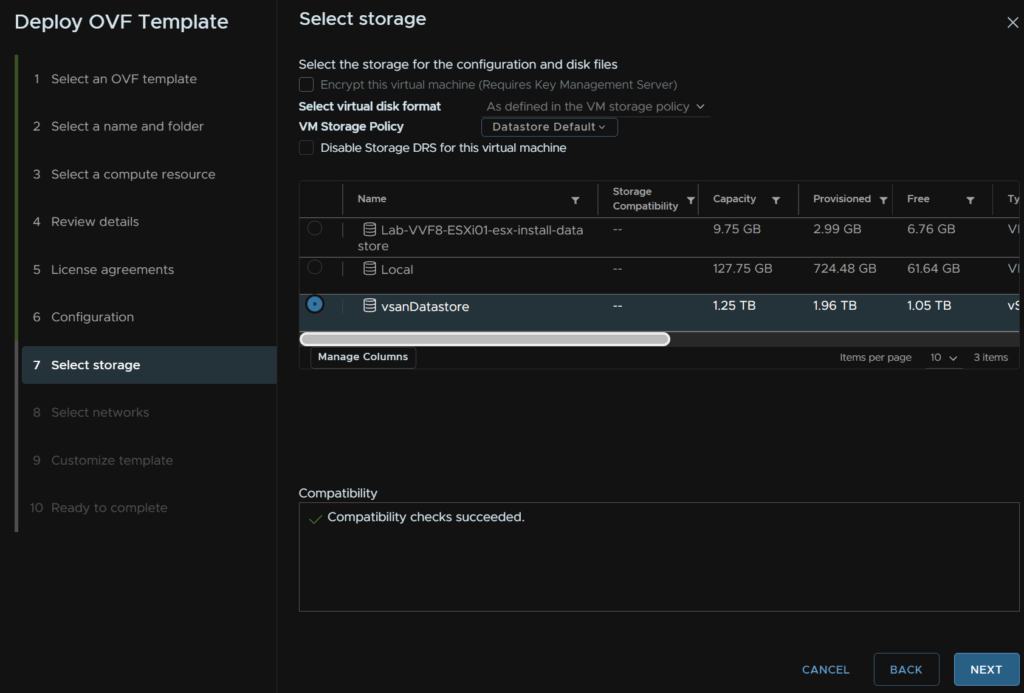
Select a datastore, select the format as thin provisioned and click Next
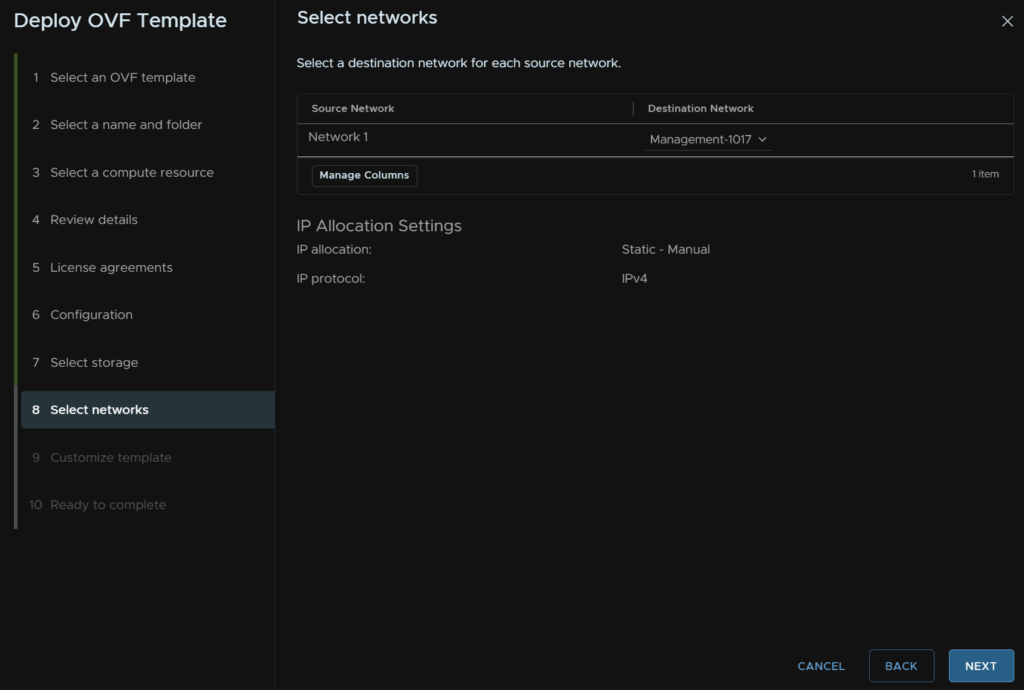
Select the network port and click Next
In VCF Operations head to Administration/Cloud Proxies and click Add
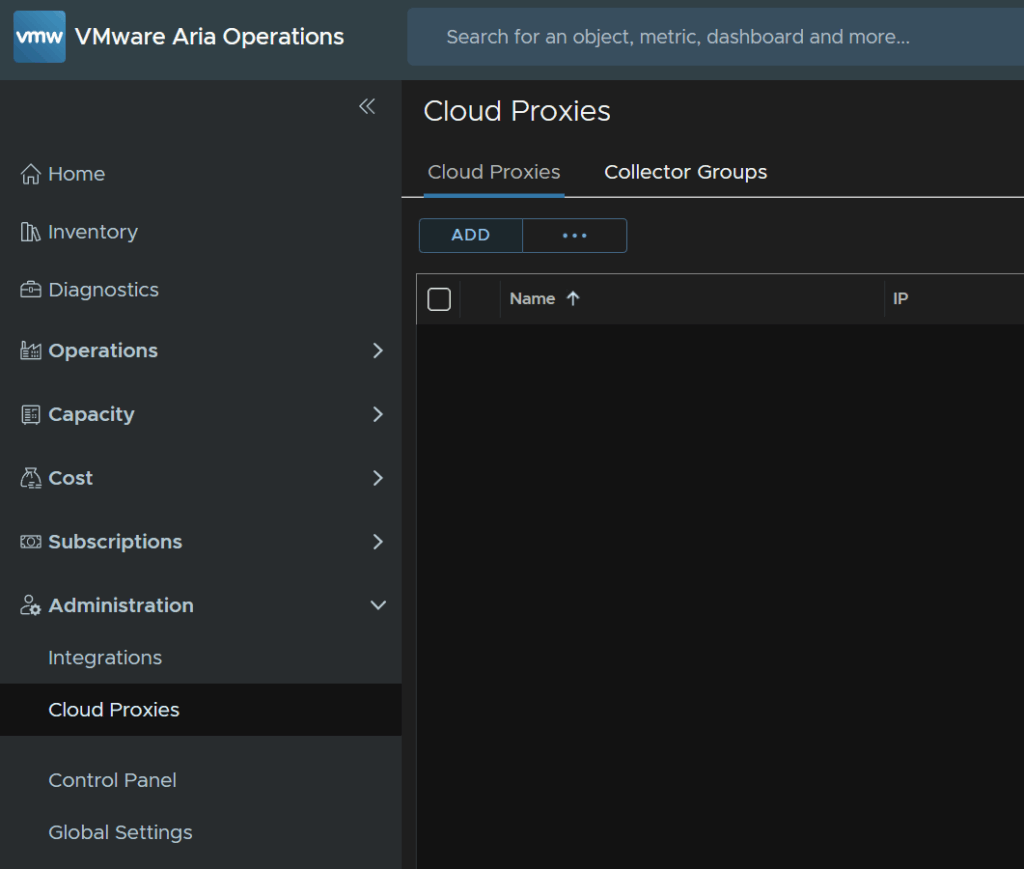
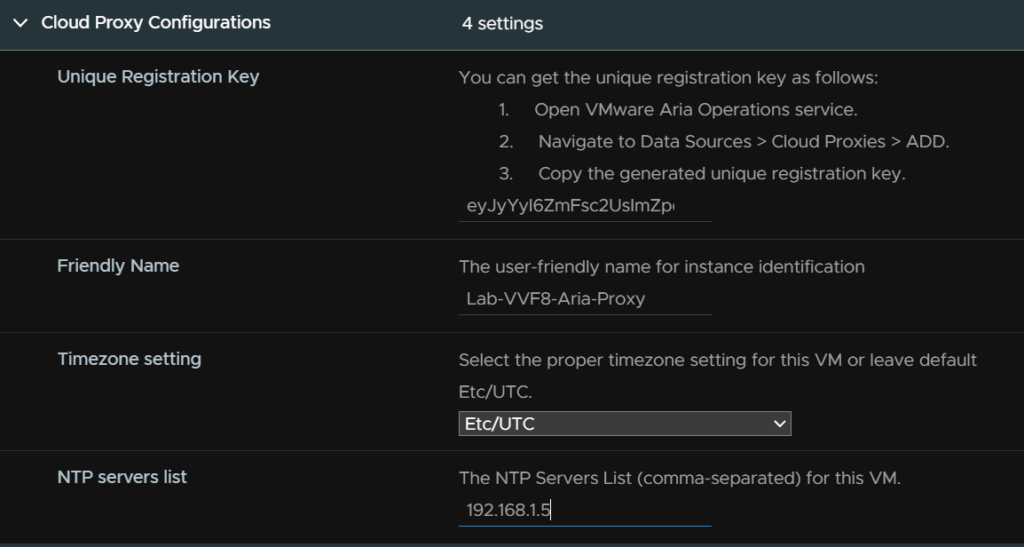
Here you can select if you want data persistence and log forwarding, I dont need either of these so I left them off, but the important bit is to copy the very long code

Back in the OVF deployment wizard in vSphere, paste the long key into the first field, add a friendly name, I used the same as the VM name, select your timezone and enter an NTP server, it can be something external like time.cloudflare.com
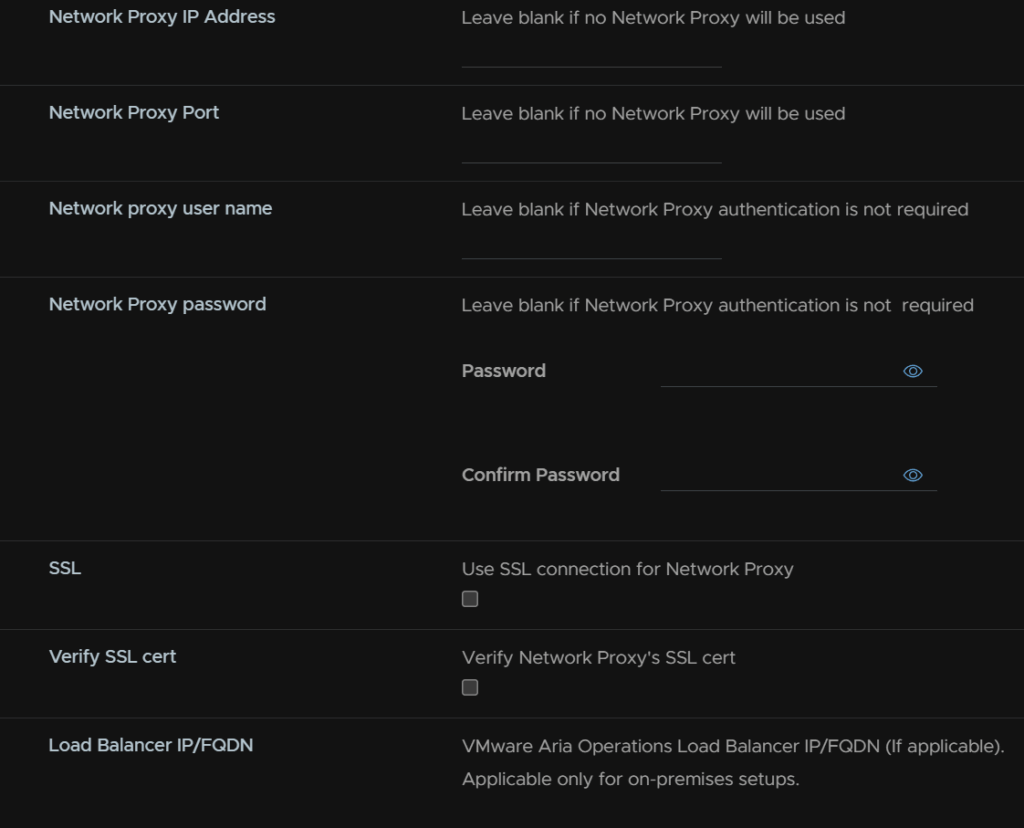
Add in your network proxy settings if you have one, I dont so I left it blank

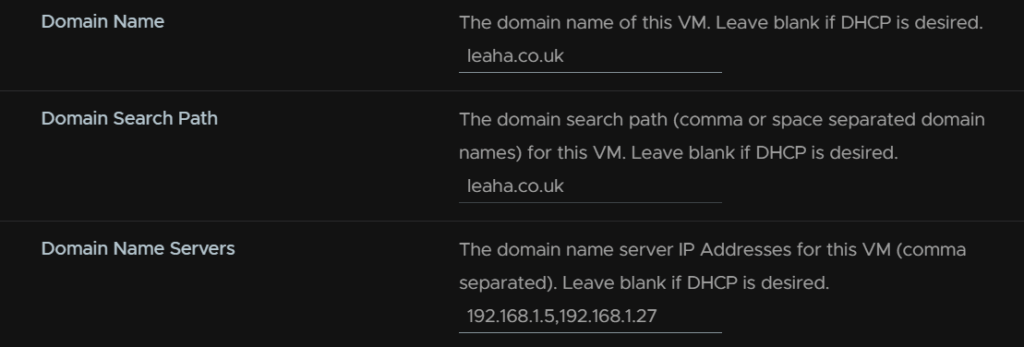
Add your domain name, DNS search domain and DNS servers, comma separated
Set the IP type to static, enter the IP address, gateway and subnet prefix
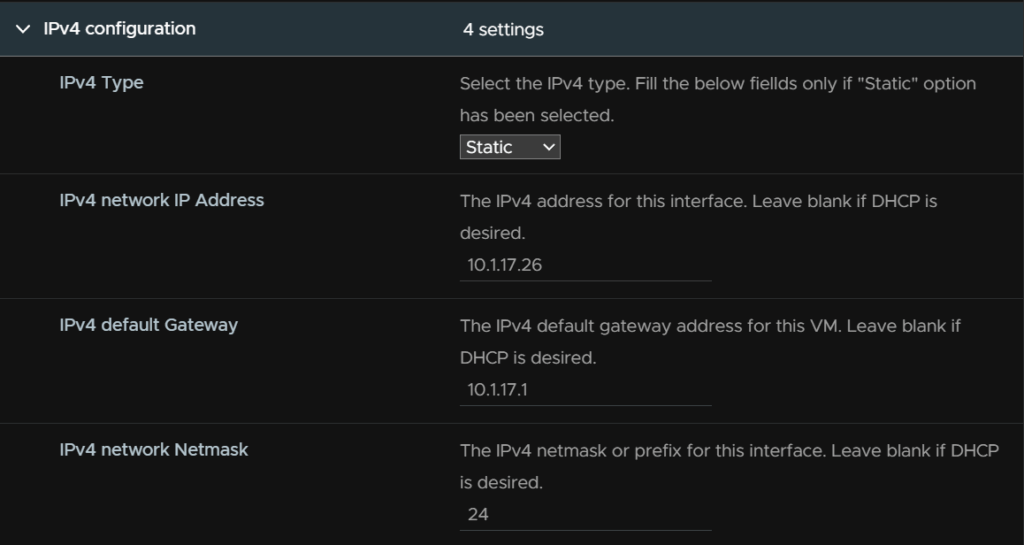
I didnt configure IPv6, then click Next
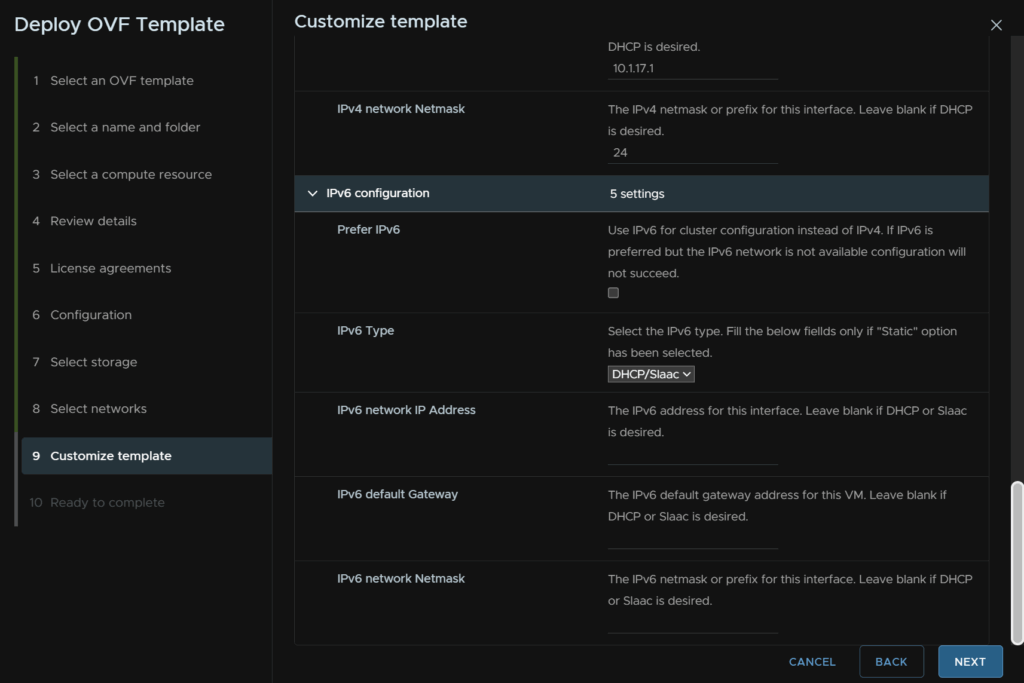
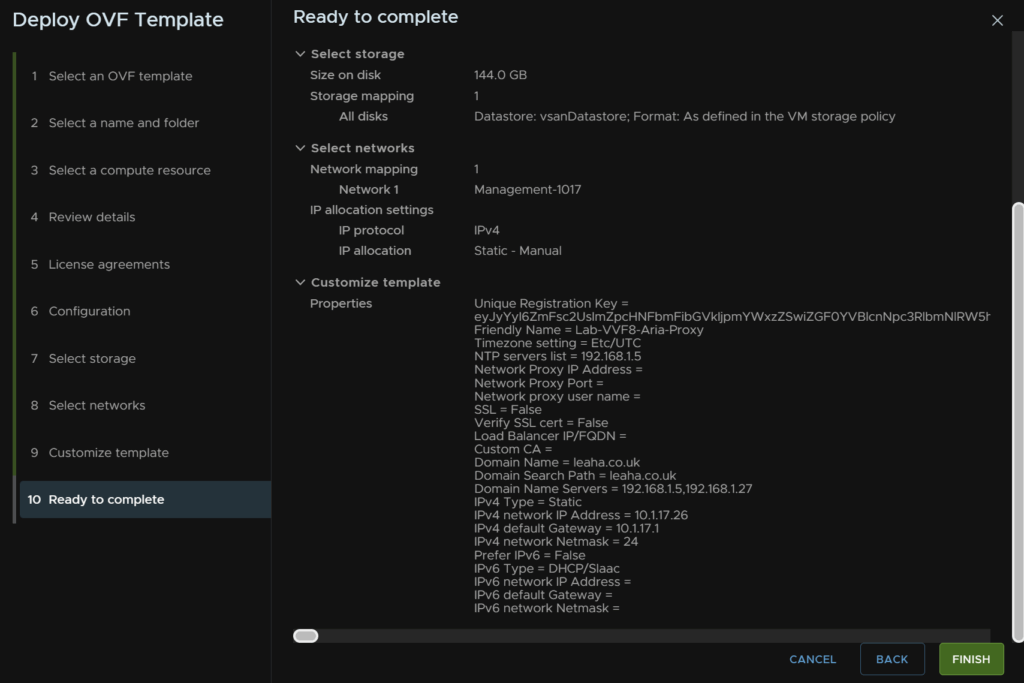
And click Finish
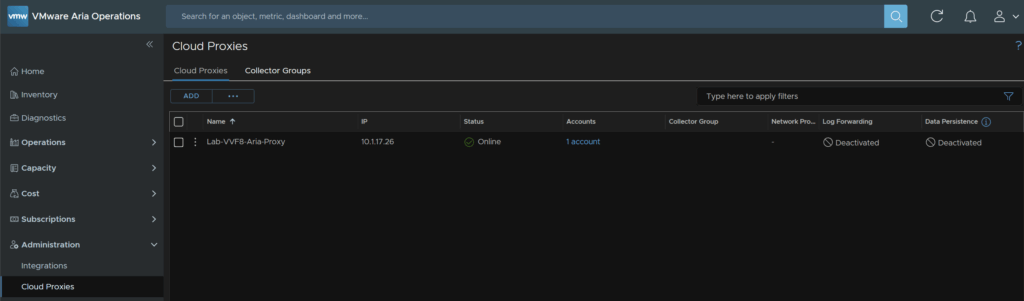
Once its deployed it will show up in the Cloud Proxies section in VCF Operations after ~20 mins
This wont set a root password on the appliance, if you open the console and login as root it will prompt you to set one
5 – VCF Operations For Logs
5.1 – Adding The Binary
First you’ll need to download the OVF appliance from Broadcom’s website, you want to do to My Downloads and select Aria Operations For Logs
From here select your release
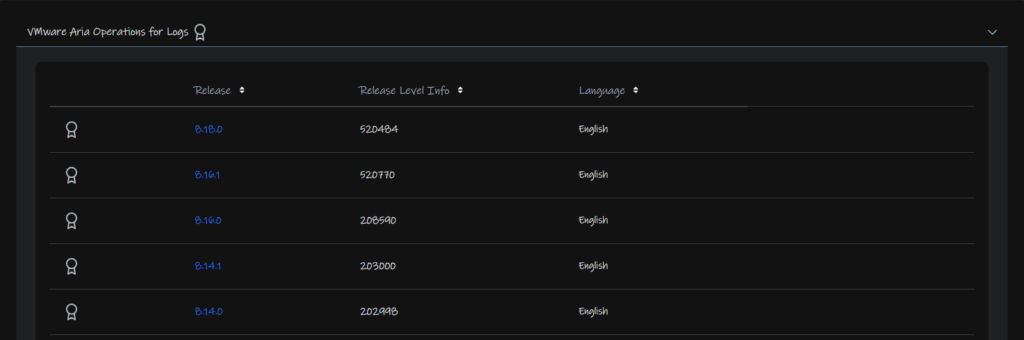
And download the OVF here

We then need to upload the patch to Aria LCM
Connect to it with the root account using WinSCP
Double click the bar here
And navigate to /data and click ok

On the right panel head to where ever you have the OVA downloaded and drag it over to the root of /data
It should look like this, the folders in /data may be different, the important thing is that the file is under /data
From the Aria LCM UI click Lifecycle Operations
Click Settings/Binary Mappings

We can click the trash can icon to remove the Aria Ops install OVA we mapped earlier
When you refresh the page it will be done, then click Add Binaries

Enter /data as the base directory and click Discover
Select the logs OVA and click Add
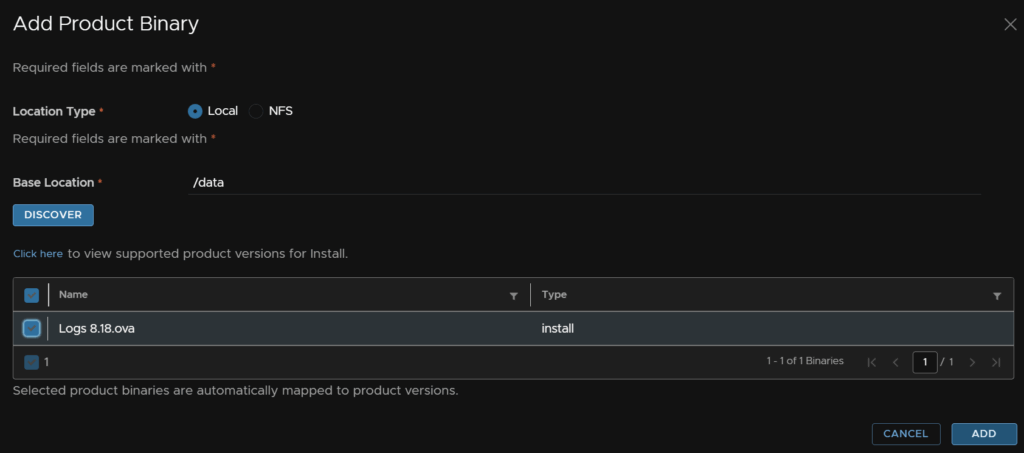
After 5 mins we can refresh the page and the install binary will be added
5.2 – Deploying The Appliance
Click Environments, click the three dots on the new environment we setup during Aria Ops and click Add Product
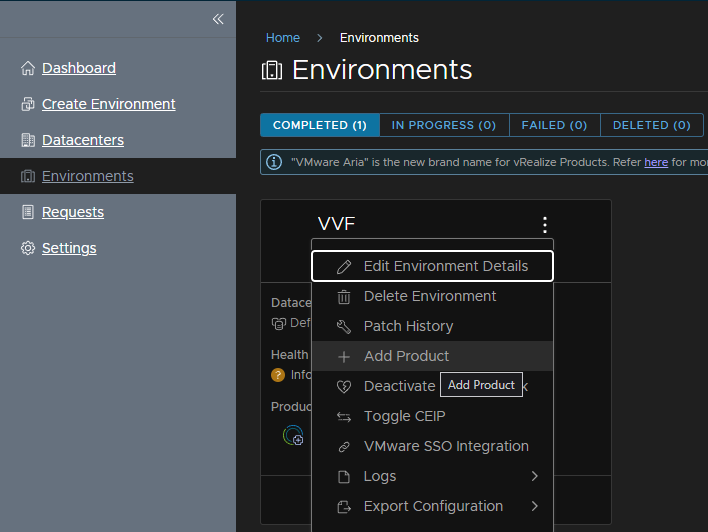
Check the box for Aria Operations For Logs and click Next
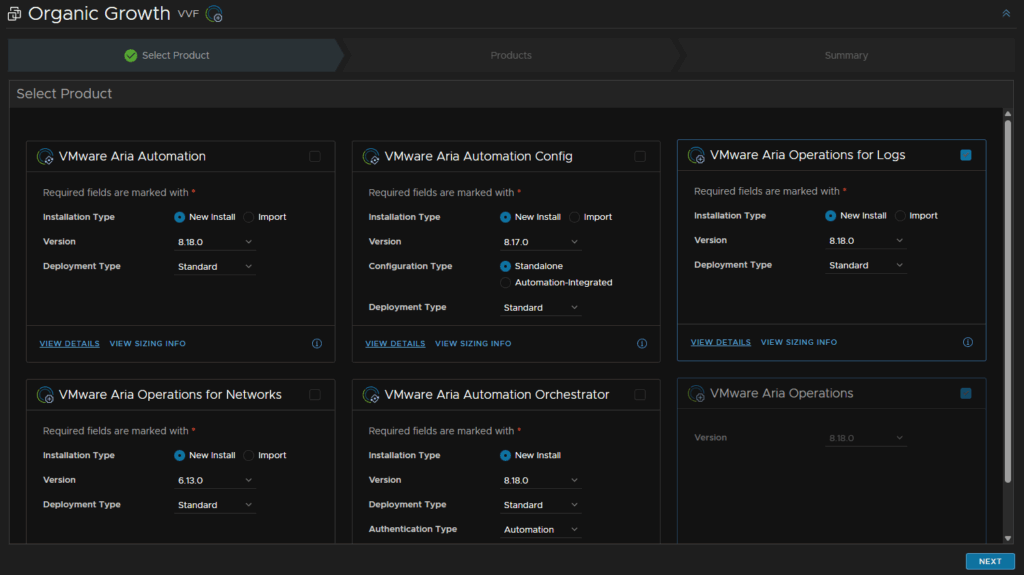
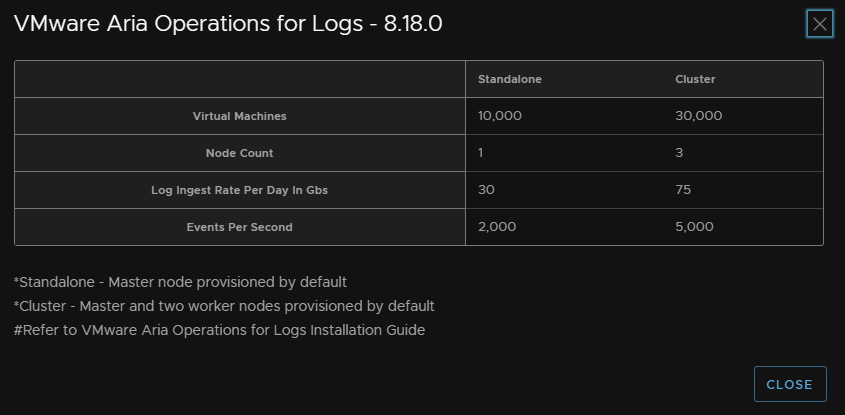
The standard sizing will be fine for most environments, but the VM scan be scaled for more if you dont want a cluster
Accept the EULA and click Next
Click Select for the license
Select your license and click Update
Then click Validate Association
Then click Next
Click the + and then Generate Certificate

The FQDN for this server wants to be in DNS already, enter the FQDN in the Alias and CN, for O, OU and C enter anything, under the FQDN box enter the FQDN and the IP in the IP box, then click Generate
Select it from the drop down and click Next
Select your vCenter, cluster, optionally a folder and resource pool, then the management network, datastore, disk mode and click Next
This should be populated from our Aria Ops deployment
Then add your domain anme, domain search path, DNS servers, NTP server, you can use host time if needed, IPv4 gateway and netmask and click Next
This should be pre populated from the Aria Ops deployment again
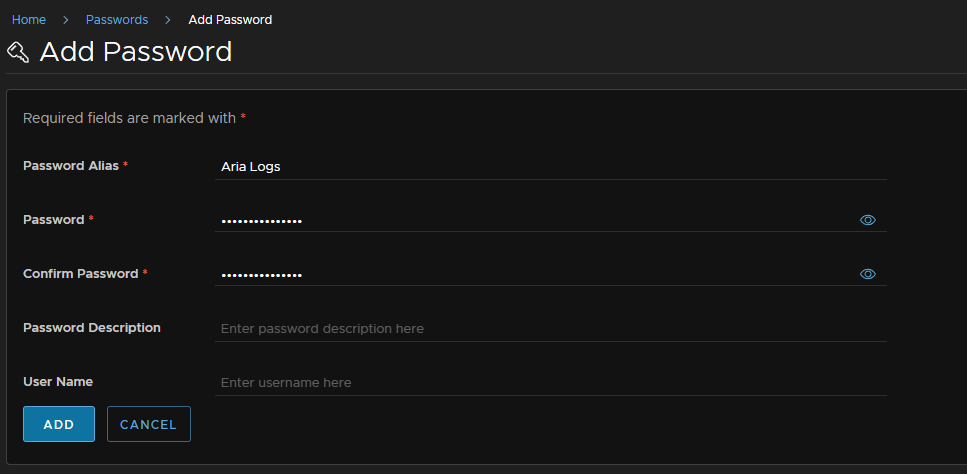
Click Add Password

Click Save

Add an alias, and the password, this needs to be 15 or more characters, the only allowed special characters are !@#$%^&*, then click Add
This will be both the root and admin password
Here the node size is what is meant by scaling a single node, Broadcom’s sizing is this
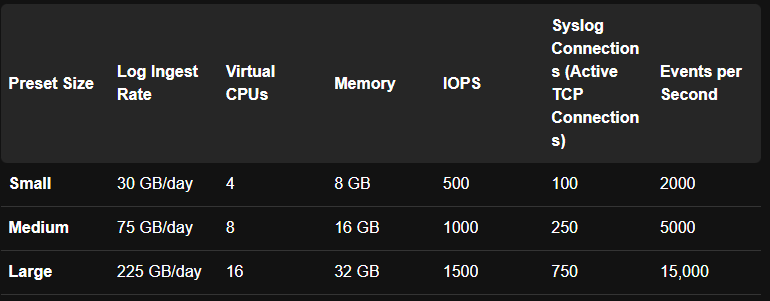
Select the size for your environment, I am opting for Small, optionally enable FIPS compliant, the certificate should be auto populated, check the box to upgrade the VM compatibility and use English, add an admin email, and click the x on the Product Password
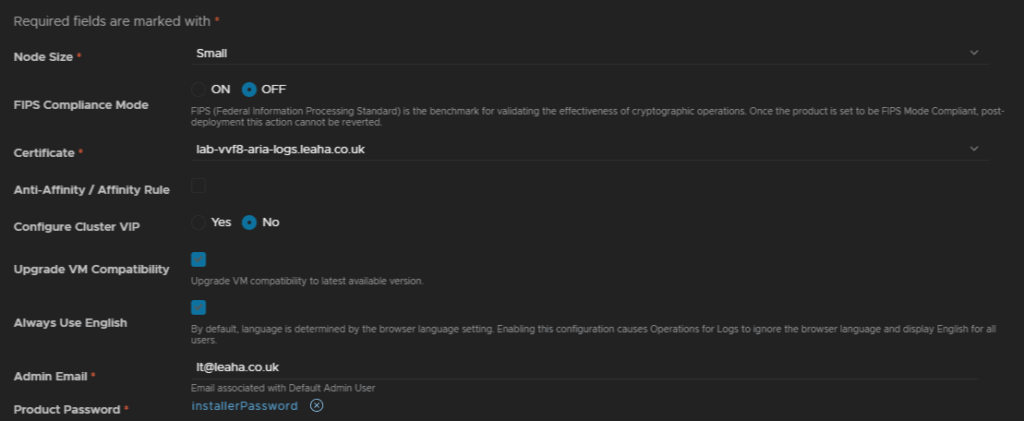
Then click Select Product Password
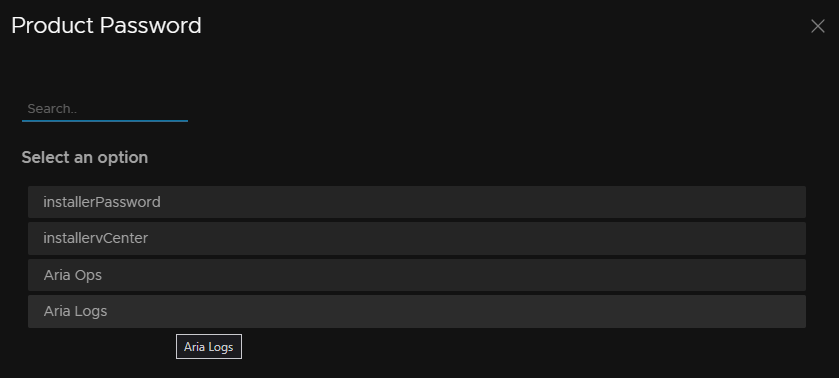
Select the Aria Logs password
Check the box to monitor this with Operations, the auth provider should be blank and NTP should be filled out from earlier
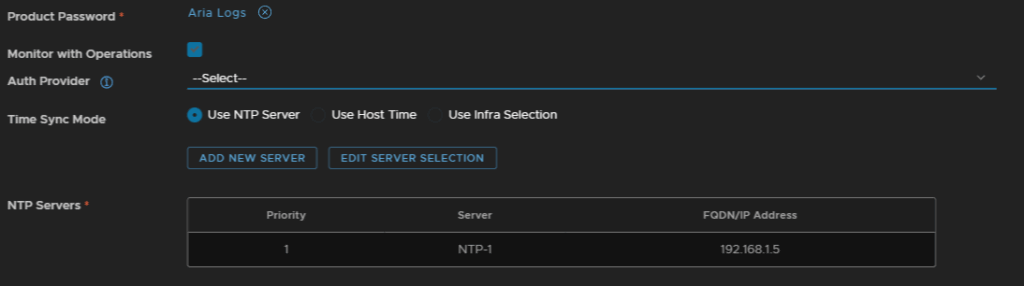
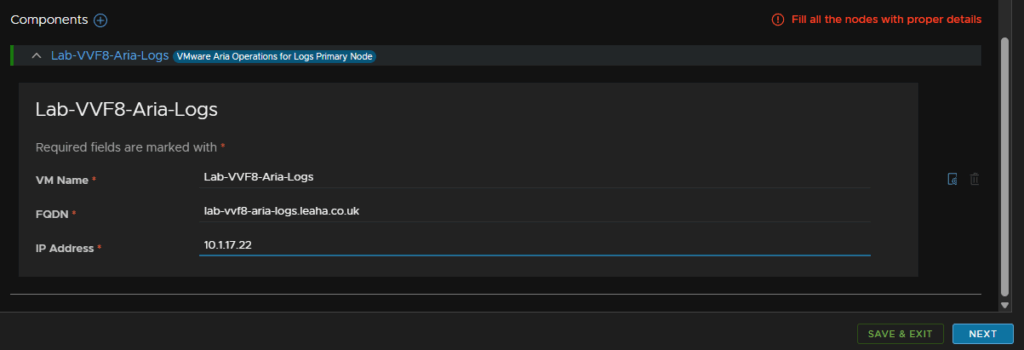
At the bottom enter the VM name, FQDN and IP address and click Next
Click Run Pre Check
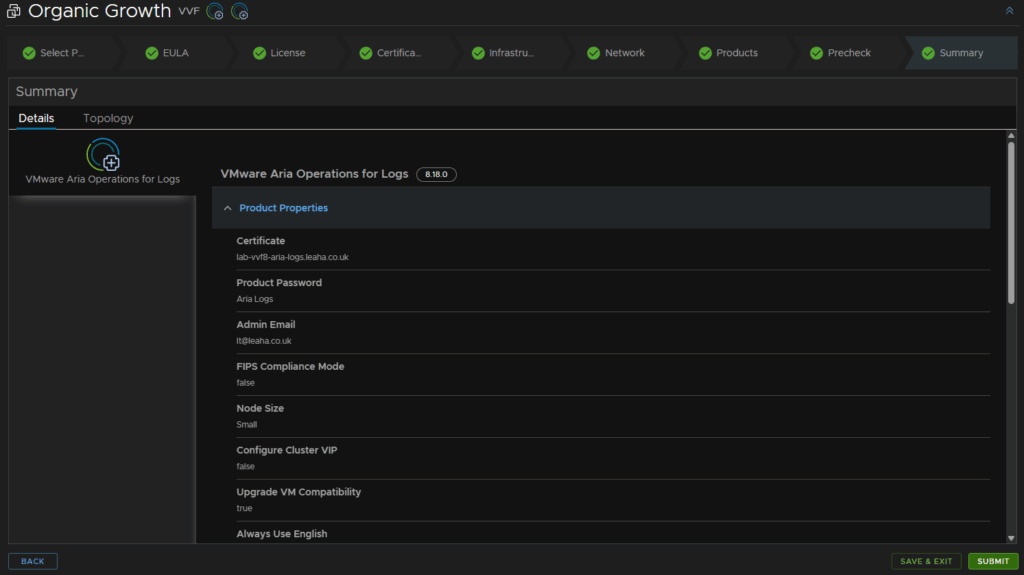
Once thats passed click Next
Then click Submit
The deployment will take ~30-45 mins
6 – VKS/Tanzu
6.1 – Deploying The Avi Load Balancer – Free Tier
6.1.1 – Deploying The Appliance
We will want to head to the Broadcom downloads site and click into VMware Avi Load Balancer

Select the version you want, as we are using VKS with VVF, we will want 22.1.7
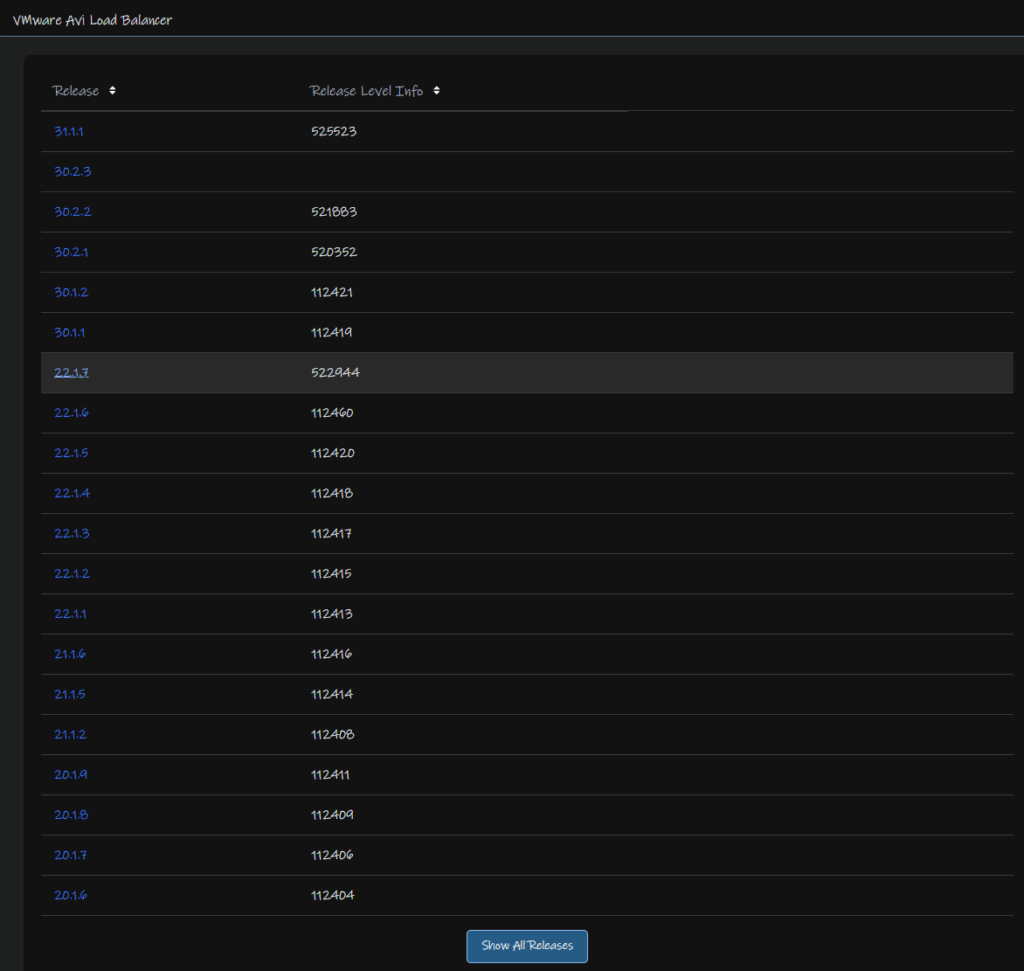
And download the controller OVA

Now we need to right click our cluster and click Deploy OVF Template
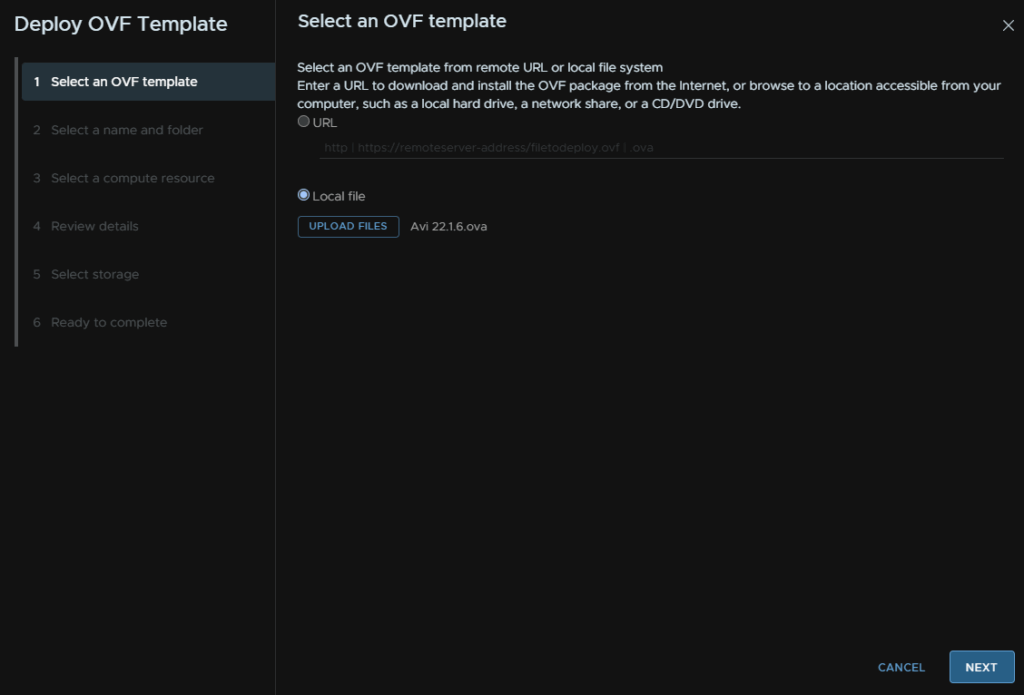
Click the Local File radio button and click Upload Files
In this case I am deploying an older version, 22.1.6, but the entire process is the same, when you have selected your OVF click Next
Name the VM and select a folder for it to go in, I am just using the datacenter and click Next
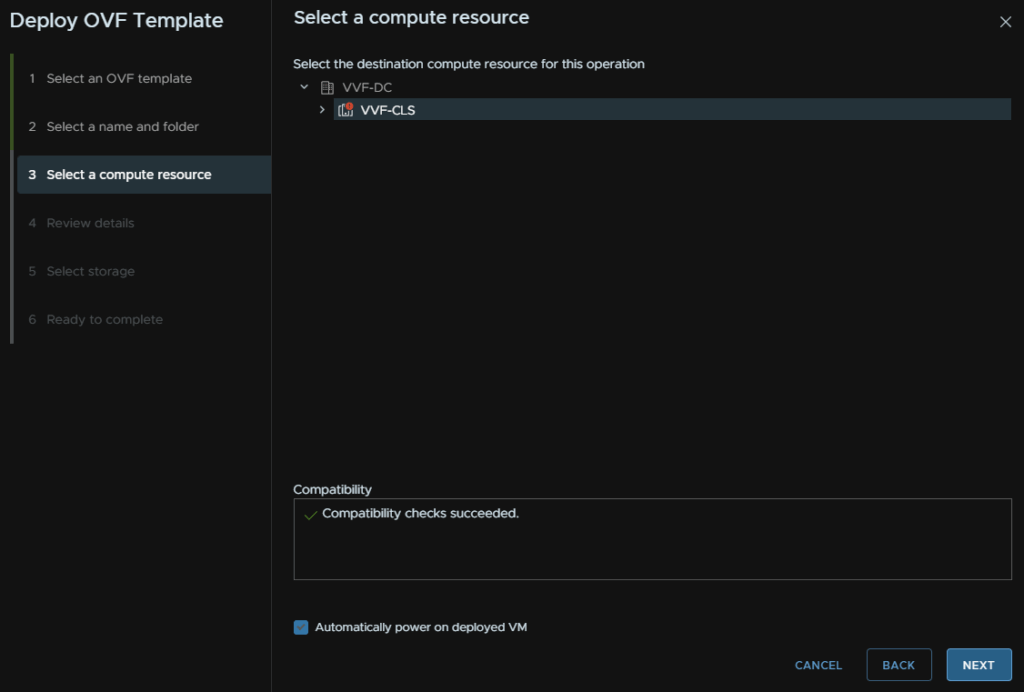
Select the cluster for compute and check the box to automatically power the VM on and click Next
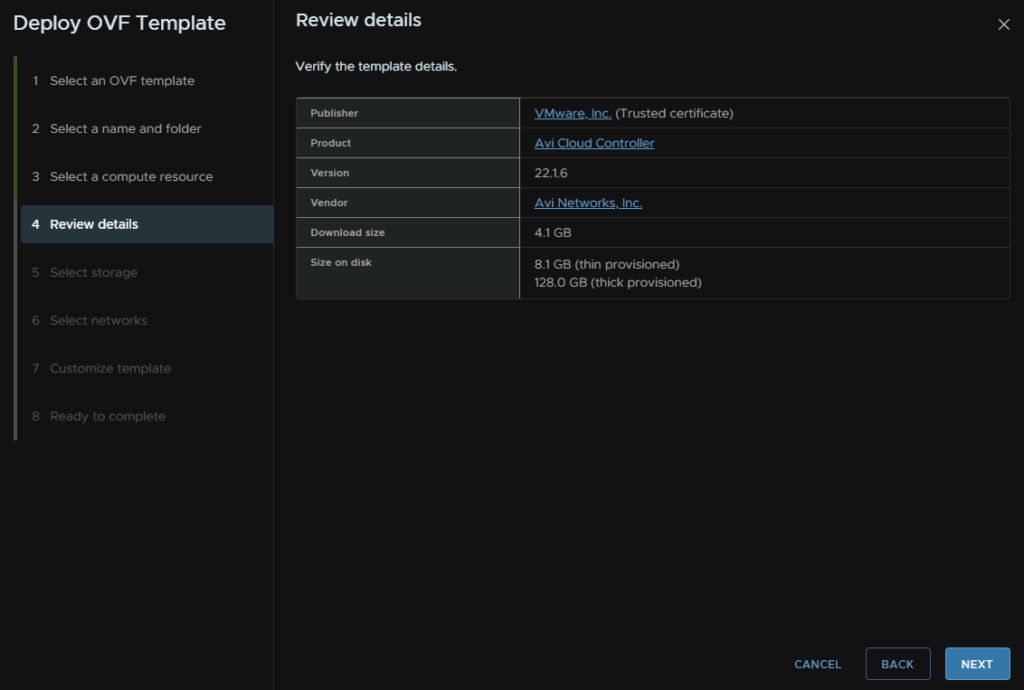
Click Next
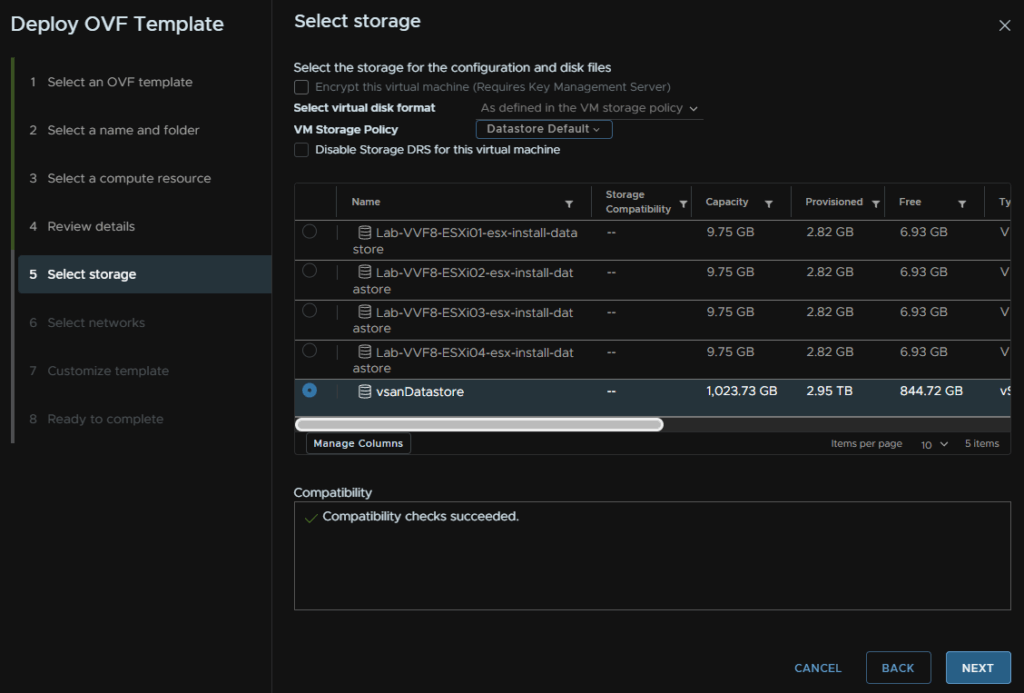
Select your datastore, in my case the vsanDatastore, and click Next
Select the port group for the controller and click Next
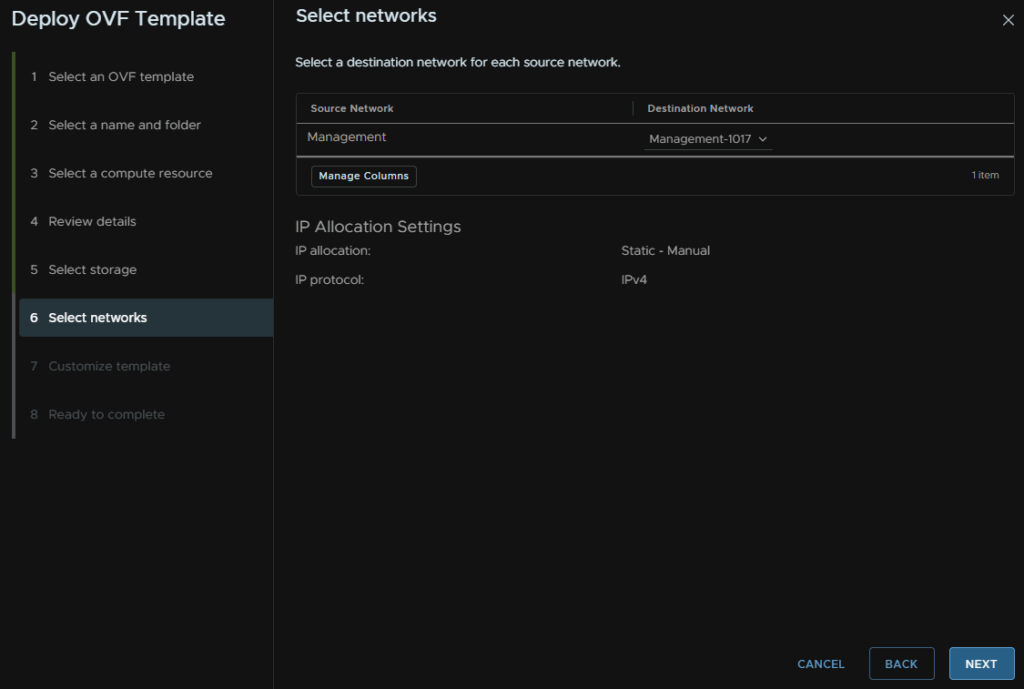
Enter an IP address on that port group, the subnet and the gateway, leave IPv6 blank unless you are explicitely using it
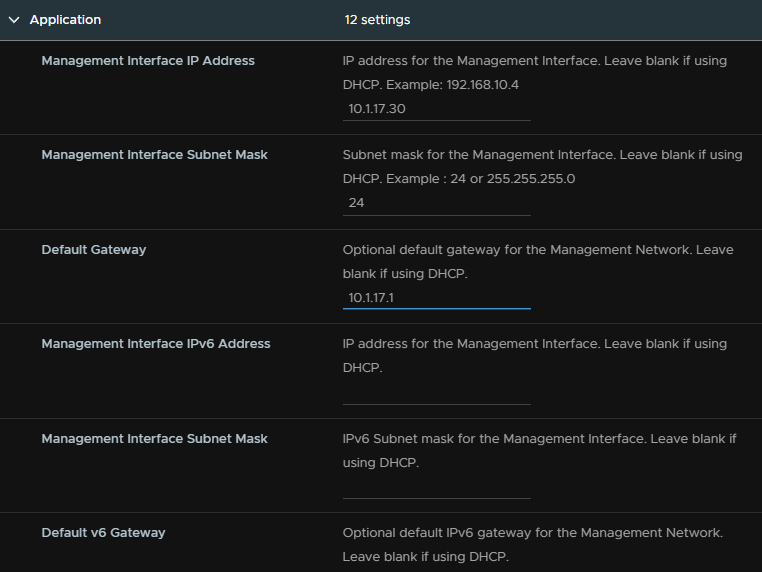
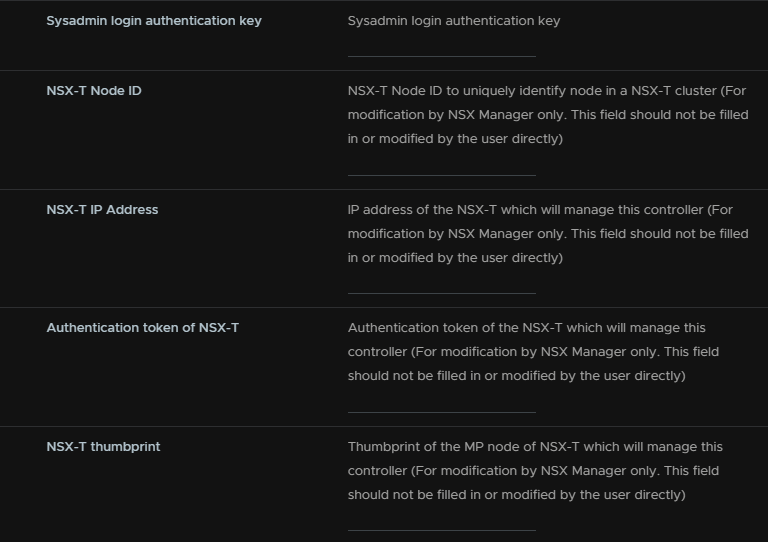
Leave all this blank
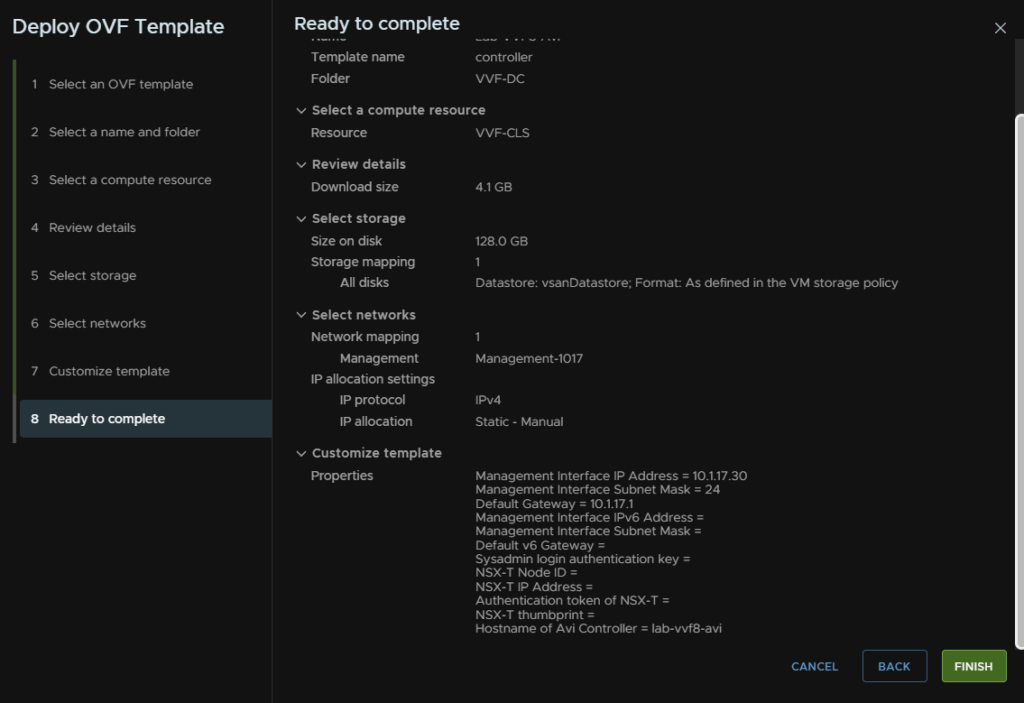
Add the hostname

And click Next and Finish
6.1.2 – Configuring Avi
Once the appliance boots head to the WebUI to begin the setup, this can be accessed on
https://fqdn
Or
https://ip
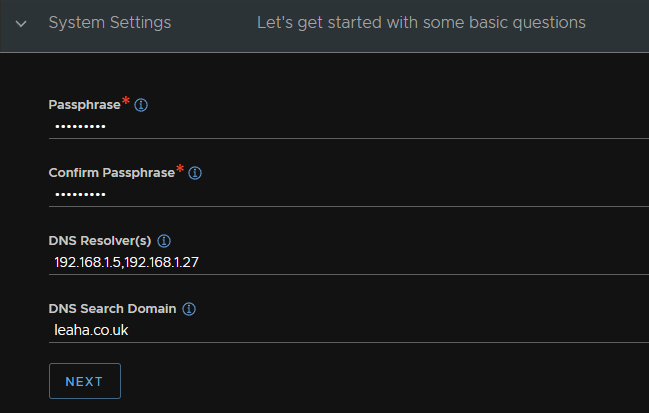
Fill in the admin password and confirmation boxes with the password you want the account to have, and optinally add an email, and click Create Account

Add a passphrase for the continuation backup, your DNS servers, comma separated, and a DNS search domain, and click Next
Fill out SMTP address settings, you will want Anonymous Server for a password less SMTP server like I have
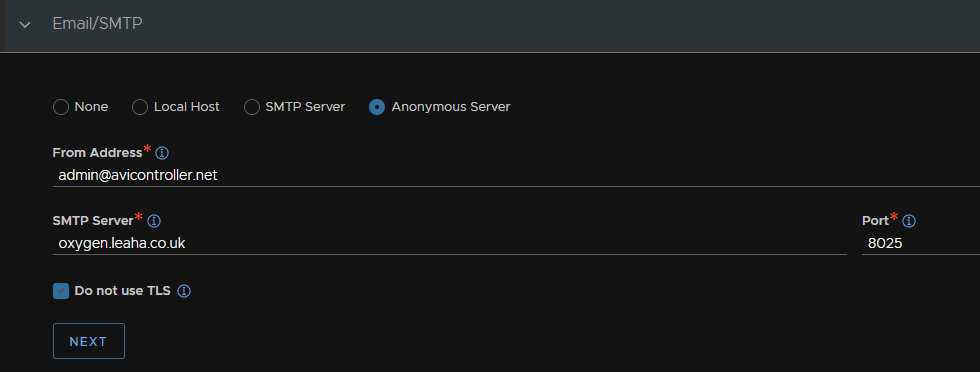
However for production environments you will want SMTP server with a username/password on port 587 and ensuring TLS is used
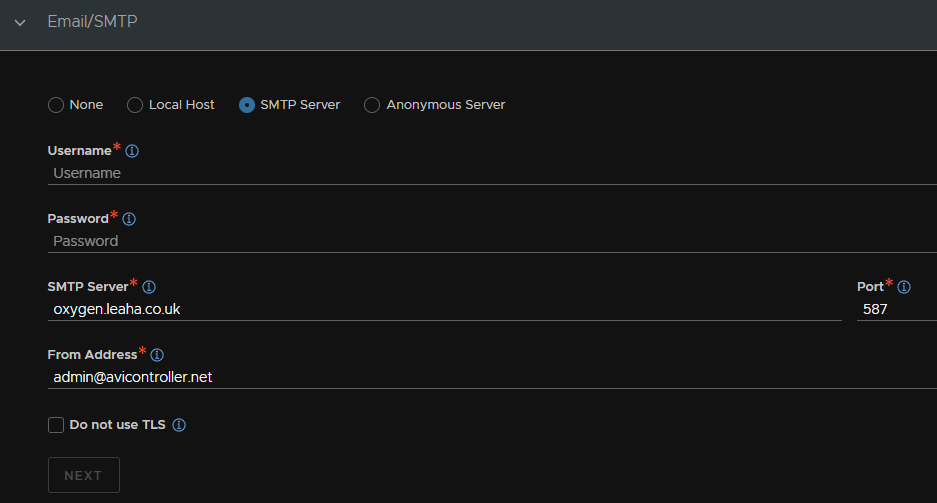
And click Next
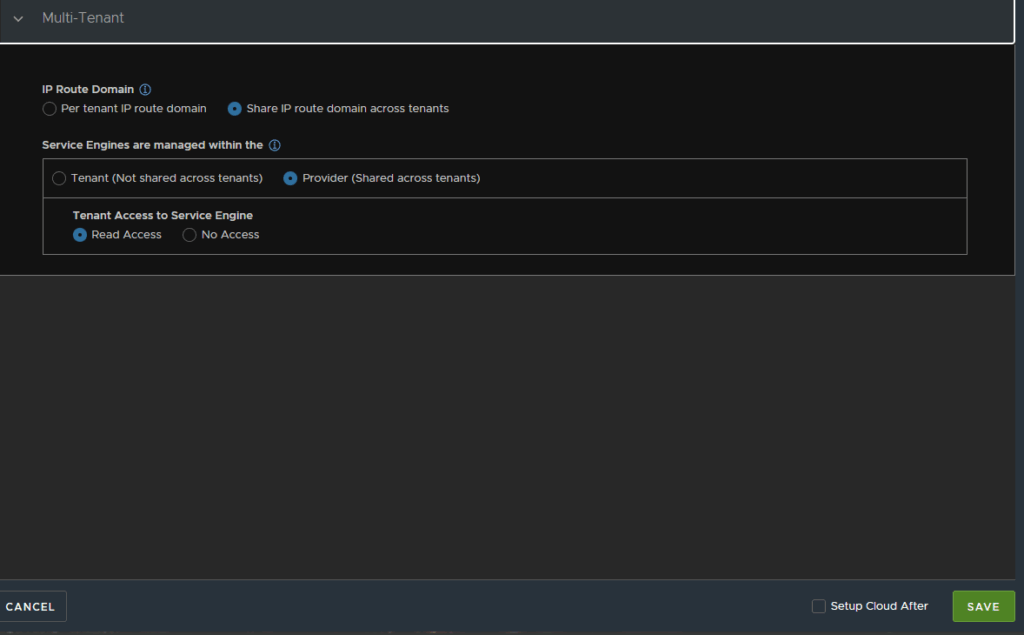
Leave Multi-Tenant at the default and click Save
We then need to setup the licensing, head to Administration/Licensing and click the settings cog
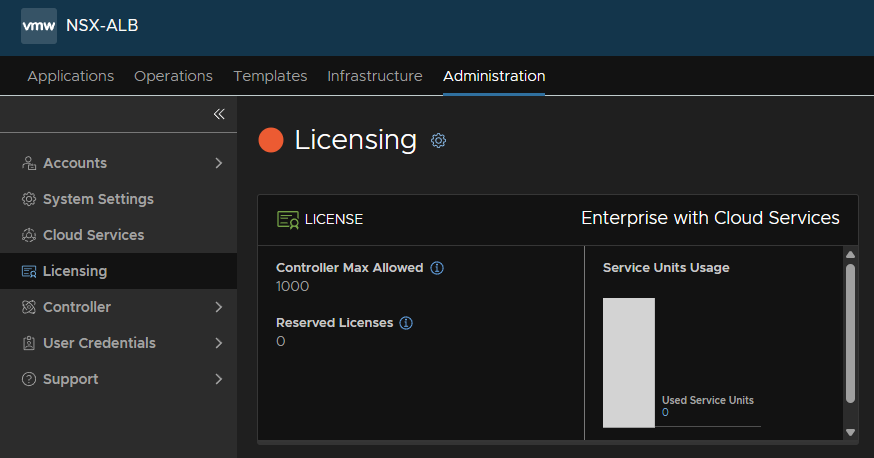
Click the radio button for Essentials Tier and click Save
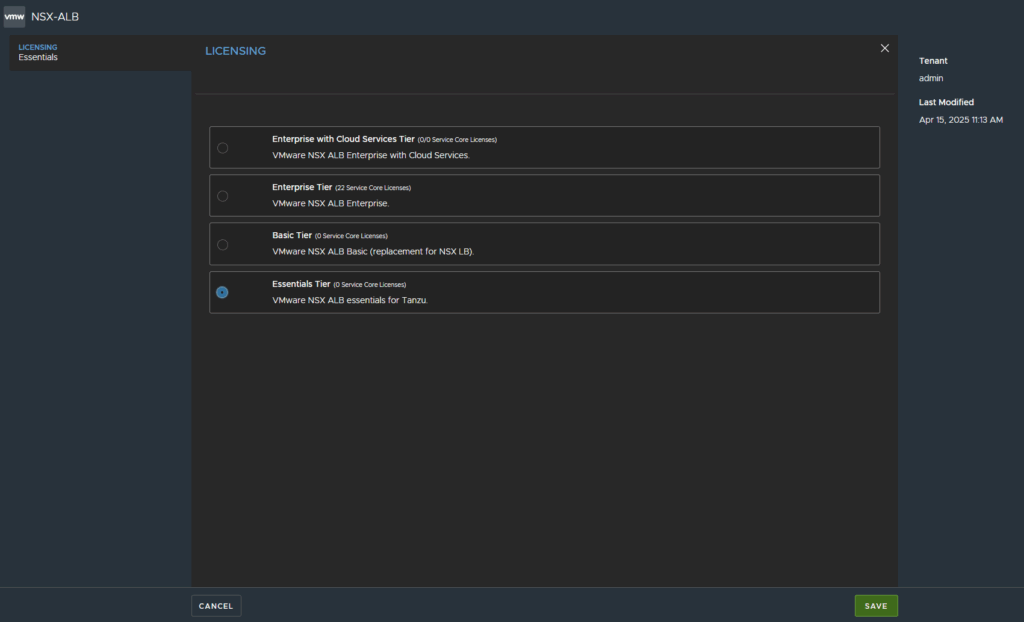
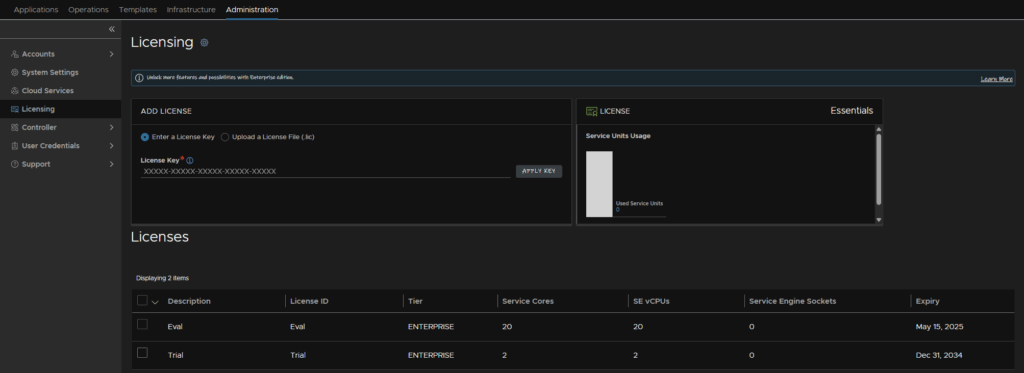
It should then look like this, you can add a key for enterprise, but as we dont have that, you will also see to the right, the license is on Essentials
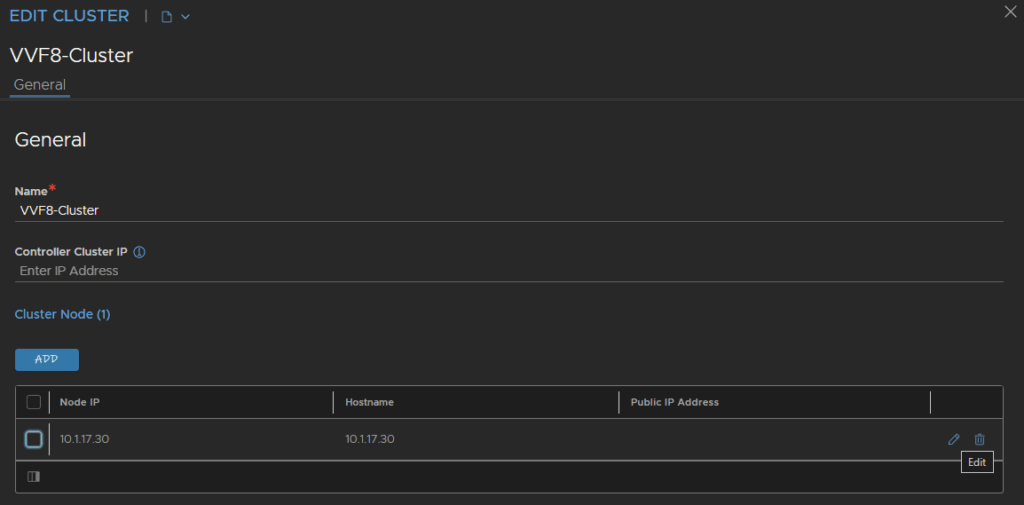
To then change the hostname/cluster name, head to Administration/Controller/Nodes and click Edit
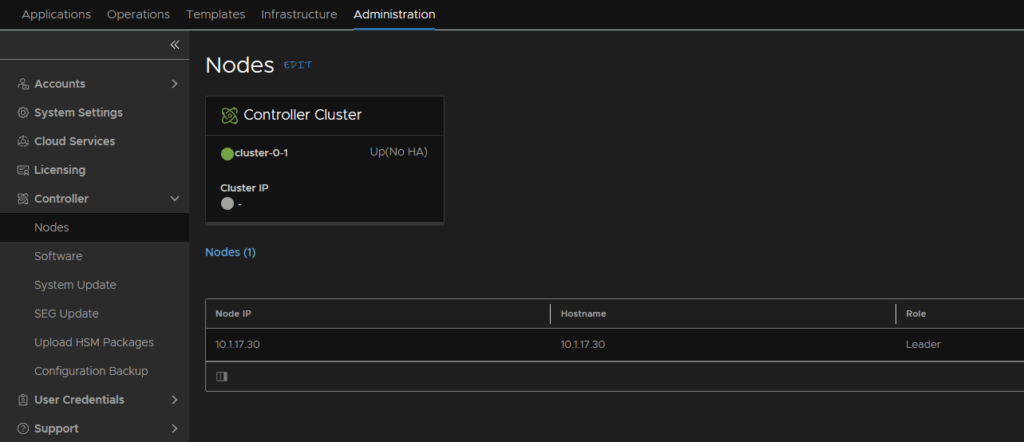
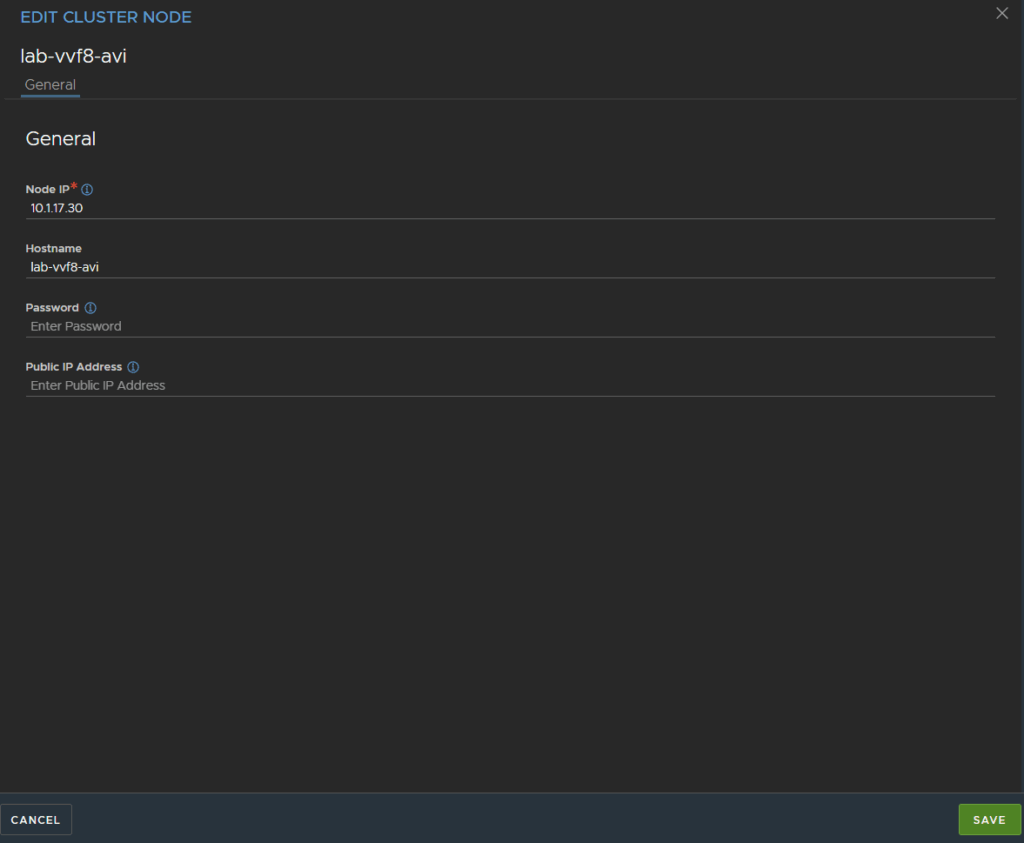
You can change the cluster name, and click the pencil on the right of the node to edit its hostname
Set the hostname and click Save
And Save again

This will then cause the UI to go down, and the node to reboot, this is expected
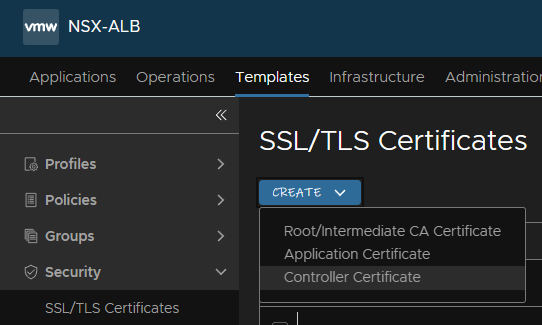
Once its back up, we then need a new controller SSL certificate
head to Templates/Security/SSL/TLS Certificates, then click Create/Controller Certificate
For the name and common name, use the server FQDN, organisation/organisation unit/locaility dont really matter here so I just used VVF
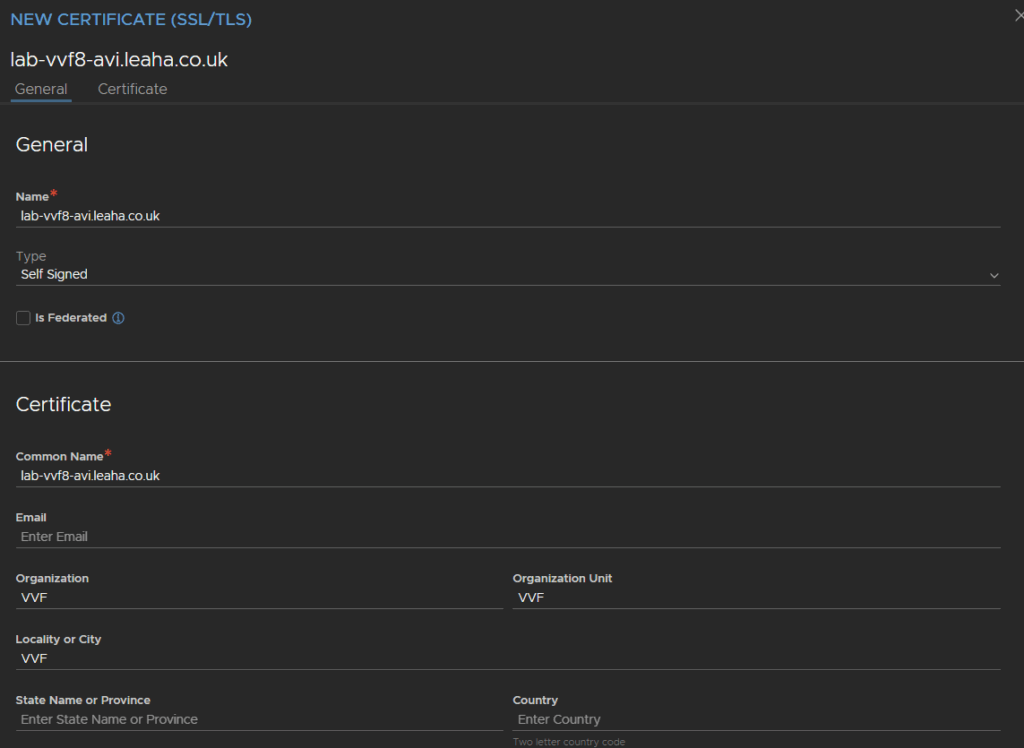
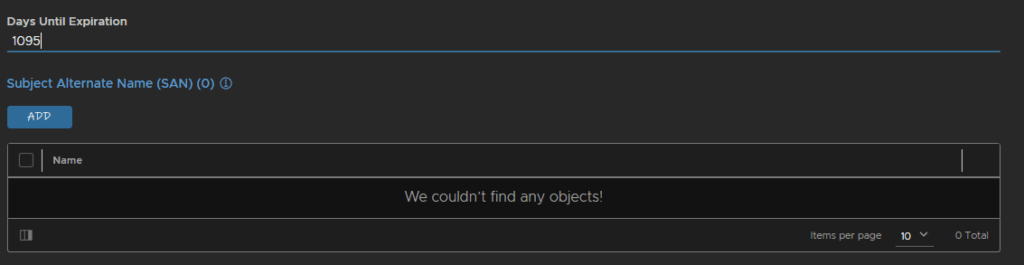
Then scroll down to the bottom, the default expiration date is in 365 days, I went for 3x that at 1095, but you can use whatever time you like, then click Add
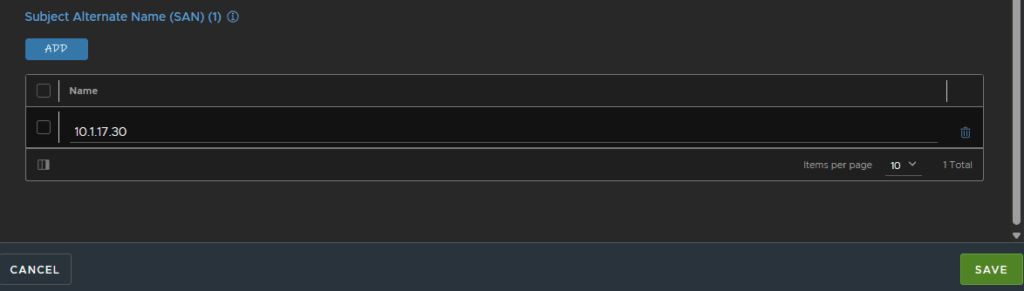
And enter the controller IP address then click Save
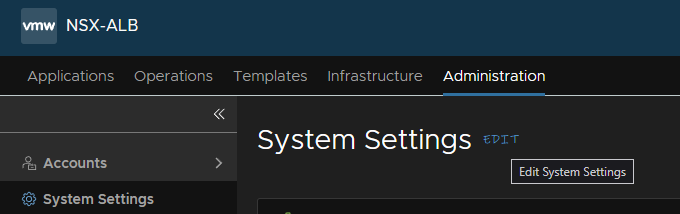
To apply that, go to Administration/System Settings and click Edit
The default looks like this
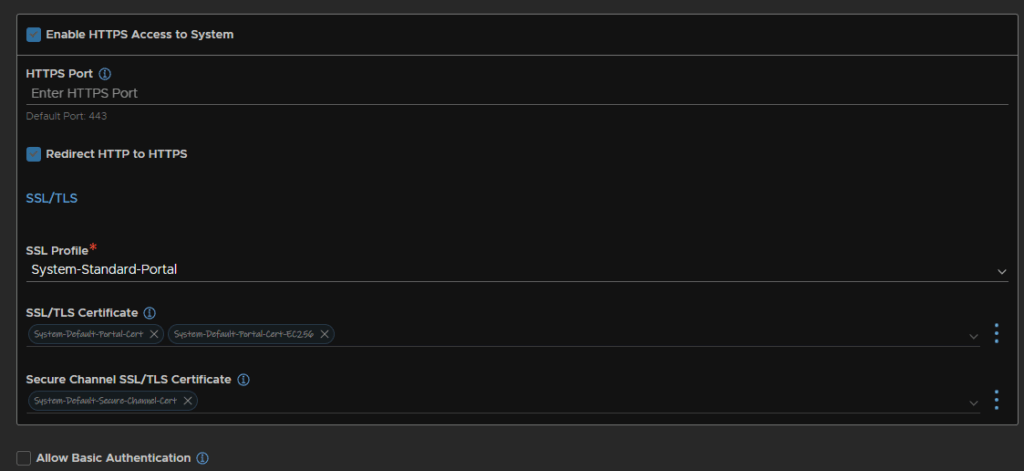
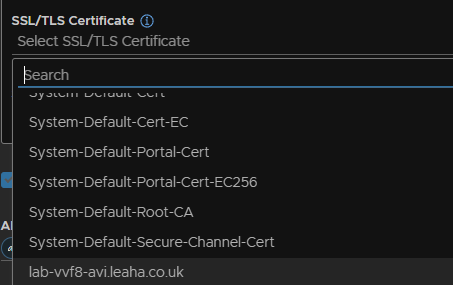
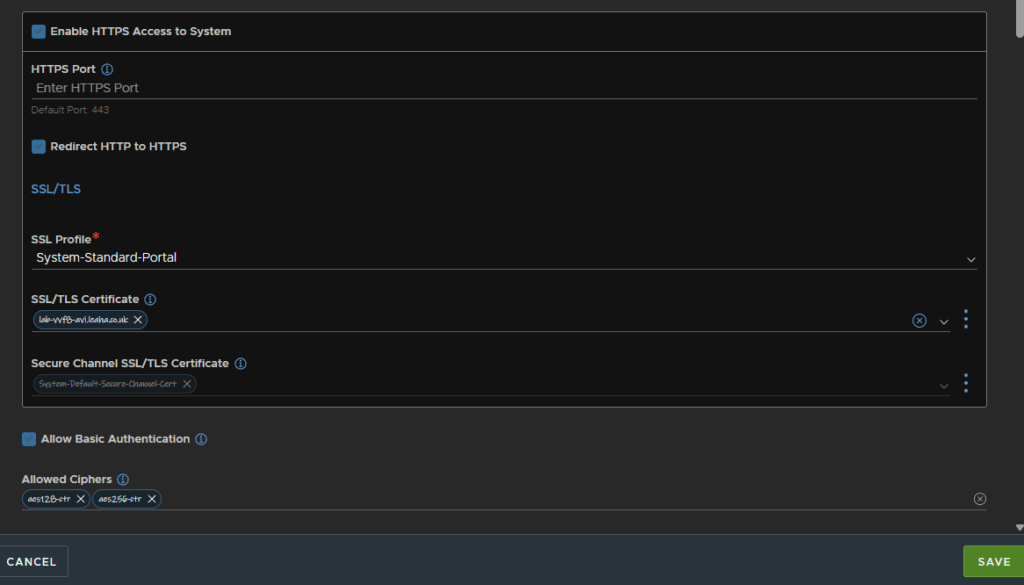
We will click the X on the SSL/TLS Certificates to remove the default ones, and click it and add the one we just generated
Leave the Secure Channel SSL/TLS Certificate the at the default
We will also enable Basic Authentication and click Save, it should look like this
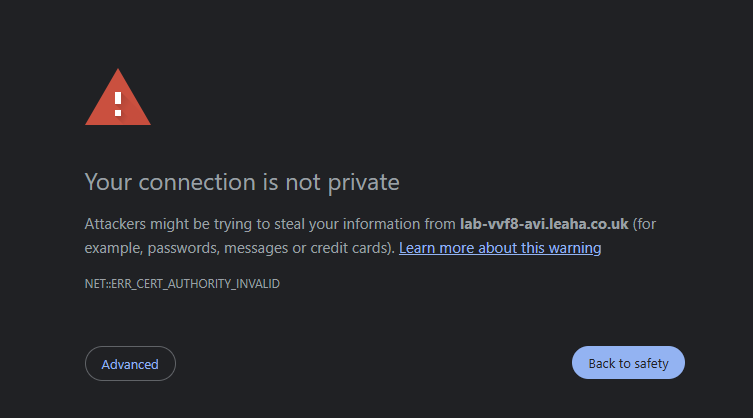
And refresh the GUI, you will see this as the certificate has changed, we just need to accept it
6.1.3 – Connecting Avi To vSphere
For this we will need two networking, a frontend and a workload networks
I have created two VLANs for this
Frontend VLAN 1021 – 10.1.21.0/24
Workload VLAN 1022 – 10.1.22.0/24
These are both routable, and the gateway is the .1 address in each subnet
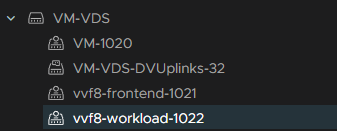
I created two portgroups on my VM VDS for these networks like so
The names will also need to be all lowercase
We need to then connect Avi to our vCenter
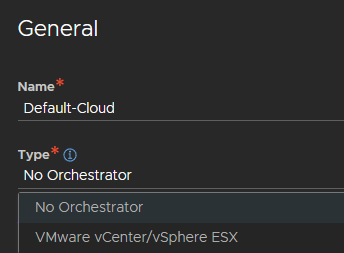
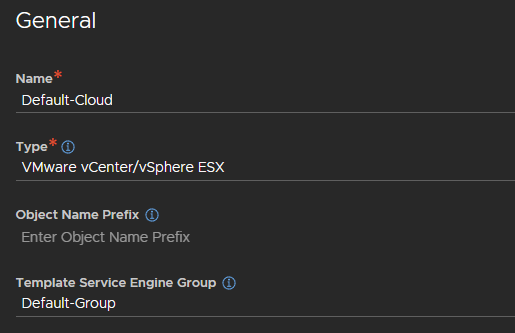
Head to Infrastructure/Clouds, expand the Default Cloud and click the Pencil on the right to edit it

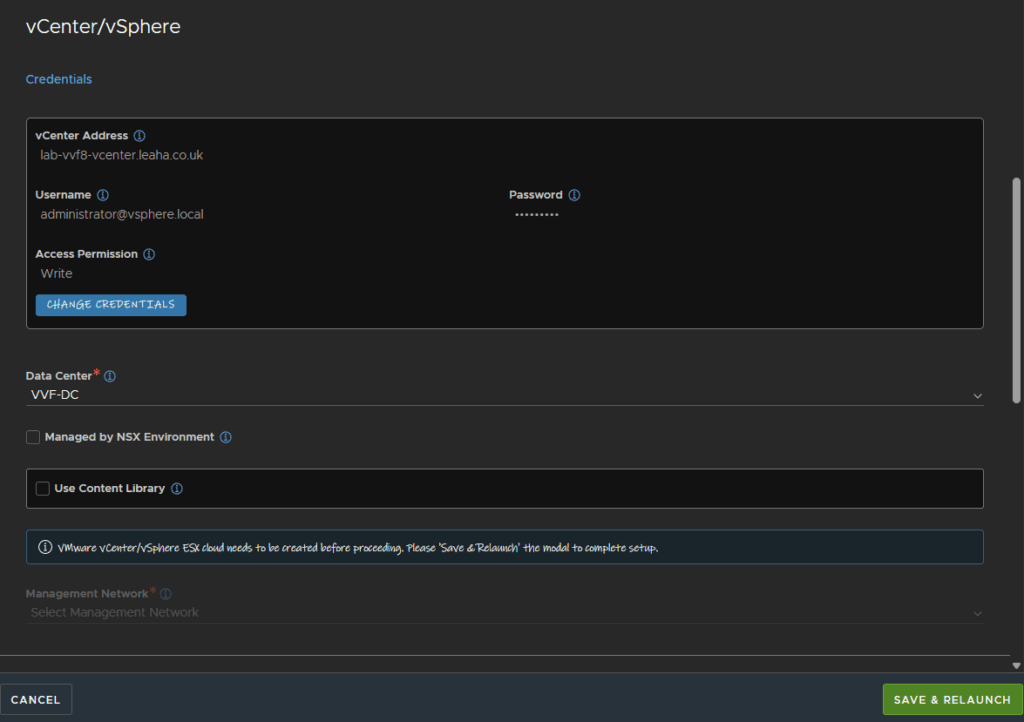
Change the Type to VMware vCenter/vSphere ESX, you cant rename the default cloud object
Click the drop down for the Template Service Engine Group and click Default-Group
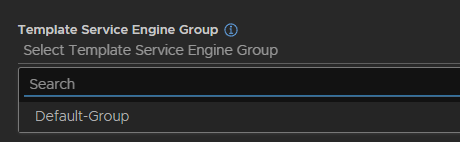
It should look like this
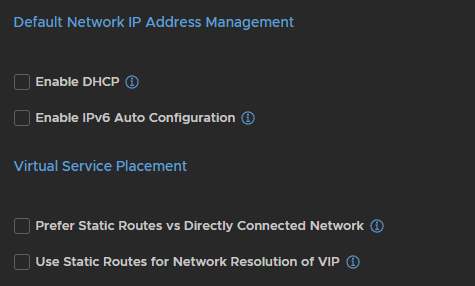
Leave this at the default
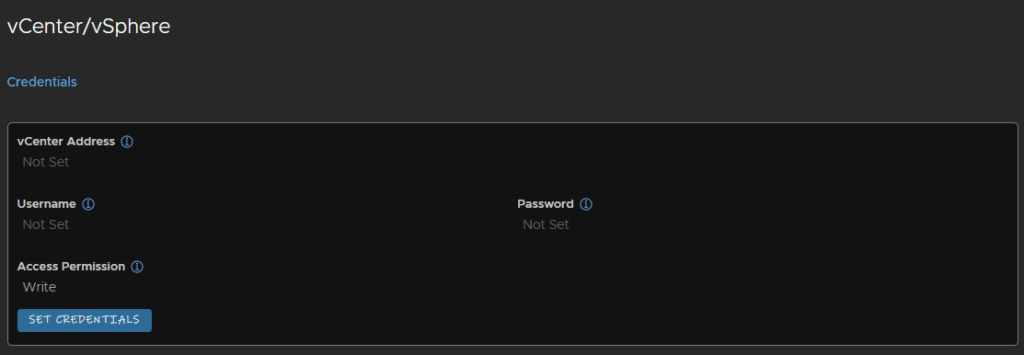
Under vCenter/vSphere click Set Credentials
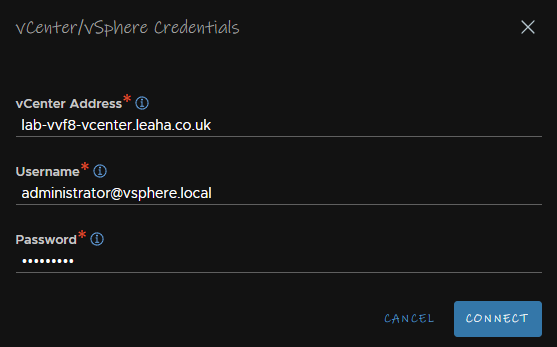
Add the vCenter FQDN and for the username, this will need full admin, you can either use a service account or, like I have, the [email protected] account, and the password, then click Connect
Make sure your datacenter is selected, ensure Managed By NSX Environment is unchecked, and uncheck Use Content Library, then click Save And Relaunch
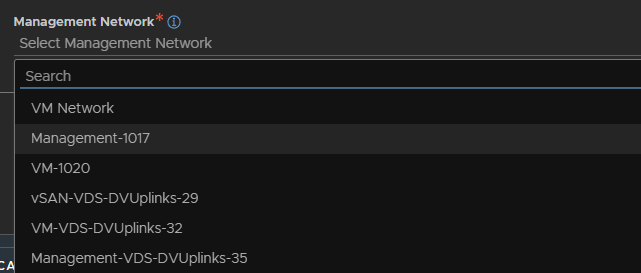
Once thats done we can select the management network, which for me is Management-1017
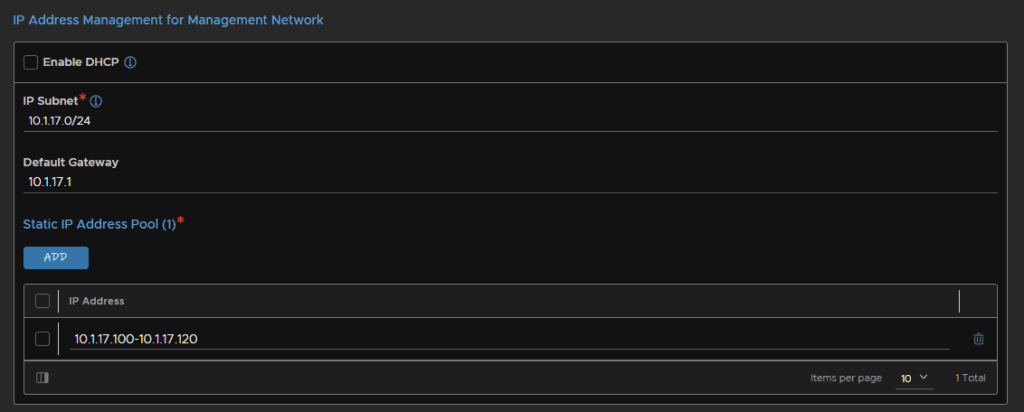
Leave DHCP off, and enter the management subnet and gateway, then add an IP range in the static IP pool section, these IPs should be reserved for Avi
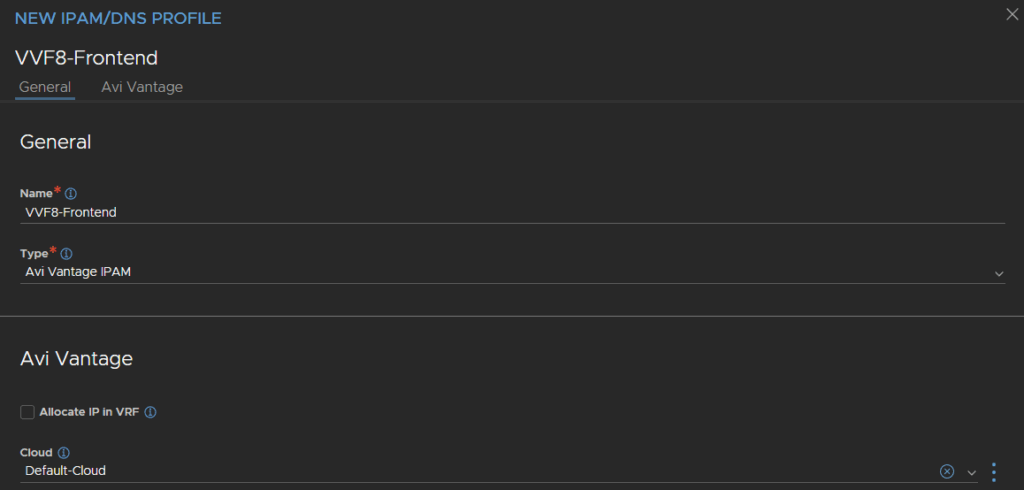
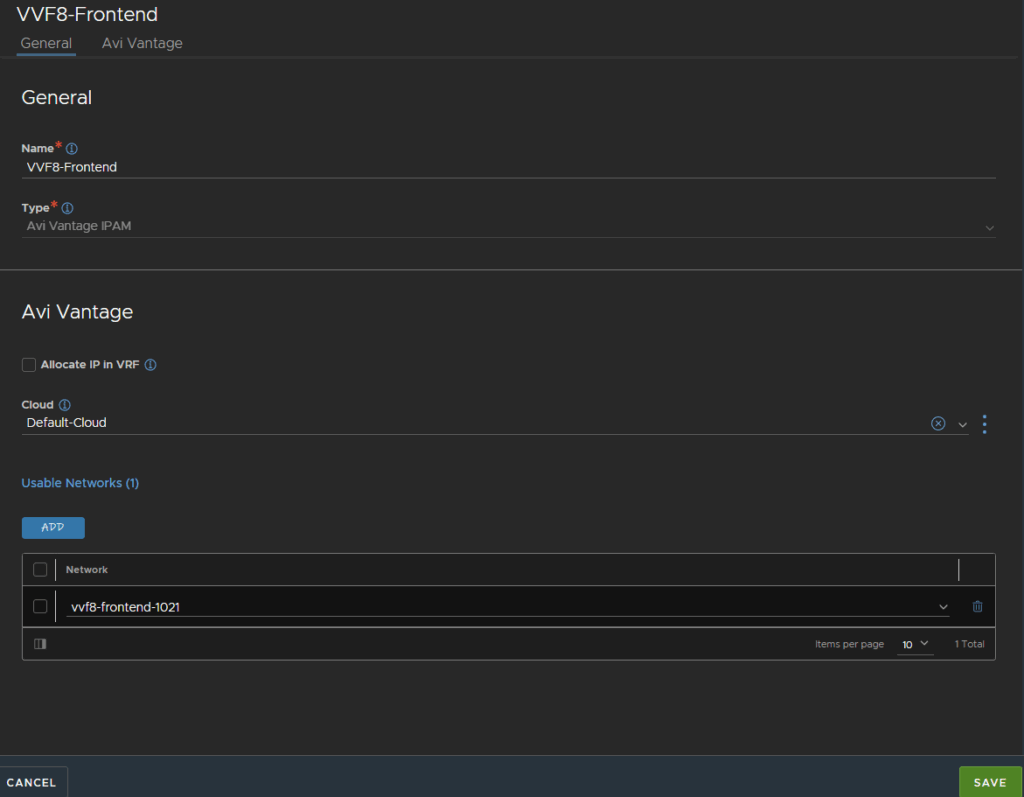
For IPAM/DNS Profile, click the three dots on the right, then click Create

Give it a name, this will be the front end network, and the type needs to be Avi Vantage IPAM, select the cloud to be the Default-Cloud
Click Add to add a network
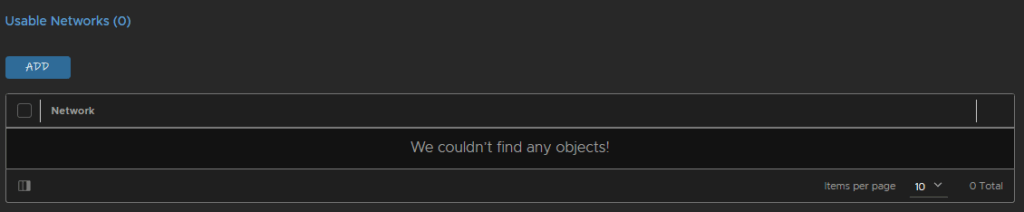
And select the frontend network we created earlier
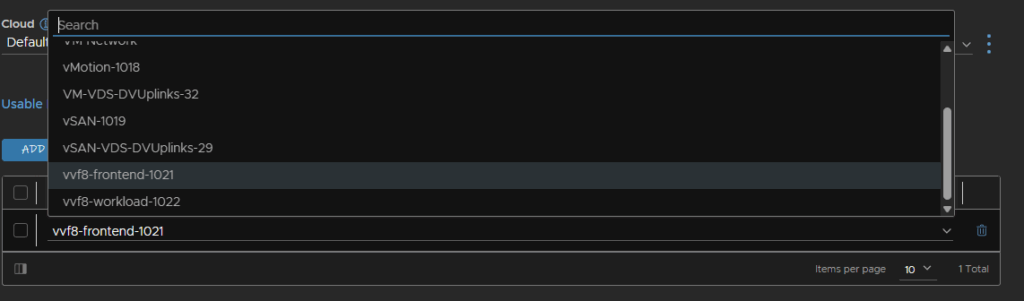
Then click Save
If we scroll back down to IPAM/DNS we can see the IPAM profile has been added, and then click Save
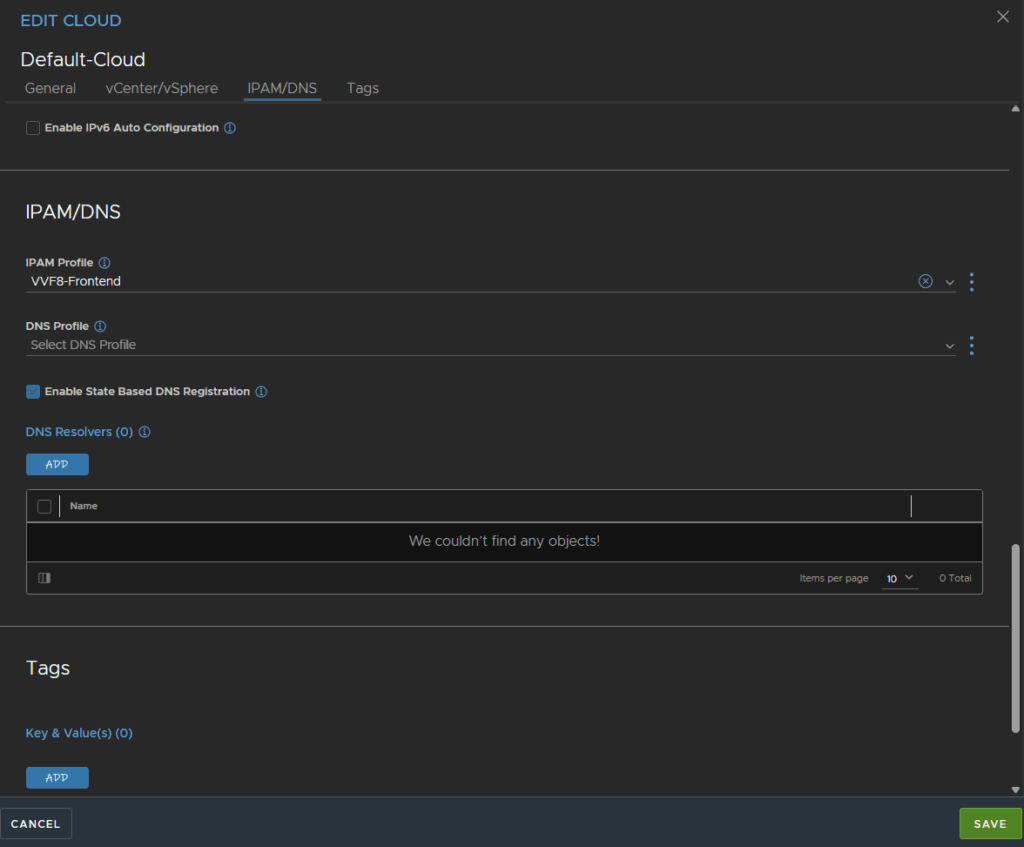
If you then give it a few mins and refresh the page, the vCenter should be showing up as green

6.1.4 – Avi Networking
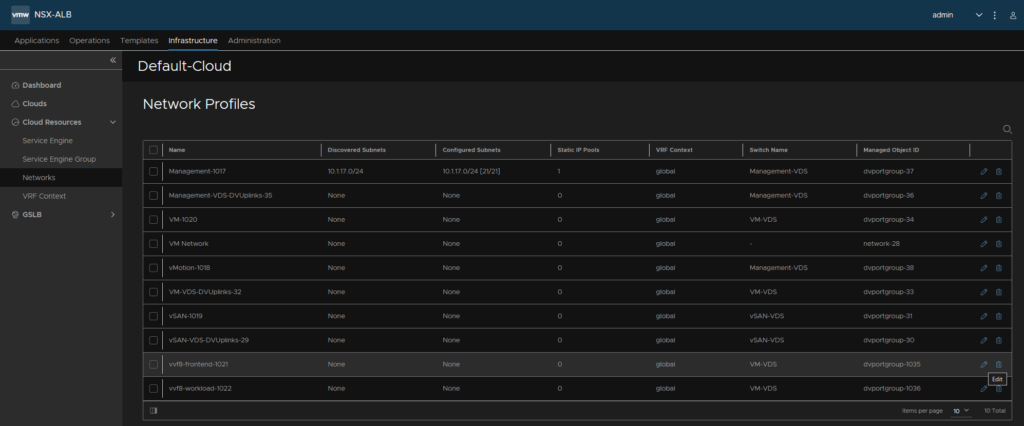
Now we have vCenter in we need to sort the frontend/workload networking out
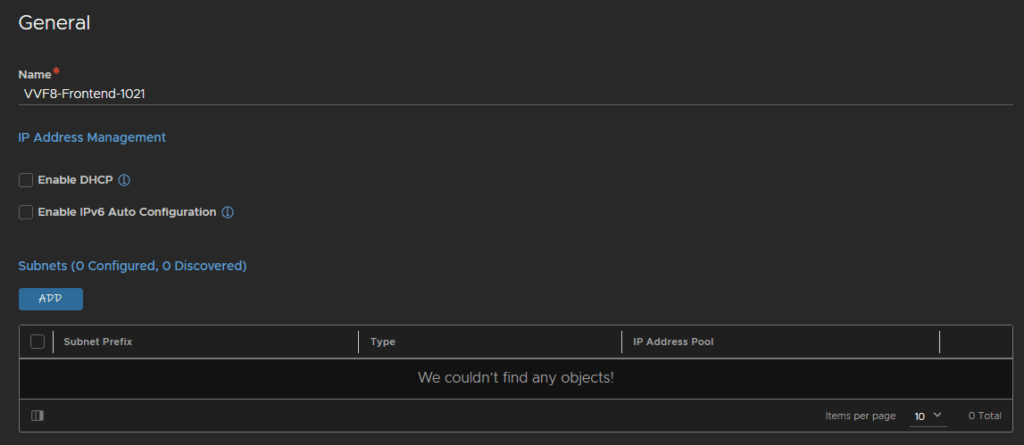
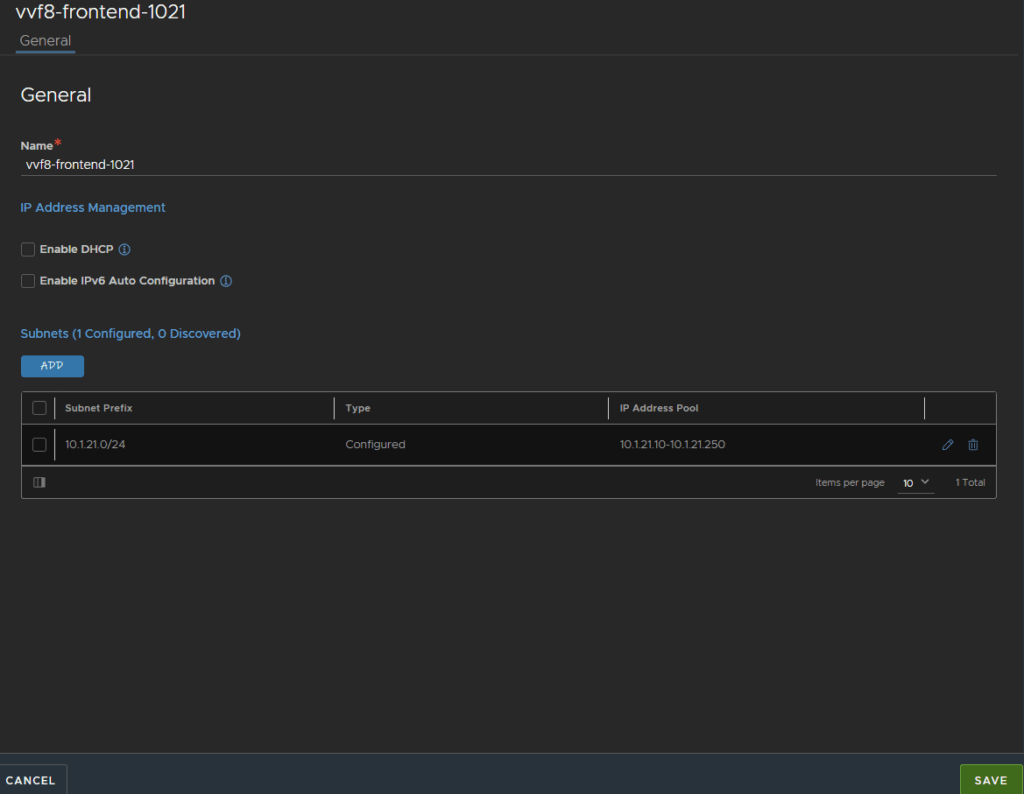
Head to Infrastructure/Cloud Resources/Networks and click the pencil on the frontend network
Click Add
Add the subnet prefix and click Add
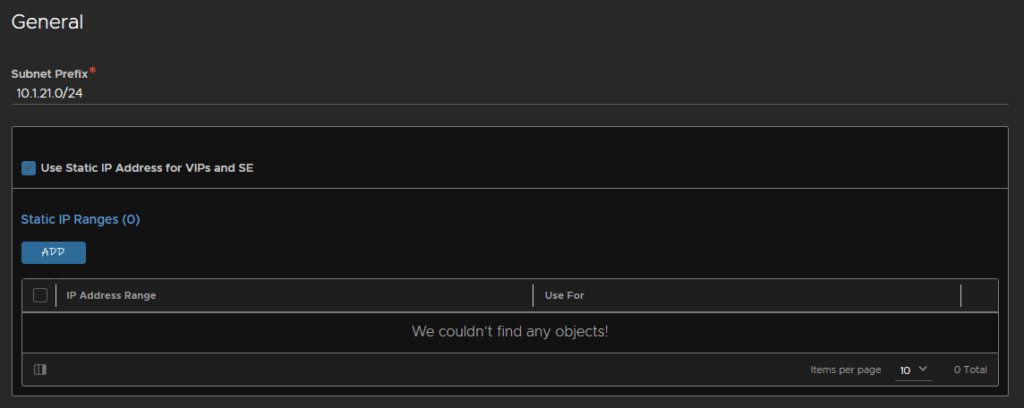
Add the IP range for service engines, as the subnet is dedicated for this, I have used the vast majority of the IP addresses, and click Save
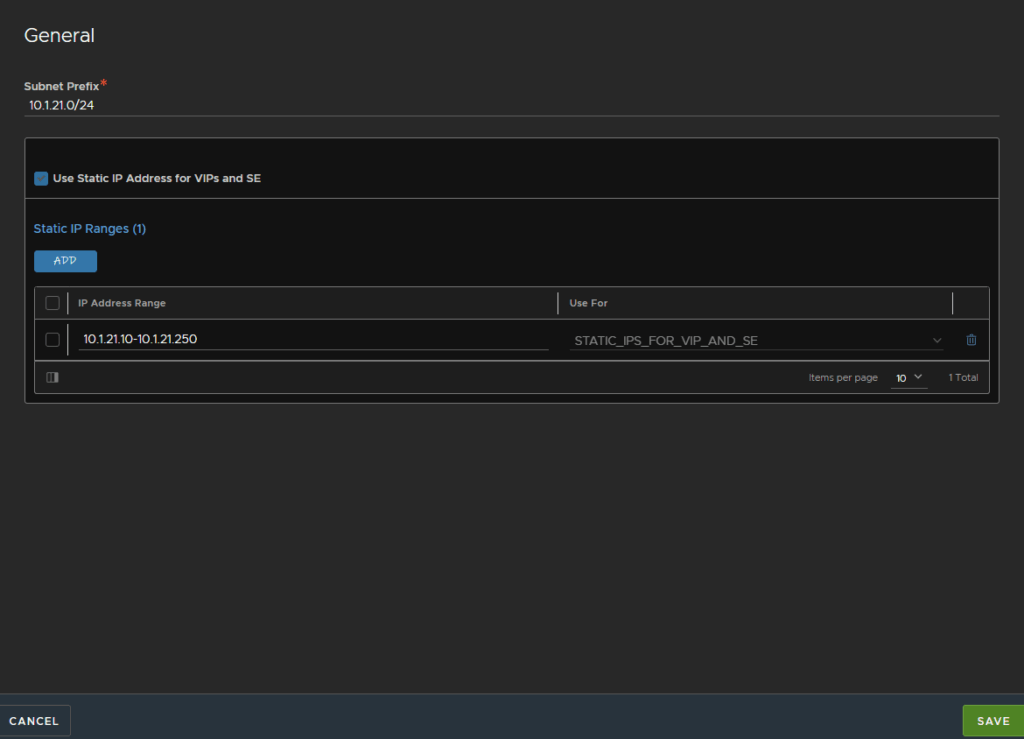
Then Save again
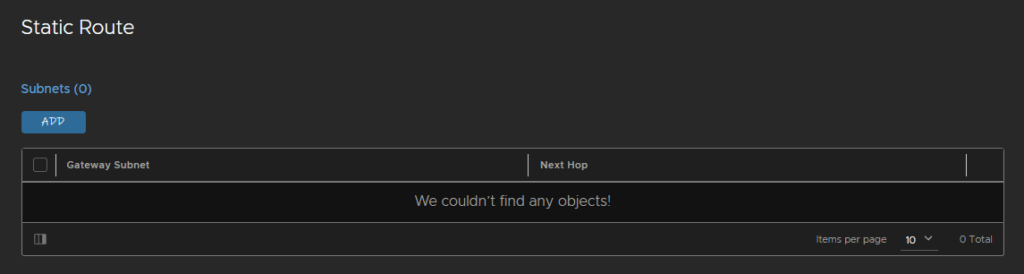
The workload network will be handled by the workload control plane, so Avi doesnt need anything filling out for that, but as it wont be able to route between them, we need some static routes
Head to Infrastructure/Cloud Resources/VFR Context and click the pencil on the right for the global VFR context
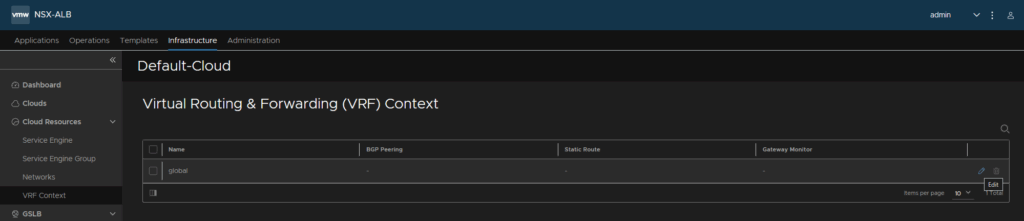
Click Add under static route
Add a route for 0.0.0.0/0 to the frontend gateway, mine is 10.1.21.1
Then click Add again

And add the workload subnet with the next hop as the frontend gateway, then click Save
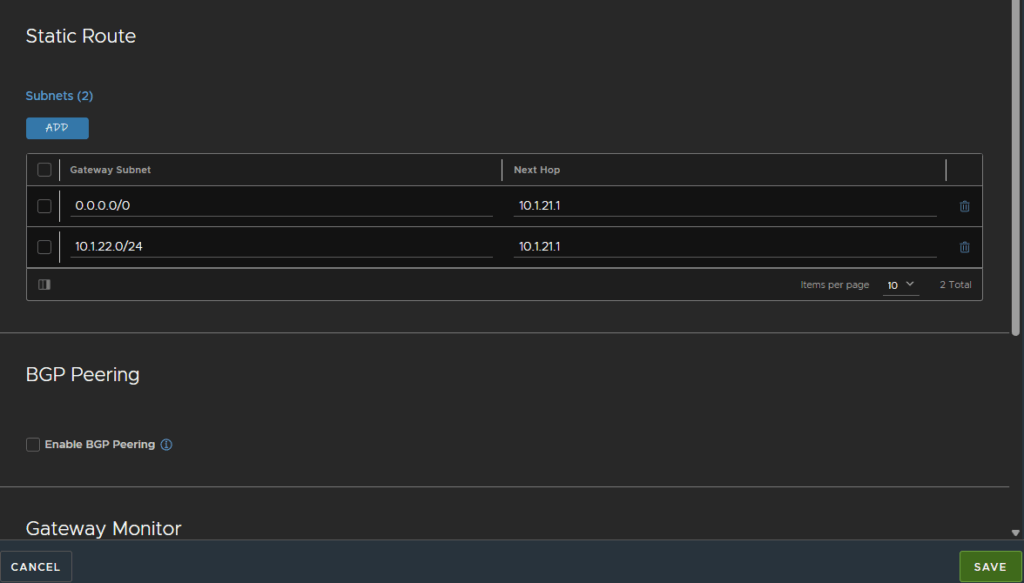
It now shows as having two static routes

6.2 – Enabling Workload Management
6.2.1 – vSAN
For this we need some storage policies, if you have a vSAN enabled cluster the default vSAN policy will work fine
vSAN ESA created a custom policy for my VVF lab, so I will just use that, no setup needed
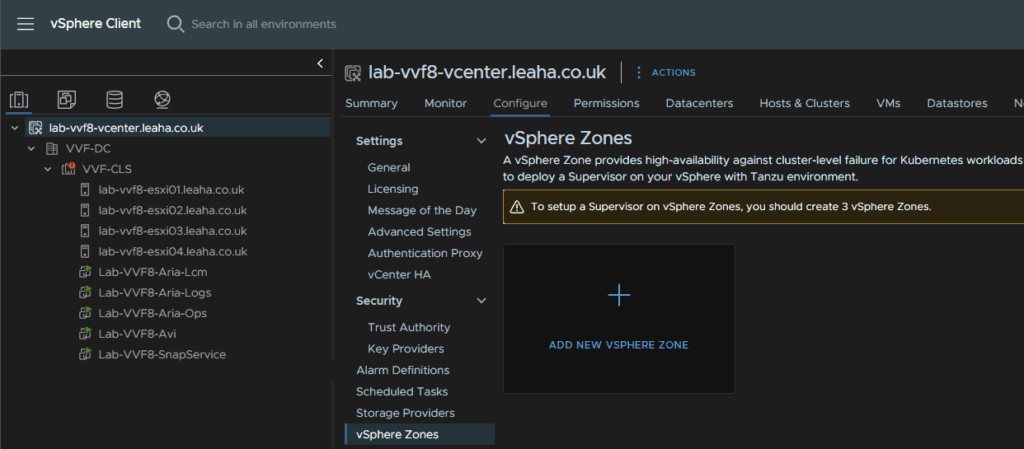
We then need our vSphere zones
We have two choices here, we can do one zone for a single cluster, or three zones for three clusters for redundancy at a cluster wide level, as we have a single cluster, we will have one zone, if you have two clusters, you can do two zones spread over two clusters
Click the vCenter in vSphere and click Configure/vSphere Zones and click Add New vSphere Zone
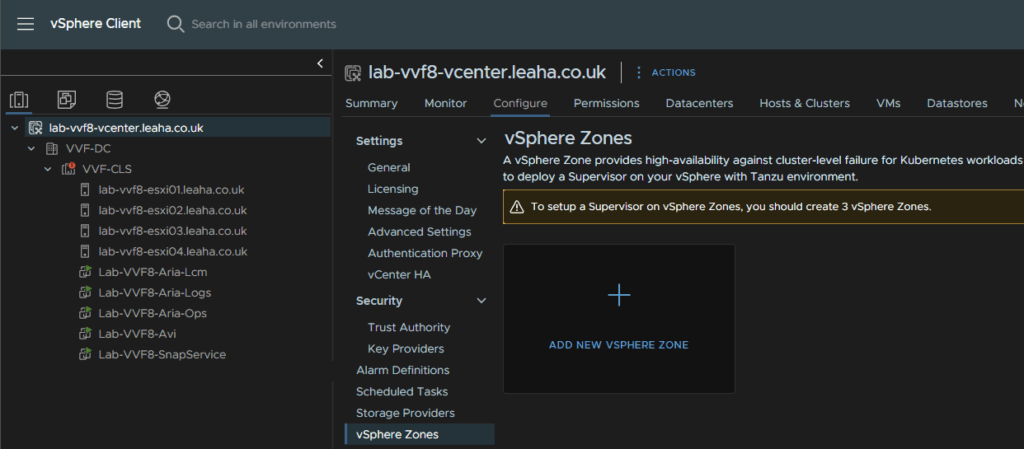
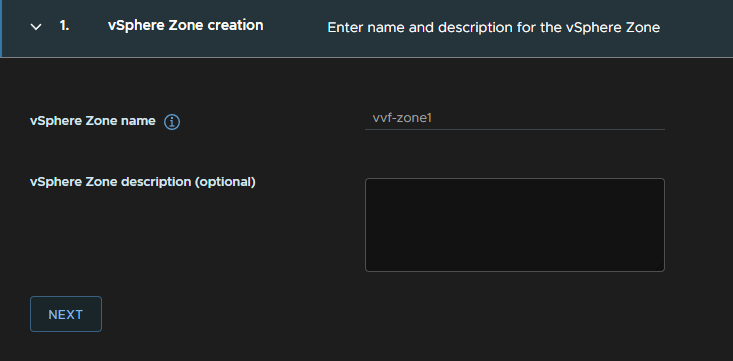
Add a name, it must be in lower case letters/numbers and click Next

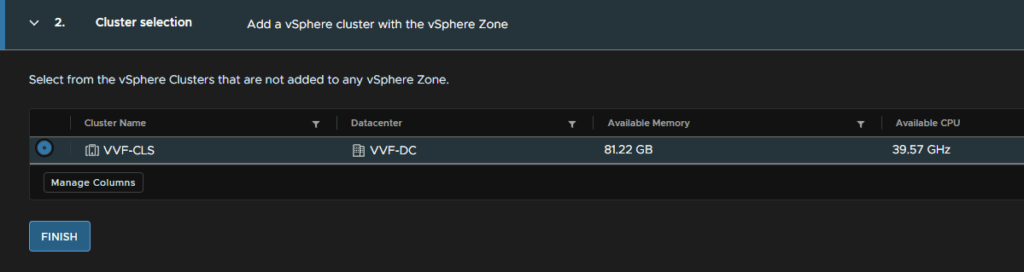
Seelct the cluster and click Finish
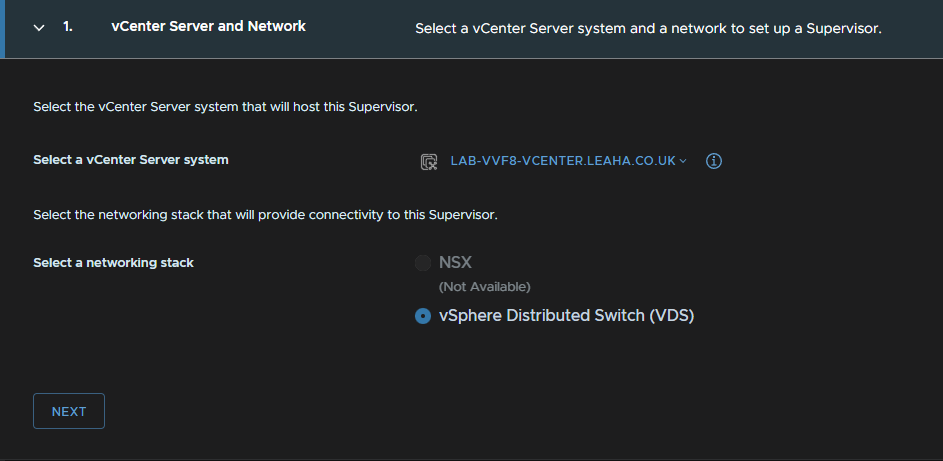
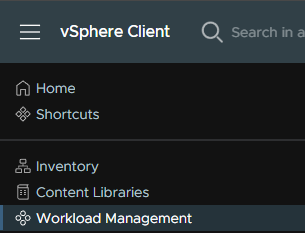
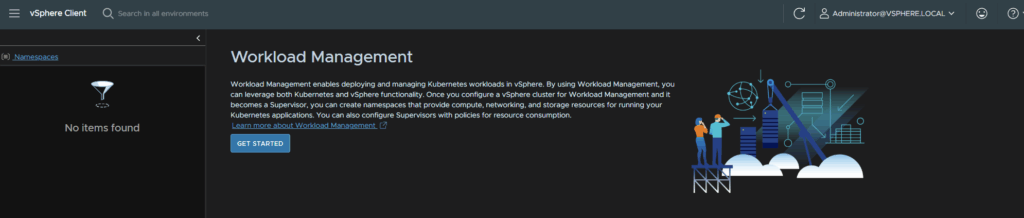
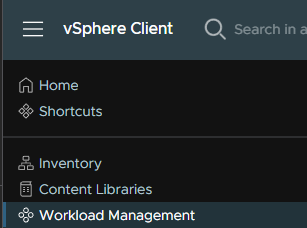
Click the three lines in the top left of vSphere and click Workload Management

Click Get Started

Leave the radio button on VDS< NSX shouldnt be available anyway, and click Next
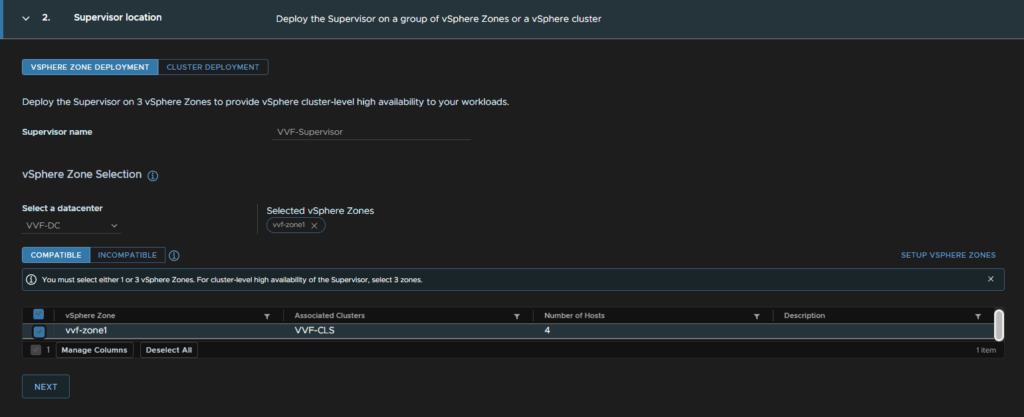
Name the supervisory, make sure the right datacenter is selected, and check the zone we created earlier, then click Next
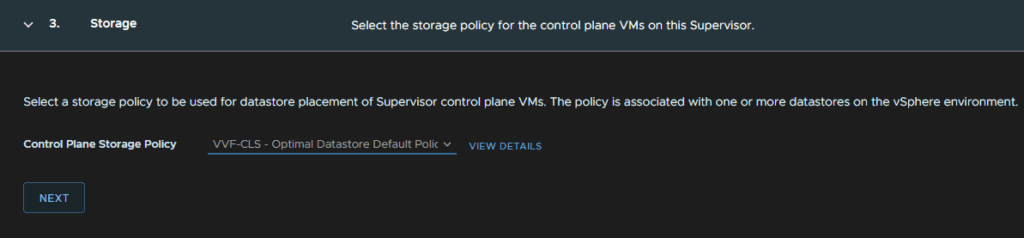
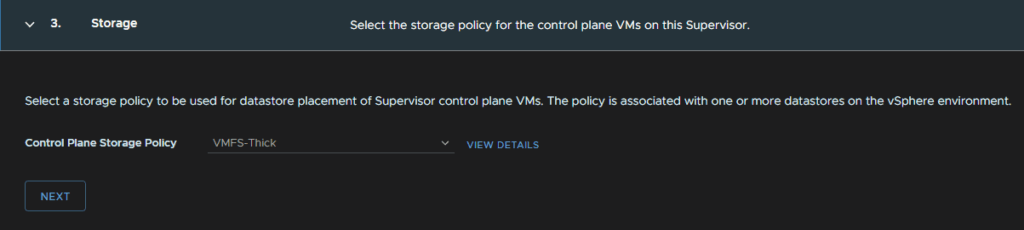
Select the vSAN policy you want, I am using the default and click Next
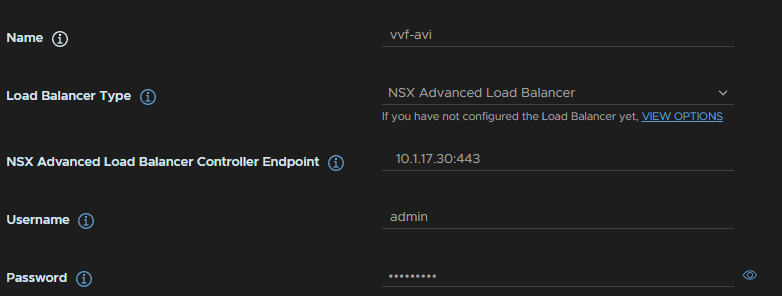
For the load balancer, we need a DNS compliant name, this can be anything and doesnt need to be registered in DNS
The Load Balancer Type wants to be NSX Advanced Load Balancer, the old name for Avi
The controller endpoint, want to be the management IP, with :443 on the end, eg 10.1.17.30:443
And add the controller admin username and password

Now we need the controller certificate, in Avi head to Templates/Security/SSL/TLS Certificates and click the download button on the right for our custom certificate

Click Copy To Clipboard on the Certificate section on the pop up, then click Done

And paste it in here changing nothing

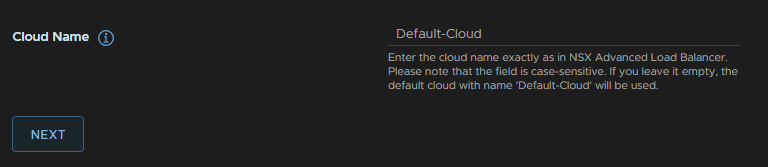
For the Cloud Name, enter Default-Cloud and click Next
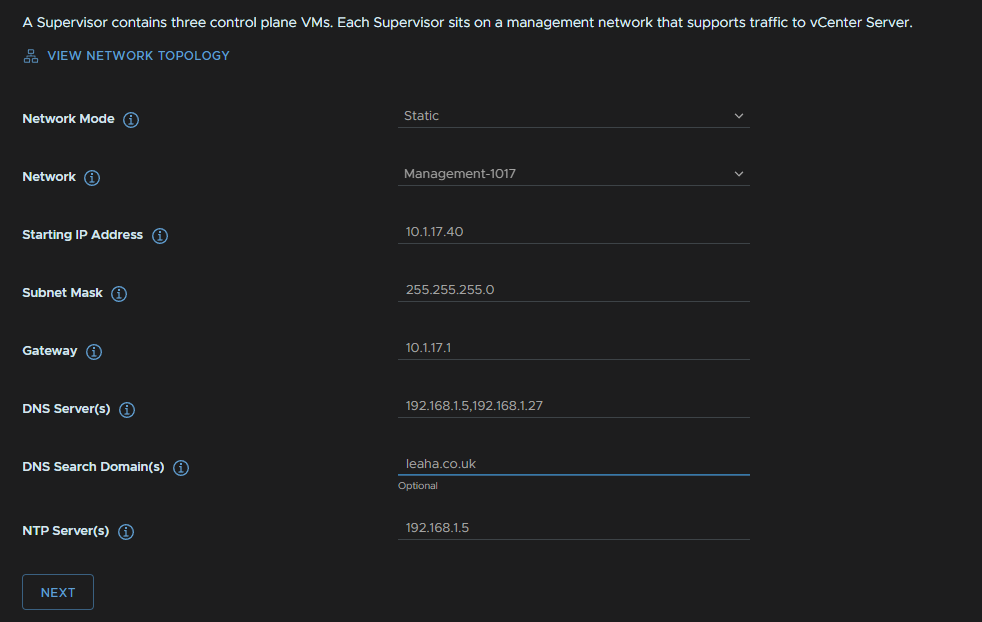
Then, for the networking, we will want this set as static, this is for the control plane management VMs
The network wants to be your management portgroup, subnet and gateway, then add in your DNS, search domain and NTP server
Then click Next

For the workload network, change the mode to static, and leave the Internal Network For Kubernetes Service at the default 10.96.0.0/23

Select the workload portgroup, the Network Name wil auto populate
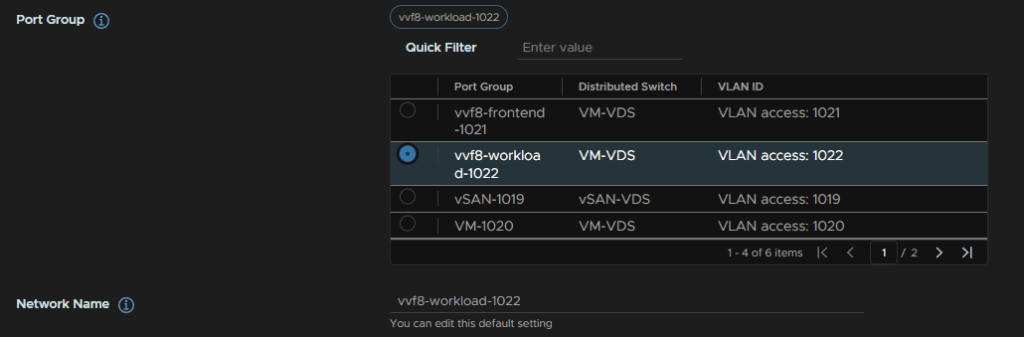
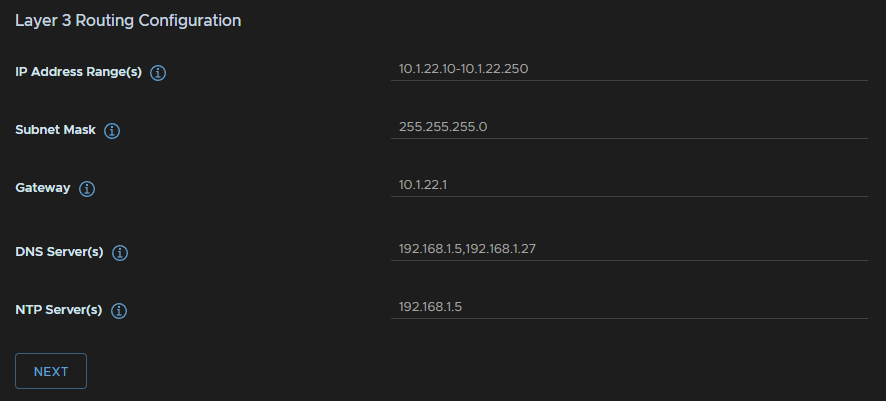
Now we need our workload IPs, we have a whole /24 subnet for this, so we will use the majority of the block, for the IP range
Then add the subnet mask, gateway, and your DNS/NTP servers, this will be the same as the management networking settings
Then click Next
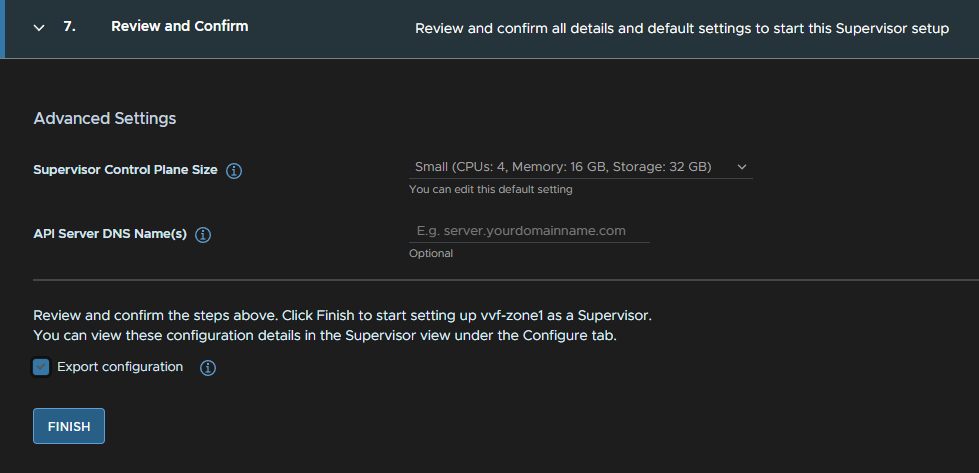
For the supervisor cluster size, small will be fine for most environments using this lightly, for my lab I will be using Tiny, however this shouldnt be used in production
Check the box to export your configuration and click Finish

We can click View to see the deployment progress, but this can take ~30 mins
6.2.2 – VMFS
If you dont have vSAN its a little more complex, we need two policies, one for thin provisioning, this we can use for our containers and TKG clusters, and a thick provisioning policy for management, if you use thin on management it will fail to create certain management containers in the consumption interface
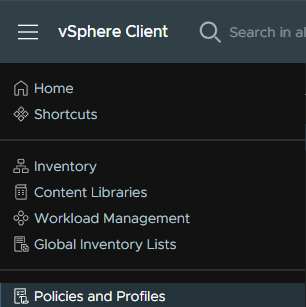
Click the three lines in the top left, then Policies And Profiles
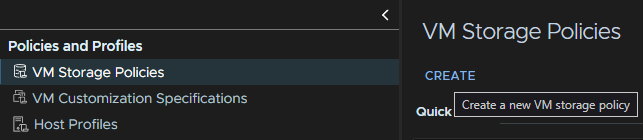
Click VM Storage Policies, then Create
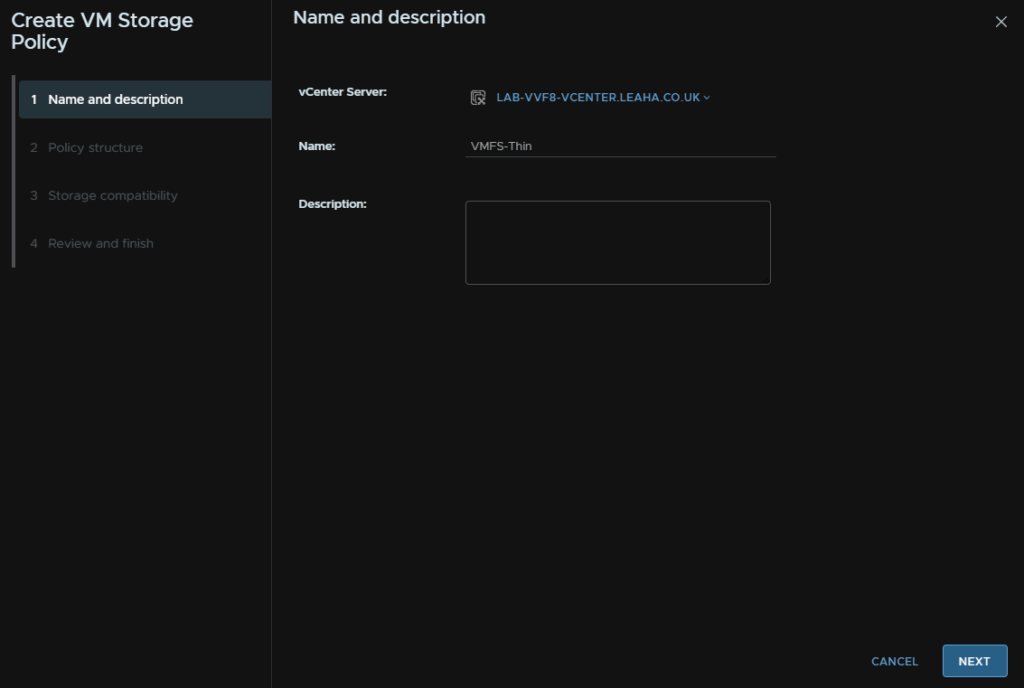
Name it and click Next
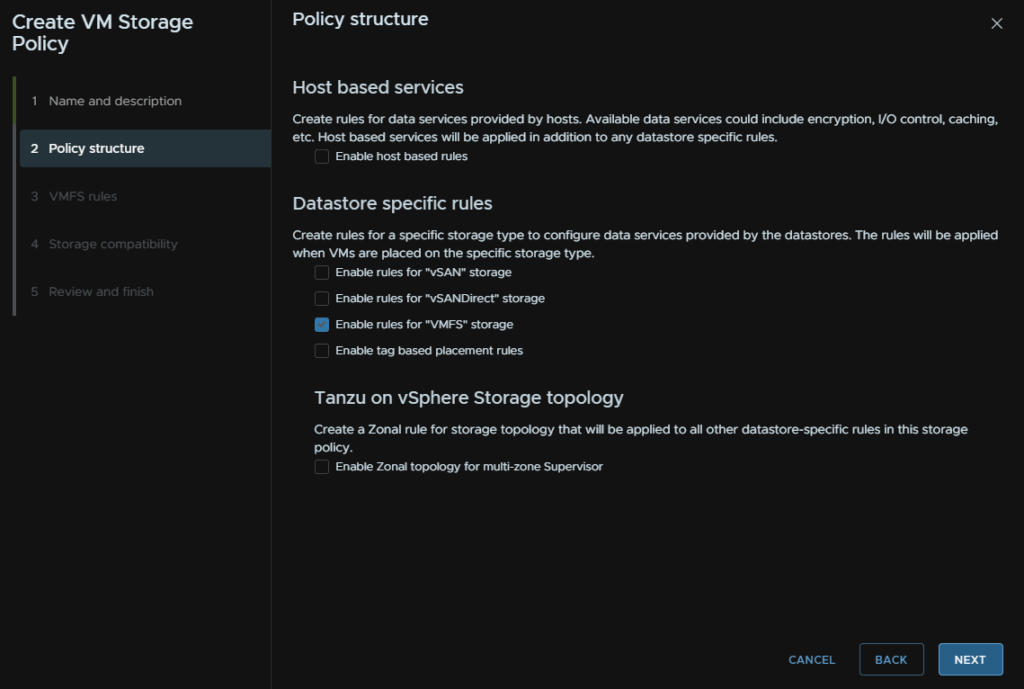
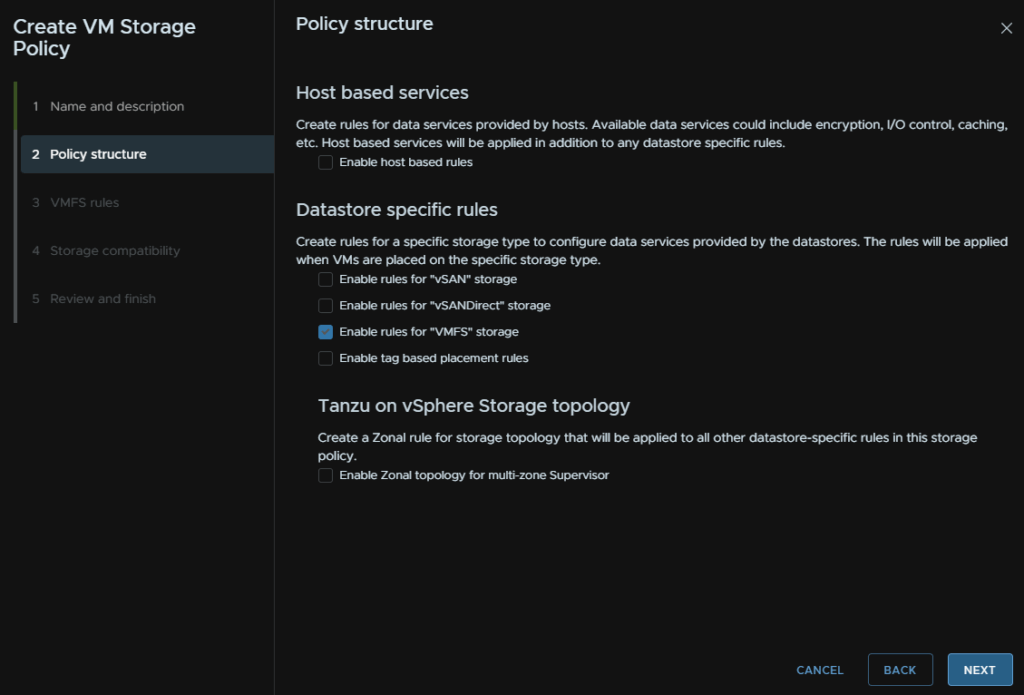
Check the box for Enable Rules For VMFS Storage and click Next
Click Next again
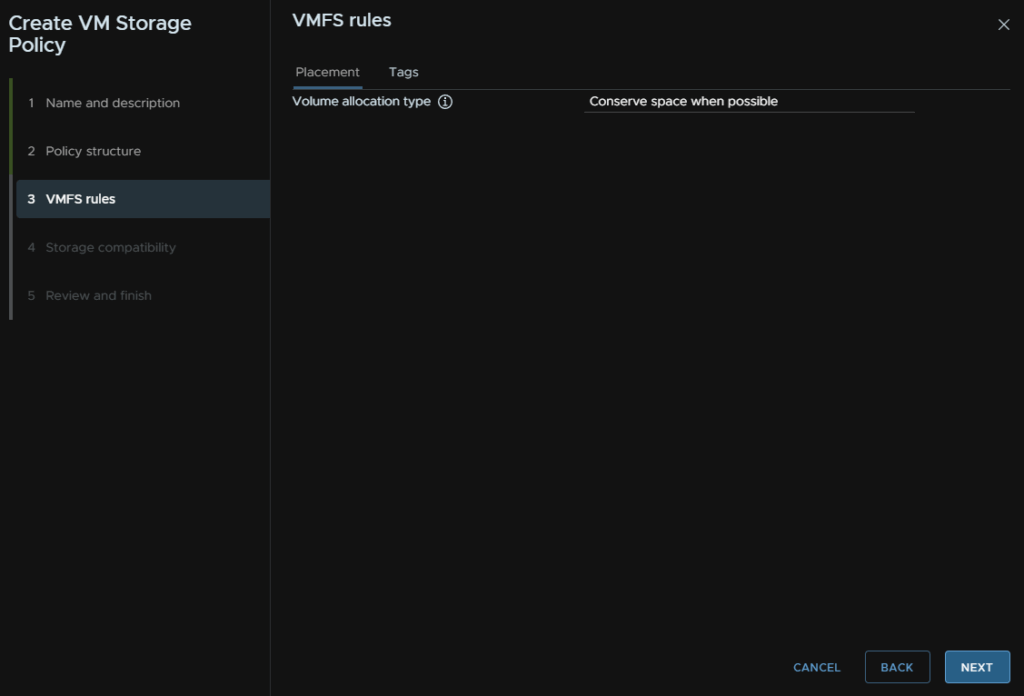
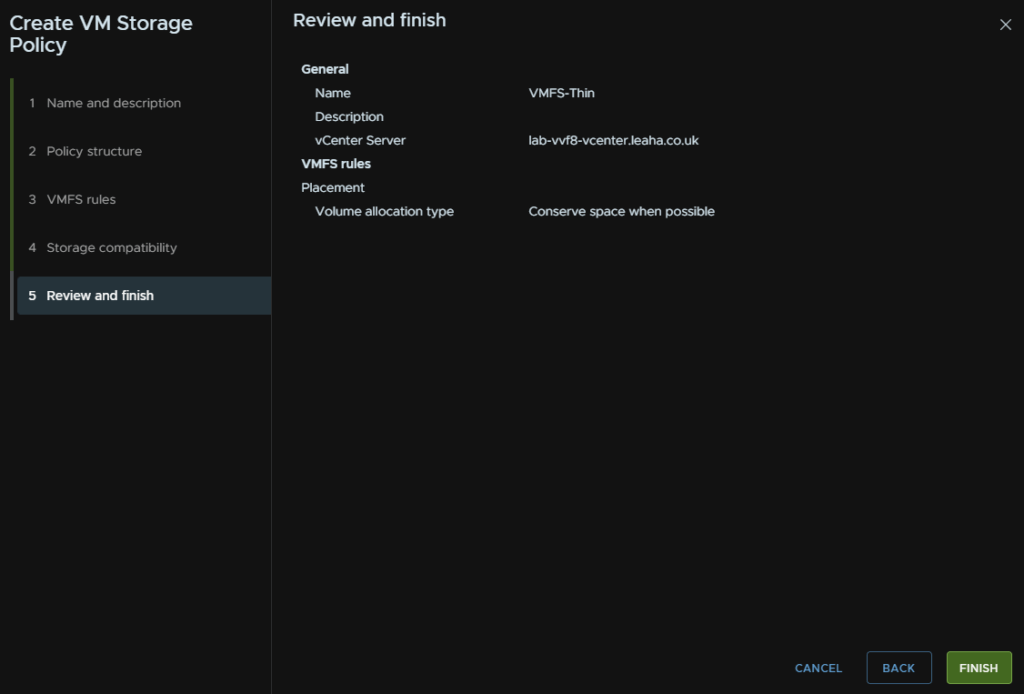
And again
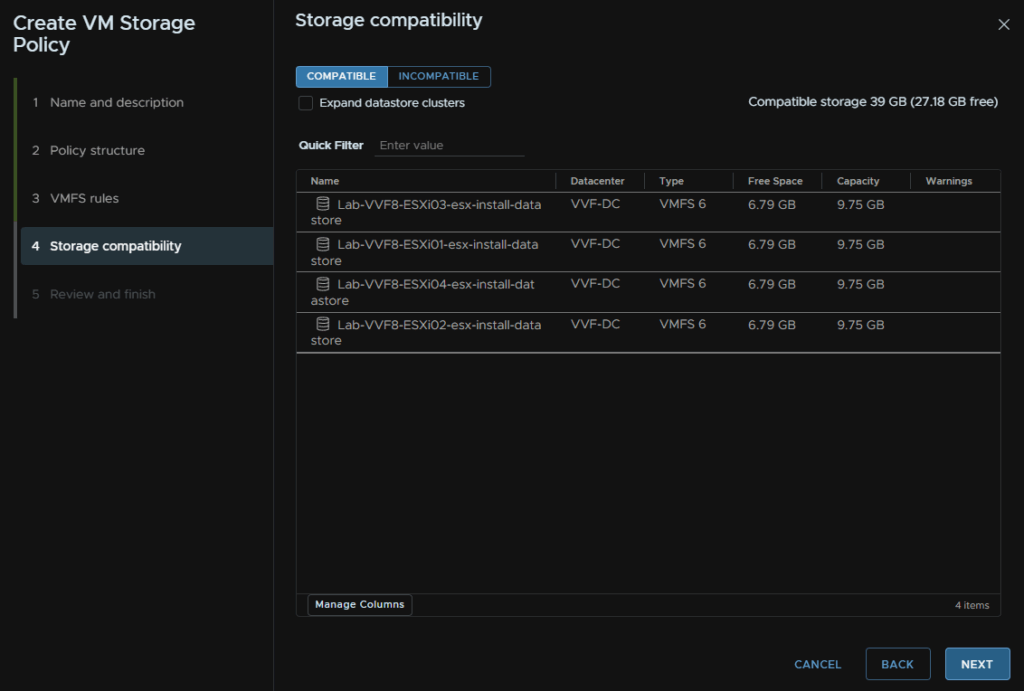
Then Finish
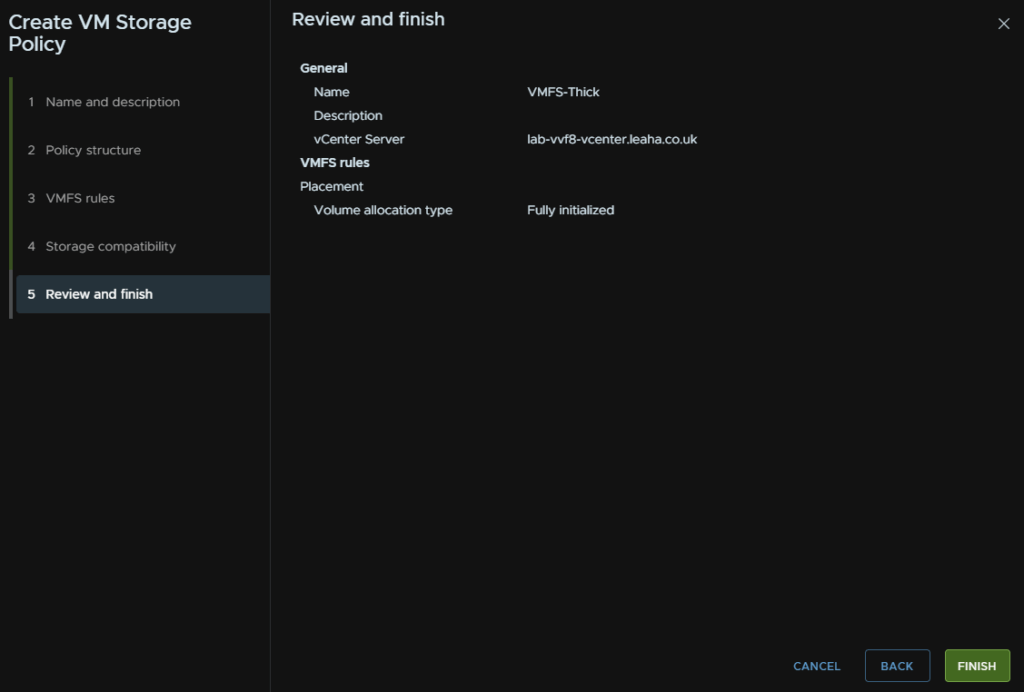
Create another, for thick provisioning, name it and click Next
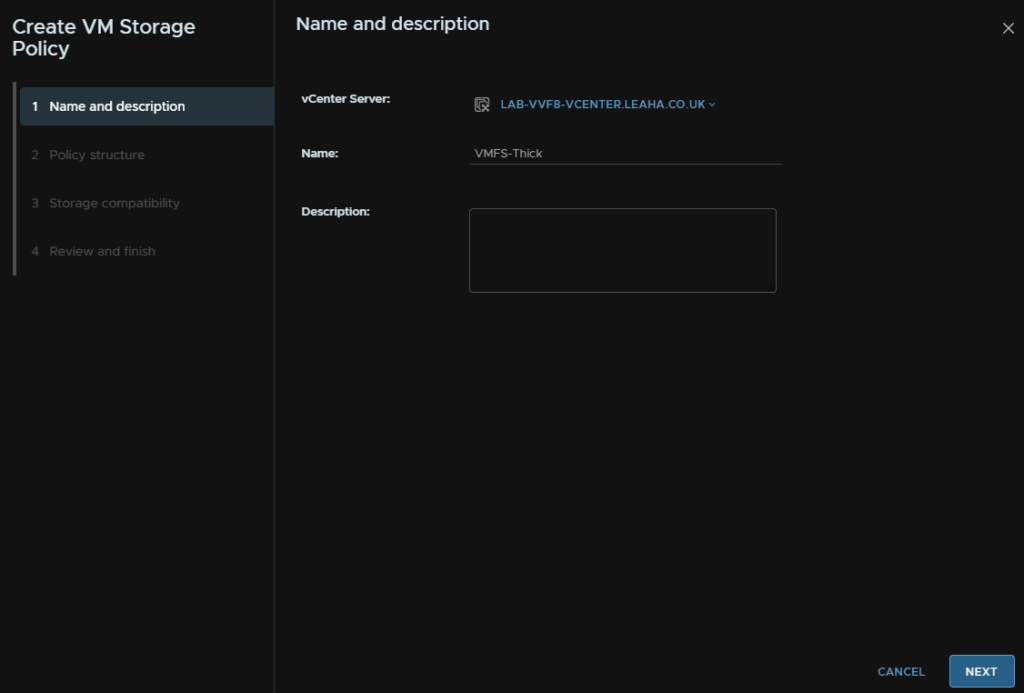
Check the box for Enable Rules For VMFS Storage and click Next
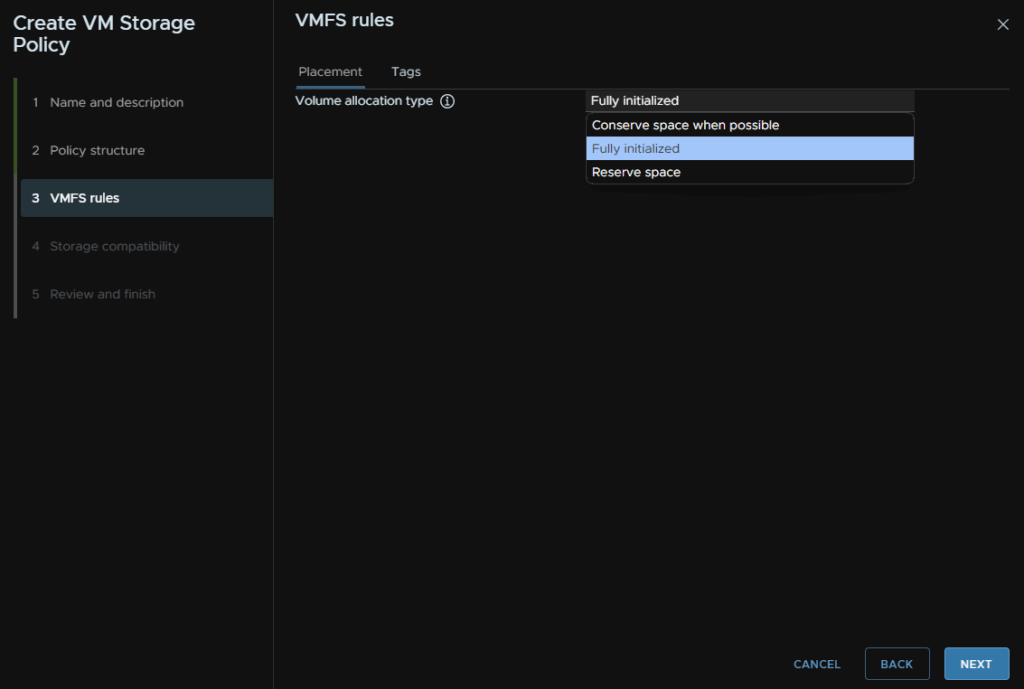
Change the volume allocation type to Fully Initialized and click Next
Then Next again
And Finish
We then need our vSphere zones
We have two choices here, we can do one zone for a single cluster, or three zones for three clusters for redundancy at a cluster wide level, as we have a single cluster, we will have one zone, if you have two clusters, you can do two zones spread over two clusters
Click the vCenter in vSphere and click Configure/vSphere Zones and click Add New vSphere Zone
Add a name, it must be in lower case letters/numbers and click Next
Seelct the cluster and click Finish

Click the three lines in the top left of vSphere and click Workload Management
Click Get Started
Leave the radio button on VDS< NSX shouldnt be available anyway, and click Next

Name the supervisory, make sure the right datacenter is selected, and check the zone we created earlier, then click Next

Selecy the thick policy here and click Next
For the load balancer, we need a DNS compliant name, this can be anything and doesnt need to be registered in DNS
The Load Balancer Type wants to be NSX Advanced Load Balancer, the old name for Avi
The controller endpoint, want to be the management IP, with :443 on the end, eg 10.1.17.30:443
And add the controller admin username and password
Now we need the controller certificate, in Avi head to Templates/Security/SSL/TLS Certificates and click the download button on the right for our custom certificate
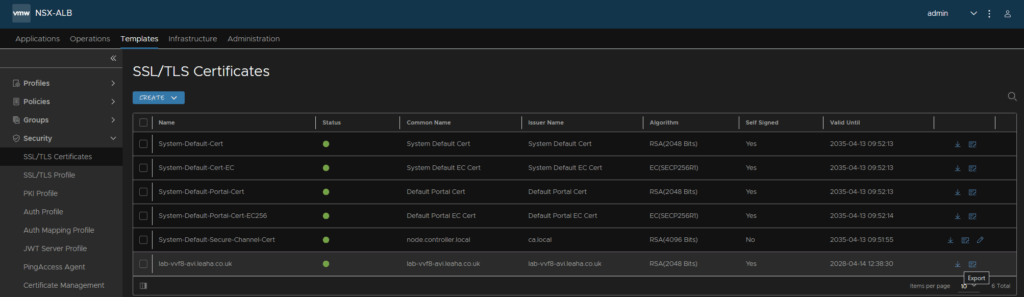
Click Copy To Clipboard on the Certificate section on the pop up, then click Done

And paste it in here changing nothing

For the Cloud Name, enter Default-Cloud and click Next

Then, for the networking, we will want this set as static, this is for the control plane management VMs
The network wants to be your management portgroup, subnet and gateway, then add in your DNS, search domain and NTP server
Then click Next
For the workload network, change the mode to static, and leave the Internal Network For Kubernetes Service at the default 10.96.0.0/23

Select the workload portgroup, the Network Name wil auto populate

Now we need our workload IPs, we have a whole /24 subnet for this, so we will use the majority of the block, for the IP range
Then add the subnet mask, gateway, and your DNS/NTP servers, this will be the same as the management networking settings
Then click Next

For the supervisor cluster size, small will be fine for most environments using this lightly, for my lab I will be using Tiny, however this shouldnt be used in production
Check the box to export your configuration and click Finish
We can click View to see the deployment progress, but this can take ~30 mins

6.3 – Consumption Interface Deployment
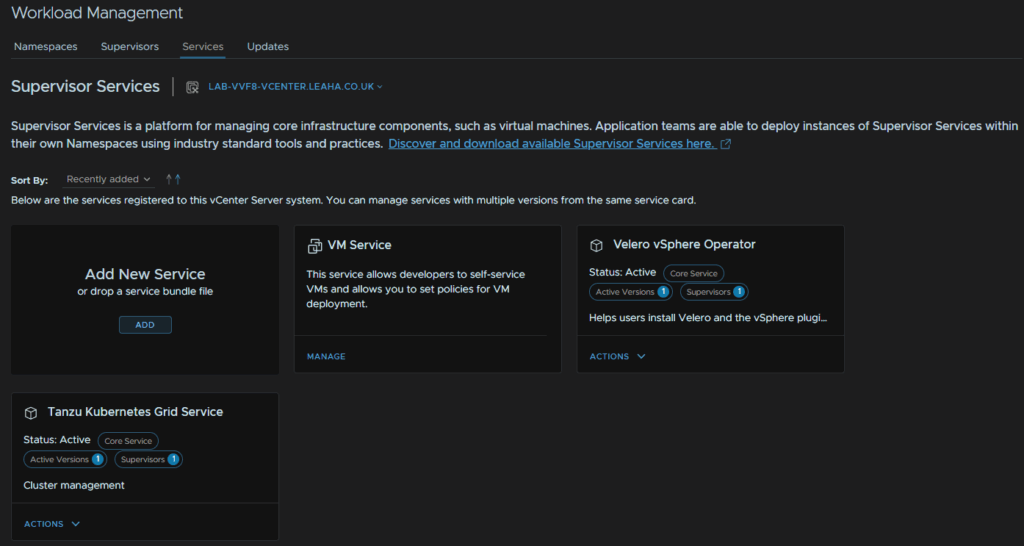
Once you have namespaces deployed, click on the three lines in vSphere and click Workload Management
Click the Services tab, the click Add under Add New Service
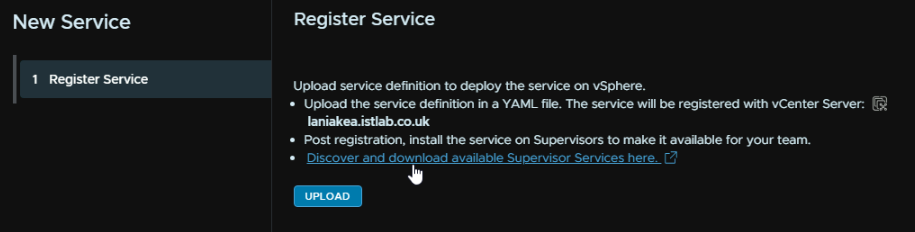
Click the link to discover and download new services
Then scroll down till you reach the Consumption Interface section, and click the like to download the latest version
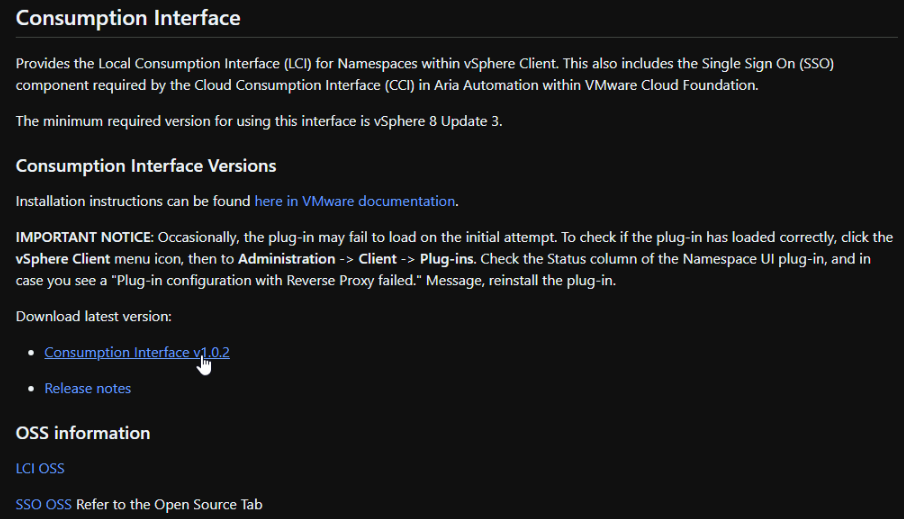
This will open a tab in VMware Jfrog, and save the YML on the popup
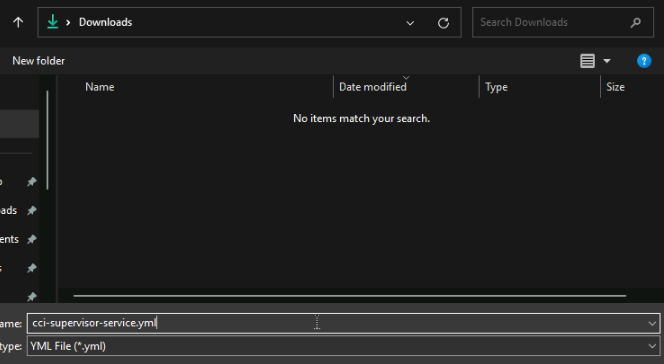
Head back top vSphere, and this time when adding a new service, click Upload
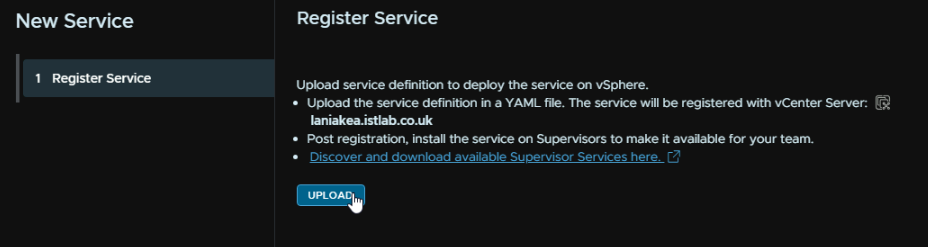
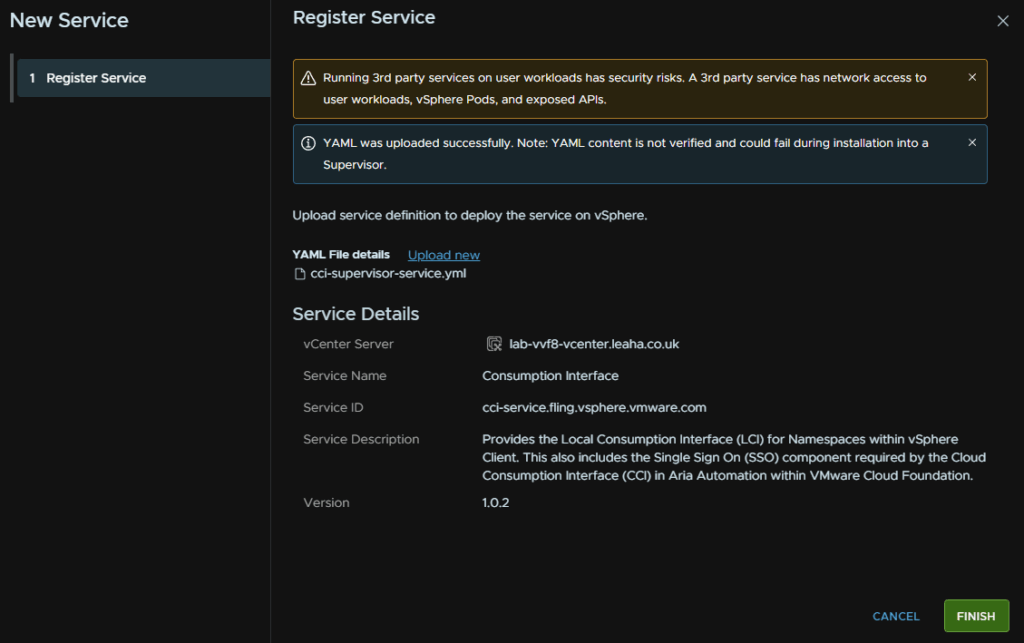
And double click the YML we just downloaded

And click Finish
Now we have added the service, we need to enable it, for the new consumption interface widget, click the Action drop down and then Manage Service
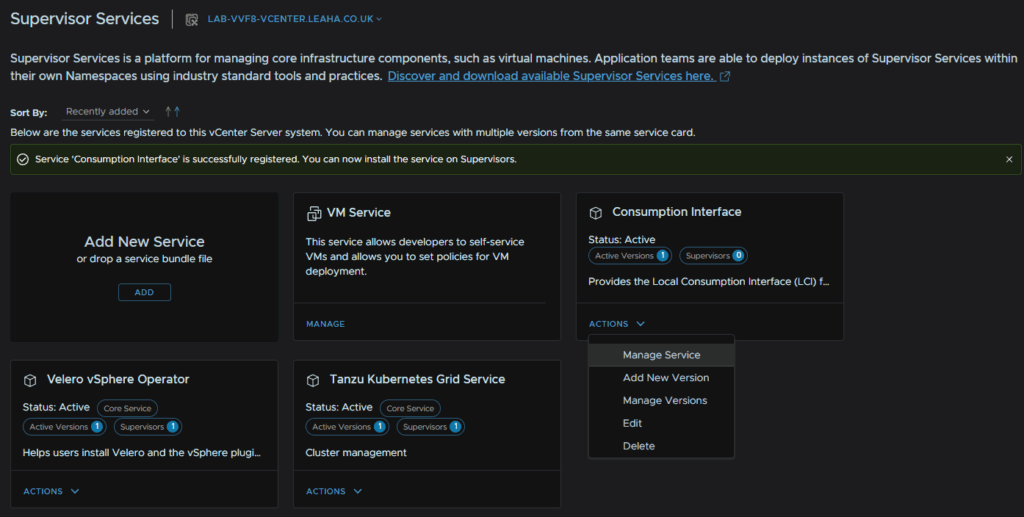
Select the supervisor, and then click Next
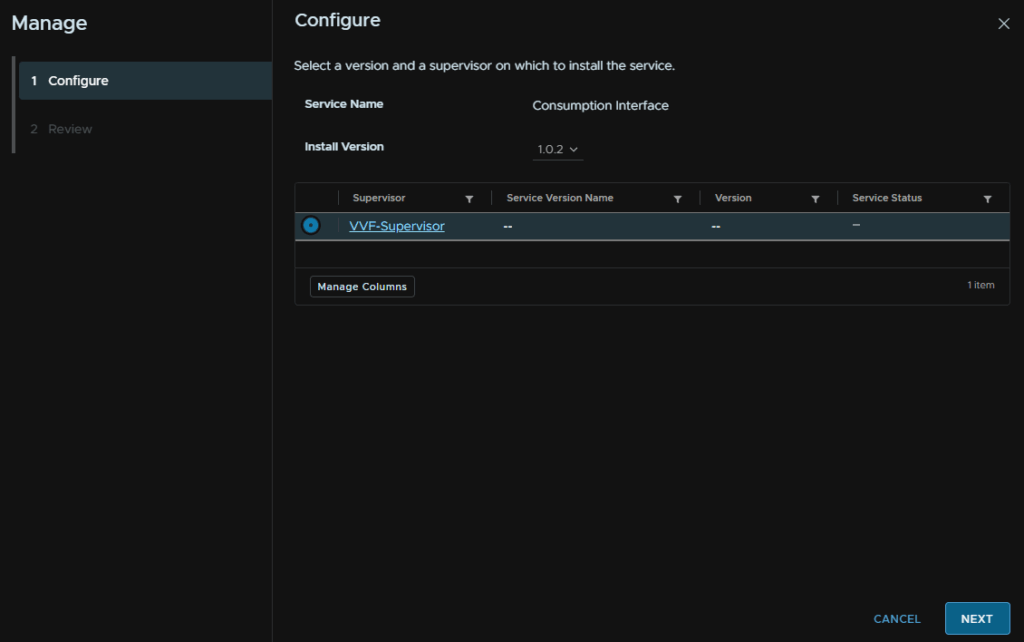
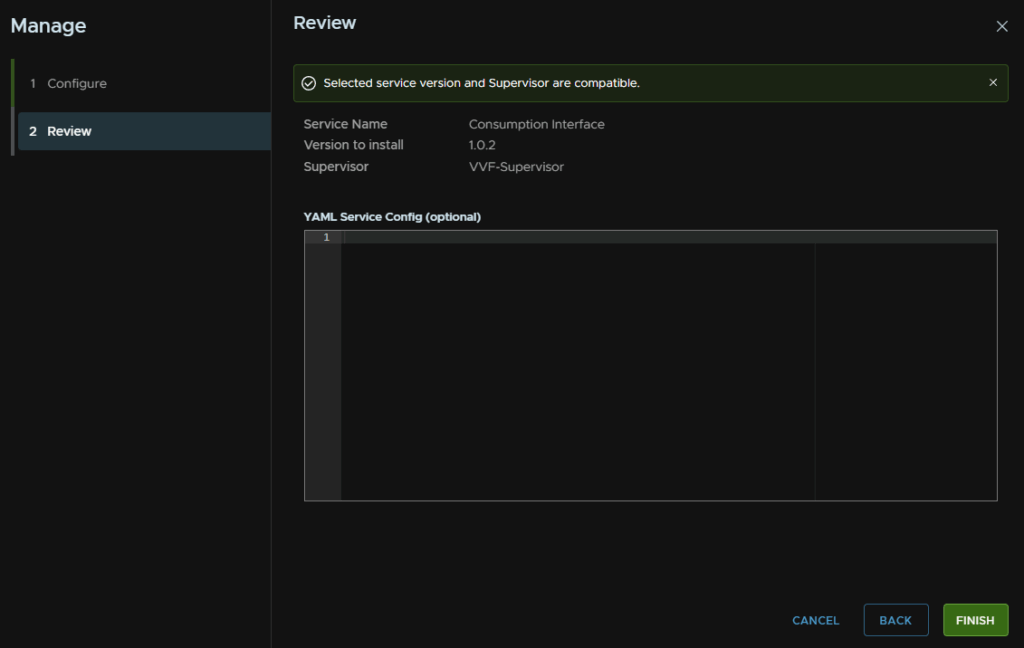
Wait for the compatibility check to run, and click Finish, dont add any service config
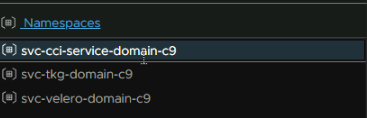
You will see a new namespace pop up
And the plug in should be installed in a few mins, the pops can take 5 mins to spin up
Which you can see in the Pods widget in the Namespace Summary
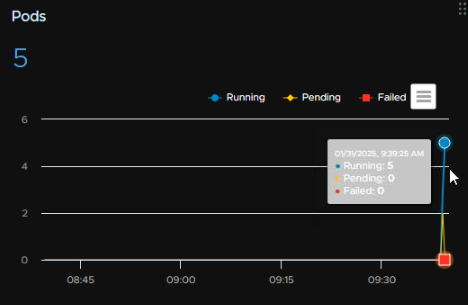
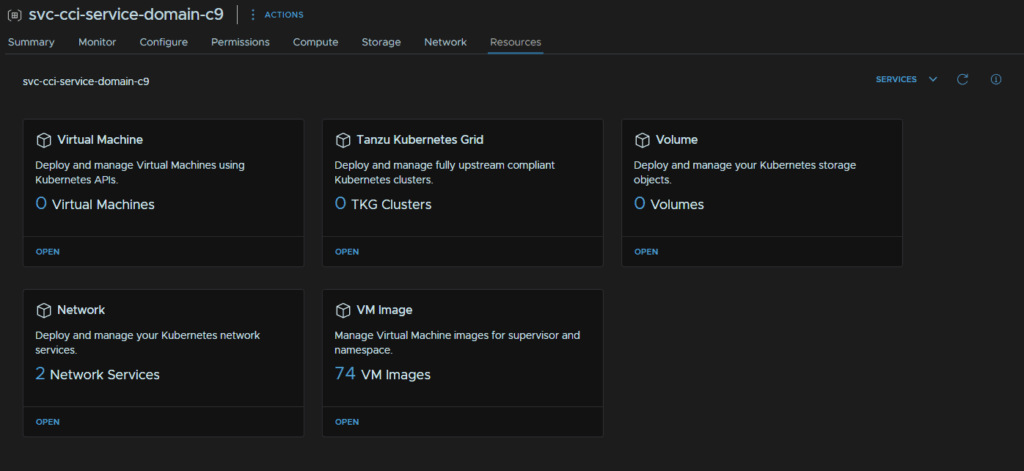
Once you have refreshed your browser, you can see the Resources tab is populated for all namespaces, this will be helpful for Devs who want to create cluster, and they can use the vSphere UI for this with the plug in for their dedicated namespaces
Hi Leaha
Thanks for your impressive work you did; I have a dedicate workstation with 256 GB of RAM, 5 x 1GB physical NICs, with CPU Xeon-2680 v3 12 Phy. cores [24 with HT], with about 7 or 6 TB of storages [SSD, NVMe, SHDD]
So, Is it sufficient to deploy lab like yours?
Do you share with me your lab environment design?
For VVF, does it require any special license; or can I use my previous licenses for each product?
Thanks in advance
I think it all depends what you want, for a VVF style setup, vSphere plus Aria Ops/Logs, yeah this is plenty to run a 1 node cluster, updating ESX is a little more manual given you cant place the host in maintenance mode with vCenter online
For my lab, its a custom Epyc 7402P server with 384GB RAM, and a Ryzen 5800U mini PC with 32GB and about 5TB SSDs, I run most of VCF, SDDC Manager, vSphere without vSAN, NSX, VCF Ops/Logs, this generally works, though migrating the vCenter, NSX Manager, VCF Ops and SDDC Manager to one machine for upgrades is a little difficult, but I have recently got, and am in the process of setting up my new Dell VRTX with 4xM640, as a cluster for running nested VCF, and migrating appliances for patching
So what you have is definitely enough to run a physical lab, nested labs, you might need more, but it depends on what youre doing
Hope this helps <3